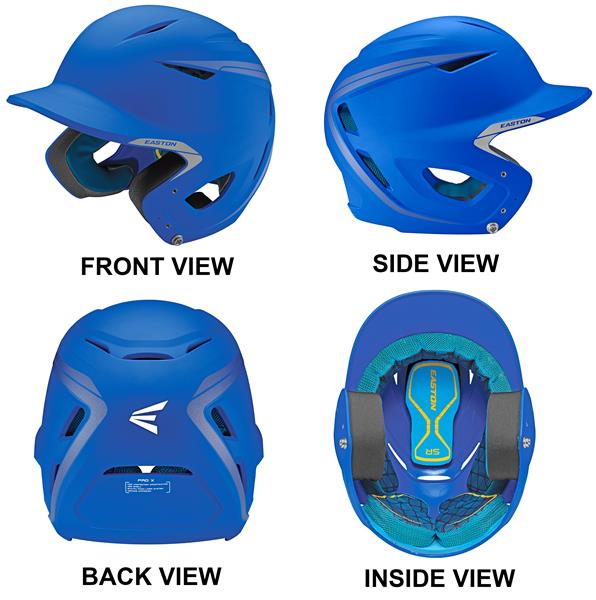
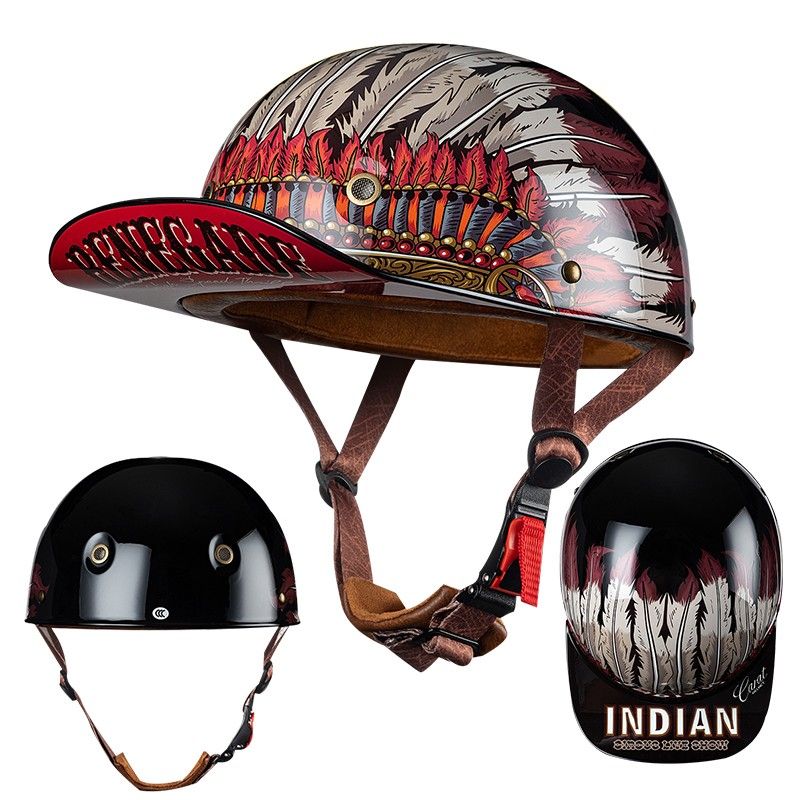
Need to Fix Your Baseball Helmet. Here’s Everything You’ll Need in 2023Need to Fix Your Baseball Helmet. Here’s Everything You’ll Need in 2023
Introduction to Baseball Helmet Repair Kits
As a baseball player, the condition of your helmet is incredibly important. A cracked helmet or loose hardware can compromise your safety on the field. That’s why having the right baseball helmet repair kit on hand is essential.
In this article, we’ll explore everything you need to know to fix up your batter’s or catcher’s helmet. We’ll look at the tools and components included in typical kits, where to find replacement pads and screws, how to remove old hardware, and best practices for installing new parts. Whether you play softball or baseball, youth or adult leagues, this guide will help you keep your helmet in tip-top shape.
Why Your Helmet May Need Repairs
Helmets take a beating during games and practices. Fastballs, foul tips, and collisions can loosen screws and create cracks over time. You may notice the pads wearing down or deteriorating as well. If anything feels loose or damaged, it’s vital to make repairs before your next time on the field.
Face masks in particular see a lot of stress. The constant impacts can shear bolts and screws, requiring new hardware to keep the mask securely attached. Old or rusty hardware should be replaced right away. The same goes for any bolts or screws elsewhere on the helmet.
While a good helmet can last for years, the padding breaks down much faster. Thin or compressed padding won’t provide adequate shock absorption. Replacing these pads restores comfort and safety.
What’s In a Helmet Repair Kit
Helmet repair kits contain the essential components for fixing most issues. At a minimum, they include replacement screws, nuts, washers, and tools. Higher quality kits provide ample extras of each hardware piece, since bolts are easy to drop and lose.
The exact screws required depend on your helmet make and model. Most kits include an assortment of common metric and standard fastener sizes for baseball and softball helmets. The hardware is often stainless steel or anodized aluminum for durability.
You’ll get multiple Phillips and flat head screwdrivers for removing old screws and fastening new ones. A socket wrench with standard and metric hex bits covers various nut sizes. The inclusion of threadlock helps prevent screws from loosening over time.
Padding replacement kits also exist. These provide new foam, cloth, and vinyl pads for the helmet interior. For catchers, separate kits replace the thicker pads behind the face mask.
Finding Replacement Parts
In addition to full repair kits, many vendors sell individual helmet components. This allows you to get just the specific hardware or pads you need.
When replacing facemask screws, match their thread pitch and length. Measure an existing bolt to ensure you get the right size. Helmet manufacturers often list replacement parts on their websites as well.
Foam pads can deteriorate quickly from sweat and use. Get replacements in the same thickness and material as the originals. Peel-and-stick options make pad swaps easy.
Removing Damaged Fasteners
Before installing new screws, the old ones must come out. A power drill with Phillips and hex bits helps speed up the process. Use a light touch to prevent damage.
If fasteners refuse to budge, apply penetrating oil and let it sit for a few minutes. This helps loosen rusted or stuck bolts. Turning the screw back and forth slowly can help break things free.
Be cautious when removing facemask hardware. The bolts usually have lock washers that dig into the metal. Back the nuts off completely before unscrewing the bolts to avoid scratching the paint.
Preparing the Surface

Common Issues Requiring Baseball Helmet Repairs
Baseball helmets endure considerable stress during games and practices. Several common issues may necessitate repairs:
- Loosened screws and bolts
- Cracked or chipped helmet shells
- Worn or compressed padding
- Damaged or bent facemasks
- Rusted or corroded hardware
- Deteriorated chin straps
Identifying these problems early can prevent more severe damage and ensure your helmet remains in top condition. Regular inspections before and after games can help catch potential issues before they become serious safety concerns.
Signs Your Baseball Helmet Needs Attention
How can you tell if your helmet requires repairs? Here are some key indicators to watch for:
- Visible cracks or dents in the shell
- Loose or rattling facemask
- Faded or peeling paint
- Uncomfortable fit due to compressed padding
- Difficulty adjusting the helmet
- Rust spots on metal components
If you notice any of these signs, it’s time to consider repairing or potentially replacing your helmet. Remember, a well-maintained helmet is crucial for your safety on the field.
Essential Components of a Baseball Helmet Repair Kit
A comprehensive baseball helmet repair kit should contain various tools and components to address common issues. Here’s what you can expect to find in a quality repair kit:
- Assorted screws and bolts (stainless steel or anodized aluminum)
- Nuts and washers in various sizes
- Phillips and flathead screwdrivers
- Socket wrench with standard and metric hex bits
- Threadlocker adhesive
- Replacement padding (foam, cloth, and vinyl)
- Facemask hardware
- Cleaning supplies (alcohol wipes, cotton swabs)
- Small pliers or needle-nose pliers
- Protective gloves
These components allow you to tackle most common helmet repairs, from replacing loose screws to swapping out worn padding. Having a well-stocked kit on hand ensures you can quickly address any issues that arise, keeping your helmet in top condition throughout the season.
Choosing the Right Repair Kit for Your Needs
When selecting a baseball helmet repair kit, consider the following factors:

- Compatibility with your helmet brand and model
- Quality of included hardware (stainless steel is preferable)
- Variety of screw sizes and types
- Inclusion of specialty tools for your specific helmet
- Quantity of spare parts (more is better for future repairs)
- Overall durability and organization of the kit
Investing in a high-quality repair kit can save you time and money in the long run, allowing you to perform multiple repairs and maintenance tasks over the life of your helmet.
Step-by-Step Guide to Repairing Your Baseball Helmet
Repairing a baseball helmet requires attention to detail and careful execution. Follow these steps to ensure a successful repair:
- Assess the damage and identify the components that need replacement
- Gather all necessary tools and replacement parts
- Clean the helmet thoroughly with a mild soap solution
- Remove any damaged hardware using the appropriate tools
- Clean screw holes and surrounding areas with rubbing alcohol
- Install new hardware, applying threadlocker as needed
- Replace worn padding, ensuring a snug fit
- Reassemble the helmet, following manufacturer guidelines
- Test the repaired components for stability and fit
- Allow any adhesives or threadlocker to cure before use
By following these steps, you can effectively repair most common helmet issues and restore your equipment to proper working condition.
Tips for Removing Stubborn Fasteners
Sometimes, old or rusted fasteners can be difficult to remove. Try these techniques to loosen stubborn screws:
- Apply penetrating oil and let it sit for several minutes
- Use a rubber band between the screwdriver and screw head for better grip
- Gently tap the screwdriver with a hammer to break rust bonds
- Heat the area around the screw with a hair dryer to expand the metal
- As a last resort, use a screw extractor tool for stripped screws
Remember to work carefully to avoid damaging the helmet shell or other components during the removal process.
Proper Installation of New Hardware and Components
Installing new hardware correctly is crucial for maintaining the helmet’s structural integrity and safety features. Here are some key points to remember:
- Use the correct size and type of screws for each component
- Apply threadlocker to prevent loosening over time
- Tighten screws to the manufacturer’s recommended torque specifications
- Install facemask hardware in an “X” pattern for even pressure distribution
- Ensure padding is securely attached without gaps or bunching
- Double-check all connections before finalizing the repair
Taking the time to properly install new components will ensure your helmet provides optimal protection and performance on the field.

The Importance of Proper Torque
Why is proper torque so crucial when installing helmet hardware? Correct torque ensures that screws and bolts are tight enough to hold components securely without overtightening, which can damage the helmet shell or strip threads. Using a torque wrench allows you to achieve the precise tightness specified by the manufacturer, balancing security and structural integrity.
Maintaining Your Repaired Baseball Helmet
After completing repairs, proper maintenance is key to extending the life of your baseball helmet. Follow these tips to keep your helmet in top condition:
- Clean the helmet regularly with mild soap and water
- Avoid exposing the helmet to extreme temperatures
- Store the helmet in a cool, dry place when not in use
- Inspect hardware and padding before each use
- Address any new issues promptly to prevent further damage
- Replace the helmet if it sustains a significant impact, even if no visible damage is present
By following these maintenance practices, you can ensure your repaired helmet continues to provide reliable protection throughout its lifespan.
The Lifespan of a Baseball Helmet
How long should a baseball helmet last with proper care and maintenance? While there’s no definitive expiration date, most manufacturers recommend replacing helmets every 2-3 years for optimal protection. However, helmets that are well-maintained and haven’t sustained significant impacts may last longer. Always prioritize safety and replace your helmet if you have any doubts about its protective capabilities.
When to Replace Your Baseball Helmet
While many issues can be repaired, there are situations where replacing your helmet is the safest option. Consider replacement in the following scenarios:
- The helmet has sustained a severe impact
- There are deep cracks or structural damage to the shell
- The helmet is more than 3-4 years old
- Padding is severely compressed and no longer provides adequate cushioning
- The helmet no longer fits properly due to wear or growth
- There are signs of material degradation, such as brittleness or discoloration
When in doubt, consult with a professional or the helmet manufacturer to determine if replacement is necessary. Your safety on the field should always be the top priority.

Signs of an Outdated Helmet
How can you tell if your helmet is too old to provide adequate protection? Look for these indicators:
- Faded or chalky appearance of the shell
- Brittle or cracking plastic components
- Outdated safety certifications
- Difficulty finding replacement parts
- Loose fit that can’t be adjusted properly
- Visible wear and tear on key protective areas
If you notice several of these signs, it’s likely time to invest in a new helmet to ensure you have the latest safety features and optimal protection.
Choosing the Right Replacement Parts for Your Baseball Helmet
When repairing your baseball helmet, selecting the correct replacement parts is crucial for maintaining safety and performance. Here’s how to ensure you’re getting the right components:
- Identify your helmet’s make and model
- Consult the manufacturer’s website or manual for part specifications
- Measure existing components to match sizes accurately
- Choose high-quality materials (e.g., stainless steel hardware)
- Consider purchasing directly from the manufacturer for guaranteed compatibility
- Check for any updated parts that may offer improved performance
Taking the time to source the correct replacement parts will ensure your repairs are effective and long-lasting.

The Importance of Authentic Parts
Why should you prioritize authentic, manufacturer-approved parts for your helmet repairs? Using genuine parts ensures proper fit, maintains safety certifications, and preserves the helmet’s structural integrity. While aftermarket parts may be cheaper, they may not meet the same quality standards and could compromise the helmet’s protective capabilities. Always prioritize safety over cost when it comes to helmet repairs.
Advanced Repair Techniques for Baseball Helmets
For those comfortable with more complex repairs, here are some advanced techniques to address specific helmet issues:
- Repairing minor shell cracks with epoxy resin
- Replacing entire padding systems for improved comfort
- Upgrading facemask attachments for enhanced stability
- Refurbishing helmet finishes with specialized paints
- Installing custom comfort features like sweat-wicking liners
- Modifying helmets for specific medical needs (with professional guidance)
These advanced repairs should only be attempted by those with experience and a thorough understanding of helmet construction and safety standards. When in doubt, consult a professional or the helmet manufacturer.

The Pros and Cons of DIY Advanced Repairs
Is it worth attempting advanced helmet repairs yourself? Consider these pros and cons:
Pros:
- Potential cost savings over professional repairs
- Ability to customize your helmet to your preferences
- Opportunity to learn more about helmet construction and safety features
Cons:
- Risk of compromising the helmet’s structural integrity
- Potential voiding of manufacturer warranties or certifications
- Time-consuming process requiring specialized tools and knowledge
- Possibility of decreased resale value for modified helmets
Carefully weigh these factors before deciding to undertake advanced repairs on your own.
The Future of Baseball Helmet Technology and Repairs
As baseball helmet technology continues to evolve, repair techniques and components are likely to change as well. Here are some trends to watch for in the coming years:
- Integration of smart technology for impact monitoring
- Advanced materials with improved shock absorption properties
- 3D-printed custom fit padding and components
- Self-healing materials for minor damage repair
- Modular designs allowing for easier component replacement
- Enhanced ventilation systems for improved comfort
These advancements may require new repair techniques and tools, so staying informed about the latest developments in helmet technology is crucial for maintaining your equipment effectively.

The Role of Technology in Helmet Safety
How might technological advancements improve baseball helmet safety in the future? We may see the integration of sensors that can detect and record impact forces, providing valuable data for assessing potential injuries. Additionally, materials science breakthroughs could lead to helmets that offer better protection while being lighter and more comfortable. As these technologies emerge, repair and maintenance practices will need to adapt to ensure these advanced features continue to function as intended throughout the helmet’s lifespan.
In conclusion, maintaining and repairing your baseball helmet is a critical aspect of ensuring your safety on the field. By understanding common issues, having the right tools and replacement parts on hand, and following proper repair techniques, you can keep your helmet in top condition throughout its lifespan. Remember to always prioritize safety, and don’t hesitate to replace your helmet when necessary. Stay informed about the latest advancements in helmet technology to ensure you’re always using the best protective equipment available for America’s favorite pastime.

Introduction to Baseball Helmet Repair Kits
As a baseball player, the condition of your helmet is incredibly important. A cracked helmet or loose hardware can compromise your safety on the field. That’s why having the right baseball helmet repair kit on hand is essential.
In this article, we’ll explore everything you need to know to fix up your batter’s or catcher’s helmet. We’ll look at the tools and components included in typical kits, where to find replacement pads and screws, how to remove old hardware, and best practices for installing new parts. Whether you play softball or baseball, youth or adult leagues, this guide will help you keep your helmet in tip-top shape.
Why Your Helmet May Need Repairs
Helmets take a beating during games and practices. Fastballs, foul tips, and collisions can loosen screws and create cracks over time. You may notice the pads wearing down or deteriorating as well. If anything feels loose or damaged, it’s vital to make repairs before your next time on the field.
Face masks in particular see a lot of stress. The constant impacts can shear bolts and screws, requiring new hardware to keep the mask securely attached. Old or rusty hardware should be replaced right away. The same goes for any bolts or screws elsewhere on the helmet.
While a good helmet can last for years, the padding breaks down much faster. Thin or compressed padding won’t provide adequate shock absorption. Replacing these pads restores comfort and safety.
What’s In a Helmet Repair Kit
Helmet repair kits contain the essential components for fixing most issues. At a minimum, they include replacement screws, nuts, washers, and tools. Higher quality kits provide ample extras of each hardware piece, since bolts are easy to drop and lose.
The exact screws required depend on your helmet make and model. Most kits include an assortment of common metric and standard fastener sizes for baseball and softball helmets. The hardware is often stainless steel or anodized aluminum for durability.
You’ll get multiple Phillips and flat head screwdrivers for removing old screws and fastening new ones. A socket wrench with standard and metric hex bits covers various nut sizes. The inclusion of threadlock helps prevent screws from loosening over time.
Padding replacement kits also exist. These provide new foam, cloth, and vinyl pads for the helmet interior. For catchers, separate kits replace the thicker pads behind the face mask.
Finding Replacement Parts
In addition to full repair kits, many vendors sell individual helmet components. This allows you to get just the specific hardware or pads you need.
When replacing facemask screws, match their thread pitch and length. Measure an existing bolt to ensure you get the right size. Helmet manufacturers often list replacement parts on their websites as well.
Foam pads can deteriorate quickly from sweat and use. Get replacements in the same thickness and material as the originals. Peel-and-stick options make pad swaps easy.
Removing Damaged Fasteners
Before installing new screws, the old ones must come out. A power drill with Phillips and hex bits helps speed up the process. Use a light touch to prevent damage.
If fasteners refuse to budge, apply penetrating oil and let it sit for a few minutes. This helps loosen rusted or stuck bolts. Turning the screw back and forth slowly can help break things free.
Be cautious when removing facemask hardware. The bolts usually have lock washers that dig into the metal. Back the nuts off completely before unscrewing the bolts to avoid scratching the paint.
Preparing the Surface
Once hardware is removed, clean the screw holes and surrounding area. A cotton swab dipped in rubbing alcohol works well. This removes grime so new fasteners can cinch down tight.
Check for any cracks radiating from screw holes. These can expand over time and compromise safety. Discontinue use and replace any helmets with deep cracks or structural damage.
Installing New Hardware
When bolting components back together, use the torque specifications from the manufacturer. Overtightening can damage the helmet. Use a torque wrench if possible.
For facemasks, loosely attach the top bolts first. Then install the bottom screws. With all hardware started, go back and tighten in an “X” pattern to the proper torque.
Use threadlocker on new bolts to prevent loosening. Let it set as directed before use. Finally, pull on the facemask to ensure nothing shifts.
Stick replacement padding directly to the interior shell. Make sure pads lay flat with no bunching or gaps. Trim with scissors for an exact fit.
Testing and Final Checks
After replacing components, inspect your work closely. Ensure all hardware is tight. Try on the helmet and shake your head around. Everything should stay firmly in place.
Check that new padding allows a snug, comfortable fit. All interior bolts and edges should be covered. No section of the head should feel direct pressure.
For catchers, test visibility and range of motion. You must be able to turn your head fully inside the helmet. The facemask should not obstruct sight lines.
Finally, examine the exterior for damage. Cracks, deep gouges, or loose components mean it’s time for a new helmet. Repairs can only go so far if the shell itself is compromised.
Proper Maintenance Adds Life
To minimize repairs, take good care of your helmet. Store it properly when not in use. Clean the padding regularly with mild detergent and allow it to fully dry.
Inspect for damage after each use. Tighten any loose screws right away. Replace pads annually or whenever they show wear.
Avoid hitting or throwing helmets, which can cause cracks and breakage over time. With proper care, a high-quality helmet should last for many seasons.
Knowing When to Replace

Although repairs extend its life, there comes a point when a helmet must be retired. Typical useful life is around 5-10 years, depending on use.
Replace immediately if you see any cracks in the shell, damaged hardware you can’t fix, or exposed foam. The “expiration date” stamped inside indicates the last recommended year of use.
As padding breaks down and parts wear out, the protection offered reduces. Upgrading to a new helmet ensures optimal safety and performance.
With the right tools and replacement parts, bringing an old battered helmet back to life is straightforward. Keep your repair kit stocked and your head will stay protected all season long!
Why You May Need New Helmet Hardware
As an active baseball player, inspecting your helmet regularly is a must. Those impacts from hits and collisions can take a toll over time. You may not notice the subtle effects of the deterioration until something goes wrong. That’s why watching for signs you need new helmet hardware is so important.
Much like tires on a car, the components on a batter’s or catcher’s helmet wear down with use. Gradual loosening of screws, rusting of metal parts, and breakdown of padding reduces the protection the helmet was designed to provide. Being proactive with repairs ensures your safety stays intact.
Catcher’s masks especially bear the brunt of foul ball after foul ball. The constant reverberations work bolts loose and can bend or snap parts entirely. Face masks must handle the momentum of balls traveling upwards of 70 mph or more. Even small gaps in the padding can mean a painful sting.
Batting helmets also handle high-speed impacts on a regular basis. Those line drives coming in at 100 mph or more exert incredible force. Over time, the shocks take a toll on the helmets shock-absorbing capabilities. Deterioration happens slowly, so you need to be vigilant.
Subtle Signs Mean Pay Attention
How can you identify when your helmet needs repairs? Subtle cues can signal issues. Keep an eye out for:
- Loose or wobbly chin straps
- Face masks or side pads shifting when hit
- Cracked or bent helmet shell
- Padding that’s visibly thinning or worn
- Rust spots on metal components
- Fasteners that are difficult to tighten properly
Even if the gear looks fine overall, reaching the manufacturer’s recommended retirement timeframe means replacement time. Most suggest 5-10 years, depending on usage intensity and care.
Don’t Guess – Inspect
Rather than guessing, examinations after each use or weekly are wise. Take off those helmets and look everything over closely. Peer inside with a flashlight to spot padding issues not visible otherwise.
Grab hold of face masks and try gently jiggling them. Any loosening or play requires new screws or bolts to get it snug again. A simple wiggle check takes seconds but could save you from injury.
Knock on the shell with your knuckles while listening closely. Any cracking will change the sound and reverberation. Tap near vents and along edges by screw holes particularly.
Minor Fixes Now Prevent Big Problems Later

On finding any wear and tear, make the necessary repairs immediately. Don’t keep using faulty equipment hoping the issues will go away.
A few new screws and some padding replacements are quick inexpensive fixes. Waiting risks a more dangerous failure down the road. It also extends the helmet’s lifespan rather than requiring full replacement.
As with your body, prompt care for minor helmet dings keeps you on the field. Detecting problems early allows for easy remedies. Don’t play games with safety – inspect and maintain your gear.
While no helmet lasts forever, attentive care and strategic upkeep does extend usable time. Know what subtly signals the need for repairs. Address issues promptly to keep protecting your most valuable asset – your head.
With a critical maintenance mindset, you can keep that trusty batter’s or catcher’s helmet in play season after season. Monitor and mend, fend off serious harm. Game on!
Types of Helmet Hardware Kits Available

When it’s time to repair or upgrade your batter’s or catcher’s helmet, you’ll need the right components. Helmet hardware kits provide all the nuts, bolts, screws, and tools required to get the job done right.
Manufacturers offer several types of repair kits to suit different needs. From basic screw assortments to deluxe kits loaded with extras, you can find the ideal set for your helmet fixer upper project.
Good, Better, Best – Helmet Hardware Kits Galore
Entry-level kits provide the essentials for replacing common fasteners on baseball and softball helmets. You’ll get an array of Phillips and hex screws in standard sizes like #4, #6, and #8.
Upgrading to a mid-range kit brings more variety in screw lengths and diameters. You’ll have better odds of finding a match for your existing hardware. The included nut driver and screwdrivers also tend to be higher quality.
Top of the line kits leave nothing to chance performance-wise. You get generous quantities of screws, washers, lock washers, nuts and bolts. Multiple driver bits and wrenches cover all sizing needs.
DIY Handyperson or Seasoned Pro? Options for Any Repairer
Weekend DIYers can opt for basic screw assortments to handle occasional minor fixes. The typical homeowners tool kit likely covers the necessary screwdrivers and wrenches.
Those tackling more involved repairs will appreciate mid-grade kits. You get enough hardware to replace all fasteners if needed. The bonus tools ensure proper tightening to avoid future loose screws.
Coaches, equipment managers, and frequent helmet repairers will benefit most from pro level kits. You’ll have parts to spare for various repair jobs. The high-end tools like torque wrenches provide precision work.
Function Over Fluff
When selecting a helmet repair kit, focus on what you actually need. Don’t overpay for unneeded extras.
If you already own quality screwdrivers and wrenches, a basic screw assortment will suffice. Those without tools should choose a kit with included drivers to get the job done.
Similarly, a catcher needing just new faceguard bolts won’t use the spare helmet shell screws. But having ample spares and options ensures you can fix unforeseen issues down the road.
Shop Smart – Compare and Contrast

To identify the ideal kit, carefully compare the contents and quality. Most vendors provide detailed listings of everything included.
Make sure the screw sizes match what your helmet requires. Look for durable steel hardware and chrome vanadium screwdrivers.
Kits from reputable sports equipment companies usually offer better components than generic varieties. Customer reviews can provide insight on real world performance.
With the right repair kit, you can tackle any helmet fix-up project. Choose based on your needs and budget to keep heads protected.
What’s Included in a Typical Kit
Helmet repair kits contain the components necessary to fix many common issues. While contents vary, most include an assortment of replacement hardware and tools.
Understanding what comes in a standard kit helps you choose the right one. You want to make sure you get the parts, fasteners, and tools suitable for your particular repair project.
Typical Components

At the minimum, expect a range of screw sizes and types. Phillips and hex bolts in diameters like 3/16″, 1/4″, or 5/16″ cover most needs.
Nuts, washers, and lock washers complement the screws. You’ll get quantities of each based on the kit quality. Multiple lengths give flexibility for varied applications.
In addition to the hardware, drivers for removal and installation are standard. A Phillips and flat head screwdriver handle the screws. Hex keys or a nut driver tighten nuts and bolts.
Higher end kits include extras like threadlocker to prevent loosening. A socket wrench set expands the bolt sizes covered beyond what a nut driver allows.
Padding Replacement Kits
For re-padding helmets, specialized kits are available. These include foam, vinyl coverings, adhesive, and mesh for mounting.
The foam comes pre-cut to fit common helmet models. The adhesives bond to the shell for a custom fit. For catchers, thicker rear pads cushion foul ball impacts.
Materials Matter
Metal components should be durable steel or anodized aluminum. Nuts and bolts may be zinc plated for corrosion resistance.
Precision tools like screwdrivers feature hardened chrome vanadium steel shafts for strength. Cheaper kits may have lower grade budget tools.
For padding kits, closed cell foam absorbs shock best. Vinyl covers should match OEM parts and feel comfortable when worn.
The Extras Add Convenience
Bonus items elevate the usefulness of certain kits. Spare parts mean you can handle multiple repairs and replace lost screws.
Threadlocker ensures bolts stay tightened. A carrying case keeps everything organized in one place for quick access.
While not mandatory, these extras provide versatility and convenience during upkeep and repairs.
Compare Contents Before Buying
Since kits vary in components, study lists closely before purchasing. Make sure it includes appropriate supplies for your particular helmet and repair needs.
Having the right parts and tools readily available makes fix-up jobs quick and painless. Get your helmet back in working order with a properly stocked repair kit.
Where to Find Replacement Helmet Pads

The padding inside a batting or catching helmet takes a beating over time. As the foam compresses and vinyl cracks, you’ll need fresh replacement pads to restore comfort and safety.
Many sources carry replacement pads for most major helmet models. With some research, you can find an exact match or suitable generic alternatives.
Check With the Manufacturer
Your first stop should be the helmet maker’s website. Most offer replacement parts for their gear. Find your specific model and see if padding kits are available.
These factory parts ensure an accurate fit. The foam density and cover materials will match the originals. Installation is usually simple with adhesive backing.
Aftermarket Replacements
In addition to the helmet companies, many sports equipment retailers sell replacement pads. These aftermarket varieties work across multiple brands.
Look for pads in the correct thickness and materials for your needs. Measure any existing pads to get the sizing right. Catcher’s helmet rear pads require extra thick foam.
Universal Fit Options

Another option is universal or generic fit pad kits. These let you cut basic foam and fabric pieces to size.
Take careful measurements of your helmet’s interior to know what shapes and sizes to cut. Trace the outlines on the foam first for a template.
With some handy work, you can create custom pads. But results may not match factory parts fit and finish.
Scouring Online Marketplaces
Websites like eBay and Craigslist are handy for finding replacement parts. You may luck upon new old stock OEM pads at bargain prices.
Search using your exact helmet make and model name along with keywords like “pads”, “replacement”, or “repair kit”. Check seller reviews to validate legitimacy.
Shop Smart to Save Money
Research all sources to find affordable replacement padding. Buying direct from manufacturers can be priciest.
Look for sales on aftermarket pads that meet your requirements. With some diligent hunting, you can save big over MSRP prices.
Revive that helmet with fresh new pads. Protect your head and wallet at the same time.
Buying New Facemask Screws and Bolts
The facemask on a batting or catching helmet takes a beating from constant impacts. Over time, the screws and bolts holding it in place can shear or break.
Replacing these fasteners immediately keeps the mask securely attached. Shopping for new facemask hardware is easy when you know what to look for.
Match Your Existing Hardware
To identify replacement screws and bolts, examine your helmet closely. Note the thread diameter, length, and pitch of the fasteners.
Also pay attention to the drive type – Phillips or hex head. Bring one of the intact screws with you to the hardware store for comparison.
Matching the specs of your existing hardware ensures proper fit and function when replaced. Don’t guess – measure first.
Common Sizes
While sizes vary across helmet models, metric fasteners around M5 to M8 are typical.
Lengths range from 10mm up to 25mm usually. Standard thread pitches around 0.8 to 1.25mm are common.
Phillips and hex drive styles allow easy tightening with basic tools. Stainless steel resists rust.
Buy in Bulk

When purchasing new facemask hardware, get multiples of each screw and bolt needed. It’s inevitably easier to drop and lose small parts during repairs.
Having spares on hand avoids frustration and delays if you misplace any fasteners. Plus, bulk packs often cost less per piece.
Proper Materials
Opt for durable metals like stainless steel, anodized aluminum, zinc plated steel or titanium.
Softer metals like brass can shear off over time. Coatings help resist rust and corrosion from sweat and weather.
Nylon lock nuts and washers help secure the bolts long-term. Thread lock fluid provides extra insurance against loosening.
Shop Smart
Big box hardware stores offer individual screws and bolts affordably. For one-stop convenience, helmet repair kits include complete facemask hardware assortments.
Comparepricing between local retailers and online sources. Buying in bulk yields significant cost savings in most cases.
Keep spare screws, washers, bolts and nuts on hand for quick repairs when facemask issues arise. Stick with quality metal components for lasting performance.
Getting the Right Size Helmet Screws
When replacing loose or damaged screws on a baseball helmet, using the proper size is crucial. The wrong length or diameter screws won’t secure correctly and may damage the helmet.
Figuring out the right specs requires examining the existing hardware. With some simple measurements, you can identify perfect replacements.
Start by Measuring What’s There
Closely study each screw you plan to replace. Use a ruler or calipers to determine the head diameter, length, and thread diameter.
Also take note of the drive type – Phillips, slot, hex, Torx, etc. Make sure to measure both interior and exterior fasteners.
Match these dimensions as closely as possible when ordering replacements. This ensures proper fit and function.
Metric or Standard Sizing
Baseball and softball helmet screws typically use metric sizing. But some older or youth models may have standard imperial units.
Common metric diameters are M3, M4, M5, etc. For standard bolts, fractions like 1/8″, 5/16″ are normal.
Have both metric and standard size references handy when measuring to determine the system yours uses.
Mind the Threads
Fastener threads are measured in pitch, the distance between adjacent threads. Finer thread pitches grip better in hard plastics.
Most helmet screws have a pitch around 0.8 – 1.25mm. Again, check yours against rulers to get an accurate pitch count.
Matching the thread pitch ensures full contact between the screw and the helmet’s molded threads for a solid hold.
It’s Okay to Estimate
Don’t worry about getting the size down to the exact hundredth of a millimeter. Close is often good enough.
Round your measurements to the nearest whole number metric size or fractional standard size. Available replacement screw stock has some wiggle room.
The key is getting very close to the original dimensions. This gives the best performance.
When in Doubt, Go Up a Size
If measuring leaves any uncertainty between two possible sizes, choose the next incrementally larger option.
Larger screws that fit the holes properly are less likely to strip out under force. Err toward a beefier bolt for critical structural areas.
With careful measurements and size matching, upgrade your helmet with perfectly fitting replacement screws.
Understanding Torque Specifications

When installing new screws and hardware on a baseball helmet, proper tightening is crucial. Torque specifications dictate the optimal tightness to secure parts without causing damage.
Understanding and following manufacturer torque values ensures robust, long-lasting repairs. Taking the time to do this right will save you work down the road.
What is Torque?
Torque measures the amount of rotating force applied when tightening a fastener like a screw or bolt.
It’s expressed as inch-pounds or Newton-meters. Higher torque values mean more twisting force is being applied during tightening.
Excessive torque can strip threads or cause cracks. Too little torque leads to loose, unsafe connections.
Finding Recommended Specs
Helmet manufacturers will provide torque specs for all hardware components. Sometimes these are printed in the instructions.
If not there, check the company website or contact their customer service department to obtain the values.
Alternatively, start with light torque and increase slowly while testing the hold. But manufacturer info is ideal.
Dialing in the Torque Wrench

Special torque wrenches allow precisely controlling torque applied to fasteners. Dial in the suggested helmet values before use.
Quality wrenches have clear gauge markings for setting specific torque amounts. Double-check the setting before tightening bolts.
Using a torque wrench prevents over- or under-tightening during repairs.
Testing the Torque
Once set up, test the wrench on spare fasteners first. Securely tighten and then check the bolts with a tool designed to measure resulting torque.
This confirms your wrench is calibrating properly before moving on to repairing the actual helmet.
Periodically re-test the torque wrench to ensure accuracy over time as components wear.
Take Your Time
Rushing through torque adjustments can lead to errors. Carefully set the desired torque value and recheck it before tightening critical hardware.
It’s also good practice to have someone double-check your torque wrench settings before repairs.
Taking it slow ensures you dial-in specifications correctly. Don’t rush safety.
Torque values are set for a reason by engineers. Follow them precisely for reliable long-term performance after repairs.
How to Remove Old or Damaged Hardware
Before new screws, bolts or pads can be installed, the old components must come out. Removing helmet hardware properly prevents damaging the shell.
With some patience and the right tools, you can detach stuck or broken parts for replacement. Here are tips to safely remove any piece from a batting or catching helmet.
Go Slow with Penetrating Oil
If screws feel stuck, apply penetrating oil around the threads and let it soak in for 5-10 minutes. This lubricates the connections for easier turning.
After soaking, turn screws back and forth slowly with gentle pressure from a screwdriver. Don’t force anything or you may strip the head.
Use Proper Driver Fit
Make sure screwdriver heads fit snugly in fastener heads before attempting removal. A tight fit prevents the driver from slipping and damaging the helmet or your hands.
The proper size Phillips and hex (Allen) keys give the most grip and control when backing out stubborn screws.
Back Nuts Completely Off

On bolts with corresponding nuts, always fully loosen the nut first before unscrewing from the helmet side. This prevents scratching the paint or damaging bolt threads.
Once the nut is detached, unscrew the bolt itself slowly. Reversing this order risks surface damage.
Drill Out Broken Screws
Sheared or broken screws must be drilled out carefully. Use a left-handed drill bit slightly smaller than the screw diameter to back it out.
Change to a larger bit if needed to clear all debris. Go slowly to avoid drilling too large a hole for replacements.
Use Heat on Stubborn Pads
Padding adhesives can turn gummy and difficult to separate over time. Warming with a hairdryer softens the bond for easier removal.
Heating also makes any foam itself more pliable to aid removal. Just don’t overheat and melt padding materials.
Safety First!
Wear eye protection when removing any helmet components. Bits of debris can fly as you work.
Be ready for parts to suddenly break free after long soaking. Keep your grip and work deliberately to avoid damage.
With the right precautions, even stuck screws and padding can be removed successfully. Then you’re ready for fresh new gear.
Cleaning Helmet Hardware Areas

Before installing new screws, pads, or other components, it’s smart to clean the helmet surface areas first. This removes any dirt or debris for optimal bonding.
Taking this simple preparatory step helps new hardware and padding mount flush and tight. A quick scrub now prevents problems down the road.
Start With a Thorough Inspection
Look over the inside and outside of the helmet closely under good lighting. Check for any cracks radiating from screw holes that may indicate underlying issues.
Ensure all old adhesive or foam remnants are removed so new pads adhere properly. Identify any corrosion or rust around hardware.
Wash Away Grime
Use mild soap and warm water to gently clean helmet surfaces. Avoid any harsh chemicals that could damage the shell materials.
Let the helmet air dry fully afterwards so no moisture remains when adding new components.
Alcohol Cleans Hidden Areas
For hard to reach spots like screw holes, use cotton swabs dipped in rubbing alcohol. This dissolves oils and dirt in tight spaces.
Allow alcohol to fully evaporate before reinstalling hardware. Take care around any helmet graphics or decals.
Address Rust Buildup
If existing hardware shows rust or corrosion, use a metal brush attachment on a power drill. Carefully scrub only affected areas to remove oxidation.
Wipe down with alcohol afterwards and apply a corrosion inhibitor before adding new screws or bolts.
Prep Padding Areas
Use a wire brush on low speed to rough up foam contact points. This helps new adhesive stick better to the shell for maximum hold.
Wipe away any dust with a clean lint-free cloth. Avoid abrasives on shell exteriors or decals.
Take Your Time
Don’t rush through cleaning and surface preparation. Doing it right is essential for long-lasting gear upgrades.
Meticulous cleaning now prevents having to redo repairs later after parts fail prematurely.
With surfaces prepped properly, new batting helmet hardware and padding can be installed worry-free.
Proper installation of new hardware
It’s a new season and time to get your baseball gear ready to hit the field! A key piece of equipment that can often get overlooked is your baseball helmet. Having a properly fitted and maintained helmet is crucial for staying protected out there on the diamond. While it may seem simple, there are some important steps to take when installing new hardware and making repairs on your batting helmet for optimal safety and performance.
The first thing you’ll want to do is a thorough inspection of your current helmet setup. Look for any cracks or dents in the outer shell, as these can compromise the integrity. Check that the interior padding is in good condition and not compacted or deteriorating. Press on the padding in different areas to make sure it still has bounce-back and isn’t flattened out.
Next, examine the helmet’s metal cage facemask and chin straps. Are there any broken or missing screws that connect the cage to the shell? Do the straps have any fraying or tears? Damaged facemask hardware can cause the cage to come loose on impact, while deteriorated chin straps won’t keep the helmet securely in place. Replacing any defective parts is crucial.
When installing new facemask screws, be sure to get the proper size meant for baseball helmet attachment. The screw heads should nest flush within the helmet shell when tightened down. Don’t use screws that are too long or short. For optimal hold, apply a small amount of thread locker to the screws before inserting them into the pre-drilled helmet holes. This will help prevent them from loosening over time.
Carefully align the new facemask so the eye opening and chin cup are in the correct position for clear vision and protection. Hand tighten the screws evenly so that the tension is distributed, then finish securing them snugly using a screwdriver. Don’t over-tighten as this can strip the screw holes. The facemask should feel stable but still have a little play for shock absorption.
When replacing worn helmet padding, choose replacement pads designed specifically for athletic use. Foam rubber and compressed vinyl pads will withstand sweat and absorb shock best. Cut the pads to shape using the old pads as a template. Peel off the adhesive backing and press into place within the shell channels. Go slowly and smooth out any bubbles or wrinkles as you adhere the padding.
For chin strap replacement, detach the old straps via the splitter hardware near the ear flaps. Thread new straps through the correct helmet slots and re-attach to the splitter hardware. Adjust the strap sliders so the chin cup sits centered under your chin when buckled. The straps should be snug but not uncomfortably tight. Yank on them to verify the splitters are secured.
To help keep your helmet in top shape all season long, be sure to regularly inspect and maintain it. Before each use, re-check the hardware for any loosening and re-tighten if needed. Periodically clean the helmet pads with mild soap and water to fight odor and sweat buildup. Replace the pads once they become excessively worn or compressed.
While it may not seem like the most exciting part of prepping for a new baseball season, taking the time to properly inspect and fix up your batting helmet is time well spent. A few small repairs and hardware upgrades can go a long way in helping to prevent injuries this season. Stay safe out there on the field and play hard!
Things You’ll Need for DIY Baseball Helmet Repairs and Upgrades
If you want to fix up and upgrade your baseball helmet yourself, here are some of the key items you’ll want to have on hand:
- Facemask screws – Purchase screws specifically meant for baseball/batting helmet attachment. Stainless steel screws will resist rust. Have an assortment of sizes to match your helmet’s hardware.
- Screwdrivers – A Phillips head screwdriver is commonly used for tightening/loosening helmet screws. A mini screwdriver works best for the small screws.
- Replacement helmet padding – Look for foam rubber or compressed vinyl padding shaped to fit baseball helmet interiors.
- Chin straps – Straps made of durable nylon or polyester will withstand wear and tear.
- Thread locker – Applying thread locker helps secure screws in place. Avoid permanent types.
- Helmet cleaning solution – A gentle cleaner specifically made for sports helmets helps remove dirt, sweat, and bacteria buildup.
- Rag – Use a soft, lint-free rag to apply cleaner and buff your helmet shell for a scratch-free shine.
- Masking tape – If repadding, use tape to make a template of your old pads for sizing new ones.
- Scissors – Trim new pad pieces to fit using scissors. Use sharp shears for clean cuts.
Along with these repair items, be sure you have the right tools for properly sizing and fitting your helmet to your head. A soft measuring tape allows you to accurately measure your head circumference to determine ideal helmet size. The interior padding should feel snug but not too tight. If unsure about the proper sizing and fit, consult with a coach or sporting goods retailer for guidance.
Taking a methodical approach with the right equipment makes DIY baseball helmet repairs and upgrades much easier. Invest in quality replacement parts meant for safety helmets to ensure optimal performance. With the proper protection and fit, you’ll be able to play your best game while staying injury-free.
Tips for Keeping Your Baseball Helmet in Top Shape

A high-performing baseball helmet doesn’t just happen. Taking proactive steps to maintain and care for your protective headgear is key for keeping it in ideal condition all season long. Here are some useful tips for maximizing the lifespan and safety of your batting helmet:
- Inspect it regularly – Before each use, check for signs of wear like padding compression, loose screws, or damaged shell. Address any issues immediately.
- Clean frequently – Use a gentle helmet-specific cleaner to wipe away dirt, sweat, and bacteria around padding.
- Replace parts as needed – Don’t wait for total failure. As soon as parts show wear, replace with new hardware.
- Avoid heat – Don’t leave helmets baking in hot cars between games. Heat can degrade parts over time.
- Secure screws – Routinely check screws and tighten any that are loose. Use thread locker for added security.
- Swap out padding – Replace padding every season or sooner if excessively compacted or deteriorated.
- Store carefully – Place on a shelf or hang when not in use. Don’t pile other gear on top that could cause damage.
- Keep customization minimal – Limit stickers or paint that could cover up cracks or compromise the shell surface.
- Consider upgrades – Newer helmet styles offer additional features like dual density foams or extra vents.
While batting helmets are built to withstand the rigors of the game, they need proper maintenance to maximize their protective abilities over time. By making helmet care a routine part of your baseball equipment regimen, you’ll extend its usable lifespan and ensure crucial safety for seasons to come.
Treating your helmet with care demonstrates responsibility and leadership to younger players also. Model good habits by making safety inspections and upkeep a consistent priority. A little time invested on an ongoing basis will keep you confidently covered whenever it’s your turn to step up to the plate.
Testing helmet for safety after repairs
You went through the effort of inspecting your baseball helmet and making necessary repairs. But how can you be sure the fixes you made have restored the helmet to ideal safety levels? Proper testing after DIY repairs is a crucial final step before stepping onto the field with repaired protective gear.
Start by doing another thorough inspection of your batting helmet. Closely examine the outer shell, looking for any cracks or damage that may have been missed. Check that padding inserts are correctly in place and secure. Ensure all hardware like facemask screws are properly tightened and flush with the surface.
Next, shake the helmet vigorously and listen for any rattling that could indicate loose screws or improperly installed parts. Take a soft mallet and gently tap around the surface area, listening for dull or hollow sounds that may reveal unseen cracks or weaknesses.
Carefully inspect the facemask,chin straps, and other attachments. Try bending and flexing the facemask to check for brittleness or weakness. Make sure strap hardware connects solidly to the shell and adjusters slide smoothly but stay put when positioned.
Once you’ve verified mechanical soundness, the real test is to try on the helmet. Put it on and carefully yet firmly press around the entire shell with your hands. See if pressing causes any gaps to appear between shell and liner or shifts the position of pads. Look for tight spots or places that feel loose compared to the rest.
Next, strap the helmet on securely and try vigorously shaking your head from side to side and up and down. If the helmet shifts excessively or straps loosen, it may need adjustment. You want it stable but not painfully tight. Also examine if peripheral vision is impaired by improper facemask alignment.
If possible, use a soft mallet to lightly rap the shell while someone is wearing it. Listen for them to report any points that feel/sound markedly different. Serious weaknesses won’t always be apparent when the helmet is not on a head.
Finally, test shock absorption by placing the helmet on a soft surface like a mattress and dropping a softball from a height of 2-3 feet so it impacts near the crown. Do this a few times around the shell, listening for solid contact versus a dull thud, which can indicate compromised padding.
For total assurance, take the helmet to a sporting goods retailer that offers helmet testing services. Trained specialists use precision equipment to identically strike different points on a helmet and measure impact force. This quantitatively assesses shock absorption across the entire shell.
They also have helmet drop towers to test impact performance by logging g-forces at different drop heights. A brand new helmet dropped from prescribed heights should produce expected g-force results.
Some additional tests a specialist may perform include:
- Shell compression – Assessing structural integrity by gauging how much force is needed to flex the shell.
- Facemask shear test – Attaching gauges to test how much force is required to shift the facemask and attachments.
- Chin strap strength test – Measuring maximum load chin straps withstand before failing.
Specialized equipment can also x-ray helmets and use sensors to identify weaknesses and defects not visible to the eye. Investing in professional testing provides quantitative data to confirm your repairs have restored the helmet to safe working order.
Proper helmet testing does require an investment of care, time and potentially money. But considering how crucial proper head protection is on the field, the effort is worthwhile. Taking methodical steps to validate your DIY handiwork helps ensure you can confidently wear your batting helmet without putting your safety at risk.
Warning Signs It May Be Time to Replace Your Baseball Helmet

No matter how well you maintain your baseball helmet, there will likely come a time when repairs and parts replacements are no longer adequate and it’s time to retire your trusty head protector. Here are some telltale signs that indicate your helmet has reached the end of its safe lifespan:
- The shell has visible cracks, gouges or perforations
- Padding is excessively compacted and no longer bouncing back
- The chin straps are frayed or hardware is broken/won’t stay secured
- You notice wobble or play when mounted facemask is grasped and shaken
- Helmet easily shifts/rotates when head is turned aggressively side to side
- Facemask bars are bent or fractured
- Outer shell has visible “spider cracking” radiating from points of impact
- Helmet is over 5 years old (even if rarely used)
- Newer helmet designs offer more appealing features/technology
- Helmet sustained a major impact and you feel it may be compromised
If your helmet exhibits any of these red flags, it’s definitely time to think about replacement. While it may still offer basic protection, deteriorated helmets often don’t absorb shock nearly as well as they once did. Don’t let sentiment make you hang onto a helmet past its prime.
Another factor hastening retirement is if newer helmet models offer appealing upgrades not available on your older lid. Manufacturers are continually innovating helmet technology—lighter and more breathable shells, dual-density foams for multi-impact protection, advanced vent systems, secure quick-release chin straps, and more.
Take time to research the latest helmet models and see if certain features would be an asset to your game. Depending on your needs, an upgrade may be a smart investment in your safety and performance.
While it can be hard to retire a trusty old helmet you’ve worn for years, recognizing when it has given all it can give is an important judgement call. Protecting against injury needs to trump sentiment. Identify when degraded function compromises your safety margin, and it’s time for an upgrade. Your head will thank you!
Ensuring proper helmet fit after hardware changes

You went through the process of inspecting your baseball helmet and replacing worn out hardware like padding and facemask attachments. But now a crucial question remains—does your repaired helmet still fit correctly for optimal protection and comfort?
It’s important to thoroughly re-assess fit every time you make physical changes to your batting helmet. Altering components like padding thickness, chin strap length, and facemask position can change how the helmet sits on your head even if the shell itself is the same.
Start by visually examining the helmet on your head to identify any obvious gaps, shifts or pressure points. Turn your head from side to side while wearing it secured to check for wobble or evidence the helmet is improperly balanced.
Next, try aggressively shaking your head up and down and back and forth. You want the helmet to stay stable without painfully pressing into any spots or exhibiting excessive play. Have a coach watch from the front and sides to spot any shift.
Get a sense of how the repaired helmet compares to its previous fit and feel by putting your old helmet back on. While wear is likely what prompted your repairs, the shapes and indentations reflect how it correctly conformed to your head.
Examine the chin strap adjustments, ensuring the chin cup centers beneath your chin and straps lay flat against the jawline when buckled. If straps were replaced, slide adjusters to recreate proper positioning.
Study the facemask opening size and shape. Make sure it provides clear downward and peripheral vision without obstruction. Repositioning the cage could have altered its angle and positioning across your sightlines.
Press around the inside pads with your fingers, feeling for secure adhesion and even contact. Any detected gaps or loose areas indicate where padding shifts or additions may be needed to achieve uniform pressure.
For the most precise assessment, use measuring tools to dial in ideal dimensions. A fabric tape measure lets you re-verify the circumference of your head to double check the shell size is correct.
Special helmet fit tools can then quantify proper padding thickness and gaps. These can greatly aid in identifying exactly where padding needs slight increases or reductions to achieve an anatomically contoured fit.
It’s also a good idea to monitor the repaired helmet’s fit over multiple wears. Padding can settle and hardware can be re-tightened. Keep noting any pressure points or movement that develop so adjustments can be made.
Don’t ignore small fit imperfections and think they’ll break-in over time. Take a methodical approach to achieving a dialed-in fit customized to your head’s unique size and shape. Perfectly fitted helmets are safer, more stable, and much more comfortable over long games and seasons.
With all the time you invested repairing your trusted helmet, be sure not to stop short of the final step of verifying excellent fit. Even if repairs are flawlessly executed, an improper fit undermines their benefit. For confident protection, prioritize fit, adjust as needed, and then get back in the game!
Selecting the Best New Baseball Helmet for You
Shopping for a new baseball helmet is about more than just looks and decals. With many equipment options on the market, it pays to consider key factors to select head protection that ticks all the boxes for safety, fit and performance.
Research the latest helmet technologies and features before visiting retailers. Look into things like dual-density foams, anti-microbial linings, advanced venting, modified shell shapes, quick-release chin straps and more.
Know the regulations for your league or level of play. Certain features like metal facemasks or visors may not be allowable under league rules. Ensure any new helmet meets required safety standards like NOCSAE certification.
Try on different models in your size range to get a firsthand feel for weight, balance and overall comfort. Move around while wearing helmets to assess stability and vision peripherals.
Be wary of a seamlessly perfect fit right off the shelf. Expect to need some custom padding adjustments to get a dialed-in contoured fit. Multi-layer padding systems allow more fine tuning.
Examine shell durability and construction. Look for solid resin materials that offer fuse-molded layers for strength while remaining lightweight.
Investigate sizing options like removable jaw pads and inflatable inner bladders that enable more size customization as your head grows and shape changes.
Don’t overlook aesthetics. Cool colors and patterns you find appealing boost enjoyment in wearing the gear and build fond associations.
Consider specialty helmets for needs like switching between catcher and field positions. Features like removable face guards or dual crowns cater to versatility.
Think long-term. Opt for helmets offering replaceable parts and components you can upgrade over multiple seasons.
Shop end-of-season sales to score closeout deals on outgoing helmet models when retailers empty inventory for new arrivals.
Taking the time upfront to be selective will help you find your perfect new baseball helmet match—one offering the ideal blend of comfort, adjustability, structural integrity and style to keep you performing safely and confidently this season and beyond.
Maintaining helmets to avoid frequent repairs

As a baseball player, keeping your helmet in good working order is incredibly important for your safety on the field. However, helmets can deteriorate over time, especially if not properly maintained. Following some basic maintenance tips can help extend the life of your baseball helmet and avoid the need for frequent repairs.
Inspect regularly for cracks and damage
Make it a habit to thoroughly inspect your baseball helmet before each use. Look for any cracks, dents, or deterioration of the outer shell, as these can compromise the integrity and shock-absorption of the helmet. Pay particular attention to high-impact areas like the facemask, chin strap, and top/back of the helmet, which take the brunt of hits. Even small cracks or deformities mean it’s time to replace your helmet.
Check and tighten hardware
The screws, bolts, and hardware that hold a helmet together also take a beating during games and practices. Loose connections between the shell and interior padding can reduce the helmet’s effectiveness. Get into the routine of checking and tightening any loose helmet hardware before stepping onto the field. It takes just a few minutes but makes a big difference in keeping everything secure. Investing in a small screwdriver or hex wrench toolkit can help with on-the-go tightening when needed.
Replace deteriorating parts

With frequent use, parts like the helmet liner, chin straps, and facemask padding can become worn out or damaged. As these parts degrade, the fit and shock absorption of the helmet suffers. Keep an eye out for thinning or cracking materials and replace individual parts as needed. Many companies sell replacement parts like pads, straps, and hardware kits to breathe new life into old helmets.
Clean regularly
Over time, dirt, grime, and sweat can build up on both the interior and exterior of helmets. Not only is this unsanitary, but it can also lead to corrosion and deterioration of materials. About once a month, give your helmet a thorough cleaning inside and out with warm water and gentle soap. This removes bacteria and buildup that can degrade the helmet. Be sure to rinse and air dry completely before use.
Store properly
The way you store your helmet between uses can have a big impact on its lifespan. Keep it in a cool, dry place out of direct sunlight when not in use. Heat and UV rays speed up the breakdown of helmet materials. Avoid tossing it in a crowded equipment bag, which can lead to chips and cracks. Investing in a helmet storage bag provides padding and protection.
Replace every few seasons
No matter how well-maintained, the materials and integrity of a baseball helmet deteriorate over time. Experts recommend replacing batting helmets every 2-3 years at minimum, or after a major impact. Catcher’s helmets should be replaced annually. The cost of a new helmet is minimal compared to the protection it provides from injury. When in doubt, err on the side of caution and get a new helmet for optimal safety.
Get the right fit
An improperly fitted helmet leaves you vulnerable to injury, no matter the condition. As you grow and your head size changes, check that your helmet still fits snugly all the way around without movement or gaps. The padding should compress comfortably around your head. The chin strap should be snug around the chin and jaw. Take the time to adjust sizing components for a customized, stable fit. An ill-fitting helmet is likely to shift on impact, reducing protection.
Consider upgrades
As helmet technology progresses, upgrading to a newer model every few years can enhance safety and performance. Newer designs incorporate innovative materials, interior padding, and shock absorption systems. High-end options add features like advanced ventilation, anti-glare shields, and sensors. While pricier, upgrades can be worthwhile for optimized protection and an improved experience on the field.
Don’t alter the helmet

It may be tempting to decorate or modify your baseball helmet to show team spirit or personality. However, any alterations like drilling holes, adding paint or stickers, or attaching external accessories can undermine the integrity of the helmet. Even minor changes can impact the performance of the carefully engineered structure. Enjoy showing your style through uniform accessories instead of making permanent mods to your helmet.
Rely on the experts when needed
Performing basic maintenance and replacements on your own can save money and extend your helmet’s lifespan. However, at a certain point, it’s safest to let the experts handle major repairs. If you notice expanded cracks, large dents, deformed areas, or internal damage beyond surface-level fixes, retire that helmet from play. Consult your local sporting goods shop about professional helmet inspections and refurbishment services.
Taking care of your baseball helmet doesn’t require a ton of time or money, just some simple diligence. Incorporate these tips into your pre- and post-game routine to keep your helmet in peak shape all season long. The small effort goes a long way in preventing costly repairs or injury from damaged equipment. With proper maintenance and occasional upgrades, your trusty helmet will protect your head for seasons to come.
When it’s time to replace a helmet completely

As an active baseball player, a high-quality helmet is your most important piece of protective gear. However, even with proper care and maintenance, there comes a point when it’s necessary to retire an old, worn out helmet and replace it with a new one. But how do you know when it’s really time to buy a brand new helmet? Here are some clear signs that indicate your current headgear has reached the end of its lifespan.
It’s sustained a major impact
If your helmet takes a major direct hit from a ball or other high-speed impact, it’s likely time for a replacement. Even if you can’t see visible damage, the inner protective foam panels and structure have probably compressed to absorb the shock. This diminishes their ability to disperse impact in the future. Don’t risk another big impact in a compromised helmet – replace it.
The shell has cracks or damage
Over time, the outer plastic shell can develop stress cracks from repeated use and flexing. Inspect closely for any cracks longer than 2 inches, as these indicate the integrity is breaking down. Chips, gouges, and dents also weaken the structure. Damaged helmets are less capable of handling high-velocity impacts.
Interior parts are deteriorating
Inside every helmet, energy-absorbing foam panels and comfortable fabric pads provide protection and fit. But these interior parts degrade over time. If you notice the foam is cracked, crumbling, or flattened, it won’t absorb shock like it should. Thin or torn fabric parts also indicate a helmet near the end of its usefulness.
It doesn’t fit snugly anymore
As you grow, an improperly fitted helmet increases injury risk. If your current headgear sits unevenly, moves around on your head, or has gaps between padding and your head, the fit is likely compromised. An ill-fitting helmet can shift dangerously on impact. Take the time to periodically check for proper compression and stability.
It’s more than 2-3 years old
Batting helmets should be replaced every 2-3 years minimum due to wear and tear over time. For catchers, it’s recommended to replace headgear annually as they suffer more abuse. Write the purchase date on your helmet so you know its age. Replacing on this schedule ensures you always have optimum protection.
Newer technologies and designs exist

As helmet engineering progresses, newer models incorporate safety and performance innovations. Upgrading to the latest tech every few years enhances your protection and comfort on the field. Consider newer features like advanced ventilation, anti-glare facemasks, padding systems, and smart sensor options.
It doesn’t align with league requirements
Youth baseball organizations often update equipment requirements as safety research evolves. Make sure your current helmet meets the specific criteria like NOCSAE standards, authorized materials, and banned alterations. You may need a new approved model to comply with the latest youth baseball safety rules.
It has visible sweat and grime buildup
Over months of use, sweat, body oils, and dirt accumulate on both interior and exterior helmet surfaces. This visible grunge buildup not only looks gross but indicates degraded materials. Deep cleaning can’t reverse this level of wear. A fresh start with a new helmet maintains hygienic use.
Parts are no longer replaceable

If your helmet is missing major parts like padding and chin straps that are now discontinued, it may make more sense to replace the entire helmet. Hunting down obsolete replacement parts can be tough. Why struggle trying to salvage a clearly worn out helmet?
You can afford the cost of a replacement
Finally, if your budget allows, erring on the side of caution and purchasing a new replacement helmet periodically is smart. Prioritizing safety and performance outweighs prolonging the use of an aging, inferior product. The cost of a new helmet pales in comparison to its impact and concussion prevention value.
As much as you rely on your trusty baseball helmet, remember it won’t last forever. Being proactive about inspecting its condition and replacing it when needed ensures you always have the best protection. Use these telltale signs that it’s time for an upgrade as guidance. Your head and brain will thank you.