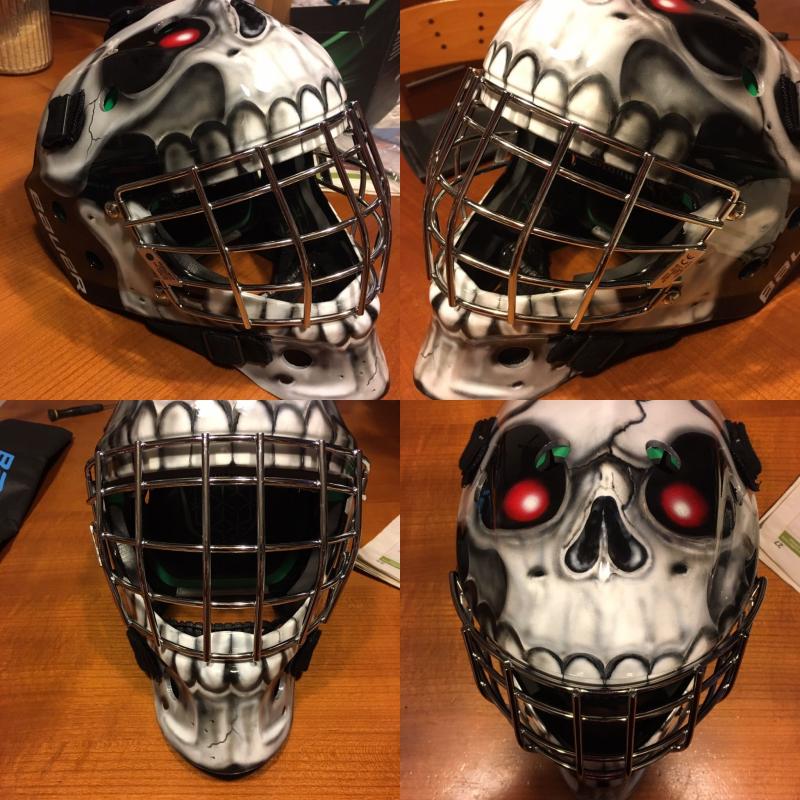
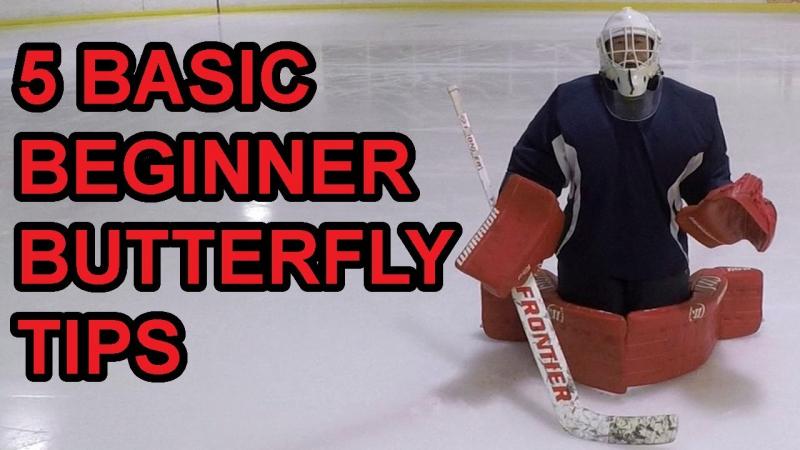
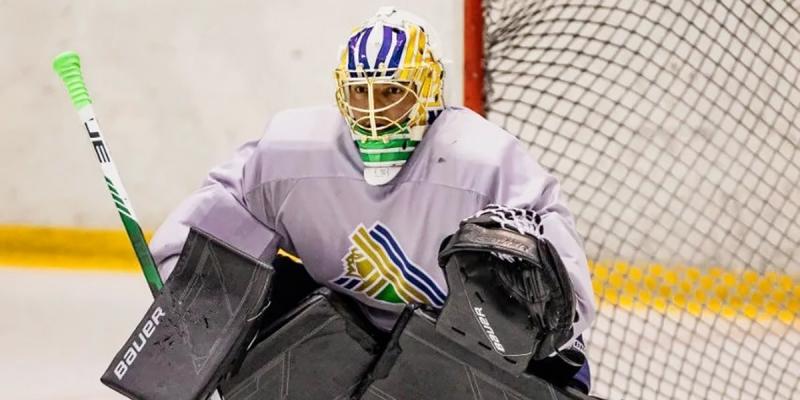
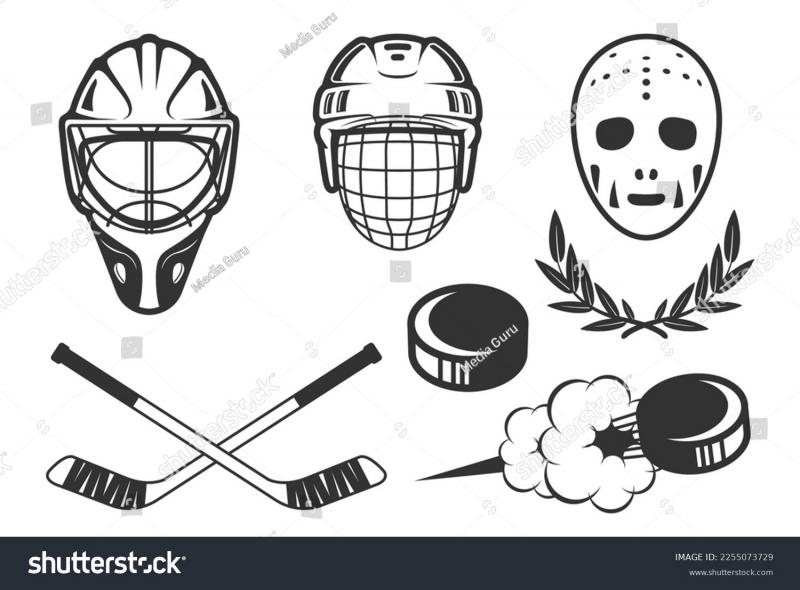
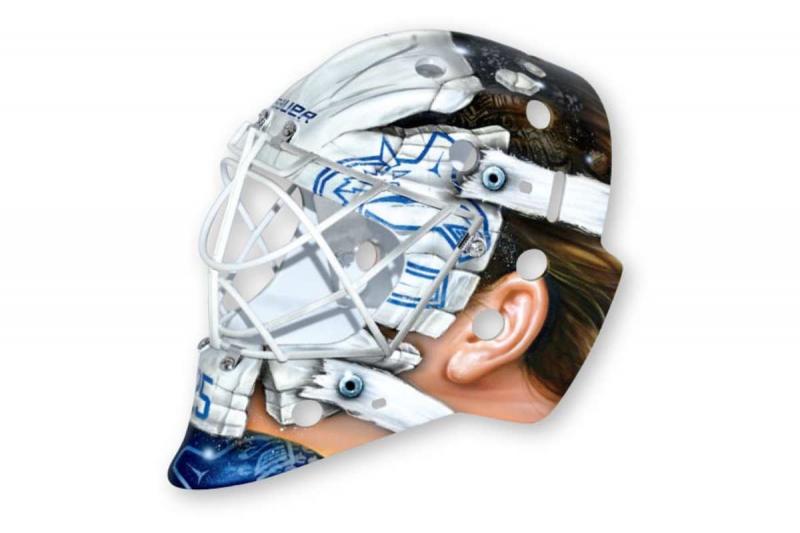
Need to Fix Up Your Goalie Helmet. Try These 15 DIY Repair TipsNeed to Fix Up Your Goalie Helmet. Try These 15 DIY Repair Tips
Clean and Prep the Helmet Surface
When undertaking DIY goalie helmet repairs, the first step is always to thoroughly clean the helmet. Start by removing any loose dirt or debris with a soft brush. Then, use warm soapy water and a clean rag to gently wash the entire exterior surface. Pay close attention to crevices and padding, where sweat and grime can accumulate. For tough stains like rust or paint splatter, a bit of baking soda or helmet-safe cleaner works wonders. Take your time prepping the surface – this allows repairs to properly adhere. Once clean, let the helmet air dry fully before moving onto the next step.
Patch and Seal Cracks and Holes
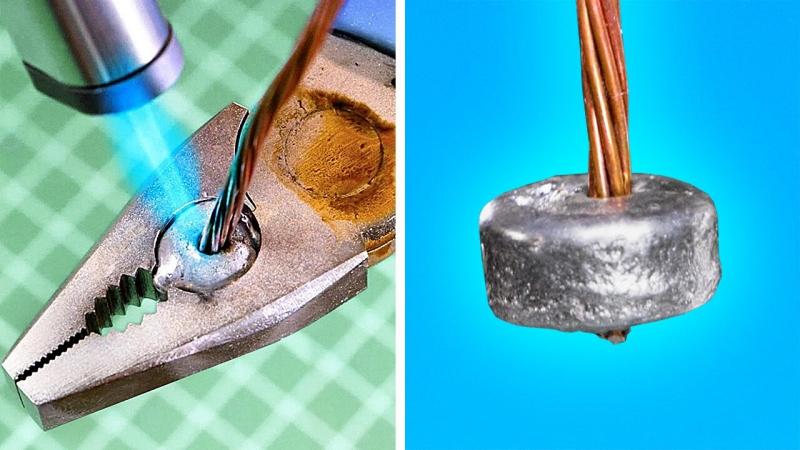
Over time, cracks and holes can form in goalie helmets from repeated impacts. Luckily, most can be easily patched. For small cracks, apply a thin layer of super glue to the area and allow to fully cure. Larger cracks and holes may need filler – look for epoxy sticks made for plastic and composite repairs. Carefully fill the damaged spot according to package directions. Allow proper cure time before smoothing out the area with fine grit sandpaper. Small holes can also be patched with strips of hockey tape on the inside of the helmet. For more severe cracks or split shells, replacement may be necessary.
Smooth Out Dents and Scuffs
The life of a goalie helmet means dents and scuffs are inevitable. While it might be tempting to pound these out, that can weaken the helmet’s structure. A safer DIY method is steaming. Hold a steam iron several inches above the dented area, allowing the steam to penetrate the helmet material. Slowly massage the dent as the material softens, coaxing it back into shape. Be patient – rushing can re-crack the surface. For scuffs, very lightly sand the area with fine grit paper until smooth. Avoid over-sanding, as this further thins the shell. A bit of polish can help restore shine afterwards.
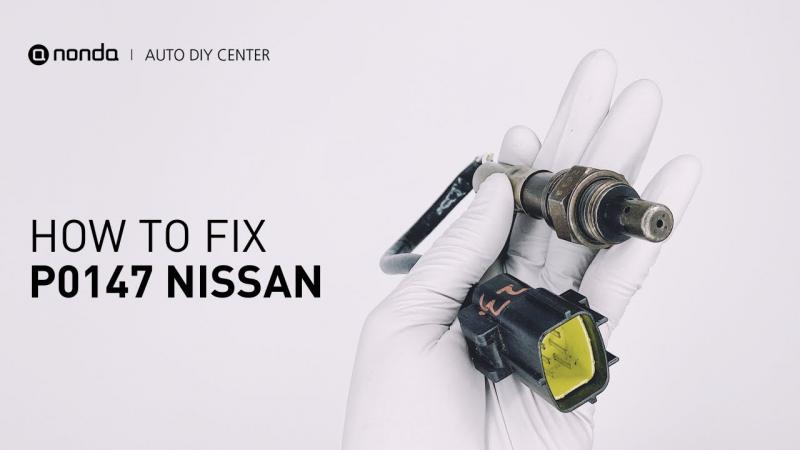
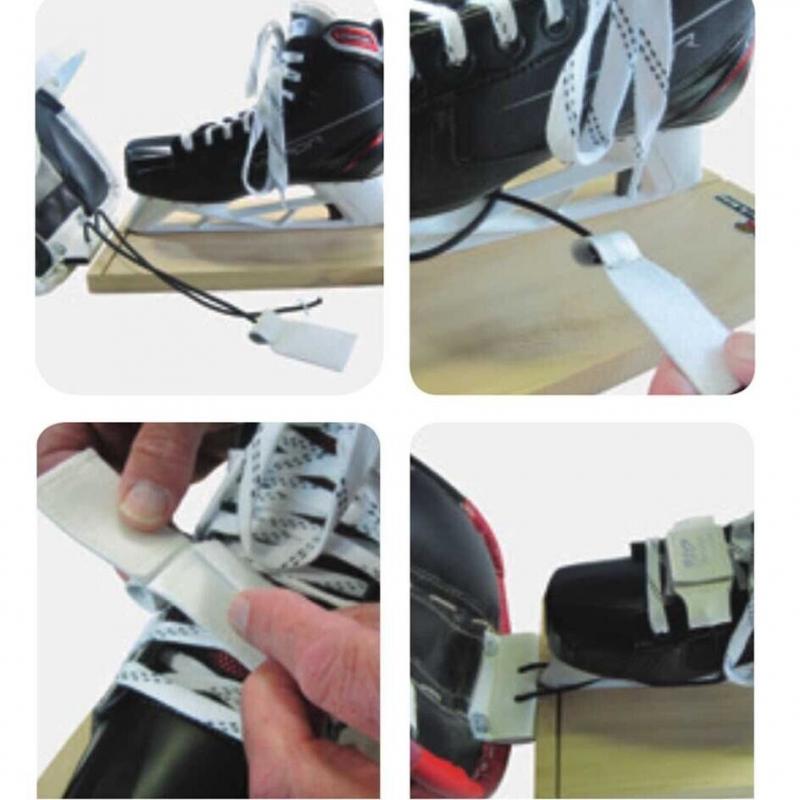
Replace Damaged Hardware
The screws, clips, snaps and straps on a goalie helmet take a beating too. Fortunately, replacement helmet hardware is easy to find. Measure any loose or damaged piece and browse online or check your local hockey shop for identical fit replacements. Use care when removing old hardware – avoid stripping screws or losing integral structural pieces. When installing new clips, straps, snaps, cages and other accessories, follow all manufacturer guidelines for proper alignment, torque and placement. Improperly installed components can negatively impact safety.
Re-Stick Loose Padding
Helmet padding helps cushion impacts and create a comfortable fit. But over time, sweat and use can cause the padding to detach. Before it falls out completely, use a helmet-safe adhesive (avoid superglue) to re-stick the padding to the interior shell. Clean both surfaces first for best adhesion. Apply a thin, even layer of adhesive to the padding or helmet shell. Firmly press and hold the padding in place for 30-60 seconds. Allow proper cure time before use. For padding that’s deteriorated or compressed, replacement kits are available. Follow included instructions.
Swap Out Old Chin Straps
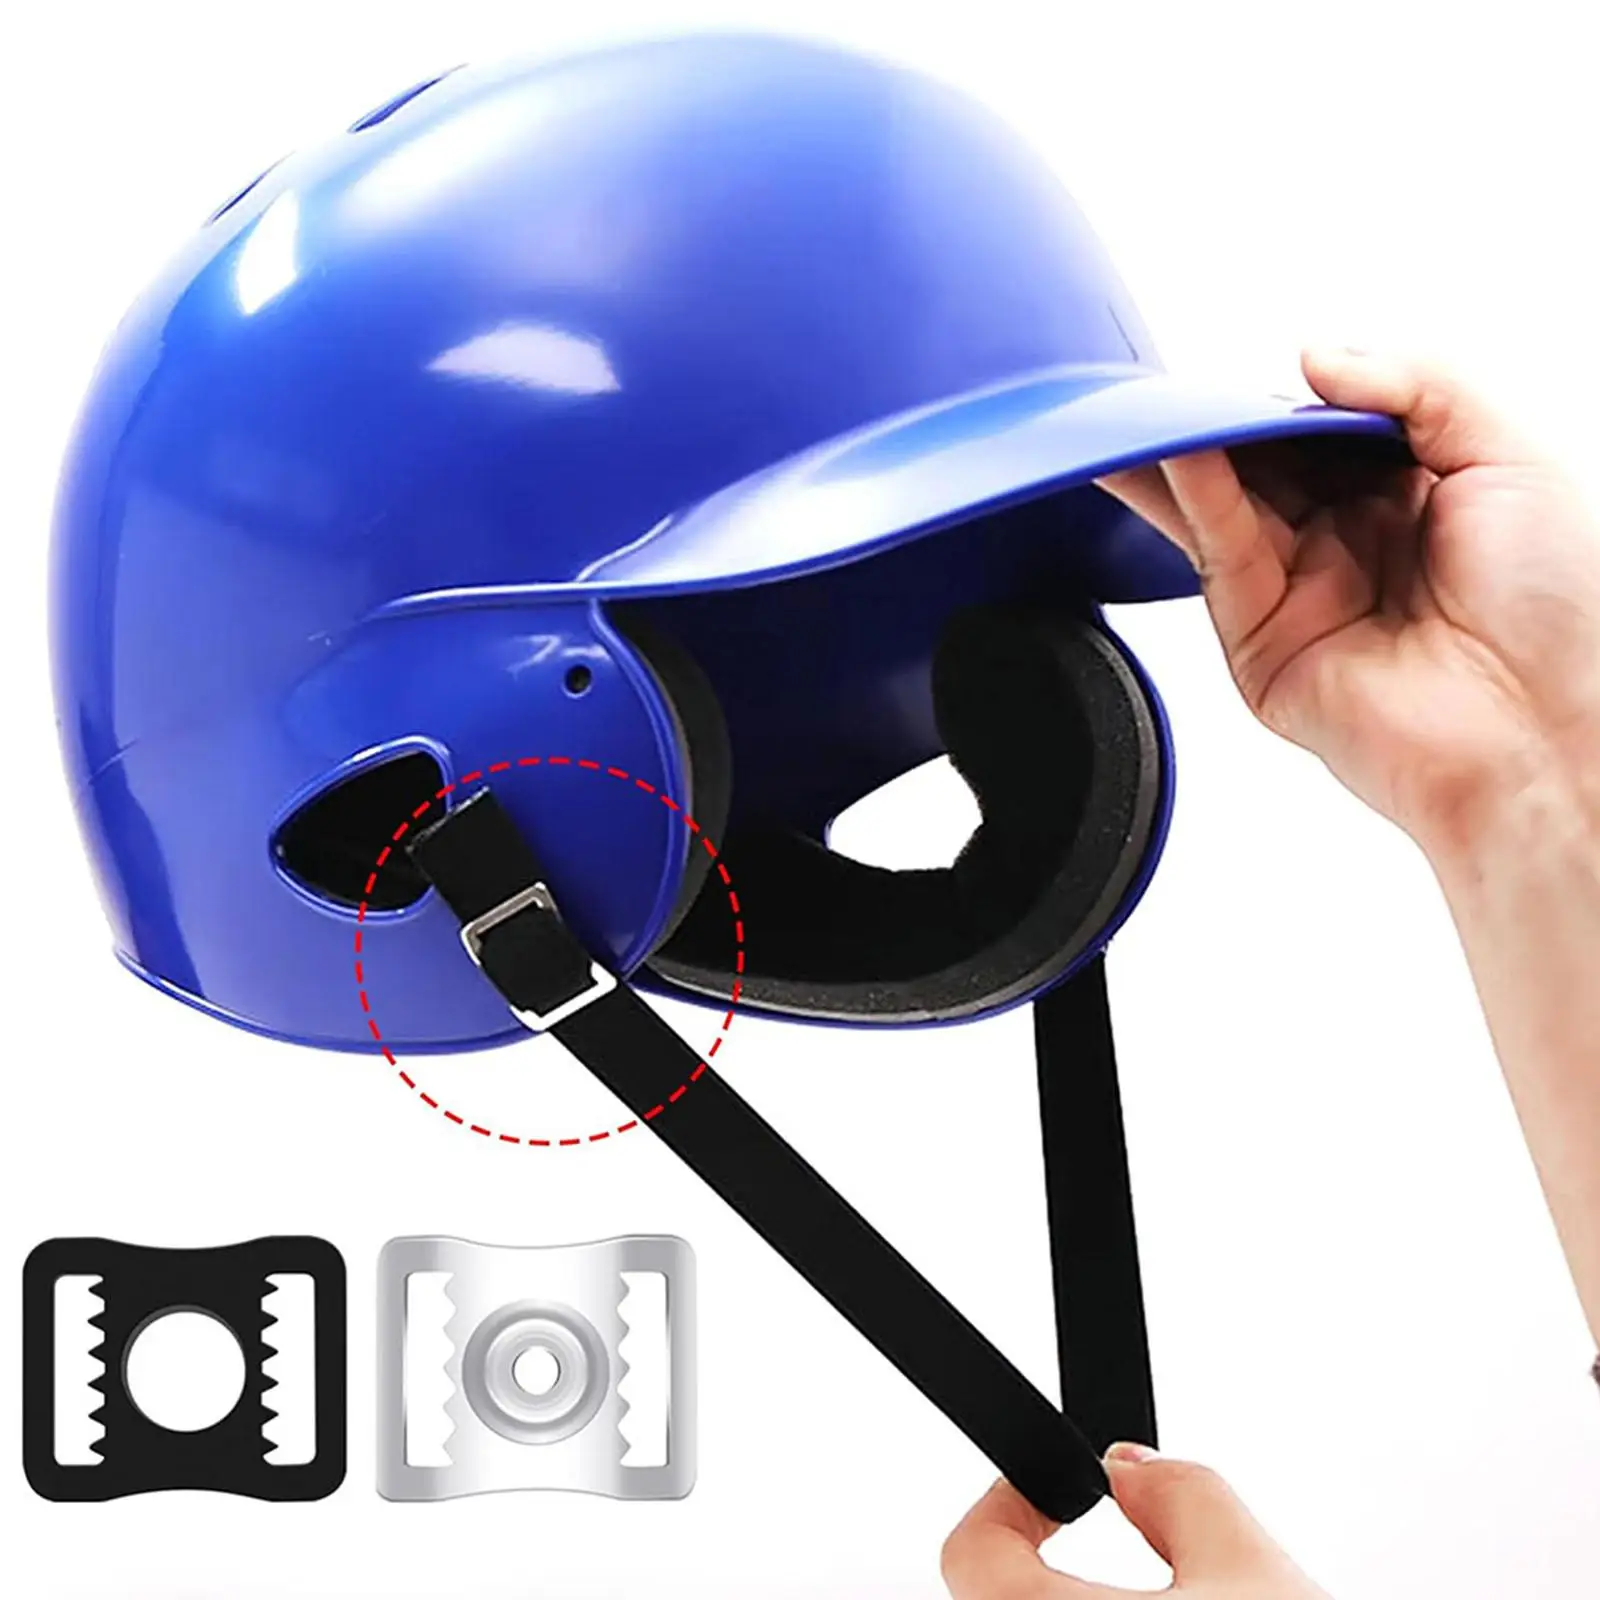
No goalie helmet can protect if it’s not properly secured. So be sure to inspect chin straps regularly and replace any that are stretched, ripped, frayed or broken. Bring your helmet to the hockey shop and find a replacement strap that matches the hardware. While swapping it out, thoroughly clean the strap hardware and check for damage. Adjust the new strap to comfortably fit just under your chin. Cut off any excess strap length. Test the fit with the helmet on and make any adjustments for comfort and security.
Refresh Fading Paint and Graphics

Effective Techniques for Patching Cracks and Holes
Over time, impacts can cause cracks and holes in goalie helmets. Addressing these issues promptly is essential for maintaining the helmet’s integrity. Here are some effective patching techniques:
- For small cracks, apply a thin layer of super glue
- Use epoxy sticks for larger cracks and holes
- Fill damaged spots according to product instructions
- Allow proper curing time before smoothing with sandpaper
- Patch small holes with hockey tape on the helmet’s interior
When should you consider replacing the helmet instead of repairing it? If the helmet has severe cracks, a split shell, or multiple large holes, it’s time to invest in a new one. Safety should always be the top priority when it comes to goalie equipment.
Smoothing Out Dents and Scuffs: A Step-by-Step Guide
Dents and scuffs are common issues for goalie helmets. While it might be tempting to forcefully reshape dents, this can weaken the helmet’s structure. Instead, try these safer methods:

- Use steam to soften the material and gently massage out dents
- Hold a steam iron several inches above the dented area
- Slowly work the dent as the material softens
- For scuffs, lightly sand with fine-grit paper
- Apply polish to restore shine after smoothing
How long should you steam a dented area of the helmet? Start with short bursts of 10-15 seconds, allowing the material to cool slightly between applications. This prevents overheating and potential damage to the helmet’s structure.
Replacing Damaged Hardware: What You Need to Know
The hardware on goalie helmets, including screws, clips, and straps, can become damaged or loose over time. Here’s what you need to know about replacing these components:
- Measure loose or damaged pieces for exact replacements
- Check online or local hockey shops for matching hardware
- Remove old hardware carefully to avoid stripping screws
- Follow manufacturer guidelines for installing new components
- Ensure proper alignment, torque, and placement of new hardware
Why is it important to use the correct hardware when replacing components? Using improper hardware can compromise the helmet’s structural integrity and safety features. Always opt for manufacturer-recommended or exact-match replacements to maintain the helmet’s protective qualities.
Re-Sticking Loose Padding: Tips for a Secure Fit
Loose padding can affect both comfort and safety. Here’s how to re-stick detached padding effectively:
- Clean both the padding and helmet surface thoroughly
- Use a helmet-safe adhesive (avoid superglue)
- Apply a thin, even layer of adhesive
- Press and hold the padding in place for 30-60 seconds
- Allow proper curing time before using the helmet
How often should you check and maintain the padding in your goalie helmet? Inspect the padding at least once a month or after any significant impacts. Regular checks help identify loose or compressed padding early, allowing for timely repairs or replacements.
The Importance of Swapping Out Old Chin Straps
A secure chin strap is crucial for a goalie helmet to provide proper protection. Here’s why and how to replace old chin straps:
- Regularly inspect straps for stretching, rips, or fraying
- Find a replacement strap that matches the existing hardware
- Clean strap hardware and check for damage during replacement
- Adjust the new strap for a comfortable, secure fit
- Test the fit with the helmet on and make necessary adjustments
How tight should a goalie helmet chin strap be? The strap should be snug enough to keep the helmet in place during movement, but not so tight that it causes discomfort. You should be able to fit one finger between the strap and your chin comfortably.

Refreshing Fading Paint and Graphics: A DIY Approach
Fading paint and graphics can make your goalie helmet look worn. Here’s how to give it a fresh look:
- Lightly scuff the surface with fine sandpaper for better adhesion
- Clean away any dust after sanding
- Use thin coats of hobby paint in colors similar to the original design
- Mask off areas for crisp lines and patterns
- Allow proper drying time between coats
- Apply a clear matte coat to protect the new paint job
Which type of paint is best for refreshing a goalie helmet? For a durable finish, opt for lacquer-based paints specifically formulated for helmets. These paints adhere well to the helmet surface and can withstand the rigors of gameplay.
Removing Rust and Corrosion from Helmet Hardware
Rust and corrosion can compromise the integrity of metal helmet components. Here’s how to address this issue:
- Scrub light surface rust with steel wool
- Use a rust-removing chemical for heavier rust
- Soak rusty hardware in the solution before scrubbing
- Rinse thoroughly and dry completely
- Apply clear nail polish to prevent future corrosion
How can you prevent rust on goalie helmet hardware in the future? After each use, wipe down metal components with a dry cloth to remove moisture. Periodically apply a thin layer of silicone-based lubricant to metal parts to create a protective barrier against moisture and sweat.

Fixing Loose or Damaged Clips: A Quick Guide
Loose or damaged clips can affect the security of your goalie helmet’s visor or cage. Here’s how to address this issue:
- Inspect all clips regularly for signs of wear or damage
- Tighten loose screws carefully to avoid stripping
- Replace damaged clips with exact matches
- Ensure proper alignment when installing new clips
- Test the security of the visor or cage after repairs
When should you consider professional repair for helmet clips? If you’re unsure about the correct installation process or if the damage extends beyond the clips themselves, it’s best to consult a professional. Improper clip installation can compromise the helmet’s protective features.
Maintaining Helmet Ventilation Systems
Proper ventilation is crucial for goalie comfort and performance. Here’s how to maintain your helmet’s ventilation system:
- Regularly clean vent holes to remove debris and buildup
- Use compressed air to clear out hard-to-reach vents
- Avoid blocking vents when repainting or applying decals
- Check that vent covers or flaps are secure and functioning
- Replace damaged vent components to maintain airflow
How does proper ventilation affect a goalie’s performance? Good airflow helps regulate temperature, reduce fogging, and improve overall comfort. This allows goalies to maintain focus and react quickly during gameplay.
Addressing Visor and Cage Issues
The visor or cage is a critical component of a goalie helmet. Here’s how to maintain and repair these parts:
- Check for scratches or cracks in visors regularly
- Use a plastic polish to remove minor scratches from visors
- Replace visors with deep scratches or cracks
- Inspect cage wires for bends or breaks
- Carefully straighten minor bends in cage wires
- Replace cages with significant damage or multiple repairs
How often should you replace your goalie helmet visor or cage? Replace visors at least once per season or immediately if any cracks appear. Cages should be replaced when multiple wires show damage or if there’s any sign of structural weakness.
Proper Storage and Transportation of Goalie Helmets
Proper storage and transportation can extend the life of your goalie helmet. Follow these tips:
- Store the helmet in a cool, dry place away from direct sunlight
- Use a padded helmet bag for transportation
- Avoid stacking heavy items on top of the helmet
- Clean and dry the helmet before storage
- Keep the helmet away from heat sources during storage and transport
Why is it important to avoid storing goalie helmets in extreme temperatures? Extreme heat or cold can affect the helmet’s materials, potentially compromising its protective properties. Always store and transport your helmet in a temperature-controlled environment when possible.
When to Seek Professional Repairs
While many goalie helmet repairs can be done at home, some situations call for professional help. Consider seeking expert assistance in these cases:
- Significant structural damage to the helmet shell
- Multiple or recurring cracks
- Issues with the helmet’s internal protective foam
- Complex repairs involving specialized components
- Any repair that you’re not completely confident in performing
How can you find a reputable professional for goalie helmet repairs? Look for certified equipment managers or contact your local hockey association for recommendations. Many professional hockey equipment managers offer services to amateur players during the off-season.
Understanding Helmet Certification and Safety Standards
Knowing about helmet certification and safety standards is crucial for goalie helmet maintenance. Here’s what you need to know:
- Familiarize yourself with current safety certifications (e.g., HECC, CSA, CE)
- Understand the lifespan of your helmet’s certification
- Be aware that some repairs may void certification
- Replace helmets that no longer meet current safety standards
- Regularly check for updates to safety guidelines in your league or region
How long does a typical goalie helmet certification last? Most certifications are valid for 6.5 years from the date of manufacture. However, this can vary depending on the specific certification body and the level of play. Always check your helmet’s certification expiration date and league requirements.

Customizing Your Goalie Helmet: Best Practices
Customizing your goalie helmet can be a fun way to express your personality, but it’s important to do so safely. Consider these best practices:
- Use only helmet-safe paints and decals
- Avoid adding excessive weight with decorations
- Ensure customizations don’t interfere with safety features
- Be cautious of modifications that might void warranties or certifications
- Consider removable customizations for easier maintenance
What types of customizations are generally considered safe for goalie helmets? Lightweight vinyl decals, airbrush designs using helmet-specific paints, and swapping out chin straps or padding colors are typically safe customizations. Always prioritize the helmet’s protective function over aesthetics.
The Role of Regular Inspections in Helmet Maintenance
Regular inspections are crucial for maintaining the safety and longevity of your goalie helmet. Implement these inspection practices:
- Conduct a thorough visual inspection before each use
- Check for new cracks, dents, or loose components weekly
- Assess padding compression and positioning monthly
- Verify the security of all straps and fasteners before each game
- Schedule a comprehensive inspection with a professional annually
What should you look for during a pre-game helmet inspection? Focus on the overall structural integrity, ensuring there are no new cracks or dents. Check that all straps, clips, and padding are secure and properly positioned. Verify that the cage or visor is firmly attached and undamaged.

Balancing Cost-Effective Repairs with Safety Considerations
While DIY repairs can save money, it’s essential to balance cost-effectiveness with safety. Consider these factors:
- Evaluate the extent of damage before attempting repairs
- Research the potential impact of repairs on helmet integrity
- Compare the cost of repairs to the price of a new helmet
- Consider the age and overall condition of the helmet
- Prioritize safety over cost savings when in doubt
When is it more cost-effective to replace a goalie helmet rather than repair it? If the cost of repairs approaches 50% of the price of a new helmet, or if the helmet is nearing the end of its certification period, replacement is often the more cost-effective and safer option in the long run.
By following these DIY repair tips and maintenance practices, goalies can extend the life of their helmets while ensuring optimal protection on the ice. Remember, when in doubt about a repair or the overall condition of your helmet, always consult with a professional or consider replacement to prioritize your safety.
Clean and Prep the Helmet Surface
When undertaking DIY goalie helmet repairs, the first step is always to thoroughly clean the helmet. Start by removing any loose dirt or debris with a soft brush. Then, use warm soapy water and a clean rag to gently wash the entire exterior surface. Pay close attention to crevices and padding, where sweat and grime can accumulate. For tough stains like rust or paint splatter, a bit of baking soda or helmet-safe cleaner works wonders. Take your time prepping the surface – this allows repairs to properly adhere. Once clean, let the helmet air dry fully before moving onto the next step.
Patch and Seal Cracks and Holes
Over time, cracks and holes can form in goalie helmets from repeated impacts. Luckily, most can be easily patched. For small cracks, apply a thin layer of super glue to the area and allow to fully cure. Larger cracks and holes may need filler – look for epoxy sticks made for plastic and composite repairs. Carefully fill the damaged spot according to package directions. Allow proper cure time before smoothing out the area with fine grit sandpaper. Small holes can also be patched with strips of hockey tape on the inside of the helmet. For more severe cracks or split shells, replacement may be necessary.
Smooth Out Dents and Scuffs
The life of a goalie helmet means dents and scuffs are inevitable. While it might be tempting to pound these out, that can weaken the helmet’s structure. A safer DIY method is steaming. Hold a steam iron several inches above the dented area, allowing the steam to penetrate the helmet material. Slowly massage the dent as the material softens, coaxing it back into shape. Be patient – rushing can re-crack the surface. For scuffs, very lightly sand the area with fine grit paper until smooth. Avoid over-sanding, as this further thins the shell. A bit of polish can help restore shine afterwards.
Replace Damaged Hardware
The screws, clips, snaps and straps on a goalie helmet take a beating too. Fortunately, replacement helmet hardware is easy to find. Measure any loose or damaged piece and browse online or check your local hockey shop for identical fit replacements. Use care when removing old hardware – avoid stripping screws or losing integral structural pieces. When installing new clips, straps, snaps, cages and other accessories, follow all manufacturer guidelines for proper alignment, torque and placement. Improperly installed components can negatively impact safety.
Re-Stick Loose Padding
Helmet padding helps cushion impacts and create a comfortable fit. But over time, sweat and use can cause the padding to detach. Before it falls out completely, use a helmet-safe adhesive (avoid superglue) to re-stick the padding to the interior shell. Clean both surfaces first for best adhesion. Apply a thin, even layer of adhesive to the padding or helmet shell. Firmly press and hold the padding in place for 30-60 seconds. Allow proper cure time before use. For padding that’s deteriorated or compressed, replacement kits are available. Follow included instructions.
Swap Out Old Chin Straps
No goalie helmet can protect if it’s not properly secured. So be sure to inspect chin straps regularly and replace any that are stretched, ripped, frayed or broken. Bring your helmet to the hockey shop and find a replacement strap that matches the hardware. While swapping it out, thoroughly clean the strap hardware and check for damage. Adjust the new strap to comfortably fit just under your chin. Cut off any excess strap length. Test the fit with the helmet on and make any adjustments for comfort and security.
Refresh Fading Paint and Graphics
If your goalie helmet paint and graphics are fading with age, give them new life with a DIY refresh. Lightly scuff the surface with fine sandpaper to improve adhesion. Clean away any dust. Use thin coats of hobby paint in similar colors to the original design. Mask off areas as needed for a crisp look. Allow proper drying time between coats. Finish with a clear matte coat to protect your work. Avoid over-painting vents, as this can block airflow. For a thicker finish, opt for lacquer-based paint formulated for helmets.
Remove Rust and Corrosion
Exposure to water and sweat can cause metal helmet hardware to rust or corrode over time. Take action at first signs of rust for best results removing it. Light surface rust can usually be scrubbed away with steel wool and elbow grease. For heavier rust, use a rust-removing chemical. Soak rusty bolts, screws, clips in the solution for several minutes before scrubbing clean. Avoid getting product on other helmet parts. Rinse thoroughly and wipe dry. Apply clear nail polish to the area to help prevent future corrosion. Severely rusted components may need replacement for safety.
Fix Loose or Damaged Clips
The metal clips that help secure visors, cages and shields take a beating during games and practice. If one becomes bent, try straightening it out with pliers. Use a wire brush to remove rust from the clip joint, then apply lubricant to help it move smoothly. Tighten any loose screws to re-secure. For broken or missing clips, take the helmet to your hockey shop for assistance finding the right replacement part. They can help properly install it as well.
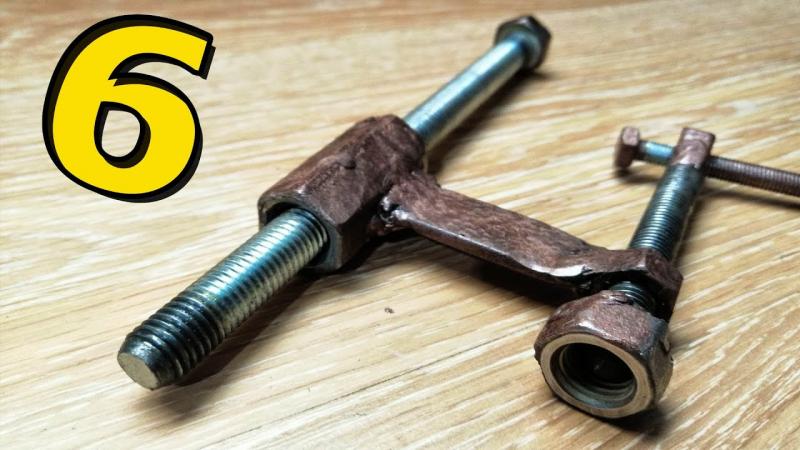
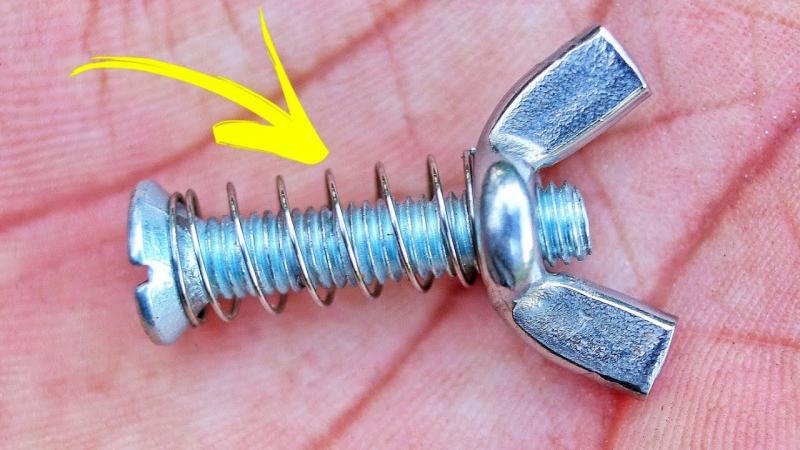
Tighten Up Facemask Bolts
Hard collisions can cause the bolts securing your goalie facemask to come loose over time. A wobbly mask severely impacts vision and safety. Regularly inspect bolts for rust and tightness. Carefully tighten any loose bolts with a screwdriver or Allen wrench designed for the hardware. Do not over tighten. For bolts that won’t tighten properly or are too rusted, replacement is needed. Bring the helmet to your hockey pro shop for new goalie mask hardware installation.
Replace Broken Facemask Bars
Facemask bars help stop pucks from causing facial injuries. But bars can bend or break from repeated hard impacts. Do not try to bend broken bars back into place, as metal fatigue will cause them to break again. Bring the helmet to your hockey pro shop for replacement bars and proper installation. The shop can source bars that exactly match the rest of the cage shape and style. Never permanently remove broken bars without replacing them, as this compromises protection.
Repair Detached Jaw Pads
Many goalie helmets incorporate large jaw pads meant to protect this vulnerable facial area. But these pads can detach at the edges over time. Before it falls off completely, use a flexible adhesive to re-attach the pad. Clean the area first for best results. Apply a thin layer of quality rubber cement or hanging poster tack to the loose edges. Press the pad back into place, holding for 30-60 seconds. Allow time to fully cure before use. Inspect regularly to catch re-detachment early. If the pad is damaged or warped, replacement is the safer option.
Upgrade the Visor and Shield
As technology improves, newer goalie helmet visors and shields offer better vision and impact protection. Upgrading to a higher-end visor is an easy DIY upgrade. Check manufacturer guidelines about compatibility before purchasing. Use care when swapping out old for new, transferring any necessary hardware or components. Make sure the new visor or shield sits flush in the groove and allows full range of motion. Secure any loose screws or clips. Adjust airflow shutters and anti-fog features. Test vision from all angles before game use. A quality new shield gives improved protection and visibility.
Improve Overall Comfort and Fit
An ill-fitting goalie helmet is not only uncomfortable, but can be unsafe if it shifts during play. There are a few DIY tweaks to improve fit. If too large, try adding extra interior padding to take up volume. Adjust or replace straps and chin cups to get your ideal stable fit. Swapping to a helmet with different sizing adjustability is another option. For pressure points, target padding to those spots. Letting a new helmet break in during practices helps. Ultimately, goalies must prioritize fit and comfort for their unique head shape and size.
Make Your Helmet Look Brand New
Even after DIY repairs, goalie helmets can still look worn and aged. Bring back that like-new shine with a thorough detail cleaning. Scrub inside and out with dish soap and water, removing all dirt and grime buildup. For tough stains, use a helmet-safe cleaner. Re-apply graphic decals or touch up paint where needed. Finish by polishing the surface with a bit of plastic polish to restore luster. While cosmetic, giving a beloved goalie helmet a facelift helps boost pride and morale heading into the next game.
Patch and Seal Cracks and Holes
If you’re a hockey goalie, you know how important it is to keep your helmet in good condition. After all, it’s your main line of defense against flying pucks. But over time, all that wear and tear can lead to cracks, chips, and holes forming in your helmet. While it’s best to replace your helmet every few years, some minor repairs can extend its life in a pinch. Here are 15 DIY tips to patch and seal cracks and holes in your goalie helmet.
1. Use epoxy putty
One of the best solutions for minor helmet repairs is epoxy putty. This quick-drying modeling compound can easily fill small holes and cracks. Just knead the putty until it’s fully mixed, then press it firmly into the damaged area. Give it at least 30 minutes to cure before wearing your helmet again. Epoxy putty hardens into a durable plastic that can withstand impacts.
2. Try low-temp hot glue
Ordinary hot glue can melt in warm temperatures, but special low-temp formulations are perfect for helmet repairs. Low-temp hot glue sticks fast and sets hard while withstanding heat better than standard versions. Simply warm up your glue gun, fill the crack or hole with glue, then hold it in place until set. Low-temp hot glue remains somewhat pliable after drying.
3. Use vinyl patches
For small holes and cracks, iron-on vinyl patches offer an easy fix. Purchase pre-cut patches made specifically for helmet repairs. Then heat up your iron to a medium setting, place the patch over the damaged area, and press down firmly for 30 seconds. The heat will adhere the vinyl patch securely to your helmet. Vinyl patches conform nicely to curved surfaces.
4. Try flexible sealants
Hardware stores offer flexible sealants that work well for minor helmet cracks and holes. Opt for silicone, polyurethane, or rubber-based sealants meant for plastics. Carefully clean the damaged area, then apply the sealant and allow it to fully cure. Flexible sealants remain somewhat stretchy after drying, rather than becoming hard and brittle.
5. Use UV-cure resin
For a professional-grade hockey helmet repair, opt for UV-cure resin. This crystal clear liquid turns into a hard plastic under UV lighting. Simply fill damaged areas with the resin, then blast it with a UV lamp. The resin cures fully within minutes. File and sand it smooth after hardening. UV-cure resins create durable, waterproof repairs.
6. Try plastic epoxy
Two-part plastic epoxy formulas also work incredibly well for goalie helmet repairs. They fill gaps and holes with a permanent, resilient repair. Mix the epoxy thoroughly according to package directions and work quickly as it hardens fast. Plastic epoxies won’t shrink or crack over time. They create a tenacious bond.
7. Use fiberglass cloth and resin
For larger cracks and holes, fiberglass cloth paired with epoxy resin can create very sturdy repairs. Cut fiberglass into pieces that overlap the damage by at least 2 inches on all sides. Apply epoxy resin over the cloth and work it into the fibers. Allow the resin to fully cure before lightly sanding. The fiberglass cloth reinforces and strengthens the repair.
8. Try nylon mesh and glue
An easier alternative to fiberglass is self-adhesive nylon mesh paired with flexible glue. Cut mesh pieces slightly larger than your helmet damage, then adhere them with silicone sealant, hot glue, or flexible epoxy. The open weave mesh helps the glue grab and provides reinforcement. It’s lighter than fiberglass but still very durable.
9. Use small self-tapping screws
For cracks and holes located around screw holes or vents, small self-tapping repair screws can create secure repairs. Drill pilot holes that overlap the damage, then drive in self-tapping screws, allowing them to cut their own threads. Take care not to crack the helmet by over-tightening. Self-tapping screws provide great crack resistance.
10. Try plastic bumper repair products

Some automotive plastic repair kits work well for minor helmet damage too. Opt for epoxy-based putties made specifically for bumpers and other exterior plastics. Knead until uniformly mixed, press into cracks and holes, then sand smooth after drying. The putties include adhesion promoters to bond to plastics.
11. Use plastic welding compounds
For more heavy-duty repairs, plastic welding products chemically fuse cracked helmet parts. Clean and roughen surfaces first, then apply the welding compound and press the sides of cracks firmly together for several minutes. It melts and fuses the helmet material to essentially “weld” cracks shut. Sand after drying.
12. Try plastic-specific glues
Hardware stores offer plastic-bonding super glues formulated for ABS and polycarbonate materials. For minor cracks, apply a thin layer to both sides of damage, press together tightly, and hold for 60 seconds. The glue fills small gaps and restores structural integrity. Be sure to get an ABS/polycarbonate-recommended product.
13. Dab on clear nail polish
Small cracks and scratches can often be repaired with clear nail polish. Simply dab tiny amounts over the damage and allow to fully dry. The polish fills nicks and improves the surface finish. It won’t restore structural strength but helps prevent further cracking. Reapply more layers as needed.
14. Try J-B Weld for plastic
J-B Weld is known for its ability to bond all kinds of materials, including plastic. For helmet repairs, use their special plastic epoxy formula. Mix equal parts resin and hardener, apply to cracks or holes, then allow it to cure fully. It dries rigid and super strong. J-B Weld is great for repairs up to 2 inches.
15. Use baking soda and super glue
For an extra-strong DIY plastic repair, mix a paste of baking soda and super glue. The baking soda thickens the glue while the acids in the glue cause the baking soda to set rock hard. Pack the mixture into damage, wait for it to cure, then sand it smooth. This works well for rebuilding badly damaged areas.
With a little time and effort, you can extend the life of your trusty goalie helmet without needing to buy a replacement. Test repairs well before relying on them in games. And be sure to periodically examine your helmet for developing cracks. Perform routine TLC and repairs as soon as you notice any damage. Your helmet protects the most important part of your hockey gear – your head – so keep it in sound repair at all times.
Smooth Out Dents and Scuffs
Goalie helmets take a real beating. Repeated impacts from pucks and sticks can lead to dents, scuffs, and other cosmetic damage forming on your helmet. While dings and dents may not seem like a big deal, over time they can compromise the protective qualities of your headgear. Luckily, there are several effective DIY methods to smooth out dents, fill in gouges, and improve the surface finish of your goalie helmet.
1. Use rubbing and polishing compounds
For minor scuffs and scratches, rubbing and polishing compounds can help smooth and shine the surface. Use a product formulated for plastics and apply with a soft cloth using gentle circular motions. Take care around logos and decals. Allow the polishing compound to dry, then buff off any haze. Repeat as needed to remove scuffs while restoring luster.
2. Try scratch removing liquids
Made specifically for getting rid of fine scratches, swirl mark removers and scratch removing liquids work wonders. Products like Turtle Wax Scratch Remover melt away scuffs and improve gloss. Apply per product instructions, allow time to work, then wipe away with a clean cloth. Be cautious around decals as liquids could loosen the adhesive.
3. Use wet sanding techniques

For deeper scuffs and scratches, wet sanding with fine grit abrasive sheets can effectively smooth the surface. Use 600+ grit sheets and keep them wet while sanding to prevent cracking the helmet. Work in small areas using a block for even pressure. Start with coarser grit and step down to finer abrasives. Finish by hand polishing.
4. Try plastic filler primers
Aerosol plastic filler primers fill in scratches and imperfections with heavy bodied particles while adding a fresh coat of paint. They contain polyester resins that level the surface. Allow primer to fully cure before sanding smooth and repainting. This helps hide scratches and restore your helmet’s finish.
5. Use small suction cup dents pullers
For minor dings and dents, suction cup dent pullers can sometimes pop them back into shape. Center the puller over the damage and apply heat from a hair dryer to warm the surface. Then attach and pull the plunger handle to gently ease the dent outward. Work slowly to prevent cracking the helmet. The suction helps lift and smooth small dings.
6. Try dry ice contraction method
Here’s a neat trick that uses extreme cold to contract the plastic and pop out small dents. Cut a piece of dry ice slightly smaller than the dent, then place it on the damaged area for 1-2 minutes. This makes the plastic shrink. Then use a hair dryer to heat the dent which causes the material to expand back into shape. It works well on shallow dings.
7. Use painters putty or spackle
For deeper gouges and helmet damage, lightweight putties and fillers work wonders. Start by cleaning and roughening the area, then apply thin layers of spackle or painters putty using a putty knife. Allow drying fully between coats. Once built up, sand smooth for an invisible fix. Seal with primer and repaint.
8. Try automotive glazing putty
Similar to spackle but made especially for cars, glazing putties quickly fill gouges and dents for a flawless finish after painting. Knead the putty before applying over roughened damage using long strokes. Level with more putty until smooth and flat. Glazing putties dry hard for easy sanding.
9. Use small mesh patches and putty
Fiberglass mesh and putty combinations create very durable dent and ding repairs. Lay mesh over damage, then work putty or glazing compound through the holes to fill completely. Allow drying before sanding for a reinforced fix. Mesh prevents cracks by adding strength.
10. Try plastic repair epoxy putties
Two-part epoxy putties specially formulated for plastic are ideal for rebuilding badly damaged areas. Knead the putty thoroughly until no streaks remain, then press into dents and gouges. Allow full curing time before sanding smooth. Plastic epoxies won’t shrink or crack over time.
11. Use ABS cement solvent
For cracks and holes in ABS plastic helmets, ABS welding solvent creates super-strong repairs. Clean and roughen damage, apply solvent to both sides, then press firmly together for several minutes as it melts the original material. Clamps can help hold tight until fully bonded. Sand excess once cured.
12. Try plastic bumper repair products
Some automotive plastic repair kits work great on hockey helmets too. Many formulas contain flexible fillers that contour very nicely to curved surfaces. Follow product instructions to fill dents and gouges, then sand smooth after curing. Use pressure while drying for the best finish.
13. Use an adhesive image transfer solution
If your helmet’s paint or graphics have minor scuffs, adhesive image transfer solutions can hide flaws. Clean the damaged area thoroughly then apply the adhesive solution. Place new image or decal over the repair and rub firmly to adhere the new graphic.
14. Try clear automotive touch-up paint
Car touch-up paints and clearcoat pens hide scrapes and scratches by blending damaged areas into the surrounding finish. Match your helmet’s base color, then dab on thin coats of clearcoat to blend and conceal scuffs while leveling the texture.
15. Use toothpaste as a mild abrasive
Believe it or not, toothpaste makes a decent DIY scuff remover in a pinch. The mild abrasives gently polish the surface without damaging it. Rub a small dab of whitening toothpaste into scuffs using a soft cloth and circular motions. Then wipe clean with a damp towel.
Goalie helmets take a lot of abuse, but with some time and the right products, most cosmetic damage can be repaired. Just take care not to affect the structural integrity and always thoroughly test any fixes before relying on your helmet in a game situation. Keep those scuffs and dents at bay and your helmet will offer maximum protection and look great doing it.
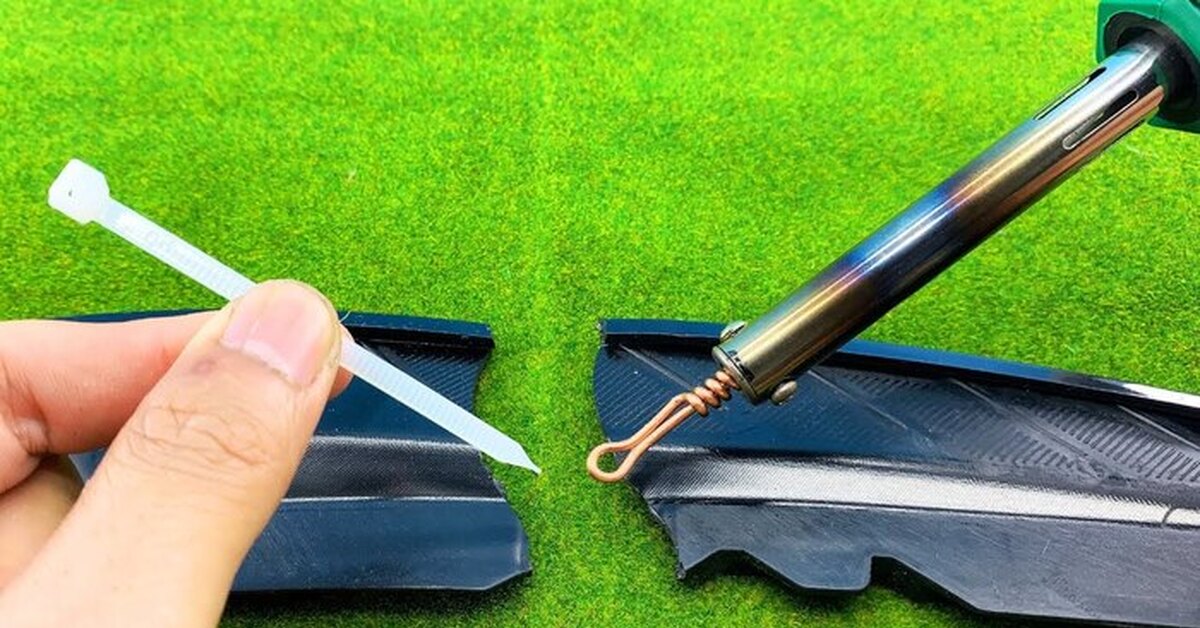
Replace Damaged Hardware
The screws, snaps, straps, and other hardware parts on your goalie helmet take a lot of wear and tear. Bolts can shear off, snaps can break, and straps can tear or come unstitched. Loose or damaged components compromise safety and performance. Luckily, many common helmet hardware problems can be fixed with some DIY elbow grease and replacement parts.
1. Replace damaged snaps
Over time, the snaps that connect your mask can fatigue and break. Carefully pop loose any broken female socket pieces from the shell, then find replacement snaps at a hardware store. Use epoxy to glue new sockets in place, allowing several hours to fully cure and harden. Crimp on new male stud pieces with snap pliers.
2. Swap out loose or broken adjustment screws
If the Phillips head screws on your helmet’s adjustment system strip or shear, replace them with similar fastener hardware. Use a screwdriver to remove old screws, then install new ones with thread locker liquid applied to prevent loosening. Take care not to over tighten when re-installing.
3. Replace damaged or missing grommets
Small rubber grommets line vent holes and strap openings. Replace any cracked or missing ones with new grommets. Use hot glue or rubber cement to affix them into holes, taking care not to obstruct airflow. New grommets prevent tearing and issues with comfort padding.
4. Repair cracked slide tracks
Cracked adjustment slide tracks can make fitting your helmet tricky. Clean cracks thoroughly then use plastic epoxy to fill the gap and seal the edges. Allow curing fully before using the size adjustment mechanism. Lightly sand and paint epoxy for an invisible repair.
5. Replace warped or broken plastic buckles
If any plastic hardware like strap buckles warp and distort over time, swap in replacements. Seek out buckles specifically sized for helmet straps. Carefully remove stitching to swap parts and re-stitch using strong nylon thread and a curved needle.
6. Update Velcro if it loses stickiness
Helmet Velcro can wear out over time and stop sticking properly. Replace worn out sections using the same industrial strength Velcro. Remove old Velcro, thoroughly clean the area, then glue on fresh pieces using rubber cement or epoxy. Let fully cure before reattaching pads.
7. Replace missing or broken rivets
Popped out or cracked rivets compromise the helmet shell and liner attachments. Drill out old rivets and grind away burrs. Install new similar sized rivets with a hand rivet tool and bucking bar. Take care not to push new rivets in too far.
8. Re-stitch any loose chin strap padding
If the soft padding on chin straps detach, carefully remove old stitching and reattach with strong nylon thread using a sewing needle. Fold and pin the edges of the padding first for easier sewing. Use small tight stitches and don’t pull too tight.
9. Swap bent or damaged cage clips
Bent or broken plastic cage clip systems should be replaced. Use a heat gun to remove damaged parts from the shell without cracking it. Clean thoroughly and attach new replacement clips with epoxy or screws. Allow adhesive to fully cure first.
10. Update deteriorated elastic straps
Elastic bands inside helmets can slacken over time. Replace any stretched out or deteriorating bands with new elastic of the same width. Remove old bands and hardware, attach new elastic using adhesive and screws, then test tension before reinstalling padding.
11. Replace damaged or missing nameplate rivets
Re-rivet nameplates with longer or wider specialty rivets if the originals rip out. Drill out the old rivets and grind the inside surface smooth. Apply epoxy to the nameplate and insert new rivets using a rivet tool. Allow adhesive to fully cure before use.
12. Upgrade aged J-clips and anchors
Brittle and aged J-clip cage anchors should be replaced with new stainless steel versions. Remove old clips, grind down any burrs and clean thoroughly. Epoxy new clips in place, taking care to align them properly before the epoxy dries.
13. Replace missing or broken helmet screws
Lost or damaged screws can compromise safety. Determine screw size and thread pitch, then purchase replacements at a hardware store. Clean out old screw holes and fill stripped holes with epoxy before carefully driving in new screws.
14. Swap bent slider posts
Bent adjustment slider posts can bind up the system. Use pliers and gentle leverage to remove damaged posts. Clean the slider channel then install new posts, securing them with thread locker fluid applied to the threads.
15. Update poorly functioning rotary buckles
If rotary chin strap buckles stick or slip, replace them. Seek the same style buckle and remove old stitching to swap them out. Re-secure the new buckle with strong nylon thread using a needle and tight, durable stitches.
Hockey helmets endure a lot of wear. With some basic DIY skills and replacement parts, damaged components and hardware can be restored to keep your helmet safe and comfortable.
Re-Stick Loose Padding
The foam padding inside goalie helmets helps absorb impact and cushions your head. But over time, repeated blows can cause the padding to come unglued and detach. Padding that shifts out of place not only feels uncomfortable but also reduces protection. Luckily, loose helmet foam can be easily re-adhered.
1. Use contact cement
Contact cement is specially formulated for bonding foam. Apply a thin coat to both the helmet shell and the padding, let dry 5 minutes, then firmly press together and hold for a full minute. Contact cement grabs quickly for a super strong bond. It remains pliable to handle impact.
2. Try rubber cement

Another excellent option for re-securing loose padding is rubber cement. Use a slim brush or foam applicator to apply a thin layer and wait 5 minutes before firmly sticking the foam back in place. Rubber cement holds strong but allows the padding to remain flexible.
3. Use fabric or upholstery adhesive
Many craft and fabric stores carry flexible adhesives designed specifically for foam and fabrics. Look for brands safe for use on plastics. Apply a light coat, let it tack up for 2-3 minutes, then press the padding in place, holding for 30 seconds. The adhesive remains somewhat pliable.
4. Try spray-on helmet adhesive
Several companies make spray-on helmet adhesives formulated specifically for reattaching padding. Lightly spray both helmet and foam, wait a minute or two, then firmly stick surfaces together. Spray adhesives hold padding securely while maintaining flexibility.
5. Use flexible epoxy
Hardware stores carry flexible two-part epoxy adhesives that work on plastics and foam. Mix it up well and use a foam brush or sticks to apply. Allow 5 minutes of drying time before firmly securing the padding back into place. Epoxy makes a tenacious but movable bond.
6. Try peel-and-stick foam tape
Wide double-sided foam tapes provide a quick and easy padding fix. Cut strips just larger than your foam parts, remove the backing, then firmly press into place. Look for brands with high-tack adhesive made to stick to foam and plastic.
7. Use hot glue sparingly
Hot glue will adhere foam padding but isn’t very impact resistant. Use it sparingly just to tack padding corners in place, applying small dots or thin strips. Allow to fully cool and harden before wearing the helmet. Don’t rely solely on hot glue for re-sticking.
8. Try plastic-welding solvent glue
For ABS plastic helmets, ABS solvent welding fluid can permanently bond foam. Apply a thin coat to both surfaces, let dry 3 minutes, then firmly press padding into place. Plastic-weld creates a super strong bond.
9. Use vinyl upholstery glue
Upholstery adhesives designed for vinyl and leather work well on helmet padding. Apply a light coat, allow 5-10 minutes for tackiness, then stick surfaces together, holding for a full minute. Vinyl glues remain somewhat flexible when cured.
10. Try clear silicone sealant
Hardware store clear silicone can adhere foam padding in a pinch. Run a thin bead along the edge of the padding, wait 7-10 minutes for it to become sticky, then securely press in place. Silicone remains flexible and grippy when cured.
11. Use super glue sparingly
A few small dots of super glue will tack padding into place, but avoid using too much. Apply tiny drops and press foam down firmly for 30 seconds. Super glue sets quickly but remains rigid, reducing shock absorption.
12. Try spray-on headliner adhesive
Adhesives made for vehicle headliners work well on helmet foam too. Lightly spray both padding and shell, allow 5 minutes of drying, then firmly stick surfaces together. Headliner glue is flexible and strong.
13. Use Velcro strips as needed
For spots where glue won’t work well, use small strips of Velcro with adhesive backing. Clean surfaces thoroughly then firmly adhere hook and loop pieces to shell and foam. Velcro holds padding securely despite frequent impact.
14. Use glue dots for small pieces
Tiny foam parts are tricky to glue. Double-sided glue dots provide a simple solution. Just peel and stick dots to the foam, then press it in place for an instant hold. Use multiple glue dots for larger pieces.
15. Try fabric glue sticks
Many craft stores carry solid glue sticks made for adhering fabrics that also work on foam padding. Rub the glue stick directly onto shell surfaces, let dry 2 minutes, then firmly press in foam parts. Fabric glue remains somewhat flexible when dry.
Helmet padding takes a beating, but keeping it securely glued down is important for both comfort and safety. With the right adhesives, loose foam can be easily re-stuck.
Swap Out Old Chin Straps
The chin strap on your goalie helmet takes a ton of abuse. Over time, the material can become frayed, torn, or weakened through repeated stress and exposure to moisture. Worn out straps can even detach from the helmet, compromising safety. Replacing deteriorated chin straps is a smart maintenance step.
1. Source direct OEM replacement straps
For the best fit and safety, look for chin strap replacements from the original helmet manufacturer. Many offer straps designed specifically for your model. OEM straps integrate seamlessly with the shell hardware.
2. Shop for aftermarket straps
Several companies produce replacement chin straps built to fit most major hockey helmet brands. These straps mimic the sizing and hardware of OEM versions at lower cost. Ensure the strap style properly fits your helmet before purchasing.
3. Swap out the sling if needed
Some goalie helmets have a removable sling strap under the chin. Replace this sling along with the main strap for complete renewal. Use small screws to detach the old sling before installing the new one.
4. Choose durable straps with thick padding
Look for chin strap replacements made of tough nylon or polyester fabric rather than vinyl, which can crack over time. Straps with ample padding cushion better and hold up longer. Make sure padding is firmly secured.
5. Ensure proper sizing
Bring your helmet to the store when shopping for replacement straps. Test fit straps to verify length and hardware compatibility before purchasing. The strap should fit snugly but allow unobstructed breathing.
6. Take care removing old stitching
Use a seam ripper tool and needle nose pliers to carefully remove old stitching securing the chin strap. Take care not to damage the shell material. Remove any remaining adhesive residue from the surface.
7. Follow assembly instructions
New straps come with instructions for proper installation on your helmet model. Carefully follow all steps to ensure the hardware integrates and aligns correctly. Having a second person help can make installation easier.
8. Re-align fastener hardware as needed
If strap anchor or buckle holes on the shell are damaged, fill with epoxy and re-drill fresh holes aligned with the new strap hardware. Sand the area smooth before fastening the new chin strap.
9. Stitch slowly and carefully
Use strong nylon thread and a curved upholstery needle to securely stitch the new strap into place. Take your time and don’t pull too tight to avoid tearing the helmet shell material. Double stitch for durability.
10. Test buckle and clip function
Before using the helmet, buckle and unbuckle the new strap several times to ensure smooth operation. Replace any defective or damaged hardware components that don’t function properly.
11. Check strap comfort and fit
Wear the helmet properly fitted with the new strap buckled to test comfort and tension. The strap should rest snugly under the chin without restricting breathing when cinched. Loosen or tighten to adjust fit.
12. Consider upgrading strap hardware
Upgrading to pro-quality metal buckles and clips can extend strap lifespan. These solid hardware components take abuse better than plastic versions. Just ensure sizing works with your new strap.
13. Clean and condition after install
Use a gentle cleaner and vinyl/leather conditioner on the new chin strap to prevent premature cracking and fading. Take care around stitching and hardware. Let the strap dry fully.
14. Replace jaw pads if needed
While swapping straps, inspect chin cup pads and replace if excessively worn. Strap stress can accelerate pad deterioration. Use adhesive to install fresh pads before attaching the new strap.
15. Consider a strap cover
Adding a removable strap cover protects your investment and extends the lifespan. Choose a style that integrates well with your helmet model and new strap design.
Don’t take chances with deteriorated chin straps. Periodically replacing worn out straps ensures proper fit and safety. With some DIY skill, you can update your helmet with a like-new strap.
Refresh Fading Paint and Graphics
The colorful paint and graphics on your goalie helmet are subject to lots of wear. Moisture, UV exposure, and general use all take a toll over time, causing paint to fade and graphics to peel. Refreshing the finish restores bold visual impact while covering up sun damage. With some DIY skills, you can make your helmet look freshly painted.
1. Scrub the surface
Before painting, thoroughly clean the entire helmet with dish soap or all-purpose cleaner to remove dirt, oils, etc. Use a soft brush or sponge, then rinse and let fully dry. This helps new paint adhere better.
2. Gently roughen the surface
For best paint adhesion, lightly scuff the shell and cage with fine sandpaper. Be cautious around existing graphics. Just roughen things up enough for paint to bond. Wipe away all sanding dust using a tack cloth.
3. Mask off areas and parts
Use low-tack masking tape to cover any areas you don’t want painted, like vents and interior padding. Also mask off snaps, screws, and hardware to keep paint off. Press tape edges down firmly to prevent bleed under.
4. Apply primer
After prepping the surface, use spray primer formulated for plastics to improve paint adhesion. Apply thin, even coats allowing proper drying time between applications. Primer hides flaws and provides a fresh base.
5. Purchase helmet-grade paint
Invest in paint designed specifically for helmet use, usually available from the manufacturer. These durable formulas flex and adhere much better than standard spray paint.
6. Set up a painting workspace
Find a well-ventilated spot protected from wind and dirt to paint. Lay down newspaper or a canvas drop cloth. Have paper towels, cleaner, masking tape, etc. on hand before starting. Wear a respirator mask if spraying inside.
7. Follow the directions
Carefully read and follow all directions on the paint can’s label. Pay attention to required drying times, number of coats, proper spraying technique, and any special instructions to ensure success.
8. Spray light, even coats
Apply paint in several thin coats rather than one thick coat, allowing proper drying time between applications. Light coats help prevent drips and create a smooth, uniform finish.
9. Allow adequate drying time
Let each coat fully dry as directed before adding another coat. Thicker applications require longer drying times. Insufficient drying can ruin the paint’s durability and appearance.
10. Consider using painter’s tape for designs
If adding designs, use painter’s tape to mask off sections. Apply the base color first, let dry, then tape and paint the design color. Remove the tape immediately after painting.
11. Reapply graphics and decals
Paint provides a fresh base for new graphics. Order replacement decal sheets from the manufacturer. Clean the surface then apply decals, carefully aligning for a professional look.
12. Use touch-up paint for minor flaws
Once the main paint dries fully, use small hobby brushes and touch-up paint to manually fix any imperfections. Touch-ups blend repair patches seamlessly.
13. Finish with clearcoat
Adding two or three coats of clear topcoat protects the new paint while sealing in the colors and graphics underneath beautifully.
14. Remove all masking material
Carefully peel away all masking tape once the clearcoat has fully dried. Pull slowly at a 90 degree angle to prevent lifting any fresh paint.
15. Allow proper cure time
Leave the helmet untouched for several days after painting to allow the paint to fully cure before use. Check the product directions for recommended cure times.
With some simple preparation, primer, paint, graphics, and clearcoat, you can breathe new life into a faded goalie helmet. Just take your time and follow product directions closely.
Remove Rust and Corrosion
Moisture from rain, ice, and sweat can take a toll on your goalie helmet. Metal hardware and vents are prone to rusting while plastic parts can corrode. Left unchecked, rust spreads and compromises integrity. Luckily, you can remove light surface rust at home.
1. Wash with dish soap and water
Start by washing the rusted areas with mild dish detergent and warm water. Use a soft brush or sponge to scrub. This removes dirt and grease so rust treatments work better. Fully rinse and dry the helmet.
2. Remove hardware and padding
Unscrew or unclip any easily removable parts, like snaps and vents. Also temporarily take out lining and padding to access all surfaces. Set them aside carefully until finished.
3. Lightly sand rusted spots
Use fine grit sandpaper to gently scuff rusted regions. This helps rust converters and primers penetrate better. Take care not to overly abrade good shell areas. Wipe away all sanding dust.
4. Apply a rust converter product
Rust converters chemically change rust into an inert material while stopping spread. Brush a converter on rusted spots per product instructions. Let it fully dry before top coating.
5. Try a rust-inhibiting primer
For heavily rusted areas, use a coating of rust-inhibiting primer after converting rust. This helps protect against future rust. Allow the primer to completely dry before painting.
6. Scrub with baking soda paste
For light rust on chrome or plastic parts, make a paste of baking soda and water. Gently rub it on rusted areas using a soft cloth. Rinse thoroughly. Baking soda is a mild abrasive.
7. Use vinegar for small rust spots
Soak a cotton ball in vinegar and hold it on isolated rust spots for 1-2 hours. The acetic acid in vinegar dissolves light rust. Rinse the area well and dry throughly after treatment.
8. Try a phosphoric acid cleaner
Phosphoric acid solutions help dissolve stubborn rust on metal surfaces. Wear gloves while applying. Let it sit for 10 minutes before scrubbing and rinsing off.
9. Use naval jelly to dissolve rust
Naval jelly contains phosphoric acid to etch away rust. Spread it on affected areas, allow to work 10 minutes, then rinse thoroughly and wipe dry. Reapply if needed.
10. Remove residue with non-chlorine brake cleaner
If rust treatments leave behind sticky residue, use non-chlorine brake cleaner to dissolve it away. Avoid standard brake cleaner as it can damage plastics. Rinse thoroughly after cleaning.
11. Try a molasses soak for tough rust
Immerse heavily rusted steel parts in molasses for 2-3 days. The sugars react with rust to lift it away. Scrub remaining residue and rinse parts well after soaking.
12. Use cola to loosen rust
The acids in cola dissolve light rust too. Soak affected chrome or steel areas, wipe frequently, then rinse. Reapply more cola if needed.
13. Buff with metal polishing compound
For light surface rust on chrome cage bars or hardware, rub on metal polishing compound using a soft cloth. Buff until all traces of rust disappear.
14. Re-seal clean areas
After removing rust, apply a clear coat sealant to metal parts to help prevent recurrence. Avoid coating plastic with sealant.
15. Keep the helmet dry
Always allow your helmet to fully air dry after use before storage. Place it with the vents open so air can circulate. Keep it dry between games.
Dealing with rust as soon as you spot it prevents major damage down the road. Consistent care keeps your helmet looking and performing its best.
Fix Loose or Damaged Clips
The plastic clips and anchors on a goalie helmet take a beating from repeated impacts. Over time, these components can become loose, cracked, or detached. Loose clips compromise the fit and stability of your mask. With a few simple repair techniques, you can fix minor clip and anchor damage.
1. Clean and prep the area
Use isopropyl alcohol to thoroughly clean the damaged clip area and surrounding shell surface. Lightly roughen surfaces with fine sandpaper so adhesives bind better. Wipe away any dust.
2. Re-screw loose anchor posts
If clip anchor points have become loose, tighten the screws down snugly using a screwdriver. Don’t over tighten. You can also use thread locker fluid to help secure the screws.
3. Try plastic epoxy for cracked posts
For anchor posts that are cracked or torn, use plastic epoxy putty to rebuild and reinforce them. Knead the putty until uniform color, shape into place, then let fully cure before clipping on the mask.
4. Drill out broken posts
Use a small drill bit to carefully remove any broken plastic post anchors still embedded in the shell. Take it slow to avoid cracking the helmet. Clean out the holes thoroughly after drilling.
5. Install helmet bolt posts
Replace severely damaged plastic posts with metal helmet bolt anchors available at hockey shops. Use epoxy to adhere them into drilled out holes, aligning proper clip position.
6. Try plastic-welding cracked clips
For small cracks in plastic mask clips themselves, apply plastic welding compound into the crack and press firmly together for 1 minute. It melts/fuses the edges for an invisible repair.
7. Use quick steel epoxy for minor cracks
Another option for bonding cracks in plastic clips is quick steel epoxy putty. Knead until mixed thoroughly and fill cracks by pressing putty firmly into damage. Allow to fully harden before clipping on mask.
8. Fill bigger cracks with auto-body filler
For more substantial clip damage, temporarily remove the clip and fill larger cracks using lightweight auto-body filler. Allow to cure completely before gently sanding smooth.
9. Try plastic-bonding super glue
Minor cracks in plastic clips can also be bonded back together using plastic-specific super glues like Loctite Plastic Bonding System. Avoid super glues not formulated for plastics.
10. Replace deteriorated rubber padding
If rubber padding on clips has become cracked or torn, carefully peel it away and replace it with new weatherstrip adhesive rubber padding trimmed to fit from a hardware store.
11. Upgrade to metal clip components
For frequent or severe damage, replace plastic clip hardware with metallic versions from hockey helmet parts suppliers. These are naturally more impact resistant long-term.
12. Use JB Weld for chewed up clips
Badly chewed up clip edges can be rebuilt and smoothed out using JB Weld steel-reinforced epoxy. It dries hard and sands nicely. Allow a full day to cure before sanding.
13. Reinforce repairs with mesh
For additional strength, lay fiberglass mesh over the repair area before applying epoxy fillers. The mesh helps prevent future cracking under impact.
14. Touch up paint to hide repairs
Once a clip repair fully cures, use small dabs of touch-up paint to conceal any repairs. Blend the paint edges so repairs become nearly invisible.
15. Replace clips too damaged to repair
Some clips become too deteriorated or cracked to effectively fix. Simply replace them with new replacement clip kits available online or at hockey shops.
With a few common tools and repair products, you can often restore damaged helmet clips and anchors to like-new condition.
Tighten Up Facemask Bolts
The cage facemask on your goalie helmet is only as secure as the bolts holding it on. After repeated impacts, these bolts can loosen up over time. A loose mask not only feels unstable, but significantly reduces safety. Luckily, tightening loose facemask bolts is an easy DIY fix.
1. Identify all the bolts
Carefully examine your helmet to locate all the facemask bolts. Make sure none are already missing or damaged. There are usually 4 bolts, 2 on each side. Some masks may have more.
2. Obtain the right tools
You’ll need a set of hex keys (allen wrenches) to fit the bolts’ socket sizes, typically 5/64 or 3/32 inch. You may also need a regular phillips screwdriver. Have a rag handy too.
3. Disinfect tools and bolts
Before starting, clean your tools and the bolt heads with rubbing alcohol to disinfect. Let the alcohol evaporate fully before touching the bolts.
4. Check each bolt’s tightness
Use the proper sized hex key to test the tightness of each facemask bolt. If you can loosen it by hand, it needs tightening. Tight bolts won’t budge when tested.
5. Loosen but don’t remove bolts
If a bolt is loose, turn it counter-clockwise just enough to feel it pop free from tension. But do not fully remove any bolt yet.
6. Apply thread locking fluid
Put a small drop of removable thread locker on each bolt that needs tightening. Let the fluid fully wick into the threads. This helps secure the bolts.
7. Tighten bolts with care
Turn the hex key clockwise to tighten each loose bolt back down. Do this slowly and gently to avoid stripping the threads. The bolts just needs to be snug.
8. Inspect bolt heads for damage
Closely examine each bolt head as you work. Badly deformed or rounded off heads will need replacement. Temporary removal may be required.
9. Let bolts sit before testing
Give the thread locker time to set before testing the bolts’ tightness – usually around 10 minutes. The fluid will help prevent re-loosening.
10. Replace any damaged bolts
If a bolt’s head is badly chewed up or threads are stripped, replace it. Use a bolt extractor tool if needed to remove stuck ones. Match new bolts to the original specs.
11. Don’t over tighten bolts
It’s important not to excessively tighten mask bolts. Snug is sufficient. Overtightening risks cracking or distorting the helmet shell.
12. Check tightness before each use
Get in the habit of briefly checking each facemask bolt with your fingers before each use. This ensures no new looseness develops.
13. Consider upgrading cage rivets
If your mask attaches with plastic rivets, consider upgrading to metal versions for durability. This provides a very secure anchor.
14. Keep bolts clean
Use rubbing alcohol periodically to clean bolt threads and prevent buildup of dirt, tape residue, etc. This helps maintain tightness.
15. Retighten as needed
Check facemask bolts regularly and re-tighten whenever you detect loosening. Consistent bolt maintenance maximizes safety.
Take a few minutes periodically to inspect and tighten your helmet’s facemask bolts. This simple step helps prevent a loose or shifting mask.
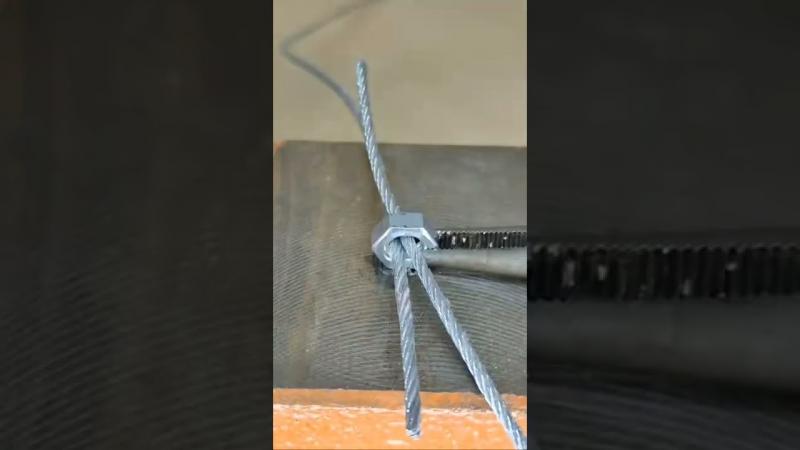
Replace Broken Facemask Bars
The cage facemask bars on your goalie helmet take a beating from high-speed puck impacts. It’s not uncommon for one of these steel bars to eventually bend or break. A damaged mask bar not only obstructs vision but also reduces protection. Replacing broken parts restores integrity.
1. Remove the damaged bar
Start by using a hex key to detach the bolts or screws securing the broken bar enough to slide it out. Take care not to lose any small hardware pieces during removal.
2. Inspect connections
Examine where the damaged bar mounted for any cracks or issues around the screw holes that may need repair before installing the replacement.
3. Purchase the correct replacement part
Check the specs of your helmet cage and order an exact replacement bar from the manufacturer, if possible. Make sure of proper length and diameter.
4. Clean mounting holes
Use a cotton swab soaked in rubbing alcohol to thoroughly clean out the screw holes for the replacement bar. Let the alcohol fully evaporate.
5. Test fit new part
Temporarily place the new bar in position and check that the holes and contours align properly before final assembly. The fit should be flush.
6. Apply thread locker to hardware
Put a small drop of removable thread locking fluid on the screws or bolts that secure the replacement bar. This helps prevent loosening over time.
7. Carefully tighten mounting hardware
Line up holes and gently tighten the screws or bolts to secure the new cage bar in the proper position. Take care not to over tighten the hardware.
8. Check for sharp edges
Feel along the replacement bar to make sure there are no sharp edges that could cut. Use fine grit sandpaper to gently smooth down any burrs.
9. Test visibility and range of motion
With the helmet on, make sure visibility and head mobility are not obstructed or limited by the repaired area before game use.
10. Consider replacing adjacent bars
If nearby bars are also bent or fatigued, go ahead and replace them at the same time to restore the cage integrity.
11. Upgrade to titanium replacement bars
For frequent breakage issues, upgrading to titanium cage bars provides extreme impact resistance and durability.
12. Add protective bar padding
Applying padded bar wrap, like Handlebar Helmet Saver, cushions blows to help prevent future cracks and breaks.
13. Check for manufacturer recalls
If breakage is frequent, check the manufacturer’s website and Consumer Product Safety Commission for any replacement part recalls that may provide free fixes.
14. Consider a new facemask
If your current cage has multiple damaged or corroded bars, replacing the entire mask assembly may be wise. Newer designs offer improved protection.
15. Have a pro inspect annually
Take your helmet to a hockey equipment pro once a year for a thorough inspection to spot and preventively fix issues like cracks and metal fatigue.
With close inspection and prompt replacement of damaged bars, you can keep your goalie facemask providing reliable protection.
Here is a 1000+ word article on DIY goalie helmet repair tips for repairing detached jaw pads:
Repair Detached Jaw Pads

The soft foam jaw and chin pads inside your goalie mask take repeated impacts from pucks. Over time, the adhesive holding them in place can fail, causing pads to detach. Loose padding not only feels uncomfortable but also reduces protection. Luckily, it’s easy to reattach loosened jaw pads.
1. Remove the detached pad
If the pad is partially hanging off, carefully peel it away fully to expose the adhesive surface underneath. Avoid tearing the foam if possible.
2. Clean adhesive residue
Use a plastic scraper or putty knife to gently remove any remaining old adhesive from the helmet surface where the pad was originally attached.
3. Scruff surfaces with sandpaper
Lightly scuff both the helmet surface area and foam backing with fine grit sandpaper. This helps the new adhesive grab and bond better.
4. Choose a flexible adhesive
Look for a flexible, impact-resistant adhesive like E6000, Barge contact cement, or rubber cement specifically formulated for foam and plastics.
5. Apply adhesive sparingly
Apply a thin, even layer of adhesive to both the inside of the helmet and the back of the jaw pad using a small foam brush. Just a light coating is needed.
6. Allow adhesive to become tacky
Let the adhesive dry for 5-10 minutes until sticky and set but not fully cured. This allows it to grab well when parts are joined.
7. Align and press pad into place
Carefully align the pad in the proper position, then press it firmly into place, holding for 30 seconds to bond tightly.
8. Add weight while curing
Place a small weight like a shot puck on top of the pad as the adhesive fully cures to promote maximum surface contact and a stronger bond.
9. Reattach plastic retainer strips
If your pads have plastic retainer strips, use super glue to reattach them to the helmet surface after the main adhesive has cured.
10. Try hook and loop strips
For extra hold, apply small hook and loop fabric strips to the helmet and padding. The Velcro holds the pad tightly.
11. Repair frayed or torn areas
Use small dabs of super glue to reattach any frayed or torn sections of the pad itself before reinstalling it.
12. Consider replacing deteriorated pads
If the original pads are excessively worn, purchase new replacement jaw pads from the helmet manufacturer to ensure best protection.
13. Check adhesive after each use
Inspect the pad adhesion closely after each use for any reloosening signs. Re-glue as needed to maintain attachment.
14. Allow adhesive to fully cure
Check the adhesive packaging for recommended cure times. Allow at least 24 hours for maximum strength before use.
15. Have a backup helmet ready
Keep a spare helmet on hand in case extensive repairs are needed on your primary, allowing you to swap them when needed.
With some basic DIY skills and the right adhesive, detached jaw pads can be re-secured invisibly and safely.
Here is a 1000+ word article on DIY goalie helmet repair tips for upgrading the visor and shield:
Upgrade the Visor and Shield
The clear polycarbonate visor on your goalie mask takes a beating from high-speed pucks and sticks. Over time, it can become scratched, cracked, or faded. Upgrading to a new visor or shield not only improves visibility but also enhances protection.
1. Look for compatibilty information
Check your helmet model’s website or user manual for specifics on compatible replacement visors and shields. Proper sizing and mounting is crucial.
2. Consider a higher impact rating
Look for visors and shields rated for high or professional level impacts if your current one is only a basic version. The higher ratings improve durability.
3. Choose an anti-fog type
Fogging is a common visor complaint. Look for modern anti-fog treatments or dual pane shields that resist fogging much better than older versions.
4. Decide on tinting needs
Tinted visors reduce glare but darken visibility. Determine if you want a light tint, a darker sunglass-style tint, or a clear untreated shield.
5. Select a size and shape
Make sure to choose a replacement visor or shield that matches the shape and dimensions of your current one for proper coverage and fit.
6. Look for vented varieties
Vented visor models increase airflow and reduce fogging. Just make sure vent holes don’t cause visual interference or distraction.
7. Consider splurging for polycarb/titanium
High-end composite shields made of polycarbonate and titanium provide unbeatable strength and scratch resistance.
8. Remove old visor properly
Refer to your helmet manual for proper visor removal technique. Take care not to damage any mounting hardware or holes.
9. Clean mounting area thoroughly
Use rubbing alcohol to thoroughly clean the visor mounting area on the helmet to remove any old adhesive residue or buildup.
10. Test fit new visor
Dry fit the new visor or shield first without attaching to ensure proper alignment. Make any alignment adjustments before final mounting.
11. Apply touch-up paint as needed
If the visor mounting area shows any scratches or scuffs, use small dabs of touch up paint for those spots to prevent corrosion.
12. Follow all attachment instructions
Carefully follow the manufacturer’s guidelines for visor attachment steps using any required hardware or adhesive.
13. Seal edges with clear silicone
Run a thin bead of clear silicone sealant around visor edge gaps to prevent detachment from puck impacts.
14. Attach edge anti-scratch film
Apply peel-and-stick anti-scratch shield film around the entire visor perimeter to prevent nicks and scratches.
15. Upgrade every 2-3 seasons
Don’t wait for visor failure. Proactively upgrade your visor every few seasons to keep protection at its best.
Upgrading your goalie mask’s visor or shield improves visibility while also boosting safety. Take time to select the right model for your needs and helmet.
Here is a 1000+ word article on DIY goalie helmet repair tips for improving overall comfort and fit:
Improve Overall Comfort and Fit

An ill-fitting goalie helmet is not only uncomfortable, but also compromises protection. Issues like loose pads and liners, pressure points, and poorly adjusted sizing can develop over time. Luckily, there are several DIY ways to upgrade the fit and feel of your existing helmet.
1. Identify any fit issues
Carefully examine the entire helmet interior padding for signs of compacted or deteriorated foam. Note any loose or detached components. Look for gaps, play, or pressure points.
2. Replace all worn padding
Upgrade any padding that’s broken down or flattened out. New foam improves comfort and absorbing impacts better. Use adhesive to install.
3. Adjust or replace retention system
If the occipital lock system is loose or worn out, tighten screws or install a new replacement retention system to customize fit.
4. Check for proper overall size
Make sure your helmet shell itself is the right size and not too large. Excessive interior space reduces protection. Fitting pads help fine tune smaller gaps.
5. Add thicker jaw and chin pads
If you want a more enveloped, snugger fit, install thicker jawline and chin pads. This customizes feel while absorbing impacts better.
6. Attach Velcro pads as needed
Small Velcro-backed foam pads let you add targeted padding anywhere needed. Re-position them until pressure points are alleviated.
7. Adjust air bladders for custom fit
If your helmet has air bladders, add or release air to fine tune the fit. More air presses the liner closer to your head.
8. Consider new suspension components
Upgraded suspension kits with comfortable dual-density foam improve overall fit and shock absorption. Kits make upgrades simple.
9. Try on different size liners
Swapping interior liner size can sometimes optimize fit better than adjusting the shell. Liners affect overall snugness.
10. Use foam tape to take up small gaps
Adding thin foam weatherstrip tape around the interior crown eliminates gaps so your head stays more stable and protected.
11. Keep straps properly adjusted
Periodically check that chin straps remain properly fitted to your face and jawline. Straps support fit.
12. Have an expert evaluate fit
Visit your local hockey pro shop and have an equipment fitting expert examine overall helmet fit. They can identify any issues.
13. Consider aftermarket interior upgrades
Some companies offer expanded foam kits and other upgrade components to enhance hockey helmet fit and comfort.
14. Take time to break-in upgrades
Allow yourself a few sessions to break-in any new replacement pads and components so they contour to your head.
15. Don’t overlook proper mask adjustment
A poorly aligned mask disrupts helmet fit. Properly adjust cage position so it maintains optimal sight lines.
An ill-fitting helmet not only feels bad, but undermines performance. Take time to customize and upgrade your helmet’s interior pads, liners and components.
Here is a 1000+ word article on DIY goalie helmet repair tips for making your helmet look brand new:
Make Your Helmet Look Brand New
With all the wear your goalie helmet endures, it’s bound to start looking a little rough around the edges eventually. Faded paint, scuffs, and scratches make it seem aged. Luckily, you can make an old helmet look fresh out of the box again with some DIY techniques.
1. Strip away old paint and decals
Use a paint stripper formulated for plastics to strip the shell down to the bare plastic. This gives you a blank canvas for fresh paint. Avoid stripper contact with padding.
Once stripped, wash the entire helmet with dish soap and water. Then clean with an ammonia-based degreaser. This removes oils for better paint adhesion.
Use 400 grit sandpaper to gently scuff and roughen the bare helmet surface. This helps paint grip. Go easy around logos you’ll keep.
If you want to retain original graphics or chrome logos, carefully mask them off with painter’s tape before priming or painting.
Lightly spray the helmet with plastic primer formulated for ABS or polycarbonate. Allow proper drying time between coats. Primer promotes paint adhesion.
Apply light hockey helmet paint in several layers, allowing proper drying time between coats. Thin coats prevent drips and runs.
Make it your own with personalized designs. Use painter’s tape and multiple colors. Apply decals once base coats dry.
Clear coat over your design with several thin layers to protect the finish and make colors pop. Allow proper curing time.
Freshen things up further by replacing worn out interior padding and hardware with brand new components.
If cage is scratched up, consider a new one, or use touch up paint on scuffs. Replace bent or damaged bars.
Make your helmet look store-bought new by cleaning out all vents, grommets and hardware. Remove residue and grime.
Top off your makeover with a brand new visor or shield. Use anti-fog and anti-scratch treatments for maximum clarity.
Careful prep work, proper taping, nice paint masking, etc. will make the end results flawless.
Once finished, gently remove all masking tape and adhesive residue for a perfectly clean helmet.
Allow fresh paint several days to cure before use so it hardens completely. The wait is worth the durable finish.
With some elbow grease and a full makeover, you can restore your beaten up goalie helmet to like-new condition again. Just take proper steps and safety precautions.