How can a lacrosse stick repair kit save you money. What are the must-have components for comprehensive lacrosse gear repairs. Why is proper gear maintenance crucial for player safety and performance.
The Importance of a Lacrosse Stick Repair Kit
Lacrosse is a demanding sport that takes a toll on players’ equipment. From fierce checks to rocket shots, gear undergoes significant wear and tear throughout the season. A high-quality lacrosse stick repair kit is an essential tool for any player looking to extend the life of their equipment and avoid costly replacements.
With the right repair kit, players can address common issues such as dents, cracks, and fraying, effectively reviving their favorite sticks and pads. This not only saves money but also allows athletes to continue using gear they’re comfortable with, enhancing their performance on the field.
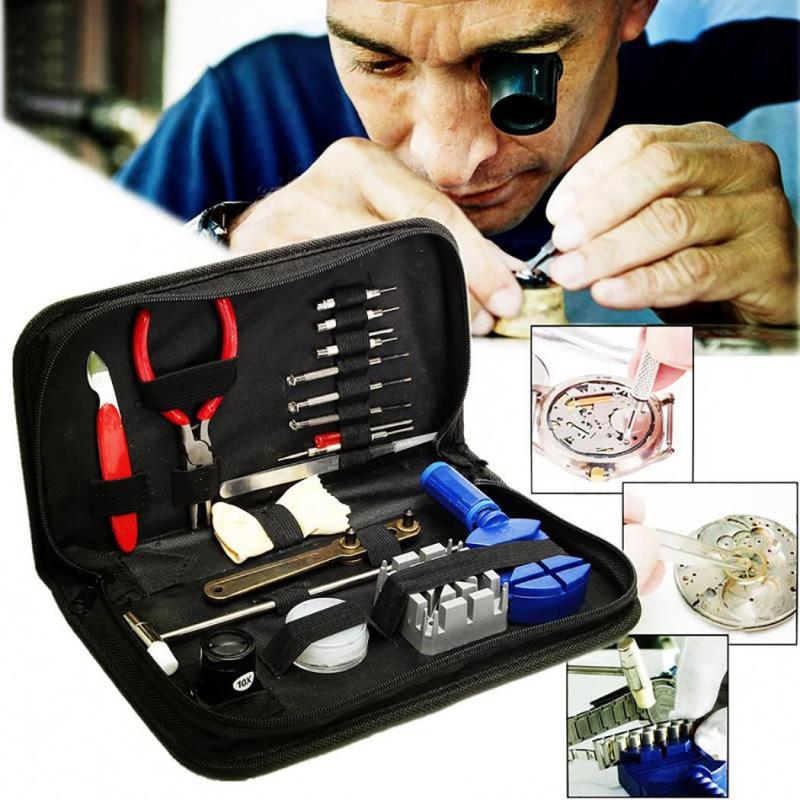
Key Components of a Comprehensive Repair Kit
- Replacement mesh, sidewalls, and shooting strings
- Shaft and head repair epoxy
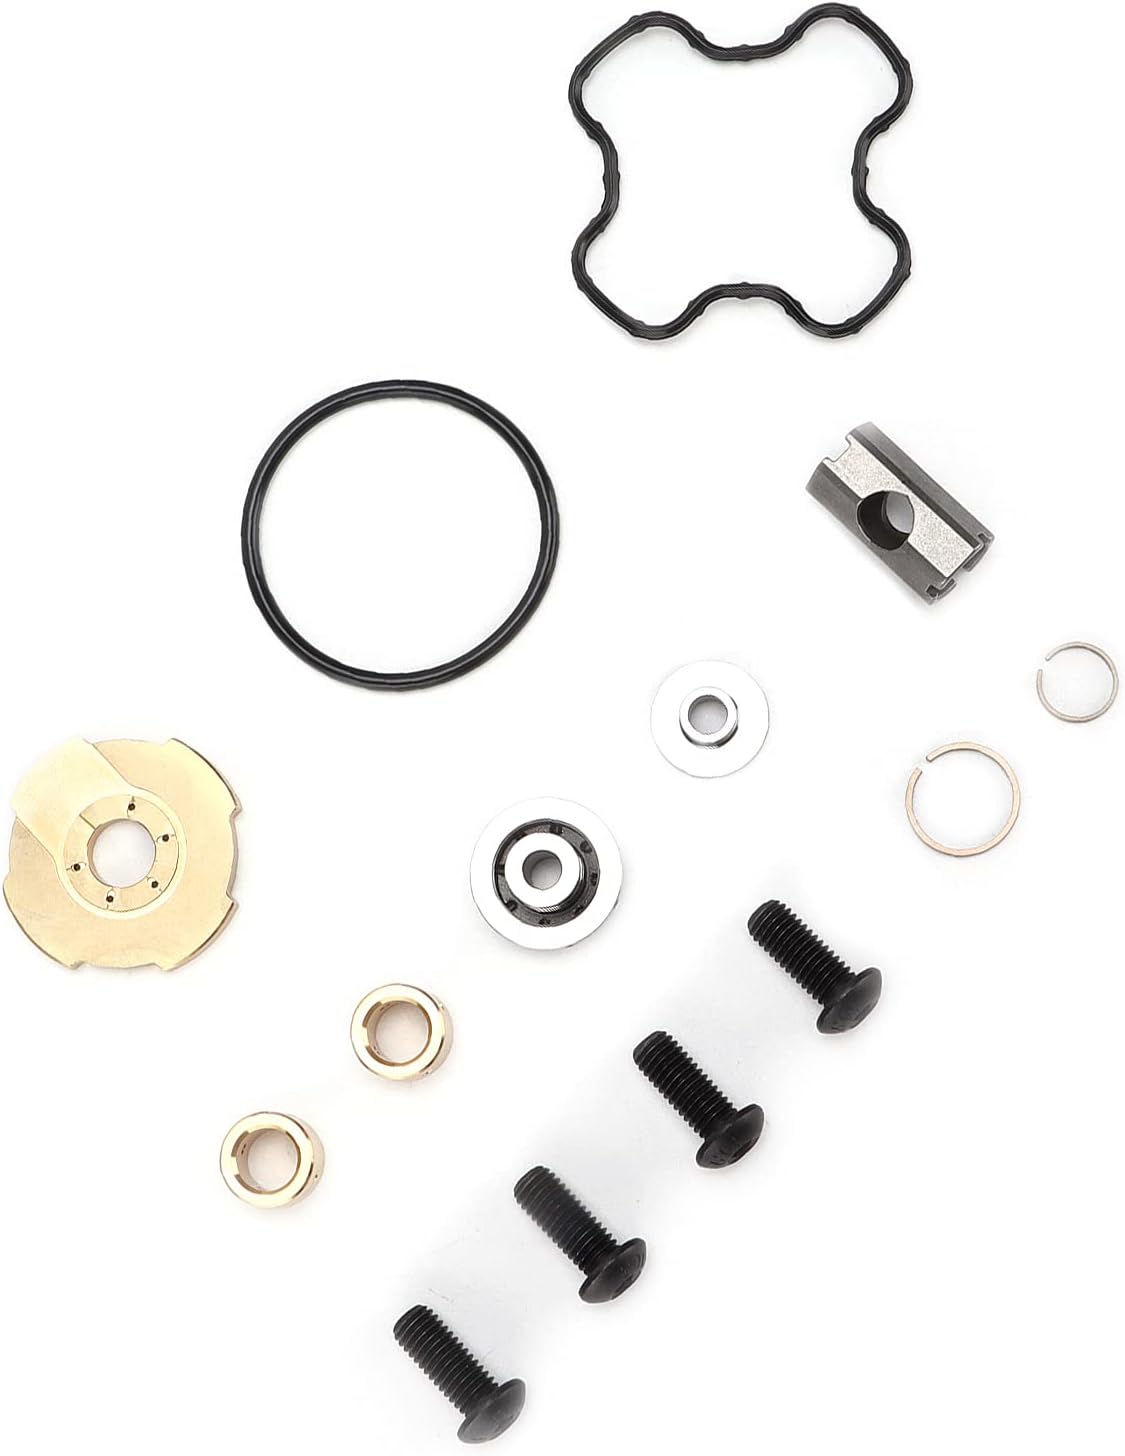
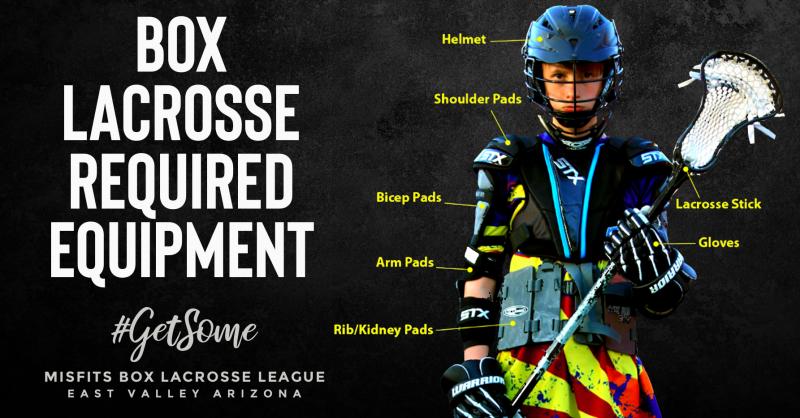
- Helmet hardware (chin straps, clips, screws)
- Padding adhesive
- Seam grip
- Gear wash
Is a repair kit worth the investment? Absolutely. The cost of a well-stocked kit is significantly lower than repeatedly purchasing new equipment. For instance, restringing a stick with materials from a repair kit can save players upwards of $150 compared to buying a new one.

Common Gear Issues and DIY Fixes
Lacrosse players often encounter specific equipment problems that can be easily addressed with a repair kit. Let’s explore some of these issues and their solutions:
Frayed Shooting Strings
Over time, shooting strings can fray, impacting a player’s accuracy. Instead of purchasing a new stick, simply restring the sidewalls and pocket using replacement mesh and materials from the repair kit. This quick fix can restore the stick’s performance to like-new condition.
Damaged Gloves and Pads
Gloves and pads frequently develop holes and split seams after rough play. Using heavy-duty seam grip adhesive and patching materials from the repair kit, players can easily seal holes and reinforce splits. A thorough cleaning afterward can make the pads look and perform like new.
Loose Helmet Hardware
Helmet safety is paramount in lacrosse. When clips and hardware securing the facemask become loose or bent, it’s crucial to address the issue immediately. Replacement clips, screws, and chin straps from a repair kit can quickly restore a helmet’s integrity, ensuring player safety on the field.
Maximizing Equipment Lifespan Through Proper Maintenance
Beyond repairs, a comprehensive kit allows players to perform deep cleaning of their equipment, which is essential for extending its lifespan. After a grueling season, specialized cleaners can remove sweat, mud, and grime from helmets, pads, gloves, and cleats.
How often should lacrosse gear be cleaned? Ideally, players should perform a deep clean at least once per season, with regular maintenance cleaning throughout. This practice not only prolongs the life of the equipment but also helps prevent the buildup of bacteria and odors.
Selecting the Right Replacement Materials
When it comes to restringing a lacrosse stick, choosing the appropriate replacement parts is crucial for achieving optimal performance. Different positions and playing styles require specific types of mesh, sidewalls, and shooting strings.
Mesh Selection
For midfielders seeking good ball control for quick sticks, feeds, and shots on the run, a medium pocket with soft mesh in the 10 to 12 diamond range is often preferred. Brands like HeroMesh or Type 1 nylon meshes offer the right balance of flexibility and pocket depth.

Sidewall Materials
Soft to medium-soft sidewall materials allow the pocket to shape properly while providing some stability. Composites like HeroRail and Thruster are popular choices for their balance of flexibility and durability. Defensive players might opt for stiffer sidewalls to restrict pocket movement and provide firmer ball control during checks and ground balls.
Shooting String Configuration
The arrangement of shooting strings significantly affects ball control and aim. Many players prefer double straight traditional laces in opposing interlocking patterns for smooth cradling. Adding a U-nylon or leather shooter at the collar can provide additional hold.
Cost-Effective Gear Management Strategies
Implementing a proactive approach to gear maintenance can lead to substantial savings over time. Here are some strategies to consider:
- Regular inspections: Check equipment for signs of wear before and after each game or practice.
- Immediate repairs: Address minor issues promptly to prevent them from becoming major problems.
- Proper storage: Store gear in a cool, dry place to prevent unnecessary degradation.
- Rotation: Alternate between multiple sets of gear to distribute wear evenly.
- Preventative maintenance: Apply protective coatings or treatments to extend equipment life.
How much can proper gear management save a player over a season? While exact figures vary, consistent maintenance and timely repairs can easily save hundreds of dollars annually on replacement costs.
Environmental Impact of Equipment Repair
In addition to financial benefits, repairing lacrosse gear has positive environmental implications. By extending the life of equipment, players reduce waste and minimize their carbon footprint associated with the production and transportation of new gear.
Does repairing gear really make a difference environmentally? Indeed, it does. Every piece of equipment kept out of landfills contributes to waste reduction. Moreover, the resources saved by not manufacturing new items can be substantial when considered on a larger scale.
Sustainable Practices in Lacrosse
- Upcycling old equipment for training purposes
- Donating gently used gear to youth programs
- Participating in equipment recycling initiatives
- Supporting brands that use eco-friendly materials and manufacturing processes
Advanced Repair Techniques for Seasoned Players
As players become more experienced with basic repairs, they may want to explore advanced techniques to further customize and maintain their gear. These skills can provide an edge on the field and extend equipment life even further.

Custom Pocket Patterns
Experimenting with unique stringing patterns can help players achieve the perfect pocket for their style of play. Advanced techniques might include:
- Channel pockets for improved ball retention
- High pockets for quicker release
- Specialized patterns for face-off specialists
Shaft Customization
Players can modify their shafts for improved grip and performance:
- Adding texture with grip tape or spray
- Cutting shafts to custom lengths
- Installing end caps for weight distribution
Head Shaping
Some players reshape their stick heads for better performance:
- Pinching the throat for improved ball control
- Flaring the scoop for easier ground balls
- Adjusting face shape for defensive checks
Are these modifications legal? It’s crucial to consult official regulations before making any alterations to ensure compliance with league rules.
Building a Comprehensive Lacrosse Repair Arsenal
While basic repair kits are excellent for common fixes, serious players and teams may benefit from building a more extensive repair arsenal. This expanded toolkit can handle a wider range of issues and support more advanced customization options.

Additional Tools to Consider
- Stick doctor’s needle and awl for precise stringing
- Heat gun for reshaping plastic components
- Dremel tool for fine adjustments to heads and shafts
- Leather punch for custom stringing holes
- Specialized lubricants for moving parts
How much should one invest in a comprehensive repair arsenal? While costs can vary, a well-equipped toolkit might range from $200 to $500. However, this investment can pay for itself many times over through extended gear life and reduced replacement costs.
Team-Level Repair Stations
For lacrosse programs and clubs, setting up a dedicated repair station can be highly beneficial. This central hub allows for efficient maintenance of team equipment and can serve as a valuable resource for players learning repair skills.
Components of a team repair station might include:
- Workbench with good lighting
- Wall-mounted tool organizers
- Storage bins for replacement parts and materials
- Instructional posters for common repairs
- Safety equipment (gloves, eye protection)
Implementing a team repair station not only saves money on equipment but also fosters a sense of responsibility and care for gear among players.

The Future of Lacrosse Equipment Maintenance
As lacrosse continues to grow in popularity, the field of equipment maintenance is likely to evolve. Emerging trends and technologies may shape how players care for their gear in the coming years.
Innovative Materials
Advancements in material science could lead to more durable and easily repairable equipment. Self-healing polymers, for instance, might be incorporated into stick heads and shafts, allowing minor cracks and dents to repair themselves.
Smart Equipment
The integration of sensors and smart technology into lacrosse gear could revolutionize maintenance practices. Imagine helmets that alert players to structural weaknesses or sticks that provide data on string tension and pocket depth.
3D Printing for Repairs
As 3D printing technology becomes more accessible, players might be able to print custom replacement parts for their equipment, further extending the life of their gear and reducing waste.
What impact will these advancements have on the sport? While it’s difficult to predict with certainty, these innovations could lead to safer play, more consistent performance, and reduced equipment costs over time.
In conclusion, a well-stocked lacrosse repair kit is an invaluable asset for any player or team. By mastering the art of equipment maintenance and repair, athletes can extend the life of their gear, save money, and ensure optimal performance on the field. As the sport continues to evolve, staying informed about the latest repair techniques and technologies will be crucial for players looking to gain a competitive edge while practicing sustainable equipment management.
Why a Lacrosse Stick Repair Kit is a Must-Have
As an avid lacrosse player myself, I know firsthand the importance of keeping your gear in tip-top shape. Those fierce checks, rocket shots, and quick cuts can really take a toll on your equipment over time. But with the right lacrosse stick repair kit, you can extend the life of your gear and avoid spending big bucks on replacements.
A quality DIY lacrosse repair kit allows you to fix those inevitable dents, cracks, and fraying that happen after hard use. I’ve used these kits countless times to revive my favorite sticks and pads that would have otherwise ended up in the trash. If you want to save money and get more out of your equipment investment, a repair kit is absolutely essential.
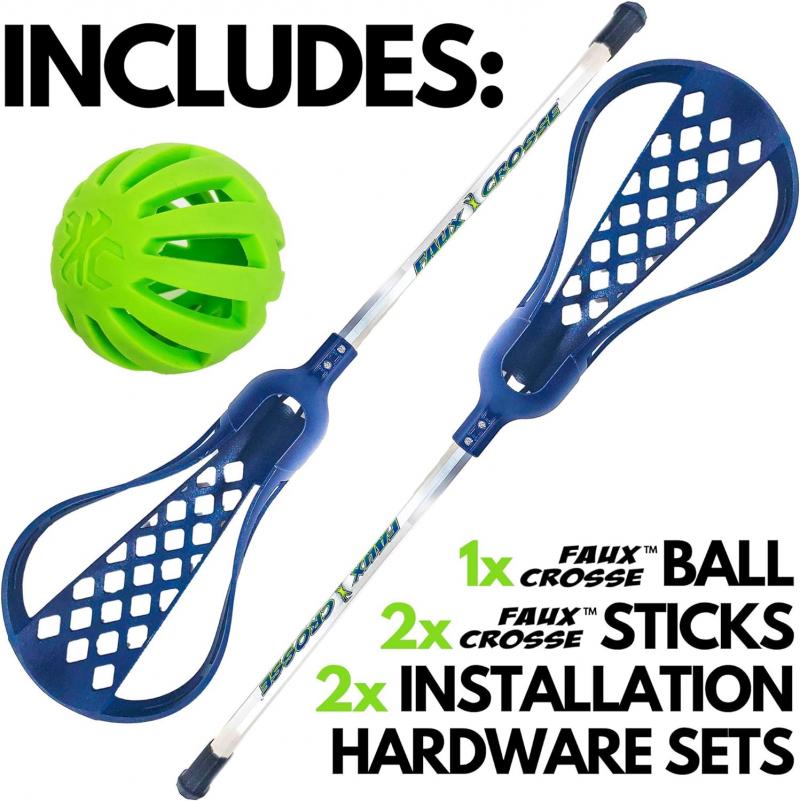
When selecting a kit, make sure it includes the key components needed for comprehensive lacrosse gear repairs. Here are some must-have items:
- Replacement mesh, sidewalls, and shooting strings – Keep extras on hand to restring sticks as needed
- Shaft and head repair epoxy – Mends cracks and dings in shafts and heads
- Helmet hardware – Chin straps, clips, screws to replace damaged parts
- Padding adhesive – Re-adheres helmet liner and pad foams
- Seam grip – Patches rips and holes in pads and gloves
- Gear wash – Deep cleans grit and dirt from equipment
I always cringe when I see players tossing perfectly good sticks and pads that just need some simple repairs. With a basic kit, minor fixes take just minutes and keep you playing safely with the gear you love.
For example, over time the shooting strings on my go-to attack stick were really fraying and impacting my accuracy. Rather than buying a shiny new Maverik, I just restrung the sidewalls and pocket with replacement mesh and materials from my kit. Comfy custom pocket back in action! No $150 splurge necessary.
Gloves and pads take a beating too. Last season my favorite STX arm pads developed a few worrisome holes and seams were splitting after being roughed up in the crease. But with some heavy-duty seam grip adhesive and patching from my stash of repair supplies, I easily sealed those holes and reinforced the splits. After a good cleaning, the pads looked and performed like new again.
Helmets are a super important piece of safety gear that need proper care. The clips and hardware keeping the cage secure often get bent and loose over time. My repair kit came through BIG time last month when my Cascade facemask was wobbling around after a gnarly collision. With some handy replacement clips, screws, and a chin strap, my lid was fixed in time for the next game.
Beyond the ability to revive gear on the fly, a repair kit also allows you to deeply clean equipment, which extends lifespan. After a sweat-soaked, muddy season you can break out the specialized cleaners to wash away grime from helmets, pads, gloves, cleats and more. Keeping your gear fresh makes it last longer.
While proper gear storage also prevents damage during the offseason, unforeseen rips, cracks, and dents are inevitable over years of play. Don’t waste money replacing quality items that just need a little TLC. Give your equipment new life and save cash with a fully stocked lacrosse repair kit!
Selecting the Right Replacement Mesh, Sidewalls, and Shooting Strings
When it comes time to restring your lacrosse stick, having the right replacement parts on hand is crucial for getting that perfect custom pocket back. The mesh, sidewalls, and shooting strings all work together to give you the hold, release, and accuracy you need on the field. With a variety of types and styles available, choosing the best materials for your position and playing style is key.
As a midfielder, I prefer a medium pocket that provides good ball control for quick sticks, feeds, and shots on the run. So I typically use a softer mesh in the 10 to 12 diamond range, which bags out nicely after stringing and breaking in. I’ve found that HeroMesh or Type 1 nylon meshes offer the right amount of flexibility and pocket depth for my taste. If you’re an attackman dishing crisp passes or a FOGO maneuvering in tight spaces, you may opt for a similar pocket style.
For sidewalls, I tend to use soft to medium-soft materials that allow the pocket to shape properly. Composites like HeroRail and Thruster provide some stability while still letting the mesh pockets as desired. They also have more give for stringing tight sidewall knots. On close defense, you might want stiffer sidewalls that restrict pocket movement and hold the ball firm during checks and ground balls.
Shooting strings are hugely important for ball control and aim. I string double straight traditional laces in opposing interlocking patterns to cradle smoothly. For added hold, I sometimes incorporate a U-nylon or leather shooter at the collar. Vs and U-shoots are great for adding whip and velocity on shots as well. Whatever your stringing preferences, it’s smart to restring with the same shooting set-up you’re used to in order to maintain feel and accuracy after a pocket refresh.
Along with the right materials, proper stringing technique is a must for optimal pocket performance. Investing in a quality stringing kit and watching some YouTube tutorials on lace techniques, sidewall styles, and shooting string configurations is time well spent. Take it from me, there’s nothing worse than spending hours restringing your stick only to end up with a sloppy, uneven pocket that needs to be redone. With the right knowledge you can customize your perfect pocket every time.
Don’t settle for poor ball control or brick wall shots after a restring. Take the time to choose high-quality mesh, sidewalls, and shooters that match your preferences. Combine that with solid stringing skills and you’ll extend the life of your favorite stick with a flawless pocket that improves your game.
Finding Sturdy New Shaft and Head Components
If the shaft or head of your lacrosse stick sustains one too many checks, you may need to repair it or replace key components. Thanks to a DIY repair kit, you can swap out damaged parts to get your stick game-ready again.
First, assess if the shaft or head can be salvaged. Minor dents and cracks in the shaft can often be repaired with epoxy. But if the damage is extensive or it feels structurally unsound, replacement is safest. For heads, large holes, broken sidewalls, or distorted scoops likely warrant a new head.
When shopping for new shafts or heads, durability should be a top consideration. As a defenseman constantly banging sticks during ground balls and clears, I’ve learned the hard way that flimsy equipment just doesn’t cut it.
For metal shafts, look for strong yet lightweight alloys like Scandium Titanium to withstand checks without weighing you down. Top brands like Maverik and STX use premium metals and engineering for optimum strength. I switched to a Maverik Tank shaft last season and it has held up great despite the abuse.
Composite shafts offer good durability too but are best suited for offensive players who take less checks. The fibers and resins create a rigid yet flexible shaft ideal for quick maneuvers and shots on goal. Brands like Epoch and Warrior make excellent composite shafts that maintain their structure.
As for heads, the best durability comes from stiff yet resilient plastics like those used in the Brine Clutch 3 and Warrior Evo Pro X heads. Rigid sidewalls and thick scoops hold their shape while ABS and polycarbonate plastic bodies resist cracking. For top performance, always restring new heads with fresh mesh, sidewalls, and shooters.
Be sure to find replacement components that match your play style and stick specs. As a close defender, I love a stiff, oversized head paired with a 30″ long d-pole shaft. Make sure new gear aligns with your preferences. With the right replacements, you can play confidently knowing your stick is up for the rough and tumble game of lacrosse.
Rather than needlessly buying all new equipment each season, repair kits allow you to swap out just the broken components you need. A little DIY maintenance goes a long way! Invest in quality replacement shafts and heads so you can keep dishing assists and throwing checks with trusted gear.
Repairing Dents and Cracks in Helmets and Pads
As a lacrosse goalie, my helmet and pads take a beating from stopping point blank shots every game. Through normal wear and tear, dents, cracks, and holes in these protective gears are inevitable. Thankfully, a well-stocked repair kit allows me to fix minor damage and keep my equipment safe and game-ready.
For small dents and cracks in the shell of helmets, I fill them with epoxy putty from my kit. Applying the putty and letting it dry and harden seals up the flaws nicely. Major cracks or structural issues of course warrant professional help or replacement. But minor fixes I can easily do myself.
Padding in helmets and pads also gets compacted and damaged over time. To plump up flattened foam and get padding back to its shock-absorbing best, I use specialty spray adhesives. Lightly coating the foam and letting it dry restores cushion and protection. For bigger holes or tears, I cut patches of spare foam to fill in the gaps. A few strategic sprays and the padding is restored.
To firmly reattach loose pieces like logos and plastic hardware, my repair kit came with heavy-duty multi-use glue. Just a few drops bonds pieces securely so they don’t flap around and irritate my skin. No more annoying scratches from a flapping neck guard!
For heavy-use areas on pads prone to rips like elbow caps and chest flaps, I reinforce them preventatively with seam grip tape. Adding strips over high-stress seams before they tear helps gear last extra seasons. An ounce of prevention really does help here!
Don’t toss quality pads and helmets with minor damage. With the right adhesives, epoxy, foam patches and seam tape, you can repair cracks, holes, and dents yourself. A stocked repair kit ensures you always have the materials on hand for a quick fix. Just be sure to replace gear that can no longer provide adequate protection after extensive repairs. DIY patches can stretch useful life but know when it’s time to retire damaged items and invest in new ones. Protect yourself with safe gear secured and reinforced using repair supplies.
Replacing Foam Padding in Helmets for Safety

As a lacrosse player, a properly fitting helmet with quality foam padding is absolutely essential for protection. But after years of hard hits and compression, that padding can get flattened down and lose its shock absorbing abilities. A quick foam replacement using my repair kit helps get my helmet feeling safe and comfortable again.
I like to check the fit and condition of my helmet foam before each season. If it’s not providing enough snug cushion around my head anymore, it’s time to swap in fresh padding. Thinner, compacted foam won’t provide adequate impact protection. Replacing it restores crucial safety properties.
When upgrading your helmet’s foam padding, use replacement materials specifically designed for sports helmets. Many kits include pads made of durable vinyl nitrile or EVA foam that won’t compress permanently. Look for padding about a 1⁄2 inch thick to sufficiently cushion heads from collision forces.
Carefully remove the old foam from the helmet shell using a plastic pry tool to avoid cracking the lining. Clean the interior and install the fresh padding pieces using adhesive spray. Follow the helmet manufacturer’s replacement guide for proper sizing and placement. A snug but comfortable fit is key.
Positioning the new foam correctly ensures it overlaps to disperse impacts most effectively. Take time to get the alignment right so gaps don’t form as pieces compress with use. Press firmly so the adhesive holds the padding securely in place as you play.
Don’t jeopardize your safety with flattened, worn out padding. Routine foam inspection and replacement is a quick process that restores the protective qualities of your helmet. Just make sure to do it right. With fresh, quality padding installed correctly, you can play confidently knowing impacts will be absorbed rather than transmitted directly to your head.
Prioritizing helmet safety is smart. Don’t wait for a serious injury to take action. Investing in replacement parts ensures you always have what’s needed for critical DIY repairs and upgrades. Keep your head protected and your helmet performing at its best.
Swapping Out Facemask Clips for a Secure Fit
As a lacrosse player, keeping your helmet facemask securely attached is a must for safety. But after seasons of checks, collisons and general rough play, the clips and screws holding the mask in place can loosen up or get damaged. Replacing these components ensures the cage stays firmly positioned to protect your face.
Before each season, I inspect the hardware on my helmet setup. If the clips are bent out of shape or stripped, or the screws are loose, replacement is necessary. A wobbly mask impedes vision and leaves you vulnerable to sticks and balls impacting unprotected areas.
When shopping for new clips and screws, be sure to get the exact types and sizes specified by your helmet model. These small parts are designed specifically to work with the shell and holes. Generic pieces may not align and fasten properly. Investing a few bucks in the right OEM hardware is worth it.
Replacing the clips and screws is a simple process. Just unscrew the old parts, remove them and thoroughly clean the screw holes. Then align the new pieces and securely fasten them with a screwdriver. I like to use a small amount of thread locker on the screws to really keep them from loosening up again.
Follow any special positioning or torque instructions from the manufacturer. You want things aligned and snug, but be careful not to overtighten and strip the holes. Taking a few minutes to correctly swap out these critical components ensures your mask stays locked in place game after game.
Don’t play with a loose or shifting facemask and risk serious injury. Periodically inspecting and replacing worn out clips, screws and other helmet hardware extends the life of your protective gear. Keep spares on hand so you can replace damaged parts immediately when needed between games. Stay safe and secure the cage with fresh, quality components.
Fixing Chin Straps and Mouthguards with New Hardware
Properly securing your helmet with a snug chin strap is vital for protection during play. Likewise, keeping your mouthguard firmly in place keeps teeth safe from hard shots. But clips, screws and straps wear out over time. My repair kit allows me to easily swap in new hardware to keep these items fixed and functional.
I check the condition of all helmet hardware before each season and replace anything that looks worn. Frayed or torn chin straps don’t stay buckled properly. Corroded or malfunctioning clips and screws make it tough to get the right fit consistently. Replacing them ensures dependable security.
For mouthguards, the little connecting loops and tethers eventually snap from continual taking on and off. Or sometimes the plastic wear plates lining the guard slots on helmets crack. Fresh mouthguard hardware gets your guard staying put every play.
When replacing these components, refer to manufacturer instructions for re-installation. Properly threading straps through buckles and anchors provides ideal stability and comfort. Get the strap tight enough to secure the helmet without choking off your airflow or digging into skin.
Likewise, correctly looping tethers through mouthguard holes gives you maximum stretch so you can easily get them in and out between plays. But they’ll stay anchored during action. Taking a few minutes to replace worn out parts makes a big difference in keeping your head and mouth protected shift after shift.
Don’t play with faulty or ill-fitting helmet hardware. A stocked repair kit will have the chin straps, clips, screws, and mouthguard components you need to quickly replace worn out pieces. Keep spares on hand for timely fixes and upgrades as needed. Stay safe and secure out there.
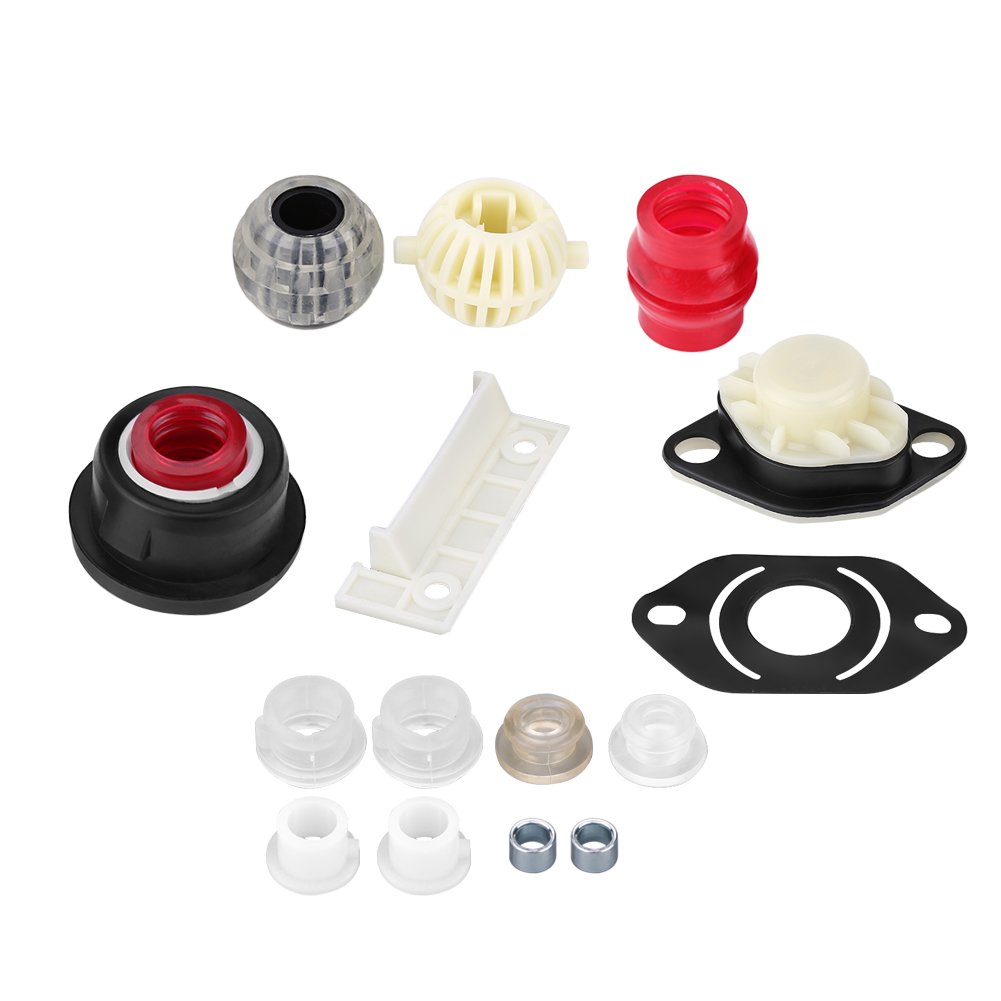
Reattaching Plastic Clips and Buckles on Pads
The plastic clips, straps, and buckles connecting pads and keeping them secured take a ton of abuse out on the lacrosse field. It’s not surprising that these components eventually pop loose or break from the continual wear and tear.
Before each season I do a full inspection of my pads, replacing any clips, straps or buckles that have detached or cracked. Having these fasteners positioned correctly and in good condition ensures my pads stay protectively covering limbs during intense play.
Many kits include spare clips and buckles to conveniently replace damaged ones. Determine what style you need based on your pad models and replace the matching hardware. Carefully align new pieces in the proper anchoring positions for full range of motion.
I secure the fresh clips using heavy-duty flexible glue recommended for plastic and included in repair kits. Just a few drops bonds the components tightly to the pad lining or shell. For extra reinforcement, I also stitch around them using tough kevlar thread.
Replace warped or ill-fitting buckles that make straps difficult to properly tighten and loosen as needed. Take note of how straps correctly thread through for full adjustability. Don’t settle for make-do rigging; replace defective parts fully.
Broken clips and buckles not only irritate with protruding edges, but also let pads shift, leaving you unnecessarily exposed. Take a few minutes to reattach loose pieces or replace damaged ones so your protective gear stays securely covering you all season long.
Keeping your pads appropriately fastened is crucial for safety and high performance. Have the right replacement parts ready in your kit for prompt fixes as needed. Don’t risk playing with faulty securing components. Stay fully equipped and protected out there on the field.
Patching Rips and Tears in Chest Pads and Gloves
In the fast-paced, physical sport of lacrosse, ripped protective gear is inevitable. But just because your chest pad and gloves get some holes doesn’t mean they need to be replaced. With some basic materials from a repair kit, I can easily patch tears and reinforce high-wear zones to extend the life of my equipment.
At the first sign of ripped stitching or fabric, I clean the area thoroughly and apply adhesive seam grip patched designed specifically for sports gear repairs. The no-sew grip tape seals holes firmly and its stretchy composition moves naturally with pads and gloves during play.
For larger holes or pads with liners, I cut patches out of spare foam using the tear as a template. After gluing the foam patch into place, I put seam grip tape over it for an extra seal and to smooth the texture.
On gloves, I focus on the palms, fingers and padded backs which tend to wear fastest for field players. Goalie gloves also take abuse on the blocking palms from continual ball impact. High-wear zones deserve preventative reinforcement even before rips happen.
Taking a few minutes to patch emerging holes and place protective strips extends the usable lifespan of quality gloves and pads by entire seasons. Just be sure any repairs allow full flexibility – don’t restrict movement by overpatching areas.
Waiting to repair tears leaves you vulnerable to painful stingers off uncovered skin and potential injuries off compromised padding. Keep your repair kit stocked and be proactive. Protect your body and budget by quickly patching worn gear as soon as issues emerge.
Gluing Down Loose Gripper Materials on Equipment
Many lacrosse pads and gloves feature grippy materials on surfaces like elbow caps, chest plates, and palm areas to help control stick checks and passes. But with continual abrasion, these grippy patches can come unglued and peel off.
Rather than replacing quality gear because of loose grippers, I use flexible adhesive from my repair kit to firmly reattach them. Just thoroughly cleaning the area, applying a few drops of glue, and firmly pressing the material back down does the trick nicely.
I also coat high-wear zones preventatively with adhesive to avoid future lifting. Chest pads, forearm guards, and glove palms take a particular beating, so I regularly re-glue the grippers in these spots before pieces detach.
For gloves, I carefully apply glue only to grip material edges, avoiding contact with glove liner fabric so I don’t compromise breathability and comfort. A small flexible silicone spatula helps get glue just where I need it without messy spills.
Grippers detaching mid-game can lead to reduced ball control and protective padding shifting around. Don’t wait until they fully peel off – be proactive in responsively re-gluing as needed each season. Quick fixes extend gear usefulness for minimal cost and time.
I also replace missing or deteriorating grip pieces with fresh sheets of textured material kept in my repair kit. Cutting patches to size and gluing them in place restores helpful grip abilities to gloves and pads.
Don’t trash great equipment just because of gripper issues. With the right adhesives and materials, restore traction and control to keep equipment performing as needed season after season.
Maintaining Protective Cups and Cleats for Top Performance

Two pieces of lacrosse gear that can really impact performance are protective cups and cleats. Keeping these items in quality condition means inspecting and maintaining them routinely.
Protective cups take lots of abuse from shots, checks, and general impacts. I check my cup before each season and if the hard plastic exterior looks warped or cracked, I replace it. Interior foam also compresses and thins over time, so I swap that out periodically for continuous optimal protection.
Good athletic supporters that keeps cups securely and comfortably in place are also important. I replace worn out or ill-fitting ones that allow too much cup movement. Proper positioning is key for protection and pain prevention!
For cleats, I examine soles each season for excessive wear. Once tread depths get low, traction suffers greatly. I keep replacement studs and screws in my kit for promptly fixing any that get damaged or fall out during play.
Mid-soles and uppers also wear down and can tear. I reinforce weak spots with seam grip tape before they fully rip. For torn eyelets and loose sole stitching, I use tough kevlar thread and needle to re-sew as needed.
Don’t wait until gear critically fails to take action. Routinely inspect and perform maintenance like swapping out worn parts, reinforcing developing holes, and cleaning dirty gear. Well-cared-for equipment lasts longer and gives you better performance and protection season after season.
Take gear care seriously and stock your repair kit accordingly. Protect your body and give yourself a competitive edge by keeping protective cups and cleats in peak playable condition.
Cleaning Gear Properly to Avoid Further Damage

Allowing dirt, grime, and sweat to build up on gear can actually accelerate wear and cause damage. But improperly cleaning equipment can also wreak havoc. Using the right methods and products is key.
Helmets with caked on dirt should be hand washed rather than tossed in a washing machine where the jostling can crack shells and lining. I use a helmet-specific cleaner and microfiber cloths to gently clean inside and out.
For pads, gloves, and clothing, I first wipe away surface dirt then use an antimicrobial sports wash in the washing machine on cold gentle cycle. Air drying ensures foams don’t shrink; I replace any that do.
Balls, heads, and shafts also need periodic deep cleaning. Built up dirt and grease hinders ball flight and grip. I use a stiff nylon brush and mild cleaner to scrub gear free of residue without causing harm.
Avoid caustic cleaners on any lacrosse gear – ingredients like bleach can degrade important protective foams, plastics, and metals. Read ingredient labels closely and test on inconspicuous areas first if unsure.
Be extra careful cleaning composite shafts, shooting stringing, and pad graphics where harsh chemicals can cause fading, discoloration and deterioration. Mild soap and water keeps these items fresh without damage.
Regular, proper deep cleaning makes gear last longer by preventing destructive build up as well as cosmetic stains. But use the right products for each material. A well-stocked kit has specialty cleaners to safely revitalize every type of equipment.
Don’t let grime accumulate and shorten usable life. But also don’t go overboard cleaning without care. Apply the right techniques using quality cleaners to keep gear looking and performing its best season after season.
Storing Equipment so It Lasts Longer
How you store gear between seasons plays a big role in its longevity. The right techniques and supplies protect equipment from damage that shortens usable lifespan.
I recommend storing pads flat rather than hanging to avoid foam deformation. Carefully fold or roll them to minimize creasing. Helmets should be stored in helmet bags on wide shelves, not stacked where weight can warp shells.
Balls, gloves, arm pads and shoes can be loosely stuffed with newspaper or packing foam to retain shape. Just avoid overly compressing foams. For sticks, gradually release tension on strings rather than over-loosening.
Before storage, thoroughly dry all gear to prevent mold growth. I use antimicrobial sprays on padding and fabrics as added insurance against mildew and stench.
It’s ideal to store equipment in cool, dry basements or closets. I attach moisture absorbing packets in bags to prevent dampness damage. Rodent-proof containers also keep mice from nesting in pads over the offseason.
Avoid hanging gear on nails or hooks that can create tears and compression marks. Use wide, padded hangers and shelves that evenly distribute weight. Stuff toes of cleats so uppers hold shape.
Taking care to properly store equipment reduces unnecessary damage so gear stays playable longer term. Investing in quality storage supplies like breathable bags, anti-mold sprays and padding/stuffing pays off.
Be proactive so you aren’t spending the first week of each season desperately trying to revive musty, warped gear. Keep it clean, dry and correctly stored so equipment maintains quality season after season.
Knowing When to Retire Damaged Pieces for Safety

While many repairs can extend usable life, at a certain point damaged protective gear needs to be retired and replaced for safety.
Helmets with cracks deeper than the shell should be tossed, as they likely can’t withstand high-impact collisions anymore. Check expiration dates and replace expired helmets.
Pads and gloves with holes and tears too large to effectively patch also lose protective abilities, and trying to fix them restricts mobility. Know when to cut losses and invest in new.
Bent cleats alter running and increase injury risk. Don’t play through pain hoping it will improve. Replace cleats regularly as tread wears down.
Warped or cracked sticks also require retirement. Shafts with interior foam exposed absorb less vibration. Heads lose ball control and accuracy when sidewalls split or bubble.
While it’s tempting to milk every last bit of use from gear, safety has to come first. Be objective in assessing damage and deterioration. Gear that has lost structural integrity, cushioning, and reliability needs to be taken out of commission.
A quality repair kit helps minimize waste by resuscitating many common issues. But know equipment lifespan realities. Keeping unfit gear in play WILL eventually lead to injury and poor performance. Retire responsibly – your body and competitiveness will thank you.
With smart maintenance and strategic repairs, gear can serve you well for seasons. But everything reaches an expiration point. Be proactive about assessments and don’t jeopardize your safety with unfit equipment past its prime.
Revitalizing Classic Lacrosse Gear with DIY Solutions
Some of my favorite lacrosse equipment are vintage sticks, pads, and helmets I’ve had for years. While the gear shows some wear, I’ve been able to keep these classics playable with creative repair techniques.
On old wood sticks, I’ve replaced worn mesh and shooting strings to restore great pocket feel. Lots of tape on shafts fixes cracks. I’ve also sanded and re-painted heads to remove dents and restore sheen.
For vintage pads with loose or torn sections, I’ve carefully hand stitched problem areas using strong upholstery thread. I also glue fresh pieces of foam in thinning or compacted zones to replace lost padding.
On old helmets with interior foam degradation, I’ve cut replacement padding to size and shape using an X-Acto knife and adhesive. This revived comfort and safety.
I take care not to alter classic designs by over-patching or incorrectly replacing components. Researching original specs helps in restoration. My repair kit is stocked with tons of odds and ends perfect for getting creative with fixes.
Don’t ditch cool vintage gear just because it’s a bit beat up. With some imagination and elbow grease, revive classics to playable quality again. They look awesome on the field and preserve lacrosse history.
Mixing DIY repairs with retro style brings these gems back to life. Don’t let damaged gear collect dust when a little attention lets it see glory days again. Restore and enjoy vintage equipment for generations to come.