How can you improve your lacrosse shooting accuracy. What are the key techniques for developing a powerful shot. Why is wall ball practice crucial for enhancing shooting skills. How does diversifying your shot repertoire benefit your game.
The Foundation of Great Lacrosse Shooting
Becoming a great lacrosse shooter is essential for any offensive player looking to make a significant impact on the field. While raw power might seem impressive, it’s the combination of accuracy, technique, and consistency that truly sets apart elite shooters. Let’s explore the fundamental aspects of improving your lacrosse shot and transforming into a formidable offensive threat.
Prioritizing Accuracy Over Power
One of the most common mistakes young lacrosse players make is focusing solely on shot power at the expense of accuracy. This approach often leads to poor form and inconsistent results. Instead, players should prioritize accuracy first, gradually building up power as their technique improves.

How can you develop better shooting accuracy?
- Start with slower, controlled shots
- Focus on proper form and follow-through
- Use targets or specific areas of the goal to aim for
- Practice shooting from various angles and distances
By mastering accuracy early on, players create a solid foundation for developing a more powerful shot without sacrificing precision.
Strength Training for Lacrosse Shooters
While fancy equipment and specialized training programs can be beneficial, the core of shooting improvement lies in basic strength and conditioning. A strong, well-conditioned body provides the foundation for generating power and maintaining control throughout the shooting motion.
Essential Exercises for Lacrosse Shooters
- Pull-ups: Strengthen back and arm muscles
- Push-ups: Develop chest and core strength
- Sit-ups and planks: Enhance core stability
- Running: Improve overall endurance and leg strength
- Olympic lifts: Develop total body power (for more advanced athletes)
How often should lacrosse players incorporate strength training into their routine? Aim for strength exercises every other day, allowing for proper recovery between sessions. This consistent approach will gradually build the physical foundation necessary for powerful, controlled shooting.
The Magic of Wall Ball Practice
Wall ball is often touted as the secret weapon for improving overall lacrosse skills, and shooting is no exception. This simple yet effective practice method offers numerous benefits for aspiring sharpshooters.
Why is wall ball so effective for improving shooting skills?
- Forces players to focus on accuracy
- Improves hand-eye coordination
- Develops consistent catching and throwing mechanics
- Allows for high-repetition practice
- Translates directly to on-field shooting scenarios
To maximize the benefits of wall ball practice for shooting, incorporate various release points, angles, and distances into your routine. This diversity will help you adapt to different game situations and improve your overall shooting versatility.
Diversifying Your Shot Arsenal
Great lacrosse shooters are not one-dimensional. They possess a diverse array of shots that allow them to score from various positions and situations on the field. By expanding your shooting repertoire, you become a more unpredictable and dangerous offensive threat.

Key Shot Types to Master
- Time and room shots
- On-the-run shots
- Low-angle shots
- Quick-release shots
- Bounce shots
How can you effectively practice different shot types? Set up drills that simulate game scenarios, varying your starting position, approach angle, and defensive pressure. This approach will help you develop the ability to choose and execute the most appropriate shot for each situation.
The Power of Partner Training
While solo practice is valuable, partnering up with a teammate, coach, or even a parent can significantly enhance your shooting development. Having a training partner allows you to replicate more realistic game scenarios and receive immediate feedback on your technique.
What are the benefits of partner training for lacrosse shooters?
- Simulates game-like passing and catching situations
- Allows for practice of quick-release shots
- Provides opportunity for constructive feedback
- Increases motivation and accountability
- Enables more complex drills and scenarios
When training with a partner, focus on creating drills that mimic common offensive plays and shooting opportunities. This approach will help you develop the skills and decision-making abilities needed to excel in actual game situations.
The Importance of Proper Shooting Technique
While developing power and accuracy is crucial, the foundation of great lacrosse shooting lies in proper technique. One of the most fundamental aspects of good shooting form is the emphasis on overhand shooting.
Why is overhand shooting so important in lacrosse?
- Increases shot accuracy and consistency
- Provides better ball control and spin
- Makes it harder for goalies to read and react to shots
- Reduces the risk of injury from improper mechanics
- Translates well to other lacrosse skills like passing
To develop proper overhand shooting technique, focus on keeping your hands high, leading with your top hand, and following through towards your target. Practice this form consistently, even when shooting under pressure or from unconventional angles.
Utilizing Video Analysis for Shooting Improvement
In today’s technology-driven world, video analysis has become an invaluable tool for athletes looking to refine their skills. Lacrosse shooters can benefit greatly from recording and analyzing their shooting form and technique.

How to Effectively Use Video Analysis
- Record yourself shooting from various angles
- Review footage in slow motion to identify areas for improvement
- Compare your form to that of elite shooters
- Track progress over time by recording regular shooting sessions
- Share videos with coaches or experienced players for feedback
What specific aspects of shooting should you focus on during video analysis? Pay attention to your stance, hand positioning, body rotation, follow-through, and overall fluidity of motion. Look for inconsistencies or deviations from proper form that may be hindering your shooting effectiveness.
Mental Preparation for Shooting Success
While physical skills and technique are crucial, the mental aspect of lacrosse shooting is often overlooked. Developing a strong mental game can significantly impact your shooting performance under pressure.
How can lacrosse players improve their mental approach to shooting?
- Visualize successful shots before and during games
- Practice positive self-talk and confidence-building exercises
- Develop pre-shot routines to maintain focus and consistency
- Learn to manage pressure and anxiety in high-stakes situations
- Study and analyze successful shooters to emulate their mindset
By incorporating mental training into your overall shooting development plan, you’ll be better equipped to perform consistently in both practice and game situations.
Advanced Shooting Drills for Elite Performance
As you progress in your shooting development, incorporating more advanced drills can help push your skills to the next level. These drills should challenge your accuracy, power, and decision-making abilities in game-like scenarios.
Examples of Advanced Shooting Drills
- Rapid-fire shooting: Practice quick releases from various positions
- Moving target drills: Shoot at a swinging or moving target to improve accuracy
- Pressure shooting: Have a defender apply pressure as you shoot
- Combination drills: Incorporate dodging, passing, and shooting in sequence
- Endurance shooting: Maintain accuracy while fatigued
How often should advanced players incorporate these drills into their training? Aim to include at least one or two advanced shooting drills in each practice session, rotating through different challenges to continually improve your skills.
Leveraging Technology for Shooting Improvement
While traditional training methods remain effective, modern technology offers new opportunities for lacrosse players to enhance their shooting skills. From smartphone apps to advanced training equipment, these tools can provide valuable insights and feedback.
What technological tools can benefit lacrosse shooters?
- Shot tracking devices that measure speed and accuracy
- Virtual reality training systems for decision-making practice
- Slow-motion camera apps for detailed form analysis
- Online platforms for sharing and receiving expert feedback
- Wearable sensors that analyze body mechanics during shooting
While these technological aids can be beneficial, it’s important to remember that they should supplement, not replace, traditional practice methods. Use technology as a tool to gain insights and track progress, but continue to focus on fundamental skills and techniques.
Nutrition and Recovery for Optimal Shooting Performance
To maintain consistent shooting performance over time, proper nutrition and recovery are essential. A well-fueled body and adequate rest contribute to better focus, energy levels, and overall shooting effectiveness.
Key Nutrition and Recovery Tips for Lacrosse Shooters
- Consume a balanced diet rich in lean proteins, complex carbohydrates, and healthy fats
- Stay hydrated before, during, and after practice and games
- Incorporate post-workout recovery snacks to replenish energy stores
- Prioritize quality sleep to support muscle recovery and cognitive function
- Use active recovery techniques like stretching and light exercise on rest days
How does proper nutrition and recovery impact shooting performance? Well-nourished and rested athletes typically demonstrate better focus, consistent energy levels, and improved muscle control – all crucial factors in maintaining shooting accuracy and power throughout practices and games.

Adapting Your Shooting Style to Different Positions
While the fundamentals of good shooting technique remain consistent, players in different positions may need to adapt their approach to maximize effectiveness. Understanding how to optimize your shooting based on your role on the field can significantly enhance your offensive impact.
How do shooting techniques vary for different lacrosse positions?
- Attackmen: Focus on quick releases and shooting in tight spaces
- Midfielders: Develop strong on-the-run shooting and time-and-room shots
- Defensive midfielders: Practice transition shooting and capitalizing on fast-break opportunities
- Face-off specialists: Work on quick-stick shots after winning possessions
By tailoring your shooting practice to your specific position and on-field responsibilities, you’ll be better prepared to contribute offensively within your team’s system.
Developing a Personal Shooting Identity
As you progress in your lacrosse journey, it’s important to develop a personal shooting identity that capitalizes on your unique strengths and playstyle. While mastering fundamental techniques is crucial, finding ways to differentiate yourself as a shooter can make you a more valuable offensive threat.

Steps to Develop Your Shooting Identity
- Identify your physical strengths (e.g., power, quickness, accuracy)
- Analyze your playing style and on-field tendencies
- Study and emulate aspects of successful shooters with similar attributes
- Experiment with unique shot variations or release points
- Refine and perfect signature moves or shots that suit your game
How can developing a personal shooting identity benefit your game? By honing a distinctive shooting style, you become less predictable to defenders and goalies, potentially creating more scoring opportunities for yourself and your teammates.
Continuous Improvement: The Key to Long-Term Shooting Success
Becoming a great lacrosse shooter is not a destination, but a continual journey of improvement and refinement. Even the most skilled players at the highest levels of the sport constantly work on enhancing their shooting abilities.
What strategies can players use to ensure ongoing shooting improvement?
- Set specific, measurable goals for shooting performance
- Regularly reassess and adjust training methods
- Seek feedback from coaches, teammates, and opponents
- Stay current with evolving shooting techniques and strategies
- Maintain a growth mindset and embrace challenges as opportunities to improve
By committing to continuous improvement and remaining open to new ideas and techniques, you’ll be well-positioned to develop into an elite lacrosse shooter capable of making a significant impact on the field.
5 Ways To Become A Great Lacrosse Shooter
EDITOR’S NOTE: This piece by Connor Wilson originally entitled ‘5 Ways To Become A Great Lacrosse Shooter’ was published March 23, 2012. It has been reformatted and updated to make sure it brings as much value to the lacrosse community as possible.
If you play offense, you need to be a great lacrosse shooter. That’s just the way it is.
When I played midfield in high school, I could shoot the rock hard, but my accuracy was suspect. REALLY suspect. If the ball consistently traveled within 10 feet of the cage I was “on”. I once shot a ball so hard, so sidearm, and so poorly, that it went onto the highway, which was easily 75 yards away from the field and separated by a line of trees. Even my own teammates were laughing at me. Totally fair and completely embarrassing. Needless to say, when I got to college, my coach put a longstick in my hands as quickly as he could.
But, after graduating, I stuck around to help coach, as an assistant, and somehow I drew the assignment of warming up and working with our goalies. Due to constant heckling from the kids I was coaching, I quickly realized that I had to be a better lacrosse shooter, and that I had better improve quickly! So here is how I made a change in my shooting technique and how YOU can prep to be much better.
These FIVE Tips can help you become a better shooter in only a couple of weeks:
5 Ways To Become A Great Lacrosse Shooter
1)
Forget Power, and Focus on Accuracy
It is extremely hard to learn how to shoot hard, and THEN work on your accuracy. I tried this in high school, and it does NOT work. The form you develop by focusing on power only is almost universally AWFUL. Focus on shooting the right way, and focus on putting the ball where you want it, THEN work your way up the power scale. Without control, pure power is garbage.
2)
Train Simple, Train Hard to be a Better Shooter
So many athletes today think they need to have a personal trainer or be on the cusp of training technology. Bologna. If you want to shoot accurately and hard, you don’t need a trainer. You need a pull up bar and some running shoes. Do pulls ups every other day for your back and arms. Do push ups every other day for your chest and core. Do sit ups or other ab exercises religiously. RUN and work those legs! Great shooters generate control and power with every portion of their body. Be strong, train hard and your shooting will improve. If you are going to hit the gym, focus on Olympic lifts for total body power.
3)
Play Wall Ball
It seems like I always use wall ball as a “way to improve”. This is because it is the SINGLE most important aspect of becoming a good lacrosse player. If you can really pound the ball off the wall, it means you can catch and then move the ball accurately. Shooting is very similar, and the skill sets translate effortlessly. Like I said in point 1, focus on accuracy. When you shoot on a cage, the ball can go anywhere. Who cares? But when you play wall ball, you need to be accurate. It’s a great shooter’s best friend.
4)
Keep Your Shooting Skill Set Diverse
There are guys out there who are pure time and room shooters (Derek DeJoe, Forrest Sonnenfeldt, Kyle Wharton) and there are guys who are better on the run (Mike Kimmel, Kyle Harrison, Jordan Evans) and then there are guys who are great at both (Ryan Brown, Sergio Perkovic, Paul Rabil, Jay Jalbert).
You want to be the guy who is great at both.
Maybe you’ll be better at one, but practice both. Going out and ripping shots all day from 13 yards is a mistake. Take some on run, take some from low angles. Mix it up and be diverse, because you’ll probably have to do that in a game. Don’t be a one-dimensional shooter.
5)
Partner Up For Better Training
I don’t mind seeing a guy out on a field with a bag of balls all by himself. Nothing wrong with that at all. But if you have the chance to partner up when shooting, take it! It is much easier to replicate catching a pass on the run and then shooting, or catching a pass for a time and room shot when you have someone to throw it to you./cdn.vox-cdn.com/uploads/chorus_image/image/63160745/e1R5A3155.0.jpg) This partner can be a parent, coach or teammate. Reliance on a partner should NOT be used as an excuse (e.g. my shooting partner can’t make it so I’m going to play video games instead) but it can definitely help you improve!
This partner can be a parent, coach or teammate. Reliance on a partner should NOT be used as an excuse (e.g. my shooting partner can’t make it so I’m going to play video games instead) but it can definitely help you improve!
I’d mention SHOOTING OVERHAND as a sixth tip, but at this point, you should really know better. Don’t believe me? Shoot Overhand. And Shoot Overhand Under Pressure. There, NOW you should believe me.
For more shooting tips on how to be a better lacrosse shooter, check out this video on our YouTube page with Rob Pannell, Max Seibald and Joe Vitale putting on a shooting demonstration.
Got some shooting tips you’d like to share with everyone? Hit up the comments section!
5 Tips for a Faster Lacrosse Shot – LaxWeekly
Hey everyone it’s Jake with Lax Weekly, and today we are talking all about shooting in lacrosse. Some lacrosse players have clocked in shot speeds of nearly 120 miles per hour, and today I want to make it super easy for you to increase your shot speed.
Today I’m going to tell you 5 things you can do right now to instantly have a faster shot, as well as 3 bonus tips to keep in mind. I’ll also tell you who the best college and pro lacrosse shooters are right now so you can go watch their film. Whether you are a beginner who is just learning how to shoot or an advanced player who is looking for a quick refresher, I think this article is perfect for all offensive lacrosse players.
If you’d prefer to see a video version of this article, check out this video on my YouTube channel:
I highly recommend getting a pen and paper and taking some notes and re-reading the article just to make sure you understand everything.
Tip #1: Hold Your Lacrosse Stick Looser
My first lacrosse shooting tip for you is that you need to hold your stick way looser than you are right now./cdn.vox-cdn.com/uploads/chorus_asset/file/13675938/usa_today_10853773.jpg) Our tendency as lacrosse players is to tense up and grip the stick super tight when you shoot, but in reality, it’s best to do the exact opposite. By holding your stick looser, you’ll be able to put way more velocity on the shot. Let me explain.
Our tendency as lacrosse players is to tense up and grip the stick super tight when you shoot, but in reality, it’s best to do the exact opposite. By holding your stick looser, you’ll be able to put way more velocity on the shot. Let me explain.
A relaxed grip loosens up your wrist joints, and believe it or not, your wrist flexibility is a huge component of how fast you shoot. When you tighten up that grip, your joints get all tight and the range of motion of your shot is limited.
So, next time you go out for a shooting session make it your mission to hold the stick looser and watch your shot speed increase.
Tip #2: Bring Your Hands Further Back
So the second thing you can do to improve your shot is to bring your hands further back, away from your body. It’s gonna be uncomfortable, it’s gonna be hard but i see way too many people try to shoot the ball with their hands in close.
Coaches call this alligator arms, and you want to do everything you can to avoid that. When your hands are back, you can generate way more power on your shot.
Perfect example of how far your hands should be back when you shoot
I think an easy way to make sure you’re doing this is by having your hands far and away from your body enough that you could fit a basketball through your arms. If you always have this much space, that means you’re doing it right.
Tip #3: Strengthen your Core
The third way to increase the speed of your lacrosse shot is by having a stronger core. You might think you use your arms the most to shoot, but it’s actually your core – which includes your abs, back and legs. Most of the power from your shot should come from these muscle groups, and if you’re not training them, you’re missing out on some extra speed to your shot.
Good thing there’s an excellent exercise you can do right now in the comfort of your own home – planks. Planks are a great way to train your core without any weight, and if you’ve never done one, get ready for quite the surprise.
An example of a plank. Credit: Better Health Solutions
I like to keep things simple, so start by seeing if you can do a plank for 20 seconds. Rest for 40 seconds and do another one. Shoot for 10. Once you feel comfortable with that, try 10 with 30 seconds on 30 seconds off and work your way up.
I remember when I started doing planks regularly I felt like a different lacrosse player. I was shooting faster, I was harder to push around, and I just felt more confident. I’m excited to see some of you all implement planks into your game and see what happens!
Tip #4: Use the Right Release Point
The fourth way to increase your shot speed is by making sure you have the right release point, meaning, what angle you hold your stick out when you shoot. If you think about shooting like a clock, 12 o clock would be straight overhand high to low, while 6 o clock would be straight underhand low to low.
This is what a 3/4 release looks like
In my opinion, the best release point is the 3 quarters release, or about 1:30 on a clock.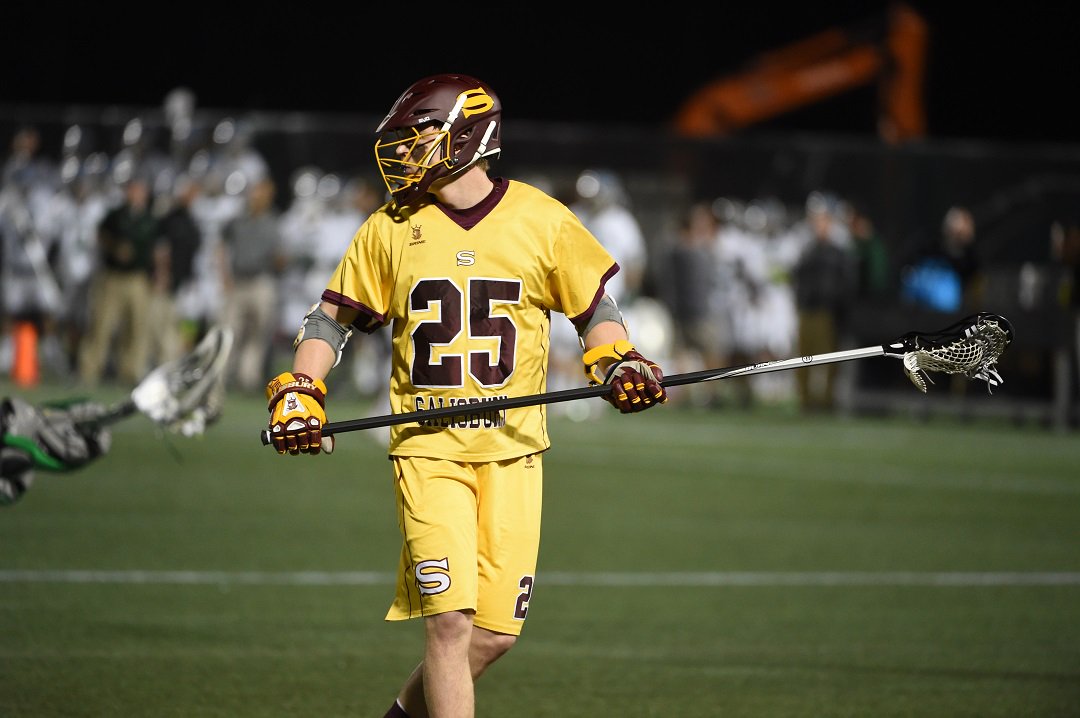 This gives you the best balance of accuracy and power, and most of the great shooters in the game use this release.
Tip #5: Follow Through
And the fifth way to increase your shot speed is by making sure you’re following through when you shoot, meaning that your momentum from the shot should be so much that your back is facing the goal because you’re turned around.
I see a lot of young lacrosse players shoot almost like a basketball shot with the flick of a wrist, but shooting in lacrosse is very different – it’s a full body movement. I remember I listened to a podcast with Paul Rabil, one of the greatest lacrosse shooters of all time, and he said shooting a lacrosse ball is like throwing a heavyweight punch – that’s a lot of effort.
Bonus Tip 1: Think of a lacrosse shot like a baseball or golf swing.
I think there’s a lot we can learn from those two sports when it comes to form. The best baseball players and golfers are able to generate so much power from their core, and we should learn from them so we can do the same.
Sometimes when I’m bored I like to look at slo mo videos of golf and baseball swings and try to break down what they do.
Bonus Tip 2: Everyone’s shooting form is a little different
One shot form might work well for one person and not another person – I think a lot of it comes down to feel. For example, Mac O’Keefe is a lacrosse player from Penn State and is definitely one of the best shooters in the world, and he shoots most of his shots underhand or sidearm. On the other hand there’s a guy like Ryan Brown, also one of the best shooters in the world, and he uses a 3 quarters release. Overall, it can be different for everyone.
Bonus Tip 3: Film yourself while you shoot
Try to start filming yourself shooting. That’s the best way to really see if you’re shooting the right way. And you don’t need anyone else to watch you – all you need is a tripod with a phone attachment which you can find here. And you can use your smartphone’s camera to slow down the footage. So all in all it’s super easy.
So there you go – those are all my tips to help you shoot super fast. Check out the free Lax Weekly email newsletter or the YouTube Channel for more great stuff on how to become a great player.
Increase Your Shot Power, Accuracy and Consistency
Smart Backstop for Lacrosse, in conjunction with professional lacrosse player Martin Bowes, is excited to launch a special Inside Lacrosse series detailing practice tips that have allowed Martin and players he’s trained with to rise to the top. The first installment features Martin’s tips for increasing your shot power, accuracy, and consistency. Check back regularly for more tips on how how to practice smart, and visit www.smartbackstop.com for details on the smartest practice tool of all — the Smart Backstop for Lacrosse.
Momentum:
Let’s consider momentum and how it can affect both the speed AND accuracy of every shot we take. I’d like to focus specifically on our momentum at the point of release and into the follow through. Put simply, we want all of our momentum to be directed toward our target, the cage, or even a teammate for a longer pass, at this specific point in time. I’ll go over this concept for both time and room and on-the-run shots because our momentum is very different leading up to them respectively.
Time & Room:
Let’s start by thinking about our footwork leading into a time & room shot; we catch the ball or create separation with the ball, sometimes crow hop or shuffle, and then step HARD towards our target to initiate our shot. For a righty shooter, we’d be stepping with our left foot. Most athletes have no issues here. Where we can improve is usually on the next step. As you release your shot, what’s your back foot doing? (the right foot in this case). Does it stay planted, step to the right or left, or does it swing around and step directly towards your target? Obviously we want to step towards the target, but to make that happen we should focus less on making sure we take the proper steps, and more on generating a ton of momentum towards our target and it will happen naturally.
On The Run:
Nowhere we are running into our shot, but what direction are we running? Lets consider an example where a shooter is dodging from top center to his right hand. Typically, we won’t be able to run right at the cage because a defender is in front of us. In this case we dodge and start running towards the back right corner of the field (roughly a 45 degree angle). This sets our momentum to the corner of the field by design, and that’s okay, but how does our momentum change as we release our shot and follow through? For a lot of players, it doesn’t — they run towards the back corner, release the shot and continue running on that path. That works sometimes and for certain people they score a lot of goals that way. But what I’ve found is we get a bump in power, accuracy and consistency when we turn our momentum directly to the target for the release and follow through.
‘The Kinematic Sequence’ of a shot:
There is an “order of operations” that takes place throughout our body every time we shoot. First we step, then our hips turn, then shoulders, hands come through, and finally the head of our stick follows through. When these things happen out of order, even with intentions of stinging the corner, we lose power and accuracy on our shot. I compare this to the kinematic sequence often referred to when learning or mastering how to swing a golf club. The sequence is very similar for lacrosse in some ways, but there are far more variations to consider like running in different directions and the type of shot we are taking (overhand, sidearm, underhand, behind the back etc.). For our purposes here, a large focal point within this concept is timing our kinematic sequence so that our hips turn before our shoulders do. A common error for a lacrosse shot is to start turning the shoulders, then step (triggering the hip rotation), and finally following through. In order to maximize our power and efficiency, we want to queue our hip rotation first (by stepping), and then allow our shoulders and hands to come through in that order.
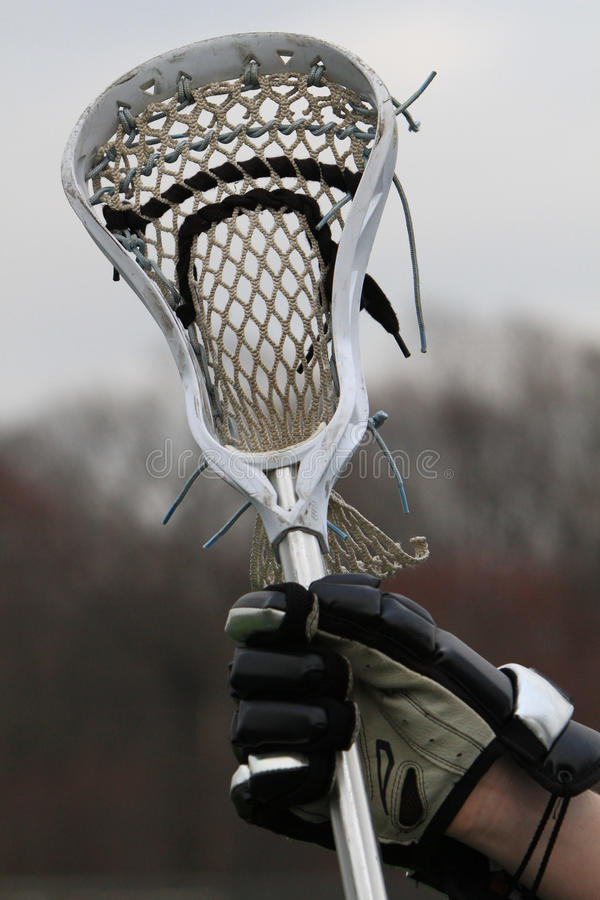 Our legs are the strongest muscles in our body — we should take advantage!
It’s important to note the major role our core muscles play in this sequence. This kinematic sequence doesn’t necessarily always have to start at the same place, because in certain scenarios we are better off shooting as quickly as possible. Example: catching to shoot within 5 yards of the cage. In this case regardless of what our feet are doing, we can use our core muscles as the starting point for the sequence and then upper body from there. This particular shot clearly won’t be as hard as if we got a hip rotation first, but it doesn’t necessarily have to be from that range. Core is the key here. We could still shoot the ball using strictly upper body muscles, but we gain more power and control without adding any time by engaging our core muscles.
Timing the wrist SNAP
All caps because the wrist snap is almost everything when it comes to accuracy. There is also a power component to this. If you strengthen your forearm muscles for a more explosive snap of the wrists, you will shoot harder and quicker. I bring this up from an accuracy standpoint and here’s why: If you were to take an overhand shot, for example, that bounced in front of the cage and stuck underneath the cross bar, can you envision WHEN you snapped your wrists? What about a shot where you wound up the exact same way, but snapped your wrists much earlier (within the same range of motion) than the previous shot?Where would that one go? It would go much higher (assuming this shot is being released overhand). This is because your wrists are your trigger; when you snap them, the ball releases. This is important to remember because all the power generation that we can practice and learn is great, but to throw a ball all we really have to do is snap our wrists.
This concept is something I’ve personally worked on tirelessly to improve my shooting mechanics and consistency with my mentor and coach Chris Marmiani, aka Coach Stache. Coach Stache taught me that understanding that when you snap your wrists will change the release point of your shot is the easy part. To really implement this concept while practicing from one shot to the next, all other aspects of your mechanics must be the same. If you change the way you’re stepping, or where you wind up, where your hands are or how low your getting, etc., then there are other variables affecting the accuracy and precision. In order for the timing of your wrist snap to be the only accuracy adjustor from one shot to the next, EVERYTHING else about your shot has to be the same. To be powerful, accurate and consistent shooters, we need to improve how we generate our force and be cognizant of when to snap our wrists.
Time to Practice! Reps are always more productive when you use a Smart Backstop™! To order yours, visit www.smartbackstop.com and receive $20 Off & Free Shipping with the code ILaugust.
More from Smart Sports Tek
Shooting Mechanics for the Lacrosse Player
by Chelsea Ortega, DPT, SCS, CSCS
>> Telehealth Details
>> Request an Appointment
Let’s talk shot mechanics! A lacrosse shot is an extremely powerful, rotational movement. It requires head-to-toe strength and stability in order to control the power and momentum that goes into a shot. Very few scientific studies have been conducted looking at the motions of lacrosse as shooting mechanics vary widely during play. In the studies that have been conducted, the lacrosse shot is broken down into 3 phases: crank back, acceleration and follow-through. In higher level lacrosse players, we see peak rotational velocities starting from the pelvis, moving to the trunk and then to the arm. This kinematic sequence allows for maximal force production and higher stick and ball speeds.
Physical therapy can help improve your shooting mechanics and your shooting velocity! Here’s how:
1. Proper Range of Motion throughout the Kinetic Chain
The lacrosse shot requires good range of motion throughout the entire body including shoulders, thoracic spine and hips. A physical therapist can help determine if you’re lacking any motion and address it with specific exercises and manual therapy to help you achieve full mobility. The following 2 exercises are used for improving hip and thoracic range of motion and their deficits.
90/90 Hip Stretch w/ Internal Rotation
Adductor Thread the Needle
2. Rotational Core Strengthening
Power in the lacrosse shot comes from the ability to activate the core and bring the trunk forward and over the hips towards the target. Improving your rotational force will allow you to translate your trunk and arms over your hips more quickly to improve velocity of your overall shot. The following 2 exercises can be used to improve rotational core strength.
Standing Chop
Ball Squeeze Rotations
3. Kinetic Chain Movements and Training
The lacrosse shot involves the entire body, from your feet planted on the ground to your arms bringing your stick through. Strengthening the entire kinetic chain through multidimensional exercises will help translate your strength into the movements required for shooting a lacrosse ball. The next 2 exercises can help improve the coordination of your shot and strength throughout the body.
Rotational Resisted Lacrosse Shot
Lateral Hop to Rotational Resisted Lacrosse Shot
4. Lower Extremity Balance
You must have a solid foundation on your feet in order to pull off a full force shot. This requires balance on both your driving leg and your lead leg. Balance exercises can be sport-specific and can integrate the entire kinetic chain as well. See below.
Single Leg Crossbody Reach
Wall Ball Single Leg Balance
Try these exercises out and let us know what you think! Please don’t hesitate to reach out with questions or to schedule an appointment!
Improve Your Lacrosse Shooting Skills With These 3 Tips
There are a number of keys to being successful in lacrosse.
However, one of the most crucial points of all concerns shooting and goal
scoring because, well, in order to win a lax game, a team has to score more
goals than their opponent!
Our GameBreaker Lacrosse Camps are structured in such a way that we have specific periods of time during camp that focus on improving your shooting, but we also mix it into so many other areas of the game. Here are some of the skills our coaches will focus on at all locations across the country, like at our Massachusetts Lacrosse Camps: shooting drills, ground balls, defense (team and individual), fast breaks, dodging, stick skills, triangle offense, clears, face-off and wing play, and man up, man down.
If you’re a field player and you can’t wait until one of our
Lacrosse Camps this summer to start improving your shooting ability, then
you’re in luck! Here are a handful of tips to help get you moving in the right
direction when it comes to putting the ball in the back of the net, courtesy of
Coach Callahan Kent of the Franklin
Road Academy.
Seeing the Goal in Different Levels
A lacrosse goal isn’t all that big, but as a shooter, it’s
important to divide it into high, middle, and low levels, along with using each
of these levels to your advantage when it comes to deception. Giving yourself
the best opportunity to score a goal is to get a goalie on their heels while
you’re making a move. With that in mind, it’s good to focus on faking at a
certain level and then actually shooting toward a different level of the cage.
Mixing Up Your Shots
Every attacker has a one or two types of shots that they
prefer to use more than others, but that doesn’t help with keeping the level of
deception for opposing defensemen and goalies. To be a truly unstoppable force,
you need a bunch of different types of shots in your back pocket that you can
whip out at any particular moment depending on the situation. It’s obviously
tougher for the opposition to know what they should be planning to defend when
an attacker can shoot with power, finesse, to various levels, or by bouncing
the ball.
Following Through Towards Your Target
This seems like a pretty simple tip, but it’s also vitally
important to having consistent success. Following through with your top hand
and having your stick head finishing in the same place you want the shot to end
up will help make this happen.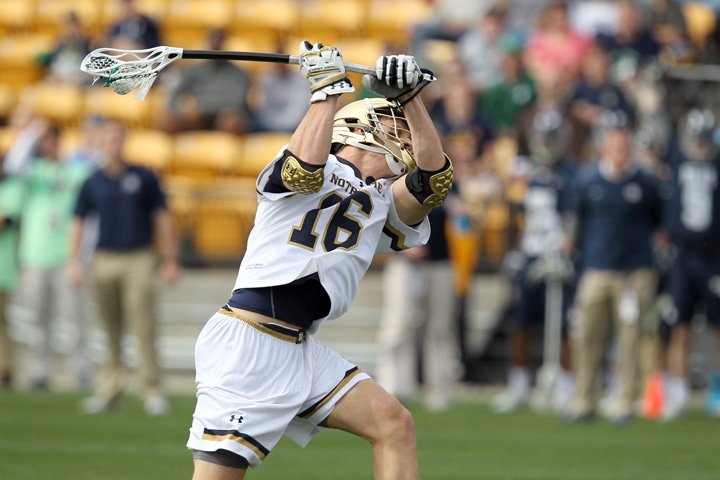 Momentum is also key when it comes to having as
much power as possible on whatever shot you do end up taking. Being off
balanced and not in the best position to fire off a shot toward the goal makes
it very unlikely that you’ll end up celebrating a goal once the shot itself has
landed. Don’t fade away – those shots only work in basketball. Keep yourself
moving full-steam ahead and stay aligned.
Shooting Tips and Key Concepts – Championship Productions Blog
Kelly Amonte Hiller and the powerhouse Northwestern women’s lacrosse program place a major emphasis on practicing basic lacrosse skills every day. It’s not only key to a team’s progress, but it’s especially important for young players so they develop and continue to get better.
One of those fundamental areas that needs repeated practice is shooting. With Hiller as your guide, check out these dynamic shooting tips and learn about the three types of shots that can pay major dividends for your team.
Overview
When it comes to shooting, there are six key areas to focus on and remember: Be sure to keep an angle on the stick, remember to drop the top hand, keep the head of the stick facing your target, have a loose grip but not too loose, wrists should be relaxed and flexible, and arms should always be away from your body. A dynamic player and shooter must also learn to play with both hands. This will help you become a double threat out on the field.
3 Key Things to Remember about Shooting
1) Think about where your target is
Most players think that they should aim for the corners of the net, but we need to add more to it in order to maximize the chances of scoring. When shooting for the corners, there’s a higher margin of error as many shots will go outside of the net. Instead, pick a spot 6-8 inches inside the net. This is still out of the goalie’s range and now the margin of error is still inside the net. Pick a target and drive the ball there. Remember, if you miss the net, you definitely won’t score.
2) Know your opposing goalie
This makes a big difference in terms of where you place your shots. Are they a righty or a lefty? If a righty, it’s best to place shots on the offside hip where the goalie has to carry her stick all the way around to make a tough save. Or consider going offside low. Remember to pick a spot and focus on it. Drive the ball right to it and follow through.
3) Make it count
You may only get one, two or three shots in a game, so make them count. Be deceptive each time that you step up to the net.
3 Types of Shots
1) Inside Shot
An inside shot is difficult because of the limited room available to execute. Plus, there’s added pressure from the defense and goalie. Instead of taking a big torso twist to wind up, take more of a snap shot with just the wrists while keeping the stick close to the body. Sometimes, we recommend that shooters choke up with the bottom hands to provide maximum protection.
Remember that most goalies are taught to step out on these shots. Often, you will see players come around the crease and try to fire it by, but the goalie will make that save 9 out of 10 times. Therefore, with an inside shot, it’s key to remember to make a fake and move the goalie. Then, you can fake high and drive the ball low.
It’s common for players to rush and shoot quickly because of defensive pressure. But be sure to take an extra second to give a quick fake and drive it home. Head fakes and stick fakes will work frequently, but remember to keep the stick between your shoulders and you’ll know the ball will be protected.
2) Outside Shot
With an outside shot, it’s important to have some power, but not too much power or else you’ll lose control. Find that balance to have a controlled shot on net but with enough power to get it by the goalie.
Start with your feet to the side and your arms away from the body. Take a shuffle step, create torque by turning the hips first and then have the arms follow through. Drive the shot down. Your body will often naturally rise up, and so does the goalie. Therefore, drop your shoulders and drive the ball into the corner. If you’re missing the net a lot, check your form and make sure to take some steam off your shots so the ball goes in the net.
3) Shooting on the move
This is probably the easiest shot because deception is built in. But it’s the most difficult to be accurate and get on net. Here, your body movement is naturally deceptive for the goalie. The goalie must move with the shooter to take away the angle of the net. It’s helpful here to throw a stick fake to throw off the goalie’s body movement. Then place the ball on the offside of the body. The faster you move your feet, the faster the goalie must make an adjustment in the net. Here, you are using speed as your deception.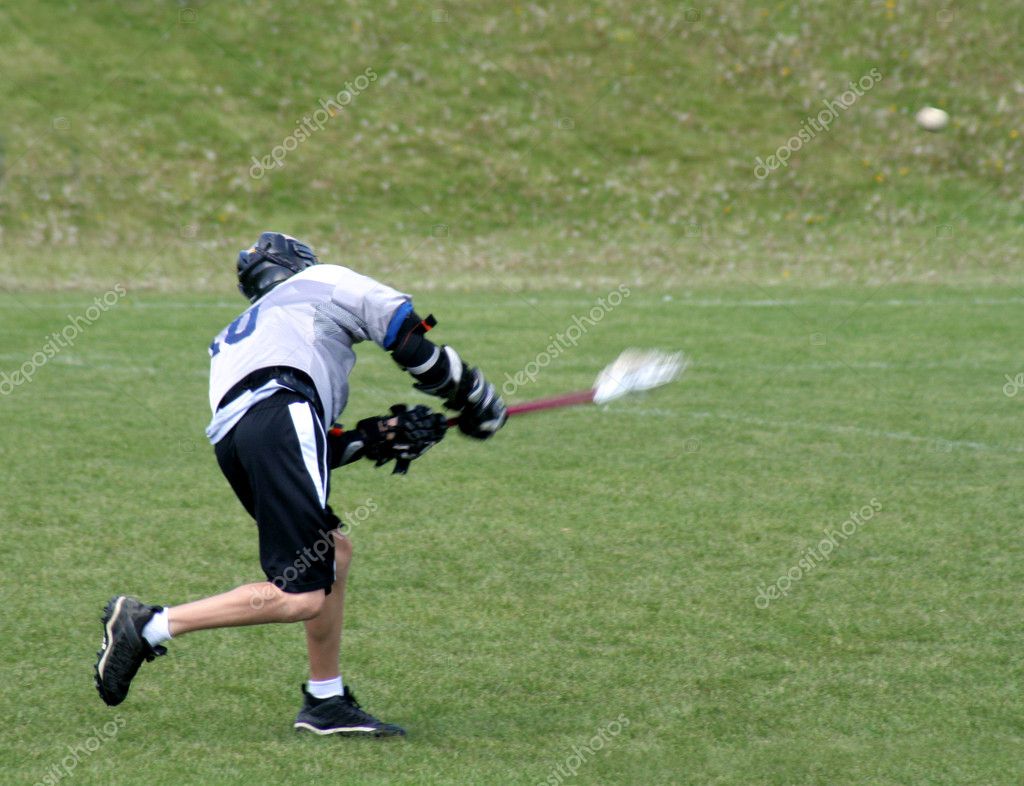
The following shooting tips can be seen on the Championship Productions’ video “Kelly Amonte Hiller’s Skills of a Champion: The Basics.” To check out our exclusive girls’ lacrosse catalog, click here.
Lacrosse Tips – How to Improve Your Accuracy and Stick Skills
In the U.S., there has been a surge of interest and lacrosse is one of the fastest growing sports nationwide. While practice is the best way to build muscle memory and skills in any sport, there are some specific tips for playing lacrosse that will improve your stick skills and your accuracy.
Try Soft Lacrosse
Before spending the time and money on lacrosse equipment only to discover you don’t like the game as much as you’d thought, try what’s known as soft lacrosse. It’s a modified version of the game, but utilizes many of the same skills.
Communicate with Teammates
It’s essential that every member knows what their mark will be and how to handle any situation that they encounter. Be sure everyone knows their position, who the mark is, and always ensure clear calls are made for the ball.
Keeping it Simple
Going for a long glory shot will typically end in an interception. Keep your passes short, sharp, and try to immediately pass it should you scoop up a loose ball. A defender will likely be nearby.
Cradle the Ball
Knowing for sure that the ball is in the stick is a problem, especially for novice players. They typically take their eyes off the field to make sure the ball is still there. Catching the ball in the stick’s pocket is called cradling and it’s a skill that improves with practice.
Gently is the Key Word
One of the biggest mistakes beginners make is being too stiff. When catching the ball, use a gentle touch, let the stick “give,” and address the ball as if you were catching a fresh egg.
Don’t Wait for the Ball
Get in the game and follow the ball – don’t wait for it to come to you. When it comes in your direction, move toward it to reduce the likelihood that an opponent will scoop it up first.
Be Versatile
Being able to catch and throw with either hand is a definite advantage. The opposing team will have more difficulty when it comes to discerning your play.
Know the Four Basic Shots
The underhand long shot, overhand long shot, sidearm long shot and backhand shot are the four basic moves in lacrosse. Practice faking your shots to one location while actually going in the other to avoid transmitting your moves to opponents.
Face the Passer
Facing the passer enables you to always know the ball’s location and its trajectory.
Don’t Face the Receiver
Turning slightly sideways to the receiver keeps your body between a defender and the receiver and doesn’t transmit who will be catching.
Practice Makes Perfect
Use every practice session to hone your skills until they become second nature. It will improve your mastery of the stick and accuracy of your every shot.
Due to the popularity of lacrosse, the need for high-quality equipment is absolutely necessary for practice and gameplay.
We want YOU to have the best product at the best price. We want the game of Lacrosse to be promoted anywhere and everywhere around the globe and hope to be part of its growth.
Every ball we sell is officially approved and meets all the NOCSAE standards. We believe in offering top quality products and unparalleled customer service, therefore, we offer a money-back guarantee for every single ball sold.
90,000 9 tips from Jay Wolf
Hello, dear visitors of the site basketball-training.org.ua ! In this article, we’ll talk about one of the most important basketball elements – the throw. And not even just about the throw, but about how to achieve a significant increase in the accuracy of your throws, while not fundamentally changing their structure, that is, without retraining.
Of course, the correct throw, or, more precisely, the “classic forehead throw” is cool, correct and beautiful.However, it seems to me that the important thing is not how you throw, but how effective these throws are. If your throw is difficult to cover, and it regularly hits the ring, you do not need to change anything drastically: look at the throwing technique Larry Byrd , Michael Jordan , “Magic” Johnson and Ray Allen . They all threw in different ways, which did not prevent them from scoring well; so – draw your own conclusions.
Shooting Practice: Aiming Point
The tips below are those from Jay Wolf – Shooting Improvement Specialist, Summer Camp Organizer, owner of StarShooter , you can read more about him on his website – starshooter.net. Well, now, in fact, tips divided into 2 parts: how to improve throws from close range; how to improve medium and long range throws (3 point throws).
Improving close range and hoop shots
- All shots from a short distance , both to the right and to the left of the basket, must be performed with a rebound from the backboard and an aiming point.
Basically – nothing new, this is where all the training of throws begins in every sports school: they teach to throw from the backboard, while the ball must touch the upper corner of the “square” drawn above the ring.The ball should gently touch this corner (remember about reverse rotation of the ball when thrown) and bounce into the basket. In order to focus the thrower’s attention on the aiming point, you can stick a dollar sign or a sight picture there. Remember: the shield is your best ally, be sure to learn to throw with a bounce from it.
- Practice clean throws from under the hoop and clean throws with a rebound from the backboard from the second “antennae”.
So, we understand. A clean throw is a throw in which the ball is dropped into the basket without touching the ring itself. To achieve such a throw, you need to throw very softly, with a reverse rotation, finishing with a brush. Such throws require the basketball player to focus on maximum concentration and change the trajectory. So, we make 5 throws from under the ring in a row, 3 of which must be clean. If it’s very simple, then add up to 10 throws, trying to do everything cleanly. The throws can be performed with a rebound from the backboard, but the ball must not touch the hoop of the ring itself.Challenge yourself – and pass this test with honor!
Medium and Long Range Shooting Improvements
- Again do clean throws : 5 throws in a row from one point.
By the way, clean throws are a big problem for me: the peculiarity of my throw is that I kind of load the far bow, “striking” which, the ball falls down. But here’s the problem – if the ring is a little higher than usual, then almost all the balls go into the near bow, and while I get used to it, I smear a lot.
This task allows to develop a consistent shot accuracy. Five shots in a row helps to improve accuracy, because the form of the throw, the effort applied, the trajectory – all this must be the same and repeat all the time. Clean shots force the trajectory to “lift”, which is also good: they are more difficult to cover and, as a rule, when the ball touches the ring, the ball will fall into the basket. And one more thing: a high trajectory generates a short bounce, which will be easier for partners to compete for.
- Perform multiple free throws in a row before leaving the pitch (practice).
This move will allow you to repeat all the elements of the throw and develop confidence in your abilities. After the throw, you pick up the ball yourself, return to the free throw line – and then shoot again. It is important to repeat the entire routine that occurs before free throws in the game. In order to recreate the game situation even more realistically, just add jerks to the exercise: threw the ball, dashed after the ball (to the middle of the hall, etc.) returned to the line – threw it.Players can be stimulated by a certain competitive effect: who will spend more time on the execution of 5 (7, 10) penalties in a row – runs, does push-ups, carries a partner to the locker room, etc.
- Perform ,200 free throws daily for for 5 days, or 500 on the first day and 200 for the next 4 days. Target: 25/25 shots, of which 15 will be clean.
Here you need to understand that you will need at least 1 partner who will “bring the kernels”.In America, of course, this is not a problem, there are staff who receive money for this kind of service. But with us – it will be more difficult, you will have to look for like-minded people. According to Jay Wolf, such a series of shots will help hone the form of the throw, the moment of release of the ball and the trajectory; and also – they will increase the accuracy of 3-point shots. Again, according to Wolf, 100 shots will take 15 minutes.
I once tried to throw such a series of free throws. My technique is as follows: I squat a little, then straighten my legs and straighten my body at the same time I straighten my arms.As soon as the body fully unbends (I also stand on my toes), the ball is released. It turns out – like one movement. So, the calves from such rises quickly began to hurt, the hands were tired, and the hand refused to twist the ball. But some results did appear, so the exercise is useful, even very useful.
- Determine the places from which you are most often shooting in the games – and practice the “crown points”, performing at least 5 clean throws in a row from these points.
I already wrote about this in the article about the methods of throwing development ( Shooting training in basketball ), it turned out not quite the same as I imagined it in my head, but still it is very informative and useful.
- Practice the throw on on a correctly marked area , on a correctly marked backboard. The court must have a correctly drawn 3-point line.
And again I will complain a little: why in our country are people doing everything who have no idea how it should be? Why are basketball markings applied by people who have never played basketball and do not know what the endline is? As a result, it runs under the front bow of the ring.And “treshka” – why is it 6 meters on the right, and more than 7 meters on the left? Why?
So – try to choose good sites with correct markings. And one more note: at first it is very difficult to throw with a rebound from the shield, if the shield is streetball, i.e. much smaller than the standard.
- Hold your hands after throwing , as if passing the ball into the basket until it hits there.
Here it should be noted that in his video about the throw, the legendary Pete Maravich (lessons from which will soon appear on the site) recommends not to hold a fixed hand, but rather to wave 2-3 times after the ball , repeating the final stage brush work.
- And once again about the type of throw: is a good throw , this is the one that is not covered by the opponent in 60% of cases and reaches the basket.
The point is that by doing this kind of shooting practice, you can build confidence and improve the stability of your shot. And the belief that now you can score is a very cool thing.
Another little piece of advice from me personally: visualization is a thing that really works (somehow I’ll write about it in the context of developing skills in throwing, dribbling, muscle development, etc.)NS.). So, if, when releasing the ball towards the ring, you mentally imagine how it will go down into the ring, rustling pleasantly with the net, the percentage of realization may increase. The main thing is to believe!
And this is where I end up, I wish you successful training and accurate throws! Good luck, and see you soon on the pages of our site.
How to increase the power of the throw
A throw in hockey is the logical end of any attack. A hockey player who shoots on goal always wants to do it as efficiently as possible, catching the goalkeeper by surprise.Of course, you need to try to deceive the goalkeeper – show a throw in one corner, and throw in another. But accuracy and cunning alone are not enough – the goalkeeper can have time to react to the flight of the puck. This is where the power of the throw is important.
Shooting power is how fast a player can launch the puck with a quick movement of the hands and arms.
But how to train this very power of the throw?
Many people think that everything is only in brushes, but this is far from the case.Of course, strong hands are important, but they are not the only ones involved in shaping the strength of the throw. For a strong throw, you also need to develop muscles of the forearm, chest, and shoulder joint.
Muscle development options.
This is done with ordinary push-ups and pull-ups with different variations: for example, waiting with a narrow or wide grip, pull-ups in various ways. You can upload brushes using a special brush expander. There is also an interesting method: in a broken stick, drill a hole, thread a rope, hang a weight for the beginning of 1 kg on the rope and twist the stick with your brushes in one direction, then in the other direction.Soon the brushes will get stronger – the weight can be increased. Pay attention so that the elbows are tightly pressed against the body.
This is where we come to the most interesting moment in this topic – all of the above may not work if the throwing technique is not set.
Russian hockey player Alexander Ovechkin. Has one of the strongest and most accurate shots in the NHL.
In order for the dreams of throwing like Ovechkin’s to turn into reality, you just need to do the throwing technique.It is worth contacting a competent trainer who will decompose every movement on the shelves, and will control your training process, and only then you can talk about physical activity on the hands and all other muscle groups involved.
Where to train the throwing technique?
You can train your throwing technique both on the ice and in the throwing area, and it is probably worth starting from the throwing area, for the reason that you will be dressed, will be in simple sneakers, and will be able to concentrate exclusively on the throwing technique.Well, when the technique is mastered, you can begin to apply it directly on the ice, while continuing to hone your skills in the shooting zone and work on the physical condition of your body. This holistic approach tends to give the best results, and it gets them pretty quickly. Don’t forget to practice your throwing technique regularly.
Choosing the right club is also very important.
What conclusion can be drawn?
And the conclusion is quite simple – a competent specialist will help you in mastering the technique, your work and perseverance will help to pump the necessary muscles, and then your throw will become a headache for goalkeepers!
Technique for performing precise hockey throws
In this article you will find:
For those who read the article, there is a gift at the end! 🙂
Precision Click Technique
Clicking is the most powerful throw in terms of power, as opposed to wrist, it takes more time to prepare and execute the throw.
More often than others, defenders use the click, this is due to the fact that when positional play in the attacking zone, they have time for such a throw. Attackers usually use a click when entering the attack zone at speed.
Every technical component counts in click technique. The ability to hold the club correctly also plays a role here. Changing the correct grip in the heat of the fight leads to inaccurate throws.
Correct Clicking:
- The lower the player sits when clicking, the wider the arms are from each other, but do not lean too far towards the puck.
- The lower arm is always straightened and is in the lock when clicked, this makes it possible to put pressure on the stick and use its flex.
- The lower arm rises slightly above the shoulder on the swing, and the arm extends slightly forward about 140 degrees from the ribcage line. The hip is pivoted towards the throw, the knee and ankle in the lock.
In order for the puck to rush on the ice, you need to use the hook of the stick as a hold-down at the moment of impact.To lift the puck slightly in flight, you need to click without pressing the hook.
Errors:
- Incorrect hand position when gripping the club.
- The lower arm is too low or high.
- The lower arm is bent at the elbow, the elbow is not in the lock at the beginning, execution and completion of the throw.
- Swing from behind the ear, the player raises the club high and spends a lot of time on the throw. The thigh does not turn towards the throw.
Important:
Beginner players try to just hit the puck so that it flies high. This is the misconception of effective hitting; unexpectedly low and strong shots are much more dangerous for goalkeepers. The effectiveness of the throw in his one hundred percent hit on target.
Wrist Shot Technique
A wrist shot is a preparation roll that the player spends the least amount of time performing.
The opponent has little time to block the shot, and the goalkeeper has little time to react and catch the puck. The wrist throw can be performed with the right or left foot, the player has a split second to make a decision and throw. And so it doesn’t matter which foot the hockey player rolls on. There is a moment – you need to throw.
Hand throw is an excellent technique that can diversify the player’s attacking actions and bring an element of surprise to the defending team.
Wrist Throw Technique
Correct execution of the wrist throw:
- The lower arm from the upper arm is located approximately at the distance of the player’s forearm length.
- The upper hand must be in the pocket area, then the lower hand will be positioned correctly and then the player will be able to 100% use the opportunity of a modern club.
- At the moment of the throw, the upper hand goes forward and up and then to the shoulder, and the lower hand presses on the stick.
- After the puck flew off the hook, there is no point in continuing to move forward, there is no point in continuing to move the lower arm forward, the stick must be quickly lowered onto the ice and started to finish.
Errors:
- Incorrect hand position when gripping the club.
- The lower arm is too low or high.
- Wrong hand position during shot preparation, the player takes the puck far away from the body to accelerate, he has to reach for it and this does not give his hands the opportunity to use the flex stick.
- Incorrect work of the hands during the execution of the throw, the upper hand remains at the hockey player’s body, and the lower one goes far forward and up.
Advice:
Try to shoot with the wrist at the goal when the hook of the stick is not visible to the goalkeeper. Without seeing the moment of the throw, the goalkeeper is practically unable to react to the wrist throw.
Mastery of wrist throws is a formidable weapon not only for goalkeepers.Hidden passes due to such a technique are practically invisible to the players of the opposing team.
Output:
Execution of throws in hockey – the main and final stage of the attack. Every player on the ice field should have good throws. The secret to the success of performing clicks and wrist throws is in long, methodical, exhausting workouts that eventually bring the throws to automaticity.
The technical correctness of the execution of one or another throw in conjunction with separate training of throws leads to an unconsciously correct and accurate implementation.