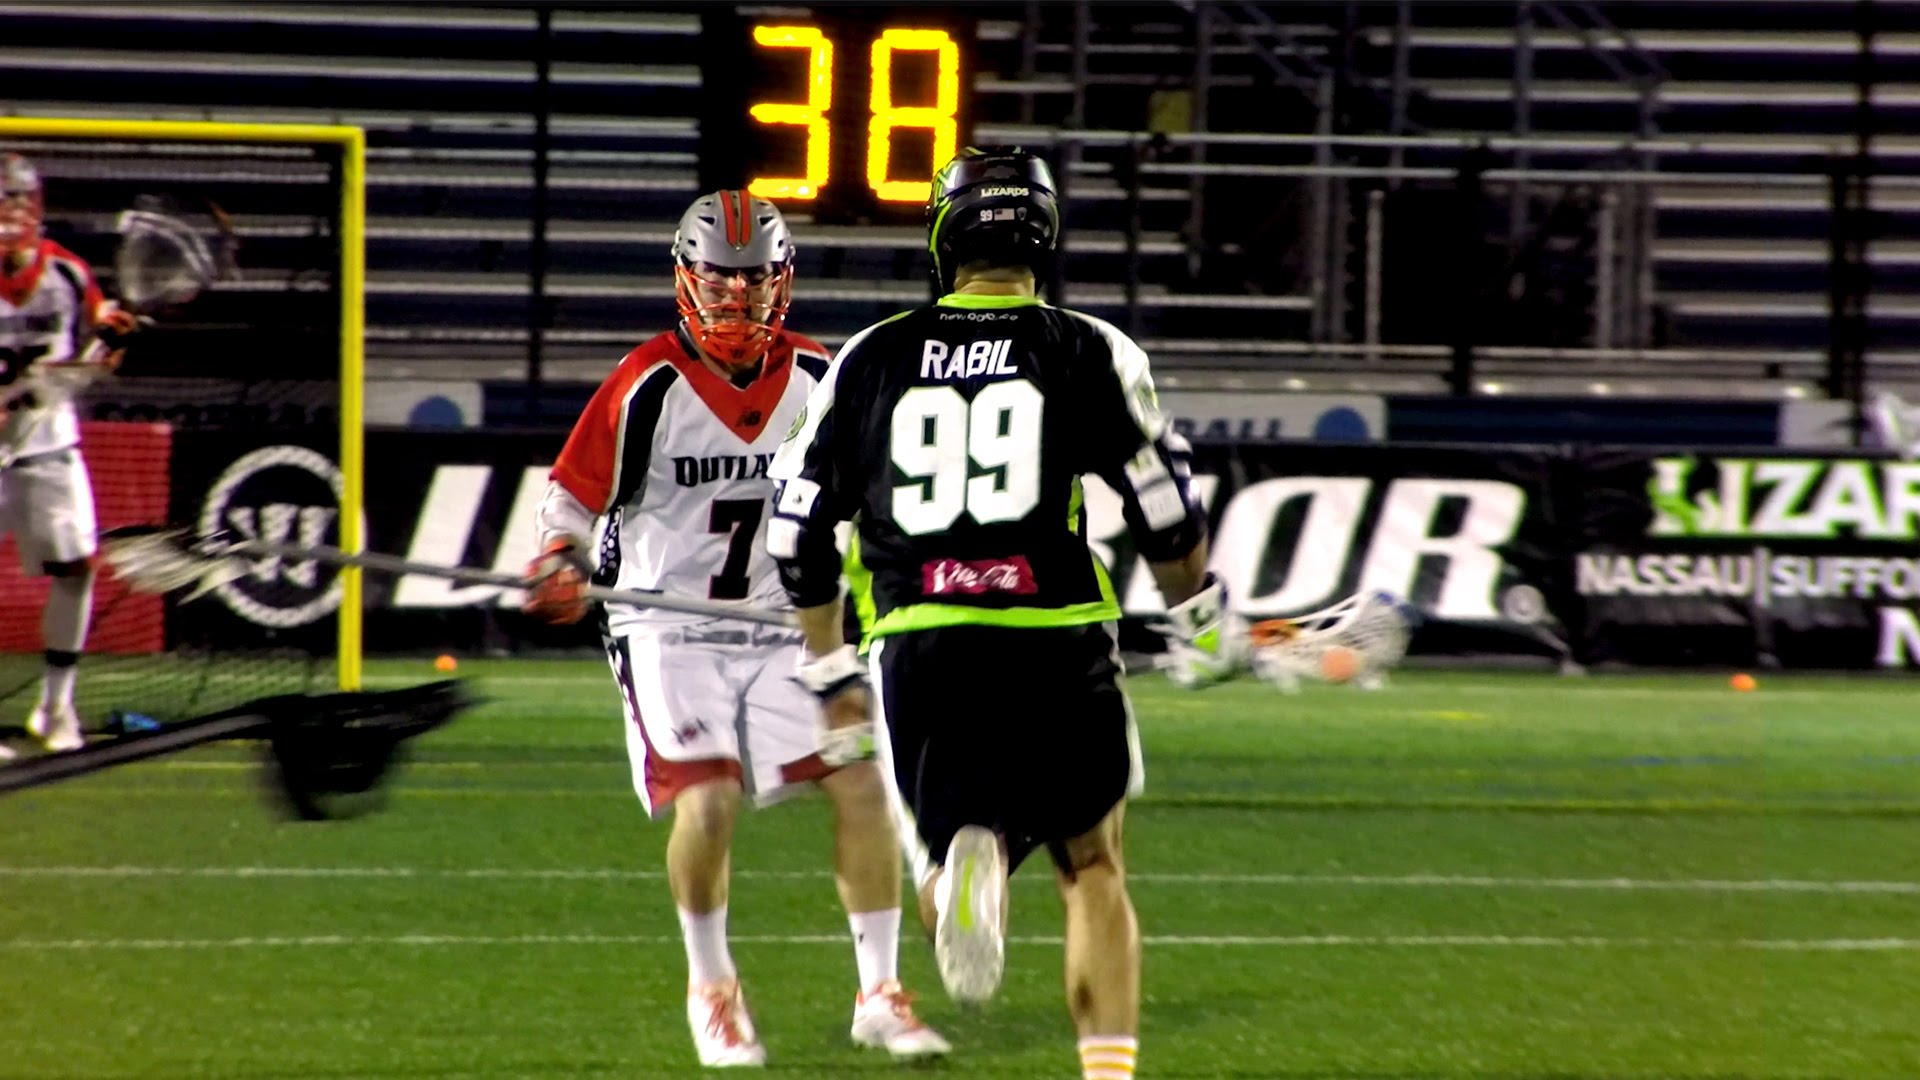
How can lacrosse players improve their shooting velocity and accuracy. What are the key components of an effective lacrosse shot. Why is proper shooting technique crucial for success in lacrosse. How does Paul Rabil exemplify elite shooting mechanics.
Understanding the Importance of Lacrosse Shot Mechanics
Lacrosse is a sport that demands precision, power, and finesse, especially when it comes to shooting. Many youth and high school players often overlook the critical aspect of perfecting their shooting technique and mechanics. This oversight can significantly hinder their ability to score goals effectively and consistently.
Shooting a lacrosse ball accurately at high speed, while running full tilt towards the goal with a defender in hot pursuit, is one of the most challenging skills in sports. It requires a combination of athleticism, technique, and mental fortitude that can only be developed through dedicated practice and a deep understanding of shot mechanics.

The Four Phases of a Lacrosse Shot
To truly master the art of lacrosse shooting, players must understand and perfect the four distinct phases that comprise a complete shot:
- Approach
- Crank Back (Wind-up)
- Stick Acceleration
- Follow Through
Each of these phases plays a crucial role in generating power, maintaining accuracy, and ensuring consistency in your shots. Let’s break down each phase in detail:
Phase 1: Approach
The approach sets the foundation for a successful shot. During this phase, the player takes several steps towards the goal with the intent to shoot. The speed and number of steps can vary depending on the situation and the player’s style. This phase concludes when the drive leg (the leg that propels the player forward) makes contact with the ground.
Phase 2: Crank Back (Wind-up)
The crank back phase is critical for generating power in your shot. It begins when the drive leg touches the ground and ends when the lead leg makes contact. This phase involves preparatory movements that set up the acceleration of the stick. A key element here is getting your hands away from your body and rotating them back to create the necessary power for a fast shot.

Phase 3: Stick Acceleration
This phase is brief but incredibly dynamic. It starts when the lead leg hits the ground and concludes with the release of the ball. The rapid acceleration of the stick during this phase is what ultimately determines the velocity of your shot.
Phase 4: Follow Through
The follow-through begins immediately after the ball leaves the stick and ends when the trunk rotation stops. A proper follow-through is essential for accuracy and can help prevent injuries by allowing for a smooth deceleration of your body’s motion.
Analyzing Paul Rabil’s Shooting Technique
Paul Rabil, widely regarded as one of the greatest lacrosse players of all time, exemplifies perfect shooting mechanics. By studying his technique, we can gain valuable insights into what makes an elite lacrosse shot.
Hand Positioning and Body Tension
One of the most notable aspects of Rabil’s shot is how he reaches his hands back and up as far as possible while simultaneously moving his hips toward the target. This creates a push/pull effect that generates tremendous tension and, consequently, shot speed. The principle at work here is that the further an object is from its axis of rotation, the faster its linear speed.

Planting the Lead Foot
Another crucial element of Rabil’s technique is how he firmly plants his lead foot into the ground. This action prevents the shooter from falling forward as they throw their back hip at the target and complete the shot. Many high school players overlook this step, but it’s arguably the most important for generating power and maintaining balance.
The Power Source: Ground Force Generation
A common misconception among young players is that shot power comes solely from upper body strength. In reality, the true source of power in a lacrosse shot is the ground. By driving the lead foot forcefully into the turf, a player can convert linear momentum into rotational momentum through friction against the ground.
The intensity with which a player “screws” their foot into the ground directly correlates with their maximum shot velocity. A softer plant will result in lower shot speed and potentially cause the shooter to fall forward, compromising accuracy and balance.
Common Shooting Mistakes to Avoid
When observing junior high or high school lacrosse games, you’ll often notice players making two primary mistakes in their shooting technique:
- Failing to get their hands far enough away from their body during the wind-up phase
- Falling forward after the shot due to insufficient force in planting the lead leg
These errors significantly reduce shot power and accuracy, limiting a player’s effectiveness on the field. Recognizing and correcting these issues is crucial for any player looking to improve their shooting skills.
Improving Your Lacrosse Shot: The Medicine Ball Solution
While proper technique is fundamental, tools and drills can help players develop the strength and muscle memory needed for powerful, accurate shots. One particularly effective tool is the medicine ball.
Medicine ball exercises can help players develop the core strength and rotational power necessary for explosive lacrosse shots. Some beneficial exercises include:
- Rotational throws against a wall
- Overhead slams
- Russian twists
- Woodchoppers
These exercises mimic the motions involved in a lacrosse shot while adding resistance, helping to build the specific strength and coordination required for powerful shooting.
Incorporating Shot Practice into Your Training Routine
To truly master the art of lacrosse shooting, consistent practice is key. Here are some tips for incorporating shot practice into your training routine:
- Start with stationary shots to perfect your form
- Gradually introduce movement, progressing to shots on the run
- Use a variety of shooting drills to simulate game situations
- Film yourself shooting and analyze your technique
- Practice with both hands to become a more versatile shooter
Remember, quality repetitions are more important than quantity. Focus on executing each shot with proper technique rather than simply taking as many shots as possible.
The Mental Aspect of Shooting in Lacrosse
While physical technique is crucial, the mental aspect of shooting in lacrosse should not be overlooked. Confidence, focus, and decision-making all play significant roles in a player’s shooting performance.
To improve the mental side of your shooting game:
- Visualize successful shots before and during practice
- Develop a pre-shot routine to center yourself
- Practice under pressure by adding time constraints or competition to your drills
- Learn to quickly read and react to defensive positioning
- Cultivate a positive mindset and learn from missed shots rather than dwelling on them
By combining proper physical technique with strong mental preparation, you’ll be well on your way to becoming a formidable shooter in lacrosse.
Adapting Your Shot for Different Game Situations
While mastering the fundamentals of shooting is essential, top lacrosse players also know how to adapt their shots for various game situations. Different scenarios may call for adjustments in power, release point, or even shot type.
Quick-Stick Shots
Quick-stick shots involve catching and shooting the ball in one fluid motion. This technique is crucial for capitalizing on fast-break opportunities or finishing in tight spaces near the goal. To improve your quick-stick shooting:
- Practice proper hand positioning for a quick release
- Work on your hand-eye coordination
- Develop a feel for the right amount of power to use in different situations
Time and Room Shots
When you have more time and space, you can set up for a more powerful and accurate shot. To maximize these opportunities:
- Focus on getting your hands as far back as possible during the wind-up
- Use the extra time to properly plant your feet and generate maximum power
- Practice aiming for specific spots on the goal
Shooting Under Pressure
In game situations, you’ll often need to shoot while under defensive pressure. To improve your ability to shoot effectively under these conditions:
- Practice shooting with a defender closing in on you
- Work on quick releases and different release points
- Develop your ability to shoot accurately while off-balance
By mastering these different types of shots, you’ll become a more versatile and dangerous offensive threat on the lacrosse field.
The Role of Equipment in Shooting Performance
While technique is paramount, the equipment you use can also impact your shooting performance. Here are some factors to consider:
Stick Selection
The right stick can make a significant difference in your shooting. Consider these factors when choosing a stick:
- Shaft material (carbon fiber, aluminum, etc.)
- Shaft flex
- Head shape and stringing
Experiment with different setups to find what works best for your shooting style.
Pocket Depth and Stringing
The depth and stringing of your pocket can affect ball control and release. A deeper pocket may offer more hold and power, while a shallower pocket can provide a quicker release. Find the balance that suits your playing style and position.
Ball Type
Different types of lacrosse balls can have varying weights and surface textures. While regulation games use standard balls, practicing with slightly heavier balls can help build strength and improve your shot speed with regular balls.
Remember, while equipment can enhance your performance, it’s no substitute for proper technique and consistent practice.
Measuring and Tracking Your Shooting Progress
To truly improve your shooting, it’s important to measure and track your progress over time. Here are some ways to quantify your shooting performance:
Shot Speed
Use a radar gun to measure your shot speed. Keep a log of your speeds over time to track improvement. Can you consistently shoot over 70 mph? 80 mph? Set goals and work towards them.
Accuracy
Set up targets in the goal and track your hit percentage. You can use hanging targets or simply aim for specific areas of the net. Record your accuracy rates for different types of shots and distances.
Consistency
Measure how many shots out of 10 or 20 meet your speed and accuracy goals. Consistency is key in game situations, so aim to improve your percentage of quality shots over time.
Video Analysis
Regularly film your shooting sessions and analyze your technique. Look for improvements in your form and identify areas that still need work.
By tracking these metrics, you’ll have concrete data to guide your training and motivate you to continue improving.
Applying Shooting Skills in Game Situations
Ultimately, the goal of improving your shot is to become a more effective scorer in games. Here are some tips for applying your shooting skills in live play:
Shot Selection
Learn to recognize high-percentage shooting opportunities. Consider factors like:
- Defensive positioning
- Goalie positioning
- Your location on the field
- The game situation (score, time remaining, etc.)
Off-Ball Movement
Great shooters know how to get open for shots. Work on your off-ball movement to create shooting opportunities for yourself and your teammates.
Quick Decision Making
In a fast-paced game, you often only have a split second to decide whether to shoot or pass. Practice quick decision-making in your drills to improve your on-field performance.
Shooting Under Fatigue
Games are physically demanding, and you’ll often need to shoot when you’re tired. Incorporate conditioning into your shooting drills to practice maintaining proper form and accuracy when fatigued.
By focusing on these aspects, you’ll be better equipped to translate your shooting skills from practice to game situations, ultimately becoming a more dangerous offensive threat on the lacrosse field.
How To Add 10 MPH to Your Lacrosse Shot
Editor’s Note: This article, authored by Sean Kelly and originally titled, ‘How to Add 10 MPH to Your Lacrosse Shot’ was originally published on February 25, 2015 at 12:53 p.m. A former two-sport DI athlete at Fairfield University, Kelly has dedicated his life to building better lacrosse athletes, on and off of the field. Sean contributes regularly from his state-of-the-art Sports and Mental Preparation Facility in New Jersey. Take it from here, Sean!
Part 1: The Problem
Here’s what you need to know:
Focusing and perfecting technique and proper shooting mechanics is often overlooked by youth and high school lacrosse players.
There are 4 components of a lacrosse shot that need to come together in order for a shooter to maximize his velocity, accuracy, and consistency.
Mastering the Art of the Lacrosse Shot
Shooting a lacrosse ball accurately, at a high speed, while running full speed toward the goal with a strong, fast, angry defenseman bearing down on you is one of the more difficult things to do in all of sports.
Shooting is a skill. It is an art form that needs to be studied in order to be mastered. I feel that the reason that many high school players struggle with velocity, accuracy, and consistency in their shot is that they do not spend enough time mastering the mechanics.
If you cannot take a set shot without your form breaking down then there is no reason that you should be progressing to shooting on the run or in live game situations.
4 Components of a Lacrosse Shot
Let’s go over the components of a lacrosse shot step by step.
Phase 1 – Approach
During this stage, the player is taking several steps advancing towards the goal with the intent to shoot. The speed of the approach and the number of steps taken will vary between player and situations.
This phase ends when the drive leg (the leg that is planted on the ground pushing the player forward toward the goal; when shooting right handed the drive leg is the right leg) contacts the ground.
Phase 2 – Crank Back (Wind-up)
This phase begins when the drive leg touches the ground and ends when the lead leg hits the ground. It consists of any preparatory movement that proceeds accelerating the stick with the intent of releasing the ball towards the goal.
One of the most important components of a proper lacrosse shot is the ability of the player to get his hands away from his body and rotate them back to create enough power to shoot fast. Many players struggle with this concept.
Phase 3 – Stick Acceleration
The duration of this phase is very short and dynamic. It begins when lead leg hits the ground and ends with the ball’s release.
Phase 4 – Follow Through
Once the ball has left the stick Phase 4 begins and it comes to an end when trunk rotation has been terminated after the shot.
Interpreting Rabil’s Shot
If you look at this picture of Paul Rabil what do you notice?
He is reaching his hands back and up as far as he can go while simultaneously moving his hips toward his target.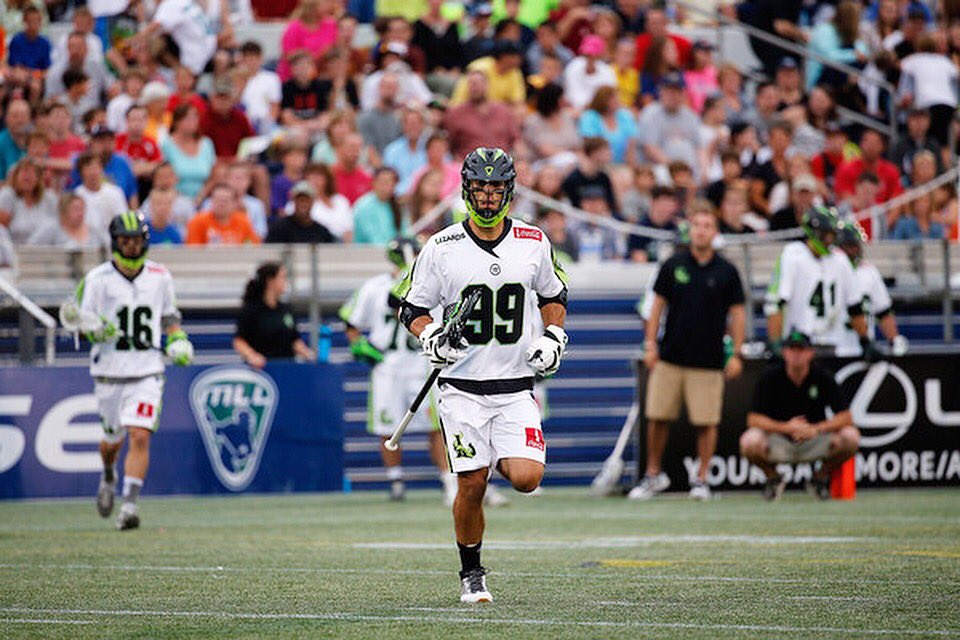
This push/pull effect causes tension that creates the speed behind his shot. The further an object is from its axis of rotation, the faster its linear speed.
What else do you notice while looking at these pictures of Paul Rabil? He is planting his lead foot hard into the ground.
This will prevent the shooter from falling forward as he throws his back hip at the target and finishes his shot. This occurs in Phase 3.
I feel like this is the most ignored step when it comes to high school lacrosse players and it is probably the most important.
Where is the power generated? The ground!
To produce more power, you must generate force into the ground. When Rabil drives his lead foot into the turf, friction against the ground then allows him to convert his linear momentum into rotational momentum.
The softer we screw our foot into the ground, the lower our max velocity is going to be.
If you go to your local junior high or high school game, you will see a lot of shots that look very different from the ones above.
The most common mistakes made are shooters not getting their hands far enough away from their body and falling forward after the shot because they are not screwing their lead leg into the ground hard enough.
In Part 2, I will provide you with what we have found at SKPC to be the best solution to this problem; the medicine ball.
Goalie Tips for Saving Shots on the Run
As a lacrosse goalie we need to be adequately prepared to save all types of shots including shots on the run, aka alley dodges.
These are pretty common shots and I’m actually surprised it’s taken this long for someone to ask me a question regarding saving shooter’s shots off of the dodge and on the run.
Thank you for the email and the tips. I love reading your posts and tips. I’m a rising senior at Faith Lutheran High school in Las Vegas, Nevada and the biggest challenge for me is on the run shots, I just can’t really tell where the shots are going.
So when the ball carrier starts top center and dodges down the alley firing a shot on the run, what should be our approach as a goalie to make that save with the highest probability possible?
In this post, I’ll share my tips for saving shots on the run.
Be Set for the Shot
By far the biggest problem I see for goalies – when it comes to defending shots on the run – is that they are not set in their stance when the shot is fired.
This is a challenge, not just for shots on the run, but for all shot types. We have to ensure we are set in our ready stance in order to give us a higher probability of making the save.
The complexity with shots on the run is that since the shooter is moving we need to move on our goalie arc as well. Often times when the shooter releases the shot, the goalie is still in the process of moving and not set in that perfect lacrosse goalie stance.
A tactic we can use to put ourselves in better position to make the save is simply turn our hips a little to face the shooter. This allows us to be in a better position on the arc without actually moving.
Of course, when the alley dodger moves sufficiently we would need to move to the next point on our arc but the hip moving method allows you to be in better position without taking those little steps along the arc that completely prohibit “being set”.
One important point in particular for shots on the run is making sure you stay square to the shooter. Make sure your toes are pointing at the shooter and that the shooter is between your toes.
As I said, it’s harder to get set in your stance for a shot on the run because it requires moving on the arc.
So you really need to practice short quick bursts when you move on the arc. And always land in the next spot in your perfect stance, ready to make a save.
Remember that for the shooter, shooting on the run is harder. They won’t be able to get as much velocity and accuracy on the shots.
So if we keep your movements on the arc short and precise and get set before the shot is released, we’ll have a great chance to save it.
Trail the Shooter By A Step
As a shooter dodges from top center down the alley, a common goalie problem is to move on the arc too soon and too far. Thus the goalie ends up out of position giving the shooter too much open goal to aim for.
As a shooter alley dodges from top center, our position needs to be like the example on the right, however many goalies find themselves moving too far on the arc like the left position.
A perfect spot on the arc splits the goal from the shooter’s perspective. Give him two spots to shoot at. Otherwise, you’re baiting the shooter (perhaps unknowingly).
Thus I teach goalies to trail the shooter by a step. As the shooter passes into the next quadrant which necessitates a move on the arc, wait just one extra step before moving.
As a ballcarrier dodges from sector 3 down the alley into sector 4. Wait just an extra step before moving on your arc.
If I’m moving on the arc to keep up with a dodger running down the left-handed alley (3 to 4), I don’t step toward the pipe until he crosses my right foot (which is closest to the pipe).
This will help ensure we end up in the right place on the arc and don’t give the shooter an unknowingly large area of the goal to aim for.
Consider a Flat Arc
If you’re consistently having trouble saving shots on the run, you may consider adopting a flat arc.
A flat arc is one where the goalie sets up deeper in the goal. Sometimes almost with their heels on the goal line.
The flat arc comes with its set of disadvantages but it also comes with some advantages – primarily less movement.
Moving from spot 3 to spot 4 (referencing the diagram above) is way easier in the flat arc as there is less movement required. Really you just move your feet a tiny bit and square up the shooter.
The result is that goalies playing a flat arc will often be in better position during alley dodges than the goalies who a higher 5-point arc.
So it’s something to consider if you’re consistently getting beat by alley dodges.
Practice Shots on the Run
For goalies wondering how to get better at saving shots on the run, in addition to following the tips above, my final answer is to practice saving shots on the run.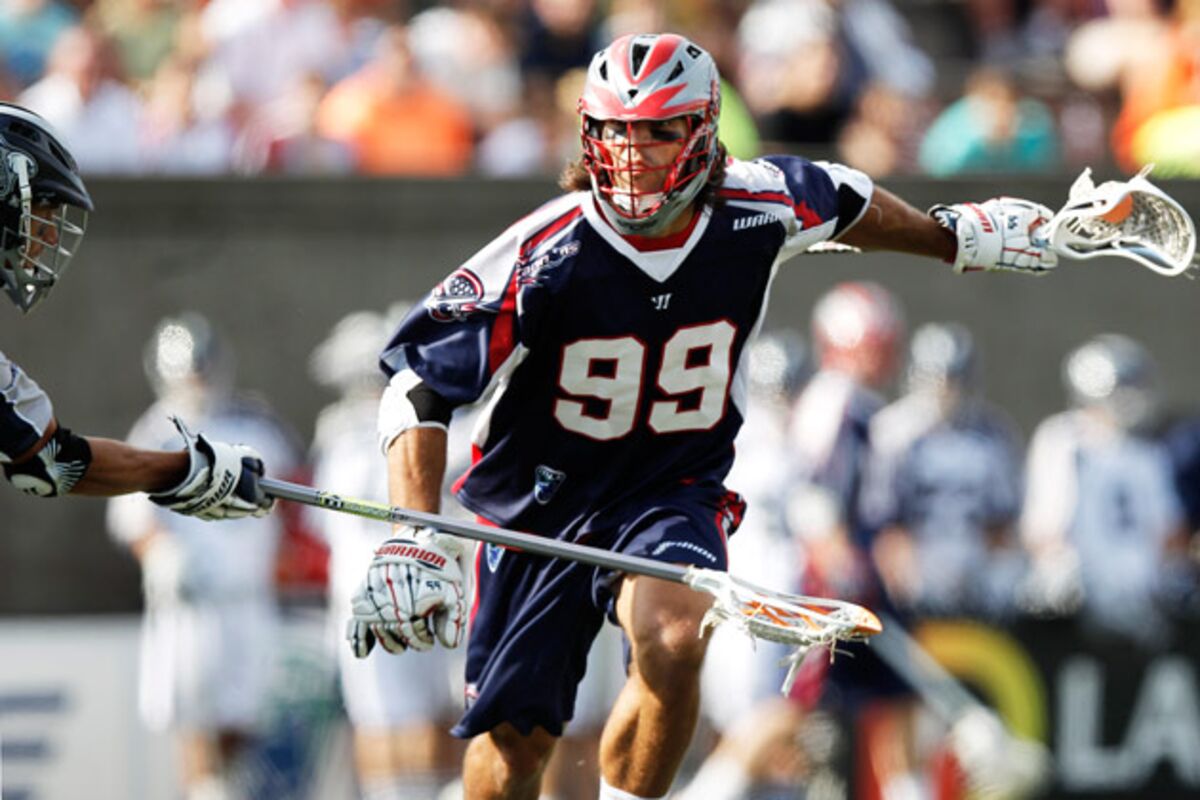
As a goalie coach, when warming up a goalie or training a goalie in practice, be sure to shoot shots on the run.
It’s a different save type. You still need to understand the basics of making a save but saving a shot on an alley dodge is more about being in the right place on the arc and being set in a great lacrosse goalie stance.
There are tons of drills that involve shooters letting it fly while on the run. So be sure to incorporate your goalies into the action so they see their fair share of shots on the run.
Read the Shooter’s Body Language
Regarding the last part of the issue the goalie referenced in the intro: “I can’t really tell where the shot is going”.
If the shooter is outside of 8 yards, there is no need to anticipate or guess.
Just focus on picking up the ball in the shooter’s stick and seeing the shot as soon as possible. Then make the right save movement to execute the save.
If the shooter is inside of 8 yards it gets a little trickier. Since this gives us goalies way less time to react, we really need to read the shooter in order to increase the probability of making the save.
The shooter’s shoulders will give away a lot of information. Especially on shots on the run.
If they’re angled downwards at the time of the shot release, we can be reasonably sure the shot is going low.
And vice versa, if the shoulders are angled slightly upwards or even parallel to the ground, we can look for that shot to be waist and up.
Sure, there are shooters who can fake body language signals to fool the goalie but for shots under 8 yards we must read the signals we’re given. If a shooter fakes the body language of a low shot then sticks it top shelf from inside 8 yards – you know what, they deserve that goal. Move onto the next one.
Reading the shooter’s body language for shots inside of 8 yards will help the goalie get an edge and tell with more certainty where the shot is going.
Videos to Improve Shots on the Run Save
MLL goalie Brian Phipps put together a great video with tips on saving shots on the run:
youtube.com/embed/mlBwnxPq-7s” frameborder=”0″ allowfullscreen=”allowfullscreen”/>
Scott Rodgers also has a great instructional video about picking up a shot on the run:
Here is Tim Troutner from the PLL Redwoods breaking down his approach for saving alley dodge shots:
Finally it also helps lacrosse goalies when they know what their offensive opponent is trying to do. Check out this video from Paul Rabil where he gives tips for shooting on the run:
Conclusion
Saving shots on the run is something that all lacrosse goalies need in their repertoire.
It’s a common shot type. Luckily for us goalies, it’s harder to get velocity and accuracy on a shot on the run. So we really need to ensure we’re set up in great stance on the right place on the arc to limit what a shooter sees.
A benefit of the flat arc is less movement so if you’re consistently getting beat on alley dodges shots consider trying that.
Finally, if you’re struggling making saves on shots the run, practice, practice, practice until they’re no longer a problem.
Until next time! Coach Damon
Anyone have any other tips for saving shots on the run? Would love to hear about them in the comments down below.
Tips for Shooting on the Run
Shooting on the Run
tips from Mark Millon, Jay Jalbert and others
Mechanics
“I remember when I first started to force myself to do it lefty, it was just a really awkward thing. You’re running, and you have to keep your whole upper body still, and still have torque,” Jalbert says. “And I remember just fighting through that. It was a really difficult thing.”
Remember the two Ts: torso and torque.
| Paul Rabil – one of the best ever shooting on the run |
As opposed to a stationary shot, in which you can plant your feet and release it head-on, shooting on the run requires less of your legs to generate shot power. Most of it will come from your arms and midsection. Your legs, however, do generate the momentum, which is then converted by your upper body into shot power.
Approaching the cage as a righty, you should line up your shot four steps in advance. Jalbert calls it, simply, a run dodge. Draw your defender on your left hip while sweeping right. Take your first three steps down the alley — left, right, left — to get him there.
Then, on your fourth step, your right foot steps over your release point.
Allow your feet about a millisecond delay for your upper body to initiate shooting motion. Then whip your torso in a right-to-left motion toward the cage, and follow through with your arms and wrists as you would naturally.
(Approaching as a lefty, use the reverse footwork.)
Hand Position and Arm Angle
Before that fourth step, your hands should already be in a position to shoot.
As with any shot, your top hand should not be too close to the throat of the stick, because you will wind up pushing the ball.
But more so with shooting on the run, your top hand should not be too low, either. A lot of the whip is already generated by the torso-torque mechanic. Positioning your hands too low on the stick not only leaves you susceptible to a trail check, but it also decreases accuracy. A shot on the run is already less accurate than a stationary shot.
When you step over the release point with that fourth step, your hands should extend away from your body, elbows up, and ready to follow through on the torque created by your upper body.
Also, keep the stick “light in your hands,” Jalbert advises. “A lot of real young players, they have that kung-fu grip,” he says. “It should be tender.”
As for arm angles, shooting on the run lends itself best to sidearm and overhand approaches. Choose the angle according to your position on the field. Overhand shooting is more accurate on the run and many top players recommend an overhand shot when shooting on the run to improve accuracy.
However, if you’re dodging across the goal, go ahead and shoot sidearm. This gives you a better angle and widens your options of where to shoot on the cage.
If you’re coming down either alley, an overhand shot works best.
‘Get Small’
Think of a spring-loaded gun. “My body gets small before I shoot,” Jalbert says.
The more tightly wound your torso is upon your release, the more power you’ll get on your shot. It means tightening up your abdomen by contorting your upper body and hips, and releasing that energy through your arms and wrists.
Lean into the goal when shooting to generate this effect.
Step over your release point with your outside foot, delay, and whip your torso around for the greatest strength on your running shot. You can think of it like a golfers swing or leading with your hips in a baseball swing.
Drills and Workouts
Your body wants to stop. It wants to stop and shoot. So practice everything in motion, without a ball, even.
Jalbert had an apple orchard in his backyard growing up. There were six trees in a row. To get used to shooting on the run, when he was younger, he would dodge each tree in succession, and practice getting his hands out into shooting position after each tree.
The same effect could be achieved with any row of obstacles. The important thing is that you never stop moving your feet.
As for developing muscles used while shooting on the run, use workouts for strengthening your rotational core.
More tips for shooting on the run:
Shooting on the run may be the hardest skill to learn in lacrosse and will require tons of practice. You are going to be shooting on the run a lot. When you are practicing, spend as much time as you can focusing on shooting on the run. Any time your on a goal practicing your shot (hopefully all the time) spend 85%-90% of the time running full speed and shooting. Don’t worry if you miss the goal badly the first few hundred times.
There are a few keys to scoring from outside.
Try to be deceptive. Try to hide your stick behind your body until the last second. You are going to have the defensive players from the opposing team all over you when you have the ball, so you need to learn to be deceptive.
| Paul Rabil shooting on the run |
Shoot with the proper technique. Hands and elbows high and away from your body, hands 12 inches apart close to the bottom of your handle, turn your shoulders and hips and uncork like a golfer. Your power will come from a big hip and shoulder turn while cradling your stick behind your body. Just as your ready to release your shot uncork your body in the direction of the target.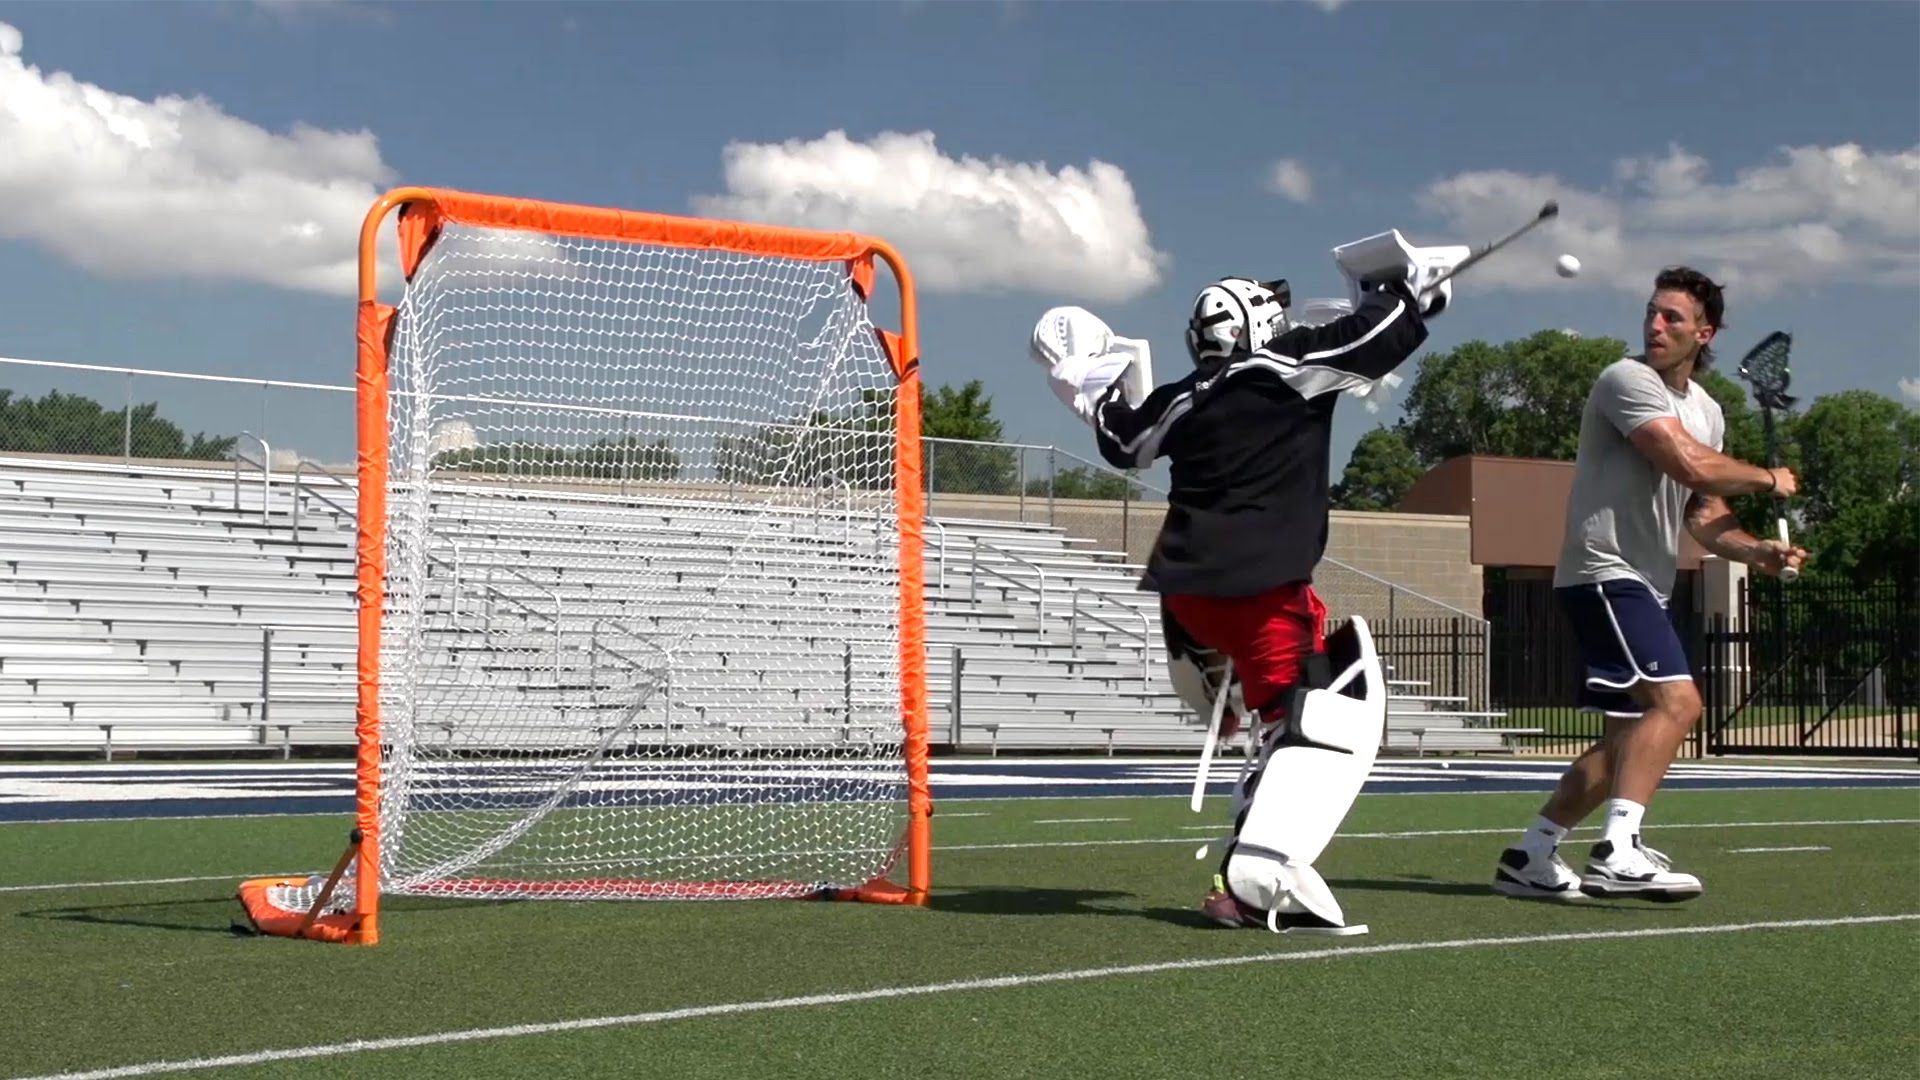
Don’t be afraid to take bounce shots. They can provide an additional aspect of deception with unpredictable bounces and often find the back of the cage.
Learn to do it with both hands.
This description is for a right handed shot, a left handed shot will be reversed.
KEEP YOUR EYES ON THE GOAL. Start by moving across the face of the goal from the right side to the left and have your shoulders parallel with the sidelines but as you begin to plant your left foot “show your numbers” to the goal. Begin the shooting motion by planting your left foot so it will face at about the 10 o’clock position, bring your right foot around slightly after so it will end up pointing at the goal. Be sure to have your right foot come around slightly before the stick, this will force you to “coil” your body so you will have more torque in your body which translates to more velocity in your shot. YOU MUST TAKE A WIDE STEP WITH YOUR RIGHT FOOT SO YOU CAN GET ALL OF THE VELOCITY FROM THE TORQUE IN YOU BODY INTO THE SHOT. Remember, you are moving through the entire process, do not stop to shoot. If you bring your right foot around properly with all of your body power behind the shot, the follow through should almost spin you completely around. Keep the stick behind your body so the goalie cannot see it, be careful not to “hang the stick”. YOU SHOULD HAVE A SORE LOWER BACK AFTER WORKING ON THIS OR YOU ARE NOT DOING IT RIGHT. You can practice shooting on the run from any angle on the field. It does not have to be across the face of the goal only.
Again, this is a tough skill even for top players. It is going to take a considerable amount of practice to master. Watch some high level lacrosse to see it in action!!
What is the Average Speed of a Lacrosse Shot? – Lacrosse Pack
Lacrosse players are always trying to one up each other when it comes to the speed of their shot. Thus, it come as no surprise that many newcomers to the game of lacrosse want to know how their shot compares to the rest of the community.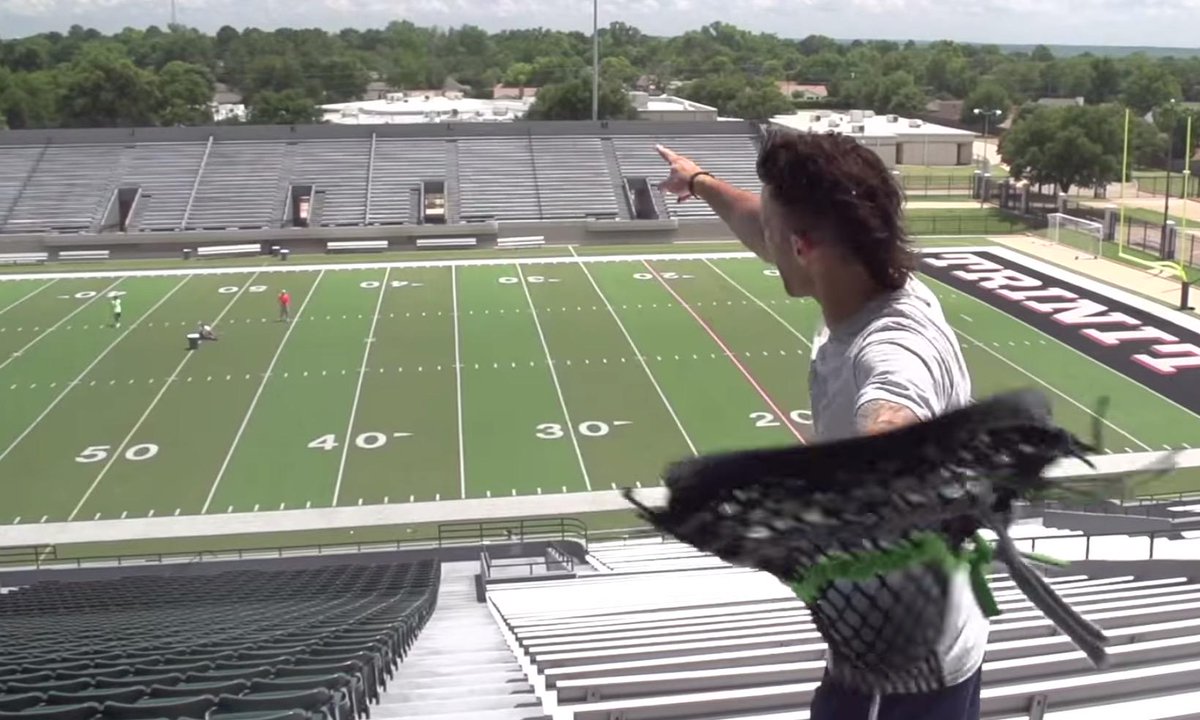
The average speed of a lacrosse shot lies somewhere in the range of 70-80 mph for the recreational lacrosse player. However, the age and level of experience are major factors in what determines the average speed of a lacrosse shot for a specific individual.
To have a solid grasp of where your shot speed lies relative to other players, it is necessary to analyze the numbers in terms of age and competitive tier as opposed to looking at the lacrosse community as a whole. Obviously, the average shot speed for professional lacrosse will be exponentially higher than the average shot speed for youth lacrosse, so why even factor them into your shot speed comparison?
Average Lacrosse Shot Speeds at Different Competitive Tiers
I went ahead and broke down the average shot speeds by competitive level in the table below.
| Level of Competition | Average Shot Speed Range |
| Youth Lacrosse | 60-75 mph |
| High School Lacrosse | 70-85 mph |
| Collegiate Lacrosse | 80-95 mph |
| Professional Lacrosse | 90-105 mph |
These numbers provide a far more reasonable comparison for players looking to get an accurate gauge of where their shot speed lies at their individual lacrosse level.
Obviously, there will be shot speed outliers at each competitive tier. For instance, a fresh youth lacrosse player may fall well under the shot speed average of 60 mph. This is to be expected, considering they just recently picked up a lacrosse stick for the first time.
On the other end of the spectrum, there will be players that just have a knack for shooting at a high velocity. For example, during my high school playing years I remember our best offensive player having an average shot speed that hovered around the upper 80s to low 90s.
Keep in mind that the shot speeds listed above are time and room shot speeds recorded during casual shootarounds. When a lacrosse player references how fast their shot is, they usually refer to their time and room shot numbers. After all, the majority of youth and high school lacrosse games do not feature a radar gun behind the goal.
In this environment, players are able to completely maximize their shot speed potential. This is because they are able to extend their windup as much as possible without having to worry about any oncoming defensive pressure.
In short, the speeds listed above are not in game shot speeds.
The average speed of a shot in game is noticeably slower than the time and room shot speeds recorded during practice. This can be attributed to players having to predominantly shoot on the run under duress.
Shooting on the run detracts from the overall shot power that a player is able to create. As a result, a lacrosse player may shoot 3 mph to 8 mph slower in game relative to their time and room shot during practice.
Fastest Lacrosse Shot Speeds Ever Recorded
As of the year 2020, Patrick Luehrsen boasts the fastest lacrosse shot ever at 119.9 mph according to Guinness World Records (source). Check out the video below to see it in action!
youtube.com/embed/qerJqiNv0Iw?feature=oembed” frameborder=”0″ allow=”accelerometer; autoplay; encrypted-media; gyroscope; picture-in-picture” allowfullscreen=””/>
There are an abundance of examples where lacrosse players have broken into triple digits. Some other notable shot speeds are provided in the table below:
| Name | Shot Speed |
| Zak Dorn | 116 mph |
| Jarrod Neumann | 115 mph |
| Mike Sawyer | 114 mph |
| Michael Manley | 112 mph |
| Paul Rabil | 111 mph |
I always liked watching the Zak Dorn video. At the time, his 116 mph shot was the world record for the fastest lacrosse shot. He actually entered the 2014 MLL fastest shot contest as a fan and beat out some of the fastest shooters the MLL had to offer! Watch the video above to see this cinderella story for yourself.
youtube.com/embed/LbPFmgl7igY?feature=oembed” frameborder=”0″ allow=”accelerometer; autoplay; encrypted-media; gyroscope; picture-in-picture” allowfullscreen=””/>
Factors that Influence the Average Speed of a Lacrosse Shot
There are several elements that affect how fast a lacrosse player is able to shoot on average. Contrary to popular opinion, there is a lot more to shot speed than just size and strength.
Whip of the Lacrosse Pocket
For those of you that do not know, the whip of the lacrosse pocket refers to how low the ball throws during a pass or shot. The greater the whip, the lower the ball throws. For more information on the concept of whip in lacrosse, check out my article A Full Breakdown of What Whip Actually Means in Lacrosse.
With a high whip lacrosse stick, the ball tends to remain in the pocket for longer during the shooting motion. To counteract this excessive pocket hold, lacrosse players generally extend their shooting windup. This way, the ball releases toward their intended target rather than whipping into the ground.
The extension of the shooting windup allows players to generate more power on their shot. This additional extension allows players to get their hands out and away to incorporate the entire body into the shooting motion.
Without sufficient whip, it is extremely challenging for players to nail down proper shooting technique because the ball releases from the pocket too early.
Optimal Body Torque
The amount of body torque that a player utilizes also contributes significantly to average shot speed.
The lacrosse shot is not meant to be limited to a simple movement of the arms. Proper shooting technique involves a violent twisting of the body toward the goal.
Shooters that only take advantage of their arms miss out on a whole lot of potential power. All of the premier shooters channel their momentum into the ball by throwing their whole body into rotation. Their shot begins with one shoulder facing toward the goal. By the end of their shooting motion, the opposite shoulder faces toward the goal. This is a solid indicator that a they are making the most of body rotation.
Just take a look at the fastest shooters in the world. When they set up their body for a shot, they practically face their entire back toward the goal prior to initiating the shooting motion. They use this as a mental cue to support maximal body torque throughout the shot.
Snapping the Wrists in a Timely Fashion
Believe it or not, the wrists can add a couple of miles per hour to a shot as well.
This is largely due to players snapping their wrists at the final stretch of the shot motion. The wrist snap forces the ball out that much quicker, adding a bit of zip to the shot as it releases from the pocket. Although this particular aspect of shot technique does not receive as much attention relative to pocket whip and body torque, it is definitely not something to be overlooked.
Many high caliber lacrosse players, such as Paul Rabil, preach about the importance of snapping the wrists during the shooting release. They do so not just because of the shot speed benefits, but the shot accuracy benefits as well.
Following Through Toward the Target
When a lacrosse player executes proper shooting technique, their momentum should carry them towards the area on the goal that they are aiming for because of the force of their follow through.
The lacrosse shot is all about a transfer of power. If a player stops their momentum midway through their shot, they will execute what coaches commonly refer to as a “still” shot. This is not something that coaches want to see because it indicates that a player is not following through properly.
Many players make the mistake of not following through with their hips toward the shooting target. As the ball releases from the pocket, the hips should complete their rotation all the way through. This way, the player careens towards the goal involuntarily.
To better visualize this concept, check out a slow motion video of Peter Baum’s follow through in the video below!
Is Your Shot Fast Enough?
When I first started lacrosse, I was obsessed with upping the speed of my shot to get to that next skill tier. I watched countless YouTube instructional videos and modified my lacrosse pocket numerous times to get every little edge I could.
It was only later in my playing career that I realized that having a tremendous amount of shot speed is an accessory, not a necessity.
Ultimately, accuracy takes precedence over velocity at the youth and high school level. A player may be able to shoot in the upper 80s, but this velocity will not matter if they are unable to pick out the open spots on cage.
We have all wanted to burn a hole through the goalie’s stick with our shot at some point. But the reality is that this is just not feasible. Players that are able to optimize for shot precision and deception always have a better shooting percentage than a player with a wildly inaccurate rocket of a shot.
So to answer your question “Is my shot fast enough?” it really just depends on your own personal aspirations and play style.
For example, an attacker that predominantly operates in and around the crease will not necessarily need a high velocity shot to succeed. They can get away with a shot that hovers around 60 to 70 mph.
If your plan is to nab most of your goals from 10 to 12 yards out, it is much more crucial to elevate your shot around the mid 80s to sneak the ball past the goalkeeper. Only you can really know if your shot speed is truly fast enough for what you are trying to accomplish on the field.
Helpful Tips To Increase Your Average Lacrosse Shot Speed
If you are serious about improving your shot speed, there are a couple of subtle practices that you can implement to help you on your journey of self progression.
Obviously, brute strength plays a sizable role in how fast your lacrosse shot will be. I tried to provide some not so obvious tips in the list below aside from strength and repetition to help accelerate your shot development. Just know that getting faster and stronger in conjunction with these tips will help you to break into the top shot speed percentile.
Make a Habit of Practicing with Your Gloves On
The majority of lacrosse players make the mistake of practicing without their lacrosse gloves. Although practice in and of itself will aid you in reaching your shooting aspirations, why not simulate game play as much as possible during your practice sessions?
Getting comfortable with the feel of lacrosse gloves takes time and repetition. By the time that you step out onto the field, wearing gloves should feel like second nature. The last thing you want to have happen is have your gloves feel foreign on your hands. You already have enough to worry about when it comes to shooting with accuracy and power.
So throw on your gloves when you practice on your own. If you can throw on your helmet too, even better!
The more you are able to simulate live game play, the more at home you will feel on the lacrosse field when game time rolls around. This will bolster your confidence and help you to apply your shooting practice to actual games.
Integrate a Crow Hop into Your Shooting Motion
A lot of things have to be done correctly for a player to have a powerful time and room shot. Working nearly every muscle in unison to transfer power into your shot is no small task.
Incorporating a crow hop into your time and room shot will promote efficient use of the body during the shooting process. For those of you that do not know, the crow hop is the footwork involved with the time and room shooting motion.
Generally, there are two different kinds of crow hops: the two step crow hop and the three step crow hop. Ultimately, both methods are effective at generating shot power from the legs as long as the footwork is coordinated with the shot release.
Throughout the crow hop, you should keep a wide base to keep yourself stable throughout your shot. Once you perform the crow hop and produce some forward momentum, your front foot should be firmly planted into the ground. Your toes should be pointed toward the target if possible.
Take a Video of Your Shooting Technique
Another strategy of making the necessary adjustments to your lacrosse shot to increase speed is to take a video of your shot mechanics.
Many players believe they have perfect shot mechanics until they see their technique from a third party perspective. Players are easily able to point out flaws in their shooting motion that they would typically be unaware of when they take a look at themselves on film.
For example, many players over exaggerate the amount of body torque they are utilizing during their shot. It is only when they see themselves on video that they realize that they are not rotating their body nearly as much as they initially thought.
A major part of increasing shot speed is continually honing in on shooting fundamentals. The first step in this process is to identify your shoot flaws. Many players do not even make it past this first step because they never take the time to objectively analyze their shot.
Although it may seem tedious, taking fifteen minutes to gather some footage of your standard time and room shot and shot on the run will accelerate your shot progression immensely. If you truly want to take your shot speed to the next level, it is essential that you take the time and effort to do things that other players refuse to do. Every little effort counts.
Boston Cannons Announce Two Shooting & Offensive Skills Clinics with World Champion Paul Rabil
BOSTON, MA – The Boston Cannons of Major League Lacrosse (MLL), the premier professional outdoor lacrosse league, today announced two Shooting and Offensive Skills Clinics with Cannons’ star Paul Rabil. The clinics will be held on Saturday, November 20th at Fore Kicks in Marlborough, MA and Sunday, November 21st at Fore Kicks in Norfolk, MA. These are the first in a series of Boston Cannons clinics that will take place in New England throughout the fall.
“Every year, we look forward to getting our players and coaches into the community to create exceptional learning experiences for New England youth players,” said Mark Kastrud, Boston Cannons Vice President and General Manager. “Beginning our clinic series with an offensive skills clinic, Rabil was the obvious choice to teach the kids, given his talent, success and ability to teach the skills that got him where he is today.”
Rabil was selected #1 overall by the Cannons in the 2008 MLL Collegiate Draft. He has scored 78 goals in 3 seasons, including 33 in 2009 when he was named MLL Most Valuable Player and Offensive Player of the year. This past June in the Federation of International Lacrosse World Championship, Rabil led Team USA to the gold medal, earning All-World Most Valuable Player honors.
The Shooting and Offensive Skills clinic will teach skills including shooting on the run, shooting with time and room, dodging to shoot or feed and more. The Boston Cannons clinic series throughout the fall will teach a range of skills, from offense to defensive skills and goalkeeping.
Each clinic is $75 per participant and is available for youth players ages 9 – 16. The clinics will take place at the Fore Kicks Sports Complex in Marlborough (219 Forest Street) on Saturday, November 20, from 4 PM to 6 PM, and at the Fore Kicks Sports Complex in Norfolk (10 Pine Street) on Sunday, November 20, from 10 AM to 12 PM. Players must bring full lacrosse gear to participate.
Pre-registration is required and space is limited. To register, contact the Boston Cannons front office at (617) 746-9933 or e-mail [email protected]
CLICK HERE TO DOWNLOAD THE FLYER/REGISTRATIONS FORM
Boston Cannons 2011 Season Tickets
Season
Ticket packages for the 2011 Season are on sale now! Packages start at only $126 for the seven game package including the 2011 MLL All-Star Game on July 9. To purchase or for more information on Cannons season tickets, call the Cannons at 617-746-9933, visit www.bostoncannons.com or e-mail [email protected]
About The Boston Cannons
The Boston Cannons are one of six teams in Major League Lacrosse (MLL). MLL is the premier, professional outdoor lacrosse league. The Cannons began play in June of 2001. Four Boston Cannons have been named league Most Valuable Players (Conor Gill-2004, Mark Millon-2005, Paul Rabil-2009, Matt Poskay-2010). In May of 2011, the Cannons will begin their 11th MLL season at their current home of Harvard Stadium.
TopYa! Lacrosse on the App Store
TopYa! and The Paul Rabil Experience are here to help you take your lacrosse game to the next level. Improve your shots, moves, fakes and stick skills while having FUN doing it!
Watch instructional videos from Paul Rabil, record yourself performing a skill, then upload your video to get feedback from one of our certified Virtual Coaches. Your teammates will wonder how you improved so quickly!
Create lacrosse videos called Head to Head Challenges and see if your friends or other players around the world can TOP you.
Lacrosse Clubs and Coaches can create their own skill videos to challenge their players.
Parents can follow their kids’ progress and watch their videos, even while on the go.
IMPROVE YOUR LACROSSE SKILLS
Progress through a series of skill levels as a professional or your own coach guides you. Then practice the skill and upload your own video accomplishing it. Receive direct feedback from your Virtual Coach to help you improve.
CREATE HEAD TO HEAD CHALLENGE VIDEOS
Express your lacrosse creativity and your sense of competition. Teams of one or more players can perform any type of lacrosse related skill they come up with – serious, funny or somewhere in between. The Referee scores each Head to Head Challenge and you’ll receive Goals toward your total.
To encourage competition and connection, players or teams competing with each other from different countries can earn Caps and additional Goals.
SHARE WITH YOUR FANS
Become Fans of other players and share your favorite Skill accomplishments and Head to Head videos with them. See what other players are creating in your Activity Stream.
FOR COACHES AND LACROSSE CLUBS, TOO
Create your own content for your individual teams or club. From your own Dashboard, watch your players improve outside of their regular training. Track their progress on your Team and Club Leaderboards.
5 Summer Tips for Midfielders
Paul Rabil is the best midfielder in the world…
Are you a midfielder? Are you hoping to snag the attention of collegiate coaches at your summer tournaments? Hope no more, because I tell you exactly what to focus on. I give pointers on what will make you stand out amongst your peers. Other midfielders will compare to you like Kylo Ren compares to Darth Vader. Spoiler: Darth Vader dominates Kylo in every category. You ready? Good! Keep on reading.
Play Good Defense
A lot of young midfielders put in the work offensively. They have a good shot and throw accurate passes; however, many of the same players are worth nada on defense. Want to get a coach’s attention at midfield? The best attention grabber is to be a two-way midfielder. This means you can play good offense and defense.
Midfielders that play good defense are hard to come by. This is doubly true for the middie who’s elite on both sides of the ball. Don’t believe me? Think about this. NCAA lacrosse now has an 80 second shot clock. The PLL has a 45 second shot clock. The MLL has a 60 second shot clock. Know what wastes a good 5-10 seconds from the shot clock? Having to sub out your defensive midfielders for your offensive ones; however, the guy who can play both sides of the field won’t have to sub off. Therefore, he gets more time on the field. Coaches want this guy.
On a recruiting trip at Susquehanna, I discussed how the game has evolved to favor two-way midfielders with head coach Stewart Moan. He explained how two-way midfielders are the most valuable players in lacrosse with the shot clock addition. Why waste time subbing your personnel, when they can play both sides of the field? An example situation follows: A coach is looking at two solid high school midfielders. He can only offer one. Both are good on offense; however, only one plays good defense. The coach is going to recruit the more versatile player.
This is why you need to play good defense at midfield. I can’t promise coaches will make you a two-way midfielder, but good short stick defensive midfielders still carve out major roles on their respective rosters. If coaches only see you as a defensive option, that’s still better than them seeing no role for you at all. If you look at the 2019 MLL and PLL drafts, you’ll notice a majority of midfielders picked play both sides of the field. You need to strive to play like them. They are the future of lacrosse.
Able to Score on Run
The best way to get noticed as an offensive midfielder is by doing this: having the ability to shoot and score on the run. If you are hoping to play top tier D1 and can’t score on the run, you have no chance. Midfielders who take the ball up top, dodge down the alley, and rocket a shot opposite corner while sprinting full-speed are the equivalent of John Wick with an M60. They are that deadly.
As a d pole, I can confirm that midfielders who score on the run are the hardest to cover. It’s extremely easy to beat up a guy trying to score when keeping his feet flat. You can level him, lift check him, or easily stand in the shooting lane. It’s a lot easier said than done to do this on a guy sprinting towards the net with Katniss Everdeen level accuracy.
To recap, you younglings dreaming to be the next Paul Rabil, remember this: be elite at shooting on the run.
Get Open on Clears
This one is pure effort. As a midfielder, you are the primary target on clears. Think of yourself as Odell Beckham Jr. You are the guy the quarterback is targeting downfield (unless you’re Eli Manning and can’t hit water when in a boat). As a short stick, it’s a lot easier for you to move through the ride and there is less worry of going offsides. Plus, you are a bigger threat to score when pushing the pace.
Coaches notice the players that slack on clears. The guys that walk a couple yards backwards and half-heartedly call for the ball. The guys that beeline for the box so another midfielder is forced to sub in and clear. Don’t be those guys. Those guys are as lame as Dave Gettleman.
Instead, you should constantly move to get open. If the ball carrier is in trouble, you cut back to him. If the goaltender is looking for a deep pass to push tempo, run downfield while looking back at the ball. There is a role for the player who consistently clears the ball. I promise you a coach will like you more than the guy slacking on clears. Failed clears cost you in big games. Make sure you prove you’ll contribute to a successful clearing effort.
Push Ball on Fast Breaks
Please do not interpret this as forcing the ball when there’s nothing open in transition. You need to be smart about this. However, it drives me crazy when there’s a 4v3 fast break and the ball carrier has an open man but decides to hold it and wait for the offense to settle. Why would you not at least challenge the defense? When you wait for the offense to settle, you are allowing a scrambled defense to settle. Of course, if no one is open, don’t throw the ball into coverage; yet, if the top defenseman slides early, pass it off so your teammate gets an open shot. Making big plays in transition is one of the little things scouts will notice.
Be in Excellent Shape
As a midfielder, you need to be in better shape than any other position. You should not be constantly subbing off for air. In college, only two midfield lines consistently play. That’s a lot of running around full speed. You may get away with being out-of-shape in high school, but you won’t in college. So, you might as well give yourself an edge over your competition.
Some guidelines to know you’re well-conditioned follow: your mile should be under six and a half minutes, your mile and a half should be under ten minutes, and your forty yard dash should be under five seconds. Don’t freak if these numbers sound ridiculous. Admittedly, these are extreme numbers. But if you’re enough of a specimen to put these numbers up, you will physically dominate over your summer competition. Being a physical specimen on the field can make coaches more lenient on your playing deficiencies.
Conclusion
Do you agree with my tips? Do you disagree? Did I miss something? Let me know your thoughts by connecting with me on Twitter or Instagram. You can also subscribe to my website to comment directly onto this article. Regardless, thank you for reading and hope you enjoyed!
90,000 Many Russians play sports incorrectly, harming themselves
Before any exercise, be sure to warm up and stretch. Warming up should take at least 7-10 minutes. Stretch out immediately after warming up. When running, if you feel pain or tightness in the lower leg area, you need to stop and stretch the lower leg, as well as the muscles of the thigh in front and behind. There is a venous pump in the lower leg – a pump that pumps blood upward through the body – so the lower leg should never be left “stone”.
Today, thousands of men and women jog, wind kilometers on bicycles and swing abs on horizontal bars. But even with the naked eye it is clear that many of them play sports incorrectly and harm themselves. How to avoid injury?
If in my youth I knew about the correct running technique, muscle pumping and other nuances of physical education, says a professional fitness trainer, Honored Master of Sports, multiple champion of Russia and European champion (1996) in triple jump, European champion in pentathlon, as well as master of sports in rugby and football Elena Lebedenko – then today I would have my menisci and knees, a healthy back and so on.Unfortunately, some things people find out too late. And this is why I train in order to teach my wards not to get injured and to increase their health ”.
According to Elena, the most traumatic amateur sport is running.
First, when running, a person receives a serious shock load on the orthopedic apparatus, knees and lower legs. The body of a 20-year-old runner will cope with this load on its own, but if you are
30 or more, the joints need to be spared in order to maintain their working resource as long as possible.“I often see large men and women running in marathons (competitive sneakers with a thin heel. – Ed.), Or even not in running shoes at all, besides, on asphalt,” says Elena. – This is a direct path to serious knee injury. To avoid unpleasant consequences, sneakers should be chosen with the thickest and softest soles and, if possible, not save too much on them. It is also advisable to select sneakers with the correct pronation for each particular runner (pronation, or inversion, of the foot is an internal eversion of the foot while walking or running.- Approx. ed.) and just comfortable, for a specific foot. And you need to run along a gravel path or, even better, along a tartan, forest path or grass. This is especially true for runners weighing more than 80 kg for men and 60 kg for women. I will say more, in the gym, during workouts, I forbid running even on an automatic treadmill – only walking on it. The point is that the treadmill gives a strong kickback when the foot is positioned and the shock load on the knees increases. ”
Secondly, you need to run correctly.The expert emphasizes that the foot should be placed softly, as if it were made of papier-mâché, not jump high, but “creep” over the path so that the head always remains at the same level. It is better to run slowly, since a fast run does nothing to health, but only takes away from him. It is better for health to run longer and slower, and it is easier to follow the technique when running slowly. Better yet, walk long and fast with sticks.
“You need to show your running technique, it’s really difficult,” continues Elena Lebedenko.- But all the same I will try in words. You need to run not with your shins – we call it “gluing your legs” – but with your thighs and buttocks. The thigh should be extended forward of the pelvis and during the push pass through the pelvis back. The leg should be lifted off the ground at the last moment, and not in the middle of the trajectory. It is necessary to put your foot under the center of gravity, and not try to bring it forward. And do not jump in any case – otherwise you will be left without a foot, knees, lower leg and lower back! The groin and chest must be in front. If a runner’s butt is “off”, this is wrong, not running anymore, but, as we say in internal slang, “pushing a wheelbarrow”.
Further – also extremely important – elbows and shoulders. We often tell clients that elbows are running. When running, the shoulders should be relaxed and lowered, the arms should be bent at the elbows at about 90 degrees. The elbows should move in parallel planes and work like pendulums – with each step, move a little forward and wind up all the way back. Improper use of the arms while running leads to injuries to the neck and ribs. If you learn how to run correctly, you can do it even with overweight, and everything will only be a plus ”.
A separate running technique, quite complex, but minimizing the load on the legs, is toe running. Without experience, it is unlikely that it will be possible to immediately run “to the tip”. It is necessary to introduce this technique into use gradually, first the first 5 minutes of jogging, after a couple of weeks 10 minutes, and so on. The point is that after the flight phase the runner should land not on the heel or even on the entire foot, but on the toe. Then the foot rolls onto the heel, or rather, the weight is transferred to the entire foot, followed by the traditional push.It should be noted that running “to the toe” is not equally physiological for all runners – it is easier for someone, harder for someone. In any case, it is necessary to start running “on the toe” at an extremely slow pace.
The main mistakes when cycling are completely different, for example, a low-set saddle, continues Elena. A large load on bent legs is extremely unphysiological, since the cartilage at this moment has a small area of contact with the joint. The saddle must be positioned so that the leg is straight at the bottom of the trajectory.
Further – the swing of the press. Only dry and short people can afford to lean back and sit on a special device. For heavy and even people with an average weight, this exercise will lead to lower back injuries, warns Lebedenko. “The abs should be pumped like this: lie down on the floor at home, put your outstretched legs with your heels on the sofa, relax your legs, put your hands behind your head and twist your torso into a roll until your shoulder blades are off the floor.” For a start, 30 times is enough.
The next exercise on the press – lie on the floor, put your legs bent at a right angle on the sofa so that the buttocks are close to the sofa.Then relax your legs, put your hands behind your head and in this position do another 30 twists, trying to tear your shoulder blades off the floor.
Further, the number of twists in both positions can be increased.
Horizontal bars and parallel bars are very good for men of short stature with short arms, emphasizes Lebedenko. People whose arms are longer than average should approach strength exercises on horizontal bars and uneven bars carefully, gaining the load gradually. It is also worth remembering that excessive zeal when working on the uneven bars and horizontal bar, especially in people with a large weight and age over thirty, can lead to serious complex injuries of the elbow and (or) shoulder joints, which are difficult and long to heal.
“Alas, a person is strong in hindsight,” Elena Lebedenko repeats her main idea. – Most of my clients came to me after knee surgery, spinal disc replacement and other unpleasant surgeries. Now they know for sure that they need to do sports correctly. Do not bring it to this, learn everything in advance ”.
Running injuries: causes, treatment, prevention
The other day, 45-year-old Colin Farrell took part in the Brisbane Marathon, which was his first in life. The actor managed to cover the distance of 43 kilometers in 3 hours 54 minutes and 22 seconds. Thus, he finished 222nd among 683.
As soon as Farrell reached the finish line, the crowd of fans gave him a thunderous ovation. This moment was captured by Australian running coach Pat Carroll.
We already knew that Farrell runs regularly, but not everyone can afford such an intense load.
Many people give up running for fear of injury during training.And those who have already devoted themselves to running movement do not always think about the health of their legs. But this is a very important aspect: the more kilometers you run, the more your joints, cartilage and muscles are loaded. And no matter how good you feel during your morning run on the pavement, the reality is that the body will respond to your movements.
It should be admitted that knee problems occur in most of the runners. We spoke with Luke Greenberg, Coach and Co-founder of MotivNY, about the most common running injuries and how to avoid them (pun intended).We have some tips for you on how to save your feet from unnecessary problems.
1. Knee pain
This applies to injuries to the front of the knee joint. To understand what is causing the pain, have a professional examine and touch your knee. Only then can the cause of the injury be found. Alternatively, you can identify the source of your pain while running on your own. Pay attention, when you train, in which part of the leg the cutting pain appears. “This is very important because more often than not the knee is the area of symptoms, and not the cause of pain,” says Greenberg.
What is the threat? Don’t run over pain, especially if you are a beginner. “Typically, this type of problem comes from weakness in your hips or feet, or from increasing the distance too quickly, which often happens when you join a group run and feel pressured by fellow runners when your body is asking you to. stay”.
How to solve the problem? Bizarre strength training or light weight training is often the best prophylaxis for avoiding leg injuries, according to Greenberg.For example, a squat. The lowering phase, with your buttocks pointing towards the floor, is part of strength training. “It has certain benefits for the tendons, making them stronger. The inability to perceive the load occurs where the painful sensation is born, so the heavier type of training helps in solving this problem. ”
2. Hamstring Problem
If you feel excessive tension in the back of your thigh, this is a clear sign that your hamstring is suffering from a lot of stress: fast running, fatigue, and other muscle weakness.Hamstring traction can occur at several points: in the tendon near the joint, in the cartilage area, or in the abdominal area.
What is the threat? In the acute phase of pain, continuing to run is a bad idea, especially when it comes to sprinting or speed distances. Although the extent of the injury varies, you can spend 6 to 8 weeks repairing the tendon. You also need to be careful after the muscle’s healing phase. “These injuries are easily exacerbated by running, squatting and deadlifting, so it is wise to give up these activities until your doctor tells you to.”
How to solve the problem? Start with short isometrics (push movements). “This is beneficial because it speeds up the healing process and minimizes the accumulation of randomly placed scar tissue,” says Greenberg.
And remember to start your workouts with minimum distances before returning to regular running. Try plyometrics like squats or skateboarding. “Often people do not realize how tired the muscle is and continue to exercise at full strength.And this increases the likelihood of re-injury. ”
3. Shin Injury
In this situation, the problem affects the front and lower legs. It can appear as shooting pain in the lower leg towards the foot or in the front outer part near the knee. “Pain varies greatly in severity, and both are fairly common in aspiring runners whose legs are not used to stress and strain.”
What is the threat? The expert says that with such pains you cannot run.If this type of injury becomes inflamed, even normal standing or walking can interfere with muscle recovery. “These injuries are among the most common fracture injuries and are considered to be the consequences of poor running technique.”
How to solve the problem? Relax. Let the inflammation subside and, of course, consult with a specialist who will analyze your gait. “Most of the time, shin problems are the result of technical mistakes in running that the person can correct to avoid future injury.”
4. Piriformis syndrome
Burning pain in the middle of the buttocks that occurs when the piriformis muscle compresses the sciatic nerve. The syndrome itself refers to increased muscle spasm in the region of the stabilizing thigh muscle, which is located over the sciatic nerve. Because of its location, the syndrome is often confused with lower back problems. “A good doctor can tell if the problem is inside the piriformis muscle or if the injury is more serious.”
What is the threat? This problem is not the worst.“It usually gets better after warming the buttocks and doing stress relief exercises. If the pain disappears immediately upon warming up and does not recur within a few hours after running, then therapy can be continued with exercises on that muscle group. ” If the pain intensifies, it is better to consult a specialist.
How to solve the problem? There are several effective sets of exercises for strengthening the hips and buttocks. With their help, you will relieve tension from the nerve, restore the work of the hip joint or gluteal muscle. You also need to sit less in one place and massage the tissue with massage devices and ribbed rollers.
5. Achilles tendonitis
Have you ever woken up and felt a sharp sharp pain in your foot while taking the first step? This is one of the signs of inflammation of the Achilles tendon, which develops due to the malfunctioning of the ankle muscles. Pain appears at the back of the ankle. “This is due to either inflammation or degenerative wear and tear on the tendon due to improper exercise technique.”
What is the threat? The advice is the same as for a knee injury: don’t exercise until you recover. But don’t be discouraged, as this injury won’t stop you from doing strength training. During squats, lunges, deadlifts and other types of weightlifting, the tendon is not overstrained. Also, these workouts will only strengthen other leg muscles, which in the future will help to better distribute the load along the foot.
How to solve the problem? “I always recommend evaluating the extent of injury with a physical therapist because there are several reasons that can inhibit the healing process of a muscle and cause problems such as ankle immobility, hip sprains, improper weight distribution during walking, and imbalance in the leg muscles.”
Greenberg says active strength training is the best solution. Think of squats on one leg, keeping balance at the lowest point for five seconds. Then work with light weights. If you are not sure about the exercise technique, then it is better to consult a trainer.
First published on the American GQ website.
You will probably also be interested:
Answering all the main questions about sports nutrition
When is the best time to go out for a run?
How to get it right running shoes
How to prepare for a marathon?
How can start doing sports ?
Photo: Getty Images
Do you often check your mail? Let there be there will be something interesting from us.
10 Important Tips for Newbies (and More) – The City, 06/15/2020
Moscow parks begin their work, which means that now you can run at any time. If you have long dreamed of putting on sneakers and darting wherever you look, you should prepare. We answer the most popular questions about running training with Rinat Shagiev, master of sports in athletics and trainer of the I Love Supersport Running school.
I’ve never run before – where should I start? How long should the first runs take?
Beginners shouldn’t take themselves too seriously and make Olympic plans.The best thing to do is to be mindful of yourself and your feelings while running. Everyone who wears sportswear and sneakers has individual characteristics and individual reactions to stress and recovery from them. Thoughts like “I’ll run a marathon by the end of the year” should be discarded. What if an urgent business trip, an unplanned vacation – there can be many reasons for adjustments. Remember that you are not a professional athlete, so you can sometimes step back from the plan if the week has turned out to be too difficult.Training should be fun, not a burden. With such introductory notes, the likelihood that you will throw them decreases dramatically.
Rinat Shagiev
Master of Sports in Athletics and Coach of the I Love Supersport Running School If you are not yet ready to run at an easy, continuous pace, alternate between running and walking – for example, two minutes of light jogging can be alternated with two minutes of walking. For beginners, it is better to run three times a week, start with 30 minutes of light jogging, increasing the load gradually – every week – by no more than 10%.From the third week of regular running, you can add interval workouts with a change of pace. For example, you run quickly for 30 seconds, then there is one minute of calm, light jogging – and so two series of four times, and between them a five-minute rest.
In addition to running directly, it is important to include exercises for general physical fitness in your daily life. They will help with injury prevention and stamina growth. You don’t need to buy special equipment, and you don’t even need a gym membership – all this can be done at home or in the yard.Squats, lunges forward and backward, gluteal bridge – there are many options, just find a complex that is comfortable for you.
Read also
How to warm up before running?
Photo: Getty Images
Skipping the warm-up before a workout is one of the biggest mistakes beginners make. Our expert Rinat advises to do an articular dynamic warm-up before each run. This is a set of exercises (head rotations, circular movements with arms, lunges with alternating legs), in which they replace each other without delay.Overall, it takes only five minutes, and the benefits last for years of life: the risk of injury is reduced and the efficiency of running is increased.
If you run in the morning, devote more time to the warm-up – it will allow you to wake up, warm up your muscles, ligaments and prepare them for the upcoming work. Do the warm-up smoothly, without sudden movements. It’s also important to stretch after your workout. It is essential for the body’s recovery and prevention of the risk of injury. Muscles constantly contract during exercise, and it is very important to bring them to their original state at the end of the workout.
When is the best time to run – in the morning or in the evening?
There are no major differences between morning and evening runs. When scheduling, you should focus only on your own habits, biorhythms and your schedule. But if you already decided to run early, prepare your uniform in the evening, do not complicate the awakening.
How to avoid injury while jogging?
There is no dependence of the number of injuries on age, gender, body mass index, time of year and day. The set of factors affecting injury varies from person to person.But, in order not to harm yourself, do not skip the warm-up and cool-down. This is as important a part of your workout as running itself.
Take time to warm up at the beginning of your workout and cool down and stretch after. Start your runs at a slow, comfortable pace. Light jogging will allow you to recharge with energy, give a positive adaptation to the cardiovascular system, and strengthen the musculoskeletal system. How do you know that you are running easily? This is a stress in which you can maintain a conversation and do not feel severe shortness of breath.If it’s hard for you, just slow down.
Where is the best run and on what surface?
Photo: Sergey Kiselev / AGN Moscow
It is ideal to find a park nearby with a flat dirt track. But if there is nothing like that nearby, this does not mean that you need to abandon the idea of jogging. Running on asphalt is also permissible – the surface is flat, and the risk, for example, of getting into a hole with your foot and getting injured is minimal. But training like this creates more shock. So the correct running technique, developed muscles and control of the increase in the level of load will help you here.
What is the correct running technique?
While on the move, it is important to monitor the position of the body and foot. It is better to train with a straight back, straightened shoulders and a slight forward bend. When running, you need to land on the forefoot – this eliminates braking when landing and reduces the time the foot touches the ground, saves energy. Where to put your hands? Everything is easier here: bend at the elbows at a right angle.
Can you run hungry?
Not worth it. An hour before your workout, especially if it’s in the morning, it’s best to have a light snack.Oatmeal or a cheese sandwich and tea will do. If your workout will last no more than an hour and you did not have time to have breakfast, then half an hour before jogging half a banana, a mug of tea or a glass of water is enough. But it is better to refuse fatty foods before training.
What clothes and shoes are best for beginner runners?
Photo: Getty Images
Ideal gear – lightweight and free of movement. In general, jogging workouts will work with any kind of sportswear that you feel comfortable in.But the most important thing is that it should be made of synthetics (polyester and polyamide) in order to wick moisture away well.
Sneakers are an important part of a runner’s outfit. This is something that is not worth saving on. Comfortable running shoes will provide comfort while moving and reduce the risk of injury. For running, sneakers are bought half a size or a size larger.
How to start running after quarantine?
Jogging has long been banned. If you finally decide that it’s time, the main principles here are continuity and gradualness.If physical activity was in your life before self-isolation and was kept in quarantine (for example, every day began with exercise), then there should not be any particular difficulties. Your body is already used to stress. But if you have been sitting at the computer most of the day, then you should not expect much from yourself.
