How to choose the right lacrosse ball for cradling. What is the proper stance for effective cradling. How to maintain eye contact while cradling. What are common cradling mistakes to avoid. How to let the pocket do the work in cradling.
Selecting the Ideal Lacrosse Ball for Cradling Practice
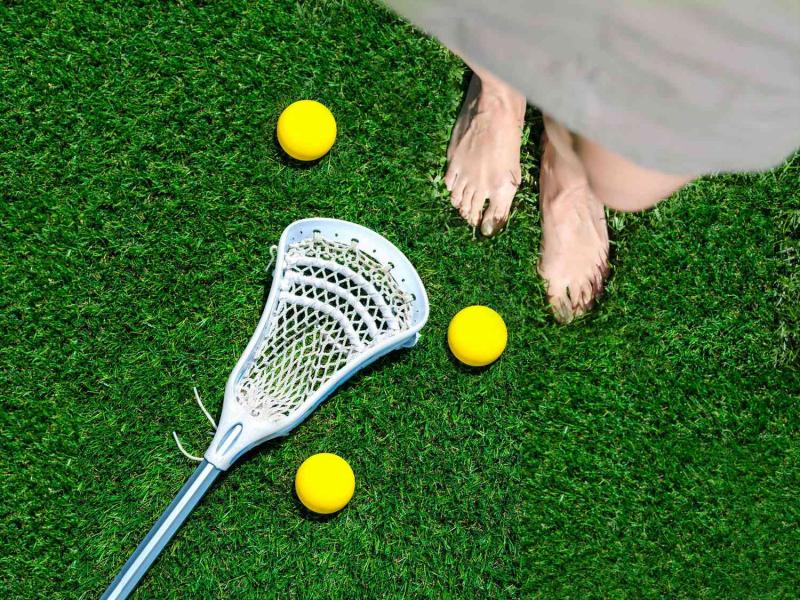
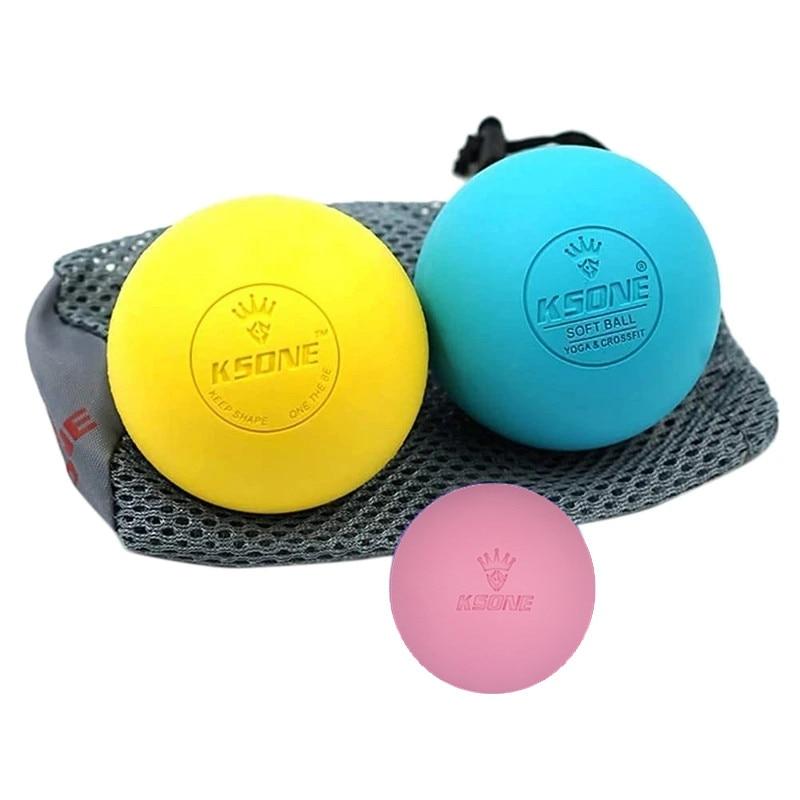
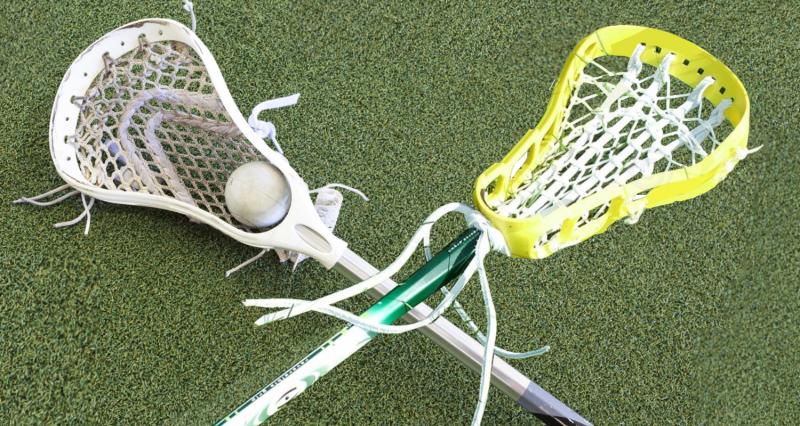
Choosing the right lacrosse ball is crucial for mastering the art of cradling. For beginners, a softer rubber ball is recommended over a hard, solid rubber one. This allows you to develop proper technique without risking injury to your hands. As you progress, you can transition to regulation solid rubber balls.
Size matters when it comes to lacrosse balls. Youth and women’s lacrosse utilize slightly smaller balls compared to men’s lacrosse. It’s essential to select a ball that matches the size of your lacrosse stick head. The ball should fit comfortably in the pocket, neither too tight nor too loose.
Characteristics of an Ideal Practice Ball:
- Soft rubber composition
- Appropriate size for your stick head
- Allows for easy movement within the pocket
- Provides a good feel for cradling motion
Perfecting Your Cradling Stance for Optimal Control
A proper stance is the foundation for effective lacrosse ball cradling. Stand with your feet shoulder-width apart and knees slightly bent. This position provides stability and allows for quick reactions during gameplay.
Grip the lacrosse stick with your dominant hand at the bottom of the shaft, as this hand will be doing most of the work. Place your other hand a few inches above, guiding the head of the stick. Maintain a loose but controlled grip to allow for fluid motion.
Key Elements of a Proper Cradling Stance:
- Feet shoulder-width apart
- Knees slightly bent
- Dominant hand at the bottom of the shaft
- Secondary hand positioned above for guidance
- Loose but controlled grip
Mastering the Fundamental Cradling Motion
The cradling motion is initiated from your dominant bottom hand. Whip the stick smoothly from right to left in a circular motion, using your wrist as the main pivot point. Keep your movements controlled and fluid, avoiding any jerky motions.
As you move the stick side to side, gently roll your top wrist in the same direction. This subtle movement helps angle the head for better ball control. Practice cradling at different heights to improve your overall technique and adaptability.
Can you cradle a lacrosse ball at different heights?
Yes, cradling at various heights is an essential skill to develop. Start with high cradling at shoulder height, using a large range of motion. Gradually lower to chest level with medium motion, and then practice tight, close cradling at hip height. This progression helps you develop proper technique and prepares you for different game situations.

Harnessing the Power of Your Lacrosse Stick’s Pocket
A well-broken-in pocket is key to effortless cradling. During the cradling motion, slightly relax your bottom hand grip when moving the stick from left to right. This allows the ball to roll smoothly within the pocket, utilizing the stick’s design for optimal control.
Visualize the ball moving in a consistent figure-8 pattern within the pocket. Initiate the cradle with a strong whip to get the ball rolling, then relax to maintain its momentum. Avoid clenching your hand tightly around the ball, as this inhibits movement and requires more effort.
How does the pocket contribute to effective cradling?
The pocket plays a crucial role in cradling by:
- Allowing the ball to roll smoothly with minimal effort
- Creating a natural figure-8 pattern for ball movement
- Reducing the need for excessive hand control
- Enhancing overall ball retention and control
Developing Advanced Cradling Techniques Through Practice
To elevate your cradling skills, incorporate various drills and scenarios into your practice routine. Focus on maintaining eye contact with the field while cradling, as this is crucial during actual gameplay. Practice cradling while running, changing direction, and maneuvering around obstacles to simulate real game situations.

Experiment with different cradling speeds and intensities to adapt to various on-field scenarios. Work on transitioning smoothly between high, medium, and low cradles to improve your versatility as a player.
Essential Cradling Drills for Skill Enhancement:
- Cradling while running in a zigzag pattern
- Performing quick direction changes while maintaining control
- Cradling around stationary objects or cones
- Practicing one-handed cradling for advanced control
- Incorporating stick fakes and dekes into your cradling routine
Avoiding Common Cradling Pitfalls and Mistakes
As you work on perfecting your cradling technique, be aware of common mistakes that can hinder your progress. By identifying and addressing these errors early on, you can develop proper habits and improve more quickly.
What are the most common cradling mistakes to avoid?
Some frequent cradling errors include:
- Cradling from the shoulder instead of the wrists
- Moving the stick up and down rather than side to side
- Gripping the stick too tightly
- Watching the ball excessively instead of maintaining field vision
- Using too much motion with the top hand
- Not initiating the cradle with enough force
- Cradling at inconsistent speeds

By focusing on proper technique and being mindful of these common mistakes, you can develop a smooth, efficient cradling motion that becomes second nature over time.
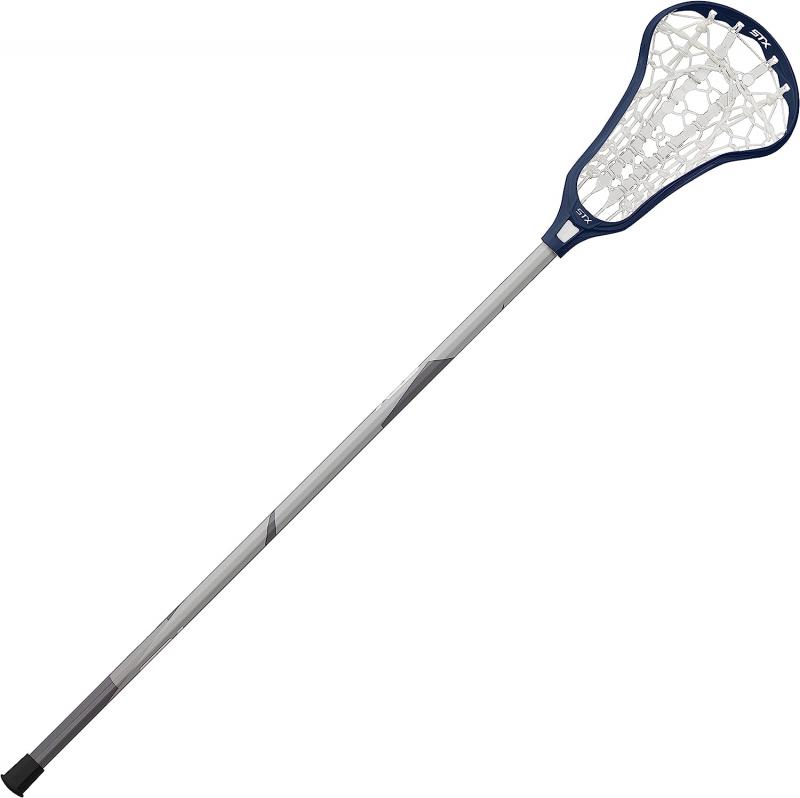
Selecting the Right Lacrosse Stick for Optimal Cradling
The choice of lacrosse stick plays a significant role in your ability to cradle effectively. For beginners, a stick with a deeper pocket is recommended as it provides better ball control. As your skills improve, you can transition to a stick with a shallower pocket for quicker ball release.
The pocket’s depth and stringing pattern greatly influence how the ball rolls during cradling. A well-broken-in pocket with the ideal depth allows for effortless ball movement, enhancing your overall cradling technique.
Factors to Consider When Choosing a Lacrosse Stick for Cradling:
- Pocket depth (deeper for beginners, shallower for advanced players)
- Stringing pattern and tension
- Shaft material and weight
- Head shape and design
- Overall balance and feel of the stick
Remember that finding the right stick may require some experimentation. Consider trying different options to find the one that feels most comfortable and suits your playing style.
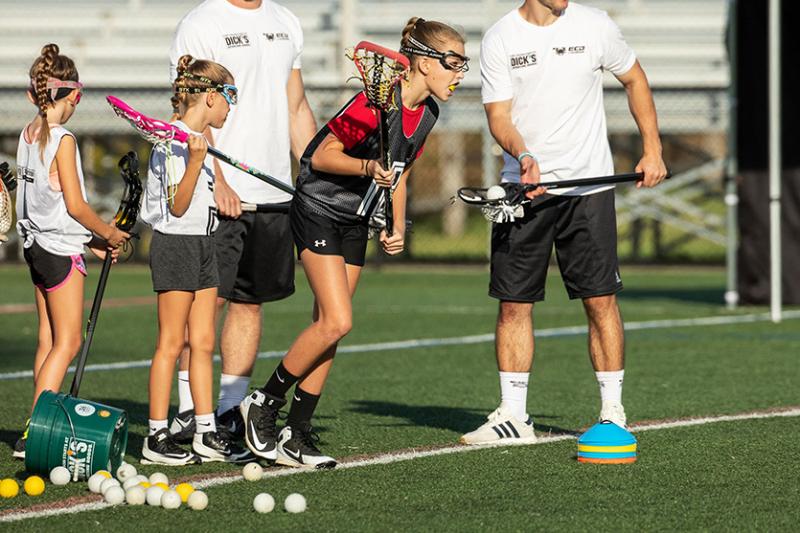
Incorporating Cradling into Game-Like Scenarios
To truly master cradling, it’s essential to practice in situations that mimic real game conditions. This approach helps you develop the ability to cradle effectively while facing defensive pressure, making quick decisions, and maintaining awareness of your surroundings.
How can you practice cradling in game-like situations?
Try these methods to enhance your cradling skills in realistic scenarios:
- Practice cradling while running at different speeds and changing direction
- Incorporate dodges and fakes into your cradling routine
- Work on cradling in traffic by having teammates act as defenders
- Practice transitioning quickly from cradling to passing or shooting
- Simulate game situations where you need to protect the ball from checks
By regularly practicing these game-like scenarios, you’ll develop the muscle memory and instincts needed to cradle effectively during actual matches.
The Role of Physical Fitness in Improving Cradling Ability
While technique is crucial, physical fitness also plays a significant role in your ability to cradle effectively. Developing strength, endurance, and coordination can greatly enhance your cradling skills and overall lacrosse performance.

What physical attributes contribute to better cradling?
Key physical aspects that impact cradling include:
- Wrist and forearm strength for better control
- Core stability for maintaining balance while cradling
- Cardiovascular endurance for sustained cradling during gameplay
- Hand-eye coordination for precise ball control
- Overall body awareness and proprioception
Incorporate exercises that target these areas into your training regimen to support your cradling technique development. This holistic approach will help you become a more well-rounded and effective lacrosse player.
Advanced Cradling Techniques for Experienced Players
As you become more proficient in basic cradling, you can start exploring advanced techniques that will give you an edge on the field. These advanced methods require a high level of skill and control but can be incredibly effective when mastered.
What are some advanced cradling techniques used by experienced players?
Some sophisticated cradling methods include:
- One-handed cradling for enhanced ball protection and stick control
- Behind-the-back cradling to surprise defenders and create space
- Quick-switch cradling to rapidly change hands and directions
- Low-to-high transitions for sudden changes in ball position
- Combination moves that blend cradling with dodges and fakes

These advanced techniques should only be attempted once you have a solid foundation in basic cradling. Practice them regularly in controlled settings before trying to implement them in game situations.
The Mental Aspect of Cradling: Focus and Awareness
Cradling is not just a physical skill; it also requires mental acuity and focus. Developing the ability to cradle instinctively while maintaining awareness of the game around you is crucial for success on the lacrosse field.
How can players improve their mental game when it comes to cradling?
To enhance the mental aspects of cradling:
- Practice cradling while scanning the field to improve situational awareness
- Work on divided attention by cradling while listening to verbal cues
- Develop a pre-game routine that includes visualizing successful cradling
- Use mindfulness techniques to stay focused during high-pressure situations
- Regularly analyze game footage to identify areas for improvement in your cradling technique
By honing both the physical and mental aspects of cradling, you’ll become a more complete and effective lacrosse player, capable of maintaining possession and creating opportunities for your team.

Choose the Right Lacrosse Ball
Cradling a lacrosse ball takes practice and the right equipment. When starting out, choose a softer, rubber lacrosse ball rather than a hard, solid rubber ball which can hurt your hands while learning. Opt for a ball with some give that allows you to get the feel for cradling without pain. You’ll eventually work up to cradling a regulation, solid rubber lacrosse ball but start soft while perfecting your technique.
Make sure the ball is the appropriate size. Youth and women’s lacrosse balls are a bit smaller than a men’s lacrosse ball. Use a ball that’s proportionate to the lacrosse stick head you’ll be using – you don’t want a ball that’s too small and will rattle around or too large to control. The ball should sit comfortably in the pocket of the head, not so tight that it doesn’t move freely but not so loose that it falls out.
Having the right lacrosse stick is also key for effective cradling. For beginners, choose a stick with a deeper pocket that helps control the ball. As you improve, you can switch to a stick with a shallower pocket for quicker ball release. The pocket should be woven to the ideal depth for effortless rolling of the ball as you cradle. A perfectly broken-in pocket helps immensely when learning proper technique.
Get in the Right Stance
Cradling begins with adopting the proper stance to generate power and control. Stand with your feet shoulder-width apart and knees slightly bent. Keep your knees bent throughout the cradling motion to remain balanced and ready to react.
Hold the stick with your dominant hand at the very bottom of the shaft. This hand does most of the work during cradling. Your other hand grips the shaft a few inches above the first hand to guide the head. Hold the stick loosely but with control – a tight, tense grip inhibits fluid cradling.
Angle the head away from your body diagonally at about 45 degrees. Point the top of the head away from you, with the pocket facing inwards towards your body. This position lets the centrifugal force do some of the work.
Start Cradling
Initiate the cradling motion from your dominant bottom hand. Whip the stick smoothly from right to left in a circular motion, using your wrist as the main pivot point. Keep your movements controlled and fluid – no jerky motions.
As you whip the stick side to side, lightly roll your top wrist in the same direction of motion. This angles the head to help control the ball. Don’t make dramatic motions with the top hand – a subtle roll is all that’s needed.
Cradle at different heights to practice control. Start with high cradling at shoulder height using large range of motion. Lower to chest level with medium motion then practice tight, close cradling at hip height. Cradling high helps develop proper technique then you can shrink the motion for quicker releases.
Let the Pocket Do the Work
A perfectly broken-in pocket helps the ball roll out smoothly with minimal effort. During cradling, relax your bottom hand grip slightly when whipping the stick from left to right. This extra space allows the ball to roll out of the pocket, up the sidewall and into the next pocket “valley.”
Cradling works best when you make the pocket do most of the controlling. Imagine the ball moving in a consistent figure 8 pattern within the pocket through the momentum. Whip hard initially to get the ball rolling fast then relax to keep up the speed.
Avoid cradling with your hand clenched tightly around the ball. This inhibits movement, causes the ball to stick and requires more work. Let the pocket propel and guide the ball instead.
Maintain Eye Contact
Keep your eyes up and focused forward throughout cradling. Don’t watch the ball or your stick. This trains your muscle memory and hand-eye coordination to cradle without looking.
Make sure you can cradle smoothly while running, juking, spinning and changing direction. Practice cradling drills that incorporate movement and activity to get comfortable with multitasking.
Simulate game situations by cradling around obstacles and defenders. Cradle with your head up looking for cutters to pass to. Mimic realistic play to develop on-field cradling skills.
Common Cradling Mistakes
Here are some common cradling errors to avoid:
- Cradling from the shoulder instead of the wrists
- Moving the stick up and down instead of side to side
- Squeezing the stick too tightly
- Watching the ball excessively
- Using too much motion with the top hand
- Not whipping the initial cradle hard enough
- Cradling at inconsistent speeds
With practice, cradling becomes second nature. Don’t get frustrated early on. Stick with it, utilizing proper technique, and you’ll be cradling like the pros in no time.
Get a Lacrosse Stick or Cradlebaby
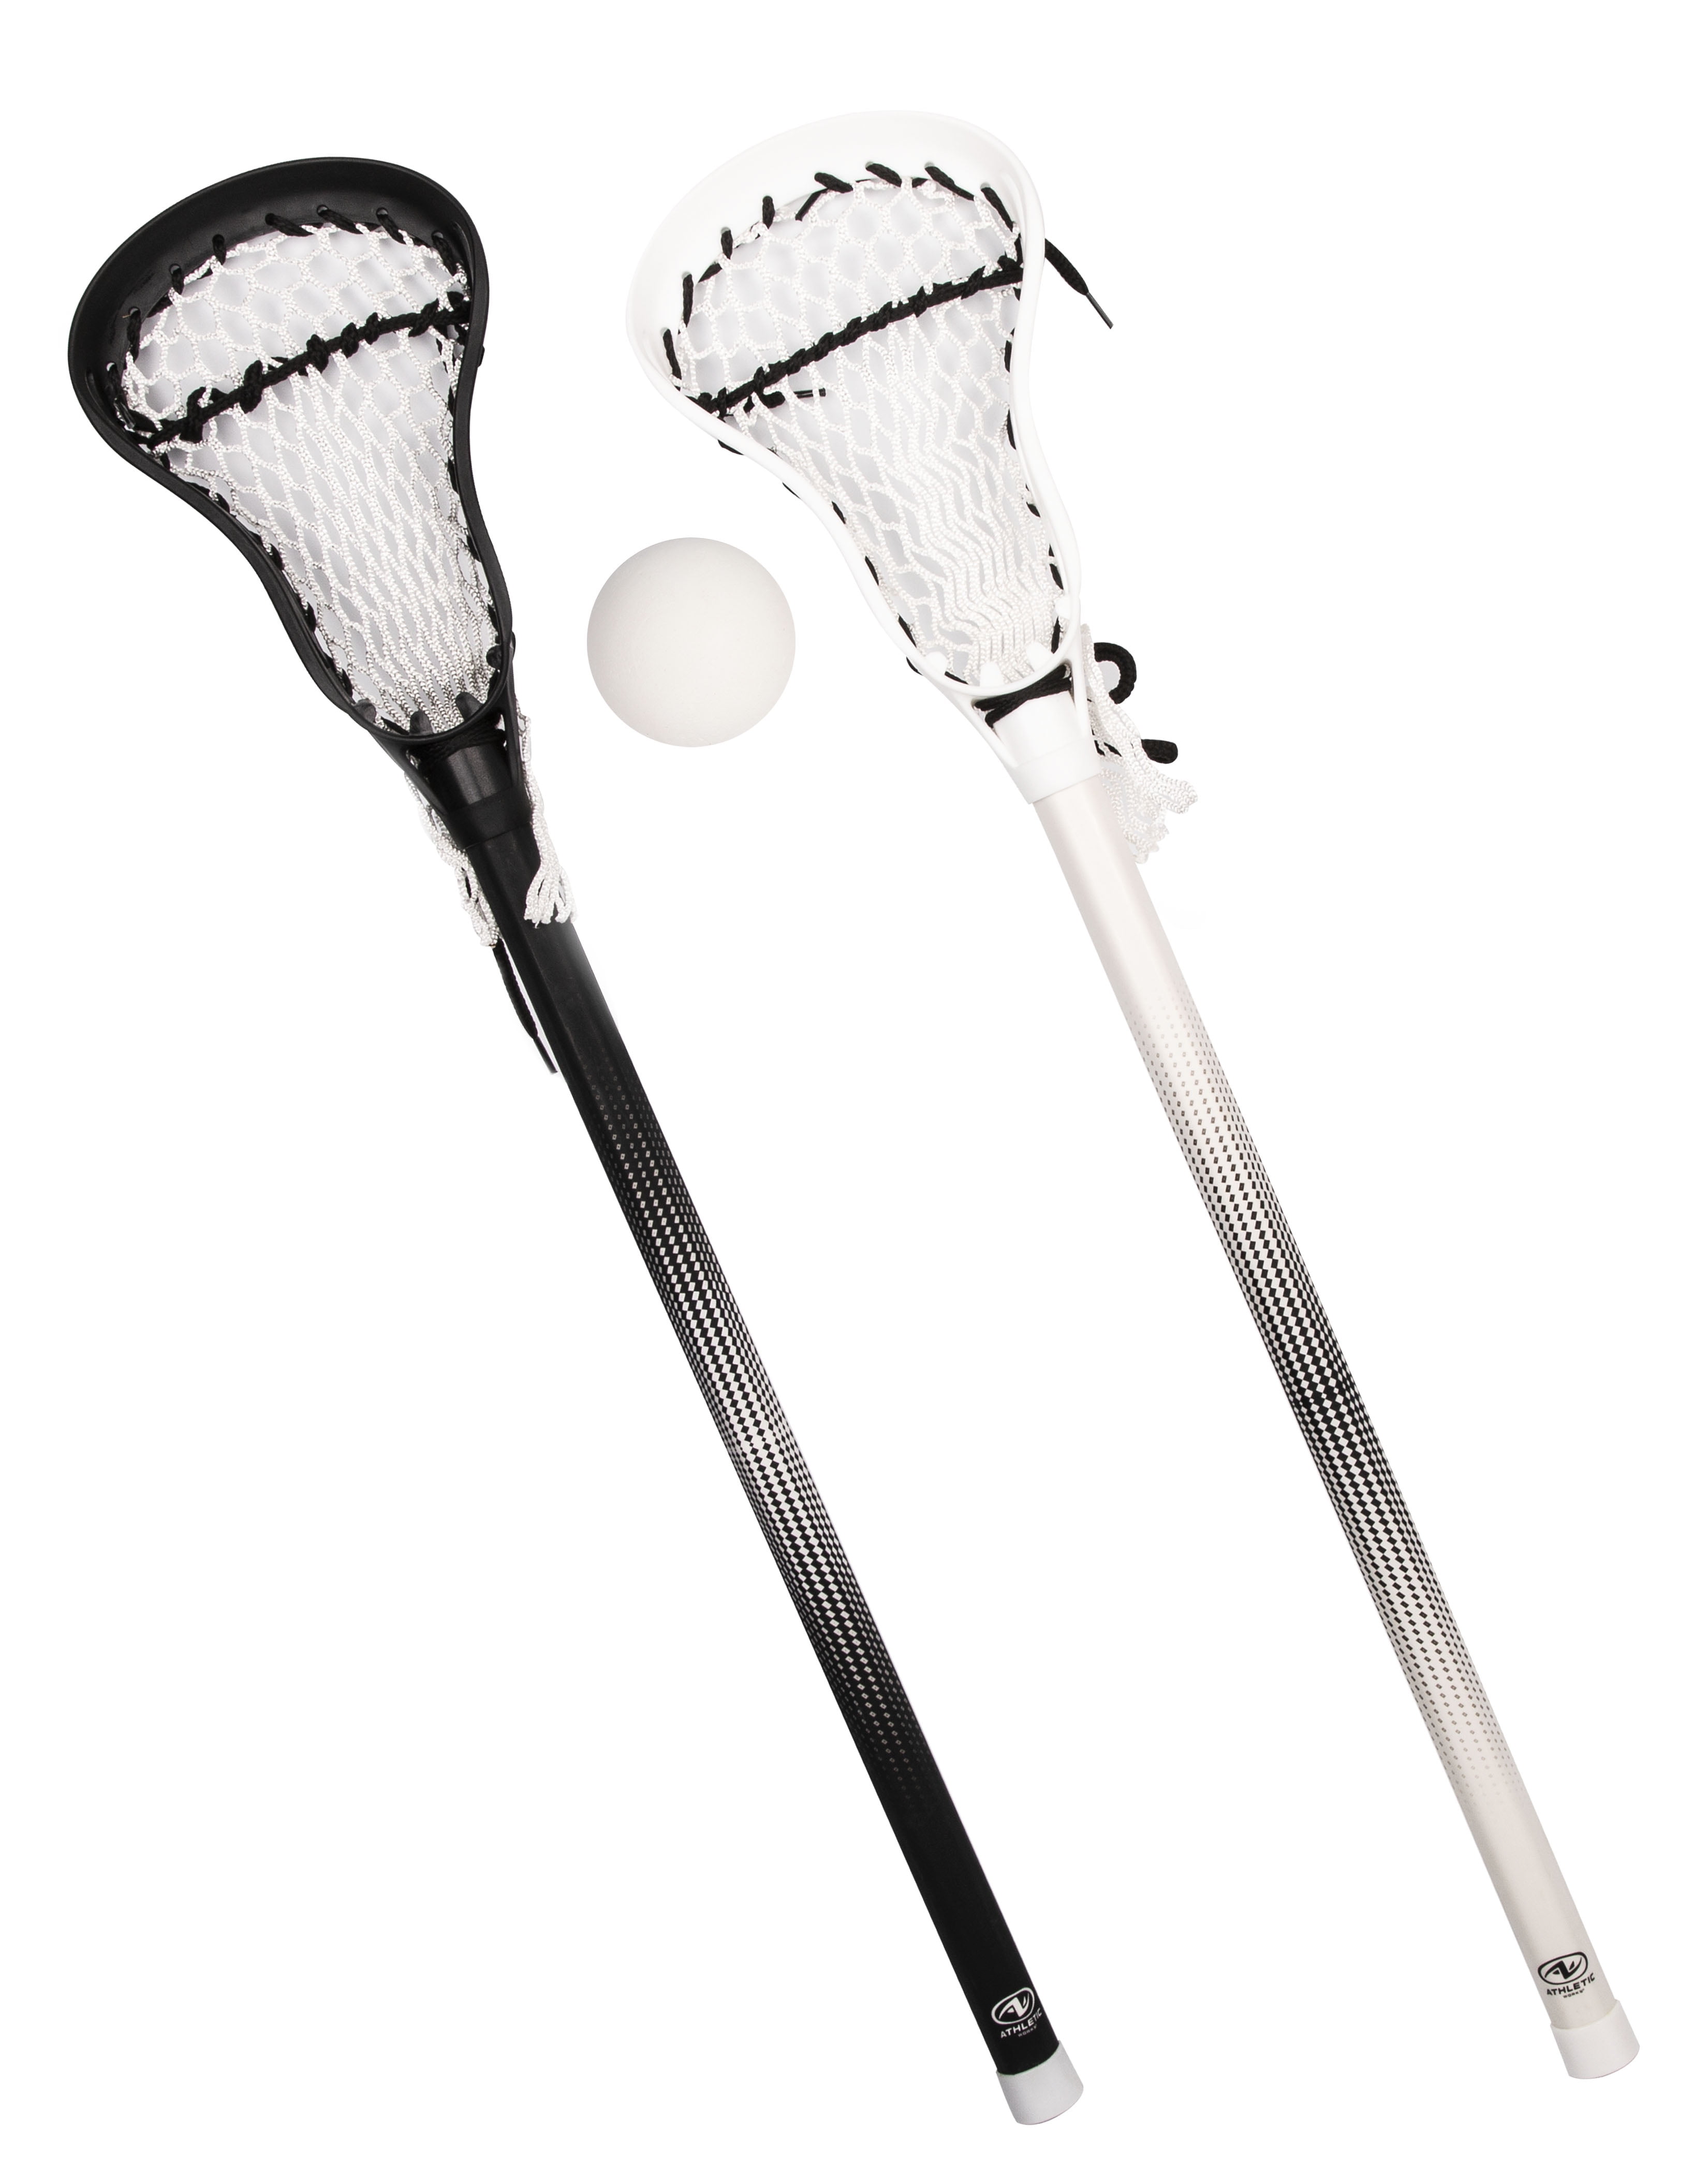
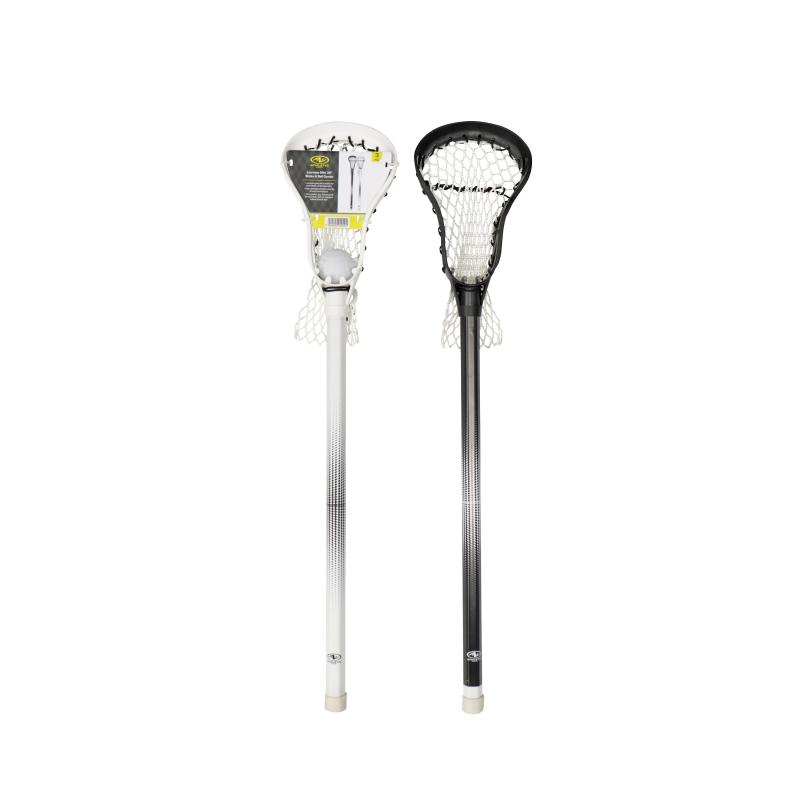
Before you can start cradling a lacrosse ball, you need to get the proper equipment. The two main options are a traditional lacrosse stick or a ball-on-string cradle known as a “cradlebaby.” Let’s explore the pros and cons of each.
Lacrosse Stick
A lacrosse stick has a long metal or composite shaft attached to a plastic head with a woven pocket. Sticks come in different sizes, weights and pocket shapes for various positions and skill levels. For beginners, look for an entry-level stick with a deep pocket to help control the ball while learning.
Benefits of using a lacrosse stick:
- Mimics in-game experience
- Lets you practice full throwing motion
- Strengthens hand-eye coordination
- Various sizes/weights for different players
Downsides of a stick:
- Can be expensive for a beginner stick
- Heavy and tiring for new players
- Less ball control than a cradlebaby
Cradlebaby
A cradlebaby is a ball attached to a nylon string and plastic handle. The length is adjustable to suit players of all sizes. It allows you to focus just on the cradling movement.
Benefits of a cradlebaby:
- Lightweight and easy to maneuver
- Easier ball control for beginners
- Low cost compared to a stick
- Portable and easy to transport
- Allows you to cradle balls of various sizes
Downsides of a cradlebaby:
- Doesn’t mimic actual gameplay
- Can develop bad habits
- Limited to just cradling motion
- Balls tend to wear out over time
The Verdict
For brand new players focused just on developing basic cradling skills, a cradlebaby is the way to go. The lightweight feel and constant ball control builds confidence in your abilities quickly. Plus it’s an inexpensive way to get started.
As you advance, transition to a lacrosse stick to learn the full range of motions required in a game. Use the stick to practice cradling in conjunction with throwing, catching, scooping and dodging. This takes your skills to the next level on the field.
Many players use a cradlebaby for warm ups before games or for skill training drills at home. The high control helps reinforce proper technique between on-field practices. Combine a cradlebaby with stick training for the ideal cradleball experience.
Key Cradling Tips
Once you have your cradlebaby or lacrosse stick, keep these technique pointers in mind:
- Use your wrists as the pivot points
- Point head diagonally away from body
- Cradle side to side in smooth figure 8 motion
- Roll top wrist subtly in direction of cradling
- Let the pocket propel the ball
- Keep eyes up, not on the ball
- Practice at different heights
- Maintain control while moving
With the right equipment and proper technique, you’ll be cradling like a pro with a lacrosse stick or cradlebaby in no time!
Hold the Stick Properly
Before attempting any cradling techniques, it’s crucial to learn how to properly hold a lacrosse stick. Your grip and hand positioning enable fluid, controlled motion and generate power for fast cradling.
Bottom Hand Position
Place your dominant hand at the very bottom of the shaft. Wrap your thumb around the shaft and rest your fingers on the front, keeping a relaxed but firm grip. This bottom hand does most of the work during cradling and provides stability.
Angle the head of the stick diagonally away from your body at about 45 degrees. The exact angle isn’t crucial, but you generally want to point the top of the head away from you. Face the pocket towards your body to help control the ball.
Keep your wrist and forearm loose – this is your main pivot point for the cradling motion. Don’t grasp the stick in a rigid, tense grip. Maintaining flexibility in your bottom hand and wrist is key.
Top Hand Position
Your top hand should grip the stick a few inches above your bottom hand. Unlike sports like baseball, the top hand in lacrosse provides guidance rather than power. Place this hand in a neutral, natural position.
Use a light hold with your top hand fingers on the front of the shaft. Avoid squeezing too tight – you want to be able to slide this hand quickly up and down the shaft as needed. The top hand makes subtle movements to angle the head during cradling.
Keeping soft hands prevents the stick from bouncing and vibrating during motion. You want to cradle smoothly without jerky movements.
Arm and Body Positioning
Stand with your feet about shoulder-width apart, knees slightly bent. Maintain this athletic stance throughout cradling and resist the urge to lock your knees. Keeping your knees bent makes it easier to be mobile while cradling.
Hold your stick out in front of your body at chest level when starting out. As you advance, you can cradle closer to your body for quicker releases. But begin cradling from an extended position to establish proper mechanics.
Keep your cradling arm extended but not rigidly straight – maintain a slight bend in your elbow. This gives you room to whip the stick smoothly through its arc rather than crunching your motion.
Hold your opposite arm out partly extended for balance. You may need quick minor adjustments from this arm to maintain control if the cradling feels off.
Adjusting Your Grip
It takes practice to find your ideal hand positioning and grip strength. Pay attention to how the stick feels during cradling:
- If the head vibrates excessively, relax your grip pressure.
- If the ball is difficult to control, grasp firmer with your bottom hand.
- If your hand slides up the shaft, regrip the bottom.
- If the motion feels jerky, loosen up your hands and arms.
Don’t be afraid to stop and readjust your grip until it feels right. Proper hand positioning is vital for keeping the ball in your stick.
With the right grip and stance, you’ll have the foundation necessary for smooth, powerful cradling. It just takes repetition to find what works best for your hands, strength and comfort level.
Start Slowly
When learning to cradle a lacrosse ball, begin with slow, controlled motions. Cradling too quickly as a beginner leads to fumbling the ball and developing bad habits. Take your time to build proper technique before working on speed.
Find Your Rhythm
The cradling motion follows a smooth, rhythmic arc from side to side. Start the movement slowly, focusing on keeping the arc consistent. As you become comfortable, gradually increase your speed while maintaining the same path of motion.
Cradling should feel like a pendulum swing or metronome beat. Use the fluidity of your wrist to provide momentum instead of forcing the motion.
Establish an even tempo by counting the seconds it takes you to complete one full cradle. Increase your speed incrementally over time while keeping the same count. This ensures controlled acceleration.
Use Gentle Whipping
Initiate each cradle with a gentle whip of your bottom hand from right to left. This creates centrifugal force to keep the ball rolling within the pocket.
Whip only hard enough to get the ball moving smoothly. Excessive force causes you to lose control. As the ball picks up speed, relax your bottom hand to keep it coasting at a steady pace.
Imagine whipping a towel rather than a baseball bat. You want finesse, not brute power. Work on making crisp but gentle motions from your wrist and forearm.
Minimize Top Hand Motion
When starting out, keep your top hand still and let your cradling hand do all the work. Too much top hand movement inhibits fluidity.
Once you establish an easy rhythm, subtly roll your top wrist in sync with the direction of cradling. Use small motions to lightly pivot the head – overdoing it throws off the feel.
Advanced players utilize the top hand more for fakes and creative moves. But when building your foundation, let your dominant lower hand run the show.
Keep Your Eyes Up
Resist the urge to watch the ball. Keep your head up and eyes focused forward throughout the cradling motion. This trains critical muscle memory so you can cradle without looking down.
Pick a focal point ahead of you and concentrate on keeping the arc smooth. Use your peripheral vision to monitor ball control and hand positioning.
Maintaining eye contact also keeps you alert to incoming defenders. Get comfortable multi-tasking your vision from the start.
Practice Both Hands
Don’t just cradle with your dominant hand – practice with your off hand as well. This builds overall stick skills and dexterity.
Alternate hands during your training sessions. You’ll be surprised how quickly your non-dominant side picks up the coordinated motions. Take it slowly until each hand has a smooth feel.
On the field, you need to be able to cradle effectively with either hand. Defenders force you to switch often, so dual-hand competency is critical.
Mastering the basics slowly gives you proper cradling biomechanics. Once the technique is ingrained, then ramp up your speed and elaborate on the moves.
Keep Your Elbows In
Proper arm and elbow positioning is key for efficient, controlled cradling. Avoid sticking your elbows out wide – keep them tucked in a “winged” stance for optimal power.
Lead Elbow In
Focus first on keeping your lead elbow (the arm cradling the ball) tucked close to your body. Resist letting it flare out away from your side.
By keeping your lead elbow in, you generate more force from your core and use your arm as a lever. Flaring the elbow makes you rely solely on arm strength.
Point your lead elbow towards the ground rather than straight back. This allows a full range of motion during the cradle. Think “elbow in and down” as your mantra.
Trail Elbow In
Your back arm’s elbow also shouldn’t wing out. Keep it bent at your side pointing back. This balanced stance prevents over-rotation.
Imagine your trailing elbow acting as a rudder to steer your body. Subtle motions from this elbow guide the direction of your cradle and clears space for driving forward.
Focus on driving this elbow back on your cradle’s upswing to generate more power from your core muscles.
Winged Stance
The ideal arm and elbow position is called a “winged” stance. Your elbows are bent 90 degrees and tucked firmly at your sides like a bird’s wings.
This alignment engages your latissimus dorsi muscles for more powerful cradling. The momentum comes from your back and core, not just your arms.
A winged stance also lets you adjust directions quickly during cradling. You have greater mobility than with flared elbows.
Practice Without Stick
Try practicing the cradling motion without a stick to master the winged elbow position.
Mimic the cradling arm arc with your elbows bent and anchored. Concentrate on using your core to power the movement.
You can also do this by facing a wall. Keep your elbows from touching the wall as you swing your arms in cradling motions.
Train With Resistance
Use resistance bands or weights while cradling to reinforce keeping those elbows tight.
The added load intensifies the temptation to flare your elbows out. Resist it and maintain form – this builds tremendous core and arm strength.
You can also have a partner provide manual resistance by pressing on your elbows to keep them anchored in.
Getting in the habit of proper elbow alignment right from the start prevents bad habits down the road.
Use Your Wrists
The secret to smooth, controlled cradling is using your wrists as the main pivot point. Generating the movement from your wrists rather than arms preserves fluidity and power.
Lead Wrist
Initiate the cradling motion by flicking your lead wrist downwards. This light whip sparks momentum you can build on.
Keep your wrist loose and limber – any tension inhibits free motion. Maintain some flex to absorb shock and allow whipping.
As you complete the cradle backswing, roll your wrist slightly upwards to angle the head. Time this subtle wrist roll precisely to control the ball’s path.
Trail Wrist
Your trail wrist helps guide the lead wrist’s arc and timing. Allow this wrist to hinge back naturally on the upswing, controlling the arc height.
If the lead wrist wants to rise too high, the trail wrist blocks it from overextending. It functions like a stop gap.
Some players intentionally flex their trail wrist on the downswing to add extra whip. But focus on keeping it neutral until you perfect the basics.
Finger and Arm Relaxation
Resist gripping the stick tightly with your fingers – this reduces wrist flexibility and range of motion.
Keep light finger contact for maneuverability. Let the stick move freely in your fingers as the wrists control the motions.
Avoid using rigid, locked arms to power the cradle. This forces your wrists and inhibits fluidity. Let the arms hang loose as wrists generate momentum.
Two-Way Wrist Work
Your wrists don’t work independently – power comes from using them in tandem.
As your lead wrist reaches the end of its downswing arc, engage your trail wrist to rides momentum back upwards into the next cradle.
Practice making the transition between wrist motions smooth and seamless. One wrist initiates then the other continues the flow.
Wrist Strengthening
Strong, flexible wrists are vital for effective cradling over time. Here are some ways to boost wrist strength:
- Squeeze tennis balls
- Rotate a dowel rod
- Lift light dumbbells with your palms up
- Do push-ups on your fists
- Use wrist curls and reverse curls
Don’t forget to stretch your wrists thoroughly before and after cradling to maintain flexibility and prevent injury.
Cradle at Different Heights
An important cradling technique is changing the height of your arc. Cradling high, low, and mid-range develops all-around skills and ball control.
High Cradling
Begin by cradling with an exaggerated high arc, up near your shoulder. This forces you to use proper mechanics with your wrists and arms.
Focus on making crisp motions even on high swings. Don’t just flop the stick aimlessly overhead – stay controlled.
High cradling improves shoulder and arm strength since it works your full range of motion. Take it slow until the movements feel smooth.
Mid-Level Cradling
After getting comfortable cradling high, drop down to chest/face level. This mid-range arc is ideal for protecting your stick from checks.
Concentrate on keeping your cradle motions compact but still fluid. Don’t shorten your wrist motion – modify the arc instead.
Mid-level cradling allows quicker stick movements for dodging defenders or passing on the run.
Low Cradling
Finally, practice cradling tight to your body, down around hip level. Low cradling is perfect for power drives to the goal.
The compact motions are harder to intercept but require mastery of wrist control. Take care not to over-flick your wrists on the low arc.
Changing levels mid-cradle can also be effective. Swing high then suddenly drop low, or vice versa, to throw off defenders.
Two-Handed Cradling
Work on transitioning between one and two-handed cradling at different heights:
- High arc – switch to two hands for extra control
- Chest level – either one or two hands
- Low cradling – typically one-handed
Your top hand can provide stabilization and leverage at the extremes. Find the right balance for each level.
Add Footwork
Don’t just cradle statically – practice cradling while moving and dodging.
Shuffle side to side, carioca, backpedal, sprint – make your feet dance while cradling. This boosts coordination.
Change cradle heights spontaneously as you move. React as if avoiding defenders on the run.
Mastering all cradling planes gives you the complete package. Vary your arc and hand grip often to become a triple-threat with the ball in your stick.
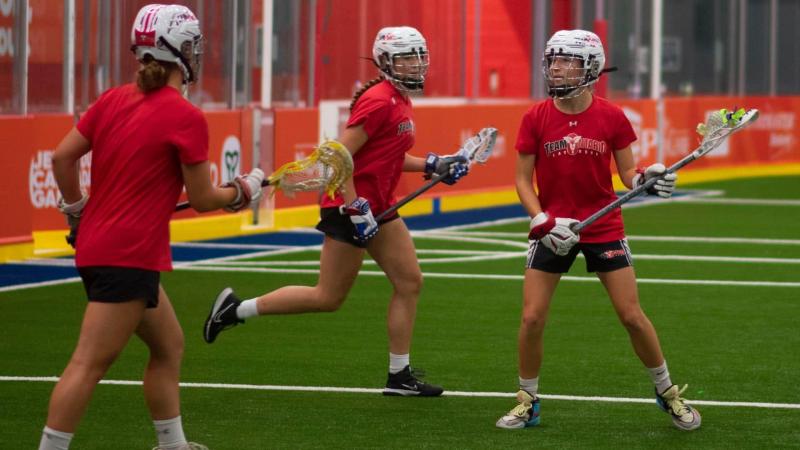
Cradle While Moving
Don’t just cradle standing still – it’s crucial to practice cradling while running, dodging and changing directions. This develops on-field cradling skills.
Cradle at Different Speeds
Start by jogging slowly while cradling, focusing on maintaining proper technique.
Gradually build up speed, sprinting at full tilt down the field. Pay attention to arm motion and wrist movement – don’t sacrifice form as you accelerate.
Practice starting and stopping quickly during cradling. Change pace randomly to mimic real game play.
Cradle While Dodging
Incorporate lateral dodges like side shuffles into your cradling. Drop your hips and stay low during cuts.
Work on jab steps, fakes and jump stops too. The ability to cradle seamlessly while dodging defenders is a huge asset.
Have a partner run with you applying light pressure as you dodge and weave. This improves multi-tasking the cradle.
Cradle While Changing Direction
Sharply change direction while cradling to imitate reacting to open space or pursuing ground balls.
Focus on keeping continuous motion during cuts – no stuttering. Whip the ball smoothly around your body as you pivot and spin.
Try cradling in circles, figure 8’s and cariocas. Master controlling the ball through all types of motions.
Add Passing and Catching
Cradle towards a teammate and practice quick sticks passes back and forth to apply game skills.
Work on seamlessly catching passes in your crosse while maintaining crisp cradle motion.
This trains you to cradle naturally as part of passing plays rather than in isolation.
Over-the-Shoulder Cradling
Running forward while cradling behind your back prepares you to protect the ball on the run upfield.
Twist your torso and lean into the cradle to keep the ball shielded from checks.
Switch hands to evade pursuit. Few things excite crowds more than a nasty over-the-shoulder cradle.
By training with movement, your cradling skills directly translate to using the technique successfully during intense game action.
Practice Catching and Throwing
Cradling works hand-in-hand with catching and throwing skills. Work on seamlessly transitioning between cradling, catching and passing to apply the techniques in game situations.
Catching After Cradling
Have a partner pass you ground balls to scoop up after cradling. Concentrate on quickly securing the ball before returning to cradling.
Practice catching over-the-shoulder passes after cradling backwards. Develop the dexterity to absorb passes from all angles.
The better you get at controlling the ball after catching, the faster you can return to evasive cradling.
Throwing After Cradling
Cradle towards a partner, then work on quick stick passes to get off fast shots after the cradle.
Step into throws and use your hips and core to generate velocity. Follow through towards your target.
Smooth, deceptive cradling naturally sets up accurate passing so work on connecting the motions.
Quick Stick Cradling
Incorporate quick sticks into your cradling training. When receiving passes, cradle for just 1-2 seconds before a return pass.
Concentrate on snagging the ball cleanly from the cradle into your pocket before turning and firing back.
Quick sticks keep the defense off balance and take advantage of crisp cradling.
Shooting After Cradling
Practice shooting on the run. Cradle at full speed towards the goal then transition into a blistering shot.
Work on fakes and jukes to set up your drive. Defenders have difficulty stopping accurate shooters who cradle adeptly.
A deceptive cradle before shooting also improves your accuracy as it shifts momentum towards the target.
Box Drills
Set up a passing diamond or box drill with teammates. Cradle and move the ball rapidly around the box with quick sticks and catches.
This intense exercise trains you to cradle without looking, react to catches and make crisp passes.
The more cradling integrates into dynamic drills, the more ingrained it becomes in your muscle memory.
Turning cradling into second nature as part of passing and shooting is instrumental for succeeding on the field.
Work on Changing Hands
During games, defenders will try to force you to cradle with your weak hand. Practice smoothly transitioning between dominant and non-dominant hand cradling.
Switch Hands Mid-Cradle
Start a cradle with your strong hand, complete 2-3 arcs, then pass the stick to your bottom weak hand while cradling.
Don’t stop motion – continue the pendulum swing with minimal interruption during the hand change.
Gradually increase passing speed between hands for seamless transitions.
Cradle Length with Each Hand
Rather than switching hands back and forth quickly, work up to longer cradling periods with each hand.
Cradle perfectly for 10 arcs with your dominant hand before passing to the weak hand for 10 more arcs.
This builds endurance and competence cradling with both hands independently.
Switch Under Pressure
Have a partner lightly pressure you as you switch hands cradling. Don’t be frazzled – stay smooth.
Battle through checks during transitions. This mental toughness trains you to change hands amidst intense game action.
Practice cradling while being lightly pushed side to side to force hand transitions.
Cradle and Pass Drills
Incorporate hand changes into passing and catching drills:
- Receive a pass with your strong hand then cradle and return pass with your weak hand.
- Quick stick passes back and forth alternating hands after each catch.
- Cradle lengthwise down the field alternating hands every 10 yards.
Mixing up hand changes during dynamic drills cements the skill.
Strengthen Your Off Hand
Use hand strengtheners, tennis balls and wrist curls to build dexterity in your weak hand. Nimble wrists and grip facilitate smooth off-hand cradling.
Mastering ambidextrous cradling gives you a distinct edge when defenders press you to zig when they think you’ll zag.
Cradle Faster and Tighter
Once you have sound technique, it’s time to increase cradling speed and tightness. Faster, more compact motions make it harder for defenders to intercept passes and shots.
Incremental Speed Increases
Bump up your cradling tempo by counting rhythm, starting slowly then speeding up. Count “1-2-3-4” over 4 full cradles, then “1-2-3” over 3 and so on down to a quick “1.”
Don’t sacrifice motion quality as you go faster – keep the smooth pendulum swing. It just happens in less time.
Accelerate and decelerate through a series of speed counts to develop quickness and control.
Explosive First Step
Focus on an aggressive first cradle to abruptly gain momentum off the start.
Drop into a slight squat, explode up and drive through your initial downswing with purpose.
Displace defenders with this violent first move then settle into rhythmic speed cradling.
Low and Tight
Cradle tighter to your body, down around hip level. This makes it hard for stick checks.
Keep your elbows tight with wrists locked to minimize arc size. Whip hand motions become very compact.
Stay low through the cradle, knees bent, for explosion out of cuts.
Pocket the Ball
When evading pressure at top speed, momentarily “pocket” the ball rather than cradling.
Cup the ball tightly with your top hand fingers pressed around the pocket to secure it.
This protects the ball while bull rushing through traffic. Immediately return to cradling once clear.
Change Grip Pressure
Loosen your bottom hand grip slightly when accelerating then regain control as you decelerate.
This finer hand pressure manipulation keeps the ball rolling smoothly at high speeds.
Advanced cradlers can finesse grip pressure throughout the motion to perfectly control pace.
After mastering proper technique, ratchet up cradling quickness and dexterity to hit another level with the ball in your stick.
Cradle with Both Hands
Although one-handed cradling is common, utilizing two hands can be effective too. Learn when and how to cradle with both hands on the stick for maximum control.
High Cradling
Cradling up high near your shoulders is easiest with two hands for added command.
Choke up with your top hand for leverage to whip the long arc powerfully. Keep the motion smooth and arms relaxed.
The top hand adds stability on the very wide cradle swing. Drop back to one hand as you bring the cradle downward.
Power Runs
When barreling through traffic or warding off checks, two-hand cradling provides superior ball security.
Clamp both hands firmly on the stick to shield the ball from prying sticks. Use your body as a wall to fend off defenders.
Running hunched over with two hands shelters the ball like a fullback plowing through the line.
Switches and Jukes
Quick hand shifts and direction changes are best controlled with two hands on the stick.
The top hand adds an extra point of leverage for quicker maneuvers. Remain poised through fakes and cuts.
Spin moves, about-faces and twirls go smoothly with dual grips for added dexterity.
Fatigue Sets In
As your cradle arm fatigues, use both hands to take pressure off rather than sacrificing technique.
When your bottom hand loses crispness, incorporate the top hand more to compensate.
This prevents sloppy cradling that can lead to turnovers when physically drained.
Regain Control
If the ball starts to slip or your cradling feels off, clamp down quickly with both hands to regain composure before continuing the fluid motion.
Two-handed cradling resets your balance and positioning to restore one-handed rhythm.
Utilize two hands strategically as needed while cradling to maintain possession and control of the ball.
Do Lacrosse Wall Ball Drills
Wall ball drills using a lacrosse stick and ball are a phenomenal way to sharpen cradling skills. The repetitive rebounding action ingrains proper technique.
Single Cradle Wall Ball
Stand 5-10 yards from a solid wall without windows. Cradle the ball in your stick then throw it against the wall mimicking a pass.
As the ball rebounds, catch it in your stick head and immediately transition into cradling again before the next throw.
This drill integrates cradling, catching, passing and hand-eye coordination.
Double Cradle Wall Ball
For added difficulty, introduce a double cradle between throws. After catching the rebound, cradle right to left then quickly left to right before the next pass.
Work up to triple or quadruple cradles between throws to increase the cradling repetitions.
Always cradle then pass – resist the urge to just pass without the cradle motion.
Add Footwork
Move your feet while cradling and throwing. Shuffle side to side or backpedal to receive wall rebounds instead of being stationary.
This dynamic footwork simulates real game movements while cradling.
Change direction suddenly while cradling to improve multitasking skills.
Cradle “Around the World”
Catch the ball after it rebounds then pivot or spin before cradling and passing again. Work pivots and cradles in every direction.
Change your cadence and stance each throw to cradle under different circumstances.
Maintain control and fluidity while spinning – no stuttered motions.
Mix Up Heights
Vary the ball height as it rebounds using bounce passes against the wall. Cradle high, low and mid-range.
Adjust your body position and mechanics to cradle effectively at all levels.
Wall ball drills with focused cradling repetition will quickly get your skills up to speed.
Watch Lacrosse Videos for Inspiration
Nothing gets your creative juices flowing for cradling like watching lacrosse highlight videos. Observe the best players’ techniques to expand your skills.
Study the Pros
YouTube has endless highlight reels of pro and college players showcasing their cradling abilities. Take notes on what you observe.
Focus on their form – hand positioning, arm motion, body posture. Watch for elements you can incorporate.
See how the pros transition smoothly between catching, cradling and passing.
Look for New Moves
Scan videos for unique cradling moves like behind-the-back and through-the-legs maneuvers. Expand your repertoire.
Attempt crossover, inverse and reverse cradling by mimicking YouTube tricks.
Challenge yourself by slowly practicing difficult sequences viewed in videos.
Vary Arc Heights
Pick up tips for modifying your cradle height by watching others. Short compact cradles are tougher to intercept.
Note how the pros cradle high momentarily then quickly drop into tight, low maneuvers.
Observe their body position and mechanics at different cradling heights.
Analyze Footwork
Focus on foot maneuvers that set up evasive cradling. Crisscrosses, jump-stops and quick changes of direction keep defenders guessing.
Watch how they coordinate deceleration and acceleration with precise cradling during dodges.
Their cradling looks effortless because their feet are always in sync.
Get Creative
Use video clips to spark new cradling drill ideas. Design challenges mimicking your favorite moves.
Tape yourself attempting skills, compare to the pros, then keep refining.
Seeing elite cradling in action inspires your own development. Isolate aspects to integrate into your game.
With smart practice and repetition, those jaw-dropping techniques will soon become second nature.


