How do Quest 10×10 canopy sidewalls enhance your outdoor experience. What factors should you consider when selecting sidewalls for your canopy. Which materials offer the best protection and durability for various weather conditions.
Understanding Canopy Sidewalls: Function and Benefits
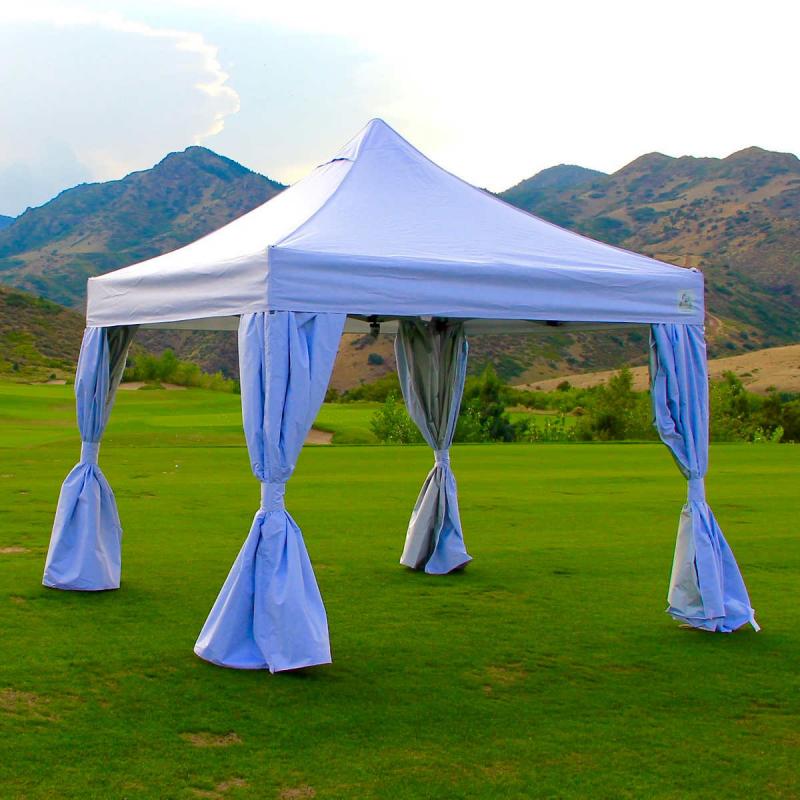
Canopy sidewalls are essential accessories that transform a basic Quest 10×10 canopy into a versatile, protected space. These vertical panels attach to the canopy legs, creating an enclosed area that shields users from various elements. But what makes them so valuable for outdoor enthusiasts and event organizers?
- Enhanced weather protection against rain, wind, and harsh sunlight
- Improved temperature control by blocking cold winds or providing shade
- Increased privacy for changing, resting, or conducting business
- Customizable configurations to adapt to different needs
- Opportunity for branding or decorative graphics
- Added safety from falling objects in various settings
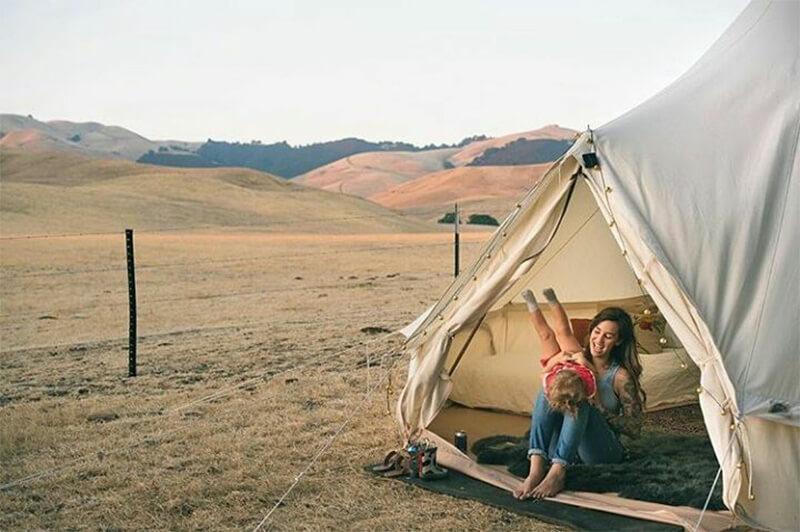
By incorporating sidewalls, your Quest 10×10 canopy evolves from a simple sun shade into a dynamic, adaptable shelter suitable for diverse applications. Whether you’re camping, hosting an event, or setting up a temporary workspace, sidewalls significantly enhance the functionality of your canopy.
Straight Leg vs. Slant Leg: Choosing the Right Sidewall Design
Quest offers both straight leg and slant leg versions of their 10×10 canopy tent. Understanding the differences between these designs is crucial when selecting appropriate sidewalls. How do these canopy types differ, and why does it matter for sidewall selection?
Straight Leg Canopies
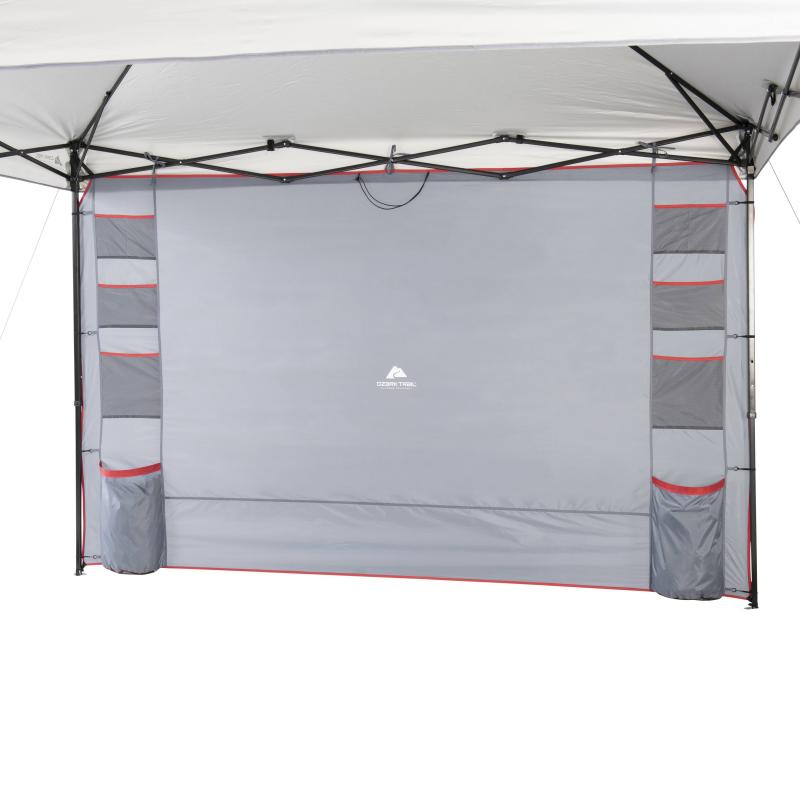
Straight leg canopies feature vertical support poles that maximize usable space underneath. Sidewalls for these models are typically rectangular and attach directly to the legs.
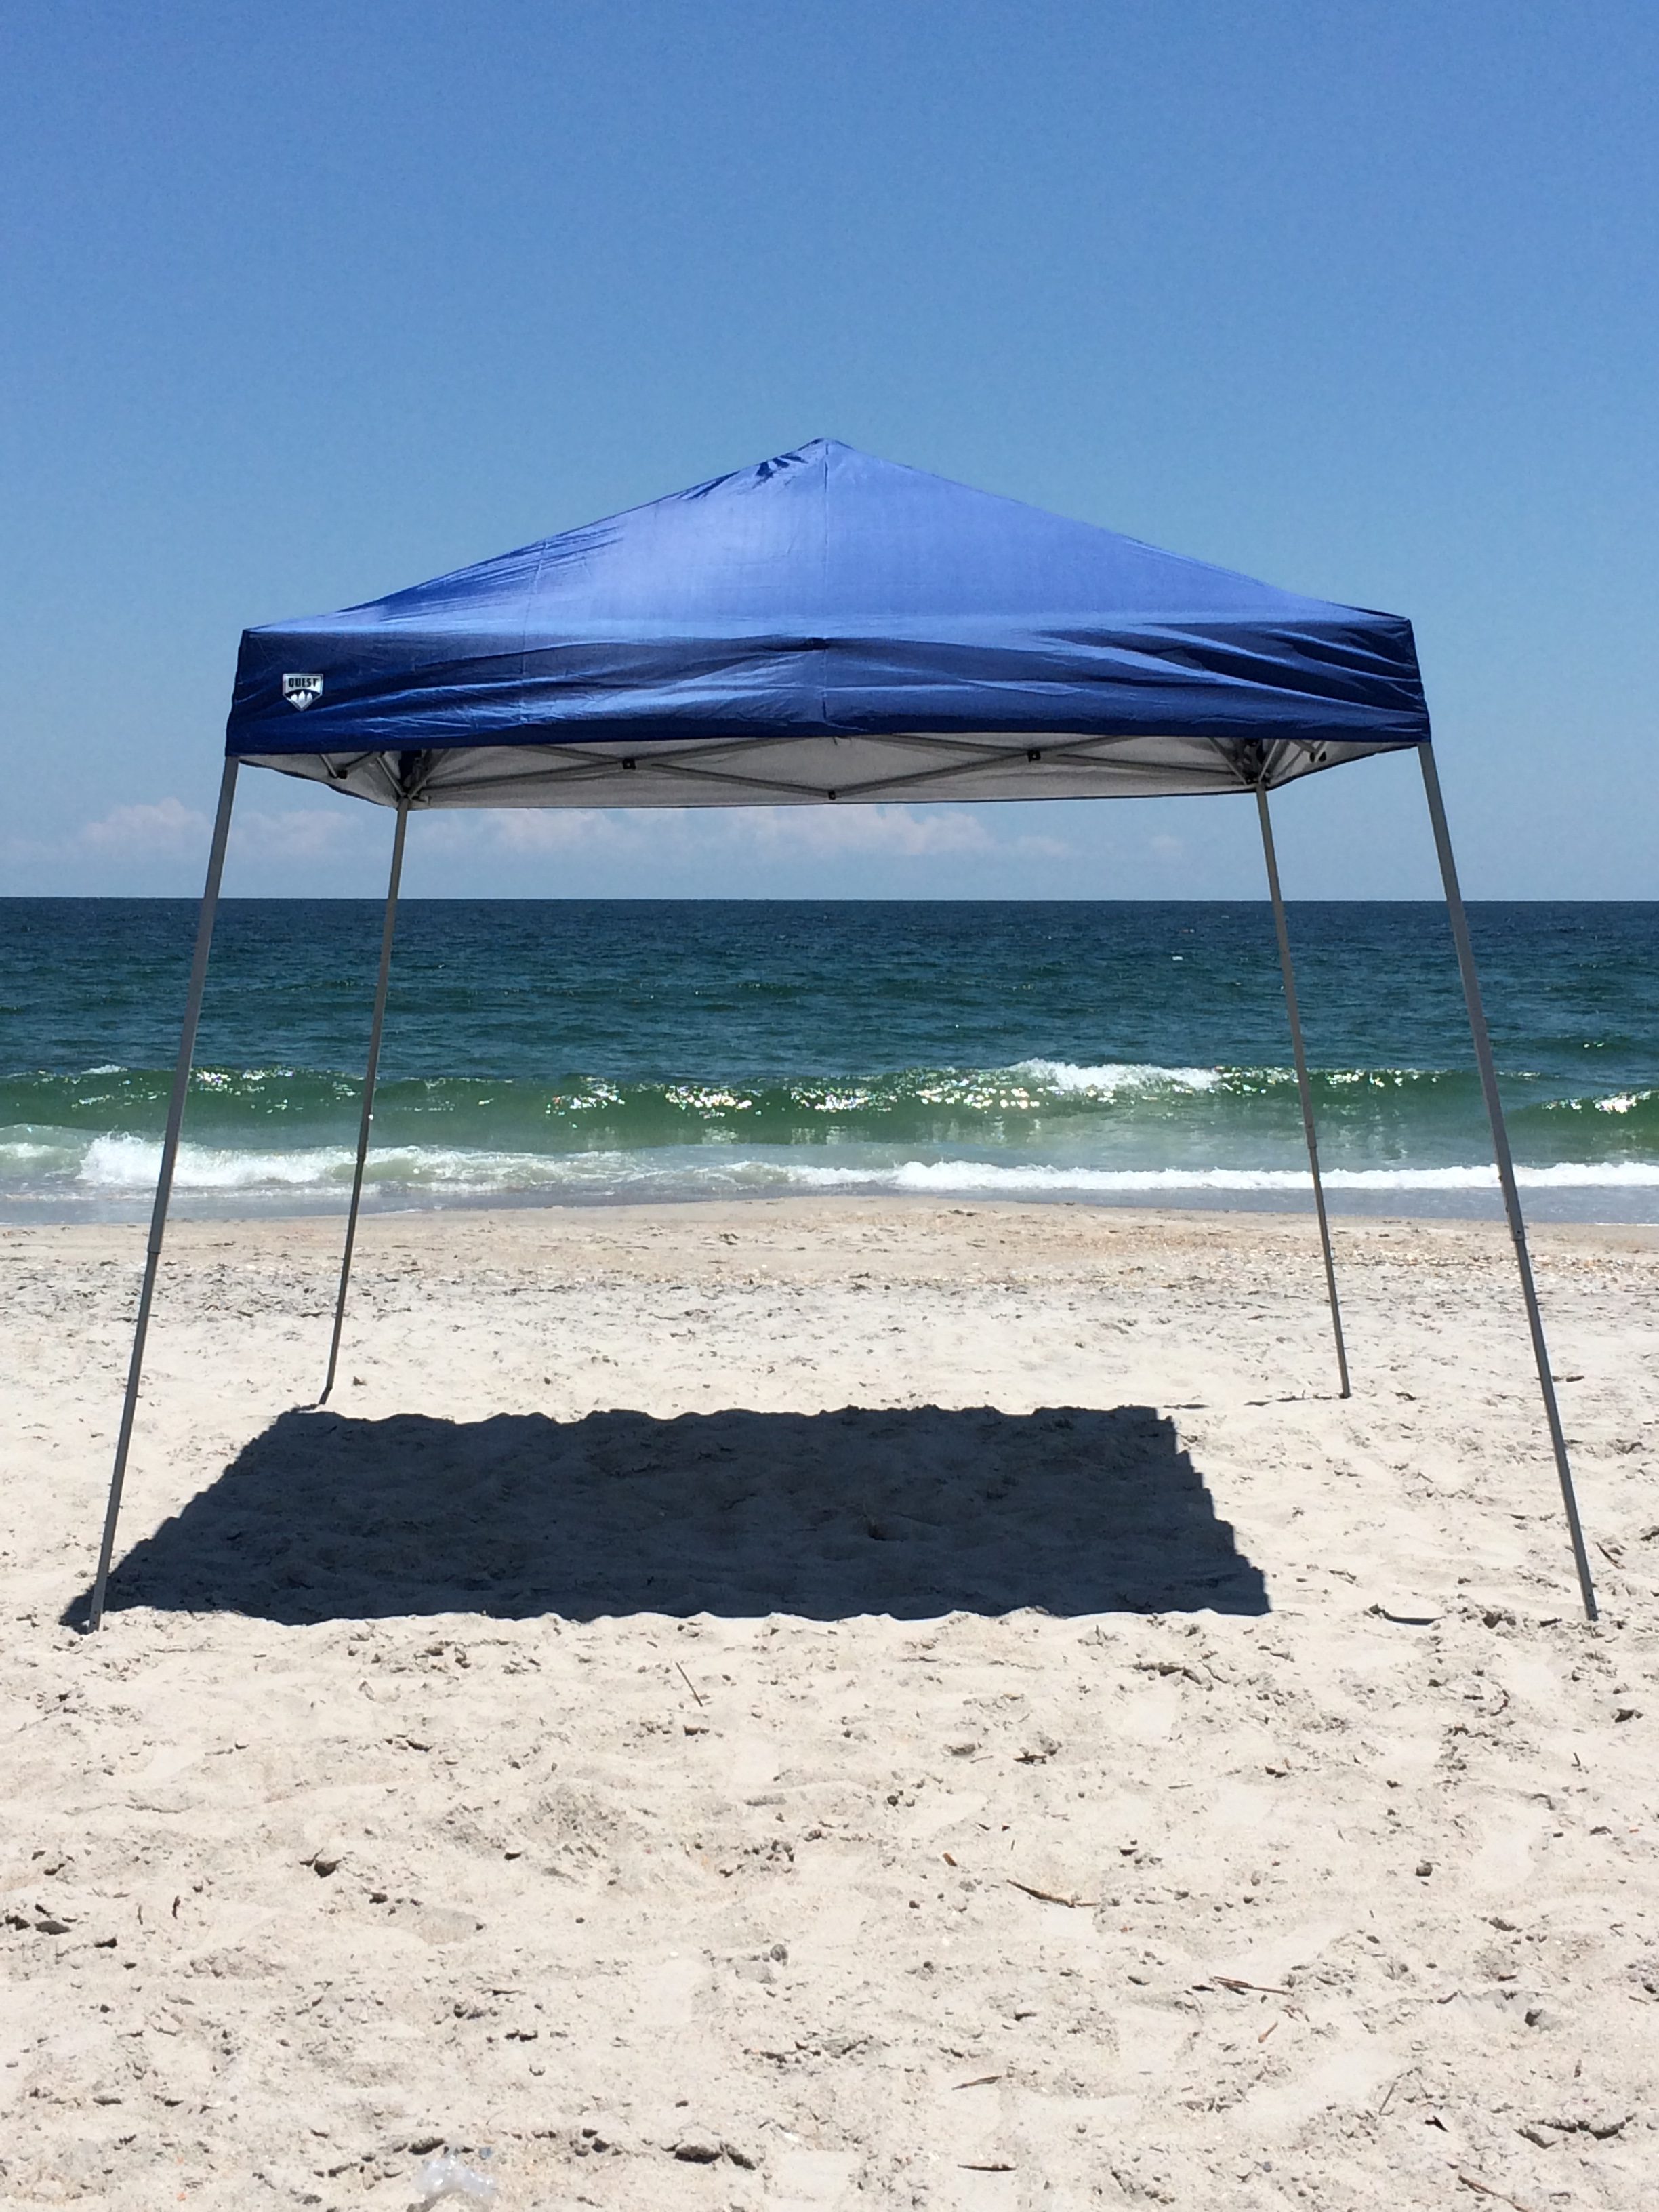
Slant Leg Canopies
Slant leg canopies have angled support poles that provide more headroom at the center. Sidewalls for these models are often trapezoidal to accommodate the sloping legs.
Choosing sidewalls specifically designed for your canopy type ensures a proper fit and optimal performance. Mismatched sidewalls may result in gaps, poor tension, or inadequate coverage, compromising the effectiveness of your setup.
Material Matters: Selecting the Ideal Sidewall Fabric
The choice of sidewall material significantly impacts the performance and durability of your Quest 10×10 canopy setup. What are the main options available, and how do they compare?
- Vinyl: Waterproof and highly durable, but less breathable
- Polyester: Lightweight and allows visibility from inside, ideal for temporary setups
- Canvas: Breathable and classically styled, but heavier and requires more maintenance
Each material offers unique benefits, and the best choice depends on your specific needs. Consider factors such as frequency of use, typical weather conditions, and portability requirements when making your decision.
Customizing Your Space: Sidewall Height and Configuration Options
The versatility of Quest 10×10 canopy sidewalls allows for various configurations to suit different scenarios. How can you tailor your setup to meet your specific needs?
Sidewall Height
Full-height walls provide maximum enclosure and protection, while half-height walls allow for better air circulation. Some users opt for a combination of both to balance privacy and ventilation.
Number of Sidewall Panels
You can choose from a full 4-wall set for complete enclosure, a 3-wall configuration leaving one side open, or even single panels for targeted protection. The flexibility to add or remove panels as needed enhances the adaptability of your canopy.
Access Points
Look for sidewalls with built-in features like zippered doors or roll-up flaps. These allow easy entry and exit while maintaining the benefits of an enclosed space.
By carefully considering these options, you can create a canopy setup that perfectly suits your intended use, whether it’s for a trade show, outdoor event, or camping trip.
Branding and Aesthetics: Elevating Your Canopy with Custom Graphics
Quest 10×10 canopy sidewalls offer more than just functional benefits; they can also serve as powerful branding tools or enhance the visual appeal of your setup. How can you leverage this opportunity?
- Custom printed graphics for business logos or promotional messages
- Decorative designs to create a specific ambiance or theme
- Solid colors to complement your overall aesthetic
When considering custom graphics, balance visual impact with practical concerns such as readability from a distance and durability under various weather conditions. High-quality printing on appropriate materials ensures your branded or decorated sidewalls make a lasting impression.
Practical Considerations: Weight, Budget, and Ease of Installation
While functionality and aesthetics are crucial, practical aspects play a significant role in choosing the right Quest 10×10 canopy sidewalls. What factors should you consider to ensure your sidewalls meet your practical needs?
Weight
Lighter materials like polyester or vinyl are easier to transport and install, making them ideal for frequent setup and takedown. Heavier options like canvas offer a premium feel but may require more effort to manage.
Budget
Vinyl sidewalls typically offer the most affordable option, while canvas and custom-printed options come at a higher cost. Assess your budget against your needs to find the best value for your investment.
Ease of Installation
Look for features that simplify setup, such as hook-and-loop attachments or quick-connect poles. While zippers or lacing may offer a more secure closure, they can add time to the installation process.
By carefully weighing these practical considerations, you can select sidewalls that not only meet your functional requirements but also align with your operational capabilities and budget constraints.
Weather Resistance: Protecting Your Space in Any Condition
One of the primary functions of Quest 10×10 canopy sidewalls is to provide protection against various weather conditions. How do different materials and designs perform in challenging environments?
Rain Protection
Vinyl sidewalls offer superior waterproofing, making them ideal for rainy conditions. Treated polyester can also provide good water resistance, while canvas may require additional weatherproofing.
Wind Resistance
Heavier materials like canvas tend to withstand wind better, but proper installation is key for all types. Look for sidewalls with reinforced edges and secure attachment methods.
UV Protection
All sidewall materials offer some degree of UV protection, but darker colors and specialized UV-resistant fabrics provide the best defense against harmful sun rays.
When selecting sidewalls for weather resistance, consider the typical conditions in your area and choose materials and designs that offer the best protection for your specific needs.
Maintenance and Care: Extending the Life of Your Canopy Sidewalls
Proper care and maintenance of your Quest 10×10 canopy sidewalls can significantly extend their lifespan and ensure consistent performance. What are the best practices for keeping your sidewalls in top condition?
- Clean sidewalls regularly with mild soap and water, avoiding harsh chemicals
- Allow sidewalls to dry completely before storage to prevent mold and mildew
- Store in a cool, dry place away from direct sunlight when not in use
- Inspect for damage regularly and repair small tears promptly to prevent further damage
- Apply appropriate weatherproofing treatments as recommended by the manufacturer
By following these maintenance tips, you can ensure your Quest 10×10 canopy sidewalls remain effective and attractive for years to come, providing reliable protection and enhancing your outdoor experiences.
Selecting the right sidewalls for your Quest 10×10 canopy involves careful consideration of various factors, from material choice to practical concerns. By understanding your specific needs and the options available, you can create a versatile, protected space that adapts to a wide range of uses and weather conditions. Whether you’re setting up for a casual backyard gathering or a professional event, the right sidewalls can transform your canopy into a functional, comfortable, and visually appealing environment.
What Are Canopy Sidewalls and Why Use Them?
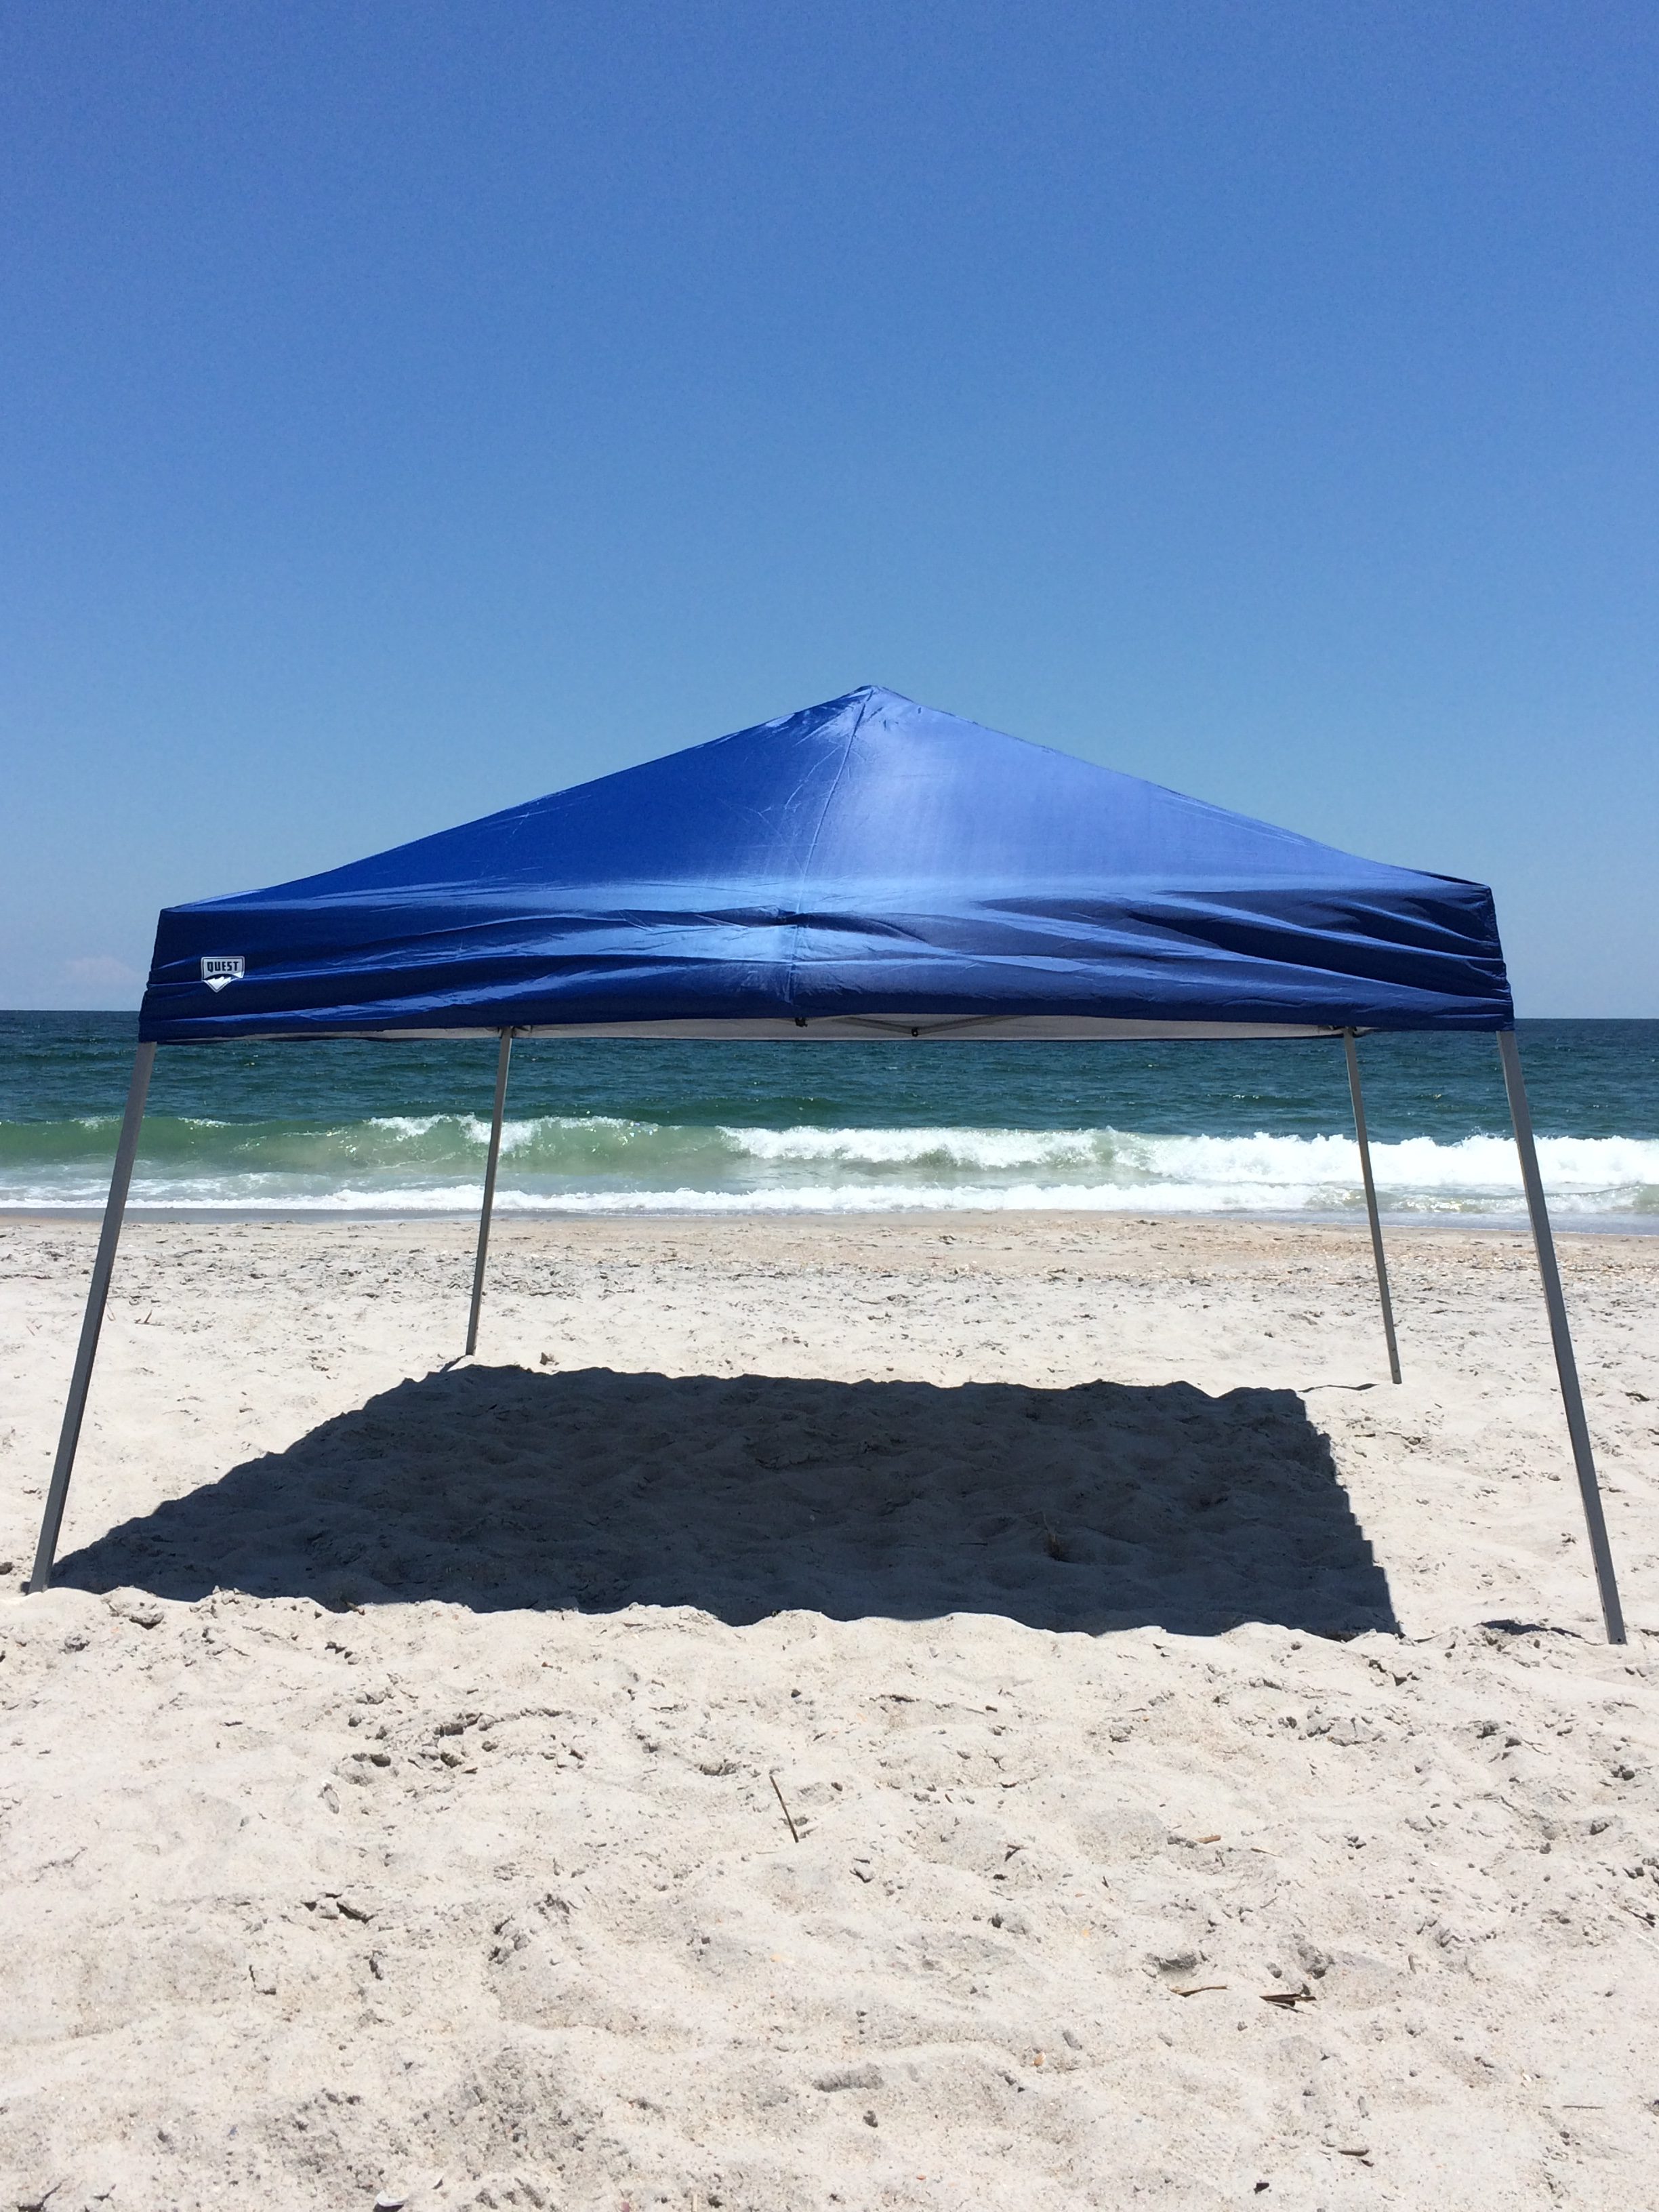
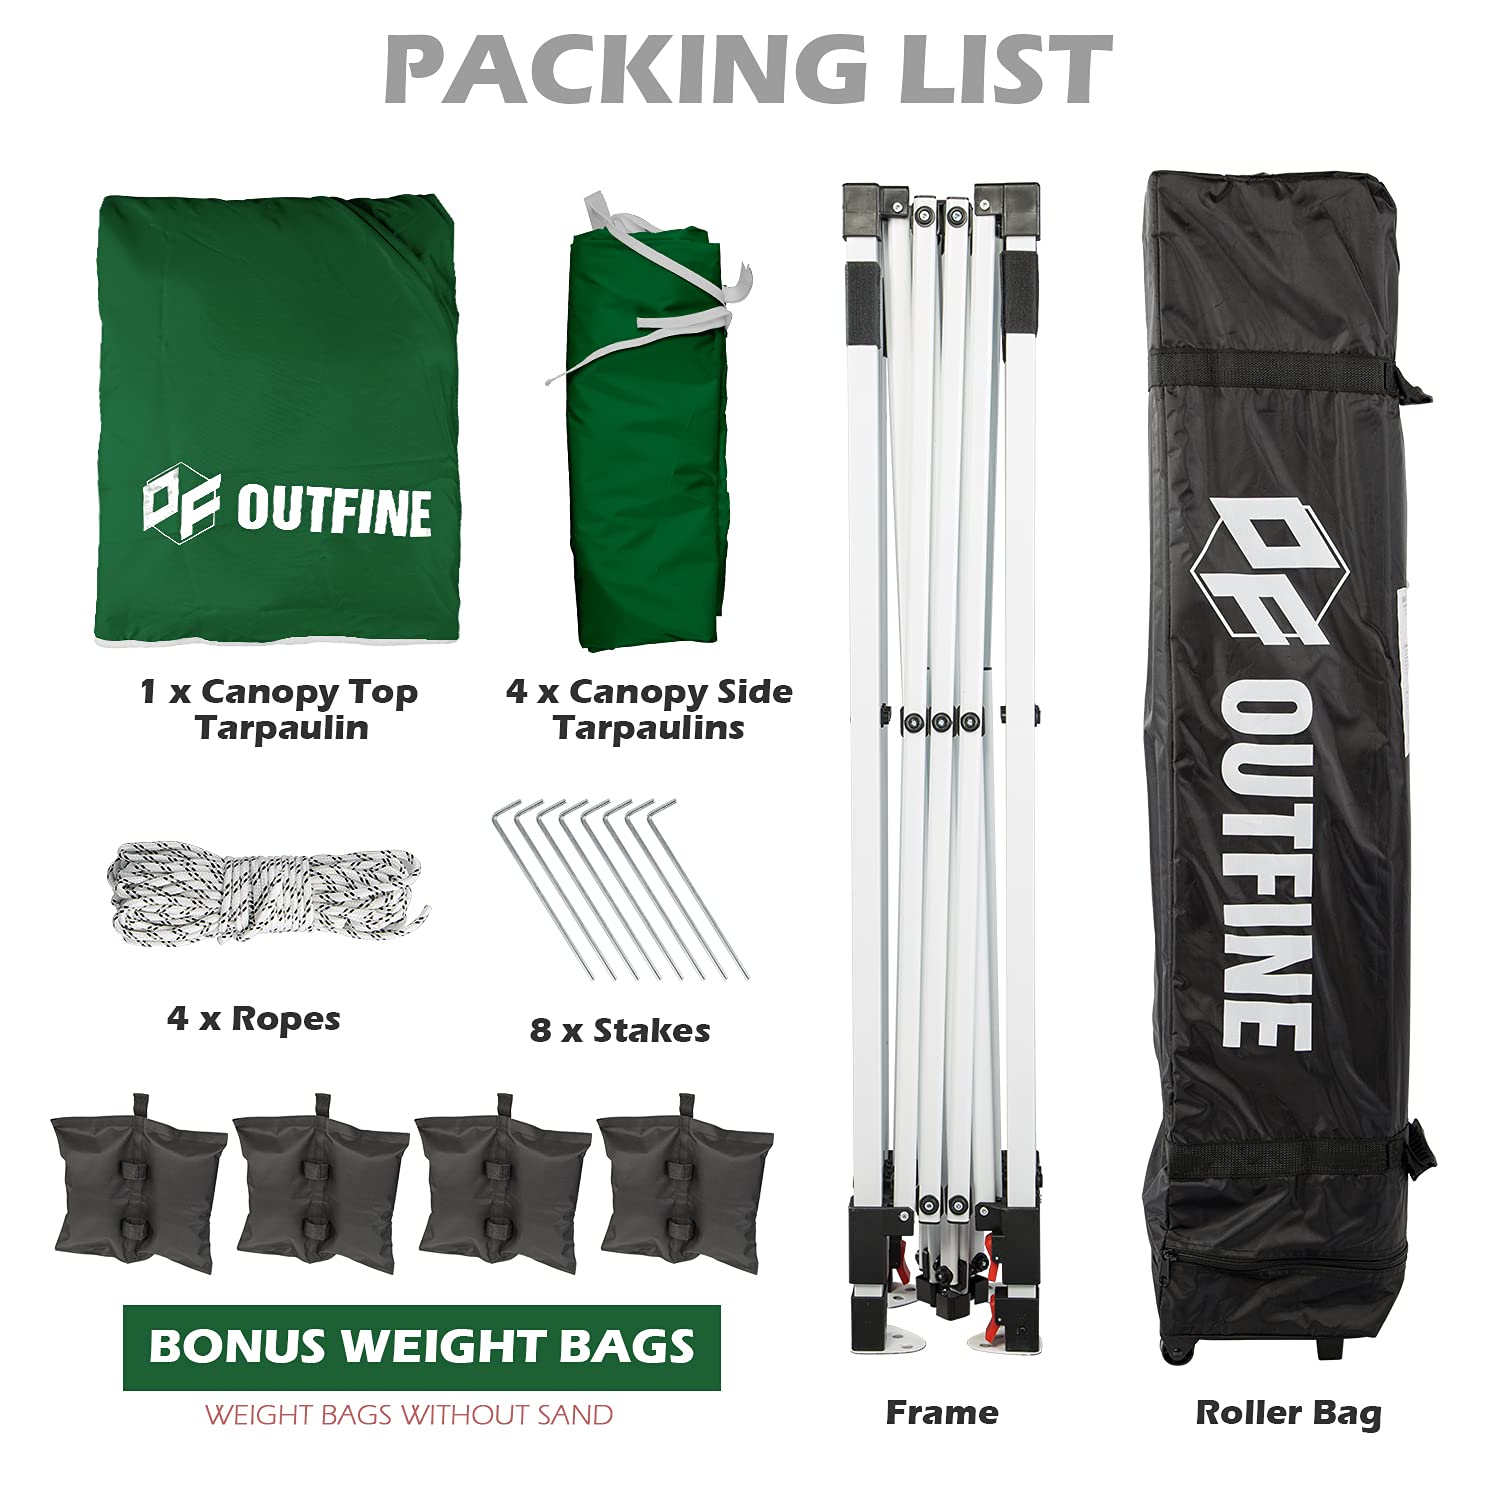
Canopy sidewalls are vertical walls that can be attached to the legs of a pop-up canopy tent. For a Quest 10×10 canopy, sidewalls enclose the space underneath the canopy to create a protected area safe from sun, wind, rain, and other elements. Sidewalls transform a basic canopy into a more functional space for both recreational and commercial purposes.
There are several key reasons to use canopy sidewalls with your Quest 10×10 tent:
- Weather protection – Sidewalls provide additional shelter from rain, wind, and harsh sunlight. This allows you to utilize the space even in inclement weather.
- Temperature control – By enclosing the canopy space, sidewalls help regulate temperature. Sidewalls block cold winds in winter and provide cooling shade in summer.
- Privacy – Sidewalls create a private enclosed area for changing, resting, or conducting business away from public view.
- Versatility – Different sidewall configurations allow you to customize the canopy space for different needs. Roll up sidewalls to open the space or take panels off completely.
- Aesthetics – Printed sidewall graphics can brand or decorate the canopy space.
- Safety – Enclosing the canopy provides an added measure of safety from falling objects for activities like camping or work sites.
For these reasons, adding sidewalls takes a basic Quest 10×10 canopy from a simple sun shade to a more functional and adaptable shelter option.
Quest 10×10 Canopy Sidewalls: How to Choose the Right Ones for Your Setup?
When selecting canopy sidewalls for a 10×10 Quest canopy, there are a few key factors to consider in order to choose the right setup:
Straight Leg vs. Slant Leg Canopy
Quest offers both straight leg and slant leg versions of their 10×10 canopy tent. The slant leg provides more headroom while the straight leg offers more usable space underneath. Sidewalls specifically designed for each model are recommended for proper fit.
Sidewall Material
Quest canopy sidewalls come in vinyl, polyester, or canvas materials. Vinyl is waterproof and durable yet less breathable. Polyester is lightweight and provides visibility from inside the tent. Canvas is breathable and classically styled but heavier.
Sidewall Height
Full height walls provide maximum enclosure while half height walls allow airflow at the bottom. Match the wall height to your specific needs.
Number of Sidewall Panels
A 4-wall sidewall set will fully enclose the canopy. A 3-wall set will provide coverage on 3 sides, leaving 1 side open. Opt for 2 panels or a single panel to act as a wind, sun, or rain block.
Access Points
Look for sidewalls designed with access flaps or zippered doors to allow entry and exit while keeping the space enclosed.
Graphics
Custom printed graphics can be applied to plain sidewalls for branding, privacy, or decorative purposes.
Weight Considerations
Lighter polyester or vinyl walls are easier to install than heavy canvas. But canvas provides a more luxurious look and feel.
Budget
Vinyl walls are typically the most affordable option. Heavier canvas and custom printed graphics will add cost. Purchase only what you need depending on your specific requirements.
Ease of Installation
Sidewalls that quickly attach with hook & loop straps or poles are simplest to put up. Zippers or lacing add time but provide closure and styling.
By evaluating these factors, you can select the right Quest 10×10 canopy sidewalls to create the optimal enclosed space. Consider how you will use the canopy and what features will enhance the experience. Measure carefully and read reviews to find the best sidewalls for your straight leg or slant leg Quest canopy model.
With the addition of quality sidewalls matched to your specific Quest 10×10 tent, you can get even more return from this versatile canopy. Sidewalls allow you to customize the space for privacy, weather protection, temperature control, and aesthetics. Sturdy materials like vinyl, polyester and canvas paired with convenient access points, full or half wall height, and custom graphics give you options to create the ideal canopy setup.
Key points to remember when buying Quest 10×10 canopy sidewalls:
- Choose sidewalls specifically made for Quest canopies
- Match the sidewalls to straight leg or slant leg frame
- Select material, height and number of walls based on needs
- Look for convenient access flaps and custom print options
- Factor in weight, cost, and ease of installation
With the right canopy sidewalls, your Quest 10×10 tent becomes a more versatile shelter able to adapt to changing weather, privacy needs, and activities. Sidewalls are an investment that returns real benefits in increased functionality and peace of mind knowing your equipment is protected from the elements.
Sidewalls for Straight Leg vs Slant Leg Canopies
When setting up a Quest 10×10 canopy tent for an outdoor event or activity, one decision you’ll need to make is whether to use sidewalls, and if so, what type. Quest canopies come in both straight leg and slant leg configurations, and the sidewalls are designed differently for each leg style. Choosing the right sidewalls for your canopy setup ensures proper coverage, protection from the elements, and an attractive overall look.
Straight Leg vs Slant Leg Canopy Design
First, let’s briefly review the difference between straight and slant leg canopies. Quest 10×10 canopies with straight legs have vertical legs that rise straight up from the four corners to meet the top poles across the ceiling. This creates a box-like tent with 90-degree angles. Slant leg canopies have legs that angle outwards as they rise up, meeting the top poles at 45-degree angles. This creates a more sloped look to the canopy tent.
Both straight leg and slant leg Quest canopies are sturdy, durable, and great for outdoor setups. The main difference is aesthetics – the straight leg has a more classic party tent appearance, while the slant leg style has a more unique, contemporary look. The choice comes down to visual appeal and what fits best for your event or activities.
Sidewall Options for Straight Leg Canopies
For Quest 10×10 canopies with the straight leg design, you can choose from two main sidewall options:
- Straight sidewalls
- Angled sidewalls
Straight sidewalls, as the name suggests, hang vertically from the top of the canopy down to the ground. They fit flush against the straight legs and provide an enclosed rectangular wall. Straight sidewalls are best if you need to fully block wind, rain, or sunlight from entering through the canopy sides.
Angled sidewalls for straight leg canopies have top edges that fit flush beneath the canopy ceiling but angle outward at the bottom. This allows some protection from the elements while still allowing airflow and visibility. Angled sidewalls have a more aesthetic, decorative look compared to the full coverage of straight sidewalls.
Sidewall Options for Slant Leg Canopies
For Quest 10×10 canopies with the slant leg design, the main sidewall options are:
- Slant sidewalls
- Straight sidewalls
Slant sidewalls are tailored specifically to fit the angled legs of the slant leg canopy. The top of the sidewall hangs flush beneath the canopy ceiling, and the bottom edges angle outwards to meet the slanted canopy legs. This creates an enclosed look that complements the sloped tent frame.
Straight sidewalls can also be used on slant leg canopies, but there will be a gap at the bottom between the vertical sidewall and the angled legs. This allows some air flow and visibility while still providing some wind/rain protection. The visual impact is more of an angular, layered look.
Other Sidewall Considerations

When choosing your Quest 10×10 canopy sidewalls, here are a few other factors to consider:
- Height – Sidewalls come in heights ranging from 3 feet to 8 feet tall. Choose based on your privacy and coverage needs.
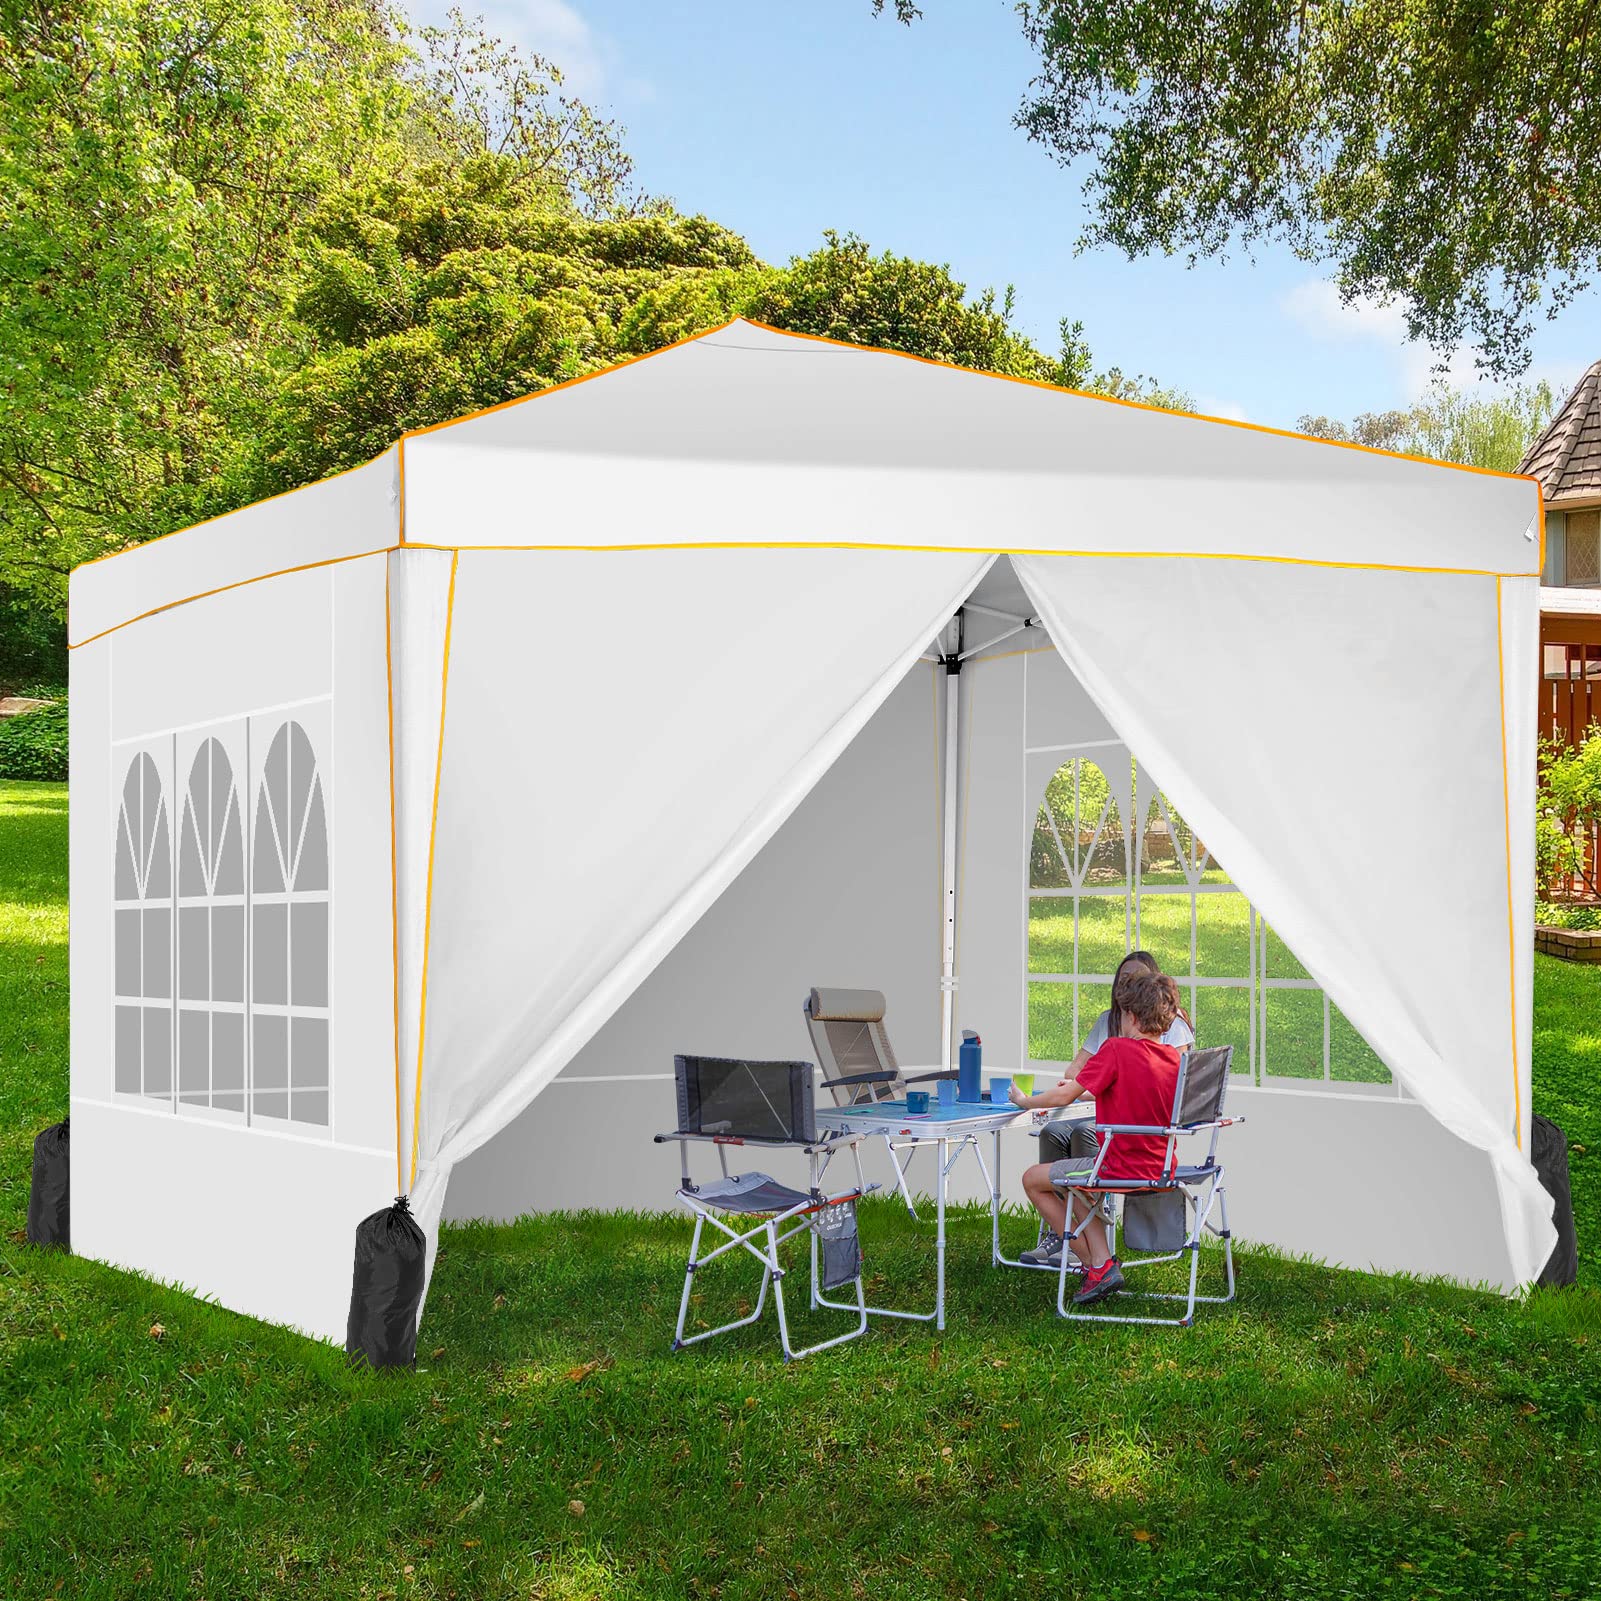
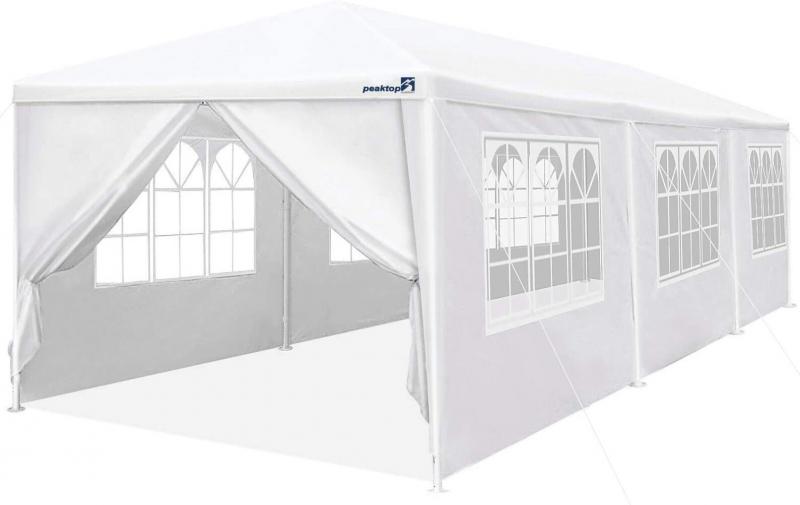
- Windows – Some sidewalls have clear vinyl windows to allow in light and visibility even when sidewalls are fully closed.
- Doors – Look for sidewalls with zippered doors if you need access in and out of the enclosed tent.
- Materials – Sidewalls come in vinyl and polyester. Vinyl provides more weather protection. Polyester is lighter and more breathable.
- Color – Select sidewall colors that coordinate with your canopy top and suit your event decor.
It’s also important to note that sidewalls are usually sold separately from the canopy tent itself. Make sure to measure your canopy setup before ordering so you get sidewalls tailored to the correct height and leg style.
Getting the Right Fit
In summary, straight leg Quest 10×10 canopies pair best visually and functionally with straight sidewalls, while slant leg canopies match up best with slanted sidewalls. You can sometimes use the opposite sidewall style, but it will leave gaps and look mismatched. Be sure to check your canopy leg style, measure carefully, and order the corresponding sidewalls for a tailored setup that looks sharp and functions optimally.
With the right sidewalls for your straight leg or slant leg Quest canopy, you’ll stay comfortable and protected from the elements while hosting outdoor events and activities. Sidewalls add functionality, privacy, and style to make your canopy setup uniquely your own.
Material Options: Polyester, Vinyl, and Other Fabrics
So you just bought a new 10×10 canopy tent for backyard parties, craft fairs, or camping trips. Nice choice! Those extra-large canopies provide tons of shaded space for you and your crew. But if you want some privacy or protection from wind and rain, you’ll need sidewalls too. When shopping for 10×10 canopy sidewalls, you’ll find there are a few fabric options to consider, each with their own pros and cons.
Polyester is one of the most popular sidewall materials. It’s a synthetic fabric that’s lightweight, fairly water-resistant, and inexpensive. Polyester sidewalls come in different densities – from around 200 denier on the low end to 600 denier for thicker, more durable canvas-like polyester. The heavier polyester holds up better to wind, rain, and abrasions over time. Basic polyester walls typically cost $50-150 for a 10×10 tent.
Vinyl is another common sidewall material, often seen on party canopy tents. It’s 100% waterproof, wipeable, and provides great visibility compared to other opaque fabrics. Durability can vary among vinyl walls, but the best are reinforced with polyester backing or thick 18 oz. vinyl. Condensation and heat buildup are downsides of solid vinyl sidewalls. Expect to pay $100-300 or more for vinyl.
There are also some other specialty canopy wall fabrics to consider:
- Mesh screens provide air flow and insect protection while still allowing visibility. Lightweight and inexpensive at around $30-60.
- Clear PVC plastic walls offer maximum rain protection and visibility. More expensive than vinyl, around $200-500.
- Fabric/PVC combo walls have opaque lower fabric portions and clear vinyl upper portions. A good balance of privacy and visibility for $100-250.
- Insulated walls with built-in foam barriers help keep interiors warmer in cold weather. Cost is $200-400.
Wind and Rain Considerations
Wind and rain performance should factor into your canopy sidewall decision. Walls need to be securely attached to resist gusts that can lift and toss poor quality materials. Thickness and density are important – light 40 denier polyester just won’t cut it in bad weather. The best wind-resistant walls use very rugged 600+ denier polyester, sometimes with grommets or hooks for extra reinforcement.
Rain protection depends partly on fabric choice. Vinyl is fully waterproof, while polyester and mesh will soak through. Poly fabric with factory sealed or taped seams improves water resistance. Some walls have roof line attachments to keep rain from dripping between the canopy and walls. Half-height walls leave openings for moisture and wind, so consider full-height sidewalls for wet conditions.
No fabric is 100% impervious to driving rain, so also check your canopy’s water resistance if using the walls in storms. Avoid non-waterproof party tents and look for canopies with sealed seams, polyester top fabric, and quality construction.
Choosing the Right Height
10×10 canopy sidewalls come in different height options to suit your needs:
- Half-height walls are about 4 feet tall. They provide partial protection while allowing light and visibility. Best for fair weather usage.
- Three-quarter walls around 6 feet high offer more coverage from sun and rain but still allow some air flow from underneath. A good compromise option.
- Full-height or standard walls are usually 8-10 feet tall matching the canopy legs. Maximum privacy and weather protection but can feel closed-in on nice days.
- Extra-tall walls extend 1-2 feet above standard leg height. The added coverage prevents rain from blowing in under the roofline.
Taller walls are best for poor weather, while lower sidewalls work great on sunny, calm days. Consider what conditions you’ll most often use the canopy in. You can always start with half-height or 3/4 walls and get taller ones later if needed.
Picking the Right Style
10×10 canopy sidewalls come in different styles to suit square, slant leg, and straight leg tents:
- Square sidewalls have four straight panels sized to fit square frame tents. Most cost-effective option.
- Slant leg walls conform to sloped legs with angled panels. Avoid sagging on slant style canopies.
- Straight leg walls have vertical panels to complement straight upright legs. Look crisp and tidy.
- Universal or hybrid walls fit both straight and slant legs via adjustable hooks or velcro.
Measure your canopy’s leg style before ordering walls – square walls won’t work on slant legs, and vice versa. Universal walls offer flexibility but fit loosely on some tents.
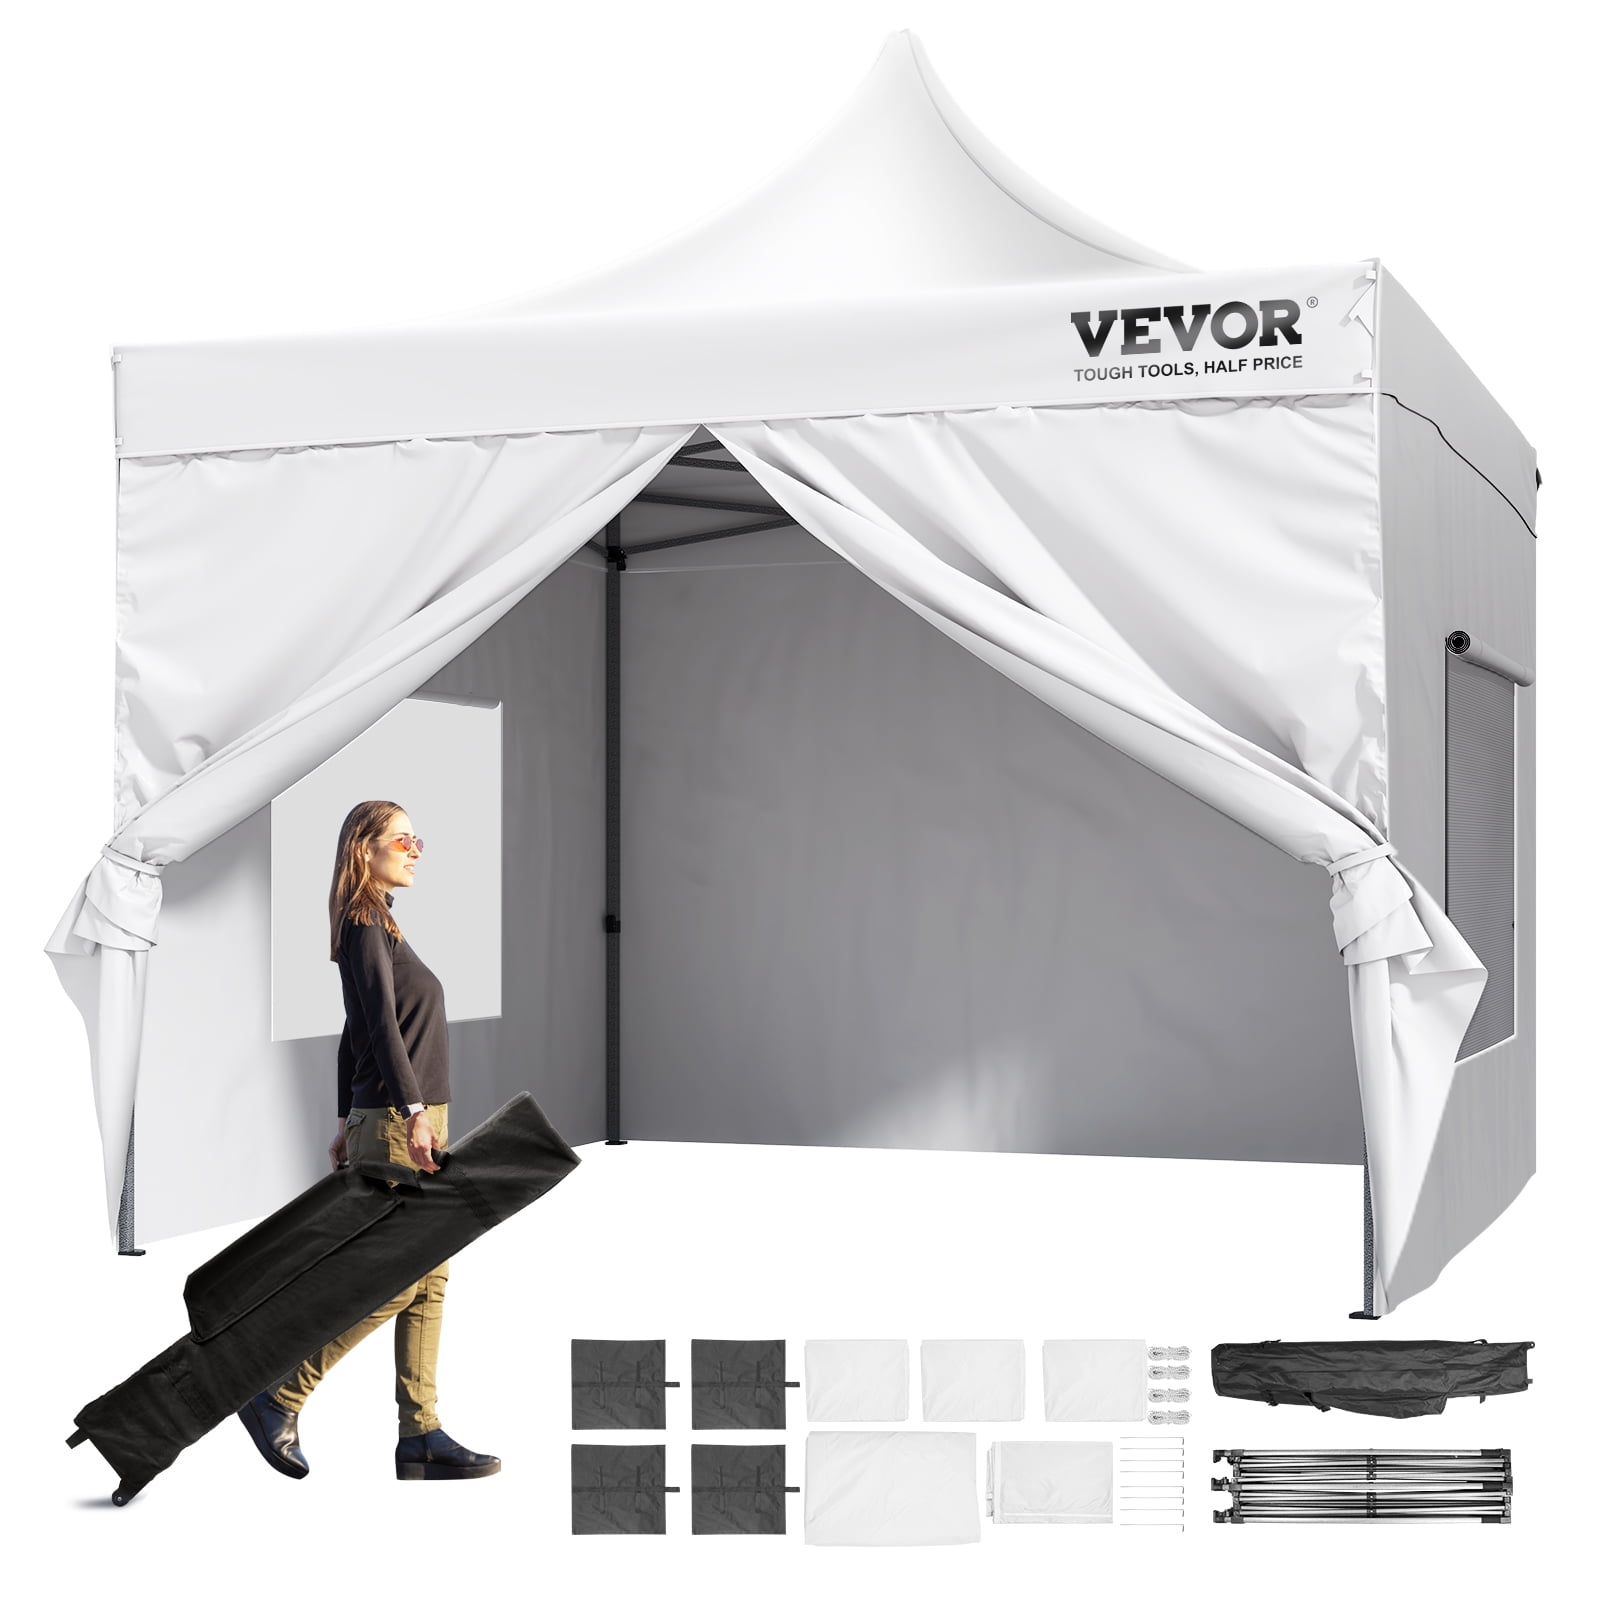
Choosing Quality Zippers, Windows & Doors
More expensive canopy sidewalls have higher quality features like overlapping zipper doors, transparent vinyl windows, and mesh screen panels. Basic walls use simple fabric flaps tied to poles, lacking refined details.
Waterproof zippers are best for wet weather. Avoid cheap plastic zippers that easily break. Overlapping zipper doors provide an extra layer of protection from wind-driven rain. Convenient D-shaped doors make getting in and out easier without removing a whole wall section.
Clear vinyl windows give you some visibility without taking down walls. They may be removable for ventilation too. Mesh windows offer air flow on hot days. Walls with transparent upper halves provide views while lower fabric blocks wind.
Look for nice quality touches like padded carry bags for storage, hook and loop attachments, interior pockets to hold gear, and robust reinforcement at stress points. With some basic maintenance, high quality 10×10 canopy sidewalls can last for many years of regular use.
Key Takeaways
When shopping for 10×10 canopy sidewalls, consider the following factors:
- Select durable, weather-resistant fabrics like heavy polyester or vinyl
- Full-height walls provide the most weather protection
- Match the wall style to your canopy’s straight vs. slant leg design
- Look for robust zippers, windows, doors and storage bags
- Higher cost brings better quality, features and longevity
With good sidewalls that fit your canopy style, you’ll be able to enjoy your 10×10 tent in any conditions – rain or shine! Just make sure to secure them tightly in windy weather.
Solid Sidewalls vs Sidewalls with Windows
When shopping for 10×10 canopy sidewalls, one decision you’ll face is whether to get solid fabric walls or walls with see-through vinyl windows. Both have their advantages depending on how you plan to use your canopy tent.
Solid sidewalls construct entirely of opaque fabric like polyester or vinyl. They provide complete privacy and sun/wind/rain protection for the enclosed space. You can’t see in or out of them when they are installed. Solid walls transform a canopy into more of an enclosed temporary room.
In contrast, sidewalls with clear vinyl windows let in natural light and allow visibility from inside the canopy. The transparent plastic windows are typically removable, so you can open them up when you want airflow or to chat with people outside the tent. Models with mesh screens instead of clear vinyl offer air circulation while still blocking bugs, debris and some weather.
Here are some things to consider when deciding between solid and window sidewalls for your 10×10 canopy:
- Fully solid sidewalls provide maximum weather and sun protection, blocking wind, rain, heat/cold, and UV rays. Great for harsh conditions.
- Solid walls also give you complete visual privacy for changing clothes, medical exams, private discussions, etc.
- Windows allow some natural light into the canopy interior, making it feel more open and less cave-like.
- Visibility through windows enables communication between inside and outside the tent.
- Screens and removable vinyl windows provide good ventilation on hot days.
- See-through panels give children enclosed play spaces where parents can still watch them.
If you’ll primarily use your 10×10 canopy for outdoor retail spaces, medical clinics, or any application needing total visual privacy, solid sidewalls are the way to go. They create an opaque, secluded environment.
For general partying, camping, and backyard relaxing, window walls may be the better choice. Their transparency makes the interior feel less isolated. Airflow from mesh screens also helps on humid or hot days.
Many sidewalls offer a compromise with opaque lower fabric and clear vinyl upper sections. This allows visibility above eye level while still blocking direct wind down low. It’s a nice balance for both weather protection and an open interior feel.
More Factors When Choosing Wall Style

In addition to windows, here are some other 10×10 canopy sidewall considerations:
- Doors: Zippered doorways make entry/exit easy without removing walls. Choose a quantity and style to suit your needs.
- Height: Walls come in half, 3/4 and full heights. Taller is better for bad weather usage.
- Leg style: Match the wall shape to your canopy’s straight or slant leg design.
- Durability: Heavier fabrics withstand wind/rain better. Look for abrasion-resistant materials.
- Waterproofing: Fully waterproof vinyl or sealed seam polyester provides the best rain protection.
- Cooling: Mesh screens release heat buildup on hot sunny days.
Also check for conveniences like storage pockets, padded bags, velcro or grommet attachments, and quality reinforced stress points. The most heavy-duty 10×10 canopy sidewalls can stand up to years of regular use if properly cared for.
Setting Up Walls Properly
To get the most out of your canopy sidewalls, it’s important to set them up correctly. Here are some tips:
- Attach walls securely using all grommets, velcro, hooks, or ties. Loose walls flap dangerously in wind.
- Seal off gaps where the walls meet the canopy frame and ground. Use closure flaps or skirt attachments to prevent water intrusion.
- Angle windowed walls toward the sun to prevent heat/glare buildup inside.
- Roll up window flaps or open mesh panels to increase airflow on hot days.
- Make sure doors zip cleanly without snagging to keep the interior dry.
- Tuck and stake down loose wall fabric edges to guard against wind lift.
- Use all guy-ropes and canopy stakes to maximize wind resistance in storms.
With good quality sidewalls installed properly, your party, event or camping experience will continue rain or shine. Walls transform a basic 10×10 canopy into a versatile weatherproof temporary room for many uses.
Key Takeaways on 10×10 Canopy Walls

- Solid sidewalls provide total privacy and sun/weather protection.
- Window walls allow light, cooling airflow, and visibility.
- Match wall style to your specific canopy usage.
- Look for heavy-duty, waterproof fabrics.
- Secure tightly and seal off any gaps around the roofline and ground.
Finding the Right Height for Your Canopy
When shopping for sidewalls to enclose your 10×10 canopy tent, you’ll have to decide how tall you want them. Wall heights typically range from around 4 feet up to the full height of the canopy frame at 8-10 feet. The right choice depends mainly on your planned uses for the tent.
Lower half-height walls are best suited for fair weather conditions. They provide a nice balance of protection from sun and light winds while still allowing airflow underneath. Half-height sidewalls give you some privacy without making the interior feel closed-in.
Three-quarter height walls about 6 feet tall offer much more coverage from rain, sun, and stronger winds. But they still allow some fresh air circulation and visibility under the tent. This makes 3/4 height a popular middle-ground choice for canopies used in a range of conditions.
Full height walls running from floor to ceiling provide complete enclosure and weather protection. They convert the portable canopy into a temporary room. But full height walls can feel confining on nice days when you want an open, airy interior.
Here are some factors to help decide which of these common 10×10 canopy sidewall heights is right for your setup:
- Weather Usage: Taller walls protect better from rain, sun, wind, heat/cold. Choose based on typical conditions.
- Privacy Needs: Higher walls provide more seclusion from sight lines outside.
- Feel: Lower walls prevent a closed-in, cave-like interior on sunny days.
- Canopy Style: Match the height to straight or slant leg frame design.
- Windows: Transparent upper sections let in light and views.
Half-height walls are commonly used for basic shelter on nice days and are especially popular for vendor booths at outdoor fairs. The visibility and air flow keep customers and merchants comfortable.
Three-quarter height sidewalls strike a nice balance for general backyard and camping use. They provide decent coverage if the weather turns while still letting in refreshing breezes.
Full height walls extending right up to the canopy roof line are best for harsh weather, privacy-critical applications, and extensively enclosed spaces. Just avoid feeling too shut in on hot, humid days.
Match the Frame Style
An important point when choosing wall height is making sure the panels properly fit your canopy’s frame. 10×10 tents come in two main leg designs:
- Straight leg canopies have vertical legs and square corner joints for a classic pitched roof look.
- Slant leg canopies have angled legs that meet in pointed topside corners, creating downward sloping roof lines on each side.
To avoid saggy loose fits, sidewall heights and shapes must align cleanly with the leg style:
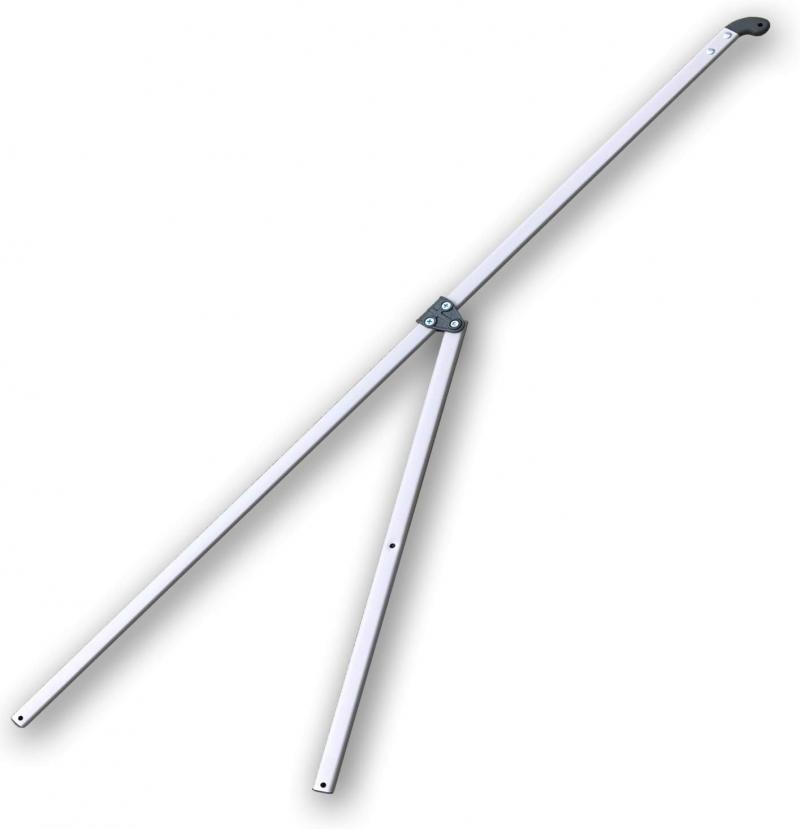
- Full height straight leg walls have rectangular panels stretching from floor to ceiling.
- Full slant leg walls require trapezoidal angled panels to match the slope.
- Some brands offer adjustable “hybrid” walls for versatility between designs.
Measuring the leg shape before ordering walls ensures your new sidewalls will mate cleanly to the canopy frame. Mismatched shapes lead to poor weather protection and an unsightly appearance.
Doors, Windows and Other Features
In addition to height, also look for 10×10 canopy sidewalls with convenience features to suit your needs:
- Doors – Zippered flaps make entry and exit easier.
- Windows – Transparent vinyl or mesh panels provide light/ventilation.
- Storage – Bags and pockets keep walls tidy when not in use.
- Attachment – Secure walls tightly with velcro straps, grommets or hooks.
- Durability – Thick, waterproof fabrics withstand wear and weather.
Quality walls carefully constructed with reinforced stress points will hold up better over time. Avoid cheap models with flimsy doors, attachments and fabrics.
Using Walls Safely
To safely enjoy your new 10×10 canopy sidewalls:
- Securely fasten walls to the frame to prevent wind damage.
- Seal off any gaps where walls meet the top and bottom edges.
- Use all guy-ropes and stakes to maximize wind resistance.
- Open windows and doors for ventilation if condensation builds up inside.
- Use caution around space heaters or grills if partly enclosed by walls.
With quality sidewalls installed properly, your 10×10 canopy becomes a versatile sheltered space for backyard fun, camping trips, outdoor retail booths, and much more. Choose the right height to suit your weather, privacy, and ventilation needs.
Key Sidewall Height Considerations

- Half height provides basic shelter while allowing air flow.
- Three-quarter height balances coverage and open feel.
- Full height maximizes weather protection and privacy.
- Match wall height and shape to straight or slant frame legs.
- Add convenience features like zipper doors and clear windows.
Matching the Color to Your Existing Canopy
So you’re looking to buy some new sidewalls for your 10×10 canopy tent. An important decision is choosing a color that complements the existing canopy roof and frame. Matching or coordinating the hue keeps your setup looking sharp. Here are some tips for picking that perfect shade of new sidewalls.
First, assess the current color scheme. What color is the canopy roof fabric? Are the frame pipes plain silver aluminum or powder-coated? Any logos or accent colors used? Making note of these existing tones helps guide your sidewall choice.
If your canopy top is a bold graphic print or vivid solid color, consider neutral white or black walls so as not to clash. They allow the roof to remain the focus while framing the space subtly.
For a canopy with a translucent roof, like many outdoor party tents, opaque walls in the same or close shade maintain a monochromatic look. Sky blue roof with navy blue walls, for example.
Matching the sidewall color precisely to the roof is popular when the canopy has custom graphics, team colors or corporate logos. Consistent branding carries the theme all around the tent.
If the frame is powder-coated an attractive tone, rather than bare metal, pick up that color in the walls for a pulled-together appearance. Or choose a complementary shade, like red walls with black frames.
For a more eye-catching effect, go bold with contrasting or patterned walls that make the canopy a focal point. Just beware busy prints can overwhelm in smaller tents.
Things get tricky if your existing canopy has multiple colors. Try to pick out one dominant roof or frame shade to guide the walls. Or default to versatile black or white sidewalls as a safe bet.
No need to match sidewall and roof colors perfectly. Close tints in the same palette, like sage green walls with olive canopy, are sufficient to look coordinated. Off-white walls with cream canopy is another example.
If your canopy has silver aluminum poles, neutral or basic colored walls tend to complement best. Avoid competing brights that could clash with the metal frame.
Don’t forget to consider interior décor and furnishings when color-matching walls. Drapes, signs, flooring and fixtures inside the tent also contribute to the overall aesthetic.
In the end, choose 10×10 canopy sidewalls in a shade that you find attractive and fits your taste. Just be aware of the existing color scheme so the pieces work together visually for a professional, cohesive look.
Other Factors in Picking Wall Fabric
In addition to color, a few other considerations for selecting your 10×10 canopy sidewall material:
- Durability – Heavy-duty materials withstand sun, wind and rain. Polyester, vinyl and canvas are popular options.
- Waterproofing – Fully waterproof vinyl or polyester with sealed seams provide the best rain protection.
- Shade – Opaque fabrics block sun and offer privacy; translucent filter light.
- Wind resistance – Heavier, tighter woven fabrics hold up better in gusts without flapping.
- Breathability – Mesh window panels allow ventilation and air flow in hot conditions.
Compare fabric specifications like denier rating and vinyl thickness to assess durability. Heavier often equals tougher and longer lasting.
Anticipate how you will primarily use the canopy when picking wall fabrics. Outdoor events need durable, water-resistant materials. Parties may prioritize visual privacy or transparent windows.
Order swatches if conveniently available to see colors and fabrics firsthand. Photos online don’t always show hues accurately.
Key Takeaways
- Pick sidewall colors that complement or match the existing canopy roof.
- Consider bold graphic prints vs. subtle neutrals or tints from the same color family.
- Walls that contrast or clash with the frame and roof appear haphazard.
- Prioritize durable, weather-appropriate fabric regardless of color.
- Order samples to see materials and colors up close before purchasing.
With some coordination in the colors and materials, your new 10×10 canopy sidewalls will complete the look and function of your tent beautifully. Have fun with the possibilities!
Checking for Sturdy Construction and Zippers
You’ve picked out some great looking sidewalls for your 10×10 canopy. But beauty is only skin deep. Underneath that fabulous fabric, the walls need a robust underlying structure and hardware to stand up over time. Here’s what to look for in well-constructed canopy sidewalls and doors.
Starting from the top, quality walls have reinforced binding along the edge that connects to the canopy frame. This prevents tears and fraying where fabrics bear the most stress. Binding may be fabric or vinyl – the key is adequate thickness and reinforcement.
Check that attachment points to the frame are sturdy. Look for thick straps, heavy-duty grommets, and securing hooks made from tough materials. Weak, thin attachment hardware rips out under windy conditions.
Zippers are another vital construction component. They take abuse each time you open and close doorway flaps. Go with rugged coil zippers made for outdoor use, not cheaper lightweight models prone to breaking.
Doors themselves should be made of durable, opaque fabric panels sized to properly cover the entrance area. Avoid flimsy screens that sag and flap in the breeze. Soft wheeled closures that curl the door edges together provide a better seal.
The lower edges of walls should have a means to secure them to the ground when installed. Grommets, stake loops, or hook-and-loop flaps keep wind from blowing under and lifting the walls up. An attached weighted skirt works even better to seal the bottom edge.
Look for nicely reinforced corners and seams so the panels maintain their shape over time. This prevents sagging hems and gaps that let in dust and moisture.
Ideally the walls will be constructed using binding, thread and fabrics rated for outdoor use that resist UV damage, mildew, and abrasion. Marine-grade materials are best for longevity.
See if walls come with a carrying bag or storage straps. This protects them from sun damage, dirt, and tears when not deployed. Padded bags prevent rubbing that degrades delicate fabrics.
Heavy-duty 600-1000 denier polyester or 18 oz. marine vinyl are good canopy wall fabrics. Heavier and tighter weave provides durability and weather resistance. Mesh screens should also be tightly woven.
Avoid walls made with thin, flimsy materials prone to shredding on sharp canopy frames. Also beware cheap vinyls that can crack in cold weather.
Take time to closely inspect the stitching, fabric hems, inner structural panels, and hardware thickness once the walls arrive. This confirms the walls are built to last through years of gusty winds and soaking rains. Quality materials and workmanship do cost a bit more but add tremendously to lifespan and performance.
Caring for Your Walls

To make your well-constructed canopy sidewalls last:
- Completely dry off vinyl and polyester before storing to avoid mildew.
- Use wear pads at stress points where fabrics contact frame.
- Keep zippers lubricated and clean for smooth operation.
- Touch up small fabric holes to prevent growth.
- Clean off bird droppings or sap drips that can degrade materials.
With some basic care and maintenance, sturdy and rugged 10×10 canopy sidewalls should endure many years of reliable service. Investing in quality is worth the upfront cost.
Key Construction Considerations
- Reinforced top binding prevents rips and tears.
- Heavy-duty grommets, straps and hooks securely attach to frame.
- Marine-grade coil zippers withstand heavy use.
- Thick, opaque fabric panels and doors block wind and rain.
- Anchor bottom edge securely to ground.
- Carrying bags protect during transport and storage.
Carefully check all structural components once your new canopy sidewalls arrive. High quality materials and stitching make walls built to last through all weather conditions.
Getting the Proper Fit for Your Canopy Model
You want new sidewalls for your 10×10 canopy tent, but which style will actually fit properly? Canopies come in different frame configurations that require matched sidewalls for full coverage and proper weather protection.
The most common variables are:
- Straight vs. slant legs
- Standard vs. extra tall leg extensions
- Square vs. tapered frames
Straight leg canopies have vertical pipes that create a classic pitched roof peak. Slant or angle leg models have angled supports meeting in a point at the top. This causes the roof to slope downward along each side.
Full height 10×10 canopy sidewalls must align with the leg style:
- Straight leg walls have flat rectangular panels.
- Slant leg walls require trapezoidal shaped fabric sections to follow the slope.
Universal or hybrid sidewalls try to fit both leg types via adjustable attachments. But they often end up a bit loose and baggy looking.
Canopy frames also vary in height. Standard models are around 10 feet tall. Some allow for taller 12 foot extensions. Again, the walls must reach all the way to the top for full coverage.
And a few canopies taper in from 10 feet square at the top to smaller dimensions at the bottom. This requires custom tapered walls that narrow down to match.
Measuring your canopy’s specifications before ordering walls avoids getting the wrong style. If unsure, contact the manufacturer with frame details to verify which walls will fit properly.
Other Fit Considerations
In addition to the frame, here are some other sizing factors for well-fitting canopy sidewalls:
- Height – Standard, 3/4 height, or short walls should align with frame.
- Shape – Square, tapered, 6 sided, or octagonal sidewall shape.
- Doorways – Zipper doors must cover frame openings cleanly.
- Ground level – Walls should overlap grass or other surface without large gaps.
- Canopy style – Match to pop-up, pole tent, or tension frame types.
Avoid forcing misaligned walls onto a canopy. This puts excessive strain on the fabric and hardware causing premature failure and instability. It just looks sloppy too.
Take down precise frame measurements and compare to wall sizing charts when ordering. Factor in height extensions and tapered or angled variables. Or design fully custom walls cut to your exact specifications.
Email the company with your canopy make and model if unsure what will properly fit. Most reputable brands have excellent customer service to help get this right.
Installing Walls for Optimal Fit
Once you have properly matched sidewalls, make sure to install them cleanly for the best fit:
- Securely attach all top straps, grommets or Velcro to frame poles.
- Align zips and closures to canopy openings.
- Overlap and secure bottom edge to ground surface.
- Stake out and tension walls evenly without sagging.
- Seal gaps where needed with provided flaps or skirting.
Taking the time to correctly install well-fitting sidewalls keeps your canopy interior protected in all weather conditions. While also allowing full access and visibility when desired.
Key Takeaways
- Measure canopy frame shape and height before ordering walls.
- Get walls that match straight vs. slant legs.
- Factor in leg extensions and tapered variables.
- Avoid loose universal-fit walls if possible.
- Double check sizing chart details before purchasing.
Properly measured and matched 10×10 canopy sidewalls keep your tent looking crisp while providing full weather protection for seasons to come.
Should You Get Sidewalls for 1, 2, 3 or 4 Sides?
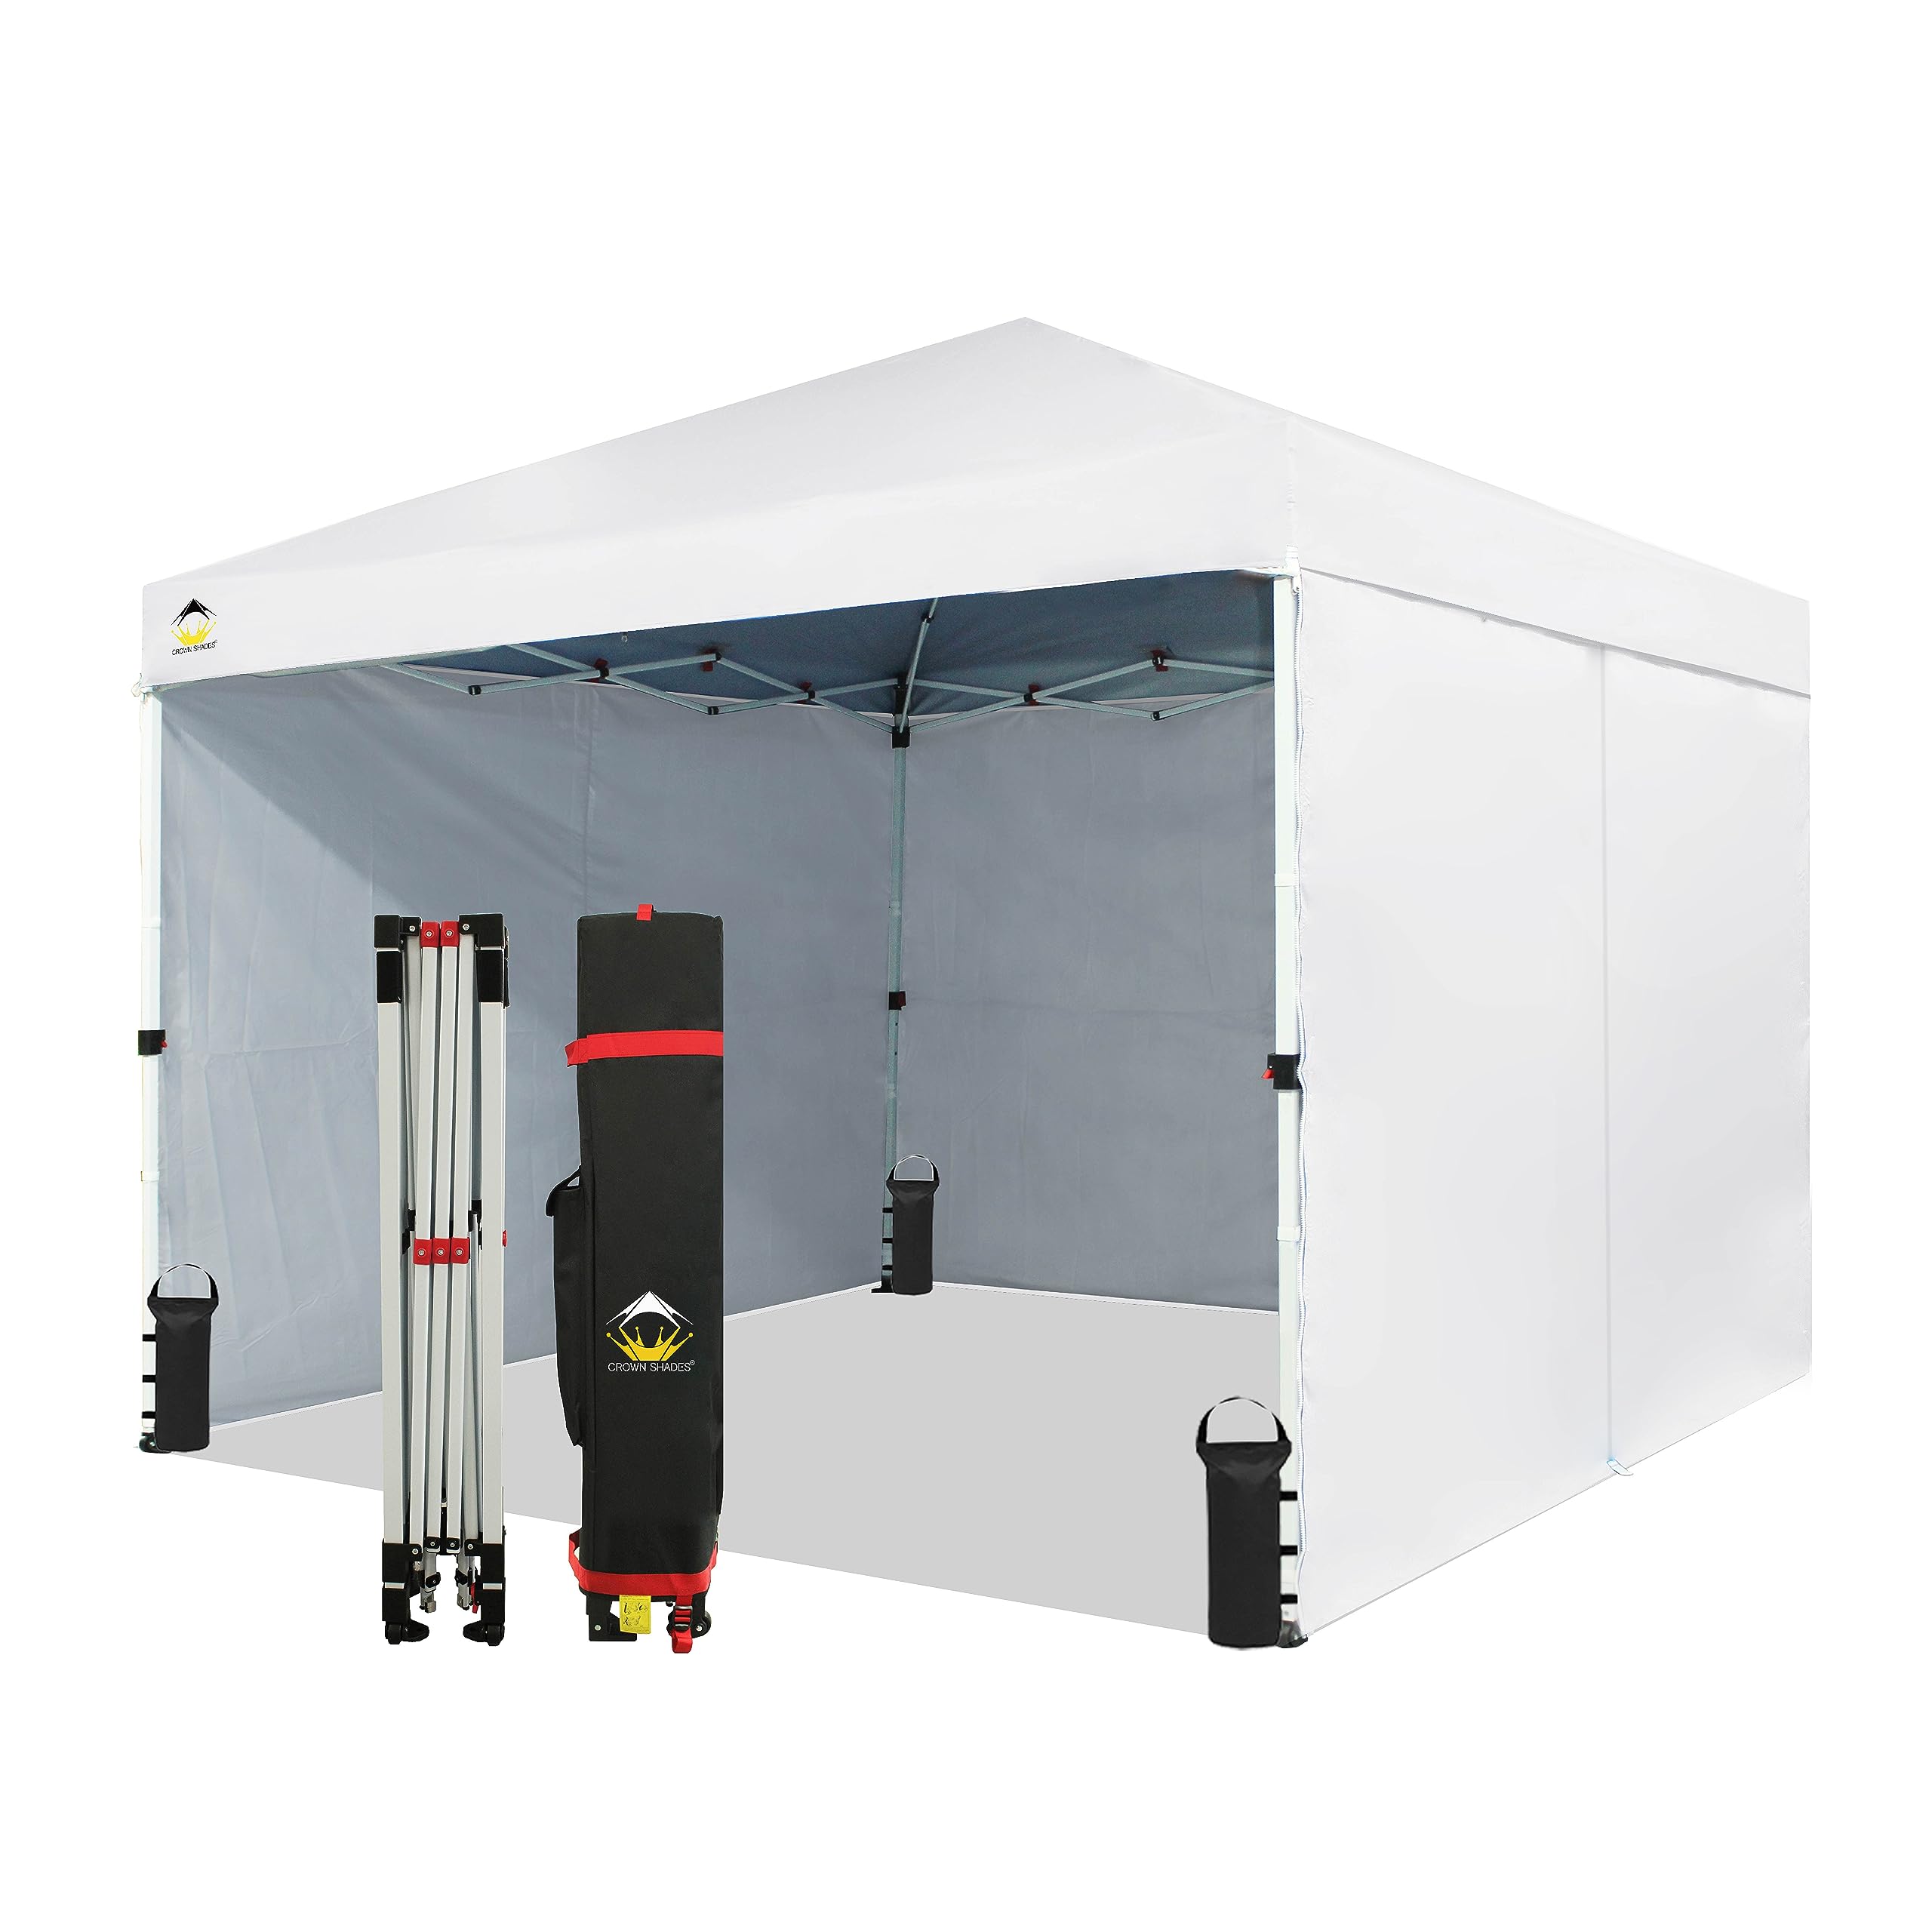
When buying 10×10 canopy sidewalls, one decision is how many wall panels you need. Getting all 4 provides a fully enclosed tent space. But partial sidewall sets let you balance openness, protection and cost.
A few factors to consider:
- Fully enclosing all 4 sides gives maximum privacy and weather protection.
- Less than 4 walls provides ventilation and visibility while lowering cost.
- Prioritize which directions need wind/sun/rain blocking.
- Match walls to the number of doorways you want.
- Consider interchangeable walls to alternate open and closed areas.
Here’s a closer look at canopy setups using 1, 2, 3 or 4 sidewalls:
1 Sidewall
A single 10×10 canopy sidewall panels costs the least but offers minimal enclosure. Some situations where just 1 wall could work:
- Blocking sun/rain from one direction only.
- Using as a backwall display for retail booth.
- Dividing interior space or blocking wind.
- Covering one side fully while leaving 3 sides wide open.
Just remember a lone wall catches more wind pressure, so secure it carefully. Anchor bottom edge and reinforce the pole connections.
2 Sidewalls
Two walls lets you block two adjoining sides, such as the back and one side. Benefits include:
- More wind/sun/rain protection than just 1 wall.
- Can fully enclose corner areas.
- Allows L-shaped counters or divides.
- Usually placed on main windward sides.
For maximum stability, set two 10×10 canopy sidewalls on opposite sides rather than on adjacent corners.
3 Sidewalls
Three walls enclose three sides of the canopy such as the back and both sides. This configuration offers:
- Privacy and protection from most directions.
- Leaves one side fully open.
- Allows L-shaped or U-shaped interior layouts.
- More cost effective than buying 4 walls.
Try to orient the open side away from prevailing wind or rain directions. Three walls balance shelter and ventilation nicely.
4 Sidewalls
A full set of 4 matching 10×10 canopy sidewalls fully encloses the entire space. Key benefits include:
- Total visual privacy and sun/wind/rain protection.
- Allows use of space heaters, A/C, etc.
- Can feel room-like and cozy inside.
- Offers most versatility for all weather and uses.
The downside of four walls is lack of natural airflow. Open doors, windows and roof vents to prevent condensation buildup.
Customizing Your Setup
Look for canopy sidewalls with interchangeable wall panels, doors and windows. This allows customizing the open vs. closed sides to suit changing conditions.
Some other creative ways to configure 1, 2, 3 or 4 walls:
- Add clear vinyl windows for light and visibility.
- Mix solid and mesh walls to balance privacy with ventilation.
- Use detachable sidewalls to open or close different sides quickly.
- Swap locations of doorways and closures.
Experiment to find your ideal canopy setup. The beauty of removable modular walls is flexibility to alternate open air freedom with fully enclosed private space.
Key Sidewall Number Considerations
- 1 side provides basic wind/sun protection for lowest cost.
- 2 walls enclose corners well.
- 3 walls balances coverage and ventilation.
- 4 fully encloses all sides but can feel confining.
- Look for changeable walls, doors and windows.
Choose the number of 10×10 canopy sidewalls that perfectly suits your changing needs!
Getting the Right Amount of Airflow

One key benefit of 10×10 canopy sidewalls is the ability to control airflow. Wall configurations let you block wind and rain while ventilating the interior on hot days. Here are tips for getting the right canopy airflow for your conditions.
Start by looking at removable sidewalls with transparent vinyl windows, screens and closures. These allow customizing airflow and visibility:
- Mesh screens maximize ventilation while blocking bugs.
- Clear vinyl windows also encourage airflow when opened.
- Zippered closures seal off or open up different sides as needed.
If going with solid opaque sidewalls, be sure to leave at least one side completely open for ventilation. Or opt for full-height walls with mesh screen windows up top.
Consider the number of walls too. One or two partial walls allows more breezes than three enclosed sides. Four full walls blocks airflow entirely unless you add windows.
For hot summer events, favor taller half-height walls over full ceiling height. The open space up top enables air circulation and heat escape.
Set up sidewalls in a wind-smart alignment. Walls perpendicular to prevailing breezes block wind while allowing some airflow. Angling walls to “funnel” winds also works well.
Take advantage of natural wind currents. Feel where gusts come from most often and try to position the most open canopy wall in that direction.
Use swivel wall closures, removable panels and roll-up vinyl windows to quickly modify airflow as conditions change. Keep things flexible.
Monitor conditions inside the canopy, especially on hot days. Open up more mesh screened areas if you notice the space getting stuffy.
A small portable fan placed by open doors or windows can also gently move hot stagnant air out. Just avoid strong full size fans that could damage the canopy.
When Maximum Airflow is Needed
There are times when you’ll want to maximize canopy interior airflow. Such as:
- Very hot days over 90 degrees Fahrenheit.
- Humid, muggy days when condensation easily builds.
- Large daytime gatherings with many people present.
- Enclosed food service stations producing heat and steam.
- Crowded indoor dance floors at night to circulate air.
Here are some tips for getting the most air circulation possible in your 10×10 canopy on those extremely hot or muggy days:
- Open mesh screened windows on 2 or more sides.
- Roll up all clear vinyl sidewalls to ceiling height.
- Remove 1 or 2 entire wall panels if possible.
- Open all closures and doors wide.
- Use multiple portable fans to keep air moving.
- Avoid enclosed lighting which adds heat. Use open outdoor fixtures.
Taking some time to optimize ventilation will keep your canopy guests comfortable. Preventing that hot, sticky feeling makes for a much better experience all around.
Achieving Optimal Airflow Balance
Ideally, 10×10 canopy sidewalls with removable panels and windows give you total control over ventilation versus enclosure. Here are some guidelines for airflow balance:
- Block wind and rain as needed but leave one side partially open.
- Default to mesh screened windows for refreshing breezes while deterring bugs.
- Open vinyl transparent windows when interior starts to feel stuffy.
- Remove a wall completely when temperatures and humidity call for maximum air exchange.
- Use portable fans to safely move air on extremely hot days.
Monitor canopy interior conditions and make airflow adjustments in real time. Keep your group comfortable in the protected shelter while preventing a muggy, stagnant interior air environment.
Key Canopy Airflow Tips
- Favor removable screened windows for ventilation control.
- Open up vinyl sidewalls when heat builds up.
- Remove 1 or 2 walls entirely in extreme heat.
- Use portable fans if needed.
- Angle walls perpendicular to wind direction.
With smart canopy airflow management, you get the best of both worlds – protection from sun, wind and rain while preventing a hot, airless interior. Stay cool and comfortable!
Using Sidewalls for Sun Protection or Rain Protection

A major benefit of 10×10 canopy sidewalls is controlling sun and rain exposure. Configuring opaque and transparent walls blocks or allows in sunlight and precipitation conveniently.
For sun protection, solid fabric canopy walls provide shade and block UV rays. This creates a cooler, more comfortable environment on hot sunny days. Opaque materials like 600 denier polyester or vinyl totally cut off direct sunlight.
Mesh screened sidewalls also filter sunlight somewhat while allowing air flow. Light still comes in but the intensity is diffused. Mesh screens have a UPF UV resistance rating so some harmful rays are blocked.
For best sun blocking, use:
- 4 full-height solid opaque sidewalls
- Blackout fabrics that absorb light and heat
- Extra roof drapes and shade sails above walls
- Sun-facing walls angled to deflect rays
For rain protection, waterproof vinyl sidewalls work best. Polyester walls treated with water-resistant coatings also repel raindrops effectively. Just avoid cheaper absorbent fabrics.
Full floor-to-ceiling height provides the most rain coverage. Any gap along the roof line risks water intrusion. Extend walls 1-2 feet above the frame for extra protection.
Here are some other wet weather canopy wall tips:
- Choose coated polyester or vinyl fabrics
- Seal all seams and bindings thoroughly
- Close all zippered entrances and flaps
- Anchor bottom edges fully to ground surface
- Angle sidewalls perpendicular to wind direction
For both sun and rain, the number of walls matters too. One lone wall blocks only one direction. Two or three walls prevents sun and rain from sideways. Four fully enclosed sides offers surrounding protection.
Balancing Light, ventilation and Views
The ability to toggle transparent vinyl windows and mesh panels open or closed is a major benefit for balancing sunlight, weather protection and interior views.
Here are some tips for blending these factors with your 10×10 canopy sidewalls:
- Close all clear windows and mesh in harsh sun or rain.
- Open partway or remove mesh panels on hot, sunny days as needed.
- Roll up clear vinyl wall sections when more light and views are preferred.
- Swap opaque walls for transparent ones (and vice versa) as conditions change.
- Circle the tent and adjust walls and windows to follow the sun.
Sidewalls with interchangeable clear, mesh and solid panels let you actively moderate your canopy environment. Keep your guests comfortable in all weather conditions.
Key Sun and Rain Protection Tips
- Use opaque fabric walls to block sun and UV rays.
- Prioritize waterproof vinyl or treated polyester materials for rain protection.
- Seal off all gaps for best coverage from elements.
- Open mesh and clear vinyl windows to balance light/views.
- Rotate walls around canopy to follow sun or wind shifts.
With the right sun-blocking and water-resistant canopy sidewalls, you can enjoy your outdoor event rain or shine! Just actively manage windows and closures to fine tune interior light and airflow.
Easy Installation vs Permanent Attachment

10×10 canopy sidewalls come in two main styles when it comes to installation and attachment. Some feature easy pop-on/pop-off convenience while others get permanently strapped or fastened to the frame.
So which is better for your canopy setup – easy portable walls or permanent ones?
Let’s compare the pros and cons of each approach:
Easy Installation Sidewalls
Easy installation walls use simple attachment methods like velcro, grommets, straps, or channel inserts. This allows quickly popping walls on and off as needed. Benefits include:
- Fast to install without tools or hardware.
- Walls easily removable for open sides, storage, transport.
- Allows customizing open or closed walls as conditions change.
- Provides flexibility if moving canopy to new locations.
- Lower initial cost than permanent models.
The main downsides of easy on/off walls are reduced stability in windy conditions and poorer weather sealing if gaps form around edges.
Permanent Attachment Sidewalls
Permanently mounted walls get strapped, bolted, or clamped tightly to the canopy frame poles. This creates a stronger connection with benefits like:
- Very secure even in wind, rain and snow storms.
- Weathertight seals prevent moisture intrusion.
- Walls won’t detach or blow away in extreme winds.
- Sturdy support for heavy duty or hazardous uses.
- Provides fixed enclosed space for storage, utilities, etc.
The fixed nature does make permanently installed walls less convenient. Changing layouts, accessing contents, repairs and transportation become harder with walls that don’t detach.
Balancing Convenience and Security
For many casual canopy uses like parties or camping, easy pop-on/off walls offer fine convenience and utility. Just be sure to securely fasten all straps, clips and closures.
More heavy duty applications like semi-permanent storage spaces, harsh weather climates, or industrial sites often justify permanent sidewall attachment. These rigidly fixed walls provide unmatched stability and protection.
Some tips for balancing convenience and security:
- Use sturdier grommets, thick straps, quality hardware for removable walls.
- Seal off gaps thoroughly with flaps and skirts when using easy install walls.
- Consider permanent corners with removable panels on other sides.
- Use easy mount walls but add extra reinforcement at connection points.
Think about your specific canopy usage, location and weather when deciding between install ease and rigid permanence for sidewalls. Pick the method that fits your needs.
Other Wall Installation Considerations
- Match style to straight leg or slant leg canopy frame.
- Get full floor-to-ceiling height for maximum stability.
- Overlap and secure bottom edge to ground surface.
- Angle walls perpendicular to prevailing winds.
- Seal off all gaps thoroughly after installing.
- Use all supplied straps, grommets, rails and hardware.
Take time to properly install your canopy walls in the optimal configuration. Proper attachment suited to your specific canopy use provides safety and good performance.
Key Sidewall Attachment Considerations
- Easy install suits temporary uses.
- Permanent mounting better for semi-fixed uses.
- Enhance easy walls with robust closure hardware.
- Match mounting style to straight or angled canopy legs.
Choose the canopy sidewall installation method that best balances ease of use with stability and optimal weather sealing for your particular canopy setup situation.
Foldable and Portable vs Fixed Sidewalls
An important decision when buying 10×10 canopy sidewalls is whether you want foldable portable walls or fixed panel walls. Both offer advantages depending on your canopy use.
Here’s an overview of the pros and cons of foldable vs permanently mounted walls:
Foldable and Portable Walls
Foldable sidewalls use flexible fabric panels that collapse down for easy transport and storage. Benefits include:
- Folds into compact bundles to save space.
- Lightweight to carry by hand or in vehicles.
- Easy to set up and take down repeatedly.
- Convenient for temporary or changing locations.
- Allows versatile reconfiguration as needed.
The main downsides are foldable walls may lack rigidity in windy conditions. And continual folding can weaken fabric over time.
Fixed Walls
Fixed sidewalls use permanently rigid frames and solid panels that don’t collapse. Benefits include:
- Very sturdy and stable in wind/rain.
- Withstand heavy use without sagging.
- Provide fixed storage or room space.
- Allow mounting internal hardware or shelves.
- Feel more solid and secure overall.
Fixed walls are heavy, bulky and hard to transport or reconfigure though. Storage, mobility and flexibility become limited.
Deciding What Works Best

For mobile uses like camping trips, temporary retail booths or backyard parties, foldable fabric sidewalls offer great convenience and versatility. Just ensure adequate stability with secure hardware and anchors.
More permanent installations like semi-fixed storage buildings, event concession stands or backyard sheds benefit from rigid permanently mounted wall systems. These provide rock solid stability and weatherproofing.
For a blend of both, some sidewalls use modular interlocking panels. These fold up individually but connect into solid unified frames. This balances portability and rigid stability when assembled.
Other Foldable vs Fixed Considerations
- Weather resistance – Heavier fixed walls withstand high winds better.
- Windows – Folding walls accommodate roll-up vinyl windows easily.
- Doors – Hinged doors integrate better on fixed walls.
- Attachment – Fixed walls allow robust permanent mounting hardware.
- Material – Fixed uses solid panels, while folding relies on fabric.
Measure your specific needs for mobility, weather protection, configuration flexibility and lifespan when choosing foldable over fixed 10×10 canopy sidewalls.
Tips for Utilizing Each Type
To make the most of foldable canopy walls:
- Use sturdy grommets, hooks, and straps to add stability.
- Anchor bottom edge thoroughly to resist wind lift.
- Store folded walls in carry bags when not set up.
- Clean and dry thoroughly before long term storage.
For fixed sidewalls:
- Make electrical or plumbing connections permanent and robust.
- Seal around edges to prevent water and dust ingress.
- Install shelving securely to withstand abuse and weight.
- Consider small access doors for maintenance.
Key Folding vs Fixed Sidewall Considerations
- Folding offers great portability and flexibility.
- Fixed provides maximum stability and weatherproofing.
- Assess mobility needs vs. robustness and permanence.
- Some modular systems balance both approaches.
Choose the right combination of foldable fabric sidewalls and/or fixed rigid panels to meet your specific canopy usage requirements.
Budget-Friendly vs Heavy Duty Premium Sidewalls
10×10 canopy sidewalls come in a wide range of quality and price levels. On one end are basic budget-friendly walls made with lightweight materials and simple construction. At the high end are premium heavy duty walls with robust fabrics, frames and mounting hardware designed for commercial use and extreme weather conditions. Let’s compare the pros and cons of budget vs premium canopy walls.
Budget-Friendly Canopy Walls
Budget sidewalls appeal to cost-conscious consumers and temporary applications like parties and camping. Typical features include:
- Thinner polyester or vinyl fabrics from 200-400 denier range.
- Lighter weight foldable or roll-up fabric panels.
- Simple grommet or velcro panel attachments.
- Minimal doors, windows or other accessories.
- Pricing ranging from $50-150 per 10×10 wall.
The main drawbacks of budget walls are reduced weather protection, shorter lifespan, and limited durability compared to premium models.
Heavy Duty Premium Canopy Walls
Heavy duty canopy walls designed for frequent commercial use have these features:
- Thick 600-1000 denier polyester or 18 oz. vinyl.
- Robust permanently-mounted frames.
- heavy-gauge aluminum or steel wall components.
- Secure straps, grommets and hardware.
- Full-width zippered doors and vinyl windows.
- $300-500+ per 10×10 wall section.
The main downside of commercial-grade walls is higher upfront cost. But their heavy construction provides many years of reliable service in harsh conditions.
Deciding Between Basic and Heavy Duty
For occasional backyard parties or camping trips where weather extremes aren’t a big concern, budget sidewalls offer plenty of utility. Just be prepared to replace them periodically as cheaper materials degrade.
Businesses needing sturdy walls for markets, events, storage, or work areas should consider investing in premium commercial-grade canopy sidewalls. The enhanced durability and weather resistance pay off over time.
Here are some guidelines for choosing budget or premium walls:
- Budget – Casual backyard use, temporary events, mild climates.
- Premium – Commercial settings, permanent installation, extreme weather regions.
- Hybrid – Use heavy duty corner panels with budget side inserts.
Maximizing the Benefits of Each
To make budget sidewalls last:
- Take down promptly after use and store indoors.
- Inspect for tears and damage periodically. Patch or replace.
- Use secure ties and anchors to reinforce against wind.
- Consider spray treatments to improve water resistance.
For premium walls:
- Follow manufacturer cleaning and maintenance guidelines.
- Use all provided installation hardware for maximum stability.
- Keep drain holes and channels clear of debris.
- Lubricate zippers and hinges periodically.
Key Budget vs Premium Considerations
- Budget suits cost-conscious temporary uses.
- Premium provides heavy duty durability and weatherproofing.
- Match quality level to your specific canopy usage.
- Hybrid mixes provide a middle ground option.
Choosing the right canopy sidewalls for your needs and budget will provide years of excellent utility! Just balance cost, durability, lifespan and performance.
The Best Places to Buy Quality Canopy Sidewalls

Where you purchase your new 10×10 canopy sidewalls from can make a big difference in getting high quality products that properly fit your tent. Some outlets offer better selection, prices, quality, service and support than others. Here are the best places to shop for canopy walls:
The Canopy Manufacturer
Purchasing replacement sidewalls directly from the company that made your canopy tent is often a smart bet. Benefits include:
- Guaranteed model-specific proper fit.
- Designed to integrate with your existing canopy.
- Matches original fabric colors and features.
- Trusted brand name quality and construction.
- May offer discounted bundling with the tent purchase.
Just confirm the company sells the same sidewalls separately before assuming so. And expect to pay full retail versus third party discounts.
Canopy Accessory Specialty Shops
Companies focusing specifically on canopy accessories like sidewalls, lighting, floors and furnishings also offer great selection and expertise. Benefits include:
- Large online inventory of walls, windows, doors, etc.
- Staff very knowledgeable about proper fit.
- Priority place for niche canopy accessory products.
- Competitive pricing with tent brands.
- Great customer guidance to pick ideal setup.
The main downside is potential lack of warranty support versus the original canopy maker. But products are likely high quality.
General Equipment and Party Rental Stores
Local rental outlets and sporting goods stores can also carry replacement canopy sidewalls. Pros include:
- Hands-on product inspections before buying.
- Try assembly and fit before purchasing.
- Support local brick and mortar businesses.
- Ability to return or exchange easily.
- No shipping waits or costs.
Just know that selection is unlikely to be comprehensive for all canopy makes and models.
Shopping Tips for Quality Canopy Walls
Regardless of where you buy replacement 10×10 canopy sidewalls, keep these tips in mind:
- Bring your canopy model name/number to match up.
- Measure your frame to get precise sizing.
- Closely inspect construction quality and materials firsthand.
- Avoid no-name brands with sketchy quality.
- Watch out for counterfeit knockoff canopy accessory products.
- Price compare between sellers, but don’t make cost the only priority.
Taking the time to shop carefully from a reputable source will reward you with high quality sidewalls that stand the test of time and weather. Your canopy will look and function its best for years to come!
Key Sidewall Purchasing Tips
- Buy directly from the canopy maker for guaranteed fit.
- Canopy accessory shops have wide specialty product range.
- Local stores allow hands-on inspection before purchase.
- Bring measurements and canopy model details when shopping.
- Carefully vet quality before purchasing.
Do some research to find the best sidewall retailer for your specific canopy make and model. Investment in quality products ensures years of excellent hassle-free service life!


