How to choose the ideal location for your weather station. What factors to consider when selecting mounting equipment. How to ensure proper installation for long-term accuracy. What are the key steps for perfect weather station mounting.
Selecting the Optimal Location for Your Weather Station
Choosing the right location for your weather station is crucial for collecting accurate data. Here are the key factors to consider:
- Elevation: Mount the station high enough to avoid obstructions and capture true wind flow
- Sunlight exposure: Ensure full sun throughout the day for solar radiation sensors
- Distance from heat sources: Position at least 100 feet from AC units, chimneys, or other heat emitters
- Representative area: Select an open location that reflects the overall area’s conditions
Is elevation important for weather station mounting? Absolutely. Higher elevation reduces obstructions and leads to more representative measurements. Aim to mount your station:

- At least 5 feet off the ground
- Higher than surrounding roof lines
- Above average tree height when possible
Elevated stations not only improve data accuracy but also enhance wireless connectivity and security against tampering.
Ensuring Accurate Wind Speed Measurements
Wind speed sensors require open airflow for accurate data collection. To achieve this:
- Consult your weather station manual for recommended clearance distances
- Follow the general rule of placing sensors at least 4 times their height away from obstructions
- For example, 10-foot high sensors need at least 40 feet of open clearance
Are there specific requirements for wind speed sensor placement? Indeed. The height of your sensors determines the necessary distance from obstructions like buildings, trees, and walls. Always refer to your weather station’s manual for precise guidelines.
Choosing the Right Mounting Equipment
Selecting appropriate mounting equipment is essential for the longevity and accuracy of your weather station. Consider the following factors:
Mounting Pole Selection
A sturdy mounting pole keeps your weather station secure. Look for:
- Steel, aluminum, or thick PVC construction
- Minimum 2-3 inch diameter
- Schedule 40 or 80 pipe ratings for durability
- Length of 10-20 feet for good elevation
For stability, bury mounting poles at least 2 feet in concrete.
Bracket Considerations
The mounting bracket connects your weather station to the pole. Choose a heavy-duty bracket designed for outdoor use, such as:
- Marine grade aluminum
- Powder coated steel
- Reinforced nylon or ABS plastic
Ensure the bracket fits your specific weather station model and offers adjustable angle settings.
Ensuring Durability and Long-Term Performance
To guarantee your weather station’s longevity and accurate data collection, consider these factors:
Load Capacity
Verify that your mounting pole and bracket can safely support the combined weight of your weather station, sensors, and cabling. Most professional weather stations weigh 15-25 lbs, while consumer models are lighter at 5-10 lbs. Choose hardware rated for at least 50 lbs to ensure durability.
Construction Materials
Select weather station mounting equipment made of:
- Rust-resistant aluminum or stainless steel
- UV-stabilized ABS plastic
- Reinforced nylon or polycarbonate
Avoid unprotected steel that can corrode when exposed to the elements.
Corrosion and UV Protection
How can you protect your mounting equipment from corrosion and UV damage? Choose hardware with:
- Powder coated, anodized, or galvanized finishes for rust resistance
- Marine grade finishes for maximum protection in seaside or high-humidity environments
- UV-inhibitors to prevent sun damage
- Waterproof sealing to keep out moisture
Remember, consumer-grade indoor mounts won’t withstand outdoor conditions for long.
Optimizing Installation and Maintenance
Proper installation and maintenance are crucial for your weather station’s performance. Consider these aspects:
Anti-Vibration Measures
Can vibrations affect weather station accuracy? Yes, they can impact temperature readings. Using cushioned mounting pads or grommets helps absorb vibrations from wind and other sources, improving temperature accuracy, especially for sensitive sensors.

Ease of Installation
To simplify the installation process, look for mounting equipment with:
- Pre-assembled brackets
- Integrated cable routing
- Adjustable angle settings
- Complete mounting hardware
Professional-grade equipment with these features allows for faster and easier setup.
Anchoring and Stability
How can you ensure long-term stability for your weather station? Quality mounting kits include galvanized steel anchor bolts and fasteners for securing poles in concrete. This prevents the pole from loosening over time, maintaining stability and accuracy.
Maximizing Data Accuracy and Longevity
To ensure your weather station provides accurate data for years to come, consider these final points:
Size Considerations
When it comes to mounting brackets, size matters. Larger brackets offer greater adjustability and stability, while compact mounts take up less space. Choose the right size based on your weather station configuration, location constraints, and local wind conditions.
Long-Term Durability
Quality mounting equipment made of durable materials can operate smoothly for a decade or longer. Avoid flimsy brackets that may fatigue and fail prematurely. Investing in high-quality mounting equipment ensures your weather station’s longevity and consistent performance.

Troubleshooting Common Mounting Issues
Even with careful planning and installation, you may encounter some challenges. Here are solutions to common mounting issues:
Dealing with Uneven Surfaces
How can you mount a weather station on an uneven surface? Use adjustable brackets or shims to level the mounting pole. Ensure the station remains perpendicular to the ground for accurate wind direction readings.
Minimizing Electromagnetic Interference
Electromagnetic interference can affect sensor readings. To minimize this:
- Keep the station away from power lines and large metal structures
- Use shielded cables for wired connections
- Consider a lightning rod for additional protection in storm-prone areas
Addressing Wind-Induced Vibrations
In areas with consistently high winds, additional measures may be necessary to reduce vibrations:
- Use guy wires to stabilize taller mounting poles
- Install wind baffles around sensitive instruments
- Consider a more robust mounting system designed for high-wind environments
Enhancing Your Weather Station’s Functionality
Once your weather station is properly mounted, consider these additions to maximize its utility:
Integrating with Smart Home Systems
Can a weather station be integrated with smart home systems? Absolutely. Many modern weather stations offer:
- Wi-Fi connectivity for real-time data access
- Integration with popular smart home platforms
- Custom alerts and automation based on weather conditions
This integration allows you to automate tasks like adjusting your HVAC system or irrigation schedule based on local weather data.
Adding Supplementary Sensors
Enhance your weather station’s capabilities by adding supplementary sensors:
- Soil moisture sensors for gardening and agriculture
- UV index sensors for sun safety
- Air quality monitors for environmental awareness
- Lightning detectors for storm tracking
Ensure any additional sensors are compatible with your existing system and mounted according to their specific requirements.
Data Logging and Analysis
To make the most of your weather station data:
- Set up automatic data logging to track long-term trends
- Use weather analysis software to visualize and interpret your data
- Consider sharing your data with local weather networks to contribute to broader meteorological studies
Regular analysis of your weather data can provide valuable insights into local climate patterns and help you make informed decisions about outdoor activities and home maintenance.
Maintaining Your Weather Station for Optimal Performance
Proper maintenance is crucial for ensuring your weather station continues to provide accurate data. Here are some key maintenance tasks:
Regular Cleaning and Inspection
How often should you clean your weather station? Aim for a thorough cleaning and inspection at least twice a year, with more frequent checks in dusty or high-pollen areas. During these inspections:
- Clean all sensors gently with a soft brush or cloth
- Check for any signs of wear, corrosion, or damage
- Ensure all moving parts (like anemometers) spin freely
- Verify that radiation shields are clean and undamaged
Calibration Checks
Regular calibration ensures your weather station continues to provide accurate readings. Consider these points:
- Compare your station’s readings with official local weather data
- Use calibration kits for precise adjustments
- Some sensors, like barometers, may require professional recalibration every few years
Software and Firmware Updates
Keep your weather station’s software and firmware up to date to ensure optimal performance and access to the latest features. Many modern stations offer automatic updates, but it’s worth checking periodically for any available upgrades.
Leveraging Your Weather Station Data
A properly mounted and maintained weather station can provide valuable data for various applications. Here are some ways to leverage your weather station’s capabilities:
Personal Weather Forecasting
Can a home weather station improve local forecasting? Absolutely. With accurate local data, you can:
- Create short-term forecasts for your immediate area
- Identify microclimate effects specific to your location
- Track seasonal trends and patterns
Agricultural Applications
For gardeners and farmers, a weather station can provide crucial information for:
- Optimizing irrigation schedules
- Predicting frost risks
- Calculating growing degree days
- Planning planting and harvesting activities
Energy Efficiency
Use your weather station data to improve energy efficiency by:
- Optimizing HVAC system operation based on outdoor conditions
- Planning solar panel placement and estimating output
- Identifying the best times for natural ventilation
Outdoor Activity Planning
Accurate local weather data can help you plan outdoor activities more effectively:

- Determine the best times for sports and recreation
- Plan photography sessions based on lighting conditions
- Prepare for potential weather-related safety issues
By following this comprehensive guide to weather station mounting and maintenance, you’ll be well-equipped to collect accurate, reliable weather data for years to come. Remember that the key to success lies in careful planning, proper installation, and regular upkeep. With these elements in place, your weather station will provide valuable insights into your local climate, enhancing your understanding of the environment around you and enabling more informed decision-making in various aspects of your life.
Installing a weather station is an exciting project for any home or business owner looking to gather hyperlocal weather data. But perfectly mounting your weather station is key to getting accurate measurements. Follow this 15-step guide to choose the ideal location, select durable mounting equipment, and safely install your weather monitoring station for years of flawless data collection.
Choose the Right Location for Optimal Weather Data
Choosing the perfect mounting location is the most important decision when installing your weather station. Consider these key factors when picking a spot:
- Elevation – Mount the weather station high enough to avoid obstructions and get true wind flow.Rooftops and hills work great.
- Sunlight – Ensure the location gets full sun exposure throughout the day for solar radiation sensors.
- Away from heat sources – Position the station at least 100 feet from AC units, chimneys, or other heat emitters.
- Representative area – Pick an open location representative of the overall area to get accurate measurements.
Take your time selecting the ideal mounting site for the best quality weather insights.
Verify Wind Speed Requirements
Wind speed sensors need open airflow to collect accurate data. Consult your weather station manual for the recommended distance from obstructions like buildings, trees, and walls based on the height of your sensors.
As a rule of thumb, place wind sensors at least 4 times the height away from obstructions. For example, sensors 10 feet high require at least 40 feet of open clearance.
Factor in Elevation Needs
Higher elevation reduces obstructions and leads to more representative measurements. Mount stations:
- At least 5 feet off the ground.
- Higher than roof lines of surrounding structures.
- Above average tree height whenever possible.
Elevated stations also improve wireless connectivity and security against tampering.
Pick a Sturdy Mounting Pole
A heavy-duty mounting pole keeps your weather station securely in place. Look for:
- Steel, aluminum, or thick PVC construction.
- Minimum 2-3 inch diameter.
- Schedule 40 or 80 pipe ratings for durability.
- Length of 10-20 feet for good elevation.
Bury mounting poles at least 2 feet in concrete for anchoring stability.
Select a Durable Bracket
The mounting bracket connects your weather station to the pole. Pick a heavy-duty bracket designed for outdoor use, like:
- Marine grade aluminum.
- Powder coated steel.
- Reinforced nylon or ABS plastic.
Ensure the bracket fits your weather station model and has adjustable angle settings.
Verify Load Capacity
Make sure the mounting pole and bracket are rated to safely hold the combined weight of your weather station, sensors, and cabling.
Most professional weather stations weigh 15-25 lbs. Budget consumer models are lighter around 5-10 lbs.
Select hardware rated for at least 50 lbs for durability.
Check Construction Material
Look for weather station mounting equipment made of:
- Rust-resistant aluminum or stainless steel.
- UV-stabilized ABS plastic.
- Reinforced nylon or polycarbonate.
Avoid unprotected steel that can corrode and fail over time when exposed to weather elements.
Evaluate Size Options
Larger mounting brackets offer greater adjustability and stability. But compact mounts take up less space.
Choose the right size based on your weather station configuration, location constraints, and wind speed considerations.
Consider Anti-Vibration Pads
Cushioned mounting pads or grommets absorb vibrations from wind and other sources that can impact temperature readings.
This helps improve temperature accuracy, especially for more sensitive sensors.
Pick Corrosion Resistant Finish
Powder coated, anodized, or galvanized mounting hardware resists rust and corrosion much longer than bare metals.
Marine grade finishes provide maximum protection in seaside and high-humidity environments.
Ensure UV and Weather Protection
Look for mounting equipment designed specifically for exterior installation with:
- UV-inhibitors to prevent sun damage.
- Waterproof sealing to keep out moisture.
- Weather-resistant construction materials.
Consumer-grade indoor mounts won’t last long outside.
Verify Anchoring Kit Included
Quality mounting kits include galvanized steel anchor bolts and fasteners for securing poles in concrete.
This prevents the pole from loosening over time for greater stability.
Select Easy Installation Design
Opt for mounting equipment with straightforward installation like:
- Pre-assembled brackets.
- Integrated cable routing.
- Adjustable angle settings.
- Complete mounting hardware.
Simpler professional installs get your station up and running faster.
Ensure It’s Built to Last Years
Quality mounting equipment made of durable materials will operate smoothly for a decade or longer.
Avoid flimsy brackets that fatigue and fail after a few seasons of weather exposure.
Paying a little more for robust commercial-grade mounting gear is well worth it.
Find Affordable Quality Solutions
You don’t have to overspend to get reliable mounting equipment built to handle the elements.
Look for reputable weather station companies offering heavy-duty mounting kits with premium materials and construction at reasonable prices.
With smart shopping, you can find great value mounting hardware that will provide years of reliable service.
Installing your weather station’s anemometer at the optimal height is crucial for collecting accurate wind speed data. Here are some key factors to consider when verifying wind speed requirements before mounting your equipment:
Check Wind Speed Requirements
The general rule is to mount wind speed sensors high enough to avoid obstructions, but low enough to avoid buffeting from rooftops and other structures. As a guideline:
- Position sensors at least 4-5 times the height away from buildings, trees, and walls. For example, if sensors are mounted 10 feet high, allow at least 40-50 feet clearance.
- Don’t mount sensors directly above roof peaks, as wind accelerating over the roof can artificially increase readings.
- Consider prevailing wind direction at the location so sensors capture natural wind flow.
But ultimately, consult your weather station’s manual for the recommended mounting height and clearance. This varies based on the type of anemometer and wind vane.
For example, Davis Instruments recommends:
- Smaller propeller anemometers: 8-10 feet high with at least 4 times height clearance.
- Larger maximum wind anemometers: 10-15 feet up and 5 times height clearance.
- Sonic anemometers: 6-16 feet elevation based on location obstructions.
Meanwhile, Columbia Weather Systems gives these specifications:
- Standard wind sensors: At least 10 feet above roofline with 2 times height clearance.
- Ultrasonic anemometers: 6.5-16 feet up based on surrounding structures.
The more clearance you can provide, the better. But also consider factors like convenience for maintenance access. Err on the side of mounting sensors slightly higher rather than lower.
Account for Future Obstructions
When siting your weather station, think ahead to future potential obstructions from growing vegetation. A small sapling today may grow into a 40-foot tree obstructing wind flow over time.
Leave extra buffer space around current structures and vegetation allowing for years of future growth.
Consider Prevailing Wind Direction
Determine the prevailing wind direction for your location using historical weather data from nearby stations.
If possible, orient your anemometer perpendicular to the predominant wind direction to maximize wind exposure and accurate readings.
Evaluate Sensor Type and Heights
Requirements also depend on the specific type of wind speed sensor:
- Small propeller anemometers – Low mounting around 8-12 feet.
- Taller maximum wind anemometers – Elevated 10-15 feet up.
- Sonic anemometers – More flexibility from 6-16 feet high.
Consult manufacturer specifications to pick the optimal mounting height for each sensor’s design.
Check Zoning Height Restrictions
Verify there are no local zoning laws restricting structures above a certain height that could impact your weather station mounting options.
Getting the proper permits avoids issues down the road.
Consider Ease of Access
Also factor in ease of access for periodic cleaning and maintenance check-ups on sensors.
Don’t mount anemometers so high that accessing them becomes dangerous or requires special equipment.
Carefully following wind sensor mounting guidelines results in more accurate wind speed data.
Mounting your weather station at the optimal elevation is essential to get accurate measurements. Here are some key factors to consider when determining the ideal height:
Consider Elevation Needs
In general, you want to mount the weather station as high as feasible without being impacted by rooftop turbulence or zoning restrictions. Some guidelines include:
- Minimum of 5-10 feet above ground level.
- Above the roofline of surrounding structures.
- Higher than nearby tree height if possible.
- No more than 20 feet elevation unless using a commercial tower.
Higher stations experience better wind exposure, increased security, less obstruction, and improved wireless transmission. But also consider convenience for maintenance access when siting your elevation.
Factor in Prevailing Wind Direction
Position your mounting pole perpendicular to the predominant wind direction for your area. This prevents structures from sheltering the station and provides optimal wind flow.
Avoid Rooftop Turbulence
Don’t mount stations directly above peaked roofs, as wind accelerating over the roof can artificially amplify wind readings from sensors.
Elevate weather sensors at least 5-10 feet above the roofline to escape turbulence.
Watch Out for Late Afternoon Sun
If possible, avoid having a western exposure where the sinking late afternoon sun can shine directly on sensors and create inaccurate temperature spikes.
Account for Future Tree Growth
Consider existing vegetation growth rates to allow enough overhead clearance for 5-10 years of future obstruction.
Otherwise, your station may eventually get shaded once small trees mature over time.
Check Zoning and Permit Requirements
Most residential areas limit structures above 20 feet. Verify your intended mounting elevation complies with local zoning laws before installing.
Getting the proper permits avoids headaches down the road.
Evaluate Wind Shear
Higher elevations experience faster wind speeds. If comparing data with other local stations, factor in wind shear differences due to varying heights.
Adjacent stations at significantly different elevations will show wind speed discrepancies.
Carefully planning your weather station’s mounting height results in optimal siting for accurate data collection year after year.
Choosing a sturdy mounting pole is key to keeping your weather station securely in place for the long haul. Here are the most important factors to look for when picking out an anchoring pole built to last:
Pick a Sturdy Mounting Pole
The mounting pole bears the entire weight of the weather station and must resist winds, storms, and other forces. Therefore, it pays to invest in a heavy-duty commercial grade pole such as:
- Steel – Look for schedule 40 or 80 pipe with a diameter over 2 inches.
- Aluminum – Choose at least schedule 80 pipe in a 3-inch diameter or larger.
- Thick-walled PVC – Opt for schedule 80 pipe with a 3 to 4-inch diameter.
Other specifications to look for include:
- Height of 10 to 20 feet for good elevation.
- Rated for at least 50+ lbs load capacity.
- Weatherproof and corrosion-resistant finish.
- Pre-drilled holes for running cables.
Bury It Deep in Concrete

For maximum stability, bury mounting poles at least 2 feet deep in concrete, with deeper footings in loose soil. Auger or trench a wide hole and use anchor bolts to secure the pole.
Consider Pole Diameter
Wider poles are sturdier but take up more space. Choose based on factors like wind load, elevation, and location constraints.
3-inch diameters work for most home weather stations under 20 feet high. Go larger for taller commercial towers.
Evaluate Wall Thickness
Schedule 40 pipe should suffice for many residential installations. Schedule 80 has thicker walls for additional durability with high winds.
Assess Wind Speed and Exposure
Reinforced heavy-wall poles are a must in regions with frequent high winds or intense storms.
Corrosion-resistant aluminum stands up better in seaside and industrial environments.
Pick an Anchoring Method
Through-bolting into a concrete pad provides maximum security. Lag bolts into an existing patio or footing are simpler for DIY installs.
Verify Height Regulations
Check zoning laws and permit requirements before installing tall mounting poles, especially in neighborhoods with strict HOAs.
Investing in a robust, commercial-grade mounting pole provides rock-solid stability for your weather monitoring station year after year.
Choosing the right mounting bracket is crucial for securely attaching your weather station to the pole while resisting the elements. Here are the key features to look for in a heavy-duty bracket designed to last:
Select a Durable Bracket
The mounting bracket connects your weather station enclosure to the anchoring pole. Look for brackets specifically designed for outdoor use, such as:
- Marine-grade aluminum – Corrosion resistant and lightweight.
- Powder coated steel – Durable and strong.
- Reinforced ABS plastic – Affordable but weather-resistant.
Other important features include:
- Adjustable angle settings for positioning sensors.
- Pre-drilled holes for cable routing.
- Mounting u-bolts to fit 2-3 inch poles.
- Gaskets, seals, and grommets to prevent water intrusion.
Match Your Weather Station Model
Verify the mounting bracket is designed specifically to fit your weather station enclosure.
Look for a universal bracket if using multiple sensor arrays.
Check Weight Ratings
Confirm the bracket is load rated for at least 50 lbs for professional stations weighing 15-30 lbs.
But even lighter 5-10 lb consumer stations benefit from a heavy-duty bracket.
Include Wind Sensors
Factor in additional wind speed, wind direction, and rain gauge sensors that will add weight and wind loading.
A durable bracket supports the entire assembled station.
Evaluate Size and Profile
Larger mounting plates provide more versatility. Low profile brackets conserve space.
Assess options based on your specific station configuration and siting constraints.
Ensure Full Rotation
Test that the bracket allows full 360-degree rotation for aligning sensors relative to north.
Prevent Vibration Transfer
Cushioned grommets or elastomeric pads help isolate vibration from the pole to improve temperature sensor accuracy.
A rugged mounting bracket survives years of harsh weather exposure while keeping your station securely attached.
Ensuring your mounting equipment is rated to safely handle the full weight of your weather station is critical for stability. Follow these guidelines for verifying adequate load capacity:
Verify Load Capacity
The mounting pole, bracket, anchors, and other hardware must be rated to support the total weight of your assembled weather station. Consider factors like:
- Station enclosure weight – Typically 5-30 lbs.
- Added sensor weight – Anemometers, wind vanes, etc.
- Cabling and wiring loads.
- Dynamic wind and ice loads.
- Other attached accessories.
Calculate the fully loaded weight and specify equipment with adequate capacity.
Check Manufacturer Specs
Vendor product listings should clearly state load capacity ratings for brackets, poles, and related mounting hardware.
Compare these against your weather station’s total weight.
Include a Safety Margin
Add an extra buffer of at least 25-50% above the calculated stationary load to allow for wind gusts, ice buildup, and other dynamic forces.
It’s better to overbuild than underbuild your mounting.
Evaluate Materials and Construction
Heavier gauge metals, thicker poles, and reinforced plastics provide higher load ratings.
Commercial mounting components are stronger than general consumer hardware.
Assess Environmental Factors
Frequent high winds, storms, and heavy snow or ice warrant extra capacity. Upgrade mounting if situated in harsh environments.
Consider Height Factors
Higher mounted stations require stronger brackets and poles that won’t bend or sway in wind.
The taller the elevation, the more robust the mounting should be.
Inspect Existing Infrastructure
When retrofitting onto existing infrastructure, carefully inspect condition and capacity before attaching new loads.
Properly sizing mounting equipment prevents weather station failures down the road.
Choosing mounting equipment constructed from durable, weather-resistant materials ensures it will stand up to years of harsh outdoor conditions. Here are the best construction materials to look for:
Check Construction Material
The mounting bracket, pole, and related hardware should be made of heavy-duty materials capable of surviving all weather extremes, such as:
- Marine-grade aluminum – Corrosion and rust resistant.
- Stainless steel – Long-lasting in any climate.
- Reinforced ABS plastic – Affordable but weatherproof.
- Powder coated steel – Prevent rust with an enamel finish.
Avoid unprotected carbon steel that will corrode after a few seasons of exposure.
Assess Environmental Factors
Marine aluminum or stainless steel is best for oceanfront and high humidity climates prone to faster corrosion.
Reinforced plastics work better in polluted industrial areas.
Consider Temperature Extremes
Materials like ABS and PVC plastic become brittle and crack in very cold temperatures. Metals fare better in frigid conditions.
UV-stabilized plastics are needed in hot, sunny climates.
Evaluate Galvanized vs Stainless Steel
Galvanized resists corrosion 60-80 years in rural climates but just 10-15 years in industrial or seaside environments. Stainless steel is better in harsher conditions.
Weigh Cost vs Longevity
Plastic brackets cost less upfront but may need replacing every 5-10 years. Stainless hardware costs more but lasts 50+ years.
Check Compatibility
Avoid mixing dissimilar metals like aluminum and bare steel to prevent galvanic corrosion.
Use weatherproof adhesives and sealants when joining different materials.
Choosing mounting components made of durable, long-lasting materials prevents premature failure and adds decades of reliable service life.
Choosing the right size mounting bracket and pole for your weather station setup is key to stability. Here are factors to consider when evaluating size options:
Evaluate Size Options
In general, larger mounting plates and thicker poles provide more durability. But you need to balance strength with space constraints. Assess size based on:
- Wind load – Larger required in high wind zones.
- Weight load – More capacity needed for heavier stations.
- Height – Taller poles must be stronger and wider.
- Available space – Compact sizes if siting in confined areas.
Measure your station enclosure’s footprint and determine ideal pole diameter to match.
Consider Weight and Wind Factors
Heavier stations with multiple sensors need sturdier poles and larger mounting plates.
Areas with frequent strong winds call for more substantial hardware.
Check Manufacturer Recommendations
Product manuals will suggest minimum pole diameters and bracket sizes to safely handle specific station models.
Allow Room to Expand
Get a pole and mounting bracket rated for higher capacity than your initial planned load, allowing extra room for adding sensors down the road.
Assess Location Constraints
More compact low-profile mounting works better in tight spaces between buildings or under low eaves.
Ensure Full Range of Motion
Larger plates make it easier to rotate and tilt stations for sensor adjustments.
But don’t oversize the bracket causing stability issues in wind.
Taking the time to properly evaluate mounting sizes results in ideal equipment sizing for your unique situation.
Anti-Vibration Pads?
- Select your location – Get as high and unobstructed as possible.
- Choose your mounting bracket – Look for heavy duty steel or aluminum with multiple bolt holes and a stable triangular shape.
- Mark holes for anchors – Use the bracket itself as a template to mark where you’ll need to drill anchor holes.
- Drill anchor holes – For concrete or brick, use a masonry bit. For wood, a standard drill bit. Holes should be slightly wider than anchor diameter.
- Insert anchors – Hammer in wedge anchors for masonry or use lag bolts for wood.
- Bolt bracket down – Get those anchors tightened down firmly until the bracket is fully secured.
- Level the bracket – Use shims if necessary to get the mounting plate perfectly level.
- Attach weather station – Carefully bolt your weather station base onto the mounting bracket.
- Check for wobble – Give your station a gentle shake test, it shouldn’t wobble at all if properly secured.
- Seal connections – Use silicone caulk anywhere the mounting pole or brackets connect to prevent moisture corrosion.
- Route cables – Tuck wires and cables coming from sensors neatly and out of the wind.
- Test readings – Monitor data for a few days to make sure there are no irregularities.
- Maintain stability – Periodically check your mounting job remains vibration-free and make any adjustments needed.
Installing a weather station at your home or business allows you to track hyperlocal weather data. But simply purchasing a weather station isn’t enough – you also need to properly mount it in order to get accurate readings. Choosing the right mounting solution and location is crucial. Don’t worry though, we’ve got you covered with this comprehensive guide on achieving the perfect weather station mounting.
Corrosion Resistant Finish
The first step is selecting a high-quality weather station mounting bracket designed specifically for the outdoors. Look for an anchoring bracket constructed of aluminum, steel, or stainless steel to prevent corrosion over time. The mounting pole should have a powder-coated or galvanized finish to protect against the elements. This is especially important if you live near the ocean or in an area with salt air. A weather-resistant finish will stand up to years of exposure.
You’ll also want UV protection to avoid sun damage. Plastic mounts tend to become brittle and degrade over time. A sturdy metal mounting bracket with UV-resistant powder coating is the smart choice for durability. Consider the gauge of the metal as well – thicker steel or aluminum provides more stability. Heavier gauges around 16 to 18 are recommended for maximum wind resistance.
Height and Location
Once you’ve selected the right anchoring bracket, it’s time to determine the optimal mounting height and location. Your weather station needs to be high enough to get accurate wind speed readings. As a rule of thumb, it should be mounted at least 1.5 times the height of any nearby obstructions. So if you have a one-story house with a 20 foot roof peak nearby, your mount should be at least 30 feet high.
It’s also crucial to find a consistently sunny spot, facing north to avoid glare on the solar panel. The perfect location is in open space away from trees and buildings that could potentially block wind and rain. If mounting on a roof, choose the highest peak without nearby chimneys or vents. And make sure it’s easily accessible for maintenance.
Mast Strength
Your mounting pole needs to be strong enough to handle the weather station’s weight and withstand high wind conditions. A general guideline is to use a pole with a wind load rating at least four times the total weight of your instruments. For example, if your weather station weighs 10 pounds, choose a mast rated for at least 40 pounds of wind load.
The diameter of the pole also factors in. A wider 2-inch diameter aluminum or galvanized steel pole provides more stability compared to thinner options. Go extra heavy duty for exposed locations prone to high winds. Side sway is minimized with a thicker mounting mast.
Bolts and Brackets
All mounting hardware should be made of weather-resistant materials to avoid rust and corrosion. Stainless steel bolts, washers, nuts and lock washers are ideal for outdoor installation. Place a rubber washer between metal surfaces to prevent galling when tightening bolts.
Look for a weather station mounting bracket that allows for easy pole attachment using strong U-bolts. The bracket itself should have at least four pre-drilled mounting holes for securing it to a vertical surface. Lag bolts into wall studs or roof rafters provide maximum holding strength.
Wind Speed Sensor
One of the most critical sensors on your weather station is the anemometer for measuring wind speed. For accurate data, it needs to be mounted on a long horizontal boom extended at least 2 feet from the vertical mounting mast. This allows it to fully capture wind currents without turbulence from the pole.
The boom should be just as sturdy as the main mast. A 1-inch diameter aluminum boom is typically sufficient to support the anemometer without excessive swaying. Use U-bolt clamps on the end to secure the wind speed sensor in place.
Lightning Rod
One often overlooked aspect of weather station mounting is lightning protection. Your expensive electronics are vulnerable, so installing a simple lightning rod can prevent voltage surges. Use a grounded copper rod 1-2 feet above the station with a conductive wire connecting it to an earth ground.
A more advanced lightning arrestor with gas tube technology provides even better protection. And make sure your weather station has surge protection built into the console unit. With these safeguards, your station can safely operate for many storm seasons.
Cabling
Connect your weather station console to the sensors using exterior-rated cabling designed for long term outdoor use. Shielded cable prevents electromagnetic interference for clean sensor data. Use the shortest run length possible and avoid splicing multiple cables together.
Secure cables neatly along the mounting mast using UV-resistant cable ties. Provide some occasional slack rather than pulling cables taut. Leave enough extra length at the bottom to comfortably reach your console location indoors.
Straight and Secure Installation
With the perfect mounting bracket and hardware selected, now the real work begins – securely installing your weather station for accurate long term operation. Here are some best practices to follow:
Solid Mounting Surface
Choose a flat vertical mounting surface without cracks or defects. For wood, this may require installing a metal backplate first to provide a solid surface for the bracket. Concrete, brick, or stucco walls are ideal. Use appropriate lag bolts, anchors, or masonry fasteners to securely attach the bracket.
Level and Plumb
Make sure your mounting bracket is perfectly level before tightening everything down. This ensures the top of the pole sits plumb straight up and down. Use a spirit level tool on the bracket and double check with a plumb line along the mast. Adjustment is easier before fully tightening bolts.
Tighten Bolts
Use properly calibrated torque wrenches when tightening mounting hardware. This ensures bolts are tightened enough without over-tightening. Follow the recommended torque specs for each hardware item. Under-tightened connections will loosen over time from wind vibration.
Rugged Base
For maximum stability, anchor the base of your mounting pole in concrete. Place it at least 18 inches deep for optimal wind resistance. Or use rugged ground anchors suited for the soil type, such as helical earth anchors that screw into the ground.
Guy Wires
In exposed mounting locations, guy wires provide critical support and wind resistance. Install at least 3 guy wire sets spaced 120 degrees apart. Securely anchor them into concrete footings or ground anchors. Adjust tension on the wires until the mast sits completely plumb.
Weatherproofing
Seal all drilled holes with silicone caulk and ensure junction boxes are weather-tight. Conduit connections should be sealed and wiring neatly run for clean installation. Coat exposed lag bolt threading with anti-seize compound to deter rust.
A final clear coat of spray paint provides an extra layer of UV and corrosion protection. Maintain your mounting bracket’s weatherproof finish to get the longest life possible.
Accurate Sensor Mounting
To obtain accurate weather data, each sensor needs to be correctly mounted following best practices:
Rain Gauge
Install your rain collector level about 3 feet above ground on a sturdy mounting rod. Make sure it’s not obstructed by trees or buildings that could limit rain collection. Place it several feet from the mounting pole to avoid wind shadow effects.
Anemometer
As mentioned, extend the wind speed sensor on a horizontal boom at least 2 feet from the vertical mast. Point the boom north to avoid wind distortion from the mast. Calibrate and check for proper wind vane rotation.
Thermometer
The outdoor temperature sensor should be weather-shielded in a vented radiation shield. Mount it about 5 feet above ground away from heat sources. Avoid placing it where sunshine can directly hit and provide false readings.
Hygrometer
Humidity sensors often get mounted in the same shield as the thermometer. Just make sure it’s not touching any metal surface that could influence moisture readings. Maintain an air gap all around the sensor.
With each component expertly mounted in the optimal position, you’ll get highly accurate weather monitoring 24/7. Just be diligent about maintenance and recalibration at least annually.
Ongoing Maintenance
Here are some tips for keeping your weather station in top working order:
Inspect Mounting
Periodically inspect the anchoring bracket, mounting pole, guy wires and concrete footings for any evidence of loosening or corrosion. Tighten hardware or make repairs immediately.
Check Alignments
Ensure your mounting mast remains perfectly straight and vertical over time. Wind can slowly alter alignment. Verify levelness and use adjustment guy wires as needed.
Clean Sensors
Clean all sensor components at least twice a year. This removes dirt or insect buildup that could affect readings. Carefully wipe sensors clean and inspect units.
Recalibrate
Each sensor has calibration procedures to ensure accuracy. Annually follow all recommended calibration steps per the manufacturer’s instructions. This guarantees precision weather data.
Severe Weather
Be prepared to take weather station components offline if necessary before extreme wind conditions. Store indoors until the severe weather passes to avoid equipment damage.
By consistently maintaining your mounting setup and sensors, your weather station will deliver trouble-free operation for many years.
Conclusion
Properly mounting your weather station is crucial for collecting accurate hyperlocal weather data. Follow this comprehensive guide to select durable mounting hardware able to withstand outdoor elements. Carefully consider mounting location, height, and orientation for ideal wind flow and sunlight. Use robust materials, secure anchoring, and expert sensor placement. And don’t neglect ongoing maintenance and calibration. With attention to every detail, you’ll have a weather station that performs reliably for the long haul.
Installing your own hyperlocal weather station is an exciting project for data nerds and weather enthusiasts. But to get accurate readings, proper mounting is a must. This comprehensive guide covers everything you need for robust, durable mounting that stands up to the elements.
UV and Weather Protection
The key to long-lasting mounting hardware is UV-resistance and weatherproofing. Prolonged sunlight exposure can degrade plastic parts, causing brittleness and breakage. And metal pieces are vulnerable to rust and corrosion from moisture.
Seeking out mounting equipment made of stainless steel or aluminum is your best bet for fighting the elements. Look for powder-coated or galvanized steel poles and brackets, which have a protective coating to avoid UV damage and resist rust. Anodized aluminum offers great corrosion resistance too.
Any exterior mounting bolts, nuts, washers etc. should also be stainless steel. And don’t forget lightning protection! A grounded copper rod and arrestor circuit can divert damaging voltage surges safely away from your expensive monitoring equipment.
Height Matters
To get clean airflow, your weather station needs to be high enough to clear nearby obstructions. As a general rule, mount your station at least 1.5 times the height of anything within 30 feet. So if you have a 2-story house, go with at least 30 feet of elevation.
Higher is better for unobstructed wind flow. Just make sure to use a sturdy pole rated for the wind load at that height. Guying wires can add stability for tall masts prone to swaying. And leave room for installing guy wire anchors around the pole base.
Optimal Location
Finding the right spot on your property is also key. You need consistent sun exposure, away from trees or buildings that could shade your instruments. Point the pole north to avoid solar glare on the weather station’s sensors.
Wide open spaces are ideal for accurate wind and rain data. If you must mount on a roof, choose the highest, most exposed peak. And pick a spot that’s easy to reach for future maintenance and recalibration.
Prevent Galling
When assembling mounting hardware, watch out for galling. This happens when tightening stainless steel bolts without lubrication, causing damage to the threads. A dab of anti-seize compound prevents metal-on-metal galling.
Also use a rubber washer between any aluminum and steel mounting connections. This avoids direct contact of dissimilar metals that can accelerate corrosion over time.
Robust Mounting Methods
A flimsy mounting setup just won’t cut it for weather data accuracy. Here are some tips for bombproof installation:
Concrete Footings
For maximum stability, permanently anchor your mounting pole in a concrete footing. The steel or aluminum mast pipe should extend at least 18 inches down into the concrete below ground level.
Be sure to keep the pole plumb as the concrete sets. You can also use rugged ground anchors for your pole’s base if digging concrete is not an option.
Guy Wires are Your Friend
In exposed areas, guy wires provide critical support and keep your mast precisely vertical. They prevent swaying in windy conditions. For a single-pole setup, 3 guy wire sets spaced 120 degrees apart is ideal.
Securely anchor the guy wires in heavy duty ground anchors. Pro tip: Install the anchors first, then raise the pole into position before attaching the wires.
Clear Cable Runs
Use shielded, exterior-rated cable to connect your weather station console to the remote sensors. Take the most direct path possible from pole to indoor mounting location. Avoid splicing multiple small cables together for clean installation.
Neatly run cables along the mounting mast using weatherproof wire ties. Provide a drip loop where wires enter the building to prevent water ingress.
Rugged Mounting Bracket
Choose a sturdy mounting bracket specifically designed for weather stations. Look for pre-drilled holes to bolt securely to the mounting surface using lag screws into wall studs or roof rafters.
The bracket should fully wrap around the pole and clamp tightly using strong U-bolts. A thick gauge steel or aluminum bracket is best for maximum holding strength.
Lightning Arrestor
Install a lighting arrestor device to divert voltage surges safely to ground before they can damage your expensive weather station.
Connect an arrestor circuit between your station and the mounting hardware, along with a dedicated grounding rod. This provides a safe path for electrical spikes caused by nearby lightning strikes.
Expert Sensor Positioning
Each weather data sensor needs to be meticulously positioned for optimal accuracy:
Anemometer
Mount your anemometer wind speed sensor on a horizontal boom extending at least 2 feet from the main mast. This allows clean airflow reaching the unit without turbulence.
Orient the boom north to avoid wind distortion. Calibrate the sensor according to manufacturer specifications for reliable wind direction and speed data.
Thermometer Shielding
Proper placement of the temperature sensor is key for precision readings. Enclose it in a vented radiation shield mounted about 5 feet up the pole to avoid radiant ground heat.
The shield prevents solar heating while allowing air circulation. Take care to weatherproof all connections and conduit openings.
Tip Bucket Rain Gauge
For accurate precipitation data, your rain gauge needs to be sited in open space away from wind obstructions. Position the collection funnel about 3 feet above ground on a sturdy mounting rod.
Make sure the unit sits perfectly level for proper operation. Calibrate and inspect it before each rainfall season.
Maintenance Is Vital
Don’t neglect periodic maintenance on your weather station mounting setup. Here are some important to-do’s:
Inspect Hardware
Check all mounting connections including poles, guy wires and anchors for signs of loosening, corrosion or fatigue at least once per year. Tighten any loose bolts and address issues immediately.
Recalibrate Sensors
Follow manufacturer recommended recalibration procedures for each sensor annually. This ensures your wind speed, temperature, rainfall and other data remains highly precise over the long term.
Check Level and Alignment
Over time, your mounting pole can shift from perfectly plumb. Re-check levelness and use the guy wires to adjust alignment as needed. Keeping the mast truly vertical is crucial.
Severe Weather Precautions
Take extra precautions during extreme wind events. You may need to temporarily detach expensive anemometer sensors and store safely indoor until conditions improve.
Routine maintenance and care will keep your weather station delivering accurate hyperlocal data 24/7, no matter the conditions.
Conclusion
Proper weather station mounting takes care and diligence. Follow this guide to select durable, rugged mounting equipment able to withstand sun, wind, rain and lightning strikes. Carefully consider height, location, pole strength and expert sensor placement based on weather data type. Don’t cut corners on installation and anchors. And perform routine maintenance and calibration for a system that will operate smoothly for many years to come.
So you just got your shiny new weather station and you’re itching to get it set up. But before you start sticking it on your roof or in your backyard, let’s talk about mountings and brackets – the unsung heroes that will keep your station secure in the elements. Trust me, the last thing you want is your new toy crashing to the ground in the first stiff breeze!
Installing your weather station properly is a bigger job than you might think. But follow this 15 step guide, and you’ll have a solid, sturdy setup that will last for years. Let’s dive in!
Anchoring Kit Included?
First things first – does your weather station come with mounting hardware? Many affordable home weather stations include an anchoring kit with the basics to get it secured. This usually includes mounting poles or brackets, screws, and anchors for the ground or roof surface.
If your kit didn’t include mounting gear, don’t sweat it! You can pick up general mounting poles, brackets, and hardware at any home improvement store for less than $20.
Step 1: Pick Your Location
Now it’s time to pick the perfect spot to set up your station. You’ll want an open location away from obstructions like trees or buildings. For roof mounting, choose a spot at the highest elevation of the roof, but avoid the peak where snow and ice collect.
If installing in your yard, find a flat, open area and make sure to abide by the station’s recommended distances from concrete, fencing, pools, etc. Refer to the manual so you don’t invalidate the warranty!
Step 2: Assess Mounting Surface
Determine what type of surface you’ll be drilling or screwing into. Most home stations can be mounted to wood, brick, concrete, or metal roofing. Make sure the included hardware is suitable for the material. You may need to pick up some masonry anchors for concrete or stucco installation.
Step 3: Mark Holes
Based on your drill bit size, mark out holes for anchoring the mounting pole to the surface. Use a measuring tape to space and align them properly. For roof mounts, mark an additional halfway point hole to secure the bracket to the pole.
Step 4: Drill Holes
Put on those safety goggles and bust out the power drill! For wood, brick, or concrete, drill your marked holes to the appropriate size and depth for the anchors. Take precautions not to drill through interior walls or electrical wiring.
For metal roof installations, use a nail punch to create starter holes. Then secure with galvanized self-tapping roofing screws.
Step 5: Install Anchors or Screws
Insert your anchors into the holes – either screw or drive-in style. For wood or brick, screw the anchor directly into the hole. For concrete, tap it in with a hammer. Follow the anchor specs for proper depth and torque.
Step 6: Attach Mounting Bracket
Now attach the mounting bracket or pole plate to the installed anchors using the provided bolts and washers. Level it and loosely tighten the bolts. Leave some play for adjusting once the pole is inserted.
Step 7: Insert Vertical Mounting Pole
Slide your vertical mounting pole down into the bracket sleeve. Use the included pin, bolt, or clamp to secure the pole. The exact attachment method will vary by hardware.
Step 8: Check for Plumb
Hold a bubble level against the mounting pole to check plumb in two directions. Adjust the pole as needed until perfectly plumb.
Step 9: Tighten Bolts
With the pole properly leveled, tighten down the bracket bolts to lock it into position. Don’t overtighten – just make snug!
Step 10: Attach Weather Station
Now for the fun part – securing the actual weather station! Attach it to the top of the mounting pole using the provided screws or clamps.
For roof mounts, attach the station to a secondary horizontal cross arm bracket to keep it level. Adjust as needed for proper alignment.
Step 11: Install Guy Wires (Optional)
For maximum wind resistance, guy wires or cables can secure the upper mounting pole and provide added tensile strength. Attach turnbuckles to the pole just below the weather station, then secure the opposite ends into the ground with anchors.
Step 12: Insert Anemometer Arm
Slide your anemometer wind vane arm into the SUP017 hole on top of the weather station. Orient it to true north and tighten the set screw.
Step 13: Install Grounding Rod
In electrical storms, lightning can travel through your mounting pole. Install a nearby copper grounding rod and wire to divert strikes away from your weather station.
Step 14: Route Cables
Connect and route any sensor cables along the interior of the mounting pole. Use cable clips or zip ties to secure them neatly in place along the route.
Bring cables into your home through the nearest window or door frame. Don’t cut or splice any cables!
Step 15: Check Your Work
Give everything one final inspection to make sure all bolts and connections are tight and properly assembled. Power it up and do a test run to check that the sensors are recording accurately.
And that’s it – you’ve conquered weather station installation! Pat yourself on the back. Now your station will securely and accurately measure conditions for years of weather watching and forecasting.
Just be sure to never underestimate the power of mother nature. Even robust mounting jobs can get battered by extreme winds, hail, snow loads and temperature swings over time. So periodically check your mounting hardware and connections to be sure everything’s still ship-shape.
Following this comprehensive guide properly will give you the best shot at weather station mounting success. But if you need any extra pointers, additional help or advice is just an online weather forum away. The weather enthusiast community is passionate about their station rigs and eager to assist fellow hobbyists.
So enjoy your exciting new data stream and achievment in weather station installation. May it bring you years of meteorological insights! Just keep a close eye on the mounting equipment maintaining your weather station’s integrity.
Easy to Install Design
Installing a personal weather station can seem daunting, but it doesn’t have to be! With a few simple tools and following some key steps, you’ll have your weather station mounted and collecting data in no time. In this guide, we’ll walk through a straightforward 15 step process to get your weather station perfectly and securely mounted.
The most important decision to make early on is where to mount your weather station. You’ll want to find a location that gives your sensors maximum exposure to wind and rain without being blocked by trees, buildings, or other obstructions. An open area of your yard is ideal, but roof and side-of-house mounts work too. Just be sure your mounting location allows the full range of weather elements to be measured by your station.
Once you’ve identified the perfect spot, acquiring the right mounting hardware is key. A weather-resistant shelf, pole, or tripod paired with a sturdy bracket specifically designed for weather stations will provide the stable base needed. Metal mounting poles or masts are commonly used, but don’t underestimate the strength of wood! Pressure treated 4×4 lumber makes an economical and durable mounting pole.
Here’s the step-by-step process for securely and successfully mounting your personal weather station:
- Select your ideal mounting location based on exposure and obstruction factors.
- Choose your mounting pole material and acquire the necessary hardware if not included with your weather station.
- Dig a hole for your mounting pole. Make it deep enough to securely anchor the pole. Using a post hole digger makes this easier.
- Insert the mounting pole in the hole and fill the space around it with concrete to firmly secure it. Make sure it’s completely vertical.
- While the concrete cures, loosely assemble your weather station’s mounting bracket per included instructions.
- Once dry, mount the bracket securely to the pole at the desired height using lag bolts or other sturdy fasteners.
- Carefully install the weather station console/display on the bracket as directed by the manufacturer.
- Connect and attach the weather station’s sensors to the console one by one, being sure to meet cable length limitations.
- Fasten the sensors down securely. Use mounting arms, ties, or brackets as needed for proper sensor positioning.
- Neatly route and collect any loose cabling, securing it to the pole with zip ties or clips.
- Verify all sensors are properly aligned and cables are plugged in correctly to the weather station console.
- Activate your personal weather station per included power-on instructions.
- Access the station console to ensure proper operation and data collection from each sensor.
- Make any minor adjustments needed to sensor positions or orientations to optimize data accuracy.
- You’re all set to start enjoying live weather data! Your perfectly mounted station will provide years of reliable service.
With the right location, hardware, and methodical installation process, you can have your own weather station up and running in no time. Careful planning and securely anchoring all components is crucial to getting accurate measurements. But the effort pays off with a weather station that provides fascinating meteorological data literally at your fingertips. So take your time, follow the proper mounting steps, and enjoy your new window into your local weather from the comfort of home!
Built to Last Years
When investing in a personal weather station, you want one that will provide reliable data for years to come. The key to longevity is choosing a station made with quality components and materials that can stand up to the elements. By selecting weather-resistant construction and following proper setup and maintenance, your home weather station can deliver tons of interesting data for the long haul.
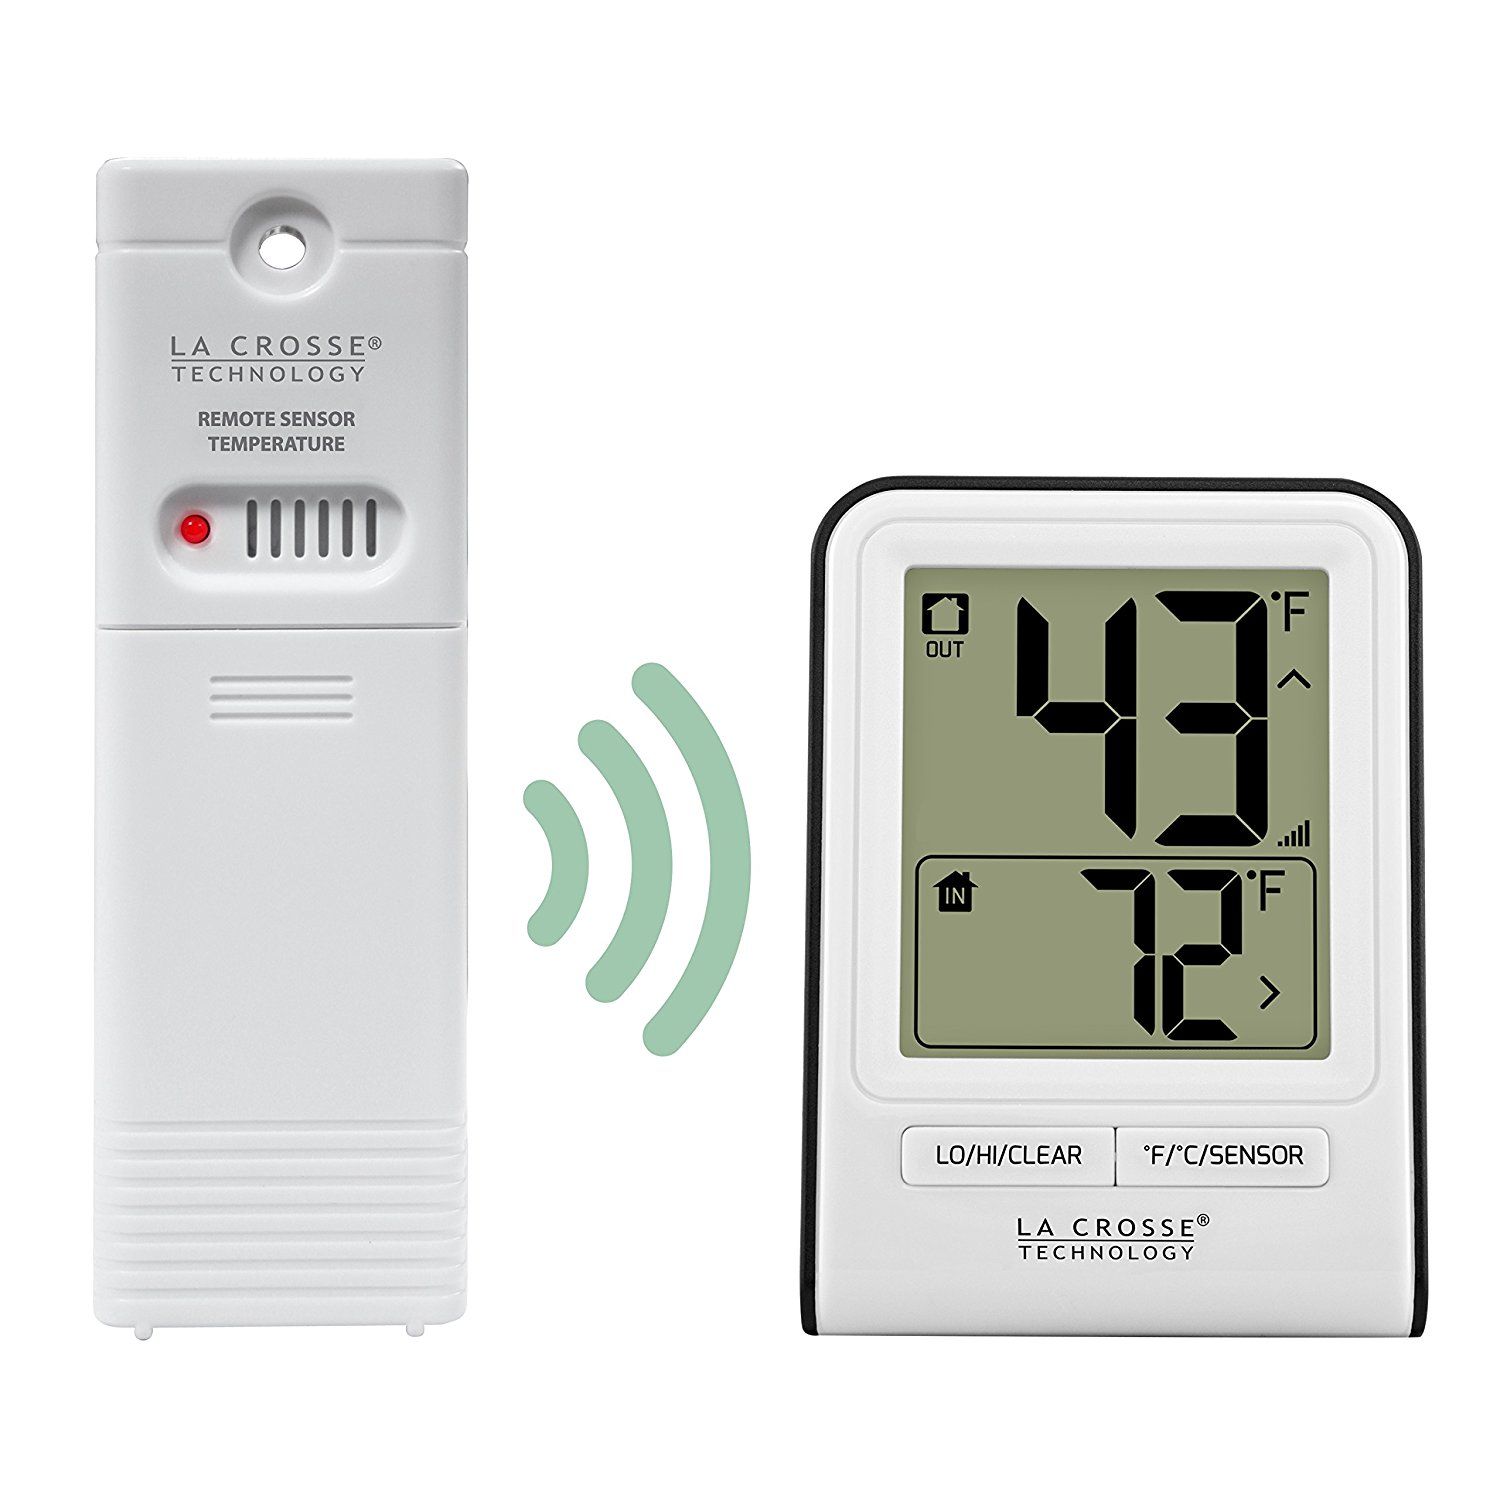
Start with a trusted brand known for making weather stations that last. Top manufacturers like Davis Instruments, Ambient Weather, and La Crosse Technology use rigid, durable plastic or metal to house the console and sensors. High-end stations often have aluminum or stainless steel construction which resists corrosion and maintains structural integrity through all kinds of weather.
You’ll also want to look for weather-tight seals around electronics and openings. Quality stations protect sensitive internal components from moisture, dust, and insects. Tightly fitted gaskets, sealed ports, potted circuit boards, and robust casing keep the inside of the console dry and functioning properly for years of service.
In addition to a solid external build, look for weather stations with quality internal electronics and sensors. Those made with precision instruments, research-grade sensors, and sophisticated data logging features will provide more accurate and reliable operation over time. Features like temperature compensation and individual sensor calibration improve data consistency.
Proper mounting and siting is also essential for your weather station’s longevity. Choose a location with good exposure that secures sensors and prevents vibration. Use quality brackets, poles, and guy wires to firmly anchor external components. Keep the console indoors or in a ventilated shelter to prevent overheating and moisture damage.
Maintenance is required to keep your weather station running for the long term. Every few months, thoroughly inspect and clean the exterior to remove debris, salt buildup, and other grime. Check for insects or bird nests that could obstruct sensors. Use a soft cloth to gently clean sensors and solar panels.
The console may need internal cleaning as well. Carefully open it up to clear out any accumulated dust or insects with compressed air. Check for corrosion on electronic boards and wiring connections. Reseat cables to ensure a solid connection.
Calibration is also needed periodically to ensure your weather station provides accurate data year after year. Most manufacturers provide instructions for properly calibrating sensors. This may involve specialized equipment to verify and adjust readings.
With quality construction, robust components, and proper care, today’s best weather stations are built to provide tons of weather data for 5, 10, or even 15 years! Here are some tips for longevity:
- Choose a trusted brand and high-end model
- Select weatherproof, corrosion-resistant materials
- Look for high-accuracy sensors and electronics
- Properly site and securely mount the station
- Routinely inspect and clean the station
- Periodically calibrate the sensors
- Replace spent batteries immediately
- Keep cables neatly managed
- Update firmware when available
With quality equipment properly installed and maintained, your personal weather station can become a fascinating long-term window into local weather. The investment into a station built to last pays dividends for years with a continuous stream of hyper-local weather data right at your fingertips.
Affordable Quality Solutions

Owning your own weather station used to be an expensive endeavor, with professional-grade stations costing thousands. But technology advancements have made personal weather stations much more affordable, without sacrificing critical features and accuracy.
Quality home weather stations are now available at reasonable prices from reputable manufacturers. Top brands like Ambient Weather, Davis Instruments and La Crosse Technology offer stations with robust build quality, research-grade sensors, and sophisticated data logging at budget-friendly prices.
While cheaper stations exist, they often have questionable reliability and longevity. Spending a couple hundred extra dollars gets you vital upgrades that pay off in the long run. Here are some to look for:
- Metal or rigid plastic housing, not flimsy plastic
- Sealed, gasketed enclosures to resist moisture
- Silicone-coated or potted circuit boards
- Weather-resistant cables and connectors
- IPX water ingress rating
- UV-resistant plastics and coatings
Quality sensors are also a wise investment. Resistive relative humidity sensors, precision thermometers, ultrasonic anemometers, and tipping bucket rain gauges provide laboratory-grade accuracy at consumer prices.
You’ll want a weather station with wireless capability for flexible placement options. Long range designs allow remote sensor mounting far from the console. Look for stations with over 300 foot transmission distance.
Smart data logging is another essential feature, even on budget models. Onboard storage for weather record keeping, graphing, and reporting provides helpful weather analysis. Some even integrate with weather services and smartphone apps.
Easy installation is key as well. A weather station should include mounting hardware and require minimal tools for set up. External sensors that simply wire into the console save time and hassle.
While staying under $300, you can find home weather stations with these critical features:
- Professional-grade sensors
- Wireless transmission to 300+ feet
- Rugged, weatherproof construction
- Sophisticated data logging and analysis
- Simple all-in-one mounting design
Cutting costs by choosing a no-name station with inferior build and sensors is false economy. Pay a little more upfront and you’ll be rewarded with years of reliable weather data.
Some tips for choosing an affordable but quality weather station:
- Select a trusted brand like Ambient Weather or Davis
- Check housing and components for ruggedness
- Confirm presence of research-grade sensors
- Look for wireless range over 300 feet
- Verify onboard data logging functionality
- Read reviews and look for awards
- Make sure installation is straightforward
Don’t compromise on quality to save money. With a small investment in the right weather station, you can enjoy professional-grade meteorological data right at home for years to come.