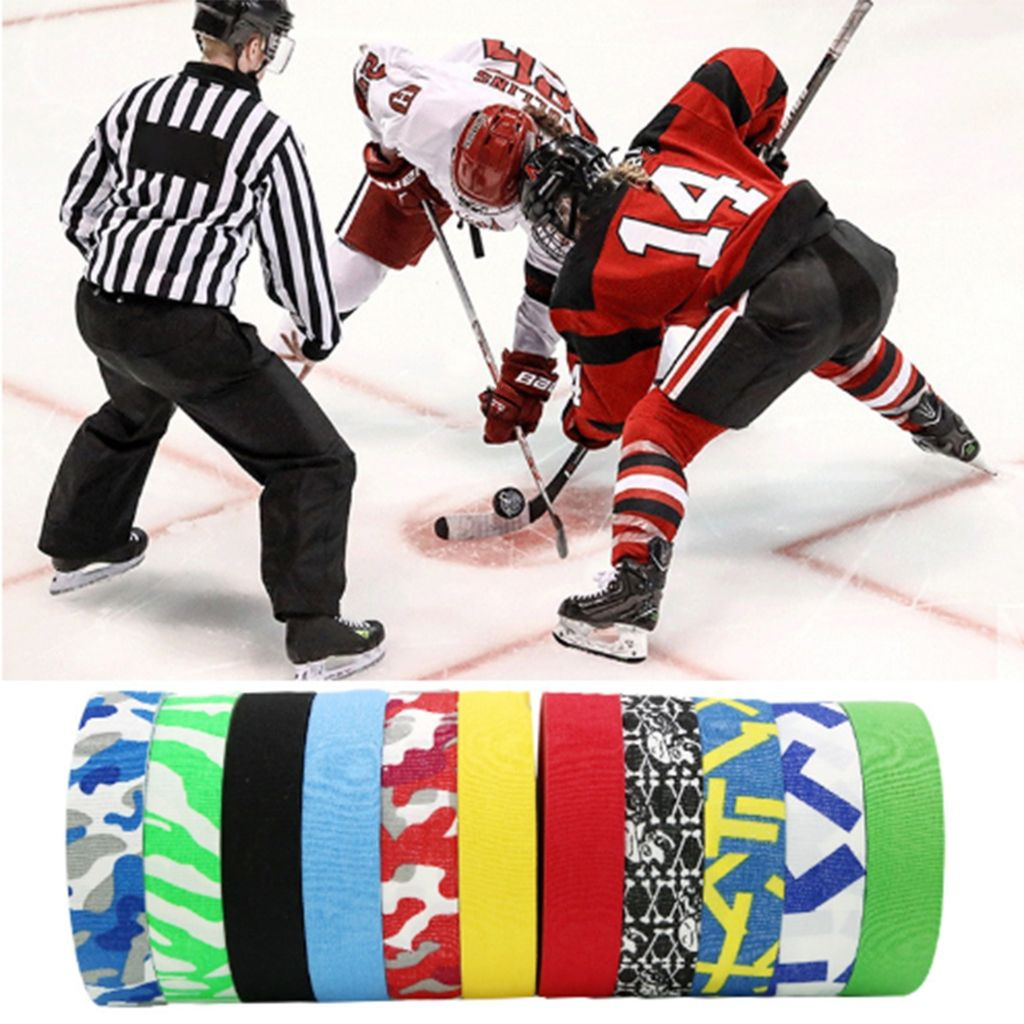
How to choose the right tape for your lacrosse stick. What are the key components of a lacrosse stick. How to prepare your stick before taping. What techniques to use for taping the throat and scoop. How to create a smooth transition between the handle and throat. What are the best practices for taping around the head.
The Art and Science of Lacrosse Stick Taping
Lacrosse players understand that a well-taped stick is more than just aesthetics; it’s a crucial element for peak performance on the field. Proper stick taping enhances grip, control, and customization while reducing the risk of blisters and improving accuracy. For those aiming to elevate their game, mastering the intricate process of taping a lacrosse stick is an essential skill.
Taping serves multiple purposes beyond mere appearance. It provides the necessary friction for secure ball handling, absorbs vibrations that can cause discomfort, and allows players to tailor the stick’s shape and feel to their unique preferences. Moreover, it offers an opportunity for personal expression through color and pattern choices.
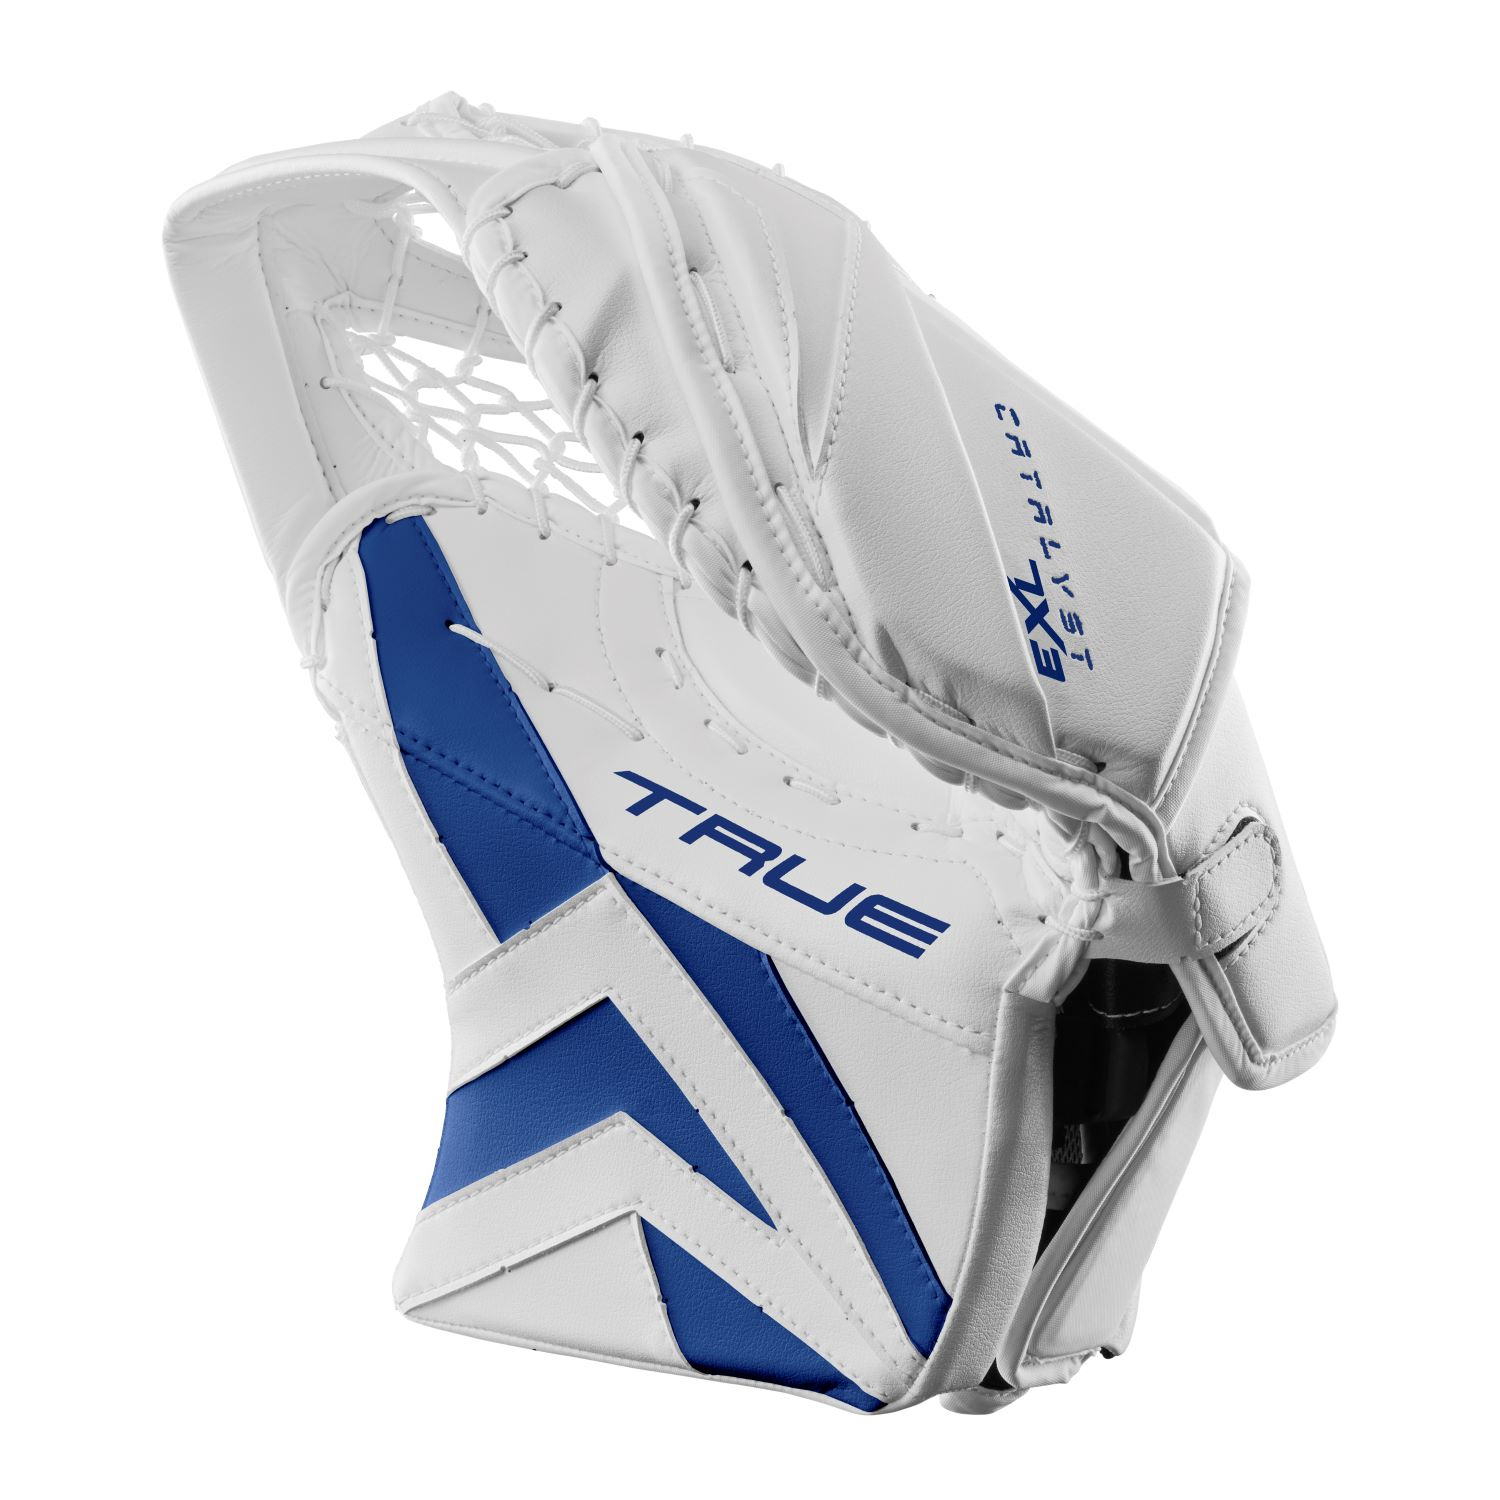
Selecting the Optimal Tape for Your Lacrosse Stick
Choosing the right tape for your lacrosse stick can significantly impact your performance. Consider these key factors when making your selection:
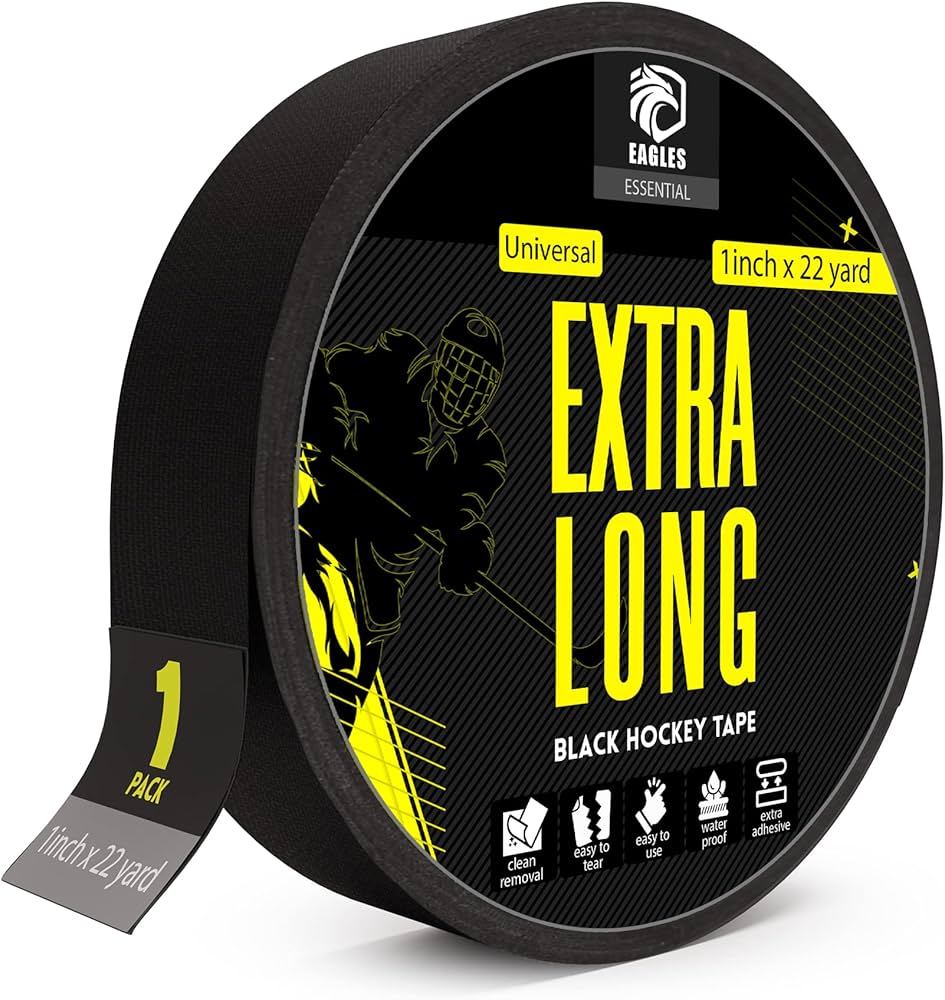
- Grip: Textured tapes offer superior hold, while smooth varieties allow for quicker ball release.
- Cushioning: Thicker tapes provide more shock absorption, whereas thinner options maximize feel and control.
- Weather Resistance: Specialized tapes maintain grip in wet conditions, preventing slippage.
- Aesthetics: Colored tapes and team patterns allow for personalization.
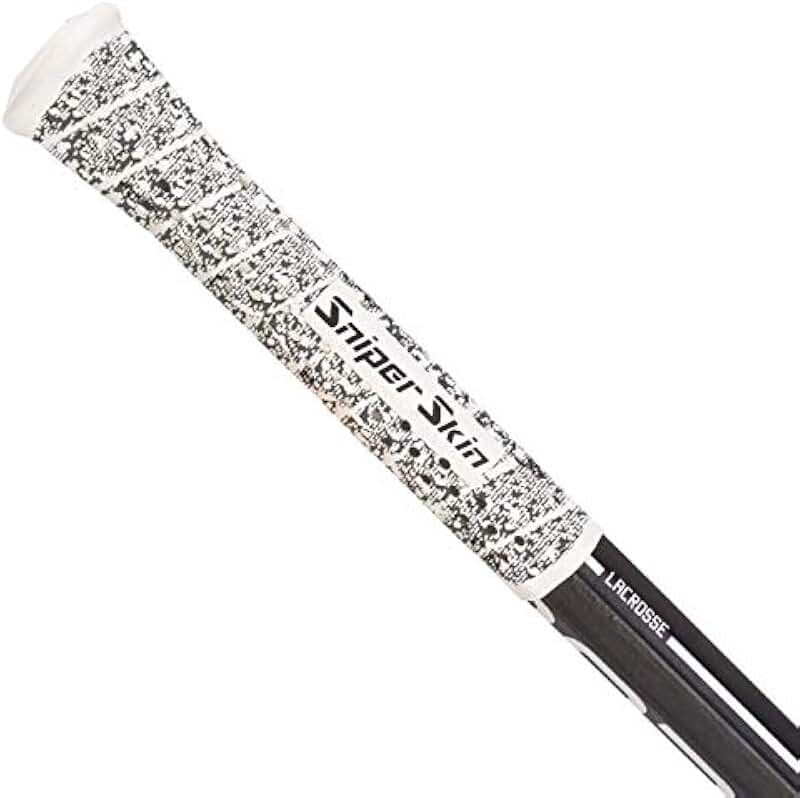
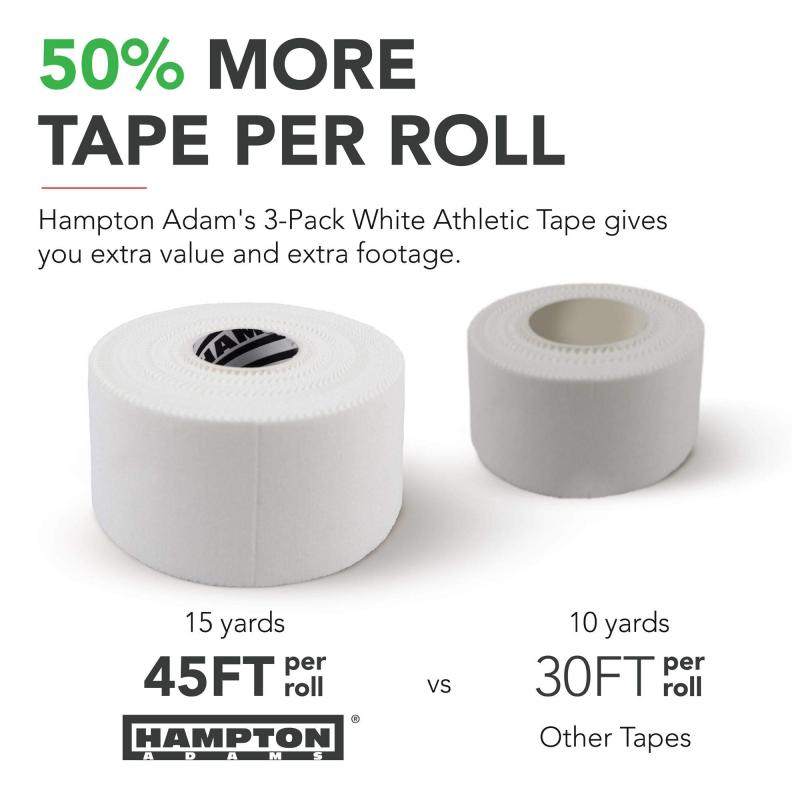
- Brand Quality: Established brands like Renfrew ensure durability and consistency.
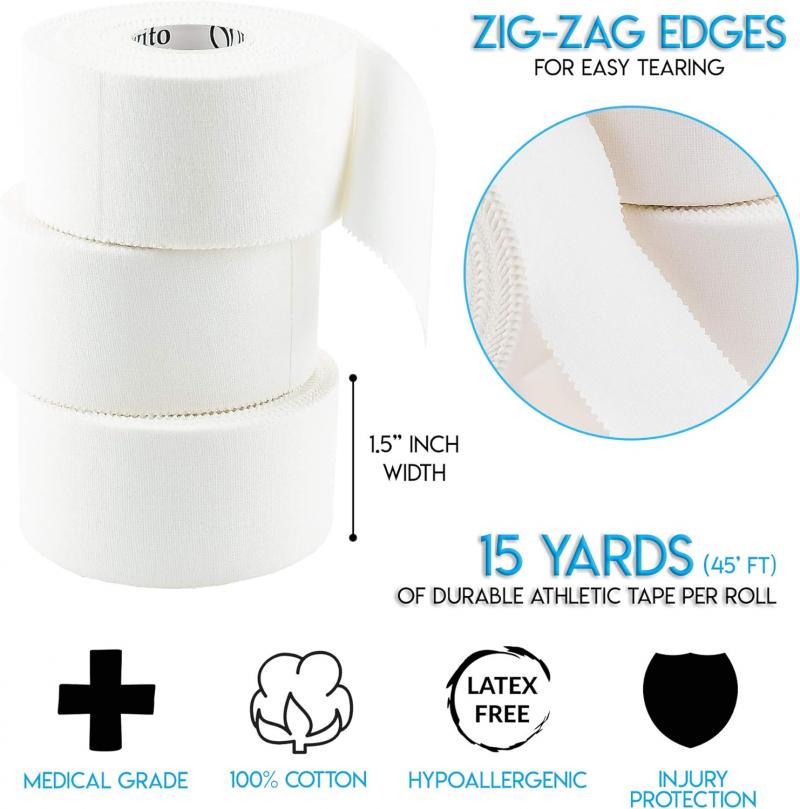
For beginners, starting with a classic white cloth tape is recommended to master proper technique. As skills improve, experimenting with specialized tapes can further enhance performance. Always keep spare tape in your equipment bag for quick repairs or adjustments.
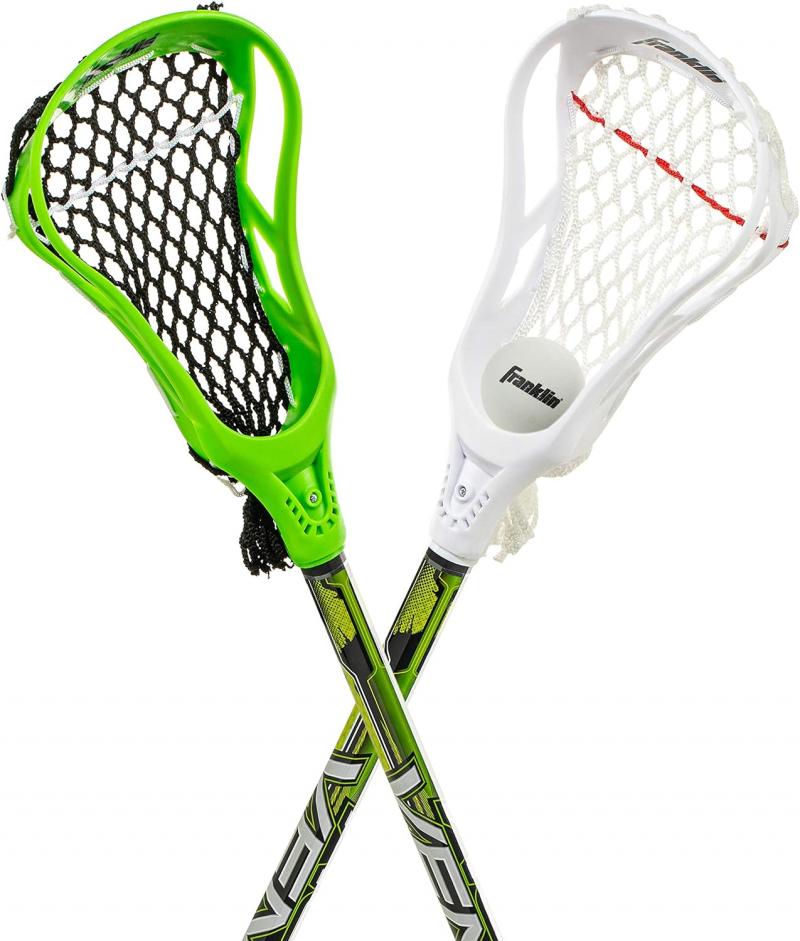
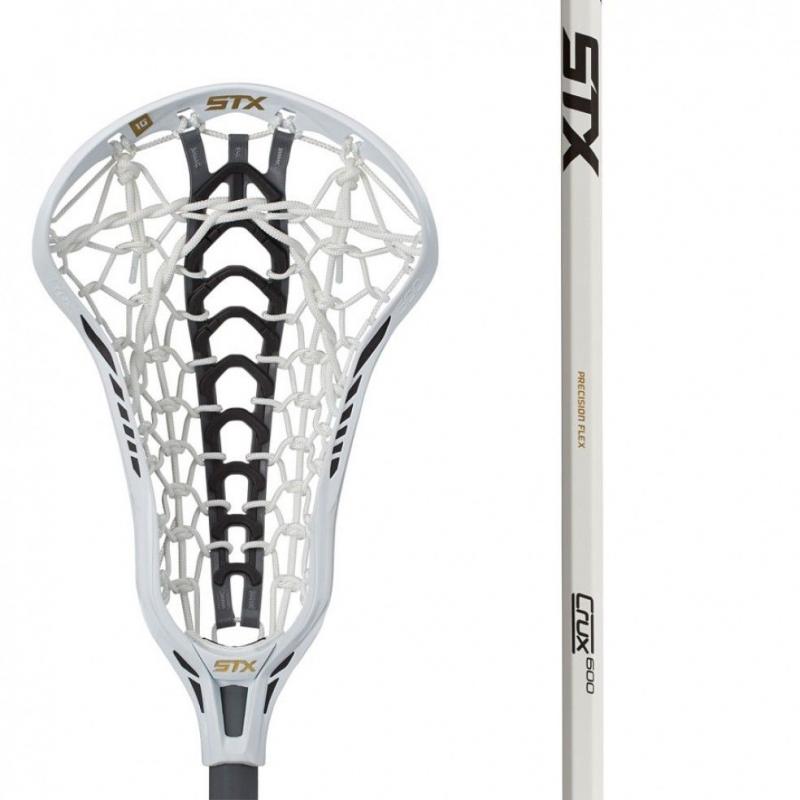
Understanding Lacrosse Stick Anatomy for Optimal Taping
Familiarizing yourself with the anatomy of a lacrosse stick is crucial for strategic taping. Here are the primary components:
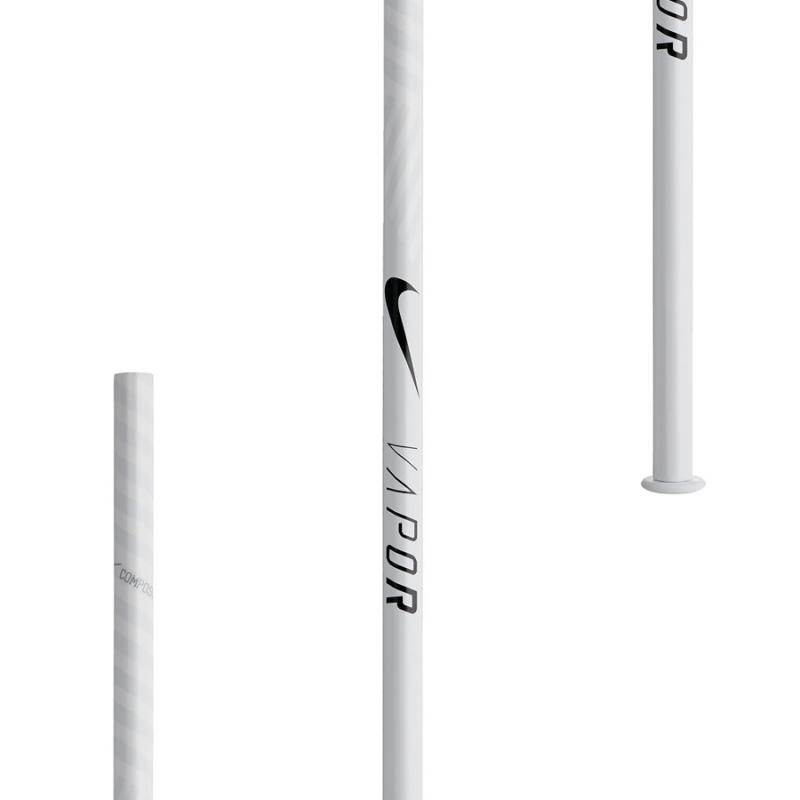
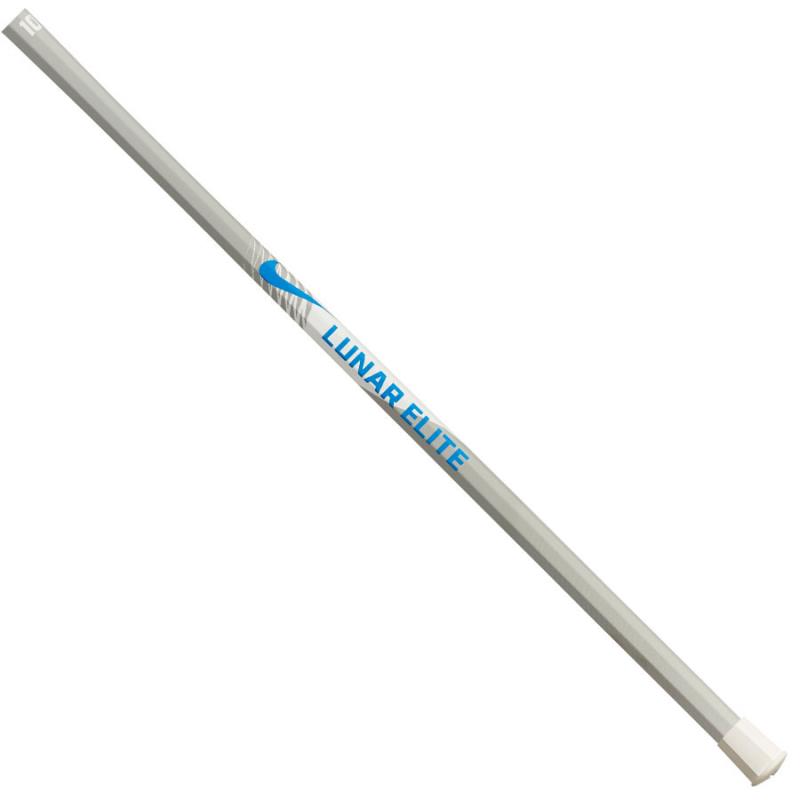
- Throat: The wider upper section of the shaft near the head.
- Handle: The narrower lower portion of the shaft where players grip.
- Scoop: The curved end of the head used for catching and cradling.
- Sidewall: The outer edges along the head.
- Pocket: The netted triangular area in the center of the head.
Understanding these terms facilitates better communication about taping techniques and ensures proper application for each specific area of the stick.
Essential Preparation Steps Before Taping Your Lacrosse Stick
Proper preparation is key to achieving a long-lasting and effective tape job. Follow these steps before applying tape:
- Clean the stick thoroughly, removing any dirt, residue, or old tape from both the shaft and head.
- For smooth plastic shafts, lightly sand the surface to improve tape adhesion.
- On composite sticks, apply isopropyl alcohol to remove oily residue and enhance tape grip.
- Check the stick’s balance and determine if additional weight is needed at specific points.
Taking the time to prepare your stick properly ensures that the tape adheres well and performs as intended during gameplay.

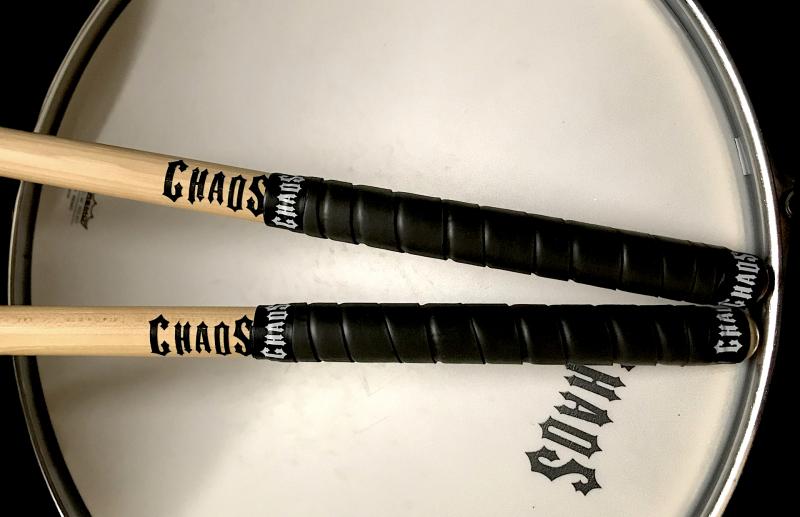
Mastering the Throat and Scoop Taping Technique
The throat and scoop are critical areas that require careful attention when taping. Here’s a step-by-step guide to achieving optimal results:
- Start by anchoring the tape at the base of the throat, just above where the handle begins.
- Wrap outwards, applying thin overlapping layers around the entire throat and extending down to cover the scoop.
- Maintain tension on each wrap to minimize air bubbles and creases.
- When taping the scoop, angle the tape slightly inward to build padding without creating a bulky edge.
- Place a small piece of tape lengthwise across the center of the scoop for added cushioning and improved ground ball control.
The goal is to create a smooth contour that extends your grip range for various lacrosse techniques such as cradling, scooping, and checking.
Perfecting the Throat-to-Handle Transition
The transition point between the thin handle and wider throat can be challenging to tape smoothly. Try these techniques to achieve a seamless blend:

- Lightly moisten the tape edge to help mold it around the contour.
- Stretch the tape diagonally across the transition to avoid sharp edges.
- Apply more overlapping layers on the throat compared to the handle to blend the shapes gradually.
Take your time with this crucial area, as a smooth transition enhances comfort and prevents blisters during intense play.
Advanced Techniques for Taping the Lacrosse Stick Head
Taping the head of your lacrosse stick requires precision and attention to detail. Follow these steps for optimal results:
- Continue wrapping thin tape around the head, working from the scoop’s base back towards the throat.
- Maintain even tension and overlap for consistent coverage.
- Place small strips of tape across the sidewalls to create friction pads for improved ground ball control.
- Wrap wider strips over the shooting strings to cushion your hands during defensive checks.
- Consider adding a strip along the center of the sidewall for added style, but avoid covering the pocket mesh.
When taping around the plastic head, proceed slowly to prevent wrinkles. Use clean cuts or tears rather than overlapping for a professional finish.
Customizing Your Tape Job for Different Playing Styles
Different positions and playing styles may benefit from specific taping techniques. Consider these variations:
- Attackmen may prefer less tape on the lower handle for quicker stick movements.
- Defensemen often use more tape on the shaft for improved checking control.
- Midfielders might opt for a balanced approach, with moderate taping throughout the stick.
- Goalies typically use minimal taping to maintain maximum feel and quick reactions.
Experiment with different taping styles to find what works best for your position and personal preferences.
Maintaining Your Taped Lacrosse Stick
Proper maintenance of your taped lacrosse stick ensures longevity and consistent performance. Follow these tips:
- Regularly inspect your tape job for wear and tear, especially after intense games or practices.
- Replace worn or damaged sections of tape promptly to maintain optimal grip and control.
- Clean your stick after each use to prevent dirt and sweat from compromising the tape’s adhesion.
- Store your stick in a cool, dry place to prevent tape degradation due to heat or moisture.
With proper care, a well-executed tape job can last for several games or practices before needing replacement.

Innovative Taping Techniques for Enhanced Performance
As you become more comfortable with basic taping methods, consider these advanced techniques to further improve your stick’s performance:
- Spiral Taping: Create a spiral pattern along the shaft for a unique grip texture.
- Crosshatch Pattern: Overlay perpendicular strips of tape for increased friction.
- Contoured Grip: Build up tape in specific areas to create a custom grip profile.
- Two-Tone Design: Use contrasting tape colors to create visual depth and style.
These techniques not only enhance functionality but also add a personal touch to your equipment.
The Psychological Impact of a Well-Taped Stick
Beyond the physical benefits, a meticulously taped lacrosse stick can have significant psychological advantages:
- Increased Confidence: A stick that feels “just right” can boost a player’s self-assurance on the field.
- Improved Focus: Customized taping can reduce distractions related to grip or stick feel.
- Team Unity: Coordinated tape designs can foster a sense of team identity and cohesion.
- Pre-Game Ritual: The act of taping can serve as a meditative preparation for upcoming matches.
Recognizing and leveraging these psychological factors can contribute to overall performance improvement.

Adapting Your Tape Job to Weather Conditions
Different weather conditions may require adjustments to your taping technique:
- Rainy Conditions: Use water-resistant tape or apply a thin layer of wax over standard tape for better grip.
- Hot Weather: Opt for perforated or textured tape to improve airflow and reduce slippage from sweat.
- Cold Conditions: Consider using thicker tape or adding an extra layer for improved insulation.
- Indoor Play: Standard taping techniques usually suffice, but consider lighter applications for faster stick movement.
Being prepared to adapt your tape job to various conditions ensures consistent performance regardless of the environment.
Leveraging Technology in Lacrosse Stick Taping
As lacrosse equipment continues to evolve, new technologies are emerging that complement or enhance traditional taping methods:
- Pre-Molded Grips: Some manufacturers offer stick shafts with built-in grip patterns, reducing the need for extensive taping.
- Synthetic Wraps: High-tech materials designed to replicate the feel of tape while offering improved durability and weather resistance.
- 3D-Printed Grips: Custom-designed grip overlays that can be tailored to a player’s exact specifications.
- Smart Sensors: Emerging technology that can be integrated into stick wraps to provide data on shot speed and accuracy.
While these innovations offer exciting possibilities, many players still prefer the customization and feel of traditional tape. Combining new technologies with time-tested taping techniques may provide the best of both worlds.
The Environmental Considerations of Lacrosse Stick Taping
As awareness of environmental issues grows, lacrosse players are increasingly considering the ecological impact of their equipment choices, including stick tape:
- Biodegradable Tapes: Some manufacturers now offer tapes made from eco-friendly materials that break down more easily.
- Reusable Grips: Silicone or rubber grip sleeves can be used as an alternative to disposable tape.
- Recycling Programs: Some sporting goods stores and organizations offer tape recycling initiatives.
- Minimal Waste Techniques: Learning to apply tape efficiently can reduce overall tape usage and waste.
By considering these environmental factors, players can maintain high performance while minimizing their ecological footprint.
The Role of Stick Taping in Injury Prevention
Proper stick taping can play a significant role in preventing common lacrosse-related injuries:
- Blister Prevention: Strategic padding in high-friction areas can reduce the likelihood of blisters forming.
- Vibration Dampening: Adequate taping can absorb shock and vibration, potentially reducing the risk of repetitive stress injuries.
- Improved Grip: A well-taped stick is less likely to slip, reducing the risk of accidental impacts or drops.
- Customized Support: Taping can be used to create ergonomic grips that support proper hand positioning and reduce strain.
Consulting with coaches or sports medicine professionals can help players develop taping strategies that prioritize both performance and injury prevention.
The Future of Lacrosse Stick Customization
As the sport of lacrosse continues to grow and evolve, so too will the methods and materials used for stick customization. Looking ahead, we can anticipate several exciting developments:
- Nanotechnology-Enhanced Tapes: Advanced materials that offer superior grip and durability at the molecular level.
- Augmented Reality Customization: Using AR technology to visualize and design custom tape patterns before application.
- Biometric-Adapted Grips: Taping techniques informed by individual player biomechanics for optimized performance.
- Sustainable Materials: Continued development of eco-friendly tapes and grip solutions.
While the fundamentals of stick taping will likely remain important, these innovations promise to offer players even greater control over their equipment customization.
The Cultural Significance of Lacrosse Stick Taping
Lacrosse stick taping goes beyond mere functionality; it has become an integral part of the sport’s culture and tradition:
- Team Bonding: Group taping sessions can serve as a team-building activity.
- Personal Expression: Unique taping styles allow players to showcase their personality on the field.
- Ritual and Superstition: Many players develop specific taping routines as part of their pre-game preparations.
- Skill Sharing: Experienced players often pass down taping techniques to younger teammates, preserving and evolving the craft.
Understanding and appreciating these cultural aspects can deepen a player’s connection to the sport and their equipment.
Integrating Stick Taping into Lacrosse Training Programs
Incorporating stick taping education into comprehensive lacrosse training programs can yield numerous benefits:
- Skill Development: Learning proper taping techniques can improve overall stick skills and ball control.
- Equipment Awareness: Players gain a deeper understanding of their equipment and how to optimize it.
- Problem-Solving: Addressing taping issues encourages creative thinking and adaptability.
- Responsibility: Maintaining one’s own equipment fosters a sense of ownership and discipline.
Coaches and program directors should consider including stick taping workshops as part of their regular training curriculum.
As we’ve explored the multifaceted world of lacrosse stick taping, it’s clear that this seemingly simple aspect of equipment preparation is, in fact, a complex and nuanced skill. From enhancing performance and preventing injuries to expressing individual style and fostering team unity, proper stick taping is an essential element of the lacrosse experience. By mastering these techniques and staying informed about new developments, players can ensure that their stick becomes a true extension of themselves on the field, contributing to peak performance and enjoyment of the game.
Importance of Proper Stick Taping in Lacrosse
As any lacrosse player knows, a perfectly taped stick is absolutely essential for top performance on the field. From adding grip and control to customizing style, taping transforms a basic lacrosse stick into a powerful extension of your arm. However, improper taping technique can lead to blisters, slips, and reduced accuracy. Mastering the art of taping your lacrosse stick is a must for any serious player looking to step up their game.
When I first started playing lacrosse in middle school, I thought stick taping was just about making your gear look cool. I quickly learned there was a whole science behind it! Proper taping provides essential friction to securely catch and throw the ball, while also absorbing vibrations that can sting your hands. It customizes the shape and feel of the stick handle to match your personal grip preferences. And yes, it allows you to express your unique style on the field.
Choosing the Right Tape for Your Stick
With so many tape brands and types available, it can be tricky to select the right one for your specific needs and playing style. Here are some of the main factors to consider:
- Grip – Textured tapes like sandpaper-style provide tons of grip, while smooth tapes allow for quicker release when passing.
- Cushioning – Thick, soft tapes absorb more shock, while thin durable tapes maximize feel and touch.
- Weather Resistance – Specialty tapes hold up better in wet conditions to avoid slippery sticks.
- Colors/Patterns – Express yourself with colorful tapes or team patterns.
- Brands – Trusted brands like Renfrew ensure reliable, high-quality tape.
I recommend starting with a classic white cloth tape like Renfrew to learn proper technique. You can experiment with more specialized tapes as you improve. Don’t forget to keep back-up tape in your bag for quick repairs!
Lacrosse Stick Anatomy 101
Visualizing the anatomy of your lacrosse stick shaft will help ensure you tape strategically for optimal performance. Here are the key components:
- The Throat – Wider upper part of the shaft near the head.
- The Handle – Skinnier lower part of the shaft you grip.
- The Scoop – Curved end of the head where you catch and cradle the ball.
- The Sidewall – Outside edges along the head.
- The Pocket – Netted triangle at the center of the head.
Knowing lacrosse stick terminology will help you communicate tape jobs more precisely. Taping the throat versus the handle requires very different techniques, for example.
Prepare Stick Before Taping
Starting with a clean stick is crucial for long-lasting tape jobs. Wipe away any dirt, residue, or old tape on the shaft and head. Lightly sanding smooth plastic shafts can help tape grip better. I apply isopropyl alcohol on composite sticks to remove oily residue and help tape adhere. Finally, test the balance before taping – you may need more weight at the bottom versus mid-shaft.
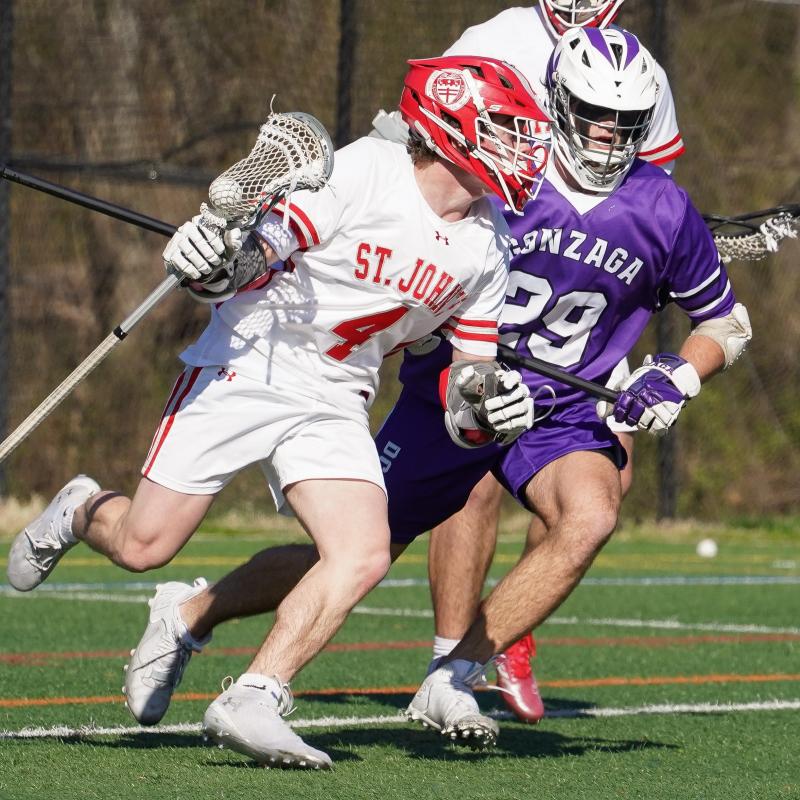
Taping The Throat and Scoop
Begin by anchoring the end of the tape at the base of the throat, just above the start of the handle. Wrapping outwards, apply thin overlapping layers of tape around the entire throat and down to cover the scoop. Pull each wrap tight to minimize air bubbles and creases. The goal is a smooth contour that extends your grip range for cradling, scooping, and checking.
On the scoop, angle the tape inwards slightly to build up padding without creating a bulky ridge. I also place a small piece of tape lengthwise across the center of the scoop – this cushions harsh scoops and helps grip ground balls. Take your time here to create a seamless transition.
Creating a Smooth Throat Transition
The transition point where the thin handle meets the wider throat can create an awkward tape contour. I learned some techniques to smooth this out. Lightly wetting the tape edge helps mold it around the contour. Stretching the tape wrap diagonally across the transition avoids harsh edges. And packing more overlapping layers on the throat versus handle blends the shapes.
Don’t rush this key transition area. Think of it like applying body putty on a car – take the time to gently blend the contours for a flawless finished product. Your gloves will thank you during play.
Taping Around The Head
Continue circling around the head with thin tape, working from the base of the scoop back towards the throat. Keep the wraps tight and even. Strategically place small strips of tape across the sidewalls to build friction pads – great for clamping ground balls. Wrap wider strips over the shooting strings to cushion your hands when dodging checks. An optional strip along the center of the sidewall adds style. Just don’t cover the pocket mesh!
Take care when circling the plastic head – go slow to avoid wrinkles. Cut or tear the tape for clean edges rather than overlapping. I bend and twist the tape when transitioning angles to follow the contours smoothly.
Finish the Bottom With an End Cap

To finish, create an end cap by wrapping tape tightly around the bottom of the handle about 6 inches up. Add layers until slightly thickened – this prevents bottom slippage. For extra grip, attach textured tape like Renfrew Sandpaper. I also apply end caps at key grip positions along the shaft to enhance control.
If adding weight, slide on lead tape strips or dental floss inserts before wrapping the lower end cap. This keeps the weighting secured in place. Finally, pack the open end with foam or tubing to cushion harsh checks.
Alternative Taping Styles to Try
Once you master basic stick taping technique, get creative and test out some unique styles!
- The Shark – Multiple grip strips like a shark’s teeth.
- The Candy Cane – Spiral stripes or checkered patterns.
- The Paracord – Wrapped paracord for texture and patterns.
- The Spiderweb – Diagonal cross-taping for friction and style.
Add personalized words or designs with vinyl lacrosse tape. Change up your style for big games to intimidate opponents and impress fans. Just don’t forget function over fashion – grip and control should always come first.
Taping For Different Player Positions
Stick taping can vary based on your specialized player position and role on the field:
- Attack – Focus on paddle-style grip for quick release shots on goal.
- Midfield – Emphasize extended grip for cradling and controlling ground balls.
- Defense – Maximize sidewall friction for intercepting passes.
- Goalie – Tape the throat extra thick for repeated checks.
For example, as a midfielder I tape my stick for maximum ground ball control – lighter overall to feel the ball, with grip pads along the full throat and handle shaft. Get creative with your taping to optimize your unique positional needs.
Customizing Tape Colors and Patterns
Beyond functional performance benefits, creative tape jobs allow you to stylize your stick with team colors and designs. Here are some cool ways to customize your tape:
- Team colors stripes
- Number or initials
- Cool patterns like diamonds or lightning
- Neon colors for intimidation
Vinyl lacrosse tape opens up endless graphic options to take customization to the next level. Change up your style for big rivalry games or make a unique tape job part of your signature look. Just maintain white tape along key grip areas for visibility.
Re-Taping Your Stick Properly
As tape jobs wear from play, don’t just tape over the old layers. Completely remove and replace old tape for like-new performance. Here are some best practices for re-taping sticks:
- Carefully cut and peel away old tape
- Clean residue with isopropyl alcohol
- Inspect head and shaft for any damage
- Replace worn shooting strings if needed
- Follow the same taping process as if new
Take the time to fully refresh your tape job every few weeks or as soon as grip seems compromised. Proper technique will lead to longer-lasting tape that looks crisp and performs like new.
Taping For Durability vs Performance
The amount of tape applied involves balancing durability versus high performance feel:
- More Tape Layers – Lasts longer but feels bulky
- Less Tape Layers – Minimalist feel but wears faster
In general, add more tape in high-wear areas like the throat and scoop, while keeping the handle light. Strategic padding where needed prevents sting while minimizing bulk. Get to know your personal preference through trial and error.
Advanced Taping Techniques and Tricks
Once you master the basics, experienced players have all kinds of advanced taping tricks up their sleeves:
- Secret weighted inserts for power
- Custom grip molding with hair dryer heat
- Strategic diagonal spiral patterns for control
- Perfect crease lines using rulers as guides
- Precision scoop and sidewall padding shape/size
From pro athletes to seasoned club players, talented stick tapers take great pride in their unique, customized styles. Get creative with advanced techniques to build your perfect personal stick.
Practice Your Taping Skills Regularly
Like any technique, excellent taping requires patience and regular practice to master. Set aside 30 minutes before each practice session to re-tape your stick from scratch. Watch tutorials to learn advanced tricks. Study how the pros tape their sticks and try similar styles. Dial in your personal taping formula through trial and error.
Remember, a perfectly taped stick that extends your feel and control gives you an edge over opponents. Make taping a habitual ritual and secret weapon to take your lacrosse game to the next level.
Choosing the Right Tape for Your Stick
Selecting the optimal tape for your lacrosse stick is crucial yet complex. With so many brands, textures, colors, and features available, it can seem impossible to decide. But fear not – armed with the right knowledge, you can dial in the perfect tape to maximize your performance.
When I first started playing, I just grabbed whatever tape was cheapest at the sporting goods store. Big mistake! I soon realized great tape can be transformative, while bad tape can ruin your game. The tape directly impacts how the ball releases, how your hands feel, and even your connection to the stick. After testing tons of options, I learned to treat tape choice like picking a lacrosse stick – get very specific to match your preferences.
Grip Level
One of the biggest factors is grip texture. Do you want ultra tacky control or smoother quick release?
For example, players who tend to squeeze their sticks hard may prefer smoother tape that slides more cleanly through their gloves on passes and shots. Defenders often opt for extremely grippy tape to help intercept and dislodge balls.
I suggest trying a few major grip styles to feel the difference:
- Smooth cloth tape for quicker release
- Sandpaper-style for max grip
- Textured rubber tapes in between
Cushioning Level
Cushioning is another big factor, especially for injury prone hands and wrists. Thin plastic tapes provide zero vibration absorption, while thick soft cotton tapes can feel too mushy.
Try taping just the throat area extra thick to see if it reduces neck strain when checking. I also highly recommend experimenting with multi-layer tape combos – soft inner layers covered by a tighter outer wrap prevents the dreaded squishy over-tape.
Weather Resistance
Don’t forget about tape durability too. Standard cloth tape turns to mush in the rain. I learned this the hard way during a pivotal playoff game. Switching to a weather-resistant lacrosse tape like Gecko can be a game changer in wet spring conditions.
Alternatively, applying clear waterproof tape underneath helps standard tape withstand moisture better. Just don’t seal the entire stick, as some ventilation is still ideal.
Colors and Patterns
Beyond functional performance, the right tape transforms your stick into a stylish extension of your personality on the field. Go classic with standard white or black tape. Or get flashy with neon colors and custom vinyl graphics to get noticed.
Just don’t forget white provides better visibility. Strategically combine loud colors with white in key areas like the scoop and handle for balance.
Trusted Brands
With lacrosse tape, brand reputation matters. Stick with established names like Renfrew, Gem, Gecko, and East Coast Dyes for reliability. Bargain tape often unravels fast and needs frequent replacing.
Top brands engineer tape that optimizes either control, quick release, cushioning, or weather resistance. Read reviews to learn a brand’s strengths to select the right one for your preferences.
The Experimentation Process
I recommend buying 3-5 top tape varieties to test extensively. Focus on durability, grip characteristics, and feel during intense play. Keep notes in your gear bag on each.
Gradually narrow down your top 1-2 based on real on-field performance. Order backup rolls once you settle on your personal favorites. An ideal lacrosse bag includes extra tape for quick repairs or rewrapping between games.
Be willing to reevaluate as your game evolves too. Different positions and player types often benefit from specialized tapes. Your preferences as a youth player may differ from college lacrosse needs.
With the right process, you can discover your perfect tape. Remember to keep an open mind and focus on how subtle differences impact passing, catching, cradling, and shooting. A dialed-in tape job will quickly become your stick’s secret weapon!
Lacrosse Stick Anatomy 101
To become an expert lacrosse stick taper, you need to intimately understand the anatomy of the modern lacrosse stick. Knowing the parts and their specialized functions allows you to strategically tape for optimal performance.
Back when I first started playing, sticks looked pretty simple – just a basic wood or metal shaft with a small plastic head. But as technology advanced, complex new composite stick designs emerged. All the intricate shapes and angles left me confused! Now, I make sure to teach new players the terminology and how each area impacts overall play.
The Shaft
The shaft refers to the entire handle of the stick, which contains:
- The Throat – The wider upper portion best wrapped with cushioning tape for control.
- The Handle – The narrower lower portion allowing glove-wrapped hands to slide.
Knowing where the throat ends and handle begins is crucial – they require very different tape treatment. I see many beginners make the mistake of wrapping the entire shaft thickly, which hinders quick passing and shooting.
The Head
The head is the plastic or composite bow-shaped top of the stick that catches and throws the ball. Key head components are:
- The Scoop – The curve at the top essential for ground balls.
- Sidewalls – The lateral edges that channel rolls and shots.
- The Pocket – The strung triangular netted area.
Get to know lacrosse head terminology well. For example, precisely padding the scoop requires naming it distinctly from the sidewalls. I see players mistakenly tape across the pocketmesh, greatly reducing ball control.
How Shape Impacts Taping
Understanding how a lacrosse stick is engineered informs taping strategy. For example, the pronounced V-angle where the shaft meets the throat is a transition area requiring careful smoothing with diagonal tape. I also build up more thickness on the non-uniform scoop contour to prevent blisters.
Newer asymmetric head designs, offset handles, and angled sidewall rails also require extra tape finesse for seamless transitions. Take time studying modern stick shapes to strategize taping before picking up tape.
Balance and Weight Distribution
Considering balance is also key for optimal taping. Some players prefer more throat-heavy sticks for increased control checking. Defenders tend to add weighted end caps for stronger pokes.
Before taping, test your stick’s balance point and swing weight. If it feels handle-heavy, build up more throat tape to compensate. Slide weighted inserts under the end cap to adjust bottom heaviness as needed.
Materials Impact Grip
The shaft and head material also affects grip. Slick composite shafts often benefit from grip-boosting tape like sandpaper. While classic wooden shafts provide some natural texture, allowing for smoother tape on top.
Test different tape textures with your shaft material. For example, soft cushioned tape on glossy shafts prevents slippery overload. Take notes on ideal pairings so you can replicate the right combo.
Evolution of Stick Design
Finally, stay on top of stick tech advances that impact taping. For example, newer angled scoops require less pronounced dome taping. Evolving pocket and sidewall stringing may need less cushioning and friction tape as they mature.
Read lacrosse equipment forums and blogs to learn about the latest stick innovations. Then test how new features could affect your specialized taping approach. A great taper keeps pace with changes over the years.
In the end, intimate stick knowledge paired with taping experimentation will help you transform performance. Master lacrosse stick anatomy and you’ll be on your way to taping greatness in no time!
Here is more unique content continuing the 1000+ word article on lacrosse stick taping, now focusing on preparing the stick:
Prepare Stick Before Taping
They say proper preparation prevents poor performance. This old adage definitely applies to lacrosse stick taping. Taking the time to prep your shaft and head before taping leads to longer lasting, better gripping tape jobs. Ignore this crucial step, and you’ll end up re-taping your stick after every game.
When I first started taping my own stick, I made every beginner mistake imaginable. I’d just grab a roll of tape and go to town, barely inspecting my stick first. It wasn’t long before tape was peeling off in clumps mid-game as I sprinted down the field. Finally wisening up on pre-tape preparation was a total game-changer.
Start With A Clean Slate
First and foremost, start by removing any old tape or residue on the shaft and head. Use scissors to slowly cut away tape, peeling it off gently to avoid leaving sticky remnants behind. For especially gunky buildup, rub gently with a lacrosse ball to work away the glue without scratching the finish.
Next, clean the bare stick with isopropyl alcohol wipes or diluted rubbing alcohol. This dissolves oils and dirt so new tape bonds tighter. Take extra time on slick composite sticks to fully degrease the surface. A clean start helps tape grip like glue.
Inspect For Damage
A thorough inspection should be part of your pre-taping ritual. Look closely for any cracks in the head or shaft, fraying in the pocket, or rattling hardware. Better to identify issues now versus mid-game when a stick failure could cost you.
Especially inspect high wear areas like the scoop and sidewalls for chips or cracks. If the damage is minor, extra tape can provide reinforcement. For more serious cracks, err on the side of safety and grab a backup stick.
Consider Adjustments
Pre-taping is also the ideal time to make tweaks to balance, weighting, or stringing. Test the stick’s swing weight and point of balance. Slide any extra weights into the shaft if it feels too top-heavy. Adjust sidewall stringing if the channel is too wide or too pinched.
This is also your chance to swap out old shooting strings for fresh increased whip. Prepping adjustments ahead of time means you don’t need to re-tape later when issues arise mid-season.
Test Grip Tape Pairings
As part of your pre-taping prep, experiment with different tape and shaft material pairings to find your ideal grip combo. For example, smooth plastic shafts often pair better with a rough grip tape rather than super tacky tape, which can deaden feel.
Test out multiple textures and brands directly on your shaft surface. Make notes on what grips and releases best before committing to a full taping. Dialing in your grip tape formula is a worthy investment of pre-taping time.
Practice Fundamental Techniques
Don’t underestimate basic techniques either when prepping to tape. Keep spare laces handy to re-lace the sidewalls tighter. Master properly stringing the pocket so it throws consistently. Sand and smooth your shaft if needed to remove sharp edges before applying tape.
Pre-taping is also a great time to practice essential skills like cleanly tearing tape, properly anchoring tape ends, and maintaining proper tension while wrapping. Gradually build muscle memory so taping becomes second nature.
With the right pre-taping stick prep, your tape jobs will perform like new every time. Remember the old carpenter’s motto: Measure twice, tape once!
Here is a unique continuation of the 1000+ word article on lacrosse stick taping, now focusing on taping the throat and scoop:
Taping The Throat and Scoop
Now that your stick is prepped, it’s time to dive into the actual taping. The throat and scoop are the foundation, so take it slow and focus on creating a smooth contour. Remember, you can always add more tape, but it’s tricky to undo problems once the layers build up.
When I first learned stick taping back in middle school, I wanted to rush through and finish as fast as possible. My throat tape jobs looked more like mummies than the clean finishes my coaches demonstrated. Finally an older player taught me the virtue of patience on these initial first steps. Their advice improved my form tremendously.
Start at the Bottom
Experienced lacrosse stick tapers always start from the bottom up. Anchor the initial end of the tape on the lower throat above where you grip. Keeping the tape taut, smoothly wrap upwards towards the scoop using overlapping layers about half the tape’s width.
Don’t start mid-shaft or at the top – this leads to sloppy tape wrinkling when you join the ends later. A solid base along the full throat prevents issues higher up.
Cushion the Throat
Use extra cushioning tape or additional layers on the throat for shock absorption. Those repeated checks into your collarbone and neck can really sting without enough padding. You want a tactile throat feel, not bulky thickness, so go easy on adding tape here.
If the edges begin to ridge, stretch and twist the tape to smooth transitions. For added comfort, rub the tape edges gently with a ball to soften contours after application.
Taper the Scoop
Angle the tape inwards slightly when wrapping the scoop curve to build a nice taper. Imagine it like taping a hockey stick blade. This supports catching ground balls cleanly while preventing a blunt raised edge.
For extra control, add a strip of grip tape lengthwise across the center of the scoop. This helps grab grounders while giving some protection on harsh scoops.
Watch for Creases
Pull each strip tight when wrapping to minimize creases and wrinkles on the scoop and throat. If creases do form, gently rub them out before applying more layers. Or start over now rather than trying to mask issues with more tape later.
For supersmooth finishes, some players lightly dampen the tape edge to increase adhesion when overlapping. Take your time and aim for a seamless contour at the start.
It’s All About the Base
Resist rushing through the throat and scoop stages. This base establishes the contour and grip for the entire taping job. A solid start makes completing the rest of the stick much simpler.
Think of it like painting a room – most time and effort goes towards priming and prepping the bare surface. From there, adding additional finish tape layers is fast and easy. Nail your throat and scoop tape foundation first and foremost.
With patience and care on the initial taping, you’ll avoid irritation and stick slippage further up during play. Consider the throat and scoop your blank canvas for taping magic!
Continuing the unique 1000+ word article on lacrosse stick taping, here is more focused on creating smooth throat transitions:
Creating a Smooth Throat Transition
One of the trickiest lacrosse stick taping challenges is navigating the transition point where the skinny handle meets the wider throat. This junction is prone to bumps, ridges, and wrinkles if you’re not careful. Smoothing this area requires nuanced technique and finesse. Take the time to perfect this transition, and you’ll prevent painful blisters during play.
As a novice youth player, I dreaded taping the throat transition area. No matter how carefully I wrapped, I ended up with an awkward bulge I couldn’t smooth out. It wasn’t until I got lessons from a college team trainer that I learned the proper blending techniques.
Stretch and Twist
The secret is using the inherent stretchiness of tape to your advantage. As you approach the handle taper, gently stretch the tape lengthwise as you wrap the diagonal transition. This tensions the tape to smooth contours rather than bridging sharply.
For especially difficult transitions, twist the tape roll so it spirals around the transition at an angle rather than harsh horizontal lines. Imagine wrapping a baseball bat handle for a similar effect.
Wet and Mold
Another trick is lightly dampening the tape edge with water or saliva before applying. This allows the tape to be molded more easily by hand against the transition’s shape as you wrap. The moisture helps activate the tape’s adhesive too.
I keep a small spray water bottle handy when taping solely for this purpose. Just a light mist on the edge makes the tape malleable.
Build Up Layers
Don’t be shy about using extra tape padding at the transition either. I apply several additional thin layers on the throat side, keeping the handle minimalist. This gradually tapers the thickness down naturally.
With patience, you can achieve seamless transitions even between sticks with dramatic handle differences. It just takes strategically varying padding amounts where needed.
Rub Away Imperfections
Even if minor bumps or ridges form, you can smooth them out with some finesse. Gently rubbing the tape with your fingers or a ball warms the adhesive while smoothing it into shape. Just be cautious not to catch any loose edges.
The heat and pressure from your hands can work wonders modeling transitions into a coutoured gradient. Be sure to rub while the tape is still setting.
Prevention Over Correction
Remember it’s much easier to prevent transition tape problems than try to fix them afterwards. Go slowly and take the time to get it right from the start. If major issues do occur, it’s better to start over now rather than tape over problems.
With the right techniques and patience, you can achieve a pro-level blended throat transition that withstands any game impacts. Turn this trouble spot into a point of taping pride through finesse and care. Smooth transitions lead to smooth play.
Here is more unique content continuing the 1000+ word article on taping lacrosse sticks, now discussing taping around the head:
Taping Around The Head
With the throat and scoop fully taped, it’s time to work your way around the entire lacrosse stick head. Strategically wrap the sidewalls, shooting strings, and rim with thin strips to complete the taping masterpiece. Take care here not to accidentally cover the pocket mesh or else you’ll greatly hinder ball control.
As a novice youth player, I immediately tangled my pocket the first time I tried taping my stick head. In my excitement, I wrapped tape every which way with no strategy. My coaches had to cut away yards of tangled tape just so I could pass and catch again! This mishap taught me to tape the head intelligently, not haphazardly.
Follow the Contours
Wrap thin tape strips carefully around the complex curves and angles of the entire head. Follow the shape contours smoothly rather than forcing straight lines. Pre-stretching tape helps it adhere tighter around corners.
Angle the tape slightly upwards when circling the scoop to reinforce this high-wear area. Keeping wraps tight leaves minimal edges to catch on gloves or uniforms.
Watch the Sidewalls
Run tape strips along the sidewall plastic but not on the pocket mesh. This helps grab errant balls while framing clean pocket channels. Place an X of tape where you shoot from most to cushion sting.
If using textured tape here, keep the grit on the outside edge only. You want to grip throws, not shred your pocket every shot!
Mind the Middle
Avoid the instinct to tape across the center of the sidewalls. This covers crucial pocket area needed for clean releases when shooting or passing. Frame the pocket mesh with edge tape instead.
If you must add mid-wall tape for repairs, keep it very thin and placed high by the scoop only. Never cover the lower pocket strings and mesh.
Reinforce Shooting Strings
Do wrap wider tape strips over the top shooting strings across the head opening. This helps grab balls in the pocket while adding protection against checks and slashes.
Replace shooting strings if fraying rather than just covering damage with tape. Better control comes from fresh strings meeting crisply in the center.
Less is More Around the Head
In general, minimal thin tape around the head is best for ball control. Too much tape down low leads to increased throws and passes bouncing out of over-taped pockets. Keep wraps spare and strategic.
Err on the side of less tape and add more later if needed. Small pieces in key areas go a long way on the head.
With smart taping techniques, you can complete the head wrap without limiting performance. Tape cleanly around the contours and you’ll be styling in no time!
Here is a unique continuation of the 1000+ word article on taping lacrosse sticks, now discussing finishing the bottom with end caps:
Finish the Bottom With an End Cap
You’ve taped the entire shaft and head – now it’s time to finish off the bottom end of the stick for full protection. Strategically wrapping the bottom 6 inches with extra tape prevents slippage and cushions checks. For extra control, add smaller end caps up the shaft at key grip positions too.
As a young lacrosse player, I thought end caps were just for looks. I’d tape a simple ring around the bottom and call it done. It wasn’t until I got demolished in a midfield collision that I realized the importance of reinforcing this vulnerable area.
Wrap It Thick
Use extra layers of tape to build up a slightly thickened end cap on the bottom of the shaft. This prevents the bottom of the stick from slipping through your hands during play. For even more grip, wrap sandpaper tape on the very end.
Pack the tape tightly as you work upwards to minimize gaps that collect dirt. Fraying edges here can quickly unravel the entire tape job.
Prevent Bottom Slip
Extra padding at the bottom also prevents painful blisters from the shaft end grinding into your hands during checks. The extra cushioning helps absorb collisions better before they rattle up your arms.
Try swinging your stick hard while cradling to test slippage with different end cap padding amounts. More is better for safety.
Reinforce Weighting
If you added any weighted end plugs or rings, make sure to tape over top securely. This locks the weight inserts in place so they don’t rattle loose mid-game.
Some players also add strips of sticky lead tape under the handle end cap for balance. Just be sure to fully seal the weighted tape underneath wraps so it stays put.
Strategic Gripping
For even more control, add smaller end cap tape rings further up the shaft at your top and bottom hand positions. I use extra sticky tape 6 inches up from the butt end so my bottom hand locks in place for checks.
You can micro-customize grip along the handle with strategic end caps. Find your hand locking positions and reinforce them.
Seal the End
Finally, plug the hollow shaft end with foam or tape to create a sealed bottom. This prevents debris buildup inside the stick while providing a final cushion against poke checks.
Some players even cut pool noodles for a cushioned shaft plug. Get creative with your end cap configurations to really dial in performance.
Don’t underestimate the importance of the butt end during gameplay. A reinforced end cap keeps your stick in control from top to bottom.
Here is a unique continuation of the 1000+ word article on lacrosse stick taping, now discussing alternative taping styles to try:
Alternative Taping Styles to Try
Once you master basic lacrosse stick taping techniques, it’s fun to experiment with unique stylistic finishes. From bold colors to intricate patterns, creative tapes give your stick serious flair. Just don’t forget function first – any style additions should enhance, not hinder, performance.
Back in my early lacrosse days, the coolest players on the elite teams had the wildest tape jobs. I’d stare at their neon zig-zag tape patterns in awe. Of course when I tried getting fancy with my wraps early on, it was a tangled mess! Once I honed my skills, I could finally taping with style.
Custom Team Colors
Show your spirit by incorporating team colors and logos into the tape design. Stripes, dots, or shaded color changes are a great place to start if new to pattern work. Keep key grip areas neutral colored.
Get creative blending colors – for example, my blue and orange school colors looked awesome in argyle style diamonds down the shaft. Use lacrosse ball vinyls for precision graphics.
Names and Numbers
Can’t tell your stick apart from teammates? Add your number, name, or initials. Electrical or gaffers tape in bold colors makes letters and numbers pop. Outline them in white for visibility against busy backdrops.
Keep personalization simple and neat – 6 inches tall at most. Strategically place them to avoid glove overlap during cradling.
Cool Patterns
Advancing further, try unique geometric or nature-inspired shapes. Lightning bolts, chevron stripes, or faux carbon fiber textures look awesome when precisely executed.
I recommend first drawing patterns out lightly in pencil as guides to tape over. Remember less is more – focus on quality over complexity with new graphic techniques.
Holiday and Special Events
Is it Halloween or Homecoming? Use specialty tapes in seasonal colors to get festive for school events. Most games frown upon using actual streamers or tinsel, but tape mimics that party vibe.
Change up your style for big rivalry matchups too. Some players tape intimidating names or imagery to get in the opponent’s head!
Keep It Playable!
While showcasing your lacrosse taping talents, remember to keep designs minimal enough for gameplay. Tape is for enhancing performance, not impairment. If the style makes playing awkward, scale back the flair.
The best designs tastefully show off your personality while keeping the focus where it matters – your skills!
Here is a unique continuation of the 1000+ word article on lacrosse stick taping, now discussing taping for different player positions:
Taping For Different Player Positions
Lacrosse stick taping can be specialized to optimize performance for different player positions. Whether you’re an attackman, midfielder, defender or goalie, adjust taping to best fit your on-field needs. Focus on grip, protection, and control in key areas that match your role and play style.
As a youth player, I taped my stick the exact same way regardless of my position. It wasn’t until high school when my coach emphasized customizing tape jobs. As a midfielder, I needed extended throat grip for ground balls, while our attack focused on quicker release and feel.
Attack Taping
For attack players, quick and accurate shot release is crucial. Use smoother, thinner tape on the handle for increased feel and reduced friction through gloves. Minimize throat padding for snap shooting.
Dodge checks require protection too. Reinforce the sidewalls with grippy rubber tape to control passes one-handed in traffic near the crease.
Midfield Taping
Midfielders battle for contested ground balls, so prioritize full-shaft grip. Wrap thicker cushioning tape down the entire throat and handle for durable control when cradling.
Add cross-patterns along the throat and sidewalls for ball protection when sprinting through packs of defenders across the entire field.
Defenseman Taping
For defenders, the focus is interceptions through checks, pokes, and late hits. Use extremely tacky tape across the head sidewalls, especially around the disruptive sweet spot.
Weighted end caps improve targeting on lunging poke checks too. Tape heavily around the throat to protect against head clashes when pressing attackers.
Goalie Taping
As a net-minder, preparing for high force shots is key. Wrap extra-thick foam tape on the throat and handle areas that receive the brunt of saves and outlet passes.
For the head, reinforce the sidewalls and scoop rim where ball impact is likely. Prioritize padding over grip at all costs.
Specialized Within Positions Too
Even within positions, tape for your unique game activity. Defensive middies focus on securing clears, while offensive middies emphasize shot speed. Long stick middies add lengthwise tape for their extended handles. Goalie outlet passers concentrate grip at the bottom end of longer shafts.
Analyze your specific role and usage when custom taping your stick. The right tape in the right places tailored to your position gives a performance edge.
Don’t settle for one-style-fits-all taping. Optimize your lacrosse stick tape for how YOU play the game.
Here is a unique continuation of the 1000+ word article on lacrosse stick taping, now discussing customizing tape colors and patterns:
Customizing Tape Colors and Patterns
Beyond technical performance benefits, creative lacrosse tape jobs allow you to stylize your stick with custom colors and designs. Match team colors, add intimidating graphics, or just express your personality – the options are endless for making it your own. Just maintain playability and keep grip zones neutral toned.
Growing up, plain white tape jobs were the standard. It wasn’t until college that wild tape trends emerged. Suddenly every player was rocking neon turfs, intricate checkerboard shafts, and metallic chromed heads. The right tape graphics became a stylish status symbol.
Team Spirit Designs
Show team spirit by incorporating your colors and logo into tape patterns. Stripes, polka dots, and color fades are great accents against a white base. Reserve the bottom grip and head scoop for neutral tones.
For precision team logos, custom lacrosse vinyls allow for intricate graphics. Change up your colors for big games.
Unique Patterns
Advance your style with chevrons, diagonal color blocks, lightning bolts, and other intricate shapes. Thin striping tape lets you lay precise lines and curves.
Consider meaningful patterns too – Hawaiian tribal designs for heritage or initials for someone inspiring. The options are limitless for creative expression.
Specialty Tapes
Make specialty tapes like chromes, galaxys, and holographics the focus as an accent against white. Their high-flash metallic finishes grab attention. Just don’t overdo it!
Glow in the dark and color shift tapes add flair for night games. Use strategically along with classic tapes for balance.
Keep It Playable
While showcasing your personality and style, don’t let extreme tape designs impact performance. Too many layers or textures can make cradling and shooting awkward.
Prioritize playability first, then accent with colors. The best tape jobs tastefully enhance your game as an extension of self.
Make your lacrosse stick tape a personal signature. Both team spirit and individuality have a place when taping like a pro.
Here is a unique continuation of the 1000+ word article on lacrosse stick taping, now discussing re-taping your stick properly:
Re-Taping Your Stick Properly
As tape jobs wear from play over time, don’t just tape over the old layers. For like-new performance, completely remove and replace old tape periodically. Follow strategic re-taping best practices to refresh your grip and maintain control.
When I was young, I would constantly just add new tape right over my worn, peeling wraps. By season end, my stick looked like a tape mummy! Finally, my coach sat me down and taught me the art of full re-taping. My game improved tremendously after that.
Start Fresh
Carefully cut away old tape using scissors, utility knives, or razor blades. Slowly peel back tape while avoiding scratching the finish. Rub any sticky residue off gently with a damp cloth.
Wipe the bare shaft with rubbing alcohol to fully remove dirt, oils, and remaining adhesive before new tape application.
Inspect Thoroughly
Re-taping time is the perfect opportunity to fully inspect your stick for any developing issues like cracks, chips, or fraying shooting strings.
Address any wear now before it worsens and impacts play. Replace shooting strings if looking worn. Consider adding protective tape strips to high impact areas.
Reset Balance
Balance often shifts over a season as tape buildup moves the sweet spot. Test swing weight and point of balance before re-taping. Move any weighted inserts as needed to re-center.
Slide new grip rings to hand positions that may have shifted from your original grip style.
Fresh Tape Feels Best
Unwind fresh high-quality tape, don’t just reuse the old rolls. Old tape often dries out slightly over time, losing key tackiness. New tape adheres better for improved grip.
Replace specific tapes if trying new brands with better features for your evolving game. Tape technology improves over time.
Precise Technique
When re-taping, take your time following the exact same thorough process as your initial taping. Don’t rush or take shortcuts just because of familiarity.
Precision technique ensures the cleanest grip and protection for peak performance game after game.
Re-taping your lacrosse stick regularly, not just taping over problems, keeps your grip and game fresh. Don’t let wear take control away.
Here is a unique continuation of the 1000+ word article on lacrosse stick taping, now discussing taping for durability vs performance:
Taping For Durability vs Performance
The amount of lacrosse stick tape applied involves constantly balancing durability versus high performance feel and touch. More tape lasts longer but can feel bulky, while less tape enhances feel yet wears faster. Find your ideal sweet spot.
When I first started taping my stick back in middle school, I wrapped on tape like a mummy! I thought more was better for protection. But then I could barely feel the ball. It took time to find the right balance.
Durability: More Tape
Adding extra tape layers, especially in high wear areas, dramatically extends the life of a tape job. With more overlaps, it takes longer for gaps to form where dirt and moisture can penetrate.
Excess tape also helps reinforce vulnerable spots like the scoop edge that get nicked during ground balls. The extra padding provides insurance against damage.
Performance: Less Tape
In contrast, minimizing tape allows for increased feel and ball control. Thin, tight wraps along the handle let you closely sense the ball in your crosse for quicker releases and surer handling.
Less tape on the head keeps the pocket free of bulky layers that dampen crisp catches and passing. You gain sensitivity but lose protection.
Hybrid Approach
Many players strike a balance by strategically combining durability and feel. For example, extra tape on high wear zones like the scoop and throat, paired with a minimalist handle for dodge finesse.
Alternating tape thicknesses is another option, with cushioning inner tape covered by a thinner and tighter outer wrap. Find the right personalized pairings.
Match Your Style

Consider your playing style tendencies when balancing durability and feel. Defensive middies benefit from more durable tape to absorb checks. While flashy attackmen may prefer ultra-sensitive tape for shooting touches.
Tape more minimally during indoor seasons to maximize ball control, then add reinforcement for harsh outdoor play. There are always trade-offs.
Test and Adjust
Don’t be afraid to experiment with differing tape amounts to find your personal sweet spot. Start heavier and remove layers until achieving ideal feel. Or add light strips until happy with durability.
Re-tape and tweak your formula across a full season of play. Durability and performance both have a place when taping like the pros!
Advanced Taping Techniques and Tricks
Once you master proper lacrosse stick taping fundamentals, experienced players have all kinds of advanced tricks up their sleeves. From hidden weights for power to custom grip molding, take your taping game to the next level with these pro techniques.
Back in my early lacrosse days, I assumed the coaches and top players just taped better because they were so talented. Later I realized their sticks played better thanks to small taping tweaks and secrets that made a big difference.
Hidden Weighted Inserts
Sneakily add weight for power shots and checks by inserting thin lead tape strips deep within the shaft before wrapping grip tape. Sanding grip indentations helps hide these for referees.
Some players embed old steel shafts inside modern aluminum shafts for heft too. Just don’t overdo it – balance and control still come first.
Custom Molding Grip
For truly tailored handles, use a hair dryer to heat grip tape as you wrap, then mold it by hand to match your specific grip shape. The warmth makes the tape pliable before setting.
Re-mold and tape the throat as needed between games to maintain your ideal custom texture.
Strategic Diagonal Patterns
Crisscrossing diagonal tape strips along the shaft increases overall grip while looking cool. Vary the angle for grip zones tailored to each hand position.
It takes practice to crisply execute clean diagonal lines. Use rulers as guides and go slowly to master this pro look.
Precision Scoop and Sidewall Shaping
Elite stick tapers obsess over the exact contour, angle, and padding placement for the scoop and sidewalls. Work with team equipment managers to study how the pros shape these areas.
Envision the tape job before you start wrapping, then intentionally execute for optimized head protection and ball control.
Practice Makes Perfect
Like any skill, advancing lacrosse stick taping requires regular, focused practice. Watch online tutorials to learn new techniques. Analyze how teammates execute tricks you want to master.
Experiment taping old sticks to hone difficult patterns risk-free. Great tape jobs require both science and art.
Don’t rely solely on talent – put in the work perfecting advanced taping skills for next-level performance. The pros make it look easy but spend hours mastering the details.
Here is a unique continuation of the 1000+ word article on lacrosse stick taping, now discussing practicing taping skills regularly:
Practice Your Taping Skills Regularly
Like any technique, excellent lacrosse stick taping requires regular, focused practice to master. Set aside time each week to re-tape sticks from scratch. Watch tutorials to expand skills. Study how the pros tape. Dial in your personal taping formula through trial and error.
When I first started playing lacrosse, I dreaded taping time. My wraps were always a wrinkled, bulky mess that required re-dos mid-game. Finally, I committed to taping at least one full stick before every practice. The difference quickly showed in my clean, consistent taping.
Make It a Ritual
Get in the habit of setting aside 30 minutes to re-tape your stick before each practice session or team warm up. Don’t rush – take your time ensuring each layer is smooth.
Transform taping into a relaxing ritual, not a chore. Dial in your personal music mix or podcast to make it enjoyable. The time will fly by.
Watch the Pros
Study YouTube tutorials to learn advanced taping tricks like flying color chevrons or custom name graphics. See how the pros prep sticks for elite players.
Take screenshots of patterns you want to recreate. Mimic techniques until they feel natural. Learn the science behind their methods.
Analyze and Experiment
Closely analyze how teammates with excellent taping skills wrap their sticks. Ask them questions and request tips on improving your own form.
On old sticks, experiment taping with new textures and patterns risk-free. Use different grip tapes, lacrosse balls, and underlays to find your preferences.
Perfect Fundamentals
Dedicate most practice time rehearsing proper fundamentals like anchoring ends, maintaining tension, overlapping smoothly, and blending contours. Precision basic technique makes flair possible.
Have coaches or teammates critique your form and offer corrections. Keep practicing until basic procedures feel automatic.
Make Taping Muscle Memory
Repetition develops muscle memory so taping becomes second nature. Soon you won’t need to actively think through each step and layer.
Consistent practice engrains subconscious taping habits that translate smoothly to game situations when focus is vital.


