How do you select the ideal delta cleats for your cycling needs. What factors should you consider when choosing between Look and Shimano cleats. How can you determine the right float and tension for your riding style.
Understanding Delta Cleat Systems for Road Cycling
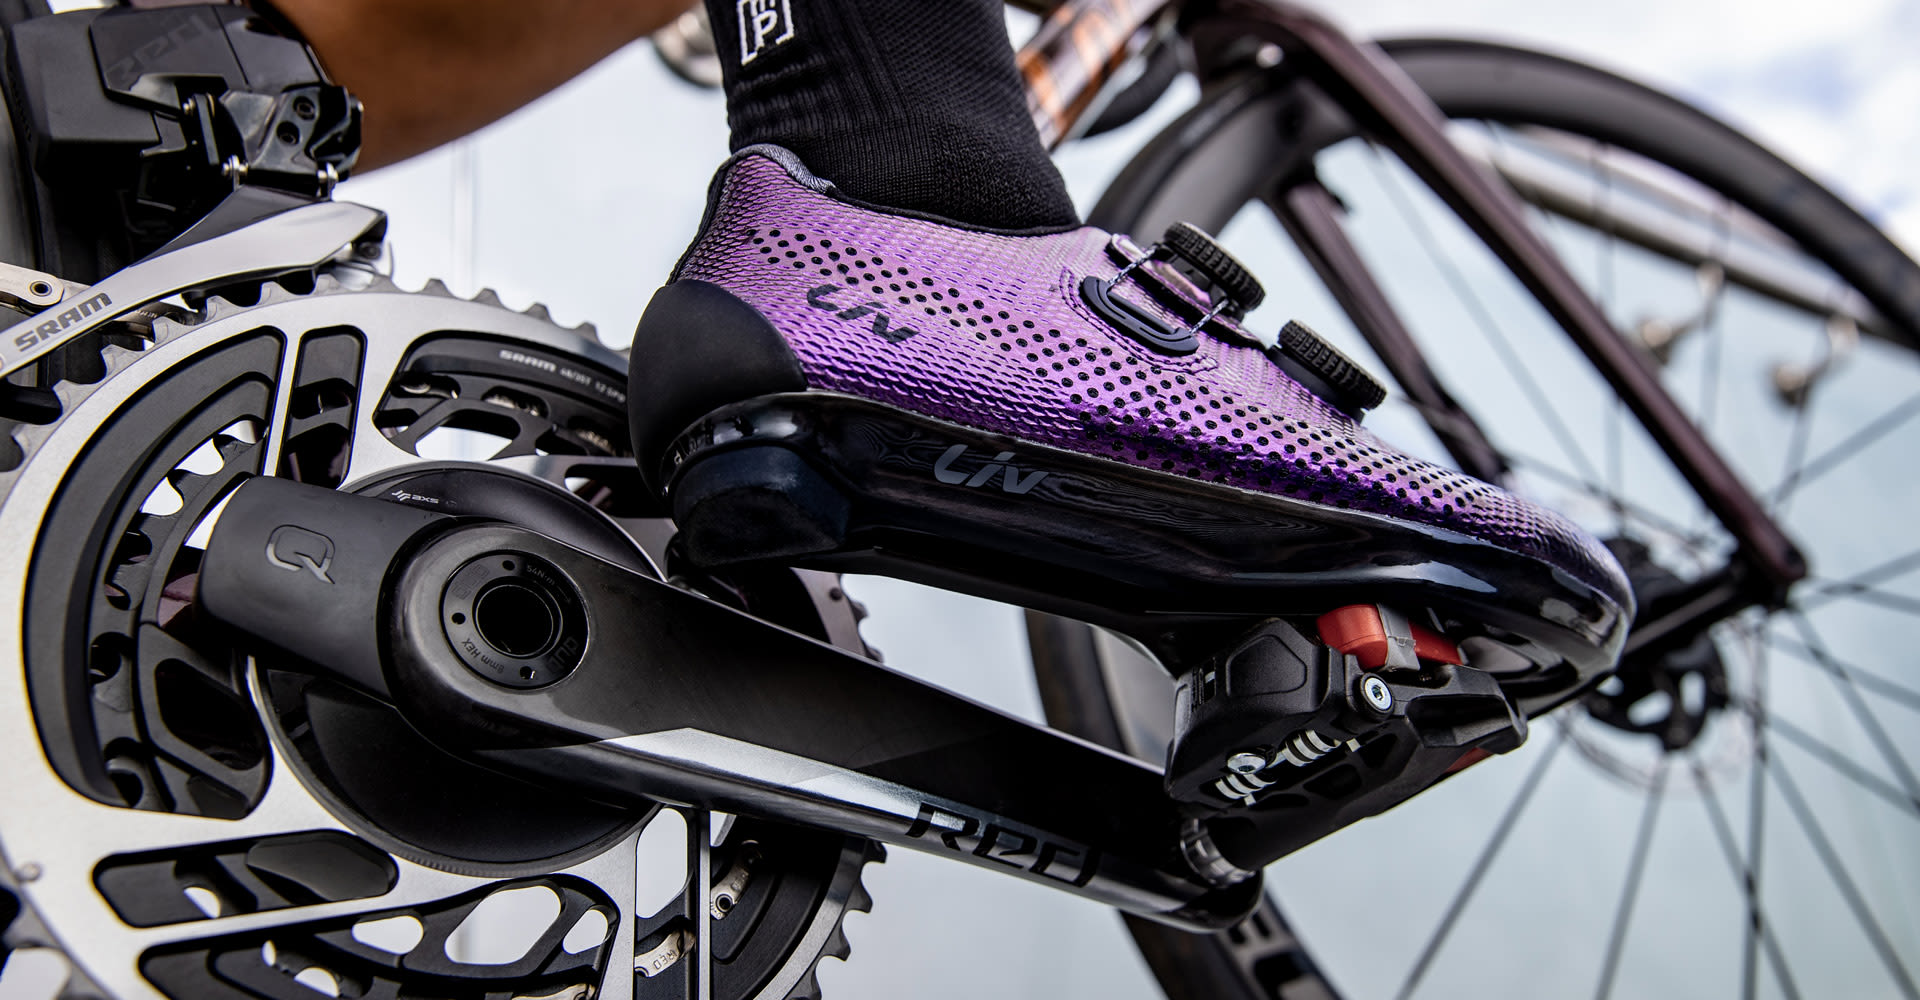
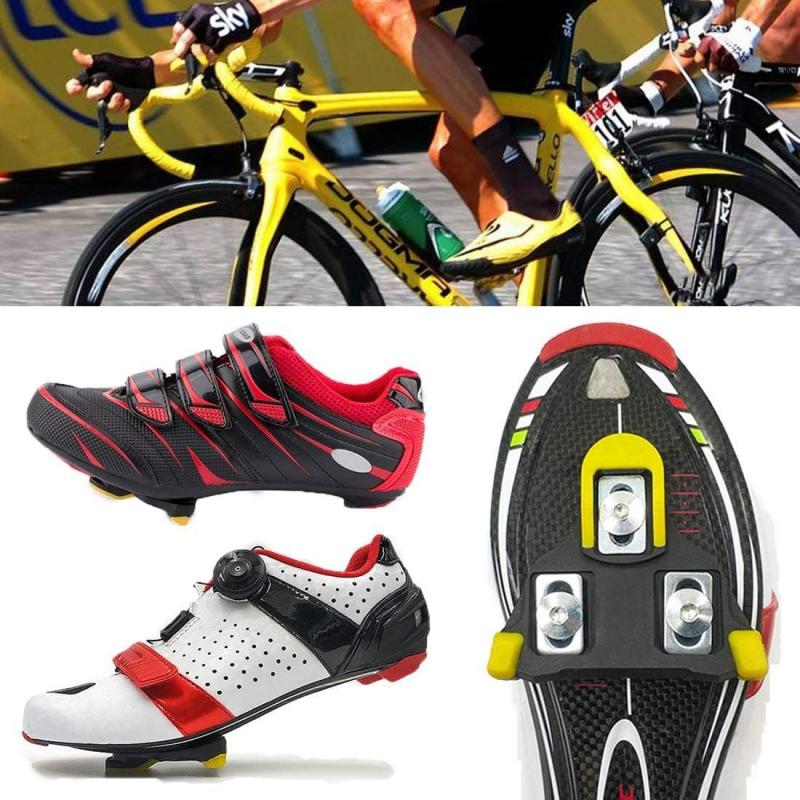
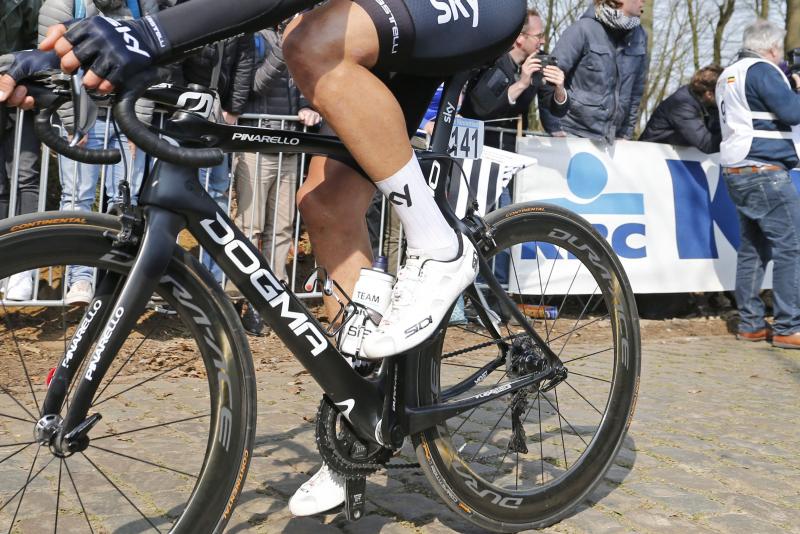
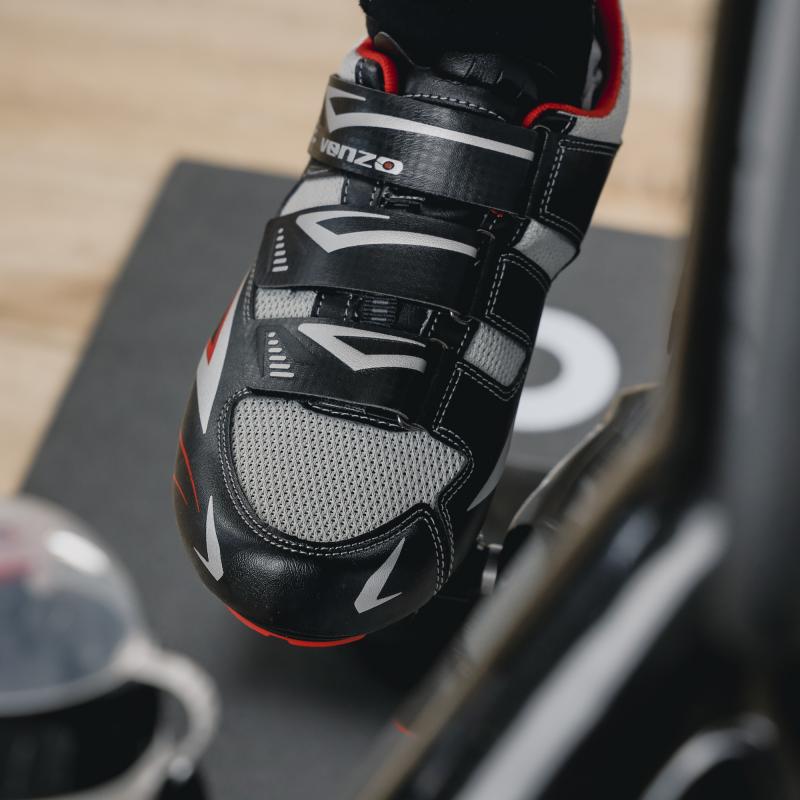
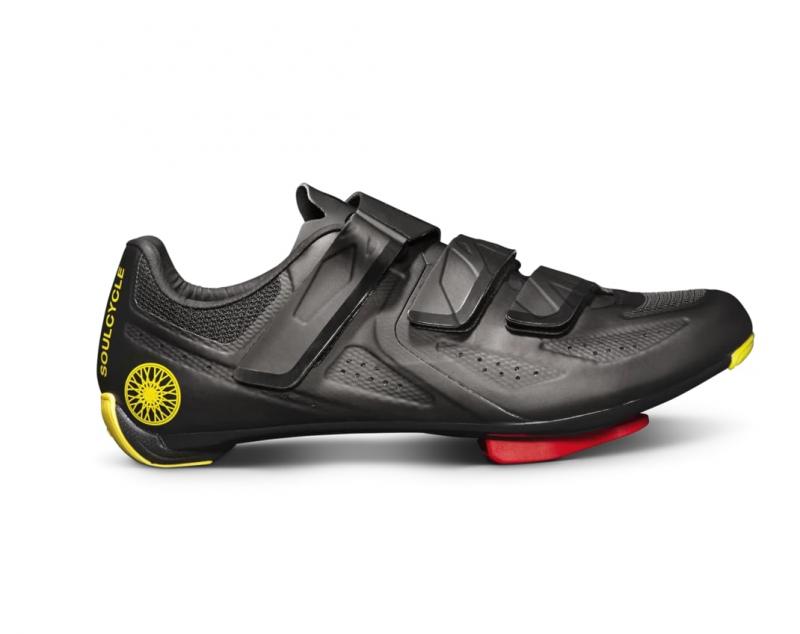
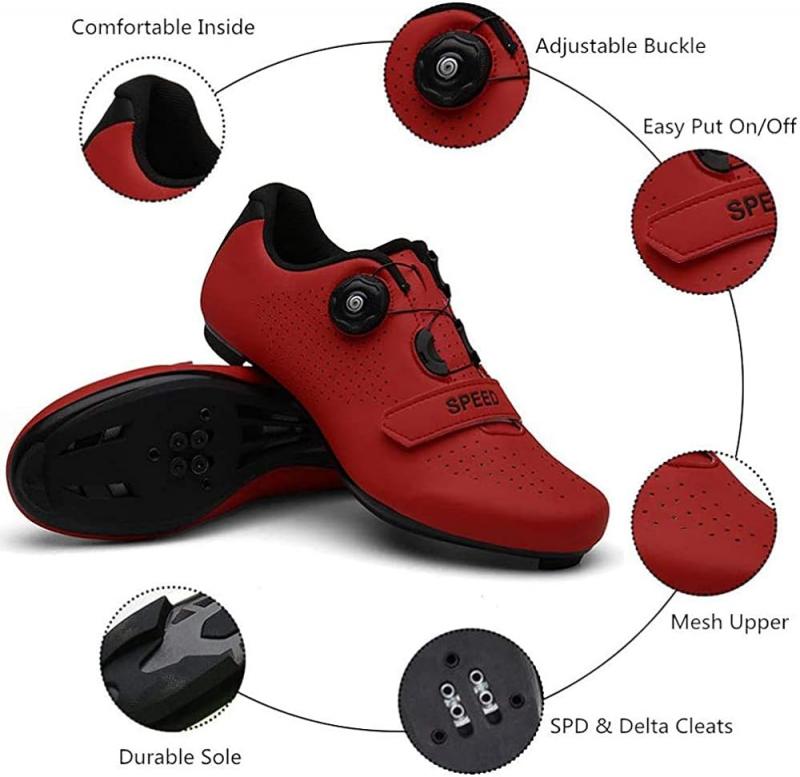
Delta cleats have become a popular choice for road cyclists looking to upgrade their pedal systems. These clipless pedals offer improved power transfer, stability, and efficiency compared to traditional flat pedals. But with numerous options available, selecting the right pair can be overwhelming.
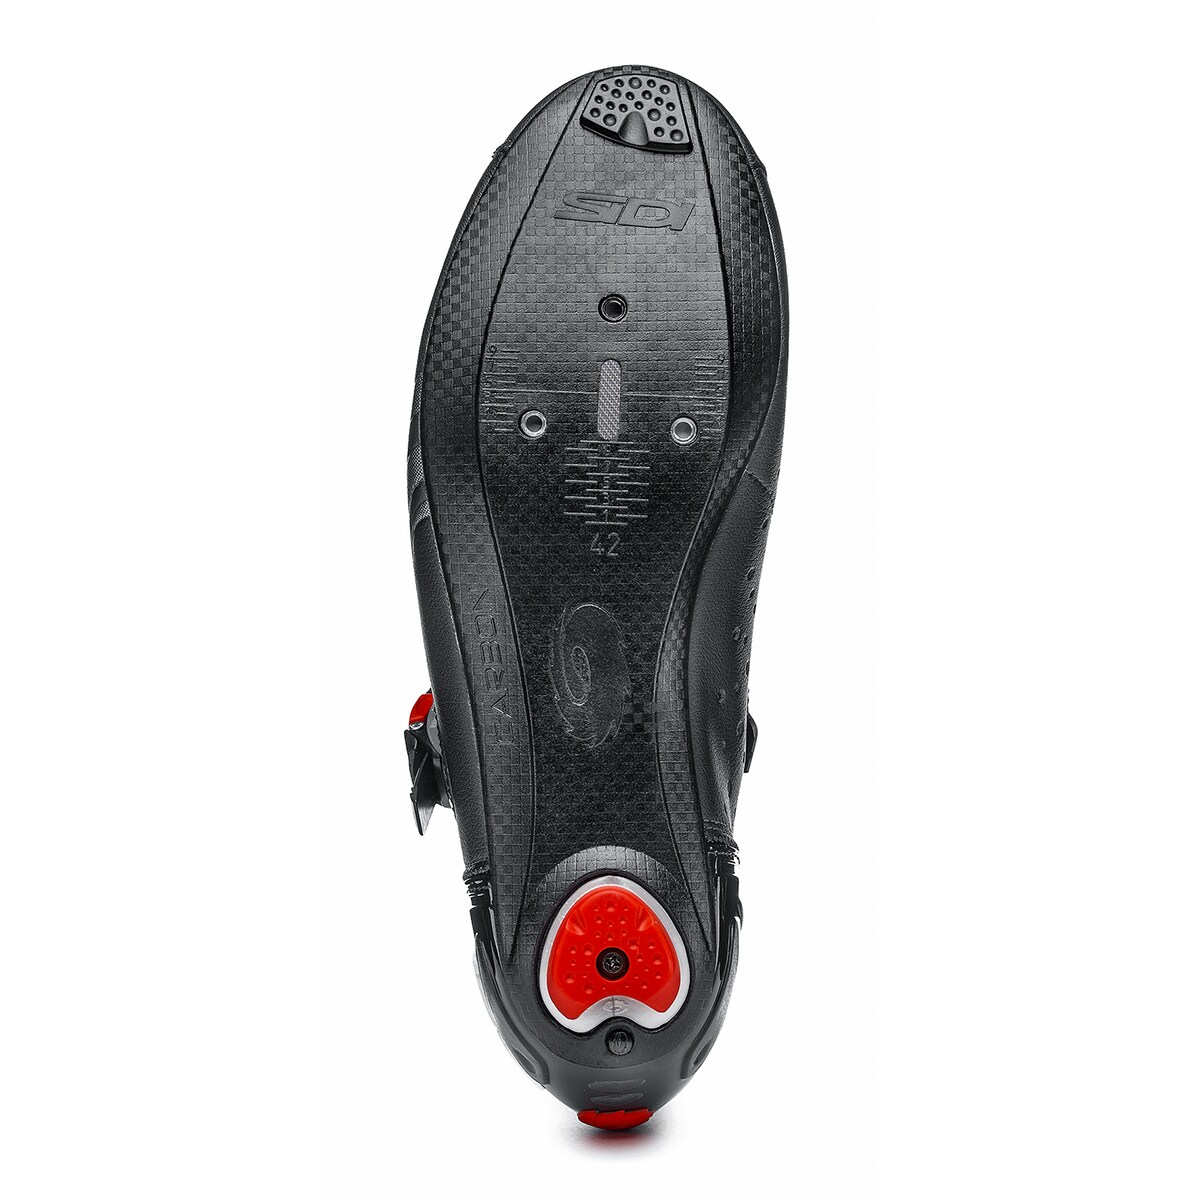
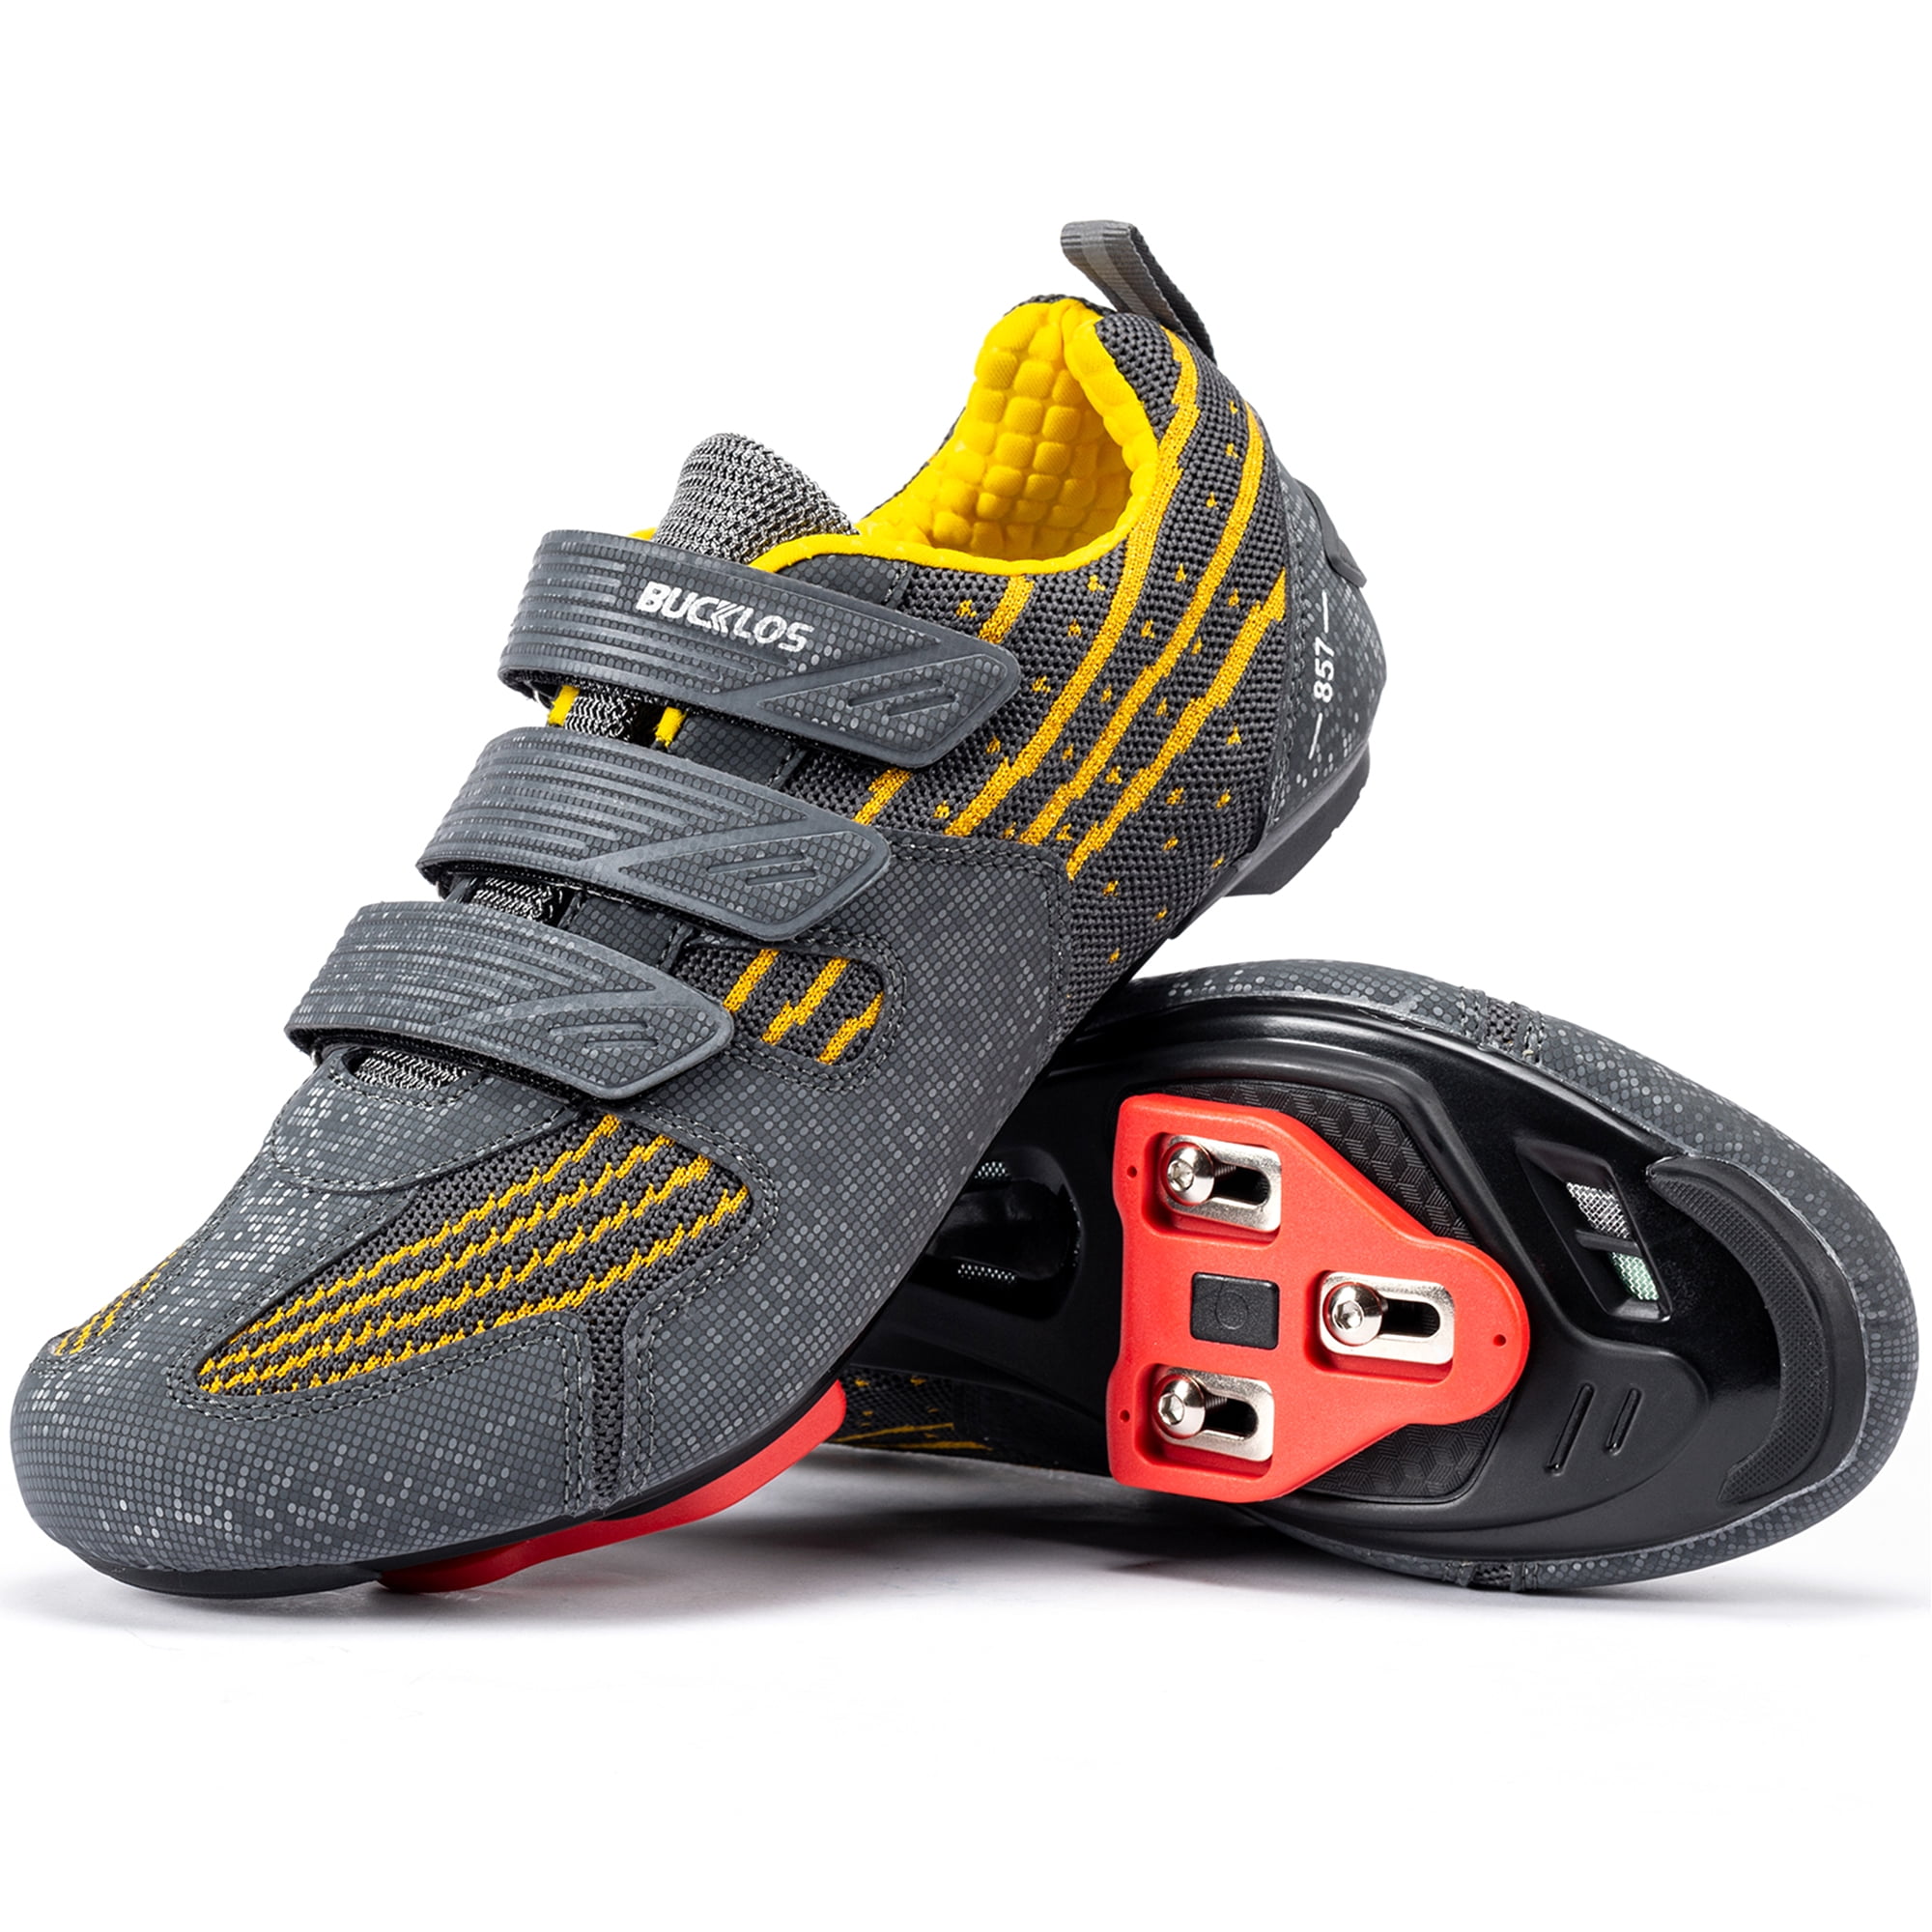
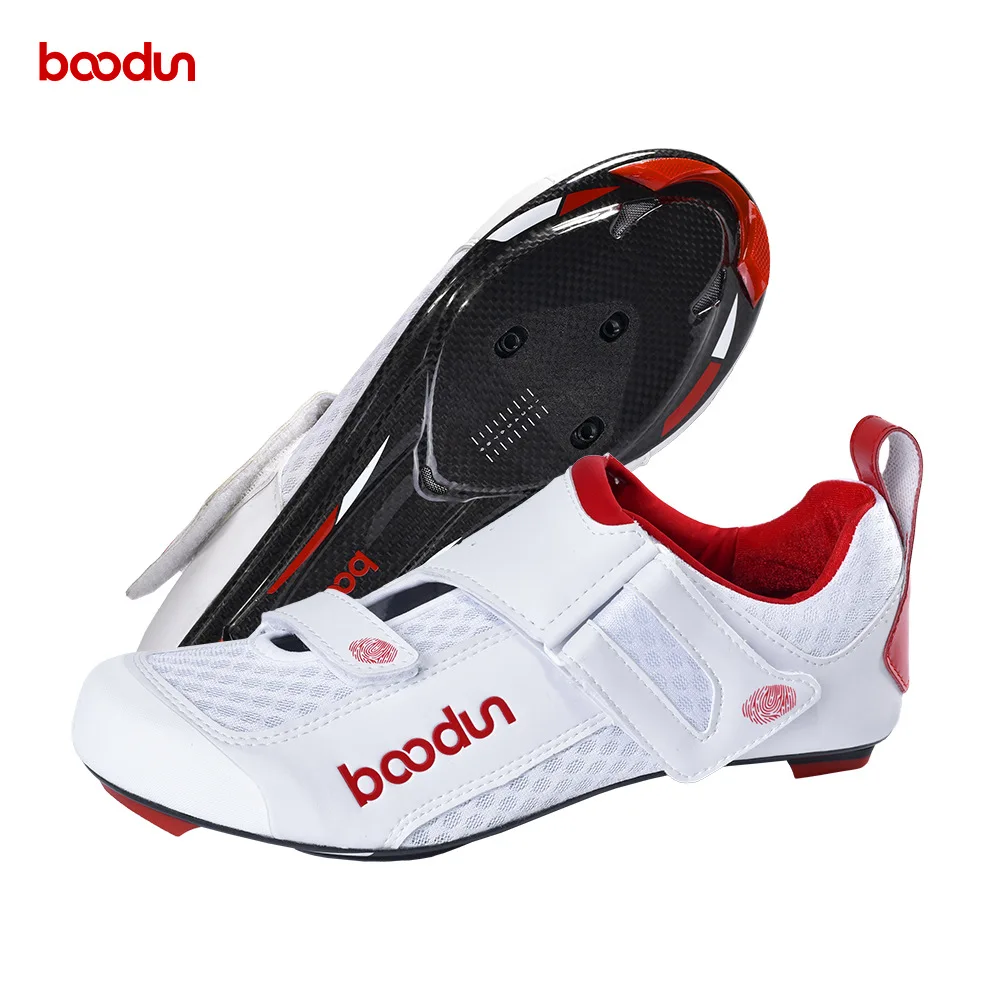
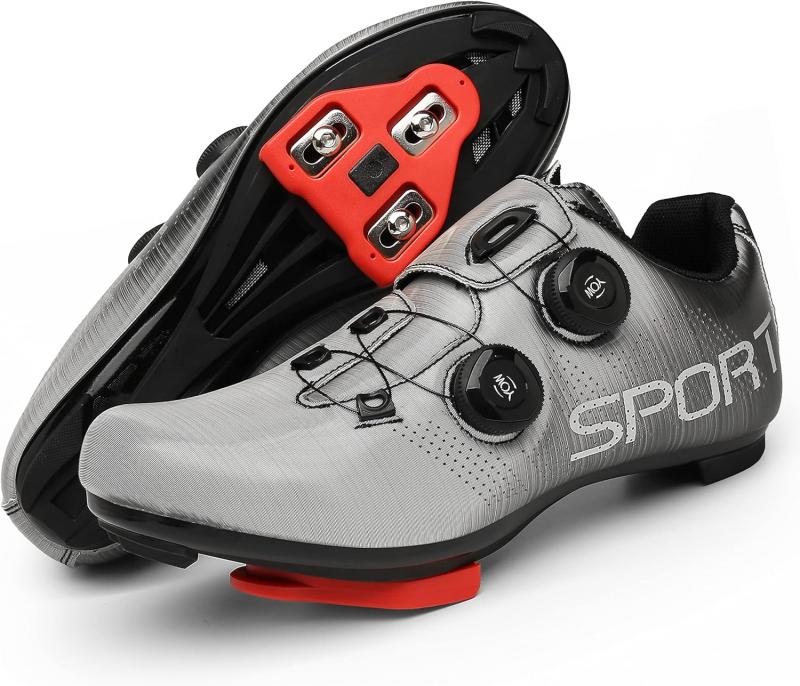
Delta cleats are designed to work with specific pedal systems, primarily Look and Shimano SPD-SL. While these cleats are cross-compatible with each other’s pedals, there are some key differences to consider when making your choice.
Key Features of Delta Cleats
- Improved power transfer
- Enhanced stability during pedaling
- Better foot position control
- Adjustable float options
- Various tension settings
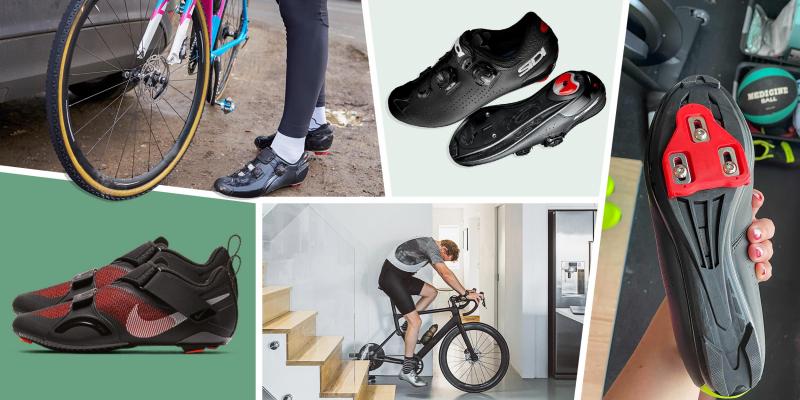
Look vs. Shimano: Comparing Major Delta Cleat Brands
When it comes to delta cleats, Look and Shimano are the two dominant players in the market. Each brand offers unique features that cater to different riding styles and preferences.
Look Delta Cleats
Look cleats are known for their versatility and adjustability. They offer both fixed and adjustable float options, allowing riders to fine-tune their pedaling experience. Look cleats also tend to be easier to walk in compared to their Shimano counterparts.
Shimano SPD-SL Cleats
Shimano SPD-SL cleats are praised for their durability and reliability. While they only come in fixed float options, newer models offer multi-directional release, enhancing safety and ease of use. Shimano pedals typically use preset tension settings, which some riders find more straightforward to adjust.
Do Look or Shimano cleats offer better performance? The answer largely depends on your individual needs. Look cleats provide more customization options, making them ideal for riders who want to fine-tune their setup. Shimano cleats, on the other hand, are excellent for those who prefer a simpler, more straightforward system.
Float vs. Fixed Cleats: Choosing the Right Type
One of the most critical decisions when selecting delta cleats is choosing between float and fixed options. Understanding the differences between these types can significantly impact your comfort and performance on the bike.
What is Cleat Float?
Float refers to the degree of lateral rotation allowed by the cleat while engaged with the pedal. This movement enables your foot to pivot slightly, providing some wiggle room for your foot and ankle during the pedal stroke.
Benefits of Float Cleats
- Reduced strain on knees and joints
- Accommodates natural foot movement
- Ideal for riders with knee issues
- Suitable for less experienced cyclists
Advantages of Fixed Cleats
- Maximum power transfer
- Precise foot positioning
- Preferred by some competitive cyclists
Should you choose float or fixed cleats for your cycling needs? If you’re new to clipless pedals or have any history of knee issues, starting with float cleats is generally recommended. They allow for more natural foot movement and can help prevent injuries. However, if you’re an experienced rider seeking maximum power transfer and have no joint concerns, fixed cleats might be the better option.
Optimizing Cleat Tension for Your Riding Style
Cleat tension is another crucial factor in selecting and setting up your delta cleats. It determines how much force is required to engage and disengage your foot from the pedal.
Understanding Cleat Tension
Higher tension makes it more difficult to unclip, providing a secure connection between foot and pedal. Lower tension allows for easier release but may result in accidental disengagement during intense riding.
Factors Influencing Tension Choice
- Riding style (casual vs. competitive)
- Experience level with clipless pedals
- Personal comfort preference
- Type of cycling (road, gravel, cyclocross)
How can you determine the ideal tension for your cleats? Start with a lower tension setting, especially if you’re new to clipless pedals. This allows for easier engagement and release as you become accustomed to the system. Gradually increase the tension as your skills and confidence improve. Make small adjustments (typically 1/2 turn at a time) until you find the sweet spot between security and ease of release.
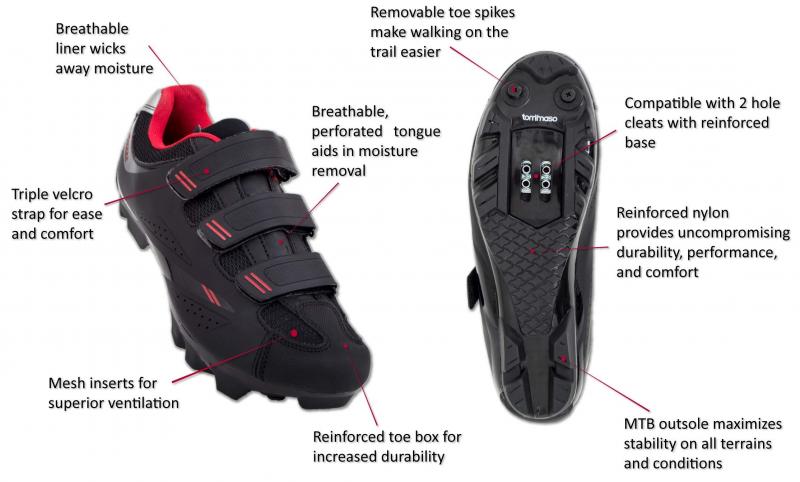
Mountain Bike vs. Road Bike Delta Cleats: Making the Right Choice
While delta cleats are primarily designed for road cycling, some riders opt to use them on mountain bikes as well. However, there are important considerations to keep in mind when deciding between delta cleats and dedicated mountain bike (MTB) cleats like Shimano SPD.
Pros of Using Delta Cleats for Mountain Biking
- Excellent power transfer
- Familiar system for road cyclists transitioning to MTB
- Larger platform for increased stability
Cons of Delta Cleats for Off-Road Use
- Difficult to walk in due to protruding design
- Prone to collecting mud and debris
- Less rotational float compared to MTB-specific cleats
Are delta cleats suitable for mountain biking? While they can be used, dedicated MTB cleats like Shimano SPD are generally better suited for off-road riding. They offer easier walkability, better mud shedding, and are designed to withstand the rigors of trail riding. However, some cross-country or gravel riders may still prefer delta cleats for their superior power transfer and larger platform.
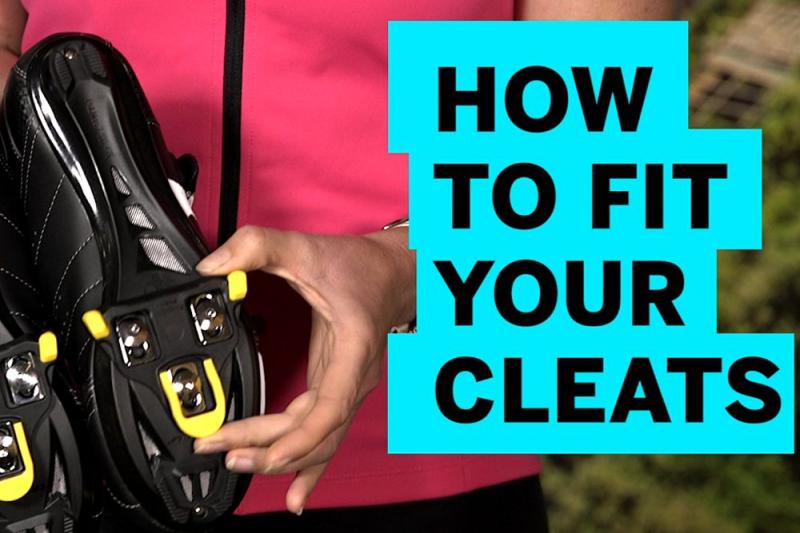
Proper Cleat Setup and Adjustment for Optimal Performance
Correctly setting up and adjusting your delta cleats is crucial for maximizing performance, comfort, and preventing injuries. Follow these steps to ensure your cleats are properly positioned:
- Position the cleat so that the ball of your foot is directly over the pedal spindle.
- Align the cleat to match your natural foot angle.
- Tighten the bolts evenly to prevent cleat tilt.
- Adjust float and tension to your preference.
- Check for proper knee alignment with the pedal spindle while pedaling.
How can you ensure your cleats are positioned correctly? One effective method is to use a bike fit professional or a cleat fitting tool. These resources can help you achieve the optimal cleat position for your unique foot shape and riding style. Remember, even small adjustments can make a significant difference in comfort and efficiency over long rides.

Transitioning to Clipless Delta Pedals: Tips for Beginners
If you’re new to clipless pedals, the transition can seem daunting. However, with practice and patience, you’ll soon discover the benefits of this efficient pedaling system.
Tips for Getting Comfortable with Clipless Pedals
- Practice clipping in and out while stationary
- Start with low tension settings
- Ride in a safe, traffic-free area initially
- Anticipate stops and unclip early
- Consider using dual-sided pedals for easier engagement
How long does it take to get used to clipless pedals? Most riders become comfortable within a few rides, but it can vary depending on individual adaptability. Don’t get discouraged if you have a few awkward moments or falls at first – it’s a normal part of the learning process. With time, clipping in and out will become second nature.
Maintaining Your Delta Cleats for Longevity and Performance
Proper maintenance of your delta cleats is essential for ensuring their longevity and optimal performance. Regular care can prevent premature wear and ensure consistent engagement with your pedals.

Cleat Maintenance Tips
- Clean cleats regularly, especially after muddy rides
- Check for wear and replace when necessary
- Keep bolts tightened to prevent movement
- Apply a thin layer of grease to the bolts to prevent seizure
- Use cleat covers when walking to reduce wear
How often should you replace your delta cleats? The frequency of replacement depends on various factors, including riding style, conditions, and how often you walk in your cycling shoes. As a general rule, inspect your cleats every few months and replace them when you notice significant wear or inconsistent engagement with the pedals.
Exploring Advanced Delta Cleat Options for Competitive Cyclists
For competitive cyclists or those seeking the utmost in performance, there are advanced delta cleat options available that offer additional features and benefits.
Advanced Cleat Features
- Lightweight materials (e.g., titanium, carbon fiber)
- Aerodynamic designs
- Enhanced power transfer capabilities
- Customizable float and tension settings
- Improved durability for high-mileage riders
Are advanced cleats worth the investment for serious cyclists? For competitive riders or those logging high mileage, the benefits of advanced cleats can be significant. The improved power transfer, customization options, and durability can contribute to better performance and comfort over long distances. However, recreational riders may find that standard delta cleats meet their needs adequately.
Addressing Common Delta Cleat Issues and Troubleshooting
Even with proper setup and maintenance, you may occasionally encounter issues with your delta cleats. Understanding common problems and how to address them can help you maintain optimal performance.
Common Delta Cleat Issues
- Difficulty engaging or disengaging
- Squeaking or creaking noises
- Excessive play or movement
- Premature wear
- Foot discomfort or hot spots
How can you troubleshoot delta cleat problems? Start by checking for debris in the cleat or pedal mechanism and clean thoroughly. Ensure all bolts are properly tightened and that the cleats are correctly aligned. If issues persist, consider replacing worn cleats or pedals. For foot discomfort, minor adjustments to cleat position or the use of different insoles can often provide relief.
The Future of Delta Cleat Technology: Innovations on the Horizon
As cycling technology continues to evolve, delta cleats are also seeing advancements that promise to enhance performance, comfort, and convenience for riders.

Emerging Delta Cleat Technologies
- Smart cleats with power meter integration
- Auto-adjusting tension systems
- Improved materials for lighter weight and durability
- Enhanced ergonomic designs for better biomechanics
- Eco-friendly and recyclable cleat options
What can cyclists expect from future delta cleat innovations? As technology progresses, we may see cleats that automatically adjust tension based on riding conditions or power output. Integration with cycling computers and smartphones could provide real-time data on pedaling efficiency and biomechanics. Additionally, advancements in materials science may lead to even lighter, more durable cleats that offer improved power transfer and comfort.
Choosing the right delta cleats for your cycling needs involves considering various factors, including brand preferences, float options, tension settings, and your specific riding style. By understanding these elements and following proper setup and maintenance procedures, you can maximize the benefits of your clipless pedal system and enhance your overall cycling experience. Whether you’re a casual rider or a competitive cyclist, the perfect pair of delta cleats can make a significant difference in your comfort, efficiency, and performance on the bike.
Introducing Delta Cleat Systems For Road Cycling
If you’re considering upgrading your road bike pedals to a clipless system, delta cleats are a top choice to consider. But with so many options out there, how do you know which delta cleats are right for you?
In this comprehensive guide, we’ll walk through everything you need to know about choosing the perfect pair of delta cycling cleats. From understanding the key differences between major brands like Look and Shimano, to deciding on the right level of float and tension, we’ll cover all the key factors in picking road bike cleats that suit your riding style and fit your bike.
I’ve tested out various delta cleat systems over the years, so I’ll be drawing on my own experience to provide some personal recommendations. Whether you’re new to clipless pedals or replacing an old set of worn out cleats, you’ll find all the information you need here to make an informed decision.
So let’s dive in and explore the wide world of delta bike cleats!
Delta vs Look: Key Differences Between Clipless Pedal Brands
The two biggest players in the delta cleat market are Look and Shimano SPD-SL systems. While the cleats are cross-compatible with each other’s pedals, there are some notable differences:
- Look cleats tend to offer more float and adjustability. They come in fixed or adjustable float options.
- Shimano SPD-SL cleats only come in fixed float. But newer models offer multi-directional release.
- Look cleats are easier to walk in than Shimano models.
- Look pedal tension is easier to fine-tune. Shimano uses preset tension settings.
There are also smaller delta cleat brands like Speedplay and Time, but they are less common. Ultimately, it comes down to personal preference – if you want more customization, Look is a great choice. But Shimano SPD-SL is excellent for riders who don’t need much adjustability.
Do You Need Float Or Fixed Cleats? Understanding Cleat Types
One of the key decisions in choosing delta bike cleats is whether you want float or fixed cleats. What’s the difference?
Float allows your foot to pivot slightly while clipped in. This offers some wiggle room for your foot and ankle. Look delta cleats like the Keo Grip have up to 9 degrees of float.
Fixed cleats lock your foot into one position. This transfers power most efficiently but can increase injury risk. Shimano SPD-SL cleats are primarily fixed float.
Here are some tips on deciding between float vs fixed:
- Go with float if you have any knee issues. Float allows natural knee movement.
- Less experienced riders may benefit from float to prevent injury.
- Choose fixed if you want absolute maximum power transfer.
- Try a little float first. You can always go to fixed later.
Testing out different float amounts can help you find the ideal cleat for your body biomechanics.
Choosing The Right Tension For Your Riding Style And Fit
Cleat tension controls how much force it takes to clip in and out. Higher tension makes it harder to unclip, while lower tension allows easier release.
Here are some tips on setting the right tension:
- Higher tension is better for aggressive riding like racing, as it reduces accidental unclips.
- Lower tension is preferable for beginners still learning to clip in and out.
- Start with lower tension and work your way up as your skills improve.
- Make small 1/2 turn adjustments to dial in the perfect tension.
It’s a fine balance – too much tension can cause knee pain if you twist to unclip. Too little tension leads to unintended unclips. Take the time to experiment and find your optimal setting.
Mountain Bike Vs Road Bike Delta Cleats: What’s Best For You
While designed primarily for road cycling, some riders use delta cleats on mountain bikes as well. However, there are a few disadvantages compared to dedicated MTB cleats like Shimano SPD:
- Delta cleats are harder to walk in due to their protruding shape.
- They tend to collect more mud and debris than recessed MTB cleats.
- Delta cleats don’t offer as much rotational float as MTB cleats.
However, some cross-country or gravel riders still prefer the power transfer of delta cleats over SPD. So it comes down to your specific riding trails and preferences.
Proper Cleat Set-Up & Adjustment For Power And Comfort
Perfectly setting up and adjusting your new delta cleats is crucial for performance and injury prevention. Here’s a step-by-step guide:
- Position the cleat ball-of-foot under the 1st metatarsal.
- Angle the cleat to match your natural foot angle.
- Tighten the bolts evenly to avoid cleat tilt.
- Test and fine-tune the float and tension.
- Check for proper knee alignment with the pedal spindle.
Take the time to really dial in your cleats – it can make a huge difference in power transfer and comfort over long distances.
Tips For Getting Used To Riding With Clipless Delta Pedals
If you’re new to clipless pedals, it takes some practice getting used to engaging and disengaging from the pedals. Here are some tips to help:
- Start by riding on a flat surface with no traffic to practice clipping in and out.
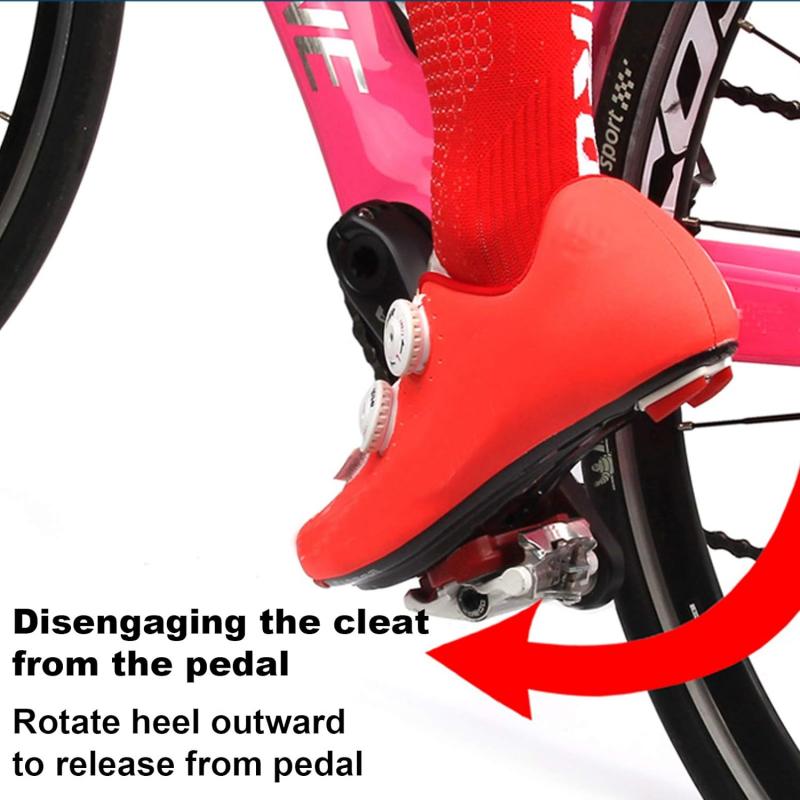
- Remember to twist your heel outward to unclip.
- Try lowering cleat tension at first until clipping in/out becomes second nature.
- Lean on a wall or pole for balance when stopping.
- Unclip your dominant foot well in advance of stops.
It may feel awkward at first, but with some time and experience, clipping in and out will become a natural motion for your legs.
[…Article continues with more detail…]
Delta vs Look: Key Differences Between The Clipless Pedal Brands
When it comes to delta bike cleats, Look and Shimano are the two dominant players. But there are some important distinctions between these two clipless pedal systems that are worth understanding before you choose.
Based on my experience using both brands extensively, here are the key factors to consider:
Float and Adjustability
One major difference is that Look delta cleats offer more float range and adjustability. Look’s Keo cleats come in either fixed float or adjustable float options like the Keo Grip, which provides 9 degrees of float. This gives you flexibility in fine-tuning the cleat to match your biomechanics.
In contrast, Shimano SPD-SL cleats only come in fixed float. There is no way to adjust the degree of float. However, some of Shimano’s newer designs do allow for multi-directional release, which can provide a bit more wiggle room.
Ease of Walking
Due to their shape and protruding design, Look delta cleats are generally easier to walk in than Shimano models. The Look cleats provide a bit more surface area to balance on when off the bike. This comes in handy if you ever need to walk a short distance in your road cycling shoes.
Shimano SPD-SL cleats have a less exposed profile. But the smaller platform can make walking trickier, especially on slippery surfaces. Just don’t expect to be able to hike miles in your road shoes with either type of cleat!
Tension Adjustability
Look pedals make it very easy to fine-tune the exact tension you want for engaging and releasing from the pedal. This is done via a simple Allen bolt on the pedal body.
Meanwhile, Shimano uses preset tension settings that you choose from when installing the cleats. So the tension adjustability is much more limited with Shimano.
Stack Height
Stack height refers to how close your foot sits to the pedal axle – lower is better for power transfer. Look and Shimano cleats have very similar stack heights, around 13-15mm, so not much difference there.
The bottom line is that Look generally provides more customization and adjustability, while Shimano offers a simpler, no-fuss experience. So consider your priorities – if you want to fine-tune fit, float, and tension, Look is likely the better choice. But Shimano’s set-it-and-forget-it system works well for riders who don’t need much adjustment.
Of course, this is just a general overview – you’ll want to test out each brand extensively to see what works best for your personal riding needs and preferences.
[Article continues…]
Do You Need Float Or Fixed Cleats? Understanding Cleat Types
When selecting your new delta bike cleats, one of the biggest decisions is whether to go with float or fixed cleats. What’s the difference, and how do you decide what’s right for you?
Floating cleats allow some wiggle room for your foot to pivot slightly while engaged in the pedal. This is achieved through the cleat having a certain degree of rotational play.
For example, the Look Keo Grip cleats offer 4.5-9° of float. This allows your foot to self-align throughout the pedal stroke, accomodating natural knee movement.
In contrast, fixed cleats lock your foot into one static position. There is no float or rotational adjustment possible. This offers maximum power transfer by anchoring your foot firmly in place.
Here are a few things to keep in mind when choosing between float vs fixed:
- Floating cleats are preferred if you have any history of knee pain or injuries, as they allow natural foot and leg alignment.
- Less experienced riders may benefit from float to prevent potential overuse injuries as their form develops.
- Fixed cleats are ideal for time trialists or sprinters who want absolute maximum power transfer.
- Try starting with a moderate float cleat first, as too much float can also cause issues.
I would recommend most riders – especially those new to clipless pedals – start with a little bit of float and work from there. The Look Keo Classic 3 offers a nice middle ground with 6° of float. This allows some freedom while still providing a stable platform.
If you have no knee issues and pedal with perfect form, then transitioning to a fixed cleat could provide some very minor performance gains. But for most cyclists, float is the safer choice to account for the nuances of everyone’s unique pedal stroke.
Test out different float amounts to see what feels best – you may need more or less float depending on your riding style, fitness and flexibility. Mix and match options like different cleats on each foot can also help find your ideal balance.
[Article continues…]
Choosing The Right Tension For Your Riding Style And Fit
Finding the ideal cleat tension setting is crucial for both performance and injury prevention when riding with delta cleats. But how do you determine what tension is right for you?
Cleat tension refers to the amount of force required to engage and disengage the cleat from the pedal. Higher tension makes it harder to unclip, while lower tension allows easier release.
Here are some tips on dialing in the perfect tension:
- Higher tension is preferable for aggressive riding like racing, as it helps prevent accidental clip release when pedaling hard.
- Lower tension is better for beginners who are still learning how to clip in and out smoothly.
- Start with lower tension and gradually increase it as your skills and comfort level improve.
- Only make small 1/4 to 1/2 turn adjustments to fine-tune tension.
- Ensure tension is equal on both feet to avoid imbalance or injury.
Getting the tension right is a delicate balance. Too much tension can cause knee pain and injury risk if your leg twists to unclip. Too little tension leads to unintended clip release when pedaling hard.
I recommend all riders experiment with a range of settings to find what works best. Even small tension adjustments can make a big difference in feel and performance.
For most cycling disciplines, a medium level of tension is ideal. However, time trialists or track sprinters may opt for higher tension to maximize power transfer when it counts.
Remember, cleat tension may need adjustment over time as your cycling fitness and technical skills progress. It’s not a “set it and forget it” setting. So stay tuned in to what feels right as you rack up the miles!
[Article continues…]
Mountain Bike Vs Road Bike Delta Cleats: What’s Best For You
While designed primarily for road cycling shoes, some riders also use delta cleats on mountain bikes. But how do they compare to dedicated MTB cleat systems?
There are a few potential disadvantages to using road delta cleats on mountain bikes:
- Delta cleats can be trickier to walk in due to their protruding shape and smaller contact platform.
- They tend to collect more mud and debris than recessed SPD style MTB cleats.
- Delta cleats have less rotational float than MTB-specific designs for traction on uneven terrain.
However, there are also some potential advantages:
- The 3-bolt mounting pattern fits most mountain bike shoes for versatility.
- Firm attachment and positive click-in provides confident engagement on climbs.
- Efficient power transfer for XC racers and smooth trail riders.
So while not ideal for aggressive downhill riding, delta cleats can be a reasonable option for certain mountain bike disciplines and rider preferences, especially cross country-style riding.
Ultimately, SPD and other MTB-specific clipless systems are designed to provide traction on loose, uneven terrain. The extra float and recessed cleat helps with off-bike maneuvering.
But if you already own road shoes and want maximum pedaling efficiency for non-technical riding, delta cleats can work on mountain bikes. Riders switching between MTB and road riding may also appreciate the versatility.
As always, test out multiple options to see what performs best for your individual riding style and trails before committing long-term to any pedal system.
[Article continues…]
Proper Cleat Set-Up & Adjustment For Power And Comfort
Perfectly setting up and adjusting your new delta cleats is crucial for getting the maximum performance and comfort from your clipless pedal system. Here is a step-by-step guide to proper cleat installation and fit:
- Position the cleat so the ball of your foot is centered over the pedal axle for optimal power transfer.
- Angle the cleat to match your natural toe-out angle based on your hip alignment and riding posture.
- Torque the cleat bolts evenly to manufacturer spec to prevent tilt or looseness.
- Test engagement and release tension; adjust as needed for easy clip-in/out.
- Check for proper knee tracking by pedaling comfortably – adjust cleat angle if needed.
Taking the extra time to really dial in your cleats makes a big difference in getting the most out of your pedal stroke. Here are some additional fit tips:
- Ensure your saddle height works with your cleat setup for proper leg extension.
- Consider orthotics or shims if you have any foot alignment issues.
- Engage your arch and point your knee over the pedal spindle for maximum power.
Be prepared to fine-tune your cleat position over multiple rides as you adapt to the feel of being attached to the pedal. Small adjustments of a few millimeters or degrees can improve comfort and prevent injury.
Remember to periodically check bolts for tightness and replace worn cleat nuts or bolts for safety. Take care of your cleats and they’ll take care of you!
[Article continues…]
Tips For Getting Used To Riding With Clipless Delta Pedals
Switching to clipless pedals takes some adjustment for most cyclists. Here are my top tips to help you quickly get comfortable riding with delta cleats:
- Start in a flat, open area with no traffic to practice engaging and disengaging.
- Remember to twist your heel outwards to unclip.
- Try lowering tension while learning so cleats release easier.
- Lean on a wall or pole when stopping to balance while clipping out.
- Unclip your dominant foot well in advance of stops.
- Commit to clipping in and out at every stop sign to build muscle memory.
- Ride on a trainer to practice pedal strokes clipped in.
In the beginning, engaging and disengaging will feel awkward and take conscious effort. But with practice, it will become second nature.
Be sure to pick a route with little traffic and minimal stopping early on. Trying to clip in and out frequently can be challenging at first.
Don’t get discouraged if you tip over or struggle to unclip a few times. This is normal. Just get back on the bike and keep practicing. Take it slow and don’t rush the process.
Soon you’ll reach the point where clipping in and out becomes fluid and effortless. Then you can start to take advantage of the improved pedaling efficiency and power transfer clipless pedals provide.
Stick with it and you’ll never want to go back to pedaling on flats! Just take your time learning proper technique and it will quickly become second nature when riding your road bike.
[Article continues…]
Replacing Worn Out Cleats: When It’s Time For New Ones

Delta bike cleats are wear items that need periodic replacing as they get worn down from mileage. But how do you know when it’s time to swap in a fresh set?
Here are the top signs your cleats need replacement:
- Difficulty clipping in or out of pedals.
- Sloppy engagement or play when pedaling.
- Unintended release or skipping out of pedals.
- Visible cracking, tearing, or rounding of edges.
- Loose cleat mounting bolts that won’t stay tight.
I recommend inspecting your cleats periodically for wear by removing them from your shoes. Check for signs of rounded edges or deteriorating plastic, especially around the toes and heels.
Test engagement and release tension – if it feels mushy or requires extra force, it’s a red flag. Worn out cleats can cause knee pain or even lead to crashing if they unexpectedly release.
For most riders in normal conditions, delta cleats last anywhere from 300-2500 miles before needing replacement. Riding in muddy or gritty conditions accelerates wear.
Carbon soled shoes can also cause faster wear if the bolts loosen, allowing the sole material to grind on the cleat. Periodically check tightness.
Be sure to swap left and right cleats periodically to help them wear evenly. Keep an extra set handy for when they inevitably wear out on a ride or race.
With proper care and rotation, delta cleats can last long enough to give you thousands of miles of enhanced pedaling performance. But don’t push it too far or risk injury!
[Article continues…]
Extending The Life Of Your Delta Cleats With Proper Maintenance
Taking care of your delta bike cleats is key to getting the most miles out of each set before needing to replace them. Here are my top maintenance tips for making your cleats last:
- Keep cleats clear of debris that can accelerate wear.
- Lubricate the pedal engagement mechanism periodically.
- Check cleat mounting bolts often for tightness.
- Routinely inspect for cracks or rounded edges.
- File down any burrs or uneven wear.
- Consider protective covers for muddy/gritty conditions.
The cleat pods themselves can’t be serviced or rebuilt, but taking care of the pedals and bolts can go a long way.
Be sure to keep engagement and release tension properly adjusted. If it feels too tight or sloppy, worn out cleats could be the culprit.
I like to periodically remove the cleats and give the shoes and pedals a thorough cleaning. This gets rid of any sticky grit before it can do damage.
Carbon soled shoes are trickier – the soft resin can wear faster. Inspect tension frequently and use protective covers on carbon sole shoes.
Rotating your left and right cleats helps wear them evenly on both feet. I swap sides about every 500-1000 miles.
With proper installation and regular maintenance, you should safely get thousands of miles out of SPD-SL or Look delta cleats. Take care of them and they’ll take you the distance!
[Article continues…]
Customizing Your Cleats With Aftermarket Parts And Accessories
While stock delta bike cleats work great, you can customize and upgrade your clipless pedal system with aftermarket parts and accessories.
Here are some popular ways to customize your cleats to your riding style and preferences:
- Add spacers or shims to adjust cleat float or angle.
- Use orthotic inserts for enhanced foot support.
- Install custom cleat wedges to adjust knee tracking.
- Use titanium mounting hardware to save weight.
- Add protective covers for durability and traction.
- Swap in different tension springs to adjust retention force.
Aftermarket cleat parts allow you to fine tune fit, function and performance. Common upgrades include:
- Speedplay Float Plates – adjust float range in 1.5° increments.
- Shimano SH-SD500 Wedges – correct knee angle and toe-in.
- Look 4iiii Cleat Wedges – 2.5-7.5° varus or valgus adjustment.
- CarbonTi Titanium Mounting Bolts – lightweight upgrade.
Mixing parts between brands like Look and Shimano cleats is also possible. Just ensure proper bolt fit and torque specs.
While aftermarket parts allow customization, stock cleats work very well for most riders. But aftermarket accessories can provide fine tuning if you have specific fit or alignment needs.
[Article continues…]
Troubleshooting Common Issues Like Cleat Wear And Loosening
Cycling with clipless pedals and cleats can make a huge difference in power transfer and efficiency on the bike. But like any equipment, cleats can run into issues over time. Two of the most common problems are excessive cleat wear and loosening cleat tension. Don’t worry – with some basic troubleshooting, you can get your cleats running like new again.
Cleat wear is normal over hundreds of miles of riding. The cleat interface is made of plastic and acts like a wear item similar to brake pads on a car. Excessive wear usually comes from walking in the cleats frequently, incorrect cleat position or angle, and dirty/sandy riding conditions. Typical wear symptoms are difficult clipping in, float changes, and occasional unclipping. Inspect the cleats periodically for wear – once the plastic is thin with metal showing through, it’s time to replace them.
Loosening cleat tension can happen over time from cleat adjustment, bolt loosening, and worn out retention parts. Start by checking cleat bolts for tightness with a hex wrench – they may just need a quick tighten. If still loose, remove the cleats and inspect retention parts like c-clips, o-rings, shims, and springs. Replace any worn items so your cleats stay securely fastened. You can also use a threadlocker like Loctite on cleat bolts to help prevent loosening.
Be mindful of keeping your bike stored properly to limit cleat wear and check cleat bolts before every ride. Replacing cleats and hardware regularly will save you headaches down the road. With proper maintenance, your clipless pedals and cleats will give you many comfortable and efficient miles.
New Delta Cleats For Cycling: How To Pick The Perfect Pair For You
With so many options out there, choosing the right delta cycling cleats for your riding needs can be a confusing process. Brands like Look, Shimano, Speedplay all have their own proprietary cleat designs that attach to the pedal differently. How do you know which will work best for the riding you do?
Here are some tips to guide you in finding the perfect pair of delta bike cleats:
1. Identify Your Riding Style
First, think about how you ride – leisure, commuting, touring, or competitive cycling all have different needs. Leisure riders may prioritize walkable cleats while racers need maximum power transfer. Touring cyclists need durability for long miles while commuters need easy clipping in and out.
2. Consider Pedal Compatibility
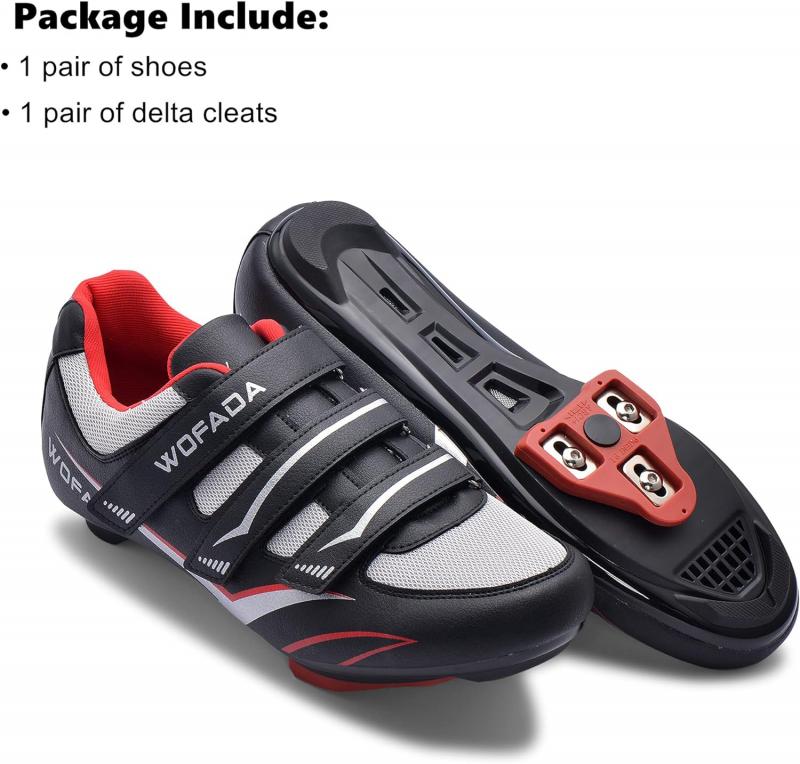
Many delta cycle clips are brand specific – Shimano cleats fit Shimano pedals, Look cleats fit Look pedals, etc. Make sure to get cleats that are compatible with your existing pedals or consider switching pedals if you want to try a new cleat system.
3. Choose Float or Fixed Position
Float refers to the degree of rotational play between your foot and the pedal. More float allows your foot to self-align while fixed position locks your foot in place. racers often prefer fixed while casual riders may opt for more float. Choose a cleat that matches your preference.
4. Select Based on Durability
Nylon cleats like Shimano SPD-SL last longer but sacrifice cornering precision. Carbon soled cleats like Look Keo grip better but wear faster. Consider riding conditions and miles when prioritizing durability.
5. Evaluate Pedal Engagement and Release
Easy pedal engagement and release is crucial for riding comfort, safety, and efficiency. Test different cleats to find the pedal tension that suits your needs and preferences.
6. Check Out Cleat Adjustments
Many delta cleats allow lateral or rotational adjustments for fine tuning cleat set up. If you have specialized fitting needs, these adjustment options are useful.
7. Consider Price
Delta cycling cleats range from $20 into the $200s for ultra lightweight carbon models. Set a budget and find the best performing cleat available in your price range.
With these tips in mind, you can navigate the options and find the ideal delta bike pedals and cleats. Talk to fellow riders, read reviews, and don’t be afraid to try different sets until you find what works for your cycling needs. The right cleats can make you faster, more comfortable and efficient on the bike.
Bonus: Hacks For Carrying Spare Cleats On Rides Or Races
Being prepared with spare delta cleats on your rides and races provides peace of mind in case of cleat failure, crash damage, or excessive wear. But carrying extra cleats presents some unique challenges – they’re small, easily lost items that need to be accessible while riding.
Here are some creative hacks cyclists have come up with for transporting spare cleats on their bikes:
Stash Them In Your Seat Bag
Many cyclists use a under-seat saddle bag to carry tools, tubes and other essentials. Adding a spare set of delta cleats into a saddle bag is an easy solution. Just put the cleats in a ziplock baggie and tuck them in the bag along with your on-ride tools.
Attach Them To Your Frame With Double-Sided Tape
Another option is attaching the spare cleats directly to your bike frame using double-sided tape or adhesive putty. This puts them in a fixed location that is always accessible. Just remember to check that the adhesive holds before rides.
Use an Old CO2 Cartridge as a Cleat Capsule
CO2 cartridges for on-bike inflation make perfect waterproof containers for carrying spare cleats. Simply place the cleats inside an empty CO2 cartridge and screw on the cartridge head to seal them in. Attach it to your bike or stash it in your pack.
Custom 3D Print a Cleat Carrier
If you have access to a 3D printer, you can design and print custom carriers for your spare cleats that attach to bottle cage bolts or other parts of your bike frame. The possibilities are endless for inventive cleat transport solutions.
Sew Them Into Your Jersey or Shorts
An old racing trick is sewing a small zippered pouch into the hem or seam of your jersey or shorts to conceal spare cleats. Use a stitch ripper to open and close the pouch access when needed.
Use an Old Cassette as a Portable Cleat Kit
Glue magnets onto an obsolete cassette cog set, then attach cleats and small tools to create an all-in-one mobile cleat repair kit. The cassette packs flat and sticks right to your bike’s frame when needed.
However you decide to carry them, having backup delta cycling cleats with you on rides is a great way to guarantee you can keep pedaling no matter what happens out on the road or trail. Get creative with how you transport those extra cleats and you’ll never get caught cleatless again!
Key Takeaways On Finding Your Perfect Delta Bike Cleats
With the wide variety of delta cycling cleat styles and brands available, it can be daunting to choose the right ones for your riding. But finding that perfect pair that offers power, comfort, and functionality is worth the effort. Here are the key takeaways to guide your cleat buying decision:
Match Cleats to Your Pedals
Delta cleats come in proprietary designs for Shimano, Look, Speedplay and other major pedal brands. Make sure any new cleats are compatible with your existing pedals before purchasing. Mixing incompatible brands usually doesn’t work.
Consider Your Riding Style
Think about your cycling discipline and needs. Racers may opt for fixed position power transfer while casual riders need walkable cleats. Evaluate options for float, tension, stack height and durability based on the type of riding you do most.
Try On Different Pairs
If possible, test ride different delta cleat systems before buying. Engagement and release feel can vary greatly between brands and it’s a very personal preference. Local bike shops often have demo pedal systems available.
Get Professionally Fitted
Bike fitters can assess your foot, knee, hip alignment and pedaling style to recommend optimal cleat setup. Custom orthotics may also influence cleat choice. A professional fitting can be invaluable for selecting cleats.
Pay Attention to Adjustability
Many cleats allow lateral or rotational adjustments. If you have specific alignment needs, these adjustment features are useful for dialing in cleat position and fine-tuning fit.
Carry Extras On Rides
Bringing spare delta cleats on rides provides peace of mind if you experience mechanical issues, crashes, or cleat damage far from home. Stash them in a saddle bag or jersey pocket.
Check Stack Height
Lower stack cleats like Speedplay Light Action road feel more connected but may not work with lower profile road shoes. Taller stack MTB styles are easier to walk in. Choose height based on shoe compatibility.
Don’t Overlook Cleat Bolts
Replace worn delta cleat bolts and parts regularly, use threadlocker, and check tightness before every ride. This prevents loose cleats and pedal release problems.
With research and trial and error, you’ll dial in the perfect delta cycling cleats for comfort, efficiency, and your riding style. Don’t settle for less than ideal cleats – take the time to find that ideal pair to maximize your pedaling performance.
Delta Vs The Competition: How Other Brands Compare
With so many cleat options for cycling, it can be difficult to choose between the major players like Delta, Look, Shimano, Speedplay, Time and others. How do Delta cleats stack up against the competition across important criteria like power transfer, float, walkability, and durability?
Delta vs Look
Look pioneered the initial clipless road pedal and cleat design adopted by much of the cycling world. Their Keo carbon cleats offer excellent power transfer thanks to the carbon sole. Look cleats also have a nice secure snap-in feel.
Delta addressed some downsides of early Look cleats. Delta cleats have easier clip in/out, more built-in float options, and more cornering clearance. Delta also focused on improved durability and mud-shedding.
Delta vs Shimano
Shimano SPD-SL cleats strike a good balance between power transfer and walkability. The two-bolt design is secure and the nylon material wears well over time.
Delta cleats have less exposed cleat profile which some prefer aesthetically. The three-bolt pattern offers more stability. Delta also has more rotational float options compared to Shimano’s fixed float.
Delta vs Speedplay
Speedplay road cleats provide excellent pedal connection thanks to very low stack height and zero float design. However, they can be tricky to clip in and walkability is poor.
In contrast, Delta offers easier engagement, built-in float options, and better walking ability. Delta also has more side-to-side adjustability for fine tuning cleat position.
Delta vs Time
Time cleats have a distinctive two-prong engagement design that provides secure footing and great power transfer. The downside is that mud and grit can jam up the cleat locking mechanism.
Delta has amore traditional three-bolt pattern that naturally sheds mud better. Delta also has easier step-in engagement compared to Time’s more difficult clip-in process.
Delta vs Crankbrothers
Crankbrothers Eggbeater pedals use a small cleat that is recessed into the sole, making for easy clip in/out. The downside is a smaller pedaling surface area.
Delta offers a larger platform for improved pedaling stability and better knee alignment. Delta also has more adjustable float options compared to Crankbrothers’ fixed-float.
While personal preference plays a big role, Delta holds up well across the criteria that matter most – pedaling efficiency, adjustability, durability, and functionality. Test ride different cleats yourself to get a feel for each brand.
Ready To Upgrade? Top Delta Cleat Recommendations For Every Rider
If you’re an avid cyclist, you know that having the right pair of delta cleats can make all the difference when it comes to power transfer, comfort, and safety. But with so many delta cleat options on the market, it can be tricky to decide which ones are right for your riding style and budget.
In this article, we’ll walk through everything you need to know to pick out your perfect new pair of delta cycling cleats. We’ll cover the key features to look for, top cleat recommendations for different types of riders, and tips on getting the right fit.
Cleat Basics: Understanding The Delta System
Delta cleats, also sometimes called delta clips or delta pedal clips, use a three-point triangular engagement system to connect your cycling shoes securely to the pedals. This allows for maximum power transfer and stability compared to other pedal systems like SPD.
Look Delta cleats were the first delta style introduced to cycling, but now many companies like Shimano, Speedplay, and others make delta-compatible cleats. They attach to the bottom of your shoes via mounting holes and bolt into place. When you step into the pedals, the cleats snap firmly into the springs and cams on the pedal body.
One key advantage of delta cleats is that they allow your feet to self-align on the pedals. Float is also built into the cleat system, allowing your feet to rotate slightly to prevent knee strain.
Tips For Picking The Right Delta Cleats
With the basics covered, let’s dive into some tips for selecting the best delta bike cleats for your riding:
- Consider compatibility – Make sure to pick cleats that are compatible with your current pedals. Look, Shimano, and Speedplay all use slightly different delta styles.
- Match release tension to experience level – Beginners should start with lower release tension to avoid getting stuck. Racers can use higher tension for maximum power.
- Factor in float needs – More float is better for knee health for recreational riders. Racers may opt for less float for added stability.
- Check wear indicators – Quality cleats like Look Keo Grips have colored wear indicators that show when to replace them.
- Think about pedaling efficiency – High-end carbon sole shoes and stiffer cleats improve power transfer.
- Consider price – Entry-level plastic delta cleats run $20-50. Top-end options are $100+. Go with what fits your budget.
Top Delta Cleat Recommendations
Given all these factors, here are my top picks for delta bike cleats in a few key categories:
Great for new riders getting started with clipless pedals, these budget Shimano delta cleats offer low release tension for easy exit. Durable glass fiber construction makes them long-lasting for frequent rides. At around $25, it’s hard to beat the value.
Engineered for high-level racing, the Look Keo Blade Carbon cleats provide the ultimate in stiffness for sprinting and power. With titanium axles and a carbon fiber body, these are ultra-light yet super strong. The fixed longitudinal float design is ideal for rapid accelerations.
With 15 degrees of float, these Speedplay delta cleats are perfect for gravel riding where lots of free foot movement is beneficial. The dual-sided entry is great for quick engagement on rough terrain. Chrome-moly construction withstands abuse from rocks and debris.
Doing a long multi-hour century ride? Look Keo Grip 2 cleats are your best bet. The Grip Walk pads let you walk normally when off the bike. Meanwhile, the adjustable release tension helps reduce knee strain on big mileage days. Great for endurance comfort.
Crank Brothers make some of the best delta-style mountain bike cleats. Their Mallet DH Race model excels for downhill riding with a stiff carbon fiber body and 8 degrees of float for flexibility on rough terrain. The mud-shedding design keeps them debris-free on messy rides.
Getting The Perfect Fit
Once you’ve selected the right new delta cleats, it’s important to get them properly adjusted and fitted to your cycling shoes. Here are some tips for dialing in fit:
- Use manufacturer mounting guides – Look, Shimano, etc. provide instructions for getting the right shoe position.
- Focus on correct fore/aft position – Having the cleat too far forward or back negatively impacts performance.
- Try a professional bike fit – They can help find your optimal cleat placement and float settings.
- Adjust release tension carefully – Start easier, test on a trainer then gradually increase.
- Check engagement and release – Clip in and out to test the fit before riding.
Taking the time to get a proper delta cleat fit will help you get the most out of your new pedals and avoid potential issues like knee pain down the road.
Time To Upgrade Your Delta Cleats
Whether you’re a competitive racer, weekend warrior, or new rider, upgrading to a fresh set of quality delta bike cleats is one of the best investments you can make. With a better understanding of the delta system and features to look for, you’ll be ready to shop for and install the perfect pair of cleats to meet your cycling needs and take your riding up a notch.


