How to string a Pita Pocket in lacrosse sticks. What materials are needed for the Pita Pocket. How to install leathers and sidewalls in a lacrosse stick. How to create the center twist in a Pita Pocket. What are the steps for stringing outer and inner nylons in a Pita Pocket. How does the Single Twist Pita Pocket differ from the traditional version.
Understanding the Pita Pocket: A Unique Lacrosse Stick Stringing Technique
The Pita Pocket, also known as a Dogtrack, is a specialized stringing technique for lacrosse sticks that offers players enhanced ball control and a distinct feel. This method builds upon the basic Traditional pocket but incorporates a crucial twist down the center, creating a channel for the ball to travel along. Additionally, the outer leathers are secured tightly to the sidewall, further improving control.
Why is the Pita Pocket gaining popularity among lacrosse players? Its unique design provides a balance between ball retention and quick release, making it an attractive option for players looking to customize their stick’s performance. While it’s considered one of the easier leather pockets to string, it’s recommended that players master the Mesh Pocket technique before attempting the Pita Pocket.

Essential Materials for Stringing a Pita Pocket
Before diving into the stringing process, it’s crucial to gather all the necessary materials. Here’s what you’ll need:
- 1 Unstrung lacrosse head
- 4 Leathers
- 1 64-inch piece of nylon
- 2 55-inch pieces of nylon
- 2 45-inch pieces of nylon
- 2 Sidewall strings
- Shooting strings (number based on personal preference)
It’s important to note that the “nylon” mentioned here may also be referred to as “crosslace” or “pocket nylon” in some stores. Avoid using sidewall string as a substitute for this nylon, as it won’t provide the same performance characteristics.
Step-by-Step Guide to Installing Leathers and Sidewalls
The foundation of a well-strung Pita Pocket lies in properly installing the leathers and sidewalls. How do you begin this process?
- Thread the leathers through the holes at the top of the lacrosse head.
- Weave the leathers through their own holes.
- Wrap the leathers through the bottom holes of the head.
- For the sidewall, use the interlocking method commonly employed in Mesh pockets.
Maintaining tension throughout this process is crucial. Both the leathers and sidewalls should be kept tight to ensure a responsive pocket.
Mastering the Center Twist: The Heart of the Pita Pocket
The center twist is what sets the Pita Pocket apart from other stringing techniques. How do you create this crucial element?
- Take the 64-inch piece of nylon and thread each end through the two middle leathers at the top, between the head and the leathers.
- Pull the nylon tight and ensure both sides are even.
- Pull the two ends under the nylon between the two leathers at the top, maintaining tension.
- Twist the nylon tightly about four times. For a wider pocket, similar to a Wide Traditional, add an additional twist.
- After twisting, use the basic traditional knot: go over the leather and bring it up above where you went over with it.
- Continue this pattern all the way down to the bottom of the stick.
When finishing the nylon at the bottom, you have two options: cutting them or tying them to the leathers. Many stringers prefer tying off to avoid cutting into the leathers.
Perfecting the Outer Nylons: Enhancing Control and Feel
The outer nylons play a crucial role in the Pita Pocket’s performance. How do you string these effectively?
- Use the basic traditional knot learned in the center twist.
- Keep the leathers close to the sidewall for improved control.
- Continue the stringing pattern all the way down the pocket.
- Tie off at the bottom and repeat for the other side.
For optimal results, consider this expert tip: Place a ball and a butter knife between the sidewalls and sidewall string. This technique allows you to string the pocket for the exact depth of the ball, resulting in a more consistent and effective pocket.
Stringing the Inner Nylons: Achieving Balance and Consistency
The inner nylons are crucial for creating an even pocket. What’s the best approach to stringing these?
- String both inner nylons simultaneously to ensure evenness.
- Interlock the nylons by performing the knot on the opposite side of where you did it with the outer nylons/channel.
- Go from the underside, pull up through the other knot, and back down again.
- Keep a ball in the pocket during this process to help shape it correctly.
- If the ball impedes knotting in certain areas, temporarily remove it, make the knot, then replace the ball.
- Continue stringing until you reach the bottom and tie off similarly to the center twist.
This method ensures a balanced pocket that will perform consistently during play.

Exploring the Single Twist Pita Pocket: A Variation for Women’s Lacrosse
The Single Twist Pita Pocket is a popular variation, especially in women’s lacrosse. How does this differ from the traditional Pita Pocket?
The Single Twist Pita Pocket uses fewer materials and has a simpler stringing process, making it ideal for women’s lacrosse sticks. Here’s what you’ll need:
- 1 women’s lacrosse head
- 2 Leathers
- 3 22″ pieces of Top String or equivalent nylon
This variation maintains the central “track” for the ball but with a single twist, offering a balance between control and quick release that’s well-suited to the women’s game.
Key Differences in Stringing the Single Twist Pita Pocket
While the basic principles remain similar, there are some key differences in stringing the Single Twist Pita Pocket:
- Use of only two leathers instead of four
- A single central twist rather than multiple twists
- Simplified outer and inner nylon patterns
- Adjusted tension to comply with women’s lacrosse regulations
These modifications result in a pocket that’s legal for women’s play while still offering many of the benefits of the traditional Pita Pocket.

Troubleshooting Common Pita Pocket Stringing Issues
Even experienced stringers can encounter challenges when creating a Pita Pocket. What are some common issues and how can they be resolved?
Uneven Pocket Depth
If your pocket depth is inconsistent, it’s likely due to uneven tension in your nylons. Ensure you’re maintaining consistent pressure throughout the stringing process, especially when creating the center twist and stringing the outer and inner nylons.
Ball Doesn’t Sit in the “Channel”
If the ball doesn’t naturally sit in the central channel, you may need to adjust the tightness of your center twist. Experiment with adding or removing twists until you achieve the desired effect.
Pocket is Too Deep or Too Shallow
Pocket depth can be adjusted by modifying the tension of your sidewall strings and the placement of your knots. Remember to check your pocket’s legality according to your league’s regulations.
Leathers are Fraying or Breaking
If your leathers are showing signs of wear, you may be pulling them too tight during the initial installation. Try easing up on the tension slightly, and consider using conditioner on your leathers to increase their lifespan.
Maintaining and Caring for Your Pita Pocket
A well-strung Pita Pocket can last for seasons with proper care. How can you ensure your pocket stays in top condition?
Regular Cleaning
Clean your pocket after every practice or game. Use a soft brush and mild soap to remove dirt and debris, then rinse thoroughly with clean water.
Proper Storage
Store your stick in a cool, dry place. Avoid leaving it in direct sunlight or in your car, as extreme temperatures can damage the materials.
Periodic Re-adjustment
Over time, your pocket may stretch or shift. Periodically check the tension of your strings and make minor adjustments as needed to maintain optimal performance.
Leather Conditioning
If you’re using leather strings, apply a small amount of leather conditioner every few months to prevent cracking and extend their lifespan.
Advanced Techniques for Customizing Your Pita Pocket
Once you’ve mastered the basic Pita Pocket, you might want to explore ways to further customize your stick. What advanced techniques can take your Pita Pocket to the next level?
Varying Twist Counts
Experiment with the number of twists in your center channel. More twists can create a deeper pocket, while fewer twists result in a shallower, quicker-release pocket.
Hybrid Materials
Consider combining traditional materials with modern synthetics. For example, you might use synthetic leathers for increased durability or specialized performance strings for the sidewalls.
Custom Knot Patterns
Develop your own unique knot patterns for the outer and inner nylons. This can allow you to fine-tune the pocket’s shape and performance characteristics.
Multiple Channels
Advanced stringers might experiment with creating multiple channels in the pocket, offering different release points for various types of shots.
Remember, any customizations should still comply with your league’s regulations. Always check the rulebook before making significant modifications to your pocket.
The Future of Pita Pocket Stringing: Innovations and Trends
As lacrosse equipment continues to evolve, so too does the art of stick stringing. What future innovations might we see in Pita Pocket stringing?

Smart Materials
Emerging smart materials could revolutionize pocket performance. Imagine strings that adjust their tension based on weather conditions or playing style.
3D-Printed Components
Custom 3D-printed elements could allow for unprecedented personalization of pocket shape and performance.
Eco-Friendly Materials
As sustainability becomes increasingly important, we may see a shift towards biodegradable or recycled materials in stick stringing.
Digital Stringing Assistance
Advanced imaging and AI technologies could lead to apps that analyze your shooting style and recommend optimal stringing patterns.
While these innovations are exciting, the fundamental principles of the Pita Pocket are likely to remain relevant for years to come. Mastering the basics will always be crucial, no matter how technology advances.
Comparing the Pita Pocket to Other Stringing Styles
The Pita Pocket is just one of many stringing styles available to lacrosse players. How does it compare to other popular techniques?
Pita Pocket vs. Traditional
The Pita Pocket builds upon the Traditional style, adding the central twist for improved ball control. It typically offers better hold than a basic Traditional pocket while maintaining a similar feel.
Pita Pocket vs. Mesh
Compared to mesh pockets, Pita Pockets generally offer more texture and feel for the ball. However, they require more maintenance and can be more affected by weather conditions.
Pita Pocket vs. Channel Pocket
Both styles feature a central channel for the ball, but the Pita Pocket’s twist often provides more hold. Channel pockets might offer a quicker release, depending on the stringing.
Pita Pocket vs. Six-Diamond Traditional
The Six-Diamond Traditional offers more customization options but can be more complex to string. The Pita Pocket provides similar performance with a potentially simpler stringing process.
Ultimately, the choice between these styles comes down to personal preference, playing style, and position on the field. Many players experiment with multiple styles before finding their ideal pocket.
Instructional Archive: “The Pita Pocket”
As part of an ongoing series, Inside Lacrosse is scouring its archives to bring you years worth of instructional tips that you may have missed. Below, Kyle Kapron explains the science on how to string the popular pita pocket. This article first appeared in the November 2005 issue of the Magazine.
Kyle Kapron is a first-team All-State attackman at Chandler High in Arizona. Chandler might not compete with McDonogh and West Genny for the No. 1 spot in IL’s high school poll, but Kapron’s stick-stringing skills could help put ’Zona on the map. Here, Kapron—who loves stringing so he can customize his own stick and continually work toward the perfect pocket—gives us the know-how to lace up a Pita Pocket.
A Pita Pocket, also known as a Dogtrack, is similar to the basic Traditional, but it uses a twist down the center, creating a track for the ball to run down. In addition to the center, the outer leathers are tied closely to the sidewall, giving better control. This is one of the easiest leather pockets you can string, although I recommend you perfect the Mesh Pocket before moving on to Traditional. So here we go, and, as always, look at the pictures if you get confused.
Materials:
1 Unstrung lacrosse head
4 Leathers1 64-inch piece of nylon
2 55-inch pieces of nylon2 45-inch pieces of nylon
2 Sidewall strings
Whatever number of shooting strings you like
To clear up confusion on the “nylon,” some places call it “crosslace” or “pocket nylon.” Do not use sidewall string for this.
Step 1: Installing the Leathers and Sidewalls
To install the leathers, you need to run them through the holes at the top of the head, then weave through the holes in the leathers. Next, wrap the leathers through the bottom holes of the head. For the sidewall, use the interlocking method that is used in Mesh pockets. You need to keep both of these tight.
Step 2: The Center Twist
Take the 64-inch piece of nylon and pull each side through the two middle leathers at the top in between the head and the leathers. Pull it tightly and even the sides up. Then take the two ends and pull them under the nylon in between the two leathers at the top, and, again, keep it tight. Now you will twist the nylon tightly about four times. To make a wider pocket, like Wide Traditional, add another twist. Once twisted, do the basic traditional knot, where you’d go over the leather and bring it up above where you went over with it. Keep going with this all the way down to the bottom of the stick.
There are two ways to finish the nylon at the bottom: you can cut them or tie them to the leathers. I’m not a fan of cutting into the leathers, so photos 2C and 2D show how I tie it off.
Step 3: The Outer Nylons
This is fairly simple once you learn the basic traditional knot, which you already used in the center twist. For the outer nylons, you’ll keep the leathers close to the sidewall. Continue all the way down, tie off and repeat for the other side.
EXPERT TIP:
Now, here’s my little trick: Put a ball and a butter knife in between the sidewalls and sidewall string. This will allow you to get a better pocket when you finish because the pocket has been strung for the exact depth of the ball. And then finish it up at the bottom of the stick.
Step 4: The Inner Nylons
For the inner nylons, you should string them at the same time; this will provide for an even pocket. Also, to interlock the nylons, you’ll have to do the knot on the opposite side of where you did it with the outer nylons/channel. Basically, you go from the underside, pull up through the other knot and back down again (instead of going over, down, then up). Continue with the ball in during this part, as it will help shape your pocket. At some spots, it will become hard to perform the knots while the ball is in place. To counter this, just pop the ball out, make the knot and then put the ball back in. Keep stringing until you reach the bottom and tie it off just like the center twist.
Single Twist Pita Pocket: #TheGopherProject Spotlight
For the first #TheGopherProject spotlight, how could I not pick someone who I consider the queen of stringers? I do not think there is anything Robin cannot do. Dye a head? Check. String a phenomenal traditional women’s pocket? Check. String mesh in any stick? Check. Since my traditional tutorial was geared towards the men, it’s only fitting that we go through the process of how to string Robin’s most favorite pocket. The Single Twist Pita Pocket. As we walk through this tutorial, Robin is going to jump in and give insight or tips along the way!
BONUS: Check out last week’s Monthly Mailbag on #TheGopherProject here!
Single Twist Pita Pocket Stringing Materials
1 women’s lacrosse head (this is kind of obvious….)
2 Leathers
3 22” pieces of Top String or Paracord (one for the top string and 2 for the runners)
2 24” sidewall strings
1 60” of crosslace for the middle section
2 84” of crosslace for sides
2 Shooters (Top string or paracord)
1 TradiTree (any women’s version will do)
1 Rubber Band
1 Lighter or rope cutter
1 need nose pliers
Knots: Same as the six diamond tutorial, all strings will start with a double over hand knot and end with a single knot.
Step 1. We’ll begin with the sidewalls. Start with the first hole and skip every other hole working your way to the bottom, tie off and you’re done.
(Robin Tip!) Be sure to keep two sidewall holes open on each side so you have a place to attach your shooters.
Step 2. Take two of the sections of top string/paracord and tie a double overhand loop knot. Make sure you leave slack so they cannot work themselves loose. Take the final piece and tie a double overhand knot and string through the first sidewall hole. Then loop through the first middle scoop hole and run the top string through the loop of one of the previous two you knotted. Loop through the same scoop hole and pull tight (see pic). Continue to the next scoop hole and repeat. Tie off on the other side.
Step 3. Attach the two leathers to the outer two scoop holes. You can use both slits in the leather but it’s common in women’s heads to only use the top slit and clip the other. Do not cut until the end of the string up. For this tutorial we are using Robin’s version for the Single Twist Pita Pocket.
Step 4. Install the Traditree. When it comes to women’s pockets, I prefer the Traditree since it allows me to control the tension and pocket depth. I do not attach like a normal Traditree I actually attach to the top of the head since it allows the pocket to be shallower. Place the leathers and runners and tie off at the bottom.
(Robin Tip) I string this freehand but I still own a Traditree and encourage everyone who strings to have one in their tool kit!
(Kevin Tip) I’m not Robin so I am using one….plus it’s the LTD one I got before she could at Laxcon last year…..score!
Step 5. From here on out, we are going to be looking at the back of the head. We’re starting in the center with the pita twists. Take the piece of crosslace and run it from the middle of the head to the sides.
Once the crosslace is perfectly centered in the middle of the head. Take the two ends and bring them behind the crosslace.
Make sure that each side is equal and give the string one twist.
Bring the string around the back of each runner (the top string or paracord) and loop around. Again, make sure each side is even and the twist is centered on the head. Now take the crosslace in your left hand and bring it to the right side. Right side to the left and do another interlock.
(Pic of head at this point)
Now for the next THREE twists, we are going to do the same step.
Take the crosslace and position it in the middle of the runners, you’re going to twist the crosslace once and make sure the twist lays perfectly in the middle of the runner and then interlock each side.
The following THREE twists, you are going to do the same step as above but do TWO twists instead of one.
(Robing Tip) I include three double twists at the throat to keep the center of the pita tight and to encourage high pocket placement. The single twists at the top flex around the ball and absorb impact better than the stiffer double twist. I want all crosslace near the throat to be tighter than that at the high pocket area.
We are going to end the last two interlocks there will be no twists, just bring the crosslace to the side.
Take the crosslace at the bottom and run it to the opposite throat hole (where the runners are already tied).
Now, let’s double check the middle section. Are all the interlocks even on each side? Is the Pita center track in a perfect line? If not, go back and adjust the tension. Now relax the hardest part is done!
Step 6. The sides! Take one section of the crosslace and center in the middle of the leather. (Robing Tip) I use an interlock knot at the top of the leather to ensure that the crosslace is as tight as possible. The crosslace nearest the scoop should be a bit tighter than that which makes up the body of the pocket to decrease the chance of the ball catching lip on a hard follow through.
From here we are going to be working both sides of the leather (instead of doing one row and then down the other) to make sure we’ve got proper tension.
Take the crosslace and interlock to the runner side and the other side to the sidewall. Meet back in the leather and create and interlock with both sides. It’s important to set the interlock properly.
Make sure each leather interlock lays in the middle of the runner interlocks. Work your way down and after the last interlock (you’ll have eight interlocks on the leather sides), run both pieces of crosslace to the sidewall hole and tie off.
(Robin Tip) Personally I string the medial sections of crosslace first and then the lateral sections after while working in pocket shape with my hand.
(Kevin Tip) Follow Robin’s tip if you are stringing without a Tradi!
Repeat on the other side.
Step 7. Shooters! Take one shooter and either on the second or third sidewall head (it needs to go through the head and not wrap around) and push one end through and even each piece. A good point of reference is that the shooter should sit between 1st and 2nd interlock.
Simple weave the shooter across the head and tie off at the opposite end.
The second shooter is going to form a “U” and sit on the interlock below the 1st.
(Robin Tip) I find that stacking the shooters so that there is minimal space between them provides a good hold-to-release ratio. The U shooter helps with accuracy (I recommend using it over a straight! It was taken out of the men’s game for a reason…), and combined with the straight shooter provides a deep enough ramp to hold the ball vertically but still release predictably.
Once you located where the shooter is going to sit, go down three or four interlocks and put the shooter through the sidewall. We’ll weave it up to the section and back down the other side. If you’ve never done this before, don’t worry, it’ll take a minute or two to get the hang of it.
Step 8. Review. Make sure your interlocks and tension is good. Are the shooters right? Double check everything before you cut and burn any excess strings. Clip the extra section of leather at the top and remove the Traditree.
Take a ball and make sure it’s at legal depth, if not, adjust, put the head on a shaft and hit the wall.
Voila! Your Single Twist Pita Pocket is complete!
How to Make Pita Pocket Bread : 13 Steps (with Pictures)
Introduction: How to Make Pita Pocket Bread
Cooking from scratch is a great way to reduce the impact on the environment and resources reducing waste and energy. This tutorial is how to make a pita salad sandwich using this fantastic pita bread recipe! What is great about this pita salad sandwich is it is healthy without all the bread that is in a regular sandwich and no processed meats! Imagine how convenient placing a salad into a wide opening like this!
This is how I converted a pita bread recipe using a bread machine to a recipe using a food processor or by hand. The results were amazing and delightful! This recipe far exceeded my expectations with showy soft and plump results adding a different approach to a regular salad. I have been trying to make fresh baked pita bread for a long time. I could never make the soft version until last night! I was ecstatic because I use pita bread as a main staple. Now I can make my own fresh and tasty pita bread and so can you! I hope I took pictures that will motivate you to bake a fresh batch for yourself!
Add TipAsk QuestionDownload
Step 1: Salad Recipe
This is an excellent way to use up left over vegetables! This is what I used to make my salad but almost any salad will compliment this bread.
Individual serving:
Wash all vegetables:
1 Handful of washed (fresh) spinach leaves
Tomato chopped
Cucumber chopped
Bell pepper chopped
Onion
Shredded carrot
Several slices yellow squash
Parmesan cheese
Few Black olives
1 Lemon wedge
1 Slice lime for garnish.
Add TipAsk QuestionDownload
Step 2: Mix the Salad Ingredients
Mix the salad ingredients well.
- Season to taste.
- Place salad in the bread with no dressing until served.
- Use a dressing of your choice or use the juice from a lemon.
- Serve in a homemade pita pocket using this fabulous pita bread recipe and garnish with a lime slice.
Add TipAsk QuestionDownload
Step 3: Original Pita Bread Machine Recipe
Here is the link and the recipe where I found the pita bread recipe: http://momgrind.com/2009/02/26/pita-bread-recipe-homemade-soft-and-fabulous/.
Written copy:
- 1-1/4 cups warm milk (I use 2%)
- 2 TBS olive oil
- 3 cups all purpose flour or bread flour (plus up to 1/4 cup for flouring the work surface)
- 1-1/2 teaspoons sugar
- 3/4 teaspoon salt
- 1 teaspoon active dry yeast, rapid rise yeast or bread machine yeast
- Directions
- 1. Add ingredients to a 1-1/2- or 2-pound bread machine according to manufacturer’s directions. Select dough cycle. When cycle is complete, remove dough from machine. Cover with a clean tea towel and let rest for 10 minutes.
- This is what the dough looks like when you remove it from the machine. It’s soft and elastic – almost spongy:
Add TipAsk QuestionDownload
Step 4: Food Processor/ Hand Method
My Recipe:
Ingredients:
- 1-1/4 Cups warm milk
- 2T Olive oil
- 3 Cups all purpose bread flour
- 1-1/2 teaspoons sugar
- 3/4 teaspoons salt
- 1 Package active dry yeast
- 4 Tablespoons wheat germ
Add TipAsk QuestionDownload
Step 5: What You Need
You will need basic baking stuff such as bowls, measuring cups, measuring spoons, wooden spoons, rolling pin, and a baking sheet.
- Mixer or food processor.
- Oven.
- Rolling pin.
Add TipAsk QuestionDownload
Step 6: Measure Ingrediants
Measure all the ingredients:
Here is the list again:
- Ingredients:
- 1-1/4 Cups warm milk
- 2T Olive oil
- 3 Cups all purpose bread flour
- 1-1/2 teaspoons sugar
- 3/4 teaspoons salt
- 1 Package active dry yeast
- 4 Tablespoons Wheat germ
Add TipAsk QuestionDownload
Step 7: Warm Milk
Warm Milk:
- Bring a pan of water to a boil and turn off the heat.
- Place another smaller pan inside the pan of water and add the milk, wheat germ, and oil and let warm up until luke warm.
- Remove the milk and pour it into a measuring cup.
Add TipAsk QuestionDownload
Step 8: Prepare the Yeast
Here is how to prepare the yeast:
- Add the yeast to a bowl and add 1/2 milk mixture to it, dissolving the yeast.
- When the yeast is dissolved add the sugar.
- Let it set for 10-20 minutes until it becomes bubbly.
Add TipAsk QuestionDownload
Step 9: Mix the Flour
Here is how to mix the flour and yeast in the food processor:
Please Note: You may use a standard mixer to mix the dough following these same instructions until it becomes too difficult to mix. Then hand knead to complete the process.
- Pour 1/2 of the flour and salt mixture into the processor and make a well in the center.
- When the yeast mixture is ready add it to the middle of the flour mixture.
- Mix well and then let set for 5-10 minutes then:
- Mix on low speed and slowly alternate pouring the remaining flour and milk mixture into the processor until it is thoroughly mixed and elastic.
- Check the dough.
 If it is sticky you should add small amounts of flour and mix again until it is not sticky. Adding too much flour will make them hard. Be sparingly with the flour. It should look like this: Elastic and kind of light.
 - Remove the dough from the processor and form into a small smooth ball.
- Oil a large bowl and place the dough in it and cover with a damp cloth until double.
Add TipAsk QuestionDownload
Step 10: After Dough Has Risen
After the dough has risen double in size:
- Punch it down.
- Flour a work surface and roll the dough into a log. If it is too sticky then add a very small amount of flour if you add too much flour it will make the bread hard, be sparingly.
- Break off pieces to form into a flat round circle about 1/8 to 1/4 inch thick 5-6 inch circle. Don’t make them thick, the secret to making them puff is making them thin.
- Lay out on a baking sheet.
- Cover with a damp towel until they puff up. (Place them in a warm area away from drafts.)
Add TipAsk QuestionDownload
Step 11: Pre-heat Oven and Lower Rack
- Pre-heat Oven to 500 degrees.
- Adjust oven rack to the lowest setting.
- Place the bread on an ungreased baking sheet and bake for 4-5 minutes or until puffed.
- If the bread has not puffed up in 5 minutes don’t cook them any longer, they won’t puff up.
- The extra time will dry it out.
- Remove from oven.
- Cool on wire rack and cover with a damp cloth, until cool.
- Place them in zip lock bags to keep fresh.
- Repeat with remaining pita rounds.
Add TipAsk QuestionDownload
Step 12: Keeping Pitas Fresh
The salad can be placed in the pita bread with no dressing and won’t get soggy unless you wait more than 4 hours to eat it.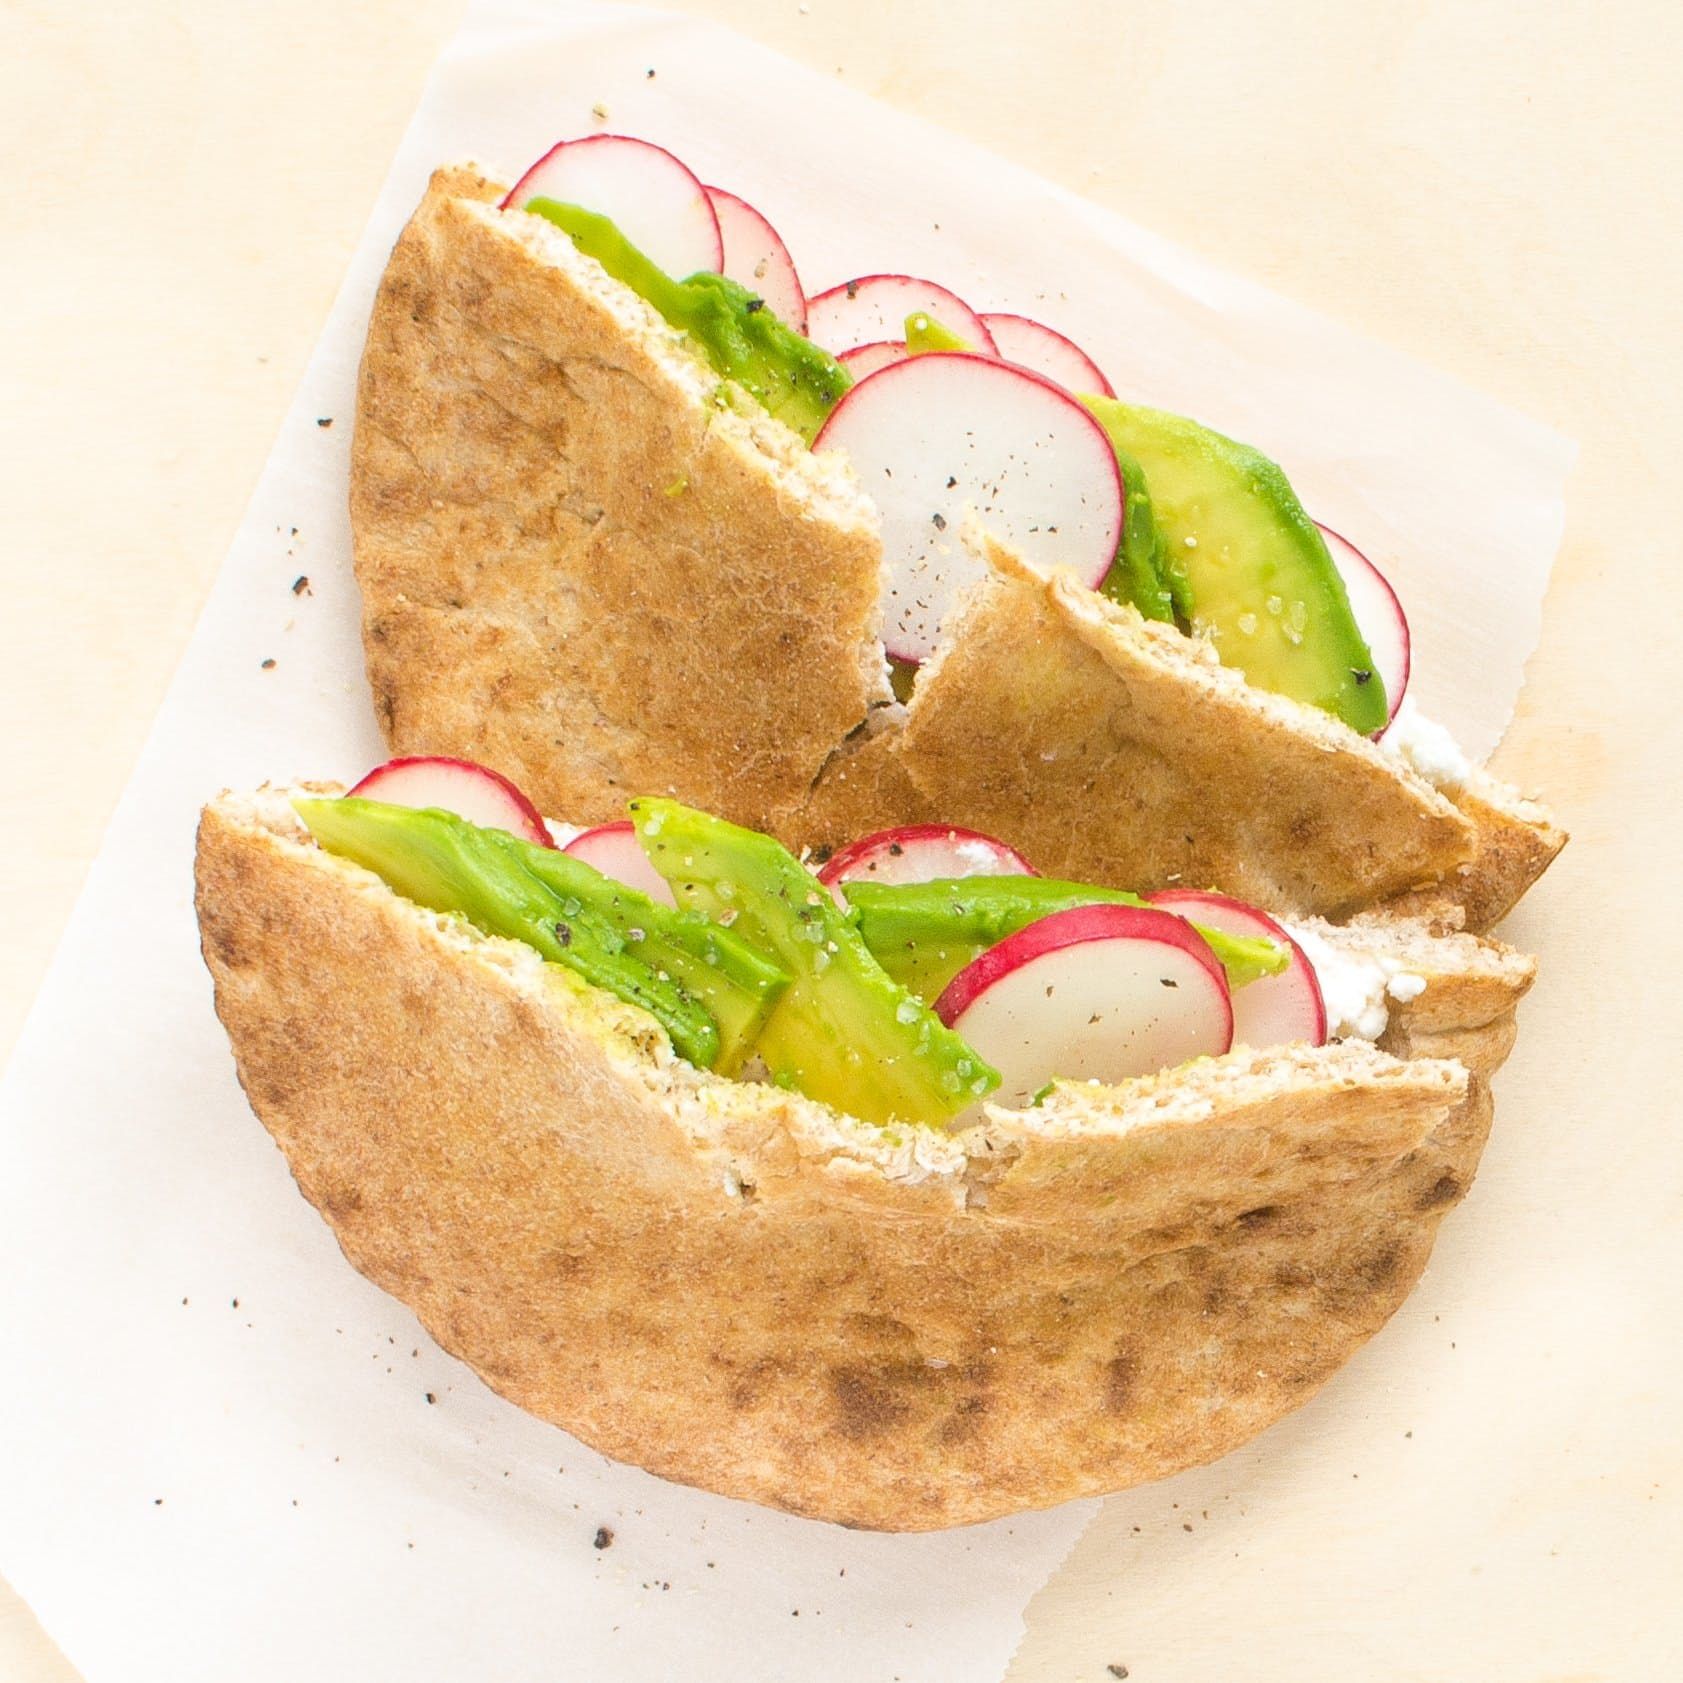 Naturally it would be best to pack the salad separately but sometimes you have to resort to what will be convenient.
They are best eaten right away but they do freeze well. Warm a single frozen pita in the microwave, on a paper towel, 10-15 seconds on each side, for a fresh out of the oven taste and texture.
Add TipAsk QuestionDownload
Step 13: Sunshiine’s Final Thoughts
Pita bread sandwiches are very good. I used to take them to work and my co-workers always commented how good they looked and how fresh they smelled! My pita bread did not puff as nicely as the original recipe because my yeast was a little old. I am pleased with this new recipe! It just makes me shiine! I will be making this on a weekly routine along with my hummus and tabbouleh salad. The Internet offers push button answers to all our needs. Instructables will have a recipe now for a great pita bread! Thank you for stopping by and do have a splendorous day!
Sunshiine
Add TipAsk QuestionDownload
Be the First to Share
Did you make this project? Share it with us!
I Made It!
Recommendations
Chef John’s Pita Bread | Allrecipes
Almost perfect first time! I just watched the video for the first time – saw why I had to use a knife to make pockets! If you do not smush bubbles you will not get a good pocket! I used an electric fry pan @400 degrees as alternate cooking method (from another review thank you!). I used 100 degree oven to rise dough for 2 hours. Browning was faster using electric pan than times in instructions – went by browning color. Flavor so good I put a little butter in one and had for a yummy snack!
I tried making pita bread in the past and every time I failed miserably so of course I was skeptical that I could successfully prepare pita bread using your instructions (It’s not you—it’s definitely me). Call me a bit overdramatic, but I literally teared up when my first batch came off the stove browned to perfection and actually sturdy enough to open as a pouch. I guess I just had to watch someone else make them before giving it another shot. Thanks from the bottom of my heart. This is now my go-to recipe from now on. Now if you’ll excuse me, I have a batch of falafels to make to go along with these bad boys.
SO TASTY! I see a lot of complaints about non-puffs, well, mine didn’t either but they tasted better than any flatbread I’ve ever bought in my life. I started smooshing the bubbles on the last few I cooked, and got much better results. You gotta smoosh! It spreads the air through the sealed pita and really helps with that pocket.
As for the pro-bakers, that works, but grilling it just gives it that to die for flavor that you just can’t get any other way!
It is a simple and fool proof recipe. I hand kneaded the dough because I don’t have the dough mixer attachment. It took me 15 minutes to knead the dough and I used about 2 table spoon flour which I sprinkled on my kneading board. All the pitas puffed and formed pocket. Since I don’t portion equally, I noted pockets of the thinner bread is more fragile than the thicker bread. I suggest if you want to form good pocket for filling, make a thicker bread. But if you want to serve as taco shell, make a thinner bread. I had it for my brunch to go with mayo and fish. Fold it up, just like soft taco. Yum….yum.
I follow the same steps except the last one. I preheated the oven to 500 degrees. Placed the rounded dough in a heavy baking sheet, as much as it takes (depending on the size). Baked for few minutes (about three minutes depending on your oven) Got the bread out and put on towel for few minutes.
Linda T
Chef John’s Pita Bread
Allstar
Really tasty bread. Mine didn’t puff up like the video but I didn’t have a stand mixer to make these. I did get a pocket but I had to sort of help open it up a little..
This was a wonderful recipe! The dough was so simple to make and I easily found a way to make and eat dinner while waiting the two hours for it to rise. When I placed the pitas in my skillet it puffed up so nicely!! I was expecting a HUGE fail but now I’ve completely fell in love with these pitas and will be making them every weekend! Did I mention they tasted amazing too? Light, fluffy, and so bread-y, they were exactly what I was looking for in a pita!
Great recipe! The only thing I can’t figure out is how Chef John rolls out the pitas with as little flour as he does. My rolling pin wants to stick. But, the flavor is great! People, if yours aren’t puffing up, it’s not that big of a deal. Cut your pitas into halves, and then run a paring knife down the middle of the insides, being careful not to cut through to the outside. I haven’t had a wasted pita yet by doing it this way. Just go slow and be careful with your knife.
I love bread. Lately I’ve been loving flat breads, andy I’ve been trying to eat less sugar, so I was happy to try this recipe and stop having to buy pita bread every week. Watching the included video is extremely helpful. I folowed the recipe, and used my kitchen aid with the dough hook and my pita turned out perfect. I’m using this as a starter recipe and will probably make changes depending on my mood. But will definitely make this as is again. In a lot of the reviews I noticed people have been having trouble getting the poof, and I think rolling the dough thinner might help with that. My son was “helping” me and the ones he rolled out were a bit on the thicker side and although they tasted delicious, they didn’t poof and i have to cut a pocket in. Once he wandered off, I rolled the dough to be thinner and they all proofed! Best pita ever.
I followed this recipe to the letter and my pitas didn’t puff up. I guess I’m going to have to find another pita recipe.
5 Mins Air Fryer Pita Bread Pizza + Tutorial {Vegetarian}
Home » All Recipes » 5 Mins Air Fryer Pita Bread Pizza + Tutorial {Vegetarian}
Published: · Modified: by Bintu · This post may contain affiliate links.
5 Mins Air Fryer Pita Bread Pizza is just the thing to serve up as a quick and easy weeknight supper, kid-approved snack or weekend lunch. All it takes is 3 everyday ingredients and almost no effort to enjoy delicious cheesy pizza goodness. Suitable for vegetarian diets. Post includes Weight Watchers points.
Post may contain affiliate links. For more information, check my disclosure
Pizza in the air fryer? Yeap. This 5 Min Air Fryer Pita Bread Pizza is fast, easy and totally delicious. The air fryer gives you all the melty cheesy goodness you expect from pizza, with a delightfully crisp and crunchy pita bread crust.
With only 3 easy everyday ingredients, a few mins to assemble, and just 5 more to cook you will have a perfect weeknight supper, kid-friendly lunch, or satisfying after-school snack. Air Fryer Pizza is sure to become a much-requested family favourite.
Why You’ll Love 5 Mins Air Fryer Pita Bread Pizza
- This recipe is highly adaptable. Keep it simple with just cheese and sauce, or pile on the toppings of your choice. My personal favourite combination is olives and artichokes, which tastes amaaaaaazing. You can also use Naan or other flat breads instead of the pita bread.
- Air Fryer Pita Bread Pizza is soooooo easy, the kids can make it themselves. Just set out the ingredients, sit back and relax as your mini chefs get creative and have fun making their very own meal (you’ll need to help get the pizzas in and out of the air fryer of course).
- A perfect make ahead meal prep solution! You can assemble these pizzas ahead of time, wrap and store in the freezer. Then when you’re ready to cook, simply throw the pizza in the air fryer, without needing to defrost! Do plan to add 2-3 mins of cook time when cooking from frozen.
Why Make Personal Pizzas in the Air Fryer?
Folks, the air fryer really does make it incredibly easy to make delicious personal pizzas that are ready to eat in almost no time at all.
This is because air fryers circulate heat all around the food, which means your pita bread pizza cook in the air fryer much faster than the oven. And with absolutely no oil at all, which means these cute little pita bread pizzas contain less calories and fat than traditional pizza.
The mini chefs and their friends just looooooove making their own personal pizza in the air fryer. They have so much fun assembling and adding as much or as little of their favourite toppings. Plus each kid having their own personal pizzas means no more arguing over who got the larger slice. Which is sweet music to this mom’s ears. #airfryerforthewin
Ready to learn just how fast and easy it is to make pita bread pizza in the air fryer? Then gather up your ingredients and I will show you….
How To Make 5 Mins Air Fryer Pita Bread Pizza
- Preheat the Air Fryer to 350 F / 180 C.
- Assemble the pizza by spreading tomato sauce on top of pita and sprinkling with mozzarella cheese. Add extra toppings, if using.
- Cut out a piece of baking parchment and add to the air fryer basket.
- Place the pita bread pizza on top of the parchment.
- Cook for 5-8 mins, checking for doneness once during cook time.
Cook Time for Air Fryer Pizza
Since air fryer temperatures can vary depending on the make and model, this recipe includes a range of suggested cook times. I recommend starting with less time, checking for doneness and then adding more time if needed.
We have found that 5 mins gives us the level of doneness that we prefer. However, you can cook yours for a few mins more till the cheese is as melty and golden as you like.
Tips for Making Air Fryer Pizza
- You can make Air Fryer Pizza using either whole wheat or regular pita bread.
- If you have a smaller air fryer, cook the pizzas one at a time. But if your air fryer is larger you can cook both at once (just make sure they are not overlapping).
- Try swapping out the pita bread for Naan or slices of French bread. Even Bagels or English muffins work great!
Pita Bread Pizza Topping Variations
3-ingredient Air Fryer Pita Bread Pizzas are sooooo tasty. But you can easily customize and add any number of toppings, different cheeses, and sauces to make this air fried pita bread pizza your own. Here just are a few of the many possibilities:
- Hawaiian Style: pineapple + ham
- Mediterranean: feta cheese + sun dried tomatoes
- Meat Lovers: pepperoni + sausage + bacon
- White Pizza: ricotta cheese + mozzarella cheese + garlic
Can I Cook Air Fryer Pita Pizzas From Frozen?
Yes you can which makes them a perfect make-ahead meal prep solution! You can assemble these pizzas ahead of time, wrap and store in the freezer. Then when you’re ready to cook, simply throw the pizza in the air fryer, without needing to defrost!
Do plan to add 2-3 mins of cook time when cooking from frozen.
Can I Reheat Pizza in The Air Fryer?
Using the air fryer is a fast and easy way to reheat leftover pizza. It returns the cheese to a nice bubbly, melty state whilst keeping the crust nice and crisp (no soggy bottoms here!). Just follow these simple steps:
- Set your air fryer to 350 F, or to 325 F for a very thin crust pizza.
- Depending on the size of your air fryer, you can reheat a single personal pizza, or 1 – 2 slices of a full-sized pizza at a time.
- To ensure the pizza heats evenly, make sure the slices do not touch or overlap.
- Cook the pizza for 3-4 mins, then check for doneness. Continue to cook in increments of 1-2 additional mins until your pizza is thoroughly reheated.
Air Fryer Pizza Weight Watchers Points
There are 9 Freestyle Points in one Air Fryer Pita Bread Pizza.
What To Serve With 5 Mins Air Fryer Pita Bread Pizza
For a perfect lunch or hearty after school snack, serve up these Air Fryer Pita Bread Pizzas with a handful of sweet and Crunchy Air Fryer Apple Chips.
Air Fryer Pizza also makes a delicious side dish. Try pairing with my Flavourful Sheet Pan Prosciutto Wrapped Chicken.
More Air Fryer Recipes
Air Fried Hot dogs.
More Kid-Approved Air Fryer Recipes
Air Fryer Blueberry Hand Pies.
Golden Crispy Air Fryer Fish.
Crunchy Air Fryer French Toast Sticks.
Thank you for reading my Air Fryer Pita Bread Pizza recipe post. And please come visit again as I continue dreaming up recipes, traditional African recipes, African fusion recipes, Sierra Leone recipes, travel plans and much more for you. Thanks for supporting Recipes from a Pantry, UK food blog.
Get the 5 Mins Air Fryer Pita Bread Pizza Recipe:
Don’t forget to tag #recipesfromapantry on Instagram or Twitter if you try 5 Mins Air Fryer Pita Bread Pizza! It is really, really awesome for me when you make one of my recipes and I’d love to see it. You can also share it on my Facebook page. Please pin this recipe to Pinterest too! Thank you for reading Recipes from a Pantry.
Print Recipe
]]>
5 Mins Air Fryer Pita Bread Pizza
5 Min Air Fryer Pita Bread Pizza is fast, easy and totally delicious.
Prep Time5 mins
Cook Time5 mins
Total Time10 mins
Course: Dinner, Lunch, Snack
Cuisine: American, Western
Servings: 2
Calories: 292kcal
Instructions
Preheat the Air Fryer to 350 F / 180 C.
Assemble the pizza by spreading tomato sauce on top of pita and sprinkling with mozzarella. Add extra toppings, if using.
Cut a circle out the baking parchment and add to the Air Fryer basket.
Place the pita bread pizza on top of the parchment.
Cook for 5-8 mins, checking for doneness once during cook time.
Notes
Cook Time for Air Fryer Pizza
Since air fryer temperatures can vary depending on the make and model, this recipe includes a range of suggested cook times. I recommend starting with less time, checking for doneness and then adding more time if needed.
We have found that 5 mins gives us the type of pizza we prefer. However, you can cook yours for a few mins more till the cheese is as melty and golden as you like.
Tips for Making Air Fryer Pizza
- You can make Air Fryer Pizza using either whole wheat or regular pita bread.
- If you have a smaller air fryer, cook the pizzas one at a time. But if your air fryer is larger you can cook both at once (just make sure they are not overlapping).
- Try swapping out the pita bread for Naan or slices of French bread. Even Bagels or English muffins work great!
Weight Watchers Points in Air Fryer Pizza
There are 9 Freestyle Points in one Air Fryer Pita Bread Pizza.
What To Serve With Air Fryer Pita Bread Pizza
For a perfect lunch or hearty after school snack, serve up these Air Fryer Pita Bread Pizzas with a handful of Sweet and Crunchy Air Fryer Apple Chips.
Air Fryer Pizza also makes a delicious side dish. Try pairing with my Flavourful Sheet Pan Prosciutto Wrapped Chicken.
Nutrition
Calories: 292kcal | Carbohydrates: 33g | Protein: 15g | Fat: 10g | Saturated Fat: 5g | Cholesterol: 35mg | Sodium: 696mg | Potassium: 175mg | Fiber: 1g | Sugar: 1g | Vitamin A: 395IU | Vitamin C: 1.6mg | Calcium: 272mg | Iron: 1.2mg
How to Make Pita Bread at Home
Today we are talking bread, but not just any bread, we are talking about pita bread. Pita bread originated in the middle east and is famous for its inner pocket, which is perfect for stuffing. While I have tried many pita recipes, it took me FOREVER to figure out how to adapt pita to the home kitchen. Now I can consistently get thin, pliable pita bread at home and you can too!
Thank you WonderMix for sponsoring today’s post. To learn more, check out their website at WonderMix.
Back in college, my best friend and I had an almost weekly habit of chicken shawarma take out.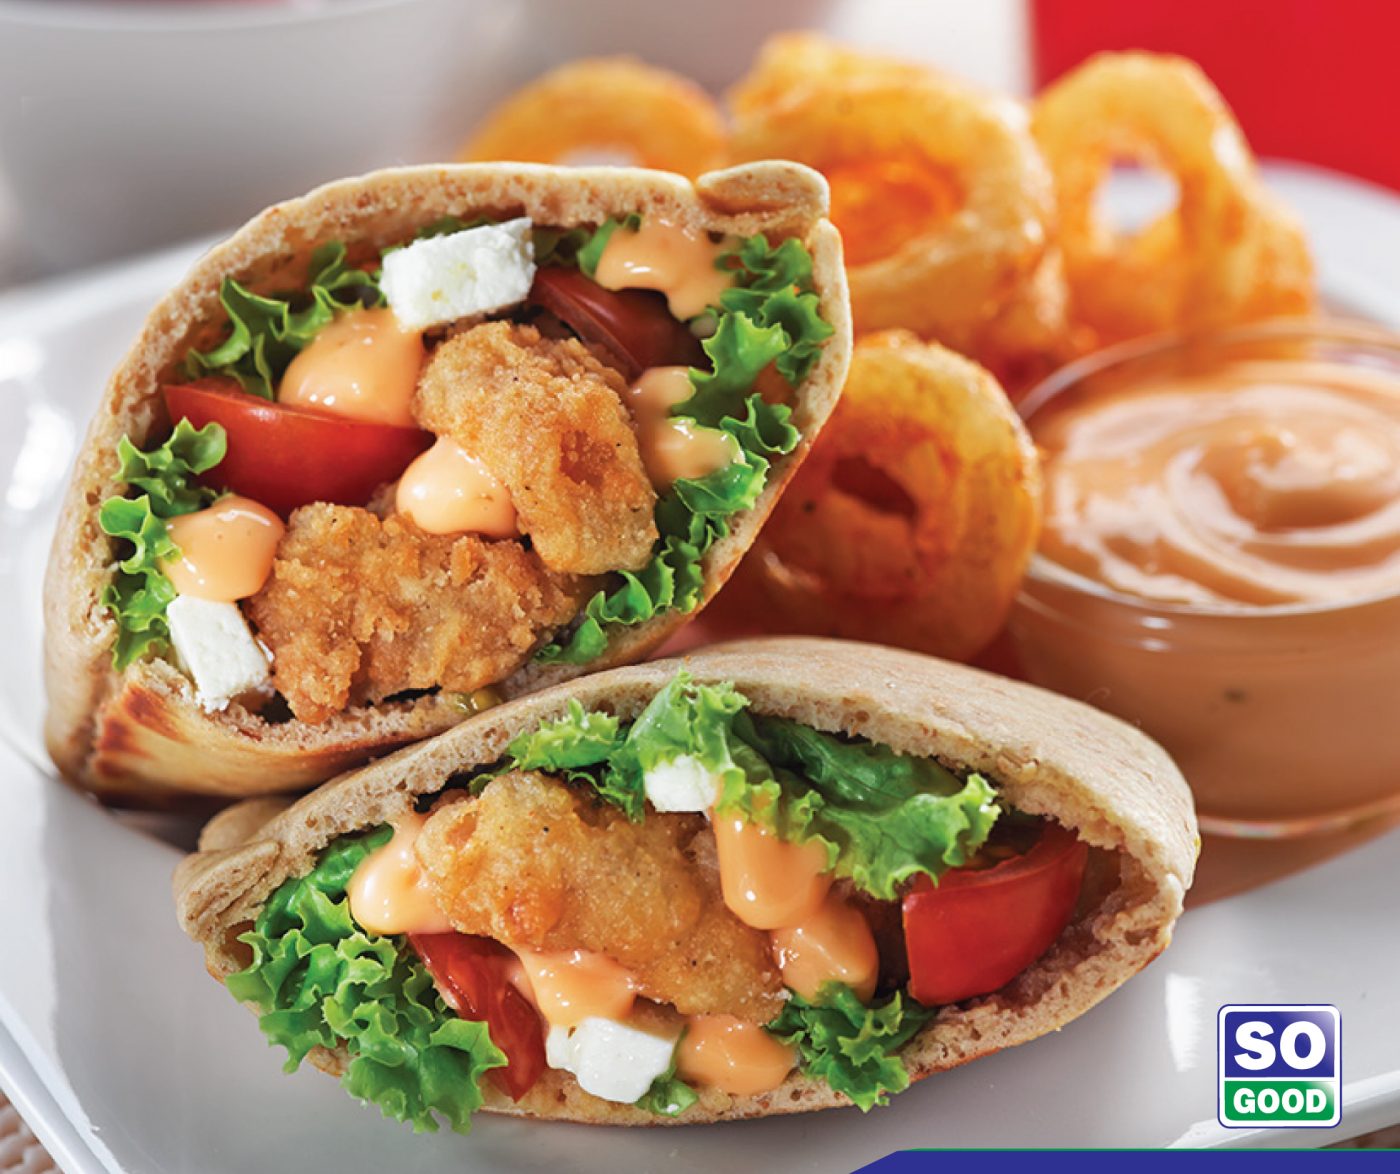 To this day is still one of my favorite meals which I now call Girls’ Night Chicken. The one element of that dish that took forever to figure out, was the perfect pita bread.
I wanted a pita bread that is thin, pliable, and a little bit chewy. Also, it needs to puff up while baking to create a perfect pocket that is strong enough to hold the filling without breaking. While this is easily achieved in 700 – 800 degree wood burning stove, it’s not so easy at home.
Over the years I tried a dozen different recipes. I have tried the oven method, the pizza stone method, the stovetop method, and the buy it from the store because I give up method. All except one of them caused my smoke alarms to go off, but none resulted in a perfectly puffed pita. Until now.
Making Pita Bread in the Home Kitchen
I recently picked up a copy of the 2010 version of James Beard’s “Beard on Bread” and I had a minor epiphany: Instead of trying to recreate the wheel, why not start with a recipe that actually works and adapt it? After following Beard’s recipe to the letter I got 6 of my 8 pitas to puff, and I was ecstatic! I could make pita bread!!
The biggest problem is that his recipe was written to prepare by hand – no stand mixer. While it’s not a total deal breaker, it takes a lot more energy to make bread without the help of modern kitchen appliance. Also, his pita turned out a lot thicker than what I wanted.
So, I went back to the kitchen and started making changes. It took about a year, but I have finally figured out a method that leaves me with thin, soft, pliable pita that puff in my home oven.
[optinform]
Using a WonderMix Mixer
The biggest difference between my version and James Beard’s version is that mine has been created for the stand mixer. While I love getting my hands messy when making most doughs, the results are more consistent with a stand mixer.
WonderMix sent me a complimentary mixer blender combo for finalizing this recipe. The WonderMix stands up to heavy doughs without dancing all over my countertop, mixes quickly and efficiently, and creates less of a mess. It’s a powerhouse that is built to last, but at a price that’s a little easier on your wallet.
For this recipe I use the dough hook with the dough divider in place. The divider cuts through the middle of the dough, which helps this smaller batch of dough mix more evenly. Together with the dough hook they knead the dough in only five minutes. By hand it would take closer to ten.
Working with Yeast Dough
The first step to great results with a yeast dough is to ensure your yeast is alive and active. I use instant or bread machine yeast. Yeast is often purchased in little paper packets, but it’s also often available in a glass jar. If the yeast is stored incorrectly, it can die before it’s expiration date. I’ve had a recipe fail ONCE due to dead yeast, so I test my yeast before adding the other ingredients.
To do so, simply add the yeast and sugar to the water in the recipe. Since we are proofing the yeast, it should be added to water between 105º and 110º degrees. This temperature allows the yeast to get a jumpstart on doing its job, without being hot enough to kill the yeast. The sugar feeds the yeast and, if all goes well, the yeast will start foaming. Once it does you are good to start adding the other ingredients.
What flour makes the best pita bread?
I use an unbleached, artisan bread flour for my pita bread. Yes, I am aware that using about 20% whole wheat flour makes for a more puffable pita recipe. However, the original I’ve been trying to recreate was a white bread pita and I prefer the texture of an all white bread, so that is our goal.
While you can substitute with an all purpose flour, bread flours have a higher level of protein. This helps with the gluten development and adds strength to the bread. In the case of pita, which should be both chewy and strong enough to hold the filling, the extra protein does make for a better pita.
Volume vs. Weight in Baking
When it comes to baking, measurements by weight are much more accurate than the volume measurements many of us Americans grew up using. So much more accurate that the more time I spend baking, the more I rely on weight measurements.
A basic kitchen scale runs about $15 and could mean the difference between perfectly puffed pita and a pocketless pita. I have listed estimated volume measurements, but I think relying on volume measurements is one reason my earlier pita struggled to puff.
In addition to weighing the flour, I also weigh the dough balls when dividing up the dough. Pita bread cooks quickly and requires a hot oven. Twenty seconds can be the difference between undercooked and overcooked pita. Having the dough balls all the same size means they will cook at the same rate and increase your chance of successful pita puffing.
Tips and Tricks
I’ve made many mistakes in figuring out how to make homemade pita bread, but I did it so that you can make yours right the first time. Here are the most important tips that I’ve learned along the way.
- Roll the pita evenly. Thicker or thinner sections can prevent puffing.
- The extra 15 minute rest between rolling is ESSENTIAL to getting the dough as thin as possible.
- Don’t crowd the pita onto the baking sheet. They need to lay perfectly flat, without rolling or bunching at the edges.
- The hotter the oven = the faster the pita cooks = the thinner the result.
- After you remove the first pita, close the oven door for a minute or two to allow the temperature to come back up before baking the next pita.
- Finished pita will be firm to the touch. It should be immediately wrapped in a clean tea towel to trap the steam and help soften the pita bread.
- If your pita bread cooks until it turns golden or gets char marks, it will get crisp and crunchy instead of soft. If you really want char marks, finish off your pita in a cast iron skillet over high heat.

Recommended Kitchen Tools
We are a participant in the Amazon Services LLC Associates Program. As an Amazon Associate I earn from qualifying purchases. For more recommended kitchen tools, check out my Kitchen Essentials page.
Homemade Pita Bread Recipe
This recipe for how to make pita bread at home will guide you through all the steps needed to make soft, pliable, thin, pita bread that is perfect for stuffing with your favorite fillers. Whether it’s Girls’ Night Chicken Shawarma, a BBQ Chicken salad on the go, or bacon and eggs for breakfast, this pita is strong enough to stand up to your fillings, but soft enough to not fall apart.
This pita can be stored at room temperature for 3 – 5 days in an airtight container, or frozen for longer storage. If your pita seems a bit stiff after thawing out, wrap it in a damp (not wet) towel and heat it for a few seconds in the microwave.
If this is your first time working with yeast, go practice with my English Muffin Bread recipe first. It’s much more forgiving and will get you comfortable with making bread at home. For other great bread recipes, check out my soft pretzel knots or see my entire bread recipe collection.
If you like this recipe, please give it a FIVE STAR rating and share with your friends!
Ingredients
- 30 ounces bread flour (about 6 cups)
- 16 fluid ounces warm water (2 cups)
- 0.5 ounce instant yeast (4 1/2 tsp or 2 packets)
- 0.08 ounces sugar (1/2 tsp)
- 0.5 ounce kosher salt (1 TBSP)
- 2 fluid ounces olive oil (1/4 cup)
- 0.5 fluid ounce olive oil (1 TBSP)
Instructions
- In the bottom of the stand mixer add warm water (105 – 110 degrees), yeast, and sugar. Allow to sit until yeast becomes foamy, 3 – 5 minutes.
- Add 1/4 cup of olive oil, salt, and 10 ounces (2 cups) flour. Mix to combine, then scrape down sides of bowl.

- Add another 10 ounces (2 cups) of flour, mix to combine, then scrape down sides of bowl.
- Add another 5 ounces (1 cup) of flour. Mix on low. With the mixer running, add the last 5 ounces (1 cup) of flour a bit at a time. Watch for the dough to pull from the edges. Once it’s no longer sticking, stop adding flour and run the mixer on low for 5 minutes to knead the dough. Dough should have an elastic consistency that resists pulling and springs back easily.
- Place dough in a large bowl and cover with the additional 1 TBSP of olive oil, turning to coat completely. Cover with a clean kitchen towel and place in a warm spot to rise 1 1/2 – 2 hours or until doubled in size.
- Punch down dough and turn out onto a floured surface. Divide into 8 equal sections**. Shape into balls and rest for 30 minutes.
- Place a baking sheet on the second to lowest rack and preheat oven to 500 degrees***, or the hottest it will go.
- While oven heats, start rolling the pitas out to 1/8″. It may resist rolling the first time. Move on to the next one and let the first one rest. After about 5 minutes of rest roll go back and roll the first one again. You may have to roll and rest the pita two or three times to get it to 1/8″.
- Once the oven and baking sheet are hot, re-roll the first two pitas to get them as thin as possible. They will double in thickness as they bake. Quickly transfer them to the hot baking sheet and close the oven door. Bake 4 minutes. The pita will puff up like little pillows, but DO NOT OPEN THE OVEN while they are baking.
- Remove the finished pita and wrap it in a clean tea towel. Finished pita will be firm to the touch, but the tea towel will trap the steam and help soften it.
- Let the oven door stay closed a minute or two to regain heat loss while you re-roll the next two pitas. Repeat the re-roll and bake steps with the remaining pitas, placing them in the tea towel with the other baked pitas.
Notes
*Baking time based on baking two pitas at once, with a 2 minute rest period to let the oven reheat.
**For best results weigh the sections of dough.
***If your oven does not safely reach 500 degrees, you can adjust the temperature down and add time. Pitas baked at a lower temperature may not puff as evenly and they will be thicker than pita cooked at 500 degrees. Do not bake at less than 450 degrees. For 8 pitas:
- 475 degrees = 5 minutes
- 450 degrees = 6 minutes.
Nutrition Information:
Yield: 16
Serving Size: 1/2 pita
Amount Per Serving:
Calories: 232
Did you make this recipe?
Please leave a comment on the blog or share a photo on Instagram and don’t forget to #reneenicoleskitchen
Whole Wheat Pita Pockets | Natural Chow
Making something delicious doesn’t have to be hard, complicated, or cost a lot of money. All it takes is a little determination, and a great recipe. And boy is this a great recipe. Whole wheat pita pockets are practically a staple food in my house. We eat them on a weekly basis. And with such simple ingredients, they’re so inexpensive to make.
You can do all kinds of things with pita pockets. One thing I love to do is use the rolled and risen dough as pizza crust, for individual pizzas! It saves time and it’s even whole wheat.I usually like to put tuna salad in them, and I’ll throw in a little handful of sprouts if I remember to start them. (For helpful tips on making your own sprouts, I’ve located a quick and easy guide here.) Other times though I’ll cut it all the way open and slather on some creamy peanut buttery goodness, some raspberry jam (did you know that raspberry has a P in it?), and call it a PB & J Sammich. Heck, if I feel like it, I’ll use it like a tortilla and toss in some Mexican cheese, homemade “refried” beans, a little lettuce, you know, the works. I can guarantee that they are not as intimidating to make as others may make it sound. They’re actually quite easy. I even have a little tutorial here for you!
Pour the warm water into a medium-sized bowl. Sprinkle the yeast and sugar on top of it. Let rest 2 minutes.
After the yeast mixture is done activating, add the whole wheat flour and salt.
And gently mix it (to prevent making a mess all over the table after you just washed it).
And the resulting mix will be very, VERY wet. But don’t worry, we’ll fix it in a second.
So we’re gonna add a leeeetle more flour to turn it into a dough instead of a thick batter.
Now this is a pretty sticky dough still so we’re not quite done yet.
Flour a work surface. This can be a counter, a tabletop, a cutting board, or whatever flat surface you got lying (or sitting, rather) around. Just flour it and plop your pita dough on it.
Now we’re gonna knead it for like two minutes until the dough comes together, adding about a 1/2 cup to get things squared around.
But as you can see, if you split your dough down the middle, you’ll find that the inside isn’t quite the right dough consistency. It’s still like a really sticky dough.
So just knead a little longer, exposing the middle and adding new flour as needed. And by now your dough should be done.
Now cut it into eighths. You can do it the square way, but to get really even pita pockets, cutting the dough like a pizza works best.
Toss all but one of the balls of dough into the bowl you used to make the dough (just to save on washing more and more dishes…)
And roll ‘em out. They don’t have to be perfect circles, but you can probably get them pretty darn close. You know what they say though, “practice makes perfect.”
I line a pan with a silpat (silicone baking mat) but you can just put some foil down or grease it. Put each rolled pita pocket on the lined/greased pan.
Now just cover the pan(s) with a kitchen towel and let ‘em rest for half an hour (hence why I start pita pockets at 11:00 am).
Here is one pan of risen whole wheat pita pockets. The one on the top left was…attacked…by my all-time taste tester. By all-time, I mean every thing I make is tested by him (whether I like it or not). Check him out chowing down on some dinner roll dough here. Now put them in the oven to bake.
Here is a pan of done pita pockets.
Like I said, I make and use these pita pockets all the time. They always taste good and are not at all hard to make. Plus, you can use them for virtually anything. I’ve tried making them into salted pita wedges.
Here’s the recipe!
Whole Wheat Pita Pockets
Prep time:
Cook time:
Total time:
Yield: 8
An easy and inexpensive lunch base.
Ingredients
- 1¼ cups hot water (not boiling)
- 1 package(2¼ teaspoons) yeast
- 2 teaspoons pure cane sugar
- 2 cups whole wheat flour
- 1 teaspoon salt
- 1½ cups extra whole wheat flour
Instructions
- Mix the water, yeast, and sugar together in a medium bowl. Let sit 2 minutes. Add the salt and flour, then stir until combined. Stir the mixture for one minute.
- Add the ½ cup of the extra flour and stir again. Transfer to a lightly floured surface and knead for 5 minutes. Separate into eight balls, roll them out, and put on a oiled or lined baking sheet. Now let them rise in a warm place for thirty minutes.
- Preheat oven to 400 degrees or higher for at least 10 minutes before baking. When time is up for the pita pockets bake them for 8 minutes.

Notes
Stays fresh for two days!
: 1655 : 5g : 1g : 3g : 346g : 10g : 2383mg : 14g : 49g
3.4.3177
90,000 The exhibition “Old Rostov” was opened in the Don capital
21.12.2019, / = RO = / In the Rostov Regional Museum of Local Lore on December 20, an exhibition “Old Rostov” was opened, dedicated to the 270th anniversary of the city.
She occupied two new halls of the renovated museum building. The exposition includes exhibits reflecting certain moments of development and prosperity of the city of Rostov-on-Don. Each showcase is dedicated to a specific event that happened in the past. For example, the development of medicine.Among the exhibits were devices for healing, photographs of people associated with this profession, and medical manuals, such as “Medical aid in Rostov on Don”. In addition, special attention of the guests was drawn to the scissors for clamping the baby’s umbilical cord, made in the shape of a stork. It should be noted that for the first time the topic of medicine is widely presented at the exhibition of the Museum of Local Lore.
There is also a showcase in the halls dedicated to education. It contains textbooks and notebooks for pupils of the late 19th and early 20th centuries, ink and sandboxes, photographs of students and schools.
The guide told the guests that the residents of Rostov-on-Don of those times loved to relax. One of the showcases of the exhibition is dedicated to this topic. It contains tennis rackets, an old camera, photographs of Rostovites on excursions and during walks on bicycles, which were only gaining popularity at that time. The inhabitants of old Rostov loved to relax in the city gardens. The exhibition featured items that in the past were used for outdoor recreation. For example, a pocket gramophone, which interested most of the exhibition guests.
– The date is not accidental, we really wanted to open this exhibition this year, because it is a jubilee year. And everyone who comes to us knows that over the past two years the museum has been undergoing major repairs, restoration, and many halls are not finished yet, but nevertheless, we really wanted to open this exhibition in December, because this a month the city was founded, and we could not pass by this date, – noted the director of the Rostov Regional Museum of Local History Galina Kulikova.
Homemade lavash – Baking 2021
While trying to replace the frequently recurring peanut butter and jelly sandwiches in lunch boxes, I reached for hummus with carrot sticks, bell peppers, and small triangular pieces of homemade pita bread. My kids and I love it – and so will you!
The plan worked well enough until we finished the pita bread. Instead of rushing to the store, I pulled out this recipe and was reminded not only of the ease, but of the great joy that you watch your own pudding in the oven right in front of your eyes.
How is this done? I’m not that sure, and I’m really told that I don’t choke every time. But the thrill is enough to leave me behind in front of the stove, watching the puff mask.
Do you know what else is magic? The taste of a warm homemade piece of pita bread. Enjoy warm with creamy hummus, then pocket a simple lentil salad and spicy herbs the next day for a nutritious lunch.
If all else fails, you can still use pita bread to make one medium pb & j.
Homemade pita bread
Makes 8 holes
Ingredients:
- 2 teaspoons active dry yeast
- ½ teaspoon sugar
- 2 3/4 cups all-purpose unbleached flour
- 1 teaspoon kosher salt
- 2 tablespoons olive oil
- 1 cup warm water
Step 1:
Mix yeast, sugar, flour, salt, olive oil and water. Mix until a sticky dough forms.
Combine all ingredients in one bowl.
The dough will be pretty sticky – that’s good! The softness of the dough helps if PUFF!
It’s alive!
Step 2:
On a clean surface lightly dusted with flour, if necessary, knead the dough for 2 minutes. Cover the dough with a clean tea towel and set aside for 10 minutes.
Step 3:
After resting, continue stirring the dough for 5 minutes or until very soft. Do not add too much flour while kneading.You want the dough to be soft and just sticky.
At this point, you can chill the dough and let it rise slowly and rise for up to three days.
Step 4:
Place the dough back in the bowl and cover with plastic wrap or a tea towel. Place the bowl in a warm place and let rise until it doubles in volume, about 1 hour.
Step 5:
Preheat oven to 450 F and place a pizza stone, cast iron pot, or inverted baking tray on the center rack.
Step 6:
Carefully remove the dough and place on a clean surface. Divide the dough into 8 equal portions.
Step 7:
Throw each serving into a ball. Work one piece of dough at a time and keep the rest covered with a towel while they wait.
Step 8:
Unroll each ball in an 8-inch round. If rolling is hard for you, let it rest for a couple of minutes to let the gluten relax and then roll again.
Step 9:
Place the circle on the preheated surface in the oven.
Bake for 2 – 3 minutes, until inflated, then turn with tongs and bake for 1 minute.
He puffed!
Step 10:
Remove the pita bread from the oven and place on a plate or basket lined with a clean kitchen towel.
Repeat the process until all pits are baked.
Want to know how to make even more bread? Check out Focaccia and flat bread from all over the world.In it you will master Focaccia, crackers, naan, tortillas and yes, PITA!
90,000 The first conscription began in Russia, for which it is forbidden to take smartphones into the army with you.
{“id”: 690878, “url”: “https: \ / \ / dtf.ru \ / life \ / 690878-v-rossii-nachalsya-pervyy-prizyv-na-kotoryy-zapreshcheno-brat-s-soboy- v-armiyu-smartfony “,” title “:” \ u0412 \ u0420 \ u043e \ u0441 \ u0441 \ u0438 \ u0438 \ u043d \ u0430 \ u0447 \ u0430 \ u043b \ u0441 \ u044f \ u043f \ u440435 \ u0439 \ u043f \ u0440 \ u0438 \ u0437 \ u044b \ u0432, \ u043d \ u0430 \ u043a \ u043e \ u0442 \ u043e \ u0440 \ u044b \ u0439 \ u0437 \ u0430 \ u043f \ u0437 \ u0430 \ u043f \ u0437 \ u0430 \ u043f \ u44 u043e \ u0431 \ u0440 \ u0430 \ u0442 \ u044c \ u0441 \ u0441 \ u043e \ u0431 \ u043e \ u0439 \ u0432 \ u0430 \ u0440 \ u043c \ u0438 \ u044e \ u0c \ u04 \ u438 \ u044e \ u0c \ u04 \ u444 u043d \ u044b “,” services “: {” vkontakte “: {” url “:” https: \ / \ / vk. com \ /share.php? url = https: \ / \ / dtf.ru \ / life \ / 690878-v-rossii-nachalsya-pervyy-prizyv-na-kotoryy-zapreshcheno-brat-s-soboy-v-armiyu -smartfony & title = \ u0412 \ u0420 \ u043e \ u0441 \ u0441 \ u0438 \ u0438 \ u043d \ u0430 \ u0447 \ u0430 \ u043b \ u0441 \ u044f \ u043f \ u0435 \ u0440 \ u04f \ u0435 \ u0440 \ u04b u0437 \ u044b \ u0432, \ u043d \ u0430 \ u043a \ u043e \ u0442 \ u043e \ u0440 \ u044b \ u0439 \ u0437 \ u0430 \ u043f \ u0440 \ u0435 \ u0449 \ u0440 \ u043 \ u0449 \ u0440 \ u044 \ u044c \ u0441 \ u0441 \ u043e \ u0431 \ u043e \ u0439 \ u0432 \ u0430 \ u0440 \ u043c \ u0438 \ u044e \ u0441 \ u043c \ u0430 \ u0440 \ u0442 “u04″ \ u044 ” “VK”, “title”: “\ u0412 \ u041a \ u043e \ u043d \ u0442 \ u0430 \ u043a \ u0442 \ u0435”, “width”: 600, “height”: 450}, “facebook”: {“url” : “https: \ / \ / www.facebook.com \ / sharer \ /sharer.php? u = https: \ / \ / dtf.ru \ / life \ / 690878-v-rossii-nachalsya-pervyy-prizyv-na-kotoryy-zapreshcheno-brat-s- soboy-v-armiyu-smartfony “,” short_name “:” FB “,” title “:” Facebook “,” width “: 600,” height “: 450},” twitter “: {” url “:” https: \ / \ / twitter.com \ / intent \ / tweet? url = https: \ / \ / dtf.ru \ / life \ / 690878-v-rossii-nachalsya-pervyy-prizyv-na-kotoryy-zapreshcheno-brat- s-soboy-v-armiyu-smartfony & text = \ u0412 \ u0420 \ u043e \ u0441 \ u0441 \ u0438 \ u0438 \ u043d \ u0430 \ u0447 \ u0430 \ u043b \ u0441 \ u044f \ u043f \ u440 \ u044f \ u043f \ u04 \ u044 \ u043f \ u0440 \ u0438 \ u0437 \ u044b \ u0432, \ u043d \ u0430 \ u043a \ u043e \ u0442 \ u043e \ u0440 \ u044b \ u0439 \ u0437 \ u0430 \ u043f \ u935440 \ u0430 \ u043f \ u935440 \ u0430 \ u043f \ u935440 u0431 \ u0440 \ u0430 \ u0442 \ u044c \ u0441 \ u0441 \ u043e \ u0431 \ u043e \ u0439 \ u0432 \ u0430 \ u0440 \ u043c \ u0438 \ u044e \ u0441 \ u043c \ u4d u044b “,” short_name “:” TW “,” title “:” Twitter “,” width “: 600,” height “: 450},” telegram “: {” url “:” tg: \ / \ / msg_url? url = https: \ / \ / dtf.ru \ / life \ / 690878-v-rossii-nachalsya-pervyy-prizyv-na-kotoryy-zapreshcheno-brat-s-soboy-v-armiyu-smartfony & text = \ u0412 \ u0420 \ u043e \ u0441 \ u0441 \ u0438 \ u0438 \ u043d \ u0430 \ u0447 \ u0430 \ u043b \ u0441 \ u044f \ u043f \ u0435 \ u0440 \ u0432 \ u044b \ u0439 \ u043f \ u0440 \ u0438 \ u0437 \ u044b \ u30432 \ u0437 \ u044b \ u30432, \ u43 u043e \ u0440 \ u044b \ u0439 \ u0437 \ u0430 \ u043f \ u0440 \ u0435 \ u0449 \ u0435 \ u043d \ u043e \ u0431 \ u0440 \ u0430 \ u0442 \ u044c0 \ u0441 \ u43 u0430 \ u0440 \ u043c \ u0438 \ u044e \ u0441 \ u043c \ u0430 \ u0440 \ u0442 \ u0444 \ u043e \ u043d \ u044b “,” short_name “:” TG “,” title “:” Telegram “,” width “: 600 , “height”: 450}, “odnoklassniki”: {“url”: “http: \ / \ / connect.
 ok.ru \ / dk? st.cmd = WidgetSharePreview & service = odnoklassniki & st.shareUrl = https: \ / \ / dtf.ru \ / life \ / 690878-v-rossii-nachalsya-pervyy-prizyv-na-kotoryy-zapreshcheno-brat -s-soboy-v-armiyu-smartfony “,” short_name “:” OK “,” title “:” \ u041e \ u0434 \ u043d \ u043e \ u043a \ u043b \ u0430 \ u0441 \ u0441 \ u043d \ u0438 \ u043a \ u0438 “,” width “: 600,” height “: 450},” email “: {” url “:” mailto:? subject = \ u0412 \ u0420 \ u043e \ u0441 \ u0441 \ u0438 \ u0438 \ u043d \ u0430 \ u0447 \ u0430 \ u043b \ u0441 \ u044f \ u043f \ u0435 \ u0440 \ u0432 \ u044b \ u0439 \ u043f \ u0440 \ u0438 \ u0437 \ u044b \ u0432, \ u043d \ u0430 \ u044 \ u043d \ ua40e \ u044 \ u043d \ ua40 \ u0439 \ u0437 \ u0430 \ u043f \ u0440 \ u0435 \ u0449 \ u0435 \ u043d \ u043e \ u0431 \ u0440 \ u0430 \ u0442 \ u044c \ u0441 \ u0441 \ u043e \ u0440 \ u043 \ u043e \ u0440 \ u043 \ u043e \ u0404304 \ u0438 \ u044e \ u0441 \ u043c \ u0430 \ u0440 \ u0442 \ u0444 \ u043e \ u043d \ u044b & body = https: \ / \ / dtf.ru \ / life \ / 690878-v-rossii-nachalsya-pervyy-prizyv-na-kotoryy-zapreshcheno-brat-s-soboy-v-armiyu-smartfony “,” short_name “:” Email “,” title “:” \ u041e \ u0442 \ u043f \ u0440 \ u0430 \ u0432 \ u0438 \ u0442 \ u044c \ u043d \ u0430 \ u043f \ u043e \ u0447 \ u0442 \ u0443 “,” width “: 600,” height “: 450}}, “: false}
54 784
views
“Forbidden” trout in Sevan and Harisa at the dacha of General Manvel: how the Armenians surprised the Japanese
Armenians, as you know, are hospitable people, trying to do everything possible to receive guests of the highest quality.Columnist Sergei Bablumyan recalls an amusing episode from his rich journalistic practice. In the early 90s, he happened to accompany Japanese journalists during their visit to Armenia.
I saw in my travel notebook the notes “Trout – Sevan”, “Levon Ter-Petrosyan”, “Dosimeters”, “Arisa” and something else, indicated concisely, but, in all likelihood, important, at least for the beginning nineties of the previous century.
Stars not of our time, or How it was forbidden to shoot barbecue at “Armenfilm” >>
Seven Japanese Toyota cars with seven Japanese driving passed the Azerbaijani Kazakh and stopped at the traffic police post in the Armenian Ijevan.Having ceased to be guests of Azerbaijan, fourteen journalists of the Tokyo Yomiuri Shimbun became guests of Armenia with the prospect of soon finding themselves in the same rank in Georgia. My task was to make the Armenian stage of the rally from Sakhalin to Krasnodar, organized by Yomiuri Shimbun in cooperation with Izvestia, the best. It is difficult to say whether we succeeded or not, but I remember something.
Forbidden trout
Acquaintance with Armenia most often begins with Sevan, and here you are not invited to the table without trout.Before the trip to the lake, the Japanese talked for a long time with Armenian ecologists, heard a lot of different things about the protection of nature in general and about the Sevan National Park in particular.
Learning about the unthinkable strictness, the guests nodded their heads approvingly, wrote down, asked again, were surprised, admired. Especially a complete ban on fishing.
Of course, they have heard about the famous Sevan trout.
“What are you, what are you, the catch is strictly prohibited!” – ecologists were indignant, referring to the articles of the criminal code.
“What about your puffer fish?” – suddenly asked the director of the National Park Gagik Sukhudyan.
The Japanese explained that this fish from the puffer family, which contains lethal doses of the poison tetrodotoxin, is considered a delicacy and is very popular with them in their country. The trick is how to cook it.
In the evening we went to Sevan, had lunch at a seaside restaurant. What do you think was the signature dish? Trout! Trout banned three times, trout four times criminally prosecuted! Served according to the number of guests – exactly fourteen fish.
– What is this, ishkhan? – the guests were surprised.
– Very similar … The whole trick is how to cook it, – the director of the Sevan fish farm Derenik Simonyan defended the ecologists.
I cannot pretend that the Japanese believed, but they ate with pleasure.
Meeting with Levon Ter-Petrosyan
The first president had just taken office and was open to communication with journalists. He immediately agreed to accept the Japanese and even ordered to provide a traffic police car for escort.He asked how else he could help.
Guests were received in the building of the National Assembly. The questions were different (no one asked about the trout), Ter-Petrosyan answered everything, spoke with special inspiration about the culture and history of Armenia.
The Japanese praised Ter-Petrosyan: smart, educated, an intellectual of the highest standard.
With the same respect they spoke of the then Azerbaijani leader Elchibey, whom they also met: a dissident, differently thinking correctly, popularly and democratically elected … It was tactless and senseless to refute.
The same is about Zviad Gamsakhurdia, a meeting with whom was still ahead. A writer, scientist, literary critic and, of course, a dissident.
And what happened to them after a couple of years?
How the Japanese ate arisa at the future dacha of General Manvel
It was the second Sunday in September. In the village of Musaler, next to Echmiadzin, they cooked traditional harisa. How to describe the shock experienced by the guests at the sight of cooks, huge cauldrons, songs with dances around the fires? Priests in cassocks blessed food.Merchants gave souvenirs. The touched Japanese undertook to teach one of the cooks to pronounce “konnitiva, do des ka?” (an analogue of our inch kachka?).
“Are there Armenians in Japan?” – asked them.
“It seems that there are fifty people …” – they were told in response.
Lunch went to Aknalich, to a house on a quiet lake, where the local nobility received their guests, and many years later this house became the property of General Manvel Grigoryan, but that was later.
In the meantime, the Japanese ate arisa, clicked cameras, determined the degree of radioactive radiation with pocket dosimeters and said: “Konnitiva, do des ka?”
“Aragats” refrigerators, hamburgers and canned food: how Mikoyan made women all over the country happy >>
Then I escorted the newspapermen to the border with Georgia, handed over to my Tbilisi colleague, received a device for measuring harmfulness, whatever it may be, as a gift, and returned home. Everything went on as usual …
 If it is sticky you should add small amounts of flour and mix again until it is not sticky. Adding too much flour will make them hard. Be sparingly with the flour. It should look like this: Elastic and kind of light.
 Pack
Pack