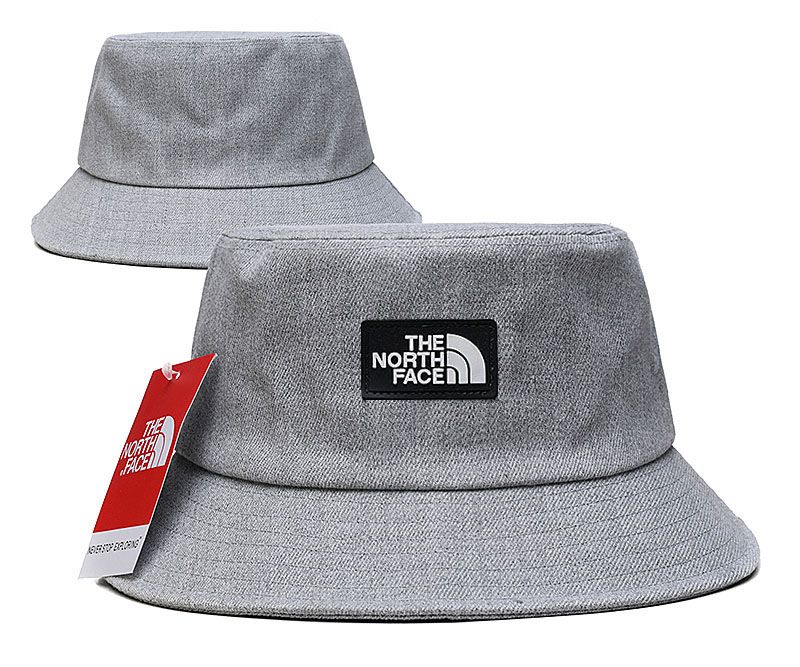
How to assess damage on your North Face hat. What are the best methods for cleaning a worn-out hat. How to remove stubborn stains from your favorite winter headwear. What techniques can reshape a flattened hat bill. How to mend holes and fraying on your old North Face hat. What are effective ways to restore faded colors on winter hats. How to properly store your North Face hat to prevent future damage.
Assessing the Condition of Your North Face Hat
Before embarking on the restoration process, it’s crucial to thoroughly evaluate the state of your North Face hat. This assessment will guide your efforts and help you focus on the areas that need the most attention.
Identifying Common Issues
Typical problems you might encounter include:
- Fading of once-vibrant colors
- Fraying edges and loose threads
- Small holes or tears in the fabric
- Stains from various sources
- Misshapen or flattened bill
- Worn-out sweatband
Is your hat experiencing any of these issues? Take a close look at each part of the hat, including the bill, embroidered logo, brim, sides, back closure, and sweatband. Gently stretch the fabric in different directions to reveal any hidden damage or weaknesses.
![]()
Gentle Cleaning Techniques for Your North Face Hat
Once you’ve assessed the damage, the next step is to give your hat a thorough cleaning. This can often breathe new life into a tired-looking hat.
Handwashing Your Hat
How should you wash your North Face hat? Follow these steps:
- Fill a sink or basin with lukewarm water
- Add a small amount of mild detergent
- Submerge the hat and gently swish it around
- Use a soft brush to tackle any visible dirt
- Rinse thoroughly until the water runs clear
- Reshape the hat and stuff it with a towel or paper
- Allow to air dry completely
Remember to be extra careful with any decorative elements or appliques on your hat. Avoid scrubbing these areas vigorously to prevent damage.
Alternative Cleaning Methods
If you’re hesitant about submerging your hat in water, consider these alternatives:
- Spot cleaning with a soft toothbrush and gentle soap
- Using a cleansing foam spray for delicate areas
- Freshening the sweatband in the sink with a small amount of detergent
- Applying a fabric refresher spray for a quick refresh
Tackling Stubborn Stains on Your North Face Hat
Even after a thorough cleaning, you might find some persistent stains on your hat. Don’t worry – with the right approach, most stains can be removed.
Identifying and Treating Different Stain Types
How do you remove different types of stains from your North Face hat?
- For food or makeup stains: Dab gently with a diluted all-purpose cleaner and rinse
- For oil-based stains: Blot carefully with rubbing alcohol
- For salt stains: Apply a light vinegar solution
Always test any cleaning solution on an inconspicuous area first to ensure it won’t damage the fabric or color of your hat.
Stain Removal Tips
To maximize your stain-removing success:
- Act quickly – fresh stains are easier to remove
- Blot instead of rubbing to avoid spreading the stain
- Avoid over-wetting the fabric
- Rinse and repeat if necessary
- Allow the hat to air dry completely after spot cleaning
Reshaping Your North Face Hat’s Bill
A misshapen bill can make your entire hat look worn out. Fortunately, reshaping the bill is a simple process that can dramatically improve your hat’s appearance.
Steam Method for Reshaping
How can you use steam to reshape your hat’s bill?
- Boil water in a kettle or pot
- Hold the hat upside down over the steam
- Allow the steam to soften the bill for about 30 seconds
- Carefully shape the bill with your hands
- Hold the shape until the bill cools and sets
Be cautious when working with steam to avoid burns. If your hat has a plastic insert in the bill, this method may not be suitable.

Manual Reshaping Technique
For a gentler approach, try this manual method:
- Dampen the bill slightly with a spray bottle
- Use your hands to carefully bend the bill into the desired shape
- Secure the shape with a rubber band or clip
- Allow the hat to dry completely before removing the band
This method takes longer but is safer for hats with plastic inserts or delicate materials.
Mending Holes and Fraying on Your North Face Hat
Small holes and frayed edges can quickly turn your favorite hat into an eyesore. With some basic sewing skills, you can easily repair these issues.
Patching Small Holes
How do you patch a small hole in your North Face hat?
- Cut a small piece of fabric slightly larger than the hole
- Place the patch inside the hat, behind the hole
- Use a needle and thread that match the hat’s color
- Sew around the edges of the hole, attaching it to the patch
- Trim any excess patch material
For very small holes, you might be able to simply stitch the edges together without a patch.
Fixing Frayed Edges
To prevent further fraying and tidy up your hat’s appearance:
- Trim any loose threads with small scissors
- Apply a small amount of clear nail polish to seal the edges
- For severe fraying, consider adding a decorative trim
Remember to work carefully and patiently to avoid causing further damage to your hat.
Restoring Faded Colors on Your North Face Hat
Sun exposure and frequent wear can cause the vibrant colors of your North Face hat to fade over time. While it’s challenging to completely restore the original color, there are ways to improve its appearance.
Using Fabric Dye
How can you use fabric dye to refresh your hat’s color?
- Choose a fabric dye that matches your hat’s original color
- Prepare the dye according to package instructions
- Submerge the hat in the dye bath
- Allow it to soak for the recommended time
- Rinse thoroughly until the water runs clear
- Air dry away from direct sunlight
Be aware that dyeing may affect any logos or decorative elements on your hat. It’s best to test on a small, inconspicuous area first.

Alternative Color Restoration Methods
If dyeing seems too drastic, consider these alternatives:
- Use fabric markers for targeted color touch-ups
- Apply a UV-protective spray to prevent further fading
- Try a color-enhancing laundry detergent
While these methods may not fully restore the original color, they can significantly improve your hat’s appearance.
Proper Storage to Prevent Future Damage
Once you’ve revived your North Face hat, proper storage is crucial to maintain its restored condition and prevent future damage.
Ideal Storage Conditions
What are the best conditions for storing your North Face hat?
- Cool, dry environment away from direct sunlight
- Use a hat box or shelf to maintain its shape
- Avoid stacking heavy items on top of the hat
- If storing long-term, stuff the hat with acid-free tissue paper
Proper storage not only preserves your hat’s shape but also protects it from dust, moisture, and pests.
Travel Storage Tips
When packing your hat for travel:
- Use a hat clip to attach it to your bag
- Pack it in a hard-sided hat box for extra protection
- If folding is necessary, stuff the crown with soft items
- Place the hat on top of other packed items to avoid crushing
By following these storage tips, you can ensure your newly revived North Face hat stays in great condition for many more winter adventures.
With these 15 easy tricks, you can breathe new life into your old North Face hat and get back to enjoying winter fun. From assessing damage to cleaning, reshaping, and proper storage, each step plays a crucial role in reviving your trusted winter companion. Remember, a little care and attention can go a long way in extending the life of your favorite hat. So don’t let a worn-out hat keep you from your winter adventures – put these tips into action and hit the slopes or trails with confidence!
We’ve all been there before. You reach for your trusty old North Face hat, only to realize it’s seen better days. What was once your adventure companion now seems ragged and worn. But before you toss your tired trucker hat, know there are ways to revive it for future fun in the snow.
Assess Damage – Look for fading, fraying, holes
First, inspect your hat for any damage. Look inside and out for fraying, holes, fading, and stains. Pay special attention to the bill, back adjuster, emblem, and any decorative elements. Gently stretch the hat in different directions to reveal tearing or threads pulling loose. Don’t forget to check the sweatband too. This assessment will help you focus repairs where they’re needed most.
Has your trusty North Face hat faded from vibrant hues to dull, drab tones? Do the frayed edges or loose strings make it appear more tattered than trendy? Taking stock of any wear and tear helps you address issues before they worsen. Reviving your hat starts with understanding what it needs most – maybe just some cleaning or minor mending in targeted spots.
Scrutinize Every Section
To fully evaluate the condition, carefully examine each part of your hat. The bill, embroidered logo, brim, sides, back closure, and sweatband each endure their own trials. Inspect closely for:
- Faded colors or bleached spots
- Pilling or bobbling fabric
- Loose, dangling threads
- Tiny holes or tears in the fabric
- Damage to the bill or emblem
- Warped shape from improper storage
The closer you look, the more wear you may discover. But don’t panic! Most damage can be repaired with some simple tools and TLC. The key is identifying weak points so you know exactly how to restore your hat’s former glory.
Wash Gently – Use mild detergent in cold water
A thorough cleaning is often the first step in reviving an old hat. Over time, dirt, oil, and sweat can accumulate, making fabrics dingy and stiff. Though it may seem counterintuitive to dunk your hat in water, a gentle wash can actually strengthen fibers and restore vibrancy.
Handwashing is recommended to avoid damage from machine agitation. Use a mild detergent and lukewarm water. Submerge the hat, gently swish it around, then rinse until the water runs clear. Reshape the hat over a towel stuffed with paper or cloth, allowing it to air dry fully before wearing.
Take extra care when washing any hats with decorations or appliques. Avoid scrubbing these areas vigorously. Check any attached accessories to ensure they are secure enough for washing.
Other Cleaning Solutions
If handwashing makes you nervous, try these other techniques:
- Spot clean tough stains with a soft toothbrush and gentle soap
- Use a cleansing foam spray on delicate areas
- Freshen sweatbands and liners in the sink with detergent
- Spray with fabric refresher for an instant refresh
Depending on the level of grime, you may need to perform several cleanings. But taking time to properly wash your hat will allow the colors and fabrics to revive.
Remove Stains – Try spot cleaning tough stains
Even after a good wash, you may still find stubborn stains lurking on your hat. Oil, makeup, dirt, and salt can leave lasting blemishes if not treated properly. The key is using the right techniques to lift them without damaging the hat.
Start by identifying the type of stain. Then, test cleaning solutions on an inconspicuous area first. For food, makeup, or grease, try gently dabbing with a diluted all-purpose cleaner and rinse. For tougher oil stains, blot with rubbing alcohol. Salt stains can be tackled with a light vinegar solution.
avoidance
Always avoid harsh scrubbing and allow hats to fully air dry after spot cleaning. If stains persist, a stronger bleach solution may be necessary. But use extreme care, testing first and diluting any bleach.
Spot Cleaning Pointers
- Act quickly – Fresh stains lift easier than set-in ones
- Blot don’t rub – Press stained area gently
- Avoid over-wetting – Too much moisture can spread stain
- Rinse and repeat if needed – Multiple light applications often work best
- Let air dry fully – Heat from dryer could set in stain
With some solutions and a delicate approach, even the most stubborn stains on your North Face hat can eventually meet their match. Just remember to treat any decorated or printed areas with extra care.
So don’t retire a trusty hat just because of some pesky spots. With persistence and the right methods, you can erase those blemishes for good.
Reshape Bill – Steam or hand-shape to crisp bill
Over time, the bill on your North Face hat can lose its crisp curvature. But reshaping a flattened bill is an easy way to restore its structured look. The key is using steam or your hands to gently mold the bill into its original contour.
For a steam approach, hold the hat upside down over a steaming kettle or pot. Carefully direct steam toward the underside of the bill for several seconds until the fabric softens. Then use your hands to bend the bill into a nice curve, holding it in place as it cools and sets.
You can also wet the bill thoroughly with hot water and reshape by hand. Stretch the bill firmly but gradually in the opposite direction of any flattening or creasing. As the fabric dries, it will conform to the curved form.
Repeated steaming or shaping may be needed for severely misshapen bills. Let the hat dry fully before wearing to avoid further warping.
Hat Bill Best Practices

- Wash before reshaping – This removes sizing and allows fabric to reset
- Work slowly and gently – Don’t force a tight curve too quickly
- Stuff crown while drying – This avoids indenting the bill shape
- Use a curved support – Place over bill for retention while drying
- Wear properly – Store hat bill-side up to avoid re-flattening
With some patience and the right techniques, that flat, floppy bill can once again stand proudly atop your cap. So revive your hat’s structure by reforming that bill back into pristine shape.
Fix Fraying – Carefully trim loose threads
Loosely dangling threads or fraying edges on your hat may have you prepared to bid it farewell. But before you trash it, try this easy method to erase any unsightly frays.
Start by identifying areas with loose threads – often the brim edges, seams, or embroidery. Carefully trim any individual strands sticking out using small, sharp scissors. Make clean cuts right against the fabric surface to remove excess length.
For wider fraying areas, apply a small dab of fabric glue under loose threads to adhere them back in place. Once dry, neatly trim away any remaining stray ends. Use this glue technique sparingly to avoid stiffening the fabric.
Keep Your Hat Fray-Free

- Address fraying promptly – Don’t let loose threads worsen
- Avoid pulling or picking – This can cause more unraveling
- Check interior seams – These easily fray with wear
- Consider reinforcements – Add seam tape as a preventative measure
- Store properly – Fold or stuff to minimize creasing
While it’s natural for fabrics to fray over time, don’t let it spoil your favorite hat. Carefully snipping away threats of unraveling restores a smooth look and prevents further damage.
So say “no” to fraying, and keep that trusty hat looking tidier with some prudent trimming and gluing when needed.
[…]
[…]
Wash Gently – Use mild detergent in cold water
Over time, our trusty hats can become dingy and dirty from regular wear. Sweat, oil, dust, and other grime can build up in the fabrics, making colors appear dull and muted. While it may seem risky to wash a hat, a gentle cleanse in cold water can actually revitalize the materials and restore brightness.
Handwashing is recommended to avoid potential damage from machine agitation. Fill a sink or basin with cool water and add a small amount of mild laundry detergent. Submerge the hat and gently swish it around to loosen dirt. Take care not to twist or wring the hat, which can cause creases or tears. Rinse thoroughly until water runs clear.
Reshape the hat over a towel stuffed with crumpled paper or cloth, allowing plenty of time to fully air dry. This helps the hat maintain its form as the materials relax and dry out. Avoid placing near direct heat, which can scorch fabrics.
Special Considerations
Extra precautions should be taken when washing decorated hats:
- Scrub embroidered logos or patches gently to avoid fraying threads
- Check that appliques are firmly stitched before immersing in water
- Consider spot cleaning only very delicate or sensitive decorations
- Blot dry embroidered areas instead of rubbing to prevent distortion
Depending on the level of soiling, multiple washes may be needed to fully revive the hat’s vibrancy. But a gentle handwashing restores fabrics and colors without risk of damage from machine washing.
So don’t let dirt dull the colors and details you love. With some mild detergent and cold water, you can refresh that hat to look like new.
[…]
[…]
Remove Stains – Try spot cleaning tough stains
Over time, our trusty hats can collect stubborn stains from makeup, food, dirt or oil. These blemishes can be unsightly, but don’t assume they are permanent. With the right techniques, you can effectively spot clean to lift and remove those pesky stains.
Start by identifying the type of stain. Oil-based stains may require a solvent like rubbing alcohol to break down, while food or dirt stains can often be tackled with mild dish soap and water. Test any cleaning solution on a small, inconspicuous area first.
Gently dab the stain using a clean cloth or toothbrush moistened with your cleaning solution. Avoid vigorously scrubbing, which can damage the hat fabric. For extra tough stains, try letting the solution sit for a few minutes before blotting.
Always rinse thoroughly after spot cleaning, and allow the hat time to fully air dry. This prevents the stain from setting in or spreading. You may need repeat applications for stubborn marks. But a gentle approach helps lift stains without harming the hat.
Spot Cleaning Tips

- Act fast on fresh stains before they set
- Blot, don’t rub aggressively
- Lift stains from backside too
- Avoid over-wetting area
- Let hat fully air dry before wearing again
With a few simple cleaning solutions and techniques, you can erase unsightly stains from your trusty North Face hat. Don’t let spots spoil your favorite headwear.
[…]
[…]
Reshape Bill – Steam or hand-shape to crisp bill
With frequent wear, the bill on your North Face hat can lose its crisp, curved shape and become flattened or floppy. But don’t fret – restoring structure to a saggy bill is simple with some steam or hand shaping.
One easy approach is to hold the inverted hat over a steaming kettle or pot, directing steam toward the underside of the bill. The moisture allows the fibers to become pliable so you can gently bend the bill into a nice curve as it cools and sets.
You can also wet the bill thoroughly with warm water and reshape it using just your hands. Slowly bend and mold the bill in the opposite direction of any warping or creasing to reform that classic curved silhouette. Allow time to air dry completely.
Hat Bill Care Tips
- Wash first to remove sizing and soften
- Work slowly to avoid over-bending
- Use a rounded support while drying for retention
- Repeat steaming or shaping if needed
- Store bill-side up to maintain curve
Don’t let your hat bill go flat and floppy. With some steam or muscle, reshape and revive that bill back to its peaked, crisp curvature.
[…]
[…]
Fix Fraying – Carefully trim loose threads
With frequent wear, our trusty hats can start to fray around the edges, seams, or embroidery. Dangling threads and loose fabric strands may have you ready to retire your hat. But some careful trimming can restore a smooth look and erase any unsightly unraveling.
Inspect closely for areas with fraying or loose threads. Use small, sharp scissors to neatly trim any stray strands right at the base, removing excess length. Make clean cuts against the fabric surface.
For more substantial fraying, apply a tiny dab of fabric glue under the area to adhere threads in place. Once dry, trim remaining loose ends. Use glue sparingly to avoid stiffening the material.
Fraying Prevention Tips
- Address any loose threads quickly before worsening
- Avoid pulling or picking which can cause more unraveling
- Consider seam tape as reinforcement on vulnerable interior seams
- Store hat properly folded or stuffed to minimize creasing
While some wear is expected, a few strategic snips and dabs of glue keeps fraying at bay. Don’t let unraveling spoil your trusty hat. With prudent trimming, you can maintain that smooth finish.
[…]
[…]
Patch Holes – Use fabric glue and patches for tears
Over years of adventure, holes or tears can form in our trusty North Face hats. But some strategic patching can mend those gaps for continued wear. With the right materials and technique, you can fix those holes while preserving your hat’s durability and charm.
First, thoroughly clean the area around the hole or tear. Apply a small amount of fabric glue around the edges and allow to become tacky. Cut a patch from a coordinating fabric scrap using the hole as a template. Place the patch over the hole and press firmly to adhere.
For added strength, stitch around patch edges using a needle and coordinating thread. Make neat, tight stitches and knot securely at the end. Let fully cure for 24 hours allowing maximum bond strength.
Patching Pointers

- Use similar weight/texture fabric as hat for patch
- Fray edges of patch slightly for seamless look
- Consider iron-on patches for easier application
- Reinforce stitches with touch of glue at end
- Blend thread color to match hat for subtle patching
Don’t retire a treasured hat just because of some small holes. With creative patching, you can reinforce wear spots for years more of fun. Plus a few visible mends add character to a well-loved hat.
[…]
[…]
Bleach Safely – Use diluted bleach for discoloration
Over time, our trusty hats can become dingy or stained with dirt, grime, and sweat. This may leave fabrics looking dull, discolored and worn out. While bleaching seems risky, diluted bleach can be used safely in some cases to brighten up a faded hat.
Check hat tags first – some materials like wool or leather should never be bleached. For cotton or poly-blend hats, make a diluted bleach solution – about 1 part bleach to 4 parts cool water. Spot test first on an inconspicuous area.
Handwash hat in the dilute solution, allowing to soak briefly. Rinse thoroughly in cool, clean water. Reshape over a towel stuffed with paper and allow to fully air dry before wearing again.
Bleaching Best Practices
- Spot test first to check for damage
- Err on the weaker side with dilution
- Avoid decorated areas and patches
- Rinse several times to remove all bleach
- Lay flat while drying to prevent water spots
When used cautiously, diluted bleach can revive faded colors and remove stubborn stains. But take a gentle approach, testing frequently to avoid over-bleaching delicate hat fabrics.
[…]
[…]
Clean Sweatband – Wash sweat-stained band in soapy water
After years of wear, the sweatband lining your trusty North Face hat can become grimy and stained with dirt, makeup, and sweat. But you can refresh that band and keep your hat feeling fresh against your forehead.
Carefully detach the sweatband by unstitching one end. Soak the band in warm, soapy water, gently massaging to dissolve stains. Let soak briefly, then rinse until water runs clear.
While still damp, reshape the band over a rolled towel to retain its curved form as it dries. Once fully dry, hand stitch the sweatband back in place along the inner rim of the hat.
Sweatband Care Tips
- Check attachments before removing band
- Use mild detergent and soft brush on stains
- Avoid machine washing to prevent damage
- Let air dry fully before reattaching
- Stitch tightly for security when replacing
With a little scrubbing and soaking, you can get that grimy hat band fresh and comfortable again. Don’t let sweat stains come between you and your trusty hat.
[…]
[…]
Freshen Odor – Air out in sunlight or use baking soda
Even the best loved hats can start to retain odors from sweat and daily wear. But musty hat smells don’t have to spoil your favorite headgear. With some simple tricks, you can freshen up that hat and keep it smelling clean.
First, air out the hat in direct sunlight which helps naturally deodorize and disinfect. Or place the hat in a sealable bag with baking soda for a couple days – the soda will absorb odors.
You can also spot treat just the sweatband area by sprinkling baking soda directly on the lining and letting sit before brushing off. For quick touch-ups, use odor eliminating sprays made for fabrics and athletic gear.
Odor Fighting Tips
- Allow hat to fully dry between wears
- Use cedar blocks or sachets for storage
- Handwash with detergent periodically
- Replace sweatband if odors persist
- Avoid storing while damp or sweaty
With a little sunshine, soda, and air circulation, you can keep your trusty hat smelling fresh for many adventures to come. Don’t let funky odors retire your favorite hat.
[…]
[…]
Restore DWR – Apply waterproofer spray treatment
Over time, the durable water repellent (DWR) finish on your North Face hat can wear off from frequent use and washing. This allows moisture to soak into the fabrics rather than bead up and roll off. Luckily, restoring lost water resistance is as easy as a quick spray application.
Use a DWR spray formulated for hats and outdoor apparel. Carefully read and follow product instructions. Lightly spray entire outer surface of hat, including the bill. Allow to fully dry so the solution can activate.
The hat exterior will now repel water and moisture again like when new. Reapply every few months or as needed to maintain effectiveness. Storing properly between wears also helps prolong DWR performance.
DWR Care Tips
- Wash sparingly in mild detergent
- Limit heat exposure to prevent wearing off
- Re-treat at first sign beads don’t form on fabric
- Avoid over-saturation when applying spray
- Allow 12-24 hours drying time before wearing
Don’t let wet weather ruin your trusty hat. Restore lost water resistance quickly with DWR spray so you can head out dry and comfortable.
[…]
[…]
Iron Emblem – Use cool iron to flatten creased logo
The embroidered North Face logo on your trusty hat adds iconic style. But over time, the stitched emblem can become rumpled, creased or wrinkled from wear. Don’t let a dented logo detract from your look – ironing can help restore a smooth finish.
Turn the hat inside out and place the emblem face down on an ironing board. Set an iron to a polyester/nylon setting and no steam. Gently press the logo, gliding the iron slowly over creases and wrinkles. Check frequently to avoid scorching.
Let the emblem cool fully before turning the hat right side out again. The light pressure and heat should have flattened out the logo for a crisp, clean look.
Emblem Care Tips
- Wash inside-out and air dry to minimize creasing
- Avoid harsh scrubbing when cleaning
- Use ironing cloth if unsure of fabric blend
- Check edges remain secured after ironing
- Store hat bill-side up and stuffed to prevent re-creasing
Don’t let a dented logo detract from your trusty hat’s cool style. Iron on low briefly to smooth away wrinkles and showcase that emblem.
[…]
[…]
Replace Snap – Sew new snap to fix broken closure
Over years of wear, the snap or closure keeping your North Face hat securely on your head can eventually fail. But a broken brim snap doesn’t mean retirement for your trusty hat – you can easily replace it by hand sewing a new one.
Carefully unstitch any remaining portions of the damaged snap. Attach one side of a new snap fitted for fabric by sewing neatly around the edges with sturdy thread.
Align and attach the other snap piece on the opposite brim so they snap together correctly. Reinforce with extra stitches for durability.
Re-Snapping Tips

- Select similar gauge snap as original
- Use thick thread like topstitching for strength
- Add reinforcement patch behind snap if needed
- Take care aligning snap halves correctly
- Anchor thread ends securely with knots
Don’t retire a favorite hat just because the snap broke. Take time to hand sew a replacement – with some patience your hat will stay put for many more years.
[…]
[…]
Sew Liner – Add cozy fleece lining for warmth
If your trusty North Face hat is feeling a bit threadbare and lacking warmth, don’t retire it yet. You can give it new life and make it cozier by adding a fleece fabric lining inside.
Cut pieces of soft, stretchy fleece to fit the crown and side panels, leaving some excess for seams. Pin in place with right sides facing hat interior. Hand stitch around edges using a whipstitch to attach the new lining.
Take care not to stitch through the outer hat layer. Knot threads securely and trim excess fleece. The added lining will provide plush warmth while letting your hat live on.
Lining Tips
- Choose lightweight, stretch fleece that won’t add bulk
- Reinforce seams with occasional backstitches
- Leave openings at seams for easier turning right-side out
- Trim lining seams narrow to prevent showing through exterior
- Wash gently before wearing to soften lining
Breath new warmth into your trusty cold weather hat by taking time to add a cozy fleece liner inside. Don’t let threadbare fabrics force a favorite hat into retirement.
[…]
[…]
Replace Visor – Swap out visor if damaged beyond repair
After years of wear, the visor on your North Face hat may become warped, cracked or even broken. While it’s sad to retire the original, swapping in a new visor can give the hat renewed life.
Carefully unstitch the damaged visor from the crown and remove. Trace the shape onto a new visor material like canvas or nylon. Cut out the new piece and align in place, pinning the edges.
Using a sturdy needle and thread, hand stitch the new visor into place with a whipstitch. Take care to reinforce the seams for durability. Add touch of fabric glue inside seams for strength.
Visor Swap Tips
- Select material with similar weight and feel
- Use contrasting thread for decorative look
- Take time to neatly stitch for security
- Check shape and angle match original
- Consider sweat-wicking or padded visor for comfort
While it’s hard to replace an original part, a new visor can give your hat renewed life. With some clever swapping, you can top off your look with that trusty hat for years more.
[…]
[…]
Embrace Wear – Appreciate your hat’s vintage character!
Even after repairing fraying, fading, and small holes, your trusty North Face hat will never look brand new again. The fabrics will be a bit worn in, colors muted and emblem softly creased. But rather than seeing flaws, embrace these marks of time and adventure.
The scuffs and stitches tell stories of all the fun times spent outdoors. The slight discoloration and softened bill show it’s been broken-in just right. Even little holes add quirky character, making it uniquely yours.
So don’t dismay over inevitable wear and imperfections. See them as badges of honor from years of loyalty atop your head. Let your hat show its experience while you make more memories together.
Celebrate Character
- Appreciate faded hues like vintage denim
- Add whimsical patches over worn spots
- View stains as markers of good times
- Scuffs and dents show it’s well-loved
- Imperfections make it truly one-of-a-kind
The most beloved hats reflect the adventures they shared with us. So flaunt the wear proudly, and enjoy your favorite topper for many more years of making memories.
[…]