Your Lawn Looking Tired. Try This Underground Garden HackYour Lawn Looking Tired. Try This Underground Garden Hack
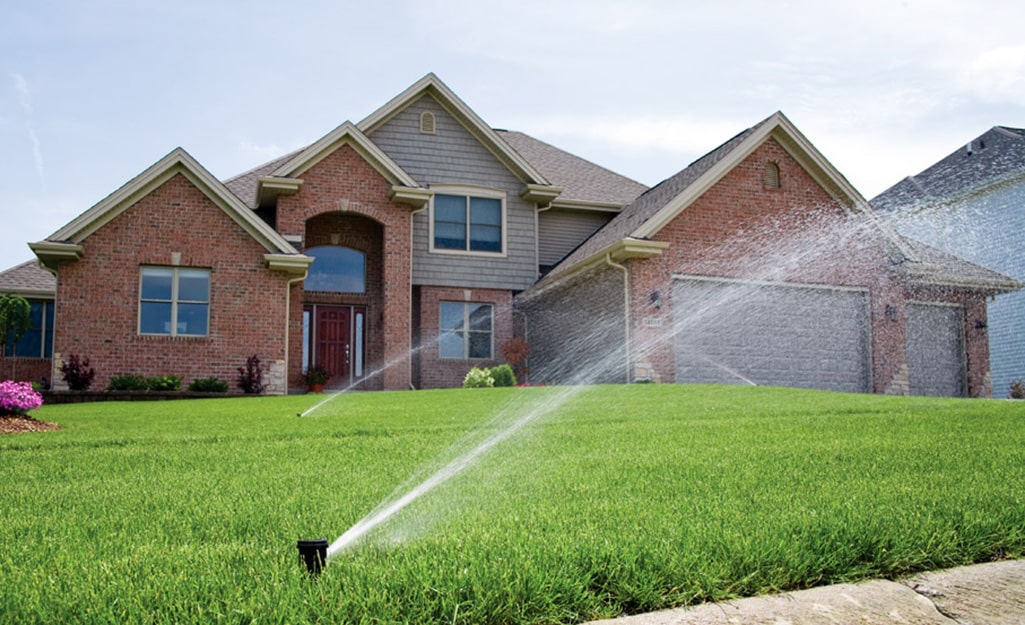
If your lawn is starting to look patchy and tired no matter how much you water it, it may be time to consider converting to an underground sprinkler system. Making the switch can seem daunting, but the long-term benefits for your lawn’s health and appearance make it worth exploring.
Why You Should Convert To Underground Lawn Sprinklers
Above-ground sprinklers are notorious for inefficient watering. Factors like wind and evaporation prevent every drop from reaching your grass roots. Underground systems deliver water directly to the soil for maximum absorption. Your grass will get greener with less wasted water.
Underground sprinkler heads also have superior coverage compared to above-ground models. Strategically placed heads ensure even water distribution across your entire lawn. No more dead patches or oddly shaped dry spots.
Consistent moisture encourages healthier grass and fewer weeds. Underground systems provide a timed, measured water supply. They can be customized to match your lawn’s needs based on soil type, grass variety, sun exposure and more.
Underground sprinklers are also less prone to damage. Lawn mowers and kids playing won’t bump the heads out of alignment. And there’s no winterizing necessary – the system won’t freeze or need blowing out.
How Much Does Underground Sprinkler Installation Cost?

The cost to install an underground sprinkler system runs $1,500 to $3,000 on average for a standard quarter to half-acre suburban lawn. Pricing depends on factors like. Underground Sprinkler Systems: Revolutionize Your Lawn Care
How do underground sprinkler systems improve lawn health. What are the benefits of installing underground sprinklers. How much does underground sprinkler installation cost. How to choose the right irrigation company for installation.
The Advantages of Underground Sprinkler Systems
Are you tired of seeing patchy, dry spots on your lawn despite constant watering? Underground sprinkler systems might be the solution you’re looking for. These innovative irrigation systems offer numerous benefits that can transform your lawn care routine and elevate the health and appearance of your grass.
Efficient Water Distribution
How do underground sprinklers improve water efficiency? Unlike above-ground systems, underground sprinklers deliver water directly to the soil, minimizing loss due to wind and evaporation. This targeted approach ensures that every drop counts, promoting deeper root growth and healthier grass.
Even Coverage
Underground sprinkler heads provide superior coverage compared to their above-ground counterparts. By strategically placing these heads throughout your lawn, you can ensure uniform water distribution, eliminating dead patches and oddly shaped dry spots that often plague yards with traditional watering methods.
Customizable Watering Schedules
Can underground sprinkler systems be tailored to specific lawn needs? Absolutely. These systems can be programmed to deliver precise amounts of water based on factors such as soil type, grass variety, sun exposure, and seasonal changes. This customization leads to healthier grass and fewer weed problems, as consistent moisture levels prevent unwanted plants from taking root.
Durability and Low Maintenance
Underground sprinklers are less prone to damage from lawn mowers, foot traffic, or children playing. Additionally, they don’t require winterization in most climates, as the underground components are protected from freezing temperatures. This durability translates to lower maintenance costs and fewer headaches for homeowners.
Cost Considerations for Underground Sprinkler Installation
How much should you expect to invest in an underground sprinkler system? The average cost for installation ranges from $1,500 to $3,000 for a standard quarter to half-acre suburban lawn. However, several factors can influence the final price:
- System type (drip irrigation, rotor sprinklers, etc.)
- Yard size and shape
- Number of sprinkler heads required
- Specialty heads for slopes or tight spaces
- Automatic controller programming
- Excavation needs (rocky or clay soil may increase costs)
- Post-installation landscaping repairs
To get the best value, it’s recommended to obtain multiple bids from reputable irrigation companies. Many offer package deals that include both equipment and installation, potentially saving you money in the long run.
Selecting the Right Underground Sprinkler Company
Choosing the right contractor for your underground sprinkler installation is crucial for ensuring a high-quality, long-lasting system. What should you look for in an irrigation company?
- At least 5 years of experience in the industry
- Specialization in irrigation rather than general landscaping
- Membership in professional industry associations
- Manufacturer certifications
- Proper licensing and liability insurance
- Comprehensive warranties on parts and labor
Don’t hesitate to ask for customer references and check online ratings on platforms like Google, Yelp, and Angie’s List. Meeting with several companies and obtaining detailed written estimates will help you make an informed decision.
The Long-Term Benefits of Underground Sprinklers
While the initial investment in an underground sprinkler system may seem substantial, the long-term benefits often outweigh the upfront costs. What advantages can you expect from this upgrade?
- Improved water efficiency, resulting in lower water bills
- Healthier, more vibrant grass with fewer dry patches
- Reduced weed problems due to consistent moisture levels
- Custom coverage tailored to your yard’s unique shape and needs
- Automated watering schedules for hassle-free lawn care
- Minimal maintenance requirements compared to above-ground systems
- Enhanced curb appeal without visible pipes or sprinklers
For many homeowners, the convenience of automatic watering and the prospect of a lush, weed-free lawn justify the initial expense of installation.
Understanding the Installation Process
What does the underground sprinkler installation process entail? While specifics may vary depending on your property and the chosen system, here’s a general overview of what to expect:
- Site evaluation and system design
- Obtaining necessary permits
- Marking underground utilities
- Trenching and pipe installation
- Placement of sprinkler heads and valves
- Connection to water source and installation of backflow preventer
- Installation of control system
- System testing and adjustments
- Landscape restoration
The entire process typically takes 2-5 days, depending on the size and complexity of your lawn. A reputable irrigation company will walk you through each step and ensure minimal disruption to your property.
Water Conservation and Environmental Impact
In an era of increasing environmental awareness, how do underground sprinkler systems contribute to water conservation efforts? These systems offer several eco-friendly advantages:
- Precise water application reduces overall water consumption
- Smart controllers can adjust watering based on weather conditions
- Nighttime watering schedules minimize evaporation
- Drip irrigation options for plant beds use even less water
- Healthier lawns act as natural air filters and cooling systems
By investing in an efficient underground sprinkler system, you’re not only improving your lawn but also contributing to broader water conservation efforts in your community.

Maintenance and Upkeep of Underground Sprinkler Systems
While underground sprinklers require less maintenance than above-ground alternatives, some upkeep is still necessary to ensure optimal performance. What maintenance tasks should you expect?
- Annual system inspection and adjustments
- Cleaning or replacing clogged nozzles
- Checking for leaks or damaged pipes
- Adjusting sprinkler heads for proper coverage
- Updating controller settings seasonally
- Winterizing the system in colder climates
Many irrigation companies offer maintenance packages that include regular check-ups and adjustments, ensuring your system remains in top condition year-round.
Enhancing Your Lawn’s Aesthetic Appeal
Beyond the practical benefits, how can an underground sprinkler system improve your property’s visual appeal? A well-maintained, evenly watered lawn creates a lush, green carpet that enhances your home’s curb appeal. The absence of visible sprinklers, hoses, and watering equipment keeps your landscape clean and uncluttered.

Moreover, consistent watering encourages uniform grass growth, eliminating patchy or overgrown areas that can detract from your lawn’s appearance. This even growth also makes mowing easier and more effective, further enhancing the overall look of your property.
Complementary Landscaping Features
With the installation of an underground sprinkler system, you may find new opportunities to enhance your landscaping. The reliable watering provided by these systems allows for the introduction of more diverse plant species, including water-sensitive ornamentals or native plants that thrive with consistent moisture.
Consider incorporating features such as:
- Flower beds with vibrant, water-loving blooms
- Decorative grasses that add texture and movement
- Small trees or shrubs that benefit from regular watering
- Ground covers that help retain soil moisture
These additions can create a more dynamic and visually appealing landscape, all supported by your efficient underground irrigation system.
Technological Advancements in Sprinkler Systems
As technology continues to evolve, so do underground sprinkler systems. What innovations are shaping the future of lawn irrigation?
Smart Controllers
Modern sprinkler systems often feature smart controllers that can be managed via smartphone apps. These controllers allow you to adjust watering schedules, monitor water usage, and even receive alerts about system issues, all from the palm of your hand.
Weather-Based Adjustments
Some advanced systems integrate local weather data to automatically adjust watering schedules. If rain is forecast, the system will skip scheduled watering to prevent overwatering and waste.
Soil Moisture Sensors
Cutting-edge systems may include soil moisture sensors that provide real-time data on soil conditions. This information allows for precise watering based on actual plant needs rather than pre-set schedules.
Water Flow Monitoring
New technologies can detect unusual water flow patterns, alerting homeowners to potential leaks or system malfunctions before they become major issues.

These technological advancements not only improve the efficiency of underground sprinkler systems but also provide homeowners with greater control and insight into their lawn care practices.
Comparing Underground Sprinklers to Other Irrigation Methods
How do underground sprinkler systems stack up against other popular irrigation methods? Let’s compare:
Underground vs. Above-Ground Sprinklers
Underground systems offer superior water efficiency, even coverage, and aesthetic benefits compared to above-ground options. While they have a higher initial cost, they typically require less maintenance and have a longer lifespan.
Underground Sprinklers vs. Manual Watering
Compared to manual watering with a hose or portable sprinkler, underground systems save time and ensure consistent watering. They’re particularly beneficial for large lawns or for homeowners with busy schedules.
Sprinklers vs. Drip Irrigation
While drip irrigation is highly efficient for garden beds and individual plants, it’s less practical for large lawn areas. Underground sprinklers provide a good balance of efficiency and coverage for typical residential lawns.
Traditional vs. Smart Sprinkler Systems
Smart underground sprinkler systems offer additional benefits like remote control, weather-based adjustments, and detailed water usage data. While more expensive, they can lead to greater water savings and lawn health in the long run.
By understanding these comparisons, homeowners can make informed decisions about the best irrigation method for their specific needs and preferences.
Potential Challenges and Solutions
While underground sprinkler systems offer numerous benefits, they’re not without potential challenges. What issues might arise, and how can they be addressed?
Initial Landscape Disruption
The installation process involves digging trenches, which can temporarily disrupt your landscape. Choose a reputable company that minimizes damage and provides thorough restoration services.
System Malfunctions
Sprinkler heads may become clogged or misaligned over time. Regular maintenance and prompt repairs can prevent these issues from affecting your lawn’s health.

Overwatering Concerns
Improperly programmed systems may lead to overwatering. Work with your installer to create a custom watering schedule tailored to your lawn’s specific needs.
Winter Damage in Cold Climates
In areas with harsh winters, systems must be properly winterized to prevent freezing and pipe damage. Many companies offer winterization services as part of their maintenance packages.
Compatibility with Existing Landscaping
Extensive root systems or hardscaping features may complicate installation. A thorough site evaluation by a professional can identify potential issues and solutions before installation begins.
By anticipating these challenges and working with experienced professionals, homeowners can ensure a smooth installation process and long-term satisfaction with their underground sprinkler system.
Making the Decision: Is an Underground Sprinkler System Right for You?
Deciding whether to invest in an underground sprinkler system requires careful consideration of various factors. How can you determine if it’s the right choice for your property?
Assess Your Lawn Care Needs
Consider the size of your lawn, your current watering routine, and any persistent issues like dry patches or uneven growth. If you’re spending significant time and effort on manual watering or struggling to maintain a healthy lawn, an underground system may be beneficial.
Evaluate Long-Term Costs
While the initial installation cost is substantial, factor in potential water savings, reduced maintenance needs, and the increased value of a well-maintained lawn. For many homeowners, the long-term benefits justify the upfront investment.
Consider Your Lifestyle
If you travel frequently or have a busy schedule that makes consistent lawn care challenging, the convenience of an automated system can be a significant advantage.
Think About Environmental Impact
If water conservation is a priority for you, modern underground systems with smart controllers and efficient design can significantly reduce water waste compared to traditional watering methods.
Consult with Professionals
Schedule consultations with reputable irrigation companies to get expert opinions on your specific situation. They can provide detailed assessments and recommendations tailored to your property and needs.
By carefully weighing these factors and gathering information from trusted sources, you can make an informed decision about whether an underground sprinkler system is the right choice for your lawn care needs.
If your lawn is starting to look patchy and tired no matter how much you water it, it may be time to consider converting to an underground sprinkler system. Making the switch can seem daunting, but the long-term benefits for your lawn’s health and appearance make it worth exploring.
Why You Should Convert To Underground Lawn Sprinklers
Above-ground sprinklers are notorious for inefficient watering. Factors like wind and evaporation prevent every drop from reaching your grass roots. Underground systems deliver water directly to the soil for maximum absorption. Your grass will get greener with less wasted water.
Underground sprinkler heads also have superior coverage compared to above-ground models. Strategically placed heads ensure even water distribution across your entire lawn. No more dead patches or oddly shaped dry spots.
Consistent moisture encourages healthier grass and fewer weeds. Underground systems provide a timed, measured water supply. They can be customized to match your lawn’s needs based on soil type, grass variety, sun exposure and more.
Underground sprinklers are also less prone to damage. Lawn mowers and kids playing won’t bump the heads out of alignment. And there’s no winterizing necessary – the system won’t freeze or need blowing out.
How Much Does Underground Sprinkler Installation Cost?
The cost to install an underground sprinkler system runs $1,500 to $3,000 on average for a standard quarter to half-acre suburban lawn. Pricing depends on factors like:
- System type – drip irrigation is cheapest, rotors most expensive
- Yard size and shape
- Number of heads needed
- Speciality heads for slopes and tight spots
- Automatic controller programming
- Excavation needs – rocky or clay soil costs more to dig
- Landscaping repair post-install
Get multiple bids to find the best value. Many companies offer package deals on system equipment and installation.
Finding The Right Underground Sprinkler Company
Choose an experienced irrigation contractor for your underground sprinkler installation. Look for:
- 5+ years in business
- Specialization in irrigation rather than general landscaping
- Membership in industry associations
- Manufacturer certifications
- Liability insurance and licensing
- Warranties on parts and labor
Ask for customer referrals and check ratings on Google, Yelp and Angie’s List. Meet with several companies and get written estimates detailing exactly what’s included.
Make sure the system designer does an on-site evaluation of your yard first. Your lawn’s specific needs should dictate the sprinkler layout and equipment used.
What Are The Benefits Of Underground Sprinklers?

Here are the top advantages of installing underground sprinklers:
- Better water efficiency – Less overspray and evaporation compared to above-ground systems.
- Healthier grass – Even watering encourages growth and eliminates dry patches.
- Fewer weed problems – Proper moisture levels prevent weeds from taking root.
- Custom coverage – Heads can be placed to accommodate the shape of your yard.
- Automatic watering – Programmable controllers handle irrigation on a set schedule.
- Less maintenance – Sprinkler heads are protected underground from damage.
- Improved aesthetics – No visible pipes, hoses or sprinklers cluttering up your lawn.
The benefits of lush, weed-free grass and not having to drag hoses around outweigh the higher upfront installation costs for most homeowners.
Installing an underground sprinkler system is a major investment that can pay off in the long run through water savings, healthier grass and increased convenience. But like any major home improvement project, it’s natural to have questions about the cost.
How Much Does Underground Sprinkler Installation Cost?
The average cost to install underground sprinklers ranges from $1,500 to $3,000 for a typical suburban lawn of around a quarter to half an acre. However, there are many factors that affect the total price tag:
- Size of lawn – The more ground you need to cover, the more heads and piping required.
- Type of system – Simple drip irrigation is cheapest. Rotor sprinklers provide the best coverage but cost more.
- Speciality components – Sloped areas or tight spaces may need customized heads.
- Soil type – Rocky or clay soil requires more excavation work.
- Zones – Multiple watering zones add expense but improve efficiency.
- Smart controls – Programmable controllers are pricier but automate watering.
Other factors like permitting fees and post-installation landscaping repairs can drive costs up. Get an itemized estimate accounting for your unique lawn challenges.
How to Get the Best Deal on Installation

Here are tips for finding affordable underground sprinkler installation:
- Get quotes from 3-5 irrigation companies to compare.
- Ask about package deals on equipment + professional installation.
- Inquire about trenching equipment discounts if you dig the ditches.
- Seek referrals for specialists that offer competitive pricing.
- Schedule install in the off-season when demand is lower.
- Opt for simple rotor sprinklers over expensive drip irrigation.
Paying a little more for quality installers with strong warranties can also save you money in the long run through fewer repairs and replacements.
Is the Investment Worth It?
Underground irrigation costs more upfront but can yield impressive ROI through factors like:
- Decreased water usage – 30-50% savings possible.
- Healthier landscaping – Less disease and pest issues.
- Reduced maintenance once installed – No seasonal blowouts.
- Higher home value – Particularly in drier climates.
If you’re tired of paying for wasted water and damage repairs on old above-ground systems, investing in underground sprinklers can pay dividends for years to come through savings and better lawn care.
Installing an underground sprinkler system requires technical expertise, quality materials and proper planning. With such a major investment at stake, it’s essential to find the right irrigation company for the job.
Finding The Right Underground Sprinkler Company

Look for these traits when evaluating potential underground sprinkler installation contractors:
- Specialized experience – Seek companies focused solely on irrigation over general landscapers.
- Established business – Look for 5+ years in operation.
- Industry affiliation – Prefer companies belonging to trade groups like IA and NALP.
- Manufacturer certified – This ensures proper training on equipment.
- Proper licensing – Required for irrigation work in most areas.
- Liability insurance – Protects your property in case of damages.
The right irrigation company will have strong technical expertise along with a track record of reliability. Checking for proper credentials helps verify this.
Vetting Potential Underground Sprinkler Companies
Here are smart tips for evaluating contractors:
- Ask for referrals from recent customers.
- Read online reviews on sites like Yelp and Angie’s List.
- Verify licensing on state contractor board websites.
- Check for complaints with the Better Business Bureau.
- Ask detailed questions about their installation process.
A site visit and estimate from a reputable contractor will give you a chance to assess their knowledge and professionalism first-hand.
What to Look for in the Estimation Process
The right contractor will:
- Do an on-site evaluation of your unique needs.
- Present a detailed plan tailored to your landscape.
- Provide an itemized quote outlining all costs.
- Use top brand name components.
- Have strong warranties on parts and labor.
- Answer all questions knowledgeably.
Finding an established underground sprinkler company with satisfied customers will give you confidence in a major investment that can enhance your landscape for years to come.
If your tired old above-ground sprinklers aren’t nourishing your lawn the way they used to, it may be time to consider an underground system. The investment pays off through healthier grass, water savings, and convenience.
What Are The Benefits Of Underground Sprinklers?
Here are the top reasons to make the switch:
- Better efficiency – Underground systems waste less water through evaporation and overspray.
- Healthier grass – Even coverage encourages growth and fights weeds.
- Automated watering – Programmable controllers handle irrigation for you.
- Customizable – Heads can be placed to accommodate yard shape.
- Durable materials – Underground pipes and heads are less prone to damage.
- Improved aesthetics – No visible pipes, hoses or sprinklers marring your landscape.
Let’s explore those benefits in more detail:
Better Water Efficiency

Underground systems apply water right to the soil through targeted spray heads. This avoids the 30-50% overspray loss common with above-ground models. Underground irrigation also won’t leave dry patches due to wind disruption.
Healthier Grass
The even water coverage encourages stronger turf grass growth. Consistent moisture below the surface prevents weed seeds from sprouting. Rich green lawns are easier with underground sprinklers.
Automated Watering
Smart controllers handle the irrigation scheduling for you based on weather and lawn conditions. No more dragging hoses around or forgetting to water. Just set it and forget it.
Customizable Layouts
Heads can be placed anywhere to accommodate the unique shape of your landscape. Odd angles, slopes and narrow spaces are no problem.
Fewer Repairs
Underground materials are more durable and concealed. No more broken pipes from lawnmowers or damaged heads from romping kids.
If a beautiful worry-free lawn sounds appealing, underground sprinklers can be a game changing investment for your landscape.
Selecting the optimal sprinkler heads is crucial for an efficient underground irrigation system. The right heads for your landscape will ensure even coverage, minimal maintenance, and years of reliable service.
Choosing The Right Underground Sprinkler Heads

Consider these factors when selecting underground sprinkler heads:
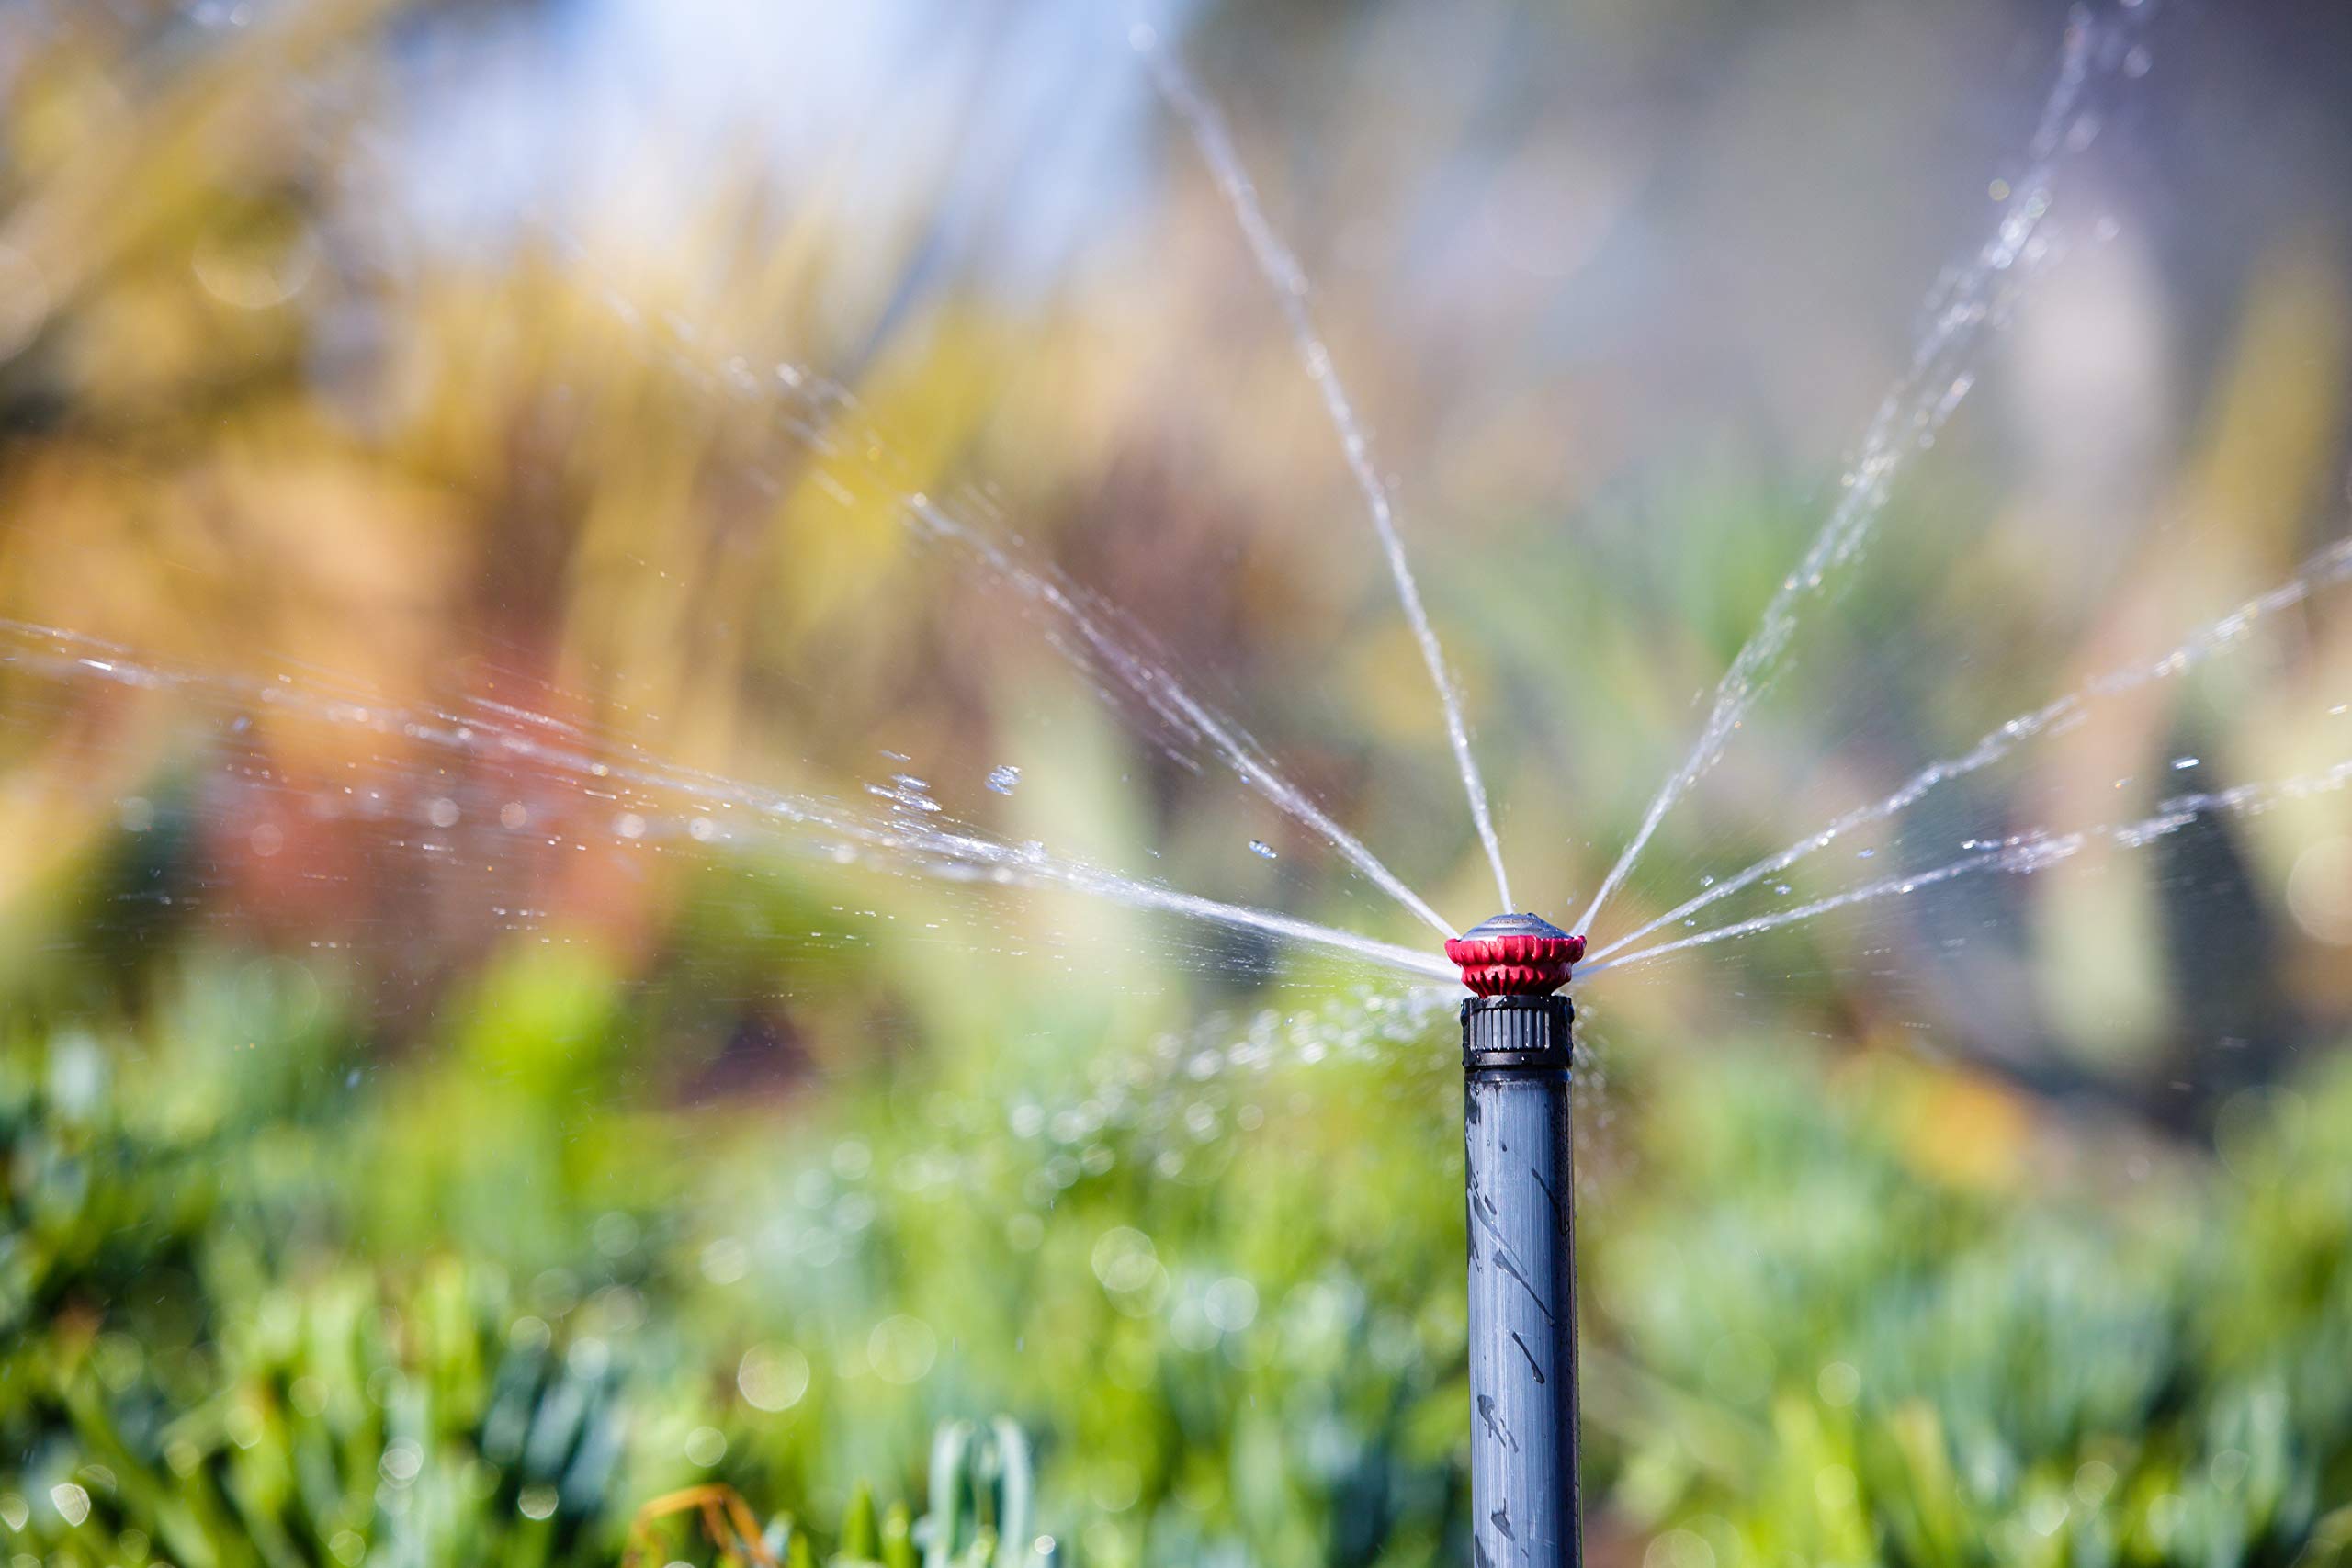
Sprinkler Pattern
Heads are available in quarter-circle, half-circle, and full-circle spray patterns. Choose patterns that provide complete coverage without overlap. For example, quarter-circle heads are great for watering up against walls and fences.
Precipitation Rate
This refers to how much water the head puts out measured in inches per hour. Match precipitation rates across heads for even coverage. Rates range from 1″ to over 3″ per hour for different needs.
Adjustable Arc
Look for heads with adjustable arcs that allow you to customize the spray angle as needed. This accommodates the unique contours of your landscape.
Nozzle Options
Interchangeable nozzles are convenient for modifying spray distance and flow rates. Some models feature dual nozzle options for extra flexibility.
Pop-Up Height
Standard pop-up heights are 4″ to 6″ but some applications call for lower or higher extensions. Consider clearance from grass height and potential obstacles.
Materials
Commercial grade plastic rotor heads offer the best value. Stainless steel bodies provide maximum durability in harsh climates.
Consulting with irrigation experts on heads tailored to your yard’s specifics will ensure optimal performance from your underground sprinklers.
Best Underground Sprinkler Brands
Trust proven brands like Rain Bird, Hunter, and Toro for quality underground irrigation components that will provide years of reliable service.
Investing in the right sprinkler heads is essential for efficiently watering every inch of your landscape to its fullest potential.
One of the best features of underground sprinkler systems is the ability to program automatic watering schedules customized to your lawn’s needs. Smart controllers make it easy to set and adjust your irrigation schedule for healthy grass.
Programming And Controlling Your Underground System
Here are tips for maximizing an automatic underground sprinkler controller:
Adjust for Seasonality

Program more frequent watering during hot peak summer months and reduce during cooler spring and fall. Avoid watering in winter when grass goes dormant.
Cycle and Soak Settings
Utilize multiple shorter watering cycles with a soak time in between. This allows soil to absorb rather than run off.
Water Early Mornings
Schedule irrigation between 4-10am when evaporation loss is lowest. Avoid watering at night that can promote fungus.
Group Zones by Needs
Divide sprinklers into zones based on plant type, sun exposure and soil. Program each zone independently.
Use Smart Weather Sensors
Add rain and freeze sensors that automatically delay watering when nature provides moisture.
Adjust for Rainfall
Reduce schedules after heavy rains so you don’t overwater.
Manual Controls
Supplement automatic watering with manual adjustments as needed.
Monthly Inspections
Do walkthroughs to check for leaks, damaged heads and coverage gaps needing schedule tweaks.
Learning your controller’s capabilities and tailoring the programming to your landscape takes some trial and error but optimizes efficiency.
Smart irrigation control paired with underground sprinklers leads to lush landscapes without wasted water.
Installing underground sprinklers is a challenging DIY project, but the cost savings can make the effort worthwhile. With proper planning, materials and elbow grease, you can install an efficient system successfully.
Do It Yourself Underground Sprinkler Installation Tips
Follow this advice to tackle underground sprinkler installation as a DIY project:
Install in Dry Months
Schedule the install during summer or early fall when trenching and planting grass seed is easier.
Map Out the System
Mark head locations, pipe runs and trenches based on coverage needs. Plan for gradual slopes.
Rent a Trencher
Renting a walk-behind trencher makes digging easier than manual shovel work in most soils.
Use Flexible Piping
Flexible polyethylene pipe is easy for DIYers to install with simple push-fittings.
Include Drainage Gravel
Add a layer of gravel in trenches to improve drainage below the pipes.
Backfill Trenches Properly
Be careful not to damage pipes when backfilling. Use sand or fine soil.
Follow Manufacturer Instructions
Consult diagrams for proper assembly and head placement techniques.
Perform Water Coverage Tests
Inspect spray patterns and adjust heads as needed for even watering.
Program the Controller
Set watering schedules based on zones, soil type and seasonal needs.
With the right tools and preparation, a DIY sprinkler system can be an affordable option for enterprising homeowners.
Underground sprinkler systems are less prone to damage than above-ground models. But over time, problems can still arise that require troubleshooting and repairs.
Common Underground Sprinkler Problems And Repairs
Watch for these common issues and how to fix them:
Leaking Joints
Leaks at pipe connections are often caused by loose fittings. Tighten fittings with a pipe wrench and add Teflon tape to threads.
Clogged Heads
Mineral deposits and debris can clog nozzles and reduce water flow. Unscrew heads and clean with a pick or vinegar soak.
Sunken Heads
Heads may sink over time. Raise sunken heads to proper grade with a riser extension.
Pool Coverage
Adjust arc nozzles and water pressure to get even coverage without dry spots or overspray.
Damaged Wiring

Rodents or gardening tools can damage buried control wires. Splice broken wires with waterproof connectors.
Faulty Valves
Valves that stick closed or leak when open should be rebuilt with a kit or replaced.
Malfunctioning Controller
Replace faulty controllers. Upgrade to a smart WiFi-enabled model for advanced features.
Winterize the system each fall by draining pipes, blowing out lines, and shutting off water supply to prevent freeze damage.
Regular inspection and prompt repair of any problems keeps an underground system operating at peak efficiency.
One of the perks of underground sprinkler systems is low maintenance. But come winter, a bit of seasonal care is still needed in cold climates to prevent freeze damage.
Winterizing Your Underground Sprinkler System
Follow this winter prep checklist to protect your system:
Flush the Lines
Run a drain cycle to clear pipes of all remaining water that could freeze and expand.
Blow Out the Pipes

Use compressed air to force any lingering moisture out of below-ground lines.
Drain and Store Above-Ground Pipes
Detach and drain any pipes that are above ground and could hold water.
Insulate Vulnerable Components
Wrap insulation around valves, backflow preventers and control boxes.
Seal Off the Water Supply
Shut off and drain the stop and waste valve that feeds water to the sprinklers.
Adjust the Controller Settings
Disable all watering schedules for the winter season.
Service the System
Inspect and repair any issues you find to start spring in top shape.
Remove and Store Your Smart Controller
Bring programmable controllers indoors so temperatures don’t damage them.
A thorough winterization protects your investment and ensures your underground sprinklers are ready for lush green grass come spring.
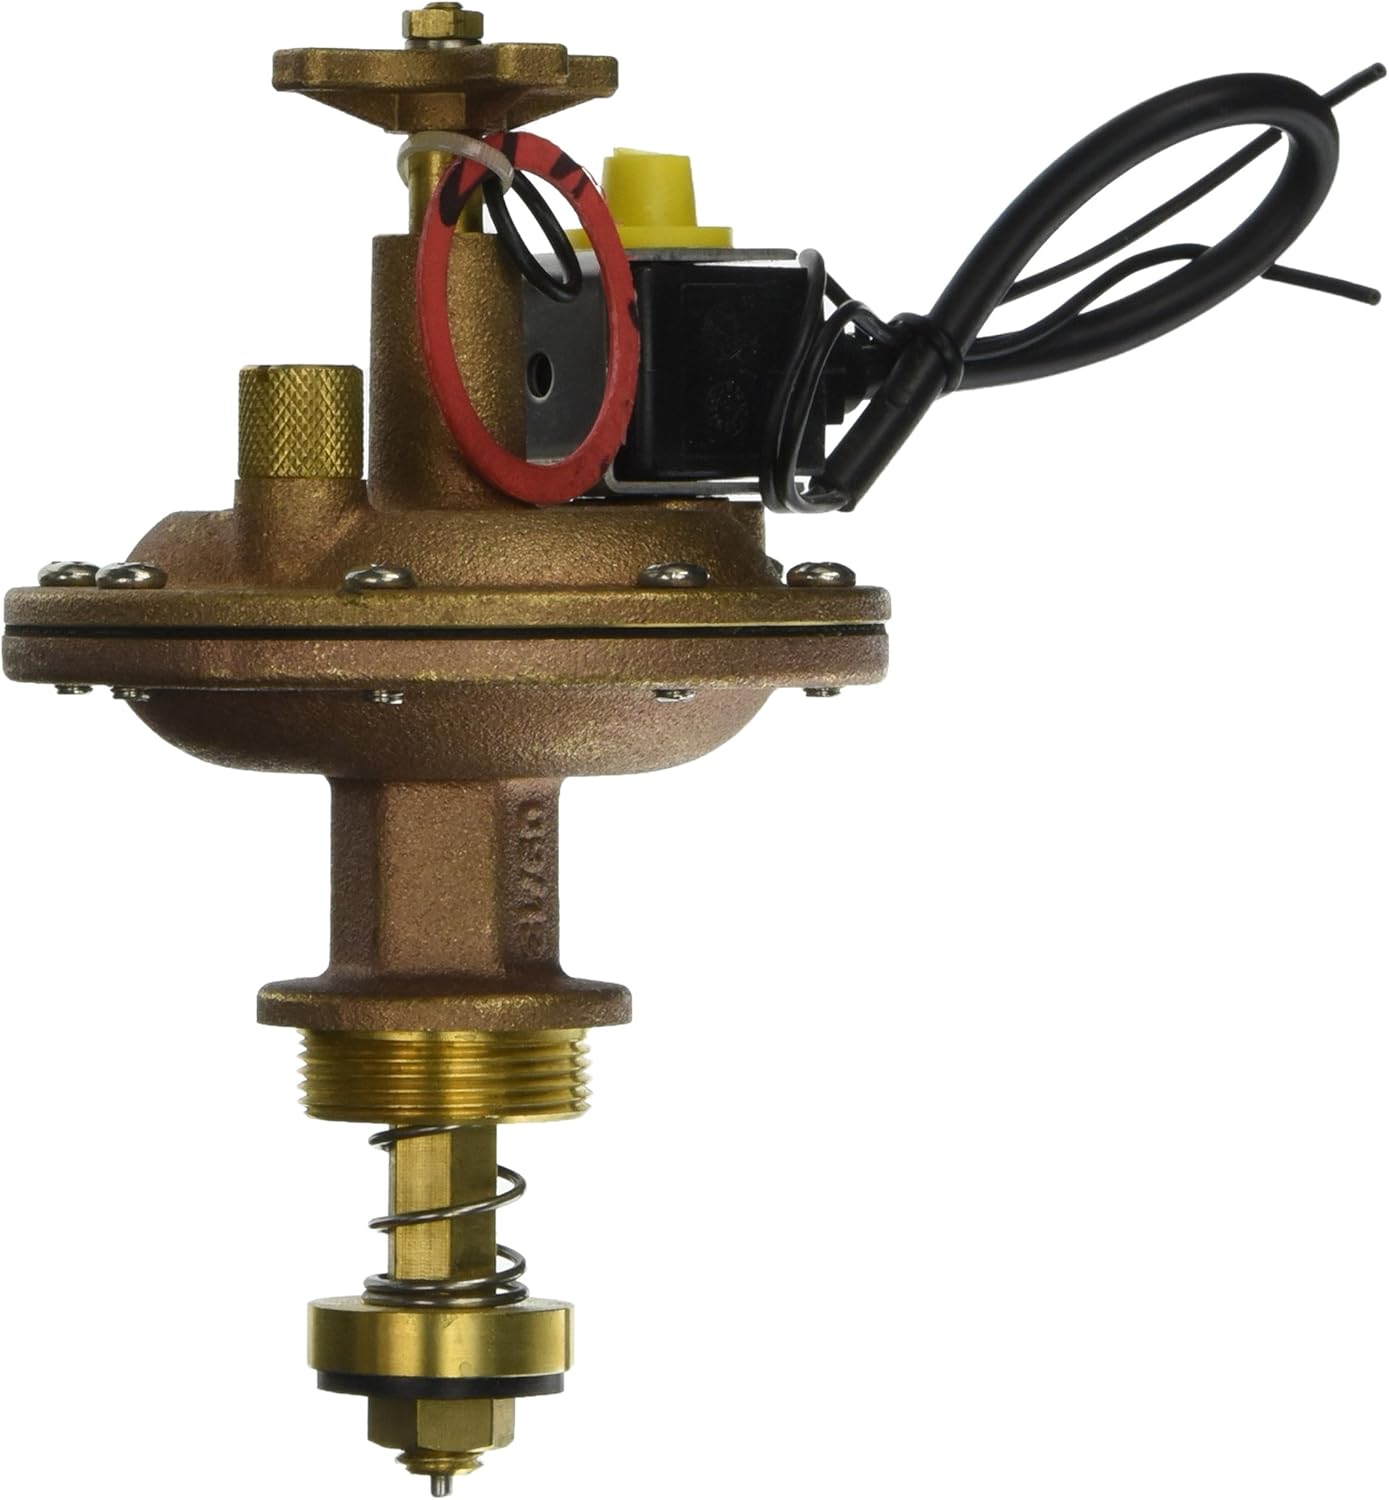
Valves play a crucial role in underground sprinkler systems by controlling water flow to zones. Investing in quality valves prevents problems and ensures reliable watering.
Buying The Best Underground Sprinkler Valves
Consider these tips when selecting new valves for your underground irrigation system:
Match the Valve Size to Piping
Choose the proper valve diameter to match the pipes they connect to for optimal water flow.
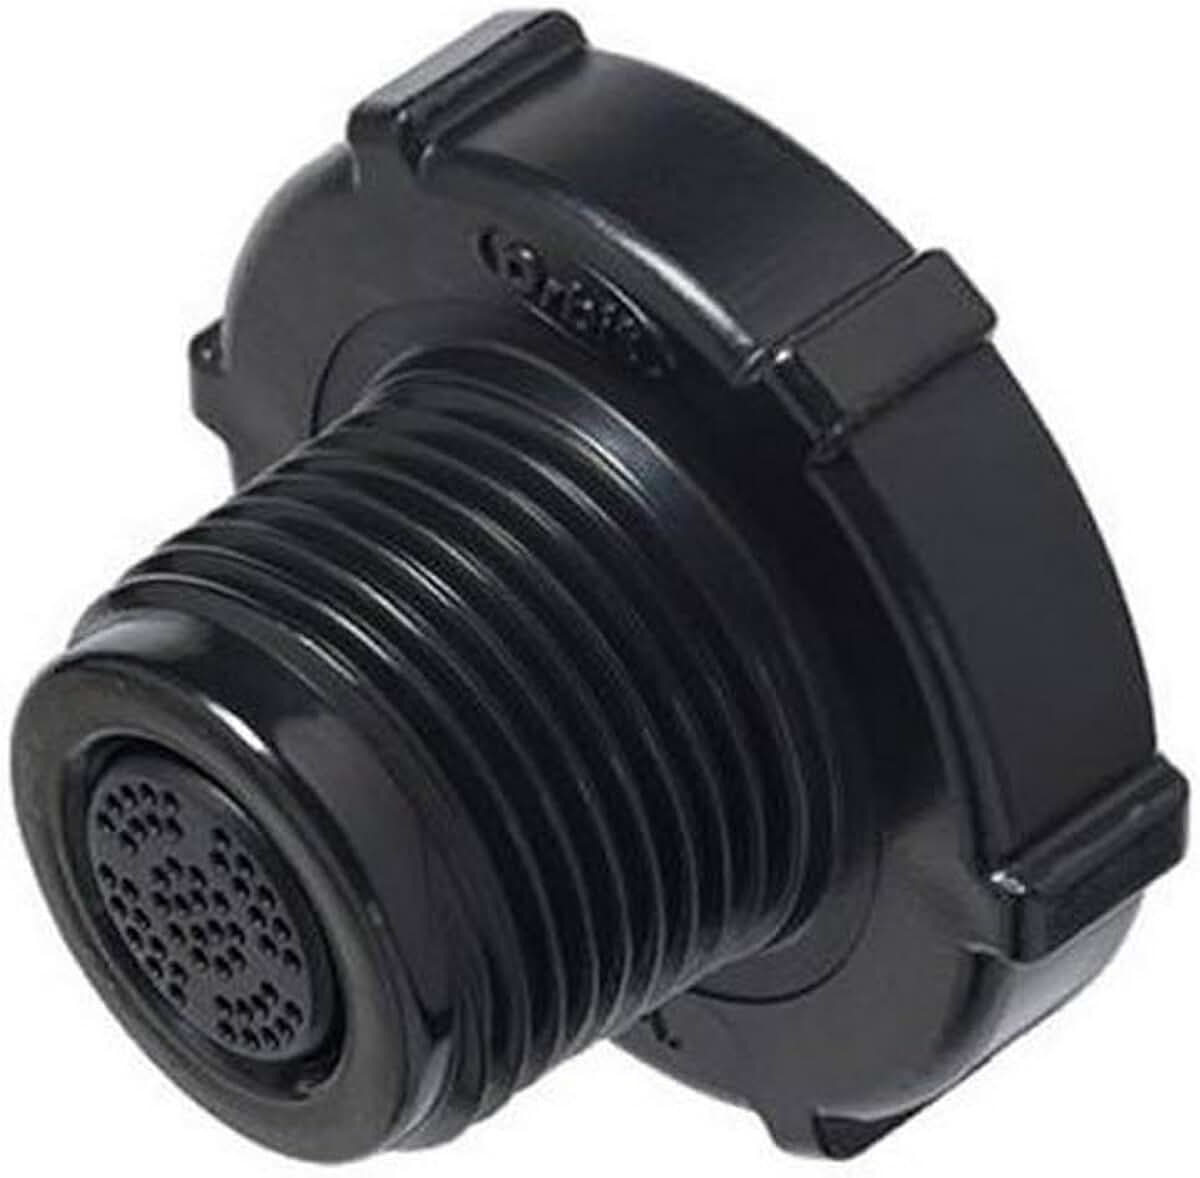
Anti-Siphon Protection
Look for built-in backflow prevention to stop contaminated water from siphoning back.
Manual Bleed Screw
Handy bleed screws make it easy to manually open valves to drain lines before winter.
Durable Materials
Commercial grade plastic valves hold up better than lower cost latex models.
Full Port Design
Full port openings allow unimpeded water flow to reduce pressure loss.
Flow Control
Adjustable flow controls balance water volume to different zone needs.
Union Fittings
Quick connect fittings simplify valve installation and future servicing.
Reputable Brands
Choose a trusted brand like Rain Bird, Hunter or Toro for quality assurance.
Investing in robust commercial-grade valves prevents lots of potential headaches down the road.
A well-designed sprinkler layout is crucial for an efficient underground irrigation system. Optimal placement of heads and pipes ensures complete coverage without overspray or dry spots.
Designing An Efficient Underground Sprinkler Layout
Use these tips when planning your layout:
Evaluate Your Landscape
Consider lawn size, shape, vegetation, slopes and sun exposure to determine watering needs.
Divide Into Zones
Group sprinklers into separate zones based on plant type and sun exposure for custom schedules.
Maximize Existing Elements
Utilize sidewalks, driveways and garden borders to reduce head spacing needs.
Account for Pressure Differences
Adjust head types and spacing for pressure variances from valves.
Allow Enough Clearance
Ensure heads have proper clearance from walls, fences, trees and other obstructions.
Follow Manufacturer Recommendations
Consult head specs for optimal coverage and overlap requirements.
Gradually Slope Lines
Use a 1-2% slope for lateral pipes to facilitate drainage.
Easy Access to Components
Place valves and control wiring where they are easily accessible for maintenance.
An irrigation professional can help craft the ideal layout tailored to the quirks of your yard.
If your current above-ground sprinkler system isn’t keeping your lawn properly nourished, it may be time to consider upgrading to an underground system.
Upgrading From Above Ground To Underground Sprinklers

Upgrading offers benefits like:
Improved Water Efficiency
Underground sprinklers deliver water directly to roots with less evaporation or wind disruption.
Healthier Grass
The even coverage of underground systems produces thicker, greener, and weed-free turf.
Better Coverage
Strategically placed heads can reach every inch of odd-shaped lawns.
Less Maintenance
Underground systems are less prone to damage from lawn mowers or kids.
Automatic Watering
Programmable timers handle watering tasks so you don’t have to move hoses.
Improved Aesthetics
No more unsightly above-ground pipes and sprinklers marring your landscape.
Upgrading does come at a cost ranging from $1,500 to $3,000 or more. But for many homeowners, the benefits outweigh the price.
Tips for Upgrading
When converting to underground sprinklers:
- Have an irrigation company design the new system based on your yard’s needs.
- Schedule the install during dry months for easy digging.
- Use existing above-ground pipe runs if possible to save money.
- Upgrade your controller to an automatic smart model.
- Make any necessary improvements to drainage and grading.
The investment pays dividends through water savings and lush, healthy grass for years to come.
Underground sprinkler systems excel at covering broad expanses of lawn efficiently. But for watering gardens, trees and shrubs, targeted drip irrigation can be a wise companion system.
Installing Underground Drip Irrigation Alongside Sprinklers
Here’s how combining drip and sprinklers can maximize irrigation for your entire landscape:
Benefits of Drip Irrigation
- Saves water by slowly applying it to soil and plant roots.
- Prevents disease by keeping foliage dry.
- Waters uneven terrain effectively.
- Can be zoned separately from sprinklers.
Best Uses for Drip Lines
- Flower and vegetable garden beds.
- Trees, shrubs and bushes.
- Sloped areas and berms.
- Odd shaped zones sprinklers miss.
Installation Tips
- Install drip lines 6-12 inches deep alongside sprinkler pipes.
- Use a separate valve for drip zones to control flow rate.
- Flush lines annually to prevent sediment clogs.
- Install a filter to keep debris out of emitters.
The combination of broad coverage from sprinklers and precision targeting of drip irrigation lets you customize watering for peak efficiency throughout your landscape.
Underground sprinkler systems have distinct advantages over in-ground and pop-up models. But they also come at a higher initial cost. Understanding the key differences helps determine the best option for your lawn.
Comparing Underground To In-Ground And Pop-Up Sprinklers

Underground Sprinklers
- Pipes and heads buried for invisibility
- Heads pop-up when watering
- Most efficient water usage
- Higher upfront cost to install
In-Ground Sprinklers
- Permanent heads fixed in ground
- Vulnerable to damage from mowers
- Prone to blocking from grass growth
- Lower cost than underground
Pop-Up Sprinklers
- Heads sit above ground when off
- Pop up on flexible stalks when watering
- Often used in existing systems
- Less expensive but not invisible
For new installations seeking optimum efficiency with low maintenance, a fully underground system is ideal. But pop-ups and in-ground models can provide affordable options for upgrading old systems gradually.
The right choice depends on your budget and priorities for your lawn and landscape.
One of the advantages of underground sprinkler systems is low maintenance needs. But some periodic care will still keep your system operating at peak efficiency for years.
Maintaining Your Underground Sprinkler System
Follow this maintenance schedule:
Early Spring
- Test and adjust sprinkler heads for proper alignment and coverage.
- Check for clogged nozzles and clean as needed.
- Inspect valves and repair leaks or malfunctioning components.
- Examine all above-ground fittings and pipes for freeze damage.
Mid Spring
- Flush debris from lines by running zones manually.
- Check soil moisture sensors are working properly before automatic watering starts.
- Adjust watering schedules based on plant needs as temperatures warm.
Mid Summer
- Monitor spray patterns while running and adjust as needed.
- Inspect for leaks and evidence of underground pipe damage.
Early Fall
- Have professional check and winterize backflow preventer.
- Winterize components and drain system before freezing temps arrive.
Proper maintenance maximizes the value of your investment and keeps your landscape lush and healthy year after year.