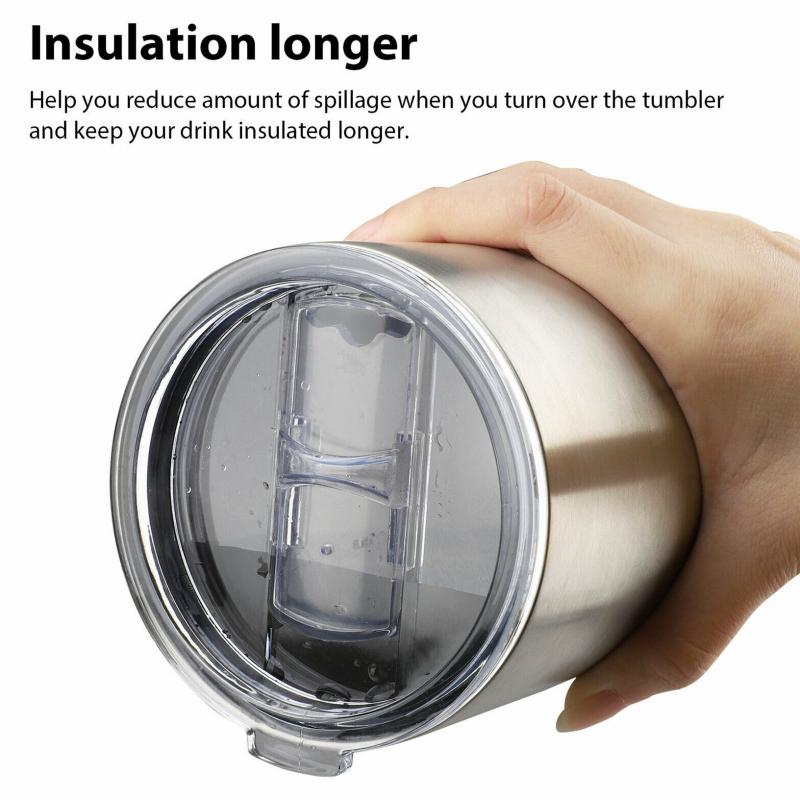
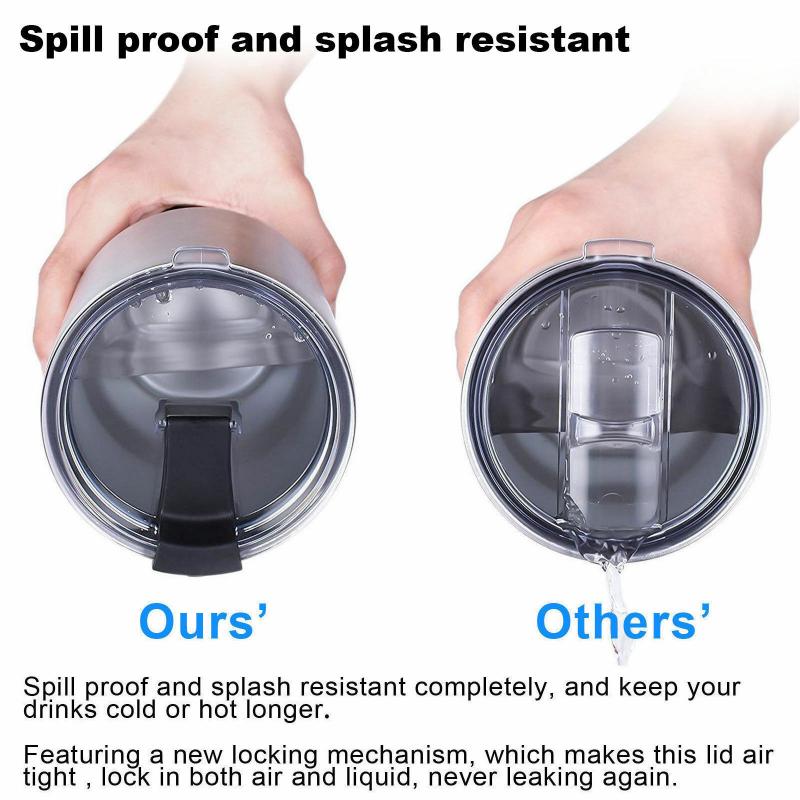
Why Do Yeti Cup Lids Leak? Examining Common Causes
Nothing’s worse than eagerly sipping your morning coffee only to discover it dribbling down your shirt. You bought your Yeti rambler expecting it to be leakproof, so what happened?
Yeti tumblers are renowned for their durability and insulation. But even the best lids can start leaking over time with wear and tear. Before you chuck your Yeti in the trash in frustration, let’s walk through some troubleshooting tips to pinpoint the issue and fix it.
Inspect the Lid Seal
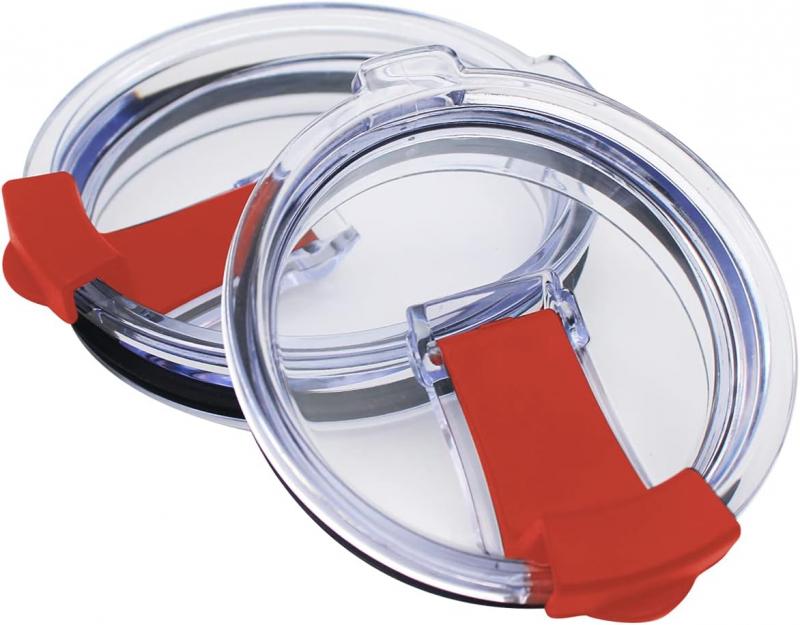
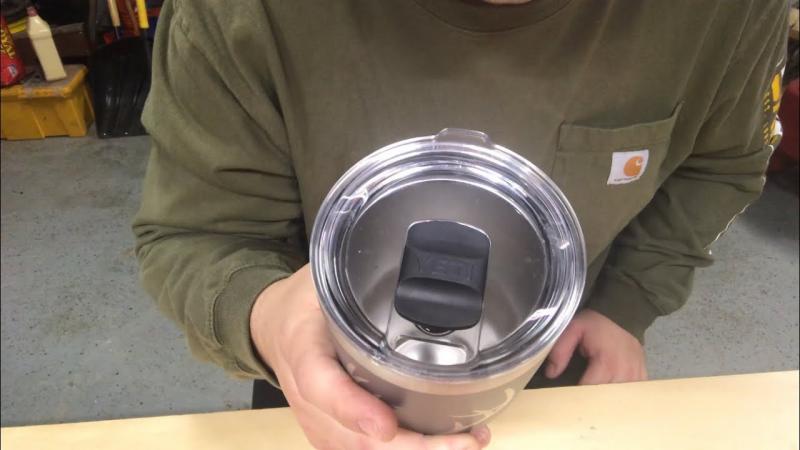
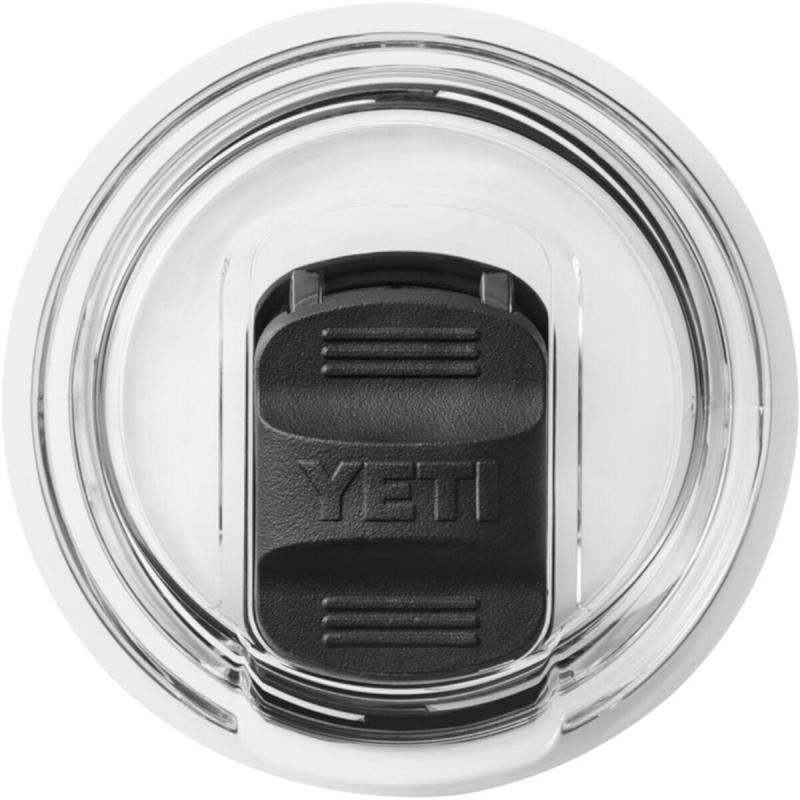
The most obvious culprit is a compromised lid seal. Turn over the lid and examine the rubber gasket closely. Look for any cracks, warping, or damage. The gasket provides a tight, water-resistant barrier when properly aligned.
Over time, this flexible rubber material can become dried out and brittle. Dropping your Yeti can also distort the shape of the gasket, preventing a tight seal. Exposure to heat or UV rays accelerates the breakdown too.
If the gasket shows obvious wear, replacement lids are available from Yeti. It’s generally more cost-effective to replace just the lid rather than buying a whole new tumbler.
Check Gasket Alignment
Another common mistake is the gasket slipping out of alignment. When installing the lid, take a close look to ensure the gasket evenly hugs the cup’s rim all the way around.
If misaligned even slightly, it can create small gaps along the seal. Turn the cup upside down to double check no daylight shines through.
You may need to press down firmly when sealing to fully engage the gasket. An audible click indicates it’s correctly in place.
Avoid Overfilling
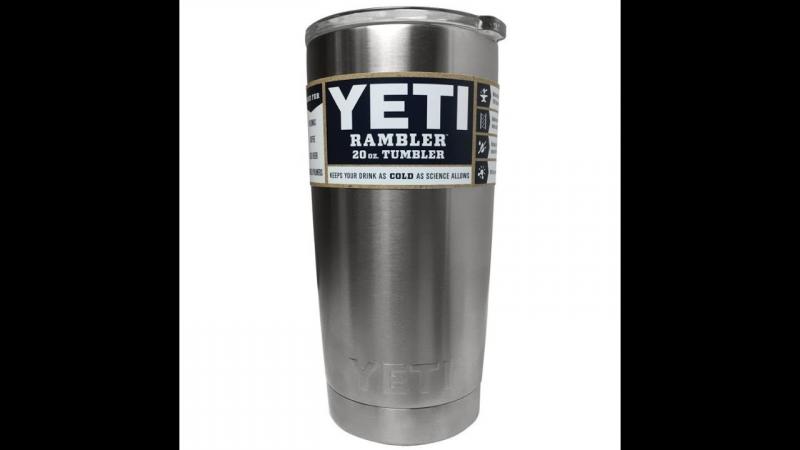
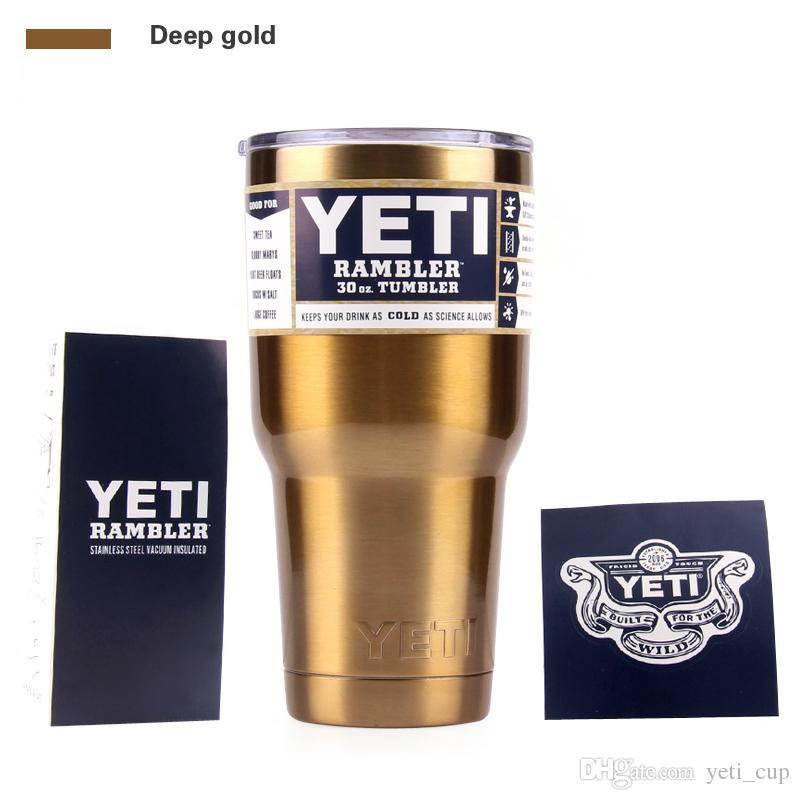
Even the best lids can leak when overfilled. The standard 30 oz Yeti Rambler holds about 27-28 oz of liquid max when allowing for ice and foam.
Pouring coffee all the way to the brim risks overflowing when you seal the lid. This forces liquid past the gasket and compromises the seal.
Leave at least 1/2 inch of headspace below the rim before sealing. For carbonated drinks allow even more room for bubbles to expand.
Tighten Fully
It may seem obvious, but lids can leak if not fully tightened. The gasket works by compressing snugly against the rim.
Twisting the lid only halfway on leaves the seal loose and incomplete. You should feel significant resistance as you twist the last quarter turn or so and hear an audible click.
If the lid feels loose even when fully tightened, the gasket is likely worn out. Try a replacement.
Clean Regularly
Beverage residue, oils, and grime buildup can interfere with the lid seal over time. For best results, wash lids regularly with warm soapy water.
Pay close attention to fully flush out any gunk around the gasket. Let all parts dry completely before reattaching.
For a quick cleaning on the go, using a wet paper towel around the brim can remove debris and re-establish the seal.
Use Proper Lid
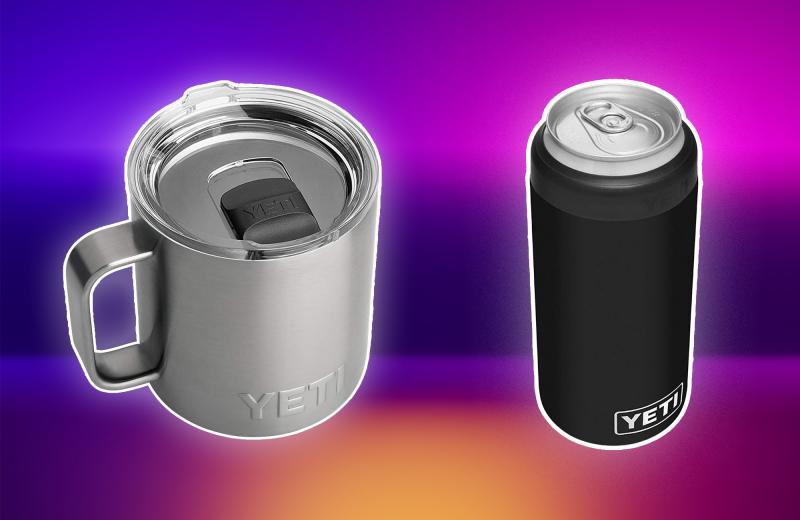
Yeti offers different lid styles, sizes, and types for their various mug and bottle designs. Using the wrong lid leads to poor fit and potential leaking.
The 36 oz Rambler bottle accepts a different lid than the 30 oz Rambler mug for example. Make sure to use the properly matching lid and base.
Be wary of off-brand lids that may seem compatible, but don’t seal correctly. Stick with original Yeti parts whenever possible.
Store Upside Down
Even tiny amounts of liquid residue along the seal can promote leaks. For best results, store your lid upside down on a cup when not in use.
This prevents ring of moisture from accumulating around the gasket area and compromising the water-tight barrier.
It also helps the rubber maintain its original shape instead of flattening out over time.
Upgrade the Lid
If you just can’t solve chronic leaks, upgrading to a newer or more heavy duty lid is an option. The standard lids work fine for most, but heavy users may benefit from a burlier build.
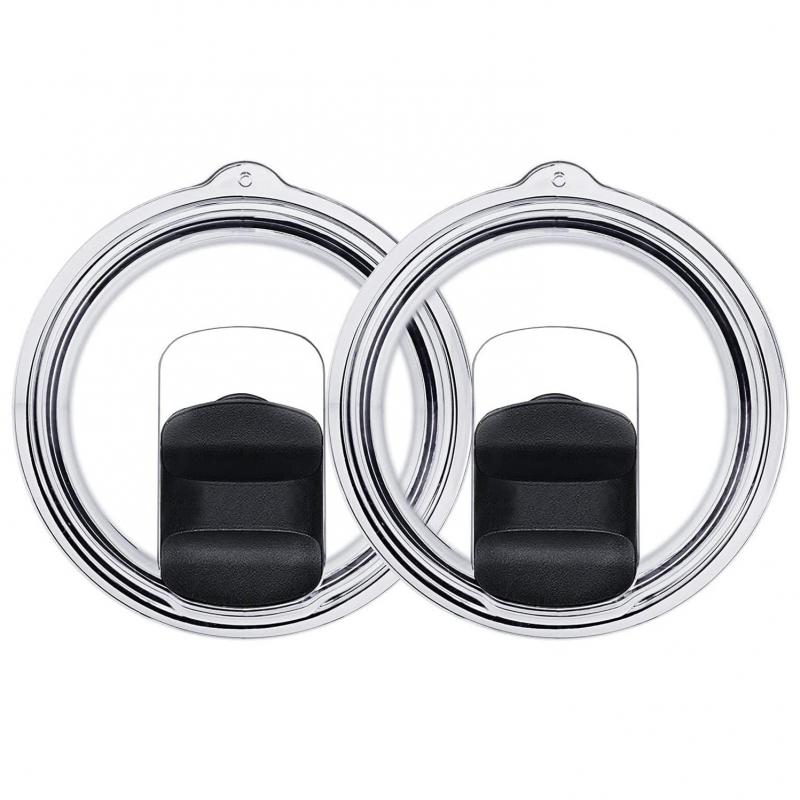
Yeti’s vortex lids have a reinforced gasket and locking mechanism to essentially eliminate leaks. The metal and plastic is also more durable.
MagSlider lids use strong magnets to securely snap the opening in place without worrying about twisting alignment.
Try Aftermarket Lids
Third party companies like Takeya and Simple Modern offer durable BPA-free lids advertised as leakproof.
Many are designed specifically as Yeti alternatives and deliver excellent insulation and sealing performance.
The fit isn’t always perfect, but some users have success using them on older Yeti models with worn gaskets.
Limit Carbonation and Heat
Carbonated beverages and very hot liquids challenge even leakproof lids. The bubbles and heat pressure test the seal.
Limit carbonated drinks to mild fizz only. Allow piping hot coffee to cool slightly before sealing and drink soon after.
Avoid shaking or agitating carbonated drinks which increases internal pressure.
Handle With Care
Any impacts or drops while your Yeti contains liquid can damage the tumbler and lid. The force can jostle the gasket loose or cause fractures.
A dented or bent base also often prevents proper lid sealing. Use care when transporting Yetis and don’t knock over.
Follow Instructions
Be sure to fully read Yeti’s care instructions which contain useful tips for trouble-free operation. Taking proper care maximizes lifespan.
Hand wash only, avoid harsh detergents, don’t microwave, use as intended — following directions prevents many headaches!
Contact Support
After trying the above troubleshooting, if your Yeti still leaks, reach out to Yeti’s customer support online or via phone. Their team can diagnose problems and arrange replacement lids or tumblers if needed.
Backed by a 5 year warranty, they’ll make sure you’re satisfied with your purchase and provide leak-free performance for years to come.
With a little care and maintenance, your Yeti can be your trusty spill-proof companion for work, travel, or outdoor adventures. Don’t toss it out at the first sign of trouble — with some savvy troubleshooting, you’ll be sipping in leak-free bliss once again.
Check the Lid Seal – Is It Cracked, Warped, or Damaged?
So your Yeti lid is leaking, but why? Start your investigation by thoroughly checking the lid seal for any flaws. This rubber gasket is vital for keeping your drink contained.
Turn that troublesome lid upside down and scrutinize the circumference of the gasket. Look for cracks or tears in the rubber by running your finger along it. Even tiny, hairline fractures can undermine the watertight barrier.
While inspecting, press, prod, and stretch the gasket to check its flexibility. Over time, the rubber can dry out and become brittle. Attempting to flex it will reveal if it maintains pliability or threatens to crack from stiffness.
Visually scan the entirety of the gasket, searching for any warped or wavy sections. The seal should have a consistent, even surface all the way around. Any spots that are pinched, creased, or flattened need to be addressed.
The gasket sits in a channel around the underside of the lid. Verify it remains properly seated in this track without slipping out of place or getting offset. All portions should hug the channel uniformly.
If you discover any cracks, tears, dry rot, warping, or displacement of the gasket, replacement is needed. The imperfections mean it can no longer compressed to form an airtight barrier against the tumbler rim.
While inconvenient, investing in a new lid is far less costly than purchasing an entirely new Yeti cup. Luckily, replacement lids can be easily sourced online or directly from the manufacturer.
Impact Damage
Inspect the lid not just for gasket flaws but also impact damage. Dropping your Yeti can put dents and dings in the metal and plastic components. This distortion prevents a proper seal.
If the lid is bent out of shape after a drop, try flexing it gently to regain its original form. But excessive deformation likely requires a replacement.
Cracks or fractures around the edge can also undermine the critical gasket compression. Hairline cracks may not be visible but can act like perforations to allow dripping.
Sun Damage
Don’t neglect wear and tear to the gasket from sun exposure. The UV radiation can degrade the rubber over time, causing brittleness, cracking, or disintegration. Leave lids in direct sunlight and the gasket will eventually fail.
If your Yeti accompanies you on frequent outdoor adventures, the lid seal bears the brunt of harsh environmental factors. Inspect carefully for subtle cracking or peeling along the edges after prolonged UV exposure.
Regular Cleaning

While inspecting for damage, be sure to also clean the gasket area thoroughly. Coffee, juice, or other beverage residue can impact sealing performance. A buildup of grime, oil, or debris along the seal prevents adequate compression.
Use a small brush and warm, soapy water to remove any gunk accumulation. Pay particular attention to the crevice where the gasket joins the lid body, as liquid can pool there.
Visually check that no obstructions remain wedged around the gasket perimeter before reattaching the clean lid. Aim for a smooth, uniform surface all the way around.
Match Lid and Tumbler
Using the proper lid designed specifically for your Yeti model is imperative. Mismatching lid and tumbler pairs is a common mistake that undermines effectiveness.
For example, don’t use a 30 oz Rambler mug lid on a 36 oz Rambler bottle. Even if it seems to fit, the gasket shape won’t correctly match the rim leading to leaks.
Refer to Yeti’s sizing guide if unsure of the right lid model for your particular cup or bottle. Using stock Yeti components ensures ideal fit and performance.
Aftermarket Lids
While third party lids may fit a Yeti, many fail to seal reliably. Stick with genuine Yeti lids to guarantee compatibility and function.
Knock-off lids mimic Yeti’s design but cut corners on materials and quality control. Flaws in off-brand gasket seals negate any potential cost savings.
Contact Yeti support if having trouble tracking down the properly matching lid for your tumbler. They can help identify the right replacement part number.
When to Replace
If inspection reveals no cracks, damage, or imperfections, then replacement may not be needed. Thorough cleaning and realignment could restore function.
But if the gasket shows wear and tear, recovery isn’t possible. Any notable drying, stiffening, warping, or cracking means the lid has reached end of life.
Average gasket lifespan is 1-2 years with regular use. But excessive heat, sun exposure, or rough treatment shortens this. Regularly examine for signs of breakdown.
Catching seal failure early allows swapping the lid before total failure. Don’t wait until your Yeti is constantly leaking all over to take action.
When to Upgrade
If your current Yeti lid model still looks fine but leaks persist, consider upgrading to a higher end lid variant. The extra cost brings enhanced leak protection.
For example, the Vortex lid has a reinforced gasket and sturdier construction for added security. The rotating slider opening also seals more reliably than snap-open lids.
For frequent outdoor adventurers subjecting their Yeti to more extreme conditions, upgrading lids is wise insurance against leaks and spills.
An improved lid also better retains heat and cold compared to more entry-level designs. Less conduction through the opening means your coffee stays hotter longer.
Added leak protection provides welcome peace of mind against damp shirts on your commute or gear in your backpack. Invest in a quality lid and drink easy knowing your Yeti has you covered.
Don’t resign yourself to a persistently leaky tumbler. With some diligent inspection and a replacement lid, you can confidently sip spill-free once again while reaping all the benefits of durable Yeti drinkware.
Ensure the Gasket is Properly Aligned and Seated
The rubber gasket lining your Yeti lid provides the critical seal that keeps drinks from dribbling down your shirt. But this leak prevention only works when the gasket remains properly installed.
Over time, rough handling or frequent removal can cause the gasket to shift out of ideal alignment. Even the slightest displacement breaks that all-important watertight barrier.
Before assuming the gasket is defective, always check that it is correctly seated first. With mild care and attention, you can re-align a functional gasket for continued leak-free use.
Inspect Alignment
Pop off the lid and set it upside down on a flat surface. Visually inspect the gasket running around the circumference. It should evenly hug the lid’s outer rim without any gaps, bulges, or pinches.
Use your finger to trace along the length of the gasket, feeling for consistency. Any spots that are raised, depressed, or shifted warrant further investigation.
Also confirm no daylight shines through when holding the lid up. Backlighting makes it easier to detect subtle alignment issues.
Re-seat Gasket
A gasket sitting too loosely likely just needs pressing back into proper position. Run your finger firmly along the channel, pushing the rubber to compress snugly.
Focus extra pressure on bulging or raised sections to re-seat fully into the channel. Correct fit should leave no openings anywhere.
Twisting the gasket while pressing can also help coax it back into flawless alignment and engagement.
Tamper Evidence
Misalignment may indicate tampering – someone forcibly removed then improperly reinstalled the gasket. Inspect closely for any slicing, shredding, or tooling marks around the rubber.
Gaskets don’t just spontaneously become severely misaligned. Such displacement suggests deliberate removal, and inadequate reassembly.
Closely examine the channel join where the gasket rests. Prying tools like screwdrivers can scratch the surfaces leaving obvious tamper evidence.
Impact Damage
Severe trauma from drops or impacts can potentially unseat a gasket. The sudden jarring force shifts the rubber seal out of position.
Inspect your Yeti base and lid for dents, cracks, or other signs of damage after any impacts. The gasket likely needs realignment after such a mishap.
But extensive battering may permanently deform the lid body or channel holding the gasket. Replacement may be the only solution.
Storage Position
How you store the detached lid also affects gasket position. Leaving the lid upside down helps maintain shape. Storing right side up can cause the flexible rubber to flatten or sink.
If your lid spends significant time detached and stored casually in a bag, for example, expect alignment loss over time. Re-seat the gasket regularly.
Sealing Motion
Pay close attention to gasket position while closing the lid. A little wiggling as you seal can gradually walk the gasket out of ideal orientation.
Excessive twisting force should not be needed to engage the lid. If you find yourself really cranking down, inspect the gasket alignment.
Regular Inspection
Get in the habit of casually checking gasket alignment whenever cleaning or reattaching your lid. Early detection of subtle shifts prevents major displacement issues.
While washing, use your finger to lightly trace and confirm uniform fit. After extensive outdoor use, verify the gasket remains intact and snugly in position.
Proper Seal Technique
When sealing the lid, take care to press firmly and evenly. Apply concentric downward pressure to fully compress the gasket without twisting or skewing.
An audible click confirms the rubber has engaged the tumbler rim to complete the watertight seal. If no click, remove and re-seat the lid.
Avoid Off-Brand Lids
Seeking budget savings, some try using generic aftermarket lids on Yeti cups. But inferior design and looser gasket tolerances lead to leaks.
Stick with genuine Yeti components for guaranteed fit and performance. Correct sizing prevents alignment issues.
Mixing and matching voids warranties. For best results, always use lids and cups from the same Yeti series.
When to Replace
If the gasket remains undamaged but refuses to sit properly in the channel, replacement may be the ultimate solution. The lid could be slightly warped or deformed.
Likewise, if tamper evidence or severe impact damage is present, replacement is wise. Don’t risk questionable lid integrity and function.
But for straightforward alignment loss with no evident defects, take time to firmly re-seat the gasket before needlessly replacing the lid.
With attentive care taken during storage, cleaning, and sealing, your gasket should maintain proper fit for years of faithful leakproof service.
An intelligently designed tumbler like the Yeti should never leak when used as intended. Don’t tolerate needless sloshing – take control and realign that gasket for spill-free drinking once again.
Don’t Overfill Your Yeti Rambler
Even the most heavy duty leakproof lids can fail when overstressed. Avoid pushing your Yeti lid beyond design limits by overfilling the tumbler.
Trying to cram every last ounce to the absolute brim risks overflowing when you seal the lid. The resulting pressure forces liquid past the gasket and leads to leaks.
Leave a bit of headspace beneath the rim before capping your Yeti. This overflow buffer zone is key to maintaining a mess-free seal.
Leave Headspace
When filling your Yeti rambler, don’t top it completely off. Stop pouring while still at least 1/2 inch from the very rim.
This headspace gives room for ice cubes, foam, or splashing during transport. It also allows you to seal the lid without spilling over.
For very carbonated drinks, leave even more empty space, up to a full inch. The bubbles need room to expand after capping.
Volume Markings
Pay close attention to any max fill lines molded into your Yeti cup or bottle interior. These indicate the true usable capacity.
For example, the 36 oz Rambler holds only 30 oz comfortably when accounting for ice and headspace. Don’t overpour beyond markings.
Ice Displacement
Many enjoy icy cold drinks from their Yeti, but don’t forget the ice displaces liquid once added. Account for this by underfilling to accommodate cubes.
Likewise leftover ice from previous fills takes up volume. Check for any old ice before topping off with fresh liquid.
allow for foam
Carbonation produces foam and fizz, especially if poured hastily. When filling sodas, beers, or sparkling water, pour gently and allow the foam to subside before judged full.
The foam can double liquid volume briefly before settling down. Overfill and you’ll make a mess trying to seal the lid.
Avoid Spills When Sealing
When closing an overfilled Yeti, liquid can spill out from the slight compression or tilting during lid sealing.
This defeats the whole point of the leakproof lid. For a clean seal, only fill to just below the upper threads so no spillage occurs.
Straw Access
If your Yeti has a straw hole, take this into account as well for max fill levels. Any tipping or movement causes liquid to push through the straw opening if overfilled.
Leave enough room so the straw opening remains above the liquid level even when tilted. This prevents accidental flows.
Avoid Exceeding Capacity
Ignoring recommended capacities causes problems. Don’t try to cram a full gallon into a 36 oz Yeti bottle, for example.
Attempting to seal an overstuffed or rounded lid is difficult and prone to splashing. Don’t test the physical limits.
Weight Considerations
An overfilled Yeti becomes dangerously heavy to carry or accidentally drop. This risks both spills and personal injury.
Don’t make your Yeti so heavy that grip and handling become difficult. Reasonable fill levels make transport manageable.
The advertised capacity hitting the digital scale is unrealistic for portable use. Consider weight, not just volume capacity.
Ease of Drinking
Leave a little headroom in your Yeti to make sipping easier, without constant spilling down your chin.
The lid opening is designed and sized for comfortable angled drinking when filled reasonably. Don’t ruin the experience with an overpacked cup.
Inspect After Washing
Check Yeti interiors after cleaning for any lingering liquid before refilling. Trapped water or drying soap film takes up volume.
A quick rinse or shake removes any remnants so you can add fresh liquid without overfilling.
Carry Lid Upside Down
When transporting a filled Yeti, turn the lid upside down. This reduces risk of accidents if exceedingly full.
Carrying right side up puts pressure directly on the seal. Flipping prevents liquid pushing past the gasket if bumped or squeezed.
Upgrade Lid to Vortex
Yeti’s Vortex lids are engineered to be more forgiving if accidentally overfilled. The reinforced gasket better withstands liquid pressure.
If making a mess when overzealous pouring, consider the Vortex as added insurance. But not overfilling remains ideal.
The standard lids work great for most when following basic fill guidelines. Don’t force a misuse situation.
Get in the habit of leaving a little room at the top and let your Yeti lid do its job. A few simple filling practices prevents undue stress that can lead to annoying drips and damp shirts.
Treat your Yeti right and it will deliver years of loyal service. Respect its capacity limits and enjoy leak-free transport with your favorite hot or cold beverages.
Tighten the Lid Fully – Avoid a Loose Fit
It seems obvious, but double check that your Yeti lid is fully tightened before assuming it’s defective. An incompletely twisted lid easily leads to accidental sloshing.
The rubber gasket seals by compressing snugly against the cup rim as you tighten. Leave it slightly loose, and it simply can’t create a watertight barrier.
Take a moment to properly secure your lid each time for mess-free drinking. Here are some tips for getting a leakproof tight fit.
Sealing Motion
When closing your Yeti lid, firmly press down as you twist to engage the gasket. You should feel significant resistance and friction during the last quarter turn or so.
If easily spinning on without resistance, likely the lid requires more rotation to fully seat. Keep twisting until you feel the compression pressure.
You’ll know the gasket is engaged and compressed when you hear an audible click. This satisfaction click confirms a tight seal.
Avoid Loose Lids
While it may seem convenient for quick on-off access, loosely fitting lids inevitably leak. The gasket simply can’t seal effectively without solid compression.
A loose lid also risks popping off unintentionally from motion during active use. Take the time to tighten down snugly.
Overtightening
You can overtighten, however, especially with repetitive sealing. Once adequately tightened, avoid keeps cranking down with excessive force.
Overtightening strains the gasket and lid body over time, causing wear or deformation. Twist just until suitably snug, without muscle overexertion.
Check for Leaks
After securing the lid, flip over your Yeti and inspect closely for any drips emerging. Give it a few good shakes to confirm no leaks.
Catching loose lids now prevents messes later. Double check your work before tossing in your bag and going.
Pressure Testing
Try squeezing the sides of your sealed Yeti to pressure test for leaks. Any liquid escaping indicates lid tightness needs addressed.
You shouldn’t see water spurting from gaps with a fully tightened lid. Tighten further or examine the gasket if failing the squeeze test.
Lid Compatibility
Ensure you are using the correctly matching lid for your Yeti model. Incompatible or off-brand lids result in loose fits prone to leaking.
Refer to Yeti’s lid sizing charts if unsure of the proper pairing. Mixing and matching can prevent adequate tightening.
Lid Deformation

Inspect closely for any warping or damage preventing the lid from properly sealing. Dents along the rim can misshape and misalign the gasket.
Attempt to gently flex the lid back to original form if damaged. But excessive distortion requires replacement.
Gasket Issues
A worn out, dried out or cracked gasket also reduces sealing performance when tightened. Pressing down on a defective gasket cannot create a tight seal.
If your gasket shows signs of wear, replacing just the lid is advised. The cups themselves last much longer than gaskets.
Clean Surfaces
Check that the gasket and cup rim are free of dirt, oils, and debris before sealing. Foreign matter interrupts the clean seal.
Run your finger around the rim to clear away any gunk buildup. Dirty parts prevent tight bonding.
Lubricating Gaskets
If fighting persistent leaks from an aging Yeti, rubbing a small amount of food-grade lubricant on the lid gasket can rejuvenate function.
Smear a thin layer of non-toxic lubricant to help the rubber slide and seal tightly once again.
But lubrication is temporary. Eventual gasket replacement remains necessary long term.
Upgrade Your Lid
Consider upgrading to a higher end Yeti lid if basic models still leak after diligent tightening. The premium lids seal easier and with less effort.
Magnetic sliders, vortext twists, and similar enhanced designs practically snap into leakproof position. Less user effort is required.
Investing a few extra dollars brings peace of mind knowing your Yeti seal is fail-safe and worry-free.
Don’t live with preventable leakage. Take a moment to properly seal your Yeti each time and enjoy the lasting temperature retention these tumblers are famous for.
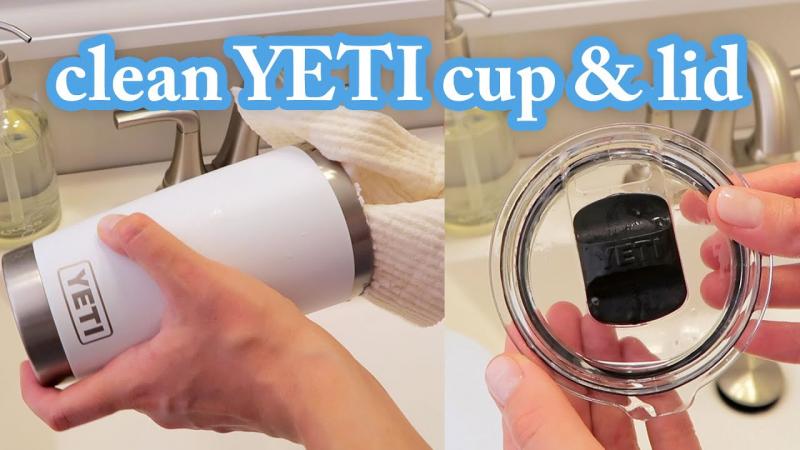
Clean Your Lid Regularly to Prevent Buildup
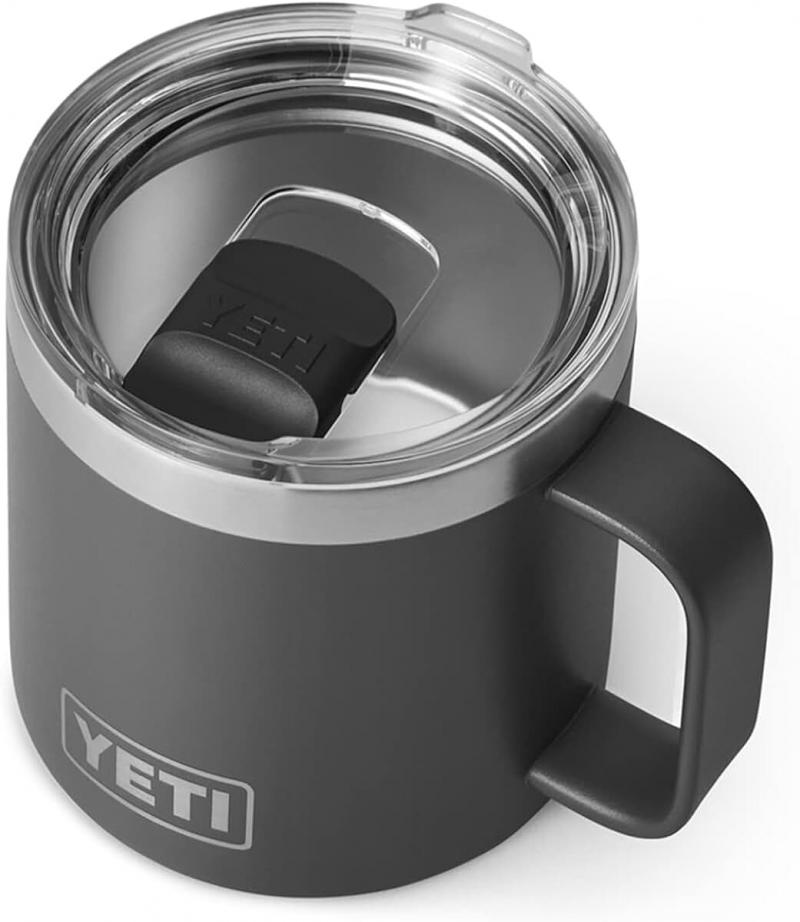
If you’re anything like me, your Yeti tumbler is your trusty companion through thick and thin. Whether trekking up a mountain trail or sitting at your work desk, your Yeti keeps your coffee, water, or favorite beverage at the perfect temperature for hours.
But over time, even the best travel mugs can start to fail you. I noticed that no matter how tightly I screwed the lid on my Yeti rambler, it would still leak out the sides and dribble down the cup. What gives? The culprit ended up being gunk buildup that I allowed to accumulate under the lid over many months of use.
Don’t make the same mistake I did! Be proactive and clean your Yeti lid regularly to prevent leak-causing buildup. Here’s my guide to keeping your Yeti tumbler lid in tip-top shape for leakproof performance.
Use Warm Soapy Water
The first step is an obvious one – wash the Yeti lid with warm soapy water. This helps remove dirt, oils, and residues that can begin to accumulate. I like to use mild dish soap without harsh chemicals. Take the time to thoroughly scrub both the inner and outer surfaces of the lid.
Make sure to rinse all the soap off afterwards, as any lingering suds can attract dirt later. Get into the nooks and crannies around the opening, as gunk loves to hide there.
Remove the Gasket
Here’s an important step that I overlooked for too long – take the gasket out of the lid and wash it separately. The gasket is the rubber ring that sits in a groove on the underside of the lid. Its job is to form a tight seal, preventing any liquid from escaping.
But when bits of coffee, tea, or other drips get lodged under there, the gasket can’t do its job properly. Remove it and give it a good scrub in soapy water. Getting grime out of the groove itself with a bottle brush is smart too.
Use a Bottle Brush
For stubborn buildup inside your Yeti lid, grab a bottle brush to really scrub away traces. Look for one with sturdy plastic bristles arranged in a circular or spiral pattern. This lets you maneuver the brush all around the lid’s innards.
Add a touch of mild detergent and warm water, then give the lid a thorough once-over with the brush. Those pesky bits clinging to the underside of the top or the threaded plastic ring will soon be history.
Clean with Baking Soda
For a deeper, disinfecting clean, consider mixing up a paste of baking soda and water. Baking soda is mildly abrasive, so it can scrub away odors and stains without using harsh chemicals that might degrade the lid’s materials.
Form a thick paste, then use your fingers or a scrub brush to spread it all around the inside of the lid. Let it sit for a few minutes before rinsing – baking soda works best when given time to do its thing.
Soak in Vinegar
If you just can’t seem to kick those stubborn smells or stains, try soaking the lid in undiluted white vinegar. The acidic vinegar will help break down residues and germs.
Remove the gasket first, since rubber doesn’t react well to extended contact with vinegar. Fill a bowl or tub with enough vinegar to submerge the lid fully. Let it soak anywhere from 30 minutes to overnight, depending on the severity of buildup.
Use a Sterilizing Solution
For super thorough disinfecting, use a sterilizing solution made for baby bottles. These solutions kill up to 99.9% of germs and leave your Yeti lid sanitized.
Many popular brands like Medela and Dr. Brown’s make pre-mixed sterilizing solutions you use per the instructions. Remove any gaskets, fill a tub with enough liquid to submerge the lid, then let sit for the recommended time.
Reach for the Toothbrush
My last-ditch secret weapon for conquering gunk in my Yeti lids is an old toothbrush. Those bristles let you scrub with precision anywhere buildup might linger.
Dip the toothbrush in warm sudsy water and gently scrub the gasket groove, any threads, or the hard-to-reach crevice under the drinking opening. Touch up with a bottle brush after to keep surfaces pristine.
Rinse and Dry Completely
After any cleaning method, be sure to rinse very thoroughly with clean water. Give the lid a good shake to remove excess moisture. I also recommend wiping down with a clean lint-free cloth just to catch any last drips.
Finally, let the lid air dry completely upside down. Don’t reassemble onto your Yeti cup until totally dry. This prevents any trapped moisture from promoting mold or odors.
Maintain Your Routine
Staying on top of regular cleanings is key to preventing major buildup that can lead to leaks. I like to wash my lid thoroughly after each day’s use. For a deeper clean, I do a complete soak and scrub each week.
Develop a routine that fits your use patterns and stick to it. A few minutes here and there means you’ll never have to wrestle with a super-gunky lid situation down the road.
When to Replace Your Lid
Over time, theAccumulation of stains and odors, cracking or warping, and a loose fit can be signs it’s time to retire your Yeti lid.
Yeti offers replacement lids in the standard size as well as slim options. Shop for the one that fits your tumbler model and you’ll be sipping spill-free once again.
With proper care and cleaning, a Yeti lid should last for years before needing a replacement. But should you need a new one, investing in an official Yeti version ensures the best leakproof experience.
Enjoy Your Yeti for the Long Haul
Armed with this battle plan, you can break the cycle of gunky buildup causing leaks and stains. Cleaning your Yeti tumbler lid regularly and thoroughly means you’ll enjoy the perfect beverage temperature and spillproof design for years to come.
Here’s to many more adventures with your trusty Yeti by your side! Just be sure to treat it right by keeping that lid squeaky clean.
Replace Worn Out or Defective Lids
My Yeti tumbler is my daily companion, keeping my coffee steaming hot all morning and ice water chilled all afternoon. But nothing is built to last forever, and eventually wear and tear can render your Yeti lid less than leakproof.
When you notice your lid struggling to maintain a tight seal, it’s probably time for a replacement. Thankfully, Yeti makes this easy by offering replacement lids for purchase.
Read on for tips on identifying when it’s time to swap out your lid, where to find replacements, and how to install them for leak-free performance once again.
Inspect for Damage
Carefully look over your Yeti lid for any cracks, warping, or holes that would allow liquid to escape. Even small fractures along the rim can undermine the integrity of the seal.
Check to ensure the gasket (the rubber ring) is both intact and still flexible. If it’s cracked or has hardened over time, it won’t be able to adapt snugly to the cup’s rim.
Check for Looseness
Put the lid on your Yeti tumbler as usual, then grasp the cup and gently twist the lid back and forth. If you feel any play or looseness in the lid, the plastic may be distorting over time.
You should feel consistent resistance as you twist; any slipping indicates the lid is probably nearing the end of its life span.
Do a Leak Test
Perform a leak test by filling your Yeti with water, putting the lid on tightly, then tipping the cup completely upside down. Hold it like this for 30 seconds to a minute.
If any water drips out, you may have tiny fractures, warping, or a shot gasket. Any leaks mean it’s time to retire the lid and get a replacement.
Can’t Kick the Smells?
No matter how much you scrub, some lids seem to retain odors and flavors over time. If a lingering stale coffee or plastic taste just won’t quit, a new lid is in order.
Shop Yeti’s Selection
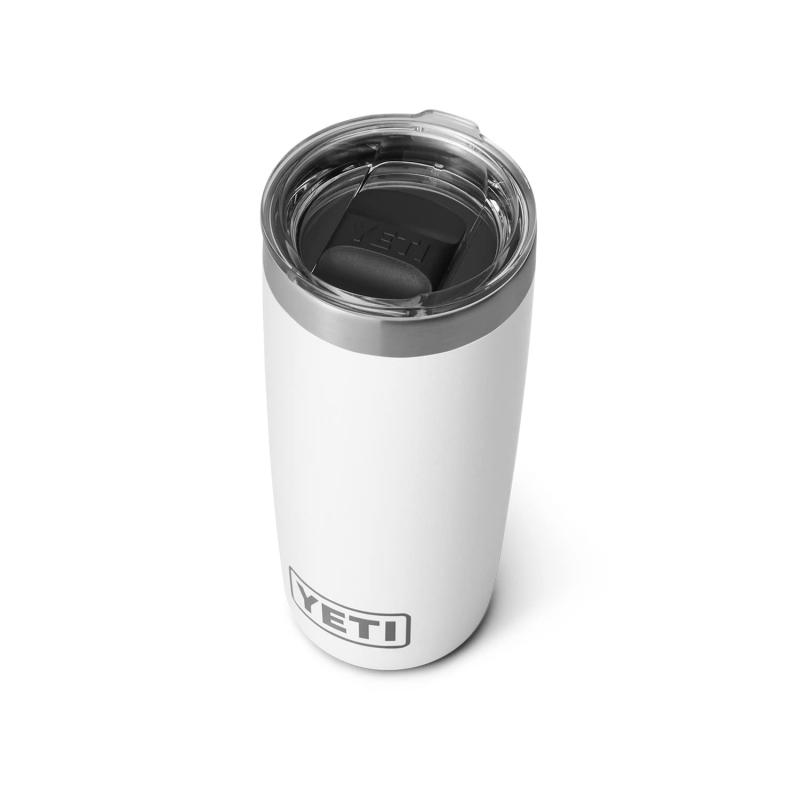
The easiest way to score a replacement Yeti lid is to go right to the source. Yeti offers standard lids for their 20 oz, 30 oz, and tumblers, along with options for the slim can insulators.
Choose the size and style to match your specific Yeti model. The standard lids come in various colors so you can get a fresh look.
Try Third Party too
You’ll also find replacement Yeti lids sold by independent retailers online and in stores. Check reviews and product details carefully when going third party.
Many lid makers tout their products as improving on Yeti’s design, with enhanced insulation or durability. Could be worth trying for heavy-duty use.
Install It Correctly
When your new Yeti lid arrives, make sure to install it properly to avoid any leaks:
- Wash the lid thoroughly first with soap and warm water
- Make sure no foam gasket remains stuck in the old lid’s groove
- Press the new gasket into the lid groove completely
- Screw the lid onto your Yeti until tight
- Do an upside down leak test to confirm fit
You may need to tighten more or loosen slightly until finding that sweet spot where the lid seats flawlessly onto your cup.
Take Precautions
To make your Yeti lids last as long as possible, take steps to minimize wear and tear:
- Avoid dropping or banging the lid, as impact can damage the structure
- Store the lid on the cup loosely, not tightly screwed on
- Wash regularly before buildup occurs
- Detach the gasket and wash it separately
- Always hand wash to prevent warping in the dishwasher
With proper care, a Yeti lid should still last at least a year or two with frequent use. But replacing defective or worn out lids as needed will keep your tumbler performing like new.
Don’t Despair over Leaks
Noticing leaks from your beloved Yeti can be a bummer, for sure. But take heart knowing replacement lids are readily available when yours starts showing its age.
With a fresh new top, your Yeti will be ready to accompany you wherever the road leads while keeping drinks deliciously hot or icy cold.
Here’s to many more adventures with a trusty Yeti tumbler by your side, sealed up leakproof thanks to replacing lids when needed.
Use Only Original Yeti Lids Made for Your Cup
When it comes time to replace your Yeti tumbler’s lid, you’ll have options. Yeti sells replacement lids, and many third parties offer their own “Yeti” lids too. But for the best leakproof seal, I strongly recommend using only original lids made specifically for your Yeti model.
Here’s why it’s worth investing in the real deal when you need a new lid for your beloved Yeti cup.
Designed for a Perfect Fit
Yeti engineers design their tumblers and lids as integrated sets. The lid shapes, gasket placement, and threading are all optimized to fit Yeti cups flawlessly.
This precision manufacturing ensures no gaps where liquid could sneak through. The gasket seals tightly against the rim thanks to the ideal alignment.
High-Quality Materials
Original Yeti lids use BPA-free, durable plastic designed to withstand damage. The gasket is made from flexible, food-safe rubber with longevity in mind.
Many knock-off lids cut corners on materials to save costs. But lower quality components mean poorer performance and shorter lifespan.
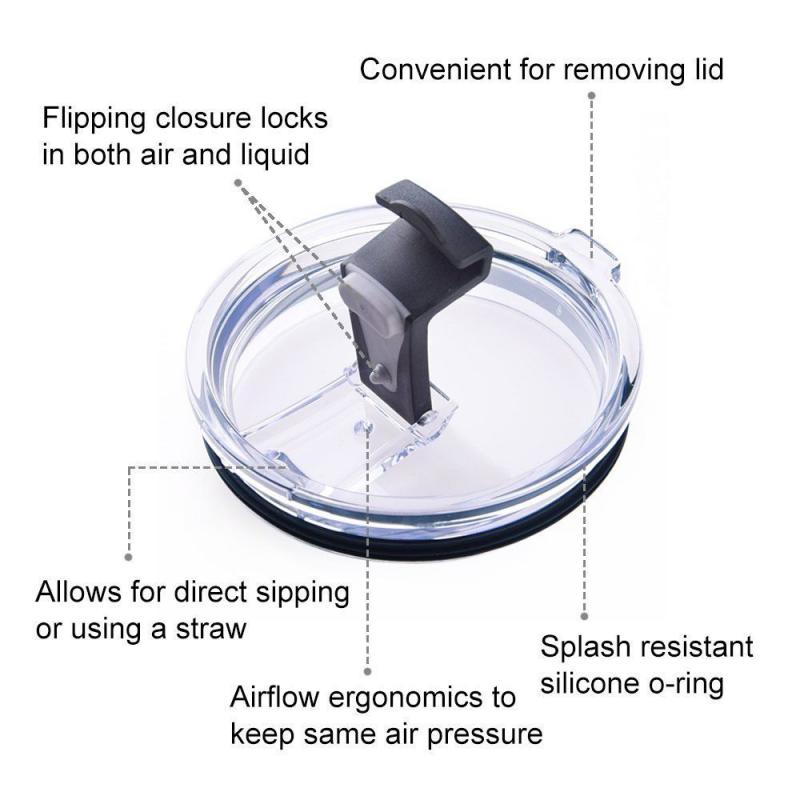
Leakproof by Design
From decades of experience making rugged coolers and drinkware, Yeti has leakproofing down to a science. Their lids feature innovations like triple interlocking points and a full-loop gasket.
Generic lids haven’t undergone such rigorous real-world testing and refinement to achieve perfect spill-proofing.
Peace of Mind
When you use an original Yeti replacement lid, you can feel confident you’ll get a secure, liquid-tight seal and long-lasting performance.
Saving a few bucks isn’t worth the hassle of leaks or needing to re-replace flimsy generic lids every month or two.
The Perfect Fit
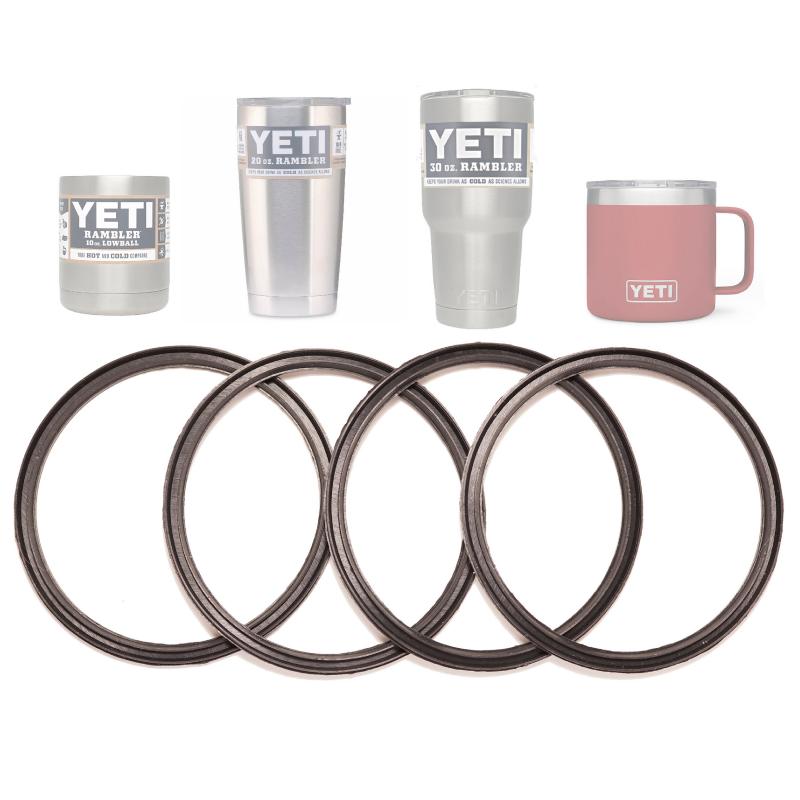
When selecting a replacement Yeti lid, be sure to choose the specific model made for your cup size. Key options include:
- 12 oz Stubby lid
- 18 oz Rambler lid
- 20 oz Tumbler standard or slim lid
- 26 oz Tumbler standard lid
- 30 oz Tumbler standard or slim lid
The product descriptions clearly state which lid fits which tumbler. Buying the right size means an ideal leakproof seal.
Click With Confidence
To make sure you’re getting an authentic Yeti lid, only buy from Yeti.com or authorized retailers like Dick’s Sporting Goods and REI.
Score extra peace of mind by registering your new lid’s serial number on Yeti.com. This guarantees your warranty and ensures you can easily replace if defective.
Hand Wash for Longevity
To help your new Yeti lid last for years, always hand wash instead of dishwasher. Avoid extreme heat or cold. Don’t boil, microwave, or freeze your Yeti lid.
Gently clean gaskets as needed to prevent residue buildup. Store lids loosely, not tightly screwed on, to maintain shape.
Drink Up in Leakproof Luxury
Treat your Yeti tumbler to the lid it deserves – an original designed specifically for leakproof performance.
While third party options exist, nothing seals as reliably while lasting as long. Using authentic replacement lids gives you the ultimate drinking experience while keeping spills at bay.
Your beverages will stay securely contained for hours of temperature-controlled enjoyment. Here’s to leak-free adventures with your trusty Yeti at your side!
Prevent Leaks By Storing Lid Upside Down
Over time, even the best travel mugs and tumblers can start to leak. Tiny fractures in the lid, warping from heat or impacts, and buildup under the gasket – all can undermine your Yeti’s famous leakproofing ability.
While thorough cleaning and replacing worn lids help, did you know how you store your Yeti can also make a difference? Storing the lid upside down when not in use can significantly extend its leak-free lifespan.
Here’s why this simple trick should be part of your Yeti TLC routine:
Prevent Warping
When a lid is screwed onto a cup tightly, the threaded plastic ring can get stretched out of shape over time. This warping prevents the gasket from sealing correctly.
Leaving the lid upside down resting on its surface avoids any tension being placed on the plastic. No twisting or distortion occurs.
Stop Stressing the Gasket
Foam gaskets need to compress and decompress to maintain their structure. Leaving the lid fastened compresses the gasket indefinitely, which can lead to cracking.
Giving the gasket a break upside down prevents damage from constant compression against the cup rim.
Avoid Buildup
Dried drips and spills under the lid are a prime cause of leaks. Storing upside down allows liquid residue to drain out instead of pooling.
This minimizes sugary drink or coffee buildup leading to bacteria and odor issues down the road.
Let Plastic Relax
Any rigid plastic lid will take on some subtle bending from daily thermal expansion and contraction. Letting it rest flat periodically allows the plastic to relax back to its natural shape.
This helps the lid maintain its designed dimensions for perfectly sealing against your Yeti opening.
Ensure Dryness
Before capping your Yeti, make sure the lid interior is completely dry. Leftover droplets and moisture can breed mold or odors.
Storing lid down provides ample air circulation for quick drying after hand washing.
A Simple Ritual
Making upside down storage part of your regular Yeti routine takes just seconds. Simply follow these steps:
- Wash lid after each use and dry thoroughly.
- Place lid upside down on a clean surface until next use.
- Visually inspect for any cracks or damage before reattaching.
If storing your Yeti long term, leave the lid off completely to maintain air flow.
Stop Spills Before They Start
An ounce of prevention is worth a pound of cure when it comes to Yeti leaks. Don’t wait until you have drips and stains to take action.
Storing your tumbler lid upside down when not drinking helps preserve its leakproof superpowers for years of enjoyment.
Empower your Yeti to do what it does best – keep hot drinks hot and cold drinks cold without springing any leaks.
With this simple habit, you can trust your Yeti to accompany you on all of life’s adventures without liquid escaping. Here’s to leak-free Yeti loyalty for the long haul!
Consider Purchasing a New Leakproof Lid
Over time, the constant twisting on and off, thermal stress, and general wear and tear can cause your Yeti lid to lose its leakproof superpowers. Before you resign yourself to a leaky tumbler, consider replacing it with an upgraded leakproof lid.
Today’s lids offer innovative designs that can outperform the original and restore spill-free drinking. Here’s why getting a new leakproof lid can give your Yeti a refresh.
New Materials
Engineering plastics and rubber compounds have come a long way. New lids feature gaskets made from advanced thermopolymers engineered for durability.
These next-gen materials maintain their seal and bounce back from compression better than older materials.
Optimized Shapes
Companies have refined lid shapes with tighter tolerances and clever geometries that improve leak resistance. Oval gaskets, angled threading, and tapered sidewalls all help.
Upgraded engineering keeps lids fitting snugly while still being easy to remove and replace.
Enhanced Insulation
Cutting-edge insulated lids have foam or vacuum insulation integrated into the interior. This maintains temperatures even better than traditional plastic lids.
If you battle heat loss or condensation, an insulated replacement lid can take performance to the next level.
Fun Colors and Textures
Replacement lids come in vibrant colors and soft-touch rubberized finishes. This allows customizing the look of your Yeti.
Coordinates with different outfits, shows team spirit, or simply reflects your personal style.
Easy Online Ordering
Big retailers like Amazon and direct brands like Takeya make getting replacement lids for your Yeti refreshingly easy.
Browse options, read reviews, and get a leakproof lid delivered straight to your door in just a few clicks.
Try Third Party Brands
Consider looking beyond official Yeti lids to brands making compatible options:
- Takeya – Silicone lids boast exceptional leakage protection
- Simple Modern – Budget-friendly but well-made choices
- Klean Kanteen – Known for insulated, Climate Lock lids
Their innovative designs can upgrade your Yeti’s performance and longevity.
Read Reviews Closely
When researching new lids, read both positive and negative reviews to spot potential issues. Look for patterns around leaks, durability concerns, and sizing problems.
This helps avoid disappointment from lids that don’t function as advertised. Stick to established brands with a largely positive consensus.
Make the Switch
Swap out that temperamental old lid for a shiny new one and get back to spill-free Yeti enjoyment. Dial in the perfect model to match your drinking habits.
Sip confidently again knowing your beverage will stay securely contained for hours, not dribble down your shirt after a few tilts.
Read on for extra guidance to ensure your Yeti keeps drinks contained so you can continue adventuring in comfort and style.
Try an After-Market Leakproof Lid for Your Yeti
If you own a Yeti tumbler, you know they are built for durability and insulation. However, the standard lids may not always be 100% spill and leak proof. Nothing is more frustrating than having your morning coffee or favorite drink splatter all over when the lid pops open unexpectedly.
Luckily, there are some great after-market lids that can help make your Yeti virtually spill and leak proof. These lids are designed to tightly seal your Yeti tumbler, preventing annoying leaks and accidental spills. Here’s an overview of some of the best anti-leak Yeti lids and how they can help.
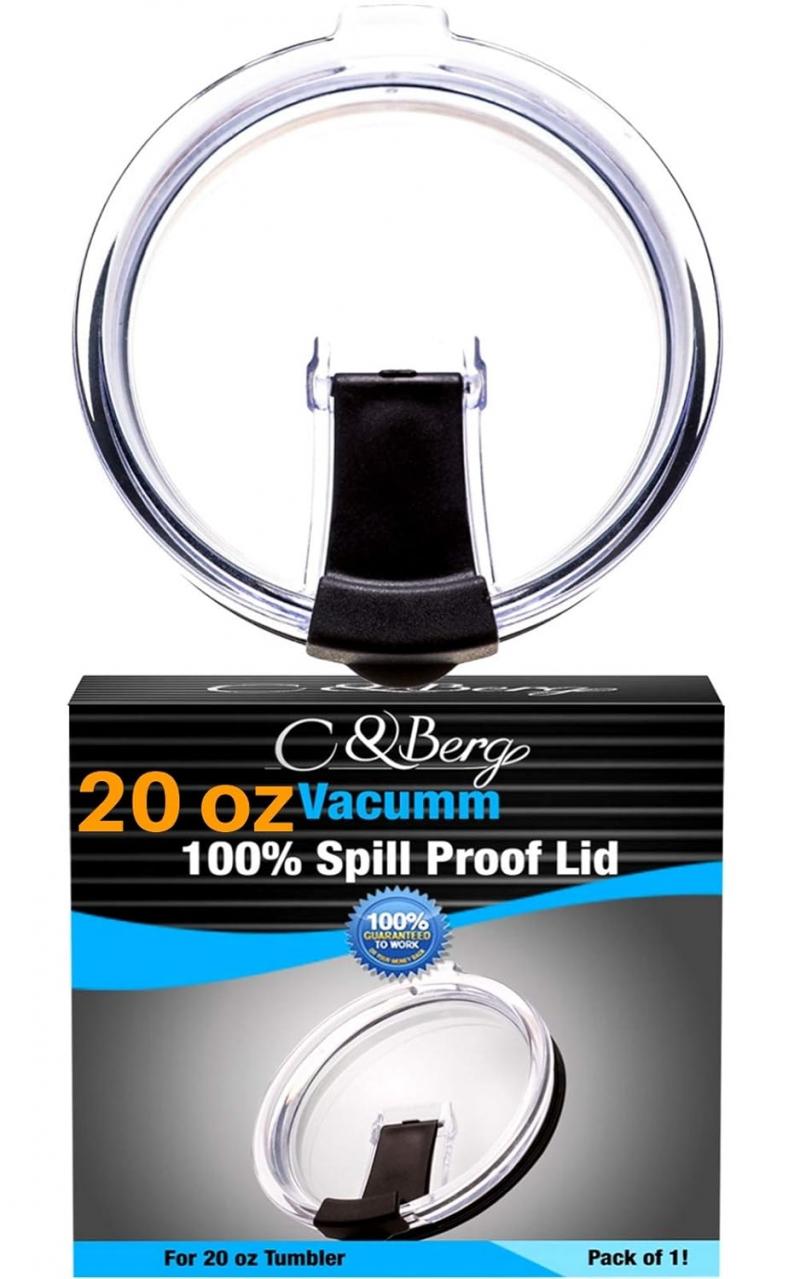
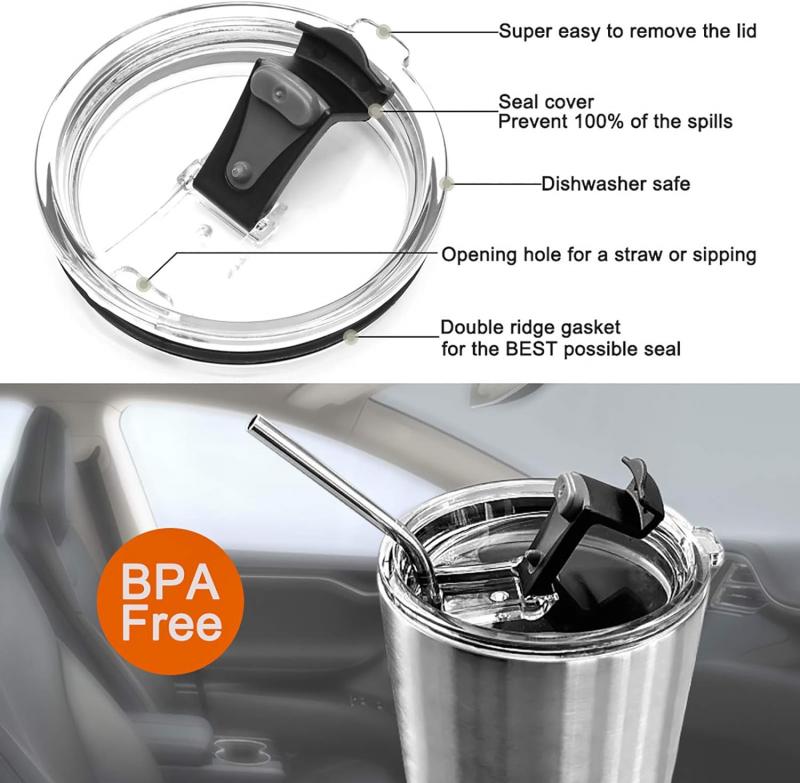
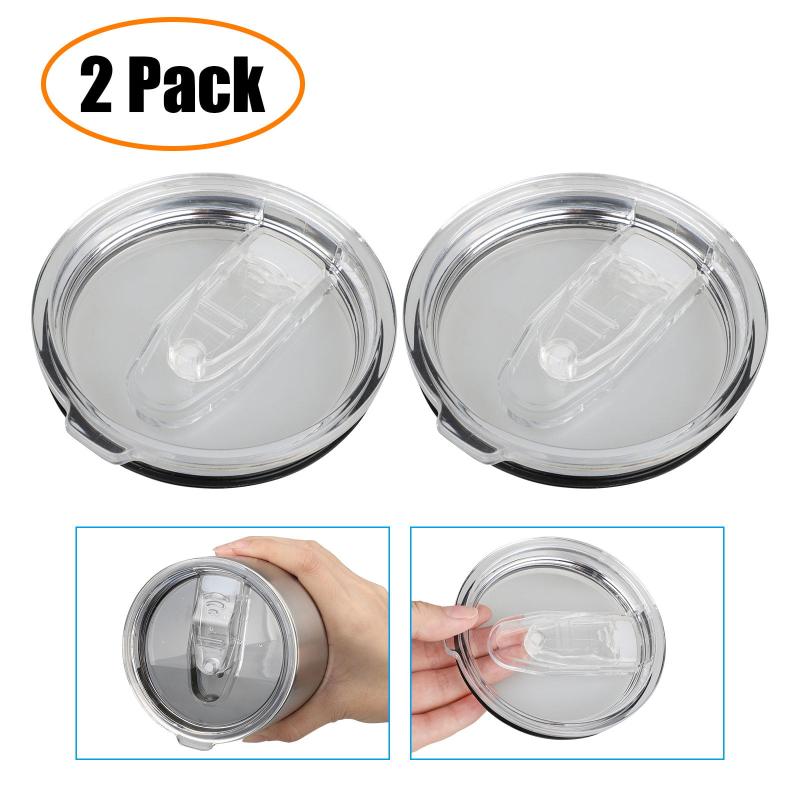
Shleak Yeti Lid
One of the most popular anti-leak lids for Yeti cups is the Shleak lid. This lid is made of durable BPA-free plastic and features a unique design to lock in liquids. It has a sliding drink opening that you move to access your beverage. When closed, the opening is completely sealed off.
The Shleak lid forms an air-tight seal on the Yeti tumbler, so you don’t have to worry about leaks or spills. Its secure design keeps the lid tightly closed, even if you accidentally drop or tip over your cup. Just slide the opening to take a sip and slide it back to re-seal.
Many reviewers praise the Shleak lid for being truly spill-proof. Its precision fit and sturdy plastic construction mean you can confidently toss your Yeti into a bag without leaks. For active lifestyles and outdoor adventures, the Shleak lid is a great anti-leak solution.
Takeya Spill-Proof Lid
Another good Yeti leak proof lid option is the Takeya spout lid. This lid is designed for tumblers and fits Yeti cups perfectly. It’s made from durable BPA-free plastic and features a spout with a hinged cap.
To drink, you flip the spout cap open. The cap locks upright while open, so you can sip easily without holding it. When you’re done drinking, just press the cap back down until it clicks to re-seal the spout. The lid creates an air-tight and water-tight seal when closed.
Reviewers love this lid for keeping drinks securely contained. The leak-resistant spout design prevents accidental opening, so there are no spills if you knock over your Yeti. For a simple and affordable anti-leak lid, the Takeya is an excellent choice.
Yak Gear Leak Lock Lid
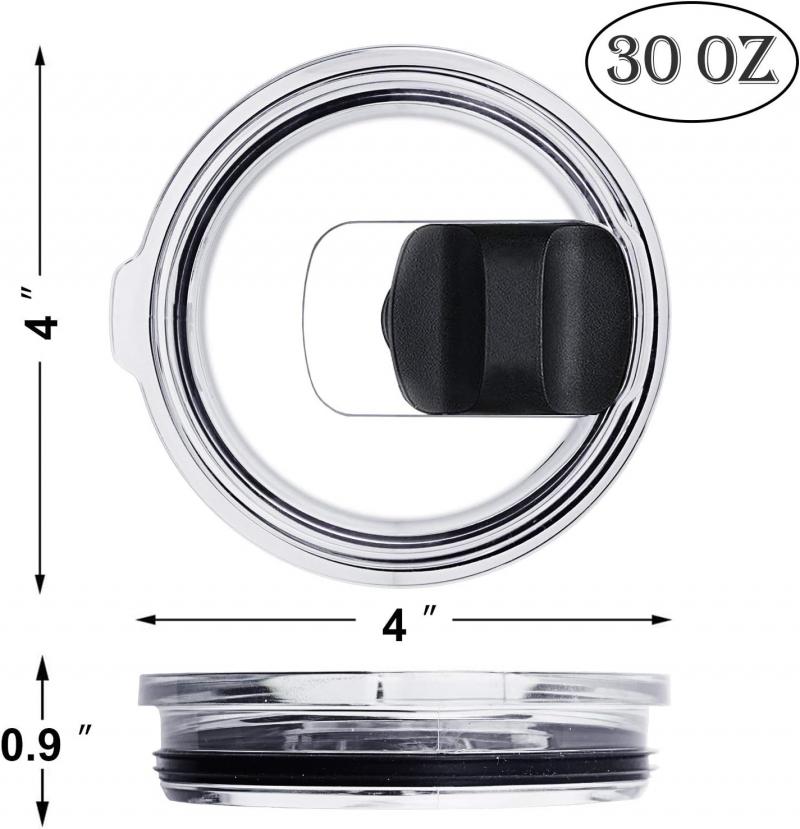
Yak Gear makes the Leak Lock lid specifically designed for Yeti Rambler cups. It fits the 20 and 30 oz tumblers perfectly and comes in different colors.
The Leak Lock gets its name from the locking drink opening. You press a button to open and release your drink. When closed, the opening is completely sealed off to prevent leaks. The lid even has a moat around the rim to catch any escaping drips.
Reviewers say this lid makes their Yeti 100% spill-proof. They can toss it in bags or cars without worrying about leaks. The press-to-open and release button provide extra leak protection when closed. For maximum leak prevention, the Leak Lock is a great choice.
Kitchen Innovations Snug Lid
Kitchen Innovations makes a Snug Fit lid that forms an air-tight, leak-proof seal on Yeti Ramblers. Made of BPA-free plastic, it has a simple flip-top drinking spout.
The snug fit design hugs the Yeti rim to prevent leaks or accidental openings. Reviewers say it really locks onto the cup securely. The flip-top spout moves out of the way for drinking but stays upright on its own.
This lid gets top marks for making the Yeti spill-proof. The tight seal and flip-top allow you to throw this cup in a bag or car without worrying about leaks. If you want a simple but effective leak-proof lid, the Kitchen Innovations Snug Fit is a great pick.
Routine Leak-Proof Sliding Lid
Routine makes a leak-proof sliding lid for Yeti tumblers and Ramblers. Made of BPA-free, durable plastic, it has a drink slit that slides open and closed.
Just use your thumb to slide the opening to drink then slide it back to seal. Reviewers love how leak-proof this lid is thanks to the secure slide design. When closed, no liquid can escape.
The Routine lid fits 30 oz and 26 oz Yeti cups perfectly. It comes in different color options and provides stellar leak protection. For a simple and affordable slide-to-open lid, Routine’s leak-proof design is excellent.
Preventing Leaks with a Proper Yeti Lid Fit
While after-market lids can improve leak protection, even the original Yeti lids can prevent leaks if installed correctly. Here are some tips for getting the best leak-proof fit with your Yeti lid:
- Inspect the lid and tumbler for debris – Clean off any dirt or crumbs before sealing.
- Push the lid on straight – Align it evenly and press straight down to create a uniform seal all around.
- Listen for the “click” – You should hear the lid click in place, indicating a tight seal.
- Close drink openings fully – Make sure slidings lids, spouts, etc are closed entirely.
- Check the seal – Turn the tumbler upside down with the lid on to ensure no liquid escapes.
Taking a little extra care when putting on the factory lid can prevent annoying leaks. However, after-market lids take leak proofing to the next level. If you want guaranteed spill protection, consider one of the great third-party lids designed specifically for leak prevention.
Enjoy Your Yeti without Worrying About Leaks
Nothing takes away from your Yeti experience like having to worry about accidental spills or leaks. After-market lids provide extra leak and spill protection so you can fully enjoy your tumbler.
Lids like the Shleak, Takeya, Yak Gear, and others form a much more secure seal than the basic Yeti lids. Their designs feature things like air-tight seals, drink openings that lock closed, and precision fits.
The best anti-leak Yeti lids allow you to go about your day without worrying about keeping your cup perfectly upright. Go camping, hiking, or riding in the car without fear of spilling. With the right third-party lid, your Yeti can handle being tossed in a bag or briefly tipped over.
Don’t let concerns about leaks stop you from purchasing or fully enjoying an awesome Yeti tumbler. Grab one of the great after-market lids made just for preventing Yeti spills and leaks. They install in seconds and provide much more reliable spill protection compared to the standard lids.
Use Caution With Carbonated & Hot Drinks in Your Yeti
Yeti tumblers are great for keeping drinks cold and insulating hot beverages. However, using them with carbonated or very hot drinks requires some extra caution. The airtight seal of a Yeti can lead to built up pressure or intense heat that warrants care when opening.
Here is what you need to know about using sodas, beer, coffee, and other bubbly or hot beverages in your Yeti Rambler or tumbler.
Opening Carbonated Drinks Carefully
The vacuum insulation and tight lid seal of a Yeti tumbler does an excellent job of containing fizz. However, this can lead to dangerous pressure buildup when opening carbonated drinks like soda, beer, sparkling water, etc.
As carbonation turns to gas, pressure increases inside the sealed tumbler. When you go to open the lid, the pressurized gas can cause the contents to foam up, spew out, and potentially explode.
To avoid a bubbly mess, always point the opening away from yourself and others when cracking open your Yeti. Keep one hand firmly on the lid and open slowly to release the pressure. Give the gas a chance to escape before fully removing the lid.
You should also avoid shaking or agitating carbonated drinks in a closed Yeti since this adds energy and compounds the pressure buildup. Open carefully and release pressure gradually every time.
Letting Hot Drinks Cool Slightly
Yeti tumblers are amazing at retaining heat. However, removing the lid on boiling hot coffee or tea can be dangerous. The steam pressure that builds up can cause scolding liquid to erupt out.
Rather than burning yourself, it’s wise to let piping hot beverages cool down slightly before drinking from your Yeti. Give the tea or coffee a few minutes to reduce in temperature and pressure.
Never remove the hot drink lid fully at first. Crack it open to allow pressure to escape, then remove slowly once the initial steam vents out. Consider using a finger to plug the small opening as you open to prevent hot liquid from spewing.
You can also try pointing the opening toward the cup wall as you slowly remove the lid. This helps block the opening and prevents eruptions while safely venting pressure.
Using Caution When Handing Off Hot Drinks
When giving a freshly poured steaming coffee or tea in a Yeti to someone else, proceed with great care. Warn them that it is extremely hot and the pressure could cause the liquid to spray out when opening.
Never open or hand off a piping hot beverage in a Yeti to a child. The combination of pressure buildup and thin skin can lead to serious scalds. Let the drink cool down significantly before giving to a child.
Also avoid handing off a hot sealed tumbler by grabbing the body. Use the lid so your fingers don’t get burned by the insulated walls retaining heat.
Starting With Less Hot Liquid
One way to reduce risk with hot beverages is to not completely fill your Yeti. Leave at least 1-2 inches of empty space below the rim when pouring boiling liquids.
This headspace allows for liquid expansion as heat is retained. It also gives steam and pressure room to dissipate rather than building up rapidly.
Consider pouring hot coffee or tea into your Yeti first, then adding ice if you want an iced drink. The initial heat and pressure will vent out, making it safer when you reopen the lid to add ice.
Using Low-Profile Lids With Care
Yeti makes low-profile lids that create a sleeker look but are more spill-prone. Going with a lower lid profile leaves less air space for pressure to escape.
Use extra caution when opening carbonated or hot drinks with a low-profile Yeti lid. The tighter seal and smaller opening mean greater risk of spewing when the pressure releases.
Crack the lid slowly and point the opening away. Consider covering part of the opening as you release the seal. And let extra hot beverages cool down a bit before drinking to reduce pressure buildup.
Enjoy Carbonated & Hot Drinks Safely
With proper care, you can certainly enjoy bubbly and hot beverages from your Yeti tumbler. Just be aware of the potential pressure buildup dangers and take steps to release it safely.
Open carbonated drinks pointed away from people and vent the initial gas carefully. Allow scalding liquids to cool down slightly before removing the lid. Leave headspace, use low-profile lids carefully, and warn people before handing off piping hot sealed tumblers.
Avoid shaking carbonated Yeti drinks and never give steaming hot cups to children. With caution and patience, you can happily use your Yeti to contain sodas, coffee, tea and other bubbly or hot beverages.
The amazing insulating properties make Yetis ideal for carbonated and hot drink enjoyment on the go. Just implement a few safety practices so the performance features don’t cause harm when opening.
With some care and technique, the Yeti can contain the heat and bubbles when sealed. And with a slow, controlled open, you can then enjoy your piping hot coffee or bubbly soda safely.
Don’t Knock Over or Drop Your Yeti Tumbler
One of the hallmarks of Yeti’s durable drinkware is the ability to withstand abuse. However, tempting as it is to test the limits, you still need to be careful not to knock over or drop your Yeti tumbler.
While Yetis can take more punishment than cheaper cups, they are not indestructible. Dropping or spilling them, especially when full, can lead to dents, leaks, or broken parts over time.
Here is what you need to know about protecting your Yeti from accidental damage and still enjoying your drinkware for years.
Use Caution on Uneven Surfaces
Yeti tumblers have a wide, tapered base that makes tip-overs more likely, especially when full. Be extra careful placing them on uneven ground or surfaces that could cause wobbling.
Avoid setting your Yeti on ground that isn’t flat or sturdy tables that could vibrate. Watch out for seating like bleachers or stands that could cause sliding or bouncing.
You can also wrap a rubber band around the base for extra traction on smooth surfaces prone to slippage. Just take care when placing your Yeti in precarious positions.
Keep Away From Ledges and Tables’ Edges
Never place your Yeti tumbler near the edges of counters, tables, stands, or other elevated surfaces. Even a slight nudge can send it toppling over the side.
Be aware of dogs’ tails, excited kids, or your own wandering elbows dislodging a Yeti placed too close to the edge. Leave plenty of buffer space so it can’t be accidentally knocked off.
For parties or crowded events, avoid setting your drink on any unprotected ledges or surfaces where oblivious people may bump into the cup.
Hold With Two Hands When Very Full
Filled to the brim, a Yeti tumbler can get quite heavy. Hold it with two hands when carrying a very full cup to minimize spills.
Grip under the base with your fingers laced when hefting a filled Yeti. Avoid holding by the lid alone since the weight can cause you to inadvertently tilt and spill.
When sitting down with a full tumbler, keep two hands on it until firmly placed on the surface. The extra stability ensures you don’t overflow any and lose precious drink.
Secure the Lid When Transporting
Make sure the lid is sealed tightly before moving your Yeti around. Loose lids can pop off, especially when you hit bumps or slopes.
Over-tightening can damage gaskets, so just turn the lid until you feel resistance. Give it an extra quarter turn or so for good measure before heading out.
Hold the body rather than the loose lid when carrying a Yeti. Grip near the base and keep the opening pointed upright to avoid spills.
Store Properly in Bags & Cup Holders
When stashing your Yeti in a bag, backpack, or car cup holder, protect it from bouncing and rubbing against other items.
Use an insulating sleeve or wrap a towel around the tumbler. Make sure it fits snugly in cup holders and can’t slide around or tip over inside.
Avoid setting or storing the Yeti on its side where liquid can seep out under the lid. Keep it upright whenever possible for maximum leak protection.
Inspect for Damage After Drops
Yetis are built tough, but that doesn’t mean they are immune to drops and spills. If your tumbler takes a fall, thoroughly check it over after.
Look for cracks or fractures in the plastic components. See if the inner and outer walls are still perfectly round with no dents or deformities.
Test the gaskets and make sure the lid still seals properly without leaking. Try filling with water and letting it sit to confirm it stays contained.
Drops can displace parts and compromise the insulating properties over time. So retire any Yetis that show damage from repeated impacts.
Prevention Is the Best Protection
Avoiding spills and drops altogether is better than enduring damage and hoping for the best. With some basic care and caution, your Yeti can look and perform like new for years.
Keep it away from ledges, uneven ground, and table edges. Carry and store it upright and hold with two hands when very full. Make sure the lid seals securely before transporting.
With proper caution, your Yeti can withstand the occasional minor tumble without issue. But repeated impacts or major crashes will degrade durability, so handle with care.
The resilience compared to normal drinkware is a perk, not a pass for recklessness. So appreciate the sturdy build by preventing drops rather than testing the limits.
Your Yeti tumbler should be a reliable companion for adventures, parties, and daily use. Don’t let preventable spills, drops, and damage cut the enjoyment and lifespan short.
Follow Proper Care & Use Directions for Your Yeti
To get the most out of your Yeti tumbler for years to come, be sure to follow the recommended care and usage directions. Seemingly small missteps can compromise performance and durability over time.
Here are some key guidelines from Yeti to follow so your Rambler, Colster, or other drinkware lasts and works like new.
Hand Wash Only
Though dishwasher-safe, Yeti recommends hand washing their products. The extreme heat and harsh detergents can degrade parts over many cycles.
Use mild dish soap and warm water to wash each piece by hand. Avoid abrasive scouring pads or cleaners that can scratch. Rinse and dry thoroughly after cleaning.
For the lid, open it up fully and hand wash the crevices near drink spouts, gaskets, etc. Double check no debris remains before re-attaching.
Don’t Use Metal Utensils
Never use metal silverware or scrape the interior with abrasive tools. The metal-on-metal contact can damage the inner wall coating.
Opt for soft plastic utensils and bottles brushes when cleaning the inside. Use care to not bang or scratch the interior.
You can store utensils in your Yeti when not in use. Just avoid moving them around or stirring with force that can abrade the coating.
Avoid Prolonged Direct Sunlight
Don’t leave your Yeti baking in direct sunlight for extended periods of time. The concentrated UV rays and heat can degrade components.
It’s fine for beach days or games in the sun, but bring it into shade if leaving unattended for long. Consider using a cover or bag if it will sit untouched in sunlight.
The double-wall vacuum insulation already prevents heat transfer to contents. No need to bake the exterior as well unnecessarily.
Don’t Over-Tighten Lids & Accessories
It may be tempting to crank down on lids and attachments, but avoid going too far. Overtightening can warp gaskets and wear down parts.
Turn lids until you feel some resistance. Give an extra partial turn or two to lock it without putting full muscle into it.
You want a snug, secure fit, not precariously over-cranked. Find the sweet spot for sufficient tightness without excessive force.
Clean & Dry Properly After Use
Never let your Yeti sit for prolonged periods with residue still inside. Always clean and dry thoroughly after each use.
Letting beverages like coffee, wine, soda, etc linger can stain and degrade the interior over time. Even small bits of debris can get lodged under gaskets and compromise the seal.
Get into a habit of at least rinsing right after use so sticky liquids don’t set inside. Then fully hand wash and dry once home.
Inspect for Damage Routinely
Make it a habit to periodically inspect your Yeti all around for any emerging damage issues.
Look for cracks or fractures, especially on high-stress areas like threaded lids. Check for dents along the bottom or ring that may impact sitting flat.
See if there is any ablation or degradation of the coating inside, which diminishes insulating properties. Feel if there are any gaps, loose parts, or gasket issues.
Addressing damage early better preserves performance. While designed for durability, Yetis still need periodic inspection and care.
Enjoy Your Yeti for the Long Run
With proper care and usage, your Yeti can optimally perform and hold up for years of enjoyment.
Always hand wash and fully dry all parts after use. Avoid metal utensils, overtightening, and direct sun exposure for prolonged periods.
Check periodically for emerging cracks, dents, deterioration or other damage issues and address promptly.
Though tough, Yetis aren’t indestructible. Following the recommended guidelines for care, cleaning, and usage helps your tumbler, Colster, or bottle function flawlessly trip after trip.
A little extra caution goes a long way toward you getting your money’s worth from a long-lasting Yeti product. So be sure to follow all the proper directions.
Yeti drinkware is an investment meant to endure plenty of adventures. With the right care, your Rambler, Colster or bottle can be your trusty companion for the long haul.
Contact Yeti Support If Issues Persist After Troubleshooting
Yeti products are backed by excellent warranties and customer service. If you still experience issues after trying to troubleshoot problems yourself, don’t hesitate to contact Yeti support.
They can help diagnose persistent issues and guide you through next steps, whether that may be replacement parts, repair, or a warranty claim.
Describe Problems Clearly and Comprehensively
When reaching out to Yeti support, be ready to explain the problem as completely as possible. Details help them properly assess the situation and determine solutions.
Note when the issue first started and any events preceding it. Did it gradually appear or suddenly happen after a fall? Providing context aids in diagnosing.
Clearly describe the specific problem or malfunction. Where exactly does it leak? What noise or grinding occurs? Be detailed so they understand.
Have Product Information Handy
Yeti will need some key product details in order to look up warranty status and compatibility with replacement parts.
Have the product name, size/capacity, color, date of purchase, and serial number ready. This helps verify warranty coverage and ensures you get the right components.
You can usually find the serial number printed on a sticker underneath the base. Provide as many identifying product details as possible.
Outline Troubleshooting Attempted
Part of providing context is letting Yeti support know what troubleshooting you’ve already attempted on your own.
Explain steps taken, like thoroughly cleaning gaskets, adjusting lid torque, changing parts positions, etc. This prevents repeating suggestions you’ve already tried.
Being transparent about troubleshooting helps you get to the proper advanced solution faster. Demonstrate you’ve done due diligence.
Inquire About Warranty Options
Don’t be shy about asking what warranty coverage may be available for your issue. It never hurts to ask!
Yeti stands behind their products and wants customers satisfied. Simply say you wanted to check if the issue might be covered under warranty.
The support rep can look at your product info and details to determine if a repair or replacement may be warranted. But they can’t offer if you don’t ask!
Be Open to Purchasing Replacements
If your Yeti is past warranty or damage was caused by normal wear and tear, be prepared to purchase replacement parts.
Many issues can be easily fixed by getting a new gasket, lid, or accessory piece. Support can identify exactly which part you need.
Replacements are affordable and preserve your existing investment rather than starting totally over. Don’t dismiss purchasing as an option.
Follow Support Recommendations
Yeti customer service aims to make the solution process smooth and effective. Follow through on their recommendations to resolve your issues.
If a replacement part is suggested, order it and try installing right away. Follow any usage tips or care steps advised.
Support combines troubleshooting experience with intricate product knowledge. Trust their guidance for getting your Yeti back on track.
Get the Most from Your Investment
Yeti products are an investment, and their support teams strive to help you get the most out of yours.
If you hit a snag your own troubleshooting can’t seem to fix, tap into their experts. Provide plenty of detail so they can make an accurate diagnosis.
Support can determine if warranty coverage applies or if reasonably priced replacement parts may do the trick.
With some guidance from the Yeti team, you can likely restore functionality and enjoy your Yeti for years to come. Don’t leave their expertise on the table.
Before totally giving up on your Yeti, connect with their support staff. The solution may be simpler than you think thanks to their extensive knowledge and experience.
