How do hockey goalie throat protectors prevent life-threatening injuries. What types of throat guards offer the best protection for goalies. Which features should you look for in a high-quality hockey goalie throat protector. How can proper throat protection boost a goalie’s confidence on the ice.
The Critical Importance of Throat Protection in Hockey
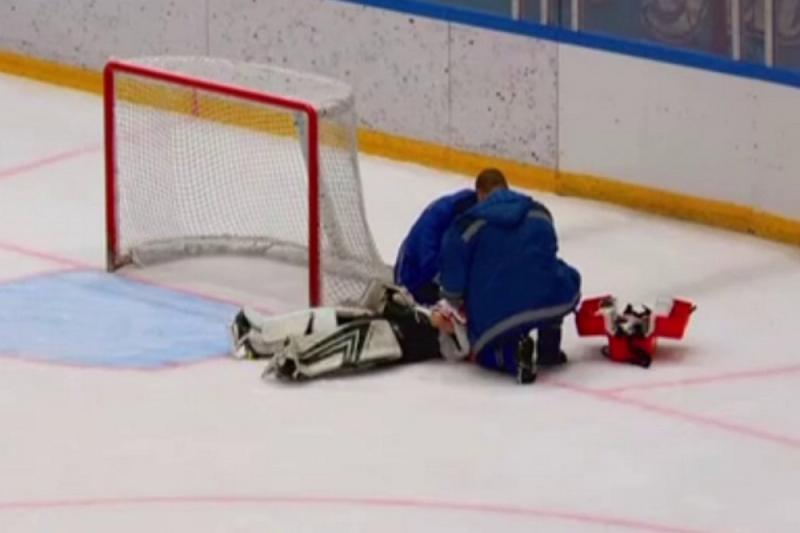
Hockey goalies face numerous risks on the ice, but few are as potentially life-threatening as a puck to the throat. Proper throat protection is not just a matter of comfort or performance—it’s a crucial safety measure that can prevent severe injuries and even save lives. Let’s explore why throat guards are an indispensable piece of equipment for every hockey goalie.
Preventing Catastrophic Tracheal Injuries
One of the most serious risks a goalie faces is damage to the trachea, or windpipe. A direct hit from a puck can crush this vital airway, potentially leading to suffocation within minutes. How does a throat protector mitigate this danger? By distributing the force of impact over a wider area, quality throat guards significantly reduce the risk of a collapsed trachea, ensuring that goalies can continue to breathe even after taking a shot to the neck.
Safeguarding the Carotid Arteries
The carotid arteries, which supply blood to the brain, run along either side of the neck and are particularly vulnerable to injury. A well-designed throat protector covers these critical blood vessels, preventing potentially fatal bleeding that could occur if a puck were to tear one of these arteries. This layer of protection can be the difference between a close call and a life-threatening emergency on the ice.
Spinal Cord Protection
While less common, spinal cord injuries from neck impacts can have devastating consequences, including paralysis. Throat guards provide a protective barrier over the cervical spine, absorbing and dispersing the kinetic energy from a puck strike. This added layer of defense helps reduce the risk of severe spinal injuries that could end a goalie’s career—or worse.
Types of Hockey Goalie Throat Protectors: Choosing the Right Guard
When it comes to selecting a throat protector, goalies have several options to consider. Each type offers unique benefits and features designed to provide maximum protection without sacrificing comfort or performance.

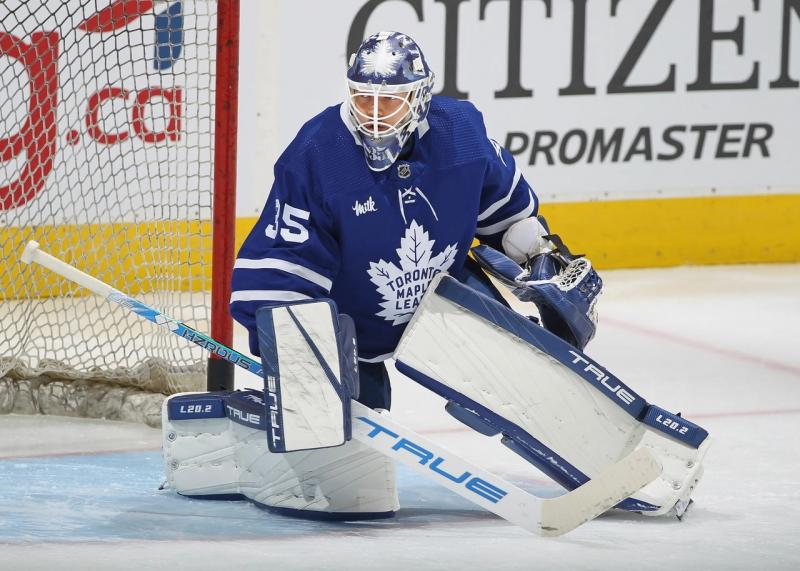
Standard Neck Guards: Versatile Protection
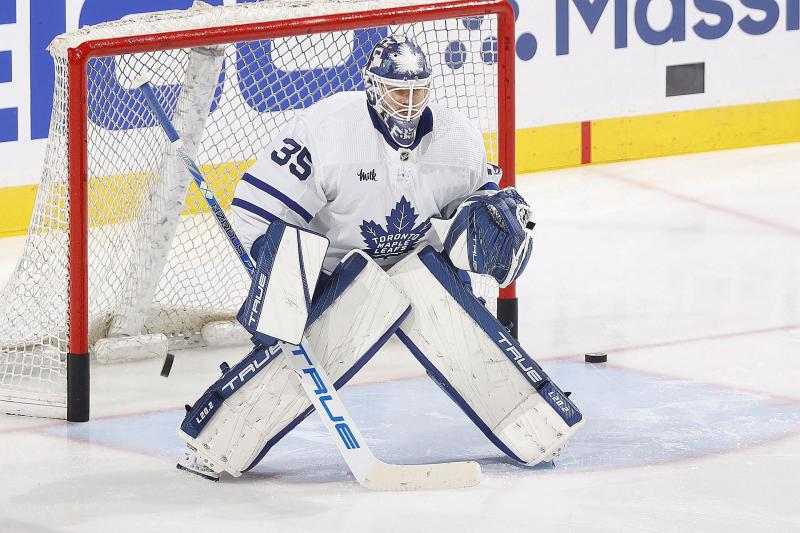
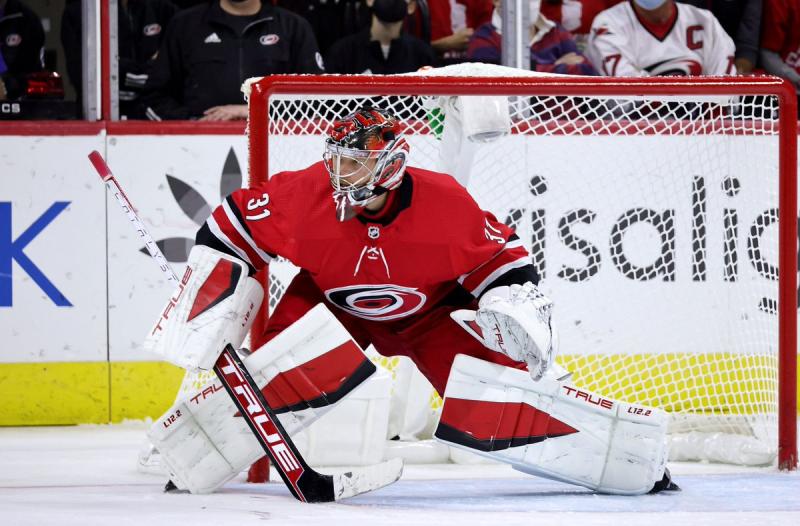
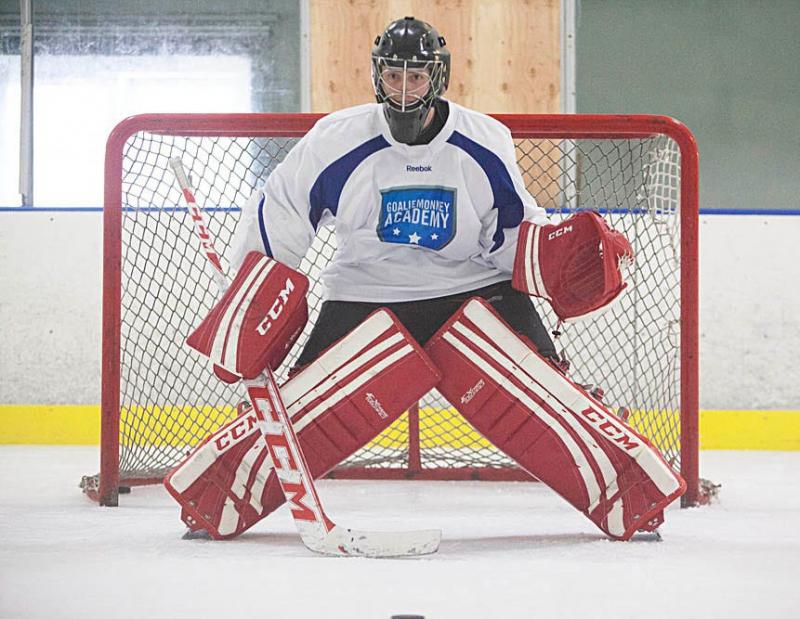
Standard neck guards are the most common type of throat protector used by hockey goalies. These guards typically consist of padded plastic clips that attach to the chest pad suspenders, with an adjustable neck guard that wraps around the front of the throat and secures with velcro. What makes standard guards so popular among goalies? Their versatility and ease of use allow for quick removal between periods and excellent airflow when needed.
Close-Fitting Neck Guards: Streamlined Safety
For goalies seeking a more snug and anatomical fit, close-fitting neck guards offer a streamlined alternative. These guards contour tightly to the neck, often using foam or gel padding that molds to the goalie’s unique shape. How do close-fitting guards enhance protection? By staying firmly in place during intense play, they ensure consistent coverage without the need for frequent adjustments.
Integrated Chest Protector Designs
Some modern chest protectors come with built-in throat guards, offering a seamless and comprehensive protection system. These integrated designs eliminate the need for separate attachments and ensure consistent coverage. Are integrated throat guards right for every goalie? While they offer excellent protection, some goalies may prefer the flexibility of standalone guards that can be easily removed or replaced.
Key Features to Look for in a Hockey Goalie Throat Protector
Selecting the right throat protector involves considering several crucial features that can enhance both safety and comfort on the ice.
- Impact-resistant materials: Look for guards made from high-density foams or reinforced plastics that can effectively absorb and distribute force.
- Adjustability: Ensure the guard can be easily adjusted for a snug, comfortable fit that doesn’t restrict movement.
- Breathability: Opt for designs with ventilation features to prevent overheating during intense play.
- Coverage area: Choose a guard that provides ample coverage for the entire front and sides of the neck.
- Compatibility: Ensure the throat protector works well with your other gear, particularly your mask and chest protector.
The Psychological Benefits of Proper Throat Protection
Beyond physical safety, wearing a high-quality throat protector can have significant psychological benefits for goalies. How does throat protection boost a goalie’s confidence on the ice? By knowing they’re well-protected, goalies can focus entirely on their performance without the nagging fear of potential injury. This increased confidence often translates to more aggressive and effective play, allowing goalies to challenge shooters without hesitation.
Maintenance and Care for Your Throat Protector
Proper care and maintenance of your throat protector are essential to ensure its effectiveness and longevity. Regular inspection for signs of wear or damage is crucial, as even small tears or cracks can compromise the guard’s protective capabilities.
Cleaning and Sanitizing
How should you clean your throat protector to maintain hygiene without damaging it? Most guards can be gently hand-washed with mild soap and warm water. Always allow the guard to air dry completely before use to prevent bacterial growth. For guards with removable padding, consider washing these components separately for a more thorough clean.
Storage and Transport
Proper storage is key to preserving your throat protector’s shape and effectiveness. Store it in a cool, dry place away from direct sunlight when not in use. When transporting your gear, consider using a dedicated compartment or protective case to prevent damage from other equipment.
The Evolution of Goalie Throat Protection: From Past to Present
The history of goalie throat protection in hockey is a testament to the sport’s ongoing commitment to player safety. How has throat protection evolved over the years? Early goalies often played with minimal neck protection, relying on their masks or improvised guards. As the speed and power of shots increased, so did the need for specialized throat protection.

Milestones in Throat Guard Development
- 1970s: Introduction of basic neck guards, often made from leather or thick fabric
- 1980s: Development of plastic and foam designs for improved impact resistance
- 1990s: Integration of throat protection with chest protectors begins
- 2000s: Advanced materials and ergonomic designs enhance protection and comfort
- Present: Continued innovation in materials and design, with a focus on maximum protection and minimal interference with movement
The Role of Regulations in Goalie Throat Protection
Hockey governing bodies play a crucial role in ensuring player safety through equipment regulations. How do these regulations impact throat protection for goalies? Many leagues and organizations have specific requirements for throat guards, mandating their use and setting standards for design and performance.
Current Regulations and Standards
While regulations can vary by league and level of play, most professional and amateur hockey organizations require goalies to wear throat protection. These rules often specify minimum coverage areas and impact resistance standards. It’s essential for goalies and coaches to stay informed about the specific requirements in their league to ensure compliance and optimal safety.

The Future of Throat Protection Regulations
As research into sports safety continues to advance, it’s likely that regulations surrounding goalie throat protection will evolve. Future standards may incorporate new technologies or materials that offer even greater protection against high-velocity impacts. Goalies and equipment manufacturers must stay abreast of these changes to ensure they’re always using the most effective and compliant protective gear.
Customization and Personalization of Throat Protectors
While safety is paramount, many goalies also value the ability to personalize their equipment. How can goalies customize their throat protectors without compromising protection? Many manufacturers now offer options for color customization, allowing goalies to match their throat guards to their team colors or personal style preferences.
Balancing Style and Safety
When considering customization options, it’s crucial to prioritize function over form. Any modifications or decorations should not interfere with the guard’s protective capabilities. Some goalies opt for custom-fitted throat protectors, which are molded to their exact neck shape for optimal comfort and protection. While these can be more expensive, they offer a level of personalization that can enhance both safety and performance.
The Impact of Technology on Goalie Throat Protection
Advancements in materials science and manufacturing techniques continue to revolutionize goalie equipment, including throat protectors. How is technology shaping the future of throat protection for hockey goalies?
Innovative Materials
Researchers are exploring new composite materials that offer superior impact resistance while remaining lightweight and flexible. Some of these materials can even adapt to different temperatures, maintaining their protective properties in both warm and cold conditions. This adaptability is crucial for goalies who may face varying rink temperatures throughout a season.
Smart Protection Systems
The integration of smart technology into sports equipment is an emerging trend that could significantly impact goalie throat protection. Imagine throat guards equipped with sensors that can detect the force of impacts and alert trainers to potential injuries. While still in development, such technologies could provide valuable data for improving both equipment design and player safety protocols.
3D Printing and Custom Fitting
3D printing technology is opening new possibilities for creating custom-fitted throat protectors. By scanning a goalie’s neck and shoulders, manufacturers can produce guards that perfectly match their anatomy, offering unparalleled comfort and protection. As this technology becomes more accessible, we may see a shift towards highly personalized protective gear for goalies at all levels of play.
In conclusion, the importance of proper throat protection for hockey goalies cannot be overstated. From preventing life-threatening injuries to boosting confidence on the ice, a high-quality throat protector is an essential piece of equipment for every goalie. By understanding the types of guards available, the key features to look for, and the ongoing advancements in protective technology, goalies can make informed decisions to ensure their safety and enhance their performance. As the sport continues to evolve, so too will the methods and materials used to protect its players, with throat protection remaining a critical focus for equipment manufacturers and safety regulators alike.
Importance of Protecting the Throat in Hockey
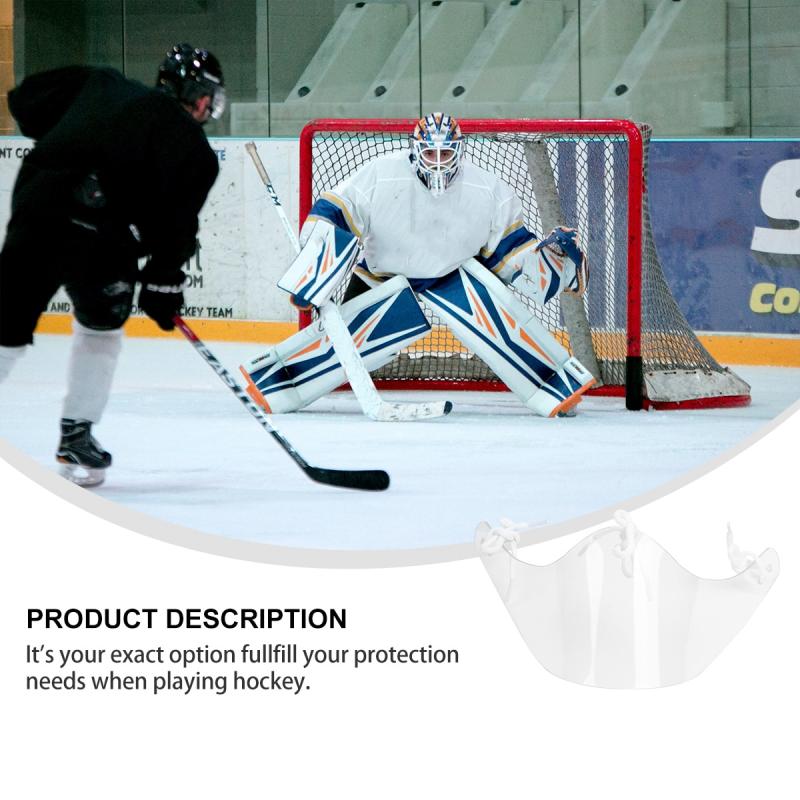
As a hockey goalie, protecting your throat is absolutely essential. A puck to the throat can cause serious injury or even be fatal. That’s why wearing a high-quality throat protector should be a top priority.
Let’s talk through why goalie throat protection is so vital in hockey:
Preventing Tracheal Injuries
One of the biggest risks is damage to the trachea (windpipe). A shot to the front of the neck can crush the trachea, making it difficult or impossible to breathe. Not being able to get enough oxygen to your brain for even a few minutes can lead to brain damage or death.
Wearing a guard allows the force of the puck to be distributed over a larger area instead of focused on the trachea. This greatly reduces the chance of catastrophic tracheal injuries on the ice.
Shielding the Carotid Arteries
The carotid arteries run up either side of the neck carrying blood to the brain. If struck just right, a puck can tear one of these critical blood vessels. That leads to severe bleeding that can quickly become fatal if not treated immediately.
Throat protectors are designed to cover these arteries to prevent potentially deadly bleeding from a puck hitting the neck.
Avoiding Spinal Cord Damage
Though less common, it’s also possible for a shot to the neck to damage the spinal cord. This could lead to paralysis below the point of injury. Parts of the spinal cord run through vertebrae in the neck and are vulnerable in this area.
By absorbing and dispersing the kinetic energy from a puck, quality throat guards provide a protective barrier over the spine as well.
Preventing Broken Hyoid Bones
The hyoid bone in the throat helps anchor the tongue and is very fragile. A direct impact can fracture this delicate bone, causing severe pain and difficulty swallowing for weeks or months.
Wearing a guard greatly reduces the force placed on the hyoid bone if struck by a puck.
Avoiding Larynx Damage
The larynx contains your vocal cords and is essential for speech. It sits vulnerably right in front of the trachea in the throat.
A shot here can bruise or tear the vocal cords, making it very difficult to talk normally. In severe cases, it may even require surgery to repair the damage.
Throat protectors cushion the larynx from the trauma of slap shots and prevention permanent injury.
Minimizing Concussions

Hits to the front of the neck can cause the head to suddenly jerk back and lead to concussions. The whiplash effect strains the brain inside the skull, resulting in symptoms like headaches, dizziness, and confusion.
By providing padding over the neck, throat guards minimize how far the head snaps back after an impact. This reduces overall concussion risk in the crease.
Boosting Confidence on the Ice
Knowing your throat is well-protected gives a mental boost as well. You can focus without fear of the puck every time you drop into your stance.
That increased confidence in your gear allows you to play more relaxed and aggressively challenge shooters.
So in summary, wearing proper throat protection as a goalie is about so much more than just saving your voice. It can truly save your life or prevent catastrophic injuries in the blink of an eye.
Don’t take chances – get yourself a high-quality throat protector and make it part of your goaltending gear for both practices and games. Your health and safety depend on it.
Now let’s explore exactly what to look for when choosing a hockey goalie throat protector that offers maximum protection.
Types of Hockey Goalie Throat Protectors
When shopping for a hockey goalie throat protector, you’ll find there are a few main design styles to choose from. Understanding the differences will help you pick the one that offers the protection and comfort you need in the crease.
Standard Neck Guards
This is the most common type of throat protector worn by goalies today. It consists of padded plastic clips that attach to the chest pad suspenders. An adjustable neck guard then wraps around the front of the throat and velcros closed.
Standard guards provide solid protection for the trachea and carotid arteries. Models with additional padding or inserts offer even more coverage for the spine and larynx as well.
The benefit of this style is it’s easy to take on and off between periods. You can also fully open the velcro closure to get more airflow when on the bench.
Close-Fitting Neck Guards
For goalies wanting a more snug and anatomical throat protector, close-fitting designs are available. These contour tightly to the neck for a streamlined feel.
Foam or gel padding molds to the shape of the throat. Small cutouts allow for full head mobility. The materials are also very breathable to prevent overheating.
Close-fitting guards stay firmly in place during action so there’s no need to readjust after scrambling in the crease. The custom fit prevents gaps that could leave you exposed.
Collar-Style Throat Protectors
Some goalies prefer a collar-style of throat protection. These are thin foam rings that loop under the chin and around the back of the neck.
Collars are minimal but add an extra layer covering the larynx and spine. They’re often worn in addition to another primary neck guard.
Many goalies like the lightweight feel of the collar. But alone they may not provide sufficient padding for the front of the throat.
Attached Throat Protectors
For maximum convenience, some chest and shoulder pads have an integrated throat guard. It attaches to the collar of the chest pad and stays in place all game.
These built-in protectors offer good trachea coverage but often less protection for the sides and back of the neck. So they’re usually paired with an additional detachable neck guard.
Attached guards eliminate any chance of forgetting your throat protector in the locker room. But you lose the ability to adjust the fit game-to-game.
Danglers
Danglers attach to the bottom of the mask with clips or velcro. A curved plastic plate sits flush under the chin.
Many goalies use danglers to protect against pucks squeezing through small gaps in full neck guards. They also provide peace of mind against freak deflections.
Danglers shouldn’t be worn in place of a full throat protector however. They leave the trachea completely exposed and vulnerable.
So in summary, the most protective option is wearing a anatomical neck guard in combination with a collar and dangler. This covers you from all angles without limiting mobility.
Next let’s go over the key features to evaluate as you shop for the best hockey goalie throat protector.
Features to Look For When Buying One
With so many hockey goalie throat protector options available, it’s important to know what features offer the best protection. Here are some key things to look for when shopping:
Coverage Area
Make sure the neck guard sufficiently wraps around the front and sides of the throat. There shouldn’t be any gaps leaving the trachea or arteries exposed.
Look for extra padding that extends coverage to the back and spine as well. The more surface area protected, the better.
Padding Thickness
In general, thicker padding absorbs more impact from pucks. But that needs to be balanced with mobility.
High-density foams or gel inserts provide robust protection without excessive bulk. Solid plastic shields also disperse energy effectively.
Materials
The ideal materials are both absorbent and tough. Multi-layered padding with a rigid outer shell performs best.
Make sure any hard plastic or acrylic won’t crack or shatter from repeated puck impacts over time.
Fit
The protector should contour snugly to your neck without any pinching or gaps. But also allow for full head movement.
Adjustable collar closures help customize the fit. Anatomical shaping will provide better coverage than flat designs.
Ventilation
Proper airflow prevents overheating and fogging up your mask. Look for breathable fabrics as well as opportunities to open the neck guard during breaks.
Ease of Attachment
The guard should clip or velcro securely to your chest protector for stability. But also allow for easy on and off between periods.
Models that attach to the helmet or mask tend to shift too much during play.
Interference with Gear
Test the throat protector with your chest pad, shoulder pads and mask. Make sure it integrates cleanly without limiting mobility.
Bulky guards can sometimes interfere with your trapper and blocker as well.
Weight
Find the lightest neck guard that still provides adequate protection. Excess weight from the protector can cause neck fatigue over the course of a full game.
So in summary, strike the right balance between coverage, padding, and comfort based on your needs in net.
Now let’s go over some of the top throat protector brands on the market.
Top Brands Making Quality Protectors
When it comes to hockey goalie throat protectors, there are a few leading brands that consistently deliver top-notch protection and durability. Here are some of the top names to look for:
Bauer
Bauer is one of the biggest players in goalie gear, so it’s no surprise they make highly-rated throat guards. The Bauer Pro Custom Throat Protector uses advanced Poron XRD foam for pro-level protection. The anatomical shape and adjustable collar provide a comfortable contoured fit.
CCM
CCM throat protectors offer a nice balance of mobility and protection. The CCM Pro Throat Guard has thick medium-density foam pads with a rigid exterior shield. Extended spine coverage and multiple attachment points prevent it from shifting. CCM’s close-fitting designs also contour nicely to the neck.
Warrior
Known for their innovative goalie equipment, Warrior provides excellent throat protectors for all levels. The Ritual Pro Neck Guard has overlapping ventilation to prevent overheating. Their Alpha and Alpha One guards use injected foam for lightweight but robust protection.
Vaughn
Vaughn focuses on maximizing protection without limiting movement. Their Velocity line features multi-layer padding arrangements for advanced energy dispersion. The Sport Throat Collar provides supplemental coverage and a streamlined feel.
Sher-Wood
Sher-Wood takes inspiration from their wooden stick heritage in crafting protective gear. The Complement Throat Protector has reinforced anchor straps combined with comfortable neoprene padding. Their throat collars are also popular additions.
Brian’s
Known for high-end custom goalie equipment, Brian’s offers premium protection options. Their Smart Strap and New Zero-G throat guards have innovative detachable designs for adjustable sizing. Brian’s also integrates throat padding into many chest protector models.
In the end, every goalie’s needs are slightly different. Try on different brand styles to find the one with the right form and function for you. And be sure to pair it with a dangler for extra protection from lower-angle threats.
Next we’ll discuss how throat guards help withstand dangerous high stick impacts.
Protecting Against High Stick Impacts
One of the most dangerous situations goalies face is stopping a high stick to the neck area. A throat protector is essential to avoid severe injury from these illegal but accidental plays.
Here’s how a quality neck guard protects you when a stick blade comes up high:
Padding Absorbs the Blow
The thick padding of a throat protector acts as a cushion to absorb the initial force of a high stick impact. Instead of the trachea taking the full brunt, the energy gets dispersed into the foam or gel.
More padding equals more protection. Multi-layered guards with reinforced shields perform the best for high stick protection.
Prevents Laceration
A neck guard serves as barrier between the bare throat and the sharpened steel of a hockey stick blade. This prevents a laceration from the blade cutting into the skin.
The sturdy outer shell of neck protectors deflects the edge of the stick rather than allowing penetration.
Reduces Whiplash
Quality throat protectors will also have extensions of padding farther down the chest. This helps support the neck and head after the initial impact.
Minimizing whiplash reduces the odds of a concussion from the neck snapping back violently.
Shifts Force to Shoulder Pads
With stand-alone neck guards, some force gets transferred through the suspender system to the shoulder pads. This shifts impact away from the vulnerable throat area.
Properly fitted and tightened chest and shoulder pad straps are key to optimizing this energy dispersion effect.
Blocks Follow Through
Often the most damage comes from the follow through after an errant high stick. Quality protectors shield the entire front half of the neck to prevent further strikes.
This includes padding under the chin in case the stick comes up under the mask. Throat collars and danglers add another layer here.
So while you never want to willingly stop a high stick, wearing proper neck protection gives peace of mind if one comes your way.
Next let’s go over how to get the right level of coverage and fit from your throat protector.
Ensuring Proper Neck Coverage and Fit
Getting adequate coverage and a snug fit from your throat protector is crucial. An improperly worn guard leaves you exposed to sticks and pucks causing damage.
Here are some tips for optimizing protection through proper positioning and adjustment:
Wrap Fully Around Neck
The protector should extend all the way around your neck without gaps at the sides. Straps may need tightening to pull the padding flush to the skin.
A guard hanging loosely off the chest won’t move with your head and can leave your trachea vulnerable.
Overlap Your Chest Pad
There should be an overlap between where the throat protector ends and your chest pad begins. This prevents any skin exposure at the collarbone.
Having padding from multiple pieces layered together improves overall protection in that danger zone.
Sit Flush Under Your Mask
The top of the neck guard should tuck under the chin cup of your goalie mask. There shouldn’t be space for pucks to sneak through.
If needed, detachable guards allow you to adjust sizing for a tighter mask fit.
Attach Snugly to Your Shoulders
Properly tensioning the straps to your chest pad or shoulders stabilizes the guard. This prevents it from shifting and opening vulnerabilities.
Periodically re-tighten the straps between saves if you feel the guard getting loose.
Test Mobility and Interference
After getting the protector in the right position, go through your full range of motion. Make sure the guard doesn’t lift or impede your shoulders as you move.
Also check for any obstruction with your trapper and blocker mobility while wearing it.
Close Velcro Tight When Needed
If your neck guard has a velcro closure, ensure it’s set tight during play. The velcro can be opened between whistles for ventilation.
A loose collar is a recipe for disaster if you take a slapshot to the neck.
Taking the time to dial in the right fit could be the difference between severe injury and walking away unharmed from a collision. Have a coach or parent double check your coverage when first wearing a new throat protector.
Next let’s explore ways neck guards provide critical supplementary padding.
Additional Padding for Maximum Protection
Beyond just protecting the front of the throat, today’s goalie neck guards provide important supplemental padding in other vulnerable areas.
Here are some of the extra protection zones enhanced by a quality throat protector:
Shielding the Sternum
Many guards extend padding down below the collar to protect the sternum. This bony area is at risk for bruising and fracture from direct puck impacts.
The extra throat protector padding adds a cushioning layer right where the collarbone and sternum meet.
Covering the Collar Bones
Collar bones are also susceptible to breaking from falls onto the shoulders or cross-checks. Neck guard padding helps cushion them as well.
Choose throat protectors with thicker foam or plastic plates to better disperse collar bone impact forces.
Protecting the Side of the Neck
The areas where the neck meets the jaw and shoulders on each side are vulnerable spots. Neck guards with wide coverage protect those pressure points from harm.
Some even have removable padded inserts to fine tune coverage of the carotid arteries.
Shielding the Upper Spine
Quality protectors extend padding all the way around the neck to safeguard the spine in back. This coverage helps prevent whiplash and vertebrae fractures.
Look for models with breathable but tough materials protecting C1 to C7 vertebrae.
Reinforcing the Base of the Skull
The bottom of the head where the skull attaches is lightly protected. Thicker neck guards boost coverage of this often-exposed area.
High density foams or gel padding work well to absorb blows while allowing head movement.
Maximizing coverage beyond just the throat takes your protection to the next level. Don’t let budget limit your guard – cut costs elsewhere if needed to get quality padding.
Next let’s discuss balancing protection and flexibility in your game.
Staying Protected Without Sacrificing Mobility
While you want robust protection from your throat guard, it can’t hinder your ability to move freely in the crease. Finding the right balance is key.
Here are some tips to maximize both safety and flexibility when picking a neck protector:
Prioritize a Contoured Design
A guard that simply hangs straight down can restrict shoulder movement as you reach across your body. Look for anatomical shaping that contours around your neck.
Curved or angled padding maintains coverage but shifts with you through your full range of motion.
Focus Padding Where Most Needed
Stacking on thick foam evenly throughout a neck protector leads to stiffness. Strategically place the thickest padding only over vital areas instead.
Thinner or ventilated materials on non-critical zones maintain flexibility.
Avoid Excess Bulk Under Your Mask
Too much thickness at the top of the guard can push your helmet forward and down, obscuring vision. Keep padding slimmer through this area.
Also ensure your mask is sized appropriately to integrate with the guard below it.
Test Mobility Before Buying
Don’t order a throat protector untested. First try on the specific model with all your gear on and simulate game movements.
Ensure your head can rotate freely and arms extend fully without restriction.
Open the Neck During Breaks

If your guard has a velcro or snap closure, open it up during stoppages in play. This allows muscles and joints a momentary break from the constraint.
Closing everything back up before action resumes maintains safety.
Perform Regular Neck Stretches
Offset any stiffness from the throat protector during play with thorough neck stretches during your warm-up and cool-down.
Well-stretched muscles and joints stay looser within the confines of the guard.
With smart design choices and preparation, you can move freely while keeping your neck well-protected. Don’t compromise on safety but ensure flexibility isn’t hindered either.
Next let’s explore some recent innovations in goalie throat protector technology.
New Innovations in Throat Protector Design
Hockey equipment manufacturers are constantly evolving their technology to improve performance. Goalie throat protectors have seen some exciting new innovations in recent years.
Here are a few of the design advances you’ll find in the latest neck guards:
Lightweight Foams
New proprietary foams provide protection comparable to heavy plastics but with a fraction of the weight. These lightweight pads reduce fatigue and increase flexibility.
Popular options include Bauer’s Poron XRD and Brian’s AxyFlex padding.
Anatomical Shaping
Using 3D scans of actual goalie necks, manufacturers can now precisely contour padding to match human anatomy. This improves coverage, flexibility and comfort.
CCM’s FitLite 2.0 technology is an example of scanning real goalies for a dialed-in anatomical fit.
Modular Padding
Separating padding into multiple interconnected pieces provides more targeted protection. Sections move independently to match a goalie’s directional neck flexion and head rotation.
Warrior’s Modular Flex Protection exemplifies this segmented padding approach for unmatched flexibility.
Magnetic Fasteners
Secure magnetic closures are quicker to attach and release than traditional Velcro collars. Magnets also fasten more reliably over time compared to Velcro which degrades.
Bauer’s Magnet Lock System allows easy on and off between periods with a fused magnet seal.
Enhanced Ventilation
Laser-cut holes, breathable open-cell foams and moisture-wicking liners help maximize air flow to the neck. This reduces heat build-up for improved comfort.
Brian’s Thermo Core and Vaughn Ventus technologies offer leading examples of cooling properties.
Don’t just settle for a basic neck guard – take advantage of the latest engineering to get the most cutting-edge protection possible.
Next let’s explore how custom guards provide a superior personalized fit.
Custom Options for a Personalized Fit
When you’re out on the ice as a hockey goalie, protection is key. A puck to the throat can cause serious injury if you’re not properly equipped. That’s where a high-quality hockey goalie throat protector comes in. With the right throat protector, you can play confidently knowing your most vulnerable areas are guarded. But with so many options on the market, how do you choose the best throat protector for your needs?
The good news is that today’s goalie throat protectors are highly customizable, with numerous design elements to ensure a personalized fit. From adjustable straps to molded plastic bibs, you can dial in the ideal configuration for maximum protection and comfort. Here’s an overview of some key custom features to consider when selecting your next throat protector.
Adjustable Neck Straps
One of the most important factors in getting a comfortable, secure fit is the neck strap design. Most goalie throat protectors use adjustable straps that buckle or snap into place. This allows you to tweak the tightness to find just the right snugness against your neck and chest. Straps are usually padded as well for extra comfort. Some even have stretchy elastic segments for flexibility during movement.
Dual straps offer additional points of adjustment, while a continuous strap with a loop in back provides a slip-free fit. Look for sturdy plastic clips and buckles that will withstand the rigors of gameplay. The ideal straps should keep the bib portion stable without choking or chafing.
Removable Bib Styles
The protective bib section suspended below the neck strap is another area where you can customize the fit. Many throat protectors today feature removable/replaceable bibs connected by snaps or velcro. This modularity lets you swap bib materials and sizes to adapt the protector to your physiology and preferences.
Common bib materials include firm molded plastic, softer padded vinyl, multilayer foam, and ballistic nylon. Each offers a different feel and level of rigidity. For larger coverage, look for extended collar-bone flaps. The bottom contour can also vary, with choices like tapered, triangular, or scooped bib shapes to protect the hollow of your throat.
Sizing Options
Of course, the whole throat protector needs to conform comfortably to your proportions. Most models come in a range of sizing from youth to adult. Measure across your adam’s apple to pick the bib width that will overlap your neck without pinching. The neck circumference must also align with the strap adjustments for a snug but flexible encircling fit.
Some protectors include detachable size extenders for the neck straps to accommodate growth. You can also often choose replacement bibs in varying heights and widths to update the coverage as needed. Consult each manufacturer’s sizing charts to ensure the best anatomical match.
Ventilation Zones
Even with full protection, overheating can be an issue for goalies exerting themselves out on the ice. Luckily, many modern throat protectors utilize strategic ventilation zones to allow airflow to hot spots. Mesh paneling and segmented padding are common techniques to circulate air while maintaining safety.
Look for sweat-wicking fabric linings as well to keep moisture away from your skin. Well-placed vents and breathable construction help you stay cool under pressure in the crease. Just ensure there are no gaps in the primary protective layers.
Interchangeable Elements
Some throat protectors take modularity to the next level by utilizing interchangeable pieces that snap or velcro into place. This way you can reconfigure the entire layout to put vital padding wherever you need it most. Mix and match components like removable collars, shoulders pads, bicep guards, and extended chest plates to build your ideal custom configuration.
Quick-release buttons, magnets, or tool-free locking tabs make it easy to swap components on the fly. Create a fully tailored setup for your playing style or tweak it over time as your needs evolve.
Specialized Protection Add-Ons
In addition to rigging the protector itself, you can augment the basic design with supplemental accessories for enhanced protection. Many companies offer add-on pieces like removable neck rolls, sternum plates, and adjustable throat cups that integrate seamlessly with your protector.
This supplemental gear bolsters defense for high-risk impact zones like your collar bone, chest, and upper spine. Mix and match compatible accessories until you achieve just the right formula of flexibility and rugged reinforcement.
Finding your perfect goalie throat protector is a balancing act between mobility and protection. But today’s modular designs allow you to really customize the fit to suit your needs. Try out different bib styles, strap configurations, and sizing until you find the ideal groove. And don’t be afraid to add specialized accessories to put some extra armor where you want it most. With the right personalized protector, you can stare down those pucks with confidence.
Proper Care and Maintenance for Longevity

As a hockey goalie, your throat protector takes a beating every time you hit the ice. All that wear and tear can degrade the protective qualities of your gear over time. That’s why proper care and maintenance is crucial for maximizing the lifespan of your throat protector.
With the right cleaning methods and storage tactics, you can keep your protector looking and performing like new. Here are some tips for goalies on maintaining throat protectors so they provide seasons of reliable protection.
Frequent Surface Cleaning
After every game or practice, be sure to wipe down the exterior of your throat protector to remove grime. Sweat, salts, and scuff marks can degrade materials if left to build up. Use a mild soap and damp cloth to gently scrub the bib and straps.
Pay extra attention to crevices and seams where moisture can collect. Rinse everything thoroughly with clean water afterward. Then pat dry with a towel and allow to fully air dry before storage.
Deep Clean the Interior
In addition to surface cleaning, regularly deep clean the interior padding and fabric linings as well. This prevents bacterial growth from sweat that seeps inside. Remove any detachable padding sections. Hand wash them in warm water with mild detergent.
For non-removable liner fabrics, dilute soap in warm water and use a sponge to thoroughly scrub. Rinse everything thoroughly afterward. Hang pieces separately to air dry completely before reassembling.
Sanitize with Disinfectants
Every month or so, do a sanitizing rinse of your entire protector with a disinfectant solution. This kills any lingering microbes living in the gear. Avoid harsh bleach solutions which can degrade materials.
Instead, use a hockey equipment disinfectant spray, or make a gentle solution of warm water with a few drops of tea tree oil. Spray or sponge over all surfaces. Let sit briefly before a final rinse. Allow to fully dry before storing.
Spot Treat Stubborn Stains
For tough stains that don’t come out with regular cleaning, break out targeted spot treatments. A paste of baking soda and water can work to lift out discoloration. Gently scrub with a toothbrush and rinse.
For blood or oily residues, try an enzyme cleaner like OxyClean or Carbona. Pre-treat the stain, let sit, rinse, and repeat until clean. Just check for colorfastness on a small area first.
Mend Any Damage
Inspect every surface of your protector after cleaning for any damage. Look for cracks in plastic bib pieces, loose or frayed stitching, warped shape, worn velcro, and other defects. Address issues promptly to maintain safety and function.
For minor tears, apply adhesive gear tape on the inside or outside as needed. Badly cracked bibs likely need professional replacement. Restitch any loose shoulder strap seams yourself with heavy duty thread.
Keep Pads Supple
Foam or padded vinyl bib inserts can get compressed with age. Restore suppleness by gently massaging and bending the pads while applying a light coat of vinyl/rubber conditioner. This keeps the material pliable to absorb impacts.
As an alternative for occasional conditioning, wipe down pads with rubbing alcohol. This helps maintain flexibility in the materials.
Check and Replace Straps
Neck and adjustment straps endure constant tugging and can become frayed over time. Closely inspect the stitching where straps attach for any loosening.
Also watch for tears in the strap edging and peeling of the covering. Cut away any dangling threads to prevent further unraveling. Replace significantly damaged straps to avoid breakage.
Let Air Dry Thoroughly
Always allow your throat protector to completely air dry before storage or use. Lingering moisture breeds odor and mold. Hang it upright or lay flat on a towel. A fan speeds drying after hand washing.
Make sure padding is fully dry all the way through before reassembly. Store it someplace clean, cool and dry between games.
With regular meticulous care and maintenance, your hockey goalie throat protector can deliver season after season of reliable protection. Establish a routine of surface cleaning, deep cleaning, inspection and storage. Your throat will thank you the next time a blistering slapshot comes your way.
When to Replace Your Old Throat Protector
As a hockey goalie, your throat protector takes a beating every time you hit the ice. With routine use, wear and tear is inevitable. But at what point should you retire your trusty old neck guard and upgrade to a new model? Here are some signs it may be time to swap in a fresh throat protector.
Fading or Discoloration
Over years of repeated cleaning and use, the materials that make up your protector can show visible deterioration. Look for fading, yellowing, or blotchy discoloration, especially on white padding or bib sections. This indicates the foam or plastic is breaking down.
While aesthetic flaws don’t directly affect safety, significant fading is usually a sign of overall aging. Replace the protector if the colors are clearly diminished.
Torn or Damaged Bib
Cuts, cracks, or holes anywhere in the protective bib material greatly compromise its effectiveness against impacts. Even minor tears or splits in the outer fabric covering can expand over time.
Inspect regularly for damage, especially along edges or seams. If the structural integrity of the bib is at all questionable, err on the side of caution and replace the entire protector.
Compression Creases
Permanently compressed creases and indentations in foam or padded vinyl bib sections also indicate a loss of crucial shock absorbing capacity. Areas that fail to spring back are not distributing impact forces properly.
Gently flex the bib to check for supple responsiveness across the surface. Deep creases that remain likely mean the materials are packing out and need replacement.
Stiffness or Brittleness
Another sign of age is bib padding that seems overly stiff and inflexible or developes brittle areas that crack easily. The materials are no longer absorbing and distributing impacts optimally.
Ideally, padding should be firm but yield slightly. Stiffness impairs mobility while brittleness transfers too much force to your throat.
Frayed or Broken Straps
Even if the bib itself is still solid, deteriorated neck or adjustment straps can render the protector unusable. Watch for torn stitching, punctured holes, and split or frayed edges anywhere on straps.
Also be wary of buckles, loops, or snaps that easily pop open, fail to stay closed, or no longer connect snugly. Faulty straps compromise the entire fit and stability.
Lingering Odor Issues
Bacteria and mildew from built-up sweat can create lingering odors even with thorough cleanings. This indicates embedded microbes degrading materials and performance from the inside.
Musty or rotten smells that won’t wash out are a sign of advanced contamination. At that point, the protector needs to be retired for a fresh start.
Abnormal Shape or Silhouette

Over years of use, the overall shape of your protector can shift and deform through repeated minor impacts. Compare your current silhouette against a new model.
If the outline seems distorted or excessively compacted in areas, sufficient coverage and overlap for your throat are likely compromised. Restore proper proportions with fresh gear.
New Recommended Designs
Beyond wear and tear, improving technology also drives the need for periodic replacement. Manufacturers continuously refine throat protector designs for better performance.
Significant upgrades like new materials, customizable modular components, and enhanced ventilation make investing in the latest models worthwhile, even if your current protector seems perfectly functional.
Changing Physique
As your body changes over the years, especially during youth and adolescence, the fit of your old protector may no longer conform to your proportions. Loose, shifting coverage leaves you vulnerable.
Replace ill-fitting old protectors with new models better aligned to your current neck, chest and shoulder circumference. Prioritize the best fit above outward condition.
While well-maintained throat protectors can deliver years of loyal performance, watch closely for any of these warning signs that indicate a need for replacement. Protect your most vital asset – your throat – with gear in peak protective condition.
Shopping Tips for the Best Price and Value
Finding the best deals while shopping can seem like an impossible task these days. Prices are constantly fluctuating, and it’s difficult to know if you’re truly getting the best value for your money. However, with some strategic planning and research, scoring big savings is within reach. Here are some helpful shopping tips to get the most bang for your buck:
Make a List and Stick To It
Before you head out to shop, make a detailed list of everything you need to buy. Having a list will help you stay focused, so you don’t end up impulse buying and overspending. Cross items off as you go, and try not to deviate from your list too much. Sticking to a list will help you get just what you need at the best possible prices.
Compare Prices Online First
Use online shopping sites and tools to compare prices before making any purchases. Sites like Google Shopping allow you to quickly search for an item and see prices offered by multiple vendors. Amazon’s price history charts can show you an item’s price fluctuations over time, so you can determine the best time to buy. Using these online resources first enables you to go into stores armed with the knowledge of what prices you should be looking for.
Know When to Buy Seasonal Items
Timing your purchases around seasonal sales cycles can result in huge savings. Items like winter coats, swimsuits, and air conditioners will be deeply discounted right before and after peak seasonal use. Make a note of seasonal items you need to purchase later in the year, and keep an eye out for the ideal window to buy during end-of-season clearances. The patient shopper can save 50-75% off initial retail prices by buying during optimal seasonal timing.
Sign Up For Email Alerts and Follow Brands on Social Media
Many brands and retailers offer special email promotions and social media sales exclusively to their subscribers and followers. Give your inbox and news feeds some shopping power by signing up for brand/retailer emails and following discount announcements on Instagram, Facebook, and Twitter. You’ll gain insider access to flash sales, coupon codes, members-only discounts, and early sneak peeks at upcoming promotions.
Use Coupons and Cash-Back Apps Strategically

Coupons and cash-back apps like Ibotta, Rakuten, and Dosh can help maximize your savings around town and online. Check sites like RetailMeNot for available coupon codes before finalizing any online purchase. For in-store shopping, only use coupons on items you actually need, and combine them with additional discounts like sales and loyalty rewards when possible for the biggest savings.
Shop Discount Stores and Warehouse Retailers
Shopping at discount stores like Ross, TJ Maxx, and Marshalls and warehouse clubs like Costco and Sam’s Club is a savvy way to get brand name items at steep discounts. These retailers purchase excess inventory and overstock merchandise from top brands and pass the savings on to customers. Combine your trip to these budget-friendly stores with coupons and sales for even lower prices.
negotiate Prices on Big Purchases
Don’t be afraid to negotiate with salespeople, especially when making large purchases like furniture, appliances, and electronics. Many prices are not fixed, and you may be surprised at the discounts a polite request can yield. Ask if they can sweeten the deal by throwing in extras like free delivery, an extended warranty, or gift cards. Negotiating requires confidence and tact, but it can pay off handsomely.
Price Match Guarantees
If you’ve found an item at a lower price somewhere else, take advantage of price match policies offered by many retailers. Bring proof of the competitor’s price to request a match at major stores like Target, Walmart, Best Buy, and more. Many retailers now offer to match online prices as well. Be sure to read the fine print, as some price matching excludes special sales and coupon offers. Wielding store price match policies ensures you always pay the lowest price.
Use Cash-Back and Rewards Credit Cards
Cash-back credit cards transform every purchase into savings by giving back a small percentage of what you spend. Popular cards like Citi Double Cash and Chase Freedom Unlimited offer up to 2% back on all purchases. Using a cash-back card to pay for routine shopping is an effortless way to put money back in your pocket. Rewards credit cards also allow you to accumulate and redeem points for statement credits and perks.
Stack Savings and Earn Rebates
Strategically stacking savings from different sources is the key to unlocking the best value. Combine sale prices with coupons, rebates, loyalty rewards, and credit card points. For example, buying a discounted clearance item with a 25% off coupon, redeeming loyalty points for an extra 10% off, and getting 6% cash back from your credit card stacks savings up to over 40% off. Layering on savings maximizes every shopping dollar.
Shopping with cost-savings strategy allows you to get the items you need and want at the most wallet-friendly prices. Taking the time to research, compare prices, and employ wise shopping habits rewards you with the thrill of getting a true steal. Armed with these savvy shopping tips, you can rest assured that your dollars are going further and you’re getting the very best bang for your buck.
Getting the Right Size for Comfort and Safety
Finding the perfect fit for clothing, shoes, protective gear, and more goes beyond just aesthetics – proper sizing optimizes comfort, performance, and most importantly, safety. Taking a few key measurements and learning size charts can help you determine your ideal size for any situation.
Know Your Body Measurements
Start by taking your basic body measurements – this provides key reference points for finding well-fitted gear and apparel. Use a flexible tape measure to measure your chest, waist, hips, inseam, sleeve length, neck circumference and head circumference. For women, bra band and cup size are also important. Record these numbers – it makes size selection much easier when this vital data is on hand.
Consult Individual Size Charts
Clothing and gear sizes vary widely between brands and styles. Once you know your measurements, always reference the size chart provided for individual items. Size charts relate your numbers to the specific sizing of that product. An XL t-shirt from one brand may fit very differently than another. Checking the size chart saves the guesswork and ensures you select the optimal fit.
Try Items On When Possible

Even with measurements, sizing varies. So when possible, try before you buy. Heading to a store allows you to physically try on items to assess fit and comfort. Try walking, sitting and moving around while trying on pants and shirts. For shoes, bring any custom orthotics you use and walk on inclined surfaces to check fit. Testing out gear like helmets and pads allows you to find the right match for your body.
Focus on Safety Gear Sizing
Safety gear like climbing harnesses, life jackets, protective sports pads and helmets require meticulous size selection. These items must fit snugly without impairing movement or comfort. Carefully measure key points like chest, waist, head circumference and limb lengths as listed in product size charts. Try on safety gear to check for secure fit and range of motion. Improperly sized safety gear severely compromises protective ability.
Mind the Gap
For apparel like dresses, coats and button-downs, consider gap sizes when between standard sizes. Gap sizing like tall, petite or slim cut styles cater to specific body types. Petite sizes accommodate smaller frames with shorter limbs and torso. Tall sizes give extra length for long arms and legs. Slim or athletic fits account for narrower hips and shoulders. Consulting gap sizing provides an ideal tailored fit.
Prioritize Comfort in Undergarments
Finding perfect bra and underwear fit makes everything you wear more comfortable. Make sure bras lay flat against the sternum, offer full coverage and don’t dig into shoulders. Straps shouldn’t be too tight or slip. Underwear should fully cover without uncomfortable squeezing or bunching. Don’t hesitate to go up or down a size as needed – comfort is key for undergarments.
Leave Room for Layering
Outerwear and performance wear often layers over other garments for warmth or protection. Size these items to comfortably fit over clothing underneath. A winter coat needs to accommodate sweaters or sweatshirts you’ll wear beneath it. Soccer shin guards must slip on over socks and fit with cleats. Think through your layering needs when selecting outerwear and protective wear sizes.
Mind Shoe Size Factors
Shoe sizing depends on length, width, arch type, foot shape and intended use. Have both feet sized since most differ in size. Try shoes with any orthotics you use. Choose athletic shoe size to accommodate swelling during physical activity. Wider sizes ensure comfort for flat or high arched feet. Consider factors like toe shape when buying pointed dress shoes. Don’t assume you are one universal shoe size.
Adjust Children’s Sizes Frequently
Children grow quickly, so re-check children’s sizes often. Let growing room in hems, waistbands and shoe size for at least one growth spurt. Size safety gear like life jackets and bicycle helmets for a snug fit now, not room to grow. Oversized protective gear offers dangerously poor protection. Update measurements at least every six months as kids grow.
Finding your optimal personal sizing takes some time and trial and error, but it’s worth the effort. Properly fitted clothes and gear flatter your figure, allow free range of motion and provide critical protective ability. Keep your key measurements handy and take time to test sizes for a custom-tailored fit every time.
Giving Your Confidence a Boost in the Crease
Playing goalie in hockey is as much a mental game as it is physical. With pucks flying at you at high speeds, you need rock solid confidence between the pipes. Finding your mental edge in net protects you better than any piece of gear. Use these tips to build up your self-assurance and take command of the crease.
Remember Your Training
When self-doubt creeps in, reflect on the hours of dedicated training that brought you here. You’ve honed your reflexes, positioning, anticipation and puck tracking through rigorous drills. Tap into the muscle memory and knowledge etched into your brain through practice. Let your preparation give you the confidence to perform at your peak.
Block Out the Noise
Tune out any negative self-talk and external criticism that seeds uncertainty. Ignore the voice inside telling you that you can’t make the next save. Block out the hecklers doubting your abilities. Eliminate any distraction that erodes your confidence. Laser focus on the puck and making the next stop.
Control What You Can
Don’t waste energy on things outside of your control like bad bounces or deflections. Pour your concentration into controlling the controllables – your readiness, positioning, rebounds and movements. Making the next save is always within your power. Have faith in your abilities.
Visualize Success

Picture making saves smoothly and effortlessly during pre-game warmups. Envision sealing your five hole or snagging shots with your glove. Mentally rehearse tracking rebounds and moving efficiently in your crease. Visualizing mastery builds up self-belief to carry into the game.
Focus on Your Process
Don’t get distracted thinking about making saves. Lock into the process – square to the puck, explosive pushes, clean rebound control. Executing the proper techniques and form you’ve drilled instills confidence that you’ll make stops without thinking about it.
Learn From Your Mistakes
When goals do slip by, don’t let them shake you. Analyze what went wrong and make subtle adjustments. Did you overcommit? Get handcuffed? Was your angle off? Make constructive tweaks and quickly refocus. Every mistake makes you better.
Control Rebounds
Limiting scrambles and second chances clears your head. After making saves, consciously direct rebounds away from danger. Controlled rebounds exude a calm command of your crease. Don’t let chaos unravel your confidence.
Ready Your Body
Prepare your body to perform at its best. Eat energizing foods and hydrate properly to feel sharp. Warm up thoroughly so your muscles respond explosively. Proper rest and recovery ensures you feel physically capable between the pipes.
Have a Short Memory
Bounce back quickly from goals against. Don’t let past mistakes throw off upcoming saves. Stay focused in the present moment. The last shot is gone. Dial in on what’s in front of you now. One stop at a time.
Trust Your Instincts
When in doubt, trust your gut. Don’t second guess your split second reactions. The ingrained instincts you’ve developed through training won’t fail you. Have faith in your ability to make saves at a subconscious level.
Embrace the Challenge
See adversity as a chance to rise, not crumble. Let tough game situations fire you up. Channel nervous energy into sharp focus. The bigger the stakes, the more confidently you need to perform. See belief in yourself as a competitive advantage.
Playing with swagger in net gives your team confidence and puts opponents on their heels. But cockiness must be backed up by preparation. Do the work, then let your self-assurance take over. With these tips, you’ll gain the mental edge to excel in the crease.