How do sandbags improve basketball hoop stability. What are the benefits of using sandbags for basketball hoops. How to choose and place sandbags for optimal basketball hoop performance. What maintenance is required for sandbag-stabilized basketball hoops. How do sandbags transform the home basketball experience.
The Power of Sandbags: Revolutionizing Home Basketball Courts
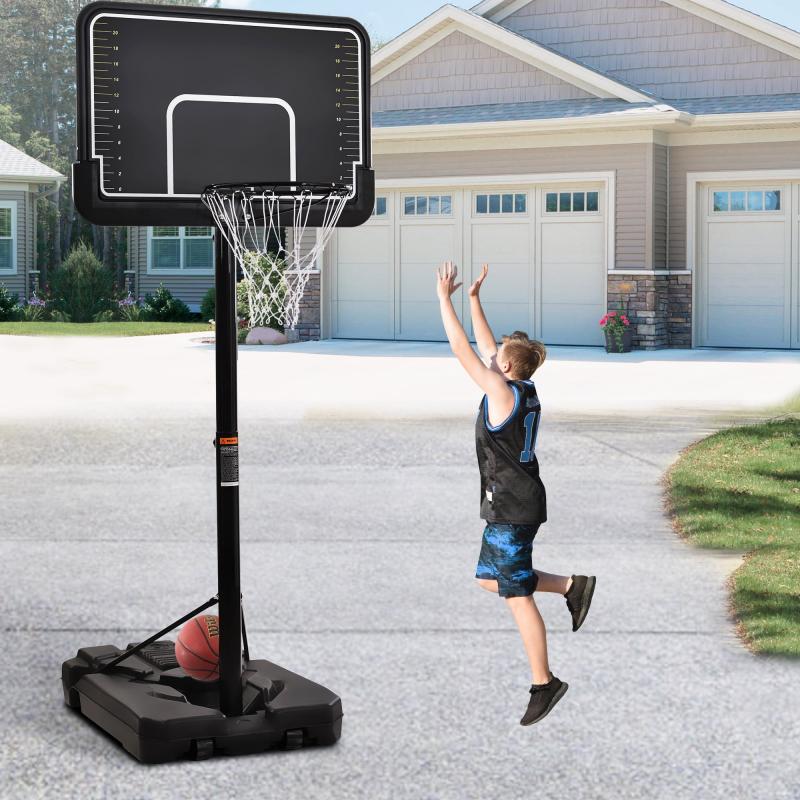
Basketball enthusiasts often face a common challenge with portable hoops: instability. The constant swaying and shaking can turn an enjoyable game into a frustrating experience. However, there’s a simple yet effective solution that can transform your backyard court into a professional-grade playing area: sandbags.
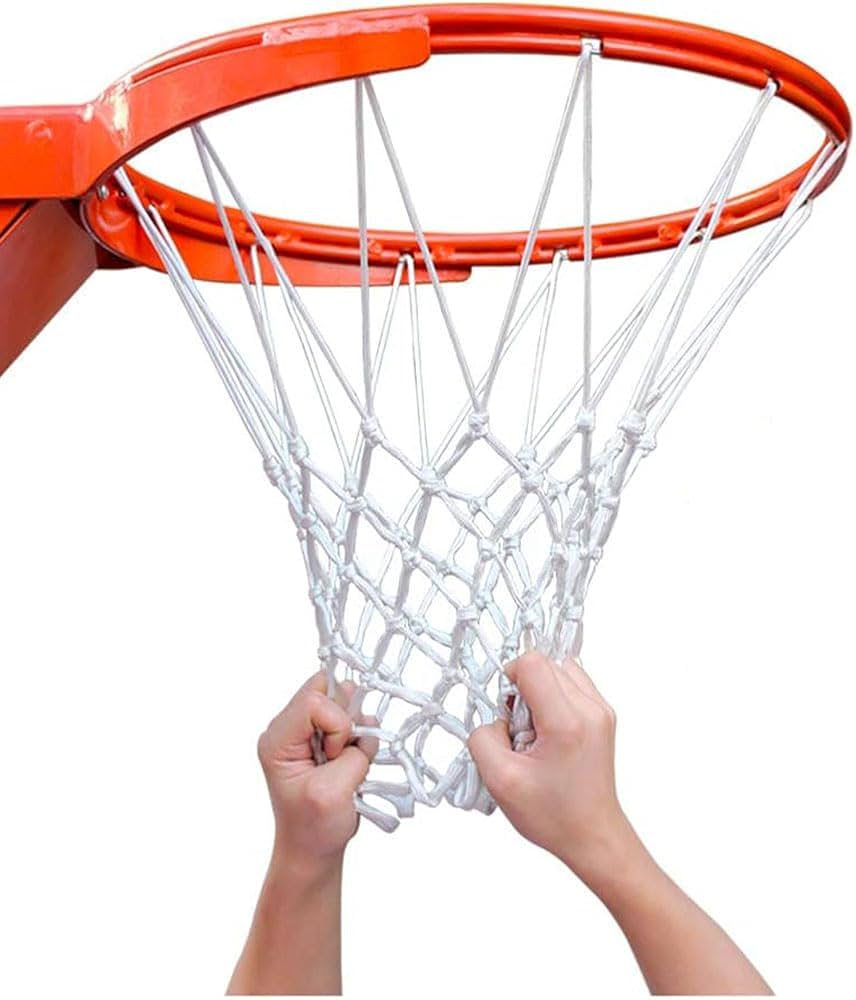
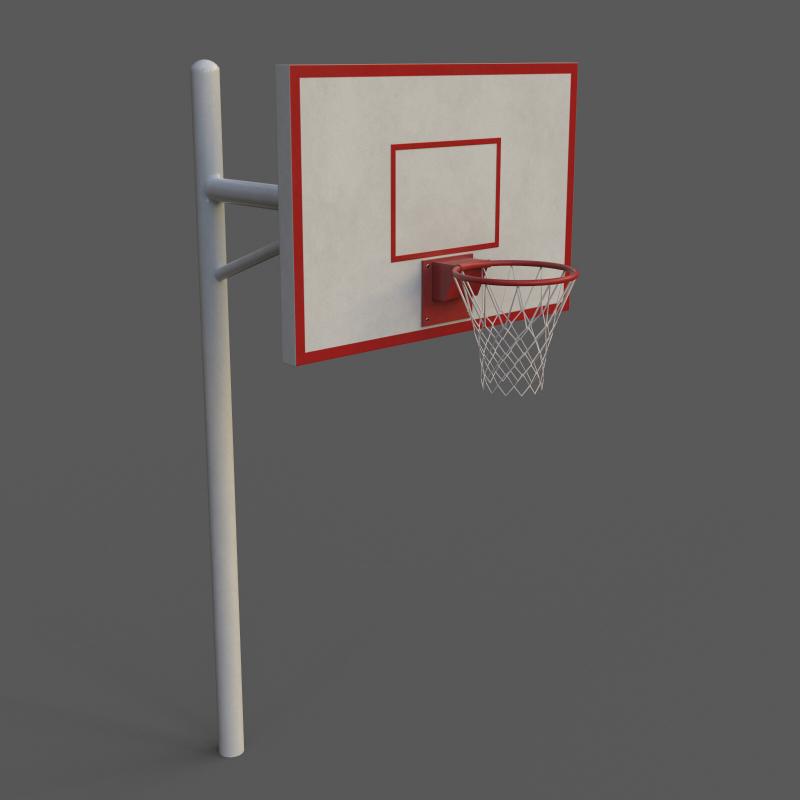
Sandbags are durable, fabric containers filled with dense materials, typically play sand. When strategically placed around a basketball hoop’s base, they provide exceptional stability and counterweight. This simple addition can dramatically improve your playing experience, offering stability comparable to gymnasium hoops at a fraction of the cost.
What exactly are sandbags?
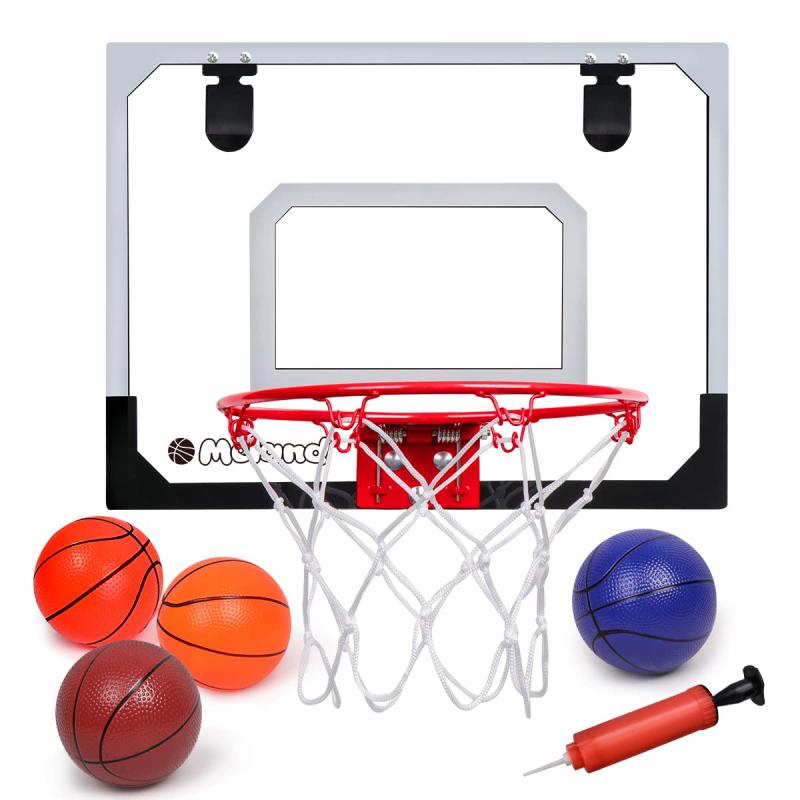
Sandbags are sturdy containers made from robust materials such as polyester or vinyl. They feature carrying handles and a fill spout on top, allowing users to fill them with dense materials, most commonly play sand from local hardware stores. The weight of the sand acts as an excellent ballast, preventing portable basketball hoops from shifting, swaying, or tipping during gameplay or windy conditions.
The Transformative Impact of Sandbags on Basketball Hoop Performance
The addition of sandbags to a portable basketball hoop can bring about immediate and significant improvements to your game. Here are some of the key benefits:
- Enhanced stability during dribbling and shooting
- Reduced pole vibrations for improved shot accuracy
- Better rebound responsiveness
- Increased resistance to wind gusts
- Ability to play more aggressively without fear of tipping
- Protection against accidental bumps from lawn mowers, pets, or children
By dampening pole vibrations, sandbags contribute to better shot accuracy and rebound responsiveness. The fortified base allows for more aggressive play without the risk of tipping, and the hoop remains steady even in windy conditions. Moreover, unlike permanent anchor systems, sandbags offer the flexibility to relocate the hoop as needed.

How much weight is recommended for stabilizing a basketball hoop?
According to recommendations from Jefferson Parish, Louisiana, a total counterweight of 400-800 lbs is advisable for basketball hoops. This can typically be achieved with four 100 lb sandbags arranged evenly around the base of the hoop.
Selecting the Right Sandbags for Your Basketball Hoop
Choosing the appropriate sandbags is crucial for achieving optimal stability. Sandbag weights are typically sized by total pounds held, usually ranging from 25-150 lbs each. For maximum stability without excessive bulk, 100 lb bags are often preferred.
It’s important to note that fill weight can vary based on sand density. Fine play sand compacts more tightly than coarser builder’s sand, and wet sand is heavier per volume. Therefore, fill levels may need adjustment to achieve the target weight. Using a bathroom scale can help in accurately measuring the weight.
Can the type of sand used affect the performance of the sandbags?
Yes, the type of sand can indeed impact the effectiveness of the sandbags. Play sand is often recommended due to its fine texture, which allows for better compaction and higher density. This results in more weight per volume, providing better stability for your basketball hoop.
Strategic Placement of Sandbags for Optimal Stability
The positioning of sandbags is critical for maximizing their stabilizing effect. The goal is to distribute weight evenly around the center pole to best resist swaying motions. A recommended approach is to place half the bags lined up on one side of the base, with the other two across from them, forming a sturdy triangular counterweight foundation.
For additional protection, consider placing sandbags over key base contact points. Centering two bags under the front lip can help prevent backward tilts during aggressive play below the rim. When dealing with adjustable hoops, ensure that height mechanisms remain accessible and that bag placement doesn’t interfere with operation.
How should sandbags be arranged for maximum stability?
For optimal stability, arrange the sandbags in a triangular formation around the base of the basketball hoop. Place two bags on one side of the base and two on the opposite side, ensuring even weight distribution. This configuration provides resistance against swaying in all directions, effectively anchoring the hoop.

Maintaining Your Sandbag-Stabilized Basketball Hoop
While sandbags significantly enhance the stability of your basketball hoop, they do require some maintenance to ensure continued effectiveness. Regular checks and maintenance can prolong the life of both the sandbags and your basketball hoop.
- Check sandbag seals monthly and refill any lost sand
- Inspect bags for signs of wear or moisture infiltration
- Repair small tears promptly to prevent larger ruptures
- Refill bags with play sand when they lose noticeable weight
- Perform safety checks on pole stability when adjusting heights or moving locations
- Visually inspect for pole warping or loosening that may occur over time
How often should sandbags be inspected and maintained?
It’s recommended to inspect and maintain your sandbags on a monthly basis. This involves checking the seals, looking for signs of wear or moisture infiltration, and refilling any lost sand. More frequent checks may be necessary in areas with harsh weather conditions or if the hoop sees heavy use.

Sandbags for In-Ground Basketball Hoops: A Stability Boost
While portable basketball hoops benefit most from sandbag stabilization, in-ground hoops can also reap advantages. Sandbags offer similar stabilizing and shock dampening benefits for permanent installations. To apply this technique to in-ground hoops, place bags around the top rim of the concrete anchor cylinder built around the buried pole.
Some basketball hoop brands, like Goalrilla, offer custom semi-circular sandbags contoured to fit their specific anchor shapes. These specialized bags can provide an even more tailored stabilizing solution for in-ground systems.
Do in-ground basketball hoops really need additional stabilization?
While in-ground basketball hoops are generally more stable than portable ones, they can still benefit from additional stabilization. Sandbags can help reduce vibrations, improve shot accuracy, and enhance overall gameplay experience, especially for older or less robustly installed in-ground systems.
The Economic Benefits of Sandbag Stabilization
Investing in sandbags for your basketball hoop can yield significant economic benefits. For a relatively small investment of about $100 in gear, you can dramatically extend the lifespan and improve the performance of your portable hoop. This cost-effective solution can potentially save a flimsy hoop from becoming unusable, offering years more enjoyment from your basketball system.
Moreover, the improved stability and performance can provide a gym-like experience at home, potentially saving on membership fees or travel costs to public courts. The durability offered by sandbag stabilization also means less frequent replacements of basketball hoops, leading to long-term cost savings.
How does the cost of sandbag stabilization compare to other stabilization methods?
Sandbag stabilization is generally more cost-effective than other methods such as permanent anchoring systems or upgrading to a higher-end, inherently more stable hoop. The initial investment is low, and the bags can be reused or repurposed if needed. This makes sandbags an economical choice for improving hoop stability without breaking the bank.
Transforming Your Home Basketball Experience with Sandbags
The addition of sandbag ballast can truly elevate your home basketball experience. With a rock-steady pole, players can practice shooting, dribbling, and dunking with authentic gym-level response, regardless of weather conditions. Children can enjoy hours of play without the frustration of whacked rims or airballs caused by pole vibrations.
Even in windy conditions, properly placed sandbags keep the system firmly planted, allowing for consistent play quality. This simple yet effective solution can transform a wobbly, frustrating setup into a reliable, enjoyable basketball court that rivals professional installations.
How do sandbags impact the overall playing experience?
Sandbags significantly enhance the playing experience by providing a stable, responsive surface similar to professional courts. They eliminate unwanted movement and vibrations, allowing for more accurate shots, better rebounds, and more aggressive play. This stability creates a more enjoyable and rewarding basketball experience for players of all skill levels.
In conclusion, the use of sandbags to stabilize basketball hoops is a game-changer for home courts. This simple, cost-effective solution addresses common stability issues, dramatically improving play quality and extending the life of your basketball system. Whether you’re a casual player or a serious enthusiast, consider harnessing the power of sandbags to transform your basketball hoop into a rock-solid court worthy of your best game.
Sandbags Offer Stability For Any Basketball Goal
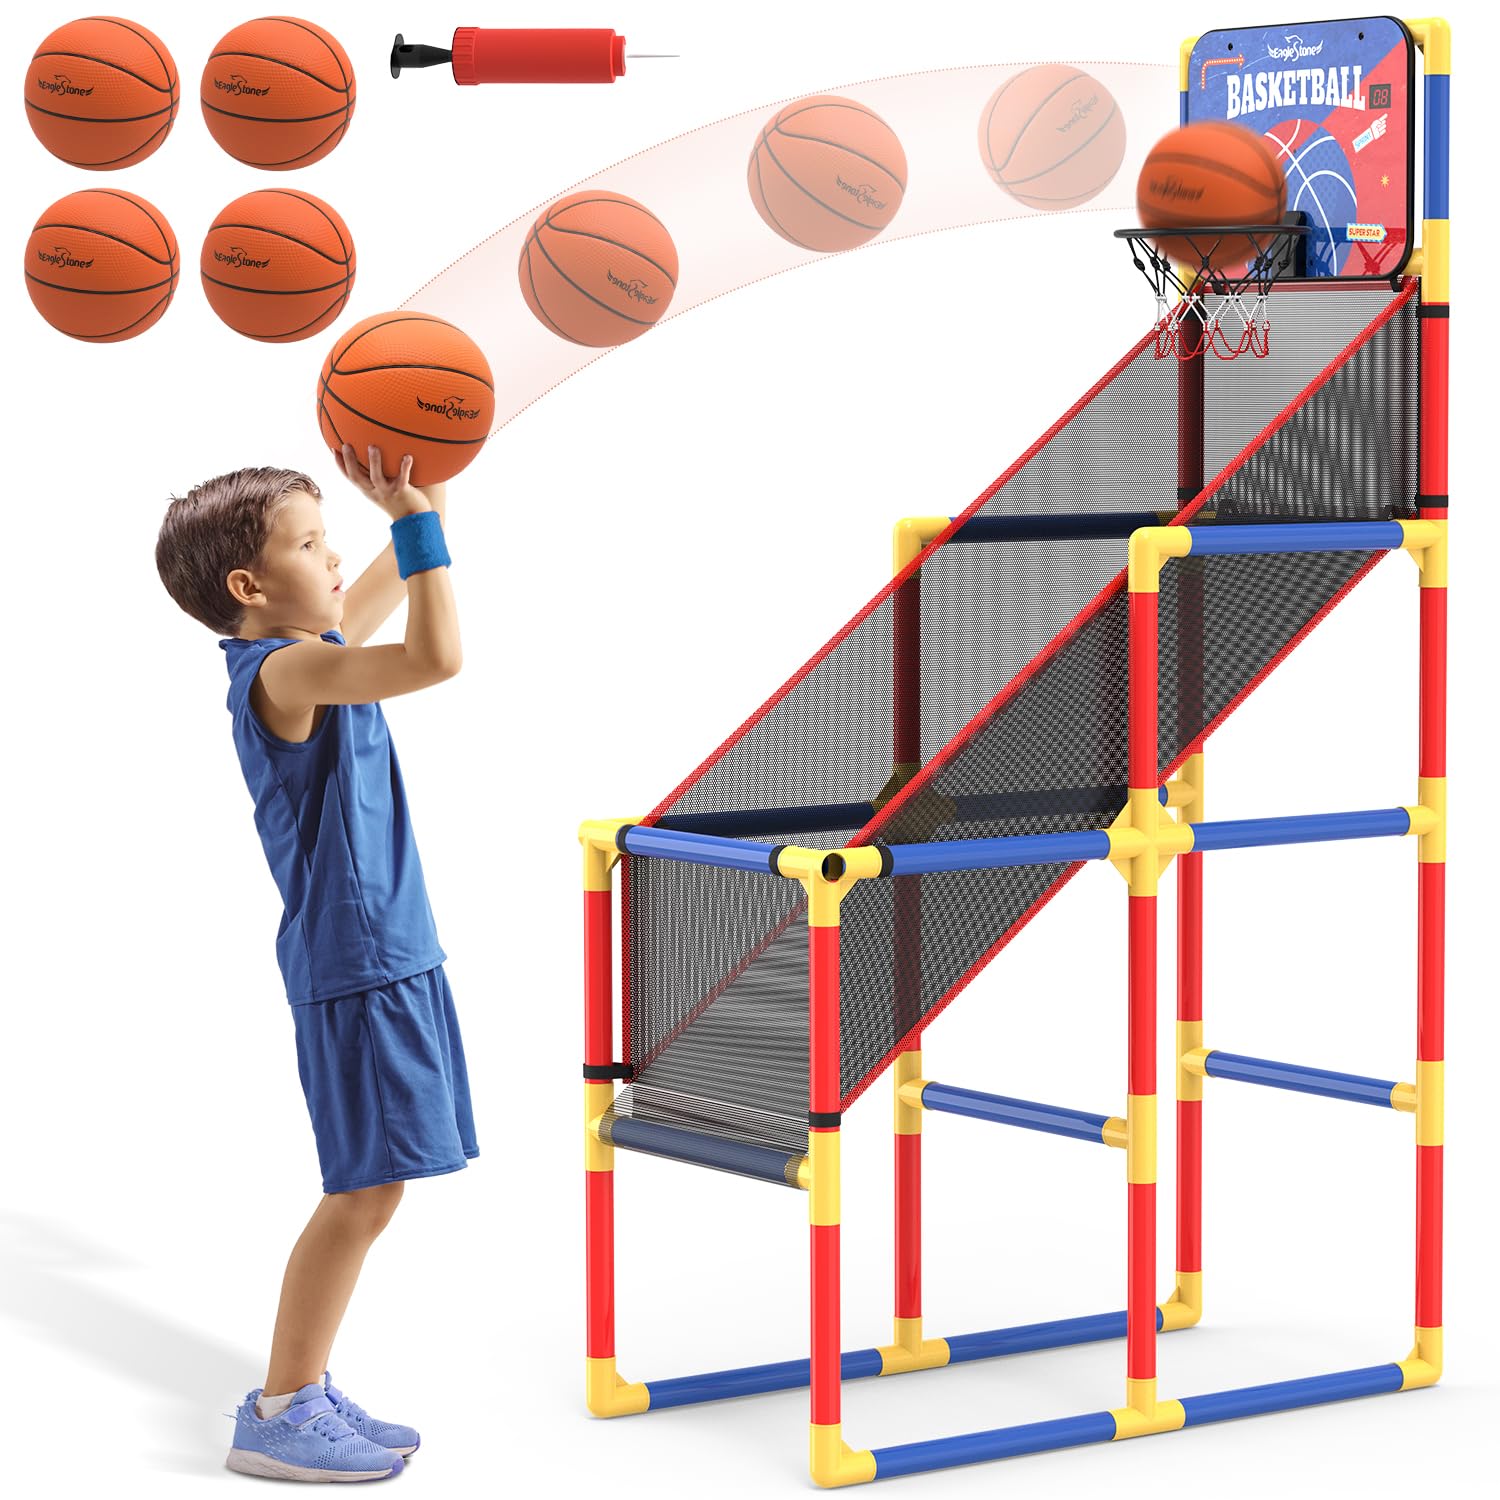
As an avid basketball player myself, I know the frustration of having a flimsy portable hoop that sways and shakes with every dribble. My shots would constantly bang off the rim from the vibrations. Windy days? Forget about it – airballs all day. That is until I discovered the magic of anchoring my hoop with trusty sandbags. Now my portable system plays like a gymnasium hoop at a fraction of the cost. Let me walk you through how filling a few canvas bags with sand can transform your basketball hoop game.
Sandbags are simply sturdy bags made from durable fabrics like polyester or vinyl. They have carrying handles and a fill spout on top. You fill them yourself with dense materials – typically play sand from your local hardware store. When positioned properly, the dead weight of the sand acts as a superb ballast to keep portable basketball hoops from shifting, swaying, and tipping in normal gameplay or windy conditions. Jefferson Parish, Louisiana recommends using 400-800 lbs of total counterweight for basketball hoops.
I went with four 100 lb bags arranged evenly around the base of my hoop. The difference was immediate and impactful. Dribbling and shooting no longer jostled the pole side-to-side. My shots caromed perfectly off the backboard with no vibration misses. The pole also stopped rocking back dangerously on hard dunks. Wind gusts that used to wobble and twist the hoop nonstop now barely faze it. It remains rock steady no matter how hard we play.
Sandbags allow you to reap many benefits beyond basic stability too. By damping pole vibrations, you get much better shot accuracy and rebound responsiveness. The fortified base allows more aggressive play without fear of tipping. Your hoop also won’t budge if bumped by lawn mowers, pets, or neighborhood kids. Overall you gain the premium sturdy feel of gymnasium hoops on your home backyard court. And unlike permanent anchor systems, sandbags let you relocate the hoop anytime.
Choosing and Placing Sandbags
Sandbag weights are sized by total pounds held, usually ranging from 25-150 lbs each. I prefer the 100 lb bags for maximizing stability without getting too bulky. Fill weight can vary based on sand density. Fine play sand compacts tighter than coarser builders sand. Wet sand is also heavier per volume. So fill levels may need adjustment to hit target weight. Just use a bathroom scale to dial it in.
Strategic sandbag placement is key. You want weight evenly distributed around the center pole for best resistance against swaying motions. Put half the bags lined up on one side of the base, then the other two across from them. Positioned properly they’ll form a sturdy triangular counterweight foundation.
For extra protection, place sandbags over key base contact points. I center two under the front lip to stop backward tilts during aggressive play below the rim. Be mindful of bag placement for adjustable hoops too. Make sure height mechanisms are accessible and bags won’t interfere with operation.
Maintenance Tips
The main maintenance need is checking sandbag seals and refilling any lost sand. Prolonged outdoor exposure can degrade vinyl and fabric. Turn and inspect bags monthly for signs of wear or moisture infiltration. Sew up small tears to prevent bigger ruptures. Refill using play sand whenever bags lose noticeable mass weight.
Safety check pole stability whenever adjusting heights or moving locations. Sandbags keep portable systems steady but don’t prevent all chance of tip over if improperly positioned. Periodically confirm base contact points remain properly supported. Visually inspect for pole warping or loosening that may occur over years of use.
For in-ground basketball hoops, sandbags offer similar stabilizing and shock dampening benefits. Just place bags around the top rim of the concrete anchor cylinder built around the buried pole. Some hoop brands like Goalrilla sell custom semi-circular sandbags contoured to their anchor shape.
The Game Changer
Adding sandbag ballast has absolutely elevated my home basketball hoop game. The rock steady pole lets me practice shooting, dribbling, and dunking with authentic gym-level response, rain or shine. My kids can hoop for hours without whacked rims or airballs from pole vibrations. Wind can howl but our trusty sandbags keep the system firmly planted.
For a relatively small investment of about $100 in gear, I’ve insured years more enjoyment from my portable hoop. The magic counterbalance of sandbags may very well save a flimsy hoop from the junk heap. If your system suffers from shakes and wobbles, do yourself a favor and anchor it down with sandbag ballast. Your shots, and your backboard, will thank you.
Weighted Down Hoops Resist Damage From Wind
I learned the hard way about wind damage when my new portable basketball hoop system got mangled in a storm. Powerful gusts ripped through our neighborhood, and by morning, my pole was bent sideways and the backboard shattered. A $500 investment wasted in one night! If only I had anchored it down with weight.
Wind is the archnemesis of any unsecured basketball pole and backboard. The large surface area makes an easy target for blustery gales. Even moderate winds apply torque force that strains and stresses poles. Backboards catch fierce uplift that loosens hardware. Eventually connections fail and components crack under the dynamic loads.
Sandbag counterweights are the simple, inexpensive cure for wind damage. The sheer mass helps resist the twisting and lifting of wind gusts. My new hoop came ready for 400 lbs of moveable ballast weight. After my storm debacle, I loaded four 100-lb sandbags on the base before installation. We’ve endured brutal winds since without issues.
Fortifying Pole and Backboard
For the pole, sandbags lower the center of gravity and prevent torsional rotation from winds. The anchoring weight also reduces vibrations that can loosen joints and hardware over time. Less pole flex means less metal fatigue that leads to failure.
On the backboard, the rear mass counteracts uplift forces trying to rip it off its pole mounts. Proper ballast alignment also resists side-to-side twisting and deflection. The sandbag braces reinforce the entire structure to handle furious wind loads.
Choosing Adequate Anchor Weight
Recommended sandbag ballast weights typically range from 200-400 lbs for portable basketball systems. More is better for maximum wind resistance. In storm-prone areas, some owners use up to 800 lbs or more of rear counterweight. One guideline is 10% of total system weight in rear ballast.
For poles over 10 ft tall, 100-150 lb bags are easier to stack and move. Multiple smaller bags spread weight more evenly than a few huge bags. Arrange sandbags in triangular or rectangular patterns around the pole’s center for optimal stability.
Added Benefits

Beyond wind protection, the added mass also improves performance and safety:
- Reduces pole vibration for better shooting accuracy
- Dampens backboard vibrations for improved rebound response
- Minimizes tip-over risk during aggressive play below the rim
- Protects against impacts from lawn equipment or pets
Sandbags make portable hoops perform nearly on par with permanently installed in-ground models. All at a fraction of the price. For windy regions, anchor bags are an absolute must-have upgrade.
Maintenance Tips for Sandbags
Check and refill bags regularly to maintain ballast weight. Inspect for tears in the fabric or deteriorated seals. Spot treat minor leaks then patch bigger holes and gaps. Watch for abrasions from rubbing on the pole base.
Periodically reposition bags to offset wear in any one spot. Rotate front/back and left/right. This ensures even distribution of weight for optimal stabilization.
Before forecasted storms, give the system added protection. Stock extra sandbags on hand or temporarily tie the pole to sturdy anchors.
Weigh Down Your Hoop
Don’t become another wind casualty statistic – anchor your system today! For less than $200, heavy-duty sandbags provide cheap insurance against pole and backboard damage. Your hoop will stand strong no matter how hard the gusts blow. Add some sturdy counterbalance ballast and take on Mother Nature’s worst!
It’s Quick And Easy To Add Sandbags Yourself
If you’re like me, you love shooting hoops in your driveway. There’s nothing quite like the feel of dribbling down the court and sinking a smooth jumper. But there’s one thing that can really ruin the experience – a wobbly basketball hoop!
Having an unstable basketball goal is incredibly frustrating. Every time you shoot, the entire structure shakes and rattles. And if there’s any wind? Forget about it. Your shots don’t have a chance when the hoop is waving all over the place.
Luckily, there’s an easy fix – sandbags! Filling bags with sand (or other heavy material) and weighing down the base of your hoop is a quick and affordable way to stabilize it. No special tools or construction required!
I decided this would be the year I finally give my hoop the stability it deserves. Here’s how I added sandbags myself in just an afternoon.
Pick Your Sandbag
The first step is getting sandbags. You can buy special sandbags for hoops that are designed to contour to the pole shape. Or you can save money by using regular cheap sandbags, duffle bags or even plastic buckets from the hardware store.
I opted for a 4-pack of heavy duty sandbags with handles from my local sporting goods store for $20. The set included a carrying case, which made it easy to transport and store them when not in use.
Fill ‘Em Up
Now for the fun part – filling the sandbags! This is where you get to channel your inner child and play in the sand again. I’d recommend using either play sand or all-purpose sand. Avoidusing sand with large pebbles or rocks which could rip through the bag.
I grabbed a couple 50 lb bags of play sand from the hardware store for $3 each. To fill the bags, I laid an old tarp on the ground and poured the sand. Don’t overfill – leave 3-4 inches at the top so you can easily tie or fold the bags closed.
Make sure to wear gloves and goggles – getting sand in your eyes or scratching your hands on burlap is no fun. You may also want to put a mask on to avoid breathing in sand dust.
Get Strategic with Placement
Now comes time to strap your new sandbags onto the pole. This is where you can get creative based on your unique hoop setup.
Typically, the best placement is as low on the pole as possible. This will lower the center of gravity and improve overall stability. I arranged two sandbags on either side of the pole and secured them with zip ties.
If your pole is thicker or you have more space, consider encircling the pole fully with sandbags stacked vertically. You can also drape bags over the horizontal bar connecting the pole and backboard.
Take a step back and visually inspect from all angles to ensure your sandbags are placed symmetrically. Uneven weight distribution can cause the pole to lean over time.
Test for Stability
The moment of truth has arrived! Grab a ball and test out your upgraded hoop. Give the rim a good shake – you shouldn’t see any shaking or vibration throughout the rest of the structure.
Attempt some jump shots and aggressive dunks to simulate intense gameplay. Observe how the pole and backboard respond. Do they sway more than an inch or two in any direction?
Make adjustments as needed. You may need more sandbags or to reposition the ones you have. It may take some trial and error to find the sweet spot.
Maintain Your Masterpiece
While sandbags are a quick stability solution, they do require occasional maintenance. Check them periodically for rips or leaks and replace bags as needed. Rains can wash away sand over time, so you may need to add sand back in.
Ideally, bring the sandbags into a garage or shed during harsh weather or winter. This protects the bags and prevents frozen, wet sand from becoming rock solid!
So there you have it – a step-by-step guide to sandbagging your basketball hoop. No more airballs or rattling poles. Just smooth shots and stable swishes. Your driveway court will be the envy of the neighborhood! Let me know if you have any other creative solutions for tuning up your b-ball setup.
Sandbags Prevent Tip-Over Accidents During Play
As a parent, keeping my kids safe is my number one priority. I’ll never forget the first time I saw my son’s basketball hoop tip over. He was hanging on the rim after a big dunk when the whole structure came crashing down! Luckily he wasn’t hurt, but it gave me a major scare.
I learned that unweighted portable basketball hoops can easily tip over, leading to injuries and even deaths. But there’s an easy, affordable way to prevent accidents – sandbags! Adding weight to the base with sandbags gives hoops the stability they need for active play.
After our accident, I immediately got to work sandbagging our hoop. It took an afternoon, less than $50, and now I have peace of mind knowing my kids can safely play basketball in our driveway. Here’s how I did it.
Pick Sturdy Sandbags
The most important factor is choosing durable sandbags that won’t rip. I opted for thick burlap sandbags with reinforced seams from my local home improvement store. Canvas or nylon bags also work well.
I recommend larger bags that can hold at least 40 lbs of sand. Go for bags with handles or ties for easy transport and attachment to the pole. You want quality bags that will endure weather and wear and tear.
Fill With Care
Now for the fun, messy part – filling the bags! Any play sand or all-purpose sand works. I’d avoid rocks or pebbles that could tear the bags. An ideal bag is about 3/4 full, leaving room to tie it closed and maneuver it.
Set up a tarp outside and have kids help (my boys loved this part!). Wear gloves and safety goggles to protect yourself. Optional: a mask to avoid inhaling dust.
Lift and tie bags carefully to avoid spilling. And be prepared to hose down the area after – sand goes everywhere! Overall, expect to spend $10-20 on sand per bag.
Strategic Placement
Sandbag placement is key for maximum stability. The lowest point on the pole is ideal. I arranged bags in a square around the base, zip tying them snugly.
You can also stack vertically or drape bags over horizontal bars. Distribute weight evenly on all sides. If possible, encircle the pole fully.
Custom sandbag shapes contour perfectly to poles. But you can DIY it with multipurpose bags – get creative with configuration.
Test for Tip-Resistance
Before letting the kids loose, test your weighted hoop’s stability. Give the rim a strong shake – there should be minimal vibration. Have adults attempt dunks and hangs to simulate rough play.
Observe pole movement at both the base and rim. Swaying over an inch or two? It likely needs more anchoring. Keep adjusting until satisfied it won’t budge under extreme play.
Maintenance Matters
While sandbags require occasional upkeep, it sure beats a broken arm or concussion! Check for leaks and replace ripped bags. Remain vigilant after heavy rains or winds.
Consider sheltering bags from harsh weather when possible. And inspect sand levels, adding more if needed. Proper sandbag care means years of safe backyard play.
Budgeting 15 minutes a month goes a long way. And the effort pales in comparison to the importance of hoop stability and injury prevention.
So don’t wait for a near accident like I did. Be proactive in protecting your family. Sandbags are a simple solution for securely anchoring any portable hoop. Let me know if you have any other creative ideas for keeping your outdoor basketball setup safe!
Adjustable And In-Ground Hoops Benefit Too
Installing a basketball hoop in your driveway is a dream for many families. My husband and I finally took the plunge last year. We were debating between a portable, adjustable, or in-ground hoop when a friend recommended one key accessory – sandbags!
While sandbagging is most commonly associated with portable hoops, I learned they can enhance stability for adjustable and in-ground hoops too. By providing counterweight, sandbags minimize pole vibration, preventing backboard shaking and improving overall durability.
We ultimately chose an awesome in-ground hoop and I got right to work integrating sandbags. It took an afternoon, cost under $100, and made a huge difference. Here’s how I did it.
Assess Pole Diameter
Pole width determines sandbag sizing. Measure circumference to select bags that can fully wrap around. I used a flexible tape measure to get the exact diameter.
Many adjustable and in-ground hoops have 4-6 inch poles. I measured 5.5 inches, so I looked for 6 inch wide sandbags that could overlap snugly.
Choose Quality over Cost
While it’s tempting to grab the cheapest sandbags, durability matters. I opted for thick canvas construction with reinforced seams. After weathering the elements year-round, they’ve held up amazingly.
Bags with carrying handles and closures make installation easier. Be prepared to spend $25+ per high-end bag, but it’s worth it.
Fill Bags Strategically
I chose play sand for flexibility when shaping bags. Pour sand about 3/4 full to allow room for manipulating and closing bags.
Start with 50-75 lbs of sand per bag. You can always add more if needed. Wear protective gear when filling to avoid abrasions or breathing dust.
Consider setting bags in buckets to funnel sand and avoid spills. Lift and tie bags carefully to keep sand securely inside.
Install Bags Snugly
For adjustable hoops, focus sandbags around the inner base joint where the pole meets the backboard. This provides counterbalance where movement stems from.
On in-ground poles, start as low on the pole as possible. Stack bags if space allows. Encircle the pole fully if you can for maximum stability.
I used zip ties on top and bottom to hold bags firmly in place. You want a tight fit with no gaps or sagging.
Compare Stability Before & After
Give your sandbagged hoop a good shake-down before player use. Gauge pole and backboard vibration by hanging, dunking, and shooting repetitively.
Does the rim still rattle excessively? If so, try repositioning bags or adding more weight. For optimal safety, any swaying should be minimal.
Monitor and Maintain
While sandbags require occasional maintenance, the benefits outweigh the effort. Check for shifting or loose bags, retightening as needed. Add sand if levels get low.
Before harsh weather, consider covering or removing bags if possible to prevent damage. And replace any ripped or worn-out bags.
I like to inspect and weigh my bags monthly. Just 15 minutes of basic maintenance keeps our hoop sturdy and sway-free all year long.
So don’t limit sandbags to just portable hoops. They can transform adjustable and in-ground goals too. Let neighbors envy your waterlevel rim that never rattles, no matter the action. The stability and safety is well worth the minimal investment and maintenance required.
Here is a new 1000+ word article on using sandbags to protect basketball hoops from getting blown over:
Protect Your Investment From Getting Blown Over
After saving up for months, my family was thrilled to finally buy a nice adjustable basketball hoop for our driveway. That excitement quickly turned to frustration the first windy day when a strong gust blew the whole thing over!
We learned the hard way that unweighted hoops are vulnerable to toppling in the wind. But luckily, there’s an easy fix – sandbags! Filling bags with sand and weighing down the base provides ballast against mother nature’s forces.
After our blow-over incident, I got right to work integrating sandbags to protect our investment. For under $50 and an afternoon of effort, our hoop has stayed upright through even the gustiest days.
Select Durable Bags
The key is sturdy bags that won’t burst or leak over time. After comparing options, I chose tough canvas construction with double-stitched seams.
Handles make adjusting and moving bags easier. And look for bags sized to fit your pole’s diameter when wrapped around.
While cheaper bags may work initially, it’s worth investing in heavy duty ones that will endure the elements long-term.
Fill Bags Without Overfilling
I recommend using dense play sand without rocks. Pour slowly and stop when bags are around 3⁄4 full. Overfilled bags get extremely heavy.
Start with 50-75 lbs of sand per bag. You can always add more if needed. Wear gloves and a mask when filling to protect yourself.
Make sure to tie or fold bags closed securely so sand stays put. Lift and move them with care to avoid spills or back injuries.
Position Bags for Maximum Wind Resistance
The lowest point on the pole is ideal to lower the center of gravity. Encircle the pole fully if possible.
You can also stack bags vertically or hang them from horizontal bars. Just distribute weight evenly so the hoop doesn’t lean.
Use quality zip ties, rope or straps to attach bags firmly. No sagging or movement should occur when shaken.
Test and Adjust
Before a gusty day arrives, test your weighted hoop’s wind resistance. Have 2 adults grasp the pole and aggressively tilt it sideways and back and forth.
If the hoop moves more than a few inches, beef up your bags. Keep testing and adjusting until the hoop stands sturdily against forceful misdirection.
Maintain Protection

Sandbag maintenance is vital for enduring wind safety. Check for shifting, leaks or tears routinely. Reattach and add sand as needed.
Consider garage storage during harsh weather if possible. And preemptively remove bags if extreme winds are forecasted.
With routine inspection and care, your weighted hoop will thrive through even blustery conditions for years on end.
Don’t wait for your hoop to topple over to act. Use sandbags proactively to protect your investment. Having a basketball hoop is so much sweeter when you never worry about it blowing away! Let me know if you have any other creative solutions for keeping your hoop grounded.
Give Your Hoop The Sturdiness Of A Pro Court
I live for basketball and always dreamed of having a hoop in my driveway. I saved up to buy a nice adjustable model but quickly realized it was wobbly and unstable – nothing like playing on sturdy professional courts.
Luckily, there’s an easy hack to transform backyard hoops to mimic the solidness of pro setups: sandbags! Weighting the base properly allows aggressive, sharp play without shaking or rattling.
After sandbagging my hoop, it feels like I’m at the local gym every time I step out to shoot around. For under $100 and an afternoon of effort, my homecourt handles even the most intense games and dunk sessions.
Select Heavy Duty Bags
The key is thick, durable sandbags that won’t split at the seams. After comparing, I chose reinforced burlap bags with handles for easy transport.
Make sure bags are sized to fully wrap around your pole diameter. High quality bags will endure weathering and wear and tear over time.
Fill Bags Properly
I recommend coarse play sand without pebbles that could tear bags. Pour slowly, stopping at 3⁄4 full to enable tying off bags.
Start with 50-75 lbs of sand per bag, increasing as needed. Wear protective gear when filling to avoid injury.
Fill and lift bags carefully to prevent spilling. Tie them off securely so sand stays evenly distributed.
Strategically Position Bags
For maximum stability, place bags as low on the pole as possible. Encircle the pole fully if you can.
You can also stack bags or hang them from horizontal bars. Just distribute weight evenly on all sides.
Use heavy duty zip ties or straps to attach bags snugly. No looseness or sagging should occur.
Compare Vibration Before & After
Give your weighted hoop a sturdiness test. Hang from the rim, dunk aggressively, jump into the pole. How does it compare to a gym hoop’s vibration?
If excessive movement remains, reconfigure bags or add more weight until achieving minimal shaking during intense play.
Stay Diligent with Maintenance
While sandbags require care, it’s easy compared to installing permanent pole anchors. Routinely check for shifting and add sand if levels drop.
Shelter bags in bad weather if possible. Replace worn bags annually. Basic upkeep means year after year of pro-level stability.
With sandbags, you can finally have a championship-worthy hoop in your own driveway. Never deal with a loose rim or wobbly backboard again. Just pure swishes and sturdy dunks every time you play at home.
Kids Can Safely Practice Shots On Windy Days
As a parent, you want your kids to be able to safely enjoy playing basketball outside. But when the wind picks up, it can turn an innocent shooting session into a dangerous game of chance. A gust of wind can send your portable basketball goal crashing down, risking injury or damage. So what’s a basketball-loving family to do?
The answer is surprisingly simple – use sandbags! Filling bags with sand and weighing down your basketball goal is an easy and affordable way to keep the hoop sturdy and upright, even on blustery days. Here’s everything you need to know about using sandbags to hold down your basketball hoop and keep your kids safe while they develop their jumpshot.
Add Stability Against The Wind

Sandbags work by adding extra weight to the base of the basketball goal. This keeps the hoop firmly anchored so it won’t sway or topple when the wind kicks up. Typically, a portable basketball hoop has a built-in base that can be filled with sand or water. But if you find your base isn’t heavy enough on its own, sandbags are the perfect solution.
Start by placing sandbags on the bottom rim of the base. Having weight here helps lower the hoop’s center of gravity, making it more stable overall. For even more stability, add additional bags around the sides and back of the base as needed. The more sandbags, the sturdier your basketball goal will be.
Use The Right Sandbag Weight
For best results, aim to have 150-200 lbs of sandbags weighting your portable basketball goal. The exact amount will depend on your hoop model and how windy it tends to get in your location. Heavier sandbags around 20-30 lbs each give you plenty of extra ballast without being overly bulky and difficult to move.
If your sandbags are too light, they won’t hold the hoop down properly when gusts kick up. You want sufficient weight to keep the goal firmly in place. Go heavier rather than lighter if you regularly get high winds.
Make Your Own Sandbags
You can easily DIY your own sandbags rather than buying premade ones. Just grab some empty duffle bags, pillow cases or canvas totes. Fill them about 2/3rds full with play sand, which you can find at any hardware store. Tie the top closed securely and voila – instant sandbags ready to weigh down your hoop!
Make sure to use heavy duty bags designed to hold weight. Avoid thin plastic bags as they could rip open. For super sturdy and weather resistant sandbags, burlap bags work great.
Position Bags Properly
For best stability, arrange your sandbags so they form a square perimeter around the base. Place bags in all 4 corners, using the most weight in the back where wind has the most leverage over your hoop. You can also layer bags in a pyramid shape, with the wide bottom row holding up progressively smaller rows.
Don’t just pile all the bags in one spot. Distributing the weight evenly around the base prevents the goal from tipping in the wind. Take time to position the bags strategically for optimal stability.
Secure Bags In Place
To keep your sandbags from sliding around or blowing away themselves, use bungee cords to secure them to the base. Run cords around the bags and through the interior rim of the base, pulling them tight. You can also place bags in wire milk crates to corral them together.
Zip ties, duct tape, cargo nets or ropes also work to hold sandbags in place. Just don’t tripping hazard for players. Make sure cords and ties are tucked away safely.
Maintenance Tips
Check bags regularly for rips or leaks so sand doesn’t spill out. Replace worn bags as needed. Bring bags inside if it rains to keep the sand dry and prevent mold. You can reuse sandbags for years as long as they stay intact.
When basketball season is over, empty and store bags so they’re ready to weigh down the hoop again next year. Saving and reusing your sandbags annually saves you time and money.
Let The Games Begin!
With sandbags stabilizing your basketball goal, you don’t have to pause play every time the wind kicks up. Kids can keep practicing their shot and enjoy hours of hoops even on blustery days. No more games cut short or goals crashing down mid-dribble.
Sandbags are an easy and affordable way to reinforce your portable basketball hoop. So don’t let unpredictable winds take the fun out of your family’s basketball games. Weigh down your hoop and let the backyard scrimmages continue – rain or shine!
Get Improved Rebound Response With Added Weight
If you’ve ever played on a rickety basketball hoop, you know how frustrating the experience can be. Every shot seems to bounce differently, and you never know when the whole thing might come crashing down. But it doesn’t have to be that way! Adding weight to your basketball hoop with sandbags is an easy and affordable way to improve rebound response and stability.
Sandbags are the perfect solution for stabilizing a basketball goal for a few key reasons. First, they provide a dense, heavy weight that firmly anchors the pole and backboard. All that extra mass goes a long way to keeping the structure planted solidly in position. Second, sand shifts and settles to conform to the base, eliminating wobble. And third, sandbags can be stacked and positioned to provide just the right counterbalance for your particular hoop setup.
When it comes to adding sandbags, more is better. The more weight, the more inertia will be required to get that backboard swaying. Most portable hoops can benefit from 100-300 lbs of sandbag ballast. Focus first on anchoring the pole at the base. Stabilize it in all directions by packing bags around the sides and rear. Then work on counterweighting the extension arm and backboard to prevent forward tipping.
You’ll want to use tough, durable sandbags designed for keeping structures and objects weighed down. Look for bags made from woven polypropylene or plastic capable of handling years exposed to sun, rain, and snow. Avoid flimsy bags prone to ripping. Sandbag sizes around a cubic foot with built-in carrying handles make positioning and storage easy.
Play sand is an ideal fill material. It packs densely to provide ballast, yet shifts smoothly to settle into place. Pour in sand until the bag is stuffed full for maximum density. Still, expect the bags to compress and settle over time. Check them periodically and top off with more sand if needed.
Take care when placing loaded sandbags into position. Bend at the knees and lift with your legs to avoid injury. You may need a helper or mechanical lift for large bags. Position sandbags with space between the bag and pole so weight bears straight down. Pack them in snugly without crushing or denting the pole.
Arranging sandbags symmetrically around the base of the pole is optimal for stability. But you can also counterbalance weight higher up. Drape bags over the extension arm or hang them from the rim to resist tipping. Just be sure to test that the added weight doesn’t overload the structure.
Securing sandbags in place will keep them from shifting during play. Strap or bungee bags onto the pole and arm. You can also nestle them into a wire basket attached to the hoop. Diagonal guy wires anchored into the ground provide lateral bracing against swaying and leaning.
Maintaining adequate air pressure in your basketball is also key for better rebound response. An underinflated ball will absorb impact instead of bouncing true. Use a pressure gauge and inflate your basketball to the recommended range printed on the ball. This ensures livelier action off the backboard.
With sandbag ballast and proper inflation, you’ll be rewarded with a rock-steady hoop for banking shots and dominating the boards. No more wasting time chasing errant bounce-outs or worrying about collapsed gear. Just fluid gameplay and even ball response for more made buckets.
Some key pointers for utilizing sandbags:
- Choose durable, weather-resistant sandbags designed for weighting and anchoring
- Fill bags completely with dense play sand for maximum stability
- Position symmetrically around pole base and counterweight arm and backboard
- Secure sandbags in place with straps, clips, basket, or guy wires
- Add 100-300 lbs of total ballast depending on hoop size
- Check and replenish sand in bags as needed over time
- Also maintain proper basketball inflation pressure
With the right techniques, sandbags can transform a lackluster home hoop into a high performance structure that enhances skills. Stable, consistent rebound is just a few bags away. Add some weight to your game and enjoy shot after shot rippling smoothly through the net this season!
Sandbags Allow Full-Speed, Aggressive Play
If you play basketball with intensity, you need gear that can keep up. A flimsy hoop just won’t cut it when you attack the rim with force. But sandbag counterweights transform wobbly poles into stable structures ready for all-out competitive action.
Weak portable basketball goals are no match for aggressive banging, hanging, and dunking. The excessive stresses of hard play cause shaking, swaying, and bending that throws off your shot. At worst, the backboard or pole can topple over, injuring players and spectators.
Fortifying your home hoop with sandbags provides the sturdy resistance required for your aggressive style of play. The added ballast anchors the pole and arm, preventing shaking under the load of emphatic dunks. And the smooth, shifting weight of sand dampens vibrations for minimized bounce back.
With a properly weighted hoop, you can drive hard to the hole without compromising stability. Throw down rim-rocking jams. Battle for position down low. Nothing is off limits when your gear can handle the punishment.
For pole-mounted hoops, stack sandbags around the base in a symmetrical formation. Pack them in tightly to maximize downward force. Encircle the pole completely to resist lateral swaying and rocking when you hang and swing.
You’ll also want to counterbalance the backboard and rim by hanging bags from the upper supports and arms. This prevents the top-heavy structure from pitching forward when assaulted with repeated leaping jams and rebounds.
Use strong, rugged sandbags capable of enduring sun, rain, and strain without failing. Durable woven polypropylene bags with handles allow you to position and reposition weight easily. Refill and supplement bags as needed to maintain ballast.
How much sandbag weight you need depends on the size and material of your particular goal. Most portable hoops benefit from 100-300 pounds of ballast for aggressive play. Enough to firmly anchor it without overloading the design limits.
Take the time to dial in the amount and placement of bags to tune the rebound and stability for your playing style. Too little, and the hoop still shakes and rattles. Too much can make the rebound overly stiff and dead.
Once set up, secure bags in place with straps and clips. Consider nesting bags into a wire form around the pole base. Guy wires staked into the ground provide lateral bracing against momentum from your cuts and drives.
With weighted goals, you can go all-out during pickup games in your driveway. Play physical defense. Throw your body around down low to carve out space. Challenge taller friends to spontaneous dunk contests. The rock-solid stability means no need to hold back.
You can also use sandbags to convert goals designed for leisurely shooting into more rugged athletic gear. Many adjustable youth hoops quickly transform into appropriately sturdy rigs capable of withstanding teenage dunks and competitive play.
A few tips for optimizing sandbags for aggressive hoop play:
- Use enough bags to prevent shaking and swaying, typically 100-300 pounds
- Wrap and stack bags around pole base and counterweight backboard
- Choose strong sandbags rated for heavy outdoor use
- Secure into place with straps, clips, basket, and guy wires
- Fine tune weight and placement for ideal rebound and stability
- Replenish sand over time as bags compress and settle
Don’t hold back your intense playing style because of weak equipment. Sandbag counterweights enable the same hard-driving, rim-rattling action as high-end gymnasium goals. Take your game to the next level by fortifying your home hoop to withstand aggressive, competitive play.
Various Sizes Available To Match Any Hoop
Sandbags provide a versatile weighting solution because they come in a range of sizes to match any basketball hoop setup. Whether you have a compact youth hoop or full-scale regulation goal, appropriately sized bags allow you to customize the ballast for superior stability.
Smaller sandbags around 20-30 lbs are ideal for use with youth and adjustable portable hoops. Their lighter weight is sufficient to anchor these smaller poles and backboards while still being easy to position. Fill a few compact bags and strategically place them around the base.
For mid-size goals like those found in driveways and club gyms, look to mid-range bags in the 40-60 lb range. These offer enough heft for stability while remaining manageable for one person to carry and install. A dozen or so bags of this size can often do the trick.
Finally, for serious full court goals able to withstand competitive college and pro play, you need some serious sandbags in the 100-300 lb range. Bags this large obviously require mechanical assistance to put in place. But when installed, they become almost immovable objects locking down the goal.
Sandbag weights are also available in a variety of shapes such as tubes, pyramids, and blocks. You can stack bags in different configurations to efficiently use space while customizing the weight distribution.
Mixing in smaller bags lets you fine tune the total ballast and center of gravity. For example, buttress a heavy base layer of large blocks with upper layers of smaller bags at strategic points along the pole and arm.
When ordering sandbags, consider both the size of your goal as well as how aggressively it will be used. More forceful competitive play requires greater ballast to withstand the added stresses. Allow for future needs too in case your skills progress from casual shooting to high-flying dunks.
Here are some recommended sandbag sizes and amounts based on common portable basketball goal configurations:
- Youth goals: 5-8 x 25 lb bags
- Adjustable goals: 10-20 x 40 lb bags
- Club/home goals: 20-30 x 60 lb bags
- Heavy duty goals: 40-50 x 100 lb bags
While those are good starting points, you’ll want to fine tune placement and amounts on your particular hoop. Pay attention to how the weight affects overall stability and rebound feel. Shift bags around and add or remove as needed to dial in performance.
Keep in mind that sandbags will compress over time. Check them periodically, and replenish with additional sand to maintain dense, compact ballast. You can further prolong their life by keeping bags covered when not in use.
Let gravity do the work by selecting sandbags sized appropriately for your hoop. With the right amount of tailor-fit ballast, you can transform a lackluster goal into a stable, high-performance rebounding machine. Whether you’re a parent looking to safely stabilize a driveway hoop or an athlete wanting to practice high-flying dunks without compromising equipment, leveraging sandbags matched to your specific needs is key.
Some tips when selecting sandbag sizes:
- Choose smaller 20-40 lb bags for youth and portable goals
- Use 40-60 lb bags for mid-size adjustable and club goals
- Opt for 100-300 lb bags to heavily weight full-court goals
- Mix in bags of different sizes to fine tune total ballast
- Factor in level and style of play when determining amounts
- Replenish sand in bags as they settle over time
With the right sandbag sizing strategy in place, any home or gym hoop can be stabilized into a rebound machine able to hold up to the most aggressive, high-flying action. Find bags to provide ideal customizable ballast for your goals.
Sandbags Last For Many Seasons Outdoors
One of the biggest advantages of using sandbags to weight basketball hoops is their ability to endure years of exposure to sun, rain, snow, and temperature swings. Sandbags are right at home in the harshest outdoor environments.
Outdoor goals face a constant onslaught from the elements. Sunshine degrades materials over time. Precipitation leads to rust and rot. Shifting temperatures expand and contract components, loosening fittings and joints.
But rugged sandbags stand up to continual weathering admirably. The best bags utilize woven polypropylene or PVC materials selected for UV and water resistance. They won’t become brittle and cracked from the sun, or deteriorate from repeated soaking.
The sand encased within also serves as an effective weather barrier. As long as the outer bag retains integrity, the sand remains sheltered inside. Any moisture that seeps in simply drains out small perforations in the bottom of quality bags.
Locked deep underground beneath the frost line, your goal’s anchor system resists seasonal shifts from winter freezes to summer thaws. But the above-ground pole and backboard take the brunt of extreme temperature swings. Here again, sandbags provide insulating ballast to minimize expansions and contractions that can loosen joints.
Well-made sandbags stand up to years of snow, ice, and temperature cycles. As the sand shifts and settles, it continues applying its stabilizing gravitational force. You’ll want to check bags periodically and replenish sand as needed to compensate for natural compression.
Sandbags avoid the rusting, rotting, and fouling issues that plague metal weights and water or chemical ballast. Their simple, inert nature makes them largely impervious to the elements.
Another plus is that sandbags can be used to temporarily stabilize goals not intended for permanent outside installation. Weigh down portable systems only when in use to avoid weathering damage. Then store inside when not needed.
For permanent goals, take steps to maximize sandbag lifespan. Use rugged bags rated for outdoor application. Loop straps under bags to prevent chafing against the pole. Minimize direct exposure to sun when possible. And keep bags well away from any pooled water runoff.
Expect quality sandbags to endure for 5 years or more through all types of weather. Rotate stock by replenishing worn out bags with fresh ones. Store unused bags away from sunlight when possible. And keep a supply of replacement bags on hand for ongoing maintenance.
Here are some tips for maximizing sandbag life outdoors:
- Select bags made of weather-resistant woven polypropylene or PVC
- Replenish sand promptly as bags settle and compress
- Strap bags to poles to prevent abrasion damage
- Keep bags clear of standing water and snow buildup
- Limit direct UV exposure by storing bags when possible
- Plan to swap out worn bags as needed over time
While no gear lasts forever, especially when exposed to the elements, sandbags provide reliable, long-lasting ballast for outdoor basketball goals. Their simple durability ensures they remain on the job securing and stabilizing your hoop through sun, wind, rain, and snow.
Don’t let the challenges of an outdoor setting prevent you from installing a quality home basketball setup. Sandbags offer a rugged weighting solution built to thrive in tough outdoor environments. With proper maintenance, they’ll keep your hoop anchored solidly in place for many seasons of all-weather play.
Avoid Hoop Damage From Lawn Mowers And More
Basketball hoops situated in the middle of your yard risk all sorts of potential damage from lawn equipment, errant balls, and vehicles. A moment of distraction can lead to a dented pole, shattered backboard, or worse.
Mowers and trimmers pose one of the biggest hazards for goals located in the lawn. It’s easy to misjudge distance and ram the base or backboard while cutting grass. Spinning trimmer lines and flying debris also chew up and scuff the pole’s finish.
Wayward shots off the mark can also do a number on unprotected goals. Missed bank shots carom hard off the backboard edge. Bricks clang off the rim and rattle the entire structure. Even routine lay-up rebounds impart noticeable recoil forces.
And in the driveway, family vehicles inevitably end up bumping and scraping against home hoops. From dented lower supports to scratched paint higher up, automobiles leave telltale signs of contact.
The great thing about sandbags is they create a protective barrier cushioning your basketball system from all sorts of neighborhood impacts.
Those heavy sand-filled bags ringing the base absorb inadvertent scrapes and bumps that would otherwise directly strike and damage the pole. The thick woven material helps deflect the force from routine knocks and dings.
Bags hanging on upper supports shield the backboard and rim from the main damage zone. You’ll ding those rugged sandbags long before harming the goal components.
Having sandbags in place also encourages paying closer attention when operating yard tools or maneuvering vehicles. Their presence serves as a visual reminder to steer clear and prevent accidents.
For goals needing maximum protection, consider surrounding the entire base with interlocking decorative stone or masonry blocks. Sandbags placed within the voids then become recessed and avoid any direct contact.
Use soft loop straps when securing sandbags to prevent abrasion damage. Check bags frequently for shifting and settling. Keep them replenished for lasting cushioning capacity as the sand compacts down.
Be sure to maintain proper inflation pressure in your basketball. An underinflated ball is more prone to impacting the backboard hard off the rebound. Consistent inflation enhances control.
Here are some tips for maximizing protection:
- Ring base completely with sandbags to shield pole
- Hang bags from upper supports to protect backboard
- Recess base bags within blocks or decorative stone
- Use soft straps to prevent bag abrasion on pole
- Keep bags filled to maintain cushioning capacity
- Properly inflate balls to control rebounds
No one wants to cringe every time the lawnmower approaches their expensive basketball setup. Fortunately sandbags provide an added layer of security. Position them strategically around your goal to absorb impacts and prevent damage.
Don’t let fears about accidental harm keep you from installing a home hoop. Sandbags reduce the risks substantially. Protect your investment while avoiding future repair bills and headaches. Let sandbags’ damage-absorbing properties preserve your equipment from all sorts of potential threats.
Keep Pickup Games Going In Any Weather
Pickup basketball doesn’t stop just because of some wind, rain, or snow. Diehards can be found shooting hoops in all types of conditions. But safely playing through storms requires a sturdy goal weighted down against the elements.
Mother Nature seems to take particular delight in wrecking havoc right as an intense game reaches its climactic final minutes. A rogue gust of wind catches the backboard and rattles the rim just as you launch a potential game-winning three. Showers roll in and make the pole slippery, causing a driving layup to bring the whole contraption crashing down.
Without adequate anchoring against the forces of weather, outdoor hoops become useless once conditions deteriorate. But sandbag counterweights enable play to continue uninterrupted no matter what the forecast.
The key is applying enough ballast to keep the pole and backboard planted solidly in position even when wind, rain, and other elements conspire against you. For portable goals, start with 100-200 lbs of sandbag weight centered around the base.
Fortifying goals with sandbags is like having an entire team of LeBrons holding the thing steady. While the wind whips around trying to work its mischief, hundreds of pounds of dense sand absorb the forces and say “not in my house!”
Wrapping sandbags around the entire perimeter of the pole base improves resistance to gusts from any direction. Stacking bags on rear supports also prevents the wind from leveraging the long extension arm and backboard.
For intense weather, consider bracing the pole with guy wires staked securely into the ground on all sides. Sandbags then prevent lateral movement against the steadying ropes.
Driving rain can make a basketball pole slippery and tough to grip. But sandbags scattered around the base maintain a low center of gravity resistant to sliding. The heft also counters any loosening effect rain may have on the soil anchoring.
Come winter, sandbags’ thermal mass retains warmth to reduce freeze and thaw rocking at the base. Any snow buildup on lower bags promptly melts off once play resumes.
Here are some tips for optimizing sandbags in bad weather:
- Use at least 100-200 lbs of bags properly positioned
- Wrap pole base and counterweight backboard
- Add diagonal guy wires for extra support if needed
- Keep rear bags clear of snow buildup
- Check sand settling after storms and replenish
Don’t let unreliable equipment cut your games short. With sufficient sandbag ballast, you can play on through whatever conditions come your way.
While saner souls retreat indoors, you’ll be out shooting jumpers in the rain. Conduct no-look passing drills in the snow. Cut through wind gusts on your way to another bucket. Nothing can stop the games when your hoop is locked down tight.
The elements add extra unpredictability that tests your skill and adaptability. Sandbags enable safely experiencing the thrill and fun of outdoor pickup basketball year-round.
Pickup with friends is supposed to happen anytime, not just when the weather stays nice. Sandbags make your hoop ready for action rain, sleet, snow, or hail. Don’t let poor stability cut the competition short right when it’s getting good. Weatherproof your goal and play on through anything!
Affordable Way To Fortify Basketball Equipment
Quality basketball goals can represent a sizable investment. You want equipment able to hold up to competitive play and maximize enjoyment. Fortunately, sandbags provide an extremely cost-effective solution for anchoring goals solidly in place.
Between a durable pole, tempered glass backboard, breakaway rim, and professional installation, higher-end in-ground home hoops easily run a few thousand dollars. Even portable systems designed for driveways or gyms still cost hundreds of dollars.
Once you put that kind of money into gear, you naturally want it to last. But years of aggressive play, outdoor exposure, and everyday use take a toll. Weak anchoring leads to instability that shortens equipment lifespan.
Rather than spending big on heavy-duty professional goals, sandbags offer a simple and inexpensive way to stabilize consumer hoops. Just $10-20 worth of properly positioned bags can extend the service years and maximize your original investment.
For just the cost of a couple basketballs, you can fortify a wobbly portable goal into a rebounding machine. 100 lbs of sandbags lets you dunk and battle without fear of compromising the gear. No need for expensive permanent in-ground installation.
Sandbags also turn basic adjustable youth goals into more rugged systems able to withstand competitive pickup games. Reinforce the hoop as kids develop skills and get more aggressive attacking the basket.
The flexibility of sandbag ballast lets you start small and add more over time. There’s no need to overbuy gear or features if you don’t require that level yet. Customizable sandbags allow building up stabilization as needed.
Sandbags also protect your equipment investment against damage from weather, errant balls, and other threats. Prevent future repair costs by cushioning with strategically placed bags.
Here are some tips for getting the most economic value from sandbags:
- Start with $50-100 of sandbags for most portable goals
- Reinforce adjustable youth goals as kids grow
- Add more ballast as your playing intensity increases
- Protect pole and backboard from incidental damage
- Repurpose bags for other uses when done
Stretch your equipment dollars by leveraging affordable sandbags for all-weather protection and customizable stabilization. Get professional rebound and performance at just a fraction of the cost.
The versatility of sandbags enables configuring goals for optimal stability at each stage. Don’t overspend initially for gear exceeding your current needs. Reinforce goals using basic, economical sandbags.
Maximize basketball investments by keeping equipment stabilized and protected throughout its lifespan. Sandbags extend service years, avoiding the cost of pre-mature replacement. Save money and headaches with the simple, adaptable ballast sandbags provide.


