How do professional-quality lacing kits improve baseball glove performance. What features should you look for in a top-rated glove lacing kit. Which are the best DIY glove relacing kits available today. How can you properly relace a baseball glove at home for optimal results.
The Importance of Quality Lacing for Baseball Glove Performance
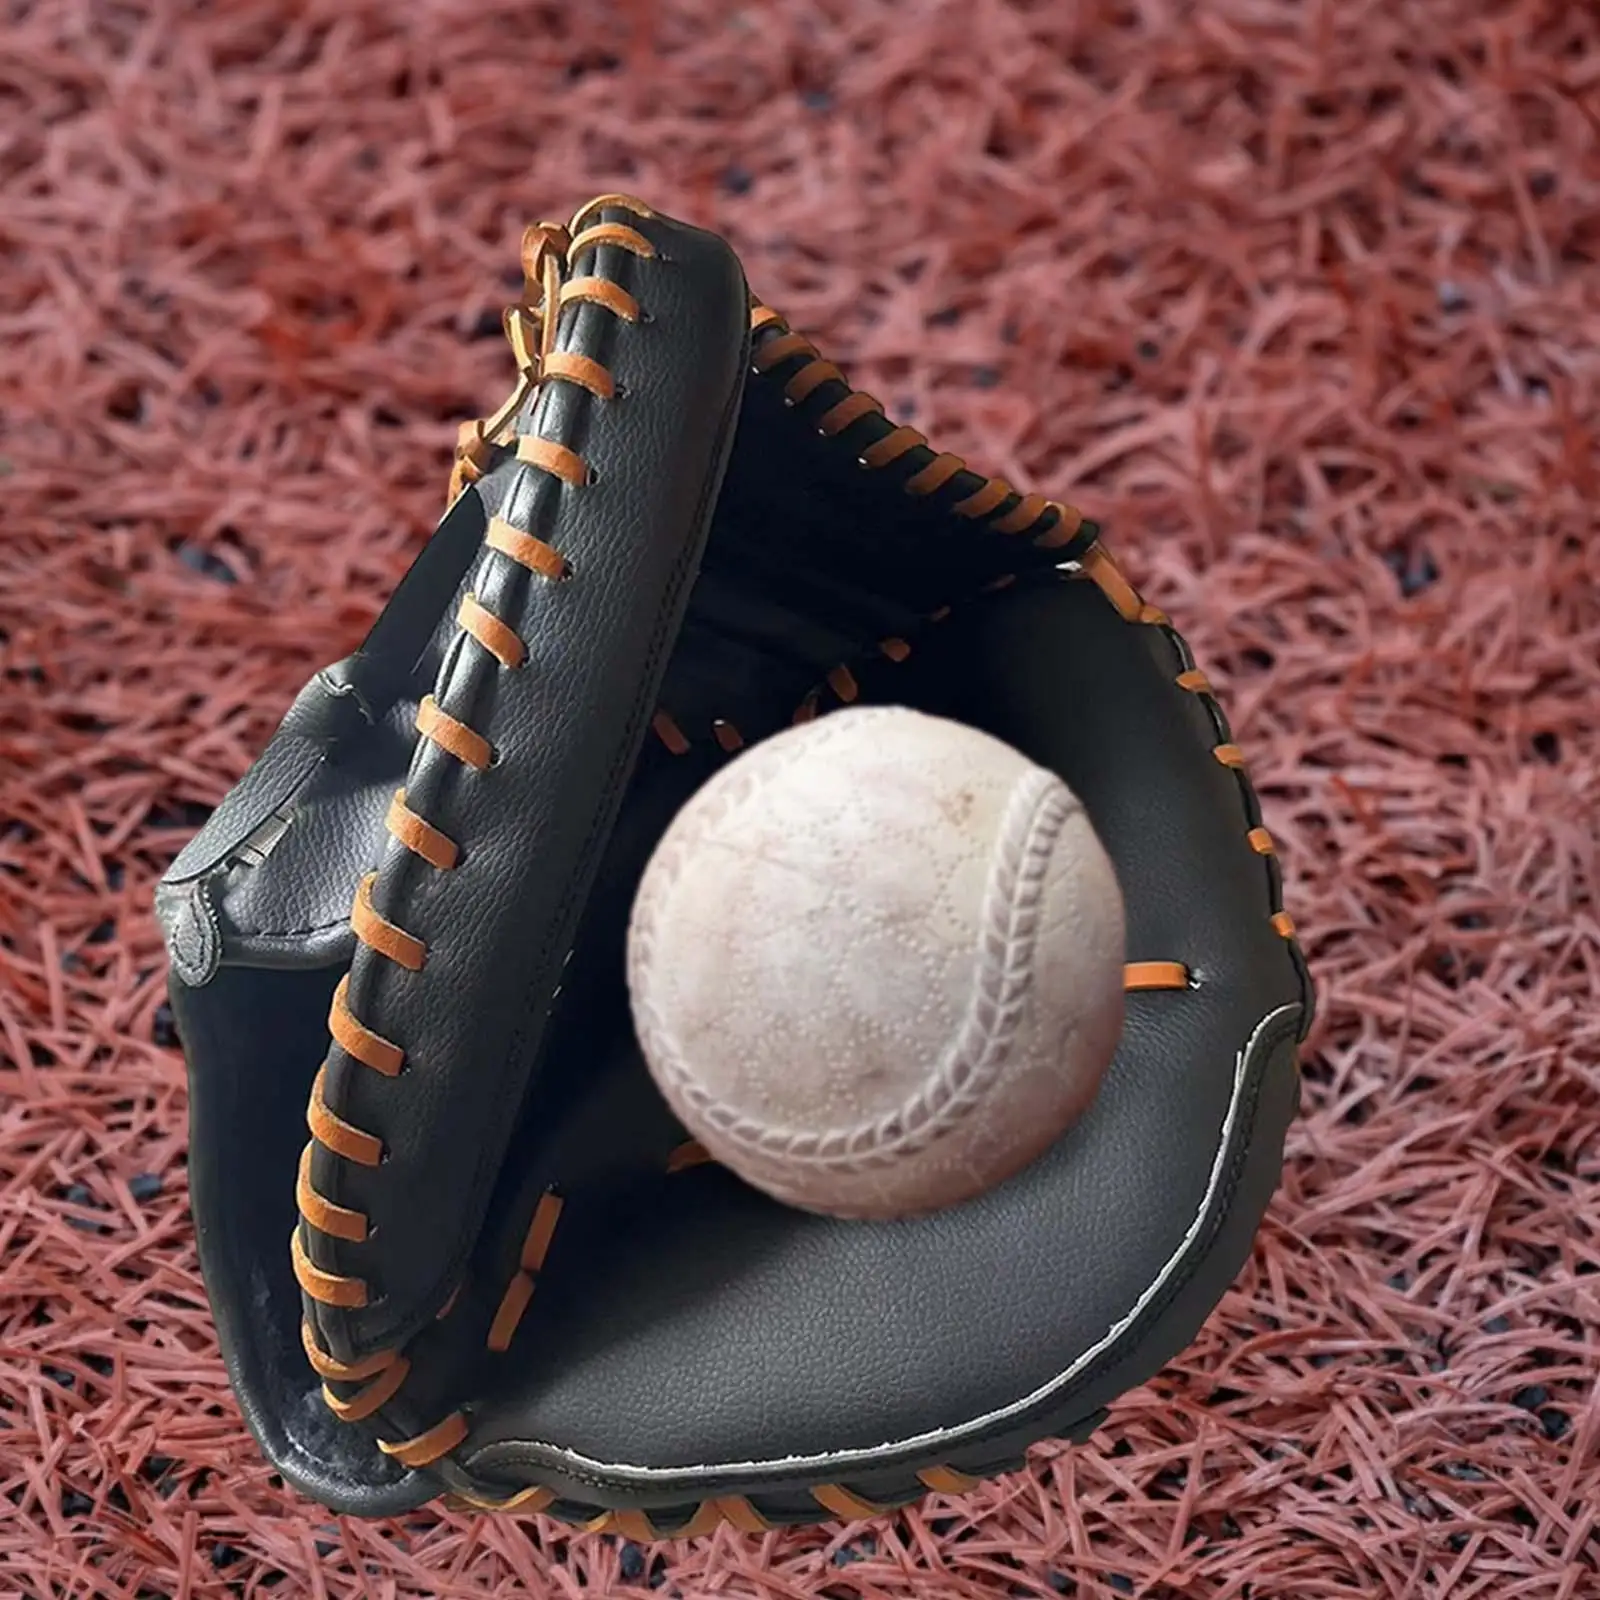
For serious baseball and softball players, a high-quality glove is an essential piece of equipment. However, even the most expensive pro-level gloves can underperform if the laces are worn out or brittle. Just as race cars need regular tire changes, baseball gloves require periodic lace replacement to maintain peak performance. This is where lacing kits come into play.
A comprehensive lacing kit provides all the necessary materials and tools to re-lace your glove, bringing it back to game-ready condition. The process, known as “relacing” or “restringing,” is relatively simple with the right supplies and instructions. Completing this task yourself not only saves money but also gives you the satisfaction of personally maintaining your equipment.
Key Features of High-Quality Glove Lacing Kits
When shopping for a glove lacing kit, several crucial features distinguish the best options:
- Premium lace material (genuine rawhide or leather for durability)
- Multiple lace widths to match original glove specifications
- Needles or awls for threading laces
- Detailed instructions with diagrams
- Affordable pricing (quality kits available under $20)
Top-Rated DIY Baseball Glove Lacing Kits
Based on the criteria mentioned above, here are some of the best lacing kits currently available for home glove relacing:
1. Rawlings Glove Lacing Kit
As a leading brand in baseball equipment, Rawlings offers a comprehensive kit that includes:
- Genuine rawhide laces
- Durable waxed thread
- Awl and curved needle
- Illustrated instructions
- Lace options in 1/8″, 3/16″, and 1/4″ widths
2. All-Star Professional Glove Lacing Kit
Used by minor league teams, this kit features:
- High-quality kangaroo rawhide laces
- Professional awl
- 224-page manual with detailed lacing patterns for major glove brands
3. Budget-Friendly Loop Stitch Needle Set
For those focusing on essential tools, this affordable set includes:

- Three loop stitch needles with curved tips
- Priced around $5
4. Leather Crafting Kit
Although designed for general leather projects, this versatile kit works well for baseball gloves:
- Multiple widths of braided nylon cord
- Bonded nylon thread
- Beeswax
- Two sew-through needles
- Awl and instructions
- Priced around $15
Expert Tips for DIY Glove Relacing
To achieve professional-quality results when relacing your baseball glove, follow these expert tips:
- Use hot water or a hair dryer to loosen existing laces before removal.
- Carefully document the original lacing pattern and lace widths.
- Apply leather conditioner to soften and rejuvenate the leather.
- Pre-wax new laces by lightly coating them with beeswax.
- Take your time and focus on consistency for optimal performance.
- Break in the glove afterward by pounding the pocket and using steam.
The Benefits of Regular Glove Maintenance
Regular maintenance of your baseball glove, including relacing, offers several advantages:
- Extended glove lifespan
- Improved performance on the field
- Cost savings compared to professional repair services
- Personalized fit and feel
- Increased confidence in your equipment
Can regular glove maintenance really make a difference in your game? Absolutely. A well-maintained glove with properly tensioned laces provides better control, quicker response times, and improved catching ability. This attention to detail can give players a competitive edge on the field.
Understanding Lace Materials and Their Impact on Performance
The choice of lace material can significantly affect your glove’s performance and durability. Here’s a breakdown of common lace materials:
Leather Laces
Pros:
- Excellent durability
- Natural feel and flexibility
- Improves with age
Cons:
- More expensive than synthetic options
- Requires more maintenance
Synthetic Laces
Pros:
- More affordable
- Resistant to moisture and rot
- Consistent performance in various weather conditions
Cons:
- May not last as long as leather
- Can feel less natural
Which lace material is best for your glove? The answer depends on your playing style, budget, and maintenance preferences. Many professional players prefer leather laces for their durability and natural feel, while recreational players might opt for synthetic laces for their lower cost and ease of maintenance.
Advanced Relacing Techniques for Customization
Once you’ve mastered basic relacing, you can explore advanced techniques to customize your glove’s performance:
1. Pocket Depth Adjustment
By altering the tension of the laces in the pocket area, you can adjust the depth to suit your position and catching style. Catchers often prefer deeper pockets, while infielders might opt for shallower pockets for quicker ball transfers.
2. Web Customization
Different web patterns can affect visibility and ball retention. Experiment with various lacing patterns in the web area to find the perfect balance for your needs.
3. Finger Padding
For added protection, you can incorporate extra padding into the finger stalls during the relacing process. This is particularly useful for catchers and first basemen who frequently catch hard throws.
4. Two-Tone Lacing
For a unique look, consider using two different colored laces in your glove. This not only adds a personal touch but can also help you quickly identify different parts of your glove during play.
How can these customizations improve your game? By tailoring your glove to your specific needs and playing style, you can enhance your fielding performance and comfort on the field. However, it’s important to note that significant modifications may affect the glove’s warranty, so consult with the manufacturer if you have any concerns.
Maintaining Your Newly Relaced Glove
After investing time and effort into relacing your glove, proper maintenance is crucial to preserve its performance and extend its lifespan. Here are some essential tips:
- Clean your glove regularly with a damp cloth to remove dirt and sweat.
- Apply leather conditioner periodically to prevent drying and cracking.
- Store your glove in a cool, dry place when not in use.
- Use a glove mallet to maintain the pocket shape between games.
- Avoid leaving your glove in extreme temperatures, such as a hot car.
How often should you clean and condition your glove? For players who use their gloves frequently, a quick cleaning after each game and conditioning once a month is a good rule of thumb. However, adjust this schedule based on your usage and the conditions in which you play.
The Economics of DIY Glove Relacing
Relacing your own glove can lead to significant cost savings over time. Let’s break down the economics:
Professional Relacing Services
- Average cost: $30-$50 per relacing
- Typical frequency: Once per season for active players
- 5-year cost (assuming yearly relacing): $150-$250
DIY Relacing with a Quality Kit
- Initial kit cost: $15-$30
- Additional lace packs: $5-$10 per relacing
- 5-year cost (assuming yearly relacing): $40-$80
Is DIY relacing worth the effort from a financial perspective? Absolutely. Over five years, you could save $100-$170 or more by relacing your own glove. Plus, you gain the ability to make quick repairs and adjustments whenever needed, potentially extending the life of your glove even further.
Beyond the cost savings, DIY relacing allows you to develop a deeper understanding of your equipment. This knowledge can be invaluable in optimizing your glove’s performance and making informed decisions when purchasing new gear in the future.
Troubleshooting Common Relacing Issues
Even experienced players may encounter challenges when relacing their gloves. Here are some common issues and their solutions:
1. Uneven Lace Tension
Problem: The glove feels imbalanced or closes unevenly.
Solution: Carefully adjust the tension of each lace, starting from the base of the glove and working your way up. Ensure consistent tension throughout.
2. Lace Breakage During Relacing
Problem: Laces break while you’re threading them through the glove.
Solution: Pre-condition leather laces with leather oil to increase flexibility. For synthetic laces, ensure you’re not pulling too hard or creating sharp bends.
3. Difficulty Threading Laces
Problem: You’re struggling to push laces through the glove’s holes.
Solution: Use a lacing needle or awl to widen the holes slightly. Apply a small amount of leather conditioner around the holes to soften the leather.
4. Loose Laces After Breaking In
Problem: Laces become loose shortly after relacing and breaking in the glove.
Solution: Initially lace the glove slightly tighter than desired. The laces will naturally loosen a bit as you break in the glove.
How can you prevent these issues in future relacing projects? Practice and patience are key. Each glove you relace will improve your technique and understanding of the process. Additionally, investing in high-quality laces and tools can significantly reduce the likelihood of encountering these problems.
The Future of Baseball Glove Technology and Maintenance
As baseball equipment technology continues to advance, we’re seeing innovations in glove design and materials. These developments are likely to impact how we maintain and relace gloves in the future:
1. Smart Gloves
Some manufacturers are experimenting with embedded sensors in gloves to track metrics like catch speed and impact force. How might this affect relacing? Future lacing kits may need to incorporate special techniques or materials to work with these high-tech gloves.
2. Advanced Synthetic Materials
New synthetic leather alternatives are being developed that offer improved durability and performance. These materials may require specialized lacing techniques or new types of laces to maximize their benefits.
3. 3D-Printed Custom Gloves
As 3D printing technology improves, we may see more customized gloves tailored to individual players’ hands. This could lead to new challenges and opportunities in glove maintenance and relacing.
4. Eco-Friendly Materials
With increasing focus on sustainability, we’re likely to see more environmentally friendly glove and lace materials. These may have different care and relacing requirements compared to traditional materials.
What does this mean for players who like to maintain their own gloves? It’s important to stay informed about new technologies and materials in baseball equipment. As gloves evolve, so too will the techniques and tools needed to maintain them effectively. However, the fundamental skills of glove relacing are likely to remain valuable, even as the specifics of the process may change.
In conclusion, mastering the art of glove relacing not only saves money and extends the life of your equipment but also deepens your connection to the game. Whether you’re a seasoned pro or a beginner just starting to explore glove maintenance, investing in a quality lacing kit and developing your relacing skills can significantly enhance your performance on the field. As baseball technology continues to evolve, the ability to customize and maintain your own gear will remain a valuable asset for any serious player.

Introduction – Why a quality lacing kit is essential for peak glove performance
For any serious baseball or softball player, having a high-quality glove is absolutely essential. But what good is an expensive, pro-level glove if the laces are old and brittle? Just like tires on a race car, the laces on a ball glove need to be replaced periodically in order to maintain optimal performance. This is where a lacing kit comes in handy.
A lacing kit contains everything you need to re-lace your glove and get it back into game-ready condition. The process of re-lacing a glove is known as “relacing” or “restringing.” With the right materials and some basic instruction, relacing a glove is quite simple and extremely satisfying. When you’re finished, you’ll have the satisfaction of knowing your glove is ready for many more seasons of reliable performance.
Must-Have Features of a Quality Lacing Kit
So what should you look for when shopping for a glove lacing kit? Here are some key features that separate the best kits from the rest:
- Premium lace: Not all lace is created equal. For long-lasting durability, look for kits that include genuine rawhide or leather laces. Synthetic laces may be cheaper but won’t provide the same performance.
- Multiple lace widths: High-end kits include lace options in different widths, allowing you to match the original lacing specs of your glove.
- Needles or awls: To get the laces threaded through the holes in the leather, you’ll need some type of piercing tool. Quality kits include needles, awls, or both.
- Instructions: Each glove has a unique lacing pattern, so diagrams and how-to guides are essential for a proper relacing job.
- Affordable price: You shouldn’t have to break the bank for a good lacing kit. There are quality options available for under $20.
Reviews of the Top DIY Lacing Kits
Based on the criteria above, here are some of the best lacing kits currently available for relacing your own glove at home:
As a leading brand in gloves and gear, Rawlings knows a thing or two about lacing. Their kit includes genuine rawhide laces, durable waxed thread, an awl, curved needle, and illustrated instructions. With options for 1/8″, 3/16”, and 1/4″ lace widths, it’s a great all-in-one solution.
Designed specifically for ball gloves, this kit from All-Star is used by minor league teams for re-lacing their gloves in-house. It contains high-quality kangaroo rawhide laces, a professional awl, and a 224-page manual with detailed diagrams for the lacing patterns of all major glove brands.
For those looking for a budget kit focused solely on the key tools, this set of three loop stitch needles is a great option. The curved tips easily insert the lace through glove holes. At around $5, it’s an affordable way to get started.
Although designed for leather crafting projects, this kit works perfectly for ball gloves too. It includes multiple widths of braided nylon cord, bonded nylon thread, beeswax, two sew-through needles, an awl and instructions. The $15 price tag makes it a great value.
Relacing Tips for DIY Glove Restoration
Once you’ve got your lacing kit, follow these tips for getting professional-quality results:
- Use hot water or a hair dryer to loosen the existing laces before removal.
- Closely document the original lacing pattern and lace widths.
- Apply leather conditioner to soften and rejuvenate the leather.
- Pre-wax new laces by lightly coating with beeswax.
- Take your time and focus on consistency for optimal performance.
- Break-in the glove afterward by pounding the pocket and using steam.
Lace Up for Another Season
With the endless pounding that ball gloves take in the field, laces break down over time. But relacing a glove doesn’t require big bucks or a repair shop. With a quality DIY lacing kit, you can restore your glove to like-new performance and get back on the field with confidence.
Want A Professional-Quality Baseball Glove? Try These Must-Have Lacing Kits: Boost Performance With The Ultimate DIY Accessories
Rawlings Brand Lacing Kits – Most trusted brand for laces, waxes, needles and accessories
For any baseball player, having a high quality glove that fits just right is essential. However, over time even the best leather gloves will need repairs and adjustments to keep performing at peak levels. That’s where Rawlings brand lacing and repair kits come in. As the most trusted name in baseball gear, Rawlings offers lacing kits with everything you need to re-lace, repair or customize your glove for a perfect fit.
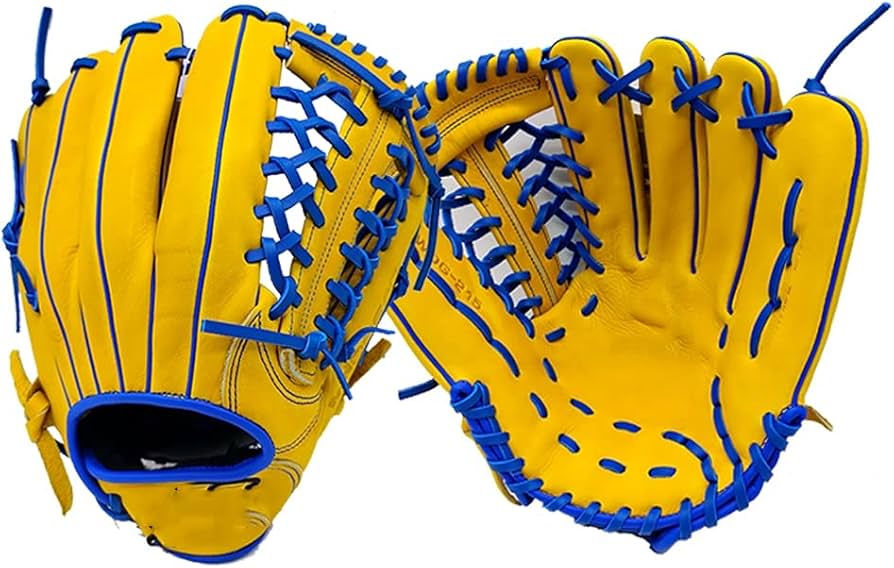
Proper lacing is key to maximizing your glove’s performance. It impacts the pocket depth and shape, overall flexibility and how the glove closes. Loose laces cause the glove to flop around and lose its form. Tight lacing makes the glove stiff and hard to control. With Rawlings lacing kits, you can easily re-lace your glove and adjust the lacing tightness in key areas to create your ideal pocket and web shape. The kits include strong, long lasting laces in a variety of colors to match your team colors or for a unique look.
Rawlings lacing kits provide top grade waxed linen or nylon laces. The wax coating ensures the laces stay securely in place and won’t loosen or fray easily. For easy lacing, the kits include durable curved needles that glide smoothly through leather. There’s also a glove mallet to ensure tight closure of the laces. Rawlings’ proprietary baseball glove oil conditions the leather, keeping your glove flexible and improving the longevity. The oil’s protective properties also help restore dried out, stiff gloves.
Here are some reasons why every player should keep a Rawlings re-lacing and repair kit in their baseball bag:
- Customize Pocket Size & Shape – Adjust lacing tightness in key break points to create your ideal pocket depth and shape.
- Reinforce High Wear Areas – Extra lacing and conditioning in the pocket, hinge and around the web increases durability.
- Repair Rips or Holes – Missing or broken laces lead to bigger problems. Re-lace small holes or tears before they spread.
- Improve Glove Control – Proper lacing keeps the glove stable, flexible and responsive when catching and fielding.
- Restore Dried Out Gloves – The oil revives stiff, dried out leather to improve pliability and performance.
- Make It Your Own – Different color laces let you customize the look and style.
- Save Money – Relacing costs a fraction compared to buying a new glove.
Choosing the Right Rawlings Lacing Kit
Rawlings offers lacing kits for every budget and needs. Here are some top options:
This kit delivers everything you need for total glove care in one convenient package. It comes with high quality waxed linen laces, curved needles, a mallet, glove oil and an instruction guide. The Paraffin-coated laces glide smoothly through leather. They hold knots securely while staying flexible. With materials sized for a standard glove, it can extend the life of gloves for countless seasons.
Serious players who want professional-grade lacing should choose the Rawlings Pro kit. It has super strong nylon laces with twisted filaments that add durability without stiffness. The kit also includes an extra-large Rawlings Pro oil bottle for maximum glove rejuvenation. With heavy duty U-shaped needles, you can re-string your glove like the pros with this premium kit.
This convenient multicolor pack provides 20 yards each of red, black, white, navy and royal blue laces. The color assortment allows matching your team colors or creating custom lace patterns. The thin 0.5mm laces work for gloves of all sizes from youth to pro styles. They allow tight stringing and precise pocket shaping. The waxed coating ensures long-lasting playability.
Frequent players who need to make quick repairs and adjustments on the go need this travel kit. Compact and lightweight, it packs large 50-yard spools of heavy nylon lace in white or black. It comes with 4 curved needles secured in a leather pouch along with a mini oil bottle. The industrial strength laces stand up to rugged play. Convenient for your bag or locker, it’s always close by when lacing emergencies strike.
Caring Tips for Baseball Gloves
Along with regular re-lacing, proper care and maintenance are also essential to ensure your glove keeps performing its best. Here are some useful tips:
- Apply oil frequently, especially before and after each season of use.
- Store gloves properly – keep them out of direct sun and away from heat sources.
- Rotate between two gloves to increase longevity of both.
- Always re-lace before oils or conditioners to allow penetration.
- Wipe down gloves after each use to remove dirt, debris and perspiration.
- Replace worn laces right away to avoid bigger damage.
- Use slots or just two fingers when breaking in a new glove.
- Tighten loose cross-lacing and web intermittent laces as needed.
- Inspect for cracks after each season and patch early to prevent tearing.
With the right lacing kits and proper care, your glove can perform like new season after season. Rawlings brand kits have everything you need for DIY lacing and repairs. Investing in quality materials pays off with better fit, control and confidence on the field. Don’t settle for an outdated, worn out glove when you can restore it yourself. Boost your game with a Rawlings lacing kit designed for optimal performance.
Want A Professional-Quality Baseball Glove? Try These Must-Have Lacing Kits: Boost Performance With The Ultimate DIY Accessories
Lacing Kit Benefits – Improved pocket control, durability and customization
As any ball player knows, a high performing glove is a vital piece of gear. The right fit and responsiveness helps you catch, field and scoop balls out of the air with confidence. But over time, even the finest leather gloves lose their shape and control as the laces stretch and wear. Relacing kits provide an easy, affordable way to restore and customize your glove for peak performance.
Quality lacing kits like those from Rawlings include strong, durable laces, needles, mallet and conditioning oils to renew glove performance. Re-lacing offers many benefits compared to buying a new glove or paying for a repair shop. With a DIY kit, you can adjust the lacing and pocket exactly how you want it. Tighter web lacing improves stability when catching line drives. Extra lace in the pocket adds depth to scoop up grounders. A DIY relace lets you fix issues before they worsen and ruin the glove. Let’s look closer at why every player needs a lacing kit:
Enhanced Pocket Control
One of the biggest benefits of re-lacing is restoring structure and control to a glove’s pocket. The pocket lacing affects flexibility and how the ball sticks on contact. Tight vertical laces keep the pocket rigid and rounded for a quick release when transferring to your throwing hand. More horizontal laces create a deeper pocket for securing balls on impact. You can adjust the lace spacing and tension pattern for your ideal pocket performance.
Snug, Secure Fit
Over time, a glove gets loose and sloppy as the original laces stretch and deteriorate. Loose lacing causes the fingers to flare open and makes the glove flop around. New lacing pulls the glove back into proper shape for a contoured, snug fit. Tight cross laces lock the glove securely on your hand. Firmly laced gloves stay stable as you reach and bend to field balls wherever they’re hit.
Reinforced High Wear Areas
Extra lace in key spots reinforces seams and adds durability. Focusing additional lacing around the web, pocket edges and hinge combats tearing and fraying. Dense lacing fills in developing holes and distributes stress over more threads. Your glove lasts longer and avoids major repairs when you reinforce wear areas proactively.
Conditioning & Protection
The waxes and oils in lacing kits nourish and protect glove leather. Wax coated laces resist moisture, dirt and oils that deteriorate threads. Conditioning oils keep leather supple to prevent cracks yet add structure. They shield against drying and damage from sun, sweat and humidity. Regular re-lacing combined with conditioning makes gloves last for seasons.
Economical Repair Alternative
Professionally re-lacing an old glove can cost $40-$60 – almost the price of a new glove. DIY lacing kits provide quality materials for a fraction of the cost. For $15-$25 you can customize the lace color and pattern while restoring performance. Kits with extra laces allow relacing multiple gloves. The inexpensive investment extends useful life rather than replacing.
Unique Style & Look
Boring black laces got you down? Lacing kits provide colors to jazz up your glove’s style. Change the entire lace color or use colors just for accents. Match team colors or go wild with neon laces. Different color combinations give your glove a cool, custom look on the field. Express your personality through creative lacing designs.
Quick Fixes On The Go
Players know minor lacing issues quickly turn into irreparable damage. Carrying a small lacing kit provides quick repairs when problems pop up at practice or games. A few new laces can temporarily stabilize stretched or frayed spots until you have time for a full re-lace. Don’t wait until it’s too late – small fixes now prevent big problems down the road.
Optimized Pocket Shape
Your glove’s pocket shape impacts how you handle balls. The pattern of horizontal, vertical and diagonal laces determines pocket size and flexibility. Relacing lets you tweak the pocket style to best suit your playing needs. Infielders often prefer shallow, rigid pockets for quick transfers. Outfielders tend to like deeper pockets with more flex for securing fly balls.
Easier Break-In
Brand new stiff leather gloves require a proper break-in for peak pliability. Looser lacing compresses and shapes the pocket faster than factory lacing. You can focus break-in on high-stress points by the web and palm heel. Once formed, re-lace the glove tighter for game play. Proper pre-game relacing improves performance.
Inspect your glove closely each season – if the laces look frayed, feel loose or show obvious wear, it’s time to re-lace. Don’t wait until major damage occurs. With the right DIY lacing kit, you can add years of life to your glove while optimizing the fit. Maintain your competitive edge with quick fixes on hand for lacing emergencies. Shop for a quality lacing kit and keep your glove in top playing condition.
Types of Baseball Glove Laces – Comparing leather, rawhide, nylon options
Want A Professional-Quality Baseball Glove? Try These Must-Have Lacing Kits: Boost Performance With The Ultimate DIY Accessories
For any baseball or softball player, having a high quality glove is essential for success on the field. A great glove can give you the edge you need for making those amazing plays. But over time, the laces on your glove can wear out or break, reducing the glove’s performance. Relacing your glove with a quality kit can restore it to like-new performance, without having to buy a whole new glove. When it comes to baseball glove lacing kits, you have a few material options to consider – leather, rawhide, and nylon. Let’s compare the pros and cons of each.
Leather Baseball Glove Laces
Leather laces have traditionally been the most popular choice for high-end baseball gloves. Leather offers some unique benefits:
- Durability – Leather laces are very long-lasting if cared for properly. They can withstand years of play before needing replacement.
- Comfort – Well-conditioned leather laces form nicely to your hand for a comfortable feel over time. The laces break-in along with the rest of the glove.
- Appearance – For players who want the classic, vintage look of an all-leather glove, leather laces complete the aesthetic beautifully.
The downside is that leather laces can be time-consuming to install and require proper conditioning. They also tend to be the most expensive replacement lace option. But for glove enthusiasts who want that authentic, old-school vibe, the extra effort is worth it.
Rawhide Baseball Glove Laces
Rawhide laces offer a good middle ground between leather and nylon options. Benefits of rawhide include:
- Durability – While not quite as hardy as leather, rawhide still holds up well over multiple seasons of play.
- Affordability – Rawhide laces cost noticeably less than leather, making them a budget-friendly choice.
- Easy to Install – Compared to leather’s stiffness, rawhide laces are more pliable and easier to string through glove holes.
The tradeoff is that rawhide doesn’t quite match the premium feel and longevity of leather laces. But for players looking for an inexpensive option that still offers solid performance, rawhide is a popular pick.
Nylon Baseball Glove Laces
On the opposite end of the spectrum from leather, nylon laces prioritize affordability and ease of use:
- Inexpensive – Nylon laces are the most budget-friendly option, good for players on a tight budget.
- Easy Installation – With how flexible nylon is, stringing a glove with these laces is fast and simple.
- Color Options – Nylon laces come in a wide range of colors, allowing you to customize your glove’s look.
The compromise is that nylon laces lack the premium feel and longevity of leather or rawhide. They may need replacing more frequently. But if upfront cost is a concern, nylon offers reliable performance at a fraction of the price.
Must-Have DIY Lacing Kits for Glove Repair
Once you’ve decided on the ideal lace type for your needs, it’s time to purchase a lacing kit. Here are some of the best all-inclusive kits that provide everything you need to re-lace your glove like a pro:
Rawlings Relace Kit
As a top baseball glove manufacturer, Rawlings makes an excellent relace kit for DIY repairs. It includes high quality rawhide laces, waxed nylon thread, curved needles, a leather awl for punching holes, and an instruction manual. For an affordable kit from a trusted brand, Rawlings is a great choice.
All-Star System 7 Glove Lace Kit
Featuring top grade kangaroo leather laces, the All-Star System 7 kit provides a premium re-lacing experience. The kit also includes a Pro Lace Hook tool to make lacing holes easily and cleanly. For players who want pro-caliber leather laces for their glove, this kit delivers.
Clayton Professional Glove Lacing Kit
Clayton offers re-lacing kits for both baseball and softball gloves. Their kits stands out for their detailed video instructions that take you step-by-step through the process. Along with high quality laces and tools, these videos make lacing your glove easy for beginners and experts alike.
Markwort Leather Lace & Web Repair Kit
This kit from Markwort provides everything you need for a full glove restoration. It contains soft leather laces, waxed polyester thread, an awl, two needles, a protective glove, and a web repair kit for any netting tears. The included eBook also offers helpful glove repair tips. It’s a great all-in-one value.
SKLZ Glove Lace & Web Repair Kit
The SKLZ kit stands out for offering three different lace options – leather, rawhide, and nylon – so you can choose your preferred material. A leather softener and conditioner also helps keep leather laces in top shape. With versatility and quality, this kit has you covered for all re-lacing needs.
In the end, the right baseball glove lacing kit comes down to your priorities – whether that’s premium feel, affordability, ease of use, or matching your glove’s original materials. By comparing the pros and cons of leather, rawhide and nylon laces, you can pick the perfect DIY kit for bringing your glove back to life. With the right set of replacement laces and handy tools, you’ll have your glove game ready just in time for spring training.
Baseball Glove Leather Care – Conditioning and breaking in for optimal feel
Want A Professional-Quality Baseball Glove? Try These Must-Have Lacing Kits: Boost Performance With The Ultimate DIY Accessories
A high quality leather baseball or softball glove can last for many seasons when cared for properly. But keeping your glove’s leather supple and long-lasting takes some work. Here are the key steps for conditioning and breaking in your glove’s leather for ideal feel and longevity.
Clean The Leather
Before conditioning, first give your glove a thorough cleaning to remove built-up dirt, salt and oils from hand perspiration. Mix a small amount of mild dish soap with warm water and use a soft cloth to gently scrub the leather inside and out. Rinse off any soap residue with clean water. Allow the glove to air dry completely before the next step.
Apply Conditioner
Once dry, it’s time to restore the leather’s oils and suppleness with a conditioner. Rub a leather conditioner thoroughly over the inside and outside of the glove, massaging it into the leather. Some top options include mink oil, glove oil, leather wax, or a moisturizing cream. Cover every part of the leather and don’t be shy with the conditioner.
Knead the Pocket
As you rub conditioner into the glove, spend extra time working it into the pocket area. Kneading and massaging the pocket softens up the stiff leather in this high-use zone. Form a fist and apply pressure as you rub the conditioned leather back and forth to loosen it up.
Wrap a Ball Inside
For a quicker break-in, place a tightly wound softball or baseball into the pocket after conditioning. Wrap the glove tightly shut around the ball using wide rubber bands or rope. This expands the pocket around the ball, creating a custom pocket shape.
Heat and Reshape
If there are any lumps or uneven shaping in the glove leather, you can gently reshape it with heat. Using a hair dryer on a low setting, lightly apply heat to problem spots, massaging the area as the leather softens. Avoid over-heating. When the shaping looks smooth, let it cool back down.
Rinse and Reapply
After a day or two, thoroughly rinse all the conditioner out from the leather using clean water. Then pat dry and apply another round of fresh conditioner. Repeating the cleaning and conditioning process helps the leather absorb maximum oil and softness.
Take Your Glove to the Field
Once your glove is cleaned, conditioned and softened, take it out for some game action. Using your glove in practice and games helps complete the custom shaping as you wear it in. Break your glove in gradually each season before intensive use.
Keep it Stored Safely
When your glove isn’t in use, be sure to keep it stored properly to avoid the leather drying out. Place a ball securely in the pocket and wrap a soft cloth around the glove to keep its shape. Store it in a climate controlled area away from direct heat or sunlight.
Deep Condition Annually
In addition to regular conditioning, give your glove an annual deep conditioning treatment each off-season. First clean thoroughly with saddle soap to strip oils. Apply a heavy coat of conditioner and let it soak in overnight. Then rinse, pat dry and rub in another layer of fresh conditioner. This keeps the leather supple for years.
Common Baseball Glove Leather Conditioning Mistakes
When caring for your baseball or softball glove, it’s also important to avoid these common conditioning errors:
Using Household Products
Automotive oils, creams or silicone sprays may seem like an easy glove conditioner, but they can actually dry out leather over time and leave a gummy residue. Stick to conditioning products specially formulated for leather.
Over-Conditioning
It is possible to over-oil your glove. Too much conditioner can break down the leather fibers, leaving it soggy and prone to tearing. Use moderate amounts and give time for full absorption.
Failing to Clean First
Skipping the pre-conditioning cleaning allows dirt and salt to get sealed into the leather. Always start with a gentle cleaning to maximize the conditioning benefits.
Using Heat Improperly
Whether applying heat with a dryer, oven or steaming, always use the lowest setting and watch closely to avoid over-heating and drying out the leather. Gauge the temp carefully.
Not Allowing Drying Time
Rushing into a game without allowing adequate drying time after cleaning and conditioning can undo all your hard work. Give your glove several days to air dry fully before heavy usage.
Neglecting Proper Storage
Leaving your glove sitting in a hot car trunk or damp garage when not in use can cause the leather to become brittle and cracked over time. Store in proper climate-controlled conditions.
With the right conditioning approach and avoidance of common mistakes, your high quality leather glove can last for many seasons to come. Be sure to clean, oil and break-in the leather properly each year for an ideal feel and long-lasting durability. Your glove leather is a prized possession – treat it with care, and it will treat you well in return.
Lacing Patterns For Infield vs Outfield – Web styles and preferences
Want A Professional-Quality Baseball Glove? Try These Must-Have Lacing Kits: Boost Performance With The Ultimate DIY Accessories
When selecting a high quality baseball or softball glove, one of the key factors to consider is the lacing pattern, also known as the web. The web can significantly impact the glove’s performance and capabilities in the field. Infielders and outfielders typically prefer different web styles based on their specific positions and needs.
Infielder Web Styles
For infield positions like first base, second base, shortstop and third base, players often opt for these web patterns:
- I-Web – The classic single post web shaped like the letter ‘I’. Provides excellent pocket control for scooping up grounders.
- Modified Trap-Eze – Wide web with a closed upper and open bottom. Great for visibility and flexibility.
- Basket Web – Woven pattern reminiscent of a basketball net. Lightweight with solid pocket control.
- Dual Post Web – Two vertical posts with horizontal laces. Gives strength and stability for infield play.
These tight web patterns offer the control, visibility and flexible feel that infielders look for when fielding ground balls, turning double plays and making quick throws across the diamond. The closed webs provide a deep, secure pocket for easily grabbing and transferring the ball.
Outfielder Web Styles
For outfield positions in center field, left field and right field, common web patterns include:
- Trapeze Web – Popular ‘open’ web with a large hole in the middle. Provides less interference when catching fly balls.
- Modified Trap Web – Half-closed web with an open wide top. Gives flexibility while offering some pocket control.
- H-Web – Web laced in the shape of an ‘H’. Features an open design preferred by outfielders.
- Deep Pocket Web – Web with extra leather strips to create an extended pocket. Ideal for catching fly balls.
Outfielders tend to favor more open web styles that offer less resistance when squeezing a ball. The open patterns also provide wide visibility for tracking balls hit high and deep. A shallow, flexible pocket allows smoothly transferring the ball when throwing across a wide arc to the infield.
Choosing the Right Web for Your Position
While personal preference always plays a role, following some general web selection guidelines based on position can give you an advantage in the field:
- Pitcher – Modified trapeze or I-web provides pitchers with flexible webbing and solid pocket control for fielding bunts and comebackers.
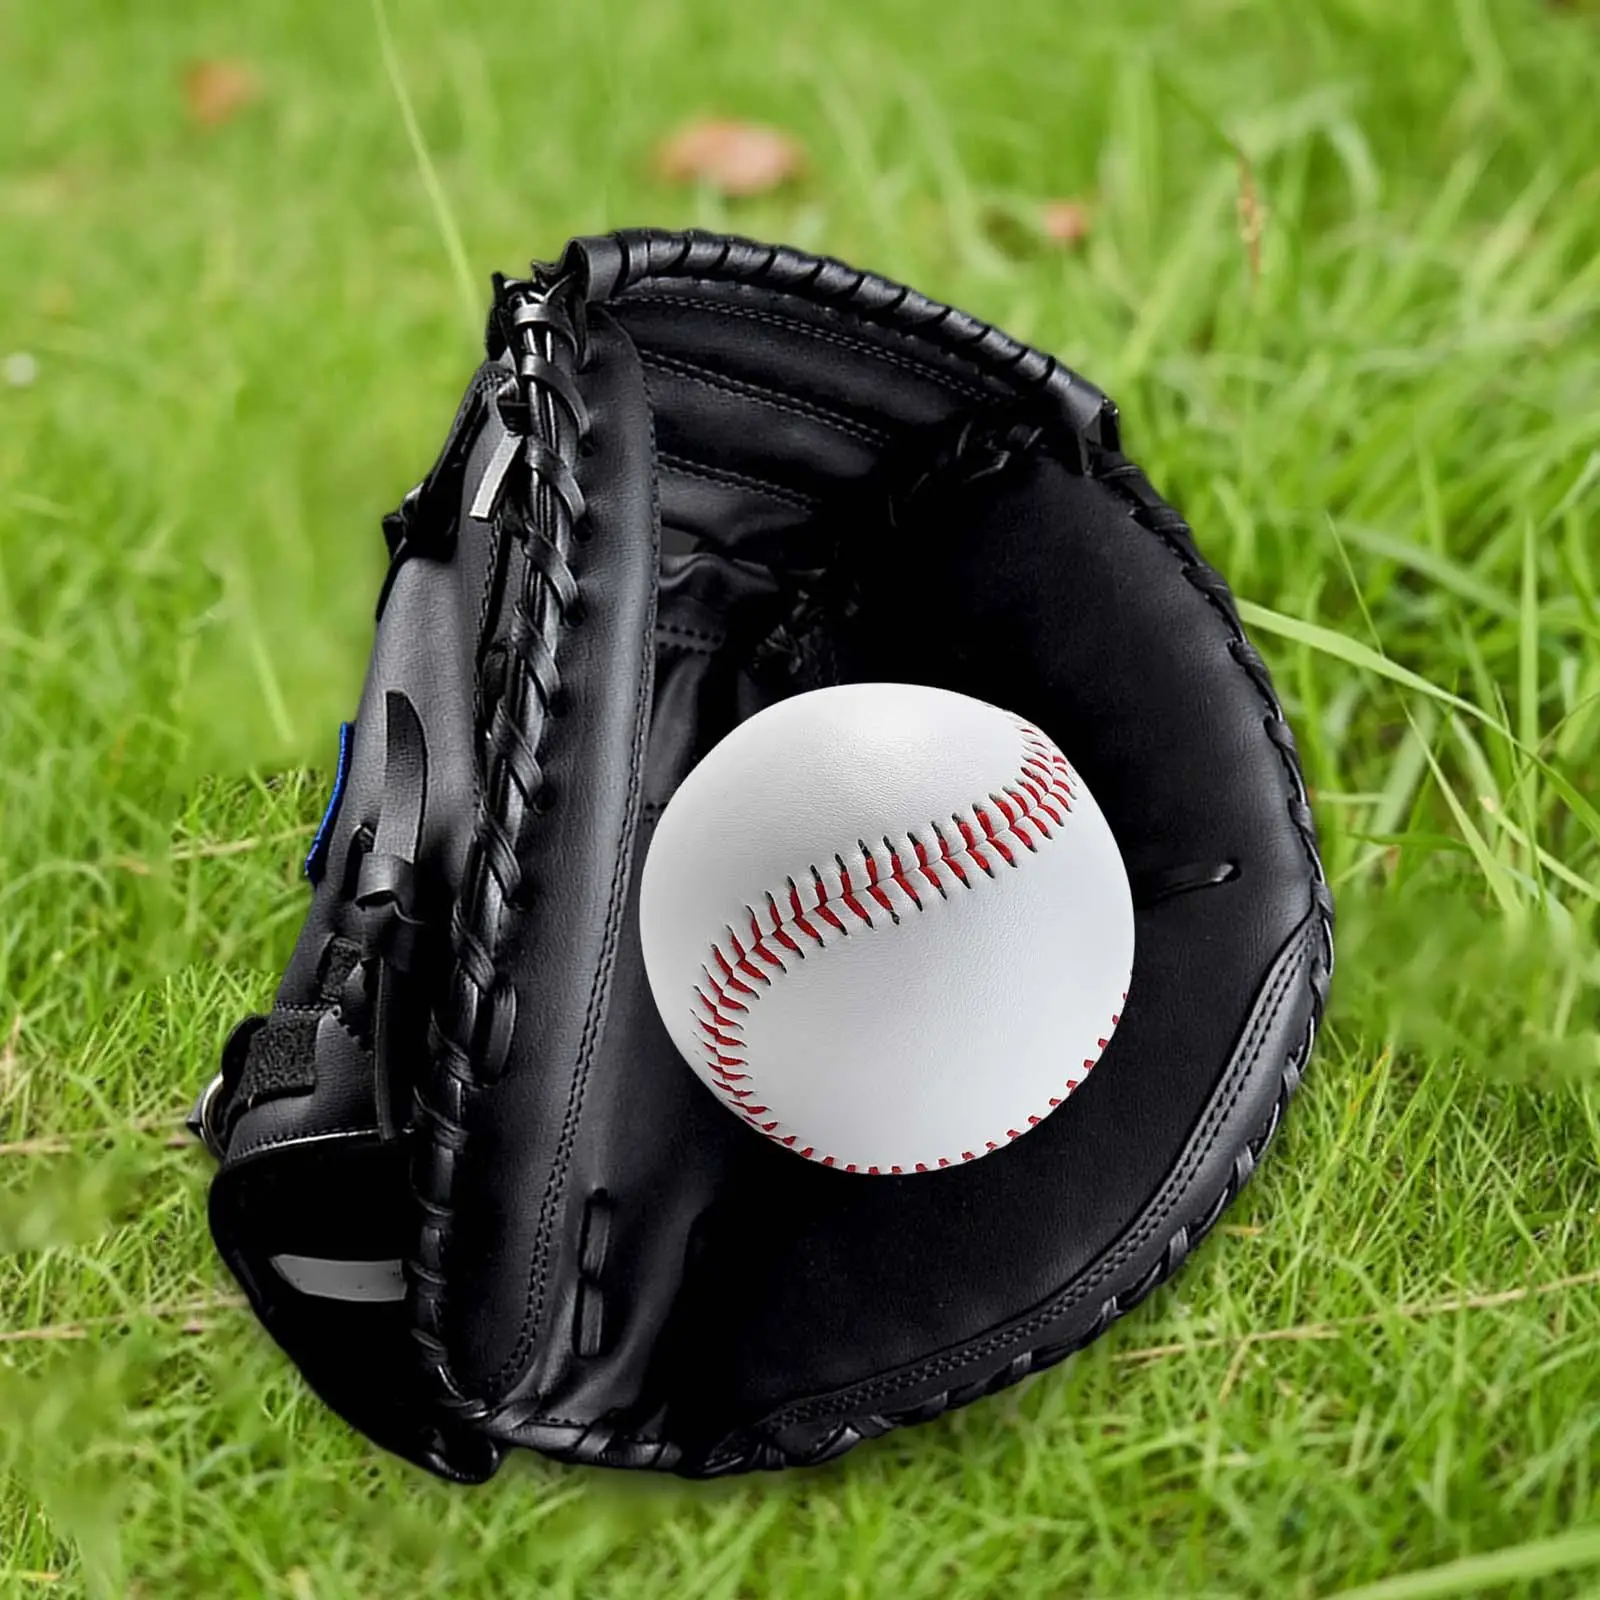
- Catcher – Closed web styles like a basket web give catchers the maximum pocket depth for secure control when catching pitches.
- First Base – I-web or trapeze web offers the flexibility to extend and stretch for scooping throws in the dirt.
- Second Base – Modified trapeze webs are ideal for turning quick double plays while providing pocket support.
- Third Base – A dual post web’s durability handles hard line drives while maintaining quick glove closure.
- Shortstop – Basket webs offer the ideal blend of pocket control and flexible break-in that shortstops need when fielding from all angles.
While personal preferences ultimately determine the right glove and web for you, following position-based web guidelines can give you a leg up. Trust your instincts, try out different gloves, and give your chosen web style enough break-in time to perfectly mold to your hand. With the ideal web pattern providing the right mix of control, flexibility and visibility, you’ll boost confidence in your glove work at any position.
Factors That Impact Web Durability
To keep your glove’s web pattern in top working order for many seasons, be aware of these factors that can impact web durability:
- Material – Leather webs last longer than nylon or vinyl. Opt for top grain leather for maximum longevity.
- Lacing – Tight, quality lacing helps minimize stretching and tearing of web holes over time.
- Proper Break-In – Gradually break in your glove web to optimize flexibility without over-stretching.
- Usage Frequency – Rotating between gloves gives webs adequate rest time to maintain shape and durability.
- Storage Habits – Storing your glove properly when not in use preserves the web shape and materials.
- Sun & Moisture Exposure – Limit UV ray and moisture damage by keeping gloves out of direct sunlight and extreme dampness.
While glove webs will eventually require replacement from extensive use, proper care and maintenance allows you to maximize the lifespan of your web. With the right web style tailored to your position, along with careful handling, your glove’s unique web pattern will deliver season after season.
Choosing the Right Lacing Needle – Curved vs straight needles for hand protection
Want A Professional-Quality Baseball Glove? Try These Must-Have Lacing Kits: Boost Performance With The Ultimate DIY Accessories
One of the key tools required for re-lacing a baseball or softball glove is the lacing needle. When shopping for needles to include in your DIY lacing kit, you’ll find there are two main options – curved needles or straight needles. Each type has advantages depending on your specific needs and preferences.
Curved Lacing Needles
As the name suggests, curved lacing needles have a slight bend or arch to their shape. The curvature offers some key benefits:
- Hand Protection – The curved shape helps keep the needle safely oriented away from your fingers and hand as you pull laces through the glove.
- Access to Holes – The bend allows you to more easily access awkward glove holes that a straight needle can’t reach.
- Reduced Hand Strain – Curved needles allow a more ergonomic wrist position as you work, reducing hand fatigue.
So for those prioritizing safety and access, curved needles can be an excellent choice. They provide that extra degree of hand protection and dexterity that straight needles lack.
Straight Lacing Needles
Straight lacing needles, as their name suggests, feature a perfectly straight, flat shape from eye to point. The benefits include:
- Maximum Control – The straight shape gives you complete control as you precisely guide the needle through holes.
- Affordability – Straight needles are simpler to manufacture, making them more budget-friendly.
- Easy to Insert/Remove – Without a curve, straight needles slide into and out of lacing holes with little resistance.
So for those wanting maximum handling precision or shopping on a budget, straight needles offer simplicity and value.
Trying Both for Your Project
When selecting needles for your glove lacing kit, it’s perfectly fine to include both curved and straight needles together. This gives you flexibility on your project. Use the straight needles for easily accessing flat outer glove surfaces, then switch to curved as you work into trickier sections and finger holes. Having both options handy in your kit means you’re prepared for any lacing scenario.
Needle Length and Thickness
Beyond the shape, also factor in needle length and thickness for your project:
- Length – Longer needles of 3-4 inches allow you to pull longer sections of lace through holes without frequent rethreading.
- Thickness – Slimmer needles fit through small holes easily while thicker needles are more durable.
Consider your glove’s leather thickness and web hole size as you select needle length and gauge. Sturdier gloves may require thicker, stronger needles.
Needle Composition
Needles can be made of various materials, including:
- Stainless Steel – Offers strength without easily bending or breaking.
- Plastic – A budget option, but more prone to bending with heavy use.
- Aluminum – Lightweight while still providing moderate durability.
Stainless steel is preferred for most lacing projects due to its durability and rust resistance. But plastic and aluminum work fine for lighter occasional use if cost is a concern.
Whether you prefer the protection of curved needles or the precision of straight ones, or a combo of both, choose lacing needles tailored to your glove project. Together with quality waxed lace and sturdy gloves, the right needles will give you a professional re-lacing result you can rely on game after game.
Proper Lacing Techniques – Step-by-step instructions for safe DIY re-lacing
Want A Professional-Quality Baseball Glove? Try These Must-Have Lacing Kits: Boost Performance With The Ultimate DIY Accessories
Re-lacing a baseball or softball glove can be a satisfying DIY project. But to get professional-quality results, it’s vital to follow proper lacing techniques. Here is a step-by-step overview of safe, effective methods for re-lacing a glove yourself:
Step 1 – Remove Old Laces
Start by carefully removing all existing laces from the glove. Use pliers or scissors to grip and snip each lace near the knot. Pull the remains of the lace out through each hole, removing any stray pieces.
Step 2 – Clean & Condition Leather
With laces removed, thoroughly clean the glove leather inside and out using a mild leather cleaner or saddle soap and water. Rinse away all soap residue. Then let the leather air dry completely. Next, rub conditioner into the leather to soften and protect it.
Step 3 – Evaluate Lacing Holes
Inspect the existing lacing holes closely. If any holes appear damaged or stretched out, use a leather hole punch tool to create new, clean holes in better positions.
Step 4 – Lace Bottom Edge First
Thread your needle and knot the end of the lace. Starting at the bottom edge of the glove, insert the needle through the first hole from inside-out. Pull the lace through but leave several inches free for tying later.
Step 5 – Continue Lacing Bottom
Continue lacing across the bottom edge of the glove to the opposite side, threading inside-out through each hole. Pull each section moderately snug, but don’t cinch it down fully yet.
Step 6 – Lace Up Web and Fingers
When the bottom edge is fully laced, move up to the first finger stall and lace through all holes up the finger and across the web. Then continue lacing each finger stall in the same manner.
Step 7 – Lace Back Across Top
Once all fingers are laced, finish by lacing across the top of the glove back to the starting point, again threading inside-out through each hole.
Step 8 – Tie Off Ends
With lacing complete, tie the starting and ending lace ends together on the glove’s outside using a sturdy square knot and extra half hitches. Carefully trim away any excess length.
Step 9 – Set Lacing Shape
Now begin gradually tightening and adjusting each section of lacing until the web shape forms properly and laces are securely tensioned. Work slowly to avoid over-tightening.
Step 10 – Seal Lace Ends
Finish by applying a drop of fabric glue or clear nail polish on the knotted lace ends. Allow to fully dry to prevent unraveling.
With practice and patience, these steps will help you re-lace your glove like a pro. Remember to work methodically, tie knots securely, tension laces gradually and seal ends carefully. Protect your hands with gloves and go slowly. Keeping proper technique in mind, you can restore your glove to peak performance.
Common Lacing Mistakes to Avoid
When DIY re-lacing your glove, beware of these common mistakes:
- Rushing and forcing lace through holes
- Poor knotting allowing laces to loosen
- Uneven lacing tension causing distorted shape
- Over-tightening and stretching leather
- Sharp lace ends scratching hands
- Fraying laces due to cheap quality
With the right materials, tools and techniques, re-lacing a glove can be simple DIY maintenance for extending your glove’s life. But rushing through the job or using inferior equipment can cause problems. Follow proper methods to get it done right the first time. With a professionally re-laced glove that’s built to last, you’ll gain confidence in the field every time the ball comes your way.
Removing Old Laces Safely – Avoiding damage to leather
Want A Professional-Quality Baseball Glove? Try These Must-Have Lacing Kits: Boost Performance With The Ultimate DIY Accessories
When re-lacing a baseball or softball glove, the first step is removing the old, worn out laces. This can be tricky – you don’t want to risk tearing or poking holes in the leather! Here are some tips for safely removing laces without causing glove damage:
Cut Laces at Knots
Rather than trying to pull laces completely through holes, simply snip each lace right at the knot using sharp scissors or snips. Cutting at the knots leaves no frayed ends sticking out to tear at leather.
Avoid Cutting into Leather
Position scissors tips right at the lace knot away from leather. Don’t allow blades to dig into glove material – grip and cut only the lace itself. Clean cuts will prevent jagged edges from forming.
Use Protective Gloves
Wear cut-resistant gloves on your non-cutting hand. This lets you grip the lace firmly as you cut without risk of slicing fingers. The extra protection and dexterity helps get a clean, close cut.
Pull Lace Ends Slowly
Once cut at the knots, lace remnants will likely remain inside holes. Grip the end of each lace piece with pliers and pull slowly straight out through the hole. Steady tension prevents snags.
Avoid Ripping at Snags
If a lace end catches on a hole, don’t keep pulling hard. This can tear the hole edges. Instead, use an awl or punch to widen the hole just enough to release the snag, then continue pulling the lace out gently.
Consider Alternative Lace Release
For old dried leather or stubborn snags, instead of pulling laces through holes, simply use a punch to create new holes right next to each old hole. This completely avoids ripping risks.
Inspect for Stray Pieces
Once all remnants are removed, carefully check that no stray lace pieces remain stuck in any holes or crevices. Remove all debris to prevent scratches.
Condition Leather
Once lacing is fully removed, apply leather conditioner to keep the glove material supple and protected. Gently massage conditioner into each hole edge.
With care, patience and the right technique, you can successfully remove old laces without causing any collateral leather damage. Keeping your glove material intact will provide the ideal clean slate for re-lacing and restoring your glove to peak game performance.
Common Errors to Avoid
When taking out old laces, be sure to steer clear of these mistakes:
- Cutting laces in mid-length instead of at knots
- Allowing scissor tips to pierce glove leather
- No hand protection from lace snags or cuts
- Pulling aggressively on snagged laces
- Ripping laces sideways through holes
- Leaving debris inside glove body or holes
- Failing to condition glove once laces are removed
Removing laces may seem simple, but small errors can damage your glove. With smart techniques and care, you can carry out this first step properly to set up re-lacing success. Your patience will pay off with a perfectly prepped glove ready for fresh, optimal lacing without any lasting blemishes.
Waxing New Laces – For strength, weatherproofing and reduced friction
Want A Professional-Quality Baseball Glove? Try These Must-Have Lacing Kits: Boost Performance With The Ultimate DIY Accessories
When re-lacing a baseball or softball glove, selecting quality leather, rawhide or nylon laces is the first step. But to get peak performance from new laces, proper prep work is also key. Waxing the laces before installation helps lock in strength, weatherproofing and smooth functionality.
How Lace Waxing Works
Wax applied to laces penetrates and coats the material. This provides several advantages:
- Seals pores to prevent moisture absorption
- Allows smooth glide through glove holes
- Minimizes friction and abrasion during use
- Protects against UV ray damage from sun exposure
- Increases lace lifespan by preserving integrity
A properly waxed lace retains that fresh-from-the-factory suppleness and slide. The wax finish also produces a professional cosmetic sheen.
Types of Lace Wax
Look for wax made specifically for glove laces rather than household waxes. Specialty lace waxes include:
- Beeswax – Natural wax with excellent penetration ability
- Paraffin Wax – Petroleum-based formula to repel moisture
- Pine Tar – Produces tackiness to help secure knots
- Glove Wax – Wax blended for ideal application on leather laces
The right formulation will prep laces optimally while conditioning the surrounding leather.
How to Apply Lace Wax
Waxing laces takes just a few easy steps:
- Cut laces to your required length based on glove size.
- Rub wax along the entire length of each piece, coating thoroughly.
- Hang laces vertically and allow wax to fully dry and set.
- Buff laces with a clean cloth for smoothness.
- Install waxed laces into glove per your lacing pattern.
Take care not to overheat wax, as too high a temperature can cause brittleness. Let the wax compound do the work at moderate temperature.
Re-Waxing Over Time
As you continue using your glove, re-apply lace wax whenever you notice friction increasing or weather resistance decreasing. Typically every few months is ideal to keep up protection and function. Spot re-wax any visibly worn lace sections as needed.
Lace Waxing Mistakes to Avoid
While waxing glove laces is straightforward, beware of these common errors:
- Using household waxes not formulated for leather
- Allowing wax to get too hot during application
- Waxing laces still inside the glove
- Applying too much wax, leaving laces overloaded
- Not allowing enough drying time before installation
- Buffing too aggressively and damaging lace fibers
With the right wax products and care taken during the process, you can significantly extend the life of any new laces. Keep an eye out for wearing and re-apply fresh wax coats periodically. Well-maintained waxed laces will retain that crisp, smooth feel season after season.
Common Lacing Mistakes To Avoid – Preventing ripped laces and holes
Want A Professional-Quality Baseball Glove? Try These Must-Have Lacing Kits: Boost Performance With The Ultimate DIY Accessories
Re-lacing your own baseball or softball glove can provide great satisfaction and save money. But without proper technique, it’s easy to make some mistakes that quickly ruin new laces or damage glove leather. Be aware of these common pitfalls:
Rushing the Lacing
Trying to lace too quickly often leads to sloppy work. Take your time and don’t force things. Work methodically hole by hole to get clean lacing right the first time.
Choosing Stiff Laces
Brand new laces can be quite stiff and hard to work with. Choose pre-softened laces, or soak and condition laces before installing. Proper suppleness prevents rips.
Over-Pulling Laces
It’s tempting to cinch laces down tightly, but too much tension strains the leather. Tighten gradually, occasionally loosening to rest leather.
Improper Knotting
Sloppy knots allow laces to loosen and unravel. Use square knots secured with half hitches for maximum holding power.
Using Wrong Size Needle
A too-thick needle damages holes, while a too-thin one bends and jams. Match needle gauge to the holes for smooth gliding.
Poor Hole Alignment
Weaving back and forth haphazardly stresses leather at odd angles. Ensure straight hole alignment for even lace tension distribution.
Neglecting Wax Coating
Wax reduces friction as laces pass through holes. Skipping wax increases abrasion and wear on laces.
Uneven Lace Lengths
Inconsistent lace lengths cause loose sections to snag and get ripped out. Measure and cut all laces to equal lengths before lacing.
Fraying Lace Ends
Frayed lace ends poke through holes and tear them larger. Singe or glue ends to prevent fraying issues.
Patience and care will help avoid these pitfalls when lacing your glove. Proper technique prevents damaging your new laces or glove leather. Take your time and follow best practices for long-lasting lacing work.
Inspecting Laces for Wear
To maximize lace lifespan, periodically inspect for signs of wear:
- Fraying or peeling wax coating
- Visible abrasions and roughened fibers
- Hard, stiff sections
- Discoloration or drying out
- Broken or loose fibers
- Separation at knots
Address issues quickly by re-waxing, tightening knots, or spot-replacing individual laces as needed. With vigilance and prompt repairs, your quality laces can deliver seasons of lasting performance.
Adding Custom Touches – Personalized lace colors and web designs
Want A Professional-Quality Baseball Glove? Try These Must-Have Lacing Kits: Boost Performance With The Ultimate DIY Accessories
Re-lacing your own baseball or softball glove not only saves money, but allows you to customize the look and feel. Personalizing your lacing and web design takes your glove from generic to one-of-a-kind. Here are some creative custom touches to try:
Colored Laces
Traditional white laces look great, but colored laces let you accessorize your glove and express personality. Consider bold colors like red, blue or neon green. Or go two-tone with alternating white and colored laces.
Team Logo Laces
Show team spirit by lacing with laces featuring your team name, logo or mascot. It’s an easy way to display your team allegiance.
Patterned Laces
Some companies offer laces with cool patterns built right in – checkered, camo, stars and stripes. Alternating patterned laces with solid white creates a visible unique look.
Extra Lace Lengths
Let your laces flow with extra long lengths hanging from the wrist strap, dangling from fingers or trailing from the web. Strictly cosmetic but eye-catching.
Creative Web Shapes
Tweak a standard web by subtly altering hole placements to create a unique shape, like an hourglass center or wings on the sides.
Finger Stall Customizations
Consider a “six finger” glove with an extra finger stall just for appearance. Or leave the pinky stall unlaced for distinguishing style.
Texture Mixing
Combine glossy and matte sections of lacing for cool contrast. Or alternate leather and nylon laces for varied textures.
Patch Additions
Sew or glue decorative patches to the glove body or wrist to complement your custom lacing. Patches display personality.
Start with small subtle touches or go all-out expressive – it’s your glove and your creation. Just be sure any mods don’t affect glove function. Express yourself like a pro with custom lacing and designs.
Maintaining Consistent Lace Tension
When adding creative touches, also remember fundamentals like consistent lace tension. Equal tightness throughout produces a pro end result. Here are tips for keeping tension uniform:
- Use a lacing awl correctly to avoid uneven hole sizes.
- Pull all laces gradually to the same tautness.
- Work systematically around the web to equalize tension.
- Loosen and re-tighten problem areas until balanced.
- Avoid over-pulling – reconfirm balance frequently.
- Test pocket depth and closure with a ball inside.
Uneven lace tension can cause misshaping and ripped laces. With patience, feel and frequent checks, your creative custom lacing can tighten up just right for long-lasting durability and artful style.
Caring For Laces – Cleaning and protection for longevity
Want A Professional-Quality Baseball Glove? Try These Must-Have Lacing Kits: Boost Performance With The Ultimate DIY Accessories
Quality leather or synthetic laces are a big investment, so proper care is key for longevity. With the right maintenance, your laces can deliver seasons of lasting performance. Here are top tips for keeping laces in great shape:
Regular Cleaning
Dirt, dust and salt from sweat will degrade laces over time. Occasionally wipe down each lace with a damp cloth, mild soap and water. Avoid over-wetting.
Conditioning
Keep leather laces supple and protected with periodic conditioning. Rub a leather conditioner into the length of each lace. Let fully absorb then buff gently.
Post-Game Drying
After games, allow laces to fully air dry to prevent moisture damage. Rotate between multiple gloves to give each adequate drying time.
Wax Touch-Ups
Re-apply a wax coating whenever you notice laces drying out or fibering. Target worn sections but don’t over-saturate.
Knot Inspections
Check knot tightness regularly and re-secure any loosening. Trim away knot leftovers to prevent snagging.
Storing Properly
Keep your glove stored out of direct sun and heat which can degrade laces over time. Allow to rest naturally open.
Spot Replacement
At first signs of breakage on any one lace, replace just that individual lace before damage spreads.
With proper care between games, your quality laces will maintain their as-new performance, longevity and aesthetics season after season.
Upgrading Leather Quality
When selecting replacement laces, consider upgrading leather grades for even greater longevity:
- Full grain leather – Highest quality and durability.
- Top grain leather – Substantial longevity, more affordable.
- Genuine leather – Budget option but less durable over time.
- Synthetic leather – Cheap alternative but lacks real leather feel.
Research material sourcing and tanning methods for finest results. With an investment in the very best leather available, your laces can deliver practically unlimited seasons of play.
Repair Kits For On-Field Emergencies – Quick lace fixes to get back in the game
Want A Professional-Quality Baseball Glove? Try These Must-Have Lacing Kits: Boost Performance With The Ultimate DIY Accessories
Even the most well-maintained glove can suffer a broken lace or unraveling knot during a game. Waiting until after to fully re-lace means sitting out valuable innings. With the right emergency on-field repair kit, quick fixes get you right back on the field.
Carry a Repair Kit
A wise player packs basic glove repair supplies in their equipment bag for immediate access when needed:
- Replacement laces
- Needle and waxed thread
- Scissors
- Super glue
- Leather awl
- Protective gloves
Keep items together in a zippered pouch for quick retrieval when a lace breaks mid-game.
Stop Unraveling
If a lace knot comes undone, snip the loose end right away to prevent full unraveling. Glue the new end down temporarily for a quick fix.
Remove Frayed Laces
Laces with excessive fraying are prone to full breakage. Cut out bad sections and patch in new lace as needed to stabilize.
Re-Secure Knots
For loose knots, tighten up with pliers and add extra knots or glue to keep laced tight under game conditions.
Patch Small Holes
If a hole gap allows laces to slip and snag, apply small pieces of athletic tape over the hole to create friction and hold laces in place.
Replace Individual Laces
At the first sign of fraying or damage on any lace, swap in a replacement lace in the proper length before it fully breaks.
With quick thinking and the right supplies on hand, you can get your glove back up and running in an inning or less. Don’t lose playing time to broken laces!
Off-Season Glove Refurbishment
While on-field repairs get you through the game, a full glove restoration in the off-season ensures peak performance next time around. Overhaul your glove each off-season:
- Completely re-lace using fresh laces.
- Patch or re-work holes enlarged from wear.
- Seal any cuts, tears or seams in leather.
- Remove built up dirt and salt with a deep clean.
- Treat the full leather with conditioner.
- Adjust interior padding if compacted or flattened.
Off-season refurbishing restores your glove to season-opening quality. Combined with emergency repairs during games, you’ll keep your glove in top playing condition year-round.
Enjoy Your Re-Laced Glove – Breaking in for ideal pocket shape and feel
Want A Professional-Quality Baseball Glove? Try These Must-Have Lacing Kits: Boost Performance With The Ultimate DIY Accessories
You did the work of re-lacing your baseball or softball glove from scratch. Now comes the satisfying part – breaking in the fresh laces to create your ideal customized pocket shape and feel. Follow these tips for breaking in like a pro:
Start Slowly
Resist the urge to rush out and play hardball right away. Let the new laces settle in gradually through light, repeated compression.
Form the Pocket
Insert a ball into the pocket and tie the glove closed around it. Let it sit to begin contouring to the ball’s shape.
Work It In
With a ball inside, flex your wrist forward and back to bend the pocket area repeatedly. Clench and release your fist to further loosen things up.
Use Your Body
Next, slide the closed glove under your mattress or a couch cushion overnight. Your body weight pressing down helps form the pocket.
Pound the Pocket
Softly tap or pound the pocket on the ball itself to flatten and widen it. Increase force gradually over time.
Toss the Ball
Lightly toss balls into the pocket and catch them there. This shapes the pocket walls and openings to your needs.
Get On the Field
Finally, start using your glove in practice at increasing intensities. Game action finishes off the custom break-in process.
With patience and gradual stress, your glove will soon feel like a second skin. Remember to condition and re-tighten laces periodically. Enjoy your handcrafted, broken-in glove game after game!
Safely Storing Your Glove
To maintain your glove’s look and performance, proper storage is key during off-season. Follow these storage tips:
- Clean glove thoroughly first and apply conditioner.
- Keep in cool, dry location away from direct sunlight.
- Fill the pocket with a ball and secure closed.
- Wrap loosely in a glove bag or soft cloth.
- Avoid tight boxes or bags which can misshape leather.
- Never store directly on concrete which can wick moisture.
- Check periodically for mold/mildew and recondition if needed.
With prudent storage care, your glove will come out of hibernation looking and feeling as great as the day you re-laced it.


