Choosing the Right Lacrosse Sidewall Materials for Maximum Durability
When stringing up a new lacrosse head, one of the most critical choices you’ll make is selecting the best mesh and sidewall materials to deliver optimal stiffness and durability. The mesh and sidewalls bear the brunt of checks, slashes, errant high school cleats, and all the general wear-and-tear dished out over a season or more of play.
That’s why smart stringers look for mesh and sidewall combos engineered for the long haul. Traditional nylon lacrosse mesh offers decent longevity, but lacks the structure you need to maintain a crisp pocket shape. Premium polyester and polyethylene blends feature interwoven fibers that better retain their structure over time. Brands like StringKing and ECD leverage advanced polymer engineering to create ultra-stiff mesh that really locks in those crisp channel ridges.
On the sidewall front, traditional nylon and leathers tend to stretch and degrade too quickly under game pressure. For sidewalls that will stand up to season after season of action, thick multifilament strings made from UHMWPE and dyneema fibers are your best bet. Materials like StringKing’s Meta-Mesh and East Coast Dye’s D30F Dyneema are pound-for-pound stronger than steel and will give your sidewalls a stiff, yet slightly flexible feel that maintains shape regardless of the abuse you dish out on the field.
The bottom line is that not all lacrosse mesh and sidewall materials are created equal. Investing a few extra bucks upfront in ultra-high strength, shape retaining fabrics can mean the difference between restringing your stick every few weeks versus every few seasons. So do your research, read the specs, and choose the best combination of materials for maximizing the longevity of your strings.
Weaving a Tight Diamond Pattern for Extra Sidewall Stiffness
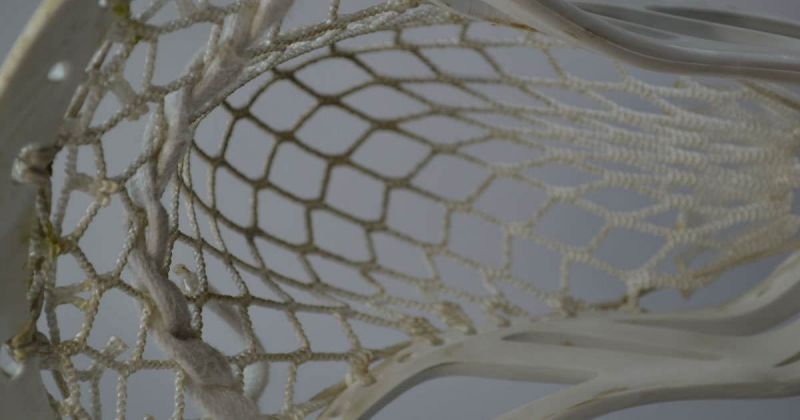
Once you’ve selected high-quality mesh and sidewall materials built to take a beating, it’s time to focus on stringing up your sidewalls in a way that maximizes durability. One of the best ways to build an incredibly stiff wall that maintains its structure is by stringing a tight diamond pattern.
The key here is keeping each diamond small and uniform by maintaining close row spacing as you string. Start by anchoring your first row of sidewall string just above the scoop using a double or triple knot. Make sure to pull each string very tight before moving down to the next row. Continue stringing rows of diamonds, keeping the rows spaced only 1-2 diamonds apart vertically. Keep cranking down hard on each knot to really lock the diamonds in place.
As you string each row, be sure to actively shape the sidewalls by angling the strings slightly inwards towards the scoop. This tension will act like a corset, squeezing the walls in tight to prevent ballooning. The rows of small, tight diamonds essentially create a rigid custom netting that will retain its structure without bagging out over time.
Avoid skipping rows for too long when stringing diamonds, as large gaps can allow the walls to relax and lose their crisp shape. If you need to add extra stiffness to certain areas, like around the throat of the head, simply decrease the row spacing in those high-wear zones.
Sticking with a consistently tight diamond pattern takes patience and practice, but the payoff is sidewalls with unparalleled rigidity. Small, uniform diamonds eliminate any loose gaps in the netting where strings could potentially shift and stretch. Simply put, tiny diamonds mean mega durability. So take your time and focus on clean, even diamonds row by row to give your lacrosse stick the stiffest sidewalls possible.
Using Multiple Anchor Knots for Increased Sidewall Durability

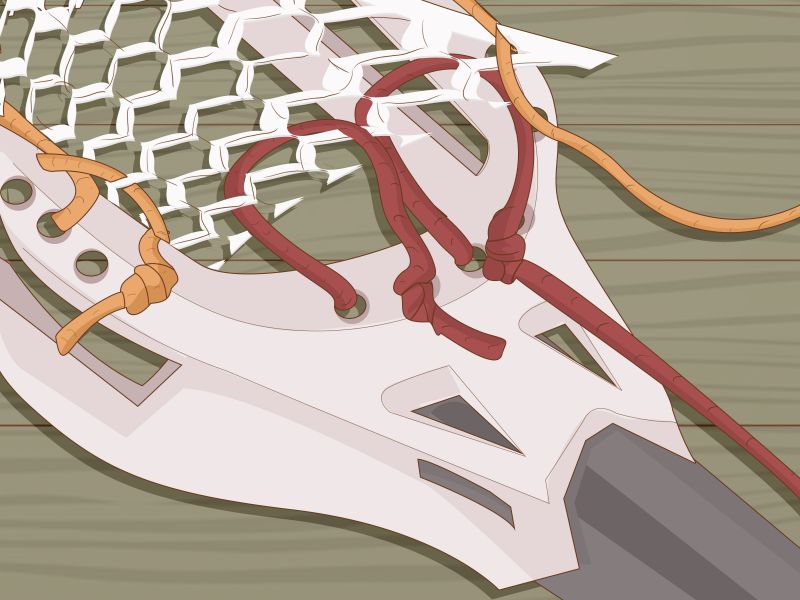
A lacrosse head is only as durable as its anchor points. When stringing up new sidewalls, pay special attention to how you attach the first row of diamonds to the scoop. This initial anchoring row bears a ton of force during checks, so a weak anchor can lead to premature sidewall blowouts.
The best way to create a rock-solid anchor is to use multiple knots when tying off your first row of diamonds. Start by tying the first knot normally near the base of the scoop. However, instead of trimming the excess string after tightening the first knot, leave 6-12 inches remaining and tie a second overhead knot using the tail end. You can even tie a third knot for ultra-secure anchoring.
By tying off the initial row with a double or triple knot, you create an anchor point far less likely to loosen or slip during play. The extra knots act as redundant safeguards, providing backup reinforcement even if one knot starts to give way under pressure. It may take a bit longer to tie off three knots per sidewall string, but it’s worth the time investment.
You should also be sure to moisten the mesh and sidewall material prior to cinching the knots down tight. Soaking the laces in water or stringing wax lets the knots really bind into the material once pulled taut and dried. The added friction and bite help prevent anchor knots from slipping over time.
Durability starts from the ground up when stringing lacrosse heads. Taking those extra minutes to create a robust, multi-knot anchor system will prevent your walls from sagging or blowing out down the road. Remember, an ounce of prevention is worth a pound of restringing further down the line. So go ahead and tie off those starting rows like you’re securing a ship to dock – the extra knots are well worth it.
Pulling Lacrosse Sidewalls Tight for Maximum Stiffness
Creating durable lacrosse sidewalls is all about tension. Keeping each string pulled tight as you build out your sidewall netting is crucial for minimizing movement and bagging over time. Make it a focus to really crank down on each knot as you work.
As you string each row of diamonds, be sure to pull each individual string as tight as possible before moving down to the next row. You want zero slack in the laces as you progress. After tying off each knot, place your knee under the head and use your body weight to yank down hard on the knot. The goal is to tension each string like a guitar.
You should also frequently stop to retighten knots in previous rows as you build down the head. Natural loosening can occur as you add rows, so it pays to periodically re-crank older knots. Consider using a high-quality stringing clamp tool to really lock in tension row by row.
Don’t be afraid to push the limits of how tight you can pull the sidewalls – high tension is what makes them so rigid. Just be cautious with nylon laces, as they can snap if overtightened. But advanced sidewall materials like Dyneema can handle extreme tension levels to produce incredibly stiff walls.
Beyond tight rows, also pay close attention to evenly distributing tension across the entire sidewall area. Use a crisscross or zigzag stringing pattern and avoid any sagging spots. Consistent tightness equals consistent stiffness.
While your fingers may ache after an intense sidewall stringing session, just remember – the more tension you can introduce without snapping strings, the less tension your sidewalls will have to endure during high-impact checks and slashes on the field. Pull them tight now so they stay tight for seasons to come.
Skipping Rows for Added Sidewall Rigidity

When stringing up a new lacrosse head, most beginners focus on creating a nice even pattern with consistent row spacing. However, intentionally skipping rows in high wear areas can dramatically add stiffness and structure to your sidewalls.
The most common way to add rigidity through row skipping is to double or triple up the diamonds around the throat of the head. This is the area that endures the most abuse from checks, so concentrating the netting offers reinforcement.
Simply space out the rows in the throat area to every other diamond, or even every third diamond. You can gradually transition back to tighter row spacing as you string towards the scoop. The wider diamond gaps will force more tension on the surrounding strings to prevent bagging.
You can also skip rows strategically in areas prone to damage, like around the sidewall holes. Fewer rows means the existing strings bear more load, creating a denser reinforced net to withstand slashes and pokes.
When skipping rows, just be mindful not to space diamonds too far apart, or the walls can lose shape between rows. Keep the gaps small enough that the mesh remains somewhat compressed between stringing rows.
Row skipping does add some complexity to the stringing process, but it allows you to engineer the stiffness profile of the head by reinforcing high-wear zones. The end result is sidewalls that are rigid where they need to be rigid. So don’t be afraid to skip some rows and get creative with your stringing patterns if it will make your walls more durable.
Angling Sidewalls Towards the Scoop for Shape Retention
Creating durable lacrosse sidewalls isn’t only about materials and stringing patterns. The angle at which you string the diamonds also plays a critical role in maintaining structural integrity over time.
As you build out each row, focus on angling the strings slightly inwards towards the scoop. Rather than stringing straight across, let each row gradient a few degrees towards the top of the head.
Stringing on an angle puts natural tension on the sidewalls, almost compressing them inwards. This counteracts the natural tendency of sidewalls to push out and bulge over time. The angled tension acts like a corset, squeezing the walls in tight.
You only need a slight angle, somewhere around 5-10 degrees on each row. Too severe an angle risks over-tensioning the strings. The goal is just enough angled force to keep the walls from bellowing out.
Be sure to maintain the angle consistency across rows. The tension works best when applied evenly from top to bottom. Consider using a simple angled jig as a guide for keeping rows uniform.
Angled sidewalls not only stiffen walls against bulging, but also help retain the original pocket shape. The inward pressure keeps the mesh compressed so it can’t stretch out of form.
Paying attention to the angle of your sidewall strings is a quick trick to build in lasting stiffness without overhauling your entire stringing method. Simply angling laces 15 degrees can extend the life of your head by seasons.
Cross-Lacing Sidewalls to Lock Channels in Place
One of the hardest parts of maintaining stiff lacrosse sidewalls over time is preventing the mesh diamonds and shooting strings from shifting and stretching. Strategically cross-lacing certain sidewall strings can lock the channel and diamonds in place.
After stringing 4-5 rows of diamonds, weave a sidewall string horizontally through a diamond or shooting string channel. Essentially loop the string under and over the mesh ridge before continuing back upright with your diamonds. This anchors the channel in place vertically to prevent slippage.
Be strategic with your cross-lacing. High-wear diamonds around the scoop and at the throat of the head are smart areas to reinforce. Also target cross-lacing the first 1-2 diamonds in shooting string channels to lock in formation.
Make sure to crank down hard on the knots after cross-lacing to maximize the downward tension on the channel. Consider finishing with a double or triple knot for extra holding power. The goal is to virtually eliminate any give in the lacing.
When weaving horizontally, be mindful of maintaining proper sidewall angle and spacing. The cross-lacing is meant to tighten, not distort the walls. Keep rows uniform above and below the crosses.
With cross-lacing less is often more. A few strategic anchors across the top and bottom diamonds go a long way. There’s no need to overdo it and cross every single row.
Cross-lacing adds crucial reinforcement without requiring advanced stringing skills. A few horizontal anchors are an easy trick for keeping your shooting strings and pocket locked in for the long run.
Experimenting with Interlocking Pull Patterns

Want to take your lacrosse sidewall stringing to the next level? Consider interlocking or interweaving sidewall strings to create unique aesthetics and targeted control over stiffness.
Rather than running each string straight vertically from top to bottom, try intermittently looping laces horizontally to lock diamonds together. Get creative forming geometric patterns like diagonals, triangles, cubes, or hourglass shapes as you build the sidewalls.
Locking diamonds together horizontally adds structure by taking tension off adjacent vertical laces. It allows you to engineer precise stiffness and shape retention by creating a custom structurally reinforced netting.
When interweaving, be mindful of maintaining proper overall sidewall shape and angle. It helps to sketch out the locking pattern beforehand to ensure symmetry across the head. Keep the patterning consistent and rows evenly spaced.
Start simple with basic crosses or X patterns between diamonds before moving on to more advanced shapes. And stick with thicker multifilament laces rather than traditional nylons, which tend to lock together better.
Interlocking sidewall patterns require meticulous attention to detail, but open up unlimited possibilities for engineering the ideal balance of flexibility and stiffness across the entire head.
So grab some colored laces and get creative exploring interwoven shapes that make your sidewalls pop. You just might stumble upon the perfect stringing formula for finally taming your wild sidewalls.
Knotting Unraveled Sidewall Ends to Prevent Fraying
Even when strung with the best materials, lacrosse sidewalls eventually start to fray and unravel over time. But tying knots at the end of strings can help contain damage and extend sidewall life.
As you string diamonds row by row, be sure to tie knots at the end of each sidewall string before trimming excess. Simply tie a basic single or double knot an inch or two up from the tip of the lace after pulling it tight.
Knotting the ends contains any potential fraying damage within the knot. If strings start to unravel down the road, the knot acts as a blockade to stop runs from spreading across the entire sidewall length. This preserves the overall integrity better.
Make sure to moisten laces with water or stringing wax prior to cinching knots down tight. This allows the knot to really bind into the material once pulled snug.
For high-wear spots like around the scoop, consider finishing off ends with triple or quad knots for even more stopping power if fraying occurs. A few extra knots takes seconds but goes a long way.
Also be diligent about re-knotting sidewall strings whenever you notice ends becoming frayed or untied. Just a couple loose strings can lead to bigger issues if not contained.
Knotted sidewall ends are a simple but crucial finishing touch in preserving the longevity of your stringing. Take those extra seconds to tie off ends properly, and you’ll save hours of restringing time down the road.
Triple Knotting Bottom Sidewall Strings for Security
The bottom sidewall strings endure tons of friction and snagging from ground contact during play. That’s why it’s critical to tie them off securely using triple or quad knots.
After stringing your final row of diamonds, take extra time tying knots when finishing off the bottom laces. Rather than a single knot, loop around three to four times before cinching it down tight. The extra loops create redundancy.
Pull the triple knot incredibly tight, really putting your weight into it. The bottom knot has nowhere else to anchor, so all tension must come from the knots themselves. Use stringing pliers to truly lock it in.
If using slick dyneema laces, consider adding a dab of superglue after tightening the triple knot. This permanently bonds the final knot wraps together into one solid lower anchor point.
Also try weaving the excess string back up vertically into an adjacent diamond row for extra locking power. This anchors the bottom knot from both vertical and horizontal pulling forces.
Inspect the tightness of your bottom knots regularly, especially early on. Natural slack can occur as the strings break-in. Be ready to re-tension as needed.
A few extra minutes perfecting those lower knots saves hours of headaches later. Apply the same mantra as rock climbing – double knot, triple check. Your sidewalls are only as secure as your anchor points, so overbuild those bottom knots.
Soaking Completed Heads to Set Strings
Allowing the strings to fully soak into the sidewall material helps lock the pattern and tension in place for the long term. Consider letting completed heads soak overnight.
After stringing up your sidewalls, place the head in a bucket and fully immerse it in clean water. Let it sit for several hours so the mesh and laces can become completely saturated. The water lets strings swell and bind into the mesh.
You can soak for just an hour or two, but letting heads soak overnight allows optimal binding. The materials have more time to interact and find their permanent tension levels.
As an alternative to soaking, you can also hang or prop heads to dry fully over several days. But soaking accelerates the process by pre-expanding and pre-tensioning while wet.
Note that excessively hot water can cause early degradation of mesh and materials. Lukewarm tap water works fine. And steer clear of any soaps or chemicals that may break down the strings.
Post-soaking, allow heads to fully air dry before playing to prevent mold growth. Gently flex and compress the head periodically as it dries to prevent warping.
A good long soak pre-sets the shape, angle, and tension of your pattern so the head performs consistently, not just when freshly strung. So be patient and let your stringing properly cure before taking it for a test drive.
Pinning Sidewalls Overnight for Shape Setting

Allowing freshly strung sidewalls to set in their true shape overnight is crucial. Pinning sidewalls accelerates the shaping process so they hold form.
Start by wetting the sidewalls and mesh either through soaking or heavy misting. The moisture allows the materials to be more pliable while drying.
Next, use wooden clothespins to gently pin the wet sidewalls inwards at intervals up and down the head. Focus on compressing the widest bulging areas to correct shape.
Be sure not to over-pin or distort the natural angle and flow of the sidewalls. The goal is just to coax the wet strings into retaining an optimal side profile as they dry and set.
Allow heads to air dry fully overnight while pinned. The strings will bind into the intended shape as the moisture evaporates. Re-mist and re-pin if walls start to detach while drying.
Consider placing a ball in the pocket while drying as well to mold the natural ball-set shape. Rotate the ball’s position occasionally for even shaping.
In the morning, remove all pins and flex the head to loosen any stiff spots before playing. The sidewalls should now retain their pinned form through games, rain, and humidity.
Rushing into play without properly shaping and setting new stringing can lead to gradual distortion or bagging as the strings relax. So invest those extra hours upfront to make that crisp shape permanent.
Applying Stick Wax to Reduce Sidewall Friction
Friction takes a major toll on lacrosse sidewalls over time. Regularly applying stick wax helps strengthen laces by reducing surface abrasion.
Lightly wax stringing when the head is brand new before you even take your first shot. This pre-treats the materials against friction while still fresh and rugged.
Pay particular attention to coating shooting strings, first diamond rows up top, and high-wear spots like sidewall holes. These areas see the most abrasive contact and begin fraying first.
Re-wax every few games to maintain protection, especially if playing in wet or muddy conditions. Water washes away wax quickly. Err on the side of over-waxing to keep strings slick.
For heavy duty friction protection, consider cheaper floor wax instead of standard stick wax. Floor wax is engineered for high-traffic abuse. Just be sure to thoroughly clean heads later before re-coating.
Focus most waxing efforts on the first half of the head, where most ball and ground contact occurs. The bottom half sees less abrasive wear during normal play.
Proper waxing lubricates strings to help repel mud, dirt, and debris that act like sandpaper chewing away at sidewalls over time. So keep those laces slick and let friction slide right off.
Spot-Checking Strings Before Each Game

Vigilantly checking for loose or worn strings before each game helps nip bigger sidewall issues in the bud down the road.
Make it a consistent pre-game habit to carefully inspect the full length of both sidewalls top to bottom. Look and feel for any premature fraying, soft spots in the mesh, or loose diamond rows.
Pay particular attention to areas that endure the most abuse like the scoop, sidewall holes, shooting strings, and lower diamonds near the throat. These tend to show wear first.
Test rows by gently pulling on diamonds and ensuring they hold tight. Spot check knots to confirm they are still fully cinched with no slippage.
If you notice excessive slack in the mesh or wobble in diamonds, tighten knots immediately to get walls re-tensioned evenly. Address any unknotted lace ends right away as well.
Keep an emergency backup sidewall lace and lighter on hand to perform quick spot repairs on the fly when needed before games.
Consistent checks allow you to reinforce spots proactively before bigger issues arise mid-game. And catching problems early prevents having to fully restring between each outing.
Ten minutes upfront could save you hours restringing later. So never grab a stick without taking time to scan the full sidewall length first.
Rewaxing and Replacing Mesh to Extend Sidewall Life
To maximize the working life of your lacrosse stick sidewalls, perform regular maintenance like rewaxing and replacing worn mesh.
Plan to reapply stringing wax every few weeks, especially on shooting strings and diamonds near the scoop that see heavy abrasion. Keeping laces slick reduces fraying.
Also periodically check for areas where the original wax has worn off or flaked away. Target re-waxing only on bare strings to save wax. Rubbing a cake of wax directly on works best.
When you notice the mesh losing its original structure and compression, swap it out for fresh mesh. Sagging pockets stretch sidewalls unevenly.
Consider bumping up to a thicker mesh if the original breaks down too quickly. Or explore different weave styles that may better withstand your playing style.
Monitor knots weekly and tighten down any that become loose before it affects sidewall tension alignment. A few hot spots of slack can accelerate degradation.
Schedule full sidewall restrings at least once a year to renew tension and profile, regardless of how intact strings may appear.
Proper care and upkeep makes quality lacrosse mesh and sidewalls last years, not just weeks. So be diligent about maintenance and your sidewalls will maintain peak structural integrity for the long run.
