Snag More Fish With An Eagle Claw Minnow Trap. This Nonstop Action Covering You In Catfish Is HowSnag More Fish With An Eagle Claw Minnow Trap. This Nonstop Action Covering You In Catfish Is How
Intro – What is an eagle claw minnow trap and why use one?
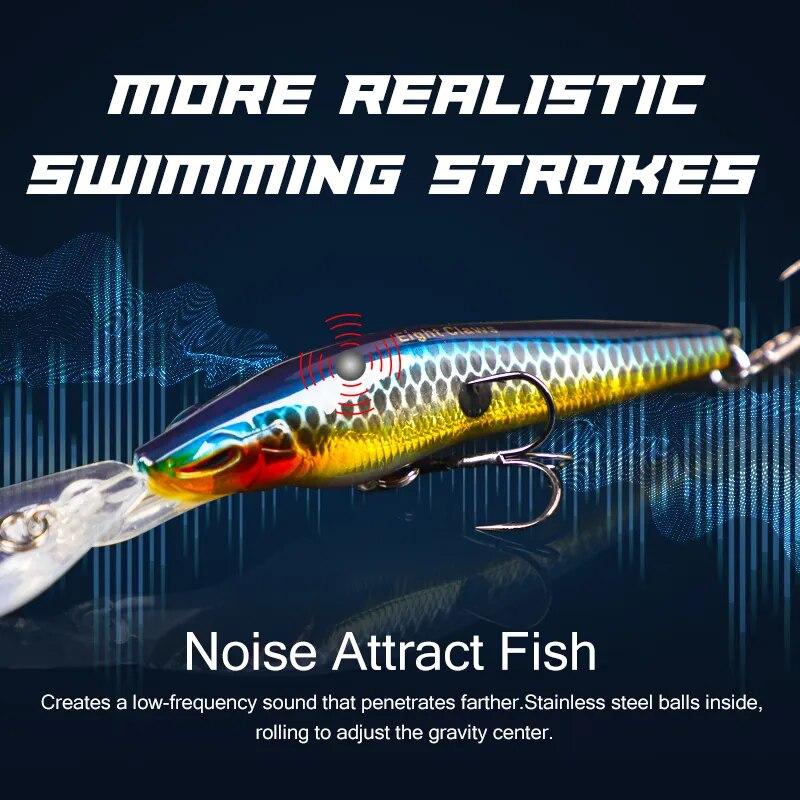
For us anglers, there’s nothing quite like reeling in a big ol’ catfish that puts up a mean fight. But catching those whiskered warriors isn’t always easy. That’s where the eagle claw minnow trap comes in. This ingenious contraption helps you snag the bait that attracts trophy cats – live minnows. If you want to fill your stringer with fat channel cats and get that rod bent over double, then read on. I’ll cover everything you need to know about this must-have tool for every serious catfisher.
A Trap That Never Sleeps
The beauty of the eagle claw minnow trap is that it works around the clock to catch bait. Once you set it and bait it up, this non-stop fish catching machine lures in schools of minnows even when you’re not there. Its one-way funnel entrance makes it nearly impossible for minnows to escape. Before you know it, you’ll pull up your trap to find it teaming with lively baitfish ready for hook duty.
I can’t count the number of times these traps have saved me when the fish were biting but I didn’t have any bait. Nothing hurts worse than seeing cats rolling but having empty hands. With a minnow trap always working for you, you’ll never be without the most irresistible catfish candy again!
Collapsible and Compact
One thing that impresses me about the Eagle Claw design is how easy they are to store and transport. Many models fold down flat, so you can stash them just about anywhere. I keep one in my tacklebox, truck, and boat at all times. That way, I can set a trap at a moment’s notice if I come across a sweet minnow honey hole.
The collapsible wire frame also makes these traps a cinch to carry on long treks. I like to set out a few around my favorite shore fishing spots that require some foot travel to access. With these lightweight traps, packing in the bait is no problem.
Customizable to Any Water
The versatility of the Eagle Claw trap is one of its greatest strengths. They offer models designed for various depths, current speeds, and bottoms. This makes it possible to match the perfect trap to the unique water you’re fishing.
Slow backwater sloughs call for traps that sit right on the bottom. Wide open reservoirs demand floating models that suspend bait in midwater. Fast-moving tailraces require heavy steel traps that won’t budge. Whatever the underwater terrain, there’s an Eagle Claw trap suited for the job.
Choosy Minnows Can’t Resist
We all know minnows can be persnickety at times. If something’s not just right, they’ll shy away. Eagle Claw traps have this finicky bait figured out. The smooth galvanized wire and vinyl coatings don’t spook wary minnows. And the spacious interiors give bait plenty of room to enter and explore.
I’ve found picky minnow schools that snubbed my other traps didn’t think twice about swimming inside the Eagle Claw. When regular methods leave you empty handed, these specialized minnow catchers get the job done.
Built to Last Season After Season
A trap won’t do you much good if it falls apart after a few uses. The durable galvanized steel and high quality components of Eagle Claw traps allow them to endure year after year. I’ve got some that are still going strong after a decade of heavy use.
The vinyl coatings also prevent rust and corrosion even after being submerged for long periods. Spending a little more upfront pays off down the road when you never have to replace worn out traps.
Safety First

Unmatched Versatility: Adapting to Any Fishing Environment
One of the standout features of the Eagle Claw minnow trap is its adaptability to various aquatic environments. Whether you’re fishing in slow-moving backwaters, fast-flowing tailraces, or expansive reservoirs, there’s an Eagle Claw trap model suited for the task.
- Bottom-sitting models for shallow, calm waters
- Floating designs for suspending bait in deeper waters
- Heavy-duty steel traps for strong currents
This versatility ensures that no matter where your fishing adventures take you, you’ll always have the right tool to secure your bait.
Customizing Your Trap for Maximum Effectiveness
How can you optimize your Eagle Claw minnow trap for specific fishing conditions? Consider these tips:
- In clear waters, use darker-colored traps to reduce visibility to wary minnows
- In muddy or turbid waters, brighter traps can help attract more bait
- Experiment with different baits inside the trap, such as bread, cheese, or commercial fish attractants
- Adjust the depth of your trap based on where minnows are most active in your fishing spot
The Economic Advantage: Say Goodbye to Bait Shop Bills
One of the most compelling reasons to invest in an Eagle Claw minnow trap is the potential for significant cost savings. How much can anglers save by using these traps?

Consider this: A dozen minnows from a bait shop can cost anywhere from $3 to $5, sometimes more. An active angler might use several dozen per fishing trip. Over a season, these costs can add up to hundreds of dollars.
In contrast, an Eagle Claw minnow trap typically costs between $10 to $30, depending on the model. This one-time investment can provide an endless supply of fresh, lively bait throughout the fishing season and beyond.
Are there any ongoing costs associated with using a minnow trap? The only recurring expense might be the bait used to attract minnows into the trap, which is often as simple and inexpensive as a piece of bread or a small amount of commercial fish food.
Durability and Longevity: A Wise Investment for Serious Anglers
When investing in fishing gear, durability is a crucial factor. How does the Eagle Claw minnow trap stack up in terms of longevity?
These traps are constructed from high-quality, galvanized steel, which provides excellent resistance to rust and corrosion. Many models also feature a vinyl coating for added protection. This robust construction allows Eagle Claw traps to withstand years of regular use, even in harsh aquatic environments.

Anglers frequently report using the same Eagle Claw trap for a decade or more without needing replacement. This longevity not only ensures a reliable bait-catching tool but also enhances the cost-effectiveness of the initial investment.
Maintenance Tips for Prolonging Trap Life
To maximize the lifespan of your Eagle Claw minnow trap, consider these maintenance tips:
- Rinse the trap with fresh water after each use, especially if used in saltwater
- Allow the trap to dry completely before storage to prevent rust
- Inspect the trap regularly for any damage or wear, particularly around the entrance funnel
- Store the trap in a cool, dry place when not in use
Beyond Catfish: Versatility in Multi-Species Angling
While the Eagle Claw minnow trap is a favorite among catfish anglers, its utility extends far beyond whisker-fish. Which other species can benefit from the live bait caught in these traps?
Minnows are a staple in the diet of many freshwater game fish. Anglers targeting crappie, bluegill, trout, striped bass, walleye, and largemouth bass can all benefit from the fresh, lively bait provided by an Eagle Claw trap.

This multi-species appeal makes the Eagle Claw minnow trap a versatile tool for diverse fishing situations. Whether you’re ice fishing for perch in the winter or casting for bass in the summer, having access to fresh minnows can significantly improve your chances of success.
Tailoring Your Bait Selection
Different fish species may prefer different sizes or types of minnows. How can you tailor your bait selection using an Eagle Claw trap?
- For smaller species like crappie or bluegill, use traps with smaller mesh sizes to catch appropriately sized bait
- For larger predatory fish, use traps with larger openings to catch bigger minnows
- Experiment with trap placement to target specific minnow species that your desired gamefish prefer
Safety Considerations: Responsible Use of Minnow Traps
While Eagle Claw minnow traps are generally safe and easy to use, it’s important to consider some safety precautions. How can anglers ensure safe operation of these traps?
First and foremost, be mindful of the small mesh openings on the trap. These can potentially pose a risk for fingers and toes, especially for children. It’s advisable to keep young anglers at a safe distance when checking or handling the traps.

Additionally, when setting traps from the shore, be sure to place them away from designated swimming areas to avoid any potential hazards for swimmers. If you’re boating near your trap, be cautious of the marker floats to prevent accidental entanglement or damage to your boat’s propeller.
Legal Considerations
Are there any legal aspects to consider when using minnow traps? The use of minnow traps may be regulated in some areas. It’s crucial to check local fishing regulations before deploying your trap. Some jurisdictions may have restrictions on:
- The number of traps an angler can use
- The size or type of minnows that can be legally caught
- Areas where traps can be placed
- Required labeling or identification of traps
Always ensure you’re in compliance with local laws to avoid potential fines or penalties.
Maximizing Your Catch: Tips and Tricks for Eagle Claw Minnow Trap Success
To get the most out of your Eagle Claw minnow trap, consider these expert tips:
- Location is key: Place your trap in areas where minnows naturally congregate, such as near aquatic vegetation or in shallow, calm waters
- Experiment with bait: While bread is a common choice, try different baits like dog food, cheese, or commercial fish attractants to see what works best in your area
- Check your trap regularly: Frequent checks allow you to remove your catch before predators are attracted to the trapped minnows
- Use multiple traps: Setting several traps in different locations can increase your chances of finding a productive spot
- Be patient: Sometimes it takes time for minnows to discover your trap. Don’t be discouraged if your first few attempts aren’t successful
How long should you leave your trap in the water? While it can vary based on location and conditions, many anglers find that leaving the trap for a few hours to overnight yields the best results.

Seasonal Considerations
Does the effectiveness of Eagle Claw minnow traps change with the seasons? Indeed, seasonal patterns can affect minnow behavior and, consequently, your trapping success.
- Spring: As waters warm, minnows become more active. This can be an excellent time for trapping
- Summer: Minnows may seek cooler, deeper waters during hot days. Consider adjusting your trap depth accordingly
- Fall: Minnows may school more tightly as temperatures drop. Look for concentrations of bait fish
- Winter: In ice fishing scenarios, minnow traps can be highly effective when placed in the right locations under the ice
The Environmental Impact: Sustainable Bait Collection
In an era of increasing environmental awareness, how does the use of Eagle Claw minnow traps align with conservation efforts?
When used responsibly, minnow traps can be a more sustainable method of bait collection compared to mass-harvesting techniques. They allow anglers to catch only the amount of bait they need, reducing waste and minimizing impact on local ecosystems.
Furthermore, by catching bait locally, anglers can avoid the potential introduction of non-native species that can occur when transporting live bait from one water body to another.
Best Practices for Eco-Friendly Trapping
To ensure your minnow trapping is as environmentally friendly as possible, consider these practices:
- Only keep the minnows you plan to use, releasing excess catch back into the water
- Avoid leaving traps unattended for extended periods to prevent unnecessary stress on trapped minnows
- Be mindful of local ecosystems and avoid over-harvesting from any single location
- Clean your traps thoroughly between use in different water bodies to prevent the spread of aquatic invasive species
By following these guidelines, anglers can enjoy the benefits of fresh, live bait while also being responsible stewards of the aquatic environment.
Comparing Eagle Claw to Other Minnow Trap Brands
While Eagle Claw is a popular choice among anglers, it’s not the only minnow trap brand on the market. How does it compare to other options?
Eagle Claw traps are known for their durability and effectiveness. The galvanized steel construction and vinyl coating provide excellent longevity, often outlasting cheaper alternatives. The design of the entrance funnel is particularly praised for its ability to retain caught minnows.
However, some anglers prefer other brands for specific features. For example, some traps offer larger capacities or unique designs for particular fishing environments. It’s worth considering your specific needs and fishing conditions when choosing a minnow trap.
Key Factors to Consider When Choosing a Minnow Trap
When comparing minnow trap brands, keep these factors in mind:
- Construction material and durability
- Ease of use and storage (collapsible designs can be advantageous)
- Size and capacity
- Entrance design and effectiveness in retaining bait
- Versatility for different fishing environments
- Price and value for money
While Eagle Claw traps excel in many of these areas, the best choice will ultimately depend on your individual fishing style and preferences.
Innovations in Minnow Trap Technology
As with many aspects of fishing gear, minnow trap technology continues to evolve. What recent innovations have improved the effectiveness of these tools?
Some newer minnow trap designs incorporate features like:
- LED lights to attract bait fish, especially useful in low-light conditions
- Multiple entrances to increase catch rates
- Specially designed bait compartments for easier baiting and cleaning
- Transparent materials that allow anglers to see their catch without opening the trap
While Eagle Claw traps may not incorporate all of these features, their tried-and-true design remains highly effective for most angling situations.
The Future of Minnow Trapping
What might the future hold for minnow trap technology? Some potential developments could include:
- Smart traps with sensors to alert anglers when bait is caught
- Biodegradable materials for more eco-friendly trapping
- Integration with fishing apps for tracking and optimizing bait collection
As technology advances, we may see these innovations incorporated into future versions of Eagle Claw and other minnow trap brands.
Mastering the Art of Minnow Trapping
While the Eagle Claw minnow trap is a powerful tool, success in minnow trapping often comes down to skill and experience. How can anglers improve their minnow trapping technique?
Mastering minnow trapping involves understanding minnow behavior, recognizing productive habitats, and fine-tuning your trapping strategy. Here are some advanced tips for becoming a minnow trapping expert:
- Study minnow species in your area and learn their preferred habitats and behaviors
- Keep a log of your trapping success, noting locations, times, and conditions
- Experiment with different baits and scents to determine what works best in your fishing spots
- Learn to read water and identify likely minnow hotspots
- Practice stealth when setting and checking traps to avoid spooking bait fish
Remember, successful minnow trapping is as much an art as it is a science. The more you practice and observe, the more effective you’ll become.
Common Mistakes to Avoid
Even experienced anglers can make mistakes when using minnow traps. What are some common pitfalls to watch out for?

- Overbaiting the trap, which can lead to poor water quality and stressed minnows
- Leaving traps unchecked for too long, potentially resulting in dead bait
- Placing traps in areas with strong currents that can wash away your bait
- Neglecting to secure the trap properly, risking loss or damage
- Ignoring local regulations regarding minnow trapping
By avoiding these mistakes and continuously refining your technique, you can maximize the effectiveness of your Eagle Claw minnow trap and ensure a steady supply of fresh, lively bait for your fishing adventures.
Intro – What is an eagle claw minnow trap and why use one?
For us anglers, there’s nothing quite like reeling in a big ol’ catfish that puts up a mean fight. But catching those whiskered warriors isn’t always easy. That’s where the eagle claw minnow trap comes in. This ingenious contraption helps you snag the bait that attracts trophy cats – live minnows. If you want to fill your stringer with fat channel cats and get that rod bent over double, then read on. I’ll cover everything you need to know about this must-have tool for every serious catfisher.
A Trap That Never Sleeps
The beauty of the eagle claw minnow trap is that it works around the clock to catch bait. Once you set it and bait it up, this non-stop fish catching machine lures in schools of minnows even when you’re not there. Its one-way funnel entrance makes it nearly impossible for minnows to escape. Before you know it, you’ll pull up your trap to find it teaming with lively baitfish ready for hook duty.
I can’t count the number of times these traps have saved me when the fish were biting but I didn’t have any bait. Nothing hurts worse than seeing cats rolling but having empty hands. With a minnow trap always working for you, you’ll never be without the most irresistible catfish candy again!
Collapsible and Compact
One thing that impresses me about the Eagle Claw design is how easy they are to store and transport. Many models fold down flat, so you can stash them just about anywhere. I keep one in my tacklebox, truck, and boat at all times. That way, I can set a trap at a moment’s notice if I come across a sweet minnow honey hole.
The collapsible wire frame also makes these traps a cinch to carry on long treks. I like to set out a few around my favorite shore fishing spots that require some foot travel to access. With these lightweight traps, packing in the bait is no problem.
Customizable to Any Water
The versatility of the Eagle Claw trap is one of its greatest strengths. They offer models designed for various depths, current speeds, and bottoms. This makes it possible to match the perfect trap to the unique water you’re fishing.
Slow backwater sloughs call for traps that sit right on the bottom. Wide open reservoirs demand floating models that suspend bait in midwater. Fast-moving tailraces require heavy steel traps that won’t budge. Whatever the underwater terrain, there’s an Eagle Claw trap suited for the job.
Choosy Minnows Can’t Resist
We all know minnows can be persnickety at times. If something’s not just right, they’ll shy away. Eagle Claw traps have this finicky bait figured out. The smooth galvanized wire and vinyl coatings don’t spook wary minnows. And the spacious interiors give bait plenty of room to enter and explore.
I’ve found picky minnow schools that snubbed my other traps didn’t think twice about swimming inside the Eagle Claw. When regular methods leave you empty handed, these specialized minnow catchers get the job done.
Built to Last Season After Season
A trap won’t do you much good if it falls apart after a few uses. The durable galvanized steel and high quality components of Eagle Claw traps allow them to endure year after year. I’ve got some that are still going strong after a decade of heavy use.
The vinyl coatings also prevent rust and corrosion even after being submerged for long periods. Spending a little more upfront pays off down the road when you never have to replace worn out traps.
Safety First
While minnow traps are fairly safe, you still need to take some precautions. The small mesh openings pose a risk for fingers and toes. I tell kids to steer clear of the traps when checking them. It’s also possible for the attachment lines to loop around your arm or leg if you’re not careful.
When setting traps from shore, keep them away from designated swimming areas. And if boating near one, avoid running over the marker floats. Eagle Claw traps may snag more bait, but don’t let that lead to injury.
Catches All Your Favorite Species
Of course, catfish get all the hype as a classic minnow-soaking species. But just about every gamefish will chomp down on a lively minnow. Crappie, bluegill, trout, stripers, walleye, bass – they all find mini baitfish irresistible.
This multi-species appeal means your Eagle Claw trap provides bait for all kinds of fishing. The local pond hoppers love them for bluegills. Trout anglers use them to harvest legal live bait. And catfishing addicts like me depend on them!
Never Buy Bait Again
When you discover how productive Eagle Claw minnow traps can be, you’ll kiss those bait shop bills goodbye. These things catch fresh minnows by the dozens for pennies on the dollar versus store-bought bait.
Why spend a small fortune on minnow buckets when you can let traps do the work? The savings quickly add up after just a few use. Before you know it, this gear pays for itself many times over.
Any Time Is Prime Time
One of the biggest mistakes anglers make is thinking minnows only bite during certain months. While spring and fall are prime times, you can trap bait almost any time of year. I’ve snagged jumbo minnows even in the dead of summer and ice-covered winter.
As long as the water temp is above 45 degrees or so, these traps will produce. Don’t limit yourself to fishing only in peak seasons. You can catch minnows and fish year-round with Eagle Claw’s help.
Store Out of Water and Sunlight
Make your traps last as long as possible by taking care of them during storage. Always allow traps to dry fully before packing them away. I like to hang mine in the garage so they drain and air out.
Keep them out of direct sunlight when not in use. The UV rays will gradually break down vinyl coatings and weaken the wire. A cool, dark place like a shed or closet makes an ideal off-season home.
Snag-Free and Tangle-Free
One of the worst feelings is losing a trap because it snagged on an underwater object and broke free. The Eagle Claw design helps prevent this. There are no external hooks or loose wires to get hung up on debris.
Binding and tangling with other lines is another common trap problem. But the smooth construction resists grabbing onto passerby lines. Just be sure to use enough weight to keep your trap secured in current and wave action.
Cure the Rust to Stop the Dust
If you notice light rust forming on your traps, take action quickly before it spreads. Fine grit sandpaper or a wire brush removes surface rust. I like to follow up with a spray-on rust converter primer.
For traps with heavier corrosion, replace damaged wire panels. It’s pretty straightforward to untwist and re-attach new wire sections. Just be sure to match the gauge and coating.
Depth Matters
One key to success with minnow traps is setting them at the right depth. This varies based on water clarity, bottom contour, and current flow. In shallow water, try just below the surface. Over deep flats, target 10-20 feet.
Watch your fish finder for baitfish schools and set traps slightly deeper. Adjust depth until you dial in the exact strike zone. Pay close attention here and you’ll load up on lively minnows.
Conclusion
The Eagle Claw minnow trap is a deadly addition to any angler’s arsenal. Its continuous, round-the-clock operation puts a steady supply of bait in your hands. The customizable designs match any water and catch finicky minnows at every turn. And the durable, snag-free construction will serve you season after season. If you’re looking to fill your live wells and bend more rods, this trap is on the job 24/7.
Overview – Main features and benefits of the eagle claw trap
Well friends, now that we’ve covered why minnow traps like the Eagle Claw are so darn useful, let’s dive into the nitty gritty of what makes these babies so effective. Trust me, these masterfully designed tools have some killer features that deliver major fish catching results. I’ll break down everything from the ingenious funnel system to durable wire construction. Read on to get the inside scoop on what sets the Eagle Claw apart.
Funnels That Guide ‘Em In
The heart of any minnow trap is the funnel system that lets prey swim in but not out. Eagle Claw tweaked and tuned their funnel design to perfection. The smooth, flared openings usher minnows into the trap with minimal spooking. And the one-way throat ensures they don’t easily escape.
Another key advantage is the funnels sit flush with the trap frame. This prevents tissue snagging and keeps those pansy minnows entering with confidence. Let me tell ya, once they swim into that inescapable trap, you got ’em for good!
Roomy Interior = Happy Minnows
You know how finicky minnows get when they feel cramped and confined. They freak out and don’t hang around very long. Eagle Claw paid close attention to this, and designed spacious trap interiors that keep bait calm and content. The swimming room encourages them to explore further and remain inside.
I also appreciate that the interior openings and tunnels allow water flow. This provides oxygen to keep minnows frisky for hours. And means you can check traps less often since bait stays lively longer.
Sized Right for the Species
Traps come sized for small, medium, and jumbo minnows. Match the size to the type of baitfish in your waters. For example, I use the collapsible small traps to catch mosquito-sized minnows for bluegill. And bust out the jumbo models for those monster shad on the big rivers.
Dialing in the ideal trap dimensions really maximizes your catch potential. Those crafty minnows don’t stand a chance once the trap is customized to match their bodies and behavior!
Heavy Duty Materials = Long Life
Let’s face it, traps take some abuse out there between currents, debris, UV rays, and careless handling. That’s why Eagle Claw uses only the toughest metals, coatings, and components.
Their galvanized steel wire is crazy strong and resists corrosion like a boss. The vinyl coatings add further protection and provide a smooth, non-threatening surface for minnows to check out.
Quick Collapse System
Their collapsible trap models feature a slick quick collapse system so you can flatten them down in seconds. No more wrestling with tangled wire frames when it’s time to pack up and hit the road! Just flip the release and it folds right down for compact storage.
I’m also a big fan of the swivel attachment ring. It prevents line from binding up during trap retrieval. Just another thoughtful detail that makes a difference.
Bonus: Double Doors
One cool optional feature I recommend is the double door entrance on certain Eagle Claw models. This gives minnows two funnels to swim into which brings in even more bait. I’ve tested the double vs single door designs and consistently catch bigger hauls with the twin entrances.
Deadly Dual Funnels
Here’s a hot tip for you. On most collapsible Eagle Claw traps you can buy additional funnels and make them dual entrance. This converts the trap into a double door minnow assassin.
With two funnels in play, from both sides, way more bait swims inside. I call this mod my “greed” upgrade because it absolutely decimates local minnow populations, in a good way!
Dial-a-Depth
No minnow will be safe from the Eagle Claw’s ability to fine tune depth. Models like the Quick Set allow you to adjust depth from 2 feet all the way to 6 feet, in precise intervals. Set to the exact layer baitfish are holding that day.
Being able to dial-in specific depths is critical to pinpoint where active minnows are roaming. And means you aren’t wasting time with traps set too shallow or deep.
Well friend, that covers the tool’s best attributes for putting prey in the bucket. Next let’s get into how to use these traps to catch your weight in whiskerfish!
Types – Floating, sinking, collapsible options
Alright folks, now that you know why Eagle Claw traps are so awesome, let’s get into the nitty gritty of which type is best for your needs. They offer a slew of models including floating, weighted, and collapsible designs. I’ll overview the pros and cons of each so you can decide which trap fits your particular waters.
Floating Traps
If you’re fishing areas with current or wave action, a floating minnow trap is the way to go. These traps suspend right under the surface, which does a few helpful things. One, it keeps them up and out of snaggy bottom structure. Two, the surface action concentrates baitfish activity.
Models like the Backpack Floating Trap have foam fillings that create neutral buoyancy. You don’t have to mess with extra weights and floats when setting. Just toss ’em out and the surface design keeps them in the strike zone!
Weighted Traps
On the other end, weighted traps sink down to hold bottom in calmer waters. I prefer these weighted wire traps when fishing lakes, ponds, and slack water rivers. The models made for bottom fishing have an extra heavy frame to keep them anchored.
Weighted traps also give you better depth control to target specific layers. Add or remove weights during rigging to get your trap down to the exact level baitfish are cruising. Versatility is the name of the game here.
Quick Set Collapsible
If storage space is an issue, or you need to pack traps way back into remote areas, collapsible models can’t be beat. As the name says, these collapse down with the flip of a release mechanism. I’m talking flat as a pancake for slipping into your tackle backpack.
Don’t let these compact designs fool you though. They still have all the fish-catching attributes of standard traps – strong wire frame, smooth funnels, bait retention. But way easier transportation and break down when not in use.
Match The Habitat
Bottom line is to match the trap style with the type of habitat you’re fishing. Slow, shallow areas with little current are perfect for those lightweight collapsible traps. Fast water calls for heavy steel frames that won’t budge. And big waves are ideal for those floating setups.
Plan to use a variety of trap designs and keep what works best in each spot. Then break out that particular trap whenever you return to that special honey hole!
Tips For Quick Set Models
The collapsible Quick Set traps do take some extra attention to use properly. Because of the flexible frame, they’ll tangle up if you don’t rig them right. Here are some tips for avoiding a mess.
First, make long casts away from the boat or shore to give the trap room to fully open. Closer casts don’t give them time to extend. Next, let the trap sink a good 5 feet before tightening the line.
Retrieve them very slowly to keep the wire frame fully extended. And when breaking down, be sure to hold the base ring steady so it collapses inward without binding up.
Customize With Bait Boxes
Here’s a cool accessory item I recommend – add-on bait boxes. These little mesh cylinders secure to the trap frame and hold extra chum inside to really pull in schools of minnows.
Fill the boxes with bread crumbs, soybean meal, or your favorite catfish dough bait. The scent plume attracts minnows from far and wide. More scent equals more bait in the bucket.
Safety Note
While all traps can be safe with proper use, collapsible models need extra precautions. The smaller mesh openings pose an enhanced risk of finger entrapment.
I recommend using long needle nose pliers to transfer minnows from the storage area of collapsible traps. And keep these specialty traps away from small children due to finger risks.
Alright folks, next up we’ll dive into how to select the ideal trap size for the minnows in your local waters…
Size – How to choose the right trap size
Hello again fellow anglers! Now that you know the pros and cons of each Eagle Claw trap style, it’s time to look at picking the right size. Selecting a trap suited for the minnows in your local waters makes all the difference. Too small and bait can’t enter. Too large and they’ll be able to escape. Let’s dive into how to dial-in the perfect dimensions.
Match The Baitfish
The most important factor in determining trap size is the length of the primary baitfish species in your area. For example, if you’re targeting 1-3 inch mosquito-sized minnows, go with a small folding trap. For 4-6 inch shiners, choose a medium model.
And when trying to trap bull minnows, shad, or other jumbo bait, only the oversized traps will do. Take a look at the minnows in your hands to determine average size. This gives a good starting point for trap selection.
Consider The Mesh Size
Mesh dimensions play a big role in trap effectiveness. The general rule is to use mesh openings small enough so bait can enter frontwards but not turn around and exit. For minnows under 2 inches, 1/8 to 1/4 inch mesh does the trick.
Between 3-5 inches, a 1/4 to 1/2 inch mesh works well. And jumbo 5+ inch minnows require larger 1/2 to 1 inch openings. Dialing in the mesh size prevents clever minnow escapes.
Keep It Compact
When in doubt, choose the most compact trap size that minnows can still enter. Traps with larger capacity than needed allow bait to spread out, making it tough to harvest them quickly. Plus oversized traps are harder to transport and store.
Pick what just barely contains the minnows in an easy to manage dense swarm. This lets you scoop or net them quickly with less escapees. Oversized traps can make bait retrieval a pain!
Folding Traps For Small Fry
For the little guys like mosquito minnows under 2 inches, I really like the folding and collapsible traps. Their small mesh openings prevent tiny escapes. And the folding models have built-in bait buckets that concentrate pint-sized minnows for fast harvest.
The popular Backpack Trap has done me right for years catching small bait. It may be compact, but it holds hundreds of micro minnows in its basket!
Add Funnel Extensions
Here’s a cool trick for getting finicky minnows to enter smaller traps. Add plastic funnel extensions that provide a wider target. This funnel attachment replaces the existing funnel with a longer, flared opening.
Funnel extensions convince spooky minnows that they have ample room to enter the trap. But thanks to the tapered end, they still can’t turn around once inside. Sneaky little mod!
Err On The Small Side
When deciding between a smaller or larger size, I recommend starting with the smaller trap. You can always scale up if needed. But it’s way easier to manage an undersized trap than trying to herd minnows in an oversized model.
Set your first baited trap for an hour and see what you catch. If it’s loaded with room to spare, size up on the next set. Just takes some trial and error to hone in on that sweet spot!
Consider The Species
Trap size can also depend on what fish you’re targeting. Panfish like crappie and bluegill will hit smaller minnows. So a compact trap works great and stores easily.
But for channel cats, flatheads, and big gamefish, target larger bait with bigger traps. Match the trap capability with the desired prey fish behavior and diet.
Well folks, now that you know how to select the perfect trap, let’s talk about…
Funnel Design – Importance of one-way funnels
Howdy folks! Now that we’ve covered trap types and sizes, let’s take a close look at funnel design. This is one of the most critical components that makes the Eagle Claw so effective. The ingenious one-way funnel system ushers minnows in but severely limits exits. I’ll overview why this system puts so much bait in your bucket.
Smooth On The Way In
The tapered, flared funnel opening makes entering the trap a breeze for minnows. The wide front gently narrows as it penetrates the trap interior. This smooth transition prevents minnows from spooking or turning back.
Some inferior trap funnels have a restrictive harsh lip that blocks prey entry. Not so with Eagle Claw’s perfectly engineered entrances.
No Escape!
But that easy entrance quickly becomes an inescapable prison once minnows pass through to the other side. The funnel significantly narrows to a one-way throat. This tight opening makes it extremely difficult for minnows to turn around and exit against the flow.
Leading in with the tapered end guiding them, prey move through the funnel quickly and without hesitation. But trying to push back through that narrow slit just doesn’t work well. Ingenious!
Strategic Funnel Placement
Eagle Claw carefully designed the funnel location to optimize performance. On most models, the funnel sits on the bottom frame axis. This strategic placement leverages gravity and downward swimming tendency to usher minnows inside.
Funnels positioned midway up traps work fine. But the low positioning takes advantage of natural minnow behavior for increased efficiency.
Dual Funnel Power-Up
Some Eagle Claw traps feature a lethal double funnel design with entrances on both sides. This dual intake absolutely slays the minnows! Schools swarm through both funnels into the inescapable wire cage.
The extra opening doubles the bait gathering power. When I need a huge minnow payload, I always turn to these double-door traps. Absolutely devastating!
Flared Opening = No Snags
The flared circular funnel opening prevents minnows from catching fins or snagging skin upon entry. Inferior funnel openings with harsh edges can snag and injure minnows.
Hurt minnows scatter and warn others away. But Eagle Claw’s refined no-snag design keeps bait calm and curious. This leads even finicky minnows right into the trap unharmed.
Funnel Maintenance
Over time, funnels take abuse from minnow strikes, debris, and corrosion. So inspect them closely each season for damage. Look for sharp bends, mesh closure, and rust buildup.
Carefully bend any smashed portions back into shape with pliers. Sand rusted areas and spray with a flexible rubber coating. And clear any clogged mesh with a brush.
Modify For Speed
Fast river current can limit trap effectiveness when bait has trouble entering. Speed up minnow entry with a simple funnel mod. Use wire cutters to trim 1/4 inch off the tapered opening. This widens the front for easier upstream swims.
Just don’t trim too much or minnows may be able to exit! This mod really helps in swift waters when you need every baitfish you can catch.
Well folks, now that you know the secrets of funnel design mastery, let’s discuss optimal bait choice…
Materials – Galvanized wire, vinyl coated, pros and cons
Howdy folks! Now that we’ve covered trap design, let’s look at materials. The specific metals and coatings used in Eagle Claw’s construction makes them ultra effective and durable. I’ll overview the advantages of galvanized wire and vinyl coatings so you know why they outlast and outfish most competitors.
Galvanized Wire Strength

The galvanized steel wire that forms the trap frame is super strong and corrosion resistant. It’s coated in a layer of zinc that protects against rust far longer than regular steel.
This heavy gauge wire is reinforced on high stress points like the funnel openings. You can feel the quality just by handling Eagle Claw traps.
Less rugged traps made from flimsy wire just don’t hold up over time. The galvanized steel construction withstands years of underwater use and abuse.
Vinyl Coating Slickness
The vinyl coating applied over the galvanized wire frame serves some key purposes. First, it provides a smooth surface that won’t scrape and injure minnows during entry.
Second, it insulates the wire against electrical current. This keeps minnows calm. Bare metal can create current that spooks baitfish.
Finally, it seals out moisture to prevent corrosion. The vinyl adds another layer of protection on top of the galvanized plating.
No Sharp Edges

Eagle Claw takes extra care to remove any sharp frame edges or wire burrs during manufacturing. This prevents cuts on both minnows and anglers.
Sharp trap edges also increase likelihood of snags during use. The smooth construction avoids getting hung up on rocks, branches, or other structure.
Reinforced Connection Points
Critical junction points where wire panels connect together are reinforced for longevity. These high stress areas at the funnel, binding rings, and base are common failure points.
Eagle Claw utilizes heavier gauge wire and extra fasteners on any connector. This prevents loose attachments or breakage after years of use.
Rust-Resistant Hardware
Another common pitfall of cheaper traps is rusty hardware that fails. The fasteners, rings, latches, and clips on Eagle Claw models all utilize rust-resistant construction.
Stainless steel and aluminum components prevent seizing up, freezing, cracking, or corroding like lower grade hardware.
Enhanced Visibility
Many Eagle Claw minnow traps feature hi-viz yellow vinyl coating on upper frames. This bright color makes the trap far more visible in murky water. No more losing traps to poor underwater visibility!
The yellow also deterrents birds from landing on the traps. Terns and cormorants love to perch on hard to see traps and steal bait.
Well friend, now that you know the advantages of Eagle Claw’s bulletproof construction, let’s discuss optimal bait rigging…
Bait – Best baits to use for different fish species
Howdy folks! Now that we’ve covered trap construction, let’s look at baiting. Having the right bait for your target species is key to filling traps with lively minnows. I’ll overview proven bait options for catfish, panfish, trout, and more. Use these tips to get the absolute most action out of your Eagle Claw minnow traps.
Bread For All-Around Action
Plain old white bread is tough to beat when you want a universally appealing bait. The carbs clouds from bread bring in all species of minnows and small panfish effectively. Just knead some slices into dough balls.
Tip: Let the dough harden so it stays on the hook longer. And consider adding some vanilla or anise extract for more attraction.
Meal For Channel Cats
Catfish go nuts for the scent of soybean meal. This inexpensive chum draws baitfish and bottom feeders from far and wide. Simply fill mesh bait bags with dry meal.
The coarse texture also releases a steady scent trail. I like to combo soy meal with a few strips of chicken liver for a catfish attracting smell bomb!
Cheese For Crappie and Bluegill
Shredded cheese like cheddar or monterey jack works great for targeting panfish. Mold shredded cheese with bread crumbs to form balls that sink slowly.
The oil in the cheese produces scent that drives crappie and bluegill wild. Go with stronger flavors like parmesan for extra potency.
Mealworms For Finicky Trout
When trying to trap trout bait, mealworms are tops. Trout have poor vision but terrific scent detection. A handful of mealworms packed into mesh bait bags really gets their attention.
Make sure to use live worms instead of dead ones, which don’t emit the chemical attractants nearly as well.
Liver For Bottom Feeders
Catfish and carp can’t resist the aroma of liver. This works great alone or combined with other chum. Chicken, beef, and hog liver all produce excellent results.
Allow liver to rot for 2-3 days under refrigeration to really amplify the stink. Just secure small chunks onto the bait hook.
Soybeans For Big Bait
Whole soybeans make a great bait choice when you need to attact larger minnows and shad. Use a needle and thread to string several soybeans onto your bait line.
You can also mash cooked beans into a paste dough ball. The key is letting the oil slowly diffuse to create a long scent trail.
Tip: Replenish Bait
Always rebait traps each time you check them. Used bait produces minimal scent. I like to premix bait balls at home so I can quickly recharge each trap.
Having fresh bait ready to go means your traps continue slaying the minnows on every deployment. Never underestimate bait power!
Well folks, now that you know the most powerful minnow attracting baits, let’s look at optimal trap placement strategy…
Technique – Where to set, how to rig traps, depth tips
Hello again fellow anglers! Now that you’ve got the right bait picked out, let’s dive into trap setup and rigging. Proper technique is what takes these ingenious tools to the next level. I’ll share my best tips for trap placement, rigging, depth control, and retrieval to fill your live wells with lively minnows.
Current Seams
Focus on current seams where fast water meets slow water. These edges provide both food delivery and ambush points for minnows. Place traps just downstream of the seam so scent flows into stagnant water.
Rocky points and island tips create prime seams. Look for eddies, riffles, and soft bubbles indicating mixing water.
Structure Shelves
The dropoff edge where shallow structure gives way to deeper water makes a killer spot. Minnows cruise these contours hunting food flushed by waves and flow.
Target shelves around weedbeds, humps, and points. Pay close attention to contour changes when scouting for locations.
Baitfish Habitat
Minnows seek cover from predators in dense vegetation, fallen timber, boat docks, and other structure. Placing traps adjacent to or downstream of cover concentrates roaming schools.
If no cover exists, create it with brush piles to draw in nervous baitfish. Focus on ambush zones near cover types.
Avoid Snags
When setting traps, ensure the area is free of snag-hazards like trees, stumps, rocks, and brush. Use rope floats to suspend traps above trouble.
Snagged traps often break free and disappear. Poor bottom also limits bait entry and retention. Find nice clean areas.
Funnel Positioning
Orient traps so the funnel openings face downstream or into waves. This allows scent to flow out attracting bait. Face them downstream in current or into the prevailing winds.
Funnels aimed away from flow or wave action diffuse scent in the wrong direction. Don’t let your bait broadcast go to waste.
Depth Control
Use sliding foam floats, split shot, or rubber core leads to adjust depth. Target just under the surface in shallow areas. Go 15 feet or deeper over submerged flats.
Watch your fish finder to see baitfish depth. Position traps slightly below schools for best action. Vary depths until you optimize.
Rebait Often
Every time you check traps, replace the bait. Old bait lacks the scent power to keep minnows swarming. Always have fresh bait ready for each redeployment.
Don’t let traps fish with worn out bait. Keep that chum smell trail going strong by frequently recharging each trap.
Quick Retrieval
Pull traps quickly once raised to the surface. This prevents minnow escape through the funnels while handling. Use long-handled nets to swiftly transfer bait.
Letting traps dangle below the surface loses shy minnows out the doors. Keep them moving from water to bucket!
Well friend, now you know how to set these traps for ultimate effectiveness. Next let’s examine the many fish species you can catch…
Target Species – Catfish, bluegill, crappie, bass, more
Greetings anglers! Now that we’ve covered trap setup, let’s look at what fish species you can catch with these lively minnows. While catfish tend to get all the attention, just about every gamefish is vulnerable to a hooked minnow. I’ll overview top targets and how to tailor traps for each.
Channel Cats
No surprise here, channel cats are a prime target for minnow trapping. The scent of minnows drives channels into a frenzy. Use small hooks and light line to hook minnows through the lips.
Target shallow muddy flats adjacent to deeper drop-offs that cats patrol. Keep bait lively with frequent water changes.
Bluegills
Aggressive bluegills can’t refuse a frisky minnow that invades their territory. Use tiny mosquito minnows around shoreline cover and docks. Float a small bobber to keep the bait shallow.
Pay close attention when the bobber darts and dances to detect light bluegill bites. Set the hook immediately at any movement.
Crappie
Slabs fall for lively minnows around submerged brush and standing timber. Add a small split shot to descent just below structure. Use longer light wire hooks for solid jaw hook sets.
Try tipping the minnow hook with a small foam float. This allows you to slowly raise and lower bait through different depths.
Largemouth Bass
Don’t overlook bass when using minnow traps. They actively feed on baitfish near grass lines, docks, and weed edges. Make long casts and slowly retrieve minnows along structure.
Pause the retrieval when possible to let the minnow hover in place. The struggling bait triggers savage strikes!
Trout
Hungry trout inhale small minnows drifted along seams and washed downstream near their lies. Use ultra clear line, small Aberdeen hooks, and avoid splashing.
Keep a low profile and move stealthily when bait fishing for spooky trout. Make natural presentations.
Perch
Aggressive yellow perch swarm on minnow schools. Use a tiny float and small snelled hook to present minnows near rock and wood cover in lakes.
Keep the bait moving slowly and erratically to call in roving perch. Their schooling nature means where there’s one, there’s many more nearby.
Muskie
Even toothy critters like muskie attack minnows near cabbage and dropoffs. Use wire leaders on large circle hooks and set the hook immediately.
Target areas that show signs of muskie like surface disturbances or followers. Their huge mouths inhale big minnows!
Well folks, now you know how to catch all the most popular gamefish with minnows. Next we’ll look at when these traps produce best…
When to Use – Spring through fall prime seasons
Hello again fellow anglers! Now that you know what fish are hungry for minnows, let’s examine when these traps are at their peak effectiveness. While minnows can be caught year round, there are certainly prime seasons to fill traps. Here’s an overview of the best times by species.
Early Spring
Early spring as water temperatures climb into the 50s is a fantastic period. Lethargic baitfish become active but aren’t yet spawning or enjoying much food abundance. Traps draw them in.
Focus on warmer, shallower areas first. Move deeper as the water slowly warms into the season. Spring rain boosts streams.
Post-Spawn
Just after fish spawn in late spring, they turn voracious to regain lost body stores. Traps produce nonstop action through early summer as gamefish feed heavily.
Productive areas are spawning sites like shallow coves that now hold hungry resident fish. Take advantage of post-spawn greed.
Heat Of Summer
Many anglers overlook summer trapping, but it remains productive especially early and late in the day. Look for the shad spawn during this period.
Focus efforts near deep baitfish holding water that fish move onto during low light periods. Just avoid midday heat.
Fall Turnover
As waters cool rapidly in fall and turnover occurs, fishing heats back up. Trap along transitional zones where baitfish migrate between deep and shallow.
Creeks dumping into lakes, steep channel ledges, and submerged islands are prime fall spots. Move around until you locate roving bait schools.
Winter? Yes!
Even in frigid conditions, minnow traps still produce. Lower overall fish metabolism means bait stays lively longer in traps. Target open water areas warmed by sunlight.
Deploy multiple small traps to cover more ground. Use dark colors for added solar warming. Be extremely cautious of thin ice!
Seasonal Migrations
Learn seasonal patterns in your waters as baitfish migrate from shallow to deep or stream to lake and back. Move traps along these pathways to intercept schools during transitions.
Mark productive trap locations each season on your maps. Over time you’ll learn the seasonal minnow highways.
Alright folks, now that you know when these traps do damage, let’s look at critical storage factors…
Storage – Keeping traps safe during off season

Hello again fellow anglers! Now that we’ve covered when these traps produce, let’s look at proper storage during idle times. Keeping traps in peak condition while not in use saves money and prevents replacement. I’ll share my tips for off-season trap care.
Allow Thorough Drying
Before any long-term storage, traps must dry fully. Bacteria and corrosion continue damaging wet traps. Hang traps in garage or basement areas until bone dry.
Drying also removes foul odors that attract insects and rodents during storage. Let air circulation work its magic.
Clean And Deodorize
Traps collect all kinds of gunk during deployment – algae, muck, and general funk. Use a strong garden hose stream to blast off debris before drying.
For severe odors, soak traps in a five gallon bucket with water and baking soda or lemon juice. This freshens things up.
Prevent Corrosion
Spray trap wire with Boeshield T-9 or another corrosion inhibitor. This creeps into crevices and displaces moisture. Reapply if any rust appears.
Avoid latex/oil based paints that seal moisture underneath leading to bubbling and peeling. Let surface treatments cure fully.
Inspect For Damage
Look over the entire trap closely for signs of damage before storage. File down any burrs or sharp protrusions.
Carefully bend wire sections back into shape if needed. Spot prime paint chips. Replace damaged components.
Collapsible Trap Care
Fold down collapsible models before storing. But loosen tension bars slightly so wire isn’t under constant pressure when collapsed.
This prevents the spring steel from taking a set bend. Lightly grease spring tension components.
Rodent Protection
Mice and other critters are attracted to traps during storage. Deter them by placing dryer sheets or moth balls in the trap basket area.
Traps stored in garages are especially vulnerable. Keep them elevated off the floor if possible.
Sheltered Storage
Avoid storing traps long-term where they’ll be exposed to rain, snow, sun, and other elements. Keep them in a shed or basement instead.
The sheltered area should also prevent condensation which promotes mold and corrosion. Keep things clean and dry.
Well friend, now that you know how to care for traps during idle time, let’s get back to fish catching action…
Safety – Avoiding snags and tangling hazards
Greetings fellow anglers! Now that we’ve covered effective use, let’s look at some safety factors. While most traps are secure when used properly, snags and tangles pose risks. With sound judgment you can avoid problems. I’ll share tips to prevent snags, entanglements, and trap loss for smooth operation.
Survey Deployment Areas
Before setting any traps, closely inspect the target area. Be on high alert for submerged trees, stumps, brush, rocks, or old fishing lines that could snag.
Probe questionable areas with a stick or fish finder. Hang traps using a float if debris is suspected. Prevention is key.
Avoid Heavy Current
Fast moving current increases chances of traps binding on structure and breaking free. Stick with moderate current flows under 1-2 mph for best control.
If fishing heavier flow, use weighted traps and test bottom for snags first. Current above 2.5 mph demands caution.
Watch Depth Changes
Check your fish finder and depth landmark references regularly as current or wind may drag traps into different depths. Don’t allow traps to drift into dangerous unknown territory.
Monitor your line angle and retrieve traps immediately if depth changes substantially. Let out additional anchor line if needed.
Quick Release Binders
Use plastic quick release binder clips instead of permanent attachment methods. This allows trapped line to pop free instead of pulling traps into snags.
Attach a length of old line to the binder that will break. If snagged, pull hard to release the clip and avoid trap loss.
Knots Weaken Line
Avoid using knots to connect the trap tether that could weaken line strength. Use snell knots tied to swivels and hooks instead of main line.
Knotted lines often break prematurely during snag incidents. Go knotless from trap to swivel for maximum strength.
Watch Hand Position
When lowering and retrieving traps, keep hands well clear of the wire openings. An accidental finger poke is extremely painful!
Wear puncture resistant gloves when handling traps. Never grab the cage portion – only hold it by the frame or rope.
Educate Kids
Make sure children understand the dangers of trap openings before allowing them to handle. Always supervise minors near deployed traps.
Stress never putting fingers inside the cage section. Help them learn how to properly transport and deploy traps safe and snag-free!
Well folks, now that you know how to avoid potential pitfalls, let’s look at critical maintenance procedures…
Maintenance – Rust prevention and wire repairs
Greetings fellow anglers! In this section, let’s look at critical maintenance procedures to preserve trap performance. Properly caring for traps prevents premature rust, damage, and lost fish-catching mojo. Use these tips to keep traps working like new.
Rinse After Use
Never let traps sit wet between trips. Thoroughly rinse with freshwater after each outing to remove algae, silt, and fish slime. These speed corrosion.
I like to blast traps with a high-pressure nozzle to penetrate all crevices. A quick rinse prevents long-term damage.
Touch Up Paint Chips
Small vinyl paint chips expose the wire below to moisture and chemicals. Dab these with matching model paint to reseal.
Avoid big flaky paint buildup. Just smooth fresh paint over any nicks and scratches.
Lube Hinges
On collapsible and multi-piece traps, regularly lube hinge points with WD40 or marine grease. This prevents binding and wear.
Give tension springs a shot of silicon lube to maintain smooth operation. A few quick squirts keeps things moving freely.
Seal Wire Ends
Exposed wire ends allow moisture inside frames causing oxidation and rust rot. File any sharp ends smooth and dab with flexible sealant.
On galvanized wire, zinc-enriched cold galvanizing compound seals cut ends against corrosion. Dries fast too.
Straighten Bends
Step on traps or encounter structure and things get bent out of shape. Use large pliers or a crescent wrench to gently re-align wire elements.
Return bends to as close to original form as possible without weakening metal. Don’t make sharp repeated bends.
Remove Surface Rust
Penetrating rust inhibitors work best on clean metal. Lightly sand away any surface oxidation using fine grit sandpaper.
Clean bare metal shines through. Then spray on rust converter chemical treatment and top coat.
Replace Damaged Sections
If certain wire sections show excessive damage or wear, just replace them. Measure new wire precisely and bend to fit.
Use pliers to open frame twists and insert fresh wire. Snugly re-attach and seal ends. Good as new!
Well friend, now that you can keep traps in peak form, let’s examine prime locations to place them…
Top Locations – Rivers, lakes, ponds, channels, bridges
Hello again fellow anglers! Now that you know trap care, let’s examine prime locations to maximize catches. While no single spot works universally, there are key areas to focus efforts. I’ll overview proven minnow zones on rivers, lakes, ponds, channels, and around bridges.
Inside River Bends
The inside bend of a meandering river collects baitfish like no other. As current deflects deeper here, minnows tuck into calm slack water. Target just off eddies along the steep bank slope.
Logs and boulders breaking current also hold schools here. Let more traps work this bait-rich curve.
Below Riffles
After tumbling through rocky riffles, exhausted minnows rest in the deeper pool below. Take advantage by setting traps directly downstream of whitewater.
The churning rapids kick food items loose too, so this area becomes a natural buffet zone bait can’t refuse.
Channel Swing Banks
Boat channels winding through shallow lakes offer prime habitat along swing banks. The dredged channel creates a defined drop-off minnows follow.
Focus traps along the channel corners and dog-legs which provide extra cover. Fish both margins of the channel.
Weedline Dropoffs
Lakes and ponds with defined weedlines dropping into deeper water are minnow magnets. Deploy traps suspended slightly over the weed tops.
Areas where grass meets rocky or sandy bottom are best. Adjust depth to stay just above the greenery.
Bridge Pier Shadows
Bridge piers bellied-out by current attract minnows to the downstream shadow zone. Position traps 1-2 feet off the pier in the slack water behind it.
Let the pier disrupt current and baitfish naturally tuck into its protective void. Piers on channel bends are super.
Use Multiple Locations
Don’t rely on a single spot – set traps across a variety of sweet zones. Different terrain often holds different minnow species.
Hit open water, shallows, mid-depth contours, cover, and current zones. Spread the love!
Well folks, now you know where these traps flat out slam the minnows. Go unleash their fish-catching fury upon your favorite waters!
Conclusion – Review of key points on effective trapping
Whew, we’ve covered a ton of ground on how to master the Eagle Claw minnow trap. Let’s do a quick review of the key points so you can start trapping hordes of lively bait like a seasoned pro.
First, understand why these traps are so effective. The ingenious one-way funnel design lets prey enter easily but prevents escape. Durable galvanized construction withstands constant use. And collapsible models provide unmatched portability and storage.
Second, match the trap type and size to your target species and local waters. Floating, weighted, and collapsible traps all shine in different habitats. And dialing in dimensions and mesh means more minnows in the bucket.
Third, bait selection and placement is critical. Pick proven minnow chum like bread, meal, or cheese. And focus traps along current seams, dropoffs, channels, and structure where baitfish congregate.
Fourth, take safety seriously. Survey areas thoroughly before deploying. Watch your hands around openings. And use fasteners designed to prevent snags. With sound judgement, these traps will provide years of productive service.
Fifth, maintain your investment by preventing rust, repairing any damage promptly, and storing properly during idle periods. A finely tuned trap catches more bait every outing.
If you learn nothing else, just remember this: rebait religiously. Freshen traps each and every check. The constant scent flow pulls in new schools with each deployment.
Now you’ve got the complete game plan to start trapping crazy amounts of minnows anytime, anywhere. Use it to keep those rods bent. I’m off to soak more cats – tight lines out there!


