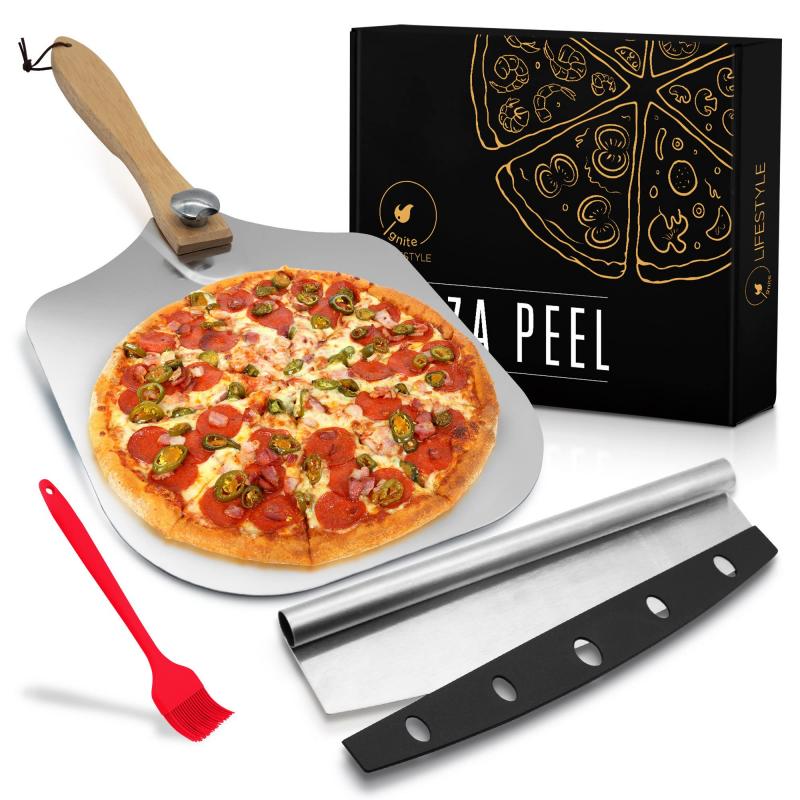
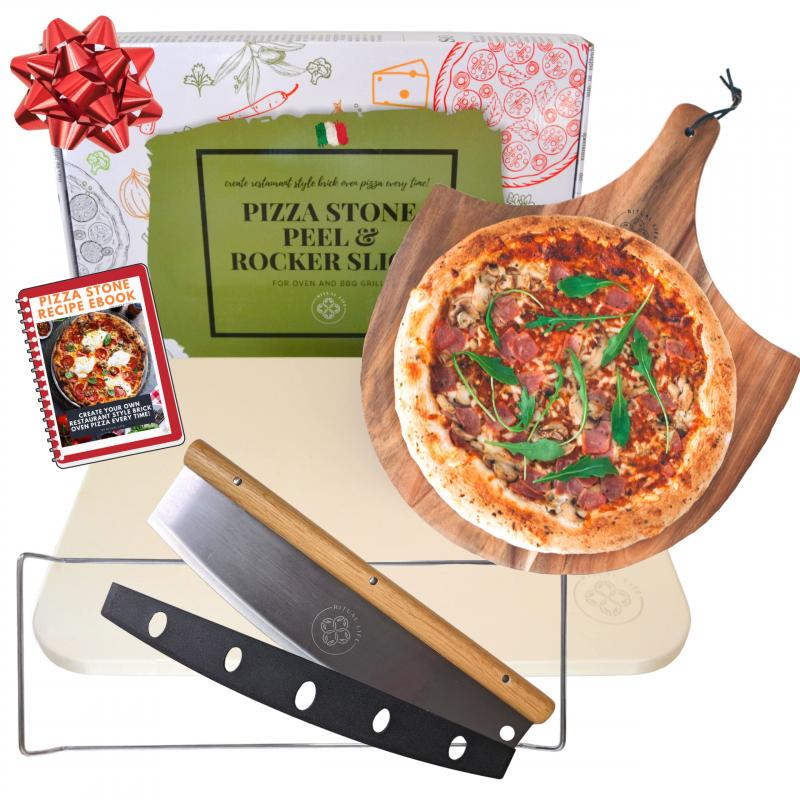
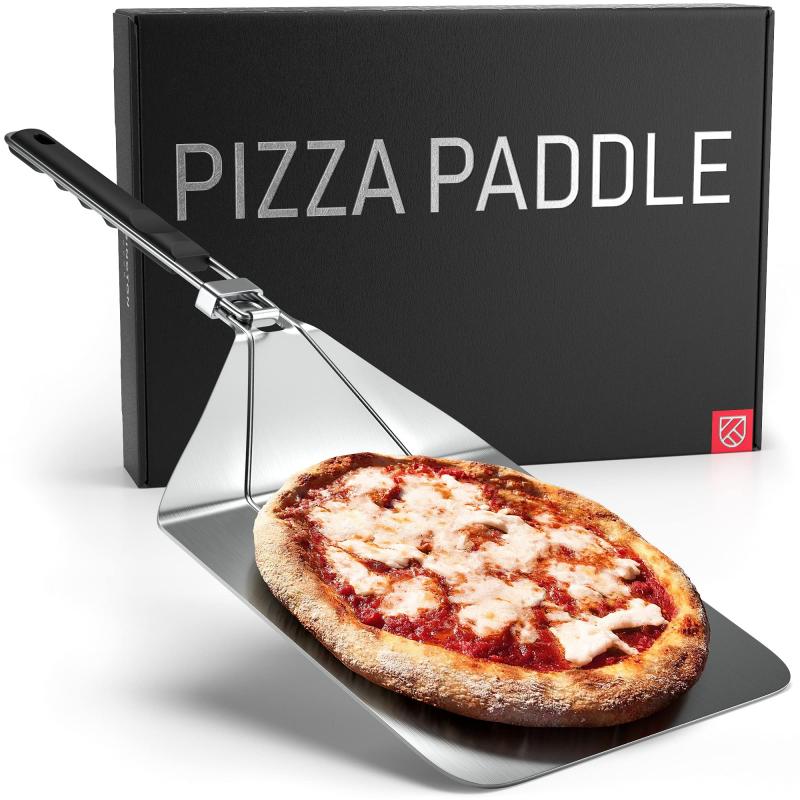
Choose the Right Pizza Peel for Your Oven and Pizza Size
So you want to make pizza like a pro right in your own kitchen? Having the right tools can make all the difference when it comes to getting that perfect, crispy crust we all crave. One of the most important tools for impressive homemade pizza is a quality pizza peel.
A pizza peel is used to transfer your unbaked pizza onto the extremely hot surface of your pizza oven. Choosing the right pizza peel ensures a smooth transfer of your pizza so the precious toppings stay put instead of sliding right onto the oven floor. The right peel also allows you to maneuver the pizza for even cooking and then remove it once baked to crusty perfection.
Here are some tips for choosing the best pizza peel for your needs:
Consider the Size
Pizza peels come in a range of sizes. Think about the size of the pizzas you typically make at home. A 12-inch peel is sufficient for smaller 6 to 10-inch pizzas. Larger 14 or 16-inch peels allow you to cook bigger 12 to 16-inch pizzas. You want a peel that is at least 2 inches wider than the largest pizza you plan to make.
Material Matters
Wood and metal are the most common pizza peel materials. Wood tends to be a bit thicker but is perfect for absorbing excess flour so your pizza doesn’t stick. Metal peels are thinner with a sharper edge that can slide under the pizza easier but require a bit more flour. Aluminum is affordable but can warp over time, while stainless steel offers durability.
Get the Right Shape
Pizza peel shapes typically include rectangular, round, and perforated. Rectangular peels allow you to get into the corners of your pizza easier. Round peels mimic the shape of a round pizza. Perforated peels have holes that allow excess flour to fall through so your pizza doesn’t become dry or stick.
Consider Weight and Balance
A peel should have some heft to smoothly transfer the pizza but not be overly heavy where it becomes tiring to use. Balance is also key – you want a peel that feels comfortable in your hand. The handle shape can affect overall balance as well.
Mind the Slope
The slope of the peel head where the pizza sits is important for easy back and forth sliding. A gentler slope allows you to regulate how fast the pizza slides off the peel and onto the oven surface.
Get the Right Finish
The texture of the peel surface impacts how much flour you need. A smoother sanded or polished peel needs less, while a more porous peel requires a bit more flour so the pizza doesn’t stick. Less flour is ideal to prevent a dried out crust.
Once you select the right size, shape, material, weight, balance, slope, and finish for your needs and pizza oven setup, it’s time to put that peel to work!
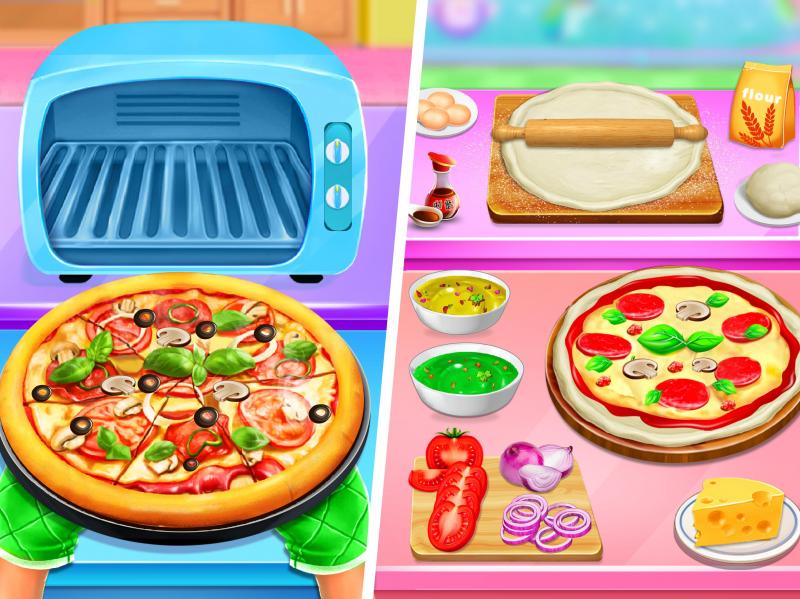
Ready to Throw Pizza Perfection?: 15 Must-Know Camp Chef Pizza Peel Tips for Creating the Perfect Crust at Home
Camp Chef makes a variety of excellent quality pizza peels that allow home chefs to make restaurant-worthy pizzas right from their own oven. From classic wooden peels to innovative perforated metal models, Camp Chef peels provide the tools you need for pizza success.
Here are 15 tips for using Camp Chef peels to create the perfect pizza crust:
1. Choose your Peel Wisely
Consider the size of your typical pizzas and oven dimensions when selecting a Camp Chef peel. Their wooden peels come in 12, 14, and 16 inch sizes with tapered fronts to easily slide under pizzas. The perforated metal models have holes to allow excess flour to fall through.
2. Prepare Your Work Surface
Lightly flour your work surface – too much will dry out the crust. You can also use semolina flour for extra crispiness. Make sure to have all your toppings prepped and ready to go before shaping the pizza dough.
3. Shape Dough Evenly
Use your hands or a rolling pin to shape dough into a uniform circle or square. Thinner crusts cook faster but may dry out quicker, while thicker crusts take longer to bake fully but stay moist and chewy.
4. Give the Peel a Light Dusting
A light coating of flour or semolina on the peel ensures the shaped dough slides right off into the oven. Tap to make sure there are no wet spots where dough could stick.
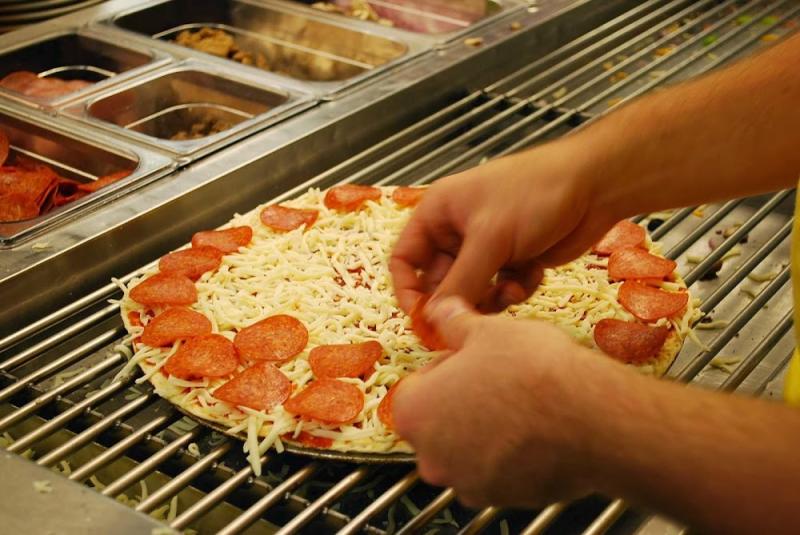
5. Top Artfully But Not Heavily
Arrange sauce and toppings attractively but don’t overdo it. Too many heavy toppings can weigh down the crust and cause it to burn or cook unevenly. Less is more!
6. Jiggle the Peel
Before sliding the pizza into the oven, gently jiggle the peel back and forth to make sure the pizza moves easily. If it sticks, carefully lift and sprinkle a bit more flour underneath.
7. Slide with a Quick Wrist Flick
In one smooth motion, quickly pull the peel sharply away from the pizza as you slide it onto the oven surface. The fast action helps prevent sticking or tearing of the dough.
8. Work Swiftly and Decisively
Open the oven and slide the pizza in swiftly and with confidence. Any hesitation could lead to sticking. Use decisive movements for the best results.
9. Rotate for Even Baking
Use the peel to rotate the pizza midway through baking to ensure even browning of the crust. Just slide it back onto the peel, turn it, and slide it back off.
10. Check Doneness before Removing
The bottom crust should be browned and the cheese fully melted and bubbly before taking the pizza out. Use the peel to lift and peek at the underside of the crust to check.
11. Get Help Lifting if Needed
For larger pizzas that are difficult to maneuver on the peel alone, get someone to help lift partially with a spatula as you slide the peel under to remove it.
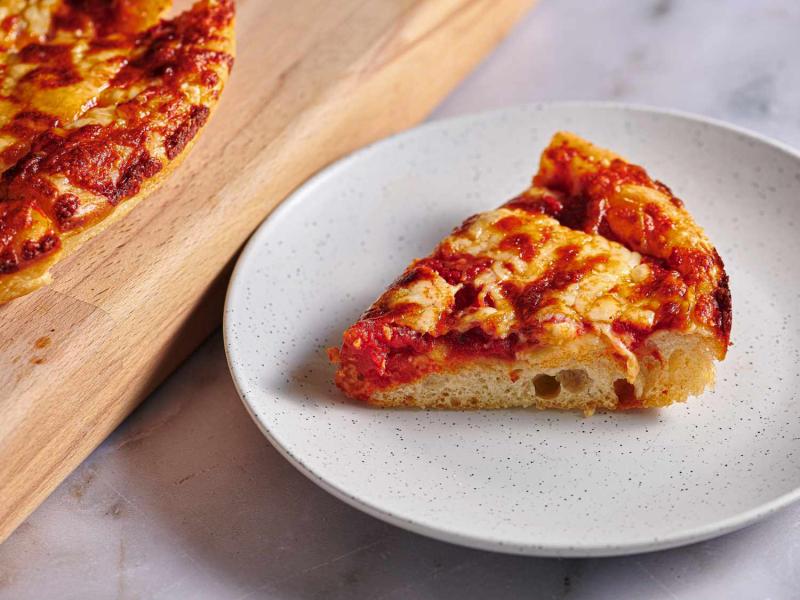
12. Let Set Before Slicing
Allow the pizza to rest 1-2 minutes before cutting so the moisture has a chance to redistribute through the crust, preventing a soggy center.
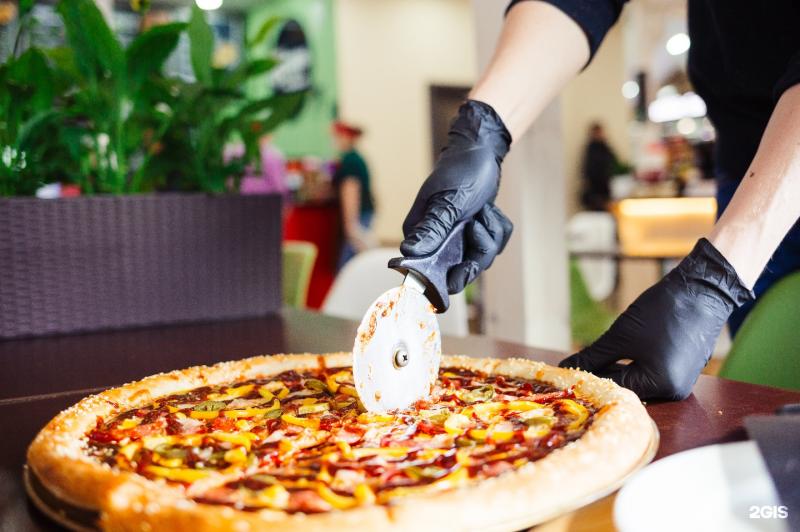
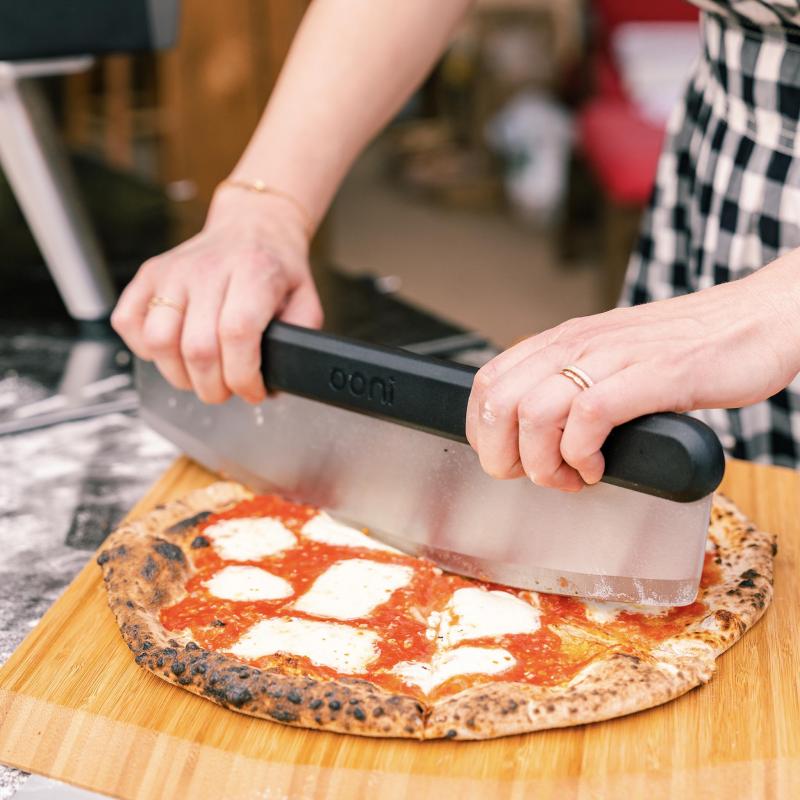
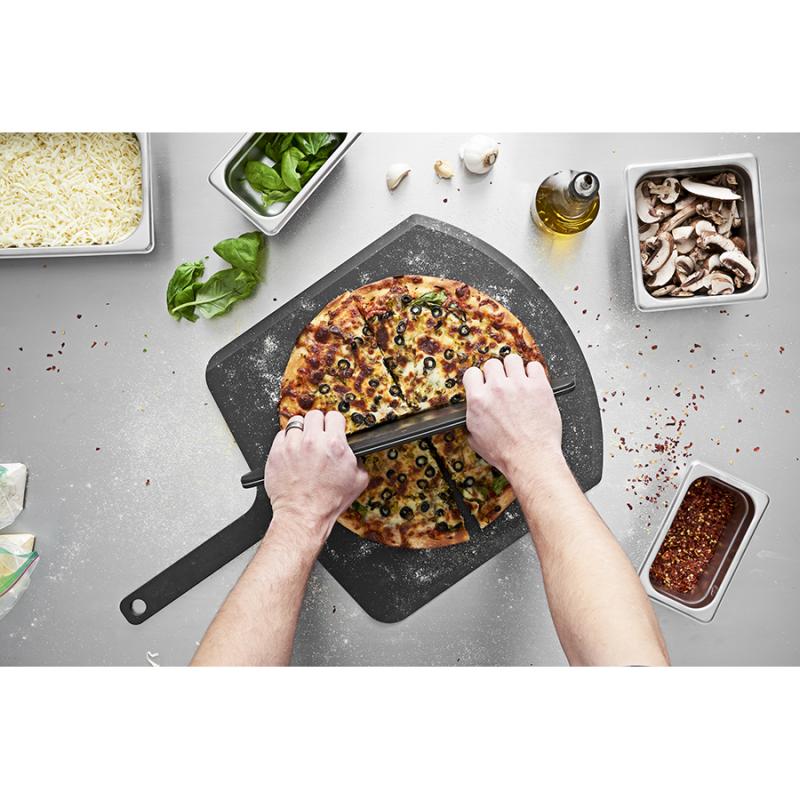
13. Chop with a Rocker or Wheel
Use a rocking pizza cutter or wheel for quick, easy slicing. Cut in triangles or squares depending on your preference.
14. Prevent Peel Sticking While Cooking
If the pizza sticks to the peel when trying to remove it, quickly sprinkle flour underneath using your fingers. Dip the peel corner in water to moisten stuck dough if needed.
15. Keep Peel Clean and Dry
Always wipe your Camp Chef peel clean after each use and make sure to dry thoroughly to prevent sticking. Periodically re-sand wooden peels to smooth out the surface.
With the right techniques and a quality Camp Chef pizza peel, you can serve up picture-perfect, crispy-crusted homemade pizzas that look and taste like they came fresh from your neighborhood pizzeria!
Why Wood and Metal Are the Best Pizza Peel Materials
When it comes to making pizza at home, having the right tools can make all the difference between a crispy, delicious pie and an undercooked mess. And one of the most important tools for transferring your lovingly prepared pizza into the oven is the pizza peel.
Pizza peels come in a variety of materials, from plastic and aluminum to wood and metal. But after plenty of trial and error in my own home pizza making endeavors, I’ve found that wood and metal peels really are the best options for getting pizzas in and out of the oven safely and easily.
Here’s why wood and metal beat out other pizza peel materials every time:
Wood’s Lightweight Yet Sturdy Design
Wood pizza peels have been used for centuries in traditional pizza making, and for good reason. Wood is lightweight, so a wooden pizza peel is easy to maneuver, even when loaded up with a 16-inch pizza. Yet it’s also sturdy enough to confidently support and slide the pizza into the oven.
Wood’s slight porousness allows it to absorb small amounts of flour or oil, helping prevent sticking. And unlike metal, wood won’t dent, bend or scratch your oven floors if you need to use a bit of extra force when launching or retrieving a pizza.
Metal’s Strength and Durability
Metal pizza peels may lack some of the lightweight feel of wood, but they make up for it with incredible strength and durability. Stainless steel and aluminum pizza peels can last for decades with proper care.
Metal peels easily support the heaviest loaded pizzas thanks to their rigid structure. Their smooth, non-porous surface also makes it easy to slide pizzas on and off without sticking. Just be sure to flour them well before use.
While metal peels can conduct more heat from the oven, high quality stainless steel handles provide insulation. And metal peels won’t warp or degrade like wood over time.
The Pizza Peel Material Matters
When launching pizza after pizza, you need a peel that allows you to confidently slide each pie into the oven. The last thing you want is the pizza sticking and tearing or ending up in a mangled pile because the peel didn’t do its job.
While you can find plastic, aluminum and even perforated metal pizza peels, I’ve found they just don’t perform nearly as well as traditional wood or sturdy stainless steel. The material really does make a difference.
Plastic peels often flex too much, especially with larger or heavily topped pizzas. They also can degrade and melt with high oven heat. Aluminum peels conduct heat, are prone to scratching and can bend out of shape surprisingly easily.
In contrast, wood and metal offer the right balance of strength, durability and ease of use that you need in a top-notch pizza peel. They allow you to launch pizza after pizza with confidence once you get the hang of the quick jerking motion to slide it off the peel and into the oven.
Caring for Wood and Metal Peels
To keep your wood or metal pizza peel in top condition:
- Always flour the surface well before launching a pizza to prevent sticking.
- Avoid excessive moisture that can warp wood or cause metal to rust.
- Hang peels or store them carefully to avoid damage.
- Hand wash and dry thoroughly after use.
- Rub a tiny amount of food-safe oil into a wooden peel periodically to condition it.
- Use a gentle abrasive pad to remove any stuck on bits of food.
With the right care, a quality wood or metal pizza peel really can last for years of home pizza making adventures.
Get the Peel Action Down
Whichever material you choose, there is a bit of a learning curve when it comes to mastering the quick forward jerking motion you need to slide the pizza smoothly off the peel and into the oven. Expect a few flops or mislaunches at first.
Practice the motion ahead of time with just your topped pizza round. And start with a wooden peel – the slight grip actually helps beginners get the action down better.
Don’t overload pizzas as you’re learning. And always have a backup peel ready to retrieval any misfired pies!
Once you get the peel slide down, you’ll be amazed at how easily you can launch pizzas again and again. It just takes practice.
The Best Homemade Pizza Starts With a Quality Peel
When making pizza at home, so much care and effort goes into preparing the perfect crust, sauce and toppings. Don’t let a subpar pizza peel ruin all your hard work.
Invest in a high quality wood or metal pizza peel and learn how to use it properly. Your pizzas will thank you with crispy, coal-fired oven-worthy crust you’ll be proud to serve.
What’s your go-to pizza peel for homemade pies? Share your top tips and tricks in the comments!
Ready to Throw Pizza Perfection?: 15 Must-Know Camp Chef Pizza Peel Tips for Creating the Perfect Crust at Home
As every pizza lover knows, a good crust makes all the difference between an okay pie and true pizza perfection. And getting that crust just right starts with having the right tools, especially a quality pizza peel.
Camp Chef’s Italian-made pizza peels are specially designed for helping home cooks launch pro-quality pizzas from their ovens. But there are some tricks to mastering the peel slide so your pizzas end up crisp and gorgeous instead of mangled messes.
Follow these 15 must-know tips for using your Camp Chef pizza peel and you’ll be serving up perfect crusts in no time.
1. Choose the Right Peel Size
Camp Chef makes high quality stainless steel pizza peels in a range of sizes from 12-inches up to 16-inches. Choose a peel size that matches the pizzas you’ll be making allowing for a couple extra inches all around the crust.
Bigger peels are heavier but give you room to maneuver. Smaller peels work for personal pizzas and keeping things lightweight.
2. Get the Flour Layer Right
A light layer of flour on the peel is key to launching pizza dough without sticking. Too much and things get messy. Too little and dough clings to the peel instead of sliding right off.
Practice sprinkling a thin, even layer of flour over the entire peel surface before placing dough. Add a touch more to sticky spots if needed.
3. Place the Dough Gently
Set your shaped dough rounds on the peel lightly to keep them movable. Don’t press down. Let gravity do the work as you top the pizza.
Jiggle the dough now and then to prevent sticking as you add sauce and toppings. Add a touch more flour underneath if needed.
4. Don’t Overload Toppings
While loaded up pies look amazing, too many toppings make pizzas heavy and harder to slide. Stick to a sensible amount that won’t weigh down the dough.
Start with less cheese and toppings while you master the peel slide. You can always add more once you become a pizza launching pro!
5. Use Cornmeal for Extra Help
Some peel pros recommend a blend of fine semolina flour and cornmeal to make sure dough slides right off. The courser cornmeal acts like little ball bearings under the dough.
Try a 50/50 mix sprinkled on the peel before adding dough for extra non-stick insurance.
6. Get Centered on the Peel
Having the dough evenly centered on the peel makes sliding it into the oven much easier. Take a peek before launching to make sure the pie is evenly placed.
If needed, use a folding peel motion to recenter dough on the board – just be gentle.
7. Rein in the Toppings
It’s tempting to add toppings all the way out to the crust, but this makes pies heavier and harder to slide. Keep toppings back about 1/2 inch from the crust rim.
You’ll still get full flavor and have an easier launch.
8. Do the Shake Test
Before launching, always do a little shimmy shake with the peel handle to make sure the pizza is free moving on top. If it sticks and doesn’t slide, add a touch more flour before trying to launch.
9. Use Confident, Quick Motions
Hesitating or pushing the pizza dough slowly results in sticking and flopping. Instead, swiftly pull the peel firmly in and out to launch pies.
Commit and don’t hesitate! The fast motion keeps dough sliding right into the oven.
10. Angle the Peel Slightly
Pulling the peel straight out increases sticking chances. Instead, tilt it ever so slightly down and away from you to help slide the pizza off from the farthest edge first.
Just a few degrees tilt is all it takes for a smooth transfer.
11. Don’t Twist Your Wrist
It’s natural to want to twist the peel when launching pizzas. But this uneven motion can make dough stick and fold over on itself.
Concentrate on a straight in and out motion. Keep that wrist steady!
12. Consider a Two-Peel Method
Using a second peel makes retrieving any flopped pies easier. Have one peel for launching and one for oven retrieval to save your pies.
Wood peels are great for retrieving since they won’t scratch oven surfaces if you need to scrape.
13. Retrieve Fails Gently
When things don’t go perfectly, resist the urge to scrape stuck dough off aggressively. This can damage oven surfaces.
Use gentle motions to retrieve dough and re-flour the mess for a fresh try.
14. Keep Trying!
Sticking and flopping happens to everyone learning the peel slide. Don’t let it get you down. Toss on some more flour and try again.
Your peel skills will improve with practice. Soon you’ll be launching pies with the best of them.
15. Have Fun!
Making homemade pizza should be an enjoyable, tasty adventure. A few flops here and there are all part of the learning process.
Relax, enjoy your pies, and keep working on your peel skills. Perfect crusts are within reach!
With the right prep and motions, you can become a pizza peel pro in no time. Follow these tips and get ready to impress everyone with your gorgeous homemade pizzas.
What’s your best pizza peel advice? Share your top tips in the comments!
Keep Your Pizza Peel Well-Floured to Prevent Sticking
As any home pizza chef knows, getting those lovingly prepared pies to slide smoothly from the peel into the hot oven is an art form. Nothing ruins homemade pizza night faster than dough that stubbornly sticks to the peel instead of releasing cleanly into the oven.
But with the right flour coverage technique, you can prevent sticking and launch pizzas with confidence every time. Here’s how to keep that pizza peel well-floured for peace of mind.
Use the Right Amount of Flour
Flouring your pizza peel too much or too little before use can both cause problems. Too much flour creates a messy cloud when launching and risks burning. Too little leads to stuck dough tears and frustration.
The key is using just enough flour to coat the surface – a thin, even layer does the trick. Start with around 2 tablespoons evenly sprinkled over the peel.
Make Sure Flour Covers Every Spot
It’s not enough to just sprinkle some flour on the pizza peel surface. You need to make sure it fully and evenly coats every inch, especially where the dough will sit.
Move the peel around to distribute flour evenly into one smooth layer before placing dough. Check for bare spots and sprinkle more flour as needed.
Reapply Flour Between Pizzas
One light flour coating isn’t enough for peak non-stick performance. You need to reapply a fresh dusting each time you load another pizza onto the peel.
Give the peel a quick wipe, add more flour, then place your next crust. This ensures each pie slides right off on launch.
Add a Touch More Flour Near Sticky Spots
Sometimes dough sticks to the peel when loading anyway. If you notice sticky points, resist scraping dough off forcefully.
Instead, gently lift the dough edge and sprinkle just a bit of extra flour right on the problem area to release it.
Consider “Double Flouring”
For extra insurance against sticking, some home pizza chefs recommend flouring both the peel and the underside of the dough before loading it.
The layer of flour on peel and crust prevents any dough-on-metal sticking when sliding pies in to bake.
Use Semolina for Extra Slide
Traditional fine semolina flour has less gluten than all-purpose flour, making it an even better choice for dusting pizza peels.
Its granular texture keeps dough sliding smoothly. Many pizzerias swear by a blend of semolina and bread flour on their peels.
Go Beyond Flour for Stick-Free Success
While flour is standard, some people also use cornmeal, wheat bran or a blend to cover their pizza peels. The slightly coarse texture acts like miniature ball bearings under the dough.
Experiment to see if you get even better non-stick results from creative flour alternatives.
Watch Out for Pitfalls
To keep your peel well-floured, avoid these common floured peel mistakes:
- Using too much flour creates a mess
- Skipping re-flouring between pizzas causes sticking
- Not covering edges leads to stuck spots
- Pressing down firmly on dough flattens flour layer
Pay attention to evenly distribute just enough dry flour for carefree launching every time.
Learn the Launching Technique
Even with a perfectly floured peel, you need to master the swift, smooth forward-back motion that slides dough neatly into the oven.
Don’t push slowly or the dough will stick! Commit to a quick, continuous motion and the pizza will release cleanly.
Practice your floured peel slide with rounds of dough before topping pies to get it down pat.
Take Your Time Loading Dough
Resist the urge to quickly plop dough onto the floured peel. Ease it on gently, then shake the peel to make sure dough can slide freely before adding toppings.
Loading slowly ensures your flour layer stays evenly distributed for a no-stick peel and perfect pizza.
Enjoy the Fruits of Your Labors
Putting in the work to keep your pizza peel well-floured before each use pays off with gorgeous pizzas that launch perfectly every time.
With the right technique, you’ll slide pies like a pro! Now grab that peel and start flouring – homemade pizza night is calling.
Ready to Throw Pizza Perfection?: 15 Must-Know Camp Chef Pizza Peel Tips for Creating the Perfect Crust at Home
For pizza lovers, a crisp, beautifully charred crust is the foundation of pie perfection. And getting top-notch crusts from your home oven starts with having the right tools, especially a high quality pizza peel.
Camp Chef’s Italian-crafted stainless steel pizza peels are specially designed to help you slide and retrieve pizzas like a seasoned pro. Follow these 15 must-know tips for making the most of your Camp Chef peel.
1. Pick the Right Size Peel
Camp Chef offers pro-style pizza peels ranging from compact 12-inch to extra large 16-inch. Consider the pies you’ll be making and choose a peel with 2-3 inches of extra space all around.
Bigger peels can handle more but are heavier. Find your ideal balance of size and ease of use.
2. Always Flour the Peel First
A light coating of flour before use prevents dough from sticking to the peel. Sprinkle about 2 tablespoons evenly over the surface before placing any dough.
Check for bare spots and add extra flour to problem areas as needed. Proper flouring is crucial!
3. Load Dough Gently
Set dough down lightly on the floured peel instead of pressing down. Let it settle into place naturally as you top the pie.
Jiggle periodically to make sure dough isn’t sticking. Add a touch more flour if it is.
4. Don’t Overload on Toppings
It’s tempting to pile on the toppings, but excessive amounts make pizzas heavy and hard to slide off the peel cleanly.
Stick to sensible topping quantities, especially when you’re just learning the peel slide technique.
5. Consider a Semolina-Cornmeal Blend
Some pros recommend using half fine semolina flour and half cornmeal to coat peels. The mix helps pizzas release even better.
Give it a try for extra non-stick insurance when you launch pies.
6. Get the Pizza Centered
An evenly centered dough round is much easier to slide cleanly into the oven than one that’s off-kilter on the peel.
Do a quick visual check before launching and re-center if needed.
7. Keep Toppings 1/2 Inch from Edges
It’s tempting to cover pizza crusts with sauce and toppings but this causes sticking issues. Keep toppings back about 1/2 inch from the edge.
You’ll still get great coverage and taste without sacrificing easy sliding.
8. Do the Shake Test Before Launching
Give the peel handle a little shake to make sure your pizza can slide freely on top before attempting to launch it.
If it sticks, lift gently and sprinkle on a bit more flour before trying to slide it into the oven.
9. Use Decisive Motions
Timid, hesitant movements when launching pizzas often end in sticking or folding over. Use confident, continuous motions instead.
Commit and don’t pause! The momentum keeps the dough sliding right off.
10. Angle Peel Slightly Downward
Pulling straight out raises your chances of sticking. Instead, tilt the peel down ever so slightly to help the farthest edge release first.
Let gravity give you just a little help for smooth transfers.
11. Keep Your Wrist Steady
It’s natural to want to twist your wrist as you launch pizzas but this uneven motion causes sticking and folding.
Concentrate on a straight back and forth movement with no wrist twisting or turning.
12. Have a Backup Peel Handy
Even pizza pros need help sometimes. Have a second peel ready to retrieve pies if your launch doesn’t go perfectly.
Wood peels are great for gentle oven retrieval when needed.
13. Gently Retrieve Stuck Pies
When things go wrong, take your time retrieving the pizza. Aggressive scraping risks oven damage.
Use gentle motions and flour liberally to salvage dough for another attempt.
14. Keep Trying!
It takes practice to master the peel slide. Early flops are totally normal. Toss on some more flour and try again.
Your skills will improve quickly with regular launching sessions.
15. Have Fun!
Homemade pizza night should be an enjoyable adventure. Don’t let the learning curve get you down.
Relax, enjoy the process, and keep honing your peel techniques. Pizza perfection awaits!
With the right prep and touch, you’ll be launching crusts like a pizzeria pro. Now grab that peel and start prepping – it’s pizza night!
What’s your best pizza peel advice for beginners? Share your tips in the comments!
Use Semolina Flour for Maximum Non-Stick Properties
For home pizza chefs, getting those lovingly prepared pies to smoothly slide off the peel and into the blazing oven is a delicate art. And nothing ruins a perfect crust faster than dough that stubbornly sticks to the launch peel instead of releasing cleanly.
But many seasoned pizza pros swear by using semolina flour on peels instead of standard wheat flour for superior non-stick properties. Here’s why this finely ground flour variety helps your pizzas launch perfectly every time.
Semolina’s Lower Gluten Content Prevents Sticking
Unlike common all-purpose or bread flours, semolina flour contains much less gluten. This is the key to its non-stick appeal.
Gluten helps dough stretch and rise. But too much can cause sticking to pizza peel surfaces. Semolina’s lower gluten content keeps dough sliding right off.
The Coarser Granules Create Tiny Rollers
Semolina flour is more coarsely ground than standard wheat flours, giving it a grittier, granular texture. These tiny granules act like miniature ball bearings under the dough, keeping it moving.
The courser semolina simply outperforms smoother all-purpose flour when it comes to peel release.
It Absorbs Less Moisture for a Drier Slide
Lower gluten flours like semolina also absorb less moisture compared to high gluten bread or all-purpose flours. This keeps the layer dusted on the peel drier.
Less moisture absorption means less dough sticking. Semolina lets pies slide without grabbing on.
Semolina Offers Superior Non-Stick Reliability
Seasoned pizza makers swear by semolina for its unmatched non-stick abilities. Once you try it on your peels, it’s easy to see why.
Dough seems to just glide across the semolina layer with zero hesitation or sticking. It’s peel dusting perfection!
Use Semolina Solo or in a Blend
Some people use 100% semolina flour to coat their pizza peels before use. But you can also mix it with cornmeal or all-purpose flour to customize slide and texture.
Experiment to find your favorite blend that imparts that effortless semolina slide.
How to Use Semolina on Your Pizza Peel
Using semolina flour on your pizza peel takes just a few simple steps:
- Wipe peel clean of any residue
- Sprinkle on a thin layer of semolina, about 2-3 tablespoons
- Distribute evenly across entire peel surface
- Place dough round gently on top
- Top and launch pizza
- Reapply fresh semolina layer for each pizza
That’s all it takes to slide pies effortlessly every time!
Troubleshooting Semolina Peel Problems
While semolina excels at non-stick, you may still encounter an occasional sticking issue. Here are some quick tips to get back on track:
- Add a touch more semolina flour near any sticky spots
- Avoid pressing down hard on dough after placing on peel
- Use a folding technique to re-center dough if needed
- Apply semolina between each pizza for a fresh layer
With just a bit of trial and error, you’ll be semolina sliding with ease.
Mix It Up for Flavor and Function
Tailor your semolina peel coating to your preferences and pizza style. Add cornmeal for crunch, bread flour for stretch or go full semolina for authentic pizzeria non-stick.
It’s fun to experiment and find your favorite peel dusting blend.
Semolina: The Secret of the Pizza Pros
Once you try this magical flour on your pizza peel, you’ll never go back. The effortless sliding action helps you launch crust after crust with ease.
Ditch the sticking stress and embrace the semolina way. Your pizzas will thank you!
Ready to Throw Pizza Perfection?: 15 Must-Know Camp Chef Pizza Peel Tips for Creating the Perfect Crust at Home

Ask any pizza aficionado and they’ll tell you – the crust makes all the difference between good and great. And perfectly crisp, beautifully blistered crusts start with the right tools, especially a quality pizza peel.
Camp Chef’s Italian-crafted stainless steel pizza peels give home chefs the ability to slide and retrieve pizzas with ease. Follow these 15 must-know tips to master your Camp Chef peel.
1. Choose the Right Size Peel
Camp Chef offers pro-style pizza peels ranging from 12-inch up to 16-inch. Pick a size that allows 2-3 inches of space all around the crusts you’ll be making.
Bigger peels can handle more but are heavier. Find your perfect balance of manageable and functional.
2. Always Flour the Peel First
Lightly sprinkling around 2 tablespoons of flour over the entire peel before use prevents sticking.
Double check for bare spots and add extra flour as needed.
3. Place Dough Gently
Set dough rounds down lightly on the floured peel instead of firmly pressing down. Let gravity ease it into place as you top.
Periodically jiggle to prevent sticking. Add a touch more flour if needed.
4. Resist Overloading Toppings
It’s tempting to pile it on, but excessive toppings make sliding tricky. Stick to sensible amounts, especially when learning.
You can always add more toppings once you master the peel slide technique.
5. Try a Semolina-Cornmeal Blend
Some pros swear by an even coating of half fine semolina flour and half cornmeal to keep dough sliding.
Give this blend a whirl for extra insurance against sticking.
6. Verify Center Placement
Having dough evenly centered makes sliding it off much easier. Do a quick check before launching.
Re-center with care if the dough has shifted out of position.
7. Keep Toppings 1/2 Inch from Edge
Covering all the way to the crust makes sliding hard. Keep sauce and toppings back about 1/2 inch.
You’ll still get great coverage without sacrifice ease of use.
8. Do the Shake Test First
Before launching, give the peel a gentle shake to ensure the pizza can slide unrestricted. If it sticks, add a touch more flour.
9. Use Confident, Continuous Motions
Timid, interrupted movements often end poorly. Instead, use decisive, smooth motions from start to finish.
Don’t hesitate or pause! Let momentum keep the dough sliding off cleanly.
10. Tilt Peel Slightly Downward
Pulling straight out can lead to sticking. Instead, tilt peel slightly down so far edge releases first.
Let gravity give you just a little extra help for seamless dough transfer.
11. Keep Your Wrist Alignment Straight
It’s natural to want to twist the peel as you launch but this uneven motion causes folding and sticking.
Focus on keeping the peel aligned straight as you slide it in and out in one smooth motion.
12. Have a Backup Peel Ready
Even seasoned pros need help sometimes. Have a second peel ready to retrieve any pies that don’t launch perfectly.
Wood peels are great for gentle oven retrieval when required.
13. Gently Rescue Stuck Pies
When things go wrong, carefully retrieve the pizza. Aggressive scraping can damage oven surfaces.
Use soft motions and flour generously to salvage dough for another go.
14. Persist Through Early Failures

Mastering the peel slide takes practice. Early flops or stickings are totally normal. Toss on some flour and try again!
Your skills will improve quickly with regular use.
15. Have Fun!
Home pizza making should be an enjoyable experience. Don’t let minor hiccups ruin the fun!
Stay relaxed, keep tweaking your technique, and delight in the homemade pies.
With the right prep and motions, you’ll be sliding pizzas like a pro in no time. Now grab that peel and start prepping – it’s pizza night!
What’s your best beginner advice for mastering the pizza peel? Share your tips in the comments!
Preheat Your Pizza Stone for At Least 45 Minutes
Baking pizza at home lets you enjoy deliciously crisp, chewy crusts straight from your oven. But to really get that authentic pizzeria texture, you need to preheat your pizza stone for at least 45 minutes before baking.
Taking the time to properly preheat your stone is the secret to crust perfection. Here’s why it makes all the difference, and tips for getting the most out of your preheated pizza stone.
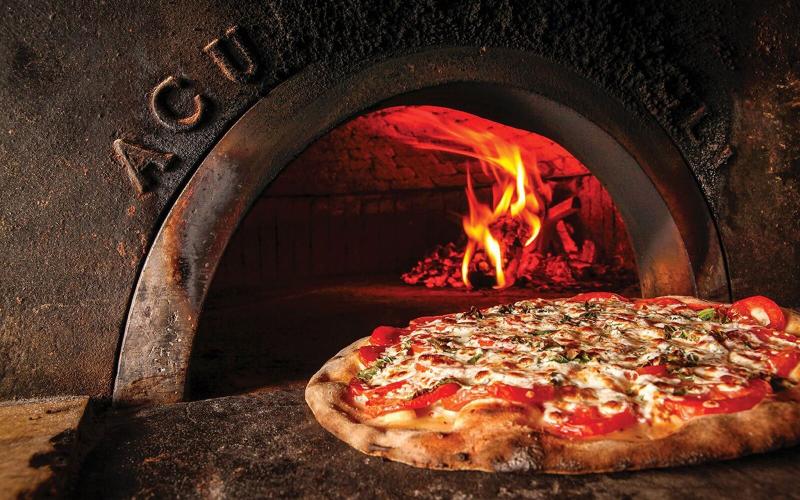
A Hot Stone Mimics a Brick Oven
Pizza stones recreate the blazing heat of a traditional brick pizza oven right in your kitchen. But to effectively crisp up crusts, they need time to fully heat up.
Preheating your stone for 45-60 minutes gives it time to reach optimum baking temperatures of over 500°F.
It Eliminates Dough-Dampening Steam
An icy cold pizza stone placed in a hot oven creates a lot of initial steaming as it heats. This excessive moisture can make pizza crusts dense and soggy.
A well preheated stone prevents this steam surge so your crust stays light and crisp.
A Hot Surface Sears and Blisters
That beautifully charred, speckled crust requires direct contact with an extremely hot surface like a preheated pizza stone.
The scorching stone caramelizes sugars and fats in the dough, giving you that artisanal look and flavor.
It Crusts Faster for Less Burning
A piping hot stone sets and crisps the bottom faster so the edges don’t overbake while the rest of the pizza catches up.
Your stone needs to be nearly the temperature of the oven. Adequate preheating ensures an evenly baked crust.
Tips for Preheating Pizza Stones
To properly preheat your pizza stone:
- Place stone on middle rack, no foil underneath
- Allow at least 45 minutes at max oven temp
- Heat oven 30 minutes prior if possible
- Let stone sit in hot oven after turning off
With adequate preheating, your stone will cook pizza after pizza to crispy perfection.
Handle Hot Stones Safely
A scorching hot pizza stone requires care when handling to avoid burns. Use these tips:
- Use thick oven mitts to grasp the stone edges
- Slide pizza onto stone; don’t toss it
- Allow stone to cool completely before removing
- Avoid quick temperature changes to prevent cracking
Exercise caution and let your preheated stone work its crust-crisping magic safely.
Preheat Even for Frozen and Pre-Baked Crusts
Even if you’re using a premade crust, go through the effort of preheating your stone. It makes a big difference in recrisping the bottom for texture and flavor.
The hot surface gives any crust a quick final browning and firming.
Try the Broiler for Extra Heat
Some ovens don’t heat efficiently enough to fully preheat a pizza stone. For an extra blast of searing temperature, use the broiler for 1-2 minutes before sliding on the pizza.
Watch closely to avoid burning. This turbo heat gives you the best chance of pizza perfection.
Don’t Rush It – Patient Preheating Is Worth It
It’s hard to wait almost an hour just for the stone to heat, but proper preheating really pays off in superior crusts.
Be patient and let your stone fully warm through. Your first bite of crispy pizza will prove it’s worth it!
For the Best Crusts, Take the Time to Preheat
That blast furnace environment right inside your oven is closer than you think – but only if you properly preheat your pizza stone first.
Don’t skip this step if you want pizzeria-quality crusts at home. Good things come to those who preheat!
Ready to Throw Pizza Perfection?: 15 Must-Know Camp Chef Pizza Peel Tips for Creating the Perfect Crust at Home
Ask any pizza connoisseur – the crust is the foundation of any great pie. And achieving beautifully blistered, crisp-chewy crusts at home starts with having the right tools, like a quality pizza peel.
Camp Chef’s artisan-crafted stainless steel pizza peels give home chefs the ability to flawlessly slide and retrieve pizzas. Follow these 15 must-know tips to master your Camp Chef peel.
1. Pick the Right Peel Size
Camp Chef offers pro-style pizza peels ranging from compact 12-inch size up to extra large 16-inch. Consider the pizzas you’ll be making and choose a peel with about 2-3 inches of space all around.
Bigger peels can handle more but are heavier. Find your ideal balance of manageable and functional.
2. Always Flour the Peel
Lightly coating the entire peel with around 2 tablespoons of flour before use prevents sticking. Check for bare patches and add extra flour as needed.
3. Place Dough Gently
Set dough rounds lightly on the floured peel instead of firmly pressing down. Allow gravity to ease it into place as you top the pie.
Periodically jiggle to prevent sticking. Add a touch more flour if needed.
4. Don’t Overload Toppings

It’s tempting to pile on toppings, but excessive amounts make sliding the pizza off the peel tricky. Stick to sensible amounts, especially when learning.
You can always add more toppings once you master the peel slide technique.
5. Try a Semolina-Cornmeal Blend
Some pros recommend an even layer of half fine semolina flour and half cornmeal to keep dough sliding easily.
Give this blend a test run for extra insurance against sticking.
6. Verify Center Placement
Having the dough round evenly centered makes sliding off much easier. Do a quick check before launching.
Re-center carefully if needed.
7. Keep Toppings Back From Edge
Covering all the way to the crust perimeter makes sliding difficult. Keep sauce and toppings back about 1/2 inch.
You’ll still get great coverage without sacrificing ease of transfer.
8. Do the Shake Test First
Before launching, give the peel a gentle shake to ensure the pizza can slide unimpeded. If it sticks, sprinkle on more flour.
9. Use Confident, Continuous Motions
Hesitant, interrupted movements often end poorly. Instead, use decisive, smooth motions the entire time.
Don’t pause or hesitate! Let momentum keep the crust sliding right off the peel.
10. Angle Peel Slightly Downward
Pulling straight out can lead to sticking. Instead, tilt the peel down slightly so the far edge releases first.
Let gravity give you just a little extra assistance for seamless dough transfer.
11. Keep Your Wrist Alignment Straight
It’s natural to want to twist the peel as you launch, but this uneven motion causes folding and sticking.
Concentrate on keeping the peel aligned straight as you slide it evenly in and out.
12. Have a Backup Peel Ready
Even seasoned pros need help sometimes. Have a second peel ready to retrieve any pies that don’t launch perfectly.
Wood peels are ideal for gentle oven retrieval when needed.
13. Gently Rescue Stuck Pies
When things go wrong, carefully retrieve the pizza. Aggressive scraping can damage oven surfaces.
Use gentle motions and flour liberally to salvage the dough for another attempt.
14. Persist Through Early Failures
Mastering the peel slide takes practice. Early flops or stickings are perfectly normal. Toss on some flour and keep trying!
Your skills will improve quickly with regular use.
15. Have Fun!
Home pizza making should be an enjoyable experience. Don’t let minor hiccups ruin the fun!
Stay relaxed, keep tweaking your technique, and delight in the homemade pies.
With the right prep and motions, you’ll be sliding pizzas like a pro in no time. Now grab that peel and start prepping – it’s pizza night!
What’s your best beginner tip for mastering the pizza peel? Share your advice in the comments!
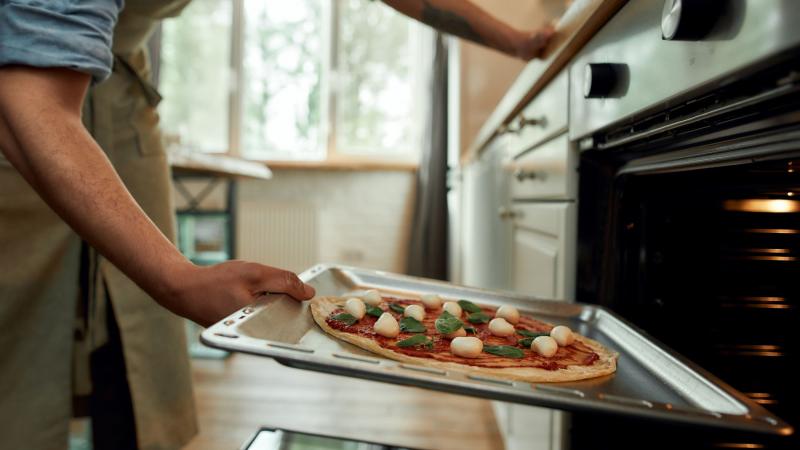
Work Quickly When Transferring Pizza to the Oven
One of the trickiest parts of homemade pizza success is smoothly transferring the assembled pie from the peel into the hot oven. Rushed or sloppy sliding leads to sticking, folding, and frustration.
The key is working quickly and decisively when launching pizzas. Follow these tips for fast and flawless oven transfers.
Move Confidently Without Pausing
A common mistake is tentatively pushing the pizza dough part way into the oven, hesitating, then trying to complete the slide. This interrupted motion gives the dough time to stick.
Instead, use a confident, continuous motion to fully slide the pizza off the peel in one quick go. Don’t pause or slow halfway through!
Commit Fully to the Slide
New pizza bakers often gently ease the pizza toward the oven, afraid of messy flops. But timid slides cause sticking and folds.
It’s better to commit and fully follow through on the peel motion. Decisive action is key for success.
Let Momentum Keep It Sliding
Starting slowly and trying to accelerate rarely works. The dough gets left behind and sticks.
Maintaining slide momentum from start to finish is critical. Commit to a quick, smooth motion.
No Twist, Just Straight In and Out
It’s natural to want to twist the peel when launching pizzas, but this uneven action causes sticking and folding.
Concentrate on a straight back and forth slide. No wrist turning!
Angle Peel Down Slightly
Pulling the peel straight out raises sticking chances. Instead, tilt it down ever so slightly so the far edge releases first.
This uses gravity to help the dough slide off cleanly.
Check Oven Rack Positioning
Having the oven rack pulled too far out or too far in makes sliding difficult. Position it so your peel slides smoothly in and out.
The ideal spot lets you transfer pizzas quickly and easily.
Stage Peels and Tools Efficiently
Having to fumble for tools slows you down. Stage everything within easy reach for a smooth workflow.
Positioned properly, you can work quickly assembling and transferring pies.
Slide Lots of Flour Under Dough
Adequate flour between the dough and peel prevents sticking that can slow you down.
Use cornmeal or semolina for even easier sliding action.
Top Quickly But Carefully
Rushing leads to sloppy topping placement that can unbalance pizzas. But take too long and dough sticks.
Find a focused but brisk speed that lets you top pies quickly yet precisely.
Have a Backup Peel Ready
Even baking veterans need backup occasionally. Have a second peel handy for easy oven retrieval of any flops or folds.
Quickly rescue any failed transfers.
Practice Makes Perfect
Don’t be discouraged by initial sliding failures. Speed and confidence come with experience.
Focus on working decisively and your peel skills will improve with each pizza.
Quick, Assured Slides Equal Pizza Success
Rushing carelessly causes problems, but excessive timidity does too. Strive for controlled haste when moving pizzas into the oven.
With practice, you’ll find the ideal confident yet brisk motions for flawless transfers.
Ready to Throw Pizza Perfection?: 15 Must-Know Camp Chef Pizza Peel Tips for Creating the Perfect Crust at Home
Ask any pizza lover and they’ll tell you – the crust makes or breaks the entire pie. Achieving pizzeria-quality crust at home begins with having the proper tools, especially a top-notch pizza peel.
Camp Chef’s artisan-crafted stainless steel pizza peels enable home chefs to effortlessly slide and retrieve pizzas. Follow these 15 must-know tips to master your Camp Chef peel.
1. Choose the Right Size Peel
Camp Chef offers pro-style pizza peels ranging from compact 12-inch to extra large 16-inch. Consider the pizzas you’ll be making and choose a peel with about 2-3 inches of extra space all around.
Larger peels can handle more but are heavier. Find your ideal balance of size and ease of use.
2. Always Flour the Peel
Lightly coating the entire peel with around 2 tablespoons of flour before use prevents sticking. Check for bare spots and add extra flour as necessary.
3. Place the Dough Gently
Set dough rounds lightly on the floured peel instead of firmly pressing down. Allow gravity to ease it into place as you top the pizza.
Periodically jiggle to prevent sticking. Add a touch more flour if needed.
4. Don’t Overload Toppings
It’s tempting to pile on toppings, but excessive amounts make sliding the pizza off the peel tricky. Stick to sensible amounts, especially when learning.
You can always add more toppings once you master the peel slide technique.
5. Try a Semolina-Cornmeal Blend
Some pros recommend an even layer of half fine semolina flour and half cornmeal to keep dough sliding easily.
Give this blend a test run for extra insurance against sticking.
6. Verify Center Placement
Having the dough round evenly centered makes sliding off much easier. Do a quick check before launching.
Re-center carefully if needed.
7. Keep Toppings Back From Edge
Covering all the way to the crust perimeter makes sliding difficult. Keep sauce and toppings back about 1/2 inch.
You’ll still get great coverage without sacrificing ease of transfer.
8. Do the Shake Test First
Before launching, give the peel a gentle shake to ensure the pizza can slide unimpeded. If it sticks, sprinkle on more flour.
9. Use Confident, Continuous Motions
Hesitant, interrupted movements often end poorly. Instead, use decisive, smooth motions the entire time.
Don’t pause or hesitate! Let momentum keep the crust sliding right off the peel.
10. Angle Peel Slightly Downward
Pulling straight out can lead to sticking. Instead, tilt the peel down slightly so the far edge releases first.
Let gravity give you just a little extra assistance for seamless dough transfer.
11. Keep Your Wrist Alignment Straight
It’s natural to want to twist the peel as you launch, but this uneven motion causes folding and sticking.
Concentrate on keeping the peel aligned straight as you slide it evenly in and out.
12. Have a Backup Peel Ready
Even seasoned pros need help sometimes. Have a second peel ready to retrieve any pies that don’t launch perfectly.
Wood peels are ideal for gentle oven retrieval when needed.
13. Gently Rescue Stuck Pies
When things go wrong, carefully retrieve the pizza. Aggressive scraping can damage oven surfaces.
Use gentle motions and flour liberally to salvage the dough for another attempt.
14. Persist Through Early Failures
Mastering the peel slide takes practice. Early flops or stickings are perfectly normal. Toss on some flour and keep trying!
Your skills will improve quickly with regular use.
15. Have Fun!

Home pizza making should be an enjoyable experience. Don’t let minor hiccups ruin the fun!
Stay relaxed, keep tweaking your technique, and delight in the homemade pies.
With the right prep and motions, you’ll be sliding pizzas like a pro in no time. Now grab that peel and start prepping – it’s pizza night!
What’s your best beginner tip for mastering the pizza peel? Share your advice in the comments!
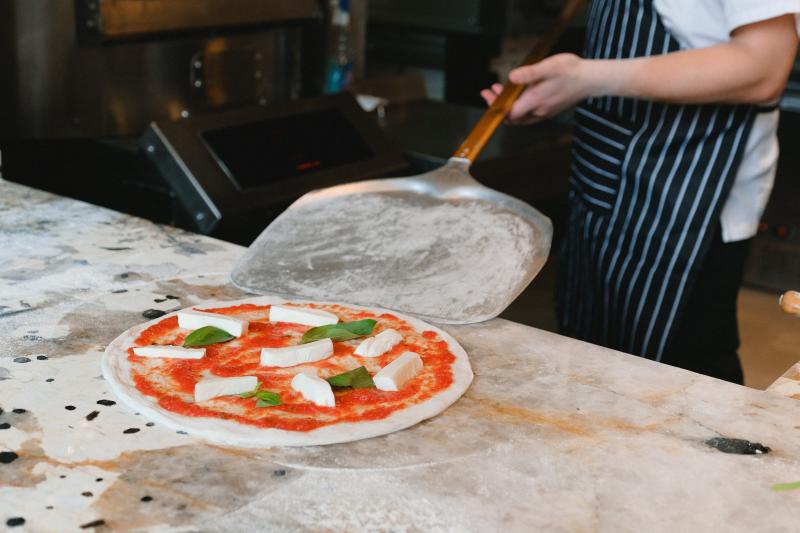
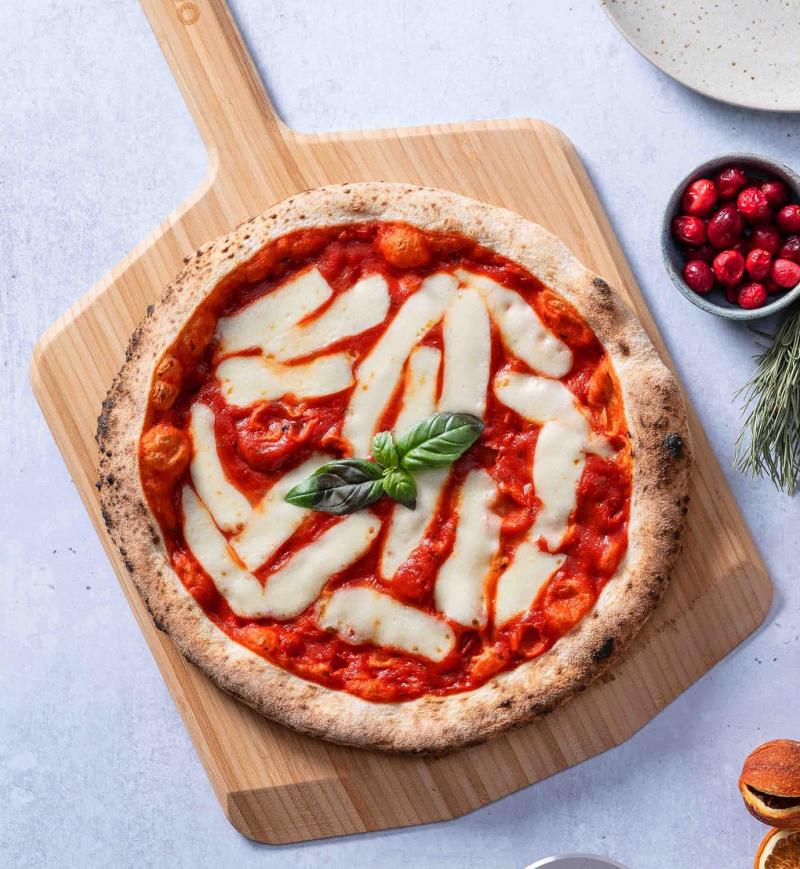
Start With Your Toppings, Then Add the Dough
One of the keys to perfectly crisp, beautifully baked homemade pizza is proper assembly order. And experienced pizza makers know – starting with toppings, then placing the dough on top is the way to go.
Building your pizza “upside down” ensures your recipes turn out right-side up. Here’s why reversing the classic assembly method results in better homemade pies.
Prevents Dough Sticking to the Peel
Laying bare dough directly on a floured peel often results in sticking, even with enough flour. But dough placed atop toppings and sauce can’t grab on.
Starting with your sauce and cheeses keeps the dough sliding around freely.
Helps Maintain an Even, Consistent Crust

When bare dough hits a floured peel, the flour clumps up creating an uneven bottom crust. But toppings weigh down the dough evenly for consistent crisping.
Building upside-down means no weird bulges or overly floured spots.
Allows Toppings to Insulate the Crust
Sauce and ingredients like meats and veggies act as a buffer between the dough and direct oven heat. This allows the crust to firm up more gently.
The toppings protect the dough from scorching or over-crisping before the inside cheese melts.
Prevents Topping Sliding and Bunching
Heaping vegetables or meats onto an already situated dough round risks ingredients sliding around into piles. But placing dough atop toppings anchors everything in place.
Your toppings end up evenly distributed instead of pushed to one side.
How to Assemble Upside-Down Pizzas
Making pizza toppings-first takes a little retraining but soon feels natural:
- Prepare dough rounds and let rest
- Spread sauce on peel leaving a 1/2″ border
- Sprinkle on cheese evenly
- Arrange meats, veggies and other toppings on top
- Pick up dough round gently and place on top
- Stretch and form dough edges if needed
Getting the Layering Right
Pay attention to layering order when topping before dough. Here are some tips:
- Sauce first protects dough from burning
- Cheese next helps everything stick together
- Delicate ingredients before heartier meats and veggies
- Herbs and spices sprinkled on last for flavor
Be Careful Transferring Topped Dough to the Oven
A heavily sauced and topped dough requires extra care when moving to the oven. Use smooth, quick motions to keep ingredients from sliding around.
A bit of slide is normal. Just reshape edges after baking if needed.
This Assembly Method Really Works
It seems backward at first, but applying toppings before dough results in pizza that looks and tastes better. Don’t knock it till you’ve tried it!
Starting off upside-down means your finished pizzas come out right-side up.
Ready to Throw Pizza Perfection?: 15 Must-Know Camp Chef Pizza Peel Tips for Creating the Perfect Crust at Home

Ask any pizza lover and they’ll tell you – the crust makes or breaks the entire pie. Achieving pizzeria-quality crust at home begins with having the proper tools, especially a top-notch pizza peel.
Camp Chef’s artisan-crafted stainless steel pizza peels enable home chefs to effortlessly slide and retrieve pizzas. Follow these 15 must-know tips to master your Camp Chef peel.
1. Choose the Right Size Peel
Camp Chef offers pro-style pizza peels ranging from compact 12-inch to extra large 16-inch. Consider the pizzas you’ll be making and choose a peel with about 2-3 inches of extra space all around.
Larger peels can handle more but are heavier. Find your ideal balance of size and ease of use.
2. Always Flour the Peel
Lightly coating the entire peel with around 2 tablespoons of flour before use prevents sticking. Check for bare spots and add extra flour as necessary.
3. Place the Dough Gently
Set dough rounds lightly on the floured peel instead of firmly pressing down. Allow gravity to ease it into place as you top the pizza.
Periodically jiggle to prevent sticking. Add a touch more flour if needed.
4. Don’t Overload Toppings

It’s tempting to pile on toppings, but excessive amounts make sliding the pizza off the peel tricky. Stick to sensible amounts, especially when learning.
You can always add more toppings once you master the peel slide technique.
5. Try a Semolina-Cornmeal Blend
Some pros recommend an even layer of half fine semolina flour and half cornmeal to keep dough sliding easily.
Give this blend a test run for extra insurance against sticking.
6. Verify Center Placement
Having the dough round evenly centered makes sliding off much easier. Do a quick check before launching.
Re-center carefully if needed.
7. Keep Toppings Back From Edge
Covering all the way to the crust perimeter makes sliding difficult. Keep sauce and toppings back about 1/2 inch.
You’ll still get great coverage without sacrificing ease of transfer.
8. Do the Shake Test First
Before launching, give the peel a gentle shake to ensure the pizza can slide unimpeded. If it sticks, sprinkle on more flour.
9. Use Confident, Continuous Motions
Hesitant, interrupted movements often end poorly. Instead, use decisive, smooth motions the entire time.
Don’t pause or hesitate! Let momentum keep the crust sliding right off the peel.
10. Angle Peel Slightly Downward
Pulling straight out can lead to sticking. Instead, tilt the peel down slightly so the far edge releases first.
Let gravity give you just a little extra assistance for seamless dough transfer.
11. Keep Your Wrist Alignment Straight
It’s natural to want to twist the peel as you launch, but this uneven motion causes folding and sticking.
Concentrate on keeping the peel aligned straight as you slide it evenly in and out.
12. Have a Backup Peel Ready
Even seasoned pros need help sometimes. Have a second peel ready to retrieve any pies that don’t launch perfectly.
Wood peels are ideal for gentle oven retrieval when needed.
13. Gently Rescue Stuck Pies
When things go wrong, carefully retrieve the pizza. Aggressive scraping can damage oven surfaces.
Use gentle motions and flour liberally to salvage the dough for another attempt.
14. Persist Through Early Failures
Mastering the peel slide takes practice. Early flops or stickings are perfectly normal. Toss on some flour and keep trying!
Your skills will improve quickly with regular use.
15. Have Fun!
Home pizza making should be an enjoyable experience. Don’t let minor hiccups ruin the fun!
Stay relaxed, keep tweaking your technique, and delight in the homemade pies.
With the right prep and motions, you’ll be sliding pizzas like a pro in no time. Now grab that peel and start prepping – it’s pizza night!
What’s your best beginner tip for mastering the pizza peel? Share your advice in the comments!
Use Bench Flour When Stretching Pizza Dough
Creating a beautifully round, evenly stretched pizza crust starts with how you handle the dough. And the secret ingredient for success? Bench flour for dusting as you stretch and shape.
Using the right flour allows you to properly form crusts without sticking or tearing. Here’s how bench flour helps you stretch pizza dough like a pro.
Bench Flour Prevents Sticking
Trying to stretch sticky pizza dough is incredibly frustrating. The dough clings to your hands and any surface you use.
Dusting your work surface and hands with bench flour keeps the dough movable so you can shape it with ease.
It Lets You Gently Work the Dough
A floured surface provides the slick platform you need to gently press, dimple, and coax the dough into a round shape without it jumping back.
Bench flour lets you work slowly and methodically without fighting the dough.
The Right Texture for Shaping
All-purpose flour tends to get worked into the dough creating areas that are overly thick. Bench flour stays put on the surface allowing you to stretch evenly.
It has the right fine texture and minimal gluten to prevent misshaping.
Bench Flour Options
The most common bench flour choices include:
- Fine semolina flour
- 00 pizza flour
- Bread flour
- Cornmeal
Experiment to see which you like working with best. Many bakers use a blend.
How to Use Bench Flour for Stretching
Using bench flour is simple:
- Clear a smooth, dry surface like a countertop
- Sprinkle 1-2 tbsp flour blend evenly over area
- Rub flour over hands to coat evenly
- Place dough ball on floured surface
- Dimpling, stretch dough outwards
- Rotate and shape until desired size
Tips for Stretching Pizza Dough
Keep these tips in mind when using bench flour to achieve a perfect crust:
- Work from center outward
- Let dough relax 5 minutes if shrinking
- Add flour underneath dough if sticking
- Don’t overstretch edges
- Maintain an even circular shape
Fix Minor Imperfections Before Topping
Once stretched out, use bench flour to gently lift edges or patches and form into an even round before adding toppings.
The bench flour keeps dough movable so you can finesse it.
Bench Flour Lets You Handle Dough Like the Pros
Don’t struggle with sticky dough that resists stretching – embrace bench flour instead!
Dust away stickiness and shape beautiful crusts with ease.
Ready to Throw Pizza Perfection?: 15 Must-Know Camp Chef Pizza Peel Tips for Creating the Perfect Crust at Home
Ask any pizza lover and they’ll tell you – the crust makes or breaks the entire pie. Achieving pizzeria-quality crust at home begins with having the proper tools, especially a top-notch pizza peel.
Camp Chef’s artisan-crafted stainless steel pizza peels enable home chefs to effortlessly slide and retrieve pizzas. Follow these 15 must-know tips to master your Camp Chef peel.
1. Choose the Right Size Peel
Camp Chef offers pro-style pizza peels ranging from compact 12-inch to extra large 16-inch. Consider the pizzas you’ll be making and choose a peel with about 2-3 inches of extra space all around.
Larger peels can handle more but are heavier. Find your ideal balance of size and ease of use.
2. Always Flour the Peel
Lightly coating the entire peel with around 2 tablespoons of flour before use prevents sticking. Check for bare spots and add extra flour as necessary.
3. Place the Dough Gently
Set dough rounds lightly on the floured peel instead of firmly pressing down. Allow gravity to ease it into place as you top the pizza.
Periodically jiggle to prevent sticking. Add a touch more flour if needed.
4. Don’t Overload Toppings
It’s tempting to pile on toppings, but excessive amounts make sliding the pizza off the peel tricky. Stick to sensible amounts, especially when learning.
You can always add more toppings once you master the peel slide technique.
5. Try a Semolina-Cornmeal Blend
Some pros recommend an even layer of half fine semolina flour and half cornmeal to keep dough sliding easily.
Give this blend a test run for extra insurance against sticking.
6. Verify Center Placement
Having the dough round evenly centered makes sliding off much easier. Do a quick check before launching.
Re-center carefully if needed.
7. Keep Toppings Back From Edge
Covering all the way to the crust perimeter makes sliding difficult. Keep sauce and toppings back about 1/2 inch.
You’ll still get great coverage without sacrificing ease of transfer.
8. Do the Shake Test First
Before launching, give the peel a gentle shake to ensure the pizza can slide unimpeded. If it sticks, sprinkle on more flour.
9. Use Confident, Continuous Motions
Hesitant, interrupted movements often end poorly. Instead, use decisive, smooth motions the entire time.
Don’t pause or hesitate! Let momentum keep the crust sliding right off the peel.
10. Angle Peel Slightly Downward
Pulling straight out can lead to sticking. Instead, tilt the peel down slightly so the far edge releases first.
Let gravity give you just a little extra assistance for seamless dough transfer.
11. Keep Your Wrist Alignment Straight
It’s natural to want to twist the peel as you launch, but this uneven motion causes folding and sticking.
Concentrate on keeping the peel aligned straight as you slide it evenly in and out.
12. Have a Backup Peel Ready
Even seasoned pros need help sometimes. Have a second peel ready to retrieve any pies that don’t launch perfectly.
Wood peels are ideal for gentle oven retrieval when needed.
13. Gently Rescue Stuck Pies
When things go wrong, carefully retrieve the pizza. Aggressive scraping can damage oven surfaces.
Use gentle motions and flour liberally to salvage the dough for another attempt.
14. Persist Through Early Failures
Mastering the peel slide takes practice. Early flops or stickings are perfectly normal. Toss on some flour and keep trying!
Your skills will improve quickly with regular use.
15. Have Fun!
Home pizza making should be an enjoyable experience. Don’t let minor hiccups ruin the fun!
Stay relaxed, keep tweaking your technique, and delight in the homemade pies.
With the right prep and motions, you’ll be sliding pizzas like a pro in no time. Now grab that peel and start prepping – it’s pizza night!
What’s your best beginner tip for mastering the pizza peel? Share your advice in the comments!
Slide and Spin For a Fast, Easy Pizza Transfer
Getting your lovingly assembled homemade pizza smoothly from the peel into the blazing oven is an art. The trick? A slide and quick spin move that launches pies fast and flawlessly every time.
Mastering this peel pivot transfer technique prevents sticking, folding, or flopping. Here’s how to slide and spin your way to pizza success.
The Slide Minimizes Sticking

First, perform a smooth, decisive forward slide motion to move the pizza fully off the floured peel and into the oven.
This initial slide prevents dough from sticking or tearing when you then spin it into place.
The Spin Positions Perfectly
Once the pizza slides off the peel, give the handle a quick clockwise or counterclockwise spin.
This aligns the crust evenly on the hot pizza stone or pan below for ideal crispness.
Why the Spin Works
Spinning the pizza after sliding accomplishes several key things:
- Lands centered on the stone
- Prevents pie from jamming into oven walls
- Evens out the crust for consistent baking
- Lets steam release so the crust stays crispy
Practice the Motion Before Topping
Trying to spin a fully loaded pizza your first try gets messy. Instead, practice the slide and spin motion with plain dough rounds.
Once you perfect the move with bare crusts, then add toppings.
Get the Right Peel Angle
Tilting the peel slightly downward, around 20 degrees, helps the pizza slide off cleanly.
Too steep an angle causes spills. Find the right subtle tilt for smooth sliding.
Use a Gentle Spin Motion
Aggressively whipping the peel handle causes the pizza to flop over or hit the oven walls. Use a gentle, controlled spin motion.
Just a subtle pivot lands pies perfectly centered on the hot stone.
Alternate Spin Direction
Rotate the peel handle clockwise for one pie, counterclockwise for the next. This accounts for any imperfections in your pizza stone’s levelness.
Alternating distributes heat evenly for consistent crusts.
Work on Consistent Launch Speed
Slide each pizza onto the stone using the same smooth, quick speed. Consistency ensures evenly baked crusts.
Strive for controlled yet fast for ideal transfers every time.
Slide, Spin, Perfect Pizza!
With practice, the slide and quick spin will become second nature. You’ll be launching pies with precision in no time!
This pro technique means beautiful, evenly cooked homemade pizza every night.
Ready to Throw Pizza Perfection?: 15 Must-Know Camp Chef Pizza Peel Tips for Creating the Perfect Crust at Home

Ask any pizza lover and they’ll tell you – the crust makes or breaks the entire pie. Achieving pizzeria-quality crust at home begins with having the proper tools, especially a top-notch pizza peel.
Camp Chef’s artisan-crafted stainless steel pizza peels enable home chefs to effortlessly slide and retrieve pizzas. Follow these 15 must-know tips to master your Camp Chef peel.
1. Choose the Right Size Peel
Camp Chef offers pro-style pizza peels ranging from compact 12-inch to extra large 16-inch. Consider the pizzas you’ll be making and choose a peel with about 2-3 inches of extra space all around.
Larger peels can handle more but are heavier. Find your ideal balance of size and ease of use.
2. Always Flour the Peel
Lightly coating the entire peel with around 2 tablespoons of flour before use prevents sticking. Check for bare spots and add extra flour as necessary.
3. Place the Dough Gently
Set dough rounds lightly on the floured peel instead of firmly pressing down. Allow gravity to ease it into place as you top the pizza.
Periodically jiggle to prevent sticking. Add a touch more flour if needed.
4. Don’t Overload Toppings
It’s tempting to pile on toppings, but excessive amounts make sliding the pizza off the peel tricky. Stick to sensible amounts, especially when learning.
You can always add more toppings once you master the peel slide technique.
5. Try a Semolina-Cornmeal Blend
Some pros recommend an even layer of half fine semolina flour and half cornmeal to keep dough sliding easily.
Give this blend a test run for extra insurance against sticking.
6. Verify Center Placement
Having the dough round evenly centered makes sliding off much easier. Do a quick check before launching.
Re-center carefully if needed.
7. Keep Toppings Back From Edge
Covering all the way to the crust perimeter makes sliding difficult. Keep sauce and toppings back about 1/2 inch.
You’ll still get great coverage without sacrificing ease of transfer.
8. Do the Shake Test First
Before launching, give the peel a gentle shake to ensure the pizza can slide unimpeded. If it sticks, sprinkle on more flour.
9. Use Confident, Continuous Motions
Hesitant, interrupted movements often end poorly. Instead, use decisive, smooth motions the entire time.
Don’t pause or hesitate! Let momentum keep the crust sliding right off the peel.
10. Angle Peel Slightly Downward
Pulling straight out can lead to sticking. Instead, tilt the peel down slightly so the far edge releases first.
Let gravity give you just a little extra assistance for seamless dough transfer.
11. Keep Your Wrist Alignment Straight
It’s natural to want to twist the peel as you launch, but this uneven motion causes folding and sticking.
Concentrate on keeping the peel aligned straight as you slide it evenly in and out.
12. Have a Backup Peel Ready
Even seasoned pros need help sometimes. Have a second peel ready to retrieve any pies that don’t launch perfectly.
Wood peels are ideal for gentle oven retrieval when needed.
13. Gently Rescue Stuck Pies
When things go wrong, carefully retrieve the pizza. Aggressive scraping can damage oven surfaces.
Use gentle motions and flour liberally to salvage the dough for another attempt.
14. Persist Through Early Failures

Mastering the peel slide takes practice. Early flops or stickings are perfectly normal. Toss on some flour and keep trying!
Your skills will improve quickly with regular use.
15. Have Fun!
Home pizza making should be an enjoyable experience. Don’t let minor hiccups ruin the fun!
Stay relaxed, keep tweaking your technique, and delight in the homemade pies.
With the right prep and motions, you’ll be sliding pizzas like a pro in no time. Now grab that peel and start prepping – it’s pizza night!
What’s your best beginner tip for mastering the pizza peel? Share your advice in the comments!
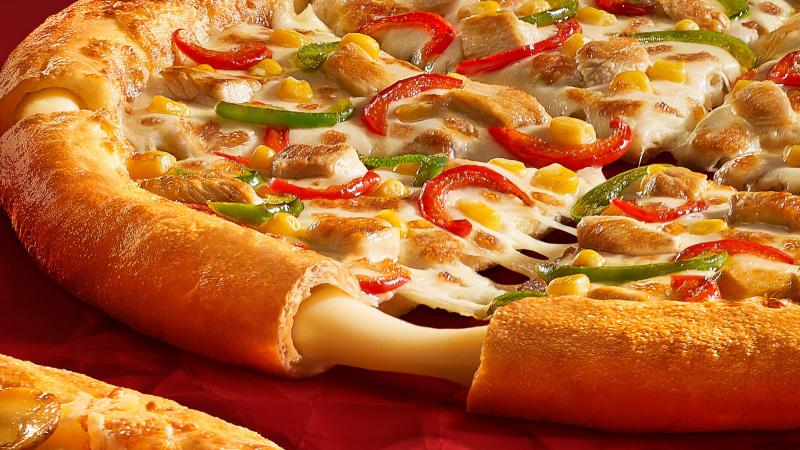
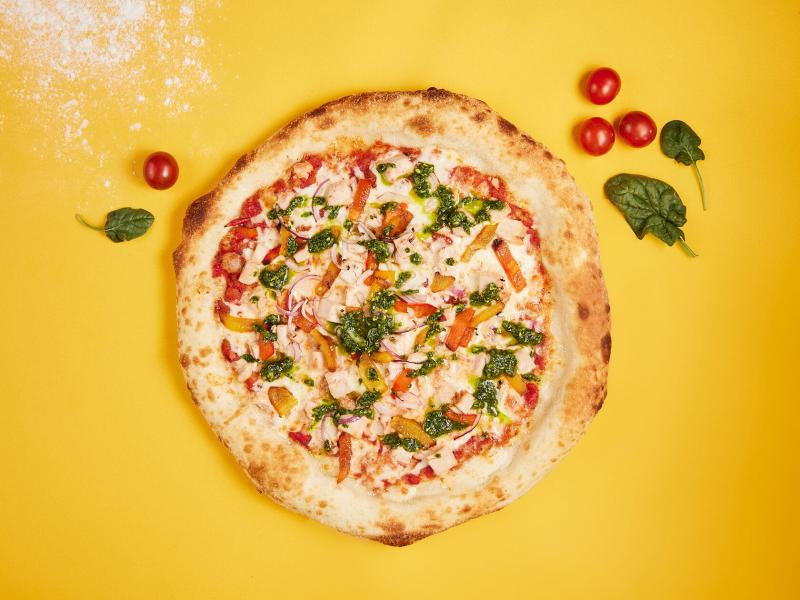
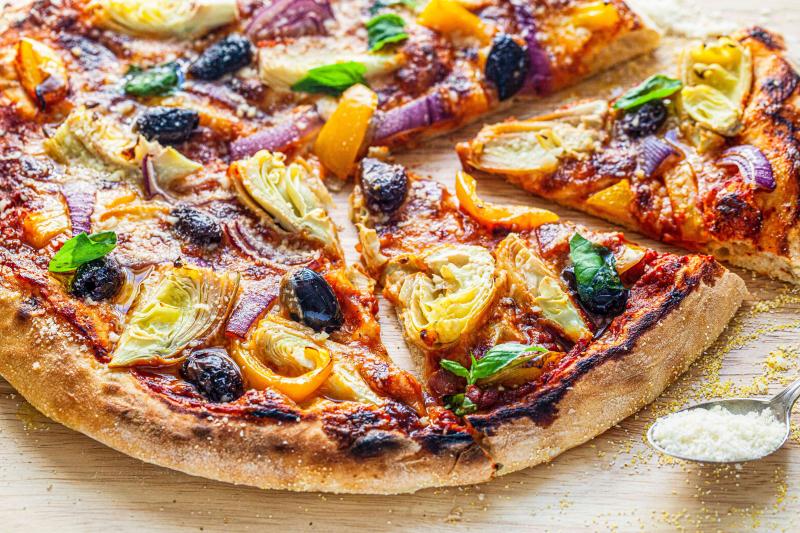
Add Your Toppings Near the Edge for Better Coverage
Achieving wall-to-wall deliciousness with your homemade pizza toppings is an art. The secret? Placing ingredients right up near the edge of the crust for maximum coverage.
Getting your toppings all the way to the perimeter prevents bare spots and delivers deep, edge-to-edge flavor. Here’s how to top like a pro.
Maximize the Real Estate
Pizza dough stretches out into a generous canvas, so make the most of all that space when adding toppings.
Don’t just pile ingredients in the middle – spread them out so flavor goes all the way to the rim.
Prevent Sauce-less Bites
A common topping mistake is leaving a bare ring of outer crust with no sauce. Push sauce fully to the edge so every bite includes robust flavor.
Let sauce slightly overlap the rim to allow for spreading and prevent dry edges.
Get the Cheese Close
Cheese insulates dough and prevents burning, so getting it near the perimeter is key. Spread shredded cheese evenly across the pie, corner to corner.
Covering all the way to the edge prevents a naked crust rim.
Meats Love the Edges
Ingredients like pepperoni and sausage offer great texture and flavor contrast at the crust’s edge. Assign them this prime real estate.
Arrange meats attractively from edge to edge for juicy bite in every slice.
Vegetables Taste Better at the Borders
Veggies piled solely in the middle tend to steam and get lost. Spread them out toward the edges of the pie so they roast and caramelize better.
Onions, peppers, mushrooms and more are delicious when kissed by those hot rim edges.
Other Topping Tips for Edge-to-Edge Coverage
- Stagger ingredients for even distribution
- Slide toppings outward with back of spoon
- Go light in center, heavier near crust
- Sprinkle herbs, spices and zest around entire perimeter
Consider an Outer “Wall” of Crust
For a decorative look with lots of edge to load up on toppings, create a wide outer crust ring.
Just press the rim out an extra inch all around before topping and filling in the middle.
Edge-to-Edge Toppings Mean No Dull Bites
Don’t limit your ingredients to just the central pizza real estate. Maximize flavor and textures by loading toppings out to the crust.
You’ll enjoy every delectable, well-topped bite!
Ready to Throw Pizza Perfection?: 15 Must-Know Camp Chef Pizza Peel Tips for Creating the Perfect Crust at Home
Ask any pizza lover and they’ll tell you – the crust makes or breaks the entire pie. Achieving pizzeria-quality crust at home begins with having the proper tools, especially a top-notch pizza peel.
Camp Chef’s artisan-crafted stainless steel pizza peels enable home chefs to effortlessly slide and retrieve pizzas. Follow these 15 must-know tips to master your Camp Chef peel.
1. Choose the Right Size Peel
Camp Chef offers pro-style pizza peels ranging from compact 12-inch to extra large 16-inch. Consider the pizzas you’ll be making and choose a peel with about 2-3 inches of extra space all around.
Larger peels can handle more but are heavier. Find your ideal balance of size and ease of use.
2. Always Flour the Peel
Lightly coating the entire peel with around 2 tablespoons of flour before use prevents sticking. Check for bare spots and add extra flour as necessary.
3. Place the Dough Gently
Set dough rounds lightly on the floured peel instead of firmly pressing down. Allow gravity to ease it into place as you top the pizza.
Periodically jiggle to prevent sticking. Add a touch more flour if needed.
4. Don’t Overload Toppings
It’s tempting to pile on toppings, but excessive amounts make sliding the pizza off the peel tricky. Stick to sensible amounts, especially when learning.
You can always add more toppings once you master the peel slide technique.
5. Try a Semolina-Cornmeal Blend
Some pros recommend an even layer of half fine semolina flour and half cornmeal to keep dough sliding easily.
Give this blend a test run for extra insurance against sticking.
6. Verify Center Placement
Having the dough round evenly centered makes sliding off much easier. Do a quick check before launching.
Re-center carefully if needed.
7. Keep Toppings Back From Edge
Covering all the way to the crust perimeter makes sliding difficult. Keep sauce and toppings back about 1/2 inch.
You’ll still get great coverage without sacrificing ease of transfer.
8. Do the Shake Test First
Before launching, give the peel a gentle shake to ensure the pizza can slide unimpeded. If it sticks, sprinkle on more flour.
9. Use Confident, Continuous Motions
Hesitant, interrupted movements often end poorly. Instead, use decisive, smooth motions the entire time.
Don’t pause or hesitate! Let momentum keep the crust sliding right off the peel.
10. Angle Peel Slightly Downward
Pulling straight out can lead to sticking. Instead, tilt the peel down slightly so the far edge releases first.
Let gravity give you just a little extra assistance for seamless dough transfer.
11. Keep Your Wrist Alignment Straight
It’s natural to want to twist the peel as you launch, but this uneven motion causes folding and sticking.
Concentrate on keeping the peel aligned straight as you slide it evenly in and out.
12. Have a Backup Peel Ready
Even seasoned pros need help sometimes. Have a second peel ready to retrieve any pies that don’t launch perfectly.
Wood peels are ideal for gentle oven retrieval when needed.
13. Gently Rescue Stuck Pies
When things go wrong, carefully retrieve the pizza. Aggressive scraping can damage oven surfaces.
Use gentle motions and flour liberally to salvage the dough for another attempt.
14. Persist Through Early Failures
Mastering the peel slide takes practice. Early flops or stickings are perfectly normal. Toss on some flour and keep trying!
Your skills will improve quickly with regular use.
15. Have Fun!
Home pizza making should be an enjoyable experience. Don’t let minor hiccups ruin the fun!
Stay relaxed, keep tweaking your technique, and delight in the homemade pies.
With the right prep and motions, you’ll be sliding pizzas like a pro in no time. Now grab that peel and start prepping – it’s pizza night!
What’s your best beginner tip for mastering the pizza peel? Share your advice in the comments!
Keep Your Peel Clean After Each Use
A top-notch pizza peel makes launching and retrieving pies from the oven easy. But letting flour, oil and baked-on bits accumulate will quickly get crusts sticking and sliding askew.
That’s why it’s crucial to keep your pizza peel clean after each use for optimal performance. Follow these tips to properly clean and care for your peel.
Remove Excess Flour
After sliding a pizza off, use a dry pastry brush, towel or gentle scraping motion to remove any leftover flour coating the peel.
This prevents flour from building up into a gummy mess over time.
Wipe Away Oil and Sauce
Use a paper towel to gently wipe the peel surface clean of any oil drips or stray sauce after retrieving baked pizzas.
Don’t let these linger to gum up the works next time you launch a pie.
Deglaze Stuck Bits
If small bits of cheese or toppings get stuck on during use, pour a little hot water over the spot to soften them for easy removal.
This gentle deglazing preserves your peel surface while getting it clean.
Use Non-Metallic Scrubbers
For metal peels, use a plastic scrub brush or wooden scraper to gently remove any stubborn baked-on spots.
Metal scrapers can damage the peel surface over time. Go non-metallic.
Dry Thoroughly
Always be sure to dry your peel thoroughly after cleaning, even if just wiping with a towel.
Any lingering moisture can speed up metal rusting or wood warping.
Apply Food-Safe Oil
Rub a thin layer of food-safe mineral oil into a wooden peel periodically to keep the surface protected.
Oil prevents drying out and preserves the wood.
Store Carefully
Hang peels or lay them flat instead of propping them up against walls. This prevents warping or dinging that affects use.
Take care not to knock wood peels together to prevent chipping.
Deep Clean Routinely
Every few months, do a thorough deep cleaning of your peel to remove any flour or oil buildup.
Use warm water, gentle dish soap, and a non-abrasive scrubber to keep things fresh.
Don’t Soak Wooden Peels
While metal peels can be briefly soaked to loosen debris, avoid soaking wood peels as they can quickly warp and crack.
Instead, use a damp cloth and minimal water.
Proper Care Means Pizza Success
Taking the time to properly clean and store your peel means it will perform like new peel after peel.
A well cared for peel makes crispy crusts a breeze! Now grab that brush and get your peel party ready.
Ready to Throw Pizza Perfection?: 15 Must-Know Camp Chef Pizza Peel Tips for Creating the Perfect Crust at Home

Ask any pizza lover and they’ll tell you – the crust makes or breaks the entire pie. Achieving pizzeria-quality crust at home begins with having the proper tools, especially a top-notch pizza peel.
Camp Chef’s artisan-crafted stainless steel pizza peels enable home chefs to effortlessly slide and retrieve pizzas. Follow these 15 must-know tips to master your Camp Chef peel.
1. Choose the Right Size Peel
Camp Chef offers pro-style pizza peels ranging from compact 12-inch to extra large 16-inch. Consider the pizzas you’ll be making and choose a peel with about 2-3 inches of extra space all around.
Larger peels can handle more but are heavier. Find your ideal balance of size and ease of use.
2. Always Flour the Peel
Lightly coating the entire peel with around 2 tablespoons of flour before use prevents sticking. Check for bare spots and add extra flour as necessary.
3. Place the Dough Gently
Set dough rounds lightly on the floured peel instead of firmly pressing down. Allow gravity to ease it into place as you top the pizza.
Periodically jiggle to prevent sticking. Add a touch more flour if needed.
4. Don’t Overload Toppings
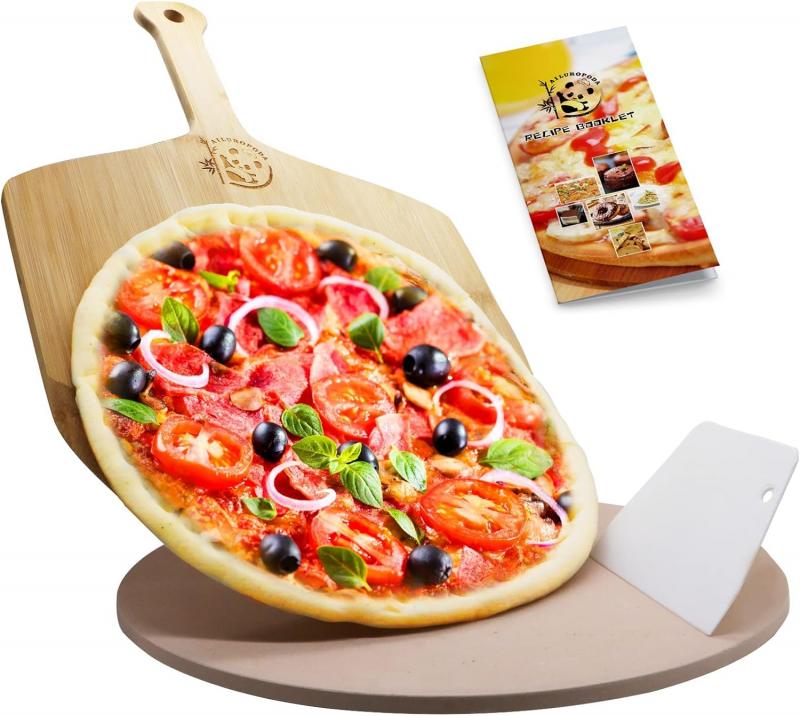
It’s tempting to pile on toppings, but excessive amounts make sliding the pizza off the peel tricky. Stick to sensible amounts, especially when learning.
You can always add more toppings once you master the peel slide technique.
5. Try a Semolina-Cornmeal Blend
Some pros recommend an even layer of half fine semolina flour and half cornmeal to keep dough sliding easily.
Give this blend a test run for extra insurance against sticking.
6. Verify Center Placement
Having the dough round evenly centered makes sliding off much easier. Do a quick check before launching.
Re-center carefully if needed.
7. Keep Toppings Back From Edge
Covering all the way to the crust perimeter makes sliding difficult. Keep sauce and toppings back about 1/2 inch.
You’ll still get great coverage without sacrificing ease of transfer.
8. Do the Shake Test First
Before launching, give the peel a gentle shake to ensure the pizza can slide unimpeded. If it sticks, sprinkle on more flour.
9. Use Confident, Continuous Motions
Hesitant, interrupted movements often end poorly. Instead, use decisive, smooth motions the entire time.
Don’t pause or hesitate! Let momentum keep the crust sliding right off the peel.
10. Angle Peel Slightly Downward
Pulling straight out can lead to sticking. Instead, tilt the peel down slightly so the far edge releases first.
Let gravity give you just a little extra assistance for seamless dough transfer.
11. Keep Your Wrist Alignment Straight
It’s natural to want to twist the peel as you launch, but this uneven motion causes folding and sticking.
Concentrate on keeping the peel aligned straight as you slide it evenly in and out.
12. Have a Backup Peel Ready
Even seasoned pros need help sometimes. Have a second peel ready to retrieve any pies that don’t launch perfectly.
Wood peels are ideal for gentle oven retrieval when needed.
13. Gently Rescue Stuck Pies
When things go wrong, carefully retrieve the pizza. Aggressive scraping can damage oven surfaces.
Use gentle motions and flour liberally to salvage the dough for another attempt.
14. Persist Through Early Failures
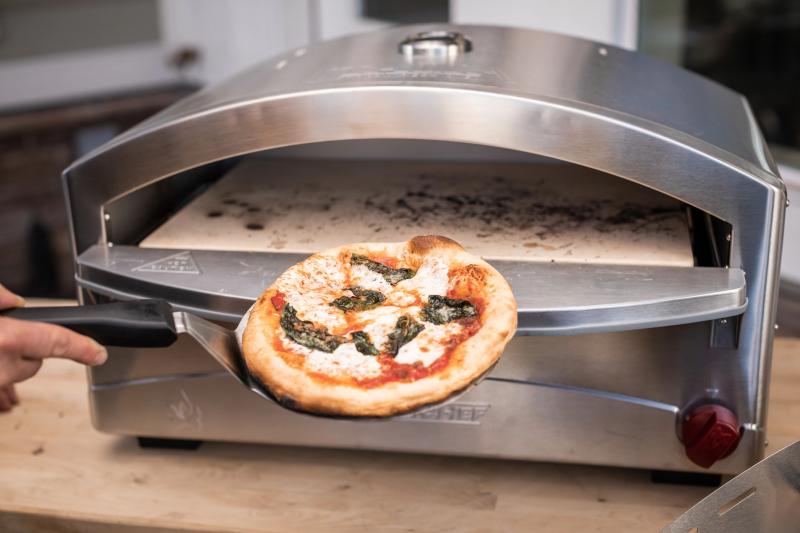
Mastering the peel slide takes practice. Early flops or stickings are perfectly normal. Toss on some flour and keep trying!
Your skills will improve quickly with regular use.
15. Have Fun!
Home pizza making should be an enjoyable experience. Don’t let minor hiccups ruin the fun!
Stay relaxed, keep tweaking your technique, and delight in the homemade pies.
With the right prep and motions, you’ll be sliding pizzas like a pro in no time. Now grab that peel and start prepping – it’s pizza night!
What’s your best beginner tip for mastering the pizza peel? Share your advice in the comments!
Consider a Turning Peel for Retrieving Pizza
Getting hot, fresh pizza smoothly in and out of the oven is tricky without the right tools. While a standard peel launches pies, a turning peel makes retrieving baked pizzas safer and easier.
This specialized dual-sided tool flips pizzas for easy removal with less mess or damage. Here’s why a turning peel should be in every home pizza chef’s arsenal.
Flipping Prevents Topping Spills

Trying to pull a fully-loaded baked pizza backwards off a peel often leads to messy spills and burns. A turning peel lets you gently flip the crust instead.
This keeps delicious toppings intact and contained.
The Angled Edges Slide Underneath
Turning peels have a tapered, beveled front edge that easily slides underneath finished pizzas for smooth flipping.
The slope lets you capture and flip pies without disturbing them.
Dual Sides Give You Options
A turning peel’s double-sided design provides the right edge for any pizza maneuver. Use the angled side for flipping retrieval and the flat side for launching.
Two peel surfaces built into one tool – convenience at its best!
The Slots Allow Steam Release
Turning peels feature slots or holes that vent steam as you retrieve pizza. This prevents soggy bottoms.
The vents also help keep the pizza from sticking to the peel.
How to Use a Turning Peel
Using a turning peel takes a gentle touch:
- Approach pizza at an angle
- Carefully slide tapered edge underneath crust
- Flip pizza upside down onto peel surface
- Slide pizza off peel onto cutting board or plate
Look for Quality Materials
Look for turning peels made from wood, aluminum, or stainless steel. High-temperature plastics can melt.
Quality materials withstand oven heat for safe, easy pizza flipping.
Consider Ergonomic Handle Designs
Look for a turning peel with a handle designed to prevent wrist strain. Well-shaped handles provide a comfortable, secure grip.
A bad handle makes flipping challenging and risky.
Keep the Surface Floured
Be sure to flour the flat side of the turning peel before launching pizzas just like a regular peel. This prevents sticking.
A light coating of cornmeal also helps keep turned crusts from grabbing.
Flip with Care
Rush the flip and you may end up wearing the toppings! Use controlled, gentle motions to keep pizzas contained.
Practice makes perfect.
The Right Tool for the Job
Skip the frustrations and burned fingers that come with awkward pizza retrieval. Let a turning peel take over the hot oven work.
Your pies will thank you – no mess, no stress.
Ready to Throw Pizza Perfection?: 15 Must-Know Camp Chef Pizza Peel Tips for Creating the Perfect Crust at Home
Ask any pizza lover and they’ll tell you – the crust makes or breaks the entire pie. Achieving pizzeria-quality crust at home begins with having the proper tools, especially a top-notch pizza peel.
Camp Chef’s artisan-crafted stainless steel pizza peels enable home chefs to effortlessly slide and retrieve pizzas. Follow these 15 must-know tips to master your Camp Chef peel.
1. Choose the Right Size Peel
Camp Chef offers pro-style pizza peels ranging from compact 12-inch to extra large 16-inch. Consider the pizzas you’ll be making and choose a peel with about 2-3 inches of extra space all around.
Larger peels can handle more but are heavier. Find your ideal balance of size and ease of use.
2. Always Flour the Peel
Lightly coating the entire peel with around 2 tablespoons of flour before use prevents sticking. Check for bare spots and add extra flour as necessary.
3. Place the Dough Gently
Set dough rounds lightly on the floured peel instead of firmly pressing down. Allow gravity to ease it into place as you top the pizza.
Periodically jiggle to prevent sticking. Add a touch more flour if needed.
4. Don’t Overload Toppings
It’s tempting to pile on toppings, but excessive amounts make sliding the pizza off the peel tricky. Stick to sensible amounts, especially when learning.
You can always add more toppings once you master the peel slide technique.
5. Try a Semolina-Cornmeal Blend
Some pros recommend an even layer of half fine semolina flour and half cornmeal to keep dough sliding easily.
Give this blend a test run for extra insurance against sticking.
6. Verify Center Placement
Having the dough round evenly centered makes sliding off much easier. Do a quick check before launching.
Re-center carefully if needed.
7. Keep Toppings Back From Edge
Covering all the way to the crust perimeter makes sliding difficult. Keep sauce and toppings back about 1/2 inch.
You’ll still get great coverage without sacrificing ease of transfer.
8. Do the Shake Test First
Before launching, give the peel a gentle shake to ensure the pizza can slide unimpeded. If it sticks, sprinkle on more flour.
9. Use Confident, Continuous Motions
Hesitant, interrupted movements often end poorly. Instead, use decisive, smooth motions the entire time.
Don’t pause or hesitate! Let momentum keep the crust sliding right off the peel.
10. Angle Peel Slightly Downward
Pulling straight out can lead to sticking. Instead, tilt the peel down slightly so the far edge releases first.
Let gravity give you just a little extra assistance for seamless dough transfer.
11. Keep Your Wrist Alignment Straight
It’s natural to want to twist the peel as you launch, but this uneven motion causes folding and sticking.
Concentrate on keeping the peel aligned straight as you slide it evenly in and out.
12. Have a Backup Peel Ready
Even seasoned pros need help sometimes. Have a second peel ready to retrieve any pies that don’t launch perfectly.
Wood peels are ideal for gentle oven retrieval when needed.
13. Gently Rescue Stuck Pies
When things go wrong, carefully retrieve the pizza. Aggressive scraping can damage oven surfaces.
Use gentle motions and flour liberally to salvage the dough for another attempt.
14. Persist Through Early Failures
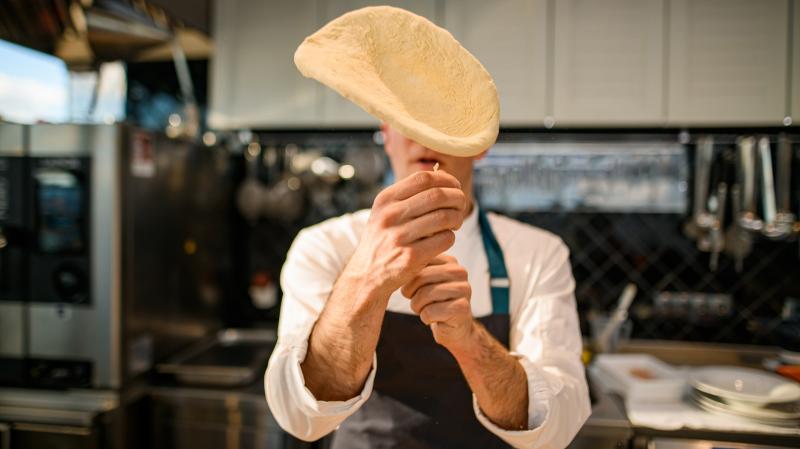
Mastering the peel slide takes practice. Early flops or stickings are perfectly normal. Toss on some flour and keep trying!
Your skills will improve quickly with regular use.
15. Have Fun!
Home pizza making should be an enjoyable experience. Don’t let minor hiccups ruin the fun!
Stay relaxed, keep tweaking your technique, and delight in the homemade pies.
With the right prep and motions, you’ll be sliding pizzas like a pro in no time. Now grab that peel and start prepping – it’s pizza night!
What’s your best beginner tip for mastering the pizza peel? Share your advice in the comments!
Store Horizontally to Prevent Warping
A quality pizza peel makes landing pies in the oven a breeze when cared for properly. And one key peel care tip is always storing horizontally to prevent the wood or metal from warping.
Laying peels flat keeps them in true so they function their best. Follow these tips for storing your peels to prevent bends and preserve performance.
Gravity Causes Warping
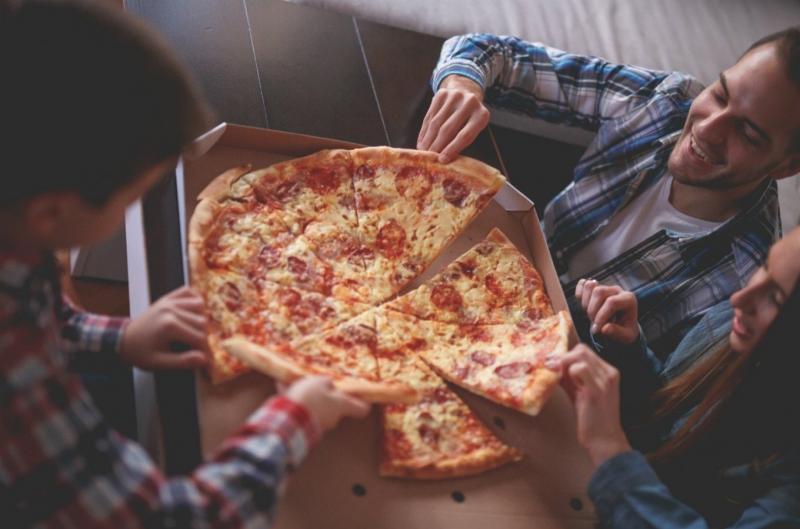
Storing peels vertically, resting on the handle or hanging on a hook allows gravity to pull on the surface over time.
This gradually causes the wood or metal to bend, warp and lose its shape.
Lay Them Flat
Always place peels with their entire surface evenly supported on a flat, level surface. This prevents sagging and distortion.
A sturdy shelf, cabinet or drawer where the peel lies flat is ideal.
Avoid Leaning on Walls
It may seem convenient to stand peels on their handle leaning against a wall, but don’t! The downward force causes warping.
Find a spot to lie peels flat instead for maintenance-free storage.
Pad Underneath for Support
If storing peels in a drawer or cabinet, line the bottom with non-slip shelf liner or a pad. This prevents dings and provides even support.
Avoid placing heavy items on top that could bend the peel.
Hang Evenly If Space Limited
If you must hang your peel, look for a center-balanced hanger that evenly distributes weight.
Offset hangers cause uneven stress that can gradually warp the peel.
Keep Wood Surfaces Conditioned
Rub a food-safe mineral oil into wooden peels before storage. This maintains moisture and flexibility.
A dried out wooden peel is more prone to cracking and warping in storage.
Store with Care
Avoid tossing peels haphazardly. Place gently to prevent dings and chips in the edges.
Careful storage means your peel stays in top working order.
Check Monthly for Warping
Periodically inspect your stored peels for any bends or shape distortion. Catch issues early before they worsen.
Proper flat storage prevents this, but it’s wise to be proactive.
Untrue Peels Work Poorly
A warped or bent peel won’t allow smooth launching and retrieving. Take steps to keep your peels flat.
Proper horizontal storage maintains precision function so peels perform their best.
Ready to Throw Pizza Perfection?: 15 Must-Know Camp Chef Pizza Peel Tips for Creating the Perfect Crust at Home
Ask any pizza lover and they’ll tell you – the crust makes or breaks the entire pie. Achieving pizzeria-quality crust at home begins with having the proper tools, especially a top-notch pizza peel.
Camp Chef’s artisan-crafted stainless steel pizza peels enable home chefs to effortlessly slide and retrieve pizzas. Follow these 15 must-know tips to master your Camp Chef peel.
1. Choose the Right Size Peel
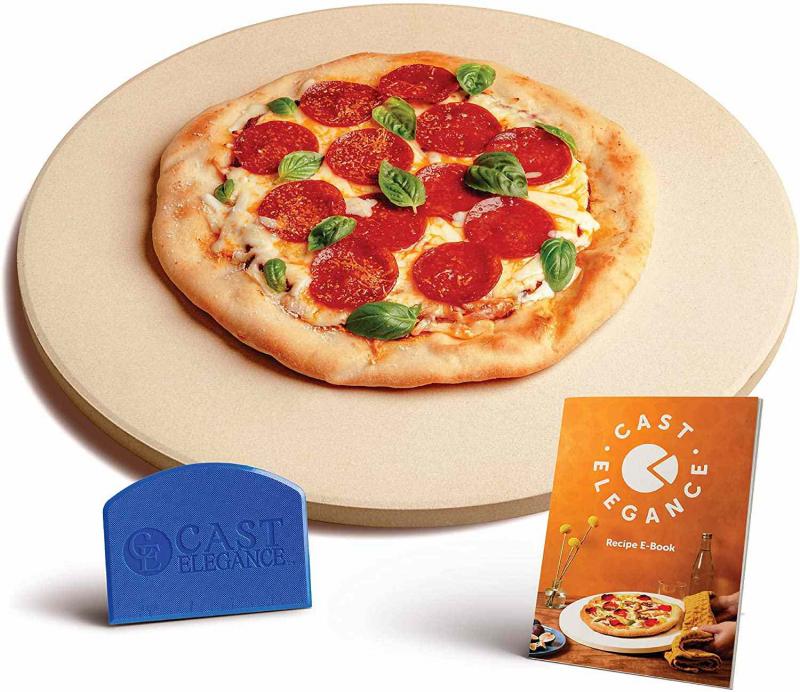
Camp Chef offers pro-style pizza peels ranging from compact 12-inch to extra large 16-inch. Consider the pizzas you’ll be making and choose a peel with about 2-3 inches of extra space all around.
Larger peels can handle more but are heavier. Find your ideal balance of size and ease of use.
2. Always Flour the Peel
Lightly coating the entire peel with around 2 tablespoons of flour before use prevents sticking. Check for bare spots and add extra flour as necessary.
3. Place the Dough Gently
Set dough rounds lightly on the floured peel instead of firmly pressing down. Allow gravity to ease it into place as you top the pizza.
Periodically jiggle to prevent sticking. Add a touch more flour if needed.
4. Don’t Overload Toppings
It’s tempting to pile on toppings, but excessive amounts make sliding the pizza off the peel tricky. Stick to sensible amounts, especially when learning.
You can always add more toppings once you master the peel slide technique.
5. Try a Semolina-Cornmeal Blend
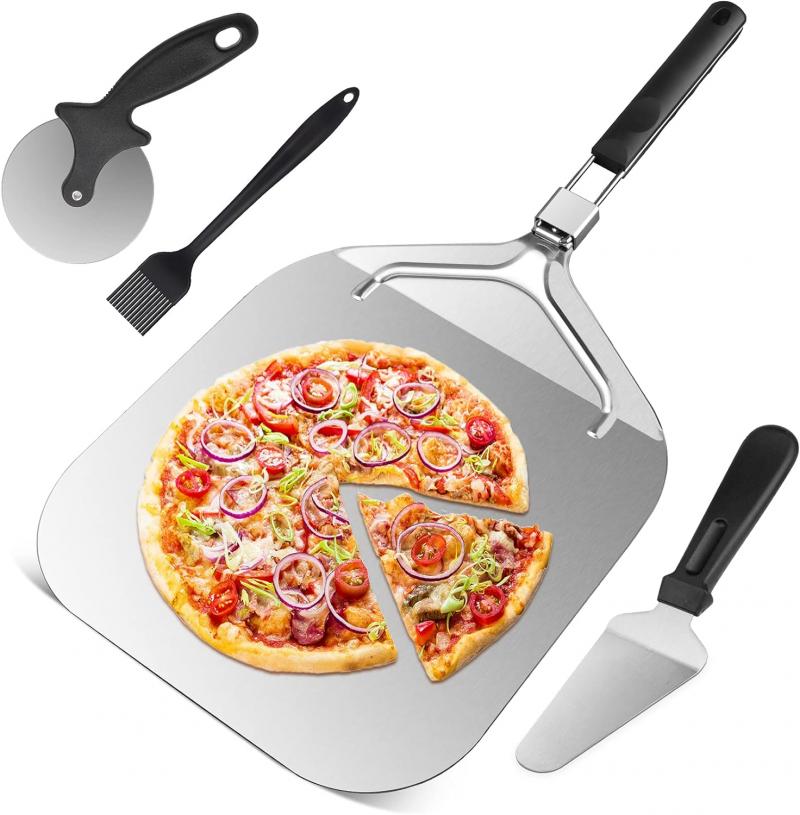
Some pros recommend an even layer of half fine semolina flour and half cornmeal to keep dough sliding easily.
Give this blend a test run for extra insurance against sticking.
6. Verify Center Placement
Having the dough round evenly centered makes sliding off much easier. Do a quick check before launching.
Re-center carefully if needed.
7. Keep Toppings Back From Edge
Covering all the way to the crust perimeter makes sliding difficult. Keep sauce and toppings back about 1/2 inch.
You’ll still get great coverage without sacrificing ease of transfer.
8. Do the Shake Test First
Before launching, give the peel a gentle shake to ensure the pizza can slide unimpeded. If it sticks, sprinkle on more flour.
9. Use Confident, Continuous Motions
Hesitant, interrupted movements often end poorly. Instead, use decisive, smooth motions the entire time.
Don’t pause or hesitate! Let momentum keep the crust sliding right off the peel.
10. Angle Peel Slightly Downward
Pulling straight out can lead to sticking. Instead, tilt the peel down slightly so the far edge releases first.
Let gravity give you just a little extra assistance for seamless dough transfer.
11. Keep Your Wrist Alignment Straight
It’s natural to want to twist the peel as you launch, but this uneven motion causes folding and sticking.
Concentrate on keeping the peel aligned straight as you slide it evenly in and out.
12. Have a Backup Peel Ready
Even seasoned pros need help sometimes. Have a second peel ready to retrieve any pies that don’t launch perfectly.
Wood peels are ideal for gentle oven retrieval when needed.
13. Gently Rescue Stuck Pies
When things go wrong, carefully retrieve the pizza. Aggressive scraping can damage oven surfaces.
Use gentle motions and flour liberally to salvage the dough for another attempt.
14. Persist Through Early Failures
Mastering the peel slide takes practice. Early flops or stickings are perfectly normal. Toss on some flour and keep trying!
Your skills will improve quickly with regular use.
15. Have Fun!
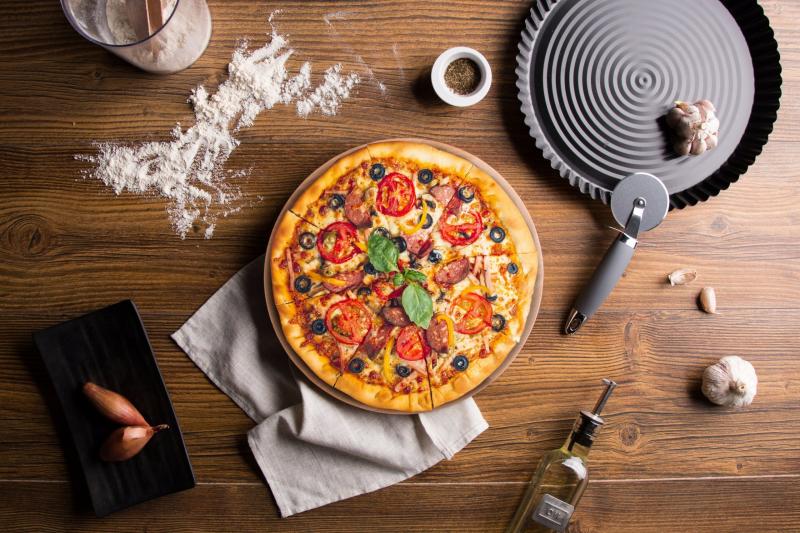
Home pizza making should be an enjoyable experience. Don’t let minor hiccups ruin the fun!
Stay relaxed, keep tweaking your technique, and delight in the homemade pies.
With the right prep and motions, you’ll be sliding pizzas like a pro in no time. Now grab that peel and start prepping – it’s pizza night!
What’s your best beginner tip for mastering the pizza peel? Share your advice in the comments!
Let Your Pizza Peel Warm Up Near the Oven
A piping hot oven and a properly floured peel seem like the only requirements foreffortless pizza sliding. But one extra step can make a big difference – letting your peel warm up nearby before use.
Giving your pizza peel time to gradually warm prevents dough sticking and gives you the perfect launch every time. Here’s why and how to do it.
Warm Metal and Wood Perform Better
A freezing cold pizza peel right out of storage can shock dough, causing it to stick. Letting it gradually warm to room temp prevents this issue.
Warmer peel materials slide more smoothly. Slow warming prevents condensation too.
Reduce Risk of Unbaked Spots
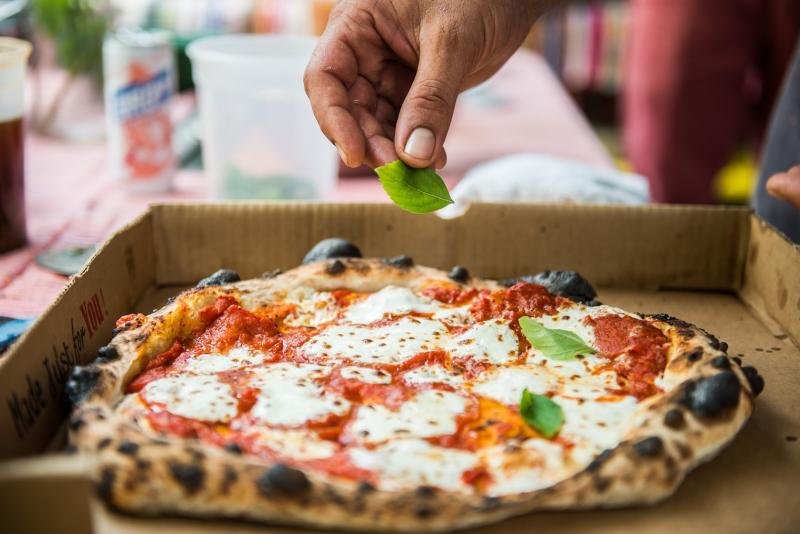
A peel still cold from storage saps heat rapidly from dough, potentially leaving unbaked spots on the crust bottom.
A warm peel maintains the right dough temperature for even cooking results.
Prevent Condensation Buildup
Plunging an icy cold peel into a hot oven causes condensation to accumulate on the surface as it warms up.
Gradual warmup prevents this excess moisture that makes dough stick.
How to Warm up Your Pizza Peel
Let your peel temper passively:
- Leave near oven as it preheats for 30+ minutes
- Bring out peel while making dough/toppings
- Store peels at room temp or hang near kitchen
- Never cold-plunge a frozen peel into the oven
Check for Warmth Before Use
Pay attention to your peel’s temp before launching a pie. If it still feels cold, give it a few more minutes to warm up.
You want it to feel pleasantly warm but not hot to the touch before use.
Warm Up Metal or Wood Peels
All pizza peels, whether wood or metal, benefit from passive warming before pie prep begins.
Just a gradual temp increase prevents sticking issues.
No Oven Warming Needed
Don’t put cold peels inside the oven to warm. Gradual natural warming as the oven preheats is enough.
Just keep your peel nearby as you get pizza night started!
Make It Part of Your Routine
Get in the habit of warming your peel every pizza night by leaving it out as you begin oven and dough prep.
This simple habit means frustration-free pizza launching!
Smooth Sliding Starts with a Warm Peel
Don’t underestimate this quick extra step. Letting your peel warm up prevents stickiness and sliding failures.
Keep your peel happy so it keeps those crispy pizzas moving!
Ready to Throw Pizza Perfection?: 15 Must-Know Camp Chef Pizza Peel Tips for Creating the Perfect Crust at Home
Ask any pizza lover and they’ll tell you – the crust makes or breaks the entire pie. Achieving pizzeria-quality crust at home begins with having the proper tools, especially a top-notch pizza peel.
Camp Chef’s artisan-crafted stainless steel pizza peels enable home chefs to effortlessly slide and retrieve pizzas. Follow these 15 must-know tips to master your Camp Chef peel.
1. Choose the Right Size Peel
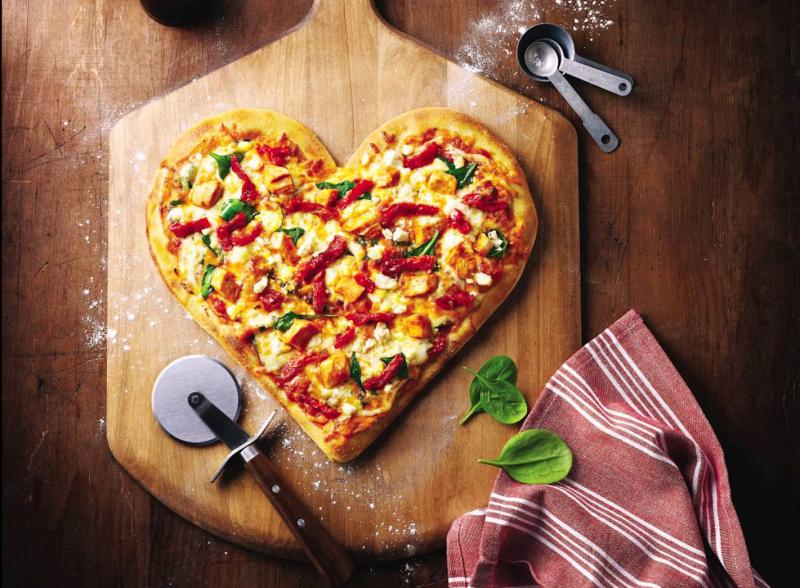
Camp Chef offers pro-style pizza peels ranging from compact 12-inch to extra large 16-inch. Consider the pizzas you’ll be making and choose a peel with about 2-3 inches of extra space all around.
Larger peels can handle more but are heavier. Find your ideal balance of size and ease of use.
2. Always Flour the Peel
Lightly coating the entire peel with around 2 tablespoons of flour before use prevents sticking. Check for bare spots and add extra flour as necessary.
3. Place the Dough Gently
Set dough rounds lightly on the floured peel instead of firmly pressing down. Allow gravity to ease it into place as you top the pizza.
Periodically jiggle to prevent sticking. Add a touch more flour if needed.
4. Don’t Overload Toppings
It’s tempting to pile on toppings, but excessive amounts make sliding the pizza off the peel tricky. Stick to sensible amounts, especially when learning.
You can always add more toppings once you master the peel slide technique.
5. Try a Semolina-Cornmeal Blend
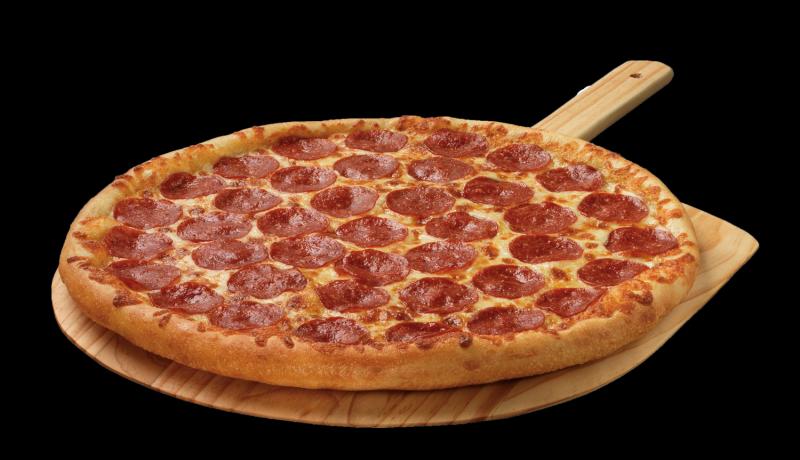
Some pros recommend an even layer of half fine semolina flour and half cornmeal to keep dough sliding easily.
Give this blend a test run for extra insurance against sticking.
6. Verify Center Placement
Having the dough round evenly centered makes sliding off much easier. Do a quick check before launching.
Re-center carefully if needed.
7. Keep Toppings Back From Edge
Covering all the way to the crust perimeter makes sliding difficult. Keep sauce and toppings back about 1/2 inch.
You’ll still get great coverage without sacrificing ease of transfer.
8. Do the Shake Test First
Before launching, give the peel a gentle shake to ensure the pizza can slide unimpeded. If it sticks, sprinkle on more flour.
9. Use Confident, Continuous Motions
Hesitant, interrupted movements often end poorly. Instead, use decisive, smooth motions the entire time.
Don’t pause or hesitate! Let momentum keep the crust sliding right off the peel.
10. Angle Peel Slightly Downward
Pulling straight out can lead to sticking. Instead, tilt the peel down slightly so the far edge releases first.
Let gravity give you just a little extra assistance for seamless dough transfer.
11. Keep Your Wrist Alignment Straight
It’s natural to want to twist the peel as you launch, but this uneven motion causes folding and sticking.
Concentrate on keeping the peel aligned straight as you slide it evenly in and out.
12. Have a Backup Peel Ready
Even seasoned pros need help sometimes. Have a second peel ready to retrieve any pies that don’t launch perfectly.
Wood peels are ideal for gentle oven retrieval when needed.
13. Gently Rescue Stuck Pies
When things go wrong, carefully retrieve the pizza. Aggressive scraping can damage oven surfaces.
Use gentle motions and flour liberally to salvage the dough for another attempt.
14. Persist Through Early Failures
Mastering the peel slide takes practice. Early flops or stickings are perfectly normal. Toss on some flour and keep trying!
Your skills will improve quickly with regular use.
15. Have Fun!
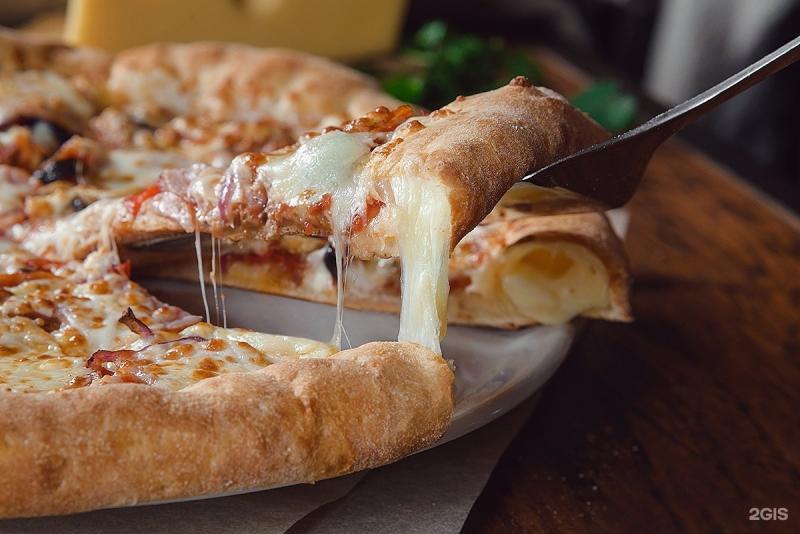
Home pizza making should be an enjoyable experience. Don’t let minor hiccups ruin the fun!
Stay relaxed, keep tweaking your technique, and delight in the homemade pies.
With the right prep and motions, you’ll be sliding pizzas like a pro in no time. Now grab that peel and start prepping – it’s pizza night!
What’s your best beginner tip for mastering the pizza peel? Share your advice in the comments!
For pizza enthusiasts, few things are more satisfying than pulling a perfect pie out of your own oven. With the right tools and techniques, you can achieve Neapolitan-style results in your home kitchen. And when it comes to equipment, Camp Chef leads the way with high quality pizza peels and baking stones engineered for outstanding performance.
Choose Camp Chef for High Quality Pizza Peels and Stones
Camp Chef offers an extensive selection of pizza-making accessories, including peels, stones, cutters, and more. Their pizza peels come in a variety of materials, sizes, and designs to suit any need. Here are some top reasons to choose Camp Chef pizza peels and stones:
- Durability – Constructed from heavy-duty metals like aluminum and stainless steel, Camp Chef pizza peels are built to last through years of regular use. Their solid construction means no warping or bending over time.
- Versatility – Available in round and rectangular shapes, as well as multiple sizes, Camp Chef’s pizza peels allow you to transfer and launch pies of all styles and sizes. Models with perforated surfaces provide an ideal release.
- High-quality materials – Only the best materials are used, including finished hardwood handles and food-grade metals that are safe for contact with dough. Camp Chef pizza stones are made from cordierite for excellent thermal shock resistance.
- Innovative designs – Patented features like built-in drip catchers on the 14″ pizza peel help keep your prep area tidy. Stones have feet to elevate hot surfaces off counters.
- Recipes and tips – Camp Chef provides tons of guidance on their website and social channels to help you master all aspects of homemade pizza using their products.
- Brand reputation – With decades of experience making specialized outdoor cooking equipment, Camp Chef is a leading brand that customers trust for high performance and reliability.
Whether you’re an amateur pizza enthusiast or seasoned chef, Camp Chef peels and stones offer superior functionality to help you sear, slide, and serve incredible pizzas. Keep reading for tips on choosing the right models and using them to achieve pizza perfection!
Pick the Perfect Pizza Peel
With all the options Camp Chef offers, how do you select the right pizza peel? Here are some key factors to consider:
- Size – Available in 12″, 14″, and 16″ diameters, Camp Chef pizza peels allow you to match your peel size to your typical pie size for easy maneuvering.
- Shape – Round peels are ideal for turning and removing round pies from your oven, while rectangular peels offer greater leverage for moving larger oblong pizzas.
- Material – Perforated aluminum peels permit flour to fall through for an easy release, while stainless steel models provide durability and a smooth polished finish.
- Features – Look for helpful extras like hanging holes, built-in herb strippers, or ergonomic handles to enhance functionality.
- Weight – Heavier peels made of thick metal tend to perform better than lightweight models, as the extra weight aids in sliding pizzas.
Think about your current pizza making setup and habits. Do you normally cook 12″ or 16″ pies? How heavy is your dough? Do you need to hang the peel nearby when prepping? Once you determine your needs, select the Camp Chef pizza peel size, style, and features that best match.
Pick the Right Pizza Stone for Your Oven
For crispy crusts and even baking, a pizza stone is a must. Here are tips for selecting the ideal Camp Chef pizza stone:
- Measure your oven dimensions and choose a round or square stone that leaves at least 1-2″ clearance on all sides.
- Opt for the largest size that will fit your oven – bigger stones hold more heat and can accommodate larger pizzas.
- Match the thickness to your oven’s heating element – 1/2″ stones for gas ovens or 3/4″ for electric ovens.
- Consider convenience features like handles or a cordierite construction that resists cracking from thermal shock.
- For outdoor ovens, select an unframed stone that fits your oven floor dimensions.
Pro Tip: Let your new pizza stone “season” before first use by giving it a test run at high heat to burn off manufacturing residues. This improves surface texture and absorbency so dough crisps up better.
Top Techniques for Using Pizza Peels
Mastering the pizza peel takes practice but is worth the effort. Follow these pro tips when using your Camp Chef pizza peel for best results:
- Chill the dough thoroughly before stretching to prevent sticking and facilitate easy transfer.
- Liberally coat the peel surface with semolina flour or cornmeal before sliding on dough. A perforated peel surface further minimizes sticking.
- Stretch dough by hand then transfer onto the peel and shape into the desired crust style. Work efficiently to keep dough chilled.
- Use quick forward and backward jerking motions to launch dough smoothly onto the stone and avoid sticking.
- Beware of overladen toppings, which can weigh down dough and impede sliding. Spread toppings sparsely over sauce.
- Transfer baked pizzas off the stone onto a cutting board, never back onto the used flour-covered peel surface.
- Cool metal or wood-handled peels fully before cleaning to avoid burns or warping. Use a plastic scraper to dislodge stuck-on flour.
Position Your Pizza Stone for Perfection
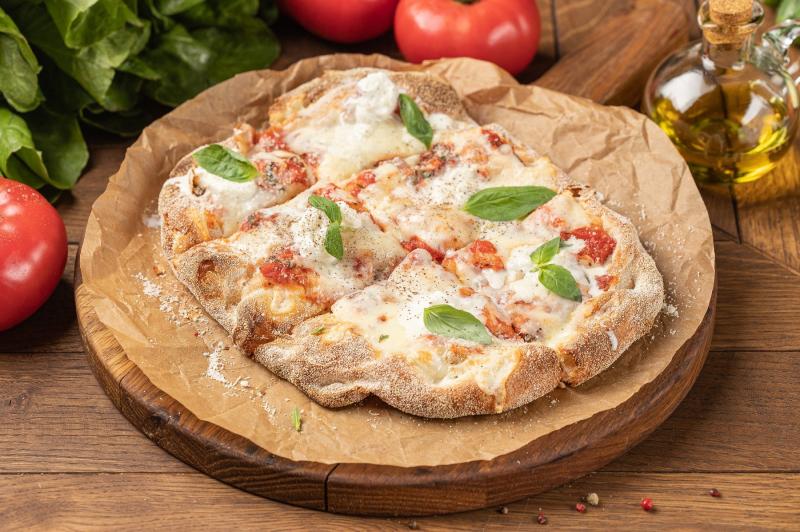
To fully capitalize on your pizza stone for incredible crusts:
- Place the stone on your oven’s lowest rack or floor. Bottom-up heat crisps the crust while toasting the top.
- Preheat your oven and stone completely for at least 1 hour at max temperature before baking.
- For outdoor ovens, situate the stone in the very back to use residual heat for extra browning underneath.
- Turn on oven broiler for the last 2-3 minutes of baking to add those coveted charred bubbles.
- Allow the stone to fully cool down before removal for cleaning. Heat shock can damage cordierite.
With the right prep and positioning, your pizza stone acts as a heat battery to deliver crisp, golden perfection with every pie.
To Elevate Your Pizza Game, Elevate Your Equipment
Great pizza begins with great tools, and Camp Chef offers an unbeatable range of high performance pizza peels and stones. Their smart innovations and quality materials empower home chefs to craft incredible artisan-style pizzas rivaling any pizzeria.
Bring the joy of pizza night home with Camp Chef. Their expertise streamlines prep and perfects the cooking process, so your friends and family can enjoy your culinary creations baked to melty, crispy perfection. The next memorable pizza experience is just a peel away.
