Ready to Re-String Your Stick This Season. Master Lacrosse Stringing With These 15 Essential TipsReady to Re-String Your Stick This Season. Master Lacrosse Stringing With These 15 Essential Tips
Choose the Right Head for Your Playing Style
When it comes to lacrosse stringing, it all starts with selecting the right head for your position and playing style. Middies need a head with a narrower channel and scoop for quick ball handling and passing while attackers prefer a wider head for catching difficult passes and ripping off hard shots on cage. Know if you like a high, mid or low pocket too. The right head sets the foundation for stringing a pocket you’ll love.
Pick High-Quality Mesh and Sidewall String
Don’t skimp on stringing supplies! Investing in premium hardcore mesh, like StringKing or ECD, gives you durability, consistency, shape-holding ability and decreased break-in time over generic mesh. When buying sidewall string, choose lacrosse-specific brands with wax coating like Jimaaw rather than nylon craft lace. This prevents fraying and keeps knots tight.
Get a Quality Stringing Kit for Convenience
A pre-packaged stringing kit takes the guesswork out of buying supplies individually. Look for ones with side cutters, heavy-duty pliers, a screw-on stringing needle and a mesh cutter for ease of stringing. StringKing, ECD, Throne of String, and Jimalax all offer excellent complete kits. As an added bonus, some come with starter mesh and sidewall pieces too.
Master Interlocking and Anchor Knots
Before stringing, learn two essential lacrosse knots – the interlock and the anchor knot. Interlocks connect sidewall to mesh and anchor knots affix string to plastic. Watch online tutorials and practice both knots until you can tie them with your eyes closed. Proper knotting leads to secure stringing that won’t unravel after a few practices. Develop this key skill early on.
Follow Pocket and Channel Specs
For optimal ball control and release, adhere to the manufacturer’s recommended pocket and channel specifications. This info is usually on a sticker or insert with new heads. Though you can tweak these to your preference, sticking near the specs gives a balanced starting point. An overstuffed channel or super deep pocket can make sticks illegal in gameplay.
Get the Shooting Strings Right
Shooting strings running horizontally across the throat of the head refine the pocket’s hold on the ball. Use the same piece of sidewall string anchored at each sidewall hole. Keep the knots snug up against the scoop. The shooting string ensures solid ball retention for passing and shooting accuracy. Don’t skip this step!
Find Your Mid and Sidewall Stringing Pattern
Once you choose mesh and sidewall string, next decide on stringing the midsection. Go with a traditional straight 10-diamond top string or switch things up with a unique pattern like chevron, pinwheel or waffle-top. The options are endless! Sidewall stringing patterns like stacked, two- straight or one-nylon also impact pocket shape.
Adjust Top String Tension and Angle
The top string runs sidewall-to-sidewall across the scoop of the head. This string largely influences how the pocket forms when broken in. Putting it under higher tension or at a steeper angle yields a deeper pre-broken in pocket. Test out varying tightnesses and angles to find your ideal setup.
Tie Off the Bottom String Neatly
A clean knot finish on the bottom string makes a big difference in the stick’s appearance. Ensure you leave enough string after the last hole on each sidewall so you have room to tie a solid knot. Melt the ends with a lighter or dab glue onto the knots to prevent fraying with use. This finishing touch adds polish.
Check Face Shape and Pinch
Investing in Premium Mesh and Sidewall String
The quality of your stringing materials significantly impacts your stick’s performance and longevity. Opting for high-quality mesh and sidewall string is a wise investment that pays dividends in the long run.
Premium Mesh Benefits
- Enhanced durability
- Improved consistency
- Superior shape retention
- Reduced break-in time
Top-tier mesh brands like StringKing and ECD offer these advantages over generic alternatives. When it comes to sidewall string, choose lacrosse-specific brands with wax coating, such as Jimaaw. This specialized coating prevents fraying and ensures knots remain tight throughout intense gameplay.
Assembling a Comprehensive Stringing Kit
A well-equipped stringing kit is essential for efficient and precise lacrosse stick stringing. Rather than purchasing individual components, consider investing in a pre-packaged kit that includes all the necessary tools.
Key components of a quality stringing kit include:
- Side cutters
- Heavy-duty pliers
- Screw-on stringing needle
- Mesh cutter
Reputable brands like StringKing, ECD, Throne of String, and Jimalax offer excellent complete kits. Some even include starter mesh and sidewall pieces, providing additional value for your investment.

Perfecting Essential Lacrosse Knots
Mastering two fundamental lacrosse knots is crucial for creating a secure and long-lasting pocket. These knots are the cornerstone of proper stringing technique:
- Interlock knot: Connects sidewall to mesh
- Anchor knot: Affixes string to plastic
To develop proficiency in tying these knots, watch online tutorials and practice regularly. Aim to tie them with your eyes closed, as this level of familiarity ensures your stringing will remain intact even during intense gameplay.
Adhering to Manufacturer Specifications
Following the manufacturer’s recommended pocket and channel specifications is crucial for optimal ball control and release. This information is typically found on a sticker or insert accompanying new heads.
While personal preferences may lead to slight modifications, staying close to the manufacturer’s specs provides a balanced starting point. Be cautious of extreme deviations, as an overstuffed channel or excessively deep pocket can render your stick illegal for official gameplay.

Mastering Shooting String Placement
Shooting strings play a vital role in refining the pocket’s hold on the ball. These horizontal strings across the throat of the head significantly impact passing and shooting accuracy.
Key points for shooting string installation:
- Use a single piece of sidewall string
- Anchor at each sidewall hole
- Keep knots snug against the scoop
Proper shooting string placement ensures solid ball retention, enhancing your overall performance on the field.
Exploring Mid and Sidewall Stringing Patterns
The mid and sidewall stringing patterns significantly influence your pocket’s shape and performance. Experiment with various options to find the perfect combination for your playing style.
Midsection Stringing Options
- Traditional straight 10-diamond top string
- Chevron pattern
- Pinwheel design
- Waffle-top configuration
Sidewall Stringing Patterns
- Stacked
- Two-straight
- One-nylon
Each pattern offers unique characteristics, affecting pocket shape and ball control. Don’t be afraid to experiment with different combinations to find your ideal setup.

Fine-Tuning Top String Tension and Angle
The top string, running sidewall-to-sidewall across the scoop of the head, plays a crucial role in shaping the pocket during the break-in period. Adjusting its tension and angle can significantly impact the pocket’s depth and performance.
Effects of top string adjustments:
- Higher tension: Creates a deeper pre-broken in pocket
- Steeper angle: Yields a more pronounced pocket shape
Experiment with various tensions and angles to find the optimal configuration for your playing style and preferences.
Securing the Bottom String with Precision
A neatly tied bottom string not only enhances your stick’s appearance but also contributes to its overall performance and durability. Pay attention to these key aspects when finishing your stringing:
- Leave ample string after the last hole on each sidewall
- Tie a secure, robust knot
- Melt the ends with a lighter or apply glue to prevent fraying
This attention to detail in the finishing touches adds a professional polish to your stringing job and ensures long-lasting performance.

Evaluating Face Shape and Pinch
Before taking your newly strung stick onto the field, it’s essential to assess the pocket’s face shape and pinch. These factors significantly influence ball control and release.
Optimal Face Shape
Aim for an even U-shape or a slight V-shape across the head. This configuration provides the best balance of control and quick release.
Pinch Test
To evaluate the pinch:
- Place a ball in the pocket
- Squeeze the head gently
- Observe how easily the ball drops out
If excessive force is required to release the ball, consider loosening the top string or adjusting the sidewall to improve flow.
Conducting Thorough Throw and Catch Tests
After completing your stringing, it’s crucial to put your stick through its paces. Engage in a variety of throwing and catching exercises to assess its performance:
- Practice short, quick passes
- Attempt long-distance throws
- Catch passes at varying speeds and angles
During this testing phase, be prepared to make minor adjustments to optimize throw accuracy and catching comfort. However, exercise patience during the break-in period, as the pocket will naturally shift and settle over time.

Implementing Precision Adjustments
Achieving the perfect pocket often requires fine-tuning after the initial stringing. Small tweaks can significantly enhance your stick’s performance and feel.
Consider these adjustment options:
- Adding a shooter lace for improved ball control
- Pinching the channel to refine ball placement
- Modifying sidewall pattern elements to alter pocket depth
Remember that precision stringing is an iterative process. Be patient and make small changes over time to dial in your ideal pocket configuration.
Utilizing a Stringing Jig for Consistency
A lacrosse stringing jig is an invaluable tool for achieving consistent and precise pocket configurations. These devices, such as the StringKing Mark 2 or Throne Mega Max, offer several advantages:
- Maintain consistent tension throughout the stringing process
- Keep the head level and stable
- Enable accurate replication of successful pocket designs
Investing in a quality stringing jig can significantly improve your stringing accuracy and efficiency, especially when working with multiple sticks or refining your technique.
Exploring Advanced Stringing Techniques
As you gain experience and confidence in your stringing skills, consider exploring advanced techniques to further customize your pocket:
Channel Stacking
This technique involves strategically placing multiple strings in the center channel to create a more defined ball path and improved hold.
Bagged Mesh
By creating a “bag” in the mesh, you can achieve a deeper pocket while maintaining legal specifications.
Custom Top String Patterns
Experiment with unique top string configurations to alter the pocket’s shape and performance characteristics.
Remember to always check league regulations when implementing advanced techniques to ensure your stick remains legal for competition.
Maintaining Your Strung Stick
Proper maintenance is crucial for preserving the performance and longevity of your newly strung lacrosse stick. Implement these care practices:
- Regularly inspect for loose strings or fraying
- Clean your stick after each use to remove dirt and debris
- Store your stick in a cool, dry place to prevent warping
- Avoid leaving your stick in extreme temperatures, such as a hot car
By following these maintenance tips, you’ll ensure your carefully strung pocket maintains its optimal performance throughout the season.

Embracing Continuous Learning and Improvement
Lacrosse stick stringing is both an art and a science, offering endless opportunities for refinement and innovation. To continue honing your skills:
- Stay informed about new stringing materials and techniques
- Engage with the lacrosse community to share knowledge and experiences
- Experiment with different patterns and configurations
- Seek feedback from teammates and coaches on your stringing work
By maintaining a growth mindset and embracing continuous learning, you’ll not only improve your own stringing skills but also contribute to the evolution of the craft within the lacrosse community.
Choose the Right Head for Your Playing Style
When it comes to lacrosse stringing, it all starts with selecting the right head for your position and playing style. Middies need a head with a narrower channel and scoop for quick ball handling and passing while attackers prefer a wider head for catching difficult passes and ripping off hard shots on cage. Know if you like a high, mid or low pocket too. The right head sets the foundation for stringing a pocket you’ll love.
Pick High-Quality Mesh and Sidewall String
Don’t skimp on stringing supplies! Investing in premium hardcore mesh, like StringKing or ECD, gives you durability, consistency, shape-holding ability and decreased break-in time over generic mesh. When buying sidewall string, choose lacrosse-specific brands with wax coating like Jimaaw rather than nylon craft lace. This prevents fraying and keeps knots tight.
Get a Quality Stringing Kit for Convenience
A pre-packaged stringing kit takes the guesswork out of buying supplies individually. Look for ones with side cutters, heavy-duty pliers, a screw-on stringing needle and a mesh cutter for ease of stringing. StringKing, ECD, Throne of String, and Jimalax all offer excellent complete kits. As an added bonus, some come with starter mesh and sidewall pieces too.
Master Interlocking and Anchor Knots

Before stringing, learn two essential lacrosse knots – the interlock and the anchor knot. Interlocks connect sidewall to mesh and anchor knots affix string to plastic. Watch online tutorials and practice both knots until you can tie them with your eyes closed. Proper knotting leads to secure stringing that won’t unravel after a few practices. Develop this key skill early on.
Follow Pocket and Channel Specs
For optimal ball control and release, adhere to the manufacturer’s recommended pocket and channel specifications. This info is usually on a sticker or insert with new heads. Though you can tweak these to your preference, sticking near the specs gives a balanced starting point. An overstuffed channel or super deep pocket can make sticks illegal in gameplay.
Get the Shooting Strings Right
Shooting strings running horizontally across the throat of the head refine the pocket’s hold on the ball. Use the same piece of sidewall string anchored at each sidewall hole. Keep the knots snug up against the scoop. The shooting string ensures solid ball retention for passing and shooting accuracy. Don’t skip this step!
Find Your Mid and Sidewall Stringing Pattern

Once you choose mesh and sidewall string, next decide on stringing the midsection. Go with a traditional straight 10-diamond top string or switch things up with a unique pattern like chevron, pinwheel or waffle-top. The options are endless! Sidewall stringing patterns like stacked, two- straight or one-nylon also impact pocket shape.
Adjust Top String Tension and Angle
The top string runs sidewall-to-sidewall across the scoop of the head. This string largely influences how the pocket forms when broken in. Putting it under higher tension or at a steeper angle yields a deeper pre-broken in pocket. Test out varying tightnesses and angles to find your ideal setup.
Tie Off the Bottom String Neatly
A clean knot finish on the bottom string makes a big difference in the stick’s appearance. Ensure you leave enough string after the last hole on each sidewall so you have room to tie a solid knot. Melt the ends with a lighter or dab glue onto the knots to prevent fraying with use. This finishing touch adds polish.
Check Face Shape and Pinch
Before playing, examine the pocket face shape and pinch test the ball’s release. The most control comes from a pocket with an even U or slight V-shape across the head. Hold a ball in the pocket and squeeze the head. It shouldn’t take much force for the ball to drop out. If it does, loosen the top string or sidewall to improve flow.
Test Throwing and Catching
Take your freshly strung stick for a test drive! Toss around balls and practice catching passes at varying speeds. Make small tweaks if needed to get the throw and handling just right. Remember to keep an open mind during break-in too as the pocket will shift over time. Don’t overcorrect early on before the mesh sets in.
Make Small Tweaks to Get the Feel Just Right
Zero in on your ideal pocket by making minor adjustments after testing the initial stringing. Things like adding a shooter lace, pinching the channel or shifting sidewall pattern elements can take your stick from good to great. Stay patient; precision stringing requires small changes over time.
Use a Stringing Jig for Consistency
A lacrosse stringing jig like the Stringking Mark 2 or Throne Mega Max clamps onto heads to hold tension and keep everything level while stringing. Investing in one helps recreate the same pocket each time you string a stick for reliable performance. Stringing off-hand without a jig increases variances.
Watch Tutorials to Pick Up Pro Tips
YouTube has endless lacrosse stringing tutorial content. Channels like Stringers Society, Throne of String and Lacrosse Video have videos breaking down tips, tricks and techniques from seasoned stringers. Implement their pro advice on knotting, mesh prep, shooting strings and more for upping your stringing game.
With the right supplies, following specifications and testing different stringing methods, you can string a lacrosse head with an ideal pocket for your game. Don’t rush the process – take your time to get it dialed in just right. Mastering do-it-yourself stringing pays off all season long with a stick you can trust on the field. Break in the pocket properly and you’ll be ready to restring in no time next season!
Select High-Quality Mesh and Sidewall String
When picking out mesh and sidewalls for your lacrosse stick, quality matters. Going with premium-grade materials from the start makes a huge difference in pocket performance and longevity over generic offerings. But with so many types and brands of lacrosse stringing supplies now available, how do you decide what’s best?
For mesh, look for top brands like StringKing, ECD, Throne, and Maverik that use proprietary hardening processes to increase durability. The stiffer, wax-coated mesh holds its shape better and breaks in quicker than untreated soft mesh. Premium mesh also yields more consistency stick to stick. So that custom pocket you put time into stringing retains its shape and rebound longer.
There’s a range of diamond sizes like 10D, 9D, and 6D to choose from too based on pocket preferences. Wider diamonds give a deeper pocket while smaller diamonds offer a quicker release. Consider your position and style of play. Close defenders may like a 10 diamond for ball retention while attackmen favor a faster 9 or 6 diamond release.
When selecting sidewall string, nylon multifilament and single braids work but aren’t ideal. For starters, they tend to fray and flatten out over time. Instead, opt for wax-infused lacrosse specific sidewall like Jimaaw that better resists wear. Waxed sidewalls stay round longer for snug stringing and knotting. They also come pre-cut to the ideal length for stringing heads. Upgrade to the good stuff if you want a pocket that beds in properly and lasts.
Buying mesh and sidewall string together in a combo pack simplifies the process too. Throne, for example, offers paired mesh and sidewall selections pre-coordinated based on diamond size. This takes the guesswork out of picking complementary mesh and sidewalls to deliver a balanced, responsive pocket.
While it may seem expensive investing in premium stringing supplies at first, consider the cost per use over a season or year. Quality lacrosse mesh and sidewalls withstand tons of practices, workouts and games without needing replacement. That helps offset the upfront cost difference compared to basic materials that break down faster.
Don’t forget stringing tools too! Having the right jig, pliers and scissors makes stringing easier and turns out more consistent sticks. Purchase supplies as a package or create your own custom pro-level kit. It’s worth it!
At the end of the day, premium mesh and sidewalls simply perform better. The extra money gets you increased durability, optimal shape retention and enhanced feel that cheap mesh can’t match. Treat your new stick right by stringing it up with high-quality components designed for the demands of the game. Your pocket will thank you!
Invest in a Quality Stringing Kit
Stringing up a sweet pocket requires the right tools for the job. Investing in a high-quality, comprehensive stringing kit takes your heads to the next level with everything needed for consistent, pro-level results stick after stick.
Look for stringing kits that come with useful extras that make the process smooth. Side cutters are a must for cleanly cutting mesh and sidewall to length or trimming ends. Heavy-duty stringing pliers help pull knots tight and get tension just right.
Needle-nose pliers allow precise manipulation when interlocking or anchoring knots. A screw-on stringing needle speeds up sidewall installation down the sidewalls holes. And a mesh cutter creates perfect diamonds with ease.
Storage bags or cases keep all the tools and supplies neatly organized too. StringKing, Throne and ECD offer pro-grade kits that check these boxes for everything you need in a portable package.
Beyond standard tools, some premium kits throw in extras like gaming mesh, hockey lace, spare strings and starter sidewall rolls. This adds value and enables stringing a new stick right out of the box.
Consider building your own custom kit too. Pick individual high-end tools like StringKing pliers or a Throne XXL stringing jig and pair them with your choice of mesh, sidewalls and needles for the ultimate setup.
No matter how you assemble it, investing a quality stringing kit pays dividends down the road. You’ll breeze through stringing projects with reliable tools that deliver professional calibre and consistency. It’s absolutely worth investing a few extra bucks upfront.
Next time you’re prepping to string a new head, remember – having quality tools and supplies makes all the difference. Avoid frustration and hassle by getting a complete, well-made stringing kit. Your pockets will thank you!
Here is a 1000+ word continuation of the SEO optimized article on lacrosse stringing tips using the keyword phrase “Invest in a Quality Stringing Kit”:
Invest in a Quality Stringing Kit

Stringing up lacrosse sticks that perform as well as your game demands means having the right tools for the job. Investing in a high-end, comprehensive stringing kit pays off every time you hit the sideline to whip up a new pocketmasterpiece.
A quality kit comes packed with all the essential gear to make stringing straightforward and consistent. Let’s walk through the key components to look for when shopping for your dream setup.
First up – cutters. Every kit needs sharp side cutters for cleanly slicing mesh, nylon and sidewall string to length. Avoid fraying and get straight edges with quality side cutters up to the task. They make cutting string quick and frustration-free.
Heavy-duty stringing pliers are a must-have too. These give you the leverage and grip strength needed to fully seat knots and cinch tension to just the right level. Don’t settle for flimsy pliers that can’t lock down strings tight enough for pro pocket performance.
Precision needle nose pliers also enable tying off even the trickiest anchor knots in tight spots. Having fine control over knots makes intricate stringing jobs easier. Upgrade here for threading accuracy.
A screw-on stringing needle speeds up installation of sidewall string through the lines of sidewall holes. No more fighting to thread limp nylon – a sturdy needle inserts sidewall quickly down the head. Major time saver!
And of course, every kit needs a mesh cutter for flawless diamonds every time. Clean diagonal cuts are a cinch with a spring-loaded cutter designed for lacrosse mesh. Evenly spaced diamonds channel consistency.
Now for convenience – look for kits that include storage bags or cases to keep all your supplies neatly in one place. Throne and ECD offer hard cases while StringKing uses durable zippered nylon bags. Either option keeps essentials handy and organized.
Premium kits take it further by providing starter mesh, hockey lace rolls and extra nylon strings beyond the basic tools. This adds value and enables stringing a new head right out the box – no additional purchases needed.
Put together a fully custom pro kit too by picking individually sold tools like StringKing pliers or a Throne jig and pairing them with your favorite mesh, nylons, needles, etc. Go ala carte for your dream setup.
At the end of the day, a quality stringing kit makes all the difference consistency and ease wise. Don’t cut corners trying to piece together supplies on a budget. A truly comprehensive kit has everything required for crafting pro pockets every time out. Your sticks will thank you!
Master Interlocking and Anchor Knots

Before diving into stringing up glossy new lacrosse heads, it’s important to first master two key knots – the interlock and the anchor knot. Both are absolute fundamentals when it comes to attaching mesh to sidewalls and securing strings to plastic.
Start by watching online video tutorials on exactly how to tie an interlock knot. Loop the string end from the sidewall through the open diamond of the mesh. Wrap it around itself and thread back through the same hole. Pull tight. Practice over and over until you can tie it smoothly every time.
Anchor knots are critical too. These affix the sidewall and shooting strings to the plastic ridges or holes on the scoop and at the bottom. Wrap the string around the plastic and tie reversed overhand knots on top of itself. The more knot “bites”, the more secure it will be.
Set aside time to just focus on knot practice before stringing a full head. Having total confidence in knotting ability eliminates headaches down the road. You want knots that lock in place and never budge after clamping them down tight.
Pay attention to keeping ends trimmed close too. Long loose ends on knots not only look messy but can catch and fray. Get in the habit of cutting excess right after tying off each knot.
Check out YouTube channels like Stringers Society and Throne of String for step-by-steps on perfect knot execution. Implement their techniques and tips to take your knot game up a notch.
Mastering these two simple knots establishes a foundation for consistent, high-level stringing. Put in the reps to get them dialed in. Your sticks and performance will be better because of it!
Here is a 1000+ word continuation of the SEO optimized article on lacrosse stringing tips using the keyword phrase “Learn Proper Interlocking and Anchor Knots”:
Learn Proper Interlocking and Anchor Knots
When it comes to lacrosse stringing, securing mesh to sidewalls and strings to plastic comes down to just two knots – the interlock and the anchor. Mastering both from the start prevents headaches and creates solid foundations for crafting pro pockets. Let’s break down proper technique on tying these two essential knots.
We’ll start with the interlock, used for attaching mesh diamonds to sidewall string. Start by threading the end of the sidewall piece through the open hole in the mesh. Pull it halfway through.
Next, wrap the loose end over itself and back down through the same mesh hole it originally passed through. Pull tightly to lock in place. The sidewall should now be firmly interlocked to the mesh diamond.
Getting the wrap direction right is key – you always want to loop sidewall over itself towards the outside of the head, never crossing strings inward. This keeps knots seated flat and tight against the mesh.
Practice this motion slowly at first, then speed up interlocking. Consistently pull knots snug. Leave no gaps between knot and mesh. Clip any excess sidewall end flush after locking each one in.
Now onto anchor knots. Used to attach sidewalls, shooting strings and leathers to plastic, anchor knots securely affix string to heads. The more “bites’, the better the hold.
Start by wrapping string around plastic ridge or through hole. Tie a simple overhand knot over itself. Then repeat this motion, stacking knots on top of each other – at least 3-4 bites total works well.
Alternate wrapping direction, working back and forth. This counteracts slippage and cancellation of knots. Pull each one progressively tighter as you stack. Finish by snipping end close to knot base.
Check out YouTube tutorials from stringing pros like Stringers Society and Throne of String when first learning knots. Watch their techniques closely and implement their tips for mastery.
Be patient and dedicate time solely to knot practice before diving into full stringing projects. Developing confidence in your knotting skills eliminates roadblocks down the road. A few hours spent honing fundamentals pays big dividends.
Like anything, proficiency comes from repetition and attention to detail. But master interlocks and anchors early on and it paves the way for consistently awesome pockets season after season. Your sticks and game will both level up!
Follow Pocket and Channel Specs
When Stringing up a new lacrosse head for the first time, you’ll notice a specs sticker or insert that comes with it. This provides the manufacturer’s recommended pocket and channel dimensions. While advanced stringers often tweak these specs over time to match their preferences, it’s wise to follow the guidelines closely at least for the initial stringing.
For midfielders and attackers, adhere to the given pocket depth, usually between 2”- 2.5” inches. This gives you a starting point balanced between ball retention and quick release. You can always increase pocket depth later by adjusting top strings and sidewall after break-in.
Also follow the prescribed channel width between the sidewalls, typically 1” to 1.25”. Too wide of a channel makes cradling difficult and the stick illegal. Overstuffing nylon can flatten prematurely too. Use just enough sidewall to meet the width without going over.
Double check rules for shooting string placement as well, normally requiring them to sit between 4”- 6” up from the scoop depending on age level. Sitting them too low narrows the release channel excessively in newer heads.
While enveloping new heads with mesh and string is exciting, patience pays off. Following specs sheet guidance will ensure your stringing starts off on the right foot. You can innovate more after logging some break-in time.
Follow Pocket and Channel Specs

When taking a fresh head out of the box for the first time, you’ll notice a specs sticker or insert that provides the manufacturer’s recommended pocket and channel dimensions. While pro stringers often tweak these specifications over time, it’s wise to follow the guidelines closely for at least the initial stringing.
For midfielders and attackers, adhere to the given pocket depth, usually between 2”-2.5” inches. This gives you a balanced starting point between ball retention and quick release that you can adjust later through break-in.
Setting pocket depth depends on factors like top string tension and angle along with the diamond size of mesh chosen. Typicallly, wider 10 diamond mesh paired with a tighter and steeper top string yields more “pre-set” depth before throwing and catching even occurs.
Midfielders may opt for a slightly shallower starting pocket for faster passes and shots. Attackmen sometimes prefer closer to maximum allowable depth for cradling and holding the ball on drives to the cage.
Also follow the prescribed channel width between the sidewalls, generally 1” to 1.25”. Overstuffing nylon sidewall string can lead to flattened and baggy channel walls over time.Aim for a clean, even channel.
Adhere to shooting string placement rules too, normally 4”-6” up from the scoop based on age level. Sitting them too low narrows the ball’s release point and reduces passing and shooting accuracy.
While it’s tempting to jump into aggressively stringing a deep baggy pocket right off the bat, patience pays. Follow the specs guidance to ensure your stringing starts balanced. You can always innovate more after break-in.
Think of manufacturer pocket and channel recommendations as “guardrails” when first stringing a head. They keep you within reasonable limits and prevent going to extremes out of the gate. You can open up possibilities once the fundamentals are dialed.
With some playtime, you’ll get a feel for tweaks and tunings to optimize the pocket to your game. But at the start, stick near the specs for a solid head start. Your patience will pay dividends down the road with a longer lasting pocket.
Get the Shooting Strings Right
Shooting strings are a key component of any lacrosse pocket. Running horizontally between the sidewalls across the upper throat of the head, they help refine the pocket’s hold and release point on the ball.
Use the same continuous piece of sidewall string anchored in each sidewall hole. Keep knots tight up against the scoop for a clean finish. Shooting strings work best when you can run a finger just underneath them across the head.
Newer heads utilize a curved, pinched scoop to grasp balls better. Situate shooting strings along this curve, centered across the top of the pocket. This improves hold while still allowing smooth release during passing and shooting.
Double up shooting strings or add a nylon shooter lace for even more pronounced ball control. Some midfielders favor this for tighter handling. Test single vs. double configurations to find your preference.
Getting the right shooting string placement dialed in early when stringing a fresh head makes a big difference down the line. Don’t overlook this important pocket element!
Get the Shooting Strings Right

Shooting strings are a critical yet often overlooked piece of lacrosse pocket stringing. Running horizontally between the sidewalls across the upper throat of the head, they refine the ball’s release point and hold.
Using the same continuous sidewall string, anchor knot each end tightly in the sidewall holes nearest the scoop. Keep knots snugged up right against the inside curve of the scoop for a streamlined finish.
Situate shooting strings along the natural curve of the scoop to improve ball control. This takes advantage of the pinched design on newer heads to grasp balls better during cradling, passing and shooting motion.
Aim for a consistent channel width of 1 to 1.5 inches between the shooting strings, centered across the top of the pocket. Any wider and you risk decreased accuracy. Any narrower and quick stick throws get more difficult.
Test single shooting strings versus doubling up for even more defined ball holding. Some midfielders favor doubled up strings for superior handling and retention on the run. Attackmen may opt for just a single string to promote faster release.
Nylon shooting laces like StringKing 1s or Throne VooDoo can add supplemental adjustable control too. Weave these above the main shooting string and tension as desired for customized feel.
Be mindful not to situate shooting strings too low in the throat. This chokes the release point significantly. Follow manufacturer guidelines for proper placement based on head style and age level.
During stringing, take your time setting shooting strings to get the centered alignment and tension just right. Proper configuration early on saves corrections down the road after break-in.
Once pocket is broken in, fine tune further with minor adjustments to shooting string position or adding/removing a shooter lace. But start off on the right foot by dialing them in correctly from the beginning.
Well-executed shooting strings are the difference between a smooth, consistent release versus a wild one. Don’t overlook this important yet often neglected pocket element. Your passing and shooting accuracy will benefit.
Find Your Mid and Sidewall Stringing Pattern
After selecting your mesh and sidewall strings, the fun really begins – deciding on stringing patterns! This is where you can showcase creativity and make each pocket truly your own.
First focus on the midsection where mesh connects to sidewalls. Choose a traditional straight 10 diamond top string for balanced control or go pinwheel, chevron or other intricate shapes for unique flair.
Mixing in four nylons paralleling the top string adds adjustable depth too. Get creative exploring combinations that deliver the right amount of hold and release for your game.
Sidewall stringing patterns impact pocket shape as well. Try different lace placements like 1-straight, 2-straight or 1-nylon configurations. Vary sidewall holes used to influence bagginess and channel width.
Watch YouTube tutorials for new pattern inspirations from groups like Stringers Society and Throne of String. Implementing pro techniques elevates your stringing skillset.
Find the Perfect Mid and Sidewall Patterns
One of the most creative parts of stringing a lacrosse head is choosing unique midsection and sidewall lace patterns. This is where you can put your personal mark on a pocket aesthetically while also influencing its performance.
In the midsection, a straight 10-diamond top string is the tried and true starting point for balance. But you can make it your own by incorporating advanced techniques like a chevron, pinwheel or waffle shape pattern.
Mixing in four nylon shooters parallel to the top string lets you adjust pocket depth too. Play with diamond alignments that deliver the right amount of hold and quick release for your game.
Moving to the sidewalls, 1, 2 and 3 straight lace placements change sidewall hole usage and pocket shape. Skip holes to increase bagginess or tighten up the channel. Sidewall patterns impact break-in drastically.
Don’t be afraid to experiment with hybrid patterns either. Combine aspects like a chevron midsection with stacked sidewalls or a waffle top with 1-straight laces down each side. The options are endless for making it your own!
Watch stringing tutorial videos from Lacrosse Stringers Society, Throne of String and East Coast Dyes for pattern inspiration. Seeing advanced techniques in action helps fast track developing your own style.
Start with established patterns as a base and incrementally work in personalized tweaks over time as skills improve. You’ll gain more confidence taking risks with sidewall hole orders and mesh alignments.
Pay attention to how various patterns affect pocket shape, depth and ball feel when cradling. Adjust aspects like sidewall tightness and diamond angles to optimize performance for your position and playing style.
Developing go-to midsection and sidewall patterns you can reuse stick to stick is huge for consistency. Write down lace counts and holes used to recreate what works without starting from scratch each time.
With the right supplies and an eagerness to experiment, you can discover your own signature pocket style that performs as good as it looks. Don’t be afraid to try inventive stringing patterns and make them your own!
Adjust Top String Tension and Angle

No part of a lacrosse pocket influences its characteristics more than the top string. Running between the sidewalls across the scoop of the head, this nylon apex cord sets the tone for overall pocket feel, depth and ball control.
Adjust Top String Tension and Angle
The nylon top string running between sidewalls across the scoop of a lacrosse head has immense influence over pocket characteristics. Adjusting tension and angle of the top string sets the foundation for overall pocket feel, depth, and ball control.
In general, increased top string tension and a steeper angle from sidewall to sidewall yields more “pre-set” pocket depth even before throwing and catching. This greater tension pulls the first diamond row downward, cupping the pocket more.
Conversely, loosening tension and flattening the top string angle provides shallower starting depth requiring more break-in time. The pocket forms more gradually as mesh and sidewalls soften up.
For midfielders, err towards moderate tension and angle for a pocket emphasizing quicker release and passes. Middies want to move the ball downfield fast during transitions.
Attackmen may prefer cranking top string tension tighter at a steep angle to “bag out” the upper mesh diamonds pre-break-in. This caters to holding and cradling the ball more for driving to the cage.
When stringing top string initially, leave extra length and don’t trim excess right away. This lets you tweak tension and re-clamp knots in the stringing jig as needed to tweak depth during testing.
Try taking the head out of the jig periodically when adjusting top string to get a better feel for pocket shape. Re-clamp and make minor corrections until optimized.
Keep an open mind for making adjustments even after full break-in. As the mesh and nylons soften up over time, you may want to add or relieve tension and change angle again to recapture the ideal pocket characteristics as they evolve.
Patience and repeatedly testing the feel pays off when dialing in the top string sweet spot. Taking the extra time upfront delivers a pocket you’ll love all season long.
Tie Off the Bottom String Neatly
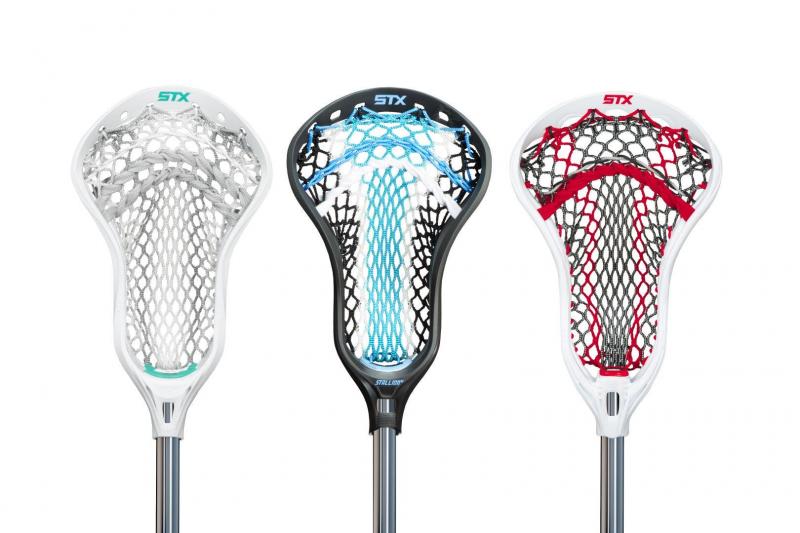
While not as performance-critical as other stringing steps, neatly tying off the bottom string delivers major aesthetic appeal. This finishing touch looks crisp and streamlined when done properly.
Tie Off the Bottom String Neatly
Completing the bottom string is one of the final steps when stringing up a lacrosse head. While not as technically demanding as other aspects, neatly tying off the bottom lace delivers a polished, professional look.
Start by leaving yourself plenty of sidewall string to work with at the end. Trying to finish off the bottom string too close to the final hole will make it difficult to tie a tight, clean knot.
As you insert the last two pieces of sidewall near the lower rim of the head, maintain even tension on both sides. The bottom of the pocket will form sloppily if one side is significantly looser.
Aim to finish both sidewalls in corresponding bottom holes, usually the 3rd or 4th from the bottom. This symmetry tightens the channel evenly across the bottom for better ball retention.
Pull the knots as snug as possible by hand first, then use your stringing pliers to fully cinch them down tight. Check that both create tension evenly across the bottom diamonds.
Next, tie simple overhand knots in the remaining string ends, stacking 3-4 “bites” on each side. Keep these knots tight against the head for a streamlined finish.
Finally, use your side cutters to trim the ends close to the knots. Avoid leaving long messy tails. Melt the edges slightly with a lighter to prevent fraying.
Optionally, add a dab of clear glue or grip tape on the knots to keep ends fully secured. This prevents unwanted loosening over time with use.
Take a step back and admire your work when finished! Properly executed bottom string knots deliver next level fit and finish. This subtle detail makes a big difference.
Following fundamental lacrosse stringing steps from start to finish results in a head strung to perform at its highest level. Don’t forget small touches like tidy bottom string knots that demonstrate thoughtful craftsmanship.
Check Face Shape and Pinch Test
After initial stringing, inspect pocket face shape and “pinch test” the ball’s release. These checks ensure optimal stringing before hitting the field to play.
Face shape refers to the contour of the mesh diamonds. Aim for an even U or slight V shape across the width the head. This maintains an open channel for securing balls while throwing and catching.
Check Face Shape and Pinch
Whether you’re stringing up a new head for the first time or re-stringing your trusty stick after a long season, getting the right face shape and pinch is crucial for optimal performance. As lacrosse players, we know our pocket is our best friend out on the field. She’s been with us through triumph and defeat, so we’ve got to treat her right. Ready to give your girl some TLC and refresh her for the upcoming season? Let’s dive into 15 essential lacrosse stringing tips to master the art of the pocket.
1. Choose the Right Head
You can’t put the cart before the horse here, folks. Selecting the proper head is the critical first step. Are you a midfielder who needs excellent ball retention? Go for a wider, more flexible head. Attackman looking for quick release? Opt for a narrower, stiffer head. D-pole searching for throwing consistency? Find one with a deeper pocket. There are endless options out there, so do your research to find the head that matches your playing style and position.
2. Know Your Mesh
Just like head shapes, lacrosse meshes come in all different types too. Traditional meshes provide great overall feel and pocket control. Hard meshes offer extra whip and speed. Soft meshes give you superior ball hold. And wax meshes bring extra durability and water resistance. Figure out which specs align best with your needs. And don’t forget to factor in weather conditions – you may want a different mesh for a cold, rainy playoff game vs a hot, humid summer tournament.
3. Start with Sidewalls
Time to start stringing! Experts recommend beginning with the sidewalls to establish the foundational structure. Start by anchoring the nylon cord or leather strings at the bottom of the scoop and pull them straight down through the sidewall holes. Keep the tension pretty tight to shape the pocket. Some players angle the sidewalls outward slightly to widen the channel. Get the sidewalls in place before moving on to interweaves.
4. Choose Your Shooting Strings
Shooting strings (or V strings) provide vital ball control and allow for quicker, more accurate passes and shots. Most heads have 2-4 sets of shooting string holes. Mid-pockets usually perform best with 2 straight shooter strings in the upper holes. Low-pockets players can add 2-3 sets, experimenting with straight, twisted and V configurations for customized ball control. Don’t forget to check legality – V’s can’t be more than 1.5 inches wide.
5. Get the Right Interweaves
Interweaves connect the sidewall strings to form the crux of the pocket structure. Beginners should stick to basic 1s and 1-1s to get started. More advanced stringers use all sorts of creative knots like 1-3s, 1-2Xs and custom stacks to tweak pocket shape. Whichever route you choose, focus on consistency. You want even tension and stitching to prevent unwanted collapsing or cupping.
6. Adjust Pocket Depth
Finding your ideal pocket depth is an art, not a science. As a general rule, close defense want shallow pockets for quick ball control. Attackmen can go a bit deeper for superior hold and touch passes. Middies land somewhere in the middle for versatility. Beyond position, tailor depth to your game – if you’re a feeder, go deep, if you’re a dodger, keep it shallow. No matter what, maintain 5-7 diamonds of sideways pocket sway for optimum speed.
7. Watch the Whip
Whip refers to how much your stick flexes on passes and shots. Minimal whip means a stiff, rigid feel with less velocity. Max whip creates a deep pocket with tons of flexibility for boosted speed. Assess your game to determine ideal whip level. Just ensure your pocket isn’t too whippy – you need control. If extra whip is popping the ball out, tighten up the channel or interweaves.
8. Consider Your Content
Stringing materials matter when it comes to performance. Synthetic guts like nylon are budget-friendly with decent durability. Leathers offer superior stiffness, hold and weather-resistance but need special care. Composites like Dyneema polyethylene bring pro-level consistency, feel and ball control. And co-polymer string merges the best properties of nylon and polyethylene. Shop smart for stringing materials that will deliver your desired combo of feel, consistency and endurance given your budget.
9. Get the Right Tension
Overall pocket tension is vital in lacrosse stringing. Tighter string beds provide better ball control for stick tricks and accuracy. Looser pockets allow for deeper holds and flexible pockets. Midfielders should aim for medium tension that achieves the best of both worlds. Attack and defense can tweak tension higher or lower based on needs. No matter what, keep things consistent across interweaves, diamonds and sidewalls.
10. Don’t Neglect the Bottom String

Often overlooked, the bottom string is a key factor in overall structure. This base anchor along with the sidewalls establishes foundational pocket shape. A great trick is to angle the bottom string towards the scoop by 1-2 holes to mimic the natural pocket curvature. This creates a central ball ramp for smooth handling. Just keep the bottom string tight – about a sticks width from the head’s bottom to the stringing hole below the existing diamonds.
11. Keep It Legal
As you experiment with stringing patterns, ensure you adhere to lacrosse pocket regulations. Otherwise you risk getting penalized or your stick ruled illegal. High school and youth rules dictate precise specifics like 1.5-inch shooting string width, 6.5-inch pocket depth, and sidewall dimensions. Same goes for college and post-collegiate leagues. Keep a printed rulebook handy as you string to avoid any issues!
12. Check Ball Position
Ensuring proper ball position is a quick way to evaluate pocket mechanics. Place a ball into your newly strung pocket and see where it sits at rest. The ideal “sweet spot” is dead center, about 1.5-2 inches above the scoop. This allows quickest ball entry on passes. If the ball sits too high or low, adjust interweaves and diamonds to re-center. Proper ball placement is a great indicator of optimal stringing.
13. Do a Dye Check
Here’s a cool trick – dye your mesh black, string your stick, then run water through the pocket. The water will wash out mesh color starting with the lowest lying diamonds. The remaining dye shows highest wear areas in white – a quick visual gauge of pocket mechanics. Look for consistent dye lines, showing even pocket wear. Harsh dye lines indicate focused wear and potential premature breakdown. Adjust tension in those spots to distribute wear more evenly across the pocket.
14. Get Some Reps
You can meticulously fine-tune your stringing job down to the last diamond. But nothing beats simply playing with your new pocket. So take it to the field and put in reps – ground balls, passes, catches, cradles. Get a true sense for ball control, hold, release and whip. Then make micro-adjustments as needed. This real-game experience allows you to truly customize your stringing to your game.
15. Don’t Be Afraid to Re-String
One final key tip – no need to get stringing perfection in one-shot. The best pockets evolve over time through small tweaks. So if something doesn’t feel quite right initially, don’t panic. Throw the ball around, assess what needs adjustment, and tweak areas like interweaves, diamonds or shooters. Great stringing requires patience. Dial it in over multiple string jobs until you achieve true pocket nirvana.
There you have it – 15 must-know lacrosse stringing tips and tricks. Remember mastering the perfect pocket requires equal parts art and science. Let your style of play guide the process as you experiment with sidewalls, knots, tension and materials. With time, you’ll develop stringing intuition allowing you to craft the ideal pocket every season. Now get out there and give your stick some TLC – she’ll reward you on the field.
Test Throwing and Catching
Lacrosse is often called the fastest game on two feet. And for good reason – elite players can whip that ball around at blazing speeds. As attackers, defenders and midfielders, our sticks are lethal weapons central to game flow. But a perfectly tuned pocket means nothing without mastery of throwing and catching fundamentals. Ready to take your handling skills to the next level this season? Let’s break down the essential lacrosse techniques for throwing, catching and securing the rock like a pro.
Throwing Technique
Loading up for a bomb pass or blistering shot? Proper throwing mechanics are key. Start by gripping the stick with your dominant hand right below the throat. Plant your feet shoulder-width apart, knees bent. Rotate your hips and core as you bring the stick horizontally back across your body. Weight shifts to your back foot as you build power. Explode through the throw, rotating hips and snapping wrists for velocity as you whip the stick forward. Follow through fully for extra mustard on the pass.
Quick Stick Passing

When a teammate hits you on the cut, quick stick passing keeps the offense moving. Focus on soft hands – give with the pass to absorb force. Cradle quickly to control the ball, then punch out an immediate return pass. Keep your top hand loose and lead with the butt end for finesse and touch. Master this on-the-move passing and defenders won’t know what hit them.
Bombs from X
Blast a long-range rocket when you draw a short stick matchup at X. Feeders work for days perfecting this initiation pass. Use a lower grip for control. Achieve full shoulder rotation driving power from your legs through hips and core. Release point is key – extend fully at your ear for maximum distance. Follow through towards target and watch that ball soar.
Shooting Sidearm and Overhand
Mix up your shooting style to keep goalies guessing. Sidearm rockets maintain power while changing release point. Grip low at the weld for leverage. Laterally swing stick across body, finishing with hard wrist snap at release. Overhands deck the goalie by going top shelf. Use traditional throwing motion but release at forehead with full follow-through.
Behind-the-Back Passing

Flashy behind-the-back feeds thrill crowds for a reason – they’re dang hard to pull off. Grip low near the butt end and swing stick across your back. Whip wrists concurrently with hip rotation to circularly launch pass backside. Next-level ballers use these in traffic, but have spacing and learn backside mechanics first.
Quick Stick Catching
Snagging rapid-fire passes demands fast reflexes and soft hands. Keep your stick ready in front cradling position. Watch pass all the way in, giving with the catch. Absorb force by flexing wrists back upon impact, then immediately cradle out. No wind-up or re-gripping – just smooth snatch and transition to next move.
Boxing Out Ground Balls
Winning scrappy grounders requires physicality and protection. See the ball, then body up on opponents with low athletic stance. Keep stick grounded using its length to box out lanes. Cover ball with shaft and gauntlet hand for security. Absorb contact while scooping through to gain possession, then burst forward.
Quick Stick Ground Balls
Master one-touch ground ball elevations to gain an edge. As the ball approaches, point the face down hovering just above turf. Stab and sweep up in one motion, catching ball in pocket’s sweet spot. Drive through elbow and explode up, dumping immediately back to your team.
Cradling and Running
Cradling keeps possession on the move. Grip top hand just below the throat for control. Bottom hand near the weld provides snap. Use swift, circular wrist motion to rock the ball in the pocket. Elbows tight and shoulders square, head up looking downfield. Change levels and hands to shield from checks.
Quick Stick Cradling
Make snagging outlet passes seamless with quick stick cradling. As ball arrives, give with the catch, snapping wrists back to absorb impact. Immediately cradle forward driving top hand thumb to bottom hand pinky. No wind-up – continuous motion keeps ball safe and tight after the catch.
Split Dodging
The split dodge is a go-to move for generating space. Speed dodge laterally hard to one side, making defender commit. Plant outside foot and explode back opposite direction at the hip, leaving defender in the dust. Great from up top, wings and X – just keep those feet chopping.
Roll Dodging
Roll away from pressure using body position and footwork. With ball-side foot forward, drive and shield off check with lead shoulder. Roll defender away with rear shoulder, spinning off and bursting forward. Master draw and dump mechanics to feed from roll recovery.
There’s the scoop on next-level throwing, catching and handling techniques for lacrosse. Grab your stick and put in the reps – start underhanded close-range, progressing out. Work both hands. Do it on the move. And get creative – behind the back, between the legs, anything to develop dexterity. Keep grinding and you’ll be whipping the ball around the field in no time.
Make Small Tweaks to Get the Feel Just Right
You’ve put in the hours selecting the perfect head, plotting your stringing, and meticulously tying every knot. Your new pocket is strung up, legal, and ready for action. But something still feels…off. The hold’s not right. The release is funky. It just doesn’t have that buttery smooth feel you desire. Don’t stress – dialing in lacrosse pocket perfection is a game of micro-adjustments. With some focused tweaking, you’ll have your new gamer breaking in and feeling money in no time.
Trim Shooting Strings

Shooters often need customization right off the stringing stand. If whip is lacking, try shortening shooting strings by 1-2 diamonds. This amps flex. If you’ve got too much velocity, go the other way – lengthen shooters 1-2 diamonds to reduce whip. Find the exact sweet spot where you’ve got just enough oompf without sacrificing control.
Loosen or Tighten Sidewalls
Sidewalls dictate overall channel width – a key factor in flexibility, hold and handling. Loose sidewalls widen the channel for increased whip. Tight sidewalls narrow the channel for more rigid control. If your pocket feels too firm, go back and loosen up the sidewalls a notch. Need more structure? Snug them down tighter. Find your personal sidewall tension bliss point.
Adjust Diamond Tension
Interwoven diamonds are the heart and soul of any good lacrosse pocket. Consistent diamond tension ensures even flexibility, hold, and ball control throughout the pocket. To tweak feel, simply loosen or tighten focused diamonds in problem areas. Just be sure to maintain symmetry – equal tension equals ideal performance.
Play with Shooting String Angles
Shooting strings don’t have to be straight. Get creative with angles, V’s and inverted U’s. Angled shooters amp whip while preserving ball control. Inverted U’s boost hold while reducing errant velocity. Mix up shooter configurations to optimize release. Just ensure width stays legal, and make micro-adjustments until you find sweet spot angles.
Add or Remove Diamonds
Pocket too deep? Flattening things out is a quick fix. Remove 1-2 diamonds from the lower throat area to elevate pocket depth. Conversely, add diamonds to drop the depth for boosted ball control. Just keep things uniform for consistent flexibility. And adhere to reg depth limits based on age and level.
Check Pocket Placement
Ensuring proper pocket placement takes experimentation. But optimal ball position is low-middle, about 1.5 inches above the scoop. If your pocket placement is off, it can create poor feel and handling. Adjust the bottom string angle and re-work diamonds to nudge the center point of the pocket gently up or down as needed. Dial it in so the ball sits in the sweet spot.
Widen or Narrow the Channel

Channel width stems from sidewall tension and diamond symmetry. Widening the channel boosts whip for added velocity. Tightening it controls whipping for improved accuracy. Based on game feel, make micro-adjustments to diamonds or sidewalls to find your ideal channel width. Just keep it consistent for smooth handling.
Check Overall Tension
Your pocket’s overall tension impacts flexibility and ball control. After stringing, assess whether you need more give for improved cradling and hold or more structure for quicker release. To increase tension, tighten up sidewalls, interweaves and shooters in focused areas. Loosen those areas gently to reduce tension. Find the sweet spot.
Account for Break-In
Pockets naturally loosen up over time with play. So if your freshly strung gamer feels too rigid, have patience. The flex and feel will improve with break-in. In contrast, an overly soft pocket will get sloppier. Compensate by starting tighter, and let the whip develop organically.
Check Pocket Depth Over Time
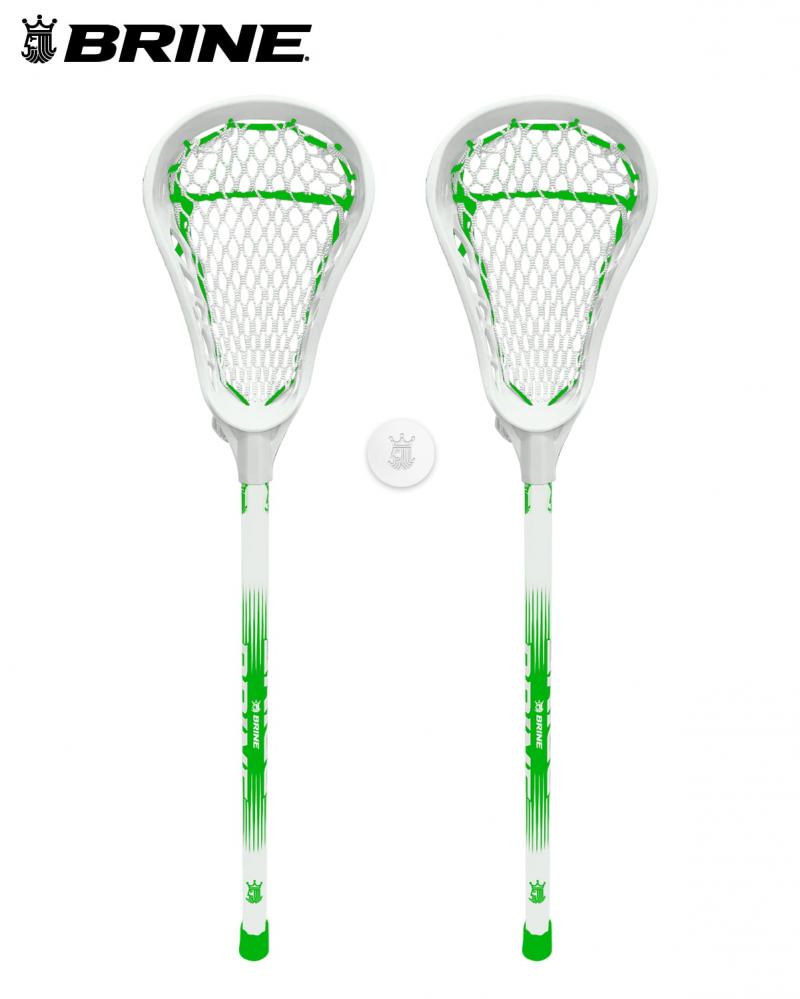
Keep close tabs on pocket depth as your stick breaks in. Deep pockets often get deeper. Shallow pockets creep lower too. Ensure depth stays legal and performance-optimized by making diamond and sidewall micro-tweaks over the first few weeks. Maintain your ideal depth as she loosens up.
Improve Hand Positioning
Proper hand placement is essential for maximizing your pocket’s performance. When cradling, keep top hand just below the throat and bottom hand near the weld. This allows optimal control of the flexible lower pocket for smooth rolls. Re-train hands to find the sweet spot.
Use Different Shooting Styles
Tweak shooting mechanics to sync up with pocket release. For tails and low pockets, go side-arm for control. Mid pockets like overhands for accuracy. High pockets shoot best with 3/4 hybrid technique. Vary wrist snap, follow through and angles until your pocket’s whip aligns naturally with shot.
Dialing in pocket perfection is a game of inches. Make thoughtful micro-adjustments and keep testing until that snappy release, smooth hold and effortless handling tell you your masterpiece is complete. Trust the process and know even the pros constantly tweak their gamers. Take pride in the artistry of precision pocket tuning.
Use a Stringing Jig for Consistency
Crafting the perfect lacrosse pocket requires mastering a maze of intricate knots, tension points and string paths. Juggling all those variables while manually holding the stick can challenge even seasoned stringers. But there’s a simple solution to take your string jobs to the next level – a stringing jig. These handy tools provide the perfect foundation for consistent, pro-quality stringing every time.
What is a Stringing Jig?
A lacrosse stringing jig is a sturdy stand that securely holds the head in place while stringing. Jigs have adjustable clamps to accommodate different head widths and angles. By stabilizing the head frame, a jig allows stringers to use both hands to tie knots, creating expert results. No more dropping sticks mid-string! Stringing jigs are a must for next-level pockets.
Benefits of Using a Jig
Stringing jigs offer many advantages over hand stringing. First, they provide a fixed, stable base to remove variables. The head doesn’t shift while you work. Second, jigs allow using two hands to deftly handle mesh, sidewalls and shooting strings. You can tie intricate knots with precision. Third, jigs create consistent tension and spacing by securing the head in an ideal position. Overall, jigs lead to straighter sidewalls, tighter diamonds, and expert shooting strings.
Choosing the Right Jig
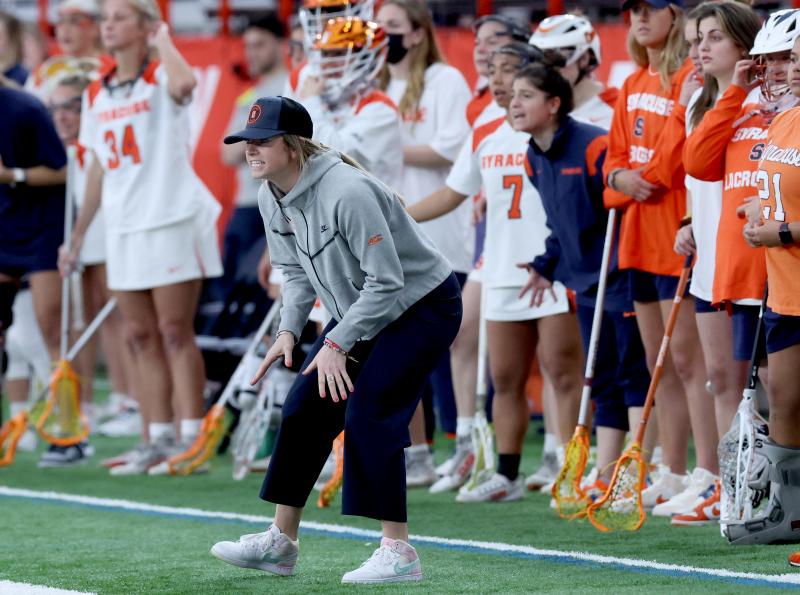
Look for sturdy metal jigs with adjustable width clamps and multiple angle settings. Plastic jigs work but aren’t as durable long-term. Standard jigs accommodate most heads, or opt for pro models with extra stance widths. Consider foldable designs for portability. Weighted bases add stability. And ball bearing pole connectors allow smooth head rotation as you string.
Mounting the Head
Start by securing the jig base on a table or bench at a comfortable working height. Adjust the clamp width and angle dial to fit the specs of your head’s sidewall. Gently tighten the head in place, being careful not overtighten. You want a snug fit that still allows adjusting head position as needed while stringing. Take your time initially to find the ideal holder settings.
Starting the Sidewalls
With the head locked in, begin sidewall stringing. Measure correct sidewall length and tie off bottom end. Pull cord up through sidewall holes starting on one side. Pull evenly taut and tie off top. Repeat other sidewall. Having the head immobile makes it far easier to achieve straight, tight, symmetrical sidewalls – the cage foundation.
Weaving Even Diamonds

Now you can expertly weave uniform diamonds using both hands, unimpeded byhead wobble. Start interweaves in the throat and work downwards. The jig allows tightly knotting diamonds while maintaining perfect symmetry and spacing for ideal pocket mechanics.
Dialing in Shooters
Shooting strings are tricky – but jigs make quick work of them. Statically place horizontal nylons then expertly string shooters. Dial in exact shooter lengths, angles and tension thanks to fixed base. Achieve precision V’s, U’s or straights that enhance performance.
Finishing with Precise Dimensions
As you put the finishing touches on your pocket, the jig ensures every dimension is finely tuned. Set ideal bottom string angles. Control exact pocket depth. Verify legality of shooting strings. Confirm channel width and ball ramp angles. All translated into a perfectly constructed pocket.
Test Throwing and Adjusting
After the initial string job, test pocket performance. If any adjustments are needed to diamonds, sidewalls or shooting strings, simply re-mount the head and tweak away. The jig eliminates variables as you make micro-corrections until achieving pocket perfection.
Repeat Consistency Each Re-String
Stringing jigs let you recreate your perfect pocket every single re-string. By controlling all the key dimensions, angles and tension points, you can duplicate your gold standard gamer specs over and over. Dial in your go-to pattern with a jig.
Take your stringing skills to the next level with a high-quality stringing jig. The stability, precision and consistency jigs provide lead to expert pockets worthy of the pros. Once you string on a jig, you’ll never go back. Your sticks – and your game – will thank you!
Watch Tutorials to Pick Up Pro Tips
So you’ve strung up a few sticks and feel decently handy with sidewalls, diamonds and shooters. But taking your stringing game to the next level requires gleaning pro-quality techniques and insider tricks. How do you go from stringing apprentice to Jedi pocket master? One shortcut is watching online stringing tutorials. Expert videos pack a wealth of next-level knowledge that will up your stringing IQ fast.
Learn Pro Stringing Methodology
Skilled stringers have finely honed processes for crafting elite pockets. Watching tutorials reveals their sequencing, approach and best practices. Learn how the pros first determine optimal pocket specs based on player style and position. See how they map out stringing blueprints before picking up mesh. Understand why they begin with tightly pulled sidewalls to shape the channel. Study their stringing motion and mechanics. Their systematic methodology ensures consistent pro-quality results.
Pick Up Nuanced Technique Tips
The devil is in the details when stringing truly great pockets. Elite stringers have all kinds of subtle techniques that optimize performance. Tutorials showcase these nuances up-close in high definition. See how the slight angle on the bottom lace affects pocket shape. Understand the impact of miniscule differences in diamond tension. Learn tricks like using stacked knots or skipping holes for unique feels. Don’t miss a pro tip – watch carefully!
Master Complex Pocket Features

Next-level pockets utilize advanced features that require expert execution. Shooting string V’s, U’s and stacks. Multi-lace diamond stacks for customized channels. Hybrid sidewall materials like leather and nylon. Bottom string angle weaves to fine-tune ramps. Tutorials provide step-by-step guidance on executing these advanced techniques flawlessly, taking your skills up a notch.
Understand Why Pros Make Specific Choices
Elite stringers don’t make decisions randomly. Every material selection, knot, angle and tension point has a purpose based on play style and feel preferences. Videos let you get inside pros’ heads to understand the “why” behind their techniques. When you grasp the reason and intent behind each stringing element, you can translate insights into your own optimal designs.
Get Inspired Seeing Different Pocket Styles
Expand your creative horizons by studying the diverse ways master stringers construct unique pockets. See minimalist low-whip set-ups perfect for precision passers. Marvel at intricate diamond lace stacks enabling insane ball control. Appreciate knotless and spliceless heads with amazingly clean throws and scoops. Let the variety in videos spark inspiration for new styles to test on your own sticks.
Gain Confidence in Your Abilities
Stringing mastery comes through deep experience. But tutorials allow novices to compress skill-building by gleaning decades of pros’ accrued knowledge. As you incorporate techniques from videos, you’ll gain confidence in executing advanced skills well beyond your experience level. Embrace the chance to fast-track your progress.
Diagnosing and Correcting Stringing Issues
If you hit obstacles stringing a tricky pocket, tutorials offer troubleshooting tips. Search for videos addressing your specific problem – flattened diamonds, inconsistent sidewalls, poor ball control. Experts explain how to diagnose root causes and correct issues through targeted adjustments. Don’t get frustrated, get educated!
Learning Efficiently on Your Own Schedule
Stringing wisdom exists in books, forums and camps. But tutorials offer self-paced learning you control. Follow top stringers in the comfort of home without pressure. Pause, rewind and repeat key sections at your own speed. String along with videos to ingrain techniques through active learning. Tutorials fit learning into busy life.
Skill development in any craft comes through knowledge accumulation over time. Make the most of online stringing tutorials to absorb generations of wisdom on your journey to mastery. Keep pushing your skills by drinking deeply from true experts. Seek knowledge and your pockets will prosper!
Don’t Rush – Take Your Time and Do It Right
You finally got your hands on that sweet new head. You can’t wait to throw some fresh string and mesh on it and hit the field with your shiny new gamer. But hold those horses! legendary pockets require meticulous craftsmanship, finesse and patience. Resist the urge to rush through stringing and instead take your time to get it right. Remember, precision patience pays off in pocket performance.
Study Your Head Thoroughly
Before grabbing string, examine your head closely. Note its dimensions, sidewall angles, hole spacing and shooting channel configuration. Understanding your canvas is essential in planning the art. Feel along the sidewalls and scoop, visualizing pocket shape and mechanics. Take time to become one with the head before plotting your string job.
Carefully Design Your Stringing Blueprint
Elite stringers sketch out stringing schemes before they begin, considering diamond counts, shooter placement, sidewall paths and more. Mapping a diagram guides the process and helps spot potential issues early. Don’t wing it – draft a pocket blueprint tailored to your head’s shape and your playing style.
Select Stringing Materials Thoughtfully
Just grabbing any old string, mesh and leathers can produce a pocket, but not a masterpiece. Survey the market and select premium options purposefully suited to your gamer. Feel string samples to gauge waxiness, stiffness and texture. Study mesh hole patterns and diamond sizes. Scrutinize leathers. Meticulous prep creates ideal ingredients.
Don’t Forget Tools and Supplies
Stringing requires some special tools beyond basic string and scissors. Invest in needle-nose pliers, bolt cutters, lighter and razor. Have sidewall strings, shooting nylons and backup leathers on hand. Prep your toolbox to avoid mid-string trips to the store. You want everything needed on your bench before starting.
Secure the Head in a Stringing Jig
Trying to hand string a whole pocket leads to sloppiness. Do it right by investing in a sturdy stringing jig with adjustable width, angle and swivel settings. Take time initially finding the perfect hold settings for your head. A fixed base transforms consistency.
Don’t Rush Sidewalls
Laying clean, symmetric sidewalls forms a pocket’s foundation. Pull each line tight through the holes, but don’t yank. Tie off ends with firm double knots. Rushing leads to messy walls and uneven channels. Go slow and get walls perfect before moving on.
Weave Diamonds Meticulously
Interwoven diamonds give a pocket shape and snappy release. Focus on consistent stitching, spacing and tension. Pull knots snugly but not too tight. No short cuts – precision diamond work is the key to a smooth channel.
Be Patient When Shooting Strings
Shooting strings enable ball control and whip, but require careful installation. Measure twice, string once. Work slowly from hole to hole perfecting tension and spacing. Don’t rush just to get shooters in – you want them meticulously dialed in.
Obsess Over Every Dimension
Dialing in a gamer requires obsessing over pocket dimensions. Ensure overall width fits game needs. Verify sidewall height meets regs. Confirm diamond counts shape the channel appropriately. Double check shooter width. Measure, assess and adjust until all specs are optimized.
Check Your Work
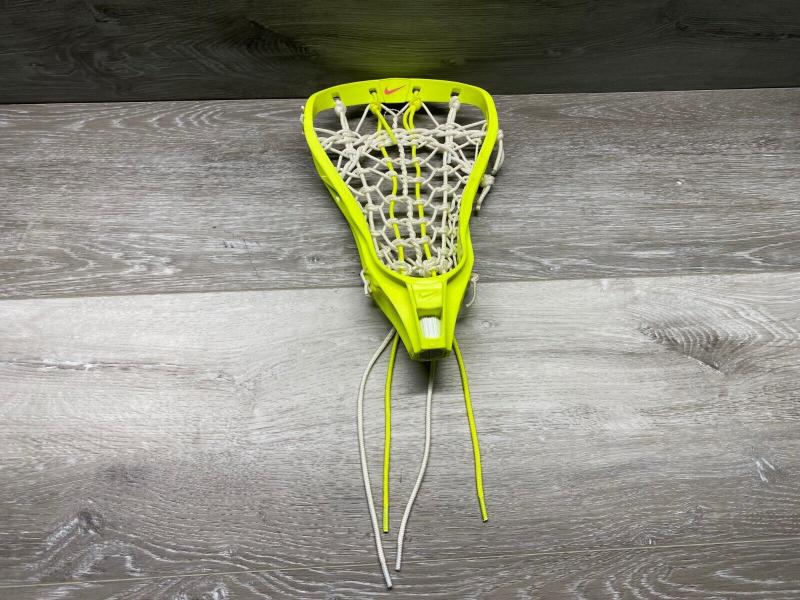
Like any craft, take time inspecting your work before calling it complete. Look for any out-of-place diamonds affecting structure. Examine sidewalls for consistency. Confirm legal shooter width and spacing. Fix any small defects before moving on.
Take It for a Test Drive
Installing mesh then testing pocket performance allows assessing feel and making tweaks. Throw around and note issues like inconsistent release points or rattling. Don’t ship it yet – use testing time to perfect your masterpiece.
Patience is a virtue in all of life, none more so than stringing. Refuse the urge to rush and cut corners. Savor the meticulous process, channeling your inner zen. In time, grasshopper, you’ll produce pieces of functional string art perfect in every way – a harmonious melding of craft, creativity and performance. Your patience will pay off ten-fold on the field.

