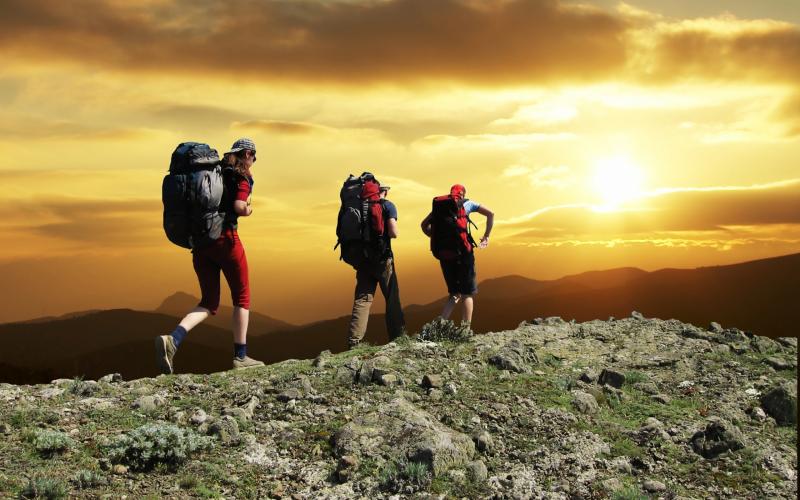
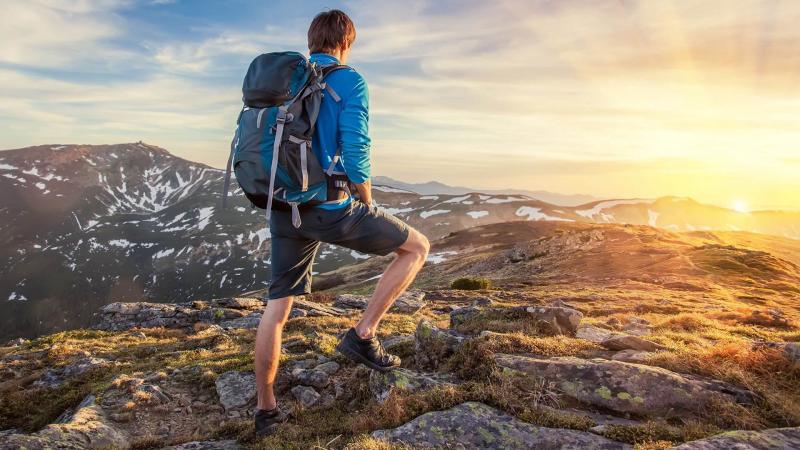
Ready for Adventure in the Great Outdoors. The Must-Have Gear to Conquer the Coleman River GorgeReady for Adventure in the Great Outdoors. The Must-Have Gear to Conquer the Coleman River Gorge
Pack a Lightweight, Warm Sleeping Bag Designed for Frigid Nights
Ready for adventure in the great outdoors? The rugged beauty of the Coleman River Gorge awaits. This natural wonder beckons you to explore its cascading waterfalls, towering cliffs, and pristine hiking trails. But before you embark on your expedition, you’ll need to pack the right gear. This is especially true when it comes to your sleeping bag — your shelter and warmth for chilly nights under the stars.
When packing for a backpacking trip in the Coleman River Gorge, your sleeping bag is one of the most critical items. Temperatures can plummet after sunset, even during the summer. You’ll want reliable insulation to keep you cozy through frigid nights in the gorge. The key is finding a lightweight, compressible sleeping bag that still provides ample warmth. With the right sleeping bag, you’ll be equipped for peaceful slumber amidst the gorge’s majestic, untamed wilderness.
Seek Out Down Fill for Lightweight Warmth
When choosing a sleeping bag for your Coleman River Gorge adventure, down fill is your best bet for maximizing warmth without the weight. Down insulation comes from waterfowl plumage, typically duck or geese. It provides superior loft and compressibility compared to synthetic fills. This means you get great insulation and heat retention from minimal weight and bulk.
High quality down sleeping bags, like those with 650+ fill power goose down, offer an excellent warmth-to-weight ratio. They compress down small, so you can easily fit them in your backpack without taking up too much room. Yet they still insulate efficiently when unpackaged, trapping body heat to keep you warm on cold nights. Down is also highly durable, maintaining its insulation properties for years with proper care.
Seek Out Temperature Ratings of 15°F or Lower
When researching sleeping bags for your Coleman River Gorge trip, be sure to check the temperature rating. This indicates the lowest temperature at which the bag will keep the average person warm. For the gorge, look for temperature ratings around 15°F or lower. Ratings of 10°F or even 0°F give you extra protection from potentially frigid overnight lows.
Keep in mind that women often sleep colder than men. So if you’re female, consider choosing a sleeping bag rated 5-10 degrees lower than the expected temperature. For example, if nightly lows are expected around 20°F, choose a bag rated 10°F or lower.
Also, note that temperature ratings are based on adding a sleeping pad for insulation from the cold ground. Sleeping directly on the hard ground can render a bag useless, no matter the rating. So be sure to pack a compact but cushioned sleeping pad to put in your tent or under your sleeping bag.
Choose a Mummy Bag for Maximum Heat Retention
Once you’ve settled on fill material and temperature rating, next consider sleeping bag shape. For colder climates like the Coleman River Gorge, a mummy style bag is your best bet. A mummy sleeping bag tapers at the feet and zips up past your shoulders, hugging your body tightly. This decreases open space inside the bag, limiting heat loss from air circulation. The snug fit also allows your body heat to be efficiently transferred to the insulation.
Look for mummy bags with insulated draft tubes and collars around zippers and neck openings. These features prevent precious heat from escaping through gaps. You want snugness without constriction, so try out bags in person and move around to test mobility.
While rectangle-shaped sleeping bags allow more room to spread out, they can’t match the heat efficiency of tapered mummy bags. When optimizing for warmth over space, mummy bags are the top choice.
Choose Compressible Down That Packs Small
For multi-day backpacking trips, look for sleeping bags that compress down as small as possible. The compacted size of your sleeping bag will determine how much room it takes up in your pack. Less bulk means you can carry more gear and food rations for extended adventures.
As mentioned above, down fill provides the best balance of compressibility and warmth. Higher fill-powers around 800-900 compress down the most. But even 600-650 fill power is compressible enough for backpacking while still being affordable.
Many down sleeping bags now come with compression stuff sacks for reducing packed size. The sack squeezes air out after packing. Make sure to get a stuff sack specifically sized for your bag model to allow full compression.
Synthetic bags typically can’t compress down nearly as small as quality down. If you need to pare your pack weight down to the bare minimum, down is superior.
Choose a Durable, Water-Resistant Outer Shell
For female adventurers, it’s advisable to choose a bag rated 5-10 degrees lower than the expected temperature, as women typically sleep colder than men. If nightly lows are forecast around 20°F, a bag rated for 10°F or lower would be a prudent choice.
Down Fill: The Ultimate in Lightweight Warmth
When it comes to insulation, down fill reigns supreme for Coleman River Gorge expeditions. Why is down fill superior to synthetic alternatives? Down offers an unparalleled warmth-to-weight ratio, exceptional compressibility, and long-lasting durability.
High-quality down sleeping bags, particularly those featuring 650+ fill power goose down, provide excellent insulation without the bulk. They compress easily, allowing for efficient packing in your backpack while still delivering superior heat retention when deployed.
The Science Behind Down’s Efficiency
How does down insulation work so effectively? Down clusters create tiny air pockets that trap body heat, providing exceptional warmth relative to its weight. This natural insulation maintains its loft and insulating properties even after years of use, making it a wise long-term investment for outdoor enthusiasts.

Mummy-Style Bags: Maximizing Heat Retention
When facing the potentially harsh conditions of Coleman River Gorge, the shape of your sleeping bag plays a crucial role in heat retention. Why are mummy-style bags considered the best option for cold climates?
- Tapered design minimizes air circulation and heat loss
- Snug fit allows efficient transfer of body heat to insulation
- Insulated draft tubes and collars prevent heat escape
- Provides warmth without sacrificing mobility
While rectangular bags offer more room to move, they can’t match the thermal efficiency of a well-designed mummy bag. For optimal warmth in the gorge’s challenging environment, a mummy-style bag is the clear choice.
Compressibility: The Backpacker’s Best Friend
How can you ensure your sleeping bag doesn’t monopolize precious pack space? The key lies in selecting a highly compressible bag. Down fill excels in this area, with higher fill-powers (800-900) offering the most impressive compression ratios.
Many quality down sleeping bags come with compression stuff sacks, allowing you to minimize packed size even further. When every inch of pack space counts, a highly compressible down bag can make a significant difference in your overall load.

Compression Tips for Efficient Packing
- Choose a stuff sack specifically sized for your bag model
- Pack the sleeping bag at the bottom of your backpack
- Use compression straps to further reduce volume
- Consider a waterproof compression sack for added protection
Durability and Water Resistance: Protecting Your Investment
The rugged environment of Coleman River Gorge demands gear that can withstand the elements. How can you ensure your sleeping bag stands up to the challenge? Look for bags with durable, water-resistant outer shells.
Ripstop nylon is a popular choice for its strength and lightweight properties. Many high-quality bags feature DWR (Durable Water Repellent) treatments, which help shed light moisture and protect the insulation within.
Caring for Your Sleeping Bag in the Field
To maintain your bag’s performance throughout your adventure:
- Air out your bag daily to prevent moisture buildup
- Use a sleeping bag liner to keep the interior clean
- Avoid compressing the bag for extended periods when not in use
- Store loosely in a large, breathable storage sack between trips
Balancing Weight and Warmth: The Backpacker’s Dilemma
How do you strike the perfect balance between a lightweight pack and a warm night’s sleep? This is a common challenge for Coleman River Gorge adventurers. The goal is to find a sleeping bag that provides adequate warmth without unnecessarily weighing down your pack.
Consider your personal cold tolerance, the expected weather conditions, and the length of your trip. A slightly heavier, warmer bag might be worth the extra weight for shorter trips or if you tend to sleep cold. For longer expeditions where every ounce counts, you might opt for a slightly lighter bag and supplement with warm clothing layers.
Weight-Saving Strategies for Sleeping Comfort
- Choose a high-quality down bag with excellent warmth-to-weight ratio
- Opt for a mummy-style bag to maximize efficiency
- Use a lightweight, insulated sleeping pad to boost warmth from below
- Pack warm, moisture-wicking base layers for sleeping
- Consider a silk or thermal sleeping bag liner for added warmth with minimal weight
Adapting to Varied Conditions: Versatility in the Gorge
Coleman River Gorge can present a wide range of weather conditions, even within a single trip. How can your sleeping bag adapt to these variations? Look for bags with features that allow for temperature regulation.
Some high-end bags offer adjustable ventilation options, such as two-way zippers or “gills” that can be opened to release excess heat. Others feature removable top quilts or modular designs that can be adapted for different temperature ranges.
Layering Strategies for Sleeping Systems
To create a versatile sleep system for the gorge:
- Start with a slightly cooler-rated bag than you might typically choose
- Add a thermal liner for colder nights
- Use a lightweight, compressible camping quilt for added warmth when needed
- Pack appropriate sleepwear that can be added or removed as necessary
This approach allows you to adapt to temperature fluctuations without carrying multiple sleeping bags.
Ethical Considerations: Responsible Down and Synthetic Alternatives
As outdoor enthusiasts, it’s crucial to consider the environmental and ethical implications of our gear choices. How can you ensure your sleeping bag aligns with responsible practices?
Many reputable outdoor brands now offer traceable, responsibly sourced down that adheres to animal welfare standards. Look for certifications such as the Responsible Down Standard (RDS) or the Global Traceable Down Standard (Global TDS) when selecting a down sleeping bag.
For those who prefer to avoid animal products entirely, advances in synthetic insulation technology have produced alternatives that approach the performance of down. High-quality synthetic bags can offer excellent warmth, quick-drying properties, and maintain insulation even when wet.
Comparing Down and Synthetic Options
| Aspect | Down | Synthetic |
|---|---|---|
| Warmth-to-Weight Ratio | Superior | Good |
| Compressibility | Excellent | Moderate |
| Performance When Wet | Poor | Good |
| Durability | Excellent | Good |
| Price | Higher | Lower |
Consider your personal values, budget, and the specific conditions you’re likely to encounter in Coleman River Gorge when making your choice.
Proper Fit and Testing: Ensuring Comfort in the Field
How can you be certain that your chosen sleeping bag will perform as expected in Coleman River Gorge? The key is to properly test and fit your bag before embarking on your adventure.
When trying on sleeping bags, wear the clothing you plan to sleep in during your trip. Ensure you can comfortably zip the bag up and move around inside it. Pay attention to the length – your feet shouldn’t press against the end of the bag, as this can compress the insulation and create cold spots.

Pre-Trip Testing Checklist
- Set up your sleeping bag at home and spend a night in it
- Test the bag in similar temperature conditions to what you expect in the gorge
- Practice packing and unpacking the bag to familiarize yourself with its compression
- Check all zippers, drawcords, and other features for smooth operation
- If possible, conduct a short overnight trip in similar terrain before your main expedition
By thoroughly testing your sleeping bag before your Coleman River Gorge adventure, you can identify any issues or discomfort early and make necessary adjustments or exchanges.
Complementary Gear: Optimizing Your Sleep System
A high-quality sleeping bag is just one part of a complete sleep system for Coleman River Gorge. What other gear can enhance your sleeping comfort and overall experience?
Essential Sleep System Components
- Sleeping Pad: Provides insulation from the cold ground and cushioning for comfort. Look for pads with high R-values for better insulation.
- Pillow: A compact, inflatable camping pillow can greatly improve sleep quality without adding significant weight.
- Tent: Choose a tent appropriate for the gorge’s conditions, with good ventilation to prevent condensation.
- Ground Cloth: Protects your tent floor and provides an extra moisture barrier.
- Sleep Clothing: Pack moisture-wicking base layers and warm, clean socks for sleeping.
By carefully selecting each component of your sleep system, you can create a comfortable and efficient setup that will serve you well throughout your Coleman River Gorge expedition.

Maintenance and Care: Prolonging the Life of Your Sleeping Bag
How can you ensure your investment in a quality sleeping bag pays off for years to come? Proper maintenance and care are crucial for preserving the performance and longevity of your gear.
Post-Trip Care Routine
- Air out your sleeping bag thoroughly after each trip
- Spot clean any dirt or stains with a gentle, specialized cleaner
- Store your bag uncompressed in a large, breathable storage sack
- Avoid storing in damp or humid environments
- Periodically wash your bag according to manufacturer instructions
For down bags, consider using tennis balls or dryer balls when machine drying to help restore loft. Always follow the specific care instructions provided by the manufacturer to maintain your bag’s performance and warranty.
Long-Term Storage Tips
Between adventures in Coleman River Gorge and other outdoor destinations:
- Store your sleeping bag in a cool, dry place
- Use a large, breathable cotton or mesh storage sack to prevent compression
- Avoid storing in plastic bags or compression sacks for extended periods
- Periodically air out your bag, even when not in use
- Consider using cedar blocks or lavender sachets to deter moths (for down bags)
By following these care and maintenance guidelines, you can ensure that your sleeping bag remains a reliable companion for many Coleman River Gorge expeditions to come.

Pack a Lightweight, Warm Sleeping Bag Designed for Frigid Nights
Ready for adventure in the great outdoors? The rugged beauty of the Coleman River Gorge awaits. This natural wonder beckons you to explore its cascading waterfalls, towering cliffs, and pristine hiking trails. But before you embark on your expedition, you’ll need to pack the right gear. This is especially true when it comes to your sleeping bag — your shelter and warmth for chilly nights under the stars.
When packing for a backpacking trip in the Coleman River Gorge, your sleeping bag is one of the most critical items. Temperatures can plummet after sunset, even during the summer. You’ll want reliable insulation to keep you cozy through frigid nights in the gorge. The key is finding a lightweight, compressible sleeping bag that still provides ample warmth. With the right sleeping bag, you’ll be equipped for peaceful slumber amidst the gorge’s majestic, untamed wilderness.
Seek Out Down Fill for Lightweight Warmth
When choosing a sleeping bag for your Coleman River Gorge adventure, down fill is your best bet for maximizing warmth without the weight. Down insulation comes from waterfowl plumage, typically duck or geese. It provides superior loft and compressibility compared to synthetic fills. This means you get great insulation and heat retention from minimal weight and bulk.
High quality down sleeping bags, like those with 650+ fill power goose down, offer an excellent warmth-to-weight ratio. They compress down small, so you can easily fit them in your backpack without taking up too much room. Yet they still insulate efficiently when unpackaged, trapping body heat to keep you warm on cold nights. Down is also highly durable, maintaining its insulation properties for years with proper care.
Seek Out Temperature Ratings of 15°F or Lower
When researching sleeping bags for your Coleman River Gorge trip, be sure to check the temperature rating. This indicates the lowest temperature at which the bag will keep the average person warm. For the gorge, look for temperature ratings around 15°F or lower. Ratings of 10°F or even 0°F give you extra protection from potentially frigid overnight lows.
Keep in mind that women often sleep colder than men. So if you’re female, consider choosing a sleeping bag rated 5-10 degrees lower than the expected temperature. For example, if nightly lows are expected around 20°F, choose a bag rated 10°F or lower.
Also, note that temperature ratings are based on adding a sleeping pad for insulation from the cold ground. Sleeping directly on the hard ground can render a bag useless, no matter the rating. So be sure to pack a compact but cushioned sleeping pad to put in your tent or under your sleeping bag.
Choose a Mummy Bag for Maximum Heat Retention
Once you’ve settled on fill material and temperature rating, next consider sleeping bag shape. For colder climates like the Coleman River Gorge, a mummy style bag is your best bet. A mummy sleeping bag tapers at the feet and zips up past your shoulders, hugging your body tightly. This decreases open space inside the bag, limiting heat loss from air circulation. The snug fit also allows your body heat to be efficiently transferred to the insulation.
Look for mummy bags with insulated draft tubes and collars around zippers and neck openings. These features prevent precious heat from escaping through gaps. You want snugness without constriction, so try out bags in person and move around to test mobility.
While rectangle-shaped sleeping bags allow more room to spread out, they can’t match the heat efficiency of tapered mummy bags. When optimizing for warmth over space, mummy bags are the top choice.
Choose Compressible Down That Packs Small
For multi-day backpacking trips, look for sleeping bags that compress down as small as possible. The compacted size of your sleeping bag will determine how much room it takes up in your pack. Less bulk means you can carry more gear and food rations for extended adventures.
As mentioned above, down fill provides the best balance of compressibility and warmth. Higher fill-powers around 800-900 compress down the most. But even 600-650 fill power is compressible enough for backpacking while still being affordable.
Many down sleeping bags now come with compression stuff sacks for reducing packed size. The sack squeezes air out after packing. Make sure to get a stuff sack specifically sized for your bag model to allow full compression.
Synthetic bags typically can’t compress down nearly as small as quality down. If you need to pare your pack weight down to the bare minimum, down is superior.
Choose a Durable, Water-Resistant Outer Shell
Your sleeping bag’s outer shell impacts both durability and water resistance. When seeking out a bag for the Coleman River Gorge’s potential wet weather, choose one with a durable water-resistant (DWR) shell.
Many premium down bags boast shells of ripstop nylon or polyester with a DWR coating. This treatment causes water to bead up and roll off the fabric. It protects your down insulation from getting soaked if condensation forms inside your tent.
Look for lightweight but abrasion-resistant materials like 20D nylon for the shell. This helps your sleeping bag withstand inevitable friction against rocks and debris on the trail. Waterproof DWR-coated shells are also easier to wipe clean after muddy hikes.
Consider Features Like Draft Tubes, Zipper Baffles, and Hoods
Besides fill and shell materials, sleeping bags come equipped with added features to seal in warmth. For cold weather bags, keep an eye out for draft tubes, zipper baffles, and hoods.
Draft tubes run alongside zippers, preventing heat leakage from the openings. Zipper baffles layer over the front zipper for the same purpose. And a mummy hood with drawcords lets you cinch the top of the bag around your head for added insulation.
Some bags also have interior pockets to warm up electronics or water bottles overnight. And don’t forget to get a repair kit for emergency fixes on the trail. With smart selections of features and materials, you’ll be geared up for the Coleman River Gorge’s chilling nights.
With the Right Sleeping Bag, You’re Ready for Adventure

As you gear up for camping in the magnificent Coleman River Gorge, choosing the optimal sleeping bag is mission-critical. Arm yourself against frigid temperatures by packing a lightweight, compressible down mummy bag with a temperature rating of 15°F or lower. Select a durable, water-resistant shell to combat dampness from spring showers or morning dew.
Prioritize packability, warmth, and comfort over unnecessary features. Then get ready to drift off under a rare dark night sky, serenaded by rushing river water and rustling trees. With your sleeping bag as your stalwart shield against the elements, the enchanting Coleman River Gorge eagerly awaits your discovery.
Choose a Durable, Waterproof Tent to Withstand Wind and Rain
Ready for adventure in the great outdoors? The rugged beauty of the Coleman River Gorge awaits. This natural wonder beckons you to explore its cascading waterfalls, towering cliffs, and pristine hiking trails. But before you embark on your expedition, you’ll need to pack the right gear. This especially applies to your tent – your shelter and sanctuary during nights camping in the gorge.
When packing for a backpacking trip in the Coleman River Gorge, your tent is a critical item to get right. The area is known for potential downpours and gusty winds. You’ll want durable, waterproof lodging to keep you dry and protected through any weather conditions. With the right tent, you’ll be equipped for peaceful slumber amidst the gorge’s majestic, untamed wilderness.
Choose a 3-Season Backpacking Tent
When selecting a tent for the Coleman River Gorge, a 3-season backpacking model is your best bet. These are designed to withstand moderate wind and rain, unlike moredelicate ultralight shelters.
While summer nights in the gorge are often pleasant, storms can blow through unexpectedly. A rain fly and bathtub floor on a 3-season tent shields you from downpours. Sturdy poles and tight seams prevent collapse from wind gusts.
Focus your search on tents weighing around 5 pounds or less. Lightweight but durable backpacking tents provide the ideal balance for your trip preparations.
Ensure the Rain Fly Fully Covers the Tent
For reliable protection from precipitation, the tent’s rain fly should extend several inches past the floor on all sides. This prevents rain from dripping inside, even with wind gusts blowing at angles.
Look for rain flies made of coated ripstop nylon or polyester. These resist UV damage over time. Waterproof ratings of 1,500mm or higher ensure raindrops bead up and roll off the fabric. Seam tape adds further rain protection.
Ideally, your Coleman River Gorge tent will have a full-coverage rainfly. But some ultralight tents have minimalist flies. Bring an extra tarp to string above one of these shelters as needed.
Choose a Durable Bathtub Floor to Keep Ground Moisture Out
Along with waterproof sides, your tent needs a impenetrable floor. Riverside campsites in the gorge can grow swampy after heavy rains.
Look for a bathtub floor, usually made of coated nylon or polyester. The floor wraps up the lower sides of the tent walls. This prevents moisture from wicking up into the living space, keeping you high and dry.
Make sure your tent floor carries a hydrostatic head rating of 1,500-3,000mm for sufficient water resistance. Taped floor seams add further protection from damp ground.
Select Strong, Wind-Responsive Poles
Flimsy poles will quickly cripple your tent’s wind resistance. Look for sturdy aluminum or carbon fiber poles to withstand gusty nights in the gorge.
Many quality backpacking tents use intersecting poles across the roof and sides. This creates a responsive frame that flexes rather than snapping when buffeted by wind.
Pole connection types also affect wind resilience. Shockcord connections let poles flex. Tents with sleeve and clip connections rely on taut fabric for structure. For the gorge, choose a blend of connection types for balance.
Look for Tents with Vestibules for Gear Storage
Your Coleman River Gorge tent should provide not only sleeping space but also storage for muddy boots and bags. Vestibules extend out from doors, creating a covered gear stash spot.
Tents sized for 2-3 people often have two vestibules, while solo tents have one. Vestibule space may be limited on ultralight models, so you’ll have to get creative with packing.
Vestibules with a mix of mesh and fabric walls provide ventilation while blocking wind and rain. Extra guylines and stakes can expand your vestibule space as needed.
Maximize Ventilation Opportunities to Limit Condensation
Chilly overnight temperatures combine with exhaled moisture to cause condensation inside tents. Too much can lead to soggy conditions by morning.
When shopping, prioritize tents with mesh walls or panels for ample airflow. Mesh doors and ceilings also allow stargazing on clear nights from your sleeping bag.
Look for adjustable vestibule doors that can swing open completely on dry days. Roll back rainfly flaps during the day to maximize ventilation and views.
You’ll still need good sleeping pad insulation to minimize ground moisture. But smart tent ventilation will go far toward preventing tent condensation issues.
Choose Durable Fabrics and Waterproof Seams Throughout

Both flooring and canopy fabric should use sturdy, waterproof materials. Check that canvas tents are wax-treated and breathable. Synthetics like polyester and nylon work well too.
Make sure all internal seams are factory sealed. Apply additional seam sealer in vestibules and high-stress spots for even more weatherproofing. Frequently cleaning your tent after trips also improves water resistance.
Setting up taught, with firm stakes and tied-off guylines, prevents sagging and puddling. Use gear lofts and hooks to keep weight off saturated ceiling fabric.
With the Right Tent, You’re Ready for Adventure
As you gear up for camping in the magnificent Coleman River Gorge, picking the right tent is a keystone decision. Look for a lightweight yet rugged 3-season backpacking model, designed to handle wind gusts and downpours. Select durable, waterproof fabrics with ample ventilation to limit condensation.
Stake down and seal up seams to fortify your protective nylon haven. Then get ready to drift off to the gentle patter of rain on your rainfly, sheltered in your trusty tent. With your temporary wilderness abode standing strong against the elements, the enchanting Coleman River Gorge eagerly awaits your discovery.
Don’t Forget a Portable Camp Stove for Quick Meals on the Trail
The call of the wild beckons. You’ve mapped out your route through the majestic Coleman River Gorge, your backpack is stuffed with gear and provisions, and you’re ready to embark on a thrilling wilderness adventure. As you plot your journey into nature’s wonderland, don’t forget one essential piece of equipment – a portable camp stove. This compact, lightweight cooking system will make whipping up hot meals easy, even in the middle of nowhere. With a camp stove, you can enjoy piping hot coffee, a warm breakfast, and a hearty dinner after a long day of hiking. No campfire required!
When selecting a camp stove, portability and weight are key factors. Look for a compact, folding design with detachable fuel canisters to minimize bulk in your pack. While larger two-burner models offer more cooking power, a single burner stove is often sufficient for quick backcountry meals. Canister stoves that use propane/butane fuel offer push-button ignition and are easy to operate, even in windy conditions. For longer trips, seek out a stove with interchangeable fuel types, allowing you to switch between canister fuel and liquid fuel as needed.
Don’t skimp on BTUs – look for at least 10,000 for rapid boiling and cooking flexibility. Also consider accessories like windscreens to boost efficiency and pot stands for stability. Brands like MSR, Jetboil, and Coleman offer excellent portable stoves built to withstand rugged terrain.
A portable camp stove allows you to cook up hot, nourishing meals to fuel your outdoor adventures. Skip the cold cheese sandwiches and enjoy a steaming cup of joe, oatmeal, or dehydrated camping meals in minutes. Breakfast burritos, pasta alfredo, beef stew – with a camp stove, you can cook it all! A satisfying meal does wonders when you’re chilled to the bone after a long day’s hike.
Whip up a hearty dinner like chili mac or jambalaya under the stars – the savory smells of sizzling meat and spices will whet your appetite after a day breathing fresh mountain air. Having a hot meal waiting after setting up camp makes the wilderness feel a bit more like home. With a portable stove, you’ll stay energized and avoid hunger pangs on long backpacking journeys.
Camp stoves also enable you to boil water for drinking, cleaning, and preparing freeze-dried meals. Properly hydrating and following safe hygiene practices are crucial when you’re far from tap water. A stove allows you to sanitize water by bringing it to a rolling boil – protecting you from nasty bacteria and protozoa. Be sure to pack a metal pot for boiling and cooking.
Safety is paramount when using a camp stove. Set up on a flat, stable surface away from vegetation. Maintain a safe distance from tents, sleeping bags, and other flammable materials. Use cooking gloves when handling hot pots. Store fuel canisters properly when not in use and avoid overfilling. Follow the manufacturer’s instructions carefully.
With a trusty camp stove in your arsenal, you’ll be ready to conquer the Coleman River Gorge in comfort and style. Stop by your local sporting goods store to pick out the perfect model for your needs. From searing steaks to simmering stews, you’ll have delicious, nutritious meals at your fingertips – even miles from civilization. Don’t hit the trail without it!
Ready for Adventure in the Great Outdoors? The Must-Have Gear to Conquer the Coleman River Gorge:
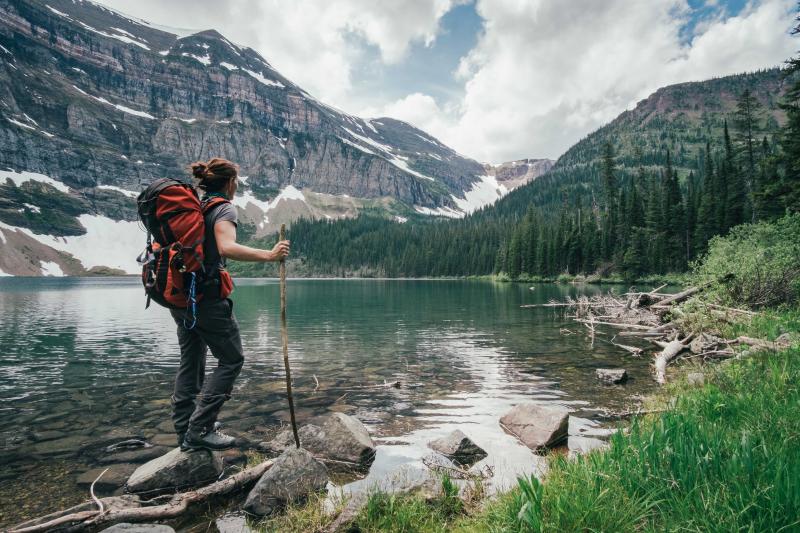
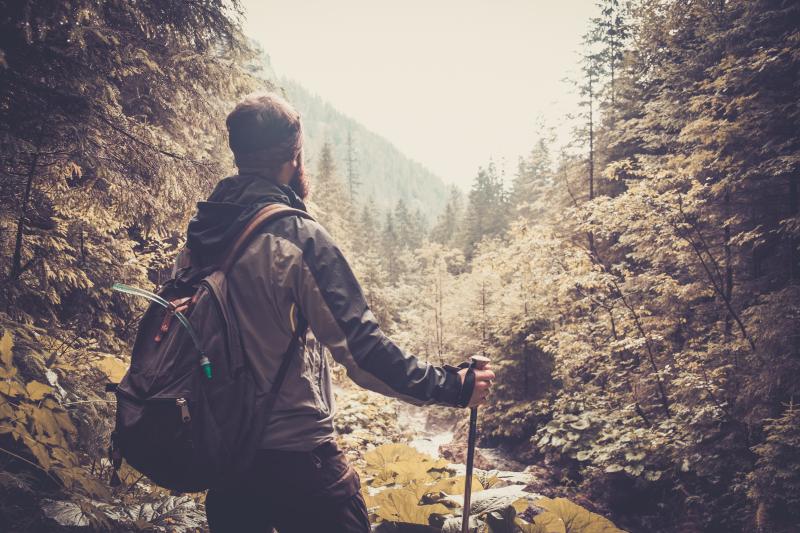
Nestled deep in the heart of the Adirondack Mountains lies the breathtaking Coleman River Gorge, with its cascading waterfalls, sheer cliffs, and sprawling old growth forests. Avid hikers and nature lovers flock to this natural wonder to traverse its steep, rocky trails and take in pristine alpine vistas. Are you planning your own trek through this untamed wilderness? Don’t head into the gorge unprepared. With rough terrain and unpredictable weather, having the right gear is crucial.
Start with quality hiking boots to provide stability, traction, and ankle support on rugged trails. Waterproof styles with stiff soles will prevent slips and keep feet dry when crossing streams. Pair with moisture-wicking socks to absorb sweat. Trekking poles improve stability on steep inclines and descents. Pack layers of quick-dry shirts and pants you can shed or add as conditions change.
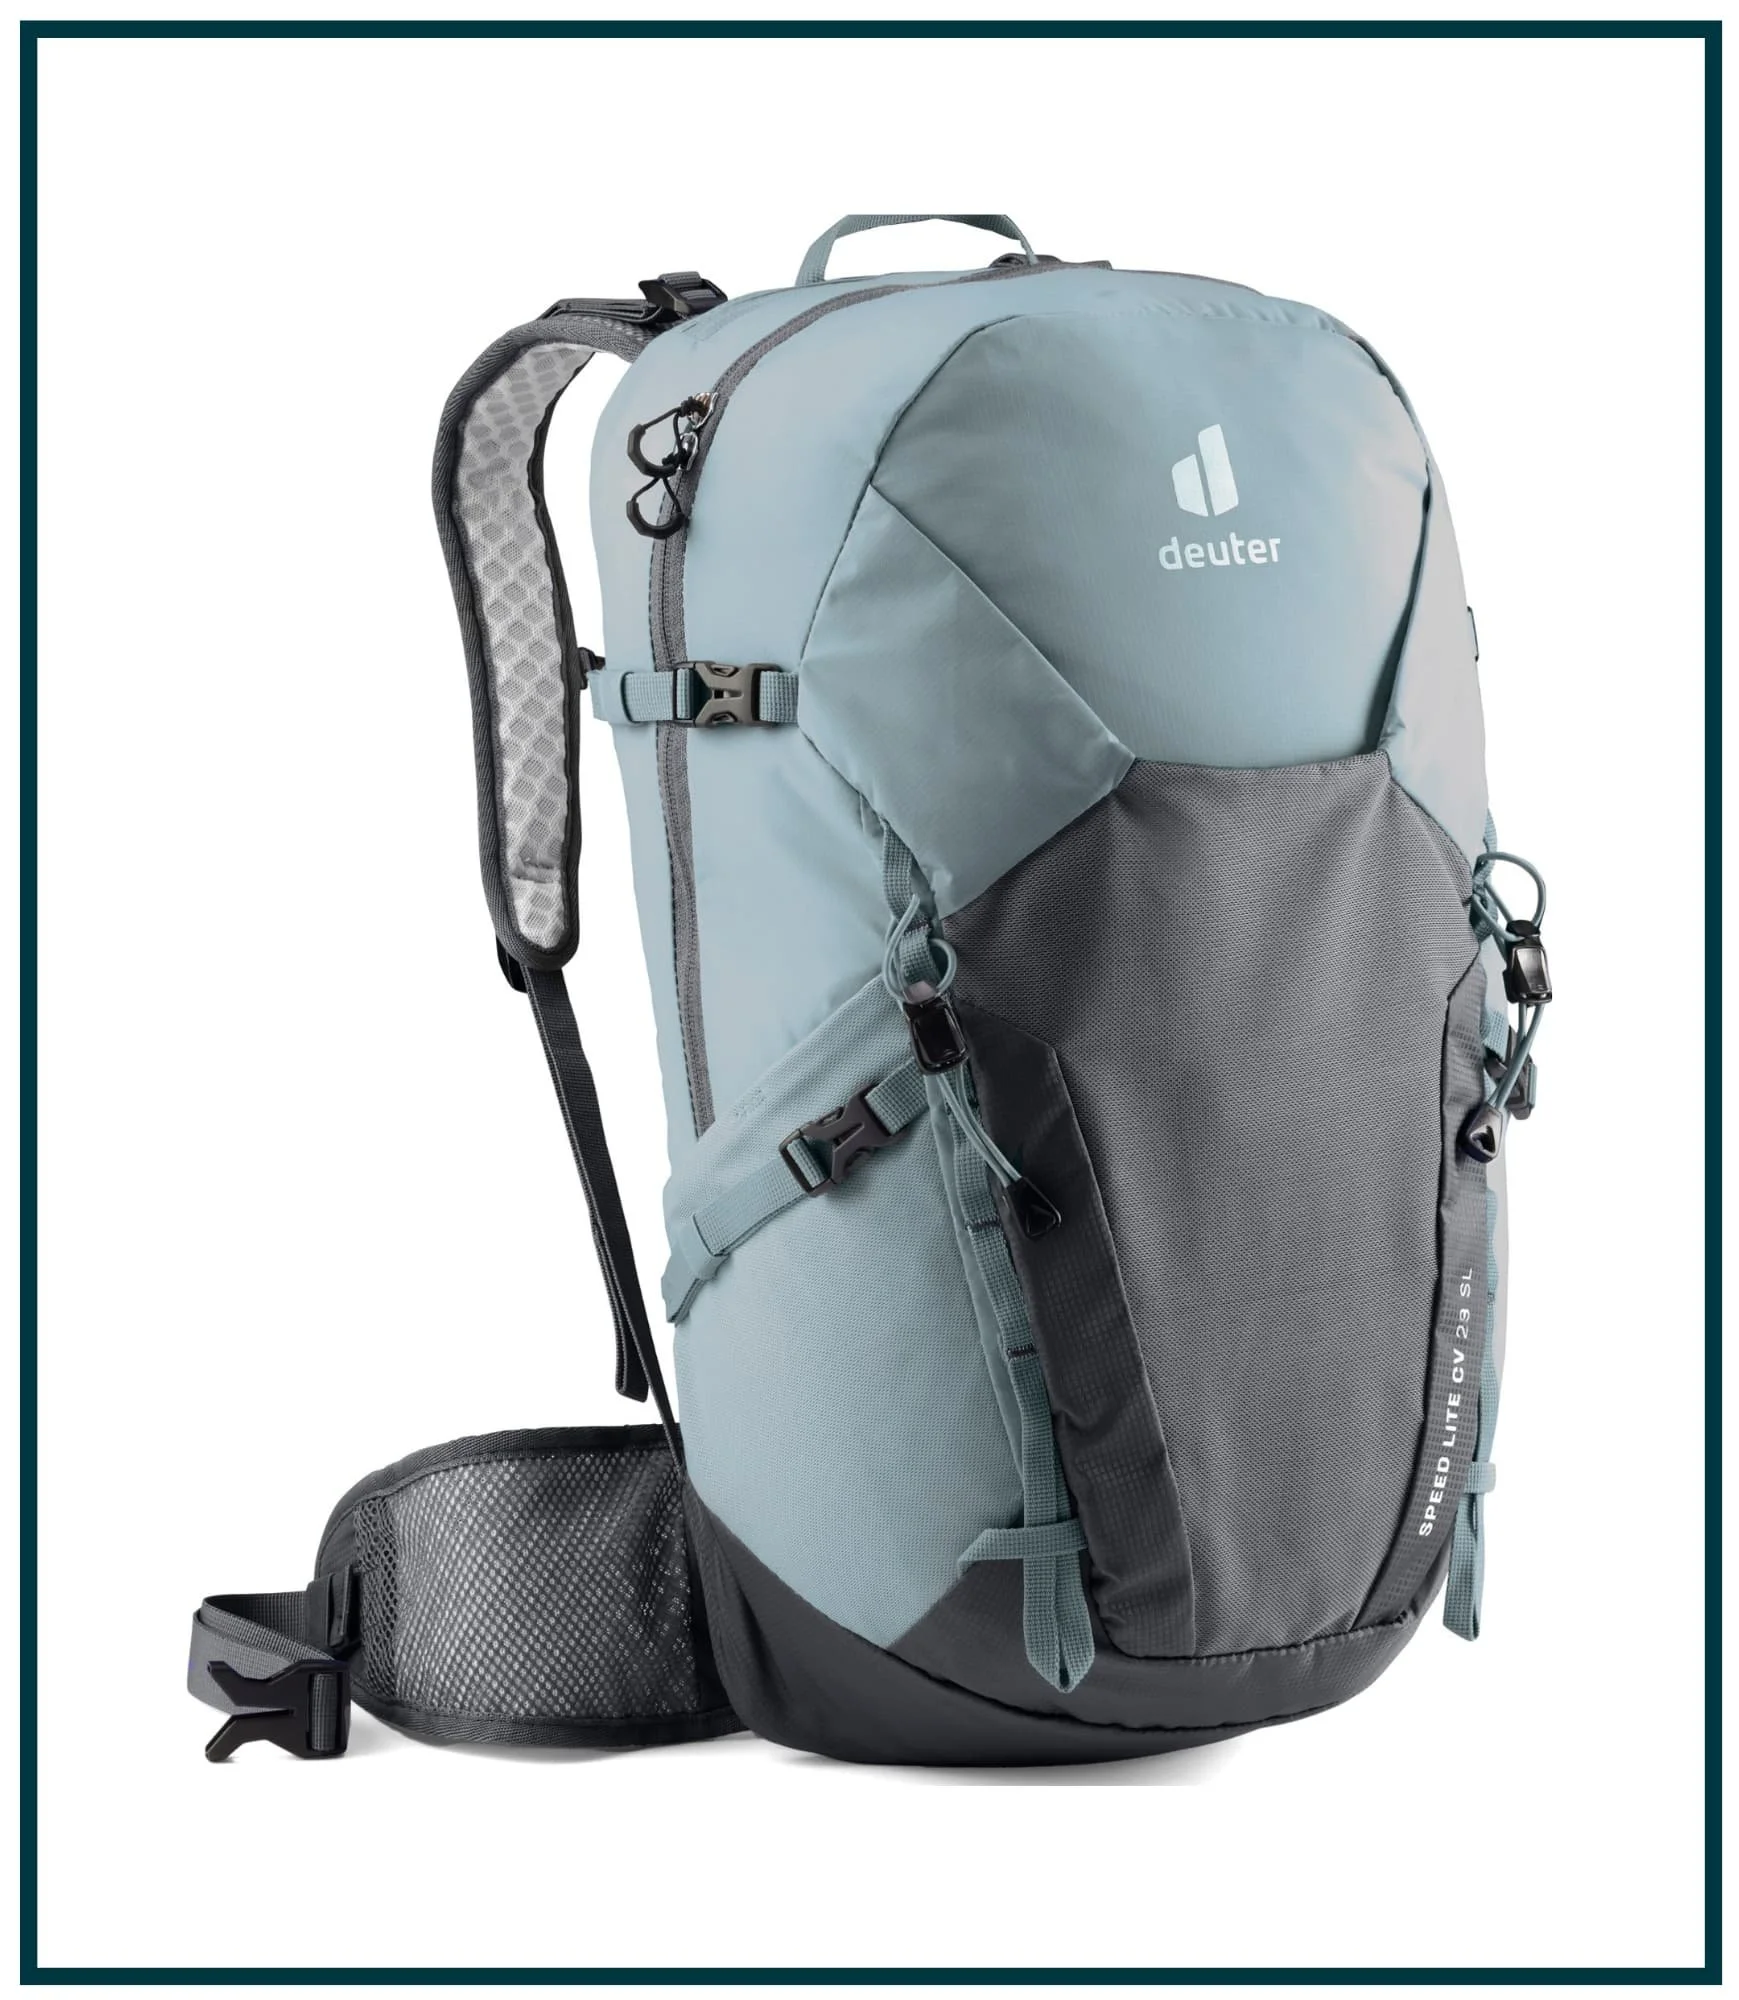
Choose a spacious, comfortable backpack sized appropriately for your torso length. Look for thick, padded straps to prevent chafing. A water reservoir with a drinking tube lets you stay hydrated on the move. Stock up on high-protein bars and trail mixes – you’ll need the energy!
Don’t forget essential navigational items like maps of the gorge, a compass, and a GPS device in case you lose your way in dense forest. A satellite messenger allows emergency contact from remote areas. Pack a first aid kit containing bandages, ointments, scissors, medications, etc. Should disaster strike miles from help, you’ll be prepared.
When setting up camp, a sturdy tent and insulating sleeping pad and bag are must-haves for sleeping soundly under the stars. A camp stove, pots, utensils, plates and cups allow you to cook meals. Water purification tablets or filters make water gathered from natural sources potable and safe. Headlamps and lanterns illuminate your campsite at night.
The Coleman River Gorge is home to black bears, so take precautions. Bear canisters protect food from thieving creatures. Bear spray deters threatening animals. Make noise when hiking to avoid surprising them. Review what to do if you encounter a bear before your trip.
Finally, don’t head into the wilderness without telling someone your plans. Share the trail map, route details, and expected return time with a contact. Schedule check-ins via satellite messenger. Register at trailheads. Taking these simple precautions can save your life if an emergency arises.
Gearing up properly will help you safely experience the Coleman River Gorge’s natural splendor. Visit outdoor stores to get outfitted from head to toe before your exciting adventure. With prudent preparation, you’ll return with thrilling tales and breathtaking photos!
Bring a Water Filtration System for Fresh, Clean Drinking Water
Pack your bags, lace your boots, and prep your compass – you’re headed into the rugged wilderness of the Coleman River Gorge! This natural wonderland boasts rocky cliffs, densely forested slopes, and refreshing streams that nourish the thriving ecosystem. As you plan your backcountry escapade, don’t take access to clean water for granted. Packing an effective water filtration system is a must to keep you hydrated and healthy on your journey.
Relying solely on the river or springs for drinking water is risky business. Bacteria, viruses, and parasites lurk in untested water sources. Giardia, cryptosporidium, E. coli, and chemical pollutants could wreck your trip, leaving you battling severe gastrointestinal illness miles from help. Investing in a water filter or purifier protects you from these nasty bugs.
Portable pump filters equipped with hollow fiber membranes are ideal for the trail. They remove 99.999% of bacteria and protozoa from natural water sources quickly and easily. Look for models that also include activated carbon in the hollow fibers to reduce chemicals, pesticides, chlorine taste, and odors.
Pump designs allow you to filter water directly from lakes and streams into your drinking bottle or water reservoir. No waiting around for treatment or tablets to work their magic!
Can’t live without crisp, cool water on demand? Opt for an integrated pump water bottle system. These all-in-one containers have filters built into their straws or lids. Dip the bottle into any lake or stream, take a swig from the straw, and drink purified water instantly. Top picks boast impressive flow rates up to 1 liter per minute so you can chug away and stay hydrated.
Another lightweight and fast option is a UV water purifier pen. Simply submerge the UV light end in your water bottle or reservoir for a rapid 60 second treatment. UV light zaps all organic contaminates, leaving water microbiologically safe to drink. Look for a model with a minimum 5W UV bulb – the higher the wattage, the faster the purification.
Whichever system you choose, be sure to backflush and clean the filter regularly on long trips. Replace worn parts like hoses, gaskets, and cartridges. Consider packing chemical tablets or drops as an emergency backup purification method in case your filter fails in the backcountry. With access to fresh, pure drinking water, you’ll stay healthy and hydrated during your Coleman River Gorge adventure.
Ready for Adventure in the Great Outdoors? The Must-Have Gear to Conquer the Coleman River Gorge:
The call of the wild summons you to the Coleman River Gorge, where sheer cliffs, tumbling waterfalls, and old growth forest await. As you gear up for navigating this untamed wilderness, having the right equipment and supplies will make all the difference on your backcountry trek. Safety and survival must be your top priorities in this unpredictable environment.
Sturdy hiking boots with ankle support and rugged tread offer stability on slippery, jagged trails. Waterproof styles withstand creek crossings. Thick wool socks wick moisture and prevent blisters. Quick-dry hiking pants and shirts allow freedom of movement and ventilation.
Choose a spacious backpack with comfortable padded straps to prevent chafing, and plenty of compartments to organize gear. A hydration reservoir or water bladder eliminates the need to stop for water bottles. Energy bars and trail mix provide vital calories and nutrients.
Don’t forget navigational essentials like waterproof topo maps, a compass, GPS device, and satellite messenger for staying on course and emergencies. Pack a first aid kit, medications, whistle, fire starter, knife, flashlight, and other survival tools.
Sleeping bags, tents, sleeping pads, camp stoves, cookware, utensils, cups and plates allow you to camp in comfort. A water purification system like a pump filter or UV pen makes found water safe for drinking. Headlamps, lanterns, and extra batteries provide light at night.
The gorge’s black bears require precautions like bear-proof canisters to protect food. Bear spray deters unwanted encounters. Make noise when moving through thick brush and know what to do if you meet a bear. Always keep your distance.
Most importantly, leave a detailed itinerary with a contact before you go. Mark waypoints on maps of your planned route and campsites. Check in via satellite messenger as you complete sections. Register at trailheads. Taking these simple precautions can save your life.
With the proper gear and prudent preparation, you’ll be ready to take on the Coleman River Gorge’s natural wonders and dangers. Visit outdoor outfitters to get fully equipped before embarking on this exciting wilderness quest!
Wear Sturdy Hiking Boots with Ankle Support for Rocky Terrain
Lace up your boots and get ready to conquer the rugged Coleman River Gorge! This breathtaking natural wonder awaits intrepid hikers with its sheer cliffs, winding trails, and untamed wilderness. As you plan your backcountry trek, putting some serious thought into your footwear is a must. The rocky, uneven terrain demands sturdy hiking boots with proper ankle support to avoid injury.
Choosing lightweight sneakers or improper boots is a recipe for disaster in the gorge. Lack of stability and traction on loose rocks and inclines leads torolled ankles, twisted knees, and nasty falls. Stepping into a hole or crevice can cause serious damage without ankle support and stiff soles.
Look for waterproof leather or synthetic hiking boots with aggressive lug soles that grip slick surfaces. An integrated shank provides torsional rigidity for crossing uneven ground and loose scree. Shock absorbing midsoles cushion each step. Quick lacing systems ensure a snug, custom fit.
Find boots offering at least 6 inches of support above your ankles. Waterproof Gore-Tex lining prevents soggy feet from creek crossings. Pair with moisture wicking wool socks to avoid blisters and hot spots. Take the time to properly break in your boots before hitting the trail.
For heavyweight backpacking trips with large packs, choose backpacking-specific boots with extra stiff midsoles that prevent “boot flop” on uneven terrain. These sturdier designs better distribute heavy loads. Look for lateral rigidity in the sole and upper for added stability with weight.
Trying boots on with the socks you’ll wear is a must. Seek out expert advice at outdoor stores to find properly fitted boots for your unique feet and hiking style. Your footwear can make or break your wilderness experience, so invest in quality.
Ready for Adventure in the Great Outdoors? The Must-Have Gear to Conquer the Coleman River Gorge:
Eager to challenge yourself in the untamed Coleman River Gorge wilderness? As you plan your backpacking journey through its sheer cliffs, dense forests, and cascading waterfalls, strategically choosing and packing gear is key to an epic yet safe adventure.
Start with waterproof hiking boots with stiff soles and ample ankle support to provide stability on uneven, rocky terrain. They’ll prevent slips, trips, and falls over miles of challenging trails. Pair with moisture wicking wool socks that prevent hot spots leading to blisters.
Quick dry hiking pants and shirts allow freedom of movement and ventilation in fluctuating conditions. Pack base layers and insulating down jackets for colder temps. Gloves, hats, and gaiters protect from the elements.
Choose a rugged, comfortable backpack correctly sized for your torso length and designed for extended trips. Look for thick padded straps, plenty of storage compartments and pockets, and a hydration reservoir or water bladder to stay hydrated on the move.
Don’t hit the trail without essential navigational gear – study maps of the gorge, and pack a compass, GPS device, personal locator beacon, and satellite messenger for emergencies when beyond cell service.
Prepare to camp in remote wilderness with tents, sleeping bags, portable stoves, cookware, utensils, purifying tablets for found water, and all other essentials to sleep and eat well. Lanterns, flashlights, and spare batteries provide light at night.
A well-stocked first aid kit, medications, whistle, fire starter, knife, bear spray, and other survival tools could save your life in an emergency miles from help. An ace bandage or splint can allow you to self-rescue with an injury.
Always leave a detailed itinerary with maps, route markers, campsites, and expected check-in times with a contact before embarking. Register at trailheads. Following these precautions helps ensure a thrilling trip.
With the Coleman River Gorge’s extreme conditions and isolation, improper footwear, inadequate navigation prep, and skimping on survival tools could prove disastrous. Invest in quality gear now for the adventure of a lifetime!
Pack Moisture-wicking Base Layers to Stay Dry and Comfortable
The breathtaking vistas and untamed wilderness of the Coleman River Gorge await! As you prepare for the challenge of backpacking through this natural wonderland, choosing performance clothing that keeps you dry and comfortable is key. Don’t head into the woods without packing high-tech moisture-wicking base layers.
From steep inclines to chilling creek crossings, the gorge will test your mettle and sweat glands. Cotton shirts and pants turn clammy and lose insulating ability when wet. This leads to chafing, hypothermia risk, and downright misery on the trail. Yuck!
That’s where moisture-wicking base layer shirts and leggings shine. Synthetic fabrics like polyester and nylon pull sweat away from your skin and disperse it rapidly. Some designs even incorporate silver ions or Polygiene technology to minimize odor after multiple wears.
Look for snug-fitting crew neck shirts and leggings that won’t restrict movement during active pursuits. Lightweight and breathable fabrics balance cooling ventilation with warmth. Opt for merino wool or wool blends for the ultimate in temperature regulation, odor resistance, and soft comfort.
For colder conditions, choose mid or expedition weight base layers with a brushed interior for extra insulation without bulk. Zip turtle neck tops provide adjustable ventilation. The thumbhole cuffs on shirts and leggings create a seamless fit with outer layers.
Proper layering provides flexibility for the unpredictable conditions of the gorge. Start with moisture-wicking base layers, add quick-dry hiking pants and shirts, then top with down puffer coats or waterproof shells as needed when the weather turns.
Ready for Adventure in the Great Outdoors? The Must-Have Gear to Conquer the Coleman River Gorge:

Eager for an epic backpacking adventure through the rugged Coleman River Gorge wilderness? As you gear up, strategically picking performance clothing and equipment will make your trek safer and more enjoyable.
Start with moisture-wicking wool or synthetic base layer shirts and leggings that keep your skin dry, comfortable, and chafe-free during active pursuits. They’ll pull sweat away from your body effectively.
Choose quick-dry hiking shirts and pants with UPF sun protection and ventilating features. Pack insulated down or synthetic puffer coats for added warmth as temps drop. Waterproof rain shells keep you dry if storms roll in.
Pick a durable backpack sized correctly for your torso and designed for multi-day trips. Look for thick padded straps, plenty of storage compartments, and a water reservoir or bladder to stay hydrated on the move.
Waterproof hiking boots with stiff soles and ankle support provide stability and prevent falls on rugged trails. Moisture wicking wool hiking socks prevent blisters. Trekking poles improve traction.
Don’t forget navigational essentials like maps, a compass, GPS device, and personal locator beacon or satellite messenger for emergencies when beyond cell service.
Prepare to camp remotely with tents, sleeping bags, portable cook stoves, water purification tools, utensils, and all other camping basics. Headlamps provide hands-free lighting at night.
A well-stocked first aid kit, medications, survival tools like a fire starter and whistle, and bear deterrents like spray could save your life in case of emergency. always tell someone your plans!
With its sheer cliffs, cold rivers, and unpredictable weather, improper clothing and lack of survival tools in the Coleman River Gorge could quickly turn disastrous. Invest in performance wear now for the trip of a lifetime!
Bring a Compass and Topographic Map to Navigate Far from Civilization

Eager to challenge yourself in the rugged Coleman River Gorge wilderness? As you plan your backpacking adventure through this natural wonderland, bringing along both a compass and detailed topographic maps is absolutely essential for navigation far from civilization.
Cell service is non-existent in the gorge’s deep forests and valleys. GPS devices can fail or lose battery power. Without old-fashioned navigational skills and tools as backup, getting lost is a very real possibility. This could prove disastrously dangerous.
A quality compass with adjustable declination allows you to take accurate readings of your bearing as you hike trails and bushwhack cross-country. Buy one with a rectangular base plate for easy map work. Familiarize yourself with using the compass before your trip.
Pair your compass with waterproof, high resolution topographic maps of the gorge region. Topos illustrate key terrain features and landmarks not shown on standard trail maps. They indicate elevation changes via contour lines – crucial when route finding far from trails.
Plot your planned route on the map ahead of time. Carefully and frequently orient the map and take compass readings on the trail to confirm your position. Note key meet-up points and camps. With topo map and compass skills, you can navigate the remotest areas of the gorge with confidence.
For additional guidance, download digital topographic map files to a handheld GPS device or smartphone app. But bring backup paper maps and a compass – electronics can fail when you need them most! Navigation is not a skill to take lightly when heading deep into the Coleman River Gorge.
Ready for Adventure in the Great Outdoors? The Must-Have Gear to Conquer the Coleman River Gorge:
Eager for an epic wilderness trek through the Coleman River Gorge? As you plan your route through this vast backcountry maze of cliffs, waterfalls, and thick forests, choosing the right navigational gear is absolutely essential.
Bring a quality compass and learn how to use it properly – you’ll need this basic tool if you become lost far from civilization. Pair it with waterproof topographic maps containing key terrain features not found on basic trail maps.
Pack essential clothing like moisture-wicking base layers, quick-dry hiking shirts and pants, insulating down jackets, and waterproof outer shells. Proper footwear like waterproof boots with ankle support prevents injury.
Choose a rugged, comfortable backpack suitable for multi-day trips. Look for plenty of storage, thick padded straps, and a water reservoir or bladder to stay hydrated on the move.
Don’t forget survival essentials like a robust first aid kit, fire starter, headlamp, emergency blanket and shelter, bear spray, and whistle. An ace bandage provides emergency splinting.
Plan to camp and cook meals along the way. Pack tents, sleeping bags and pads, a camp stove, cookware, utensils, purifying tablets for water, and all other overnight necessities.
A GPS device and satellite beacon allow emergency contact from remote areas when cell phones lack service. Always leave a detailed itinerary before departing.
Getting lost or injured miles from help could quickly turn disastrous in the Coleman River Gorge. Don’t head into the wilderness without purchasing proper navigational and survival tools first.
Carry a Pocket Knife for Basic Camping Tasks and Emergency Situations

Heading out into the great outdoors on a camping trip? Don’t forget to pack one of the most versatile and useful tools – a pocket knife. Having a good quality pocket knife on hand can make short work of many basic camping tasks, while also providing an invaluable aid in unexpected emergency situations.
From cutting rope and opening packages to preparing food and making rudimentary repairs, a pocket knife is a camper’s best friend. Unlike larger fixed blade knives, pocket knives are lightweight, compact, and easy to keep close at hand. Modern pocket knives come in a wide range of styles, sizes, and price points to suit every budget and need.
For most campers, a mid-sized folding knife with a 3 to 4 inch blade hits the sweet spot between portability and capability. The best options will have ergonomic, slip-resistant handles for a solid grip and blades made from durable stainless steel that can hold an edge. Look for locking blades for safety, and tools like screwdrivers, bottle openers, or scissors integrated into the design for added functionality.
It’s wise to keep your pocket knife sharp and oiled so it’s always ready to take on the tasks you throw at it. Even inexpensive knives can be maintained to provide years of reliable service. A basic sharpening stone and a small bottle of blade oil aren’t a bad idea to include in your camping supplies.
When you’re out on the trail miles from civilization, your pocket knife can quickly transform into your most valued companion. From cutting cord to clear a blocked trail or harvesting tinder to start an emergency fire, its utility truly shines through when you need it most. Even in less extreme circumstances, having a pocket knife close at hand gives you the freedom and confidence to tackle unexpected situations as they arise.
Preparing food while camping is made infinitely easier with a pocket knife in your toolkit. Use it to slice cheese and cure meat for sandwiches or charcuterie boards. Cut sausage and vegetables into perfect kabob skewers for grilling over the campfire. Debate settled – pocket knives are far superior to awkward multi-tools when it comes to food prep. No self-respecting campfire chef should be without one.
Don’t have a cutting board? No problem. Whip out your trusty pocket knife to turn a smooth rock or log segment into an impromptu prep surface. Cleaning fish for shore lunch? A sharp pocket knife makes quick work of scaling and filleting your catch so you can get it over the coals faster.
Making repairs and adjustments to gear while in the wilderness is no tall task with a pocket knife ready for duty. Snaps and fasteners can work themselves open and will need to be crimped back together. Guy lines come loose and need to be cut and retied. A pocket knife is the ultimate multi-tool for tackling these and other unexpected issues on the fly.
The exposed environment of camping makes your gear vulnerable to all manner of snags, abrasions, and punctures. Duct tape can only go so far – but an sharp pocket knife opens up a world of on-trail repairs. Cut custom patches and pieces to reinforce tent tears or seal holes in air mattresses. Whittle replacement pegs and stakes if yours become lost or broken. MacGyver would surely approve.
Out for a day hike and find your path unexpectedly blocked by a fallen tree? Use your trusty pocket knife to quickly clear a way through by cutting branches and smaller logs. Caught in an unexpected downpour? Cut larger fronds and leaves to construct a makeshift shelter. The usefulness of a good pocket knife truly shines through when faced with the unexpected.
Hopefully your camping trips will be perfectly planned and executed, with nary an emergency to speak of. But it pays to be prepared for the worst just in case. Should an injury or sudden illness befall you or one of your party, your pocket knife could render literal lifesaving service.
In a medical emergency, sterilize the blade with fire or alcohol and use it to cut away clothing from injuries. You can fashion rudimentary tourniquets, splints, cold compresses and other first aid items from natural materials using your knife. If stuck awaiting rescue, use it to harvest materials and prepare shelters to maintain warmth and protection from the elements.
Before any camping trip, ensure your pocket knife is honed to a razor edge. You never know when you’ll need to slice cord, butcher game, or carve a shelter. A dull blade just won’t cut it in the wild – invest a few minutes beforehand to get it shaving sharp.
Select a quality locking blade model that feels secure and comfortable in your hand. Cheaper knives have looser tolerances that let in grit to corrode the inner workings. Go for tried and true materials like carbon steel or a high-alloy stainless steel blade mated to durable synthetic or natural scale handles.
Organize some essential accessories to augment your knife’s capabilities. A miniature sharpening stone takes up little pack space while enabling you to maintain that vital edge. A fire steel lets you generate sparks galore for igniting kindling. Wrap some sturdy cord around the handle to expand its problem-solving chops even further.
A pocket knife can provide years of loyal service with proper care. Keep it clean, dry, and lightly oiled to prevent rust. Periodically disassemble it to clear out any accumulated gunk and refresh lubrication on the pivot points. A fold up protective pouch in your pack provides peace of mind against nicks, abrasions or loss.
Don’t wait until you’re miles into the wilderness to realize just how handy it is to have a quality pocket knife stashed in your pack or pocket. Make it a routine part of your camping gear checklist, and take comfort knowing you’re equipped for both mundane and unexpected situations. Your future campfire meals, gear repairs, and daring escapades will thank you.
A good pocket knife epitomizes the old adage about being far more useful than its small size would indicate. Don’t head into the wild without one! What normal camping tasks and emergency situations could youimagine relying on your trusty pocket knife for?
Pack High-Energy Snacks to Fuel Your Adventurous Expeditions

Heading out on an adventurous expedition in the great outdoors? Don’t let hunger impede your progress. Packing nutritious, high-energy snacks is essential to power you through long days of hiking, climbing, paddling or other active pursuits.
The right snacks provide a compact, lightweight and convenient way to refuel your body and brain while exploring off the beaten path. Quality nutrition also supports your immune system, energy levels and mood when spending extended time exerting yourself in the elements.
When exploring rugged wilderness areas, it’s unlikely you’ll have access to grocery stores or restaurants when hunger strikes. That makes bringing your own snacks an absolute necessity. Even for less remote adventures, packing personal snacks lets you save money while knowing you have reliable options tailored to your tastes and needs.
Nutrient-dense whole foods make excellent portable snacks. Nuts, seeds, and dried fruits pack a big punch of slow-burning energy in small serving sizes. They travel well and provide healthy fats, plant protein and fiber to help you go the distance. Combination mixes add variety and breadth of nutrients.
Ounce for ounce, natural nut butters like almond and cashew have an unbeatable macros profile. Stuff a baggie with a nut butter sandwich or celery sticks for quick protein and calories. Blend nut butters with bananas, oats, seeds and honey for more substantial, homemade energy bars.
Don’t overlook fresh fruits and vegetables – apples, carrots, oranges and snap peas hold up admirably on the trail. Bring compact nutritious staples like sweet potatoes, hard boiled eggs and cheese for hunger-squashing snacks and mini-meals.
Staying hydrated is crucial while exploring the outdoors, but plain water can get old. Infuse your H2O with flavor and electrolytes via portable drink mixes and powders. Or pack some natural juice boxes or pouches for an invigorating boost.
Though less healthy, some prepackaged snacks offer convenience for when you need a quick energy jolt. Granola and protein bars, fruit strips, crackers and nut mixes are relatively non-perishable. Individually packaged options help with portion control.
Don’t forget the comfort snacks when spending multiple days roughing it in the wilderness. Trail mix, jerky, chocolate and candy boost morale and provide nostalgic satisfaction. Share them around the campfire to bring your group together after a demanding day.
To keep your snacks fresh and protected, proper storage is a must. Resealable plastic bags allow you to separate snacks by day or meal. Compression sacks maximize space savings. Hard sided bear canisters or bags keep critters from stealing your goods.
Keep snacks easily accessible so you can grab and go to maintain energy levels throughout the day. Stash some in your pack’s top pocket, cargo shorts, or a vest with many compartments. Having snacks spread across group members prevents anyone from being left completely empty handed.
Once opened, the clock starts ticking for many snacks before they spoil or become stale. Limiting portions you take out of bulk containers at a given time maximizes freshness. Resealing tightly after opening helps extend shelf life.
Exposure to air, crushing, moisture, and temperature extremes are the enemies of snack freshness. Take special care to protect delicate items like crackers from getting crushed. Soft fruits fare best in ventilated areas of your pack. Separate non-sealed snacks in multiple bags.
Waste management is important to keep ecosystems clean and undisturbed. Always pack out empty wrappers, bags and containers with your other trash. Sticking to snacks with minimal, reusable or compostable packaging makes cleanup simpler.
Calorie counting isn’t very practical on the trail, so pack a variety of snacks adding up to plenty of energy. The freedom and physical demands of outdoor adventures will inevitably ratchet up your appetite.
When active for hours at a time away from civilization, you need more than the recommended 2000 calories a day to avoid coming up short. Estimate at least 3000-4000 calories daily for backpacking trips and intense activities like climbing.
Incorporating snacks featuring complex carbs, protein and healthy fats leads to more sustained energy than simple sugars. Its wise to eat small amounts frequently, rather than big meals and long gaps, to maintain energy equilibrium.
Everyone has personal tastes when it comes to favorite snack foods. Take some time before your outdoor adventure to put together a “greatest hits” menu of your go-to tasty and nourishing snacks to power your journey.
Pack familiar comfort snacks along with new nutritious options you haven’t tried before your trip. Exposure to heat, cold, moisture, compression and transport shock can impact snack quality and appeal.
Test out the viability of snack options by carrying them along and exposing them to conditions that mimic your upcoming travels. Evaluating ahead of time helps ensure you bring optimal choices.
Without access to grocery stores and kitchens in the wilderness, you’ll need to get creative about preparing snacks on the trail. Items that can be eaten out of hand with minimal prep are ideal.
A pocket knife and lightweight cutting board enable slicing produce, cheese and other snacks as needed. Mini stoves, utensils and mess kits allow cooking instant oatmeal or heating trail mix concoctions.
Adequate snacking is nearly as important as having proper gear and navigation tools when undertaking outdoor adventures. Failing to pack suitable snacks invites distraction, fatigue, irritability and other performance killers.
Don’t let lack of energy derail your ambitious outdoor objectives due to lack of preparation. With a well-planned selection of diet-compatible snacks in tow, you’ll be fueled up and ready to conquer whatever comes your way.
What are your go-to snacks for powering challenging hikes, long paddling days or epic climbs? Share your pro tips for keeping hunger at bay even in the most remote wilderness!
Bring a First Aid Kit for Minor Injuries and Emergencies
Heading out into nature’s unpredictable domain? Don’t leave home without a well-stocked first aid kit. From minor cuts and scrapes to unexpected illnesses or injuries, having the right supplies on hand can provide critical aid and peace of mind.
Prepackaged first aid kits offer an easy starting point, though many lack sufficient quantities or the ideal mix of supplies. With some thoughtful customization, you can tailor a kit to your specific needs for maximum effectiveness.
Start with containers designed for organization and portability. Soft zippered pouches allow flexibility while hard cases offer rugged protection. Include essentials like bandages, gauze, tape, antiseptic wipes, trauma pads, disposable gloves, tweezers, scissors, blankets, cold packs and more.
Medications provide targeted relief from discomfort, inflammation, and infections. Painkillers like ibuprofen, antihistamines for allergies, antidiarrheals, antacids, antibacterial ointment, and hydrocortisone cream tackle common ailments.
Tools allow you to remove splinters, clean and dress wounds, stabilize injured areas, and more. Tweezers, safety pins, trauma shears, thermometers, splints, and compression bandages all come in handy for diagnosing and providing first response.
In emergency situations, quick access to supplies can make all the difference. Use clear labeling and internal compartments or pouches to enable finding items fast. Mini survival guides refresh you on how to use kit contents.
Customize your first aid kid to the specific conditions you’ll encounter. Hot weather calls for electrolyte tablets, aloe vera, and sunburn cream. Cold weather adds hand warmers and lip balm. Marine kits include seasickness medication and sting relief.
The contents of your first aid kit aren’t useful if you can’t get to them when an emergency strikes. Choose portable, lightweight containers and organize supplies from largest to smallest to optimize space.
Periodically refresh perishable kit items like medications, sterile dressings, cold packs, masks, and gloves. Check expiration dates at least twice a year and before major trips. Replace depleted items after use.
Having ample quantities of key items avoids the need to ration supplies. Pack extra bandages, gauze pads, tape, antiseptic wipes, saline solution, and other basics liable to run out fast in emergency scenarios.
Include a detailed guide covering application and usage of all kit items. Handy tips help jog your memory on bandaging wounds, recognizing symptoms, administering CPR, and more.
Few premade kits cater to the wide ranging potential medical issues faced in the outdoors. Augment the basics with items like blister treatment, electrolyte tablets, insect sting relief, tick removal tools, and emergency blankets.
The contents of your first aid kit aren’t helpful if you can’t figure out how to use them. Review all items before trips and refresh essential first aid skills like CPR, wound care, immobilizing breaks, and treating shock.
Ensure everyone in your travel group knows the purpose, organization, and location of the first aid kit. Appoint someone as primary caretaker to keep it stocked and in good working order.
In addition to your primary kit, assemble a few miniature kits for specialized needs. Keep one in your pocket or backpack for immediate access to basics like bandages, wipes, tape, gloves, and medications.
Stash individual mini kits or supplies throughout your vehicle or camp gear for decentralized access. Include items tailored to likely needs – blister care in your hiking boots, burns treatment near the camp stove, etc.
When an accident or injury occurs, quick access to first aid makes a huge difference in outcome. Establish routines to check your kit contents before each trip and return all used items so they can be replaced.
Include emergency instructions inside your first aid kit detailing procedures if someone is unresponsive or badly injured. Provide contact information for emergency responders and nearby medical facilities.
Use quality containers designed to protect contents from the elements like crushing blows, moisture, dust, and grime. Rugged hard cases excel for vehicles and boats, while soft packs are great for hiking.
First aid emergencies are stressful enough without struggling to find or identify what you need. Utilize clear internal compartments, labels, and laminated guides to enable fast access to the right supplies.
Be prepared to handle not just cuts and scrapes, but sprains, fractures, burns, allergic reactions, dehydration, headaches and other common medical issues. Tailor your kit contents accordingly.
Don’t neglect prevention – include protective items like bug spray, sunscreen, sanitizing wipes, and medications to stop problems before they start. An ounce of prevention is worth a pound of bandages.
No one likes thinking about injuries and illnesses happening during idyllic outdoor adventures. But being caught empty handed in an emergency makes a bad situation far worse. Customize a first rate first aid kit and keep it close!
Have your first aid skills and supplies ever been put to the test miles into the wilderness? Share your lessons learned from keeping your companions safe and healthy in the wilds!
Choose a Lightweight, Packable Rain Jacket to Stay Dry in Downpours

Adventuring into the elements? Be prepared for surprise showers and storms by packing a lightweight rain jacket. Modern waterproof fabrics allow jackets to be both protective and packable for easy portability.
When skies suddenly open up miles out on the trail or water, getting drenched can quickly sap body heat, morale, and performance. But having a quality rain jacket at the ready keeps you shielded and forging ahead in comfort.
Packed size and weight are prime considerations when adding gear to your outdoor kit. The beauty of modern rain jackets is compressing down to palm-sized bundles, easily stashed until that first raindrop falls.
Look for thin yet resilient shells made from proprietary waterproof/breathable fabrics like Gore-Tex, H2No, or proprietary brand technologies. Durable water repellent (DWR) treatments cause moisture to bead up and roll off the surface.
Avoid bulky plastic ponchos in favor of sleek nylon, polyester or microfiber shells. Look for fully taped seams to seal out intruding moisture. Zippered hand pockets, drawcords and adjustable hoods provide extra coverage.
Breathable fabrics prevent you from getting drenched – either from rain or your own sweat. Careful venting via underarm zippers and back flaps prevent the sauna effect of cheaper non-breathable options.
While waterproofness is key, also ensure adequate breathability for your planned activity level. Hiking in the backcountry calls for more ventilation than casual day use. Check waterproof ratings and RET levels.
Fit is also critical for performance. Athletic cuts allow full mobility without riding up or exposing your back and wrists. Longer lengths and adjustable drawcords provide customizable protection.
Features like helmet compatibility, reinforced shoulders, water-resistant zippers and storm flaps demonstrate attention to detail and durability. Look for quality materials from trusted brands.
For wet adventures on or around water, pay special attention to keeping critical items dry. Choose waterproof zippered pockets to secure phones, wallets and other essentials.
Packability is defined by both compressibility and weight. Premium ultralight shells weigh under a pound while stowing down to the size of a soda can or even your palm.
Budget-friendly options from major sporting brands offer solid packability for a fraction of the price of cutting-edge ultralight models. durability and weatherproofing may suffer a bit however.
Stash your rain jacket in its own clearly marked waterproof bag or compartment of your pack. Having it quickly accessible when the weather turns prevents digging through gear to find it.
Caring for your rain jacket extends its lifespan and weatherproofing abilities. Wash in clear water, re-treat with DWR spray occasionally, and avoid direct high heat.
Pack a soft brush and tech wash for cleaning and rejuvenating fabric performance while on long trips. Clean grime and reapply DWR treatments after heavy use.
For rainy day adventures, augment your jacket with waterproof pants and gaiters to keep your whole kit dry. Choose versions made of the same fabrics for synergistic performance.
Sudden downpours and storms are facts of life for hikers, paddlers, cyclists and other outdoor explorers. A reliable rain jacket enables pushing ahead undeterred.
Test rainwear extensively across a range of real-world conditions before extended trips to reveal weak spots. Nothing subverts a jacket’s promise like failure during a critical moment.
Cheap vinyl and thin nylon raingear may suffice for occasional drizzle but prove dangerously ineffective in hardcore downpours. Invest in tried and true waterproof/breathable fabrics.
Customize features like hoods, zipper placement and drawcords to suit your needs. Are helmet compatibility and heavy duty hoods critical for paddling or backcountry use?
Don’t get seduced by claims of revolutionary new waterproof fabrics. Stick with established technologies like Gore-Tex that have decades of proven performance in the field.
For extreme wetness, layer your shell over an insulating midlayer. Outer protection keeps wind and water out while your midlayer retains precious warmth when soaked through.
Sudden storms and downpours are inevitabilities during outdoor pursuits. slickness Don’t let wet misery cut adventures short. Pack a lightweight, packable rain jacket and embrace the weather!
Have a go-to rain jacket you trust through any tempest? Share what features make it your indispensable storm-fighting companion out on the trails!
Pack a Headlamp and Extra Batteries to Illuminate the Path at Night
Adventures often continue after the sun goes down. Having a reliable headlamp in your kit allows you to extend the day and keep moving when darkness falls.
Today’s headlamps provide hands-free illumination needed for hiking, camping, fishing, running, and other pursuits after sunset. Powerful LED bulbs cast strong beams to light your way through the night.
Headlamps come in a range of styles with variable brightness settings, beam distance, battery types, and special features. Waterproof models withstand wet weather and can even be used for diving.
Look for adjustable elastic or rubber straps that allow wearing the lamp over bare skin or on a hat for versatility. The best designs include a top strap to prevent bouncing during active use.
Lumen power indicates brightness, with options typically ranging from 20 up to over 1,000 lumens in high-output models. Higher lumens cut through darkness over greater distances for fast movement.
Beam distance measures how far the usable light reaches – from 20 feet for dim, wide beams up to over 300 feet for intense concentrated spot beams ideal for navigating trails.
Run times range from under an hour on high power up to hundreds of hours on low settings. Conserve batteries by matching beam intensity and range to immediate needs.
Power comes from replaceable or rechargeable batteries. LED efficiency means even small batteries can deliver ample illumination for full nights of use. Carry spares!
Hands-free operation is the signature perk of headlamps. Adjust the angle of light by tilting your head to precisely target objects near and far while leaving hands unencumbered.
Waterproof construction protects internal components if caught out in the rain. Look for ATM ratings of 8 or above for waterproofing capable of handling heavy downpours and submersion.
For overnight trips, choose a model offering red light or dimmer night vision modes. Red light preserves natural night vision better than standard white or blue light.
Boost safety by selecting a headlamp with blinking or strobe functions for visibility and emergency signaling. Reflective strips add 360 degree passive visibility.
Headlamps with multiple bulbs can be tilted to cast both wide flood beams to illuminate your immediate area and narrow spot beams for seeing farther ahead.
Don’t forget spare batteries and bulbs for extended trips! Incandescent lamps burn out over time. LEDs last far longer but still carry spares as insurance.
For campers, a lantern function provides hands-free area lighting to illuminate cooking, social areas and gear. Adjustable beams allow directing light where needed.
Look for models with an IPX4 or higher rating to withstand splashes, dust and drops. Ruggedized headlamps hold up better under rough outdoor conditions.
Test prospective headlamp models under realistic nighttime conditions before trusting them for critical use. Analyze light quality, beam distance, and ergonomics.
Plan necessary output based on intended after-dark activities. Fast trail running requires more powerful beams than reading in your tent. Factor in battery runtimes.
Pack extra batteries even if using rechargeable models. You can’t count on access to power to recharge depleted lamps while in the backcountry when they fade out.
Headlamps open up nighttime world of hiking, running, fishing, camping, and exploring that illuminates new possibilities. Don’t get caught in the dark without one!
Ever have a headlamp fail at a critical moment on a nighttime outdoor adventure? Share your lessons learned for avoiding getting stranded in the dark!
Bring a Bear Canister to Store Food Safely Out of Reach
Exploring bear country? Protect your provisions and avoid unfortunate encounters by storing food in a bear-proof canister.
Designed to thwart bears’ smarts and strength, canisters keep grub secure from snuffling noses and paws. Peace of mind lets you sleep soundly rather than guarding your cache all night.
Hard-sided and -lidded canisters are crafted from rugged abs plastic or carbon fiber to resist chewing, claws and brute force. Screw top lids fit tightly to prevent odors escaping.
Look for models approved by government agencies like the EPA and IGBC that have passed stringent product testing requirements for certified bear-resistance.
Varying canister capacities range from small 500 cu/in solo sizes up to 1500+ cu/in group sizes weighing under 3 pounds even when loaded.
For multipurpose utility, choose larger canisters that double as camp chairs or tables by flipping them over when not storing food.
Security comes not just from materials, but smart designs lacking handles or protruding parts bears can grip and leverage to breach. Smooth curved sides thwart grabbing and opening.
Using your canister properly is key to effectiveness. Avoid overstuffing, which can prevent the lid from closing tight. Click 2-3 times to engage the locking mechanism.
Leave some room in the canister after packing to allow shaking contents down. Top off remaining space with clothing or other scent barriers.
Always place canisters at least 100 yards downwind from tents or cooking areas – farther is better. Tie off canisters so bears can’t carry them away.
For trips above tree line without suitable anchor points, select canisters with threaded bases that allow screwing them down securely.
Practice ahead of time using any locks, anchoring cords and closing mechanisms so you operate them correctly even exhausted or in the dark.
Resist the urge to scrimp on size to save weight. Undersized canisters that force you to leave some food unsecured defeat the safety purpose.
Ensure everyone understands protocols for using canisters and keeping them sealed. Sloppy handling by one person compromises safety for the entire group.
Always carry canisters – don’t attempt to hang food from trees instead, which is often ineffective. Bears easily foil all but expert food hangs.
Used properly, bear canisters provide reliable protection for both bears and humans. But small mistakes render them ineffective, so plan ahead.
For car camping trips, consider large bear-proof food storage lockers that hold supplies for multiple campers to share.
Always pack the smelliest foods like tuna, meats, and cheese into canisters first. Leave excessively fragrant items at home if possible.
Invest time acclimating rental canisters that may retain scents from previous users. Air them out thoroughly before depending on them.
Don’t become complacent on short trips or when encountering bears seems unlikely. Stay vigilant using canisters every time you camp in bear country.
Explore wild spaces without fear of lost provisions or dangerous encounters. Bring a bear canister and camp easy knowing your food is safe and secure inside!
Have any tried and true tactics for foolproof bear canister use? Share your hard-earned wisdom from feeding yourself in bear territory!
Carry Trekking Poles to Aid Balance and Take Pressure Off Knees

Hitting the trails on foot? Trekking poles are your best friend for stability, reducing injury risk, and easing the load on your knees over long distances.
Also called hiking or walking poles, modern trekking poles provide performance features once reserved for ski poles. Durable construction paired with ergonomic grips and wrist straps reduce fatigue and joint strain.
Triangular or circular shaft designs provide stability and shock absorption. Look for lightweight but strong materials like aluminum, carbon fiber, or composites that absorb trail vibrations.
Cork, foam, or rubber grips stay comfortable mile after mile. Adjustable wrist straps keep hands free while providing precision control when placing and transferring weight.
Versatile quick-lock mechanisms allow easy length adjustments to suit your height and terrain. Flip lever locks offer quickest adjustability for pushing up or easing pressure on steep grades.
Trail runners and hikers alike gain stability from planted poles, reducing ankle wrenches and falls, especially when fatigued or navigating uneven terrain. They also distribute weight to save knees.
Trekking pole tips come in rubber, plastic, or carbide models. Rubber offers silent walking and superior grip. Carbide tips excel for slick, icy or rocky trails.
Choosing between single piece or telescoping adjustable models comes down to packed size versus weight. Single pieces take up more pack space, while adjustable versions often weigh more.
For packing efficiency, trekking poles designed to collapse down smaller are ideal. They’re easy to lash onto packs when not needed for steep descents or creek crossings.
The right trekking poles feel like extensions of your arms, not awkward appendages. Test various grip styles and wrist straps to find your best fit for comfort and control.
For ultralight enthusiasts, carbon fiber poles check the critical boxes of low weight, packability, shock absorption and strength for mile gobbling performance.
Before extended trips, strengthen your upper body with exercises focusing on the shoulders, back, and core. Pole walking works muscle groups often neglected by hikers and runners.
Use straps and grips properly to maximize efficiency. Straps reduce grip fatigue, while looser grips rely more on strap tension for pole control.
While trekking poles aid balance and stability on every terrain type, their benefits are most pronounced on steep inclines, slippery surfaces, and off-camber trail sections.
When scrambling over rocks and logs, planting trekking poles on stable surfaces provides stability as you climb over obstacles high-stepping just one foot at a time.
Don’t wait until knee pain kicks in miles out on the trail to start using poles. Employ them right from the start for optimal joint protection and stability.
On exposed ridges and plateaus, trekking poles double as lightning rods to keep electrical current from traveling through your body in a storm.
Trekking poles collapse down smaller than ever these days. But still consider removable wrist straps to achieve truly compact storage for packing.
Hike your own hike, but give trekking poles a try if you crave more stability, less knee pain, and fatigue fighting efficiency over long distances.
Have a favorite trekking pole model you swear by through countless miles on the trails? Share what sets it apart from the herd!
Don’t Forget the Camera to Capture Scenic Views and Wildlife!

Exploring the great outdoors is an experience for the senses – don’t neglect your eyes! Packing a quality camera ensures scenic vistas, wildlife encounters and camp life stay preserved in pictures.
Camera technology has progressed rapidly, putting powerful and portable options within reach of every budget. Compacts, mirrorless ILCs and even phones allow vivid images from the wilderness.
Major features to evaluate include resolution, image stabilization, shooting modes, durability, battery life and connectivity options. Prioritize the ones that best match your needs and experience.
DSLRs offer unrivaled image quality and lens versatility but require lugging bulky gear. Mirrorless ILC systems provide similar advantages in more compact and rugged form factors.
Look for all-weather models with water/dust sealing and freeze proofing down to frigid temps. Ruggedized bodies and lenses withstand drops and abuse in harsh conditions.
Optical or in-body stabilization allows sharp images even handheld at slower shutter speeds or in motion. This expands shooting options in low light scenarios.
Storage matters – pack high capacity SD cards to capture hundreds or thousands of high-res images without running out of space at inopportune times.
Beyond the camera itself, accessories expand creative possibilities on location. Carry spare batteries, filters, remote triggers, tripods, and lighting as warranted.
Post-processing apps and editing software allow enhancing images from RAW files after the fact. But strive to get frames right in-camera to minimize this.
Scouting camera locations in advance is ideal – note promising spots to revisit for sunrise/sunset magic hours and maximum dramatic impact.
Use lighting and weather conditions to your advantage. Stormy skies and golden hour sun infuse landscapes with rich atmosphere.
To photograph wildlife, research subjects and habitats first. Learn optimal times to observe them, then use telephoto lenses and stealth tactics to get close safely.
Practice ahead of time with camera settings and features so they become second nature on site. Understanding exposures, focus modes and advanced settings is key.
Consider bringing collapsible reflectors and mini tripods for stability, especially in low light. A flash adds options for capturing interiors or night shots.
Don’t become so absorbed with photography that you miss the broader experience. Occasionally put the camera down and soak it all in.
With phones so ubiquitous, you may wonder if you still need a dedicated camera. But for print-worthy images, optics and sensors in serious cameras easily outperform phones.
Share memorable captures on social media and screens, but also invest time and care to edit and print standout images for display as lasting mementos.
Carry your camera comfortably and securely on your body using neck straps, holsters and tethers so it’s always close at hand when inspiration strikes.
At scenic overlooks, campsites and landmarks, try different vantage points for unique perspectives. Frame them to highlight intriguing elements.
Return home with amazing visuals you’ll cherish for a lifetime. An outdoor adventure isn’t complete without photos to share the story!
What’s your best tip for getting incredible shots of landscapes, night skies, wildlife or other natural subjects? Share your outdoor photography expertise!