Protect Your Head Playing Lacrosse With the Right Helmet CageProtect Your Head Playing Lacrosse With the Right Helmet Cage
Choose Between Box and Field Lacrosse Helmet Cages
When selecting a new lacrosse helmet cage, one of the first decisions is whether you need one designed for box lacrosse or field lacrosse. Box lacrosse, sometimes called indoor lacrosse, is played on a hockey rink with walls around the field. This faster-paced version of the sport requires more protective equipment since there is increased physical contact between players. Field lacrosse is played outdoors on a large open field without containment walls.
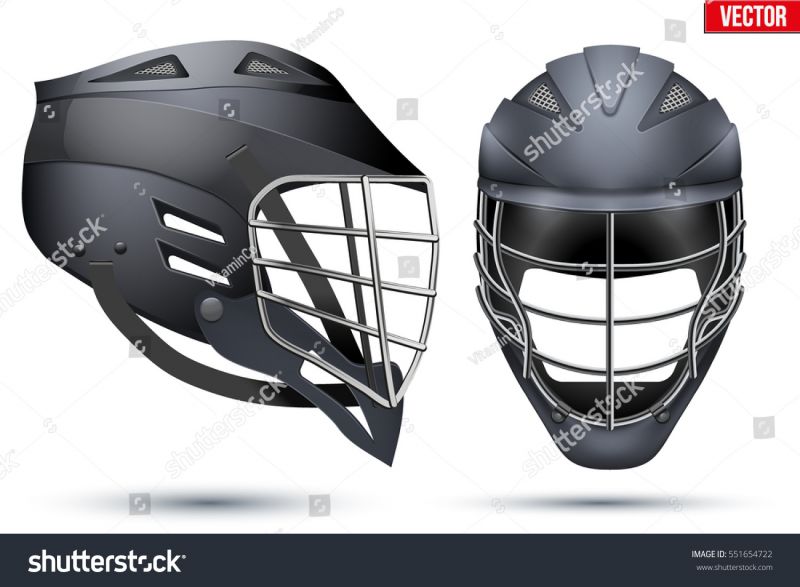
Box lacrosse cage designs tend to completely surround the face with thinner horizontal bars spaced close together. This offers better protection from direct ball and stick impacts from all angles. Field lacrosse cages have some openings since the gameplay is less confined. The horizontal bars are spaced slightly farther apart as well. Field cages also utilize more vertical bars on the sides for better visibility.
Within both box and field versions, you’ll find design variations between brands and price points. Higher-end cages use stronger alloy metals and integrate more robust reinforcement around vulnerable areas like the chin, temples, and cheeks. Measure the width between your helmet’s cheek pads when fitting a new cage to get the right amount of snugness while still allowing free head movement.
No matter which lacrosse position you play, look for a helmet cage engineered specifically for that sport’s gameplay style. Box lacrosse cages offer maximum facial protection while field lacrosse cages balance coverage and visibility. Consult your league rules to ensure the cage you choose meets all required safety standards.
Pick the Correct Sizing for a Snug and Safe Fit

Getting the right size helmet cage is critical for safety and comfort on the lacrosse field. Most cages come in a range of sizes like small, medium, large, etc. Measure the width between your helmet’s cheek pads to determine your size. The cage should fit snugly against the cheek pads without any side-to-side movement. However, it shouldn’t pinch against your face or restrict your ability to talk and breathe.
Ill-fitting cages are unfortunately very common in lacrosse. Many parents pass down old equipment that doesn’t properly fit their child. Teen players going through growth spurts and facial structure changes also may suddenly find their cage is loose or tight. Even high-level college players can end up with size issues if they don’t get properly fitted each season.
A loose cage leaves gaps where balls and sticks can make contact with unprotected areas of your face. The cage can also shift upon impact and lead to facemask detachment or injury from the cage itself. Oversized cages essentially render your protection useless. Excess movement likewise reduces visibility as the cage bars shift across your field of vision.
Overly tight cages also pose risks by restricting blood flow and oxygen. This leads to discomfort, fatigue, and reduced cognitive function and reaction time. Teeth and jaw pain from cage pressure can also cause players to remove or loosen chinstraps, again compromising protection.
Visit a specialty lacrosse retailer and get properly sized each year or anytime you experience helmet issues. Your cage should feel secure but not pinch or rub your facial area. Take time to assess the fit and alignment when putting your helmet on before each game or practice. A properly fitted cage improves safety, vision, comfort and your overall lacrosse game.
Understand Cage Design Differences Between Brands

While all lacrosse helmet cages must meet certain safety standards, you’ll notice design variations between brands and models. Higher-end cage options utilize stronger alloy metals and more robust reinforcement bars. Budget cages typically have thinner gauge steel or titanium bars without reinforcements.
Major helmet manufacturers like Cascade and Warrior offer cage models customized for their helmets. These integrate proprietary fit systems and removable bottoms for easy facemask attachment. Other companies like SportStar and Great Atlantic focus on cage design and sell models that fit most helmet brands.
Within a brand’s lineup, you’ll see differences in the number of horizontal bars, bar thicknesses, shape of vertical sightlines, and placement of reinforcing bars. For example, Cascade’s top-tier “Pro” cage has 3 horizontal bars while their “Team” model has 2 larger main bars. Brands also vary in how rounded or squared-off the cage contours are.
Consider how the cage bars affect visibility and contact with balls and sticks. More bars or reinforcements give added protection but can obstruct downward and peripheral vision. Large rounded openings allow better visibility but leave more facial area exposed.
Carefully inspect the cage design when purchasing a helmet and assess the expected gameplay conditions. All brands must pass the same certification tests, so focus on finding the best blend of protection, visibility, and fit features according to your needs and budget. Consulting player reviews can help determine real-world performance differences between cage models.
Compare Durability of Metals Used in Cages
The Importance of Proper Cage Sizing for Safety and Comfort
Ensuring the correct fit of your lacrosse helmet cage is paramount for both safety and on-field performance. A properly sized cage provides optimal protection without compromising comfort or visibility.
How to Determine the Right Cage Size
- Measure the width between your helmet’s cheek pads
- Choose a cage that fits snugly against the cheek pads without side-to-side movement
- Ensure the cage doesn’t pinch your face or restrict breathing and speech
- Visit a specialty lacrosse retailer for professional fitting
What are the risks of an ill-fitting cage? A loose cage can leave gaps in protection, potentially allowing balls or sticks to make contact with your face. It may also shift upon impact, leading to facemask detachment or injury from the cage itself. Conversely, an overly tight cage can restrict blood flow and oxygen, causing discomfort, fatigue, and reduced cognitive function.
Cage Design Variations: Comparing Brand Features and Materials
While all lacrosse helmet cages must meet safety standards, design variations between brands and models can significantly impact protection, visibility, and comfort.

Key Design Elements to Consider
- Number and spacing of horizontal bars
- Bar thickness and material strength
- Shape and placement of vertical sightlines
- Reinforcement bar positioning
- Overall cage contour (rounded vs. squared-off)
How do these design elements affect performance? More bars or reinforcements provide added protection but may obstruct downward and peripheral vision. Large rounded openings allow better visibility but leave more facial area exposed. Higher-end cages often utilize stronger alloy metals and more robust reinforcement bars, offering enhanced durability and protection.
Material Matters: Choosing the Right Cage Composition
The materials used in lacrosse helmet cages play a crucial role in their performance, durability, and overall protection level.
Common Cage Materials and Their Properties
- Steel: Durable and cost-effective, but heavier
- Titanium: Lightweight and strong, but more expensive
- Alloy metals: Offer a balance of strength and weight
How does material choice impact player performance? Lightweight materials like titanium can reduce fatigue during extended play, potentially improving reaction times and overall endurance. However, they often come at a higher price point. Steel cages, while heavier, offer excellent durability and protection at a more affordable cost.

Position-Specific Cage Features: Optimizing for Your Role on the Field
Different playing positions in lacrosse may benefit from specific cage features that cater to their unique needs and challenges on the field.
Cage Considerations by Position
- Attackers: Prioritize visibility and lightweight design for quick movements
- Midfielders: Balance protection and visibility for versatile play
- Defenders: Focus on robust protection, especially in close-contact situations
- Goalies: Require maximum visibility with specialized reinforcement
Why should players consider position-specific cage features? Tailoring your cage choice to your playing position can enhance your performance by providing the right balance of protection and visibility for your role on the field. For example, a goalie needs maximum visibility to track the ball, while a defender may prioritize robust protection for close-contact situations.
Ensuring Safety Standards: Navigating Regulations and Certifications
Adhering to safety standards and certifications is crucial when selecting a lacrosse helmet cage to ensure adequate protection during play.
Key Safety Considerations
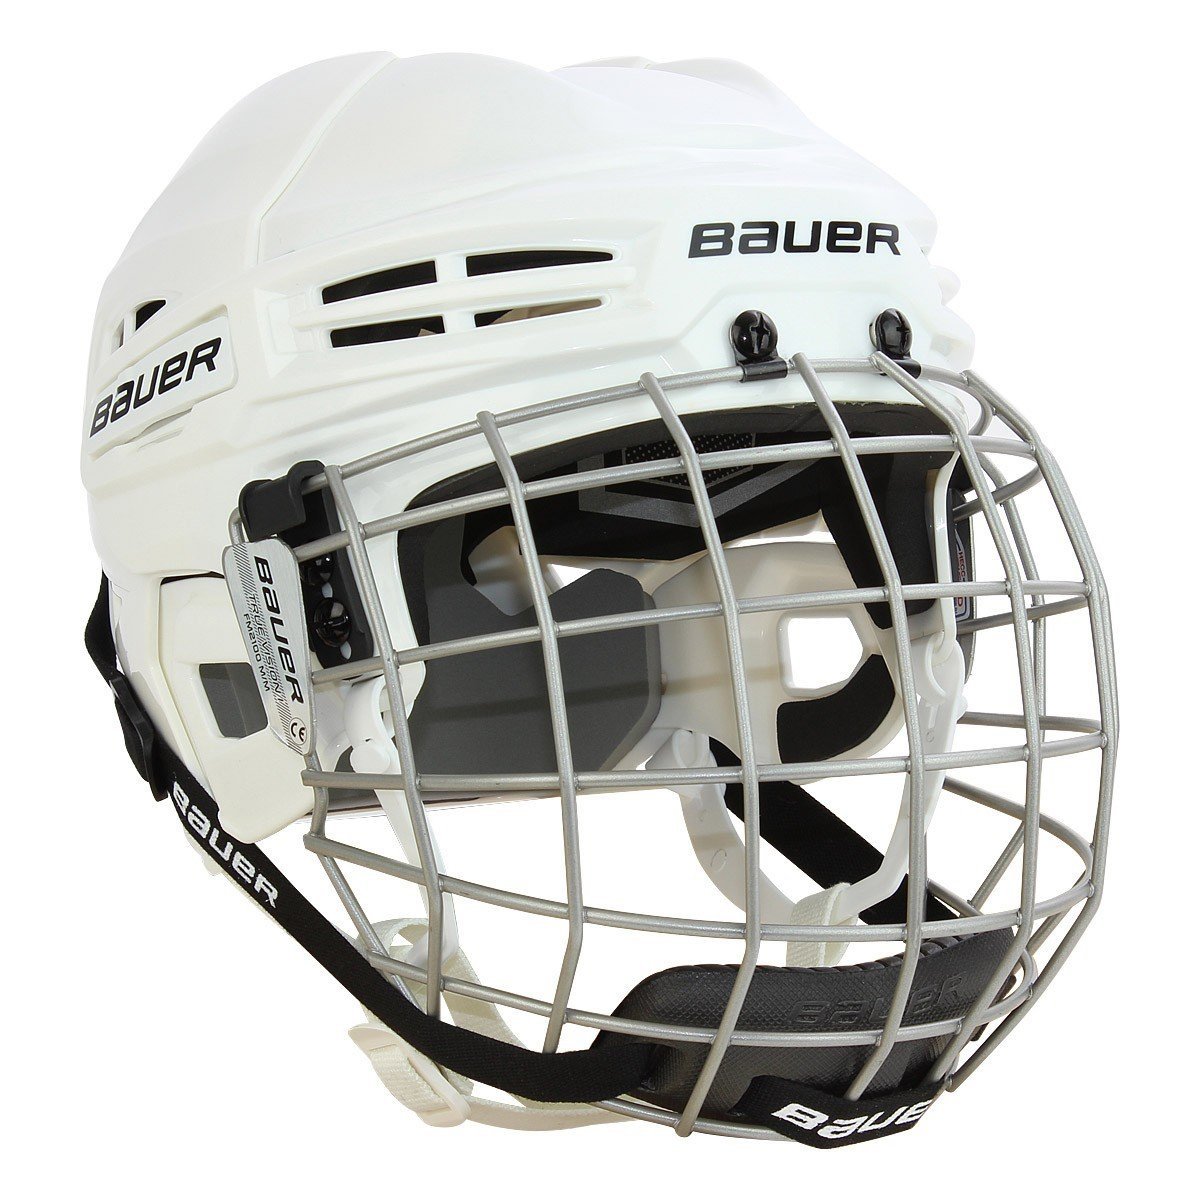
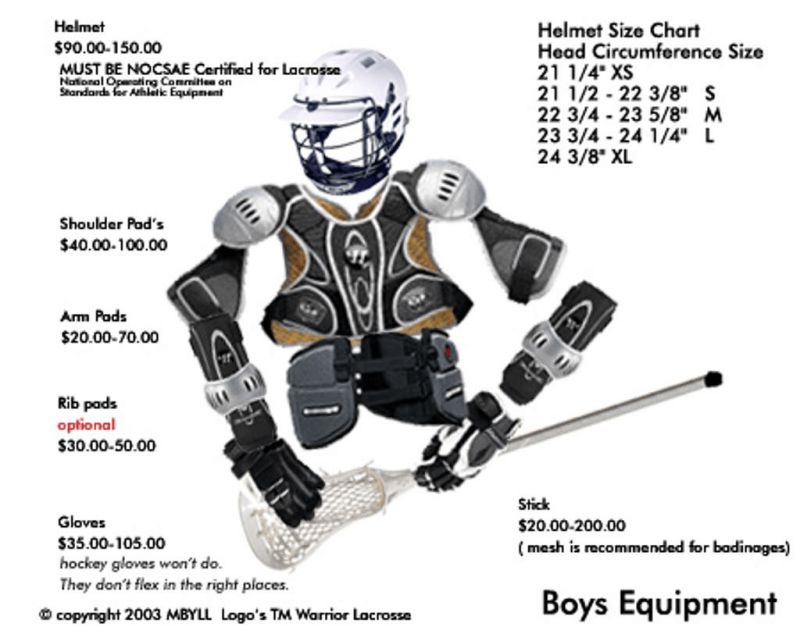
- Check for NOCSAE (National Operating Committee on Standards for Athletic Equipment) certification
- Verify compliance with league-specific regulations
- Inspect the cage regularly for signs of wear or damage
- Replace the cage immediately if it shows any structural weaknesses
How can players ensure their cage meets safety standards? Always purchase cages from reputable manufacturers and retailers who adhere to industry safety standards. Consult your league rules to confirm that your chosen cage meets all required safety certifications. Regular inspection and timely replacement of worn or damaged cages are essential for maintaining optimal protection.
Maintenance and Care: Prolonging the Life of Your Lacrosse Helmet Cage
Proper maintenance and care of your lacrosse helmet cage can significantly extend its lifespan and ensure consistent protection throughout its use.
Essential Cage Maintenance Tips
- Clean the cage regularly with mild soap and water
- Dry thoroughly after cleaning to prevent rust (for steel cages)
- Inspect for loose screws or attachments before each use
- Store in a cool, dry place away from direct sunlight
- Avoid leaving the helmet in extreme temperatures (e.g., hot car)
Why is proper cage maintenance important? Regular care and maintenance not only prolong the life of your cage but also ensure it continues to provide optimal protection. Neglecting maintenance can lead to weakened structural integrity, compromising safety during play.

Customization Options: Personalizing Your Lacrosse Helmet Cage
Many players choose to customize their lacrosse helmet cages to reflect their personal style or team identity while maintaining safety standards.
Popular Customization Techniques
- Color coating or powder coating
- Adding team logos or personal designs
- Customized bar configurations (within safety limits)
- Specialized visors or attachments
How can players safely customize their cages? When considering customization, it’s crucial to work with reputable providers who understand safety requirements. Avoid any modifications that could compromise the structural integrity of the cage or violate league regulations. Always prioritize function over form to ensure continued protection during play.
In conclusion, selecting the right lacrosse helmet cage involves careful consideration of various factors, including game type, sizing, design features, materials, and safety standards. By understanding these elements and maintaining your cage properly, you can ensure optimal protection and performance on the lacrosse field. Remember to regularly assess your equipment and consult with professionals to keep up with evolving safety standards and personal needs as you progress in the sport.
Choose Between Box and Field Lacrosse Helmet Cages
When selecting a new lacrosse helmet cage, one of the first decisions is whether you need one designed for box lacrosse or field lacrosse. Box lacrosse, sometimes called indoor lacrosse, is played on a hockey rink with walls around the field. This faster-paced version of the sport requires more protective equipment since there is increased physical contact between players. Field lacrosse is played outdoors on a large open field without containment walls.
Box lacrosse cage designs tend to completely surround the face with thinner horizontal bars spaced close together. This offers better protection from direct ball and stick impacts from all angles. Field lacrosse cages have some openings since the gameplay is less confined. The horizontal bars are spaced slightly farther apart as well. Field cages also utilize more vertical bars on the sides for better visibility.
Within both box and field versions, you’ll find design variations between brands and price points. Higher-end cages use stronger alloy metals and integrate more robust reinforcement around vulnerable areas like the chin, temples, and cheeks. Measure the width between your helmet’s cheek pads when fitting a new cage to get the right amount of snugness while still allowing free head movement.
No matter which lacrosse position you play, look for a helmet cage engineered specifically for that sport’s gameplay style. Box lacrosse cages offer maximum facial protection while field lacrosse cages balance coverage and visibility. Consult your league rules to ensure the cage you choose meets all required safety standards.
Pick the Correct Sizing for a Snug and Safe Fit

Getting the right size helmet cage is critical for safety and comfort on the lacrosse field. Most cages come in a range of sizes like small, medium, large, etc. Measure the width between your helmet’s cheek pads to determine your size. The cage should fit snugly against the cheek pads without any side-to-side movement. However, it shouldn’t pinch against your face or restrict your ability to talk and breathe.
Ill-fitting cages are unfortunately very common in lacrosse. Many parents pass down old equipment that doesn’t properly fit their child. Teen players going through growth spurts and facial structure changes also may suddenly find their cage is loose or tight. Even high-level college players can end up with size issues if they don’t get properly fitted each season.
A loose cage leaves gaps where balls and sticks can make contact with unprotected areas of your face. The cage can also shift upon impact and lead to facemask detachment or injury from the cage itself. Oversized cages essentially render your protection useless. Excess movement likewise reduces visibility as the cage bars shift across your field of vision.
Overly tight cages also pose risks by restricting blood flow and oxygen. This leads to discomfort, fatigue, and reduced cognitive function and reaction time. Teeth and jaw pain from cage pressure can also cause players to remove or loosen chinstraps, again compromising protection.
Visit a specialty lacrosse retailer and get properly sized each year or anytime you experience helmet issues. Your cage should feel secure but not pinch or rub your facial area. Take time to assess the fit and alignment when putting your helmet on before each game or practice. A properly fitted cage improves safety, vision, comfort and your overall lacrosse game.
Understand Cage Design Differences Between Brands

While all lacrosse helmet cages must meet certain safety standards, you’ll notice design variations between brands and models. Higher-end cage options utilize stronger alloy metals and more robust reinforcement bars. Budget cages typically have thinner gauge steel or titanium bars without reinforcements.
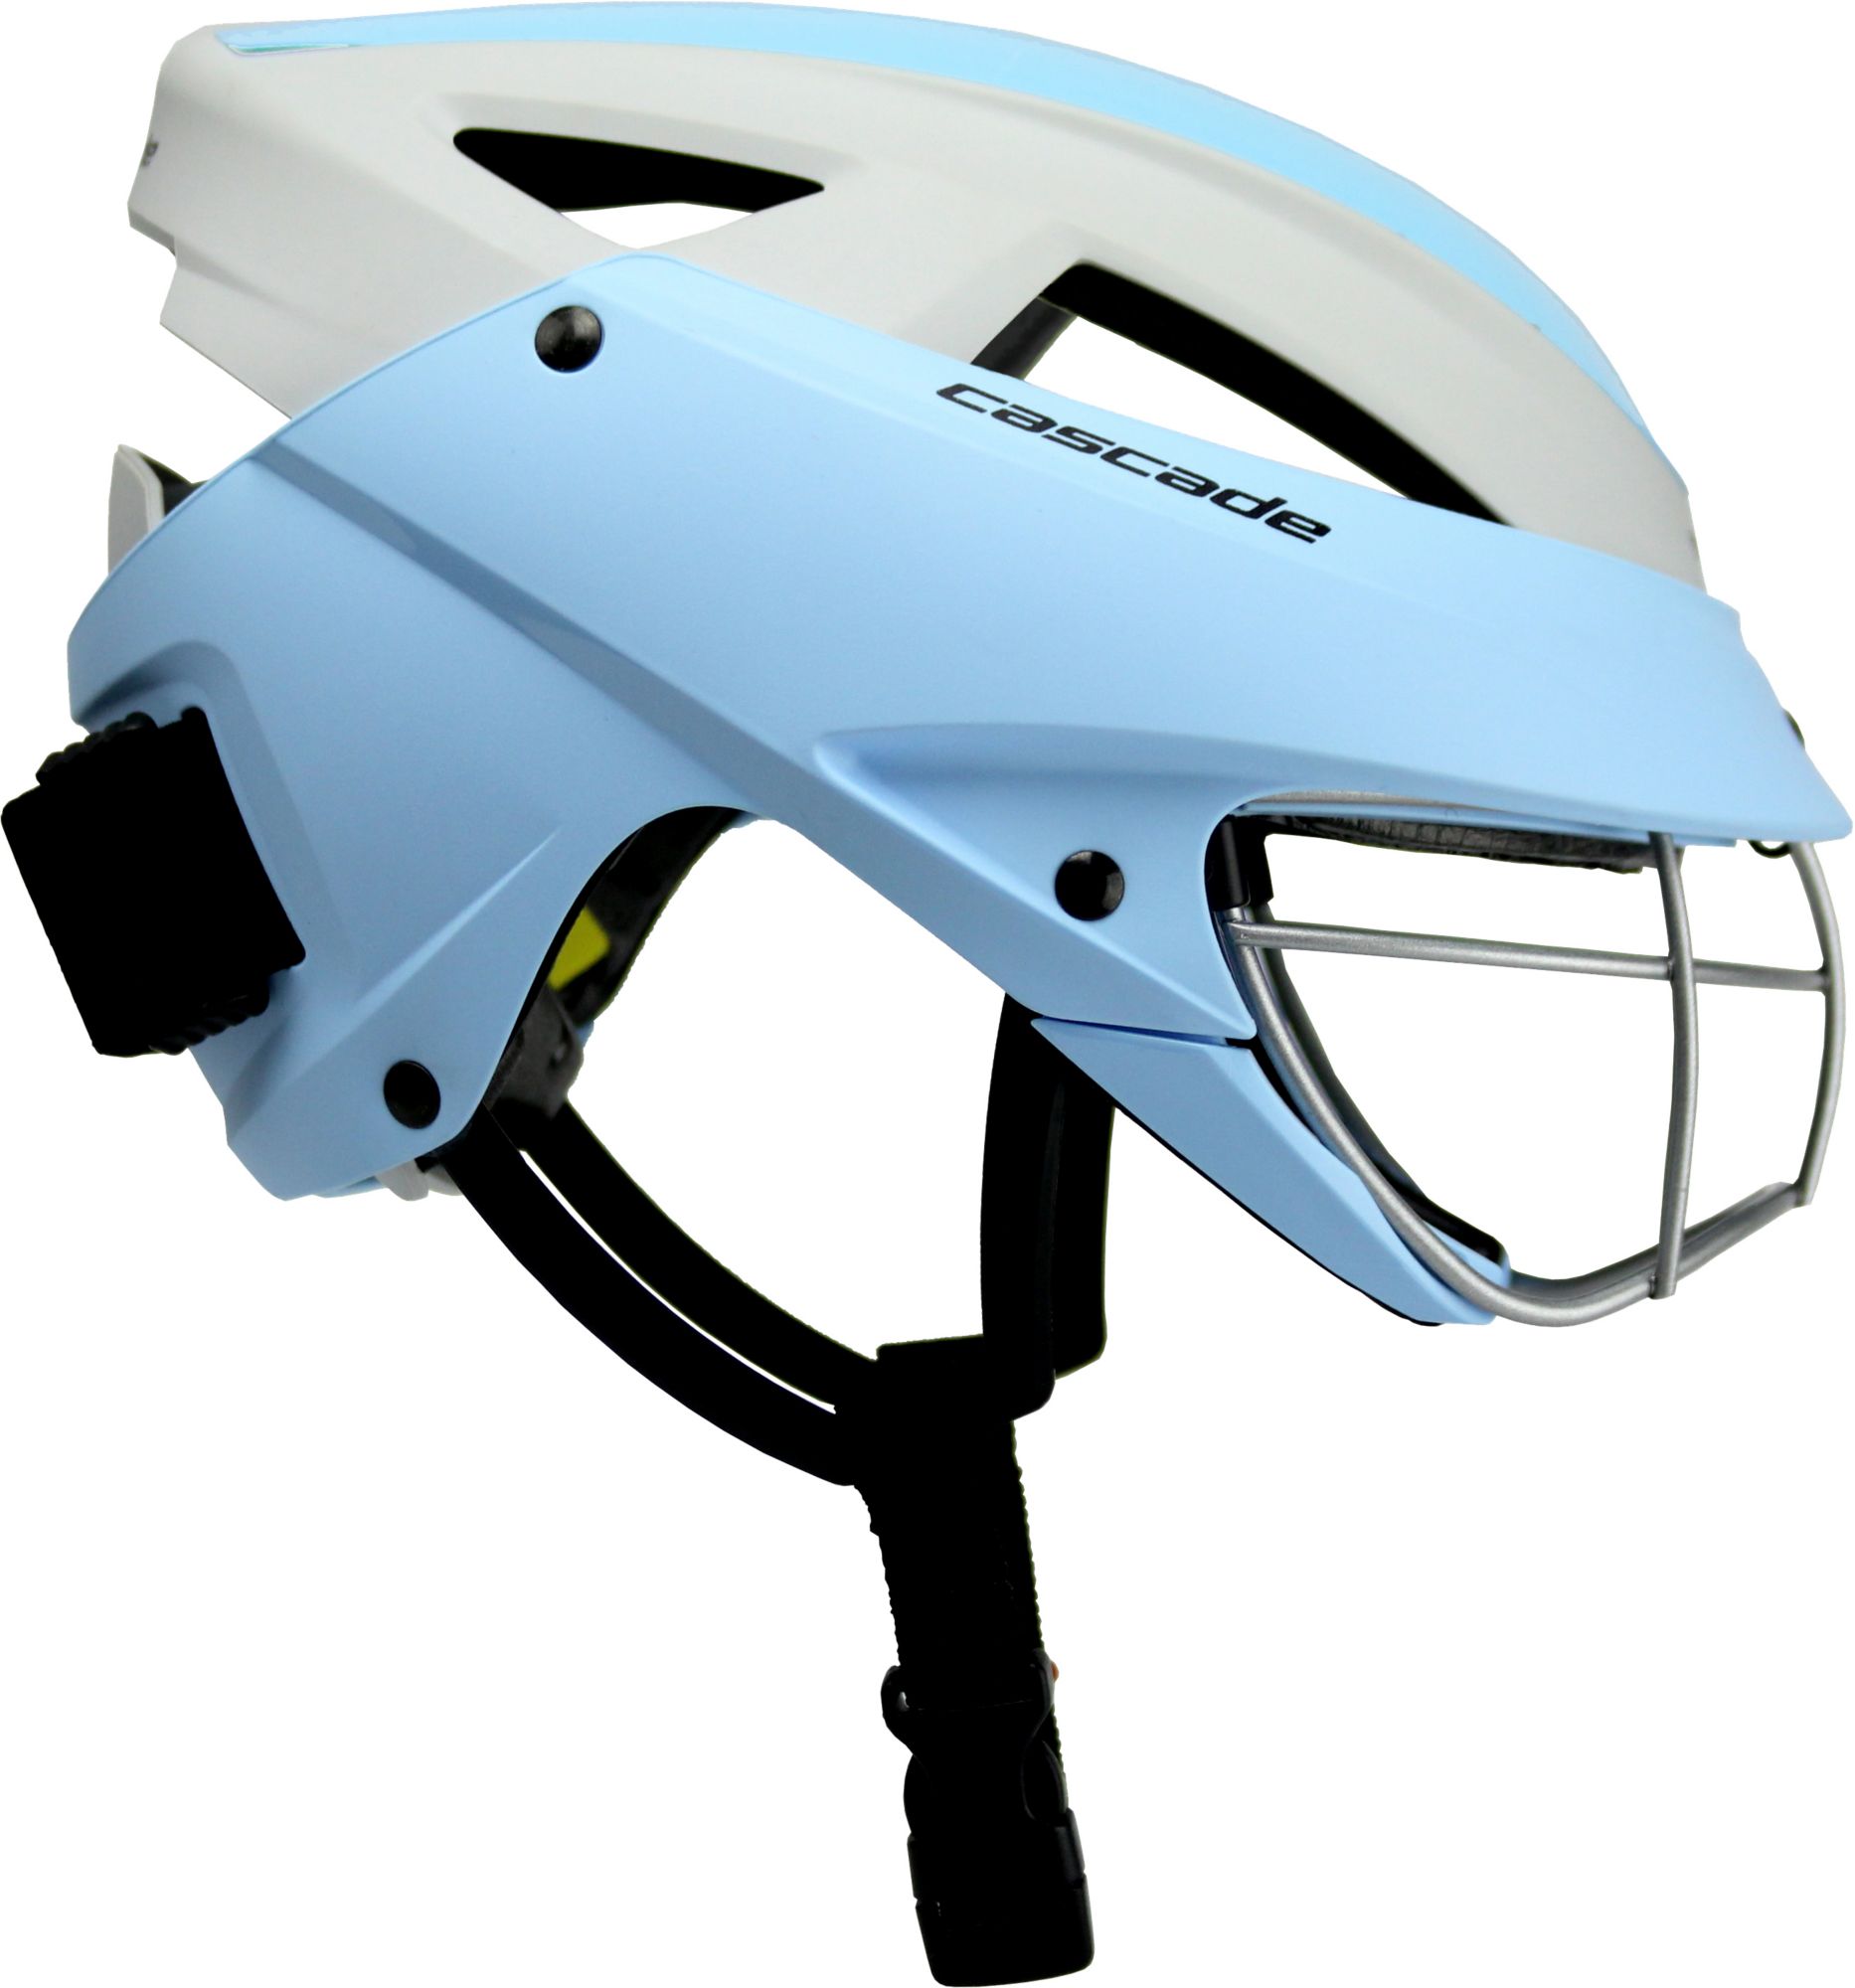
Major helmet manufacturers like Cascade and Warrior offer cage models customized for their helmets. These integrate proprietary fit systems and removable bottoms for easy facemask attachment. Other companies like SportStar and Great Atlantic focus on cage design and sell models that fit most helmet brands.
Within a brand’s lineup, you’ll see differences in the number of horizontal bars, bar thicknesses, shape of vertical sightlines, and placement of reinforcing bars. For example, Cascade’s top-tier “Pro” cage has 3 horizontal bars while their “Team” model has 2 larger main bars. Brands also vary in how rounded or squared-off the cage contours are.
Consider how the cage bars affect visibility and contact with balls and sticks. More bars or reinforcements give added protection but can obstruct downward and peripheral vision. Large rounded openings allow better visibility but leave more facial area exposed.
Carefully inspect the cage design when purchasing a helmet and assess the expected gameplay conditions. All brands must pass the same certification tests, so focus on finding the best blend of protection, visibility, and fit features according to your needs and budget. Consulting player reviews can help determine real-world performance differences between cage models.
Compare Durability of Metals Used in Cages
Lacrosse helmet cages are constructed from either stainless steel or titanium alloys. Each metal has different properties that affect the cage’s durability, strength, weight, and corrosion resistance. Most cages combine both types of metals too. Knowing the advantages of each allows you to choose a cage optimized for your gameplay needs.
Stainless steel alloys like chromium and nickel steel provide excellent durability at an affordable cost. They maintain their integrity through repeated impacts. Steel is heavier than titanium though, so it may increase neck fatigue. It’s also prone to rusting when exposed to moisture and salty sweat, which reduces its lifespan.
Titanium alloys like Ti-6Al-4V are extremely strong but lighter in weight. A titanium cage reduces strain on the neck muscles versus a steel version. Titanium corrodes far less than steel and maintains its smooth surface. However, titanium dents and deforms easier from direct ball or stick hits. It’s also substantially more expensive than steel.
Higher-end cages combine steel and titanium strategically. For example, a titanium frame may have internal stainless steel reinforcement bars. Or the main horizontal bars utilize durable steel while the vertical sightlines are lightweight titanium. Coatings like powder coating or anodization further increase corrosion resistance for both metals.
Carefully inspect cages for any signs of metal fatigue like corrosion, cracks, or denting which compromise protection. Look for robust metals used in high impact zones. Consider your position and gameplay style to determine if durability or lightweight design is more important. Discuss your needs with retailers to select a helmet cage engineered with ideal metals for you.
Determine if You Prefer Straight or Angled Bars

The orientation and shaping of cage bars impact visibility and strength. Most cages utilize either straight horizontal bars or bars angled downward towards the mouth. There are benefits to both designs.
Straight bars maximize lateral and peripheral vision for seeing the field and ball movement. Angled bars allow better downward vision for stick handling and footwork. Straight bar cages can obstruct your view more when looking down.
Angled bars deflect direct ball and stick impacts better, providing enhanced facial protection. The slope shields more of the lower face while still allowing good upward vision under the bars. Some angled cages angle the bars at different degrees, providing both downward and peripheral sightlines.
However, angled bars concentrate blows to a smaller part of the bars. This can compromise durability compared to spreading impacts across full straight bars. More bars also intersect the field of vision, creating “blindspots” and distractions.
Many players combine preferences by choosing cages with straight lower bars near the mouth and angled upper bars. This maximizes both downward and peripheral vision.
Consider your position and whether seeing the ball or your feet is more vital when deciding on straight or angled bar designs. Goaltenders tend to favor more angled cages, while attackmen need wider lateral vision from straight bars. Try on different cages to determine which bar orientations provide the sightlines you need.
Consider How the Bars Affect Vision and Airflow
The spacing, thickness, and overall design of cage bars impact two important factors – vision and airflow. Wider bar spacing improves visibility for seeing the full field, while thinner bars create less visual obstruction. But more open designs also allow increased risks of injury. Optimizing vision and airflow requires balancing protection and breatheability.
For protection, more bars or thicker bars provide better facial coverage. But this comes at the cost of added visual impediments and claustrophobic feeling from obstructed breathing. Excessive space between bars leaves gaps where balls and sticks can penetrate. Large openings also channel painful blows onto smaller facial areas instead of dispersing impacts.
In terms of airflow, widely spaced thin bars allow maximum airflow for breathing and cooling. But thinner bars deform easier from hits compared to thicker bars engineered for rigidity. More bars also diffract and obstruct airflow into the helmet, causing visor fogging and overheating issues.
Finding the right cage means assessing your needs and priorities. Close-checking defensive players may prefer maximum protection over vision, getting a cage with minimal spacing. Middies who run more need enhanced airflow, opting for greater bar openness. Carefully inspect helmet cages on the field before buying, not just looking through store packaging.
Work with retailers to understand the engineering behind different bar designs. Get the right balance of space versus protection and airflow versus stability that matches your lacrosse position and comfort needs. Don’t settle for a cage that obstructs vision or breathing.
Know When It’s Time to Replace an Old, Bent Cage
Lacrosse helmet cages experience a lot of contact over months and years of play. This can lead to bent, misaligned or fatigued bars that compromise protection. Knowing when to replace an older cage is important for safety.
Inspect your helmet cage thoroughly before each season and periodically during the season. Look for any bars that appear bent, cracked, or corroded. Even if damage isn’t visible, run your fingers over the bars to feel for roughness or gaps that indicate stress weak points.
Use a straight edge like a ruler to check cage alignment. Place it vertically and horizontally across different areas of the cage. Bars that fail to run parallel likely got bent from past impacts. You can also compare cage symmetry against a teammate’s helmet to spot irregularities.
Wiggling cage bars with your hands also reveals loosening or structural issues not apparent through sight alone. Grab individual horizontal and vertical bars at different spots and gently wiggle them. There should be minimal play or movement in properly secured bars.
Even small bar deviations can channel impacts incorrectly and leave facial zones unprotected. Damaged cages also have more play, increasing risks of detachment on impact.
While some minor cage tweaking can be corrected by an equipment manager, significant damage requires replacement. Most manufacturers recommend swapping cages at least every 2-3 seasons depending on usage. Don’t prolong the lifespan of a cage past effectiveness just to save money. Your health is worth investing in a new cage when needed.
Pick a Cage that Complies with Safety Standards

All lacrosse helmet cages sold in the United States must meet certain safety and performance standards set by regulatory organizations like NOCSAE. Choosing a certified cage is a must to ensure adequate facial protection.
NOCSAE tests cages against factors like impact resistance, penetration prevention, and durability. Cages undergo rigorous lab testing using heavy weighted pendulums to simulate blow forces seen on the field. NOCSAE also sets limits on the spacing between bars to reduce risks of sticks poking through.
Other standards focus on minimizing injury risks from detachable parts. Bars must maintain integrity even if one section fails, so a damaged horizontal bar won’t cause the entire cage to collapse upon impact. The cage border must also withstand blows without separating from the helmet shell or liner.
Certified cages undergo regular re-testing and review as lab methods improve. Look for cages labeled with the latest NOCSAE RD (Research Draft) designation along with the date, like NOCSAE RD 2023. This shows the latest test protocols were used in approval. Also verify that a cage meets all required standards for your specific helmet model.
A few helmet brands like Warrior have proprietary safety ratings that exceed NOCSAE minimums. However, never choose style over certified protection. Using non-compliant decorative cages leaves you dangerously exposed and can violate league rules. Your helmet cage is essential safety gear, so select only options verified by labs to meet all requirements.
Choose Colors and Coatings for Visibility and Protection
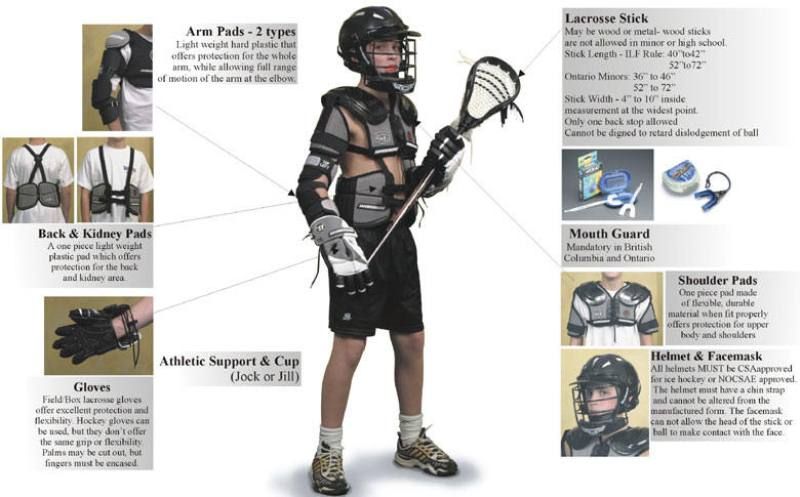
Lacrosse cages come in a variety of color options beyond basic silver metal. Color choices go beyond just style – the right hues and coatings enhance visibility and durability.
On the field, cage colors play an important role in visibility. Bright cage colors like red, yellow, and orange boost how well you stand out against grass, dirt, and opponents. This helps teammates better spot you during fast plays. Contrasting cage and helmet colors also help refs identify players more easily.
Darker cages with black, green or blue tones offer less visibility. But they reduce glare and reflections under stadium lights at night games. A gloss white cage can shine brightly day or night but produces the most glare issues.
Consider what times of day you primarily compete when selecting color. Multi-colored cages with a bright lower section and dark upper area provide a balance. Alternating bar colors helps teammates see your head movements better as well.
Protection-wise, coated cages better resist corrosion from weather and sweat. Powder coating and anodization processes help metals maintain smooth surfaces. Bare silver cages often show rusting within a season. Replacement costs add up.
Beyond colors, many cages come with school logos, team names or other custom graphics. These enable self-expression while showing team pride. Just ensure any coatings meet safety standards and won’t peel or flake with age. Your helmet cage protects you, but the right colors and coatings protect your cage.
Find Models Compatible With Various Helmet Brands
While some helmet and cage combinations are brand-exclusive, many cages work across multiple brands. Checking for cross-brand compatibility expands your options when selecting a new helmet and cage system.
Major brands like Cascade and Warrior design cages tailored for their helmet models. These integrate precise interface zones and quick-release attachments. However, their cages often still fit other helmet brands as long as the fit isn’t too loose.
Third-party manufacturers like Great Atlantic, Shake-N-Bake, and SportStar focus solely on cage design. They engineer universal models compatible across most helmet brands and types. This allows mixing and matching of cages and helmets.
A few key measurements determine fit. First is the distance between the left and right cheek pads on the helmet interior. Cages come in a range of widths to match various helmets. Proper sideways fit eliminates room for the cage to shift on impact.
The offset of the cheek pads relative to the shell is also key. Some brands sit the pads slightly forward or back. Make sure the cage borders align cleanly with the shell without leaving gaps in the offset areas.
Trying on cages before buying is ideal to verify fit. While many combinations work, some may position bars imperfectly relative to your sightlines. An adjustable chin strap also helps tweak the vertical alignment.
Exploring cross-brand cage options maximizes choices and enables selecting the best helmet and cage components. With safety as the priority, don’t assume mixing brands won’t work. Just confirm sizes match up and the attachment system creates a stable union.
Check for Compatibility With Facemasks and Chin Straps
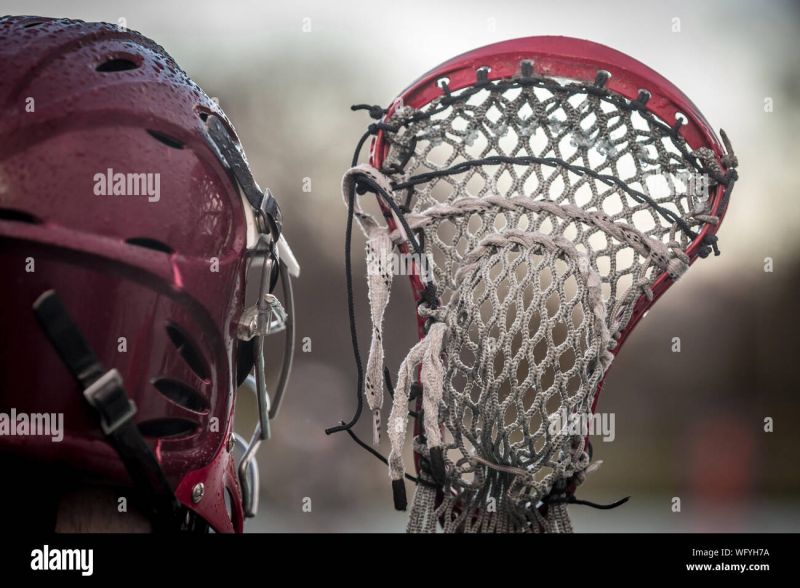
Along with the helmet itself, ensuring cage compatibility with facemasks and chinstraps is critical for protection. Mismatched components compromise integrity and safety.
Helmet-mounted facemasks attach to the cage at multiple points along the side and chin. Incompatible connections can leave gaps that allow the mask to detach upon impact. The chin strap also anchors to the cage bottom to secure fit. Quick-release clips must align precisely with the cage.
When swapping a new cage onto your existing helmet, check that the facemask attachment holes align. You may need longer or shorter mask screws. Test the fit by gently jostling the mask to ensure no room for movement. If possible, remove the cage with mask attached to test removal.
Likewise, verify that your chin strap clips easily lock onto the new cage’s underside straps. The anchors must match positions for the strap to correctly cradle your chin. Improper strap angles compromise the cage’s stability and allow it to shift on hits.
Some cages come packaged with new adjustable chinstraps for guaranteed compatibility. Many cages have universal attachment points that work across strap brands too.
Even if your current facemask and strap generally work with the new cage style, take time to inspect all connections. Subtle design differences can affect how components interface. Mixing cage, mask and strap pieces without verifying fit risks dangerous detachments just when protection is needed most.
Get Cages With Easy On/Off Attachment Systems

Taking a helmet on and off frequently, such as during practices or games, makes quick and simple cage attachment a key convenience factor. Brands use different mechanisms to allow tool-free installation and removal.
Many cages attach via plastic push-pin anchors that slide into receptacles on the helmet shell. Squeezing the anchor sides allows the pins to retract for removal. However, these can loosen over time and get damaged if overstressed.
Quick-release clip systems provide more durable attachment. These utilize plastic clips that snap onto receptacles integrated into the helmet. Clips have release tabs allowing easy detachment without tools.
Some helmets utilize cage attachment points built into the shell plastic itself. The cage edges align over molded slots or grooves that hold it securely in place through an interference fit. No separate anchors are needed.
Proprietary quick-change mechanisms on high-end helmets provide the fastest swapping. For example, Cascade’s CPX-R helmet has a lower cage section that detaches separately from the upper area with a simple depressed button release.
Make sure to follow the cage manufacturer’s instructions for proper installation and positioning. Rushing attachment can result in loose fittings. Periodically inspect clips for wear and replace damaged ones immediately.
Frequent removal capability allows sharing cages between players, switching to new visors or facemasks, or field-cleaning helmets. Choose a cage with secure yet simple on/off functions to make equipment swaps quick and easy.
Look for Designs that Allow Access to Drink Holes
Staying hydrated during intense lacrosse games requires frequent water bottle access. However, many helmet cage designs obstruct reaching the helmet’s drink holes. Seeking out compatible cages maintains hydration ability.
Drink holes appear on the side or back of most lacrosse helmets. Tilting the helmet back allows inserting a nozzle for hands-free water flow while on the field. However, cages with horizontal bars right in the drink hole area make access difficult.
Optimal drink hole access requires choosing cages with vertical sightline gaps aligned over the holes. This creates open space to fit a bottle nozzle through. Drink slots on the helmet sides need vertical bars spaced wide enough and low enough to reach under.
Some helmets have dual drink holes specifically designed for use with full cages. One sits higher on the shell for access above the cage line. The second aligns lower in the cage’s vertical bar spacing. Having both high and low options ensures you can hydrate regardless of cage position.
For easiest access, look for helmets and cages from the same brand engineered in tandem. Major brands configure their cages to work optimally with matching helmet drink hole placements.
Being able to frequently sip water during play and timeouts keeps you refreshed and performing at peak levels. Don’t ignore drink hole accessibility when selecting your lacrosse cage. Staying hydrated is key to maintaining energy and focus on hot, tiring game days.
Find Cages that Work With Helmet Accessories
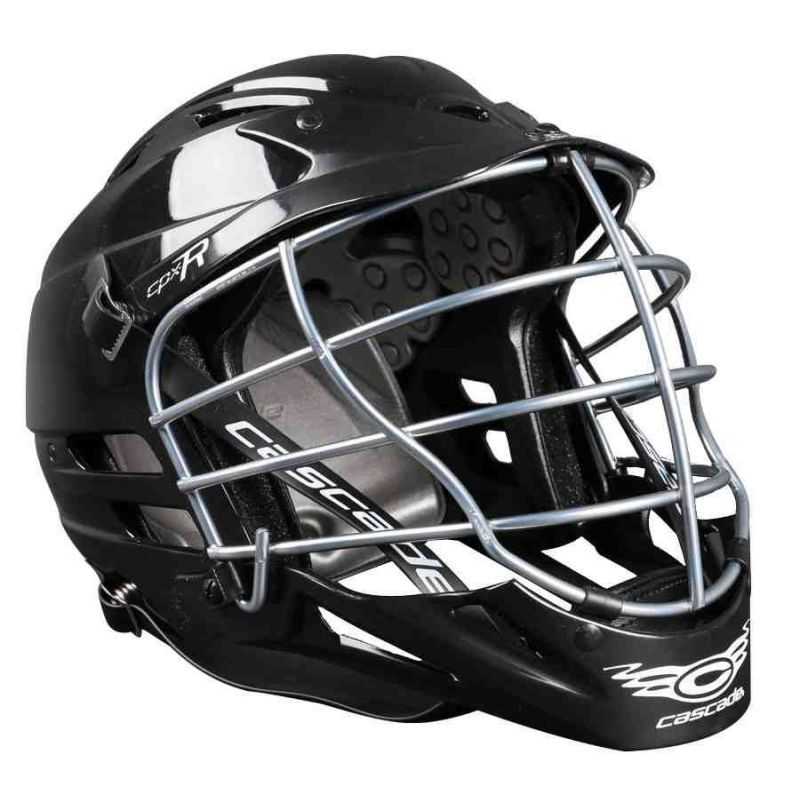
Today’s lacrosse helmets integrate various accessories that bring added functionality. From visors to protective ear pads, ensure your new cage accommodates integrated add-ons.
Helmet visors help control glare while increasing coverage area compared to just a cage. Make sure visor hinges or screws align properly with the new cage’s positioning. Misalignments can impede flipping the visor up and down.
Also check visor clearance both lowered and raised. Some cages may position horizontal bars too low, preventing the visor from fully raising upright. Upward visor rotation should not contact the cage.
Ear pads provide extra protection from checks and slashes. Verify pads can slide through openings between vertically aligned cage bars. Pads should overlay the ears without obstruction. Cages with bars wrapping too far back limit ear pad positioning.
Camera mounts allow recording gameplay from your on-field perspective. Pick a cage with a dedicated camera attachment zone if you want to utilize a recording system. Avoid obstructing camera views with cage bars in the field of view.
While those are some of the most common lacrosse helmet add-ons, new innovations emerge yearly. Assess how the cage interfaces with all your current helmet features. Switching cages should expand options, not force abandoning useful accessories that boost protection and performance.
