How to choose the right dye for your lacrosse head. What factors to consider when selecting a color. How to properly prepare and apply dye to your lacrosse stick head. Why sealing the color with a clear coat is important. When should you strip and redye your lacrosse head.
Choosing the Ideal Dye for Your Lacrosse Head: Key Considerations
Selecting the perfect dye for your lacrosse stick head involves careful consideration of several factors. By taking these into account, you can ensure that your chosen color not only looks great but also enhances your performance on the field.
Determining Your Primary Objective
Before diving into the world of lacrosse head dyes, it’s crucial to identify your main goal. Are you aiming to:
- Stand out on the field with a vibrant color?
- Match your team’s colors for a unified look?
- Express your individuality with a unique color combination?
- Improve your performance through better visibility?
Understanding your primary objective will help narrow down your color options and guide your decision-making process.

Visibility Considerations
The visibility of your lacrosse stick head plays a significant role in your ability to handle and pass the ball effectively. Bright, vibrant colors tend to offer better visibility against grass and dirt. If this is a priority for you, consider neon dyes in shades like:
- Bright pink
- Neon orange
- Fluorescent yellow
- Lime green
These eye-catching hues make it easier to track your stick head during fast-paced gameplay.
Conversely, some players prefer less noticeable colors that blend with the field, potentially giving them a strategic advantage. For a more subtle approach, consider dyes in:
- Forest green
- Navy blue
- Maroon
- Black
These darker shades can help keep opponents guessing about your next move.
Coordinating Your Lacrosse Stick with Your Gear
Creating a cohesive look by matching your lacrosse stick head to your other equipment can elevate your overall aesthetic on the field. Consider the following approaches:
Matching Colors
Coordinate your dyed lacrosse head with other elements of your gear, such as:
- Gloves
- Helmet
- Shorts
- Cleats
This approach creates a unified and professional appearance.
Team Colors
Opt for dyes that complement your team’s dominant jersey color or choose your school colors to show team spirit. This not only looks great but also demonstrates your commitment to the team.
Contrasting Colors
For a bold statement, consider dyeing your stick head a completely different color than your gear. This can create a striking visual contrast on the field. However, ensure that your color combination adheres to your team’s uniform regulations.
Durability and Longevity of Lacrosse Head Dyes
While the initial appearance of your dyed lacrosse head is important, it’s equally crucial to consider how well the color will hold up over time. Various factors can affect the durability of your chosen dye.
Factors Affecting Dye Longevity
Several elements can impact the lifespan of your lacrosse head dye:
- Sun exposure
- Dirt and debris
- Regular gameplay wear and tear
- Frequency of use
- Storage conditions
Understanding these factors can help you make an informed decision about your dye choice and maintenance routine.

Dye Colors and Their Durability
Some dye colors tend to hold up better than others over time. Generally, darker dyes such as:
- Black
- Navy blue
- Forest green
are more resistant to fading compared to lighter neon shades. Keep this in mind when selecting your dye, especially if longevity is a priority for you.
Extending the Life of Your Dyed Lacrosse Head
To maintain the vibrancy of your chosen color for as long as possible, consider these tips:
- Apply a UV-protectant clear coat specifically designed for lacrosse sticks
- Reapply dye annually before each season
- Store your lacrosse stick in a cool, dry place when not in use
- Clean your stick head regularly to remove dirt and debris
By following these steps, you can significantly extend the life of your dyed lacrosse head.
Testing and Experimenting with Lacrosse Head Dyes
Before committing to a full dye job, it’s wise to experiment with different colors and techniques to ensure you achieve your desired result.
The Importance of Dye Samples
The color you envision may not always translate perfectly in reality. To avoid disappointment, always test a small dye sample before applying it to your entire lacrosse head. Here’s how:
- Apply a small amount of dye to an inconspicuous area of the plastic
- Allow it to dry completely
- Assess the color under different lighting conditions
- Determine if additional coats are needed for desired coverage
This process helps you gauge the true color and the number of coats required for optimal results.

Exploring Multi-Color Designs
Why limit yourself to a single color when you can create a custom multi-hue design? Consider these creative approaches:
- Dye different parts of the head (scoop, sidewalls) in contrasting colors
- Create outlines in one color and fill them with another
- Layer complementary colors for unique effects
- Experiment with gradients or ombre effects
Let your imagination guide you in creating a truly unique lacrosse stick head.
Proper Preparation for Optimal Dye Adhesion
The key to achieving a vibrant, long-lasting dye job lies in proper preparation of your lacrosse stick head. Follow these steps to ensure the best possible results:
Cleaning and Sanding
A thorough cleaning and light sanding of your lacrosse stick head are crucial for optimal dye adhesion. Here’s why:
- Removes old tape residue, dirt, and oils from the plastic
- Creates a smooth surface for even dye application
- Helps the plastic better absorb the dye for more vivid coverage
Remember to wear gloves during this process to avoid transferring skin oils to the plastic, which could repel the dye.

Preparing the Workspace
Set up a proper workspace for dyeing your lacrosse head:
- Choose a well-ventilated area
- Cover your work surface with newspaper or a disposable tablecloth
- Gather all necessary materials before starting
- Ensure you have adequate lighting
A well-prepared workspace will make the dyeing process smoother and more enjoyable.
Applying Dye to Your Lacrosse Stick Head: Best Practices
The application process is crucial in achieving a professional-looking dye job. Follow these best practices for optimal results:
Multiple Thin Coats vs. One Thick Coat
Applying lacrosse stick dye in several thin, even coats produces better results than one thick layer. Here’s why:
- Reduces the chances of dripping, pooling, or dye splatters
- Allows for gradual build-up to your ideal color richness
- Ensures more even coverage across the entire stick head
Aim for 3-5 light coats, allowing 10-15 minutes of drying time between each application.
Addressing Challenging Areas
Some parts of the lacrosse stick head may require extra attention during the dyeing process:
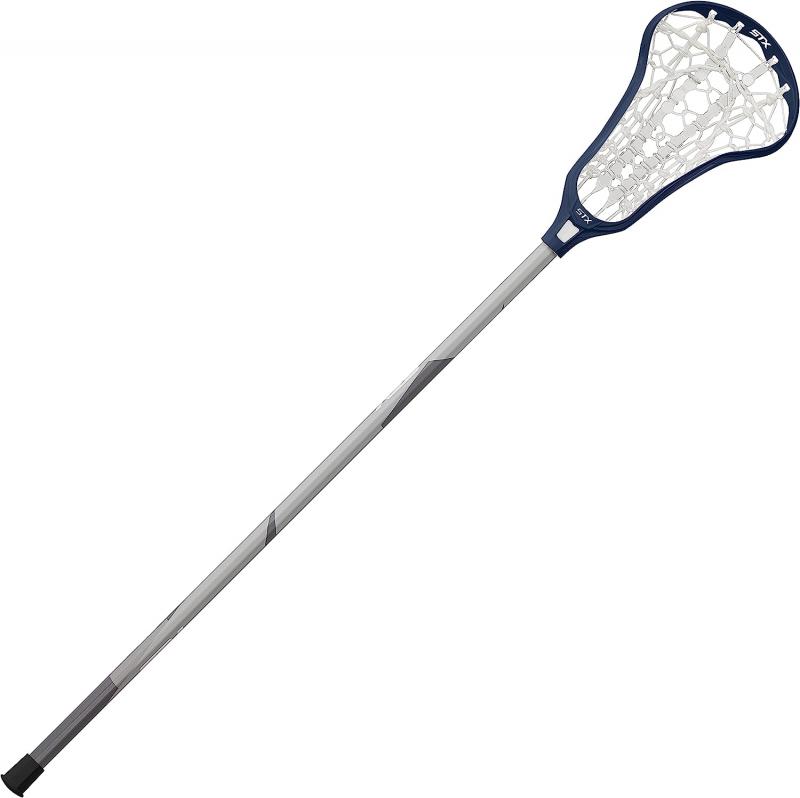
- The scoop often needs additional coats due to its curved shape
- Sidewalls may require careful application to ensure even coverage
- Stringing holes should be kept clear of excess dye to prevent interference with stringing
Take your time with these areas to achieve a professional-looking result.
Sealing and Protecting Your Dyed Lacrosse Head
After achieving your desired color, it’s essential to protect your hard work with a clear coat. This final step can significantly extend the life of your dye job.
Benefits of Clear Coat Application
Applying a clear coat to your freshly dyed lacrosse stick head offers several advantages:
- Prevents dye from chipping, fading, or wearing off during gameplay
- Enhances the underlying color by adding depth and shine
- Provides an additional layer of protection against UV rays and environmental factors
Choose between a glossy clear coat for a luminous finish or a matte clear coat for a more subdued, worn-in look.
Maintaining Your Dyed Lacrosse Head
To keep your dyed lacrosse head looking its best, follow these maintenance tips:
- Reapply clear coat once or twice per season for continued protection
- Clean your stick head regularly with mild soap and water
- Avoid exposing your stick to extreme temperatures or prolonged direct sunlight
- Touch up any chips or scratches promptly to prevent further damage
With proper care, your dyed lacrosse head can maintain its vibrant appearance for an extended period.

Recognizing When to Strip and Redye Your Lacrosse Head
Even with proper care, no lacrosse stick dye job lasts forever. Knowing when to strip and redye your head is crucial for maintaining optimal performance and appearance.
Signs It’s Time to Redye
Look out for these indicators that suggest it’s time to consider stripping and redying your lacrosse head:
- Significant fading or discoloration
- Uneven wear patterns or patchy areas
- Visible scratches or chips in the dye
- Difficulty seeing the head during gameplay
If you notice any of these signs, it may be time to refresh your lacrosse head’s color.
The Stripping and Redying Process
When you decide to strip and redye your lacrosse head, follow these steps:
- Use a plastic-safe paint stripper to remove the old dye
- Clean and sand the head thoroughly
- Apply new dye following the best practices outlined earlier
- Seal with a fresh clear coat
This process allows you to start fresh with a new color or design, rejuvenating your lacrosse stick’s appearance.

By following this comprehensive guide, you can achieve the perfect lacrosse head color every time. Remember to consider your objectives, test samples, prepare properly, and maintain your dyed head for long-lasting results. With patience and attention to detail, you’ll create a lacrosse stick that not only performs well but also reflects your personal style on the field.
Choosing The Right Dye For Your Lacrosse Head
Selecting the perfect color to dye your lacrosse stick head can be an exciting and rewarding process. With so many vivid dye options available, it’s understandable to feel overwhelmed with possibilities. By considering a few key factors, you can confidently land on a lacrosse head color that aligns with your personal style and enhances your play.
Determine Your Main Objective
Before browsing dye colors, think about the main reason you want to dye your lacrosse head in the first place. Are you looking to stand out on the field? Hoping to match your gear to your team colors? Wanting to experiment with a funky color combo? Whether you want to improve performance, show off team spirit, or express individuality, identifying your primary goal will help narrow the options.
Consider Visibility Needs
The visibility of your lacrosse stick head directly impacts how well you handle and pass the ball. Bright, vibrant colors tend to pop against grass and dirt better than darker shades. If visibility is a top concern, neon dyes in colors like bright pink, orange, yellow, or green are excellent choices. These hues make it easy to track your stick head during fast gameplay.
On the other hand, some players prefer less eye-catching colors that blend into the field, keeping opponents guessing about their next move. For a more stealthy approach, go for forest green, navy, maroon, or black dye.
Match Your Gear
Coordinate your lacrosse stick with the rest of your gear for a pulled-together aesthetic. Match the color of your dyed head to your gloves, helmet, shorts, cleats or other gear for a cohesive style. Consider complementing your team’s dominant jersey hue or choosing your school colors.
You can even dye your stick head a completely different color than your gear for a striking contrast. Just be sure the color combo aligns with your team’s uniform regulations.
Consider Durability
While vibrant dyes look fantastic when first applied, the color can fade over time from sun exposure, dirt and regular gameplay wear and tear. Some dye colors hold up longer than others. In general, darker dyes like black, navy and forest green tend to retain better than lighter neon shades.
Using a UV-protectant clear coat designed specifically for lacrosse sticks helps extend the life of any dyed color. Reapplying dye annually before each season will keep your chosen hue looking bold.
Test Dye Samples First
The exact dye color you envision in your mind doesn’t always perfectly translate in real life. Before committing to dyeing your entire head, do a test swatch first. Apply a small amount of dye to an inconspicuous area of the plastic to see how the color looks when dried.
Testing also helps you gauge how many coats are needed to achieve the depth of coverage you want. Keep in mind certain areas like the scoop and sidewall may require extra dye layers.
Consider a Multicolor Design
Why settle for a single dye color when you can create a custom multi-hue design? Get creative by dyeing the scoop, sidewalls, and other elements different colors. Outline designs in one color and fill them in with another.
Layer complementary colors on top of each other for unique effects, like applying yellow over top of blue dye to get a greenish tint. Let your imagination run wild!
Prep Properly for Dye Adhesion
Thoroughly cleaning and lightly sanding your lacrosse stick head before dyeing allows the color to adhere better. Remove all old tape residue, dirt and oils from the plastic for the smoothest surface. Lightly sanding also helps the head better absorb dye for more vivid, consistent coverage.
Wear gloves during prep to avoid getting skin oils on the plastic that could repel dye. Most dyes work best on raw white plastic free of any old color.
Apply in Multiple Thin Coats
Applying lacrosse stick dye in several thin, even coats creates better results than one thick, globby layer. Thinner coats reduce the chances of dripping, pooling, or dye splatters on your stick. Allow 10-15 minutes of drying time between each light coat.
Thinner coats also let you gradually build up to your ideal color richness. Apply anywhere from 3-5 layers for optimal vibrancy, adding more coats to areas that need extra dye.
Seal Color with Clear Coat
Finish off your freshly dyed lacrosse stick head with a protective clear coat spray or varnish. The clear top coat helps prevent dye from chipping, fading, or wearing off from inevitable lacrosse stick abuse. Reapply clear coat once or twice per season for continued protection.
An added bonus – a glossy clear coat also enhances the dyed color underneath by adding luminous depth. Matte clear coat offers a more low-key, worn-in style.
Know When to Strip and Redye
No lacrosse stick dye job lasts forever, especially with heavy use. When your head color starts noticeably fading or you simply want a change, don’t be afraid to strip off old dye and start fresh.
Look for stick dye strippers formulated especially for plastic lacrosse heads. Avoid using harsh paint removers or acetone. Properly stripping your head ensures the new dye adheres evenly and vibrantly.
With the right preparation, technique and maintenance, your custom colored lacrosse stick will maintain its eye-catching style through seasons of play. Confidently pick a hue that makes your lacrosse abilities pop or showcases your personal flair.
Removing Factory Coatings From The Head
Dyeing your lacrosse stick can allow you to customize it to match your style. However, many new lacrosse stick heads come coated in a factory gloss finish that can prevent dyes from properly adhering. Removing the factory coating is an important preparatory step before dyeing your lacrosse head for the first time.
Why Remove the Factory Coating?
New lacrosse stick heads are coated in a protective gloss finish by manufacturers. This clear gloss helps protect the head against weathering and prevents yellowing over time. However, gloss finishes create a slippery surface that dyes have trouble gripping onto. Factory gloss repels dye, causing uneven color or light spots.
Removing the slippery top coating allows dyes to soak directly into the raw plastic for much fuller, consistent coverage. Taking the time to strip away factory gloss results in significantly more vivid, uniform color.
Sanding Off the Gloss
One of the most effective methods for removing factory gloss is sanding. Lightly sanding creates tiny abrasions in the plastic for dyes to hold onto. Use 300-400 grit sandpaper and sand in different directions to remove gloss evenly across the entire head.
Focus sanding on the scoop and sidewall areas first since these flat surfaces have the heaviest coating. Sand just until the plastic loses its shiny appearance, taking care not to overly scuff or scratch the head. Wipe away all sanding dust with a dry cloth when finished.
Chemical Strippers
Chemical coating removers offer another option for getting down to the raw plastic. Look for a lacquer thinner or gloss remover specifically designed for use on plastic lacrosse heads. Apply a generous amount using the included brush and allow it to sit for the recommended time.
As the solvent works, use a clean rag to gently rub any remaining glossy areas. The coating will ball up as it lifts off the head. Thoroughly wipe away all residue after the recommended time before it can dry again.
Combination Approach
For the most thorough results, use a combination approach of light sanding followed by a chemical gloss remover. The sanding creates surface scratches for the solvent to penetrate, allowing it to dissolve any remaining coating from deeper in the plastic.
Thoroughly wipe away all residue after applying the chemical stripper. This combination process removes even the most stubborn factory gloss for optimal dye bonding.
Removing Old Dye
Used lacrosse heads previously dyed by another player also need proper stripping before redyeing. Old dye causes similar adhesion issues as factory gloss when applying new colors.
Sanding alone often proves ineffective at removing existing dye from deeper in the plastic. Combining sanding with a dye-specific stripping solution formulated for lacrosse heads lifts out old dye for a fresh, blank slate.
Avoid Harsh Chemicals
Steer clear of harsh paint removers, engine degreasers, or pure acetone that could damage your stick’s plastic. Only use stripping chemicals specifically designed for use on plastic lacrosse heads to avoid deterioration.
Test any new remover on an inconspicuous part of the head first. Discontinue use if you notice any adverse reactions like cracking, clouding, or pitting of the plastic.
Mask Off Logos
Before sanding or stripping, thoroughly mask off any factory logos, insignias, or graphics you wish to preserve with painter’s tape and plastic sheeting. Otherwise, chemicals and sanding can damage intricate designs.
Use a razor blade to carefully lift any remaining edges of old tape or vinyl decals still adhered to the plastic. Removing these facilitates total coating removal from the entire surface.
Rinse and Dry
After stripping, thoroughly rinse all residue off the head using clean water. Wipe away any remaining debris with a dry, lint-free cloth. Allow the head to fully air dry before beginning to apply dye.
Any lingering solvents or oils can still inhibit dye adhesion. A totally clean, dry surface ensures the lacrosse head dye soaks as deeply into the plastic as possible.
Removing all traces of slick factory gloss or old dye is time well spent before dyeing your lacrosse stick. The small upfront effort pays off with vibrant, evenly saturated color that lasts all season long.
Sanding The Head For Better Dye Adhesion
After removing any factory gloss or old dye from your lacrosse stick head, lightly sanding the plastic provides even better dye adhesion and consistency. Sanding creates micro-abrasions for the dye to grip, resulting in more vivid, uniform color.
Why Sand Before Dyeing?
Sanding does two key things to prepare a lacrosse head for dyeing: removes any remaining gloss and creates texture. Even after stripping, plastic can still retain a smooth, slick surface that dyes struggle adhering to.
Sanding scratches up this surface and gives the plastic some “tooth” for dye to grab onto. The tiny grooves provide extra gripping power for more even, saturated color.
Choosing the Right Sandpaper
Use a medium grit sandpaper in the 300-400 range when prepping a lacrosse head. Coarser sandpaper under 220 grit can damage and scratch plastic. Overly fine 600+ grit paper doesn’t abrade enough for dye prep.
Look for sandpaper specifically designed for finishing plastics. The ideal lacrosse head sandpaper has just enough abrasion to texture the surface without digging in too deeply.
Sanding Technique
Wrap sandpaper around a soft block or sponge rather than using it alone. This provides better control and an even sanding pressure across curved lacrosse head shapes.
Apply light, circular motions using moderate pressure. Sand perpendicular to any existing scratches to blend them in, frequently changing direction.
Focus extra sanding on the scoop and sidewalls where plastic is thickest. Thinner areas like stringing holes require a much lighter touch to avoid erosion.
Avoid Over-Sanding
Sand just until the plastic loses any glossy sheen, taking care not to scuff too aggressively. Deeper scratches can collect dye unevenly, creating darker streaks.
Frequently wipe away plastic dust to monitor sanding progress. The head is ready for dye when uniformly dull with no remaining shine. Err on the side of caution since over-sanding can’t be reversed.
Sand All Areas
Dye adhesion relies on thoroughly sanding the entire lacrosse head, not just visible zones. Use your fingertips to find and sand any overlooked slick spots, like the inner sidewall edges or underside areas.
Getting full, consistent dye coverage depends on meticulously sanding every square inch. Mark areas you’ve addressed with small pieces of masking tape as you work to prevent missing any spots.
Smooth Out Sanding Marks
Finish up by gently sanding entire surfaces lengthwise with the grain. This blended and smooths out random circular scratches, resulting in a more uniform sanded appearance.
Use worn-out sandpaper with very little grit left for this final pass. The goal is to refine the plastic, not cut further into it.
Clean After Sanding
Thoroughly wipe away all plastic dust using a dry, lint-free cloth. Any debris left on the lacrosse head prevents dye contact with the sanded plastic underneath.
You can also give the head a final rinse if needed to remove clinging particles. Allow to fully air dry before applying any dye.
Taking time to properly sand your lacrosse stick head before dyeing results in dramatically richer, more consistent color. The temporary grittiness leads to a smooth, vibrant finish.
Mixing The Dye According To Directions
Dyeing your lacrosse stick head is a great way to add some personal flair and make your stick truly unique. With the right preparation and technique, you can achieve a vivid, long-lasting custom color for your head. Perfecting the process takes some trial and error, but follow these tips and you’ll be sporting a perfectly dyed lacrosse head in no time.
The most important step is mixing up the dye bath properly. Be sure to carefully read and follow the directions on the dye package. Different dyes require different mixing ratios, temperatures, and soak times. Making sure you have the right dye-to-water ratio is crucial for getting the color saturation you want. If the mixture is too weak, your head will come out faded and blotchy.
Always mix the dye in a large plastic container or bucket; never use metal containers or pots which could react with the chemicals. Wear gloves and work in a well-ventilated area. Fill your container with hot water from the tap, then slowly stir in dye powder until fully dissolved. For a deeper hue, you can use up to double the recommended amount of dye. However, going overboard with the dye won’t make the color any richer, and you’ll just be wasting product.
If you want a custom or mixed color, combine two different dye colors in the bath. Start with equal amounts of each color and adjust the ratios as needed to get your desired shade. Just keep in mind that some color combinations can turn out muddy or muted. Do some test strips first before dyeing your whole head an unexpected color.
Prepping the Head for Dyeing

Properly preparing your lacrosse head before dyeing is crucial for getting the color to adhere evenly across all the pockets and grooves. Start by disassembling the head from the handle if possible. If not, tightly wrap the handle in plastic wrap to protect it from the dye.
Use a stiff nylon brush and mild detergent to thoroughly clean the head, paying close attention to removing all dirt and buildup from the scoop and sidewalls. Rinse until the water runs clear. Let the head air dry completely before dyeing.
Next, lightly scuff up the surface with fine grit sandpaper. This helps the dye bind better to the plastic material. Don’t scrub too hard or you could damage the head. Just a quick scuffing is enough to open the pores.
Some lacrosse players recommend using rubbing alcohol or acetone to wipe down the head before dyeing. This strips away any lacquer or coating to allow maximum dye absorption. However, this also wears down the plastic more quickly. It’s up to you if you want to remove the protective finish or not.
Dyeing Techniques for a Vibrant Color
With your dye mixture prepped and head cleaned, it’s time to submerge and soak. Wearing gloves, fully immerse the head in the dye bath, making sure all surfaces and openings are covered. For a solid, saturated color, the head must soak in the hot dye for at least 15-30 minutes. Stir the head around occasionally to circulate the dye.
If you want different color gradients or a tie-dye effect, you can dye for shorter periods, rotating or flipping the head every 5-10 minutes. Repeatedly dipping and removing will create cool patterns and shading.
Once you’re happy with the color depth, remove the head and let the excess dye drip back into the bucket. Rinse under warm running water, using a rag to gently wipe off any dye buildup in the scoop or sidewall holes. Keep rinsing until the water runs clear.
Allow the head to air dry fully before restringing and reassembling onto your handle. Dyed plastic takes longer to dry than undyed gear. Be patient and let it sit for 6 hours or more to prevent color transfer when you play.
Achieving a Long-Lasting Color
With proper dye techniques, your custom colored lacrosse head will maintain its eye-catching hues for many seasons of play. A few additional tips will help the color last even longer:
- Avoid bleaches and harsh cleaners when washing your head, as these can fade the color over time.
- Rinse heads thoroughly after each use to prevent dirt buildup.
- Keep heads out of direct sunlight when not in use.
- Consider adding a clear coat spray sealant for extra protection and shine.
- When the color does eventually start to fade, redo the dye process to revitalize the color.
Dyeing your own lacrosse stick head takes some trial and error, but the payoff is having gear that’s uniquely your own. With the right techniques and preparation, you’ll be sporting vibrant, head-turning color that will have the whole team wanting a dyed lacrosse makeover.
Preparing The Workspace For Dyeing
Getting that perfect custom color for your lacrosse stick starts with setting up a proper dyeing workspace. Dyeing can get messy, so protecting your surfaces and wearing the right gear will make the process go smoothly. With some simple preparation, you’ll be ready to transform your head into a vibrant new hue.
Start by choosing your dyeing location. An outdoor spot like a driveway or patio works great since dye can drip or splash. Cover the ground with a plastic tarp or some cardboard to protect it from stains. If working inside, cover counters and floors near your sink or tub with towels, plastic sheeting, or trash bags.
Have all your dyeing supplies in one spot before starting:
- Dye powder
- Large plastic bucket or tub for mixing dyebath
- Measuring cups and spoons
- Whisk or spoon for mixing dye
- Tongs or spoon for removing head
- Rags or scrub brush for cleaning head
- Gloves to protect your hands
- Old clothes you don’t mind ruining
Make sure to lay down some newspaper or scrap cardboard around your workspace. This will absorb any drips or spills for easy cleanup. You may also want to cover nearby surfaces like walls or furniture with plastic sheeting.
For ventilation, work near an open window or garage door. Alternatively, you can position a fan nearby to blow fumes away from you – just keep it a safe distance from any dye mixture. Dye fumes aren’t highly toxic but can irritate eyes and lungs, especially in enclosed spaces.
Wearing the right protective gear will also create a safer dyeing experience. At a minimum, you should wear rubber gloves, goggles, and old clothes or an apron you don’t mind staining.
Some lacrosse players recommend wearing a respirator mask while mixing and handling dyes. Dyes contain chemicals that can irritate airways with prolonged exposure. A respirator ensures you’re breathing easy while dyeing.
For serious lacrosse DIYers, setting up a dedicated dyeing station makes the process quick and easy each time. Mount a enamel utility sink on a backyard wall and install a removable faucet. Surround the sink with shelving to neatly organize all your dyeing supplies.
This keeps the messy work isolated outside, while handily having running water on tap. Just make sure to thoroughly scrub the sink after each use to avoid lingering stains.
If working inside, cover your bathroom or kitchen sink with a disposable plastic liner. Affix it to the rim with painter’s tape for a watertight seal. The liner catches drips and can be tossed after dyeing.
No matter where you choose to set up, having all the needed supplies and protective gear close at hand makes dyeing hassle-free. With the right covering and ventilation, your lacrosse stick will be vibrantly transformed in a safely controlled workspace.
Choosing the Right Dye
The specific fabric dye you use will determine the finished color you achieve, so choose wisely. For lacrosse heads, you’ll want a high-quality powdered dye made for synthetics like nylon, plastic, and polyester.
RIT All-Purpose Dye is the gold standard and widely available. It mixes easily in hot water and bonds reliably to plastic gear. For even stronger adhesion, choose their specialty DyeMore formula just for plastics.
PRO Chemical & Dye makes excellent dyes specifically for nylon and polymers. Jacquard iDye Poly is also popular for dying synthetic fabrics and materials. These dyes offer bright, consistent colors perfect for lacrosse heads.
Steer clear of lower quality discount or grocery store dyes. These may be weaker and not fully adhere to slick plastic heads. With higher end dyes made for synthetics, you’ll get vivid even results every time.
Beyond the standard dye colors, some specialty options can create cool effects:
- Neon dyes – For flashy tropical or highlighter colors
- UV reactive dyes – Glow under blacklight for a psychedelic look
- Tie-dye kits – For swirling and marbling effects
Experiment to create your own signature style and stand out on the field. Just remember – vibrant custom color starts with choosing a quality dye designed specifically for plastics.
Wearing Gloves And Eye Protection
Dyeing your lacrosse stick can transform it into a stylish, one-of-a-kind piece of gear. But the dyeing process involves strong chemicals that can irritate skin and eyes. Protecting yourself with the proper attire will let you dye safely and with confidence.
The number one rule when handling dyes is to wear gloves. Dyes contain acids, alkalis, and other harsh solvents that can really dry out and damage unprotected hands. Play it safe and keep your mitts covered.
Opt for thick chemical-resistant rubber gloves rather than basic kitchen gloves. Look for gloves specifically rated for use with dyes or solvents. The thicker rubber provides better protection against chemicals seeping through.
Avoid porous gloves like cotton or leather which will quickly absorb dye right through to your skin. Disposable nitrile or latex gloves can work in a pinch, but frequent exposure to dyes may degrade them over time.
Make sure to inspect your gloves for any small tears or holes before each use. One tiny pinhole can expose your hand to irritating dye. Toss damaged gloves and replace them.
Wear your rubber gloves any time you are handling dry dye powder, mixing up dye solution, submerging your lacrosse head, or rinsing after dyeing. Better safe than seeing your hands turned a funky color!
In addition to gloves, lacrosse players dyeing their sticks should wear protective eyewear. Goggles or safety glasses will shield your eyes from splashes or spills while dyeing.
Dyes can be quite irritating to the delicate tissue of the eyes. Getting concentrated dye in your eye would be extremely uncomfortable and require immediate flushing.
Safety goggles offer the best splash protection with a tight seal around the eyes. Wrap-around styles provide protection from the sides too. Clear lenses give you full visibility while handling dyes.
For small DIY dye jobs, basic shatter-resistant eyeglasses are better than nothing. Just know that regular glasses don’t seal around the eyes, so dye could still get in.
Be careful when mixing dye not to vigorously stir or whisk which could create bubbles and splashes. Work slowly and deliberately until dye powder is fully dissolved.
When dunking your lacrosse head in the dyebath, turn your face away and dip carefully. Lift it out gently to avoid drips and splatters.
Rinsing the dyed head over a sink, wear your gloves and eyewear. Splashing and rubbing can still force out dye, so keep up the protection.
Never be tempted to rub your eyes or touch your face while dyeing, even with gloves on. Tiny amounts of dye transferred into your eyes or mouth can cause a burning sensation.
By fully suiting up with the right protective gear, you can focus on the fun creative process of coloring your lacrosse stick without worrying about stains or injuries.
Choosing Between Liquid and Powdered Dye
When selecting fabric dye for your lacrosse head, you’ll have to decide between liquid or powdered formulas. Each type has advantages to consider.
Liquid dyes offer convenience and ease of use. You simply have to measure out the right amount and mix into water. No messing with powders or grains that must dissolve.
However, liquid dyes tend to be less concentrated than powders. This means less color saturation. For rich, vibrant hues in your lacrosse head, powders are the way to go.
Powdered dyes contain much more pigment per ounce than their liquid counterparts. When fully dissolved, powder dye solutions contain more molecules ready to bond to the plastic and create a deeper color.
Powder dyes do require more effort to mix smoothly into solution without clumping. But the reward is much more intense, longer-lasting color than liquid dyes can produce.
Another advantage of powder dyes is their nearly unlimited shelf life in the package. Liquid dyes deteriorate over time and lose potency after the container has been opened.
As long as you securely seal powder dye packs after each use, they’ll last for many years without fading. You can stock up on a rainbow of colors for endless custom lacrosse head projects.
One final benefit of powder dyes is the ability to mix your own custom colors. Blend two different powders in varying ratios to create unique shades.
This kind of color customization is difficult to achieve with pre-mixed liquid dyes. Only powders provide the flexibility for lacrosse players to get creative.
In the end, powdered fabric dye is undoubtedly the best choice for applying bold, even colors to plastic lacrosse gear. Their intensity and blending ability makes powders ideal for total head transformations.
Applying The Dye In Thin, Even Coats
You’ve mixed up the perfect dye bath and prepped your head – now comes the fun part of actually dyeing! Carefully applying the dye will give you an evenly colored lacrosse head that looks professionally done.
The key is to apply thin, smooth coats of dye using a foam brush or soft cloth. Thick globs will just pool and run, creating an uneven blotchy appearance.
Dip your foam applicator into the dye mixture, then wipe off excess on the rim of the container. You want it saturated but not dripping wet for controlled application.
Use smooth, long brushstrokes from top to bottom of the head to apply the dye. Slowly work around the entire head, covering all areas but not over-brushing any single spot.
Overlap your strokes to blend the dye together into a cohesive layer. Keep your strokes straight and even without streaking in circles.
Pay special attention to fully saturating inside curves and crevasses while avoiding excessive pooling in pockets. You want the color even across high and low spots.
On your first coat, it’s okay if some areas appear lighter or thinner. Simply reapply additional thin coats to build up even color density.
When dyeing a solid color, transparency on the first coats is normal as the dye gradually saturates the plastic. Be patient and keep the coats thin.
Once the base color is established, start being more deliberate with your brush strokes to even out color variations.
If any sections start to look too dark, avoid rebrushing those areas on subsequent coats. Just focus dye on light patches until everything matches.
Resist the temptation to try and cover fully in one thick coat. The excessive dye will run and puddle unevenly. Thin coats are the key!
Allow each coat to fully dry before applying the next. This prevents colors from bleeding together and maintains definition.
While dyeing, step back occasionally and examine the head from all angles. Turn it to identify any spots needing more dye for an even look.
With some care and patience, you’ll be rewarded with a pro-worthy custom colored lacrosse head using careful brush application and thin controlled coats.
Avoiding Splotches and Blotchiness
Nothing ruins a cool custom dye job like splotchy uneven color. Luckily, this frustrating issue can be avoided with a few smart techniques.
The number one cause of blotchiness is applying dye too thickly in some areas. The pooling dye soaks in differently than thinner areas, creating obvious light and dark patches.
Prevent this by maintaining a thin, even coat across the entire surface. Don’t overload your brush or allow drips and runs.
Always apply dye on clean plastic for consistent absorption. Any oily residue or dirt prevents dye from penetrating fully, leaving unsightly light spots.
Stick to long smooth brushstrokes in the same direction without circling back over wet dye. Let each thin coat fully dry before adding more.
Another culprit causing uneven dye absorption is variation in the plastic surface. If you sanded or scuffed some areas more than others, these rougher textures will grab more dye.
Try to prep the head evenly for smoothness. On molded heads with sharp texture changes, you may have to deliberately adjust dye density across different areas.
Be extra diligent dyeing inside curves and crevices. It’s easy for excess dye to puddle in these spots, creating darker lines if you’re not careful.
By maintaining control of your brush strokes and thinning coats, you can master the art of smooth, even dye coverage for stand-out lacrosse style.
Letting Each Coat Dry Before Adding Another
Achieving rich, evenly saturated color when dyeing your lacrosse head requires careful application of thin, multiple coats. But it’s just as important to let each coat fully dry before adding the next.
The patience to allow proper drying between coats prevents colors from bleeding together for a blotchy, muddled look.
After brushing on a thin layer of dye, set the head aside and give it at least 1-2 hours before recoating. Provide good air circulation to accelerate drying.
Test if the coat is fully dry by lightly touching the surface with your gloved finger. If any dye transfers or smudges, it needs more time before recoating.
You may be tempted to rush and quickly add more dye while the last coat is still tacky. But this pulls up the previous coat, creating uneven tonal shifts.
When recoating over fully dried dye, the new layer bonds separately for true color building. Rushing this process together results in muddled dark splotches.
If you’re aiming for an ombre fade effect, you can intentionally recoat areas while still partly wet. The colors will flow together for blended oomph.
But for uniform solids or sharp camo contrasts, strictly separate your colors with drying time. Avoid any wet on wet blending.
Be extra sure to follow drying times when using darker dye tones. The high pigment density has a stronger effect muddying lighter underlying coats if not fully set.
Bright warm hues like reds, oranges and yellows contain less concentrated pigment. You can push shorter drying times without significant blending or muddiness between coats.
But deep shades like blues, greens, purples, and blacks look much cleaner when given proper drying windows between layers. Don’t rush these darker dyes.
Get in the habit of checking your work after a few coats. If edges start looking blurred or colors appear muddy, you need more drying time between layers.
With patience and discipline, you’ll be rewarded with vivid dimensional color. Just remember – dry, dry, dry between coats!
Achieving an Even Color Saturation

The mark of a perfectly dyed lacrosse head is when no area looks darker or lighter – just smooth, uniform color saturation.
Achieving this level of dye consistency takes planning and a methodical coating approach. Here are some tips:
– Always start applying dye in the same spot and direction to ensure coverage. Work top to bottom or side to side in orderly strokes.
– Apply the same number of strokes per section before moving on. This prevents overbrushing some parts.
– Visually divide the head into sections to track coverage. Tick off each section as you complete it.
– Look for unevenness against the light. Darker areas are getting too much dye accumulation.
– Feather out borders of darker sections by brushing toward the lighter area and tapering off.
– For extra insurance, do your final coats spraying dye instead of brushing. Fine mist coats ensure even penetration.
– Change directions and rotate head on final sheer coats to get any last thin patches.
With a systematic dyeing approach, you’ll be amazed at the smooth uniform color possible. Just take your time and stay consistent!
Alternating Dye Colors For A Unique Look

While dyeing your entire lacrosse head a solid color definitely makes a statement, alternating colors takes it to another level. With some creative planning, you can dye unique patterns for your custom head.
Start by visually dividing up different sections of the head you want to dye separately. You can create stripes, color blocks, geometric patterns, or freehand squiggles.
Use pieces of tape to mask off the sections you don’t want dyed on each round. Carefully apply the first color only within the exposed areas.
Let the first color fully dry, then mask off different sections and apply your second hue. Repeat the process, alternating colors to build up the pattern.
When transitioning colors, overlap the dye coats slightly on the dividing line. This prevents any uncolored gaps between sections.
You can get really creative alternating specialty dyes like neon, glitter, glow-in-the-dark, or even blacklight reactive colors.
Just make sure to thoroughly mix each separate dye bath to ensure color consistency across coats. Pre-label all your mixtures.
When designing your alternating pattern, consider how the strings will intersect the colors. Simple color fades across the scoop look clean.
Stay organized keeping colored sections clearly defined throughout the process. Things get muddy quickly if dye starts bleeding together.
An alternative to sharp color blocks is slowly blending and fading colors into each other. Create ombre or tie-dye effects.
Try twisting the head and securing with elastic bands before dyeing to get wild marbled color variations.
You can also crumple plastic sheeting around the head while dyeing forspline wave patterns. Get creative!
With some planning and prep work, alternating dye techniques let you showcase team colors, outrageous neons, or funky fade effects for next-level lacrosse flair.
Color Combinations to Try
Not sure where to start with alternating color patterns on your dyed lacrosse head? Here are some stylish combos to inspire your creativity:
- School colors – Show school pride dyeing opposing blocks in your colors.
- Primary colors – Bold red, yellow and blue in stripes or sections.
- Neons – Try neon pink and green for an electric look.
- Pastels – Soft hues like lavender, mint, and peach.
- Nature colors – Earthy tones like sage green, clay red and brown.
- Anything goes! – Mix wild colors like orange, purple and metallic gold.
The possibilities are endless when you start alternating creative colors on your lacrosse head. Break outside the norm and establish your unique style and skills on the field.
Using Lacrosse Mesh Tape For Crisp Lines
Dyeing unique color block patterns on your lacrosse head requires keeping the colors separate. Masking tape can work, but lacrosse mesh tape does an even better job of creating super crisp divided color lines.
Lacrosse mesh tape is designed to adhere securely to composite sticks and heads (though temporarily). This makes it ideal for dye masking purposes.
The soft stretchy texture also conforms smoothly around curved surfaces without lifting or allowing dye seepage.
Regular masking tape tends to peel away from slick plastics with manipulation. Dye can creep underneath, resulting in fuzzy blurred color transitions.
Pre-wrap the areas you want to keep clean with 1-2 layers of mesh tape pressed down firmly. The elastic grip helps it hug contours tightly.
Use a ruler or level when marking straight tape lines to keep sections geometrically perfect. Crisscross small sections for cool harlequin layouts.
Consider alternating the tape direction with each new color to reduce buildup. Too many layers can inhibit dye absorption into the plastic.
For organic flowing lines, apply tape strips while twisting the head gently. The mesh conforms smoothly to the complex curves.
Make overlapping slits in areas where tape sections meet, then tightly overlap and press down. This prevents any gaps dye could seep under.
Check all edges have full contact after applying tape. Reseal any lifted areas by rubbing firmly to maximize adhesion before dyeing.
Remove the tape immediately after applying each color and drying to prevent bonding. Any residue is easily peeled off after dyeing.
With strategic mesh tape use, you can create color blocks, stripes, lightning bolts, numbers and any pattern you can imagine. The results will come out super crisp!
Considering a Clear Coat Finish
Once your lacrosse head dyed masterpiece is complete, you may want to consider applying a clear sealant finish for extra protection and shine.
A clear coat adds a protective barrier against scuffs, abrasion, and weathering from sun and moisture exposure.
Without a finish, the dye bonds directly to the exposed plastic. This keeps the colors vibrant initially, but direct wear gradually fades and scuffs the dye over time.
A thin clear top coat binds to the dye layer underneath, taking the brunt of wear and scratches to keep the colors pristine.
Clear finishes also provide UV protection. Dye molecules break down over prolonged sun exposure. A UV barrier layer maintains color integrity season after season.
The right clear coat adds a glossy wet look that makes colors really pop. Matte sealants offer more subtle protection without shine.
Just be sure to apply thin even coats following the product directions. Heavy pooling clear coats will run and ruin the underlying dye job.
Consider a fast-drying lacquer or enamel spray for convenience. Or brush on a clear acrylic sealer for maximum control over coating thickness.
With a protective clear layer, your labor of love lacrosse masterpiece will last for many seasons to come!
Avoiding Drips By Working Slowly

A perfectly smooth, even dye job on your lacrosse stick can be ruined by fast sloppy work resulting in drips, puddles, and runs. The key is taking your time with slow, careful brush strokes.
It’s tempting to rush through dyeing to get to the finished product faster. But working too quickly inevitably leads to mishaps.
When brushing on dye, be deliberate with your strokes. Move the brush slowly and steadily while gently pressing down for solid contact.
Quick flicks of the wrist cause drips as excess dye flings off the saturated brush. Keep the movements controlled.
Work methodically around the head section by section. Don’t rapidly jump from one area to another haphazardly.
Stay focused on the section at hand. Complete full top-to-bottom strokes before moving your attention elsewhere.
Rushing causes unevenness as you forget where you left off and overbrush some areas while under-coating others.
After finishing a section, pause and look over your work before moving on. Check for any drips or unevenness you may need to smooth out in that area.
When rotating the lacrosse head to access other sides, avoid sudden motions. Keep the head steady and move it intentionally to prevent drips.
Take breaks between coats to examine your work up close. Closely inspect for any drips or bleeds you may have missed in your haste.
Fix drips while the dye is still wet by gently dabbing with a paper towel or brushing additional dye around the edges to blend.
Once dried fully, drips can be sanded down smooth for re-coating if needed. It’s better to take it slow and avoid them altogether.
By forcing yourself to slow down, your lacrosse dye job will come out smooth as can be. Drip-free perfection just takes patience!
Tips for Dyeing Sidewalls
The angled sidewalls on a lacrosse head present some unique challenges for dyeing. Here are some tips to get clean, consistent color results.
- Use foam brushes to get into the side grooves. Stiff bristles can cause drips.
- Rotate the head as you dye so liquid doesn’t pool at the bottom of panels.
- Wrap tiny foam blocks with plastic to hold sidewalls horizontal while dyeing.
- Hang head vertically and dye sidewalls in sections from top down.
- For solid color, alternate right and left sidewalls between coats.
- Use thinner coats on sidewalls since dye can’t pool as readily.
Take it slowly paying close attention to sidewall coverage. The flatter surface shows imperfections easily. But with care, your skills will be on display from all angles!
Rinsing The Head To Remove Excess Dye
After immersing your lacrosse head to dye it, the final step is a thorough rinse to wash away any leftover dye from the surface. Proper rinsing ensures vivid colors and prevents messy transfers.
Move the freshly dyed head directly from your dye bucket to a sink or outdoor hose. Use a spray nozzle on gentle setting for controlled rinsing.
Carefully angle the head to allow excess dye to drip back into the bucket before rinsing. This recovers and saves unused dye for your next project.
Start rinsing the scoop out first, using your gloved hands to gently rub away residual dye. Rinse inside curves thoroughly.
Gradually work your way around the entire head surface, lightly massaging to displace lingering dye from pores and textures.
Avoid using hard pressure when rinsing, as this can pull up freshly adhered dye you want to keep. Just light passes to wash dye away.
Check for any kinda of drips or splashes on the plastic that you may need to spot clean with extra spraying focus and rubbing.
Rinse with warm water initially to efficiently flush dye away. Cooler final rinse water helps seal in the color.
Make sure all foam, bubbles and traces of dye runoff are completely cleared before removing from the rinse station.
You may need to periodically swap out rinse water if it becomes too saturated with dye. Keep rinsing until water runs completely clear.
Once confident all residual dye is removed from surfaces, set head on an absorbent rag or paper towels to air dry. Blot gently to soak up drips.
Thorough rinsing ensures your custom lacrosse colors stay bold and brilliant for many games of play!
Troubleshooting Dye Bleeding and Fading
No matter how careful your technique, occasionally dye jobs don’t turn out perfectly. Here are some common dye issues and remedies:
- Bleeding colors – Allow more drying time between coats
- Blurring details – Use less water diluting dye mixture
- Spotty coverage – Apply thicker or additional coats
- Muddy colors – Don’t overlap coats too quickly before drying
- Fading – Avoid direct sun exposure, re-dye annually
- Chipping or peeling – Lightly sand before reapplying dye
Don’t get discouraged with minor hiccups – touch up trouble spots and your custom lacrosse swag will be back on point in no time!
Clearing Clogged Holes With A Paperclip
One frustrating issue that can happen when dyeing your lacrosse head is small holes becoming clogged with dye. A simple paperclip makes the perfect tool to clear them out for stringing.
During the dye process, it’s easy for excess liquid dye to seep into sidewall holes and other openings. As it dries, the dye bonds and creates a plug.
If you try to string or screw on hardware, the clogs prevent proper assembly. The head may also rattle with dried dye debris inside.
Skipping this step and forcing hardware into blocked holes can crack and split the plastic around holes. Always clear them first.
Straighten out a large paperclip and gently insert the tip into any blocked openings. Carefully scrape and twist to dislodge the dried dye.
The stiff wire of a paperclip is thin enough to clear out the hole without scratching or damaging the plastic sides.
Keep some scrap paper underneath to catch any dye bits cleaned out. You don’t want to make a bigger mess!
An alternative to a paperclip is using a toothpick. Just be very gentle with the pointed end to avoid digging into plastic.
Don’t use anything wider than holes like screws or screwdrivers. Forcing wider objects will crack open the holes.
Q-tips can also work to swab out dye clogs if the cotton tip fits. Twist it around for full 360 degree cleaning.
For smaller weep or vent holes, use a thin strand of wire or guitar string bent at the end. Carefully hook and pull out any blockages.
Prevent future clogging by covering all holes with tape prior to dyeing your lacrosse head. Just don’t forget to remove it afterwards!
With some patience and a handy paperclip, you can make sure your vivid new lacrosse colors don’t get messed up by stubborn dye clogs.
Starting Off With Lacrosse Head Test Strips

Trying out new dyeing techniques on your lacrosse stick can seem nerve-wracking. Test strips let you experiment to gain confidence.
Use a leftover scrap of plastic mesh or head material if you have it. Or cut thin strips from a plastic bottle to test on.
Tape off sections along the strip and practice dye techniques like:
- Varying brush strokes
- Color blending
- Dye mixtures
- Alternating colors
- Fading and ombre
Trying test strips teaches you how different dyes interact with the plastic and each other. You can gauge optimal drying times and layering as well.
Troubleshoot issues like bleeding, muddiness, and blotchiness on scraps before tackling your actual lacrosse head.
Once you nail down the techniques, replicating the process on a head will be smooth sailing. Don’t be afraid to experiment!
Test strips build confidence and skill for beautifully dyed main projects. It’s painting by numbers, just with dye and plastic instead of paint and canvas!
Allowing The Head To Dry Completely
After putting in all the work prepping, dyeing, and rinsing your lacrosse head, it’s crucial to let it dry fully before reassembling or playing with it. Rushing drying can ruin your efforts.
Even if the dyed head looks dry on the surface, moisture and dye chemicals can still be trapped in microscopic pores in the plastic.
Assembling or stringing too early can transfer wet dye onto strings, handles, or your hands leaving stained messy smears.
Set the freshly rinsed head on a rag or paper towels in a well ventilated area out of direct sunlight. Turn periodically to allow all sides to dry evenly.
Outdoors on a breezy dry day works best for quick evaporation. Avoid drafty spots that could kick up dust onto the tacky lacrosse head.
If needed, you can gently blot wet areas with a clean rag. But avoid rubbing the surface before totally dry or you may pull up dye.
Expect drying to take at least 6-12 hours depending on humidity. Doubling this time is ideal to be absolutely sure.
The general rule of thumb is to let it dry overnight and check the following day before handling further. Don’t rush it!
Test thoroughly for dryness before reassembly. Inspect closely for any darker “wet” spots or stickiness indicating remaining moisture.
Attach a head to a handle briefly to check for dye transfer. Immediately disassemble if any color comes off onto the shaft.
You can expedite drying with fans or dehumidifiers blowing air over the head. Just keep ambient dust away during drying.
While it requires patience, allowing full drying guarantees your artistic lacrosse dye job stays crisp and bold through seasons of play. Don’t undo all your hard work by hurrying!
Re-Dyeing Your Lacrosse Head Annually
No matter how long-lasting your lacrosse head dye job, colors will gradually fade over time. Plan to re-dye annually for like-new vibrancy.
Sun exposure, abrasion from play, and elements like dirt and moisture all slowly break down dye pigment embedded in the plastic.
You’ll notice colors becoming duller over a season of play. White heads will start showing through underneath.
Rather than let fading progress, be proactive by planning a yearly dye refreshing.
Lightly wet sanding removes the top faded layer so new dye can adhere. Then simply follow your original dye process.
Mix up fresh batches of the same colors you originally used for uniform touch up results.
With annual re-dyes, your head will always look brand new. Friends will think you get a replacement every year!
Consider it part of your pre-season lacrosse gear maintenance and upkeep. Don’t settle for fading colors.
It only takes a couple hours annually to revive your dyed lacrosse swag. Stay bold and intimidating on the field year after year!
Applying A Clear Coat For Protection
After getting your lacrosse head looking perfect with custom dye, adding a protective clear coat helps lock in color and prevent fading over time.
Without a clear top layer, dyed plastic is vulnerable to chipping, scratching, and wearing down as you play.
A thin clear coat provides a shield against damage while keeping the colors brilliant underneath.
Before applying clear coat, the freshly dyed head must be fully dry and cured. Never clear coat over damp dye.
Lightly scuffing the surface with fine sandpaper gives the clear coat something to adhere to. Just avoid abrasive grit that could scratch your design.
Clean and degrease the sanded surface using isopropyl alcohol on a lint-free rag. This preps the plastic for maximum clear coat bonding.
For best control over applying thin even layers, use an acrylic clear coat and brush it on gently.
Work methodically coating all areas of the head, maintaining a wet edge as you go to prevent drips and brush marks.
Two thin coats are better than one thick coat. Allow proper drying between layers as directed by the product.
Alternatively, rattle can clear coats are available for quick easy spray application. Just be careful not to apply too heavily.
When spraying, keep the can moving smoothly across the head to build up thin wet layers without drips.
Matte finish clear coats reduce shine while still protecting. Or choose high gloss for flashy lacrosse flair.
Properly applied clear coat keeps colors vibrant and your design work protected through seasons of rough play.
Creative Ideas For Dyeing Your Lacrosse Helmet
Ready to expand your lacrosse dye skills? Try these creative helmet dye techniques:
- Ombre fade – Gradually blend from one color to another
- Spatter paint – Flick dye from a brush for a splatter effect
- Hydrographic film – Apply colorful swirling printed film
- Detachable visor – Dye just the removable visor itself
- Stencil patterns – Cut out shapes and layers colors
- Chrome paint – Add metallic chrome silver accents
Helmet dye projects require more prep for full coverage. But the payoff is a head-turning style statement in the midfield!


