How to choose the right canopy size for your needs. What features ensure strong and sturdy construction. Which Quest canopy models offer quick and easy setup. How to properly anchor your canopy for stability. What accessories can enhance your canopy experience. How to care for and maintain your Quest canopy. Why Quest canopies are a top choice for outdoor events.
Choosing the Perfect Quest Canopy Size
Selecting the appropriate canopy size is crucial for ensuring comfort and functionality. Quest offers a range of sizes to accommodate various group sizes and purposes:
- Quest 8×8 canopy: Ideal for small groups up to 6 people
- Quest 10×10 canopy: Suitable for medium-sized gatherings up to 10 people
- Quest 12×12 canopy: Perfect for large events or parties
When considering height, the Quest 6′ canopy works well for seated areas, while the Quest 8′ canopy provides ample standing room. To determine the best size for your needs, measure your intended space and consider the number of people you’ll typically accommodate.

Sturdy Construction: The Key to Canopy Stability
A robust frame is essential for maintaining canopy stability and durability. Quest canopies offer several features that ensure strength and longevity:
- Steel or aluminum frames with reinforced stress points
- Quest Quick Flip steel frame canopy with 1-inch steel construction
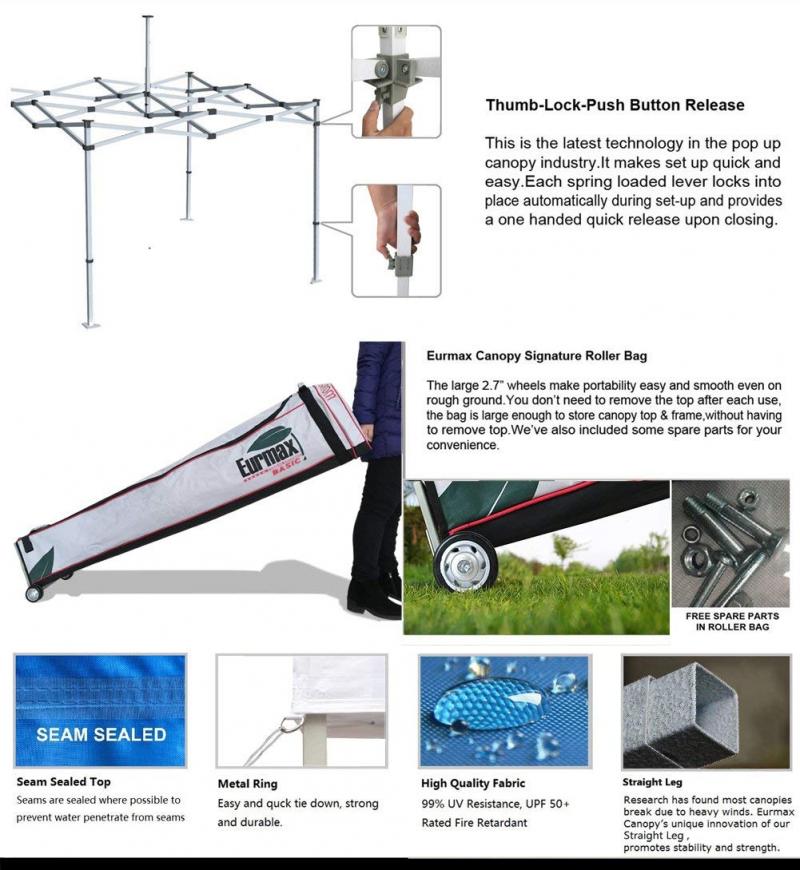
- Instant Up hub system for enhanced stability and easy setup
- Ripstop polyester canopy tops resistant to tearing
- Heavy-duty components like strong slider pull pins and steel stakes
By choosing a Quest canopy with these sturdy construction elements, you’ll enjoy a reliable shelter that withstands various weather conditions and frequent use.
Quick and Easy Setup: Quest’s Time-Saving Features
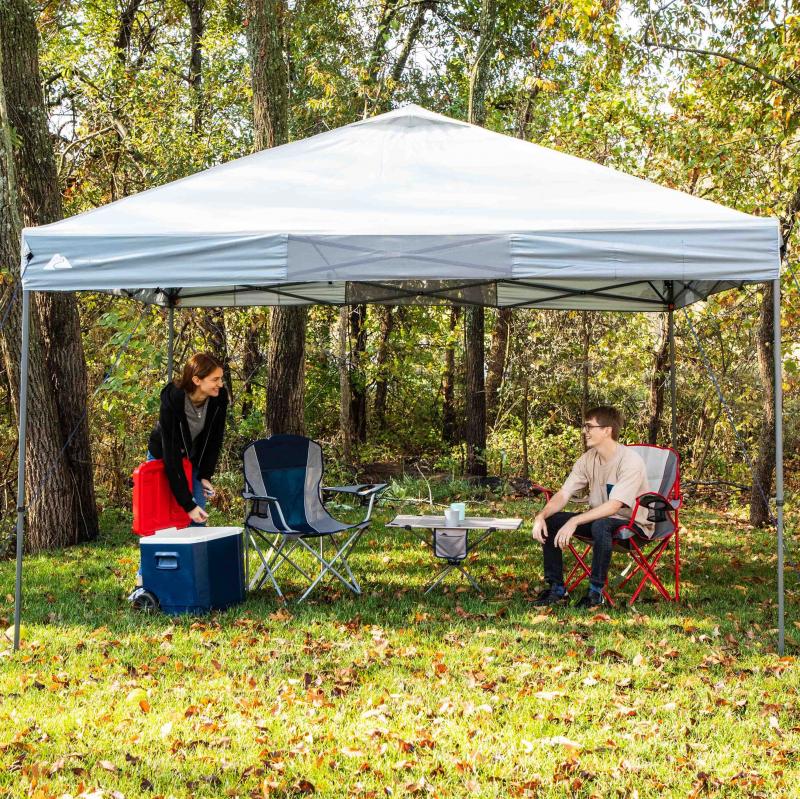
Quest canopies are designed to minimize setup time and effort, allowing you to enjoy your outdoor space sooner. Here are some features that contribute to quick and easy assembly:
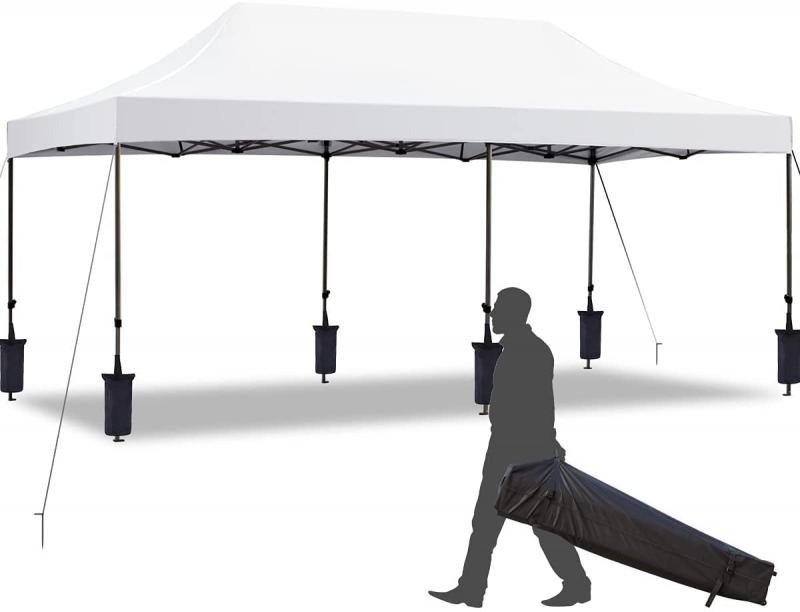
- Pop-up and “instant” canopy designs
- Push button tilt for rapid angle adjustments
- Quick Flip lever system for tool-free setup
- EZ Twist knobs for simple height adjustments
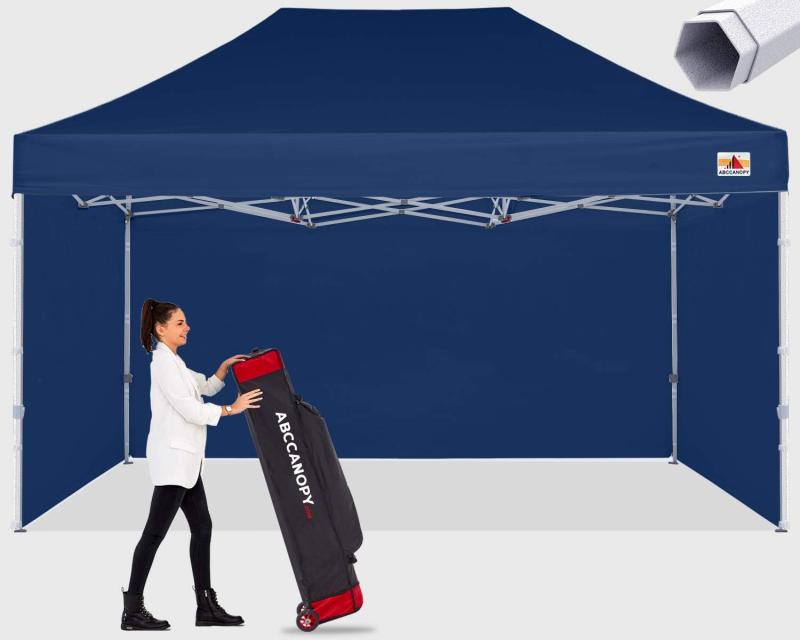
- Roller bag wheels for effortless transportation
These innovative features ensure that you spend less time struggling with assembly and more time enjoying the shade and protection your Quest canopy provides.

Enhancing Your Canopy Experience with Accessories
To maximize the functionality and comfort of your Quest canopy, consider these additional features and accessories:
- UV protection with silver-coated lining to block harmful rays
- Adjustable height legs for uneven terrain
- Enhanced ventilation systems for improved air circulation
- Sidewalls for extra protection against sun, wind, and rain
- Zippered mesh screen walls to keep insects at bay while allowing airflow
These enhancements can significantly improve your canopy experience, providing additional protection and versatility for various outdoor settings.
Proper Anchoring Techniques for Canopy Stability
Ensuring your Quest canopy remains securely in place is crucial for safety and longevity. Here are some effective anchoring methods:
- Use the provided steel stakes to secure each leg
- Employ sandbags or weight bags for added stability on hard surfaces
- Utilize guy lines and tie-downs for windy conditions
- Consider canopy wind panels to reduce wind resistance
- Place your canopy in a sheltered area when possible
By implementing these anchoring techniques, you’ll significantly reduce the risk of your canopy tipping or being damaged by strong winds.

Can you anchor a canopy on concrete?
Yes, you can anchor a canopy on concrete using alternative methods. Instead of traditional stakes, use weight bags filled with sand or water to secure each leg. You can also use specialized concrete anchors or heavy-duty strap systems designed for hard surfaces. For added stability, consider using canopy wind panels to reduce wind resistance.
Canopy Care and Maintenance Tips
Proper care and maintenance of your Quest canopy will ensure its longevity and continued performance. Follow these tips to keep your canopy in top condition:
- Clean the canopy top regularly with mild soap and water
- Allow the canopy to dry completely before storing to prevent mildew
- Inspect for any tears or damage and repair promptly
- Lubricate moving parts periodically to ensure smooth operation
- Store in a cool, dry place when not in use
- Use a protective cover to shield from dust and debris during storage
By following these maintenance practices, you’ll extend the life of your Quest canopy and ensure it remains in excellent condition for years to come.

Customizing Your Quest Canopy for Various Events
Quest canopies are versatile and can be adapted for different occasions. Here are some ideas to customize your canopy:
- Add string lights for evening ambiance at parties
- Attach banners or signs for promotional events
- Use sidewalls to create private changing areas at beach outings
- Install mosquito netting for bug-free outdoor dining
- Incorporate branded graphics for trade shows or business events
With these customization options, your Quest canopy can serve multiple purposes and enhance various outdoor experiences.
How can I personalize my canopy for a special event?
To personalize your Quest canopy for a special event, consider adding custom decorations such as fabric drapes, floral arrangements, or themed banners. You can also use removable vinyl decals or temporary paint to add names, dates, or designs to the canopy top or sidewalls. For lighting, battery-operated LED strips or lanterns can create a festive atmosphere. Remember to choose decorations that won’t damage the canopy material and can be easily removed after the event.

Comparing Quest Canopy Models: Finding Your Perfect Match
Quest offers a variety of canopy models to suit different needs and preferences. Here’s a comparison of some popular options:
| Model | Size | Frame Material | Key Features |
|---|---|---|---|
| Quest Quick Flip | 10×10 | Steel | Quick Flip lever system, Push button tilt |
| Quest Instant Up | 8×8, 10×10 | Aluminum | Instant hub system, Lightweight design |
| Quest EZ-Up | 10×10, 12×12 | Steel | EZ Twist knobs, Reinforced corners |
Consider factors such as size requirements, portability needs, and specific features when selecting the Quest canopy model that best fits your outdoor shelter needs.
Troubleshooting Common Canopy Issues
Even with high-quality Quest canopies, occasional issues may arise. Here are solutions to common problems:
- Stuck sliders: Apply lubricant to the slider mechanism
- Loose fabric: Adjust tension straps or replace worn elastic cords
- Bent frame: Gently straighten using pliers, or contact Quest for replacement parts
- Water pooling: Ensure proper tensioning and consider adding a center support pole
- Zipper problems: Clean the zipper track and apply zipper lubricant
By addressing these issues promptly, you can maintain the functionality and appearance of your Quest canopy.

What should I do if my canopy top is leaking?
If your Quest canopy top is leaking, first inspect for any visible holes or tears and patch them with a waterproof repair kit designed for tent fabrics. For general water resistance, clean the canopy top thoroughly and apply a waterproofing spray specifically made for outdoor fabrics. Ensure proper tensioning of the canopy top to prevent water pooling. If the problem persists, contact Quest customer service for further assistance or to inquire about a replacement canopy top under warranty.
Safety Considerations for Canopy Use
While Quest canopies are designed for safety, it’s important to follow these guidelines to ensure a secure experience:
- Always anchor your canopy properly, even in mild weather
- Avoid use during severe weather conditions such as thunderstorms or high winds
- Keep fire sources away from the canopy material
- Ensure proper ventilation when using in enclosed spaces
- Regularly inspect for wear and tear, replacing damaged parts promptly
- Follow weight limits and avoid overloading the canopy structure
By adhering to these safety considerations, you can enjoy your Quest canopy with peace of mind.
Eco-Friendly Aspects of Quest Canopies
Quest is committed to environmental responsibility in their canopy production. Here are some eco-friendly aspects of Quest canopies:
- Use of recyclable materials in packaging
- Durable construction that reduces the need for frequent replacements
- Energy-efficient manufacturing processes
- Options for canopy tops made from recycled materials
- Promotion of reusable canopies over disposable alternatives
By choosing a Quest canopy, you’re opting for a product that considers environmental impact without compromising on quality and functionality.
Are Quest canopies recyclable at the end of their life cycle?
While not all components of Quest canopies are fully recyclable, many parts can be recycled at the end of their life cycle. The metal frames are typically recyclable as scrap metal. For the canopy top and other fabric components, check with local recycling facilities as some may accept these materials for specialized recycling programs. Quest encourages users to explore recycling options in their area and to consider donating usable canopies to local organizations when possible, promoting reuse and extending the product’s life cycle.

Innovative Features of Quest Canopies
Quest continually innovates to improve the canopy experience. Here are some standout features:
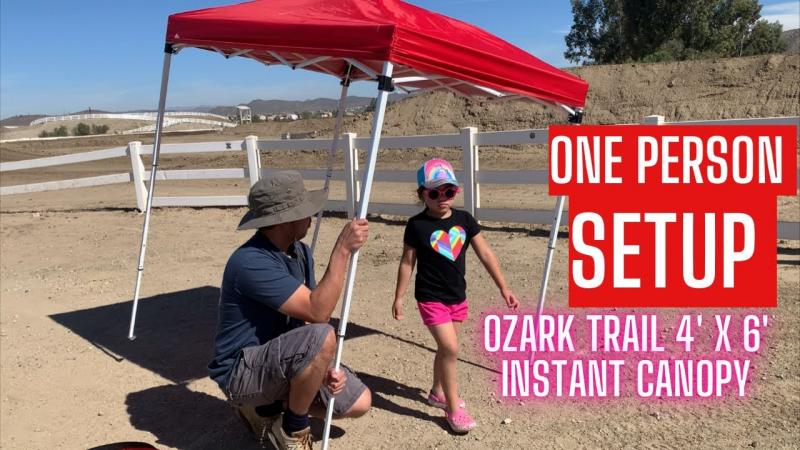
- Patented Quick Flip lever system for one-person setup
- Advanced UV protection coatings for enhanced sun safety
- Integrated LED lighting options for nighttime use
- Smart-lock technology for secure height adjustments
- Convertible sidewall systems for versatile configurations
These innovative features set Quest canopies apart, offering users advanced functionality and convenience.
Quest Canopy Warranty and Customer Support
Quest stands behind their products with comprehensive warranty coverage and customer support:
- Limited lifetime warranty on frames for original owners
- 1-year warranty on canopy tops and accessories
- Dedicated customer service team for inquiries and troubleshooting
- Easy-to-follow online resources including setup videos and FAQs
- Availability of replacement parts to extend canopy lifespan
This commitment to customer satisfaction ensures that your investment in a Quest canopy is protected and supported long after your purchase.

How do I submit a warranty claim for my Quest canopy?
To submit a warranty claim for your Quest canopy, start by gathering your proof of purchase and the product’s serial number. Visit the Quest official website and navigate to their warranty claim section. Fill out the online form with detailed information about the issue you’re experiencing, including photos if possible. Quest’s customer service team will review your claim and contact you with further instructions, which may include sending the damaged part for inspection or arranging for a replacement. Be sure to review the specific terms of your warranty to understand what is covered and for how long.
Quest Canopies for Commercial Use
Quest canopies are not just for personal use; they’re also excellent for commercial applications. Here’s why businesses choose Quest:
- Durable construction suitable for frequent use
- Customizable options for branding and marketing
- Range of sizes to accommodate various event scales
- Easy transport and setup for mobile businesses
- Professional appearance for trade shows and outdoor markets
Whether for a small business or large corporation, Quest canopies offer reliable shelter solutions for commercial outdoor events.

What are the best Quest canopy models for trade shows?
For trade shows, the Quest 10×10 Quick Flip and Quest 10×10 Instant Up models are highly recommended. The Quick Flip model offers robust steel construction and rapid setup, ideal for frequent use at various venues. The Instant Up model provides a lightweight aluminum frame, making it easier to transport between shows. Both models offer ample space for displays and come with options for custom printing on the canopy top and sidewalls, allowing for effective brand visibility. Consider adding accessories like weight bags for stability on hard surfaces and LED lighting kits for enhanced booth illumination during evening events.
Seasonal Considerations for Quest Canopy Use
While Quest canopies are versatile, adapting them for different seasons can enhance their functionality:
- Summer: Use UV-protective tops and add misting systems for cooling
- Fall: Incorporate sidewalls to block chilly winds
- Winter: Choose heavy-duty models with snow-shedding peaks
- Spring: Opt for water-resistant treatments to handle unexpected showers
By considering seasonal needs, you can maximize the use of your Quest canopy throughout the year.

How can I winterize my Quest canopy for snow conditions?
To winterize your Quest canopy for snow conditions, start by choosing a model with a steep-pitched roof to prevent snow accumulation. Add heavy-duty sidewalls to block cold winds and create a more enclosed space. Consider using a canopy heater for warmth, ensuring proper ventilation. Regularly remove snow from the canopy top to prevent excess weight. For areas with heavy snowfall, invest in additional support poles or a frame reinforcement kit. Always anchor the canopy securely, using winter-specific stakes or weights designed for frozen ground. During severe weather, it’s best to take down and store the canopy to prevent damage from heavy snow loads.
Quest canopies offer a range of features and benefits that make them an excellent choice for both personal and commercial use. From easy setup and sturdy construction to versatile customization options and eco-friendly considerations, Quest has thoughtfully designed their canopies to meet diverse needs. By following the tips and tricks outlined in this article, you can maximize the performance and longevity of your Quest canopy, ensuring countless enjoyable outdoor experiences protected from the elements. Whether you’re hosting a backyard gathering, setting up at a farmers market, or preparing for a large outdoor event, a Quest canopy provides reliable shelter with style and convenience.

Setting up a canopy can be a real struggle, with complicated assembly, not enough stability, or difficult take-down. But it doesn’t have to be that way! Quest canopies make shading and sheltering super simple with the right tips and tricks. Let’s dive into 15 easy ways you can master your Quest canopy and say goodbye to canopy frustration.
Choose The Right Canopy Size For Your Needs
First things first – make sure you get a Quest canopy that fits your needs! Will you need shade for just a few people or a large group? Consider the Quest 8×8 canopy for smaller groups up to 6 people. The Quest 10×10 canopy is great for bigger groups up to 10. And for large parties or events, check out the spacious Quest 12×12 canopy. The right size means everyone can fit comfortably underneath.
Also think about height – lower clearance Quest canopies like the Quest 6′ canopy are good for sitting areas, while taller options like the Quest 8′ canopy provide enough headroom to stand fully. Make sure to measure your space and needs before buying so you get the perfect canopy size.
Look For Strong, Sturdy Construction
A sturdy frame is crucial for keeping your Quest canopy secure and stable. Look for tough steel or aluminum frames with reinforced stress points. The Quest Quick Flip steel frame canopy uses robust 1-inch steel for maximum strength. Quest’s Instant Up hub system also makes frames super sturdy yet easy to pop up and take down.
Durability extends to other parts too. Opt for ripstop polyester canopies that won’t tear easily. And look for heavy-duty components like strong slider pull pins and steel stakes. A well-built Quest canopy will hold up well against the elements.
Make Sure It’s Quick And Easy To Set Up
Complicated assembly is one of the biggest canopy pitfalls. Save yourself time and hassle with Quest’s easy pop-up and “instant” canopies. The handy push button tilt on many models lets you adjust the canopy angle in seconds. Useful features like the Quick Flip lever system or EZ Twist knobs allow fast, tool-free setup. And roller bag wheels mean you can transport your canopy easily.
The right set up features make a huge difference in getting your canopy out of the bag and providing shade or shelter asap. Look for speedy solutions so you spend time enjoying your canopy, not fighting with it!
More Canopy Tips and Tricks
That covers the canopy basics, but there are even more tips and tricks to ensure canopy success…
- Get one with UV protection features like a silver coated lining to block harmful rays.
- Choose adjustable height legs to handle uneven terrain.
- Look for enhanced ventilation to keep air flowing.
- Sidewalls offer extra protection from sun, wind, and rain.
- Zippered mesh screen walls provide air flow while guarding against bugs.
With the right canopy features and know-how, you can avoid canopy conundrums. Quest takes the complications out of canopies with smart, intuitive designs made for hassle-free shade. Follow these canopy tips and enjoy smooth, quick setup and durable construction with your Quest. Ditch canopy frustration for shading satisfaction.
Setting up a canopy shouldn’t leave you struggling and stressed. With the right know-how, you can make your Quest canopy a breeze to set up and use. Let’s walk through 15 handy tips to master your canopy.
Look For Strong, Sturdy Construction
A flimsy canopy will leave you frustrated and fighting the frame. Look for tough, robust construction in your Quest canopy for hassle-free setup. The heavy-duty 1-inch steel frame on the Quest Quick Flip canopy provides exceptional stability. For lightweight portability but sturdy support, the Quest anodized aluminum frame is a great choice.
Reinforced stress points on the frame prevent weak spots and buckling. And durable ripstop polyester canopy tops stand up to wind gusts without tearing. The Quest pindown slider system and steel canopy stakes keep everything staked down solidly.
Pay attention to the detailed construction like robust pivot points and thick slider pull pins too. Premium materials plus reinforced engineering adds up to a sturdy, hassle-free canopy frame you can rely on season after season.
Make Sure It’s Quick And Easy To Set Up
Complex assembly instructions and difficult mechanics can make setting up a chore. Opt for smart Quest features that take the hassle out of canopy setup.
Look for tool-free adjustment knobs like EZ Twist or Flip-Lock knobs for quick height customization based on your space. The patented slider bar system on Quest models makes attaching the canopy top a breeze compared to frustrating traditional pole-sleeve designs.
Instant-up hub systems allow ultra-fast and easy popup without any complications. And Quick Flip levers let you lock the canopy frame open or closed securely in seconds. With the right Quest design features, you’ll be up and enjoying your canopy in no time.
More Canopy Tips
Here are some additional tips for canopy success:
- Look for push button tilt to easily adjust the angle
- Wheeled carry bags make transportation easy
- Water resistant tops help in rainy weather
- Vents increase airflow on hot days
With smart construction and intuitive features, Quest aims to make canopy setup and use hassle-free. Focus on sturdy craftsmanship and ease of use when picking your canopy. Then relaxing under your shelter will be a breeze instead of a chore.
Setting up a canopy can really take the fun out of your outdoor time. But it doesn’t have to be a chore with the right Quest canopy design and features. Follow these tips to make canopy setup quick, easy, and stress-free.
Make Sure It’s Quick And Easy To Set Up
Complicated assembly instructions, confusing parts, and tricky mechanics can turn your canopy into a headache. The good news is Quest offers smart design features to avoid the hassle.
Look for tool-free adjustment knobs like EZ Twist or Flip Lock that allow easy height customization without any tools. Just twist to raise or lower the canopy based on your needs. The patented pin and slider system on Quest canopies simplifies attaching the canopy top compared to traditional frustrating pole-sleeve setups.
Instant lift assist lift systems give you an extra hand during setup so one person can pop up the canopy frame smoothly and easily. Convenient carry bags with wheels make it easy to transport your canopy. And auto slider locks securely lock the slider in place without any extra effort.
With intuitive and smart features like these, you’ll be set up and relaxing under your Quest canopy in no time. No more fighting with complicated instructions or tricky connections!
More Canopy Tips and Tricks
Here are some more tips for hassle-free canopy experiences:
- Look for push button tilt for easy angle adjustments
- Choose wheeled carry bags for easy transportation
- Find canopies with vents to increase airflow
- Opt for water resistant tops for protection from the elements
With the right Quest canopy features, setup can be a cinch instead of a chore. Focus on quick, intuitive designs that let you start enjoying your canopy right away. Ditch the canopy hassle and opt for fast, easy setup.
Setting up a canopy is often a struggle, but with the right tips and tricks, your Quest canopy can be a breeze. Here are 15 ways to make canopy setup easy and enjoyable.
Get One With UV Protection Features
Sitting under a canopy on a sunny day can still expose you to harmful UV rays if the canopy doesn’t have UV protection. Make sure to choose a Quest canopy with specialized UV blocking features.
Look for a silver polyester canopy lining, like on the Quest Q64 10×10 canopy. This silvery coating helps reflect UV rays away from under the canopy. You can also find options like the Quest dual vent canopy with built-in sun screens on the vents to block extra UV.
For the most complete UV protection, opt for an accessory sidewall or screen room to fully enclose your canopy. Keep the intense sunshine at bay and relax in the shade with built-in UV blocking features.
Choose A Canopy With Adjustable Height Legs
Dealing with uneven ground can be a pain during canopy setup. Make sure your Quest canopy has adjustable leg heights to handle any terrain.
Look for options like the Quest Q60 10×10 with adjustable telescoping legs. This allows each leg to be customized based on the ground so your canopy stays level. Or choose the Quest Easy Up Instant Shelter with extenders for uneven sites.
Adjustable legs make setup smooth and frustration-free, even on unlevel ground. Get the right leg height dialed in for wherever you set up.
More Canopy Tips
Here are some additional tips for canopy success:
- Find canopies with good ventilation
- Opt for easy transport with wheeled carry bags
- Choose sidewalls for more sun, wind, and rain protection
- Look for tool-free adjustment knobs for easy customization
With the right features and know-how, your Quest canopy can be a simple joy to setup instead of a complicated struggle. Focus on smart, intuitive designs and make your canopy the hassle-free oasis you want it to be.
Setting up a canopy can be a real battle, but your Quest canopy can be smooth and simple with the right know-how. Let’s go over 15 tips to master your canopy setup.
Choose A Canopy With Adjustable Height Legs

Dealing with uneven terrain during setup can quickly lead to frustration and hassle. Make sure your Quest canopy has adjustable leg heights to handle any type of ground surface.
Look for options like the Quest Q60 10×10 with telescoping legs that adjust to your ideal height. This allows each leg to be customized based on the terrain so your canopy stays level. The Quest Easy Up Instant Shelter also offers handy extenders to accommodate uneven setup sites.
Adjustable legs take the pain out of working with unlevel ground. Get the perfect leg height dialed in quickly and smoothly no matter the location.
Look For Canopies With Enhanced Ventilation
Sitting under a canopy on a hot day can get stuffy and uncomfortable without proper airflow. Seek out Quest canopies designed with cooling ventilation.
Options like the Quest Q80 10×10 canopy offer large mesh roof vents to let hot air escape and bring in refreshing breezes. Or choose a canopy with sidewall vents like the Quest Sidewall with Mesh to increase air circulation from all angles.
Proper ventilation will let you enjoy the shelter of your canopy without becoming a hotbox on sunny days. Opt for smart airflow features.
More Tips for Canopy Success
- Get UV protection with silver-coated canopy linings
- Choose wheeled carry bags for easy transport
- Find adjustable height legs for uneven ground
- Look for quick tool-free adjustment knobs
Stay cool and breezy while being protected from the elements with a well-ventilated Quest canopy. Focus on airflow and you can turn your canopy into a comfortable oasis.
Setting up a canopy can be a real pain, but your Quest canopy can be a breeze with the right tips. Here are 15 ways to master your canopy setup.
Look For Canopies With Enhanced Ventilation
Sitting under a canopy on a hot sunny day can get extremely stuffy without proper airflow. Make sure to choose a Quest canopy designed for maximum ventilation.
Options like the Quest Q80 10×10 offer large mesh roof vents that allow hot air to escape while letting in refreshing breezes. The Quest Sidewall with Mesh provides sidewall vents to increase air circulation from multiple angles.
For the ultimate in airflow, go for a Quest Screen House which uses screen panels on all sides to maximize ventilation. Proper cooling and ventilation will make your canopy an oasis instead of a hotbox.
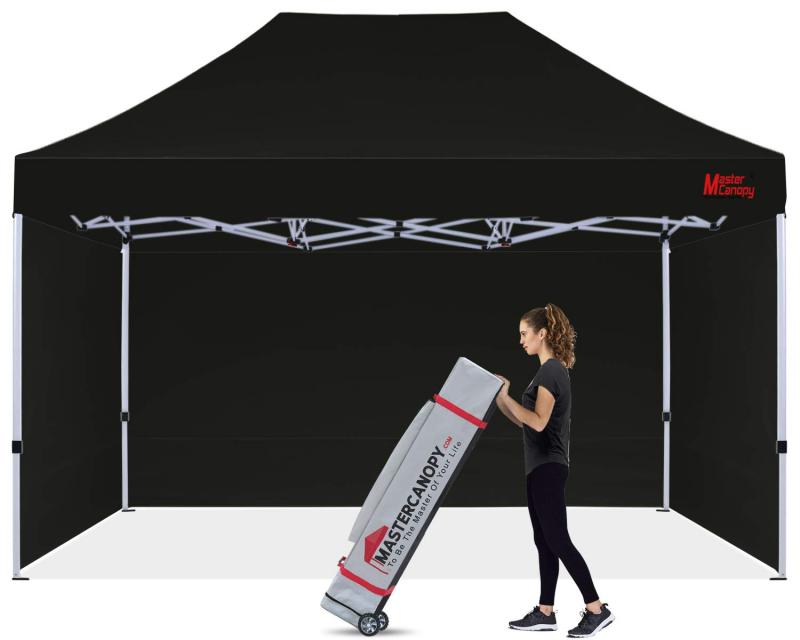
Get One With A Roller Bag For Easy Transport
Lugging around a heavy and awkward canopy is no fun, so look for built-in portability. Quest offers wheeled roller bags to easily move your canopy.
The Quest Wheeler Carry Bag converts into a rolling duffel with a pull-out handle and smooth wheels. Other options like the Quest Transport Right Light Kit include both a roller bag and oversize duffel.
Quickly roll your canopy right to the setup spot without straining yourself. Wheeled carry cases take the hassle out of transportation.
More Canopy Tips
- Find adjustable leg heights for uneven terrain
- Look for UV protection features
- Choose tool-free adjustment knobs for easy setup
- Pick sidewalls for extra sun and rain protection
Prioritize ventilation in your Quest canopy purchase and ensure cool comfort even in hot conditions. Stay breezy and relaxed in the shade.
Setting up a canopy can be a major chore, but your Quest canopy can be a piece of cake with the right setup tricks. Here are 15 tips to master your canopy.
Get One With A Roller Bag For Easy Transport
Carrying a heavy, bulky canopy any distance quickly gets tiring and stressful. Make your life easier by getting a Quest canopy with a handy roller bag for no-fuss transport.
Options like the Quest Wheeler Carry Bag convert into a rolling duffel bag with smooth-gliding wheels and an extendable pull handle. The Quest Transport Right Light Kit also includes both a duffel and wheeled roller bag.
Simply pull your canopy along instead of straining yourself to carry it. Roller bags take the headache out of getting your canopy to the perfect spot.
Choose Sidewalls For More Protection
The roof of your canopy only provides so much shelter from the elements. Add protective Quest sidewalls to fully block sun, wind, and rain.
Sidewalls like the Quest Q310 Sidewall quickly attach to your canopy frame to enclose the space. For bug protection plus airflow, go for the Quest Mesh Sidewall. Sidewalls provide customizable protection when you need it.
Control your canopy’s environment and comfort with shielding sidewalls. Keep the party going inside your protected canopy oasis.
More Canopy Tips
- Find canopies with good ventilation
- Adjustable legs for uneven ground
- UV protection features like silver linings
- Tool-free knobs for easy adjustments
Enjoy breezy hassle-free transport and setup with the right Quest canopy features. Take the struggle out of your canopy adventures.
Setting up a canopy can be a real battle, but it doesn’t have to be with the right Quest canopy features and know-how. Let’s go through 15 tips to make your canopy a breeze to setup and use.
Choose Sidewalls For More Protection
The roof of your canopy only provides partial shelter from the outdoor elements. Add Quest canopy sidewalls when you need more customizable protection.
Sidewalls like the Quest Q310 attach easily to the frame to fully enclose your canopy space. The Quest Mesh Sidewall offers bug protection while allowing airflow. Sidewalls let you control your canopy environment.
Block bright sun, gusty winds, or sudden rainfall while keeping the party going inside your protected canopy oasis. Sidewalls take your shelter to the next level.
Look For Easy To Use Folding Truss Systems
Complicated, confusing canopy frames quickly lead to frustration. Seek out intuitive Quest frames designed for hassle-free setup.
Quest’s patented Rapid Truss sliding system enables easy unfolding and folding with quick slider locks. The Fast Fold truss design ensures simple breakdown and storage. Automatic slider locks provide effortless security.
Smart truss engineering eliminates canopy confusion. Unfold and fold your canopy frame seamlessly without any complications.
More Canopy Tips
- Wheeled carry bags for easy transport
- Ventilation features to stay cool
- Adjustable legs for uneven ground
- UV protection with silver linings
Stay sheltered from the sun, wind, and rain with secure sidewalls. Then enjoy easy folding with hassle-free Quest canopy frames.
Setting up a canopy can be a chore, but your Quest canopy can be smooth and simple with the right features and tricks. Here are 15 tips to master your canopy.
Get A Canopy With Zippered Mesh Screen Walls
The canopy roof alone leaves your space exposed. Add Quest screen walls for air flow along with protection.
The Quest Mesh Sidewall provides zippered mesh screens to let breezes in while keeping bugs out. For full coverage, opt for the Quest Q319 Screen Room with mesh panels on all sides.
Screen walls block harsh sunlight and winds while preventing a stifling, confined feel. Get the best of both worlds with sheltered ventilation.
Look For Easy To Use Folding Truss Systems
Complicated frames that are tricky to fold and unfold can quickly lead to canopy frustration. Look for smart Quest features that simplify the process.
Quest’s Rapid Truss sliders allow easy unfolding with quick locks for security. The Fast Fold truss design enables simple and smooth folding for storage and transport.
Intuitive truss engineering eliminates the complications and headaches. Setup and take down your canopy seamlessly without any hassle.
More Canopy Tips
- Roller bags for easy transportation
- Ventilation for cooling breezes
- Sidewalls for extra protection
- Adjustable legs for uneven terrain
Beat the heat and bugs with sheltered mesh walls. Then enjoy foolproof folding and storage with smart Quest truss designs.
Look For Easy To Use Folding Truss Systems
Setting up a canopy tent for an outdoor event or gathering can be a real struggle, with complicated poles, unstable legs, and fabric that just won’t go on right. But it doesn’t have to be that way! Quest canopies are designed for quick and easy setup with innovative folding truss systems and thoughtful features. Follow these 15 quest canopy tips and tricks, and you’ll be able to get your canopy ready to provide shade and shelter in a snap.
1. Choose a Canopy with a Slide-On Top
Look for a Quest canopy that has a top the slides onto the frame, rather than one you have to stretch over the top. Slide-on tops are much easier to get on straight and tight. The best Quest canopies will have tops with sleeves built into the fabric that slide right onto the truss framework. This takes all the struggle out of getting the canopy cover positioned.
2. Get One with Pre-Attached Legs
Many Quest canopies come with legs that are already attached to the canopy frame. This means you don’t have to mess with attaching the legs yourself, which can be confusing and time-consuming. Just unfold the legs and you’re ready to go. If you do need to attach the legs, look for push pin or spring button connections for fast and tool-free assembly.
3. Folding Truss Framework Sets Up Fast
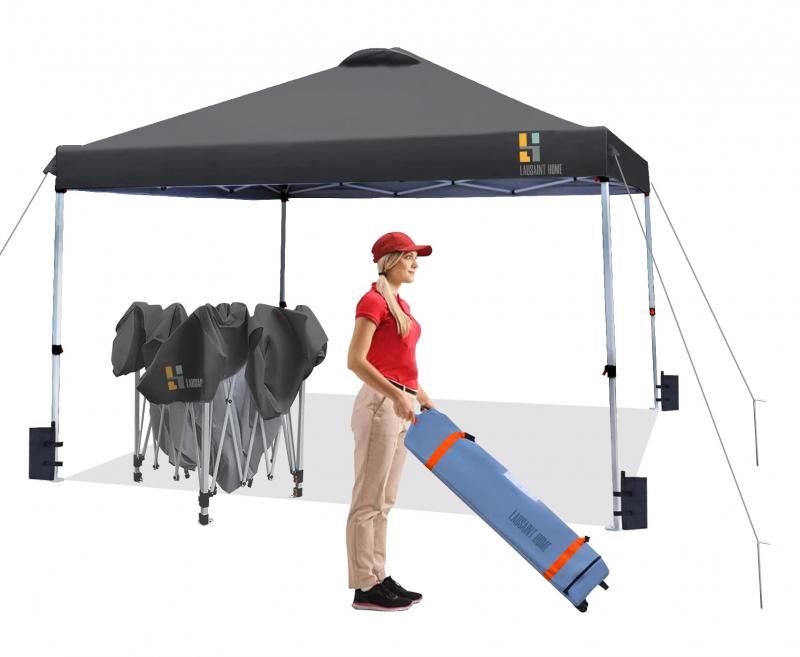
The best innovation that makes Quest canopies so easy to set up is the folding truss framework. The sturdy metal rods fold up accordion-style into a compact bundle. When you’re ready to set up, just unfold the framework and lock the truss sections into place. The whole canopy frame pops open in seconds! The folding design also makes the canopy super easy to take down and transport.
4. Adjustable Peak Height
Look for a canopy that allows you to adjust the peak height as needed. Quest’s unique adjustable peak lets you set the height anywhere from 8 feet up to 12 feet. Need more headroom and space? Crank it up. Looking for shade from low sunlight? Lower the peak. This versatility really comes in handy for tailoring the canopy to your specific needs.
5. Waterproof 600 Denier Canopy Fabric
Quest canopies feature durable 600 denier polyester canopy fabric designed to be waterproof and resistant to UV rays. The fabric tops provide excellent shade from the sun on hot days. When the weather takes a turn for the worse, the waterproof construction ensures you and your belongings stay dry if it starts to rain or sprinkle.
6. Rust-Resistant Powder Coated Framework
Don’t want to deal with a rickety, rust-prone canopy frame? Quest truss frameworks feature premium powder coated steel that resists rust, corrosion, peeling, and cracking. The smooth finish also makes the frame extra strong yet lightweight. No more worrying about the frame flaking apart after being left out in the elements.
7. Look for Sturdy Bolts and Pins
The high-quality details make a difference in how long your canopy will last and how frustration-free setup can be. Quest uses heavy-duty bolts and pins to connect truss sections, rather than plastic parts that can break. Sturdy bolts and pins make the canopy frame more stable and reinforced.
8. Get One with a Roller Bag
For super easy transport and storage, look for a Quest model that comes with a roller bag. You can pack up the canopy in the bag and conveniently roll it anywhere. No more awkwardness lugging a huge canopy box or bag. Quest’s roller bags have smooth-rolling wheels and a handle that makes moving the canopy around a breeze.
9. Look for Wind Vents to Reduce Wind Stress
Quest canopies designed for windy conditions have built-in wind vents that help minimize wind stress on the canopy. Strategically placed vents allow gusts of wind to flow through rather than causing the canopy to be pushed around. Models like the Quest Q86 offer excellent stability in winds up to 28MPH when using the included ballast bags.
10. Get One with a Truss Storage Bag
For keeping all the pieces together, choose a Quest model that has a storage bag designed specifically for the truss framework. The bag keeps the frame compact, protected, and contained. When you’re ready to set up, just remove the tightly packed frame from the bag and start unfolding.
11. Look for Lots of Height Adjustments
Get the most versatility from your canopy by choosing a model with multiple height adjustments. Quest canopies offer up to 5 height settings in many models. Dial in the perfect height for your needs without being limited to pre-set positions. Anywhere from a super low profile to fully standing height, you’ve got it!
12. Get One with a Long Warranty
Choose a canopy from a reputable brand like Quest that offers a long warranty. Many Quest models come with an impressive 5-year warranty. That shows the company stands behind the quality and durability of their products. If you ever do have an issue with the frame, fabric, or other components, you’re covered.
13. Anodized Canopy Frames Prevent Corrosion
Look for canopy frames made out of anodized metals. Anodization is an electrolysis process that converts the metal surface into a protective oxide layer, preventing corrosion. Quest uses anodized aluminum in premium canopy frames. This treatment makes them highly resistant to corrosion and wear despite outdoor exposure.
14. Tool-Free Assembly

Who wants to hassle with tools when setting up a canopy? Not me! Look for tool-free assembly when it comes to attaching the canopy legs, corners, and other components. Quest uses intuitive push pin and thumb screw fasteners so that tools are not required.
15. Make Use of Accessories
Accessorize your canopy to make it even more useful. Some great Quest accessories include sidewalls to block wind, rain, and sun; weighted roller bags for stability in windy conditions; tent packages that fully enclose the canopy; hanging interior lights; side shades; storage bags and cases; and replacement parts. Take advantage of all the available add-ons tailored for your canopy model.
With these tips in mind, you can choose the perfect Quest canopy tent that will take the headaches and hassles out of setting up. Look for their innovative folding truss system, slide-on top, sturdy and corrosion-resistant frames, handy accessories, and thoughtful features that make canopy setup a breeze. With a Quest canopy, you’ll be ready to provide instant shade, shelter, and space at your next outdoor event or gathering. No more setup struggles – just fast and easy canopying every time!
Get One With Weight Bags For Stability
Setting up a canopy tent should be easy, not a struggle. With some simple tips and tricks, you can have your Quest canopy set up smoothly and securely in minutes. Having the right canopy setup for your needs is key to getting the most out of your canopy.
One of the most useful canopy accessories is weight bags. These bags, filled with sand or water, provide stability by weighing down the canopy legs. Place a bag over each leg once extended and your canopy will stay firmly planted. Weight bags are a must if setting up in windy conditions. They also help give that extra stability on uneven ground. No more wobbly canopies!
Watch Those Leg Locks
Quest canopies come with leg locks that securely lock the legs in place once extended. Make sure these locks are properly engaged every time you set up your canopy. An unsecured leg could lead to the entire canopy collapsing, so double check those locks are clicked into place.
Similarly, be sure to unlock the leg locks before attempting to take down the canopy. Forcing the legs to retract without disengaging the lock can damage the mechanism. Get into the habit of unlocking before taking down.
Mind the Cross Bars
The telescoping cross bars that stretch across the canopy roof need care when setting up too. Make sure the locking pins are fully inserted at each end of the cross bars. These pins ensure the bars are held at full extension. Failure to secure them could mean a drooping canopy roof.
Don’t force the cross bars to retract during take down if they feel stuck. This usually indicates the locking pins are still engaged. Double check that the pins are disengaged before trying to push the bars back in.
Anchor It Down
In windy spots, use the anchor holes and guy lines to secure your Quest canopy in place. Simply drive the stakes through the holes in the canopy feet into the ground. Then loop the guy line through the anchor hole and around the stake. Pull the line tight and tie it off.
You can also place weights on the guy lines for extra hold. Having your canopy properly anchored makes it far less likely to be blown over or away by gusts.
Pick Your Spot Wisely
Scope out your canopy location ahead of time if possible. Check for overhead obstacles like tree branches. Make sure the area is level and clear of bumps and holes. Setting up on an uneven surface can strain the canopy poles and legs.
Avoid areas known to collect water when it rains. Canopy fabric sheds water well, but you don’t want rain pooling on the roof. And ensure the spot gets adequate sun exposure so that the area remains dry.
Unfold and Extend
When first setting up your Quest canopy, carefully unfold the entire frame to extend it out fully. Unclip the roof fabric from the corners to drape it over. This avoids putting excess strain on the poles and joints by extending them out gradually.
Don’t try to lift the canopy in its folded state. The weight can bend the poles. Fully extend it before attempting to lift or carry your canopy into place.
Watch the Weather
Keep an eye on the weather forecast leading up to your canopy event. If high winds or severe weather are imminent, consider rescheduling. Most canopies like those made by Quest are rated to withstand winds up to 25 mph.
If winds pick up once your canopy is already set up, be prepared to take it down promptly. It’s far easier to take down in a controlled manner than try to maintain it upright in strong gusts.
Regular Maintenance Checks
Inspect your canopy regularly for signs of wear and tear on the joints, fabric, and frame. Check for loose screws that secure the poles together. Keep an eye out for rips or fraying in the fabric.
Perform periodic cleanings of the roof and sides to prevent dirt and debris buildup. A mild soap and water solution can keep the canopy fabric looking like new.
Skip the Overkill
Some first-time canopy owners go overboard with walls and accessories right from the start. Consider how you plan to primarily use your canopy before going canopy crazy.
A fully enclosed canopy is great for events held in all weather. But for fair weather uses, start with just the basic canopy roof. Add on walls or panels later once you’ve tested it out.
Recruit Assistants
Having at least one extra set of hands will make setting up your Quest canopy much easier. With two people, you can lift the canopy more safely and unfold it into place smoothly. More assistants also mean quicker set up time.
If going solo, be prepared for a bit more effort. You’ll need to unfold the canopy slowly and carefully to avoid straining yourself or damaging the frame.
Check Your Clearance
When opening, closing, or transporting your canopy, be aware of the extra clearance needed. Raising and lowering the roof requires extra temporary space all around.
And on vehicles like trucks, ensure overhead clearances will allow the canopy to fit. Overhead electrical wires and tree branches should also be kept in mind.
Reinforce the Roof
For canopies prone to sagging in the middle, you can add a simple wooden or plastic pole across the peak of the roof. This helps distribute the weight more evenly and prevents that drooping roof look.
Just lay the reinforcing pole perpendicular to the existing cross bars. Center it on the roof peak and tie or clamp it into place.
With just a bit of prep and know-how, setting up your Quest canopy can be a snap. Use these tips and tricks to get the most out of your canopy. And customize it with accessories to perfectly suit your outdoor activity needs.
Choose A Water-Resistant Roof For Wet Weather
Setting up a canopy tent for an outdoor event can be a breeze with the right know-how. Quest canopies are a popular choice for their ease of use and versatility. But things can go wrong if you don’t follow some basic tips and tricks.
One of the key considerations is choosing a canopy with a water-resistant roof. Outdoor events always run the risk of rain. So you’ll want a canopy that can shed water easily and prevent leaks.
Polyester tops coated with polyurethane provide protection from wet weather. Water beads up and rolls off this material quickly. Just avoid touching the wet roof, as water can leak through on contact.
Weight It Down

On windy or rainy days, be sure to weigh down your Quest canopy for stability. Use weight bags or buckets filled with sand or water and hang them from the legs.
You can also drive stakes through the anchor holes in the feet and secure guy lines to them. The added weight keeps the canopy grounded in gusty conditions.
Mind the Gaps
If adding sidewalls or panels, check that gaps are minimized. Openings allow rain and wind inside, defeating your shelter.
Overlap adjacent panels and walls by at least 6 inches. Use hook and loop closures between overlaps to seal gaps. Keep walls and panels in good condition to prevent tears.
Site it Smartly
Carefully scout your canopy location to ensure rain runoff has somewhere to go. Avoid depressions or bases of slopes where water can collect.
Also provide adequate clearance so rain can drip off canopy sides without pooling. And give yourself access to mop up any moisture that gets inside.
Monitor the Forecast
Keep a close eye on weather reports leading up to your canopy day. If heavy rain or storms are imminent, consider rescheduling or finding an indoor option.
Most Quest canopies are designed for moderate rain, not downpours or severe weather. Don’t risk the safety of attendees or damage to your canopy.
Stake it Down
In addition to weighting the legs, use stakes and tie-downs to secure your canopy in wet or windy conditions. Simple polypropylene rope works well.
Drive stakes through the anchor holes in the feet if provided. Loop rope through anchor holes and around the stakes, pulling tight. This prevents uplift.
Direct Drainage
For excessive rain, consider directing the water flow off the roof away from your event space. Use plastic gutters clipped across the top that empty off the sides.
You can also slope the ground around the canopy perimeter to channel water away. Just avoid draining water onto surrounding tents or structures.
Protect Your Belongings
Keep any equipment, furniture, supplies or inventory inside waterproof storage containers. Unprotected items left out in the rain can quickly get soaked and damaged.
Have a plan to promptly move items inside or under cover if weather hits unexpectedly. Prepare tarps or plastic sheeting that can quickly cover and protect.
Watch the Wind
Gusty winds can wreak havoc on your canopy, blowing rain sideways under walls and knocking over unsecured items. If winds exceed 25 mph, take down your canopy promptly.
Even moderate winds require extra precautions like staking, weighting and tying down your canopy securely. Flying debris is also a concern to safeguard.
Use Rain Gutters
For longer term installations, attaching rain gutters along the roof perimeter provides an easy water drainage solution. Look for gutters sized appropriately for your canopy width.
Run downspouts straight down the canopy legs to keep water from pooling around and under the frame. Direct water away from high traffic areas.
Slope the Ground

For canopy sites prone to collecting water, look at re-grading the ground to improve drainage. Create perimeters around the canopy that gently slope downward away from the shelter.
Avoid overly compacting soil when re-grading, as poor drainage will result. Check for low spots that can become boggy and fill as needed.
Weatherproof Accessories
Any canopy add-ons like sidewalls, windows and doors should be made of water-resistant fabrics as well. Avoid absorbent materials like canvas that will become saturated.
In humid climates, get accessories with vent flaps to prevent condensation build up inside. Make sure doors have a water-tight seal.
Maintain Good Drainage
Keep the canopy roof and gutters free of leaves, debris and buildup that could impede drainage. Clogged drains lead to water spillover and leaks.
Inspect and clean the roof and rain gutters periodically. Leaves and debris tend to collect quickly after storms.
With the right preparations, your Quest canopy can withstand even the wettest conditions mother nature has to offer. Choose water-resistant materials, weight it down properly, and site it to promote drainage. With these handy tips, you can stay high and dry.
Look For Canopies With Extended Leg Heights
A canopy tent is a go-to shelter solution for outdoor events and activities. With smart set up tips and tricks, your Quest canopy can provide stellar performance rain or shine.
One key feature to look for is extended leg height options. Standard heights may not suit all uses. Having adjustable legs or extensions allows customizing the coverage.
Taller leg settings raise the canopy roof to accommodate vehicles, stages, and taller occupants while still providing ample head clearance.
Weight the Legs
Use weight bags or buckets filled with sand or water to add stability to your canopy legs. This prevents shifting and keeps the canopy grounded in windy conditions.
Hang weights near the base of each leg once extended. Heavier weights may require ropes or bungee cords to attach them securely.
Anchor with Guy Lines
In high winds, anchor your canopy using the pre-drilled anchor holes and guy lines. Loop guy line through the holes and stake them down taught.
You can also loop guy lines around the upper portion of canopy legs rather than the feet if needed. Just secure them tight to limit motion.
Clear Overhead Obstacles
When setting up your Quest canopy, check for and avoid any overhead obstacles like tree branches or power lines. Raising the height could bring the roof too close.
Scope out your site ahead of time to ensure adequate clearance, especially if opting for extended leg heights or tall accessories.
Reinforce the Roof
Add a plastic or wood pole across the center of the canopy roof going perpendicular to the cross bars. This provides extra support and prevents sagging.
Use rope, zip ties or clamps to firmly fasten the reinforcing pole to the roof frame. Center it evenly at the peak for best support.
Watch the Wind Rating
Most Quest canopy roofs and frames are rated to withstand winds up to 25 mph before taking down. Exceeding this can risk damage.
When gusts pick up, remove sidewalls and curtains that catch more wind. Or take the entire canopy down promptly if needed.
Slope the Legs Outward
For extra stability on loose or uneven terrain, Slope the canopy legs outward. Keep the feet wider than the top rather than straight up and down.
Just be sure the slope isn’t excessive to avoid putting too much side strain on the leg poles and joints.
Reinforce the Base
In soft ground or sand, plastic or metal footing pads can help reinforce the canopy leg bases. The added surface area prevents sinking or shifting.
Footing pads suited for deck or fence posts work well. Level and secure them prior to extending the canopy legs.
Check the Fabric
Inspect the canopy roof and side fabrics prior to each use for any rips, holes, or fraying that could expand. Catching and repairing small tears promptly can prevent bigger problems.
Seal any seams or damage with fabric glue or sealant to prevent leakage. Keep fabric taut to avoid sagging and pools of standing water.
Use Canopy Weights
Specialized canopy weight bags are made to conveniently attach to legs and frame corners for stability. These are less cumbersome than homemade weights.
Look for weights with attachment hooks and easy-carry handles. Make sure the weight rating suits your canopy size to provide adequate hold.
Angle for Runoff
Angle canopy roofs slightly to promote water runoff if possible. Adjust two opposite legs to be slightly taller to create a gentle downward slope.
Check that the angle doesn’t exceed around 5 degrees. This prevents water pooling while maintaining sufficient head space.
Watch the Weather

Keep on top of weather forecasts leading up to your event. Prepare to take down the canopy or reinforce it as needed if high winds or heavy rain loom.
Avoid setting up in lightning-prone areas. Never seek shelter under the canopy during storms, as metal parts can attract strikes.
Clear Debris Frequently
Check and clear the canopy roof and surrounding area of fallen leaves, dirt and debris regularly. Buildup can stain and age the fabric prematurely.
Clogged gutters or drains will also impede water runoff. A quick debris clearing after wind and rain goes a long way.
Secure Accessories
If adding canopy accessories like sidewalls, lighting, signage, or shelves, ensure they are securely fastened. Loose items can blow around in wind or fall onto occupants.
Use provided fastener points and heavy duty ties. Don’t overload shelves with excess weight that could compromise the stability.
With thoughtful parts selection and smart setup techniques, your Quest canopy can deliver prime performance and excellent shelter. Extend those legs to the ideal height, reinforce the roof frame, and keep the fabric clear of debris and you’ll be in canopy heaven.
Consider Getting One With LED Lighting Built-In
Quest canopies provide stellar shelter for outdoor events and activities. But getting the most out of your canopy requires following some handy setup tips and tricks.
One great feature to look for is models with integrated LED lighting. Built-in lighting makes illuminating your canopy space a breeze after dark.
LED strip lighting around the canopy roof perimeter provides plenty of illumination without glare. And it eliminates the need for temporary string lights.
Reinforce the Legs
Use weight bags or buckets filled with sand to reinforce your canopy legs. Hang them near the base of each leg for extra stability in windy conditions.
Guy lines anchored from the upper leg poles to stakes in the ground also help resist wind forces trying to push the legs inward.
Slope Slightly
Angle the canopy slightly by adjusting opposite legs to different heights. This helps direct water runoff and prevent pooling on the roof.
Just don’t overdo the slope. Keep the angle modest, around 5 degrees or less. Too much risks side stresses on the frame.
Watch Wind Speed
Most Quest canopy frames and tops can withstand moderate winds, around 25 mph, before take-down is required. Exceeding this risks damage.
Monitor wind speeds closely via weather apps or an anemometer. Take promp action if gusts approach the canopy’s wind rating.
Shelter Valuables
Move any valuable belongings like furniture, sound equipment, or inventory under the canopy or keep them secured in vehicles if heavy wind or rain strikes.
Have tarps or plastic sheeting ready to throw over items that can’t easily be relocated to covered areas.
Clear the Area
Make sure the area around and above your canopy is free of debris, overhanging items or other obstructions before setting up.
Look for any cords, hoses, or branches that could impede foot traffic or puncture the roof if blown around.
Check Attachment Points
Examine the fastening joints between canopy poles, legs, and top to ensure connections are secure. Tighten any loose bolts or fasteners.
This prevents detachment or instability in windy conditions that could lead to collapse.
Keep The Top Clean
Check your canopy roof and sides periodically and clean off any accumulated dirt or debris like leaves, sap, and bird droppings.
Buildup can accelerate wear and tear on the fabrics. A pressure wash works great for a deeper clean when needed.
Have Backup Lighting
Keep portable battery-powered lights on hand as a backup in case your canopy’s built-in lighting fails. Headlamps, lanterns, and strip lights ensure you’re not left in the dark.
Check backup lights periodically to ensure batteries are fresh. Position them around the perimeter for ample coverage.
Avoid Adding Sidewalls
Walls and side panels greatly increase wind resistance. For elevated wind conditions, avoid attaching them.
If already in place, remove side panels promptly if winds pick up. Keep them sheltered and weighted down so they don’t blow away.
Watch For Rain Buildup
Monitor canopy roofs closely during heavy rain. Water pooling can lead to roof sag, fabric stress, and leaks. Push or sweep water off gently with a broom or mop.
Avoid touching saturated fabric as contact pressure can lead to drips. Let the roof shed water naturally as possible.
Stake Down The Base
Use ground stakes and tie-down ropes to firmly anchor your canopy legs. Drive stakes deep and keep ropes taught.
Aim for at least two anchor points per leg. Crisscross corner ropes for maximum stability in high winds.
With smart canopy choices and proper setup, your Quest canopy can deliver outstanding performance rain or shine. Just remember the lighting, watch the weather, and keep it staked down!
Read Reviews To Choose The Best Canopy For You
Never Struggle Setting Up A Canopy Again: Discover 15 Easy Quest Canopy Tips And Tricks
Setting up a canopy, like the popular Quest canopy models, doesn’t have to be a struggle. With a few handy tips and tricks, you can get your canopy set up quickly and easily every time. As someone who has gone through my share of frustrating experiences trying to get canopies to cooperate, I’ve learned a few things along the way that can help you avoid the headaches and enjoy the shade.
Here are 15 of my top tips and tricks for effortlessly setting up Quest canopies and other pop up canopy tents:
1. Read The Instructions Carefully
This may seem obvious, but it’s amazing how many people try to set up a canopy without reading the instructions first. Different canopy models can have different setup procedures, so check the user manual to make sure you understand all the steps. Knowing what to expect will make the job go smoother.
2. Get Help When Needed
Some canopies like the Quest 10×10 canopy can be set up solo, but larger models like the Quest 12×12 may require an extra set of hands. Enlist a friend to help lift the canopy and pull the legs into position. Many hands make light work.
3. Assemble on a Flat Surface
Set up your Quest canopy on level ground or a hard surface, not on the grass or sand. This gives you a stable base to work on and prevents the legs from sinking into soft ground.
4. Point It Into The Wind
Position the canopy to face into the prevailing wind. This allows the wind to blow through the canopy instead of causing lift underneath. Use guy lines and stakes if needed.
5. Lock The Legs
Quest canopies have push button locks on the legs. Make sure these are fully engaged and the legs firmly locked before applying the canopy top. Wobbly legs can make setup frustrating.
6. Unfold The Top Carefully
Open the canopy top slowly and gently to avoid metal bending and fabric ripping. Unfold opposite corners first, then the middle sections last.
7. Lift From The Corners
When placing the canopy top onto the frame, lift up the corners first, then the sides. Don’t force the middle over the frame. Lifting the corners helps prevent center sagging.
8. Watch Your Head!
Keep your head away from the frame when opening and closing the canopy to avoid bumps and pinched fingers. Pay attention to the frame position at all times.
9. Use All The Attachment Points
Connect the canopy top to the frame at every available point, not just halfway. This distributes the tension and prevents flap and sway.
10. Cross The Legs
For maximum stability, cross the opposite legs rather than keeping them parallel. This widens the base and prevents leaning and shifting.
11. Angle The Legs
Pointing the feet of the canopy legs outward at about 30 degrees gives you better stability too. Angled legs prevent sliding and collapse.
12. Secure It Properly
Use all the guy lines, stakes, and tie-downs included with your Quest canopy. These help keep the canopy grounded in windy conditions.
13. Mind The Fabric Sags
Over time, canopy fabric can stretch and sag. Periodically check and re-tighten the corner attachments to minimize sags over the frame.
14. Store It Safely
When taking down your canopy, carefully fold and roll the fabric to prevent rips, tears, and mildew. Store in a dry place away from direct sunlight.
15. Maintain It
Keep your Quest canopy in top shape by checking for any loose or broken parts after setups. Replacement parts are available from the manufacturer. A well-maintained canopy lasts longer.
The Right Setup For Shade and Shelter
Setting up your Quest canopy properly using legs, top, frame, and anchors takes a little practice but pays off in providing excellent portable shade and shelter wherever you need it. Following these tips and tricks for effortless setup makes it easier to get the most out of your Quest or similar pop up canopy.
With the right techniques, you can avoid canopy struggles and spend your time enjoying the space instead of wrestling with a stubborn tent frame. Mastering easy canopy setup means more time relaxing in the shade and less time stressing over stubborn poles and fabrics.
So don’t dread your next canopy project – with these handy tips, you can handle canopy setups like a pro. Learn the tricks professionals use for quick and easy pop up canopy setups every time. Share these tips with friends who also have canopy setup struggles. And enjoy your newly mastered, frustration-free canopy experience!


