Need Tighter Lacrosse Head Screws. Try These 15 TricksNeed Tighter Lacrosse Head Screws. Try These 15 Tricks
Check Screw Tightness Regularly
If you’re an avid lacrosse player, you know how frustrating it can be when the screws on your lacrosse stick head become loose over time. A wobbly head not only affects your handling and shooting accuracy, but can completely fall off during gameplay if you don’t tighten those screws regularly! Luckily, with some simple tricks and proper maintenance habits, keeping your lacrosse head screws tight can be a breeze.
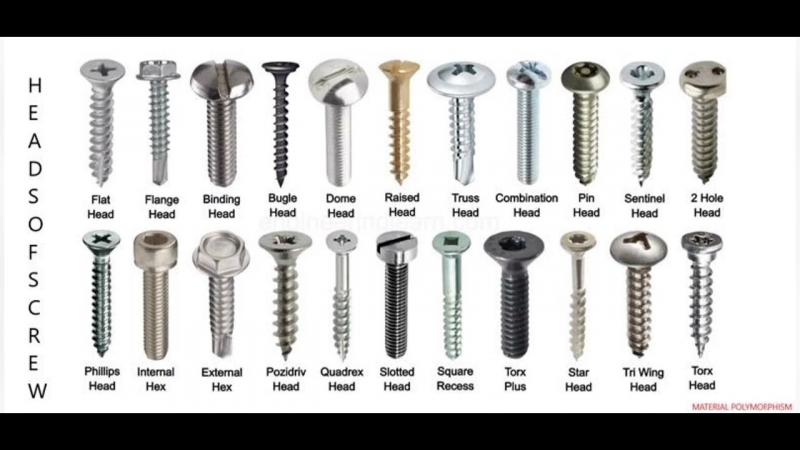
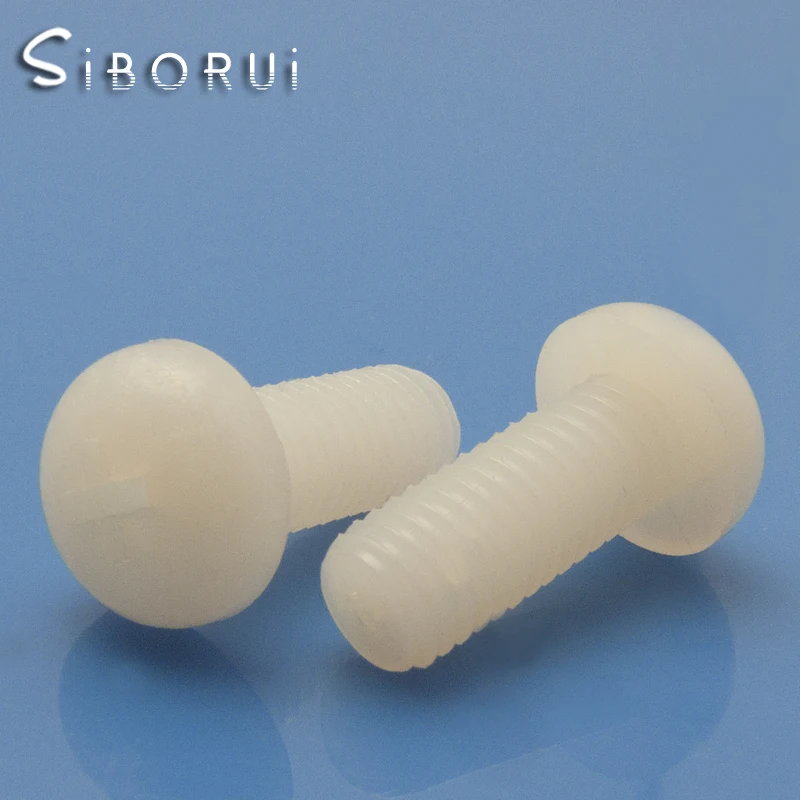
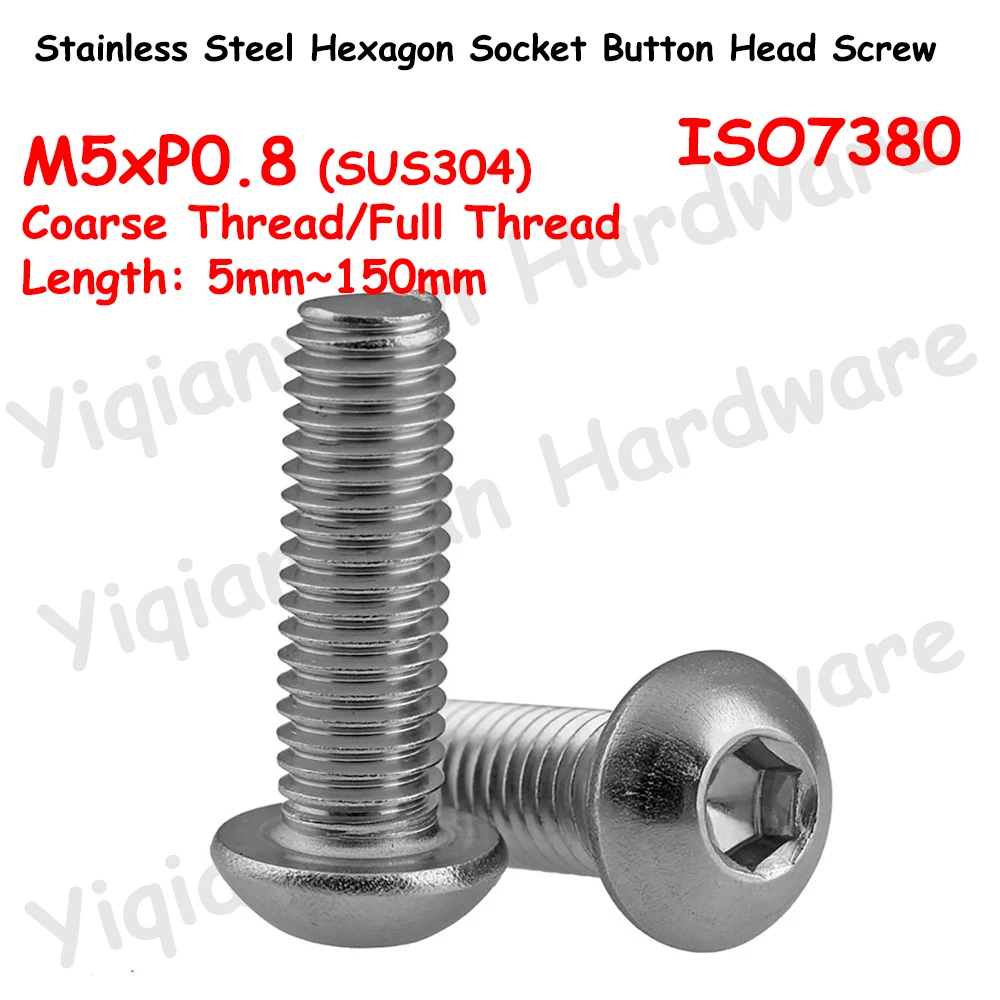
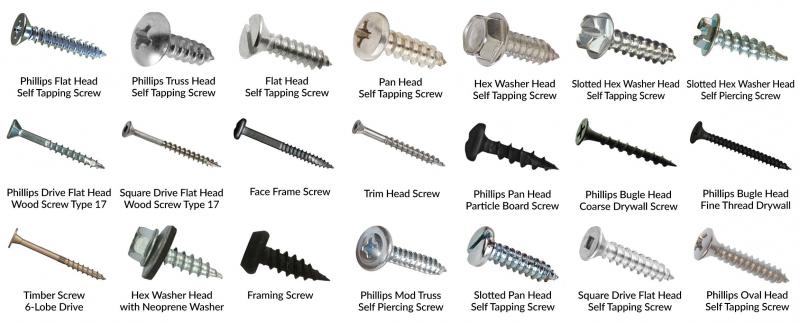
The first thing to know is that lacrosse heads use different screw sizes depending on the manufacturer – so always use the correct sized Allen wrench for your particular head. Maverik and STX heads use 3/16″ hex screws, for example, while Brine and Warrior use 1/4″ screws. Using the wrong size can strip the screw heads. It’s wise to keep a multi-sized Allen wrench set in your equipment bag at all times.
Inspecting your screws before each game or practice should become second nature. Give them a quick check with your Allen wrench and tighten any loose ones that you find. Doing this prevents screws from loosening further and eventually falling out during play. Get in the habit of doing this with every stringing or adjustment you make to your stick too.
You can also apply a small amount of removable thread locking fluid to your screws, like Blue Loctite, to help prevent loosening from vibration. Just don’t use a permanent threadlocker! This allows you to still remove screws when needed. Reapply the Loctite every few months or as needed.
When installing new screws, make sure you prep the holes properly. Use a toothpick to remove any old dried glue from the holes, then wipe clean with a solvent like isopropyl alcohol. This removes oils and debris so your screws can adhere solidly. Avoid overtightening new screws – just turn them until snug and resisting further tightening. Overtightening can actually weaken the holding power.
For extremely stubborn screws that refuse to stay tight, try using nylon lock nuts or washers. These have a nylon insert that flexes to create resistance against the screw threads, preventing loosening. You can find these at any hardware store for a couple bucks.
If your screw holes themselves have become overly loose and worn out, you can remedies this with glue or wooden toothpicks. Just add a small dab of Gorilla Glue or wood glue into the hole and insert a toothpick to take up extra space. Trim off any excess once dry. This will tighten up the fit.
Prevent issues in the first place by avoiding overtightening your strings during stringing. Excess string tension stresses the screw holes. aim for a moderate stringing tension that doesn’t warp the head. Also avoid hanging your stick by the head, which can apply leverage on the screws.
Even with the best practices, lacrosse heads do wear out over time – especially if subjected to heavy use like faceoffs and slashing. Budget for a new head every season or two. As screws wear and helmets get dented up, performance and safety decline. Staying on top of new gear ensures you get the most out of your game.
With the right habits, keeping your lacrosse head screws tight takes just seconds before each use. Following these handy tips will avoid loose screw mishaps so you can focus on improving your handles, scooping, passing, and wicked shots on goal. Stay diligent and your lacrosse stick will thank you with seasons of solid performance. Now get out there and own the field!
Use Blue Loctite on Lacrosse Screws
As a lacrosse player, you know how frustrating it is when the screws on your lacrosse stick head become loose over time. A wobbly head affects your handling and shooting accuracy dramatically. Luckily, there’s a simple solution – using a removable thread locker like Blue Loctite to keep your lacrosse head screws tight.
Loctite threadlocking fluids are designed to prevent threaded fasteners from vibrating loose. The medium-strength Blue Loctite (or Blue 242) works perfectly for keeping lacrosse head screws tightened. Here’s how it works. 15 Effective Techniques to Tighten Lacrosse Head Screws
How can you keep lacrosse head screws tight. What are the best practices for maintaining lacrosse stick screws. Why is it important to regularly check and tighten lacrosse head screws. Which tools and products can help prevent loose screws in lacrosse heads.
Understanding the Importance of Tight Lacrosse Head Screws
Lacrosse players know that maintaining equipment is crucial for optimal performance. One often overlooked aspect is the tightness of lacrosse head screws. Loose screws can lead to a wobbly head, affecting handling, shooting accuracy, and potentially causing the head to detach during gameplay. By implementing proper maintenance techniques, players can ensure their lacrosse sticks remain in top condition.
Essential Tools for Lacrosse Head Screw Maintenance
Before diving into specific techniques, it’s important to have the right tools on hand. Different lacrosse head manufacturers use various screw sizes, so a multi-sized Allen wrench set is indispensable. For example:
- Maverik and STX heads typically use 3/16″ hex screws
- Brine and Warrior often use 1/4″ screws
Using the correct size Allen wrench is crucial to avoid stripping the screw heads. It’s advisable to keep a set in your equipment bag for quick adjustments.
Regular Inspection and Tightening Routine
Establishing a habit of checking screw tightness before each game or practice is fundamental. How often should you inspect your lacrosse head screws? Ideally, this should be done before every use. A quick check with the appropriate Allen wrench can prevent screws from loosening further or falling out during play. This routine should also be performed after any stringing adjustments or modifications to the stick.
Applying Thread Locking Fluid for Enhanced Stability
One effective method to prevent screw loosening is the application of removable thread locking fluid. Blue Loctite is a popular choice among lacrosse players. Why is Blue Loctite preferred for lacrosse head screws?
- It provides a secure hold while still allowing for future adjustments
- It prevents loosening due to vibration
- It’s easily removable when needed
To apply thread locking fluid:
- Clean the screw holes thoroughly
- Apply a small amount of Blue Loctite to the screw threads
- Insert and tighten the screws
- Allow the adhesive to cure for about 15 minutes before use
Reapplication every few months or as needed will maintain optimal performance.
Proper Installation Techniques for New Screws
When installing new screws or replacing old ones, proper preparation is key. How can you ensure the best installation of lacrosse head screws?
- Remove any old dried glue from the screw holes using a toothpick
- Clean the holes with isopropyl alcohol to remove oils and debris
- Avoid overtightening – turn the screws until snug and resist further tightening
Overtightening can actually weaken the holding power and potentially damage the head or screw threads.
Advanced Solutions for Persistently Loose Screws
For screws that consistently come loose despite regular maintenance, more advanced solutions may be necessary. Consider using nylon lock nuts or washers, which have a nylon insert that flexes to create resistance against the screw threads. These can be found at most hardware stores and provide an extra layer of security against loosening.
Repairing Worn Screw Holes
If the screw holes themselves have become worn and enlarged, there are ways to remedy this issue:
- Apply a small amount of Gorilla Glue or wood glue into the hole
- Insert a wooden toothpick to take up extra space
- Trim off any excess once dry
This method can effectively tighten up the fit and provide a more secure hold for the screws.
Preventative Measures to Minimize Screw Loosening
Prevention is often the best cure. What steps can players take to minimize the likelihood of screws coming loose?
- Avoid overtightening strings during stringing – excessive tension stresses the screw holes
- Aim for moderate stringing tension that doesn’t warp the head
- Refrain from hanging the stick by the head, which can apply leverage on the screws
Additionally, be mindful of how you store and transport your lacrosse stick to minimize unnecessary stress on the head and screws.
Knowing When to Replace Your Lacrosse Head
Even with the best maintenance practices, lacrosse heads will eventually wear out. How can you tell when it’s time for a replacement?
- Persistent loosening of screws despite proper maintenance
- Visible wear and tear on the head, especially around screw areas
- Decreased performance in catching, throwing, or shooting
As a general rule, consider budgeting for a new head every season or two, especially if you’re a frequent player or engage in high-impact play like faceoffs.
Specialized Tools and Products for Screw Maintenance
Beyond basic Allen wrenches and thread lockers, there are specialized tools and products that can aid in maintaining tight lacrosse head screws:
- Torque-limiting screwdrivers to prevent overtightening
- Anti-vibration compounds designed specifically for sports equipment
- Screw hole repair kits for more extensive damage
Investing in these tools can be worthwhile for serious players or those who frequently experience issues with loose screws.
The Impact of Climate and Playing Conditions on Screw Tightness
Environmental factors can affect the tightness of lacrosse head screws. How do different playing conditions influence screw stability?

- Extreme temperatures can cause materials to expand or contract
- Humidity can affect the grip of screws within the head
- Playing on different surfaces (turf vs. grass) can impact vibration and stress on the head
Being aware of these factors can help players anticipate when additional maintenance might be necessary.
Customizing Screw Tightness for Different Playing Styles
Different positions and playing styles may require varying degrees of screw tightness. For example:
- Attackmen might prefer a slightly looser fit for quicker ball release
- Defensemen often opt for maximum tightness to withstand checks and ground balls
- Midfielders may find a balance between the two extremes
Experimenting with different levels of tightness can help players find their optimal setup.
The Role of Proper Stringing in Maintaining Screw Tightness
The way a lacrosse head is strung can significantly impact screw stability. How does stringing affect screw tightness?
- Evenly distributed string tension reduces stress on specific areas of the head
- Proper pocket depth can minimize excessive flex that may loosen screws
- Regular re-stringing can allow for inspection and maintenance of screw areas
Working with an experienced stringer or learning proper stringing techniques can contribute to overall stick maintenance and performance.

Educating Team Members on Screw Maintenance
For coaches and team captains, promoting proper equipment maintenance among team members is crucial. What strategies can be employed to ensure all players are aware of the importance of tight screws?
- Include screw checks in pre-game routines
- Organize team maintenance sessions
- Provide educational materials on proper lacrosse stick care
By fostering a culture of equipment care, teams can reduce the likelihood of equipment failures during crucial moments of play.
Innovations in Lacrosse Head Design for Improved Screw Stability
As lacrosse equipment continues to evolve, manufacturers are developing new technologies to address the issue of loose screws. What innovations are emerging in lacrosse head design?
- Self-locking screw systems
- Integrated thread-locking compounds
- Reinforced screw hole designs
Staying informed about these advancements can help players make educated decisions when purchasing new equipment.
Maintaining tight lacrosse head screws is a crucial aspect of equipment care that can significantly impact a player’s performance and the longevity of their gear. By implementing these 15 techniques and staying vigilant about regular maintenance, players can ensure their lacrosse sticks remain in optimal condition. Remember, a well-maintained stick is not just about performance; it’s also about safety and the ability to play with confidence. Whether you’re a beginner or a seasoned pro, making screw maintenance a part of your routine will contribute to your success on the field.
Check Screw Tightness Regularly
If you’re an avid lacrosse player, you know how frustrating it can be when the screws on your lacrosse stick head become loose over time. A wobbly head not only affects your handling and shooting accuracy, but can completely fall off during gameplay if you don’t tighten those screws regularly! Luckily, with some simple tricks and proper maintenance habits, keeping your lacrosse head screws tight can be a breeze.
The first thing to know is that lacrosse heads use different screw sizes depending on the manufacturer – so always use the correct sized Allen wrench for your particular head. Maverik and STX heads use 3/16″ hex screws, for example, while Brine and Warrior use 1/4″ screws. Using the wrong size can strip the screw heads. It’s wise to keep a multi-sized Allen wrench set in your equipment bag at all times.
Inspecting your screws before each game or practice should become second nature. Give them a quick check with your Allen wrench and tighten any loose ones that you find. Doing this prevents screws from loosening further and eventually falling out during play. Get in the habit of doing this with every stringing or adjustment you make to your stick too.
You can also apply a small amount of removable thread locking fluid to your screws, like Blue Loctite, to help prevent loosening from vibration. Just don’t use a permanent threadlocker! This allows you to still remove screws when needed. Reapply the Loctite every few months or as needed.
When installing new screws, make sure you prep the holes properly. Use a toothpick to remove any old dried glue from the holes, then wipe clean with a solvent like isopropyl alcohol. This removes oils and debris so your screws can adhere solidly. Avoid overtightening new screws – just turn them until snug and resisting further tightening. Overtightening can actually weaken the holding power.
For extremely stubborn screws that refuse to stay tight, try using nylon lock nuts or washers. These have a nylon insert that flexes to create resistance against the screw threads, preventing loosening. You can find these at any hardware store for a couple bucks.
If your screw holes themselves have become overly loose and worn out, you can remedies this with glue or wooden toothpicks. Just add a small dab of Gorilla Glue or wood glue into the hole and insert a toothpick to take up extra space. Trim off any excess once dry. This will tighten up the fit.
Prevent issues in the first place by avoiding overtightening your strings during stringing. Excess string tension stresses the screw holes. aim for a moderate stringing tension that doesn’t warp the head. Also avoid hanging your stick by the head, which can apply leverage on the screws.
Even with the best practices, lacrosse heads do wear out over time – especially if subjected to heavy use like faceoffs and slashing. Budget for a new head every season or two. As screws wear and helmets get dented up, performance and safety decline. Staying on top of new gear ensures you get the most out of your game.
With the right habits, keeping your lacrosse head screws tight takes just seconds before each use. Following these handy tips will avoid loose screw mishaps so you can focus on improving your handles, scooping, passing, and wicked shots on goal. Stay diligent and your lacrosse stick will thank you with seasons of solid performance. Now get out there and own the field!
Use Blue Loctite on Lacrosse Screws
As a lacrosse player, you know how frustrating it is when the screws on your lacrosse stick head become loose over time. A wobbly head affects your handling and shooting accuracy dramatically. Luckily, there’s a simple solution – using a removable thread locker like Blue Loctite to keep your lacrosse head screws tight.
Loctite threadlocking fluids are designed to prevent threaded fasteners from vibrating loose. The medium-strength Blue Loctite (or Blue 242) works perfectly for keeping lacrosse head screws tightened. Here’s how it works:
The Blue Loctite liquefies when applied sparingly to screw threads. Once the screw is threaded into the head, the Loctite wicks into the space between the threads and hardens. This creates resistance against the screw loosening from vibration or shock.
However, the Blue 242 formula allows the screw to be removed later with hand tools by applying extra turning force. So it won’t permanently lock the screws like some heavy duty threadlockers. This is ideal for lacrosse gear that requires occasional adjustment.
To use Blue Loctite on your stick:
- Clean screw holes thoroughly by scraping out old material and wiping with isopropyl alcohol.
- Apply a small drop of Loctite to screw threads.
- Reinstall screws and tighten fully.
- Allow 15 minutes for Loctite to cure before use.
Be sure you are using the proper Allen wrench size for your particular stick’s screws – 3/16″ hex for Maverik and STX heads, 1/4″ hex for Brine and Warrior. Overtightening with an ill-fitting Allen key can damage the screws.
Reapply Blue Loctite every few months or as needed to maintain the locking effect. Be careful not to apply excessively – just a tiny drop on the threads is all it takes. Before games, always double check screws for any that may have come loose.
For best results, prep the screw holes properly before using Loctite. Old lacquer, dirt and oils can prevent the adhesive from bonding well. Use a toothpick to scrape out grime, then wipe with alcohol to remove residue.
You can also apply Blue Loctite to metal screw inserts that some composite sticks utilize. Plastic and nylon inserts don’t require threadlockers but be sure to prep the holes thoroughly for better screw adhesion.
If a screw becomes fused too tightly from excessive Loctite, applying heat can help loosen the bond. Just a few seconds with a hair dryer on the hot setting will soften the adhesive so the screw can release.
For extremely stubborn screws, a screw extractor can remove seized screws. This is a reverse threaded tool that bites into the screw head as you turn counterclockwise.
To avoid issues, make sure you string sticks moderately tight. Overly high stringing tension stresses screw holes. Also store sticks properly by hanging vertically, not horizontally off hooks by the head which can loosen screws.
With some preventive habits, Blue Loctite lets you easily keep lacrosse head screws tight for optimal ball control and handling. No more losing faceoffs because your head is rattling around! Apply just a drop before games for peace of mind that your precision passes and wicked shots will find their mark every time.
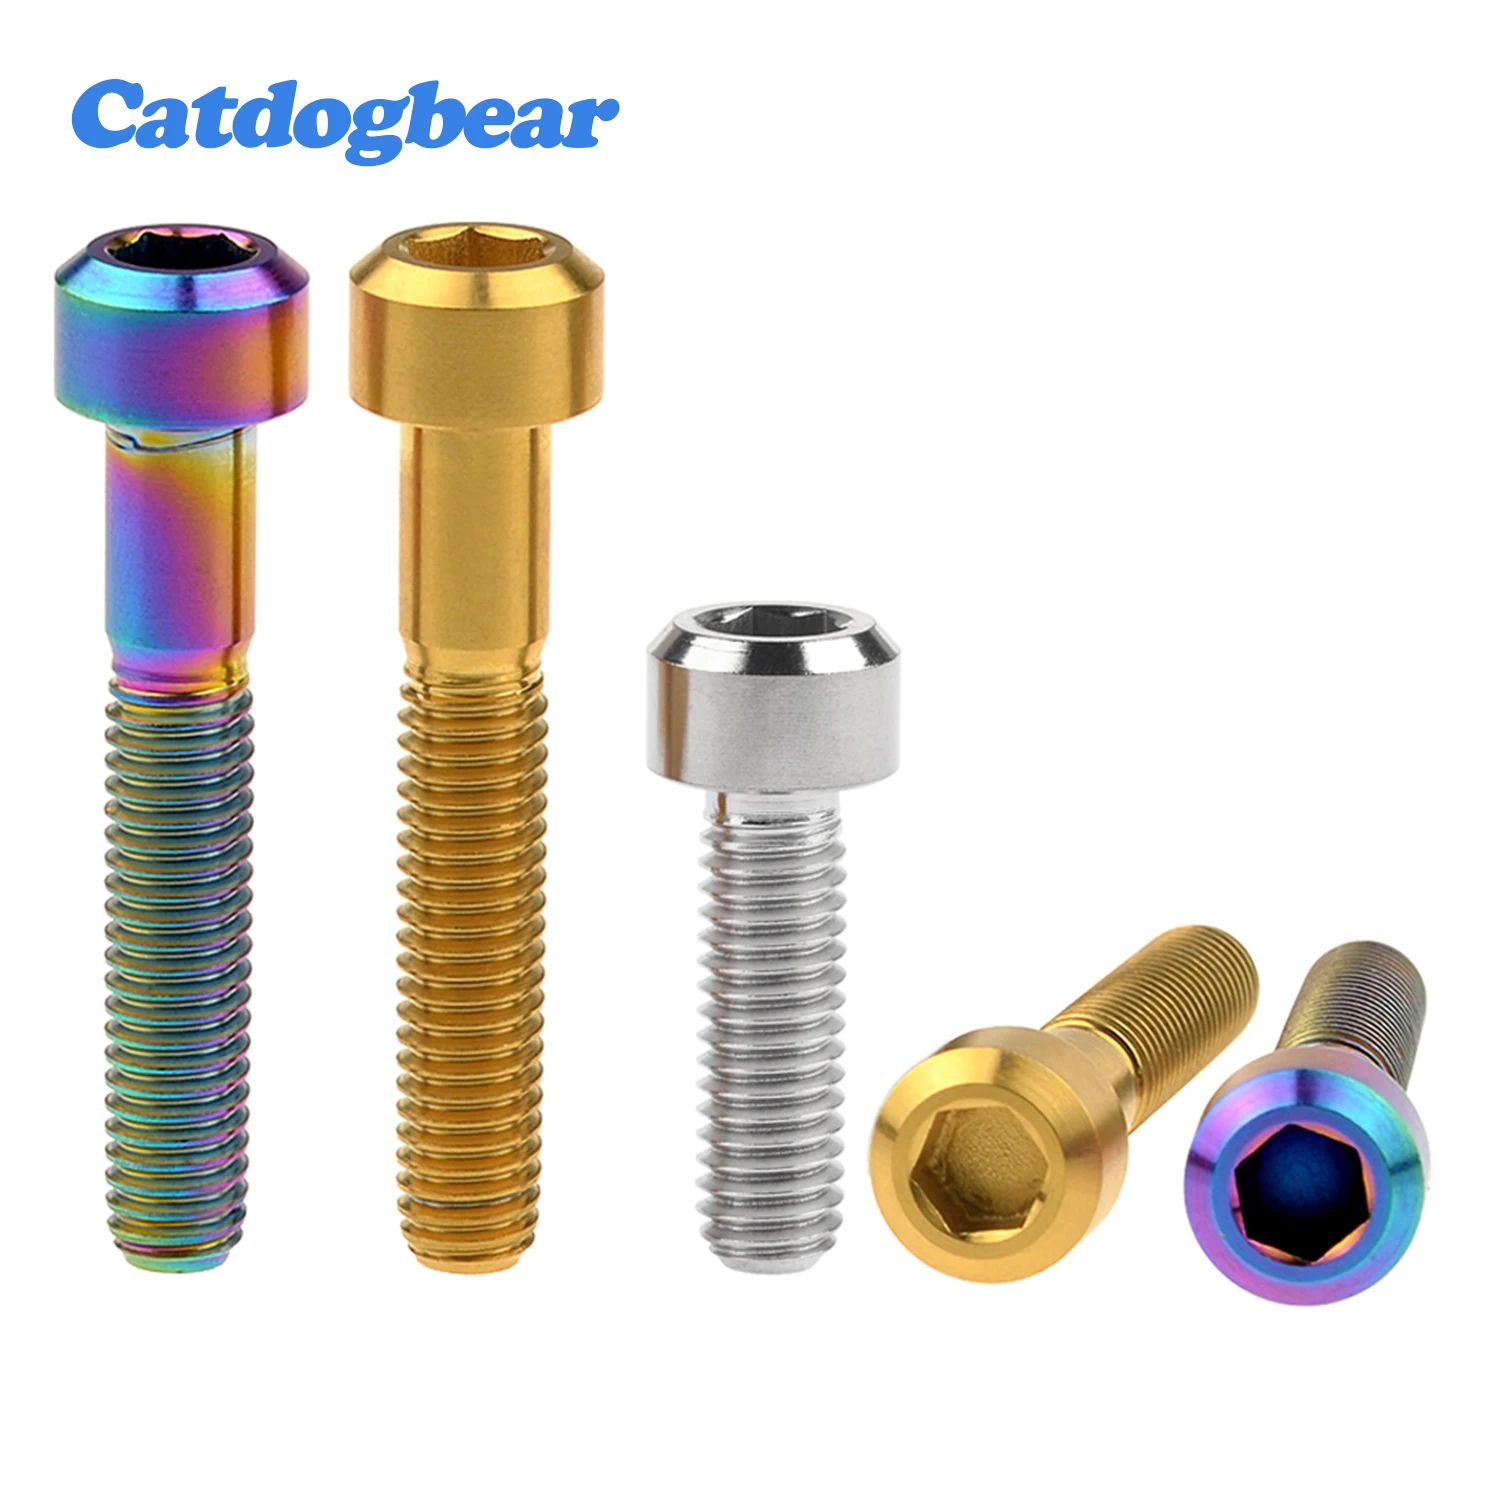
Switch to Titanium Lacrosse Head Screws
As a lacrosse player, you know the frustration of screws loosening on your lacrosse stick head over time. The constant vibrations from passing, catching, and shooting eventually take a toll. Before you know it, your head is rattling and your accuracy declines. Luckily, switching to titanium screws can provide a robust, long-lasting solution.
Titanium offers superior strength in a lightweight package, making it an ideal metal for lacrosse head screws. The material is much harder than the standard stainless steel used for screws, providing excellent resistance to loosening from vibrations.
The high strength-to-weight ratio of titanium means lighter screws that won’t add excess mass to your lacrosse head. This improves handling speed and control. Less inertia also means fewer forces acting to loosen screws during play.
Titanium’s hardness also reduces stripping and rounding of screw heads compared to softer stainless varieties. This lets you tighten screws solidly without camming out the Allen wrench. Properly tightened titanium screws stay put through seasons of rough play.
Saltwater environments from humid weather or oceanside games also have minimal corrosion effect on durable titanium hardware. Stainless steel is susceptible to pitting and rust over time.
Many aftermarket titanium screw kits are available to upgrade your existing lacrosse stick heads. Popular options include:
- Warrior Titanium Lacrosse Head Screw Kit – Fits Warrior heads.
- Maverik Lacrosse Titanium Screw Set – For Maverik heads.
- STX Titanium Lacrosse Screws – Made for STX heads.
Be sure to choose the proper Allen wrench size for your stick’s screw size. Maverik and STX use 3/16″ hex screws, while Warrior and Brine use 1/4″ hex screws. Using ill-fitting tools can round off screw heads.
When installing titanium screws, prep the holes properly – clean out old epoxy or debris with a toothpick and solvent like isopropyl alcohol. Apply a drop of removable Loctite threadlocker to prevent loosening. Tighten snugly but avoid overtightening, which can damage the softer head material.
For extremely worn-out screw holes, consider using epoxy or wood glue with toothpicks to re-fill holes before installing titanium screws. This tightens up the fit. Peel/scuff titanium screw threads with sandpaper for better grip.
Be sure to check titanium screws for tightness before each use the same as normal screws. But you’ll likely find yourself checking less often once the titanium hardware is well installed.
One downside of titanium is cost – it runs about twice the price of stainless steel screws. But the long-term reliability and performance boost are worth it for serious players. Less time re-tightening, less slop in handling, and no more losing screws mid-game!
For plastic/polymer heads like the Maverik Tank, nylon screw inserts are molded into the plastic. Use standard stainless or oxide screws for these non-metal inserts.
Keep sticks strung to moderate tension to reduce hole wear. Inspect heads regularly for cracks near screw holes which can indicate material fatigue. Budget for a new head every 1-2 seasons depending on use.
Investing in titanium lacrosse screws ensures seasons of enhanced ball control and shot speed with less maintenance hassle. Ditch those loose stainless screws rattling in your head and step up your game with durable titanium hardware. Your sticks and on-field performance will thank you!
Replace Bent or Stripped Lacrosse Screws
As a lacrosse player, you know how frustrating it is when the screws on your stick head become damaged. Bent or stripped screw heads can prevent you from tightening your head properly, causing all kinds of handling and throwing issues.
Lacrosse screws take a beating from constant vibrations and impacts. Screw heads become deformed or rounded off over time, rendering an Allen wrench useless for tightening them.
If you notice a screw no longer tightens properly with an Allen wrench, it likely has some damage. Carefully inspect each screw head for any stripping or deformities. Look for elongation or flattening of the hex shape from compression or blows.
Bent screws may still turn but they exert uneven pressure on the head, distorting its shape. This alters stringing channels and sidewall angles, negatively impacting throws and catches. A loose, bent screw also rattles around, further hampering ball control.
For stripped screws with rounded out heads, grabbing with pliers risks damage to the head or screw snapping off completely. Don’t attempt to glue or epoxy over damaged heads either as this prevents future removal.
The proper fix is to completely replace damaged screws. Fortunately, most lacrosse heads use standard size hex screws available at any hardware store or online:
- Maverik/STX – 3/16 inch hex
- Warrior/Brine – 1/4 inch hex
Buy replacement screw kits or individual screws in bulk since you’ll likely be replacing more over time. Having spares on hand for games prevents being stuck with a rattling head.
When installing new screws, properly prepare holes for maximum holding strength. Clean out old glue residue and debris with a toothpick and solvent like isopropyl alcohol. This removes oils and gunk so the screw can adhere solidly.
Consider upgrading to titanium screws for longer-lasting performance. The harder metal resists bending and stripping far better than standard stainless steel hardware.
A drop of removable Loctite threadlocker on new screw threads prevents loosening from vibration. Just avoid permanent, high-strength Loctite formulas or you won’t be able to remove screws!
Be sure to use the properly sized Allen wrench so you don’t strip new screw heads. Tighten until snug but avoid over-tightening and damaging the plastic or composite head material.
For extremely worn out screw holes, build up the hole size with glue and toothpicks before installing the new screws. This tightens up the fit for better holding strength.
Prevent bending and stripping by avoiding hanging sticks horizontally from hooks by the head, which can loosen screws. Also use moderate stringing tension – high tension stresses screw holes.
Check screws before each use and replace any damaged ones immediately. Don’t play with rattling heads that handle poorly. Budget for new heads every season or two as hole wear increases.
Replacing bent and stripped screws restores your lacrosse stick head to like-new performance. Take a few minutes to assess screws regularly and swap out any damaged ones. Your precision passing and shooting will thank you!
Tighten Screws Evenly in Crisscross Pattern

As a lacrosse player, you know how annoying it is when the screws on your stick head become loose over time. The constant impacts and vibrations of play eventually take their toll. Luckily, you can keep your head tight and secure using a simple criss-cross tightening method.
The key is tightening opposing screw pairs in an alternating, criss-cross pattern. This equalizes the pressure around the head for even tightening and proper shape retention.
Start by doing a preliminary check of all screws with your Allen wrench and tighten any obviously loose ones. Ensure you are using the proper wrench size – 3/16″ for Maverik and STX heads, 1/4″ for Warrior and Brine models.
Then begin the criss-cross sequence. Tighten diagonally opposing screw pairs in increments, like upper left and lower right, then upper right and lower left. Turn each quarter to half turn before moving to the next pair.
Work your way around the head in a circle, crisscrossing back and forth between screws. Apply moderate, even pressure – overtightening can damage the plastic or composite head material. Tighten until screws feel snugly seated, without excessive force.
This alternating tightening equalizes forces around the head, preventing distorting the sidewall shape. It also eliminates loose areas that could lead to rattling and ball handling issues during play.
Be sure to prep screw holes properly before tightening. Clean out old glue residue or debris with a toothpick and solvent like isopropyl alcohol. This removes grime so screws can adhere solidly.
For extra security, apply a removable threadlocker like Blue Loctite. This wicks between threads to prevent loosening from vibrations. Reapply every few months as needed.
Inspect screws before each use and retighten any that feel loose using the criss-cross pattern again. Develop this as a consistent habit to maintain optimal head tightness and shape.
Avoid stringing heads excessively tight, which can warp sidewalls and stress screw holes. Use moderate pocket tension only. Also store sticks properly hanging vertically to prevent head-hanging leverage on screws.
For severe screw hole wear, consider using epoxy and toothpicks to rebuild the holes before reinstalling screws. This can tighten up fit in sloppy holes on older heads.
Be prepared to replace bent or badly stripped screws as needed. Have spare screws in your bag for swapping out during games if necessary.
With some simple habits, keeping your lacrosse stick head perfectly tightened is easy. Take a few extra minutes applying the crisscross pattern before games for consistent tightness and shape retention. Your precision passing, shooting, and confident ball handling will benefit greatly from a head secured just right!
Clean Lacrosse Head Holes Before Inserting Screws
As an avid lacrosse player, you know how frustrating it is when the screws on your stick head become loose over time. All the impacts and vibrations of play take their toll, eventually causing annoying rattles and declining performance. Luckily, there’s a simple solution – thoroughly cleaning holes before inserting screws.
Over time, screw holes accumulate all kinds of grime from use and maintenance. Old dried lacquer, dirt, oils and glue residue prevent screws from properly seating and adhering within the holes. This leads to premature loosening under game conditions.
By taking a few extra minutes to properly clean holes, you allow fresh screws to bite and hold tightly for optimal stability and ball control.
Here’s a simple cleaning process to follow whenever installing new screws:
- Use a toothpick, paperclip or similar tool to scrape out any hardened lacquer, glue or other buildup from the screw holes.
- Further clean by saturating a cotton swab with isopropyl alcohol and swirling it around aggressively in the hole. This dissolves oils, dirt and remaining debris.
- Allow holes to fully dry before inserting screws. Blowing on them accelerates evaporation.
Checking holes with a flashlight helps spot any remaining grime needing removal for best results. Take your time cleaning until holes look fresh and free of anything that could impede screw adhesion.
Be sure to use proper sized Allen wrenches for your particular stick’s screws to avoid damaging heads. Follow your stick manufacturer’s specifications – for example, Maverik and STX use 3/16” while Warrior and Brine are 1/4″.
Consider applying a threadlocker like Blue Loctite before installing screws into clean holes. This seeps between threads, preventing loosening from vibrations. Just avoid permanent threadlock formulas.
Prep holes before simply retightening existing screws as well. Loose screws gradually accumulate lacquer and grime internally over play. Thorough cleaning lets them hold like new.
Store heads properly when not in use – hanging vertically to avoid leverage stress on screws. String heads to moderate tension only, overtight stringing can deform heads and enlarge holes.
Replace any bent, damaged or corroded screws for optimal hole fit. Have extras on-hand in your stick bag for quick swaps as needed.
With well-prepped holes, even budget screws grip tightly for seasons of play. But for heavy use, upgrade to titanium screws which resist bending and hold stronger than stainless steel.
Take five minutes before games to clean holes and inspect screws. Your sticks will reward you with precise ball control, confident cradling, and a rock solid feel. Don’t let grimy screw holes leave you rattling down the field!
Lubricate Screw Threads for Easier Tightening
As a lacrosse player, you know the constant struggle of keeping your stick head screws tight. The vibrations and impacts of gameplay inevitably loosen things up over time. While proper tightening technique helps, lubricating screw threads makes the job much easier.
Lubricants reduce friction and mechanical resistance as you turn screws into place. This allows you to generate higher tightening torque with less effort while minimizing potential damage.
Any general purpose lubricant can work, but light machine oils are ideal. Popular options include 3-in-1 oil, sewing machine oil, or gun oil. The thin consistency readily wicks into threads.
Avoid thicker lubricants like grease and graphite which can hamper torque and leave gummy residue. Light oils give the best friction reduction for easy tightening.
simply apply a few small drops along the length of the screw threads before installing into holes. The oil will disperse evenly as you tighten. Reapply as needed for subsequent removals and insertions.
Properly cleaning holes beforehand is still critical. Debris and lacquer prevent proper screw seating regardless of lubrication. Use a toothpick and solvent like alcohol to scrub out grime.
Lubrication shines for retightening screws that have become stubbornly stuck from compression and corrosion. Penetrating oils help break them free to tighten fully again.
Take care not to overtighten when screws turn freely from lube. Snug with moderate torque is ideal. Overtightening strains plastic heads and strips screw drives.
The smooth torque from lubrication also reduces accidental damage if a screwdriver slips. Minimizing hardware damage keeps your stick performing great for longer.
For extra holding power, apply a drop of removable threadlocker like Blue Loctite once screws are seated. This prevents loosening from vibration.
Proper screw lubrication and care maximizes the lifespan of both your screws and lacrosse stick heads. Keeping spares on hand for replacements is also wise for worn hardware.
Be sure to use the properly sized Allen wrench for your stick’s screw type – 3/16” for Maverik and STX, 1/4″ for Warrior and Brine heads. Ill-fitting tools can damage screws.
Don’t forget to periodically check and retighten screws as needed, regardless of lubrication used. But you’ll find properly lubed screws hold longer between adjustments.
Take 30 seconds before games to lube your lacrosse stick screws for an easier time tightening up. Your stick will reward you with dialed-in ball control and handling for dominating play on the field!
Don’t Overtighten Lacrosse Stick Screws

As a lacrosse player, keeping your stick head firmly screwed tight is crucial for optimal ball control and handling. However, it’s possible to overdo it – overtightening screws can actually cause more harm than good.
Overtightening places excessive shear and tension forces on the plastic or composite head material. This can strip out the screw holes, cracking and weakening the surrounding structure.
Gradually enlarged holes from overtightening allow the head to rattle around loosely. This hampers cradling, shooting, and passing precision. Overtightened screws also tend to vibrate out more easily.
Excessive torque on screws can deform the head shape, warping sidewall angles and altering stringing channels. This negatively impacts pocket function and ball release.
Overtightening also accelerates wear and tear on the screws themselves. This leads to faster rounding off or shearing of the Allen key drive areas under high stress.
Use a calibrated torque wrench if possible when first installing screws. Most composite heads require only around 5-8 inch-pounds for optimal tightness without damage. Too much more risks problems.
If tightening by hand, turn screws only until reasonably snug and resistant to further tightening. Don’t force screws past the point you feel increased resistance.
Properly cleaning holes before inserting screws also reduces the torque needed for tightening. Debris buildup makes screws seat poorly.
Apply a threadlocker like Blue Loctite for extra security, allowing you to tighten screws a little less without loosening over time.
Be sure to use properly fitting Allen wrench sizes for your particular stick’s screw type. Ill-fitting tools increase the risk of overtightening damage occurring.
Consider switching to titanium screws – their greater shear strength allows slightly firmer tightening without adverse effects on heads.
Periodically check screws before use and only tighten further if very loose. Avoid repeatedly maxing out torque at the same holes over time.
Also ensure stringing tension is moderate, excessive stringing forces can expand screw holes. Store sticks properly when not playing to avoid external forces stressing screws.
Heads will require replacement over time as screw holes slowly enlarge and warp. Budget for a fresh head at least every season or two depending on use.
With care and restraint, your lacrosse stick screws can be tightened just right for seasons of confident play. Find the sweet spot through trial and error to avoid damage from excessive torque. Moderately tight is just right!
Purchase a Lacrosse Head Screwdriver for Proper Torque
As a lacrosse player, keeping your stick head properly tightened is crucial for optimal ball control and handling. Trying to achieve ideal torque consistently by hand can be challenging. Luckily, specialized lacrosse head screwdrivers provide an easy solution.
These screwdrivers allow precise, calibrated tightening of head screws to lock them securely in place without risk of overtightening damage.
Most versions have a smoothed, ergonomic handle for comfort along with a specialized head designed for either 3/16″ or 1/4″ hex screws. Some models offer interchangeable heads.
High quality drivers have an adjustable torque nob or gauge right on the handle. This lets you dial in and limit tension to the ideal range for your stick’s screws – around 5-8 inch-lbs for most composite heads.
This prevents under or overtightening. Overtightening can crack heads or strip screws. Undertightening leads to loose rattling that hampers play. A torque-limiting driver ensures ideal snugness every time.
The preset torque also speeds up tightening compared to carefully gauging tension by hand after each turn. Just twist until the driver clicks or slips to signal complete tightness.
Popular lacrosse head screwdriver brands include Stringking, Throne, and True. Models range from $40 up to $70 depending on features. Rubber handle variants provide extra grip.
Be sure to match your stick’s hex screw size – 3/16″ for Maverik and STX, 1/4″ for Warrior and Brine heads. Only apply torque force when the driver is properly seated.
Keep extra compatible Allen wrench bits on hand for field repairs if needed. Retighten screws before each game regardless of using a torque driver.
Properly cleaning screw holes before tightening increases grip and reduces torque needs. Debris prevents solid seating. Lubricating screws also aids proper tightening.
While a torque limiting driver prevents overtightening damage, heads do wear over time. Budget for replacement as screws loosen faster on older heads.
Take a minute to properly torque your lacrosse head screws before each game for confidence in robust construction. Dialed-in tightness maximizes ball control for dominating play on the field!
Upgrade to Screws with Knurled Heads for Extra Grip
As a lacrosse player, you know the constant annoyance of stick head screws loosening over time. The vibrations and impacts of play inevitably take their toll. Upgrading to screws with knurled heads can provide an easy solution for keeping them tight.
Knurled screw heads have a pattern of raised diagonal lines or pyramid shapes across the top surface. This rough texture provides extra grip against the smooth plastic of lacrosse heads.
The increased friction resists spinning and slackening from all the torsional and sheer forces screws undergo during intense lacrosse action. Knurls practically bite into the head for added staying power.
Knurled screws also allow tighter clamping force without slippage when installing. The grip boosts effective torque so you can really crank screws down without cam-out.
Many companies sell knurled replacement screw sets designed specifically for lacrosse sticks. Just match the included Allen wrench size to your head’s screws.
Most heads use 3/16” screws, but brands like Warrior and Brine instead take 1/4” screws. Using properly sized tools prevents stripping or rounding off screw heads.
Make sure to thoroughly clean holes before installing knurled-head screws. Debris prevents solid seating and requires more torque during tightening.
A drop of removable threadlocker like Blue Loctite is highly recommended with knurls as well, for enhanced vibration resistance.
Knurled screws allow you to achieve optimal tightness without relying on permanent Loctite formulas that make removal difficult. Just remember to not overtighen.
For extremely worn out heads with enlarged holes, consider rebuilding the holes with epoxy and toothpicks before installing fresh hardware.
Periodically check knurled screws for any loosening before games and retighten as needed using the crisscross pattern.
While more expensive than standard screws, knurled lacrosse head screws provide superior staying power for extra seasons of optimal pocket performance. Ditch the rattling for good!
Avoid Exposing Screws to Extreme Temperatures
As a lacrosse player, keeping your stick head firmly screwed on is crucial for top performance. However, subjecting screws to extreme hot or cold conditions can cause unseen damage that results in annoying looseness down the road.
The composites, epoxies, and metals used in modern lacrosse stick construction all expand and contract at different rates when temperatures fluctuate outside normal ranges.
Heating screws above around 120°F can relieve tension on the threads and compromise the precise fit needed for solid tightness. This leads to accelerated loosening as they vibrate looser over time.
Prolonged heat also weakens many threadlocker compounds, reducing their effectiveness at preventing screw loosening.
Excessive cold such as freezing temps can make screw shafts and heads more brittle and prone to shearing or stripping when tightening. The threads also contract slightly, eventually working screws loose.
Avoid leaving sticks inside hot cars or trunks for extended periods. The interior can exceed 150°F on hot sunny days. Take gear inside with you when running errands.
When travelling, don’t store sticks in luggage compartments that may experience temperature extremes from the tarmac or weather. Carry them in cabin when possible.
If sticks experience high heat, allow screws and heads to gradually return to normal room temperature before tightening again or making adjustments.
In cold climates, store gear in temperate environments like locker rooms and avoid direct cold exposure before games when possible. Tighten screws after warming.
Prep holes properly before installing screws to maximize grip and reduce the torque needed for tightening. Debris in holes requires more force that can damage cold screws.
Periodically check screws before use regardless of temperature factors. Retighten any loose ones using the crisscross pattern to evenly distribute forces.
While you can’t always control environments, just minimizing extreme temperature swings goes a long way. Take care of your lacrosse screws and they’ll take care of you!
Store Lacrosse Stick Properly to Limit Vibration
As a lacrosse player, keeping your stick head screws tight can seem like an endless battle. The constant impacts and vibrations during games and practice inevitably take their toll. Luckily, proper storage between sessions can dramatically extend screw longevity.
Hanging or leaning sticks horizontally from hooks and pegs places stress on the head as gravity pulls it down. This leverage effect applies amplified shock and vibration to the screws with every bump or movement.
The same dynamic occurs when tossing loose sticks on top of gear bags. The wobbly, unsupported head gets jostled around, transmitting forces directly to screws.
For minimal vibration exposure, always store sticks vertically in stands or towers whenever possible. This eliminates leverage forces from the hanging head acting on screws.
Placing sticks gently in bins or narrow compartments without bumping or shaking also works well. Just avoid laying horizontally unstable.
Padded stick bags with dividers provide good cushioning during transport. Backpack styles keep sticks vertical on your back for minimal jostling.
Letting sticks bang around loosely in car trunks or storage rooms leads to accelerated screw wear. Take care to minimize chaotic vibration.
When hanging is unavoidable, pad hangers or use notched cradles to provide solid support across the entire head. Avoid standard open hooks.
Check screws and retighten after transportation or storage using a crisscross pattern to evenly distribute forces. Have spares ready for any bent or damaged screws.
Proper storage alone isn’t enough – always inspect screws before games and tighten if needed. But minimizing vibration exposure between uses definitely extends the usable life of your gear.
Take the extra minute to safely store sticks after finishing play. Your sticks will reward you with seasons more of confident ball control thanks to screws that hold their grip!
Replace Stock Screws with Longer Versions
If the standard screws on your lacrosse stick head keep coming loose no matter what you try, it may be time for an upgrade. Replacing the stock hardware with longer screws can provide more solid tightening for frustrated players.
Longer screw shafts embed deeper into heads, dispersing forces over more thread area and anchoring better against vibration.
The extra shaft protruding where the head meets the handle also reinforces the crucial junction point against impact stress. Standard screw lengths often leave this vulnerable area with minimal overlap.
Longer steel screws provide more shear and tear-out strength than the softer alloys often used for cost savings in stock hardware. They resist stripping from overtightening better as well.
Look for replacement screw sets offering at least 10% longer shafts than your current hardware. Allowing screws to penetrate halfway through plastic heads is ideal. Going much deeper risks poking through if you overtighten.
Be sure to match the hex size of any new screws to your head’s stock size – either 3/16” or 1/4” for most modern sticks.
Properly clean out holes before installing upgraded screws. Old debris makes proper seating difficult and requires extra torque.
Take care not to overtighten new longer screws – the extra length multiplies torque forces acting on the surrounding head material. Tighten just until reasonably snug.
A drop of medium-strength threadlocker like Blue Loctite will also keep long screws locked in place. Avoid permanent Loctite formulas.
For extremely worn out heads with enlarged holes, consider filling holes with epoxy and toothpicks to re-tighten the fit before installing longer screws.
Periodically check screws before games and tighten if needed after upgrading. While screws will loosen slower, inspection is still required.
Take control of chronic loose screw headaches by installing heavy duty longer replacements. Your stick will reward you with a solid feel and dialed-in ball control all season long!
Check for Cracks Around Screw Holes in Head
No matter how careful you are, lacrosse stick heads gradually wear out over time. Subtle cracks emerging around screw holes is a common indicator that replacement may be necessary for optimal performance.
The repeated impacts of play combined with screw tension forces take a toll on composite and plastic heads. Hairline cracks begin to radiate from the concentrated stress points surrounding holes.
These cracks then expand into the surrounding head material with every shot, check, and hard collision. Like cracks in a car’s windshield, they branch and spread progressively wider over time.
Cracks allow the head to flex and distort more easily, throwing off cherished pocket shape and ball control. Larger fractures also lead to bumpy screw seating that rapidly loosens things up.
Checking for cracks around all screw holes should become part of your regular lacrosse stick inspection routine each season.
Closely eye the area surrounding each screw, especially the main sidewall holes. Use good lighting and feel gently by hand to detect early cracks before they’re visible.
Take care not to overtighten screws once cracks emerge or it will exacerbate damage. Consider switching to nylon washers or grommets to reduce stress concentration on cracked plastic.
For repairable cracks, specialty epoxies made for plastic bonding can restore structural integrity when applied properly into the crevice.
But once cracks expand across large areas or connect between multiple screw sites, replacement is the only permanent solution. The head becomes too unstable for precise play.
Prevent premature cracking by not overtightening screws, avoiding extreme string tension, and storing sticks properly. Budget for new heads every season or two.
While part of the sport’s wear and tear, cracked heads spell trouble for your lacrosse game. Stay vigilant in checking for emerging cracks so you know when it’s time to swap in fresh gear and maintain your competitive edge.
Consider Using Nylon Lock Nuts on Back of Screws
No matter how tight you crank those lacrosse head screws, they inevitably work loose over time. The constant vibration and shocks take their toll. If standard screws just won’t stay put, nylon lock nuts can provide a secure solution.
Nylon lock nuts feature a molded plastic insert that flexes to grip screw threads tightly. This creates substantial friction against loosening while still allowing the screw to be driven in.
Simply use a nylon lock nut backed up against the plastic head on the screw ends protruding through. Tighten the screw as normal from the front, with the nylon lock nut compressed at the rear.
The flexible insert bites down on threads, acting as a shield against forces trying to work screws backwards out of holes. This mechanical lock keeps lacrosse screws firmly seated.
Plastic and metal lock nuts are available to suit standard lacrosse screw sizes like 3/16″ or 1/4″ hex. Match your specific stick’s hardware.
Proper screw hole preparation is still important for maximum friction and engagement with the nylon insert. Clean debris and oils from old holes.
Take care not to overtighten screws and damage heads or threads when using lock nuts. The extra friction allows for a lighter final torque.
Consider a drop of medium strength threadlocker like Blue Loctite as well on screw threads before installing lock nuts. This chemically adheres threads together.
Check lock nut tightness periodically before games and tighten down further if any have managed to loosen up. Carry spare nuts as backups.
While more hassle than stock screws alone, nylon lock nuts are great insurance against infuriating head loosening issues. Take control of those aggravating rattles!