Need a New Pole for Your Basketball Hoop. Learn How With This Easy GuideNeed a New Pole for Your Basketball Hoop. Learn How With This Easy Guide
Why Replace Your Basketball Pole? Signs It’s Time for a New One
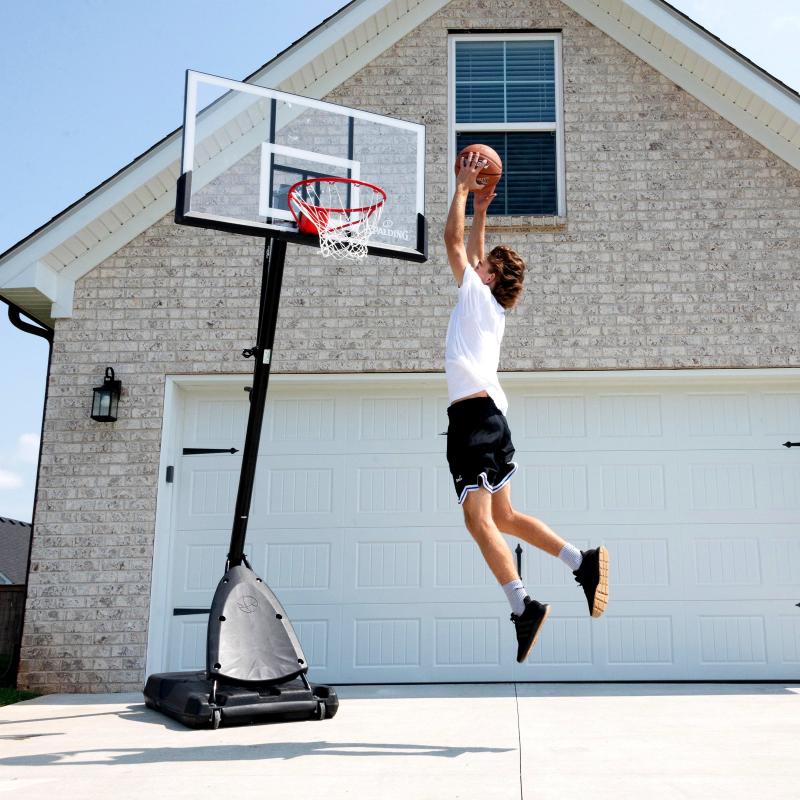
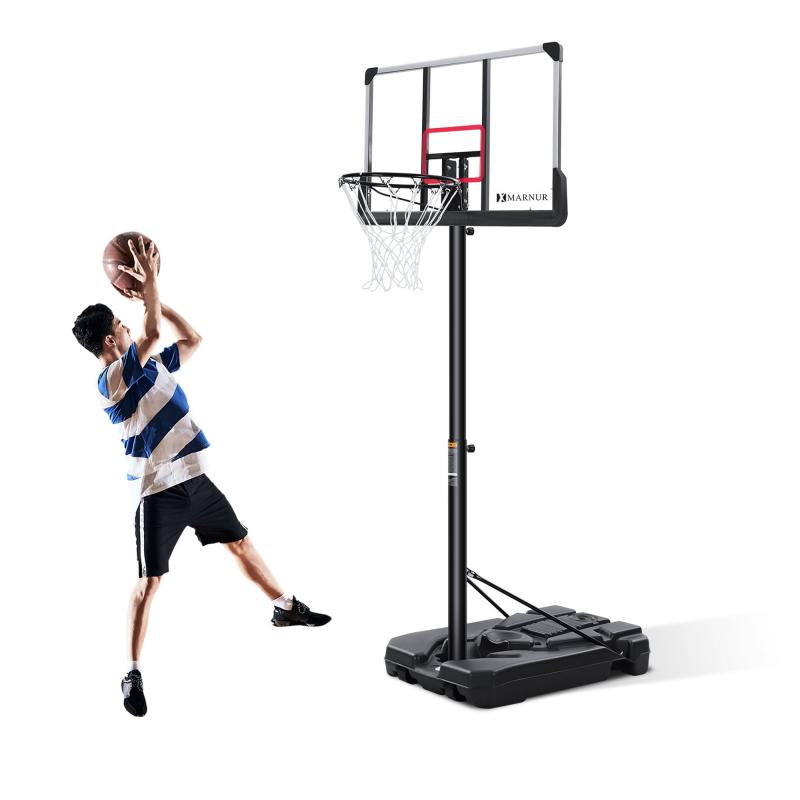
If you’ve had the same basketball pole in your driveway for years, it may be showing signs of wear and tear. Rusty poles, wobbly bases, and poles that are no longer perfectly straight are all indicators that it could be time for a new basketball pole. Replacing an aging or damaged pole can restore the joy of playing basketball at home and provide family fun for years to come.
One of the most obvious signs your basketball pole needs replacing is rust. Exposure to the elements causes metal poles to gradually rust over time. This not only detracts from the appearance of your driveway or backyard, but seriously compromises the integrity and safety of the pole. As rust eats away at the metal, it becomes weaker and more prone to snapping or collapse. It’s important to replace a rusty pole before it becomes a safety hazard.
In addition to rust, also inspect the pole for dents, cracks, or bends. Even if you don’t see exterior damage, the pole may be compromised. Wobbling when you shoot, loose bolts, or difficulty adjusting the height can indicate interior structural issues. If the pole leans or is no longer perfectly vertical, this stresses the pole base and can lead to a weak anchor. Address these issues promptly by replacing the pole.
A loose, shifting pole base is another sign it’s time for a new basketball pole. In-ground poles with concrete bases can shift over time due to ground movement or erosion. Trying to re-level a pole that’s permanently shifted can damage the concrete base further. Portable poles with water or sand-filled bases may spring leaks or become damaged. In either case, replacement is the best solution for safety and performance.
Consider Height, Material, and Ease of Installation
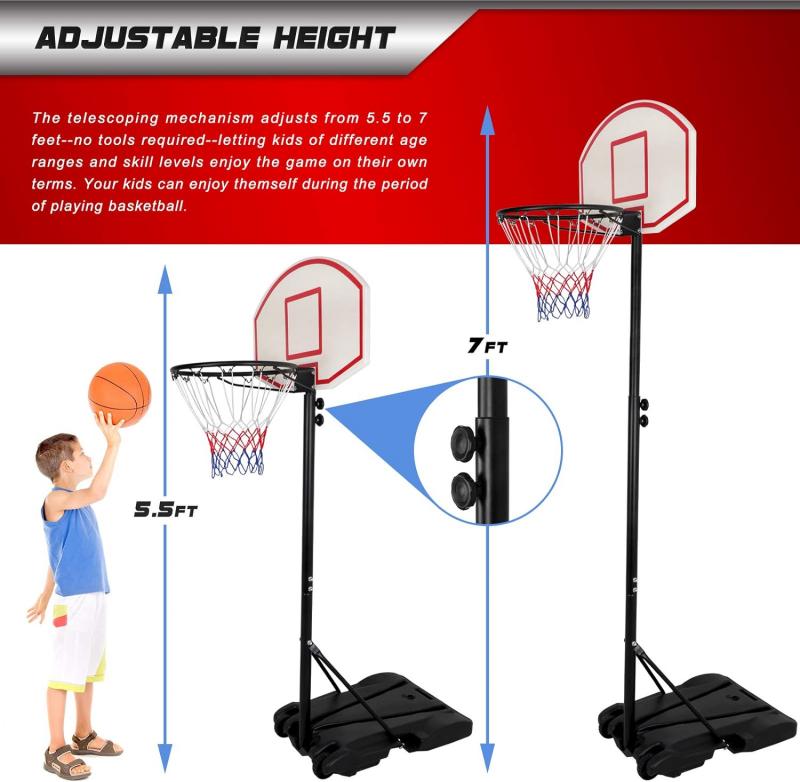
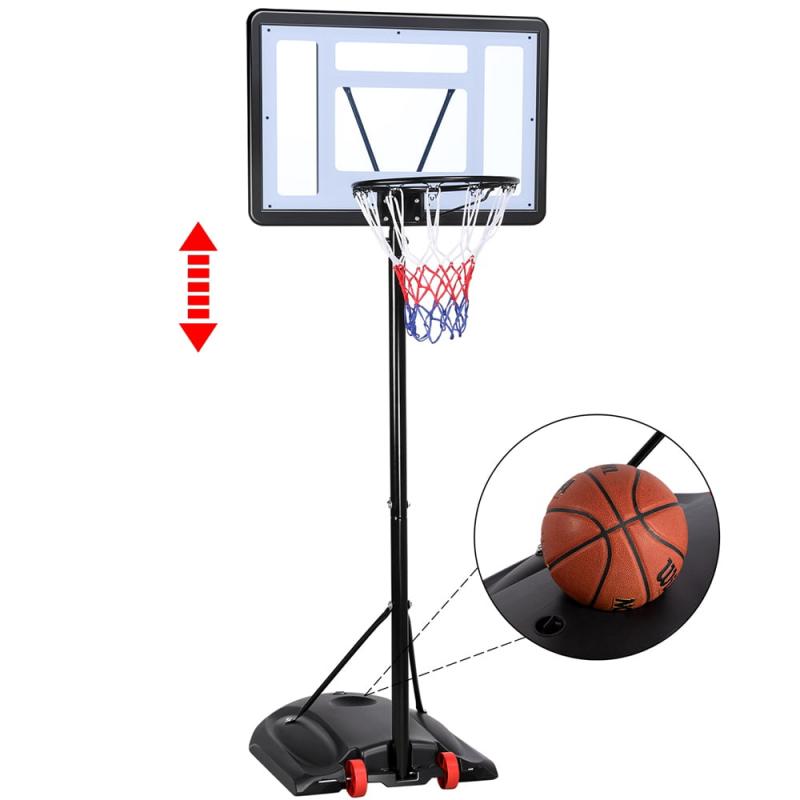
When choosing a replacement basketball pole, think about the height you need, the material, and how easy it will be to install. Measure the height of your existing pole and opt for a similar height unless you want to change it. Many poles can adjust from 7.5 to 10 feet to accommodate different age groups and abilities.
Steel and aluminum are common basketball pole materials, each with pros and cons. Steel is strong and economical but prone to rust if not regularly maintained. Aluminum resists rust but may cost more upfront. Compare material thicknesses, as thicker steel or aluminum lasts longer.
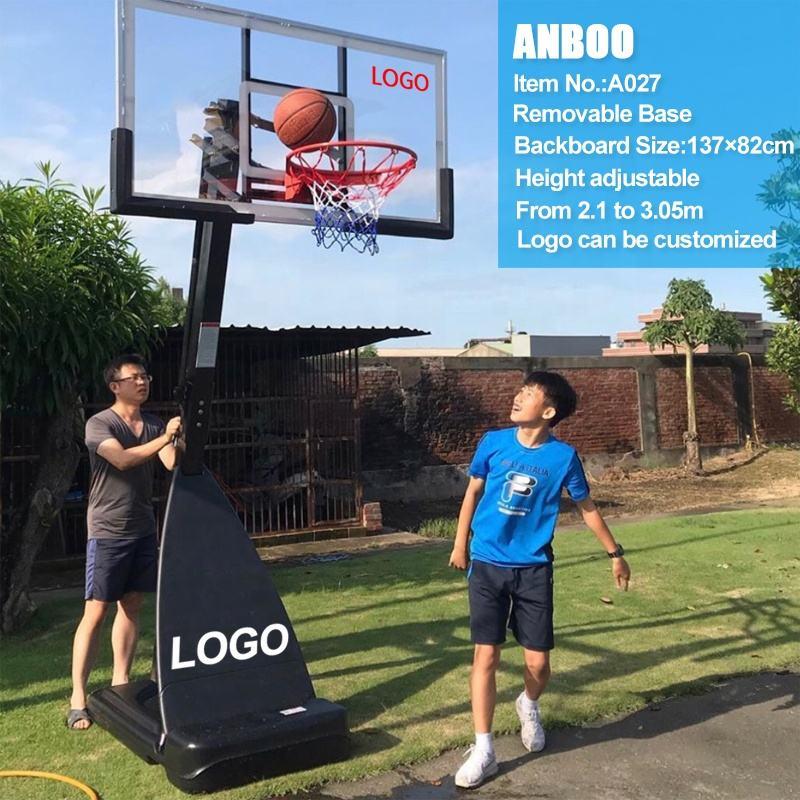
Permanent in-ground poles require digging and concrete but provide superior stability. Portable poles with fillable bases don’t need concrete and are height adjustable, but can tip over if not weighted properly. Consider your installation DIY skills and budget when deciding which new pole to purchase.
Step-by-Step Basketball Pole Removal
Once you’ve selected the perfect replacement basketball pole, it’s time to remove the old one. Start by gathering necessary tools. How to Replace Your Basketball Hoop Pole: A Comprehensive Guide
When should you replace your basketball hoop pole. How to choose the right replacement pole. What are the steps to remove an old basketball pole. How to properly install a new basketball hoop pole.
Signs It’s Time for a New Basketball Pole
Basketball hoops are a fantastic addition to any driveway or backyard, providing endless hours of entertainment and exercise. However, like any outdoor equipment, they’re subject to wear and tear over time. Recognizing when it’s time to replace your basketball pole is crucial for maintaining a safe and enjoyable playing experience.
Rust: The Silent Destroyer
One of the most obvious indicators that your basketball pole needs replacement is the presence of rust. Constant exposure to the elements can cause metal poles to corrode, compromising both their appearance and structural integrity. As rust eats away at the metal, the pole becomes weaker and more susceptible to collapse, posing a serious safety risk.
Structural Damage and Instability
Even if rust isn’t visible, other forms of damage can necessitate a pole replacement. Dents, cracks, or bends in the pole are clear signs of structural compromise. Less obvious indicators include:
- Wobbling when shooting
- Loose bolts
- Difficulty adjusting the height
- A leaning or non-vertical pole
These issues can stress the pole base and lead to a weak anchor, potentially resulting in accidents during play.
Base Problems
The stability of your basketball hoop relies heavily on its base. For in-ground poles, shifting concrete bases due to ground movement or erosion can cause the entire structure to become unstable. Portable poles with fillable bases may develop leaks or sustain damage over time. In either case, a compromised base is a clear signal that it’s time for a replacement.
Choosing the Right Replacement Basketball Pole
Once you’ve determined that a new basketball pole is necessary, the next step is selecting the right replacement. Several factors come into play when making this decision.
Height Considerations
Is height adjustability important for your basketball hoop? Many modern poles offer adjustable heights ranging from 7.5 to 10 feet, accommodating players of different ages and skill levels. Measure your existing pole and decide whether you want to maintain a similar height or opt for an adjustable model.
Material Matters
The two most common materials for basketball poles are steel and aluminum. Each has its advantages:
- Steel: Strong and economical, but prone to rust if not properly maintained
- Aluminum: Rust-resistant but typically more expensive
When comparing options, pay attention to the thickness of the material, as thicker poles generally offer greater durability and longevity.
Installation Type
Do you prefer a permanent in-ground pole or a portable option? In-ground poles require more extensive installation but provide superior stability. Portable poles with fillable bases offer flexibility in terms of location but may not be as stable as their in-ground counterparts. Consider your DIY skills, budget, and desired level of permanence when making this decision.
Removing the Old Basketball Pole
Before installing your new basketball pole, you’ll need to remove the old one. This process varies depending on whether you have an in-ground or portable system.
Tools You’ll Need
Gather the following tools before beginning the removal process:
- Sledgehammer
- Pry bar
- Ladder
- Shovel
Removing In-Ground Poles
For in-ground poles, follow these steps:
- Remove the backboard, hoop, net, and any pole padding using the pry bar.
- Dig around the concrete anchor, exposing at least 18 inches of the pole below ground level.
- Use the pry bar to loosen the pole from the surrounding concrete.
- Position the sledgehammer horizontally near the concrete and strike firmly to break the pole free from the base.
You can leave the remaining concrete in place to make digging the new hole easier.
Removing Portable Poles
For portable systems:
- Siphon out any water or sand from the base to reduce its weight.
- Use a hand truck to tip and transport the weighted base if necessary.
- Detach the pole from the base according to the manufacturer’s instructions.
Preparing the Ground for Your New Basketball Pole
Proper preparation of the installation site is crucial for the stability and longevity of your new basketball pole.
Digging the Hole
For in-ground poles, you’ll need to dig a new hole or widen the existing one. Consult the specifications of your new pole to determine the correct diameter and depth. Generally, you should allow for at least 2 feet of concrete at the base.
Ensuring Proper Alignment
To ensure your new pole will be perfectly vertical, use this pro tip:
- Lay a long board across the hole.
- Hang a plumb bob on a string from the center of the board.
- Check that the string aligns perfectly with the board edges on both sides.
- Adjust the hole with a shovel until the alignment is perfect.
Installing Your New Basketball Pole
With the groundwork complete, it’s time to install your new basketball pole. The process differs slightly for permanent and portable systems.
Installing Permanent In-Ground Poles
Follow these steps for a secure installation:
- Position the pole vertically in the hole.
- Have helpers hold it steady while you begin filling with wet concrete mix.
- Check for plumb (vertical alignment) and brace the pole while the concrete sets.
- Once secure, fill with the remaining concrete up to ground level.
Setting Up Portable Poles
For portable systems:
- Lower the pole into position according to the manufacturer’s instructions.
- Secure all removable bolts, ensuring they’re tight.
- Fill the base with water or sand as specified to provide adequate weight.
- Test the stability before use.
Securing and Stabilizing Your New Basketball Pole
Proper anchoring is essential for the safety and performance of your basketball hoop, especially for permanent installations.
Anchoring Permanent Poles
For in-ground poles, consider these additional steps to enhance stability:
- Use anchor bolts or J-bolts set into the wet concrete for extra security.
- Install diagonal braces from the pole to the concrete base for added support.
- Allow the concrete to cure fully (usually 24-48 hours) before attaching the backboard and hoop.
Stabilizing Portable Systems
While portable systems are designed for flexibility, they still require proper stabilization:
- Ensure the base is filled to capacity with the recommended material (water or sand).
- Consider adding sandbags or weights around the base for extra stability.
- On uneven surfaces, use shims to level the base and prevent tipping.
Maintaining Your New Basketball Pole
To extend the life of your newly installed basketball pole and prevent premature replacement, regular maintenance is key.

Rust Prevention
For metal poles, rust prevention is crucial:
- Apply a rust-resistant paint or coating to exposed metal surfaces.
- Regularly inspect for signs of rust and address them promptly.
- Consider using a weatherproof cover during harsh weather conditions.
Regular Inspections
Perform these checks periodically to catch potential issues early:
- Tighten all bolts and fasteners.
- Check for any signs of wear or damage to the pole, backboard, or rim.
- Ensure the base remains stable and level.
- Test height adjustment mechanisms for smooth operation.
Seasonal Care
Adjust your maintenance routine with the seasons:
- In winter, remove snow and ice buildup to prevent undue stress on the structure.
- Before spring, check for any damage caused by winter weather.
- In summer, be mindful of extreme heat effects on portable system bases.
- In fall, prepare the system for upcoming winter conditions.
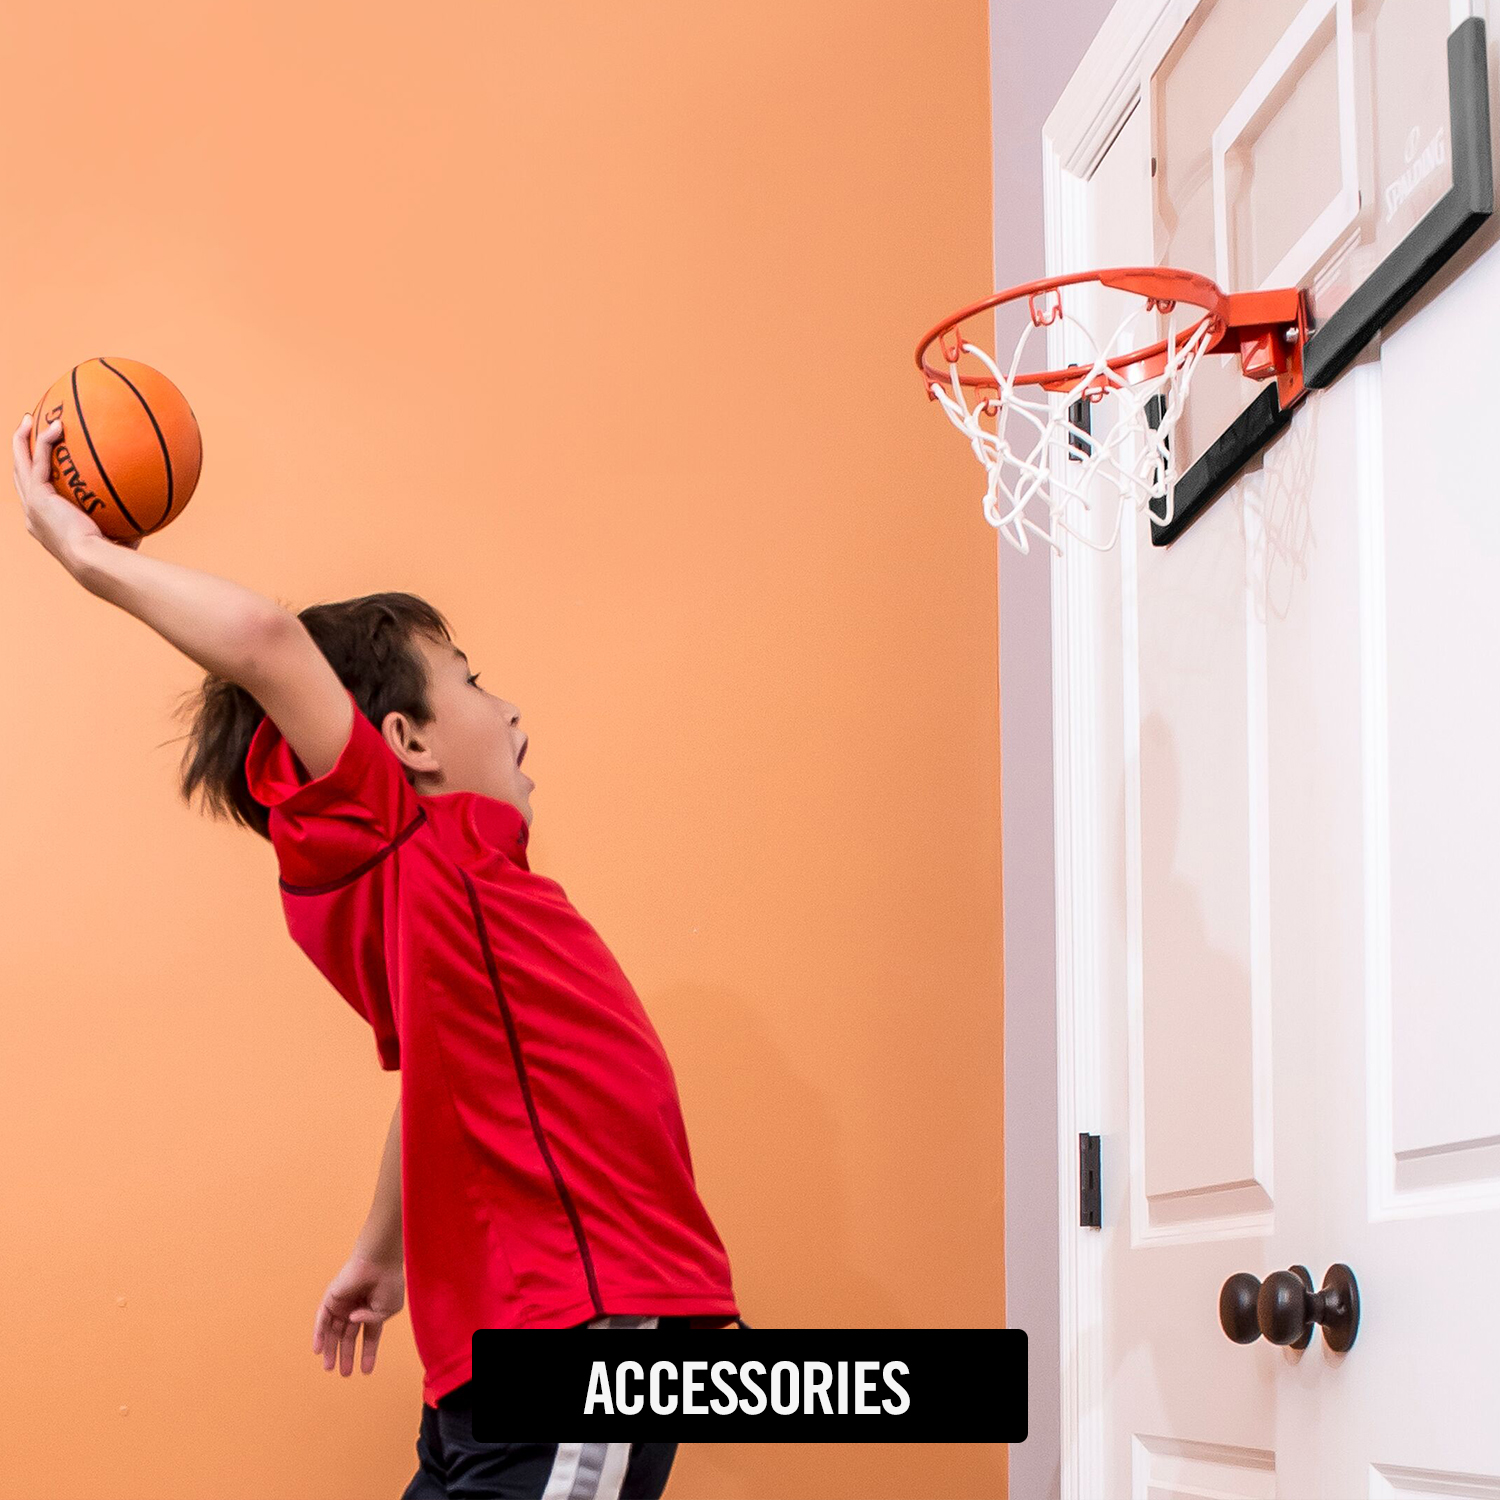
Enhancing Your Basketball Experience with Accessories
Now that you’ve installed your new basketball pole, consider these accessories to improve your playing experience:
Lighting Systems
Extend your playing time with proper lighting:
- LED lights mounted on the pole for nighttime play
- Solar-powered options for energy efficiency
- Adjustable lighting angles to minimize glare
Padding and Safety Features
Enhance safety with these additions:
- Pole padding to prevent injuries from collisions
- Breakaway rims to reduce stress on the backboard during dunks
- Non-slip court coating for better traction
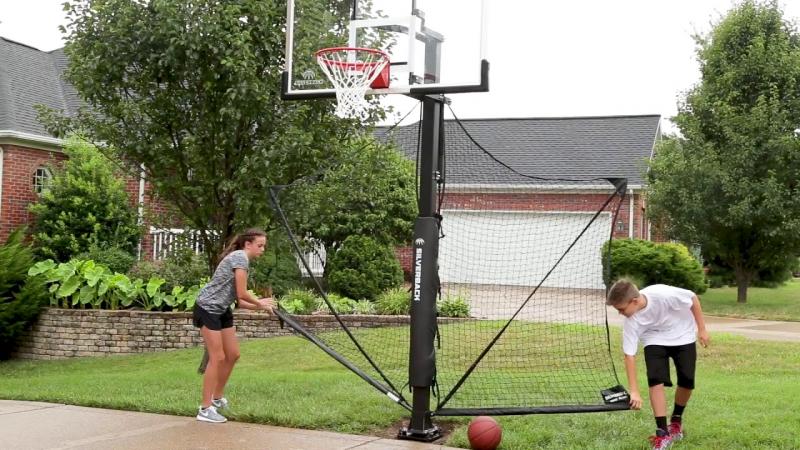
Training Aids
Improve your game with these training accessories:
- Rebound nets for solo practice
- Shot trainers to perfect your form
- Ball return systems for efficient practice sessions
By carefully selecting, installing, and maintaining your new basketball pole, you’re setting the stage for years of enjoyable play. Remember to prioritize safety at every step, from choosing a sturdy pole to ensuring proper installation and regular maintenance. With your new basketball hoop in place, you’re ready to create lasting memories and perhaps even nurture the next basketball star in your family or neighborhood.
Why Replace Your Basketball Pole? Signs It’s Time for a New One
If you’ve had the same basketball pole in your driveway for years, it may be showing signs of wear and tear. Rusty poles, wobbly bases, and poles that are no longer perfectly straight are all indicators that it could be time for a new basketball pole. Replacing an aging or damaged pole can restore the joy of playing basketball at home and provide family fun for years to come.
One of the most obvious signs your basketball pole needs replacing is rust. Exposure to the elements causes metal poles to gradually rust over time. This not only detracts from the appearance of your driveway or backyard, but seriously compromises the integrity and safety of the pole. As rust eats away at the metal, it becomes weaker and more prone to snapping or collapse. It’s important to replace a rusty pole before it becomes a safety hazard.
In addition to rust, also inspect the pole for dents, cracks, or bends. Even if you don’t see exterior damage, the pole may be compromised. Wobbling when you shoot, loose bolts, or difficulty adjusting the height can indicate interior structural issues. If the pole leans or is no longer perfectly vertical, this stresses the pole base and can lead to a weak anchor. Address these issues promptly by replacing the pole.
A loose, shifting pole base is another sign it’s time for a new basketball pole. In-ground poles with concrete bases can shift over time due to ground movement or erosion. Trying to re-level a pole that’s permanently shifted can damage the concrete base further. Portable poles with water or sand-filled bases may spring leaks or become damaged. In either case, replacement is the best solution for safety and performance.
Consider Height, Material, and Ease of Installation
When choosing a replacement basketball pole, think about the height you need, the material, and how easy it will be to install. Measure the height of your existing pole and opt for a similar height unless you want to change it. Many poles can adjust from 7.5 to 10 feet to accommodate different age groups and abilities.
Steel and aluminum are common basketball pole materials, each with pros and cons. Steel is strong and economical but prone to rust if not regularly maintained. Aluminum resists rust but may cost more upfront. Compare material thicknesses, as thicker steel or aluminum lasts longer.
Permanent in-ground poles require digging and concrete but provide superior stability. Portable poles with fillable bases don’t need concrete and are height adjustable, but can tip over if not weighted properly. Consider your installation DIY skills and budget when deciding which new pole to purchase.
Step-by-Step Basketball Pole Removal
Once you’ve selected the perfect replacement basketball pole, it’s time to remove the old one. Start by gathering necessary tools: sledgehammer, pry bar, ladder, and shovel. Use the pry bar to detach and remove the backboard, hoop, net, and any pole padding. Climb a ladder to reach hardware if needed.
For in-ground poles, dig around the concrete anchor to expose at least 18 inches of the pole beneath ground level. Use a pry bar to loosen the pole from the surrounding concrete. Position the sledgehammer horizontally near the concrete and strike firmly to break the pole free from the base. The remaining concrete can stay in place to make digging the new hole easier.
For portable poles, siphon out any water or sand from the base to lighten it. You may need a hand truck to tip the weighted base onto for transport. Detach the pole from the base according to the manufacturer’s instructions.
Preparing the Pole Hole
Now comes the hard work of digging or widening the pole hole. Refer to the new pole’s specs to determine the correct diameter and depth. Allow for at least 2 feet of concrete at the base. Remove any loose pieces of concrete from the old hole. Level the bottom and sides with a shovel.
Pro tip: Lay a long board across the hole and use a plumb bob dangling on a string to check for precise vertical sides. Adjust with a shovel until the string aligns perfectly with the board edges on both sides.
Step-by-Step Basketball Pole Installation
Once you have a perfectly plumbed hole ready, it’s time to install the new replacement pole. Have helpers on hand to steady the pole when lowering it into position.
For permanent poles, position it vertically in the hole and hold while filling with wet concrete mix. Check plumb and brace while the concrete sets. Fill with remaining concrete up to ground level after securing.
For portable poles, lower into position and secure per instructions. Make sure removable bolts are tight. Fill base with water or sand as needed to weigh down. Test stability before use.
Securing the Pole
Permanent poles require serious measures to keep them anchored securely in the ground. Pour concrete at least 1 foot deeper than the pole bottom, using rapid-set concrete if available. For extra strength, insert rebar rods into the wet concrete surrounding the pole.
Leave 6-12 inches of pole above ground level. Build a “collar” around this section with additional wet concrete. Smooth and slope gently away from pole. Allow full curing time before use.
Re-Attaching Basket and Backboard
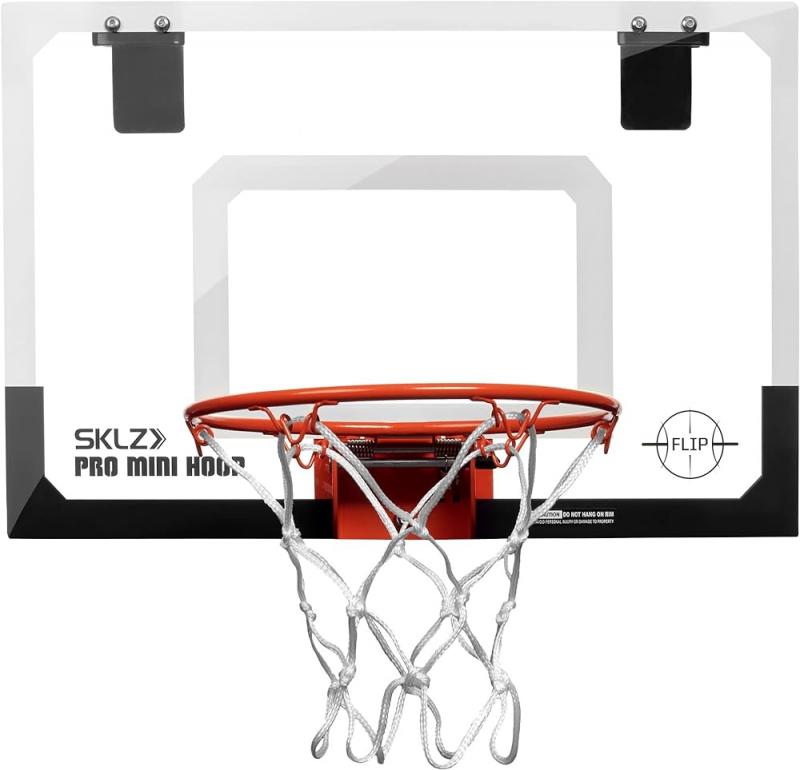
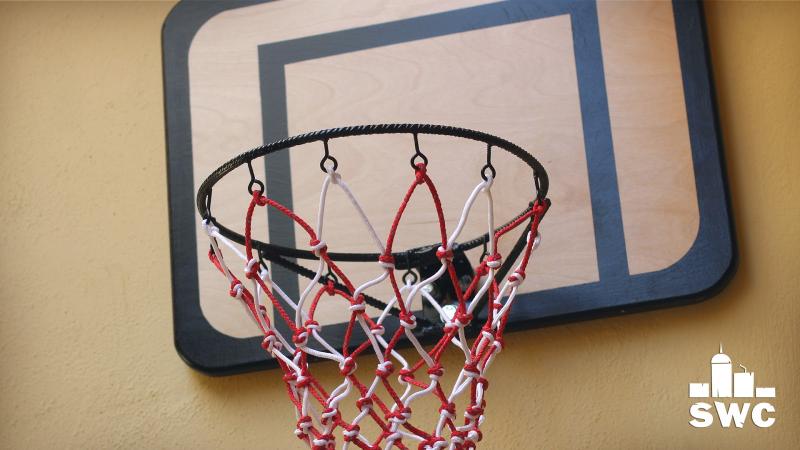
Once the replacement pole is securely installed, it’s time to complete the basketball setup. Attach backboard, hoop, and net following the new pole’s mounting instructions. Most manufacturers supply required hardware. Use care when handling glass or acrylic backboards to avoid cracks or scratches.
Consult height specs to ensure correct placement. Tighten all hardware securely, adding extra washers if needed to reduce wobble. Attach padding around the pole if desired as an extra safety measure.
Safely Raising the Pole
Adjustable-height poles require caution when first raising them to the desired rim height. Appendages or materials can become trapped between movable sections. Raise slowly while stabilizing the upper sections of the pole. Use the assistance of at least two adults, one stabilizing the base while the other gently raises the pole top.
Raise in increments, double-checking stability and alignment at each new locking position. Do not allow pole to sway side-to-side while extending upward. Stop immediately if base begins to destabilize or lean.
Leveling Tips
It’s important for the pole to be perfectly straight for optimal performance and safety. After raising to the desired rim height, validate that the pole is still perfectly plumb.
Use a level tool on two adjacent sides, adjusting until centered on both. You may need to temporarily lower the rim and realign the bottom pole section before adjusting upper sections. Recheck plumb after each adjustment before raising higher.
Securing the base of the pole is also crucial. For portable poles, weigh the base down adequately with water, sand, or concrete blocks. Permanent poles should have an expansive concrete anchor. You can further secure the base by driving diagonal rebar rods into the ground near the concrete.
Safety First
Replacing your old, worn-out basketball pole with a shiny new one is an exciting upgrade for your home. But safety should always come first before family members start shooting hoops in the driveway.
Inspect the pole, backboard, rim, and net for any manufacturer defects or damage before first use. Confirm height is appropriate for players. Check base stability and pole verticality. Give concrete several days to fully cure if freshly poured.
Supervise play time and remind players not to hang, climb, or pull on any pole components. Take care when shooting to avoid backboard glass breakage. And be sure to regularly inspect and maintain your new basketball pole investment.
With proper care and precautions, your replacement basketball pole should provide years of bouncing fun. Just be sure to look for early signs of wear and replace components as needed. And if the project ever seems too complex, don’t hesitate to call in the experts.
Choosing the Right Replacement Basketball Pole – What to Consider
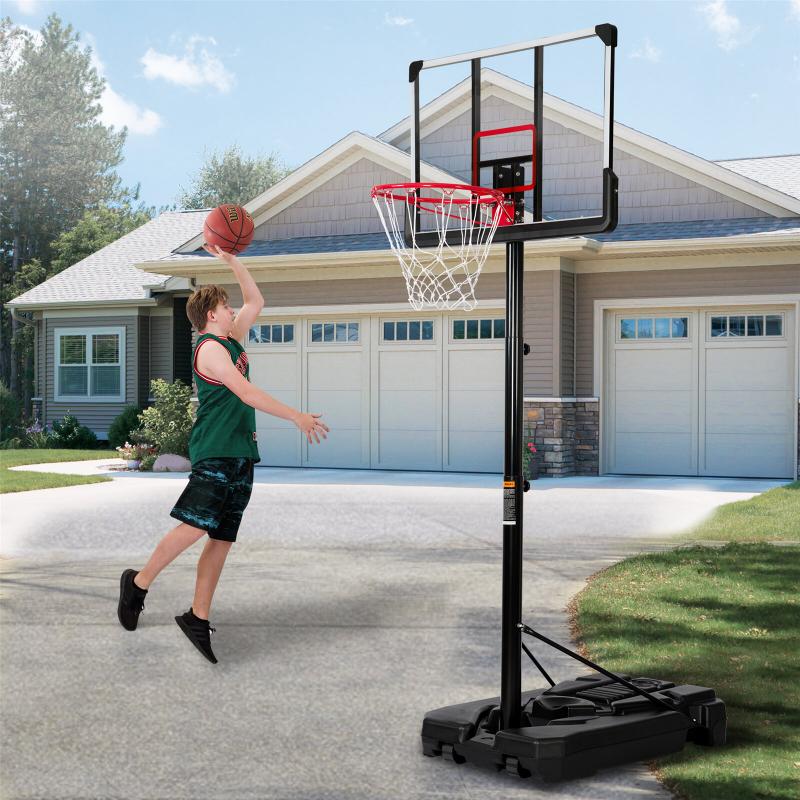
Upgrading your home basketball court with a new pole can breathe fresh life into family playtime. But with so many replacement basket pole options on the market, how do you choose? Important factors like pole material, mounting style, adjustability, and ease of installation should guide your decision.
Let’s compare the pros, cons, and key differences between common basketball pole types. I’ll share professional tips from my own experience installing and replacing poles to help you make the right selection.
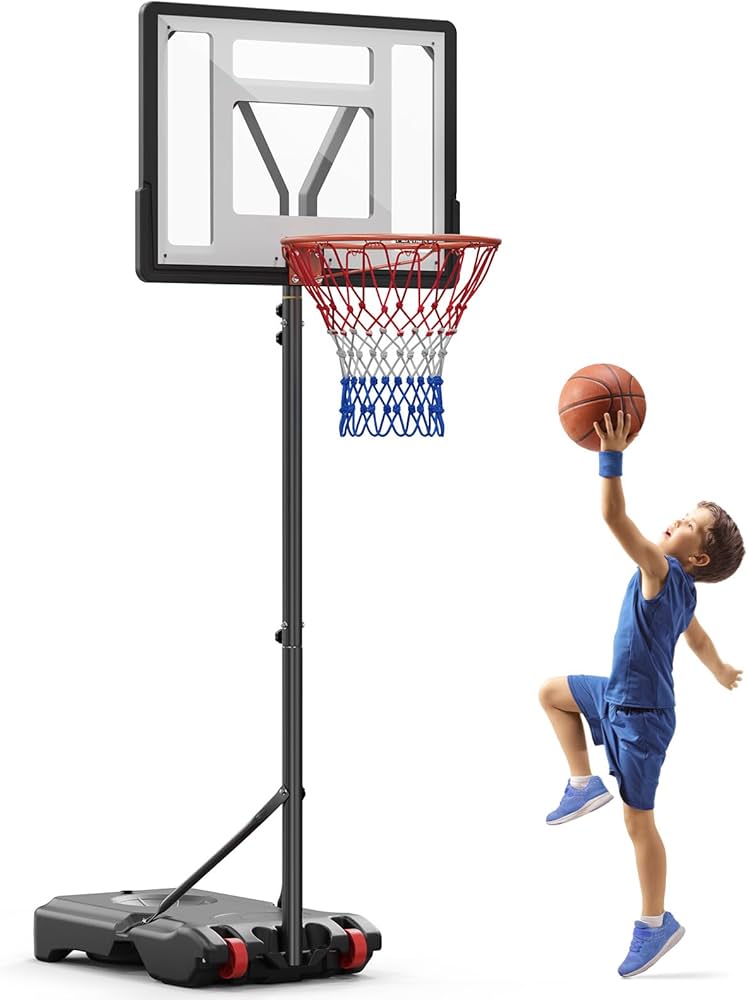
Permanent In-Ground vs Portable Poles
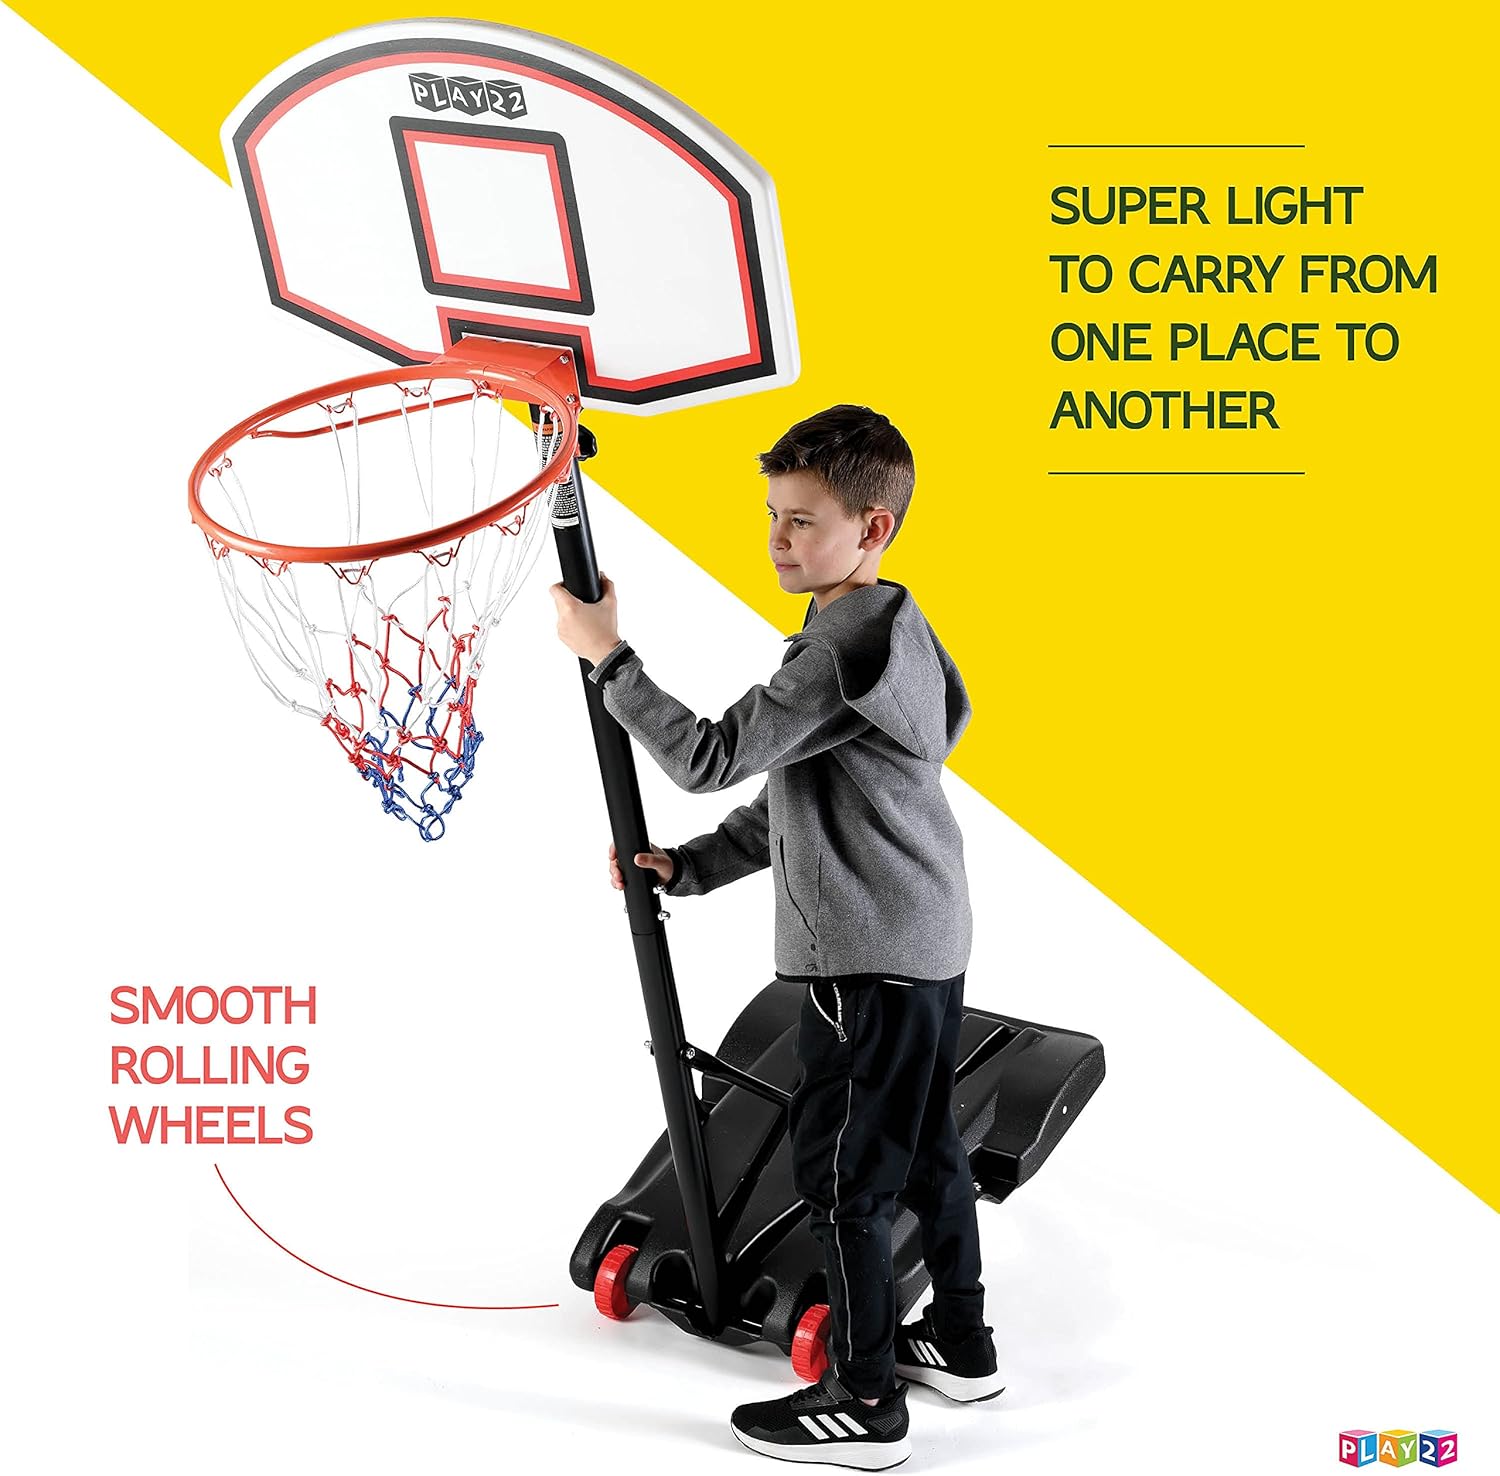
The first big decision is whether you want a permanent in-ground pole or a portable, movable pole. In-ground poles are set in concrete footing for maximum stability, while portable poles use fillable bases you can reposition around your driveway or yard.
Permanent poles take more physical effort to install but endure for decades with proper maintenance. Portable poles offer flexibility in placement and height changes, but require refilling ballast and may topple if not weighed down enough.
Consider your long-term plans for that area of your property. Are you willing to commit to a fixed pole location? How important is height adjustability for different-aged players? These preferences will steer you toward either permanent or portable.
Steel vs Aluminum Poles
Next, decide between steel or aluminum for the pole material itself. Both offer strength and durability, but key differences impact longevity and maintenance.
Steel poles are super strong but susceptible to rust when exposed to weather. Proper surface coatings help, but rust can develop over time, weakening the integrity. Aluminum better resists rust but may cost more upfront. Compare material gauge (thickness) too, as thicker steel/aluminum lasts longer.
Aesthetics matter too. Powder coated steel comes in more color options. Bare aluminum develops an oxidized gray patina over time. Weigh options like anodized or powder coated aluminum for maintaining a pristine appearance.
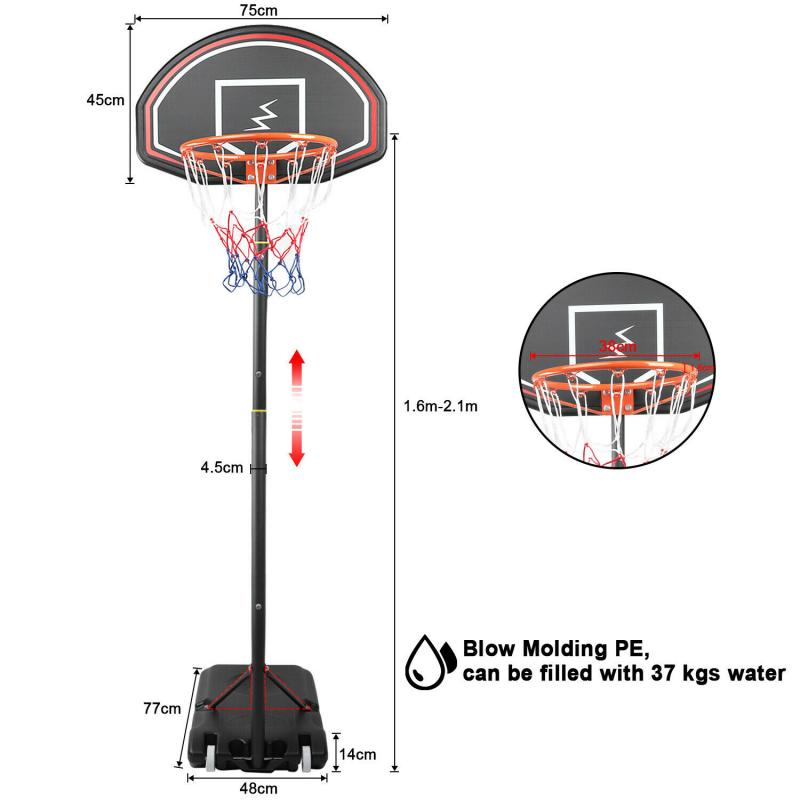
One-Piece vs Adjustable Height
Single piece poles maintain one fixed basketball rim height. Adjustable poles allow altering the rim height anywhere from 7.5 up to 10 feet through telescoping upper sections. Consider players’ ages and abilities when choosing adjustability.
Adjustable poles offer more versatility but require caution when raising/lowering to avoid finger pinching. Manual or automated adjustment mechanisms should work smoothly and lock securely.
One-piece poles cost less and have fewer moving parts to maintain. But you’re limited to a single rim height. Plan according to whether players will benefit from adjustability now or in coming years.
Anchor Design
The pole base anchoring system also merits careful inspection. Permanent in-ground poles should have deep concrete anchors, ideally with rebar reinforcements. Look for wide, heavy bases or earth augers providing ample stability.
For portable poles, favor quad or octagonal fillable bases over lighter circular bases. When filled with sand or water, wider bases resist tipping better. Make sure fill plugs and gaskets seal tightly to prevent leaking.
I recommend opting for more robust anchoring than the minimum required. Don’t go lightweight if stability is a concern. Heavy, fortified bases reduce wobble during competitive backyard play.
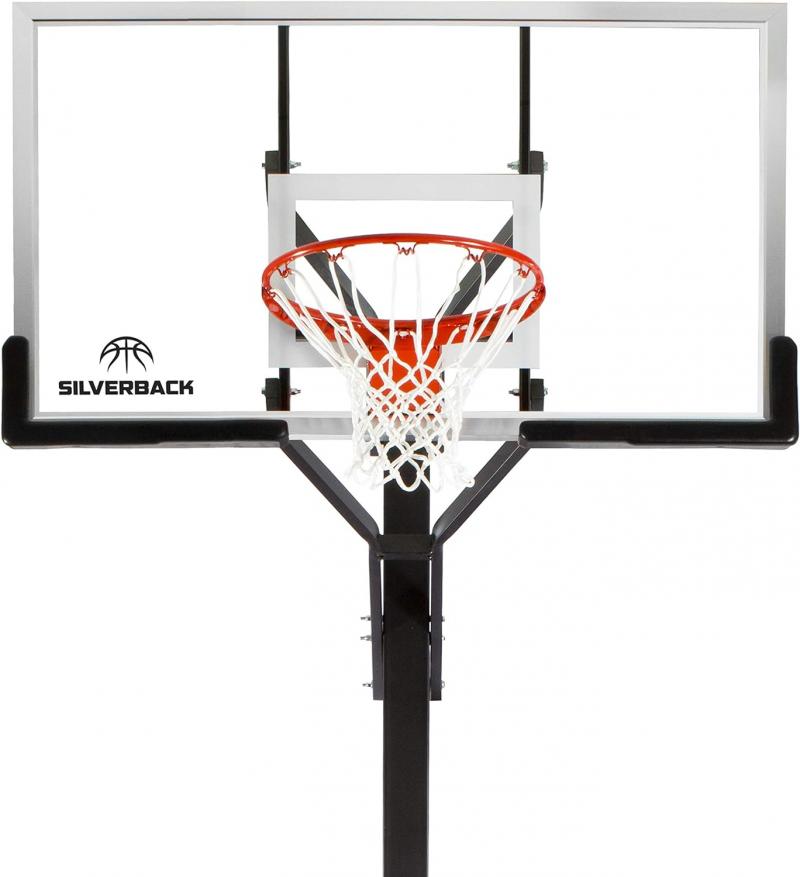
Backboard & Rim Choices
Don’t overlook the importance of the backboard and rim in your replacement pole decision. While poles get most of our focus, consider:
- Backboard material: Acrylic, steel, aluminum, glass
- Backboard size/shape: Common options are 42”, 48”, 54” rectangular or fan-shaped
- Rim type: Fixed, breakaway, or flexible
- Rim height adjustability: 10’ down to 7.5’
Match backboard size, material, and rim style to the pole mount. Make sure the pole can accommodate the hardware you want. This ensures proper weight limits, load capacity, and durability.
Installation Methods
Ease of installation is another big factor, especially if you plan to DIY. Compare pole specs like:
- Pre-assembled parts vs assembly required
- Concrete footer needs – pre-mixed vs poured dry
- Hardware and tool requirements
- Step-by-step instructions
- Customer support contact
Well-engineered poles make installation intuitive even for amateurs. Clear instructions, all necessary parts/tools, and responsive customer support alleviate frustrations.
For ambitious DIYers, in-ground permanent poles are very doable, just labor intensive. Portable poles are easiest when filled bases just need level ground. Seek professional assistance if pole specifics seem over your head.
Budget-Friendly Doesn’t Mean Cheap
With so many quality pole options available, you can find excellent value across price ranges. But don’t equate budget pricing with poor quality.
Poles from leading brands like Lifetime, Spalding, and Silverback offer durable construction at reasonable costs. Look for reputable manufacturers regardless of price point. Check reviews and inspect materials in person when possible.
Higher price does buy more robust build quality, thicker steel/aluminum, and advanced engineering. Determine needs based on use frequency, number of players, and weather exposure.
A bargain basketball pole that breaks after one season provides zero value. Seek poles warrantied for 5-15 years from manufacturers who stand behind their products.
Choosing the optimal replacement basketball pole takes some homework beforehand. Assess your needs, research options thoroughly, and inspect build quality up close. The right pole brings fun and convenience to your own backyard court for years on end.
Removing the Old Pole – Step-by-Step Instructions
Installing a new basketball pole is exciting, but first you need to remove the existing one. Taking down an old, damaged pole requires care to avoid injury or property damage. Follow these safe step-by-step instructions for smooth pole removal.
Gather Needed Tools
Removing a basketball pole is an ambitious DIY project, so ensure you have the right gear:
- Sledgehammer
- Pry bar
- Cordless drill
- Ladder
- Shovel
- Wheelbarrow
- Hand truck (for portable poles)
Use a pry bar to detach the backboard, hoop, net, and any padding from the pole first. Unscrew hardware with a drill or wrench if necessary. Climb a ladder to reach bolts out of arm’s reach.
Dig Around In-Ground Poles
For permanent poles set in concrete, dig around the anchor footing to expose at least 18 inches of the pole itself. Shovel straight down about 2-3 feet around the perimeter.
Wear eye and hand protection when shoveling concrete and dirt. Use a wheelbarrow to remove and discard debris so the work area stays clear.
Dislodge Base From Concrete
Next, work the pry bar down around the pole base, forcing it into gaps between metal and concrete. Move around the perimeter, applying focused downward pressure to gradually dislodge the pole bottom from its encased footing.
Caution – pry gently at first to avoid snapping the bar. Firm but controlled force is best to separate pole from concrete without damaging the pole.
Break Concrete Seal With Sledgehammer
Once the pry bar has freed the pole base somewhat, use the sledgehammer for added force. Position the hammer horizontally near the concrete surface and deliver firm hammer strikes around the pole.
Focus blows to break the top concrete seal securely holding the pole. The bond should fracture with multiple focused strikes. Keep hands clear when swinging hammer.
Remove Portable Base Fill
For portable poles with fillable bases, first detach the pole from the base following manufacturer instructions. Locate any plugs and siphon out water or sand fill gradually using a sump pump, siphoning hose, pails, or other method.
Caution – go slowly to avoid spilling or contamination. Dispose of fill properly, including any added antifreeze. Lighter weight will ease base transport.
Lever Pole Out of Concrete
Returning to in-ground poles, once the top concrete seal is broken, exert downward force on the pole itself. Rocking it back and forth helps twist it from side to side until it pulls free of the footing.
Use the pry bar as needed for extra leverage. Caution – keep bar in good contact to avoid slippage. Wear gloves for a tight grip.
If needed, use a shovel to remove more concrete around the base to loosen it. But keep concrete intact as much as possible.
Lower Pole Onto Wheelbarrow/Handtruck
With the pole removed from the base, slowly tilt it onto a sturdy wheelbarrow or heavy duty hand truck for transport. Center it diagonally across the load bed.
Use an assistant to help guide the pole down and support the weight. Avoid letting it tip or drop. Secure with ratchet straps if needed.
Transport Pole for Disposal/Recycling
Now you’re ready to take that old pole away for good! Transport wheelbarrow or hand truck carefully over terrain en route to your disposal or recycling location.
Many scrap metal recycling centers accept old steel or aluminum poles for payment. Or look for waste/recycling drop-off sites accepting metal. Cut into sections if needed to accommodate drop-off requirements.
Alternatively, make an old pole useful as a trellis, pole barn support, or other repurposed functions on your property with some creativity and additional brackets.
Inspect Hole Dimensions
With the previous pole gone, inspect the contours of the remaining hole if installing a new permanent replacement. Use a measuring tape to gauge depth and diameter compared to the specs of your new pole.
Widen or deepen areas if needed to accommodate the new footing size. Remove loose concrete or debris. Level the hole bottom and smooth sides in preparation for installation day.
Taking the proper precautions and following safe step-by-step removal procedures makes replacing your basketball pole smoother. Just use care when handling heavy materials, wear protective gear, and have help ready. Enjoy your new peerless pole!
Preparing the Hole – Measuring and Digging
Installing a new permanent basketball pole starts with properly preparing the hole. Measure carefully based on your new pole’s specs, dig to the correct width and depth, and ensure the hole sides are perfectly vertical. Taking time to measure precisely and dig properly ensures your new pole has an ideal anchored footing.
Review New Pole Installation Instructions
Before digging, consult the new pole’s installation guide to identify its required hole measurements. Account for:
- Hole diameter
- Total depth needed
- Depth of concrete at base
- Width of concrete collar at top
Proper hole sizing provides room to maneuver the pole into place while also keeping it well anchored. Copy the measurements for easy access.
Mark Circle Dimensions
Use spray paint or flour to mark the correct hole diameter centered on the install location. Stand in place and use a tape measure to plot an accurate circle before digging. For large diameters, tie a string to a center stake and use it as a circular guide.
Pro tip: Adjust circle orientation so hole must dig through as little existing concrete or obstacles as possible. This makes digging easier.
Dig Cautiously Down To Depth
Now the tough work begins! Use a shovel to dig straight down into the soil, following the marked circle. Widen gradually as you descend to reach the full diameter at the appropriate depth.
Make sure to call 811 beforehand to locate any buried utilities. Dig carefully if lines are present. Wear protective eyewear and gloves for safety.
Monitor depth frequently with a measuring tape until you reach proper specs. Pile excavated dirt to the side to keep the hole clear.
Maintain Straight, Plumb Sides
As you dig down, it’s crucial to maintain perfectly straight, vertical hole sides. This ensures the pole base makes flush contact everywhere for maximum stability.
Here’s a trick: Stretch a long board across the top of the hole. Use a plumb bob on a string that just brushes the board without touching sides. Adjust any non-plumb sides by digging outward until string aligns with board edges.
Level Hole Bottom
Finally, use a long, straight wood board to screed and level the hole bottom. Scoop out any high spots and low areas so bottom is perfectly flat. A small level tool verifies flatness across both directions.
Compact loose soil if present. The pole base can’t wobble or shift later when weighted down.
Add Gravel Base Layer If Needed
For especially loose or wet soil, it’s smart to add a 6-12 inch gravel base layer before the concrete footing.
Gravel provides extra stability, drainage, and protects the concrete from soil moisture. Compact gravel firmly before pouring concrete.
Measure for Concrete Needs

With digging complete, use a tape measure to calculate the cubic feet of concrete needed to fill the base up to specifications. Remember – the deeper the footing, the stronger the pole anchoring.
Order slightly extra pre-mixed concrete to account for native soil taking some volume when poured. You can always return unopened bags.
Pre-Set Anchor Bolts
Before pouring concrete, pre-set required anchor bolts protruding from the center of the hole base. Use a plumb bob to position bolts perfectly vertical.
Bolts usually anchor into the wet concrete surrounding the pole. Check your pole instructions for the number and spacing of anchors required.
Inspect and Correct Any Issues
Before concrete day, inspect the hole dimensions and correct any flaws:
- Proper diameter across entire depth
- Smooth, plumb sides
- Level, compacted bottom
- Anchor bolts pre-set and plumb
Taking time to measure precisely and dig correctly ensures your pole installation goes smoothly. Proper hole preparation gives you a sturdy, durable pole for years of backyard fun!
Installing the New Pole – A Step-by-Step Guide
Install day has arrived! Now it’s time to securely position your shiny new basketball pole into the prepared ground hole and encase it in concrete. Follow this step-by-step pole installation guide to properly anchor it for long-lasting stability and performance.
Inventory All Needed Parts & Tools
Unpack all new pole components and hardware beforehand. Arrange in order of use for smooth access. Having helpers expedites assembly. Must-have items include:
- New pole sections
- Concrete anchor kit
- Backboard, rim, and padding
- Leveling tools
- Wrenches for bolts
- Tape measure
Review manuals to understand parts and hardware purposes. Correct any issues before concrete work begins.
Position Pole Vertical in Hole
With helpers, slowly lower the bottom pole section into the hole while guiding it perfectly plumb. Use levels on adjacent sides or a plumb bob string.
Orient any holes or hardware facing the proper direction. Have an assistant hold and brace the pole upright once positioned.
Fill Partly With Concrete
With the pole held in place, fill the hole partially with quick-setting concrete about 2/3 up the depth. Add water per instructions and mix thoroughly. Shovel or pour concrete around the pole, tapping with a board to eliminate air gaps.
Make sure concrete contacts all sides and fills the hole width evenly. Periodically recheck plumb alignment as concrete fills in.
Attach Anchors Through Wet Concrete
Follow directions to install required anchor bolts or fasteners through the wet concrete into the pole sides as it sets. Tighten clamps or hardware partially.
The curing concrete will firmly hold anchors in place. Just take care not to shift pole alignment.
Allow Concrete to Set Before Filling
Before filling the remaining depth with concrete, allow the initial pour to set and harden overnight. This stabilizes the pole before more weight is added.
You can finish securing anchors once the first layer hardens. Just leave the top portion unfilled for now.
Mix and Add Remaining Concrete
The next day, mix a second batch of concrete to fill the hole up to ground level. Shovel in gradually, tamping with a board to eliminate voids.
Add just enough concrete to leave 6-12 inches of pole exposed above ground when finished. This allows collar space.
Build Concrete Collar Around Pole
Form a “collar” around the above-ground pole section using additional concrete. Mound it approximately 6 inches above ground level, tapering smoothly down and away from the pole.
Use boards as forms to shape the collar if needed. Allow curing time before attaching basketball hardware.
Attach Backboard, Rim, and Padding
Once concrete has fully cured, mount the backboard, rim, net, and pole padding according to the manufacturer’s instructions. Tighten hardware securely.
Adjust the rim height as needed and re-check pole verticality. Install proper court markings if desired.
Carefully installing each component in the proper sequence results in a professional quality pole that will provide years of service. Take your time and do it right the first time!
Making It Sturdy – Securing and Cementing the Pole
A properly secured basketball pole is crucial for safety and performance. Take steps during the installation process to ensure your new pole is firmly anchored, braced, and able to withstand aggressive backyard play.
Maximize Concrete Footing Depth
Deeper concrete pole footings equal better anchoring strength. Bury the pole base at least 2-3 feet into the ground before encasing in concrete. The deeper, the better.
Use rapid-setting concrete if possible to reach full strength faster. Pour concrete several inches above the pole bottom to prevent settling away later.
Brace While Curing
Temporarily brace the upper pole the first few days while concrete cures with supports staked into the ground or bungee cords attached. This prevents accidental bending or movement while concrete strengthens.
Check plumb alignment often as concrete sets. Rotate supports occasionally to maintain equal curing all around.
Add Rebar if Needed
For extra anchoring strength, insert rebar rods into the wet concrete surrounding the pole before drying. Crisscross pieces to form a cage.
Corrosion-resistant rebar better withstands weathering. Cut lengths with metal shears before placing into wet concrete.
Increase Collar Width
The “collar” of concrete molded around the above-ground pole base should be substantial – up to 12 inches wide. This provides extra girth and bracing.
Use gradual slopes when shaping the collar to avoid sharp edges that can crack over time.
Auger Earth Anchors
Some high-end in-ground basketball pole systems integrate earth anchor screws for maximized stability. These screw deep into the ground at angles around the pole.
Earth anchors provide exceptional resistance against ground shifting, frost heaving, or pole swaying. But they add cost and installation steps compared to simple concrete footings.
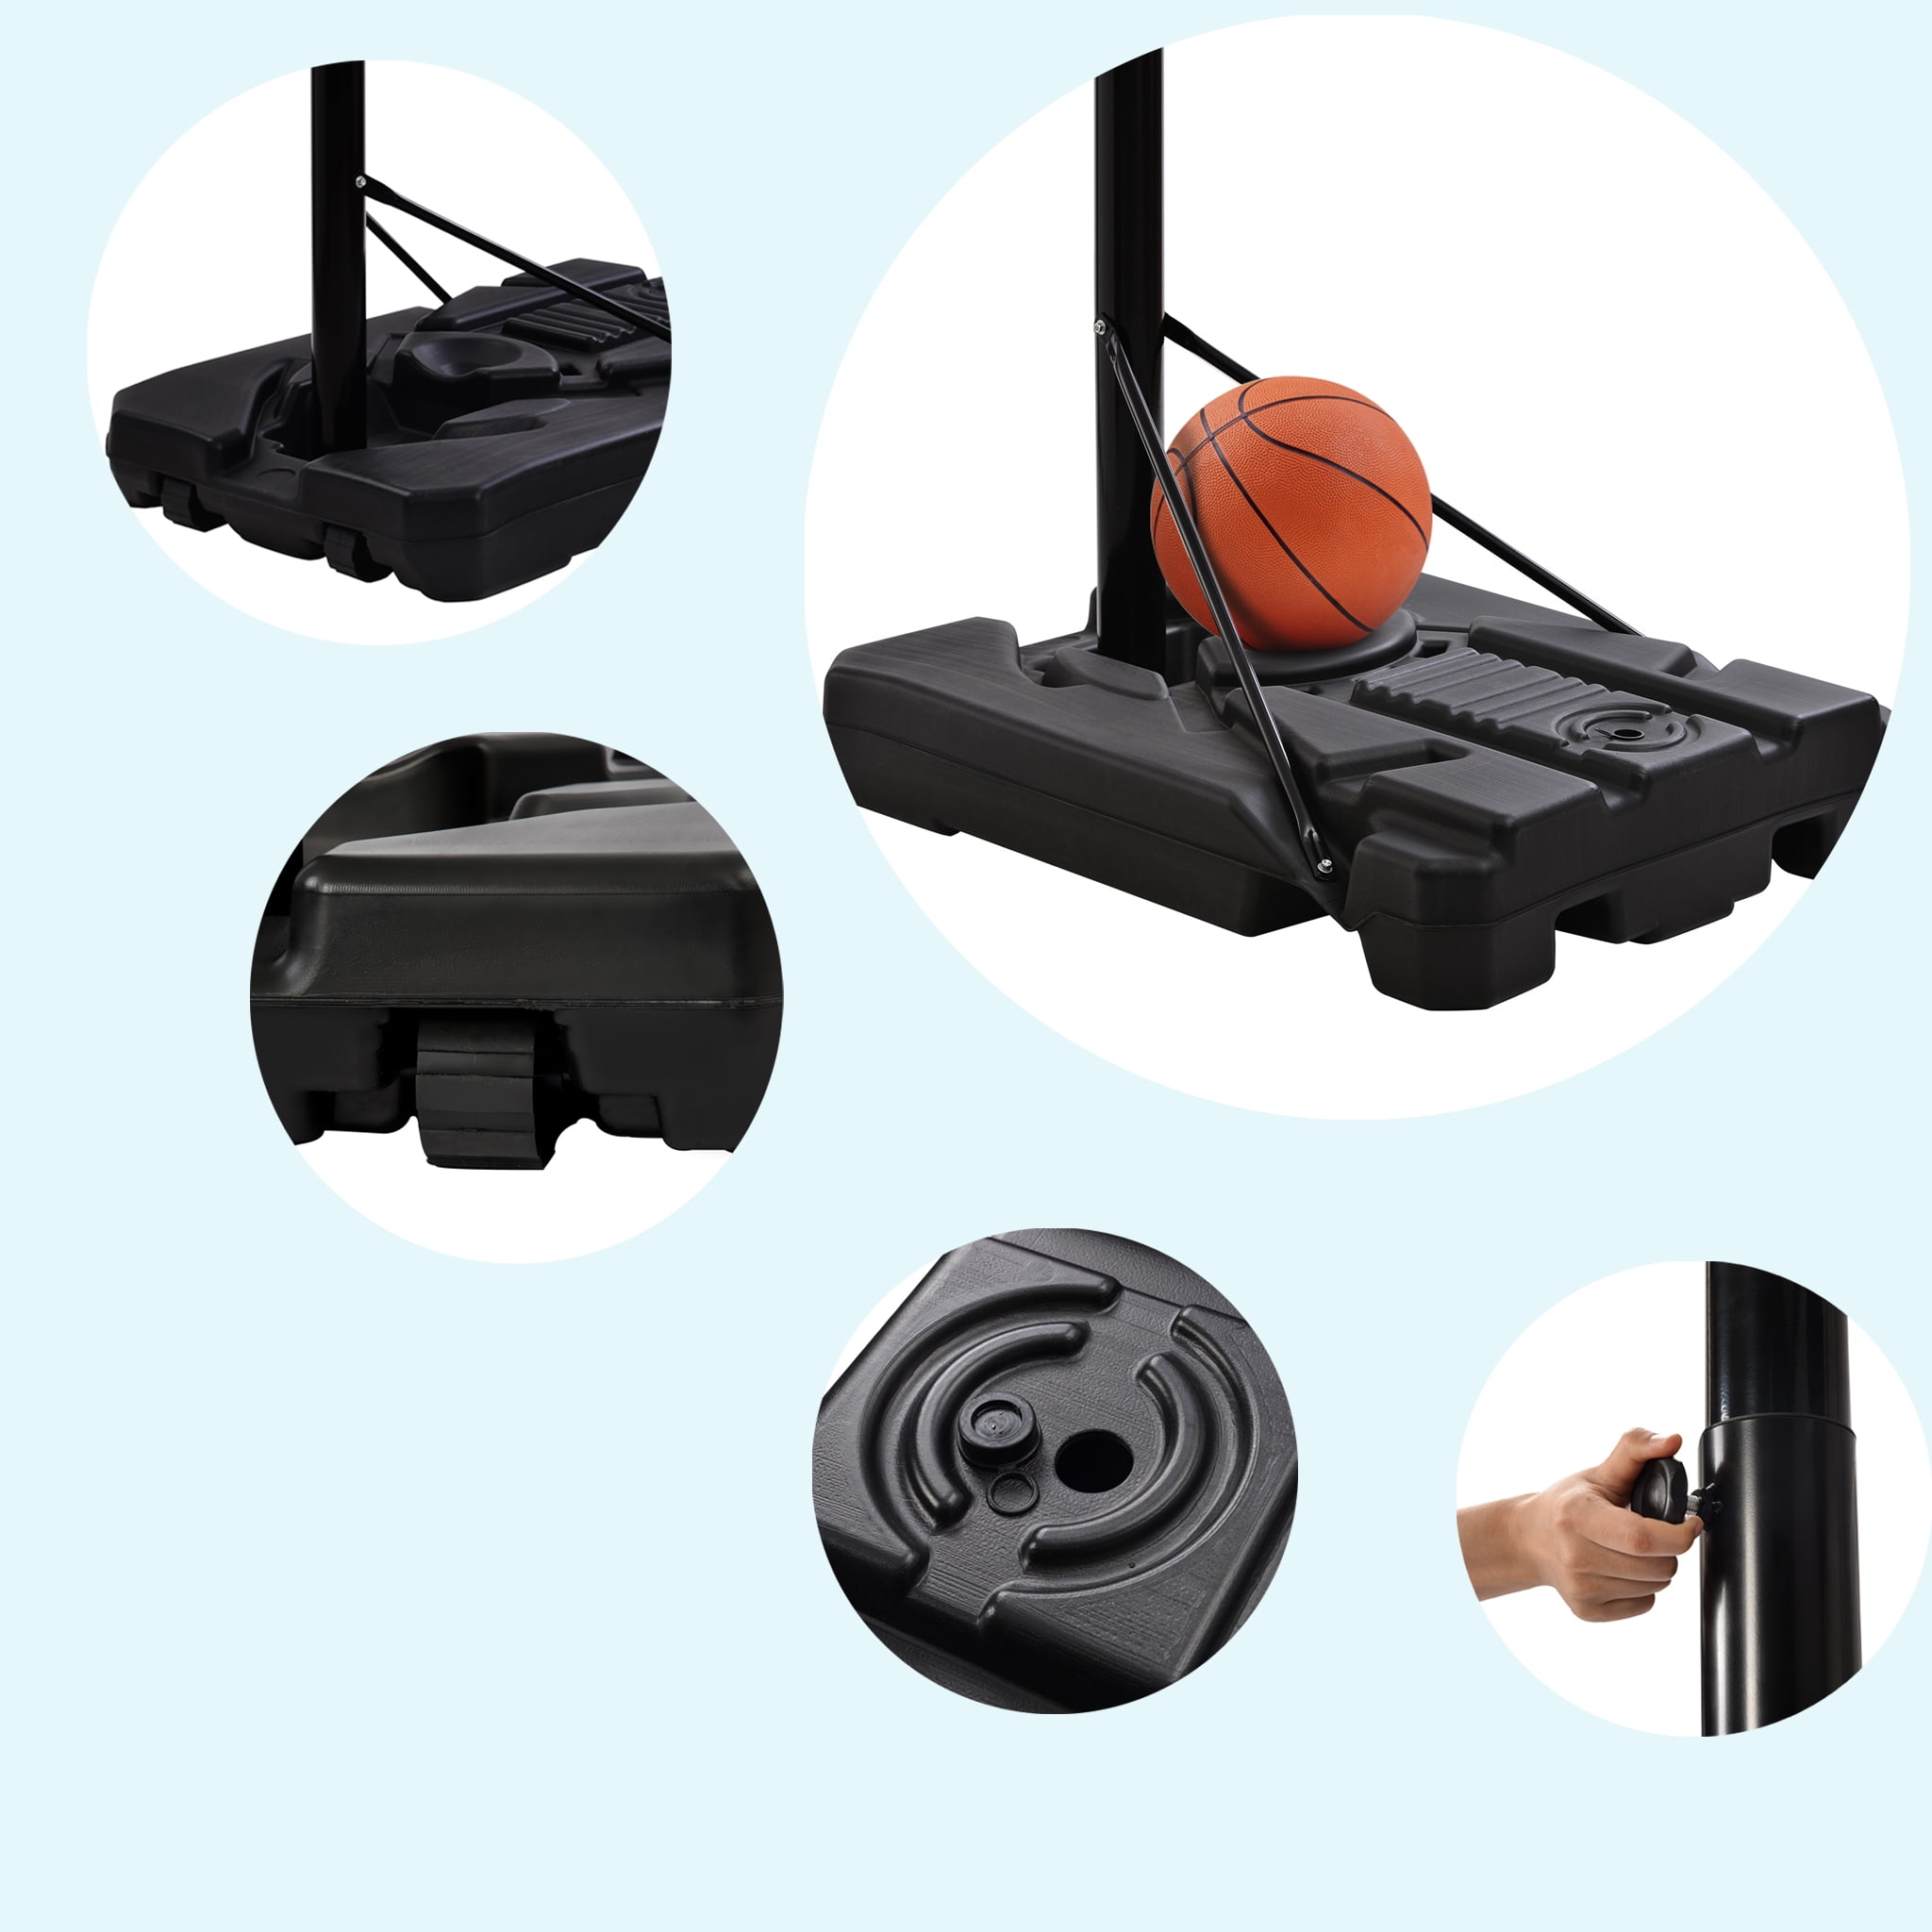
Weigh Down Portable Bases
For portable basketball poles, optimal stability requires filling the base fully with properly weighted material:
- Sand – approx. 200 lbs minimum
- Water – approx. 150-200 gallons minimum
- Concrete blocks – stack multiple rows, interlocking
err on the heavier side, especially if pole will get frequent aggressive use. Some portable bases can also anchor into the ground with staked spikes when filled.
Prevent Moisture Damage
Exposure to excessive ground moisture can gradually undermine basketball pole concrete footings. Here are some preventative measures:
- Slope soil away from pole site
- Add sand/gravel drainage layer in hole
- Seal base cracks with epoxy
- Check for pooling issues after heavy rains
Catching and resolving moisture problems early on extends the life of your pole’s foundation.
Reinforce Stability Over Time
Periodically check your basketball pole foundation for subtle shifts or cracks. Small issues can worsen over years. Remediate right away before major problems develop.
Add sandbags atop portable bases if stability declines. Sealing cracks, improving drainage, and increasing anchor points strengthens permanent pole footings.
Investing effort into maximum pole stability from day one pays off for years. But also monitor and reinforce your pole’s stout foundation as needed over time.
Re-attaching the Backboard and Rim
With your new replacement pole securely installed, it’s time to complete the basketball setup by mounting the backboard and rim. Use care in handling to avoid damage. Follow instructions to attach hardware correctly for optimal performance.
Assess Backboard Condition
Carefully unpack the backboard and check for any cracks, chips, or flaws. Also verify the rim, net, and hardware are undamaged. Contact the supplier immediately about any defects before proceeding.
Consider adding protective edge padding to prevent frame damage over time. Wrap edges with foam or thick tape.
Gather Needed Tools
Have these tools ready for a smooth backboard mounting process:
- Socket wrenches
- Adjustable wrench
- Rubber mallet
- Ladder
- Level tool
Using proper tools prevents stripped bolts or hardware damage. Wear hand protection when handling rim and metal edges.
Follow Manufacturer Instructions
Step-by-step backboard and rim mounting guidelines are provided by the pole and hardware manufacturers. Follow their procedures exactly.
This ensures all parts are correctly positioned, supported, and fastened for a stable, level installation.
Attach Mounting Frame
First, use provided hardware to bolt the backboard mounting frame onto the pole. Position the frame according to specs.
Firmly tighten bolts using the appropriate socket wrench so they don’t loosen from vibration. Don’t overtighten to damage bolts.
Lift and Attach Backboard
Now comes the tricky part – safely lifting the backboard into position on the mounting frame without damaging it or losing control. Have at least two strong helpers.
Lift together from both sides and keep the backboard vertical to avoid bending. Slide onto mounting frame pegs or bolts until flush.
Level and Tighten Hardware
With the backboard resting on the frame, check if it’s perfectly level side-to-side and front-to-back. If not, use washers behind mounting holes to adjust until level.
Fully tighten hardware once level. Some backboard mounts allow angle adjustments as needed. Just be sure all bolts are tight.
Attach and Level Rim
Next, mount the rim and net onto the backboard using provided hardware. Consult the rim specs to position it properly. Tighten bolts firmly with a wrench.
Verify the rim is perfectly level before play. Adjust rim height if needed based on player ages and abilities.
Inspect Alignment and Tightness
Before play, do a final inspection of the entire basketball assembly. Re-check:
- Backboard level and square
- Rim levelness and height
- Net attached with proper slack
- No missing or loose hardware
Address any issues now to ensure safe equipment function. Add pole padding for extra safety if desired.
Maintain Safety and Performance
Take steps over time to maximize your basketball setup’s enjoyment:
- Check bolts often for tightness
- Adjust rim height as needed
- Replace damaged or missing components
- Consider acrylic backboard upgrade
Following the manufacturer’s instructions for backboard and rim attachment results in a professional quality playing setup ready for family fun!
Safely Raising the New Pole Into Position
Adjustable-height basketball poles require extra care when first extending the pole upward to the desired rim position. Go slowly, use helpers, and take safety precautions to avoid equipment or personal injury.
Understand the Adjustment Mechanism
Before raising the pole, familiarize yourself with the height adjustment system. This may be manual or automated. Know how sections telescope and lock.
Identify adjustment handles or automated controls. Manual turning or cranking takes coordinated effort as the pole lifts.
Clear Area Around Pole
Make sure the area surrounding the pole base is free of debris, tools, or obstructions. Tape down or remove any loose items that could catch on the pole when lifting.
Check above for any tree branches or overhead wires that could interfere. Have a clear operational space.
Use Two Strong Helpers
Raising an adjustable basketball pole requires a coordinated effort by at least two adults. Position one helper at the pole base and one at the adjustment mechanism.
The base helper stabilizes the pole bottom as it lifts while the other gently raises the pole top section.
Raise Slowly in Increments
Raise the pole just a few feet at a time, locking securely into each height position before extending farther. Go slowly to avoid losing control.
Make sure helpers communicate clearly. Stop immediately if coordination issues develop or if the pole starts swaying.
Maintain Vertical Alignment
As the pole rises, helpers must prevent it from shifting off vertical alignment. Use a level to check plumb often.
The base helper may need to manually realign the pole base while the upper sections lift. Take care not to bend or stress components.
Watch for Overhead Obstacles
When nearing the desired basketball rim height, pay close attention for any utility lines, tree branches, or other overhead obstacles. Stop well short to prevent contact.
If further height is needed, adjust the rim downward instead for clearance. Safety first.
Lock Securely Before Releasing
At each locking position during raising, validate the mechanism is fully engaged and secure before helpers release their grip.
Attempting to release the pole before proper locking could cause sudden dropping, twisting, or collapse.
Add Temporary Guy Wires
For extra precaution during initial use, strap guy wires (cable braces) from the upper pole temporarily to stable ground anchors. This prevents tipping or swaying as players begin use.
Remove guy wires after several weeks once pole stability is proven during aggressive play. Or install permanent braces.
Confirm Rim Height Before Play
Before allowing play, verify the rim height is appropriate for players’ ages and skill levels. Adjust up or down if needed.
Err on the low side for younger kids. Lifting higher takes less effort than cranking back down.
Exercising care, coordination, and patience when raising an adjustable-height basketball pole ensures safe installation and avoids regrettable accidents.
Leveling the Pole and Adjusting the Height
A precisely leveled basketball pole at the ideal rim height ensures proper equipment function and safety. Take time to correctly level your new pole installation before play and make height adjustments as needed.
Why Precise Leveling Matters
Leveling the pole base and verifying the vertical pole alignment are critical steps often rushed through. But a basketball pole that’s slightly off can cause problems:
- Rim/backboard instability and vibration
- Uneven backboard rebound
- Increased wear on components
- Safety risks if pole leans
A perfectly plumb pole may seem hard to achieve, but it’s worth the effort for optimal performance and safety.
Tools Needed for Leveling
Having the right tools makes pole leveling much easier. Must-haves include:
- 4-foot level tool
- String with hanging weight
- Shovel for dirt work
- Wood shims
- Wrenches for hardware
Use a level on at least two adjacent sides to check plumb. The string method also works well.
Checking Plumb Before Finalizing Install
Begin by verifying pole plumb immediately after installing but before finalizing hardware. Attach the backboard and rim first if needed to access upper pole.
Compare level readings on multiple sides. If off, shim the base or adjust ground padding to bring into alignment.
Fine-Tuning Adjustable Height Poles
For adjustable poles, incrementally raise to full height, rechecking level at each locking position. Stop to realign if off.
Lower and correct base alignment if needed before extending higher. Don’t force height with a leaning pole.
Securing the Base
Once satisfied with plumb, shore up the base for rigidity. On portable poles, add stabilizing ballast like sandbags or concrete blocks.
For in-ground poles, backfill dirt tightly around the concrete, slope away, and drive stakes deeper if available to prevent settling shifts.
Periodic Plumb Checks
Over time, verify the basketball pole remains perfectly straight with periodic re-leveling.Soil settling, frost heaves, or ground erosion can cause the base to shift.
Adjust shims or supports to bring back into perfect plumb. A leaning pole stresses components and risks collapse.
Adjusting Rim Height
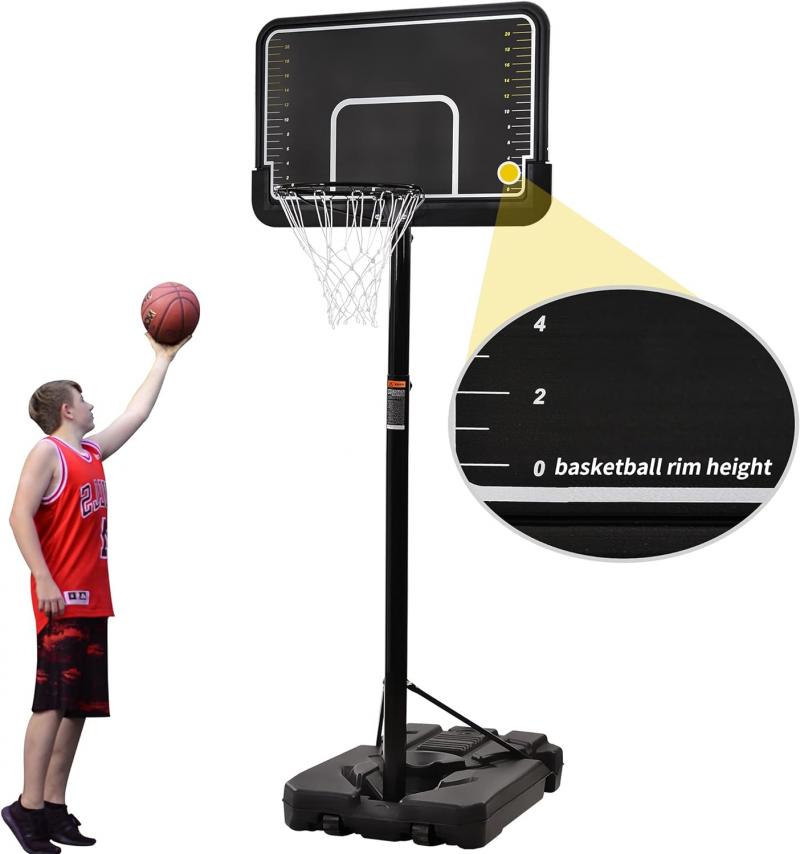
The ideal rim height depends on the primary age group and skill levels using the pole. Typical heights are:
- NBA regulation – 10 feet
- High school – 10 feet
- Middle school – 9 feet
- Elementary – 8 feet
Adjust rim height on telescoping poles by releasing locking collars and raising cautiously to the desired mark. Re-check levelness after adjusting.
Take care to level and adjust height properly on your new basketball pole for optimal safety and playing enjoyment.
Securing the Base With Sandbags or Cement
Properly securing your basketball pole base keeps it fixed in position for optimal safety and performance. Sandbags or extra cement effectively weigh down portable and in-ground pole bases.
Why Proper Weighting Matters
Insufficient hold-down weight on a basketball pole base allows unwanted movement. This causes issues like:
- Pole swaying side to side
- Backboard vibration upon rim shots
- Pole creeping out of alignment over time
- Entire pole and base tipping over
Weighing the base down properly prevents annoying movement issues and serious safety hazards.
Sandbags for Portable Poles
For portable basketball poles, individual sandbags stacked on the base provide excellent ballast. Standard recommendation is approximately 400-800 lbs total.
Use heavy-duty sandbags and stack multiple layers, interlocking bags for maximum stability. Make sure fill openings seal tightly.
Cement Blocks for Portable Bases
Concrete cinder blocks also supply rugged, heavy ballast for portable basketball pole bases. Arrange blocks neatly in rows encircling the pole.
Interlock blocks in a staggered pattern and go several layers high. Use at least 10-20 standard 8″x8″x16″ blocks for adequate hold-down weight.
Shear Collars for In-Ground Poles
For permanent in-ground basketball poles, encase the concrete footing within a “shear collar” for optimal resistance from twisting forces.
Drive rebar rods at 45 degree angles down into the concrete collar around the pole. This creates a reinforced cage.
Slope Ground Away From Pole
Prevent rain or irrigation water from pooling near the pole base. This gradually undermines concrete. Slope the surrounding ground slightly away from the pole site.
Also fill any cracks or gaps in the concrete with hydraulic cement to keep moisture from penetrating the footing.
Check Stability Frequently
Routinely verify your basketball pole base remains stabilized after installation. Give it a firm push from various directions and observe movement.
If any loosening occurs, immediately add extra ballast bags or blocks until movement subsides. Don’t allow gradual creeping.
Reinforce Against Seasonal Shifting
Take steps to reinforce basketball pole bases before seasons that commonly cause soil shifting:
- Before winter – check for frost heave risks
- Before rains – prevent erosion undermining
- Before storms – add lower-level weights
Proactively keeping your pole base stabilized through weather ensures seasonal conditions don’t detrimentally affect alignment or safety.
Testing the New Pole’s Stability and Safety
Before opening up your new basketball pole for aggressive family play, it’s smart to test stability and inspect safety. Validate solid installation to avoid accidents or equipment damage from unintended movement or component failures.
Stability Testing Methods
Assess overall pole stability by exerting force from various angles and observing response. Have 2 helpers oscillate the pole to check for movement at the base and upper sections. Methods to try:
- Push/pull forcefully on pole in different spots
- Hang from the rim with full bodyweight
- Strike backboard firmly with basketball
- Bounce ball with maximum force on backboard
There should be minimal resulting vibration or swaying at top or bottom. Immediately reinforce the base if the pole shifts excessively.
Inspect Internal Component Connections

Telescoping adjustable-height poles must have tight, secure connections between movable upper and lower sections. Shake each joint vigorously to check for any looseness or slipping.
If hardware comes loose, retighten bolts fully. Apply thread locker fluid to prevent repeated loosening. Loose joints risk pole collapse.
Verify Concrete Footing Integrity
Give the concrete anchor footer a visual inspection all the way around. Check for any cracks wider than a pencil width. Probing with a rod helps detect hidden flaws below grade.
Seal any minor cracks with flexible caulking or hydraulic cement. Have substantial cracks evaluated professionally before allowing pole use.
Examine Pole and Hardware for Defects
Inspect the entire pole shaft and all welds for any concerning imperfections like:
- Cracks
- Dents or buckling
- Peeling or compromised coatings
- Sharp edges or protrusions
Also check hardware like nuts/bolts for stripping or fatigue cracks. Address any worrisome flaws before play. Better to be safe.
Rim, Backboard, and Net Inspection

Before first tip-off, ensure rim bolts are fully tightened with no side play when grasping the rim. Inspect backboard and net mounting points as well.
Cracks or loose components compromise safety. Confirm no missing or damaged parts.
Ongoing Safety Monitoring
Routinely check your basketball setup even after passing initial inspections. Things to monitor closely:
- Net fraying or holes
- Loose bolts anywhere
- Backboard/rim stability
- Anchoring integrity
Don’t allow problems you notice to go unchecked. Addressing issues promptly maintains safety.
Verifying solid, hazard-free installation before first use prevents accidents and establishes appropriate pole care habits.
Maintaining Your Replacement Basketball Pole
Investing in a new basketball pole for your home court is exciting. But don’t neglect appropriate maintenance if you want it to last. Regular care protects your investment and prevents safety issues.
Why Maintenance Matters
Like any valuable sports equipment exposed to the elements, basketball poles require proper care. Without maintenance:
- Rust can damage steel components
- Concrete can crack and destabilize
- Hardware can loosen and fail
- Parts wear out faster
But with prudent preventative maintenance, your pole should provide many years of family fun.
Suggested Maintenance Schedule
Make basketball pole care a routine with this recommended schedule:
- Monthly – visible hardware inspections
- Quarterly – stability & level checks
- Annually – clean/seal all surfaces
- As needed – touch up any problem spots
Set calendar reminders to make inspections a habit. Log any issues noticed.
Rust Prevention
Steel poles, fasteners, and parts require extra care to prevent rust damage over time. Useful tips:
- Touch up scratches immediately
- Clean and seal annually
- Inspect foam fill plugs
- Lubricate adjustable joints
Addressing rust early prevents major section replacements down the road.
Hardware Inspections
Frequent checks of all nuts, bolts, and moving parts keep hardware snug and prevent dangerous breakdowns:
- Examine for cracks/corrosion
- Confirm no looseness
- Assess pivot/joint wear
- Re-tighten/replace as needed
Don’t allow worn or compromised hardware remain in service.
Concrete Base Care
Maintain the pole’s concrete anchor footing properly by:
- Checking for cracks annually
- Sealing cracks immediately
- Ensuring drainage slopes away
- Bracing against frost heaves
A compromised concrete base undermines the entire pole structure.
Have Experts Troubleshoot Problems
If any maintenace issue exceeds your comfort level or expertise, don’t hesitate to call in pole servicing pros. It’s worth the cost to fix problems correctly and protect safety.
Consistent basketball pole maintenance prolongs enjoyment and helps avoid regretful accidents. Protect your investment through purposeful care.
Extending Pole Life With Preventative Care
Basketball poles take a beating from weather and aggressive play. But with proactive preventative maintenance, you can extend your pole’s lifespan and preserve performance.
Benefits of Preventative Care
Too often, pole maintenance happens reactively – only after problems arise. But preventative pole care provides big advantages:
- Avoids premature rusting
- Reduces cost of repairs
- Extends concrete footing life
- Lessens safety hazards
- Sustains proper pole function
Don’t wait for issues before caring for your valuable pole investment.
Have a Care Schedule
Make pole maintenance proactive by creating a written checklist of tasks and adhering to a schedule. Example schedule:
- Monthly – spot hardware check
- Quarterly – clean/seal pole sections
- Annually – clean entire assembly
- As needed – touch up any problem spots
Set calendar reminders on your phone so inspections happen consistently.
Roof Your Concrete Footing
Prevent premature footing cracking or shifting by “roofing” the concrete. Methods include:
- Capping with solid concrete layer
- Covering with plastic sheeting
- Diverting rain runoff away
- Sealing gaps/cracks immediately
This shields the anchor concrete from erosion and moisture damage.
Lubricate Adjustable Joints
Use light machine oil or spray lubricant made specifically for basketball poles. Wipe away excess lube so it doesn’t drip.
Proactive Rust Prevention
Don’t allow rust to gain a foothold. As soon as you notice any flaking or bubbling paint, address it. Steps to take:
- Sand damaged areas smooth
- Clean and dry thoroughly
- Spot prime with sealing rust inhibitor
- Repaint quality exterior enamel
Vigilant rust prevention avoids extensive repairs down the road.
Verify Stability Often
Routinely check pole stability by firmly pushing or rocking from various directions. Reinforce or re-level the base if any loosening occurs.
Don’t allow subtle shifting to go unaddressed. Keeping your pole firmly anchored prevents safety issues.
With prudent preventative maintenance started immediately after installation, your quality basketball pole should deliver many years of wholesome family enjoyment.
Enjoy Your New Basketball Pole! Tips for Safe Family Fun
After properly installing your new replacement basketball pole, it’s time for family fun! But don’t forget to maximize enjoyment through safe setup and smart supervision.
Set the Rim at the Right Height
Adjust the rim height to suit the primary age group and skill levels using the pole. Recommended rim heights:
- NBA regulation – 10 feet
- High school players – 10 feet
- Middle schoolers – 8-9 feet
- Elementary kids – 7-8 feet
Younger kids find greater success shooting on lower rims. You can always raise it gradually as they improve.
Anchor the Base Securely
Before play, make absolutely sure your pole base can’t shift or topple. Secure portable bases with sufficient sandbags or concrete blocks. Permanent poles require deep, robust concrete footings.
Attempting “slam dunks” on unstable poles causes accidents. Anchor securely first.
Add Protective Pole Padding
Prevent injuries from players impacting the pole by installing protective padding up to at least 6 feet. Choose thick padding designed specifically for basketball poles.
Foam or molded rubber pads cushion direct pole blows. wrap padding carefully and secure properly with velcro or zippers.
Supervise Young Children Closely
When kids are playing, give them your undivided attention. Scan for potential dangers like:
- Pole shaking or tipping
- Roughhousing on equipment
- Attempting unsafe moves
- Damaging components
Correct reckless behavior immediately to prevent accidents. Caution kids against hanging on the rim or net.
Require Protective Eyegear
Mandate shatterproof protective eyewear for all youth players. Sturdy polycarbonate lenses shield eyes from errant fingers, elbows, and balls.
Prefer enclosed goggle designs or glasses with side shields and an elastic strap. Discourage contacts when playing.
Check Equipment Before Each Game
Inspect equipment routinely before family games, including:
- Loose bolts or connections
- Cracks in backboard or pole
- Frayed net needing replacement
- Pole stability and plumb
- Concrete footing condition
Address any issues promptly to maintain safety. Don’t play on damaged equipment.
Learn First Aid Treatments
Accidents can still occur even with preventative measures. Keep a well-stocked first aid kit nearby and understand treatment for common basketball injuries:
- Eye trauma
- Jammed fingers
- Scrapes/cuts
- Head trauma
Taking sensible precautions maximizes the family fun from your home basketball pole for years to come!
When to Call a Pro – Reasons to Leave It to the Experts
Installing or replacing a home basketball pole seems doable as a DIY project. But certain circumstances call for leaving it to qualified professionals. Don’t risk injury, damage, or performance issues by overestimating your abilities.
Challenging Access or Terrain
Bringing heavy equipment into cramped spaces in your yard could be problematic:
- Narrow side gates
- Steep slopes
- Densely wooded
- Underground utilities
Professionals have the right tools and experience for tricky access issues.
Limited Concrete or Excavation Ability
In-ground basketball pole installation requires extensive concrete work and hole digging best left to experts like:
- Hauling away excavated dirt
- Handling rebar reinforcements
- Getting concrete mixer to site
- Achieving proper soil compaction
Don’t attempt concrete elements you lack sufficient skill or resources for.
Truly Massive Pole Size
Oversized basketball poles meant for college or pro settings may exceed safe DIY handling capacity:
- Total pole weight over 500 lbs
- Backboard span over 6 feet
- Rim height exceeding 12 feet
- Concrete footing over 3 feet deep
Let pros handle jumbo equipment requiring heavy machinery and expertise.
Unsafe Existing Pole Removal
Safely removing a degraded old pole adds challenges like:
- Extreme rust or deterioration
- Unsupported structural damage
- Problematic access for equipment
- Hazardous materials risks
Don’t chance pole collapse, contact hazards, or getting buried in a hole. Hire experts.
Concerns About Base Stability
Special site characteristics may compromise pole base stability:
- Steep slopes
- Poorly compacted fill dirt
- High water table
- Earthquake-prone area
Let experienced pros handle engineering reinforced footings or earth anchoring systems.
Unsure About Permit Needs
Most areas require permits for permanent structure additions like basketball poles. Professionals will:
- Advise you on permit rules
- Submit proper permit paperwork
- Schedule inspections
- Ensure code compliance
Avoid headaches and potential fines by hiring experts to navigate permitting.
Know your limits and don’t be afraid to call in pole installation pros when a project exceeds your abilities or comfort level.