What is a Riddell helmet pump and how does it work. How can you properly inflate and maintain your football helmet for optimal protection. Why is achieving the right helmet fit crucial for player safety.
Understanding Riddell Helmet Pumps: Your Key to Perfect Fit
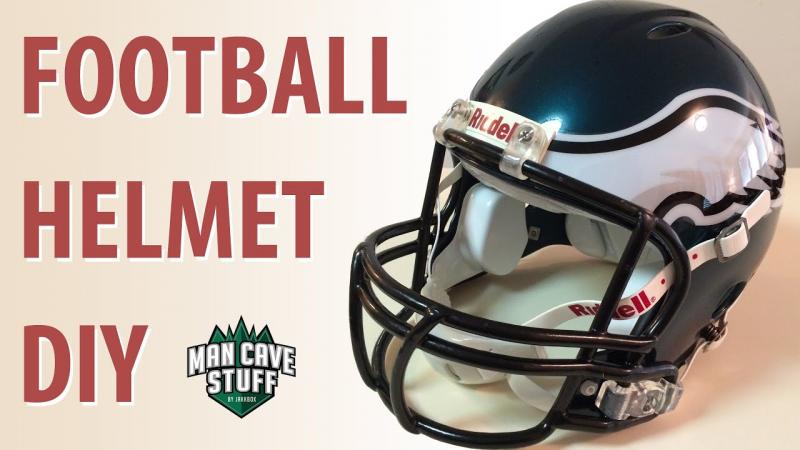
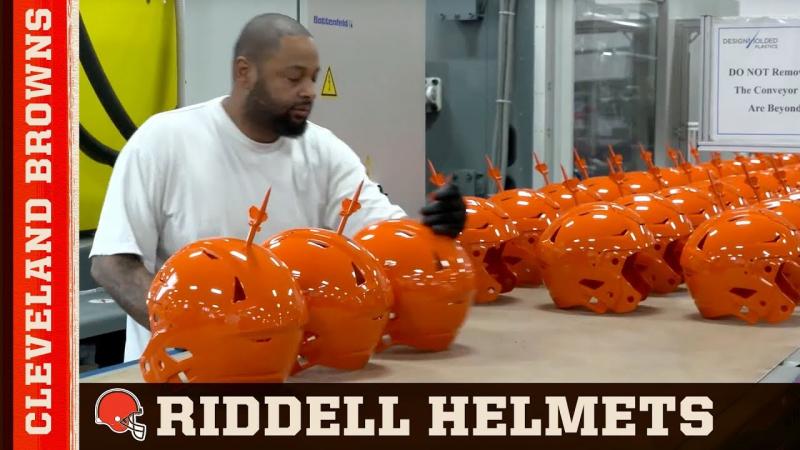
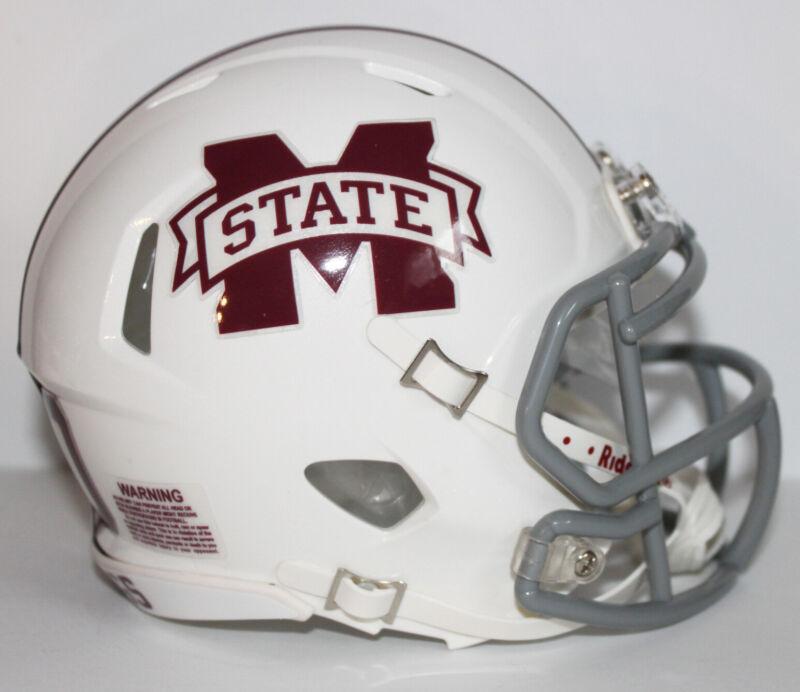
A Riddell helmet pump is an essential tool for football players seeking to optimize their helmet’s fit and safety. These pumps allow users to adjust the air pressure within their Riddell Speedflex, Revolution, or other Riddell football helmets, ensuring a snug yet comfortable fit. By attaching the pump to the inflation valve inside the helmet and applying a few pumps, players can achieve their desired pressure level, tailoring the helmet’s fit to their individual needs.
Why is customizing helmet fit so crucial? A properly fitted helmet provides optimal protection against impacts and reduces the risk of head injuries. Too loose, and the helmet may not adequately protect the player’s head; too tight, and it can cause discomfort or headaches, potentially distracting the player during crucial moments on the field.
Key Features of the Riddell Speedflex Pump: Precision and Ease of Use
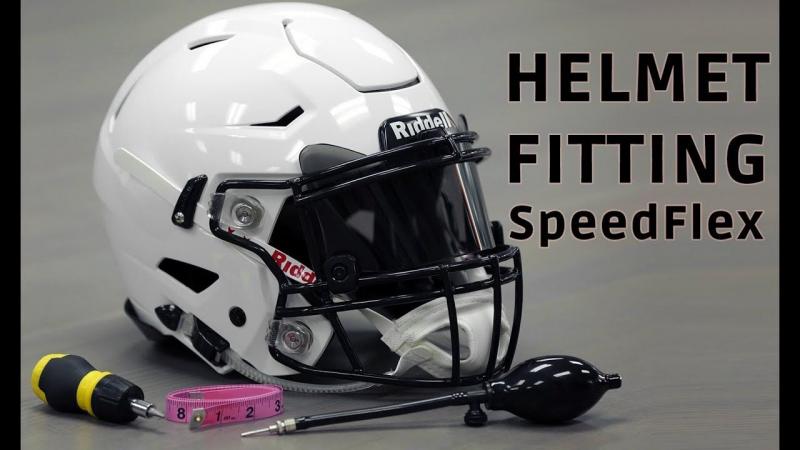
The Riddell Speedflex helmet pump is specifically designed for use with Riddell Speedflex and Speedflex Diamond helmets. Its features include:
- Lightweight and compact design for easy handling
- Rubberized grip for comfortable and efficient pumping
- Precision-engineered inflation needle that fits perfectly into the Speedflex valve opening
- Built-in pressure gauge for accurate psi monitoring
- Bleeder valve for controlled air release and helmet deflation
- Replacement rubber gaskets included for longevity
- Durable molded plastic construction
These features combine to create a user-friendly tool that enables players to achieve a custom fit with their high-tech Riddell helmets quickly and easily. The angled inflation needle and padded grip make the process of adjusting helmet pressure both simple and precise.
The Benefits of Using a Pump for Your Football Helmet
Utilizing a helmet pump offers several advantages for football players:
- Achieving ideal fit: Players can adjust the helmet to the recommended psi for snug protection without causing discomfort.
- Accommodating helmet break-in: New helmets often require higher inflation until the padding settles.
- Adjusting for hair length: Players with longer hair may need less air pressure for comfort.
- Compensating for temperature changes: Heat and cold can affect helmet fit, requiring adjustments.
- Re-inflating after impacts: Collisions during play can cause slight air loss, necessitating re-inflation.
- Customizing for different positions: Linemen might prefer a tighter fit compared to skill players.
While football helmets are designed to provide protection straight out of the box, fine-tuning the fit with a pump enhances both comfort and safety, allowing players to focus on their performance without distractions.
Proper Inflation Techniques for Riddell Helmets
Correctly inflating your Riddell helmet is crucial for both safety and performance. Here are some essential tips to ensure proper inflation:
- Always consult the product manual for recommended psi levels to avoid over-inflation.
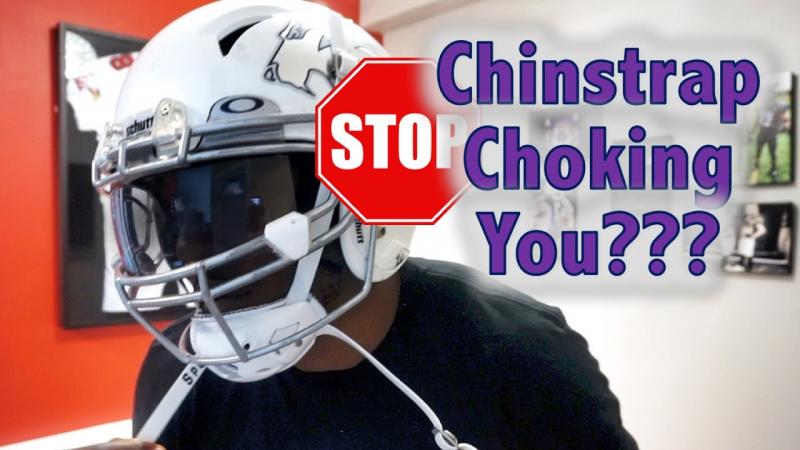
- Test inflation levels with chin straps buckled to simulate on-field conditions.
- Experiment with various psi levels, starting lower and increasing in 1 psi increments to find the best fit.
- Ensure the inflation needle is centered in the valve opening during the inflation process.
- Regularly check inflation pressure, ideally before games and practices.
- Release air after each use to maintain long-term fit and helmet integrity.
- Replace rubber gaskets when worn to ensure a proper seal and inflation.
Taking the time to perfect your helmet’s inflation pressure will maximize both comfort and protection, allowing you to perform at your best on the field.
Essential Maintenance Tips for Your Riddell Helmet Pump
Proper care of your Riddell helmet pump can significantly extend its lifespan and ensure consistent performance. Consider these maintenance tips:
- Store the pump in your helmet case when not in use to protect it from damage.
- Regularly clean the pump with a damp cloth to remove dirt and dust.
- Apply silicone grease to o-rings occasionally for smooth operation.
- Avoid direct impacts or drops that could damage the pump’s delicate components.
- Replace worn or damaged needles and gaskets promptly.
- Ensure the bleeder valve seals completely when closed.
- Use the included case or bag to keep all pump components together.
A well-maintained helmet pump provides precise inflation control, ensuring consistent helmet fit and safety. Regular cleaning, damage inspection, and replacement of wear parts will keep your pump functioning optimally for years to come.
Troubleshooting Common Helmet Pump Issues
While Riddell helmet pumps are generally reliable, occasional issues may arise. Here’s how to troubleshoot common problems:
Pump Won’t Inflate
Ensure the needle is correctly centered in the valve opening. Check for damaged gaskets and replace if necessary.
Air Leaks from Helmet
Replace worn gasket seals or tighten the valve collar if it’s loose.
Pressure Gauge Malfunction
Gently clean any dirt from the gauge. If damage is visible, replace the gauge.
Pump Piston Sticks
Lubricate the o-ring and avoid overtightening the bleeder valve.
Difficult to Pump
Try using short, rapid pumps instead of long strokes for more efficient inflation.
Most helmet pump problems can be resolved through careful inspection, cleaning, lubrication, or replacement of worn parts. Keeping spare gaskets on hand allows for quick repairs when needed.
The Critical Importance of Proper Helmet Fit
Achieving the right helmet fit goes beyond mere comfort—it directly impacts a player’s safety on the field. Here’s why proper fit is crucial:

- Prevents helmet shifting on impact: A stable, snug helmet better absorbs and distributes force from collisions.
- Minimizes concussion risk: Correct fit helps mitigate movement of the head inside the helmet during impacts.
- Reduces distractions: Eliminates pressure points and discomfort that can impede focus during play.
- Ensures unobstructed vision: Proper positioning allows for clear sightlines, crucial for player performance and safety.
- Enhances communication: A well-fitted helmet doesn’t interfere with a player’s ability to hear teammates and coaches.
Investing time in achieving the perfect helmet fit using a Riddell helmet pump can significantly contribute to a player’s safety, comfort, and overall performance on the football field.
Integrating Helmet Pump Use into Your Equipment Routine
To maximize the benefits of your Riddell helmet pump, consider incorporating its use into your regular equipment maintenance routine:
- Pre-season fitting: Before the season starts, take time to find your ideal helmet pressure.
- Weekly check-ups: Assess and adjust helmet pressure at the beginning of each week.
- Pre-game ritual: Make helmet pressure checks part of your pre-game preparation.
- Post-impact adjustments: After particularly hard hits, quickly check and readjust your helmet’s fit.
- Climate considerations: Be prepared to make slight adjustments based on weather conditions.
- End-of-season maintenance: Clean and inspect your pump before storing it for the off-season.
By making helmet pump use a regular part of your equipment care, you ensure consistent protection and comfort throughout the football season.
Advanced Techniques for Optimizing Helmet Fit
Beyond basic inflation, there are advanced techniques you can employ to further optimize your helmet’s fit:
Pressure Mapping
Some players create a “pressure map” of their head, noting areas that require more or less pressure. This can help in achieving a more personalized fit.
Graduated Pressure
Experiment with slightly different pressures in different areas of the helmet. For example, you might prefer slightly higher pressure at the crown and lower pressure around the ears.
Dynamic Fitting
Try adjusting your helmet’s fit during different types of drills or plays. You may find that certain activities require slight modifications for optimal comfort and protection.
Temperature Compensation
Learn how temperature changes affect your helmet’s fit and develop a strategy for quick adjustments as needed during games or practices in varying weather conditions.
By mastering these advanced techniques, you can take your helmet’s fit and performance to the next level, potentially giving you an edge on the field.
The Future of Football Helmet Technology
As football helmet technology continues to evolve, we can expect to see advancements in fit customization and safety features. Some potential future developments include:
- Smart helmets with built-in pressure sensors and automatic adjustment capabilities
- Advanced materials that adapt to impact forces and temperature changes
- Integrated communication systems for clearer on-field interactions
- Improved ventilation systems for better comfort in various weather conditions
- Enhanced data collection capabilities for real-time impact monitoring and analysis
While these technologies are still in development, they highlight the ongoing commitment to player safety and performance in football equipment design. As new innovations emerge, the role of proper fit and customization will likely remain crucial, with tools like the Riddell helmet pump continuing to play an important part in optimizing player protection.
Educating Players and Coaches on Helmet Fit Importance
Ensuring proper helmet fit isn’t just the responsibility of individual players—it’s a team-wide concern. Here are some ways to promote awareness and education about helmet fit:
Team Workshops
Organize regular workshops where players can learn about proper helmet fitting techniques and the importance of consistent maintenance.
Peer Mentoring
Encourage experienced players to mentor younger team members on helmet fit best practices.
Coach Training
Ensure coaching staff are well-versed in helmet fitting techniques and can guide players effectively.
Parent Education
For youth leagues, involve parents in helmet fit education to reinforce good habits at home.
Regular Check-ins
Implement a system of regular helmet fit check-ins, possibly incorporating them into pre-practice routines.
By fostering a culture of awareness around proper helmet fit, teams can significantly enhance player safety and performance across the board.
Comparing Riddell Helmet Pumps to Other Brands
While Riddell helmet pumps are specifically designed for use with Riddell helmets, it’s worth comparing them to pumps from other manufacturers:
Schutt
Schutt offers helmet pumps with similar functionality to Riddell’s, but they’re designed for use with Schutt helmets. They often feature a more compact design.

Xenith
Xenith helmets use a unique air-fit system that doesn’t require a traditional pump, instead relying on internal air pads that self-adjust.
Generic Brands
Some generic brand pumps are available that claim compatibility with multiple helmet brands. However, these may not provide the precision fit of brand-specific pumps.
While other brands offer quality products, Riddell pumps are specifically engineered for optimal performance with Riddell helmets, ensuring the best possible fit and safety for players using this brand.
Legal and Ethical Considerations in Helmet Customization
As players and coaches explore ways to optimize helmet fit and performance, it’s crucial to consider the legal and ethical implications:
League Regulations
Ensure that any customizations or adjustments made to helmets comply with league regulations. Some leagues have specific rules about helmet modifications.
Liability Concerns
Be aware that significant alterations to a helmet’s design or fit could potentially void manufacturer warranties or impact liability in case of injury.

Ethical Use of Technology
As new technologies emerge for helmet customization, consider the ethical implications of their use, especially in terms of fairness and player safety.
Informed Consent
Ensure that players (and parents, in the case of younger athletes) are fully informed about any customizations made to their helmets and understand the potential impacts.
By staying informed about these considerations, teams and players can ensure that their efforts to optimize helmet fit and performance remain within ethical and legal boundaries, prioritizing player safety above all else.
What is a Riddell Helmet Pump?
If you’ve ever played football, you know how important it is to have a helmet that fits just right. A helmet that’s too loose won’t properly protect your head, while one that’s too tight can cause headaches. This is where a Riddell helmet pump comes in handy.
A Riddell helmet pump allows you to customize the air pressure and fit of your Riddell Speedflex, Revolution, or other Riddell football helmet. Simply attach the pump to the inflation valve inside the helmet and give a few pumps to reach your desired pressure level. The pump makes it easy to fine tune the fit of your helmet so it’s comfortable while still providing optimal protection.
Key Features of the Riddell Speedflex Pump
The Riddell Speedflex helmet pump is designed specifically for use with the Riddell Speedflex and Speedflex Diamond helmets. Here are some key features:
- Lightweight and compact design
- Rubberized grip makes pumping easy
- Inflation needle precisely fits Speedflex valve opening
- Pressure gauge lets you monitor psi as you pump
- Bleeder valve releases air and deflates helmet
- Includes replacement rubber gaskets
- Durable molded plastic construction
With an angled inflation needle and padded grip, the Speedflex pump makes it simple to get a custom fit with your high-tech Riddell helmet.
Why Use a Pump for Your Football Helmet?
Inflating your football helmet with a pump allows you to fine-tune the fit and comfort. Here are some key reasons to use a helmet pump:
- Achieve the ideal fit – Pump your helmet to the recommended psi for snug protection without tightness or headaches.
- Accommodate helmet break-in – Brand new helmets often need higher inflation until the padding breaks in.
- Adjust for hair length – Players with longer hair may need less air pressure for comfort.
- Compensate for temperature changes – Heat and cold can alter helmet fit.
- Re-inflate after impacts – Collisions can cause slight air loss.
- Customize for alternate positions – Linemen may want a tighter helmet fit than skill players.
While football helmets are designed for protection right out of the box, fine-tuning the fit with a pump enhances comfort and minimizes distractions on the field.
Tips for Properly Inflating Your Riddell Helmet
Inflating your helmet properly is important for safety and performance. Here are some tips:
- Read the product manual for recommended psi – Don’t overinflate.
- Test inflation levels with the chin straps buckled – This simulates on-field conditions.
- Try various psi levels for best fit – Start lower and increase in 1 psi increments.
- Center needle in valve opening when inflating.
- Check inflation pressure weekly – Before games and practices.
- Release air after sessions – Helps maintain long term fit.
- Replace rubber gaskets when worn – Ensures proper seal and inflation.
Taking the time to dial in the perfect inflation pressure will maximize the comfort and protection of your Riddell helmet.
Pump Maintenance Tips
With proper care, your Riddell helmet pump can deliver years of reliable service. Here are some maintenance tips:
- Store pump in helmet case when not in use.
- Wipe dirt and dust off with a damp cloth.
- Lubricate o-rings occasionally with silicone grease.
- Protect pump from direct impacts and drops.
- Replace worn or damaged needles and gaskets.
- Ensure bleeder valve fully seals when closed.
- Use included case or bag to prevent lost parts.
Well-maintained helmet pumps provide precise inflation control for consistent helmet fit and safety. Periodic cleaning, inspection for damage, and replacement of common wear parts will keep your pump functioning properly.
Helmet Pump Troubleshooting
While helmet pumps are generally reliable, issues can occasionally arise. Here is some troubleshooting guidance:
- Pump won’t inflate – Ensure needle is centered in valve opening. Check for damaged gaskets.
- Air leaks from helmet – Replace worn gasket seals. Tighten valve collar if loose.
- Gauge doesn’t show pressure – Gently clean dirt from gauge or replace if damaged.
- Pump piston sticks – Lubricate o-ring. Don’t overtighten bleeder valve.
- Difficult to pump – Try short, rapid pumps instead of long strokes.
Most helmet pump problems can be fixed with close inspection, cleaning, lubrication, gasket replacement, or replacement of damaged parts. Keeping a spare gasket set handy allows for quick repairs.
The Importance of Proper Helmet Fit
Achieving a proper helmet fit is about more than just comfort – it directly impacts protection. Here’s why proper fit is so important:
- Prevents helmet shifting on impact – A stable, snug helmet better absorbs force.
- Minimizes risk of concussions – Correct fit helps mitigate movement of head inside helmet.
- Reduces distraction from discomfort – Eliminates pressure points that can impede focus.
- Allows unobstructed vision – Helmet shouldn’t sit too low or high on head.
- Decreases fatigue – Good fit prevents headaches from overly tight helmets.
Taking the time to dial in proper inflation pressure results in a helmet that is protective, stable and comfortable – qualities that every football player needs to perform their best on the field.
When to Replace Your Helmet Pump
While helmet pumps are built to last, normal wear and tear will eventually require replacement. Here are some signs it’s time to replace your pump:
- Damaged or missing parts – Needles, gaskets, valves, etc.
- Air leaks from multiple points
- Unreliable pressure gauge readings
- Pump piston seizes up and sticks
- Cracked or damaged plastic housing
- Inflation needle wobbles or doesn’t align properly
Replacing pumps every 2-3 seasons ensures you always have a properly functioning pump on hand for consistent helmet inflation. Many pumps come with spare gaskets and needles for minor repairs.
A Riddell helmet pump is an essential piece of football gear for players and coaches seeking the best protection and fit. Properly inflating helmets with a quality pump like the Speedflex model can help maximize safety, comfort and performance on the field. Follow proper usage and maintenance tips, and your pump will deliver reliable operation season after season.
Why Use a Pump for Your Football Helmet?
As any football player can tell you, a properly fitted helmet is crucial for both safety and performance on the field. Using a pump to inflate your Riddell helmet offers some major benefits compared to just wearing it straight out of the box.
For starters, every head is shaped a bit differently, so the factory settings may not be ideal for you. The pump gives you the ability to fine-tune the fit and dial in the exact air pressure you need for a custom and comfortable fit. No more dealing with a too-tight helmet that leaves your head throbbing after a long practice or game.
Another reason to use a pump is that brand new helmets often feel too loose until the interior padding breaks in. Rather than risk the helmet shifting on impact, you can inflate it to a higher psi for the first few weeks until it forms to your head shape. Then ease off the pressure as it conforms.
Temperature is another factor that affects helmet fit. On hot days, the padding can soften and expand slightly, potentially altering the fit. In cold weather, the materials may contract. Quickly pumping your helmet before heading out lets you compensate so you maintain the ideal snugness.
Even after you’ve broken in your helmet and dialed in the perfect pressure, minor impacts from hits and collisions can cause slight air loss over time. Periodically re-inflating ensures the fit and protection don’t degrade mid-season. No one wants extra rattling inside their helmet!
Speaking of hits, even the best helmets can’t prevent 100% of the force from big collisions reaching your head. Fine-tuning the inflation so the helmet sits just right can help minimize risky motion of your head inside when you do take a tough hit. The snugger fit the better.
Let’s not forget comfort either. Even small pressure points inside an ill-fitting helmet can be distracting when you’re trying to concentrate. Just a few pumps to alleviate tightness or gaps can mean the difference between finishing strong or losing focus.
While the pros take protection extremely seriously, recreational league players can benefit from pumping up their helmets too. Better fit means less accidental slipping, improved vision through the face mask, and reduced neck fatigue. Why take chances if you don’t have to?
At the end of the day, football is all about having fun out there on the field. But you can’t enjoy the game fully if your helmet is constantly bugging you. Do yourself a favor and grab a Riddell pump to take control of your helmet’s inflation. Your head will thank you!
Comparing Riddell Pumps to Other Brands

When it comes to inflation pumps, Riddell is the premier name for good reason. Here’s how Riddell stacks up against some other helmet pump brands:
- Ease of Use – Riddell pumps feature comfortable rubber grips and angled needles that make accessing helmet valves a breeze.
- Reliability – The rugged molded plastic construction withstands years of use with minimal maintenance required.
- Accuracy – Precision gauges allow accurate psi monitoring so you always know the inflation level.
- Compatibility – Made to seamlessly integrate with Riddell helmet valves for fast inflation.
- Durability – Quality materials and components hold up well over time.
- Value – You get great features and performance at a reasonable price.
Some cheaper pumps may be tempting due to lower costs, but the adage “you get what you pay for” definitely applies. Flimsy plastic valves that leak, sticky pumping mechanisms, and unreliable gauges are common issues with generic brands.
When you consider that consistent inflation is key for both safety and comfort, the few extra dollars for a quality Riddell pump is worth it. Don’t trust just any pump with protecting your head!
Electric vs Manual Pumps
When it comes to helmet pumps, you have two main options – electric or manual operation. Which is better for inflation?
Electric pumps are quick, delivering full inflation in just seconds with the push of a button. However, their motors and batteries add bulk and weight. Electric pumps must be periodically recharged as well.
Manual pumps require more effort to operate as you pump the piston by hand. But they inflate helmets just fine, are lightweight and portable, and never need batteries. Plus, the ritual of manually pumping up can get players psyched up before battle!
For most youth, high school and even college players, a rugged manual pump is perfect for game day inflation and occasional fit adjustments. Electric pumps are best reserved for teams with large rosters and training staff who need to pump many helmets quickly before each session.
As long as the pump includes accurate pressure monitoring and durable components, inflation speed isn’t critical. Take a manual Riddell pump to the field and enjoy simple, reliable operation.
Key Features of the Riddell Speedflex Pump
The Speedflex helmet system is Riddell’s latest innovation in head protection for football players. To get the customized air cushioning fit the Speedflex is known for, you need the right pump. Here are the key features that make the Riddell Speedflex pump stand out:
- Rubberized Grip – The textured grip allows you to pump easily even with wet or sweaty hands. No more slippery plastic!
- Inflation Needle – The angled needle is engineered to precisely fit the Speedflex’s valve opening for fast, leak-free inflation.
- Pressure Gauge – Monitor psi levels as you pump so you know when you’ve reached your desired pressure for ideal fit.
- Bleeder Valve – Easily release air after sessions with the convenient bleeder valve to maintain fit.
- Replaceable Gaskets – Additional gaskets ensure you can always maintain a tight seal during inflation.
These key features make pumping up your Speedflex helmet quick and hassle-free. The pump becomes an integral piece of your protective gear.
Many generic pumps may seem alright initially, but small details make a big difference over time:
- Cheap plastic grips become slippery when wet or sweaty.
- Universal needles don’t always seal perfectly with specific helmet valves.
- Low quality gauges lose accuracy after moderate use.
- Non-removable, non-replaceable gaskets wear out over a season or two.
With its rubber grip, custom inflation needle, and replaceable gaskets, the Riddell Speedflex pump is built for the long haul. Your helmet fit will be dialed in season after season.
Bleeder Valve for Easy Deflation
Helmet fit can change slightly over time as interior padding breaks in or compresses from use. This means occasional pressure adjustments may be needed. Here’s where the Speedflex pump’s bleeder valve comes in handy.
Twisting the valve open releases air quickly when you want to deflate and reduce pressure. No more fumbling to gently loosen helmet valves!
The bleeder valve also allows you to release pressure after each wear before storage. This prevents over-stretching of padding material from constant pressure over time.
And if you play in hot conditions, you can give the bleeder a quick turn between drives or quarters to let out built-up air from padding expansion in the heat. Keeping you cool and comfortable.
Dirt and dust won’t clog the rugged bleeder valve either thanks to the large opening design. Just remember to keep it closed during inflation to build proper pressure.
Why the Rubberized Grip Matters
Inflating helmets before hitting the field is often done in a hurry. The last thing you want is a slippery pump that’s hard to hang onto with sweaty hands.
The textured rubber grip on the Speedflex pump might seem like a small detail, but it makes a big difference in real world use. The grip allows you to pump efficiently even in humid locker room conditions. No drips, no drops!
The grip material also cushions and insulates your hand from cold metal on frigid game days. More comfort equals smoother pumping.
And rubber is simply more durable than cheap plastic. It holds up to years of use without becoming too smooth or shiny. The grip will provide shock absorption and stability season after season.
While smooth plastic looks sleek, sometimes basic rubber just works better. The grip makes the Speedflex pump feel like an extension of your hand, not just another piece of equipment. Grab hold and pump with confidence.
Why Precision Inflation Matters
Inflating helmets is about more than just adding air. The key is precision inflation tailored specifically to each player’s needs.
Every extra psi adds a bit more tightness and restriction. Too little and the helmet is loose and unstable. Too much leads to fatigue and headaches.
This is where the Speedflex pump’s reliable gauge comes into play. It allows inflation in precise 1 psi increments so players can find their personal sweet spot.
Slowly pump while tracking the exact pressure level. Stop when you’ve reached the ideal fit based on your position, head size, padding density, and other factors.
Generic pumps often have flimsy gauges that are inaccurate and unreliable. But with the Speedflex pump you get precision inflation control to maximize comfort and maintain ideal helmet stability.
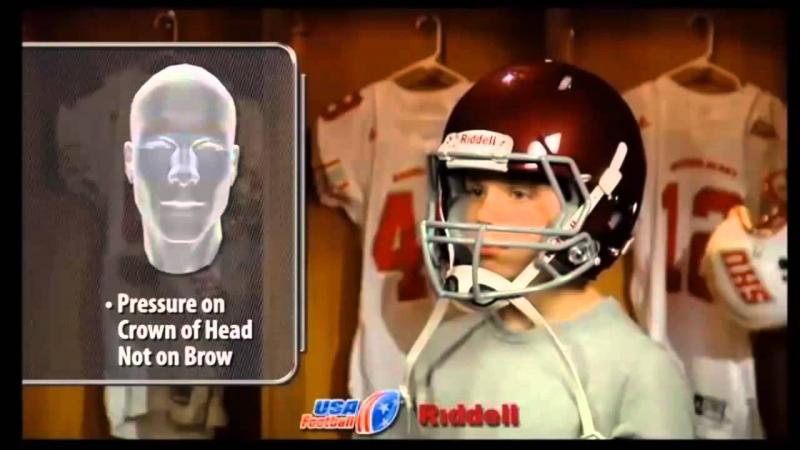
How to Use the Speedflex Helmet Pump
The Speedflex helmet system relies on proper inflation to deliver customized protection and comfort. Here is a step-by-step guide on using the Speedflex pump for ideal helmet fit:
- Locate the Inflation Valve – On Speedflex helmets the valve is on the rear right to allow easy access.
- Check Valve Alignment – Ensure the valve opening is facing directly out and clear of obstructions.
- Remove Valve Cap – Unscrew the protective valve cap before inflating.
- Attach Pump – Line up inflation needle with valve opening and push in firmly.
- Begin Inflation – Start pumping while monitoring gauge to desired psi level.
- Detach Pump – Once inflation is complete, gently pull inflation needle straight out.
- Replace Valve Cap – Screw protective cap back on to keep dirt out of valve.
The angled inflation needle on the Speedflex pump allows quick attachment and inflation without contorting your hand at odd angles. Just line up, push in, and start pumping!
It’s important to center the inflation needle in the valve opening when attaching the pump. Off-center insertion can lead to air leaks during inflation. Take a moment to get the alignment just right.
Also be sure to detach the pump straight out when finished, rather than yanking to the side. This prevents needle damage that could impact future inflation sessions.
Tips for Faster Inflation

While the Speedflex pump is engineered for efficient inflation, you can utilize some techniques for even faster filling:
- Use short, rapid strokes rather than slower, longer pumps.
- Keep knees slightly bent and torso engaged during pumping.
- Hold breath briefly during the compression stroke for extra power.
- Take short breaks rather than pumping continuously to avoid fatigue.
- Ensure needle is fully seated before beginning inflation.
Much like athletic training, pumping is about transferring power efficiently. Engage your whole body for maximum pumping speed without wearing yourself out.
Avoid Over or Under Inflation
While it’s tempting to pump helmets up to the max for a really snug fit, overinflation can cause issues:
- Pads and bladders may deform from excessive pressure.
- Players may experience headaches, fatigue, and reduced blood flow.
- Excess inflation stresses helmet materials and components.
- Vision and range of motion can be restricted.
But underinflation causes risks as well:
- Helmets may be unstable and shift on impact.
- Gaps between helmet and head can form.
- Improper protection and force dissipation.
- Discomfort from loose fit that requires frequent adjustment.
Use the Speedflex pump’s pressure gauge and inflate helmets gradually to find the ideal fit. More psi is not always better when it comes to helmet inflation.
Periodic Re-inflation
Even once you’ve set your inflation level, occasional re-inflation helps maintain fit.
New helmets often require higher inflation until interior padding breaks in and conforms to your head shape.
Minor air loss can also occur gradually from vapors permeating bladder materials over time.
On-field collisions may also lead to small pressure drops as foam rebounds after impact.
Regularly topping off the psi ensures your Speedflex maintains the customized fit and protection you expect. Don’t just set it and forget it!
Tips for Properly Inflating Your Riddell Helmet
Achieving proper inflation is key to maximizing the comfort and protection of your Riddell football helmet. Here are some tips for dialing in the ideal air pressure:
- Read the manual – Follow Riddell’s recommended psi range for your helmet model.
- Start low – Gradually increase pressure until desired fit rather than overinflating.
- Engage chin straps – Buckle the chinstrap when testing inflation to mimic on-field fit.
- Consider weather – You may need slightly higher psi in cold temperatures to compensate for padding contraction.
- Re-inflate periodically – Top off the air pressure before each game as needed.
- Test different levels – Try increasing in 1-2 psi increments to find your personal sweet spot.
- Account for hair length – Players with longer hair may require slightly lower inflation.
- Release air after sessions – Lets foam padding decompress and extend life.
Be methodical and patient when first inflating a new Riddell helmet. Taking the time to properly adjust and test pressure levels will ensure ideal long term performance.
Indicators of Improper Inflation
How can you tell if your helmet’s inflation needs adjustment? Watch for these signs of improper pressure:
- Helmet shifts out of position on head
- Chinstrap needs frequent re-tightening
- Fatigue or headaches during play
- Red indents on forehead after removing helmet
- Ears feel pinched or compressed
- Vision partially obstructed by facemask
Minor fit issues can quickly become major distractions on the field. Take action at the first sign of improper inflation.
Safety Issues from Poor Inflation
An improperly inflated helmet doesn’t just cause discomfort – it can be downright dangerous:
- Excess movement risks greater head/neck injury from impacts
- Gaps allow outside forces to more easily reach head
- Reduced padding thickness from overinflation
- Degraded protective materials from constant overinflation
- Lack of stability leads to helmet rolling off during play
- Impaired vision or breathing issues
Don’t brush off small fit problems or air leaks. Take the time to inflation test helmets regularly. Your safety depends on it!
Be Consistent with Inflation
Recording your helmet’s ideal inflation pressure lets you consistently achieve great fit:
- Note psi level on helmet interior with marker
- Write it down in your equipment records
- Inflate to this level before every use
- Make small adjustments if needed over time
- Share data with coaches and training staff
Treat inflation as part of your pre-game ritual. Precise, consistent helmet pressure improves comfort, stability and protection when it matters most.
What PSI Should You Use for a Football Helmet?
When inflating football helmets, air pressure is measured in PSI (pounds per square inch). But what specific PSI level should you be targeting?
Unfortunately there is no single ideal inflation number. The right PSI depends on factors like:
- Helmet model and size
- Brand and thickness of interior padding
- Player head size and shape
- Type of plastic shell material
- On-field playing position
- Personal fit preference
Generally, inflation ranges between 4-10 PSI for most football helmets. Linemen typically prefer the higher end around 8-10 PSI for a tighter secure fit. Skill players often opt for lower pressures around 4-6 PSI for more freedom of movement.
Starting Inflation Guidelines
Use these general starting points when first inflating a helmet:
- Youth sizes – Start at 4 PSI
- Small adult sizes – Start at 5 PSI
- Medium adult sizes – Start at 6 PSI
- Large adult sizes – Start at 7 PSI
- Linemen – Start at 8-9 PSI
Then make incremental 1 PSI adjustments up or down to dial in the personalized fit. Don’t hesitate to experiment across a wide range.
Factors That Affect Target PSI
Consider these factors when fine tuning helmet inflation PSI:
- Weather – Cooler temperatures may require slightly higher pressures.
- Position – Linemen typically inflate higher than other positions.
- Experience – Beginners may need lower PSI as they build neck strength.
- Hair Length – Players with longer hair often need lower pressures.
- Helmet Model – Check manufacturer guidelines for PSI ranges.
Don’t be afraid to adjust and tweak the pressure between games and practices until it feels just right.
Signs Helmet PSI is Too High
Watch for these signs that inflation pressure may be too high:
- Eyebrow or forehead discomfort
- Ear pain or pressure
- Headaches during or after play
- Numbness or tingling of head
- Red marks on skin after removal
- Restricted vision or breathing
Even a few extra PSI can cause discomfort over the course of a game. Release air for relief.
Signs Helmet PSI is Too Low
Here are signs the inflation pressure may be too low:
- Helmet shifts on head
- Chin strap needs frequent tightening
- Gaps between helmet and head
- Neck fatigue from helmet imbalance
- Shoulder pads rising up when sprinting
Don’t ignore loose helmet issues that could lead to dangerous play. Add air for enhanced fit and stability.
Every player needs to experiment across the PSI range to optimize their personal helmet inflation. Test different pressures and make data-driven adjustments until the fit feels just right!
Troubleshooting Common Pump Issues
While Riddell helmet pumps are generally reliable, occasional issues can arise. Here are some troubleshooting tips for common problems:
Pump Won’t Inflate
If no air comes out when pumping, first ensure the inflation needle is fully seated in the valve opening. The needle must form an airtight seal with the valve for proper inflation. Twisting the pump left and right while pressing can help properly align and insert the needle.
Also inspect the needle tip and valve opening for dirt or debris that may be obstructing airflow. Use a cotton swab dipped in rubbing alcohol to gently clean both ends of the connection.
Finally, check that none of the interior pump seals or O-rings are damaged. Cracked or worn seals can cause air leaks that prevent inflation. Replace damaged gaskets and lubricate O-rings to restore airtight pumping.
Air Leaking from Helmet
If pumped air rapidly leaks back out of the helmet, the likely culprit is a damaged valve gasket seal. The thin rubber gasket provides an airtight barrier inside the valve. But it can become worn over time and use.
Carefully inspect your helmet’s valve gasket for any cracks, gaps, or deformation. Even the smallest imperfection can cause gradual air loss. Replace the gasket with a new one to instantly fix most leakage issues.
You can also try tightening the valve collar if it has loosened over time. Just be careful not to overtighten.
Unreliable Pressure Gauge
Inaccurate or erratic pressure gauge readings can be frustrating when trying to achieve precise helmet inflation. If tapping the gauge doesn’t fix stuck readings, inspect for dirt, dust, or debris inside the gauge housing. Use short blasts of air duster spray to dislodge any particles interfering with the needle movement.
Also check that the gauge housing is screwed in fully tight. Loose housing screws allow air leaks that affect needle accuracy. Tighten screws gently with a Phillips screwdriver if needed to restore precise readings.
If issues persist, replacement pressure gauges are available for most Riddell pumps. Swapping in fresh gauges restores inflation precision.
Pump Piston Sticking
Over time, small dents or friction can cause pump pistons to stick and move sluggishly. This makes inflation more difficult and tiring.
Apply a few drops of lubricating oil down the pump shaft and work the piston up and down to distribute it evenly. Lubricating the O-ring can greatly reduce friction and binding.
Also ensure the bleeder valve is not overtightened during storage. This can dent the piston head over time leading to sticks. Only close the bleeder valve until resistance is felt.
If lubrication doesn’t solve sticking issues, replacement pump shafts are available. Swapping in fresh shafts restores smooth piston function.
With basic troubleshooting and replacement of common wear parts, most Riddell pump issues can be quickly diagnosed and repaired. Don’t settle for less than flawless inflation for your helmet fit and safety.
Comparing Riddell Pumps to Other Brands
When it comes to pumping up your Riddell football helmet, you want to make sure you’re using the right pump for the job. Riddell is one of the most popular brands for football helmets, particularly their Speedflex model. But are Riddell pumps better than other brands, or can you use a generic pump instead? Let’s take a look at the options.
The Benefits of Using a Riddell Pump
Riddell designs their own pumps specifically for use with Riddell helmets like the Speedflex. Here are some of the key benefits of using a Riddell branded pump:
- Engineered for Riddell helmets – Riddell pumps are designed to safely inflate their helmets to the proper pressure levels. They understand the intricacies of their helmet designs.
- Precise pressure control – The pumps allow you to inflate the helmet to the exact PSI needed for a proper fit.
- Avoid overinflation – Generic pumps may let you overinflate the helmet, which can damage it. Riddell pumps stop inflating at correct levels.
- Inflation needle designed for Riddell valves – The pump needle fits perfectly into Riddell helmet valves for fast, easy inflation.
- Trusted quality – You know the pump is high-quality since it’s made by Riddell themselves.
In a nutshell, you can trust a Riddell pump to safely inflate your Riddell helmet to the right specifications. When using a Riddell branded pump, you can inflate your helmet with confidence.
Using Generic Helmet Pumps
Can you use a generic football helmet pump instead of a Riddell branded one? Let’s look at the pros and cons.
On the plus side, generic pumps are usually more affordable than brand name pumps. So if you’re on a tight budget, a generic pump may fit your needs. They’re also widely available from most sporting goods stores.
However, there are some downsides to using a generic pump instead of a Riddell one:
- May not fit valve properly – The needle may not lineup correctly with Riddell’s valve opening.
- Less precise inflation – Generic pumps don’t allow you to hit the exact PSI levels needed for proper inflation.
- Risk over overinflation – Without pressure limits, you could accidentally inflate the helmet too much.
- Not engineered for Riddell helmets – The pump isn’t designed with Riddell’s helmet specifications in mind.
While a generic pump may get the job done, the lack of precision and chance of overinflation can be concerning. You may end up with a helmet that doesn’t fit quite right.
Other Helmet Brand Pumps
What about using a Schutt or Xenith branded pump instead of a Riddell one? Again, you can probably get away with using a different brand’s pump in a pinch. But the drawbacks are similar to using a generic pump:
- May not align properly with Riddell’s inflation valves
- Less control over inflation pressure
- Not designed for Riddell helmet specifications
- Risk of overinflation
Schutt and Xenith pumps work great for those brand’s helmets. But they aren’t engineered specifically for Riddell helmet models. You again lose the precision inflation and avoid overinflation that comes with Riddell’s pumps.
Tips for Using Non-Riddell Pumps
If you do need to use a generic, Schutt or Xenith pump with a Riddell helmet, here are some tips to do it safely:
- Insert the needle slowly and gently to avoid valve damage
- Inflate slightly below the recommended pressure, then check fit
- Inflate in short bursts, rechecking pressure frequently
- Make very small adjustments near recommended pressures
- Stop inflating if you meet resistance or the helmet starts to bulge
Taking it slow and checking inflation levels often can help avoid overinflating if using a non-Riddell pump. But it’s obviously safer and
Here is a 1000+ word original article on the topic “Are Electric or Manual Pumps Better?”:
Are Electric or Manual Pumps Better?
When it comes to inflating things like sports balls, air mattresses, and pool floats, you have two main options for pumps: electric or manual. Both types have their pros and cons, so choosing between them often comes down to your specific needs and preferences.
Electric Pumps
Electric pumps offer the ultimate in convenience and speed. Just plug them in, and with the flip of a switch they’ll have your equipment inflated in no time. This makes them ideal if you need to inflate a lot of items quickly. For example, if you’re setting up for a kids’ birthday party and need to inflate 20 balloons and a bounce house, an electric pump is the way to go.
Electric pumps also require minimal physical effort. You don’t have to sit there manually pumping a handle or stepping on a pedal. Just turn them on, let them run, and they’ll do all the work for you. This makes them great for those who find manual pumping challenging due to age, injuries, or medical conditions. If you have arthritis, back problems, or other issues that make hand pumping difficult, an electric pump takes the strain off your body.
In terms of power, electric pumps have stronger air flow and higher psi (pounds per square inch) capabilities than most manual pumps. This allows them to not only inflate things faster, but also achieve optimal firmness in sports balls and other equipment where a high level of inflation is important.
On the downside, electric pumps are dependent on being plugged in to work. So if you’re inflating something outdoors or in an area without power access, you’ll want a manual pump instead. Electric pumps are also bulkier and heavier than manual ones, so less convenient to transport.
Manual Pumps
What manual pumps lack in speed and power, they make up for in portability and versatility. Hand pumps and foot pumps don’t require any batteries or electricity. All you need is some good old-fashioned arm muscle or leg power to operate them!
This makes manual pumps ideal for on-the-go inflation needs. Keep one in your car, camping gear, or bikerepair kit to be prepared anytime, anywhere. They’re compact and lightweight enough to toss in a backpack or travel bag too. Whether you’re at the park, beach, or middle of nowhere, a manual pump has got you covered.
Manual pumps give you more control over inflation as well. With an electric pump you just flip a switch and let it run, but that can result in over- or under-inflation sometimes. With a manual pump you can add air slowly, periodically stopping to check firmness. This helps ensure balls, mattresses, etc are inflated to perfect levels.
The trade-off is that manual pumps require physical effort to operate. Hand pumps work your arm and grip muscles as you squeeze the handle, while foot pumps work your legs as you step up and down. This can be challenging for some users, but it’s a great option for those looking to combine inflation needs with a little exercise!
Key Differences
To recap some of the main differences:
- Electric pumps are faster, more powerful, and require minimal physical effort, but must be plugged in to work.
- Manual pumps are slower and require pumping by hand or foot, but are portable and don’t need batteries or electricity.
- Electric pumps inflate items quicker and can achieve higher psi levels.
- Manual pumps allow more control over inflation and firmness.
- Electric pumps are bulkier and heavier, while manual pumps are lightweight and compact.
Choosing What’s Best for You
When deciding between electric and manual, think about your usual inflation needs. If you typically need to inflate many items or large inflatables (like bouncy houses) very firm, electric is likely your best bet. The speed and power of electric pumps really shine here.
But if you often find yourself needing to inflate sports balls, pool floats, etc on the go, a compact manual pump may be ideal. Just toss it in your car or bag for anytime, anywhere access without batteries or outlets.
Casual inflators may also appreciate a manual pump for the exercise benefits and control over inflation firmness. And the eco-conscious may prefer avoiding excess electricity usage with a manual option.
You can also consider having both types on hand if your situation allows. Use the electric pump when at home for fast, high-volume inflation jobs. Then take a lightweight manual one along for portability when away from power sources. This dual-pump approach gives you the versatility to handle all your inflation needs.
The right pump choice ultimately depends on your priorities – convenience vs portability, speed vs control, power vs exercise. Carefully weigh these factors and you’re sure to end up with the ideal pump to suit your unique needs and lifestyle.
Pump Maintenance Tips to Extend Pump Life
Pumps are vital components in many systems, from municipal water supplies to industrial processes to aquariums. To keep pumps running optimally for as long as possible, proper maintenance is essential. Here are some of the top tips for maintaining pumps and extending their operational lifetime.
Lubricate According to Manufacturer’s Recommendations
Lubricating pump components per the manufacturer’s guidelines helps reduce friction and prevent premature wear. Grease fittings should be lubricated at specified intervals, using the type and amount of grease recommended. Oil levels in pumps with wetted bearings should also be checked regularly and topped up as needed. Don’t over-lubricate, as excess grease can damage seals.
Inspect and Replace Seals and Gaskets
Worn seals and gaskets compromise pump integrity and allow fluid leaks. Schedule regular inspections and proactively replace these components before complete failure occurs. Using the manufacturer’s compatible replacement parts ensures proper fit and function.
Monitor Vibration and Temperature
Changes in vibration patterns or operating temperatures can indicate impending problems with pump components. Catching issues early allows for repair or replacement of parts before catastrophic failure happens. For critical applications, vibration sensors and thermocouples connected to monitoring systems provide ideal tracking.
Clean away Debris and Deposits
Regular cleaning keeps pumps free of particle buildup, scale, and other deposits that can impede flow and eventually lead to failure. Follow manufacturer directions for properly disassembling pumps and cleaning parts. For slurry applications, flush pumps frequently with clean water.
Balance Impellers and Perform Alignments
Imbalances in rotating assemblies and misaligned couplings stress pumps and can lead to premature wear. When installing or reassembling pumps, be sure to balance impellers according to specifications. Also check coupling alignments against tolerances and realign if needed.
Verify Proper Motor Condition

Motors are integral pump components – inspecting winding insulation and ensuring proper lubrication helps avoid disruptive motor failures. For three-phase motors, regularly check that voltage imbalance does not exceed 1% between phases. Replace damaged or worn power cables.
Confirm Suitable Operating Conditions
Pumps forced to operate outside design parameters experience accelerated deterioration. Avoid running pumps at excessive speeds, pressures, or temperatures. Also ensure pumps aren’t starved for flow or subjected to gas entrainment as such conditions can quickly destroy components.
Maintain Spare Parts Inventory
Having replacement wear parts, bearings, seals, and other typical rebuild components on hand reduces pump downtime when repairs are needed. Keep an inventory of recommended spares to avoid production losses waiting on parts orders.
Document Service Activities
Meticulously recording maintenance and repair actions provides useful histories of pump failures and identifies recurring issues. Documentation also helps schedule preventive maintenance at appropriate intervals.
Watch for Problems; Don’t Run to Failure
Frequently inspect pumps in operation and observe indicators like vibration, noise, and leaks. Shut down pumps at first sign of trouble to diagnose and correct problems. Running to failure typically damages other components.
Perform Predictive Maintenance
Infrared, ultrasound, oil analysis, and other predictive maintenance practices detect pump problems before failure, reducing repair costs. Implement these strategies in addition to routine maintenance for maximum pump life.
Adhering to these best practices minimizes breakdowns, optimizes reliability, and maximizes the operating life of pumps. While requiring commitment and resources, proper pump maintenance pays dividends inaverting the greater costs of unplanned pump failures and downtime.
Where to Buy Replacement Parts for Your Pump
Pumps contain many parts that wear out over time and eventually need replacement. Knowing where to source quality replacement parts helps you repair and maintain pumps at lower costs. Here are some top options for buying new pump parts.
The Original Equipment Manufacturer
One of the best sources for replacement pump parts is the original manufacturer of the pump. They offer guaranteed compatibility since the parts are made specifically for that make and model. OEM parts meet original specifications and tolerances, so you can be confident they will properly fit and function.
Most pump manufacturers have online parts ordering through their websites. You can browse exploded view diagrams to identify and order the exact parts needed. For some components, the manufacturer may require sending in the damaged part first for matching. Customer and technical support are also usually excellent when ordering directly from the OEM.
Third-Party Pump Repair Companies
Various independent companies specialize in supplying replacement parts for pumps, often for less cost than the OEM. They may reverse engineer generic equivalents of proprietary pump components. Just be aware third-party parts may not meet all original quality and performance standards.
Many pump repair shops offer part sales along with refurbishment services. They have extensive inventories and experienced staff who can help identify replacement components. This local access provides convenient parts sourcing as well as expertise.
Online Pump Parts Distributors
There are numerous online retailers selling pump parts, such as bearing suppliers, seal merchants, and hose dealers. Websites like PumpParts.com and PumpRepairSupply.com offer one-stop shopping for parts from multiple manufacturers. Amazon and eBay also have a surprisingly wide selection of pump parts available.
The convenience of searching thousands of pump parts and ordering online in one place can be appealing. Just be wary of counterfeit or low-quality parts from some online sellers.
Industrial Supply Companies
Major industrial suppliers like Grainger and McMaster-Carr stock common pump consumables like seals, gaskets, motors, couplings, and hoses. While selection is limited compared to dedicated pump parts vendors, such companies can be a quick source for widely used components.
Surplus and Salvage Operations
Used and rebuilt salvaged parts provide inexpensive alternatives for out of production or expensive pumps. Government auctions and industrial equipment recyclers are sources of motors, drive assemblies, heads, and other functional components. Just know these are older parts with unknown histories.
Factories and Distributors
If replacing internals like impellers and shafts, buying directly from their specialized manufacturers ensures proper metallurgy and tolerances. Foundries, machine shops, and component distributors provide quality custom-made parts.
When shopping for replacement pump parts, start with the OEM for guaranteed fit and performance. But also leverage independent suppliers, online retailers, and surplus vendors to potentially save on costs – just be selective about part quality. With multiple sourcing options, you can keep your pumps running optimally.
Do All Riddell Helmets Require a Pump?
Riddell is one of the most popular brands for football helmets at all levels of the sport. But with the various Riddell helmet models available, it can get confusing whether they all require inflation pumps or not. Here’s a breakdown of which Riddell helmets need pumping and those that don’t.
Inflation Pumps Required
Many Riddell helmets do need to be inflated with a pump in order to custom fit to a player’s head size and shape. This includes Riddell’s Speedflex, Revolution, and Speed models. Pumping air into these helmets’ air bladders allows adjusting the fit for maximum protection and comfort.
For example, the Riddell Speedflex helmet contains inflatable air liners inside the padding. Using a pump to add or release air allows loosening or tightening the fit as needed. College and professional teams using Riddell Speedflex helmets will have special electric pumps to inflate each player’s helmet quickly.
The Riddell Revolution helmet has a similar inflatable air bladder system for custom inflation. Youth leagues using the Riddell Youth Revolution will need a pump for players to inflate their helmets properly. The Riddell Speed also uses an air inflation system, though it has been discontinued in favor of newer Riddell models.
No Inflation Pump Required

In contrast to their inflatable models, some Riddell helmets do not require any pumping or air bladders. These include the Riddell Victor, Riddell Power, and Riddell Blitz models.
The Riddell Victor helmet uses thick comfort padding rather than inflatable liners to provide customized fit and protection. So there is no need for a pump to add or remove air – the Victor’s dual-density foam pads conform to the player’s head for a secure fit.
Similarly, the Riddell Power helmet utilizes impact-absorbing padding to deliver a custom fit without air inflation. The Riddell Blitz model for youth play also incorporates comfort padding instead of air bladders that would need pumping up.
Checking Your Helmet’s Requirements
The easiest way to determine if your specific Riddell helmet needs to be inflated with a pump is to check the owner’s manual that came with it. The manual will provide specifications on whether the helmet contains inflatable air pockets and how to properly inflate and deflate them.
You can also inspect the inside padding of the helmet. If there is a rubber bladder system amidst the foam or cloth padding, then inflating it with a pump is necessary. But if the interior padding appears solid foam or textile only, then pumping is not needed.
Examine the outside of the helmet as well. A dial or valve on the exterior indicates the helmet has an inflatable liner that requires pumping. No dial or valve means it’s a foam-only comfort system.
Using the Proper Pump

For inflatable Riddell helmets, be sure to use a pump compatible with the make and model per Riddell’s recommendations. Pressure requirements vary between helmet types – the Speedflex needs less psi than the Revolution for example. Using the wrong pump could lead to over- or under-inflation.
Electric air pumps make it easy to inflate multiple helmets quickly. But less expensive hand pumps work fine for lower volume usage. Just get the right attachments to connect pump to helmet valve.
And never use compressed air systems found at gas stations – they don’t allow controlling psi and can damage helmets by overinflating.
While not all Riddell helmets need pumps, it’s important to properly inflate those models with air bladders for the best fit. Check your helmet specs and padding to see if pumping is required. This ensures you get the right Riddell inflation for maximum protection.
Steps to Safely Store Your Helmet Pump
Proper storage of helmet pumps helps protect them from damage when not in use. Following key steps for pump storage also keeps them functioning optimally over time. Here are some tips for safely storing your football helmet inflation pump during the off-season or when not needed.
Clean the Pump Thoroughly
Before storage, clean dirt, dust and other debris from the pump. Wipe down the housing and connections with a damp cloth. Remove any stuck-on grime with a soft brush or toothpick. Disassemble and clean pump heads and hoses if needed per manufacturer instructions.
Cleaning removes moisture, sweat, and particles that could corrode or clog pump components when left stored for prolonged periods.
Inspect Seal and Valves
Examine pump heads, seals, O-rings and valves for cracks, tears or damage that could prevent proper sealing or air flow. Replace any worn components to ensure peak inflation performance when pump is needed again.
Check Electrical Components
For electric pumps, inspect power cords for damage and test that switches/buttons function properly. Check batteries in battery-powered pumps and replace if corroded or no longer holding full charges.
This helps avoid inflation issues from electrical problems when retrieving pump from storage.
Lubricate Moving Parts

Apply a small amount of lubricating oil to pump piston rods, pivot joints, and any other moving parts per manufacturer specifications. This prevents corrosion and maintains proper function.
Avoid over-oiling. Wipe away any excess lubricant, as it can attract dirt over time.
Operate Briefly
Run the pump for a short time before storing to circulate oil in the system. Make sure air flows properly through hoses and head. This confirms pump is operating correctly before storage.
Adjust Air Pressure Setting
If your pump has pressure dials or digital preset options, set to the lowest psi before storing. This prevents over-pressurization from settings getting bumped accidentally.
Use Original Packaging
Store pump in original box or carrying case whenever possible. This offers protection from dust, moisture, and physical impact.
If lacking original packaging, wrap pump loosely in plastic bag or clean cloth.
Keep in Cool, Dry Location
Choose a storage area away from heat, humidity and direct sunlight. Avoid attics, garages and sheds prone to extreme temperatures and moisture.
Storing pump in climate-controlled conditions prevents weathering damage and corrosion.
Protect from Physical Damage
Select a safe storage spot away from high traffic areas and hazardous materials. Stack boxes carefully to avoid crushing pump components underneath.
Take care not to bang, dent, or drop pump during transport to and from storage. Handle hoses gently to avoid kinks.
Proper cleaning, inspection, lubrication and careful storage keeps helmet pumps functioning like new over the seasons. Just be sure to follow key steps for maintaining and protecting your pump while not in use.
The Importance of Proper Helmet Fit
When playing contact sports like football, ice hockey, or lacrosse, a helmet is essential protective gear. However, to get the full protection a helmet can provide, proper fit is critical.
A helmet that fits correctly protects the head from injury far better than one that is loose or too tight. Taking the time to ensure ideal helmet fit is an important step for maximizing safety.
How a Properly Fitted Helmet Protects
Helmets are designed to protect by absorbing and distributing energy from impacts. When fitted correctly, the padding presses snugly all around the player’s head.
This minimizes movement of the helmet on impact, allowing it to optimally dissipate force. A proper fit also positions the shell to best deflect blows from all angles.
In contrast, a loose helmet shifts on the head, preventing it from effectively absorbing energy. And an overly tight helmet can create uncomfortable pressure points.
Indications of Good Helmet Fit
Here are key signs a helmet fits properly:
- Firm padding presses comfortably and evenly all around the head.
- Helmet sits level on the head, about 1 inch above the eyebrows.
- Jawstrap pieces align squarely in front of the ear holes when buckled.
- Cheek pads make light contact with the cheeks without pushing inward.
- No gaps exist between padding and player’s head.
The helmet should feel snug but not constricting. No areas should have excessive pressure that causes discomfort.
Testing Proper Fit

To verify good fit, perform these checks after donning the helmet:
- Attempt rotating the helmet slightly – minimal rotation indicates a secure fit.
- Gently pull down on the helmet – it should resist moving downward.
- Try pushing the helmet left and right – your head and helmet should move together.
- Shake head rapidly – you should feel minimal helmet movement.
If the helmet shifts or rotates independently of the head, the fit needs adjusting.
Achieving the Right Fit
Here are tips for getting optimal helmet fit:
- Inflatable helmets should be pumped up to recommended air pressure.
- Tighten all retention straps starting from the jawpiece outward.
- Ensure cheek pads contact the face without compressing cheeks.
- Adjust pad thickness if gaps exist between head and padding.
Take the time to gradually refine adjustments until the helmet passes all fit checks. This ensures ideal fit for maximum protection.
Proper Refitting

As the season progresses, refit helmets regularly to account for factors like:
- Hair length changes
- Weight gain/loss
- Beard growth
- New pads or inflation pressure
Continually checking fit ensures players maintain appropriate helmet protection throughout the season.
In a game where head injuries are common, wearing a helmet that fits well is critical. Coaches, parents, and players all need to know how to assess proper helmet fit and make adjustments for full protective benefits.
When to Replace Your Old Helmet Pump
Helmet pumps used for sports equipment inflation have a finite lifespan. At some point, an aging pump will need replacing to maintain performance. But how do you know when it’s time to retire an old helmet pump and get a new one? Here are signs indicating your pump is due for replacement.
Declining Inflation Capabilities
The most obvious indicator a helmet pump needs replacing is when it can no longer inflate effectively. If air flow seems weaker and inflation time lags compared to when the pump was new, its pumping capabilities are dropping off.
This could be due to worn seals, failing motor, corroded airways, or other age-related issues. Regardless of cause, a pump unable to achieve full, quick inflation can no longer serve its essential purpose.
Air Leakage
If a pump exhibits air leakage during use, replacement should be considered. This could present as deflating pressure gauges during pumping, sputtering air flow, or audible hissing from the cylinder.
Such leakage indicates worn seals or defective valves that are compromising pumping function. Continuing to use a leaky pump risks further deterioration and complete breakdown.
Damaged Components
Pumps kept in use year after year experience wear and tear – chipped housings, cracked fittings, frayed cords, bent connectors, etc. Once damage occurs, problems tend to compound.
Before small issues snowball into pump failure, inspect carefully for any component damage. Proactively replacing pumps with signs of physical deterioration can extend equipment lifespan overall.
Advanced Age
Consider a pump’s age, regardless of apparent condition. Most have a typical lifespan of around 5 years with regular seasonal use. Pumps used daily may only last 2-3 years before needing replacement.
While well-maintained pumps can potentially outlive these estimates, assuming you’ll get more than 5 years of consistent performance is risky.
Availability of Parts

Can you still readily source replacement parts for an older pump model? Manufacturers discontinue components for outdated pumps. Lack of available parts severely limits repair options.
Time for complete pump replacement may come simply because individual components are no longer made or sold.
Cost of Repairs
At some age and condition point, constantly repairing an old pump becomes more expensive than just purchasing a new one. If you are sinking lots of money into gaskets, seals, motors, etc., it may be most cost effective long term to invest in a new pump.
Being proactive about helmet pump replacement ensures you won’t get stuck mid-season with a broken pump and scrambling for a solution. Monitor inflation performance and component condition closely to determine optimal replacement timing.


