How to choose the perfect sit-in kayak for solo adventures. What safety precautions are crucial for paddling alone. How to enhance your solo kayaking skills and confidence on the water.
Selecting the Ideal Solo Sit-In Kayak: Key Features to Consider
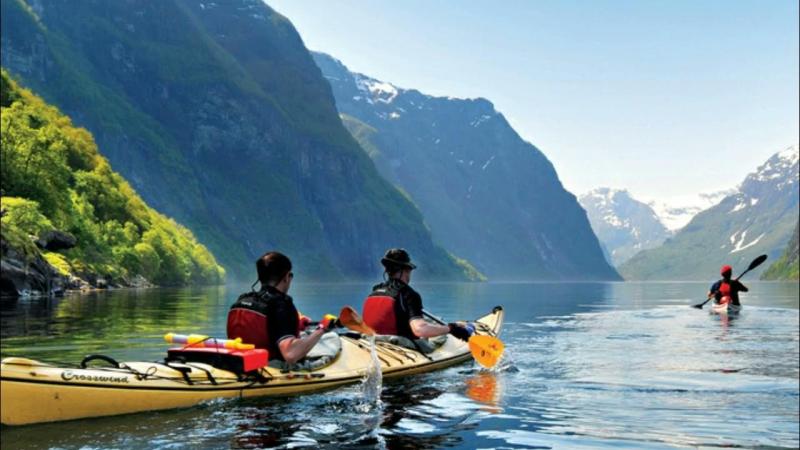
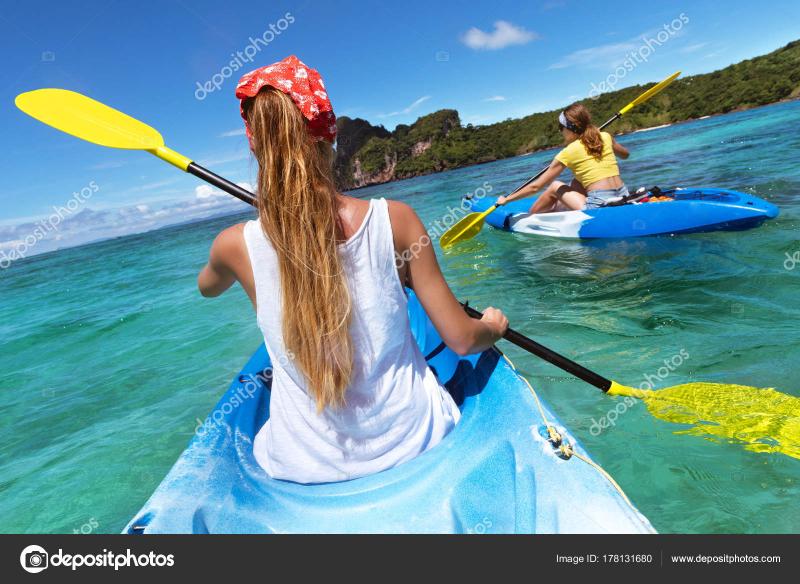
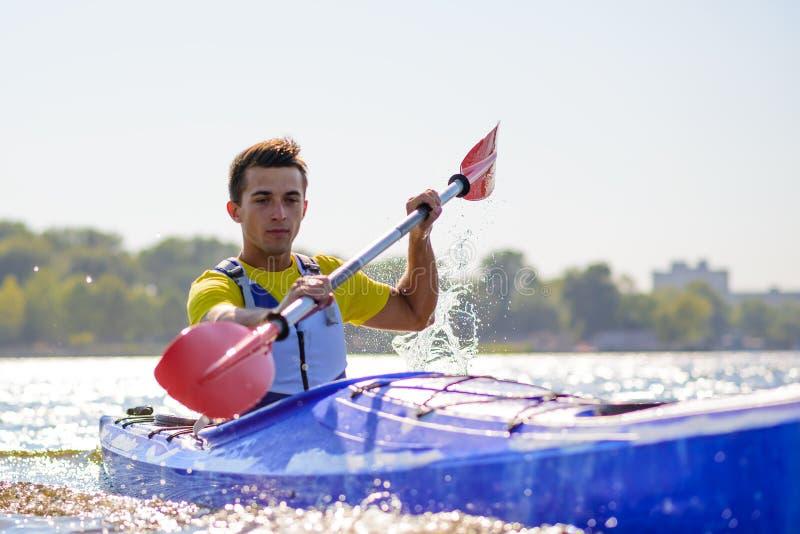
Embarking on a solo kayaking adventure requires careful consideration when choosing your vessel. Sit-in kayaks offer numerous advantages for individual paddlers, but what features should you prioritize? Let’s explore the essential aspects that will ensure your solo kayaking experience is both enjoyable and safe.
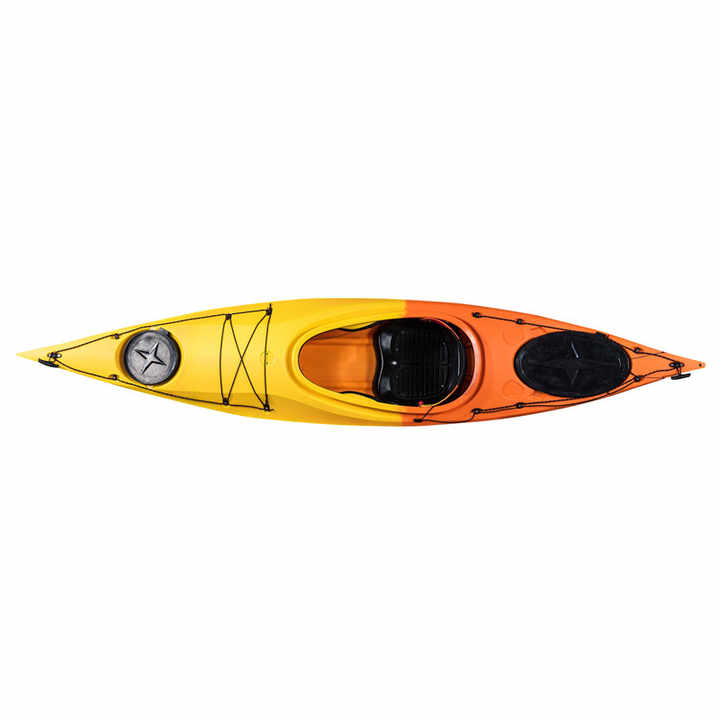
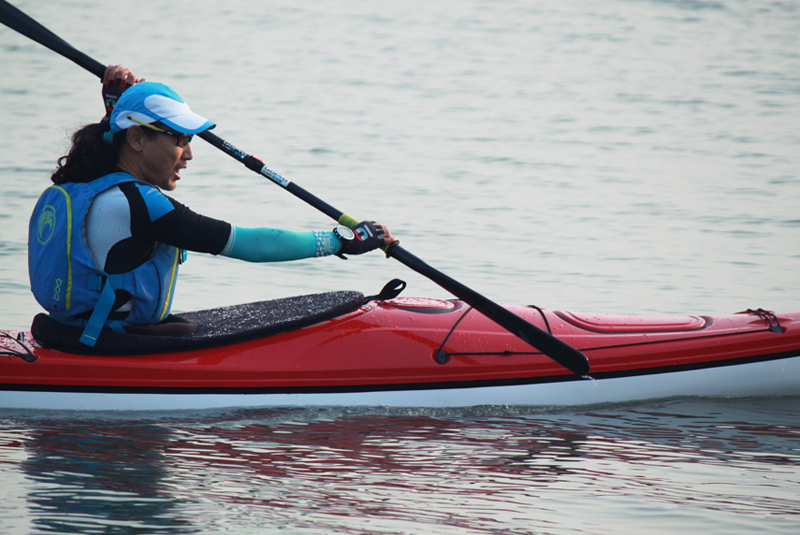
Cockpit Size and Comfort
The cockpit is your command center, so its dimensions and ergonomics are crucial. How can you determine if a cockpit is right for you? Always test the fit before purchasing. Ensure you have adequate legroom and width for comfortable entry and exit. A snug fit provides security, but avoid cramped quarters that can lead to discomfort during extended paddling sessions.
Kayak Length and Maneuverability
When it comes to solo kayaking, size matters. Are shorter kayaks better for solo paddlers? In many cases, yes. Kayaks under 12 feet in length offer superior maneuverability, especially in rivers or small waterways. They’re lighter and easier to transport, allowing you to navigate tight turns with ease. However, taller paddlers may prefer longer kayaks for additional legroom and improved tracking in open water.
Hull Width and Stability
Finding the right balance between stability and speed is essential for solo kayakers. How wide should your kayak be? For beginners, a wider hull in the 26-30 inch range provides increased stability and confidence. More experienced paddlers might opt for narrower designs that offer better speed and tracking. Consider your skill level and intended use when making this decision.
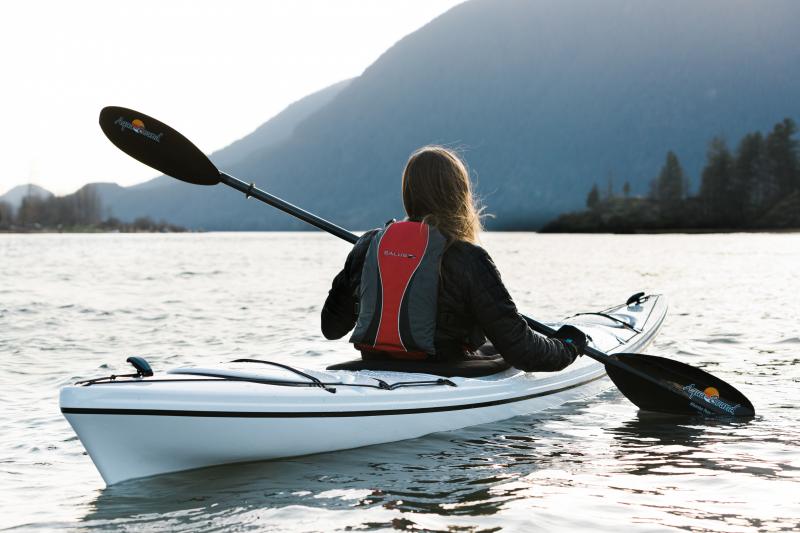
Essential Safety Features for Solo Kayaking
Paddling alone requires extra attention to safety. What features and gear should you prioritize to ensure a secure solo kayaking experience?
- Storage hatches for essential gear and supplies
- Raised seat for improved visibility
- Rudder system or fixed skeg for better tracking
- Bilge pump and emergency whistle
- Throw rope and paddle float for self-rescue
- Adequate flotation bags
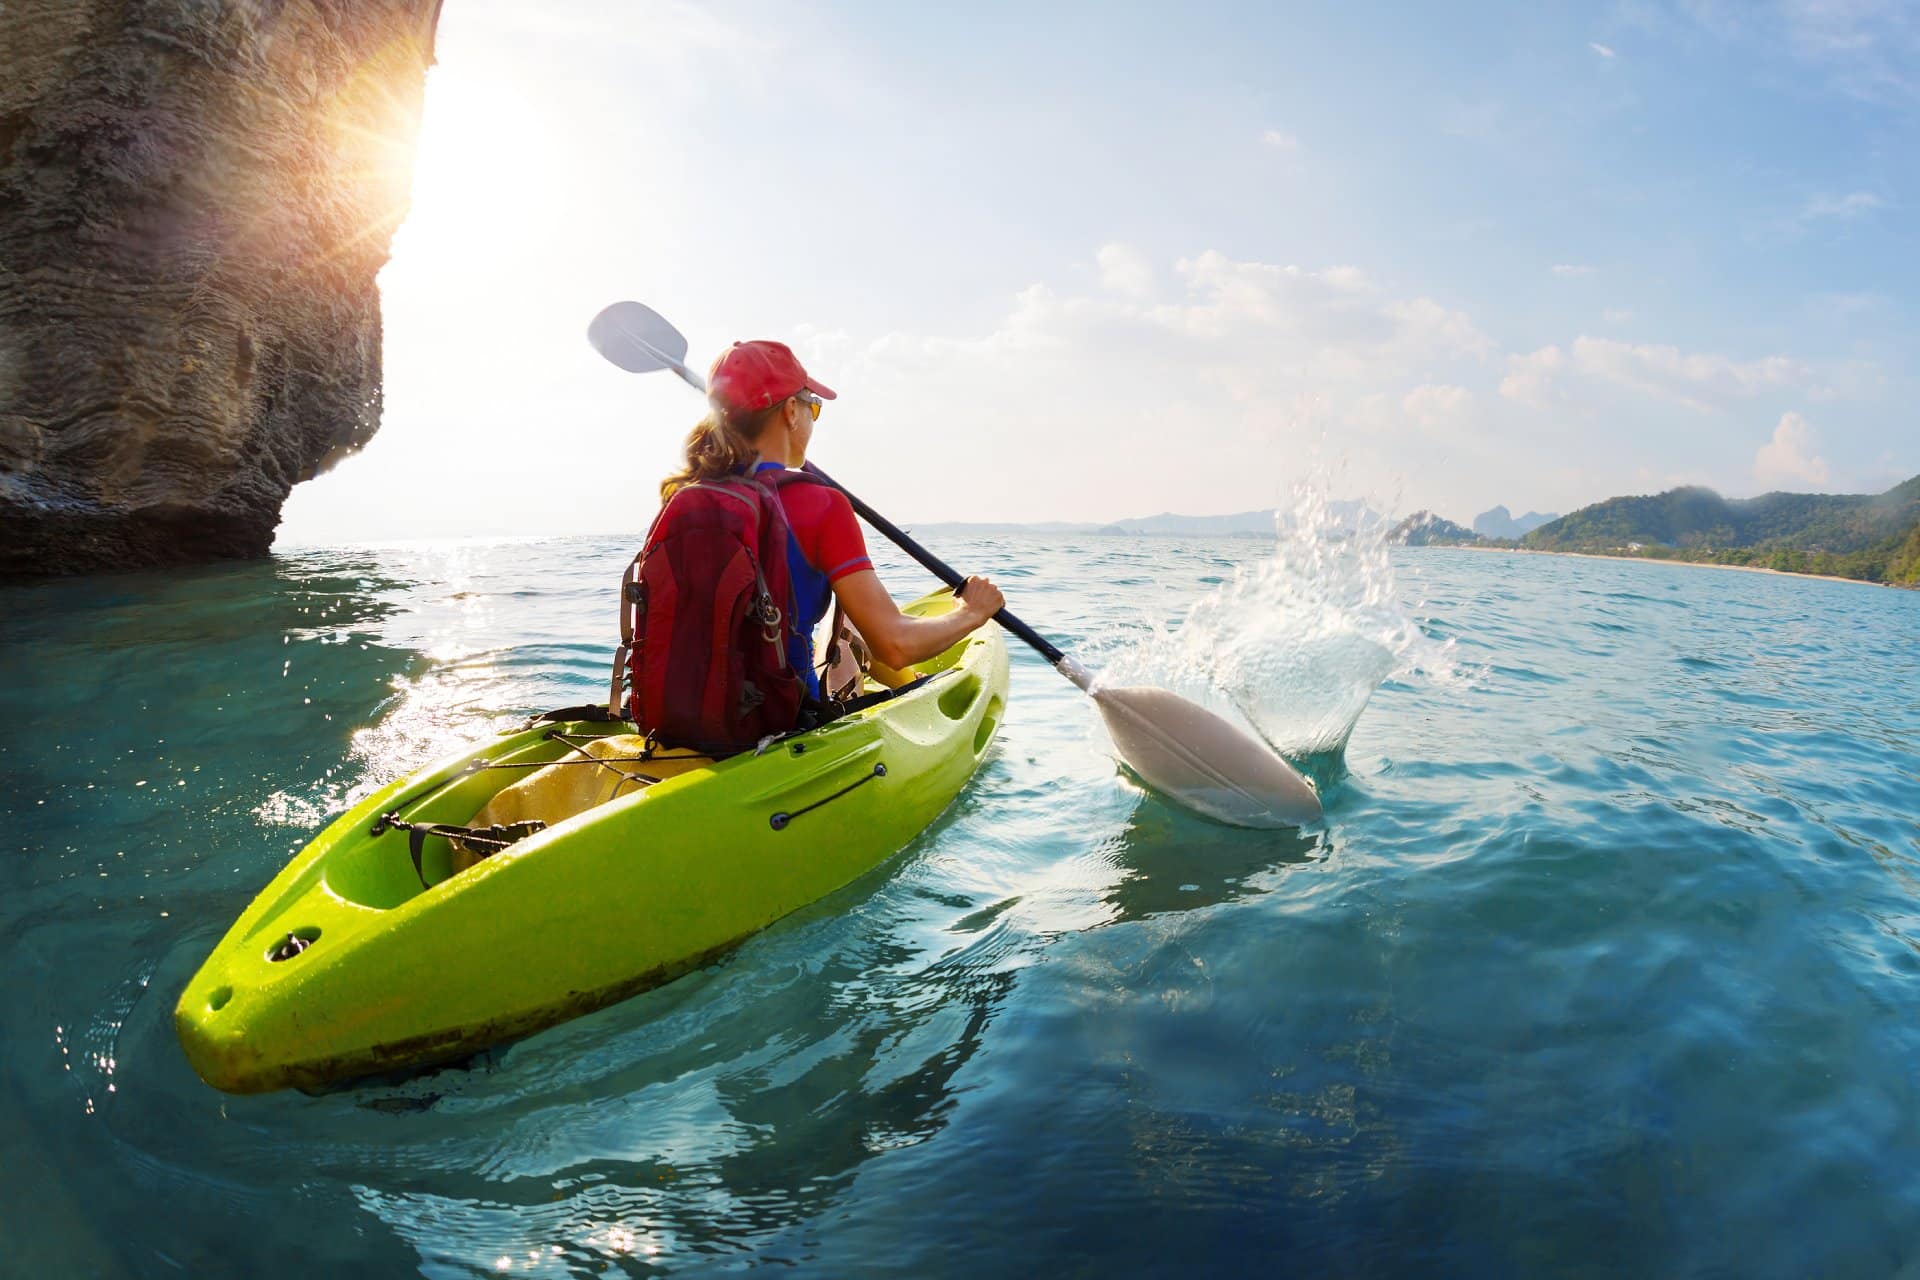
Remember, visibility is crucial when kayaking solo. Choose bright colors for your kayak and clothing to ensure other boaters can easily spot you on the water.
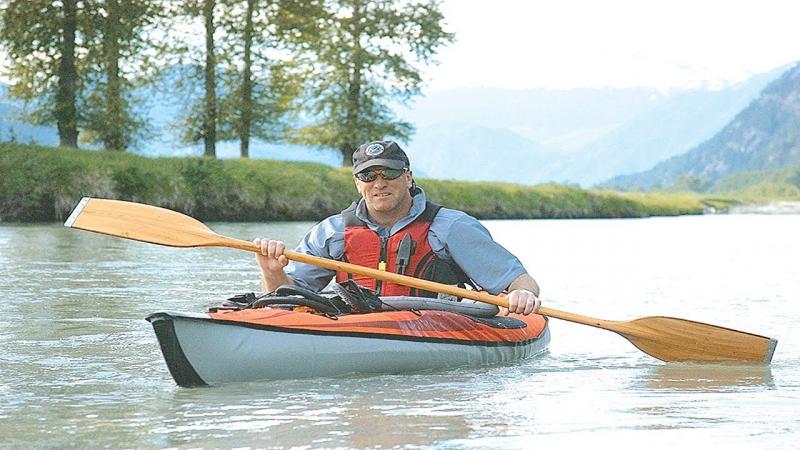
Mastering Solo Launching and Recovery Techniques
Launching and recovering your kayak alone requires practice and precaution. How can you safely enter and exit your sit-in kayak when paddling solo?
- Choose a shallow, stable area near the shore for launching
- Use a kayak stand or cradle to stabilize your vessel during entry
- Practice proper technique for sliding into the cockpit smoothly
- Master the “wet exit” in case of capsizing
- Learn self-rescue techniques, including how to re-enter your kayak from the water
Regular practice of these skills in controlled conditions will boost your confidence and safety when kayaking alone.
Dressing for Success: Appropriate Attire for Solo Kayaking
Proper clothing can make a significant difference in your comfort and safety while solo kayaking. What should you wear to ensure you’re prepared for any situation?
Opt for synthetic, moisture-wicking materials that retain warmth even when wet. Layer your clothing, starting with a base layer, adding insulation if needed, and topping it off with a waterproof paddling jacket. Always pack extra dry clothes in a waterproof bag, as hypothermia is a real risk if you capsize in cold water.
Don’t forget essential accessories like a well-fitting personal flotation device (PFD), sun protection, and appropriate footwear for walking in and around water.
Advanced Skills for the Solo Kayaker: Rolling and Self-Rescue
Developing advanced kayaking skills can greatly enhance your safety and enjoyment when paddling alone. Have you considered learning how to perform an Eskimo roll?
The ability to right your kayak after capsizing without exiting the cockpit is an invaluable skill for solo paddlers. While it requires practice and instruction, mastering the Eskimo roll can provide a significant boost to your confidence on the water.
In addition to rolling, familiarize yourself with various self-rescue techniques, such as:
- Paddle float rescue
- Cowboy scramble
- Re-enter and roll
Regular practice of these skills in controlled environments will prepare you for unexpected situations during your solo adventures.
Planning and Communication: Staying Safe on Solo Kayaking Trips
Proper planning and communication are crucial when embarking on solo kayaking excursions. How can you ensure someone knows your whereabouts and can assist if needed?
Always file a float plan before setting out. Share your intended route, expected duration, and scheduled return time with a reliable contact on land. Modern technology offers additional safety measures, such as:
- Smartphone apps for tracking and sharing your location
- Waterproof VHF radios for communication in areas with poor cell coverage
- Personal locator beacons (PLBs) for emergency situations
Remember to check in with your contact person once you’ve safely completed your trip. This simple step can prevent unnecessary worry and potential false alarms.

Enhancing Your Solo Kayaking Experience: Tips and Tricks
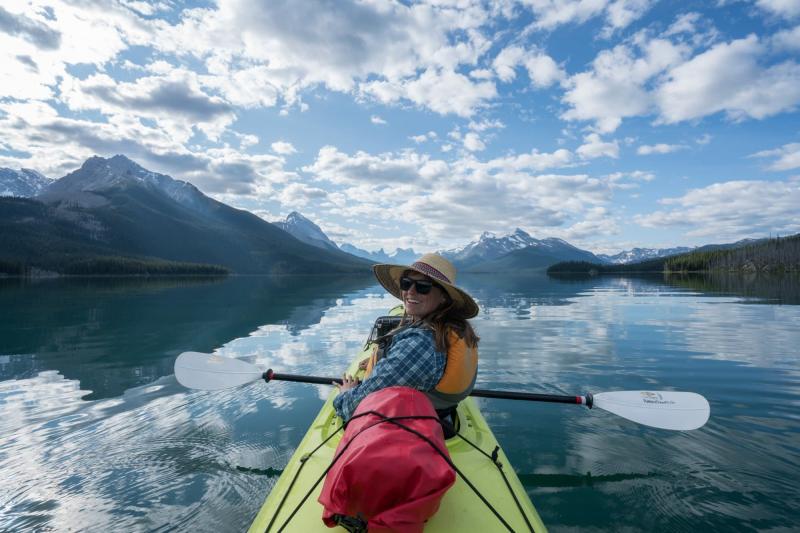
Solo kayaking offers a unique opportunity for personal growth and connection with nature. How can you make the most of your solo paddling adventures?
Embrace Mindfulness and Meditation
Use the solitude of solo kayaking to practice mindfulness and meditation. Focus on your breath, the rhythm of your paddle strokes, and the sounds of nature around you. This can lead to a deeper, more rewarding experience on the water.
Develop Your Photography Skills
Solo kayaking provides excellent opportunities for nature photography. Invest in a waterproof camera or phone case and capture the beauty of your surroundings from a unique perspective.
Explore New Waterways
Challenge yourself by exploring new kayaking locations. Research lesser-known waterways in your area and plan trips to discover hidden gems. Just remember to always prioritize safety and adhere to local regulations.
Keep a Kayaking Journal
Document your solo kayaking experiences in a journal. Record details about the locations you visit, wildlife sightings, and personal reflections. This can become a valuable resource for future trip planning and a cherished memento of your adventures.
Maintaining and Caring for Your Solo Sit-In Kayak
Proper maintenance of your sit-in kayak is essential for longevity and performance. How can you ensure your kayak remains in top condition for years of solo paddling?
- Rinse your kayak with fresh water after each use, especially if paddling in saltwater
- Inspect the hull regularly for scratches or damage
- Store your kayak properly, either on a rack or suspended to prevent hull deformation
- Protect your kayak from prolonged sun exposure, which can degrade the material over time
- Lubricate moving parts, such as rudder cables and foot pedals, as recommended by the manufacturer
By following these maintenance tips, you’ll ensure your solo sit-in kayak remains a reliable companion for many adventures to come.
Building a Solo Kayaking Community: Connecting with Fellow Paddlers
While solo kayaking offers solitude and independence, connecting with other paddlers can enhance your experience and safety. How can you build a community around your solo kayaking passion?
Join Local Kayaking Clubs
Many areas have kayaking clubs or groups that organize group paddles and social events. Participating in these activities allows you to meet fellow enthusiasts, share tips, and discover new paddling locations.
Attend Kayaking Workshops and Clinics
Look for workshops and clinics focused on solo kayaking skills. These events provide opportunities to improve your technique, learn from experienced paddlers, and connect with others who share your interests.
Utilize Online Forums and Social Media
Engage with online kayaking communities through forums and social media platforms. Share your experiences, ask questions, and learn from others’ adventures. This virtual community can be a valuable resource for trip planning and gear recommendations.
Volunteer for Conservation Efforts
Many organizations conduct waterway clean-ups or conservation projects. Participating in these events allows you to give back to the environments you enjoy while meeting like-minded individuals.

By building connections within the kayaking community, you’ll enhance your solo paddling experience and contribute to a supportive network of fellow enthusiasts.
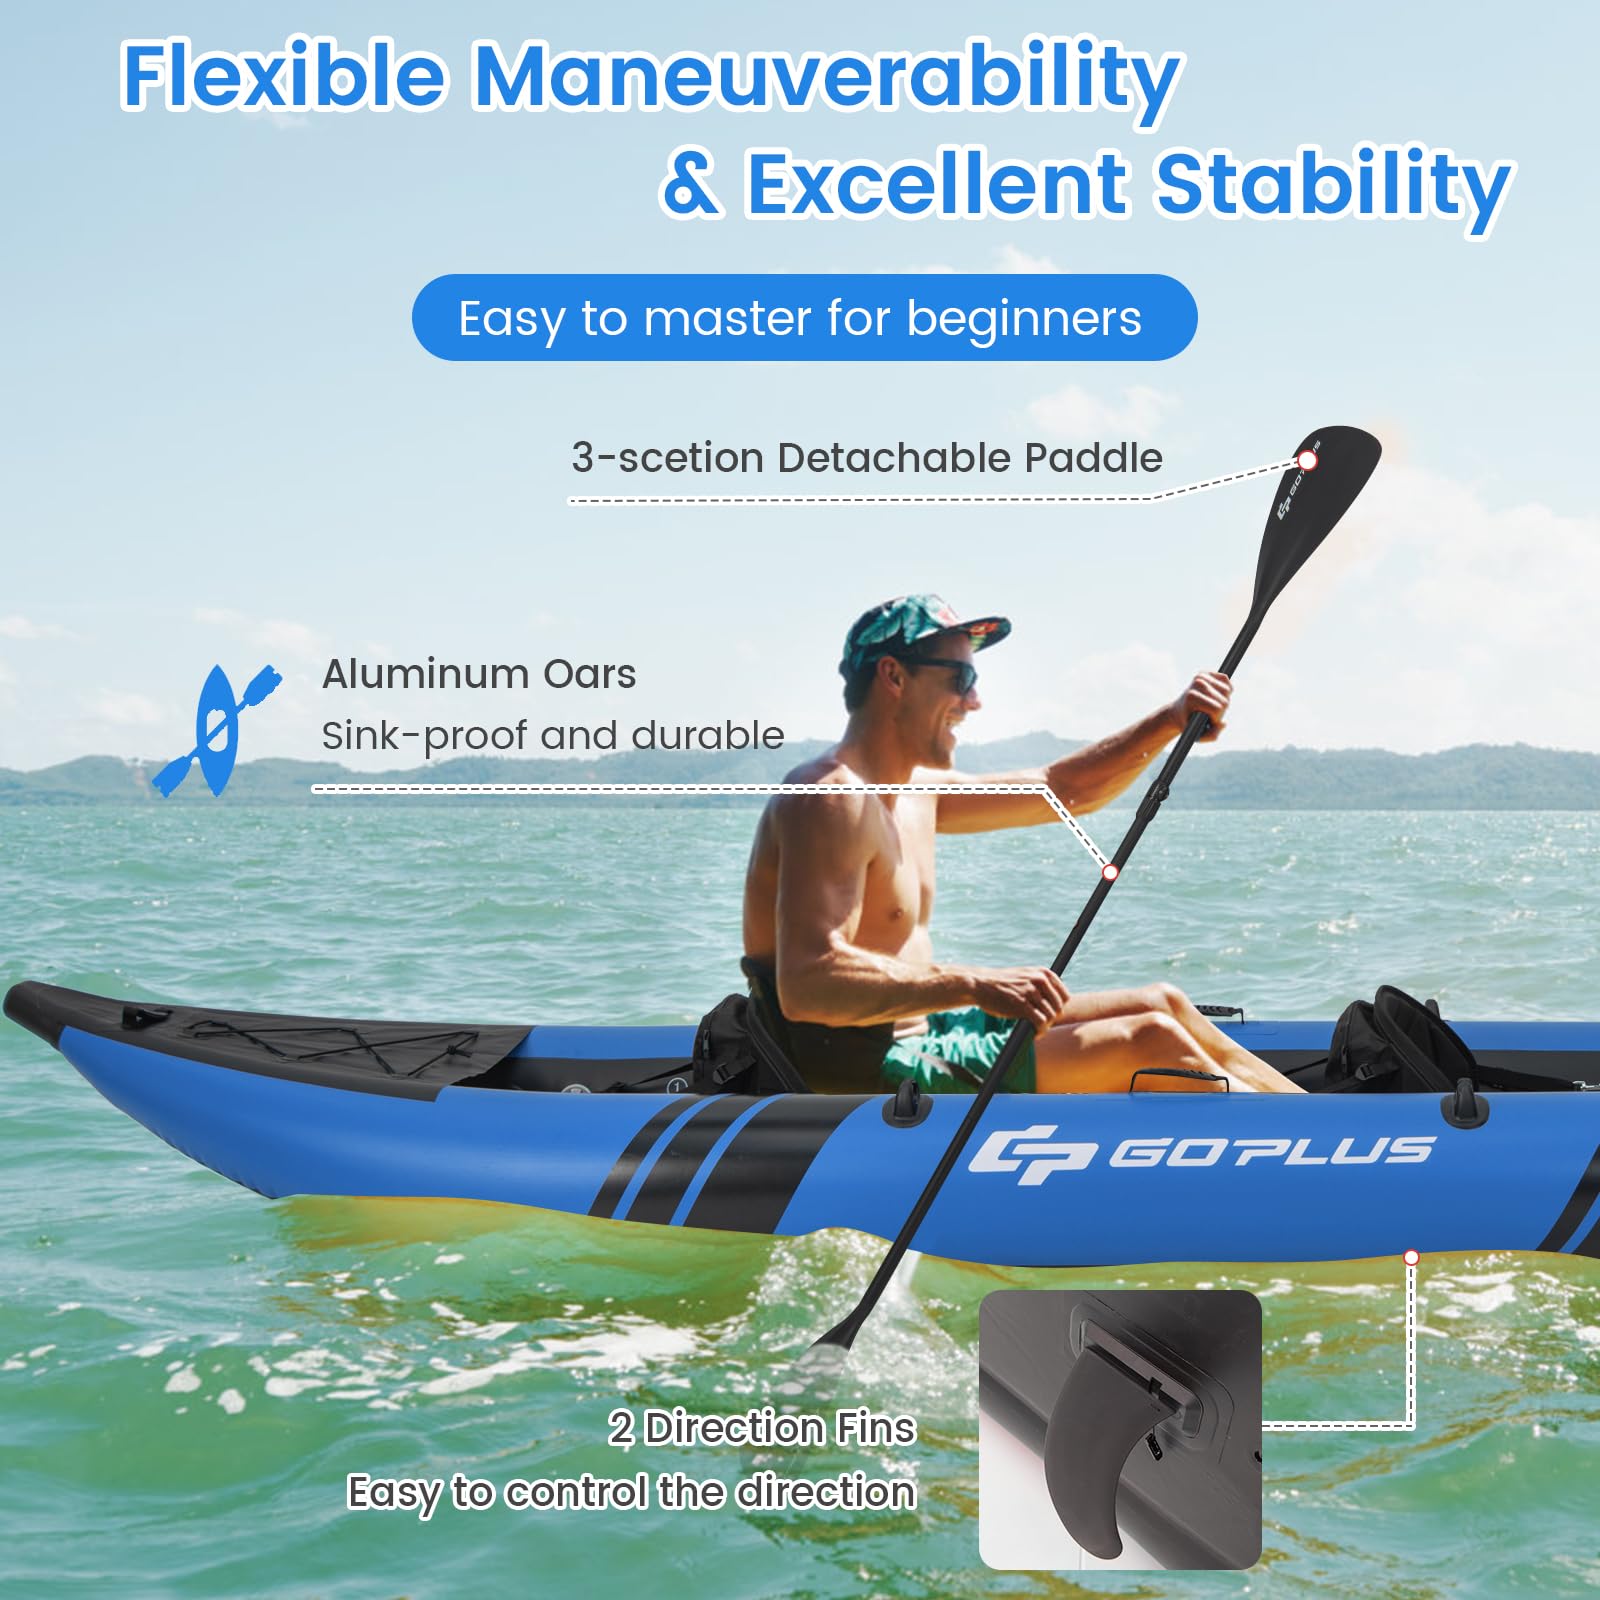
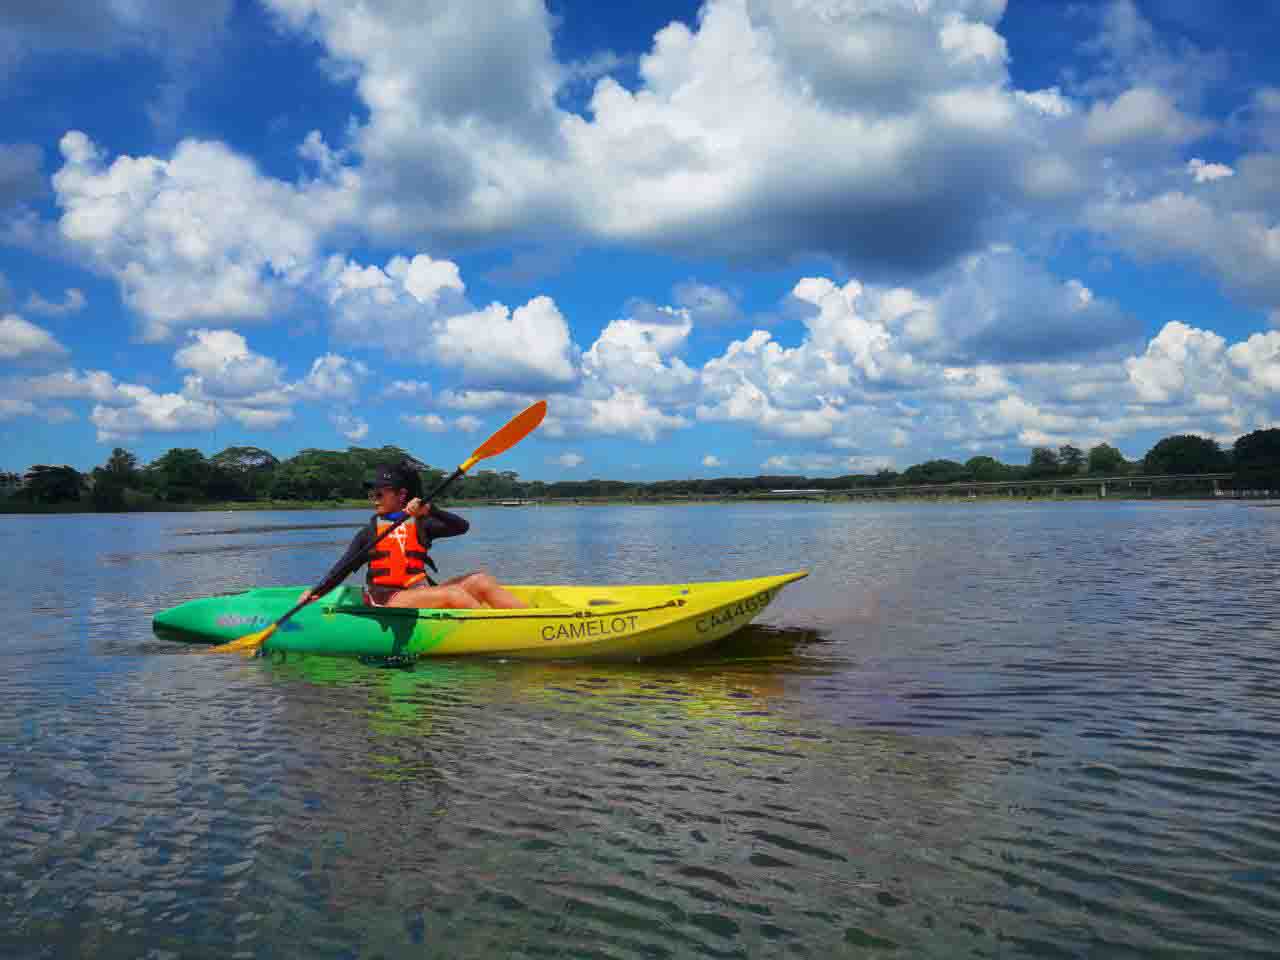
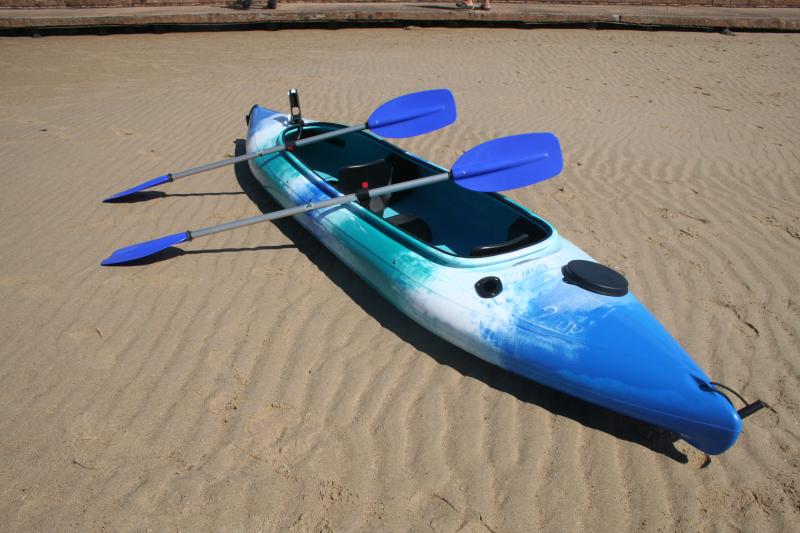
Choosing Between a Sit-In or Sit-On-Top Single Kayak
With summertime approaching, many solo paddlers are deciding between a traditional sit-in kayak or a sit-on-top kayak for their aquatic adventures. While both have advantages, sit-in kayaks tend to be better suited for a single person. Here are 15 tips to consider when selecting and mastering a sit-in kayak for one:
1. Cockpit Size Matters
Look for a cockpit with adequate legroom and width for you to get in and out comfortably. Sit-in kayaks designed for solo use will have more snug cockpits than tandem kayaks. Make sure your legs and knees have space when seated. While a tight squeeze feels secure, cramped quarters can quickly become uncomfortable.
2. Test the Cockpit Before Buying
Always try on a cockpit before purchasing a kayak. Visit kayak dealers and ask to actually sit in different models to find one with an ideal fit. Cockpits are not one-size-fits-all when it comes to comfort. Make sure you can easily reach the foot braces with your legs extended.
3. Shorter Kayaks Are More Maneuverable
For navigating rivers or small waterways solo, choose a kayak less than 12 feet long. Shorter kayaks are lighter and allow you to make tighter turns. However, taller individuals may prefer longer single kayaks with more leg room.
4. Consider Width for Stability
Wider kayak hulls are generally more stable, while narrower designs are faster and track better through the water. For beginners, err on the side of a wider beam in the 26-30 inch range for confidence staying upright.
5. Factor in Kayak Weight
Since you’ll be loading, unloading and carrying the kayak solo, keep weight in mind. Look for a kayak under 50 pounds for manageable transport. Lighter kayaks allow you to spend energy paddling rather than struggling to carry.
6. Storage Hatches Extend Gear Options
Look for a sit-in kayak with front and rear storage hatches for camping trips or all-day excursions. Pack changes of clothes, drinks, snacks, rescue gear and other essentials. Just avoid overloading hatches to keep the kayak balanced.
7. Sit High for Better Visibility
Since you’ll be navigating without a partner, choose a sit-in kayak with a raised seat that gives you better sightlines when paddling. Vantage points closer to the water can make avoiding obstacles more difficult.
8. Rudders Aid Solo Tracking
Consider a rudder system on longer sit-in kayaks to help them track straight when paddling solo. Rudders steer the kayak using foot controls, leaving your hands free for paddling.
9. Skegs Improve Directional Stability
If you prefer minimal gear, look for a fixed skeg on the bottom of a sit-in kayak hull. The skeg acts like a fin to prevent side-to-side motion for tracking in a straight line.
10. Take Solo Launching Precautions
Carefully enter and exit the kayak near shore. Use caution launching from docks or slippery surfaces. Having a partner can be useful for stabilizing on launch. Otherwise use extreme care.
11. Practice Solo Wet Exits
Capsize drills are vital if paddling solo. Rehearse escaping the cockpit, swimming clear of the overturned kayak and re-entering. Wearing a PFD and spray skirt helps prevent being pinned if capsized.
12. Carry Essential Safety Gear
Always paddle near shore and equip your sit-in kayak with a bilge pump, emergency whistle, throw rope, paddle float for re-entry and adequate flotation bags. Stay visible to other boaters.
13. Dress for Self-Rescue
Wear synthetic moisture-wicking clothing that retains warmth when wet. Layer with a waterproof paddling jacket. If capsized, hypothermia is a real risk without proper attire. Pack extra dry clothes.
14. Learn Basic Roll Techniques
Consider taking an instructional class to learn how to perform an Eskimo roll and right your kayak after capsizing. The ability to roll over and self-rescue is a useful skill for solo paddlers.
15. Always File a Float Plan
When kayaking alone, share your trip details and scheduled return with a contact on land. Remember to check in after you’re safely off the water. Smartphones or a waterproof VHF allow checking in.
By selecting the optimal solo sit-in kayak for your needs and taking necessary precautions, paddling alone can open up rewarding adventures and new challenges. Careful planning is key to memorable and safe experiences in your nimble personal watercraft.
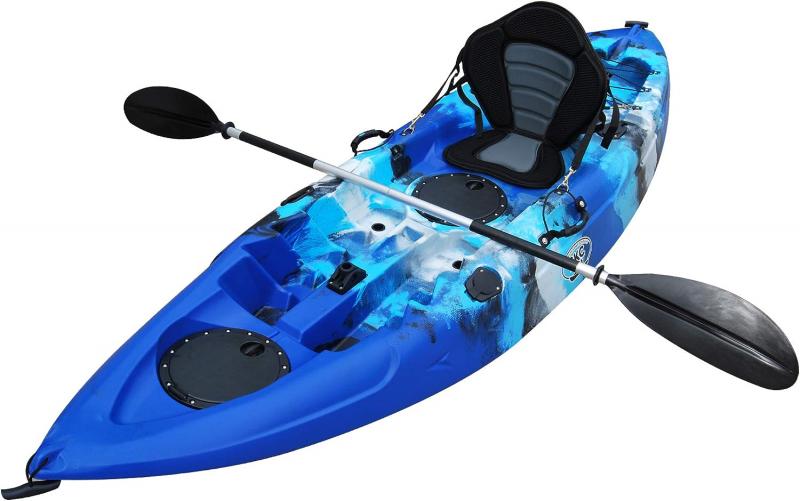
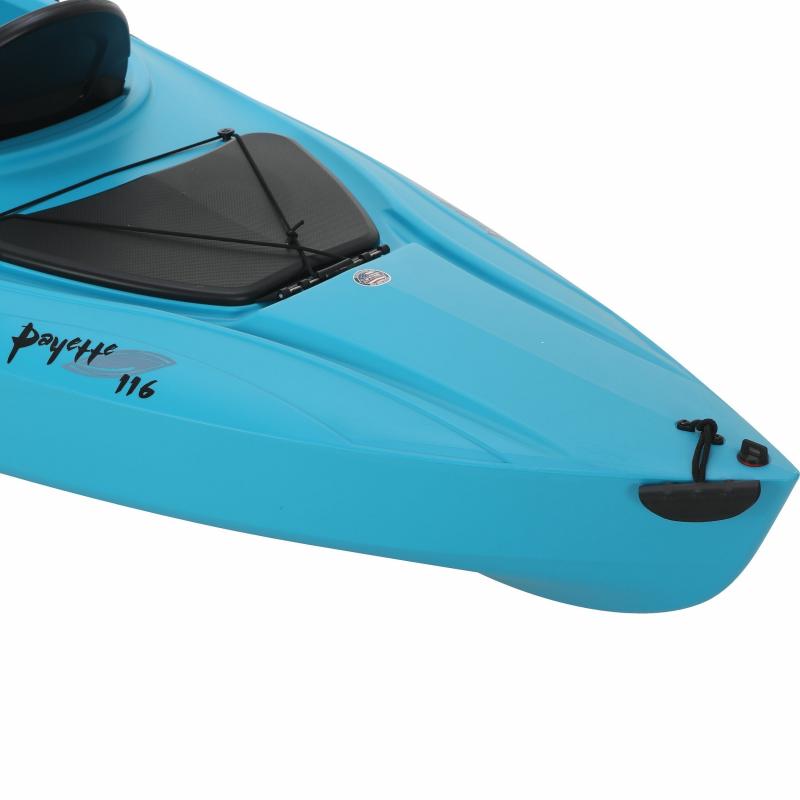
Top Features to Look for in a Solo Sit-Inside Kayak
Paddling solo in a sit-inside kayak can be a peaceful, rewarding activity. But finding the right boat for your needs is key to a successful on-water experience. When evaluating solo sit-inside kayaks, keep an eye out for these top features:
Cockpit Comfort
Since it’s just you in the kayak, cockpit size and legroom are important considerations. Look for a snug, supportive seat and foot braces you can reach easily. Test out the cockpit to ensure ample space to enter and exit smoothly.
Maneuverability
For navigating tight spaces and making quick turns in rivers or streams, pick a kayak less than 12 feet long. Shorter kayaks are lighter and more agile for one person to maneuver solo.
Stability
Wider kayak beams generally offer more initial stability for beginners learning. Look for hull widths around 28-30 inches if stability and comfort outweigh speed.
Storage Capacity
Onboard storage like front and rear hatches allow you to pack more gear for longer trips. Just be sure to balance gear weight evenly between hatches.
Raised Seat
A seat mounted higher in the cockpit gives you better sightlines to see obstacles ahead and navigate solo more safely.
Rudder or Skeg
A rudder controlled by foot pedals or a fixed skeg fin help the kayak track straight when paddling alone. Both enhance directional stability.
Paddle Holder
A device to secure your paddle is handy for times you need both hands free, like casting a fishing line or taking photos.
Thigh Braces
Padded thigh braces increase control by letting you steer the kayak by squeezing them with your legs and hips.
Skirt Rim
A sprayskirt rim around the cockpit seals out water so you stay drier in rougher conditions or rain.
Scupper Holes
Self-bailing scupper holes in the kayak floor drain water out so you don’t have to stop and bail with a pump or sponge.
Carry Handles
Molded handles make it easier to lift and carry the kayak solo to and from the water.
Bungee Rigging
Deck rigging with stretchy bungees let you cinch down spare gear. Just avoid overloading one area.
Bright Colors
A brightly-colored hull increases your visibility to other boats when paddling alone.
Safety Equipment
Never hit the water without essentials like a PFD, spray skirt, paddle float, bilge pump, flares and emergency whistle.
Lightweight
Look for a kayak under 50 pounds for easier solo transporting on your vehicle and lifting in and out of the water.
Comfortable Seat Back
You’ll be sitting for hours, so seek a seat back design that nicely supports your lower back.
Foot Pegs
Adjustable foot pegs let you brace and push your feet against them for optimal kayaking posture.
Thigh Pads
Cushioned thigh pads prevent leg chafing during long paddling sessions.
Recessed Controls
Foot pedals and control knobs set into the kayak deck offer a streamlined surface less likely to snag gear.
By balancing these useful features with your budget and needs, you’ll be primed for many memorable solo adventures in a sit-inside kayak. Don’t forget essential safety precautions like filing a float plan, wearing a PFD, and practicing wet exits and solo paddling skills before heading out.
Finding the Right Size Kayak for You

With so many kayak options on the market, it can be tricky finding one that fits your body type and paddling needs. When sizing a kayak, you want adequate room to move freely while maintaining good control. Here are some tips for choosing the right kayak size as a solo paddler:
Consider Your Height
Taller paddlers over 5’10” will want to look for kayaks over 12 feet long to accommodate their leg span. Shorter paddlers under 5’6″ can often maneuver well in kayaks under 11 feet. Your height impacts ideal kayak length.
Factor in Weight Capacity
Check the maximum weight capacity of any kayak you’re considering. Kayaks built for one person typically handle up to 300 pounds. Make sure to factor in cargo weight too.
Know Your Kayak Needs
How and where do you plan to paddle? Longer “touring” kayaks track better for covering distance. Shorter, wider kayaks are more maneuverable on small waterways.
Test the Cockpit
The cockpit is key – you want ample leg room when seated and ability to easily reach foot braces. Try sitting in various kayaks on land first.
Allow Space to Paddle
With your paddle vertical, make sure several inches separate your fist and the kayak deck. Room to paddle freely avoids hitting the boat.
Don’t Overlook Width
Wider kayaks like those over 28″ feel more stable initially for beginners. Narrower widths under 25″ may suit smaller paddlers.
Consider Thigh Clearance
Your thighs need clearance inside the cockpit rim to rotate your torso when paddling. Snug is fine, tight is not.
Check Rudder/Skeg Fit
On kayaks with rudders or skegs, make sure your legs and feet can operate the controls comfortably.
Assess Entry/Exit Mobility
Sit inside the kayak on land to see if you can easily get in and out. Practice capsizing and wet exits too.
Evaluate Solo Carrying
Lift the kayak to gauge if you can easily transport and carry it alone. Lighter kayaks maneuver easier.
Prioritize Comfort
No kayak specs matter if the cockpit feels uncomfortable. Find a boat you can sit in for hours minus soreness.
Consider Volume for Capacity
Higher volume kayaks with more cubic space can carry more gear. Important for camping trips.
Leave Room to Grow
If just starting out, opt for a wider, stable kayak you can progress in as skills improve.
Think About Transport
Make sure your vehicle can easily transport the kayak. Measure car space and kayak dimensions.
Watch the Waterline
Ideally, sit high enough in the kayak so water won’t splash your back when paddling.
Don’t Overlook Hull Shape
V-shaped hulls track better while flat bottoms are more stable. Factor in primary paddling area.
Consider Gear Storage
With hatches and bungees, is there adequate space for the safety essentials and extras you’ll carry?
Test for Legs-Up Comfort
Can you sit comfortably with your knees raised? Important for bracing maneuvers.
Ask the Experts
Chat with sales staff about sizing based on your needs. Demo days also offer test drives.
The right solo kayak for you balances size, maneuverability, and utility. Prioritize test fits and comfort over strict length or width numbers. And don’t forget safety gear, flotation aids and practice time getting in sync with your new kayak!
Selecting a Lightweight Option for Easy Transport
One of the key factors when choosing a solo kayak is portability. Since you’ll be loading, unloading and carrying the kayak yourself, weight matters. A lightweight kayak allows you to focus energy on paddling rather than struggling to transport the boat.
Consider Your Vehicle
Make sure your vehicle can easily accommodate transporting the kayak. Measure interior dimensions and assess roof rack capacity if needed.
Factor in Lift Over Height
Lower lift-over heights simplify loading and unloading from roof racks solo. Often under 40 inches is optimal.
Look for Lighter Composite Materials
Polyethylene is durable but heavier. Kayaks made using carbon fiber, Kevlar or fiberglass have lighter weight.
Compare Hull Designs
Narrower and shallower hulls require less material and tend to weigh less than wider, deeper hulls.
Consider a Modular Option
Some kayaks feature sections that disconnect for easier transport and storage. Easier to load solo.
Check for Comfortable Carry Handles
Molded grip handles on the bow, stern and sides simplify lifting and moving the kayak short distances.
Evaluate Hatch Weights
Storage hatches add convenience but also pounds. Account for this when loading gear to avoid excess weight.
Ask About Weight Capacity
Heavier paddlers may require kayaks with higher weight capacities. But don’t exceed limits.
Take Advantage of Wheels
Wheeled kayak carts that attach to the stern make moving boats from vehicles to water easier.
Enlist Help if Needed
For lifting onto roof racks, don’t be afraid to ask a fellow paddler or friend for an extra hand.
Lift Safely to Avoid Injury
Use proper bending and lifting techniques. Keep the load close to your body and avoid twisting.
Seriously Consider Weight
A few extra pounds make a big difference when carrying a kayak solo for long distances.
Try Before You Buy
Always test carry and lift a kayak prior to purchasing to ensure comfortable transport.
Factor in Gear Weight
All those extras like paddles, PFDs and electronics add up. Travel light when possible.
Balance Weight Evenly
When loading gear in hatches, distribute weight evenly to avoid capsizing risk.
Cinch Down Loose Items
Secure all equipment so items don’t shift and alter balance when transporting.
Invest in Paddling Safety Gear
Have essentials like bilge pump, whistle, lights and paddle float to avoid an overly heavy boat.
Try Inflatable Option
Inflatable kayaks pack down small for travel but aren’t as rigid or fast as hard shells.
The bottom line is that less lifting and easier transport equals more energy on the water. Prioritize lightweight materials and smart loading to find the right solo kayak for you.
Getting Proper Legroom for Comfort on the Water
Finding a kayak with adequate legroom is essential for comfort and maneuverability during paddling. You want a snug yet spacious cockpit fit. Here are tips for gaining proper leg clearance in a solo sit-inside kayak:
Consider Your Height

Taller paddlers need longer kayak lengths. Under 5’2″? You can likely manage in a kayak under 10 feet long comfortably.
Check Cockpit Width
Wider kayaks over 26 inches offer more wiggle room than narrower widths. But speed can be compromised.
Evaluate Thigh Clearance
With knees bent, make sure you have ample clearance between thighs and cockpit rim to rotate at the hips when paddling.
Test Fit In-Person
Actually sitting in the kayak on land is the best way to gauge leg clearance. Bring paddling shoes to check foot peg room.
Adjust Foot Braces
Can you comfortably reach foot pegs with legs fully extended? Adjustable foot braces allow customization.
Consider Scupper Holes
Small scupper holes around the cockpit can provide space for feet and legs but may increase splashing.
Don’t Overlook Thigh Pads
Well-padded thighs braces prevent chafing during paddling. Make sure they don’t limit leg mobility.
Look for Removable Seats
Some kayaks allow seat height and location adjustment for better leg positioning.
Check Rudder Controls
If equipped with a rudder, make sure it doesn’t obstruct free leg and foot movement.
Factor in Boat Volume
Higher volume kayaks offer more interior space but may be harder for shorter legs to control.
Consider Scupper Plugs
Blocking scupper holes can eliminate drafts but don’t obstruct water drainage when capsized.
Ensure Thigh Grip
Thigh braces shouldn’t pinch but allow firm grip to steer the kayak with your legs and hips.
Try Before You Buy
demoing different kayaks is ideal to experience true on-water legroom and comfort.
Adjust the Foot Pegs
Ideally pegs allow slight bend at the knee for optimal paddling posture and power.
Wear Paddling Clothes and Shoes
Test fittings replicate actual paddling conditions with apparel and footwear you’ll really use.
Consider Calf Clearance
Make sure cockpit design leaves space for calve movement needed for certain strokes and braces.
Don’t Overlook Boat Beam
Wider kayaks may offer more leg leeway but compromise tracking and paddling efficiency.
Finding your perfect solo kayak for ample legroom takes trial and error. Prioritize test fits and adjustments for a cockpit allowing free leg movement and comfort all day on the water.
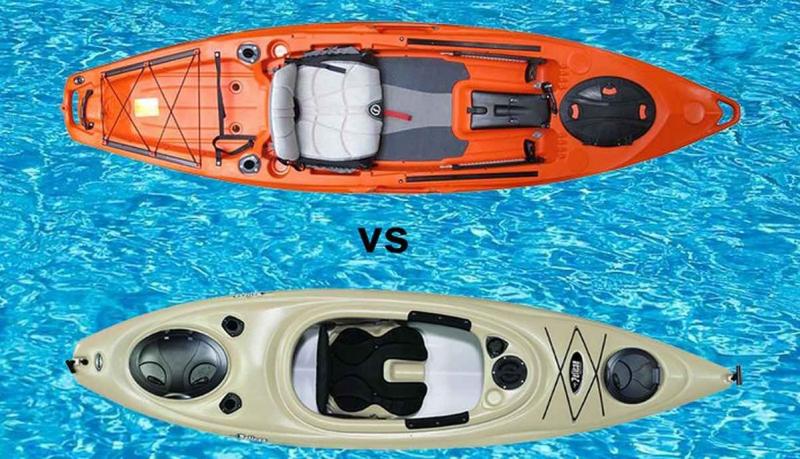
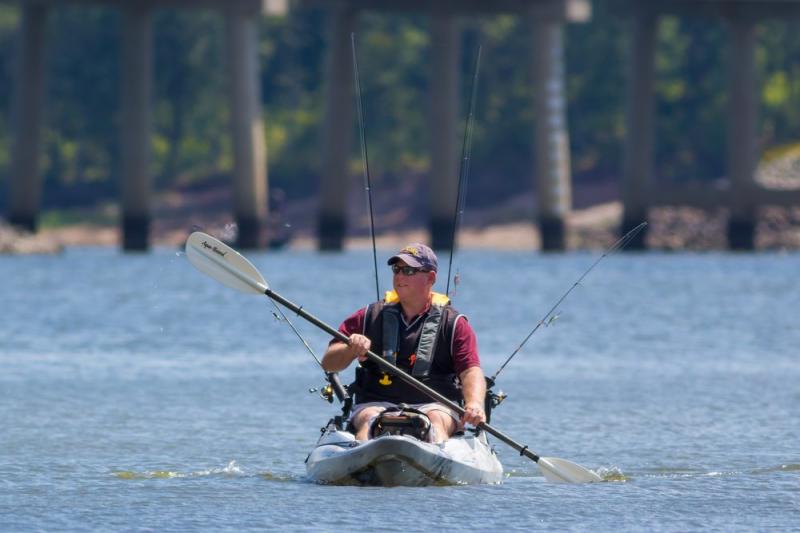
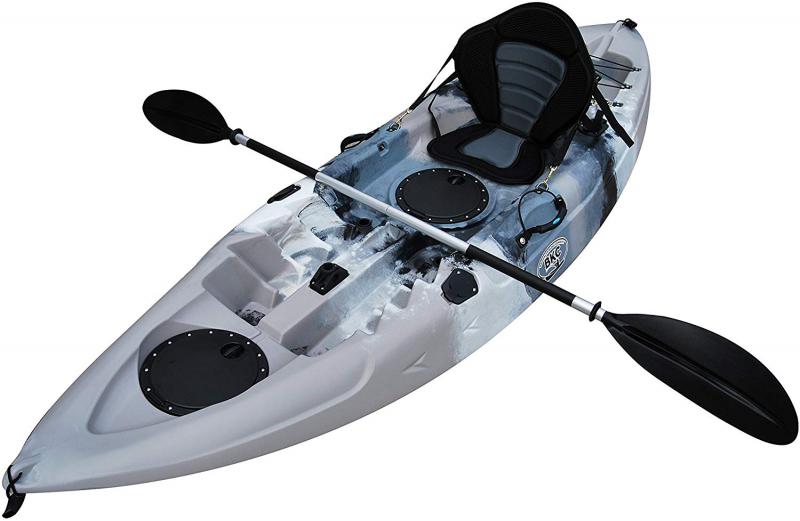
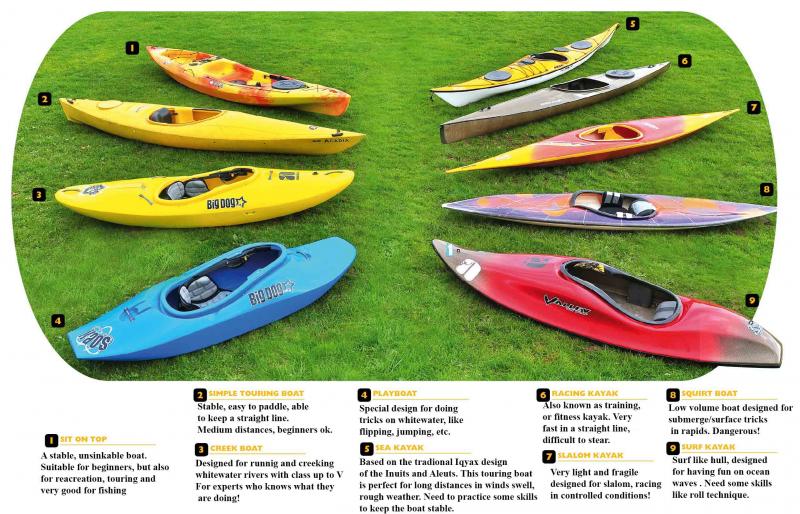
Choosing Between Recreational, Touring and Fishing Models
When selecting a solo sit-inside kayak, three main styles exist – recreational, touring and fishing models. Each offers distinct advantages based on intended paddling activities.
Recreational Kayaks
Recreational kayaks offer stability and easy maneuverability for beginners. Wider beams, 24-30 inches, provide initial stability but slower tracking. Cockpits allow easy entry and exit. These versatile boats work well for casual paddling on lakes, rivers and inshore waters.
Touring Kayaks
Touring kayaks are longer, faster boats built to cover distance efficiently. Narrower widths around 22-24 inches track and glide better with less resistance. Cockpits seal tighter using spray skirts. The long, sleek designs include storage for multi-day trips.
Fishing Kayaks
Fishing kayaks help anglers reach prime spots offshore. They offer ample storage for rods, tackle and gear. Added accessories like rod holders, tackle trays and anchor systems cater to fishing. Wider beams aid standing stability.
Stability Factors
For new paddlers, recreational kayaks offer the most initial stability. Touring kayaks take more skill to master balanced turning. Fishing models gain lateral stability from wider beams.
Speed and Tracking
Touring kayaks achieve the fastest cruising speeds, followed by recreational then fishing models. Narrower touring designs also track straighter.
Maneuverability
Shorter recreational kayaks, less than 12 feet, provide the most nimble maneuvering and turning agility. Longer touring boats, over 14 feet, track well but don’t turn as easily.
Cargo Capacity
Touring and fishing kayaks maximize onboard storage for gear. Recreational models offer less capacity for longer trips and camping.
Seating and Cockpit Size
Recreational kayaks provide the most legroom and space to enter and exit. Touring models offer snugger lean-back seating for powering through waves.
Rigging and Extras
Fishing kayaks boast specialized rod holders, tackle boxes and mounting options. Recreational and touring kayaks offer more minimalist deck layouts.
Durability
Recreational models withstand bumps and scrapes well. Touring kayaks favor lighter, less abrasion-resistant materials. Fishing models range widely.
Propulsion and Handling
Recreational kayaks are easiest for beginners to control. Touring designs demand stronger paddling skills. Fishing boats can be heavy and slow to turn.
portability
Shorter recreational kayaks are most portable for car-topping and transport. Streamlined touring kayaks weigh less but take up more roof space.
Identifying how and where you plan to paddle can dictate the best solo kayak choice. Don’t overlook trying out different styles to determine your favorites features.
Finding a Stable Single Kayak for Beginners
For new paddlers getting started solo, stability is key. A kayak with ample initial stability provides reassurance and builds confidence on the water. Here are tips for choosing a stable sit-inside kayak as a beginner:
Opt for a Wider Beam
Wider kayak hulls offer more primary stability. Look for widths of 28 inches and up for reassurance tilting won’t be an issue.
Consider Hull Shape
Rounded, spoon-shaped hulls are most stable. V-shaped hulls gain speed but compromise some stability.
Favor a Flat Bottom
Flat, hard chine hull bottoms maintain stability. Rounded bottoms allow speed but can feel tippier.
Prioritize Primary Stability
Primary stability keeps you upright when sitting still. Beginners benefit most from high primary stability.
Don’t Overlook Secondary Stability
Secondary stability comes into play when a kayak is heeled over while turning. Optimal for novices too.
Check Initial Comfort Level
When first sitting in a kayak on land, does it feel stable and inspire confidence? Trust your instincts.
Remember to Relax
Remaining calm and relaxed helps maximize stability. Anxiety and tension decrease steadiness.
Lower Your Center of Gravity
Keep your center of gravity low by sitting close to the cockpit floor for best stability.
Consider Outriggers
Outrigger floats mounted on sides add outward stability for beginners needing reassurance.
Increase Buoyancy
Added flotation bags in the bow and stern help keep the kayak floating high for stability.
Try Before You Buy
Test paddling different kayaks helps you experience their stability handling firsthand.
Use Proper Paddling Posture
Good low posture centered over the kayak’s axis point enhances balancing ability.
Practice edging
Edging skills allow leaning the kayak while maintaining stability. Essential for newbies to practice.
Take a Lesson

Basic kayaking instruction teaches skills for staying balanced in a beginner boat.
Don’t let fears of capsizing deter you from kayaking. The right stable sit-inside kayak tailored for new paddlers builds skills and confidence quickly.
Adding Flotation for Safety in Case of Tipping
Flotation aids added to your sit-inside kayak provide critical safety in the event of capsizing. Extra buoyancy keeps the overturned kayak on the surface so it’s easier to reenter. Here are tips on kayak flotation options:
Inflatable Air Bags
Inflatable air bags fit into the bow and stern hatches. They provide lift when deployed if the kayak overturns or swamps.
Foam Blocks
Blocks of buoyant foam can be inserted into kayak cavities. Ensure they are secured tightly.
Flotation Foam Pillars
Structural pillars filled with foam help kayaks float on their sides if capsized. Common in recreational designs.
Purchase Ready-Made Kits
Complete flotation kits include bags, pumps, tubing and hardware for DIY installation.
Custom Cut Foam Pieces
Cut sheets of foam into shapes fitting hatches and cavities. Glue in place for security.
Don’t Weigh Down the Bow
Avoid excess weight up front which can lead to bow submersion. Distribute weight evenly.
Consider Foam Beads
Beaded foam conforms to cavities easily. However, beads shift and compress over time.
Examine Factory Installed Foam
Many kayaks come with foam blocks glued in place from the manufacturer.
Use Kayak Flotation Bags
Inflatable flotation bags are easy to insert and remove from hatches as needed.
Replace Old Foam Periodically
If factory foam becomes waterlogged or deteriorates, replace it with fresh buoyant foam.
Test Foam Density
Higher density foams around 2 to 4 lbs/cubic ft provide the most buoyancy.
Prioritize the Ends
The bow and stern need the most foam support to prevent diving under water if capsized.
Use Expanding Foam
Aerosol expanding foam conforms well to irregular cavities. Trim off excess once cured.
Check Coast Guard Standards
Verify added flotation meets Coast Guard regulations for recreational watercraft.
Supplementary flotation gear keeps kayaking safe and fun in the unfortunate event of ending up overturned. Choose options complementing your skill level and paddling locale.
Getting the Right Cockpit Size for Easy Entry and Exit
If you’re looking to kayak solo this year in a sit-in kayak, one of the most important things to consider is getting the right cockpit size. The cockpit is the opening you sit in, and getting one that fits you properly makes getting in and out much easier.
Here are 15 must-know tips for choosing the right solo sit-in kayak cockpit size:
1. Consider your body type and size
The cockpit size you need depends on your height, weight, torso length and hip width. Taller and bigger paddlers generally need a larger cockpit opening. Measure your torso and hip width to get an idea of the cockpit dimensions that will be most comfortable.
2. Try before you buy
If possible, test out kayaks with different cockpit sizes at your local kayak shop before purchasing. This gives you a feel for how easy or difficult it is to get in and out of different kayak models and cockpit dimensions.
3. Keyhole cockpits allow more room
Keyhole-shaped cockpits are designed with an oval front opening and narrow back area. This shape gives you more room to get your legs and hips in, while keeping you snugly in place once seated.
4. Add a neoprene skirt for a tighter fit
For cockpits that are a little too big, you can add a neoprene spray skirt that attaches around the rim and seals out water. The snug fit makes it feel more secure and customized.
5. Prioritize comfort over performance
Especially if you’re new to kayaking, go for a cockpit size that feels comfortable over one built for speed or maneuverability. As your skills improve, you can upgrade later.
6. Low-volume kayaks need smaller cockpits
In slimmer, less voluminous kayak models, a smaller cockpit is needed to maintain stability and keep your center of gravity low. Wider, more stable kayaks can accommodate larger openings.
7. Consider a retractable skeg
Adding a retractable skeg fin can help counteract the reduced tracking that comes with a big cockpit. This fin deploys into the water for better directional stability when needed.
8. Look for adjustable braces
Models like the Ocean Kayak Venus 11 feature adjustable foot braces that can slide forward or back depending on your leg length. This provides a more customized fit.
9. Size up if between measurements
When in doubt, opt for the next larger cockpit size rather than going smaller. It’s easier to tighten up a loose-fitting opening than being cramped in one too small.
10. Prioritize getting knees below deck
You want enough room to easily bend and slide your knees under the deck when seated. This allows you to use your powerful leg muscles when paddling.
11. Test the thigh braces
When sitting in the cockpit, make sure the inner thigh braces allow you to securely grip the kayak between your legs. Properly-fitting thigh braces let you control the kayak’s rotation.
12. Don’t overdo cockpit size
A cockpit that’s excessively large can impact stability and leave you sloshing around. Find the happy medium between comfort and control.
13. Use foam padding for small adjustments
Self-adhesive foam padding added around the cockpit rim let you customize and fine-tune the fit. This allows minor tightening without purchasing a whole new kayak.
14. Look for a larger rear deck
For easier entries and exits, choose a sit-in kayak with a wide, flat rear deck to place items and get footing as you maneuver in and out.
15. Practice entries and exits before hitting the water
When you first get your kayak, spend time practicing how to properly enter and exit the cockpit at home or on land. This lets you get the movements down before venturing out on the water.
Finding the right solo sit-in kayak cockpit size involves considering your body measurements, trying different models, and looking for adjustable features. Prioritizing comfort will make it easier to have an enjoyable paddling experience. With the right cockpit fit, you’ll be able to enter and exit the kayak with ease and feel secure once you’re seated inside.
Testing the Rudder System for Easier Steering
If you’ll be kayaking solo in a sit-in kayak this year, having an effective rudder system is crucial for maintaining control and steering easily. The rudder helps counteract the kayak’s natural tendency to veer off course, allowing you to track straight and turn precisely.
Here are 15 tips for testing and adjusting your solo sit-in kayak’s rudder system before hitting the water:
1. Ensure rudder tightness
First, check that all rudder mounting brackets, cables, and lines are tight with no looseness or slack. Any play could make steering sloppy.
2. Lubricate pivot points
Lube the rudder head and where control lines connect with marine grease. This prevents friction and resistance when turning the rudder side to side.
3. Confirm rudder alignment
When centered, the rudder blade should sit flush and parallel with the keel line for straight tracking. Adjust if needed.
4. Test rudder control lines
Pull each line to ensure the rudder deflects fully to each side. Adjust tension if needed so lines have enough play.
5. Check rudder clearance
Make sure the rudder blade has at least 1-2 inches of clearance beneath the hull so it doesn’t hit rocks or sand.
6. Consider adding stabilizing fins
Fins on the rear hull on both sides of the rudder can aid tracking in windy conditions.
7. Start slow and easy
When first using the rudder out on the water, begin with slight movements to get a feel for its sensitivity and response time.
8. Fine-tune rudder tension
Adjust cable tightness until rudder turning from side to side feels responsive but not overly twitchy.
9. Use your feet to control
Use foot pedals connected to the lines for hands-free rudder operation. This leaves your hands free for paddling.
10. Use your hips for subtle steering
Subtly shifting your weight and hip position can fine-tune direction without major rudder input.
11. Correct drift immediately
At the first sign of drift to one side, make quick, small rudder adjustments to stay on course.
12. Stay relaxed in your upper body
Avoid over-steering with tense or jerky upper body movements. Keep your torso relaxed and let the rudder do the work.
13. Test in wind and waves
See how the rudder performs and holds a line in real paddling conditions like wind and choppy water.
14. Carry a rudder repair kit
Have spare cables, clamps and a multi-tool in case you need emergency rudder repairs out on the water.
15. Consider lessons for more tips
Take a kayaking class to learn more techniques from the experts for getting the most from your rudder system.
Taking the time to dial in your solo sit-inside kayak’s rudder system makes controlling your direction much easier. Start in calm conditions to find the optimal rudder tension and steering responsiveness. With the right adjustments, you’ll stay on course and have more enjoyable paddling experiences.
Looking for Added Storage Space and Bungees
When kayaking solo in a sit-inside kayak, having adequate onboard storage and secured gear is essential. Since you won’t have a tandem partner to help divide up and carry equipment, your single sit-in kayak needs sufficient space for your stuff.
Here are 15 tips for outfitting your solo sit-in kayak with more storage options and bungees:
1. Choose a kayak with stern storage
Look for sit-in kayak models like the Wilderness Systems Pungo 120 that have a rear tank well for storing gear and bags.
2. Add a behind-seat bag
Stow smaller items in a mesh bag secured behind the seat back using elastic cords or clips.
3. Install below-deck elastic cords
Running adjustable elastic cords inside the hull lets you safely stow extra items down low and out of the way.
4. Get a dry bag for valuables
Keep electronics, keys and other essentials dry in a roll-top dry bag clipped to deck rigging.
5. Use carabiners to attach gear
Sturdy carabiners let you easily clip on bags and accessories almost anywhere on deck.
6. Pad sharp corners
Add protective foam padding to pointy corners inside the hull to prevent accidental scrapes or punctures.
7. Try inflatable storage bags
Inflatable dry bags compress when empty but expand for oversized loads. Deflate to stow.
8. Keep essentials within reach
Store small items you’ll need access to while paddling in the cockpit in a bottle holder or mini bag.
9. Get creative with rigging
Improvised rigging like PVC racks, pool noodles, and cargo nets give endless options for securing gear.
10. Add deck-mounted rod holders
Anglers can install flush or Scotty mount rod holders to safely stow fishing rods.
11. Use bungee decklines
Crisscrossing the deck with bungee cords allows almost infinite attachment points for bags and accessories.
12. Get wider decklines
Upgrading factory decklines to wider diameter or tubular bungees gives more room for clipping on extras.
13. Leave room for bigger loads
Avoid packing gear too densely. Leave space for unexpected items or shifting loads.
14. Regularly check rigging
Inspect all bungees, clips, pads and tie-downs so storage stays secure.
15. Travel light when possible
If you won’t need bulky gear, travel lighter to keep handling simple. But have enough essentials!
With clever rigging and storage additions, you can customize your solo sit-inside kayak to bring all the gear you need while paddling. Prioritize keeping essentials close at hand while utilizing every spare nook and cranny. Stay organized, travel light when possible, and check rigging regularly to keep your stuff secure.
Choosing Quality Seats and Padding for All-Day Paddling
When kayaking solo for hours at a time, having a comfortable seat and padding is a must. The right setup will make sitting in your sit-inside kayak much more enjoyable, even on all-day trips.
Here are 15 tips for choosing quality seating for your single sit-in kayak:
1. Test seats before buying
Sit in different kayak seats when demoing boats to assess comfort and fit. Move around to test support.
2. Look for adjustable seat backs
Choosing a seat with multiple backrest positions allows you to fine-tune lumbar support as needed.
3. Seek ample thigh support
Padded thigh braces that extend far forward prevent soreness by supporting your legs and taking pressure off the seat.
4. Get a breathable mesh seat
Mesh seating stays cooler on hot days while providing needed structure and drainage.
5. Upgrade seat cushion thickness
Swap out a thin seat pad for a high-density foam or inflatable cushion offering more plushness.
6. Try gel seat pads

Gel pad inserts or seat cushions conform to your shape while relieving pressure points.
7. Look for adjustable hip pads
Having hip pads that can slide forward or back ensures a better fit for your frame.
8. Add lumbar support
Supplement the seat back with an extra pillow or lumbar pad for customized lower back support.
9. Use knee pads or wedges
These relieve strain by propping up your knees at a comfortable angle beneath the deck.
10. Try inflatable seat cushions
Inflatable seat pads allow adjusting firmness. Deflate when exiting for easier access.
11. Get a stadium seat for breaks
A portable stadium seat allows standing up or stretching while still resting on the water.
12. Take breaks to stretch
Periodically stand up in the cockpit and do some twists or leg stretches to relieve back and joint tension.
13. Stay hydrated and fueled
Drinking water and having snacks helps avoid discomfort from dehydration or low blood sugar.
14. Adjust seat frequently
Make small shifts in your seat position, backrest angle, and lower body posture fairly often.
15. Know when to call it a day
If you start feeling true pain anywhere, listen to your body and get off the water to rest.
A comfortable, properly fitted seat makes spending hours paddling solo much more pleasurable. Test options to find padding and support that works for your body. Use additional cushions, wedges, and supports to customize fit. Take breaks, stretch often, and adjust your position frequently.
Finding a Durable and UV-Resistant Hull Material
When shopping for a solo sit-inside kayak, considering the hull’s durability and UV resistance is wise. Since you’ll lack a tandem partner to help protect the hull, it really must withstand impact and sun exposure.
Here are 15 tips on choosing a rugged, UV-fighting kayak hull for solo paddling:
1. Look for polyethylene construction
Polyethylene is a highly impact-resistant plastic perfect for taking abuse. Models like the Pelican Catch 130 are rotomolded from one piece.
2. Seek multilayer polyethylene
Some hulls sandwich polyethylene between layers of acrylic, plastic or resin for added rigidity and durability.
3. Choose a thicker hull
Heavier, thicker polyethylene hulls resist dings and flex less. They also insulate better for colder conditions.
4. Ensure adequate “give”
While thick, the plastic must retain enough flexibility to absorb impacts without cracking. Meet in the middle.
5. Look for a skeg or keel
A center keel or retractable skeg protects the hull bottom from scrapes and adds tracking stability.
6. Check for a sweat finish
“Sweating” the polyethylene fills surface pores to create a smoother, more durable finish.
7. Confirm UV stabilization
Quality polyethylene is chemically treated to resist sun damage and prevent fading or degradation.
8. Consider composite construction
Fiberglass, Kevlar or carbon fiber hulls are very rugged though potentially less impact-resistant.
9. Look into rotomolded plastic
This molding process creates seamless, highly durable one-piece hulls.
10. Check warranty coverage
See what kind of damage is covered under warranty to understand the manufacturer’s confidence level.
11. Read customer reviews
Lookup real user reviews to hear unfiltered opinions on a hull’s durability and longevity.
12. Add protective hull tape
Applying clear vinyl tape along the keel line or bow stems protects from scrapes.
13. Use UV protectant spray
Spraying the hull with a UV-blocking sealant prevents sun damage.
14. Store kayak indoors/covered
Keep your kayak out of the sun whenever possible to minimize UV exposure.
15. Handle carefully during transport
Use tiedown straps and padding to prevent hull scrapes or cracks in transit.
Choosing a kayak with a rugged yet flexible polyethylene or composite hull ensures years of solo paddling. Seek UV and impact resistance along with smart storage and handling. Protect your investment and it will last paddling season after paddling season.
Selecting the Proper Paddle Length and Style
Having the right paddle for your body type and solo sit-inside kayaking needs is crucial. The paddle serves as your motor, so getting the length and blade style dialed makes paddling much more efficient and enjoyable.
Here are 15 tips for choosing the optimal solo paddle:
1. Consult sizing charts
Use your height as a starting point and fine-tune based on kayak width, seat height and paddling style.
2. Test different lengths
Try out various paddle lengths in person or borrow from other paddlers to find your ideal fit.
3. Grip ends when testing
Use the grip area when testing lengths since you won’t choke up on the shaft when paddling.
4. Look for adjustable ferrules
Models with adjustable ferrules allow tweaking paddle length until you dial it in.
5. Stand paddle should reach chin
A good guideline is choosing a length that puts the T-grip near your chin when standing upright paddle in hand.
6. Consider a take-apart paddle
Take-apart paddles with locking ferrules store and transport easier for solo kayakers.
7. Choose smaller blades for speed
Less surface area makes for faster strokes. Go larger if emphasizing control, stability or torque.
8. Look into wing or spoon-shaped blades
These styles have pointed tips and curved power faces for smoother, stronger strokes.
9. Think lightweight material
Carbon fiber, fiberglass and reinforced plastic paddles reduce fatigue over long distances.
10. Ensure sturdy, thick shaft
A thicker shaft feels more rigid and durable during aggressive solo bracing strokes.
11. Consider ergonomic handles
Contoured, padded handles reduce hand and wrist strain on multi-hour trips.
12. Keep extra paddle onboard
Stow an emergency spare breakdown paddle in case something happens to your primary.
13. Store safely at home
Utilize padding, racks and cases to prevent damage when transporting or storing.
14. Make minor grip adjustments
Play with hand placement until you maximize comfort, power transfer and minimize strain.
15. Take lessons to refine technique
Classes can help perfect your paddle grip, stroke mechanics, bracing and more.
An appropriately sized, well-fitted paddle allows solo kayakers to paddle efficiently for hours without undue soreness or fatigue. Consult sizing guidelines, experiment with lengths and blade types to optimize your paddle for comfort, performance and protection.
Taking a Kayaking Class or Watching Instructional Videos
If you’ll be kayaking solo for the first time this year in a sit-inside kayak, getting some paddling instruction can make your outings safer and more enjoyable. Lessons and videos teach essential skills.
Here are 15 tips on taking a class or watching kayaking tutorials to prep for solo paddling:
1. Learn basic paddle strokes
Master basic forward, reverse, sweep, draw, and bracing strokes before venturing solo.
2. Study paddle dynamics
Understand how blade angle, pitch, depth, and power phase impact stroke efficiency.
3. Practice capsizing and reentry
Safely flip and recover in controlled settings under instructor guidance.
4. Train emergency skills
Prep for emergencies by learning self-rescue techniques, towing, and swimmer recovery.
5. Take a pool session
Polishing skills in a pool builds confidence before hitting open water.
6. Learn how to steer and stop
Master correcting course, edging, braking, and reverse paddling to control speed and direction.
7. Study weather and water reading
Know what conditions are safe for your abilities and how to interpret forecasts.
8. Brush up on regulations
Learn right of way rules and any regional requirements that apply.
9. Refresh safety knowledge
Review protocols for safety gear,Float plans, signaling devices, and emergency response.
10. Simulate solo scenarios
Practice loading, launching, landing, and rescues alone to build solo paddling skills.
11. Consider taking guided tours
Joining group paddling tours teaches techniques while exploring new waters.
12. Watch experienced paddlers
Observe other kayakers’ strokes, gear choices and handling techniques.
13. Study instructional videos
Utilize digital tutorials to reinforce skills anytime through visual demonstration.
14. Record yourself paddling
Review footage of yourself to analyze and improve your stroke mechanics.
15. Stay up on latest techniques
Continue learning new methods and best practices as skills progress.
Classes and video tutorials help solo kayakers build skills gradually under expert guidance. Instruction reinforces muscle memory and confidence for handling your sit-inside kayak safely alone. Stay ambitious but patient with your abilities as you work toward self-sufficiency.


