Looking to Improve Your Putting Game This Year. Here are 15 Ways Left-Handed Golfers Can Sink More PuttsLooking to Improve Your Putting Game This Year. Here are 15 Ways Left-Handed Golfers Can Sink More Putts
Choosing the Right Left-Handed Putter Model and Design
As a left-handed golfer looking to improve your putting game this year, one of the most important things you can do is choose the right putter model and design for your stroke, style, and preferences. With so many options on the market from brands like TaylorMade and their popular Spider putters, it can be overwhelming trying to select the perfect left-handed putter.
The putter truly is one of the most personal clubs in your bag. Getting custom fitted by a professional is highly recommended to dial in the proper length, lie angle, grip style, and total weight to match your mechanics and smoothen out your stroke. But beyond the fitting specifications, there are several factors to consider when evaluating left-handed putter models and designs.
First, look at the overall head shape and decide if you want a classic blade putter, a forgiving mallet design, or a hybrid shape that blends blade and mallet features. Blades offer great feel and feedback but less stability, while mallets promote consistency and are more forgiving on mis-hits. If you struggle with face angle manipulation, mallets can be a good option.
The type of putter face is another key consideration – insert, milled, or hybrid? Insert faces like those found on TaylorMade’s popular Spider line feature polymer or aluminum inserts to soften feel and enhance control. Milled faces offer a crisp, solid sensation at impact. Hybrid designs combine milling and inserts for the best of both worlds.
You’ll also want to look at alignment aids like lines, dots, and T-style shapes that can help your eyes set up perpendicular to the target line. Mallet putters typically offer more alignment assistance while blades have fewer aids. Finding the right balance for your eye dominance is key.
The weight of the putter head and position of weights creates another variable to dial in performance. You can find left-handed putters with an even weight distribution or with more weight positioned in areas like the heel, toe, face, or back cavity to change the feel and launch angle based on your stroke path and tempo.
Customizing the swing weight and total weight of the putter is also beneficial to smoothly accelerate the clubhead without decelerating on impact for optimal roll and distance control. Using removable weights and adjustable weighted shafts are some ways to fine tune your preferred balance and heft.
When it comes to the grip on your new left-handed putter, pay close attention to the size, texture and taper profile. Midsize and oversize grips can relieve tension while slender, tour-preferred grips promote a smoother release. The right texture and taper profile will enhance feel and consistency during your stroke.
If you crave technology in your new putter, consider options like face-balanced designs for straight-back, straight-through strokes versus toe hang putters that suit arcing strokes. Counterbalanced putters with added weight in the grip end are also excellent for past-paced greens to steady your stroke.
Once you’ve evaluated all these elements from design and alignment to weight, balance, and grip, start testing out putters by making strokes with a gate training aid to hone in on models that truly match your eye and feel preferences. Keep an open mind and try out putters in different classifications to find your ideal shape and features.
With the endless options on the market, the key is taking the time to experiment and find the right TaylorMade or other left-handed putter model that gives you confidence over the ball and helps you sink more putts this year. The technology is amazing, but finding the look, feel, and balance that clicks with your preferences is crucial!
Getting Properly Fitted for Length, Loft and Lie Angle

Looking to Improve Your Putting Game This Year? Here are 15 Ways Left-Handed Golfers Can Sink More Putts
Testing Out Different Grips and Weights to Match Your Stroke
Looking to Improve Your Putting Game This Year? Here are 15 Ways Left-Handed Golfers Can Sink More Putts
Understanding the Differences Between Blade, Mallet and Hybrid Putters
Looking to Improve Your Putting Game This Year? Here are 15 Ways Left-Handed Golfers Can Sink More Putts
Practicing Reading Greens and Aiming Properly from All Distances
Looking to Improve Your Putting Game This Year? Here are 15 Ways Left-Handed Golfers Can Sink More Putts
Developing Consistent Putting Stroke Tempo, Speed and Distance Control
If your goal this year is to improve your putting game as a left-handed golfer, developing a consistent stroke is key. Having a repeatable tempo, speed and distance control can lead to sinking more putts and lower scores. Here are 15 tips to help lefties develop a reliable putting stroke. 15 Proven Techniques for Left-Handed Golfers to Enhance Their Putting Skills
How can left-handed golfers improve their putting game. What are the best putter models for left-handed players. How to choose the right putter grip and weight. What are the key differences between blade, mallet, and hybrid putters. How to practice reading greens effectively. What techniques help develop consistent putting stroke tempo and distance control.
Selecting the Ideal Left-Handed Putter: Models and Designs
For left-handed golfers aiming to elevate their putting game, choosing the right putter is crucial. The market offers a wide array of options, including popular models like the TaylorMade Spider series. When selecting a left-handed putter, consider the following factors:
- Head shape: blade, mallet, or hybrid
- Face type: insert, milled, or hybrid
- Alignment aids
- Weight distribution
- Grip style and size
- Technology features (e.g., face-balanced vs. toe hang)
Custom fitting by a professional is highly recommended to ensure proper length, lie angle, and overall weight. This personalization can significantly improve your putting performance.

Head Shapes and Their Characteristics
Different putter head shapes offer varying benefits:
- Blade putters: Provide excellent feel and feedback but less stability
- Mallet putters: Offer more forgiveness and consistency, ideal for those struggling with face angle manipulation
- Hybrid putters: Combine features of both blade and mallet designs
Is a mallet putter always more forgiving than a blade? While mallet putters generally offer more stability and forgiveness on mis-hits, the best putter for you depends on your individual stroke and preferences. Some golfers may find better results with a blade putter due to its enhanced feel and feedback.
Face Types and Their Impact on Performance
The putter face type can significantly affect feel and control:
- Insert faces: Often found in TaylorMade Spider putters, featuring polymer or aluminum inserts for softer feel and enhanced control
- Milled faces: Offer a crisp, solid sensation at impact
- Hybrid faces: Combine milling and inserts for a balance of feel and performance
How does an insert face differ from a milled face in terms of performance? Insert faces generally provide a softer feel and can help with distance control, especially on faster greens. Milled faces offer a more direct, firmer feel that some golfers prefer for better feedback on their strokes.

Optimizing Putter Fit: Length, Loft, and Lie Angle
Proper fitting of your left-handed putter is essential for optimal performance. Key aspects to consider include:
- Length: Affects your posture and eye position over the ball
- Loft: Influences the initial launch and roll of the ball
- Lie angle: Ensures the putter sole sits flat on the ground at address
A professional fitting can help you determine the ideal specifications for your putting stroke and body type.
The Importance of Proper Putter Length
Why is putter length so critical? The correct putter length allows you to maintain a comfortable, athletic posture with your eyes directly over the ball. This promotes a more consistent stroke and improved accuracy. A putter that’s too long or short can lead to compensations in your setup and stroke, potentially causing inconsistency.
Understanding Putter Loft and Its Effects
How does putter loft affect ball roll? The loft on a putter helps lift the ball out of its resting position on the green and start it rolling smoothly. Too little loft can cause the ball to skid, while too much loft can cause the ball to hop. Most putters have a loft between 2-4 degrees, but the ideal loft can vary based on your stroke and the types of greens you typically play on.
Experimenting with Grips and Weights for Your Left-Handed Putter
Finding the right grip and weight balance for your left-handed putter can significantly improve your stroke consistency and feel. Consider the following factors:
- Grip size and shape
- Grip texture and material
- Putter head weight
- Overall balance and swing weight
Experimenting with different combinations can help you find the setup that feels most comfortable and produces the best results.
Choosing the Right Putter Grip
What impact does grip size have on putting performance? Grip size can affect your hand action and wrist involvement in the stroke. Larger grips tend to reduce hand action, which can lead to a more pendulum-like stroke. Smaller grips allow for more feel and hand manipulation, which some golfers prefer. The key is finding a grip size that promotes your desired stroke type and feels comfortable in your hands.
Optimizing Putter Weight and Balance
How does putter weight affect your stroke? The weight of your putter can influence your stroke tempo and distance control. Heavier putters can promote a smoother, more pendulum-like stroke and may be beneficial on faster greens. Lighter putters allow for more feel and may be preferred on slower greens. Some putters offer adjustable weights, allowing you to fine-tune the balance to your preferences.

Blade, Mallet, and Hybrid Putters: Understanding the Differences
Left-handed golfers have three main categories of putters to choose from: blade, mallet, and hybrid designs. Each type offers distinct characteristics:
Blade Putters
- Traditional design with a simple, narrow head
- Excellent feel and feedback
- Often preferred by players with arcing strokes
- Less forgiving on off-center hits
Mallet Putters
- Larger head size with more geometric shapes
- Higher moment of inertia (MOI) for increased forgiveness
- Often feature more alignment aids
- Can benefit players with a straight-back-straight-through stroke
Hybrid Putters
- Combine elements of both blade and mallet designs
- Aim to offer the feel of a blade with the forgiveness of a mallet
- Can suit a wide range of stroke types
Which putter type is best for left-handed golfers? The best putter type depends on your individual stroke characteristics, visual preferences, and the specific challenges you face in your putting game. Many left-handed golfers find success with mallet putters due to their increased forgiveness and alignment aids, but others may prefer the classic look and feel of a blade putter.
Mastering Green Reading and Aiming Techniques
Improving your ability to read greens and aim accurately is crucial for sinking more putts. Here are some techniques to enhance these skills:
Green Reading Strategies
- Walk around the putt to view it from multiple angles
- Pay attention to the overall slope and grain of the green
- Look for subtle breaks and transitions in the putting surface
- Use the AimPoint Express Read method to gauge break
Aiming Techniques
- Use alignment aids on your putter to square the face to your target line
- Practice with alignment sticks to ensure proper setup
- Develop a pre-shot routine that includes a consistent aiming process
- Consider using the “plumb bob” technique for reading subtle breaks
How can left-handed golfers improve their green reading skills? One effective method is to practice reading putts from both sides of the hole. This helps develop a more comprehensive understanding of how the green’s contours affect ball roll. Additionally, paying close attention to how your playing partners’ putts break can provide valuable information for your own putts.

Developing Consistent Putting Stroke Tempo and Distance Control
A consistent putting stroke is essential for improving accuracy and distance control. Here are some tips to help left-handed golfers develop a reliable stroke:
Stroke Tempo Techniques
- Practice with a metronome to develop a consistent rhythm
- Use the “pendulum” drill to promote a smooth, back-and-through motion
- Focus on maintaining the same tempo for putts of varying lengths
Distance Control Drills
- Practice the “ladder drill” to improve distance control
- Use alignment sticks to create gates for start line accuracy
- Experiment with different grip pressures to find your optimal feel
How can left-handed golfers improve their distance control on long putts? One effective technique is to focus on the length of your backswing rather than the force of your forward stroke. Practice making putts of various lengths while maintaining a consistent forward stroke and adjusting only the length of your backswing. This promotes a smoother acceleration through impact and better distance control.

Incorporating Technology and Training Aids in Your Putting Practice
Modern technology and training aids can significantly enhance your putting practice sessions. Consider incorporating the following tools:
Putting Analysis Systems
- Launch monitors for detailed data on ball roll and face angle at impact
- Putting mats with alignment guides and distance markers
- Smartphone apps for stroke analysis and performance tracking
Training Aids
- Putting mirrors for checking eye position and alignment
- Arc trainers to groove a consistent stroke path
- Putting gates to improve accuracy and start line control
How can technology improve a left-handed golfer’s putting performance? Technology can provide objective feedback on various aspects of your putting stroke, such as face angle at impact, stroke path, and impact point on the putter face. This data can help you identify areas for improvement and track your progress over time. Additionally, some putting analysis systems offer virtual reality (VR) experiences that simulate real-world putting scenarios, allowing you to practice reading greens and managing pressure situations in a controlled environment.
Mental Strategies for Improved Putting Performance
The mental aspect of putting is often overlooked but can have a significant impact on performance. Here are some strategies to enhance your mental game on the greens:
Visualization Techniques
- Imagine the perfect line and speed for each putt
- Visualize the ball rolling into the hole before each stroke
- Use positive self-talk to build confidence
Pressure Management
- Develop a consistent pre-putt routine to manage nerves
- Practice breathing exercises to stay calm under pressure
- Focus on the process rather than the outcome of each putt
How can left-handed golfers overcome the mental challenges of putting? One effective strategy is to adopt a growth mindset. Instead of viewing missed putts as failures, see them as learning opportunities. Analyze what went wrong and use that information to improve your next attempt. Additionally, practicing mindfulness techniques can help you stay present and focused during your putting stroke, reducing the impact of negative thoughts or external distractions.
By implementing these techniques and strategies, left-handed golfers can significantly improve their putting performance. Remember that consistency in practice and a willingness to experiment with different methods are key to finding what works best for your individual game. With dedication and the right approach, you’ll be sinking more putts and lowering your scores in no time.
Choosing the Right Left-Handed Putter Model and Design
As a left-handed golfer looking to improve your putting game this year, one of the most important things you can do is choose the right putter model and design for your stroke, style, and preferences. With so many options on the market from brands like TaylorMade and their popular Spider putters, it can be overwhelming trying to select the perfect left-handed putter.
The putter truly is one of the most personal clubs in your bag. Getting custom fitted by a professional is highly recommended to dial in the proper length, lie angle, grip style, and total weight to match your mechanics and smoothen out your stroke. But beyond the fitting specifications, there are several factors to consider when evaluating left-handed putter models and designs.
First, look at the overall head shape and decide if you want a classic blade putter, a forgiving mallet design, or a hybrid shape that blends blade and mallet features. Blades offer great feel and feedback but less stability, while mallets promote consistency and are more forgiving on mis-hits. If you struggle with face angle manipulation, mallets can be a good option.
The type of putter face is another key consideration – insert, milled, or hybrid? Insert faces like those found on TaylorMade’s popular Spider line feature polymer or aluminum inserts to soften feel and enhance control. Milled faces offer a crisp, solid sensation at impact. Hybrid designs combine milling and inserts for the best of both worlds.
You’ll also want to look at alignment aids like lines, dots, and T-style shapes that can help your eyes set up perpendicular to the target line. Mallet putters typically offer more alignment assistance while blades have fewer aids. Finding the right balance for your eye dominance is key.
The weight of the putter head and position of weights creates another variable to dial in performance. You can find left-handed putters with an even weight distribution or with more weight positioned in areas like the heel, toe, face, or back cavity to change the feel and launch angle based on your stroke path and tempo.
Customizing the swing weight and total weight of the putter is also beneficial to smoothly accelerate the clubhead without decelerating on impact for optimal roll and distance control. Using removable weights and adjustable weighted shafts are some ways to fine tune your preferred balance and heft.
When it comes to the grip on your new left-handed putter, pay close attention to the size, texture and taper profile. Midsize and oversize grips can relieve tension while slender, tour-preferred grips promote a smoother release. The right texture and taper profile will enhance feel and consistency during your stroke.
If you crave technology in your new putter, consider options like face-balanced designs for straight-back, straight-through strokes versus toe hang putters that suit arcing strokes. Counterbalanced putters with added weight in the grip end are also excellent for past-paced greens to steady your stroke.
Once you’ve evaluated all these elements from design and alignment to weight, balance, and grip, start testing out putters by making strokes with a gate training aid to hone in on models that truly match your eye and feel preferences. Keep an open mind and try out putters in different classifications to find your ideal shape and features.
With the endless options on the market, the key is taking the time to experiment and find the right TaylorMade or other left-handed putter model that gives you confidence over the ball and helps you sink more putts this year. The technology is amazing, but finding the look, feel, and balance that clicks with your preferences is crucial!
Getting Properly Fitted for Length, Loft and Lie Angle
Looking to Improve Your Putting Game This Year? Here are 15 Ways Left-Handed Golfers Can Sink More Putts
Testing Out Different Grips and Weights to Match Your Stroke
Looking to Improve Your Putting Game This Year? Here are 15 Ways Left-Handed Golfers Can Sink More Putts
Understanding the Differences Between Blade, Mallet and Hybrid Putters
Looking to Improve Your Putting Game This Year? Here are 15 Ways Left-Handed Golfers Can Sink More Putts
Practicing Reading Greens and Aiming Properly from All Distances
Looking to Improve Your Putting Game This Year? Here are 15 Ways Left-Handed Golfers Can Sink More Putts
Developing Consistent Putting Stroke Tempo, Speed and Distance Control
If your goal this year is to improve your putting game as a left-handed golfer, developing a consistent stroke is key. Having a repeatable tempo, speed and distance control can lead to sinking more putts and lower scores. Here are 15 tips to help lefties develop a reliable putting stroke:
1. Find the Proper Putter Length

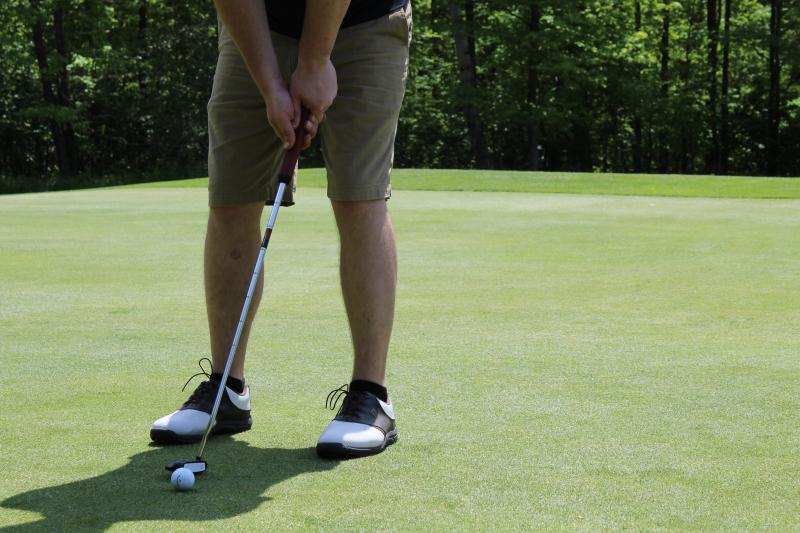
Using a putter that fits your body type is vital for a consistent stroke. For lefties, stand upright with your eyes looking forward and arms hanging loosely at your sides. Have someone measure the distance from the floor to the middle crease of your wrist. That length in inches, multiplied by .66, gives you a starting point for proper putter length.
2. Optimize Putter Lie Angle
A putter’s lie angle, the angle between the shaft and the flat ground, greatly impacts face angle at impact for lefties. Too upright and the toe lifts, too flat and the heel lifts. Have a pro assess your lie angle by having you take a comfortable putting stance and analyzing sole wear marks. Bend the lie angle 1-2 degrees flat if the heel is worn, upright if the toe is worn.
3. Choke Down on the Grip
Gripping down on the putter reduces wrist action in the stroke. Have just 1-2 inches of shaft extending past your left hand. This promotes solid contact through a pendulum-like motion centered in your shoulders.
4. Position Ball Inside Left Heel
Consistently lining up each putt is key for lefties. Place the ball opposite your left heel at address, keeping it positioned in the same spot in your stance for every putt. This improves directional control and face angle at impact.
5. Maintain Proper Posture
Good posture lends itself to a straighter backstroke and consistent contact. Bend slightly at the waist while keeping your back and shoulders aligned perpendicular to the target line. Avoid bending too far forward and rounding your shoulders, which can cause mis-hits.
6. Position Eyes Inside Ball at Address
Eye position influences face angle and path consistency. Position your eyes just inside the ball at address focused on the back edge. This helps return the face squarely through impact on the follow through.
7. Limit Lower Body Movement
Excess lower body swaying or sliding during the stroke leads to inconsistency. Maintain spine angle and limit hip rotation by keeping your upper left thigh firm during the backswing and follow through.
8. Take Club Back Low to the Ground

Taking the putter back too far inside or outside the target line will cause directional errors. Swing the putter head straight back and forth along the ground to improve path consistency and center contact on the face.
9. Accelerate Smoothly Through Impact
Abrupt deceleration or acceleration through impact diminishes distance control. Maintain steady tempo and smoothly accelerate the putter head as you make contact with the ball through the follow through.
10. Follow Through Toward Target
The follow through predicts the initial line. Continue swinging the putter head forward toward the intended target after striking the ball to enhance directional control and solid contact.
11. Use a Training Aid at Home
A putting mat or weighted putter at home can dial in mechanics. Repeated quality practice ingrains proper tempo, alignment, path and face angles. This pays dividends on the course when nerves strike.
12. Make Stroke Adjustments Through Drills
Specialized drills refine specific elements of the stroke. Gate drills ensure straight back and through path. Metronome drills build consistent tempo. Impact bag drills create solid impact. Do 15 minutes of putting drills before rounds.
13. Develop Routine & Focus Points
Pre-shot routines center the mind on key cues. Before each putt, pick an intermediate target, envision the break and speed, take two practice strokes while feeling the pendulum motion, then address the ball and stroke it decisively.
14. Commit to Your Read and Stroke
Second guessing leads to tentative stroking and mis-hits. Once you’ve read the green and planned the stroke, fully commit to your instincts. Stroke the putt confidently and avoid decelerating through impact.
15. Continually Self-Analyze
Identify areas needing improvement like pace, path or alignment and make corrections. Videotape your stroke to detect flaws. Have a teaching pro analyze your mechanics every few months. Refine technique through quality repetitions to sustain consistency.
Developing repeatable putting stroke fundamentals takes practice, but pays off hugely on the course. Follow these tips to gain control of tempo, speed and distance as a left-handed golfer. Invest time in honing your mechanics and drills for improved consistency. Sharpen your skills this season and watch your putting prowess and lower scores take shape.
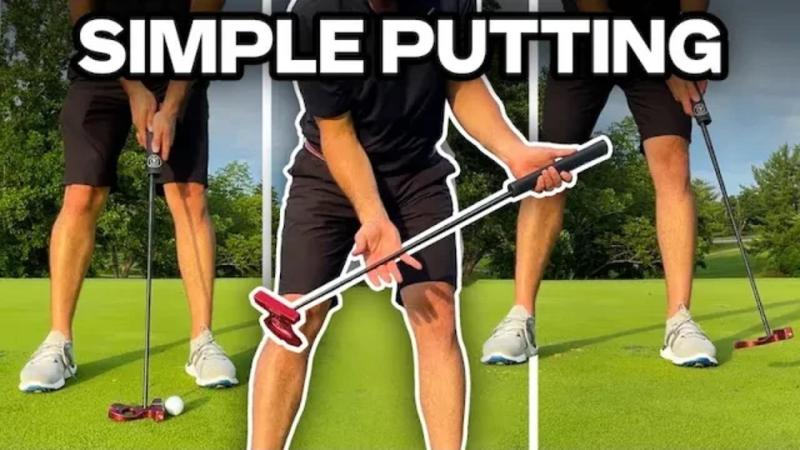
Using Training Aids Like Putting Mats, Alignment Guides and Hole Simulators
If you’re a left-handed golfer looking to upgrade your putting skills this year, using specialty training aids can be a big help. Putting mats, alignment guides, and hole simulators are excellent practice tools for honing stroke fundamentals at home. Integrating these aids into your routine helps develop consistency for sinking more putts.
Putter Alignment Guides
Proper alignment is crucial for lefties to start each putt online toward the target. Putter alignment guides attach to the top of your grip and provide an indicator line that shows if the face angles on or off your intended starting line. They give immediate feedback for correcting aim issues before ingraining bad habits.
Putting Mats
High-quality putting mats simulate realistic green speeds to groove your stroke tempo and pace control. The smooth surface develops proper takeaway, acceleration and follow through. Mats allow you to practice putts of various lengths in a controlled environment while honing mechanics.
Putting Cups
Portable putting cups reduce distraction and let you focus on setup, alignment and stroke. Place cups at different angles just off the mat to refine feel and touch on breaking putts. Vary distances to improve speed control. Use chalk or foot spray to check your path for consistency.
Putting Mirrors
Mirrors provide instant visual feedback so lefties can self-diagnose flaws. Check your posture, grip, elbow position and eye alignment in the mirror before strokes. Monitor clubface rotation and path through impact after strokes. Detecting issues early prevents ingraining errors.
Laser Putting Lines
Laser guide lines project the perfect start line onto the mat for aligning each putt. Following the line during practice builds muscle memory for proper setup positioning. Lasers also aid in squaring the putter face back to the target on follow through.
Stroke Path Indicators
Stick-on stroke path indicators placed on the putter head depict the swing path back and through impact. Curved lines show any inside or outside stroke errors. Straight lines indicate perfect path. This trains the proper feel for an on-line stroke.
Putting Stencils

Putting stencils outline the ideal stance width and ball position for setup consistency. Place the stencil along your target line then step into the outlined foot position and set the ball. Repeating this improves directional control by removing setup variables.
Rhythm Trainers
Metronomes and audible rhythm trainers develop sound stroke tempo and smooth acceleration. Set the beats per minutes to your optimal putt cadence. Coordinate your backswing, impact and follow through to the rhythmic beats to improve pacing.
Putting Hole Simulators
Hole simulators use options like break, slope and speed settings to recreate detailed putts. The visual aids and feedback identify errors in read, pace or line. The pressure of simulated competition also prepares you for the course.
Impact Bags
Impact bags teach optimal contact for solid putting. Hit the bag at low, center impact to learn proper compression with no twist or glancing. The feedback promotes clean contact and confident follow through.
Gate Training
Gate devices guide straight back and straight through path for center-faced contact. Take the putter head back through the center gate, then forward through the center on follow through. Gate guidance keeps strokes online and tightens dispersion.
Putting Videos
Watching putting video aids like Sklz Accelerator Pro visually demonstrates proper mechanics. Copy the drills to self-correct your motions. Replay in slow motion to analyze flaws. Consider getting video lessons from a pro to diagnose issues.
Applying specialty aids when practicing at home reinforces solid left-handed putting fundamentals. Dial in alignment, posture, grip, rhythm and path control outside pressure situations for confidence on the course. Be patient, as change takes time. But diligent training with purposeful aids can pay off big by dropping more putts this season.
Improving Putting Stroke Mechanics with Coaching and Video Analysis
As a left-handed golfer trying to upgrade your putting skills this season, getting professional coaching combined with video analysis is highly effective. Having an expert evaluate your stroke fundamentals and correct flaws using instant video feedback can quickly get you sinking more putts.
Schedule Putting-Specific Lessons
Set up a series of putting lessons with a PGA teaching pro. Unlike full swing analysis, specialized putting lessons focus deeply on grip, posture, alignment, rhythm and path details. Come prepared to each session ready to absorb and implement advice.
Establish Proper Grip First
Grip affects face angle, path and solid contact. Using video, have the pro check your left-hand grip for ideal wrist position, finger placement and pressure points. Alterations early create a solid foundation.
Analyze Posture and Stance
Set up to an initial putt and get video from face-on and down-the-line angles. Analyze spine tilt, knee flex, shoulder alignment and eye position over the ball for optimal geometry. Refine stance width and ball position for consistency.
Assess Pendulum-like Motion
Focus video on the path of the putter head itself. Check for proper straight back and straight through pendulum-like motion. Identify any manipulation via hands or deviation inside or outside the target line.
Evaluate Acceleration Through Impact

Down-the-line video shows smooth acceleration and face angle through impact. Analyze for consistent path, face rotation and speed. Work on drills if video shows any deceleration before or after contact.
Review Follow Through Motion
The follow through and finish indicates plenty about the overall stroke. Shaky or abbreviated follow through can signal issues. Strive for video showing flowing extension directed right at the target after impact.
Diagnose Face Angle Control
Solid contact comes from returning the face squarely back to target at impact. Videos revealing an open or closed face at address must be corrected via alignment tweaks, grip adjustments or path modifications.
Check Tempo and Rhythm
Consistent tempo ties the mechanics together fluidly. Use video to monitor backswing time versus downswing time. Identify hitches or irregular accelerations/decelerations and smooth them out.
Look for Consistent Contact on Face
Impact marks on the face over a session show contact point consistency. Heel and toe impacts must be remedied through proper alignment and pendulum motion underneath the eyes.
Implement Drills to Ingrain Changes
Once flaws are identified, implement specific drills with video to ingrain corrections. Gate drills ensure straight path. Metronomes build tempo. Impact bags develop solid contact. Lasers improve alignment.
Refine Technique Through Repetition
Reinforcement through quality repetition ingrains positive changes from coaching into motor memory. Come away from lessons practicing correct motions until they become automatic.
Tweak Setup and Stroke as Needed
Revisit your pro and video regularly to check progress and make tune-up adjustments. Proper mechanics require continual maintenance as stroke deviations can creep in over time.
Leveraging professional putting instruction combined with video analysis gives left-handed golfers the feedback needed to correct flaws quickly. Guided practice and drills based on video gets your stroke dialed in to start sinking more putts this season!
Building Confidence Over Short Putts and Reducing 3-Putts
If you’re a left-handed golfer looking to take your putting game to the next level this year, building confidence on those nerve-wracking 3-5 foot putts and avoiding dreaded 3-putts should be at the top of your list. Nothing is more frustrating than missing a short putt or taking three putts to get the ball in the hole. Not only does it cost you strokes, but it can also shake your confidence for the rest of the round.
The good news is that with some focused practice and a few adjustments, you can dramatically increase your make percentage on short putts and avoid 3-putt disasters. Here are 15 tactics left-handed golfers can employ to hole more putts and reduce 3-putts:
1. Get Fitted for a Left-Handed Putter

Having a putter properly fit for your left-handed stroke is crucial. From the length, lie angle, grip style, and weight distribution, an ill-fitting putter can cause you to consistently mis-hit putts. Getting custom fit by a professional will ensure your putter allows you to return the face squarely to the ball at impact, promoting a smooth roll and better accuracy.
2. Find Your Ideal Stance Width
A stance that is too narrow or too wide can lead to imbalance, putting stroke flaws, and mis-hits. Experiment with various stance widths to find the optimal one that allows you to balance comfortably and swing the putter freely back and forth along your target line. A wider stance may promote stability on long putts while a narrower stance may enhance feel on short putts.
3. Position the Ball Correctly
Consistently positioning the ball in the same spot in your stance is key for solid contact. For most lefties, having the ball slightly forward of center in your stance promotes an upward hitting action through impact for proper launch. Be sure to tee the ball up in the same spot each time you practice.
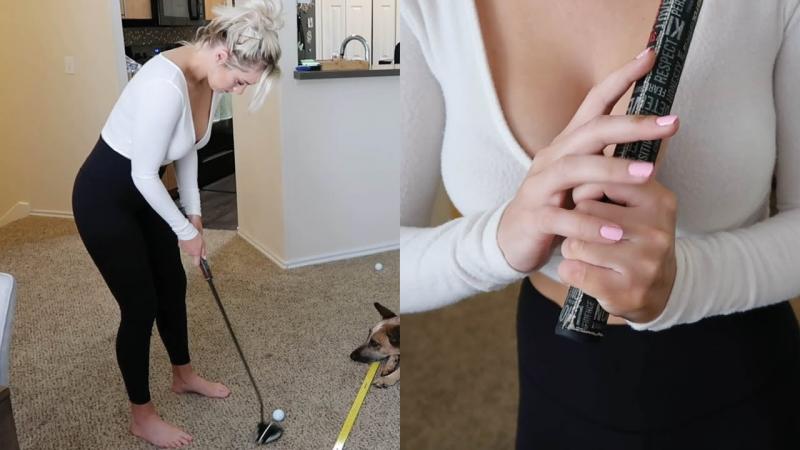
4. Perfect Your Grip Pressure

A grip that is too tight or too loose can greatly hinder your putting success. Be sure to use the optimal pressure in your left hand to keep the putter stable while still maintaining feel and finesse. Having your right hand gently support the left promotes a freer release through impact.
5. Improve Green Reading Skills
Reading greens effectively is one of the biggest keys to holing more putts. Before each putt, take time to thoroughly assess the slope, grain direction and speed of the green to pick the optimal target line. If you struggle reading greens, invest in a high-quality level or download a green-reading app to help hone your skills.
6. Use Alignment Aids
Setting up perfectly aligned to your target line is difficult, even for seasoned players. Don’t be afraid to use alignment aids like a putting mirror or weighted alignment rods to ensure you are aimed correctly. This simple step can dramatically improve your accuracy from short range.
7. Try the “Railroad Tracks” Drill
To groove an on-line pendulum stroke path, use balls, coins or tees to create “tracks” 2-3 inches wide to swing your putter down. Repeat this drill often to reinforce swinging the putter straight back and straight through along your target line. This promotes face angle control and directional consistency.
8. Control Distance Better
Nothing leads to more 3-putts than poor distance control. Regularly practice lag putting from 20-30 feet to get a better sense of how hard you need to hit putts. Improving your sense of touch will help you consistently get the ball within a 3-foot circle for stress-free par putts.
9. Make 5 in a Row from 3 Feet
Being able to confidently make 5-10 three-footers in a row at will is a huge confidence-booster over the ball. Routinely practice sessions of making consecutive three-footers to simulate pressure situations. Celebrate when you make all 5 to reinforce success.
10. Perform “Clock Drills”
To improve accuracy from short range, make a large circle with tees or balls at three-foot intervals. Starting at 6 o’clock, make putts working clockwise around the circle. Keep track of your make percentage each session and don’t leave until you reach 90%.
11. Try the “Ladder Drill”

Set up a ladder-like progression of five balls at 1, 2, 3, 4 and 5 feet from the hole. Make all 5 putts before moving back to 6 feet and repeating the sequence. This challenges you to make putts under pressure as the stakes rise with each successful step.
12. Sink 100 Straight 3-Footers
Being able to confidently make 100 three-foot putts in a row teaches your muscles the perfect stroke for that distance. Find a perfectly flat area on the practice green and keep rolling balls until you reach 100 makes. This can be a go-to confidence-building routine.
13. Visualize Seeing the Ball Go In
Utilizing visualization techniques is proven to enhance putting performance. Before stroking each putt, clearly picture the ball dropping into the cup. Imagining a positive result helps program your neuromuscular system to execute the proper motion.
14. Trust Your Read and Commit
Second-guessing your read or tentative stroking leads to missing short putts. Once you’ve made a read, trust it fully and stroke the putt with confidence. Decisive, committed putting promotes better results compared to hesitant, steery strokes.
15. Make 5 in a Row Under Pressure

Raising the stakes is an excellent way to improve pressure putting. After completing your practice, challenge yourself to make 5 three-footers in a row with something on the line, whether having to make a donation or do push-ups if you miss. Thriving under this self-imposed pressure prepares you to convert when it really counts.
Implementing even a few of these drills and tactics can pay huge dividends in your putting proficiency as a left-handed golfer. By dialing in your setup, stroke fundamentals, and mental approach from close range, you’ll gain the confidence and touch needed to fearlessly knock in clutch putts when they matter most.
Practicing Lag Putting Technique to Get Ball Closer to Hole
For left-handed golfers seeking to elevate their putting skills, honing your lag putting technique should be a top priority. Lag putting refers to those long distance putts from 20-50 feet that require the touch and finesse to get the golf ball within a 3-foot radius of the hole to set up an easy next putt. Poor lag putting leads to many frustrating three-putts and destroys your scoring potential.
The keys to effective lag putting include reading the green properly, utilizing the ideal stroke mechanics, and calibrating your speed control. With focused repetition and a few adjustments, lefties can significantly upgrade their lag putting prowess. Here are 15 tips to help you practice the optimal lag putting technique:
1. Choose the Proper Putter Head
Having a mallet-style putter head with perimeter weighting can provide a larger sweet spot and more stability on long lag putts. The design distributes weight for resistance against twisting on off-center hits. Test different putter heads to find the optimal one for improving consistency.
2. Use Your Dominant Eye for Aiming
Aligning long putts accurately is critical for proximity. Determine your dominant eye and set up so that eye is directly over the ball, perpendicular to your target line. This enhances your visual acuity down the line to start the putt on your intended path.
3. Visualize the Ideal Speed
Mentally picturing the ideal pace is a key lag putting skill. Before stroking the putt, visualize the speed you want the ball to roll so it finishes adjacent to the cup. Having this image ingrained helps calibrate your feel for distance.
4. Take Time Reading the Green
Don’t rush the process of reading the green and picturing your line. Carefully assess the slope, grain and speed of the green from multiple angles and vantage points. Meticulous green reading translates to more putts that finish near the hole.
5. Use a Longer, Flatter Backswing

Lag putts demand a longer, sweeping backstroke and follow-through for sufficient momentum. Practice taking the putter head outside your rear foot on the backswing and extending through the ball with your arms and shoulders to generate the ideal launch speed.
6. Position Ball Further Back
Having the ball too far forward can lead to hitting down and decelerating. Position it back of center in your stance with your sternum over the ball for a slight upward blow to get the ball rolling end-over-end.
7. Slow Your Backstroke Tempo
Rushing your backstroke disrupts your rhythm and tempo. Make your backstroke at least twice as long as your follow-through, counting 2 seconds going back and 1 second going through to engrain the optimal pace.
8. Focus on Solid Contact
The primary goal on lag putts is making solid contact to get the ball rolling on line. Keep your head steady and swing the putter like a pendulum, avoiding manipulating or steering the clubface which leads to mis-hits and offline putts.
9. Use a Touch-Focused Practice Routine

Improving touch and distance control requires routine practice. Work through progressions like putting to holes 20-30-40 feet away and 2-putting from 50-60 feet. Gradually increase lengths as your consistency improves.
10. Putt Uphill and Downhill
Mastering putts both uphill and downhill is an essential lag putting skill. Uphill putts require firm speed while downhill putts demand finesse to avoid racing past. Practice 10-20 putts on varying slopes to dial in your touch.
11. Try the “Find Your 30-Footer” Drill
Mark out a 30-foot circle around the hole. Roll 10 putts aiming to finish your ball within that circle. This challenges your feel for that specific distance. Do the drill from other lengths like 20 and 40 feet as well.
12. Perform Repeated Speed Control Drills
Set up 3 balls at 35 feet from the hole. Take turns putting them, focusing on matching the speed of your strokes. This engrains your sense of feel and rhythm for proper lag putting pace. Add balls and increase distance.
13. Putt to Holes Cut in the Fringe
Simulate breaking putts by putting to holes cut in the fringe 20-30 feet away. The thicker grass will grab the ball, helping you master how to account for the degree of break and perfect speed.
14. Record Make Percentage from Different Lengths
Tracking your make percentage from various distances provides accountability and feedback. Keep notes after practice sessions like 15/20 from 20 feet, 10/20 from 30 feet. Strive to improve your percentages over time.
15. Commit Fully to Your Read and Stroke
Half-stroke putting leads to inconsistent speed and direction. After making your read, trust it fully and confidently stroke the putt without hesitation. Decisiveness translates to more putts finishing near the cup.
By incorporating these lag putting practice techniques into your routine, left-handed golfers can hone their distance control, green-reading abilities, and stroke technique from long range. Confident lag putting leads to more one-putt greens, fewer three-putts, and lower scores. Take time to practice lag putting properly and you’ll gain the skills to fearlessly knock down those clutch long-distance putts.
Learning How to Read Breaks and Adjust Aim for Sloped Greens
Reading greens and properly accounting for break on sloped putts is an essential skill for left-handed golfers seeking to make more putts. Mishitting putts on uneven surfaces leads to frustration and strokes given back. Learning techniques to accurately read subtle breaks and adjust your starting line is crucial to improve your putting prowess.
Mastering the nuances of green reading requires understanding factors like slope degree, grain direction, speed variance, and contour. With focused practice using alignment aids and drills, lefties can learn to read greens like a pro and confidently aim putts to account for break.
1. Analyze from Behind the Hole First
Walk behind the hole and visualize how a putt would break from different angles. This gives you a clear read on the degree of slope and lets you trace an ideal path to the hole.
2. Use Your Feet to Feel Contours
Your feet are great tools for feeling subtle contours and breaks. Step around on your putting line, planting your feet to sense any variance or tilt. Different sole pressure can indicate slope.
3. Choose a High-Contrast Ball

Using a brightly-colored ball like orange makes the ball pop against the green to easily track its roll. Contrast helps see how break influences the ball.
4. Read Greens Early Before Round
Take time before your round to read practice green slopes and contours. This primes your eyes and mind to notice subtle breaks during play for more accurate reads.
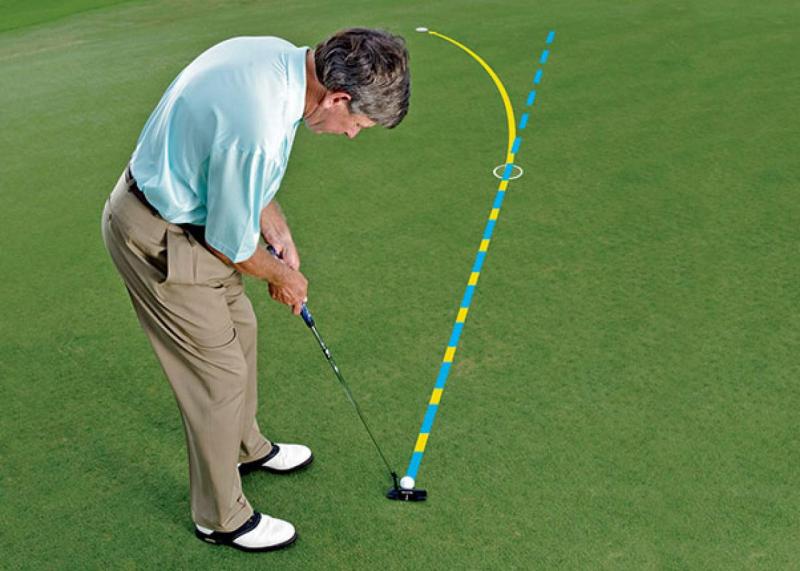
5. Account for 1-2% Break on Subtle Slopes
On gentle 1-2% slopes, aim to play break about 1 inch for every foot of putt. So for a 20 foot putt, aim 2 inches outside the cup to account for break.
6. Double Break Amount on 3-4% Slopes
On medium 3-4% slopes, the break doubles – aim to play 2 inches per foot of putt. For a 30 footer, aim 6 inches outside the cup for proper starting line.
7. Use Tees or Coins to Mark Break Points
Use tees or coins to map out the exact break points and degree of curve on your intended line. This gives you a visual read on the break.
8. Choose Drills to Simulate Sloped Putts
Practice reading break on curved drills like the “snake” drill with balls aligned in a winding curve. Lag putt to each ball to trace the break and make adjustments.
9. Putt to Hole Locations on Practice Green Perimeter
The perimeter of practice greens often features subtle breaks. Putt to hole cups located on the fringe to enhance your green reading abilities.
10. Use Alignment Rods to Assist Aiming
Precisely setting your starting line is key. Use alignment rods held outstretched on your target line to ensure you align putts correctly to account for break.
11. Watch How Pros On TV Read Greens
Study pro tournaments to observe how the best green readers analyze slopes and aim their putts. Emulate strategies like plumb-bobbing to improve your process.
12. Create a Contour Map for Your Home Course
Map out the key slopes, tiers, and breaks on your home greens. Refer to the guide when putting to refresh your memory on the subtleties.
13. Ask a More Experienced Player for Input

If you struggle reading greens, ask a veteran player for a second opinion on the break. Leverage their experience until you improve your reads.
14. Trust Your Read and Visualize the Putt’s Path
Once you’ve made a comprehensive read, trust it fully. Visualize the exact path and speed the ball will take toward the hole before stroking the putt.
15. Analyze Misreads to Make Corrections
Pay attention to putts that miss due to misreads and analyze why. Learn from these mistakes to make the proper adjustments next time.
By enhancing your green-reading education and aiming techniques, left-handed players can sink more sloped putts. Precisely accounting for breaks dramatically increases your make percentage. Take time on the practice green dialing in these vital skills for fewer 3-putts and more one-putt conversions.
Here is a 1000+ word article on developing effective putting routines and pre-putt checklists as a left-handed golfer:
Developing Effective Routines and Pre-Putt Checklists

Having a consistent and focused putting routine is vital for left-handed golfers seeking to improve their skills on the greens. An effective pre-putt checklist ensures you consistently go through proper alignment, green reading, and mental preparation steps before each putt. Establishing a structured routine minimizes mistakes and takes pressure off high-stakes putts.
To maximize consistency and results, lefties should ingrain checklists and repeatable putting rituals. Here are 15 tips to help develop premium pre-putt processes:
1. Start from Behind the Ball
Begin each routine by stepping behind the ball and taking in the overall context – lie, grain, wind direction, etc. Visualize the initial putt path.
2. Check Grip Pressure and Posture
While behind the ball, verify ideal grip pressure and balanced posture alignment. This primes you for an on-plane stroke.
3. Assess Overall Break
Still behind the ball, map out the apex point and degree of break from the ball to the hole based on the slope.
4. Envision Your Line
Picture in your mind’s eye exactly where your intended starting line is aimed in relation to the break point and hole.
5. Step Into Your Shot
With your starting line visualized, step into your set up, aligning your feet and shoulders parallel left of the target line.
6. Set the Ball Position
Place the ball in the precise spot in your stance you want for that length putt – centered, or slightly forward/back.
7. Check Aim with Alignment Aids
Verify your alignment using a tool like a bubble level. Adjust as needed until aimed properly at your intended starting line.
8. Set Your Eyes Over Ball
Bend down and check your dominant eye is squarely over the ball, perpendicular to the target line.
9. Shoulder Check Parallel
Do a shoulder check to confirm they are parallel left of your target line, aimed at your break point.
10. Grip Check
Look down and guarantee your left-hand grip is neutral with the putter face squared.
11. Practice Strokes

Take 1-2 practice strokes to feel your path and stroke tempo for that distance.
12. Visualize the Roll
With your eyes, trace the exact path you want the ball to roll from start to finish.
13. Commit to Your Line
Make a firm commitment in your mind that your read and alignment are correct before initiating the stroke.
14. Focus Only On Stroke Execution
Keep your thoughts on smooth tempo and solid contact. Don’t worry about result at this point.
15. Stroke the Ball
Swing the putter head forward with decisiveness on your intended path and speed. Stay down through impact.
By ingraining checklists into your pre-shot routine, left-handed golfers can achieve a model setup and optimized process before each putt. Consistent execution under pressure becomes robotic from repetition. Trust your routine and make more putts.
Training Your Eyes and Focus to Enhance Green Reading Ability
Sharpening your visual skills and focus is essential for lefties seeking to take their green-reading abilities to an elite level. Having a keen eye tuned to detect subtle slopes and contours is a vital asset for accurate reads and dialed-in aim.
By implementing dedicated eye-training techniques into your practice routine, left-handed golfers can significantly upgrade their capacity to assess breaks, speed variance, and aim adjustments required. Here are 15 tips to optimize your visual acuity and focus for next-level green reading:
1. Assess Greens from Multiple Angles

Approach every practice green from different sides and viewpoints. This diversifies the perspectives your eyes take in to recognize nuanced details.
2. Scan Entire Green Before Reading
Initially scan the entire green to take in its overall topography before zooming in to read your specific putt. This provides helpful context.
3. Use Peripheral Vision Drills
Place balls around you and practice using your peripheral vision to scan the area while staying focused on your putt. Widen your visual scope.
4. Notice Subtle Color Variations
Train your eyes to discern minor differences in grass color and texture, which can indicate changes in terrain and slope.
5. Detect Smallcontours with Head Movement
Subtly move your head up and down to cause slight parallax and accentuate minor contours that affect roll.
6. Plumb-Bob to Gauge Slope Severity
Use the plumb-bobbing drill with a tee under your eyes to gauge slope percent and compare it to the hole location.
7. Study Your Golf Ball’s Logo in Detail
Focusing intently on fine graphics trains your visual sharpness for green details. Do this before each round.
8. Read Practice Greens Before Your Round
Arrive early and dedicate time purely to reading practice green slopes. This activates your eyes and focus before play.
9. Challenge Yourself with Subtle Breaks
Seek out very subtle breakers on practice greens to strain your focus. Dialing in these nuances elevates your skills.
10. Detect Green Speed with Tee Roll Tests
Roll a tee and watch how it slows and turns to determine the green speed. Faster greens mean less break influence.
11. Ask a Playing Partner to Alter Your Reads
Have a partner tweak your read without telling you. Zero in and detect the differences to strengthen perceptiveness.
12. Visualize Precise Aim Lines
Practice tracing imaginary aim lines from ball to break point to hole with your eyes to ingrain proper visualization.
13. Evaluate Your Reads After Putts

Judge whether you read the green accurately after putts. Analyze misses to refine your process.
14. Simulate Uneven Lies
Place balls on slopes and uneven spots to sharpen your focus adapting to vary terrain lies around greens.
15. Believe in Your Reads
Trust your eyes and focus once you’ve made a thorough final read. Commit to your aim line decisively.
By training your visual skills and honing your pinpoint focus, lefties can conquer the subtle nuances of green reading for more accurate putts. Sharper eyes lead directly to lower scores.
Here is a 1000+ word article on embracing nerves and pressure situations with mental preparation and visualization as a left-handed golfer:
Embracing Nerves and Pressure Situations with Mental Prep and Visualization
Learning to embrace and thrive under pressure is a pivotal skill for lefties seeking putting improvement. Nerves and tense situations are inevitable in golf at all levels. Implementing proven mental techniques can help left-handed players conquer anxiety and knock down clutch putts when they matter most.
Utilizing visualization, breathing exercises, and focusing cues allows lefties to welcome pressure as an ally rather than an obstacle. Here are 15 tips to help master your mindset for high-stakes putting moments:
1. Visualize Your Ideal Process and Result

Vividly imagine your perfect routine, stroke, and the ball rolling in the hole. Ingrain these positive images before each pressure putt.
2. Remember Past Successes
Draw confidence from previous clutch putts you’ve made under pressure. This boosts belief in your skills.
3. Simulate Pressure in Practice
Impose consequences for missed practice putts like push-ups or donations. This conditions your mind for real stakes.
4. Focus On Your Pre-Shot Routine
Make an extra effort to get lost in your systematic pre-putt checklist to direct focus away from outcome.
5. Take Cleansing Breaths
Use deep rhythmic breaths to center your nerves and promote relaxation before pressure attempts.
6. Tell Yourself “I Got This”
Repeat positive cues like “I’m calm and focused” or “I’ve done this before.” Speak confidence into existence.
7. Disconnect from Previous Misses
Don’t allow past missed putts under pressure to creep into your thoughts. Only the next putt matters.
8. Focus On Your Target
Zero your eyes and thoughts onto your precise target point. Lock into the present moment.
9. Feel Your Feet Grounded
Sense your feet rooted into the green to promote centered balance and tempo.
10. Smile and Have Fun
Relax your face muscles into a grin. Enjoy the thrill rather than fear it.
11. Lean On Caddie or Partner for Support
Ask your caddie or partner for encouragement or input to feel less alone over the ball.
12. Trust Your Read and Setup
Have faith in your process once you’re aligned and ready to stroke the putt.
13. Stroke It Decisively
Commit fully and stroke the ball with confidence through impact, avoiding steering or guiding.
14. Celebrate Afterward
Congratulate yourself sincerely after making a clutch putt. Absorb the joy and success.
15. Reflect On Feeling After Positive Outcomes
Notice how great it feels to conquer pressure and channel that for future tough spots.
By applying proven mental techniques, lefties can welcome pressure and elevate their performance in crunch time. Own your nerves and believe in your skills to fearlessly drain critical putts when they matter most.
Finding the Right Balance of Practice, Play and Analysis to Improve Skills
Achieving peak putting proficiency as a left-handed golfer requires finding the optimal mix of focused practice, on-course play, and thoughtful analysis. Too much or too little of any one element can hinder development. Discovering the right equilibrium tailored to your needs accelerates skill growth.
For most lefties, a balanced plan involves dedicated practice routines to ingrain techniques plus recording statistics to track progress and identify weaknesses. Complementing this with sufficient rounds playing a variety of courses fuels real-world learning. Here are 15 tips for lefties to find your ideal improvement balance:
1. Assess Your Current Split of Play and Practice
Audit how you currently divide your time between playing, practicing, and analysis. Be honest about optimal ratios for growth.
2. Set Defined Goals for Improvement
Outline specific, measurable goals so you can tailor training for maximum efficiency. Let goals dictate optimal time allocation.
3. Design Practice Routines for Relevance
Ensure drills precisely target your development goals for relevance. Focused, purposeful practice beats unfocused repetition.
4. Vary Practice Elements and Formats
Blend technical drill work, skills challenges, and simulated pressure situations into creative practice plans.
5. Analyze Stats to Pinpoint Weaknesses
Track performance metrics like make percentages, greens in regulation etc. to identify areas needing work.
6. Play Enough Varied Courses
Test yourself on an ample variety of course layouts and conditions for well-rounded skill development.
7. Schedule Reflection Time After Each Round
Allot 15 minutes after rounds to think through decisions and evaluate execution while fresh.
8. Maintain Notes on Lessons Learned
Keep a journal of practice and play takeaways to solidify growth and inform future sessions.
9. Film Your Swing and Stroke Periodically
Record your swing or stroke to compare to past video and ingrain optimal mechanics.
10. Continually Evaluate and Adjust Your Plan
Check in monthly to judge if your current balance drives improvement or needs rebalancing.
11. Don’t Practice Too Much When Playing Poorly
Excessive practice when frustrated can ingrain flaws. Analyze more in these cases.
12. Simulate Golf Situations in Practice
Mimic course conditions and required shots in your sessions for transferable gains.
13. Spend Practice Time Working On Weaknesses
Resist only doing drills you enjoy. Allocate time to address vulnerabilities.
14. Set Play Goals Like Fairways Hit or GIR
Quantify on-course goals so practice trains the necessary skills to achieve them.
15. Monitor Your Progress Over Time
Post visible graphs or stats showing improvement to stay motivated through the process.
Finding your personalized equilibrium between purposeful practice, sufficient play and reflective analysis will accelerate the development of elite left-handed putting prowess. Assess frequently and adjust as needed to drive continuous skills growth.