Looking to Improve Your Lacrosse Goalie Game This Season. Here’s How Proper Stringing Can HelpLooking to Improve Your Lacrosse Goalie Game This Season. Here’s How Proper Stringing Can Help
The Importance of Proper Goalie Head Stringing
As a lacrosse goalie, you know that every little advantage counts. Even fractions of seconds and millimeters can make the difference between stopping a shot and watching it sail into the back of the net. That’s why proper stringing of your goalie head is so critical – it allows you to play to the best of your ability and give your team the best chance to win.
The right stringing provides the control, ball retention, and quick release you need to dominate between the pipes. Things like pocket depth, whip, hold, and channel shape all factor into your performance. Stringing affects how the ball sits in the head, how you cradle, pass, and clear, and the speed of your outlet after a save. Take the time to string your head just right, and you’ll notice the benefits in how you move and play.
As a fellow goalie, I’ve spent years perfecting my stringing setup. I’ve tried all sorts of mesh, sidewall strings, interlocks, and channel configurations. Through trial and error (and many frustratingly shipped goals!), I’ve learned what works for my personal style and comfort. I’d love to pass some of that hard-won knowledge on to you.
Whether you take on the stringing yourself or enlist a lacrosse equipment expert, there are key factors to consider. In this guide, I’ll walk you through the various specs, shapes, knots, and tricks that go into goalie stringing. I’ll also give some tips to help you dial in the right pocket for your game. Let’s dive in!
Choosing Your Mesh and Sidewall String
The first step is selecting your mesh and sidewall string. This combo determines the foundation and functionality of the pocket. For mesh, you’ll see traditional varieties like hard mesh, soft mesh, and wax mesh. Harder meshes retain their structure better but soften up over time. Softer meshes pocket easier but bag out faster. Wax mesh combines durability and quick breaks in. Consider your style – do you like a firmer, more consistent feel or a softer feel with more flex? Mesh density is also important – higher density means more ball control and stiffness.
On sidewalls, monofilament nylon is a popular choice for its blend of control and hold. You can also try multifilament nylons for added texture and grip. Sidewall material affects hold, durability, and weather performance. I prefer a firmer monofilament in wet weather for shape retention.
If you’re new to stringing, consult guides to find sidewall/mesh pairings that deliver the right amount of hold, break-in time, and weather durability for your preferences. An experienced stringer can also provide guidance.
Dialing in Your Pocket Depth and Shape

Pocket depth hugely impacts how you move with the stick and control the ball. Too shallow, and the ball rattles around and releases slowly. Too deep, and retrieving ground balls is tough. The key is finding your ideal depth – around 5-6 diamonds down from the top – for smooth catches and quick ball-to-stick transitions.
Pocket shape also matters. Wider pockets cradle easier while narrow pockets provide more control. A mid-pocket balances both. Consider a more narrow pocket if you have smaller hands. The shape you choose depends on your style – do you prefer cradling and ball retention or quick passing and shots? Work with your stringer to get the specs right.
To fine-tune depth and shape, you can tweak things like top string length, sidewall tie-offs, shooting/triangle stringing, and mesh pattern. Don’t be afraid to redo areas as you dial in what works best.
Getting the Whip and Hold Just Right
Along with pocket depth, the whip and hold of your mesh impact ball control. Whip refers to how the pocket moves on shots – more whip equals more ball dampening. Hold is how well the pocket retains its shape over time. You want enough hold to be consistent, but enough whip for soliddampening.
Factors like pocket placement, mesh density, and sidewall material affect whip and hold. A pocket set lower in the head increases whip. A dense mesh or thick sidewalls up hold. Work with your stringer to balance both to match your playing style and preferences.
And don’t forget about break-in time. Harder meshes need a longer break-in to soften up. Be patient and keep playing catch to get that pocket dialed in just right.
Customizing Your Stringing Setup
How does stringing affect a goalie’s performance?
- Determines how the ball sits in the head
- Influences cradling technique
- Impacts passing accuracy and power
- Affects clearing speed and distance
- Dictates the speed of outlet passes after a save
By investing time and effort into perfecting your goalie head stringing, you’ll notice substantial improvements in your overall game. The right stringing setup can enhance your reaction time, increase save percentages, and boost your confidence on the field.
Selecting the Ideal Mesh and Sidewall String Combination
The foundation of any successful goalie head stringing lies in choosing the right mesh and sidewall string combination. This pairing forms the basis of your pocket’s functionality and greatly influences your performance during games.
What are the main types of mesh available for lacrosse goalies?
- Hard mesh: Retains structure well but takes longer to break in
- Soft mesh: Easier to pocket but may bag out faster
- Wax mesh: Combines durability with quick break-in time
When selecting mesh, consider your playing style and preferences. Do you prefer a firmer, more consistent feel, or a softer pocket with more flex? Mesh density is another crucial factor to consider, as higher density typically results in better ball control and increased stiffness.
What sidewall string options are available for goalies?
- Monofilament nylon: Popular choice for its balance of control and hold
- Multifilament nylon: Offers added texture and grip
The choice of sidewall material affects hold, durability, and performance in various weather conditions. For instance, a firmer monofilament may be preferable in wet weather to maintain shape retention.
If you’re new to stringing, consult experienced stringers or refer to reputable guides to find the ideal sidewall and mesh pairing that delivers the right combination of hold, break-in time, and weather durability for your specific needs.
Optimizing Pocket Depth and Shape for Peak Performance
Pocket depth and shape are critical factors that significantly impact a goalie’s ability to control the ball, make saves, and initiate clears. Finding the perfect balance is essential for maximizing your performance on the field.
Why is pocket depth important for lacrosse goalies?
Pocket depth directly affects how the ball moves within the stick and how quickly you can release it. A pocket that’s too shallow may cause the ball to rattle around, resulting in slower releases. Conversely, an overly deep pocket can make it challenging to retrieve ground balls and maintain quick ball-to-stick transitions.

The ideal pocket depth for most goalies typically falls around 5-6 diamonds down from the top of the head. This depth provides a good balance, allowing for smooth catches and rapid ball movement.
How does pocket shape influence a goalie’s performance?
- Wider pockets: Easier cradling, potentially sacrificing some control
- Narrow pockets: Increased control, may be preferable for goalies with smaller hands
- Mid-pockets: Balance between cradling ease and control
The pocket shape you choose should align with your playing style and priorities. Do you value easier cradling and ball retention, or do you prefer quick passing and shot-stopping abilities? Work closely with your stringer to achieve the specifications that best suit your needs.
To fine-tune pocket depth and shape, you can adjust various elements such as top string length, sidewall tie-offs, shooting/triangle stringing, and mesh patterns. Don’t hesitate to make adjustments as you dial in the perfect setup for your game.
Understanding Whip and Hold in Goalie Head Stringing
Whip and hold are two crucial aspects of goalie head stringing that significantly impact ball control and overall performance. Understanding these concepts and how to optimize them can take your goalkeeping to the next level.

What is whip in lacrosse goalie head stringing?
Whip refers to how the pocket moves during shots and passes. More whip results in increased ball dampening, which can be beneficial for making saves but may affect passing accuracy if not properly balanced.
What does hold mean in the context of goalie head stringing?
Hold refers to how well the pocket retains its shape over time and during play. Good hold ensures consistent performance throughout a game or practice session.
Factors influencing whip and hold include:
- Pocket placement
- Mesh density
- Sidewall material
- Stringing technique
For instance, setting the pocket lower in the head typically increases whip, while using denser mesh or thicker sidewalls can improve hold. The key is to find the right balance that complements your playing style and preferences.
Keep in mind that different mesh types have varying break-in times. Harder meshes may require a longer period to soften up and reach optimal performance. Be patient during the break-in process and continue playing catch to fine-tune your pocket.

Customizing Your Goalie Head Stringing for Individual Success
While general stringing guidelines provide a solid foundation, the true power of goalie head stringing lies in customization. Tailoring your setup to your unique playing style, glove hand, and personal preferences can significantly enhance your performance on the field.
How can goalies customize their stringing setup?
- Angled top string: Can improve quick releases for your dominant hand
- U-shooter setup: Reinforces the bottom string and repels water
- Specialized knots: Can enhance hold or whip in specific areas of the pocket
- Varied sidewall patterns: Adjust pocket shape and ball control
When customizing your stringing, consider what aspects of your game you want to improve. Are you looking to enhance your passing accuracy, increase clearing distance, or improve shot reaction time? Work closely with your stringer to translate these goals into specific stringing specifications.
Experimentation is key in finding your ideal setup. Don’t be afraid to try different configurations and make adjustments based on your on-field performance and comfort level.

Essential Maintenance Tips for Optimal Goalie Head Performance
Proper maintenance of your goalie head is crucial for consistent performance and longevity. Regular upkeep ensures that your carefully crafted stringing setup continues to function at its best throughout the season.
What are some key maintenance practices for lacrosse goalie heads?
- Regular cleaning: Remove dirt and debris after each use
- Proper drying: Allow your head to air dry completely to prevent mold and mildew
- Pocket maintenance: Regularly check and adjust pocket depth and shape
- String inspection: Look for signs of wear or fraying in your sidewall and shooting strings
- Mesh care: Condition mesh periodically to maintain its performance characteristics
Implementing these maintenance practices will help preserve the integrity of your stringing setup and ensure consistent performance on the field. Remember that different weather conditions may require adjustments to your maintenance routine.
How often should goalies restring their heads?
The frequency of restringing depends on various factors, including playing frequency, weather conditions, and personal preference. As a general guideline, consider restringing your goalie head at least once per season or more frequently if you notice a decline in performance.

Pay attention to signs that indicate the need for restringing, such as:
- Inconsistent ball release
- Difficulty maintaining proper pocket depth
- Visible wear on mesh or strings
- Decreased ball control or hold
Advanced Stringing Techniques for Experienced Goalies
As you gain experience and become more familiar with your stringing preferences, you may want to explore advanced techniques to further enhance your goalie head’s performance. These advanced methods can provide additional customization options and potentially give you an edge on the field.
What are some advanced stringing techniques for lacrosse goalies?
- Channel creation: Develop a defined channel for improved ball control and accuracy
- Multi-layer mesh: Combine different mesh types for unique performance characteristics
- Custom knot patterns: Create specialized knots for enhanced hold or whip in specific areas
- Hybrid stringing: Incorporate elements from both traditional and mesh stringing styles
- Tension variation: Adjust string tension throughout the pocket for optimal ball control
These advanced techniques require a deep understanding of stringing principles and may take considerable practice to master. It’s advisable to experiment with these methods gradually, assessing their impact on your performance before fully incorporating them into your game-day setup.

How can goalies develop their stringing skills?
To improve your stringing abilities and gain a deeper understanding of advanced techniques, consider the following approaches:
- Study stringing tutorials and guides from reputable sources
- Practice stringing on spare heads or older equipment
- Seek mentorship from experienced stringers or equipment managers
- Attend stringing workshops or clinics when available
- Join online lacrosse communities to share knowledge and learn from others
Remember that developing advanced stringing skills takes time and patience. Don’t be discouraged if your initial attempts don’t yield perfect results – each stringing session is an opportunity to learn and improve.
The Impact of Weather Conditions on Goalie Head Stringing
Weather conditions can significantly affect the performance of your goalie head stringing. Understanding how different environmental factors impact your equipment allows you to make necessary adjustments and maintain peak performance regardless of the conditions.
How do various weather conditions affect goalie head stringing?
- Rain and humidity: Can cause mesh and strings to absorb water, altering pocket shape and performance
- Extreme heat: May cause certain materials to stretch or lose tension
- Cold temperatures: Can make some materials stiffer, affecting ball feel and release
- Sun exposure: Prolonged exposure may lead to material degradation over time
To mitigate the effects of weather on your goalie head, consider the following strategies:
- Use weather-resistant materials: Opt for mesh and strings designed to perform well in various conditions
- Apply protective coatings: Use mesh wax or other products to enhance water resistance
- Adjust stringing tension: Tighten or loosen strings as needed to compensate for weather-induced changes
- Carry backup options: Have alternative stringing setups available for different weather conditions
- Proper storage: Store your goalie head in a climate-controlled environment when not in use
By anticipating and preparing for various weather conditions, you can ensure that your goalie head maintains consistent performance throughout the season, regardless of environmental challenges.
Should goalies have different stringing setups for various weather conditions?
While it’s not strictly necessary, having multiple stringing setups optimized for different weather conditions can be advantageous. This approach allows you to quickly adapt to changing environments without compromising your performance.
Consider developing the following setups:
- All-weather setup: A versatile configuration suitable for most conditions
- Wet-weather setup: Featuring water-resistant materials and tighter stringing
- Hot-weather setup: Using materials that maintain tension in high temperatures
- Cold-weather setup: Incorporating more flexible materials for better feel in low temperatures
Experiment with different combinations to find what works best for you in various conditions. Remember to practice with each setup to ensure familiarity and consistency across all weather scenarios.
The Importance of Proper Goalie Head Stringing
As a lacrosse goalie, you know that every little advantage counts. Even fractions of seconds and millimeters can make the difference between stopping a shot and watching it sail into the back of the net. That’s why proper stringing of your goalie head is so critical – it allows you to play to the best of your ability and give your team the best chance to win.
The right stringing provides the control, ball retention, and quick release you need to dominate between the pipes. Things like pocket depth, whip, hold, and channel shape all factor into your performance. Stringing affects how the ball sits in the head, how you cradle, pass, and clear, and the speed of your outlet after a save. Take the time to string your head just right, and you’ll notice the benefits in how you move and play.
As a fellow goalie, I’ve spent years perfecting my stringing setup. I’ve tried all sorts of mesh, sidewall strings, interlocks, and channel configurations. Through trial and error (and many frustratingly shipped goals!), I’ve learned what works for my personal style and comfort. I’d love to pass some of that hard-won knowledge on to you.
Whether you take on the stringing yourself or enlist a lacrosse equipment expert, there are key factors to consider. In this guide, I’ll walk you through the various specs, shapes, knots, and tricks that go into goalie stringing. I’ll also give some tips to help you dial in the right pocket for your game. Let’s dive in!
Choosing Your Mesh and Sidewall String

The first step is selecting your mesh and sidewall string. This combo determines the foundation and functionality of the pocket. For mesh, you’ll see traditional varieties like hard mesh, soft mesh, and wax mesh. Harder meshes retain their structure better but soften up over time. Softer meshes pocket easier but bag out faster. Wax mesh combines durability and quick breaks in. Consider your style – do you like a firmer, more consistent feel or a softer feel with more flex? Mesh density is also important – higher density means more ball control and stiffness.
On sidewalls, monofilament nylon is a popular choice for its blend of control and hold. You can also try multifilament nylons for added texture and grip. Sidewall material affects hold, durability, and weather performance. I prefer a firmer monofilament in wet weather for shape retention.
If you’re new to stringing, consult guides to find sidewall/mesh pairings that deliver the right amount of hold, break-in time, and weather durability for your preferences. An experienced stringer can also provide guidance.
Dialing in Your Pocket Depth and Shape

Pocket depth hugely impacts how you move with the stick and control the ball. Too shallow, and the ball rattles around and releases slowly. Too deep, and retrieving ground balls is tough. The key is finding your ideal depth – around 5-6 diamonds down from the top – for smooth catches and quick ball-to-stick transitions.
Pocket shape also matters. Wider pockets cradle easier while narrow pockets provide more control. A mid-pocket balances both. Consider a more narrow pocket if you have smaller hands. The shape you choose depends on your style – do you prefer cradling and ball retention or quick passing and shots? Work with your stringer to get the specs right.
To fine-tune depth and shape, you can tweak things like top string length, sidewall tie-offs, shooting/triangle stringing, and mesh pattern. Don’t be afraid to redo areas as you dial in what works best.
Getting the Whip and Hold Just Right
Along with pocket depth, the whip and hold of your mesh impact ball control. Whip refers to how the pocket moves on shots – more whip equals more ball dampening. Hold is how well the pocket retains its shape over time. You want enough hold to be consistent, but enough whip for soliddampening.
Factors like pocket placement, mesh density, and sidewall material affect whip and hold. A pocket set lower in the head increases whip. A dense mesh or thick sidewalls up hold. Work with your stringer to balance both to match your playing style and preferences.
And don’t forget about break-in time. Harder meshes need a longer break-in to soften up. Be patient and keep playing catch to get that pocket dialed in just right.
Customizing Your Stringing Setup
While there are general stringing guidelines, the beauty is you can customize your setup based on your individual style, glove hand, and preferences.
For example, you may want an angled top string on your dominant hand glove for quicker releases. Or a U-shooter setup with nylon to reinforce your bottom string and repel water. Think about what you want to improve – passing, clearing, shot reaction time – and work with your stringer to translate that into stringing specs.
You can also match your stringing to field conditions. A shallow pocket with minimal whip is great for wet weather when you want more control. In the cold, increase depth and hold for a stickier pocket. And touch up sidewalls after games to keep a consistent release point.
Don’t be afraid to experiment. Try new meshes and interlocks each season to find what works best. Look at how the pros string their sticks for inspiration. Keep an open mind and have fun dialing in that perfect pocket!
Proper stringing is a process – you’re continually tweaking and learning what works for your game. Patience and persistence pay off. Take the time to string your head correctly, and you’ll immediately notice the benefits the next time you step into the crease. You’ve got this, goalie!
Choosing the Right Mesh and Sidewall String For Your Lacrosse Goalie Game
If you’re a lacrosse goalie looking to step up your game this season, you know that having the right equipment can make all the difference between stopping that clutch save or letting one slip by. And while your helmet and pads certainly play a crucial role, one key piece of equipment that can really impact your performance is your lacrosse stick stringing.
As a goalie, you rely on your stick to make those quick reaction saves, control unpredictable bounce shots, and clear the ball downfield. The stringing on your lacrosse stick is what gives you the control, whip, hold, and release you need to perform at your best. Here’s a closer look at how mesh and sidewall stringing impact your game, and key factors to consider when stringing your goalie stick this season.
The Importance of Pocket Depth
One of the most important aspects of goalie stringing is pocket depth. A deeper pocket improves ball control and hold, allowing you to cradle and carry the ball more securely. However, pockets that are too deep can slow your passing and clearing speed. As a goalie, a medium to deep pocket is ideal, allowing you quick ball control while still giving you the hold you need.
Traditional stringing often creates a deeper pocket using wider melt mesh or multiple shooting strings. You can also opt for pre-shaped mesh inserts that create built-in pockets. Mesh with memory also helps maintain pocket depth over time. When stringing your stick, focus on creating a pocket with a depth between 61-72mm for optimal goalie performance.
Consider Your Preferred Whip and Release

The whip of your stick refers to how the head flexes and rebounds when passing and shooting. More whip gives you more velocity but can reduce accuracy. For goalies who like a lot of whip for clearing long passes downfield, a soft mesh with thicker sidewall strings is ideal. If you prefer more control, choose a stiffer mesh material with thinner sidewall stringing.
The release of your stick is how easily the ball comes out during passes and shots. Too much hold and the ball won’t release cleanly. Too little and you could end up flinging bounce passes and ground balls. As a goalie, you want a balance of hold and release when passing to midfielders and clearing the ball. Consider using a combo of soft nylon mesh for hold and a stiff nylon shooter at the scoop for quicker release.
Balance Weather Properties
Dealing with all kinds of weather conditions is a reality of the goalie position. The right stringing choices can help optimize your stick performance whether it’s a downpour, sweltering heat, or early spring chill.
In wet weather, soft mesh will absorb and hold more water, making the pocket heavier and slowing release. A stiff mesh with multiple shooters can help shed water faster. When stringing for rain games, wax mesh can also help repel moisture.
Cold weather can make plastic mesh rigid and nylon strings stiff. This reduces hold and whip. Opting for soft leathers and flexible nylon meshes when stringing your stick for early season games can help retain pliability in the cold so you get the control you need.
On hot, humid days, wider nylon and synthetic material can get slippery when damp from sweat. Leather and wax mesh retain tackiness better when wet. Throwing a few leather strips on the inside of the scoop can improve grip in summer heat.
Personalize Your Goalie Pocket
While there are some general stringing guidelines to follow as a goalie, the most important factor is choosing a pocket style, depth, whip, and release that matches your personal playing style and preferences.
If you like quick ball control for snagging tough bounce shots, a medium pocket with a stiff mesh and leather shooting strings may be ideal. Goalies who like to look downfield for passing outlets as they clear may prefer a deeper pocket with softer nylon for superior hold.
Don’t be afraid to experiment with different meshes, sidewall patterns, shooting strings, and leathers to find your ideal goalie pocket. The beauty of stringing your own stick is fully customizing your pocket style, depth, and performance properties.
As you test out stringing options, pay attention to how the ball sits in the pocket, how cleanly it releases when passing, and whether you get the desired amount of whip. Keep tweaking your patterns until you dial in a goalie pocket that gives you the quick control, hold, and release you need this season.
With the right mesh and sidewalls tailored to your playing style, you’ll notice the difference in how accurately you move the ball downfield, how securely you can cradle in traffic, and how well you can hang on for saves on the run. Taking the time to string your goalie head just right will pay off with every save you make this season!
Key Stringing Specs: Pocket Depth, Whip, Hold For Your Lacrosse Goalie Game
As a lacrosse goalie, you know that split-second reactions and lightning fast reflexes are crucial to making those game-changing saves. What you may not realize is that the stringing on your lacrosse stick can make the difference between stopping a shot and watching it fly by.
Your lacrosse stick is your most important piece of equipment as a goalie. The stringing controls how you catch, cradle, pass, and clear the ball. Factors like pocket depth, whip, hold, and release can significantly impact your performance in the crease. Here’s a closer look at key stringing specs to consider when gearing up for goalie greatness this season.
Pocket Depth Matters
The depth of your pocket is one of the most important stringing factors for goalies. A pocket that is too shallow will make catching and controlling shots more difficult. But go too deep, and it could slow down your clearing speed.
For goalies, the ideal pocket depth is typically medium to deep, around 61-72mm. This gives you the control you need for quick saves off junk shots and bounce saves while still allowing you to carry and cradle securely.
When stringing your goalie head, focus on creating a smooth, consistent pocket. Pre-shaped mesh inserts with built-in pocket forms make this easier. You can also use multiple shooting strings and a wider mesh to increase depth. Just be sure to maintain structural integrity so the pocket doesn’t bag out over time.
Find Your Ideal Whip
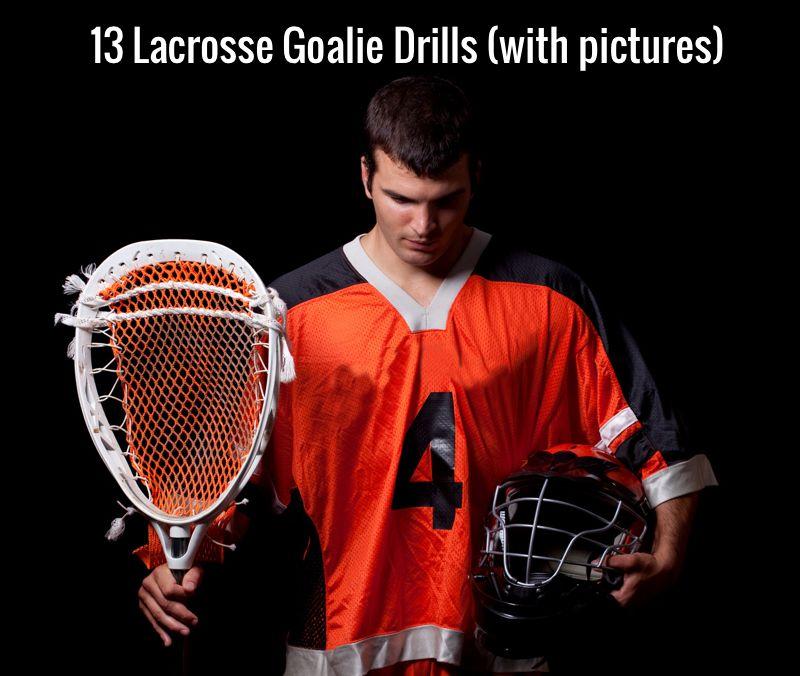
The whip of your lacrosse stick refers to how much the head flexes on passes and shots before springing back into shape. More whip builds up a higher speed when shooting and passing but can reduce accuracy.
For goalies who love rifling long clearing passes downfield, a softer mesh with thicker sidewalls will maximize whip. If you value accuracy and short-range control, go for a stiff mesh and thinner sidewalls for minimal flex.
Testing out different sidewall patterns is the best way to fine-tune your ideal whip. Start with a basic 1-1 or 2-2 sidewall pattern, then vary the stitching, string width, and mesh softness until you get the right balance of velocity and control.
Dial In Your Preferred Hold
The hold of your lacrosse stick refers to how well it retains the ball during cradling, carrying, and passing situations. Not enough hold and ground balls will slide right out. Too much hold and your passes get stuck in the pocket.
As a goalie, you want a balanced hold that allows you to securely clear and transition the ball while still being able to make crisp, accurate passes. Using a soft nylon mesh base for hold paired with a stiff nylon or plastic shooter up by the scoop is a great way to achieve that quick release.
Pay attention to how the ball sits in your pocket and how clean your passes come out when you are testing different shooting strings, leathers, and sidewall patterns. Keep adjusting until you get the precise hold you need for your goalie game.
Personalize Your Pocket
While these general stringing guidelines provide a good starting point, finding your ideal goalie pocket is all about personal preference. The right pocket depth, whip, and hold will depend on your individual playing style and strengths.
Some goalies like a stiffer setup for more control clearing through defenders. Other goalies prefer max whip for launching outlet passes. Don’t be afraid to get creative with your stringing until you find the perfect pocket for your game.
Pay attention to how different meshes, leathers, shooters, and sidewall patterns affect ball control. Keep adjusting your pocket until you find the sweet spot of hold, release, and whip that matches your performance needs in the crease.
With a customized goalie pocket tailored to your personal style, you’ll notice the improvement in cradling, passing, clearing, and even making those reaction saves. Dialing in your ideal stringing specs is one of the best ways to gain an edge in the crease this season!
Finding the Optimal Pocket Shape for Your Goalie Style

As a lacrosse goalie, you know that quick reaction time, fast footwork, and solid fundamentals are key. But you can gain an edge this season by paying attention to one piece of equipment you may be overlooking – the shape of your lacrosse stick pocket.
The exact shape of your pocket impacts how you control, carry, pass, and clear the ball as a goalie. Finding your optimal pocket shape could be the difference between nabbing that clutch save or watching the ball bounce free.
Here’s a look at how pocket shape affects your game, and key factors to consider when shaping your goalie pocket this season.
Balance Control and Speed
The shape of your pocket influences both ball control and clearing speed. A pocket shape with a rounder, deeper ball rest area gives you superior control for cradling in traffic or snagging off-target shots. But a flatter pocket shape often enables faster passes and clears.
Most goalies aim for a pocket shape that balances both. A moderately deep pocket with a flattened middle allows you to carry and control the ball securely while still throwing crisp clears.
When stringing, use a mid-depth mesh or inserts as your base. Add multiple nylon shooting strings pulled tight halfway up the head to flatten out the center of the pocket.
Consider Your Playing Style
Your ideal pocket shape also depends on your preferred playing style and technique. Close-checking goalies who like clamping down on the ball benefit from more defined side channels for superior hold. Aggressive goalies who clear long often prefer a central runner for launching clears.
Think about how you like to carry and control the ball most. Wider side channels give you more cradling command laterally across the pocket, while a pronounced center runner enables smoother end-to-end cradling.
When stringing, focus on enhancing the channels that best match your technique. For defined side ball channels, use multiple vertically stacked shooters. For a dominant center runner, accentuate the middle channel by gradually pulling lower sidewall strings tighter.
Account for Pocket Break-In
The shape of your pocket will evolve as your stick breaks in. Brand new stringing often needs 5-10 hours of play to reach its “settled” shape. As you string your stick, think about how you want the pocket to look after it settles in.
If you want more defined side channels or a flatter pocket over time, start by over-accentuating those shapes in the initial stringing. As the materials relax and soften, your pocket will gradually assume the more moderate shape you want long-term.
To maintain a consistent shape, choose meshes, leathers, and shooters that hold their structure better over time. Favor wider nylon materials over softer leathers that can bag out and stretch.
Test Adaptations for Weather
Temperature and moisture impact the pliability of your stringing materials, temporarily altering your pocket shape. Account for weather adapations to maintain optimal pocket performance all season long.
In cold conditions, nylon mesh and strings stiffen. Counteract this by using softer leathers in key stress points, or apply warm water to soften the materials before games.
Heat and humidity can cause mesh and leathers to slacken and stretch. When stringing for hot weather, choose wider nylon materials over soft leathers to retain shape.
Wet weather makes cotton pockets saggy while nylon sheds water faster. Waterproofing wax mesh is a good option for rainy games to hold shape when soaked.
Testing your pocket under different conditions will help reveal any necessary adjustments to maintain your preferred shape in all kinds of weather.
Customize for Your Needs
While there are some general starting points, the ideal pocket shape truly depends on your individual style, strengths, and technique as a goalie. Don’t be afraid to get creative with your stringing to craft a pocket profile that works best for you.
Pay close attention to how pocket shape affects your cradling, passing, clearing, and ball control. Keep refining until you find your perfect pocket shape to give you that extra edge in the crease.
Whether you prefer wider channels or a defined center runner, stiffer or softer sidwalls, take the time to shape a pocket all your own. You’ll notice the difference the first time you make that clutch save!
Tips for Stringing a Quicker Release
As any seasoned lacrosse goalie knows, having the right stringing in your stick can make all the difference when it comes to stopping shots. Proper stringing gives you better control, quicker releases, and increased accuracy – all critical elements for success between the pipes. Though there’s no one-size-fits-all approach, focusing on a few key components can help you dial in a pocket that enhances your reaction time and outlet passing.
First and foremost, consider stringing your head for a quicker release. As a goalie, milliseconds matter. You want to be able to move the ball smoothly from your stick to your teammates’ as fast as possible once you’ve made a save. This means opting for shallow, mid-to-low pocket placements that require less holding time on outlet passes. Shooting strings are also key – adding multiple shooters can help funnel the ball right into the sweet spot of your head after each save.
Don’t be afraid to experiment with different stringing patterns either. Something like a modified triple-threat with two straight shooters could allow for quicker throws without sacrificing ball control. You can also toy with adding unique elements like an inverted top string to further enhance release speed. The options are nearly endless, so don’t limit yourself to just basic setups.
Mesh depth is another vital consideration. As a goalie, you’ll want a pocket with a smooth, consistent release and hold. However, you also need sufficient ball control and flexibility for clearing after saves. Generally, pockets around five diamond rows deep strike this balance nicely. This allows you to cradle and carry comfortably while still being able to move the ball quickly.
Don’t overlook the importance of sidewall stringing patterns either. Strings like interlocks, double interlocks, and modified sidewalls affect hold just as much as shooting strings. Play around with putting more emphasis on the sidewall area of the head to enhance your passing game. An open sidewall with 1-2 well-placed shooters could be a game-changer for getting fast breaks started.
Personal preference is huge as well, so take the time to test out different setups. Notice how subtle tweaks in string placement, diamond counts, shooter configurations, and mesh produce different feels. Don’t be afraid to string, re-string, and then re-string again until you find your ideal pocket sweet spot. Having a go-to stringer you trust can help dial in your perfect pattern over time too.
Proper stringing as a goalie is truly about achieving quickness without sacrificing control and flexibility. Focus on faster setups through elements like defined shooting strings, tighter top strings, defined mid/sidewall areas, and mesh tailored to quick releases. At the same time, retain the ball control you need through defined pocket areas and holds. When balanced properly, all of these components will give you the lightning-fast outlet passing required at the goalie position.
Here are a few other tips for improving your reaction time through proper stringing:
- Use a soft mesh for better ball control and hold on saves
- Incorporate a U-shooter setup to cradle from all angles quickly
- Opt for a mid-low pocket to enhance quick stick fakes and feeds
- Add some whip to your pocket to help sink shots on clears
- Focus on sidewall stringing first, then balance with defined shooting strings
- Make adjustments over time as you notice changes in your play
With the right adjustments and experiments, you’ll be surprised at how dialing in the perfect pocket can catapult your goalie game. Don’t be afraid to tweak mesh, shooters, sidewall strings, and overall pocket placement until everything clicks. Proper stringing takes time, but once mastered, can be the difference-maker that takes your reaction time to the next level this season.
Adding a U or V Channel for Increased Ball Control
Having the right amount of hold and command over the ball is critical for lacrosse goalies. Quick feeds, sharp outlet passes, and controlling saves all depend on your ability to possess and cradle smoothly. While talent and practice are irreplaceable, dialing in the proper stringing can give your ball control an instant boost this season.
One of the best ways to enhance control as a goalie is through a U or V shooter channel. Adding one or more of these triangular shooters helps guide the ball directly into your pocket’s sweet spot. This allows for confident cradling and immediate control after every save. A U/V setup also funnels the ball right to your stick’s midpoint, making for quicker, more accurate outlet passes.
When stringing your head for more control, start by defining the U or V channel. Place one shooter on each sidewall about 3-4 diamonds down from the scoop. Connect them across the top string hole with another piece of shooter. This forms a triangular channel leading to the deepest part of the pocket. For even more defined control, you can add a second inverted U or V below the first.
You’ll also want to balance out the channel with straight or staggered sidewall shooter strings. These complement the U/V design by providing extra hold across the head. Aims for 2-4 straight or staggered shooters in total to maintain command over the entire pocket area. Too many will restrict quick releases.
Consider pocket depth as well when stringing for control. As a goalie, a pocket around 5 diamond rows deep gives the best blend of hold and fast feeds. Any deeper may hinder quick ball movement, while more shallow could reduce control. Match this with a mid-low placement to cradle smoothly across all angles.
Don’t forget about mesh either. Using a soft, broken-in piece provides bend and flexibility for catching hard shots. It also allows for superior holds during clears and fast breaks. if the mesh is too stiff, you may find the ball bouncing out more on saves.
Top strings are also vital for overall command and feel. A defined yet flexible top with medium tension reduces rattle and unwanted movement during play. Make sure to maintain some give so you can pocket the ball reliably. Too tight of a top string area restricts control.
Experiment with adding whip as well for enhanced cradling. A little movement in the lower pocket helps sink shots during clears and create holds for sharp feeds. Just be wary of too much whip, as it can make outlet passes inaccurate.
With the right balance of U/V channels, sidewall and straight shooters, pocket depth, mesh, and flexible top strings, you’ll notice your possession and command improve instantly. Don’t be afraid to restring and tweak over time until the control feels perfect. Dialing in your stringing could be the difference-maker that takes your goalie game to the next level this season.
Here are some other useful stringing tips for increasing goalie ball control:
- Add an interlock or double interlock sidewall for defined holds
- Incorporate a mid-high pocket for added control during saves
- Use softer mesh if you’re struggling with loose balls
- Maintain flexible yet defined sidewall stringing
- Experiment with different diamond counts to optimize pocket depth
- Don’t overtighten the top string area
- Consider adding multiple U/V shooter setups
Dialing in your stringing is all about achieving the perfect feel and command. Make small adjustments over time until everything clicks – the results will be transformative. With the right touches and shooter setups, you’ll instantly become a more confident possession goalie this season.
Reducing Clutch Time with a Wider Throat
Being able to make quick, accurate outlet passes is critical for lacrosse goalies. The faster you can transition the ball upfield after saves, the better. While talent and experience are key, optimizing your stringing can also drastically cut down clutch time this season.
One of the best ways to enhance your outlet game is using a head with a wider throat. Ample width at the base of the head gives you more control across a larger passing plane. This lets you swiftly hit targets upfield rather than fumbling with tight squeezes. A wider throat also provides flexibility to feed from multiple angles off saves.
When stringing your head, be sure to maintain as much width through the base as possible. Avoid tightening the lowest sidewall strings excessively – leave some slack for width. You can also experiment with skipping the first 1-2 sidewall holes completely to keep the throat clear.
Pocket placement also complements a wider throat. A mid-low pocket position centered horizontally across the head gives you the best passing versatility. You’ll be able to cleanly hit any spot on the field without adjusting your stick angle as drastically. Depth around 5 rows also optimizes quick ball movement.
Consider dropping your bottom shooting string 1-2 holes lower as well. This further opens your passing lane and provides flexibility to feed downfield off reflex saves. Just maintain enough definition in the channel so you don’t sacrifice too much accuracy.
Don’t forget about mesh either. A soft, flexible piece allows for smooth catch and release – crucial for fast outlet passing. Stiff mesh may restrict your passing speed or cause errant feeds off saves. Focus on a smooth, consistent release across the center of the head.
You can also add some whip into your pocket to enhance passing. A touch of flutter on shots creates hold for crisp feeds across the field. Too much whip however could lead to passes veering off target, so find a nice balance.
Top strings play a role too. Keep them flexible yet defined across the scoop. Too tight and you choke your throwing versatility, but too loose leads to sloppy passing. Use multiple anchor points for consistent control.
Experiment with different sidewall patterns like 1s and 1Xs as well to maintain throat width. Less restrictive setups enhance your passing angle range. Just be sure to still define the lower pocket enough to avoid flutter.
With the right adjustments, you’ll be hitting fast break outlets and clearing 70+ yards within seconds of each save. Don’t settle for pinched off throwing lanes – a wider throat could make all the difference this season. Focus on opening up the lower portion of your head during stringing for lightning-quick sticks after clutch saves.
Here are some other useful stringing tips for reducing goalie clutch time:
- Incorporate a double or triple U/V shooter setup
- Use a nylon mesh if you prefer smoother releases
- Make sure your pocket is centered horizontally across the head
- Add a bit of mid-pocket whip for hold on clears
- Opt for a goalie-specific head with maximum throat width
- Don’t over-tighten sidewall strings near the scoop
- Maintain flexible sidewalls for versatile passing angles
Dialing in your stringing could be the difference between forced turnovers and fast break goals after saves this season. With the right adjustments and focus on opening your throat, you’ll instantly become an outlet passing threat from anywhere on the field.
Should You Have a Straight or Angled Top String?
A top string that complements your playing style is crucial as a lacrosse goalie. This area greatly impacts overall feel, hold, and ball control throughout the head. While personal preference plays a big role, both straight and angled top stringing have their advantages.
Straight top strings provide a consistent, uniform feel across the entire scoop area. This allows for smooth catches and quick outlet passes regardless of where the ball first hits your mesh. A straight setup also funnels shots directly into the pocket for reliable saves. Less adjustment is needed on high or off-target shots.
However, angled top strings give you some extra command over ball placement. Tuning the angles lets you guide shots and feeds right to your stick’s sweet spot. This enhances your catching and passing accuracy. Angled tops also add some hold for cradling during clears and fast breaks.
When stringing a straight top, opt for 2-3 evenly spaced shooters anchored between the sidewall holes. This distributes tension evenly for consistency. Make sure to keep the pieces relatively tight but with a touch of give for flexibility. Too loose and the scoop area loses control.
For more angularity, incorporate anchors across the center of the head rather than at the sidewalls. Then angle the outer strings toward the sidelines. Adjust the crossings and angles until you achieve the desired ball control and placement. Just don’t overdo the angles or you’ll hinder smooth catches.
Both setups pair well with defined U/V channels down low to improve hold. A straight top with a tight middle U focuses on quick releases, while angled tops work nicely with a more flexible channel hold.
Pocket depth and placement make a difference too. Mid-low pockets complement straight tops for all-around saves, while a slightly higher placement takes advantage of angled control. Around 5 diamond rows deep tends to work well for both setups.
Don’t overlook mesh either. Soft mesh enhances the consistency of straight strings but can interfere with angled precision. A semi-stiff or mid-soft piece typically pairs best with angular tops. Focus on smoothness either way.
You can also incorporate unique strings like an inverse top to tweak performance. An inverted center creates hold while still allowing versatility. Double up angled strings for precision guiding into the pocket.
In the end, optimizing your top string area is about trying both approaches to see what complements your playing style best. Don’t be afraid to adjust angles, tension, and overall feel until everything clicks. With the right adjustments, top stringing can make a huge difference in taking command of those high shots.
Here are some additional top stringing tips for lacrosse goalies:
- Add anchors across the scoop for durability
- Incorporate whip strings for hold during long clears
- Angle tops toward your dominant hand/side
- Account for pocket depth when tuning top strings
- Use softer mesh for more flex with straight patterns
- Don’t over-tighten strings near the scoop
- Maintain give across the center for smooth catches
Whether you prefer the precision of angled tops or the reliability of straight stringing, optimizing this area is key. Experiment until you dial in the ideal scoop configuration to take command of those high heaters this season.
Getting the Right Amount of Offset for Your Preference
Offset refers to the angle at which the head sits on the shaft. This impacts everything from pocket placement to scooping ability for lacrosse goalies. While offset is built into the head’s design, stringing can also increase or reduce offset for your preferences.
More offset sets the pocket farther from the shaft, requiring less wrist movement to cradle across the center. This makes for smooth outlet passing and clearing after saves. The tradeoff is less ball protection during contacts and reduced control on hugging saves.
Minimal offset keeps the pocket tighter to the shaft, enhancing ball security in traffic. You gain leverage for those in-close stuffs. However, expect less smooth cradling and restricted passing lanes.
When stringing for more offset, focus on opening up the lower sidewalls. Keep them evenly tensioned but with ample slack so the base can angle farther from the shaft. Skipping the first few holes entirely can also increase offset.
Incorporate a U-shooter down low to pull the pocket outward. You can also set the lowest sidewall interlocks or diamonds wider to flare the base. Just keep the top string area defined so the head doesn’t get too floppy.
For minimizing offset, tighten up those lower sidewall strings instead, pulling the pocket inward. Add extra anchoring along the bottom of the head as well, like double sidewall knots near the scoop.
You’ll also want to balance out pocket depth vs. placement. A mid-high pocket paired with a straight tighter scoop evens out increased offset for control. Medium-deep mesh also keeps the ball stable during contacts.
Top strings play a role too – a flexible yet defined area prevents flare near the scoop. Use multiple anchors or an interwoven pattern across the highest holes. This keeps the head’s flexibility focused low by the throat.
Don’t forget about materials either. Soft mesh enhances a high-offset cradling and passing, while thicker grades like hard mesh increase security on low-offset heads. Use nylon for whip.
In the end, zero in on the offset range that caters to your playing style through subtle stringing tweaks. Add some flare for smooth clears, or keep it tight to protect the ball in close-quarters. Getting the angle just right is key.
Here are some other useful stringing tips related to goalie head offset:
- Skip sidewall holes near the scoop if offset is too severe
- Incorporate U-shooters down low for more angle
- Use thicker mesh if you prefer minimal offset
- Anchor below the scoop to reduce flare
- Focus on a straight, flexible yet defined scoop area
- Tension sidewalls evenly across the entire head
- Get a feel for different heads to compare offset
Whether you like the cradling freedom of high-offset or the control of low, optimizing your stringing can get you dialed in. With the right adjustments, you’ll increase saves, outlets, and clears by finding your ideal pocket angle this season.
The Pros and Cons of Traditional vs. Mesh Knots
Knotting up mesh to the sidewalls is a key step when stringing a lacrosse goalie head. You have two main options – traditional knots using sidewall string, or knots tied directly into the mesh. Each has its own advantages and disadvantages.
Traditional knots involve using the sidewall string to tie knots around mesh diamonds. This provides a secure, adjustable way to set diamond spacing. You can tune pocket depth and shape hole-by-hole for precision. Traditional knots also hold mesh firmly in place – you won’t see as much shifting during play.
However, traditional knots take more time and effort to tie evenly and consistently. They can come loose over time as mesh breaks in, requiring re-stringing. The knots also bulge the mesh outward, restricting pocket consistency. Shooting strings don’t always track as smoothly across traditional knots.
Meanwhile, mesh knots create holes within the mesh itself rather than around it. This allows for a smoother, flatter pocket shape unobstructed by sidewall knots. Shooting strings glide cleanly across mesh knots as well.
Mesh knots are also much quicker and easier to tie. You can adjust depth and shape rapidly without complicated knots. Just note that mesh knots don’t anchor the diamonds as securely. Movement and shifting can occur since the knots aren’t tied off on the sidewalls.
In most cases, a combination approach works best. Use traditional knots higher up on the head near the scoop for firmer anchoring and pocket shaping. Then transition to mesh knots down lower to smooth out the channel. You get precision up top and consistency through the ball area.
When knotting mesh traditionally, be sure to set diamonds tighter in high-traffic zones for durability. Keep the knots uniform from hole to hole as well. Switch to mesh knots once you’ve defined the upper portion of the pocket.
You can also incorporate unique knots like double or triple mesh knots to increase security if needed. Just maintain an even spacing and distribution. Alternate mesh knot directions across the pocket too – don’t tie in only one direction.
In the end, integrating both knotting styles combines the shaping of traditionals with the smoothness of mesh knots. Take your time during stringing to dial in the right balance. The payoff will be a defined yet consistent pocket across the entire head.
Some other key stringing tips related to pocket knotting:
- Use a pocket pounder tool to flatten knots if needed
- Incorporate interlocks higher up for added anchoring
- Tie knots tighter in high-wear areas
- Set mesh knots in a consistent zig-zag or crossing pattern
- Adjust tension hole-by-hole for ideal pocket depth
- Only use mesh knots once the upper pocket area is defined
- Double-check knots after stringing to ensure they’ll hold
Whether you prefer traditionals, mesh knots, or a combo, optimizing knotting is vital for a defined, consistent pocket. With the right technique and adjustments, you’ll gain accuracy and control this season.
How to Maintain Proper Tension Throughout the Head
Consistent string tension from top to bottom is vital for optimal goalie head performance. The right balance of give and structure enhances ball control, pocket feel, and passing/shooting versatility. However, tuning tension across the entire head takes precision during stringing.
First, focus on establishing a firm yet flexible base up top. Tie off the top string area with multiple anchors across the scoop to distribute tension evenly. Keep these strings tighter for structure, but avoid maxing them out completely.
Next, gradually decrease tension as you work your way down the sidewalls. The mid-area of the head is where you want the most give for cradling and ball control. Take care not to over-tighten strings in this zone.
Then, increase tension again slightly around the throat and base. You want enough structure here to avoid floppy passes or shots. Tie off the bottom strongly where the head meets the shaft.
When stringing mesh diamonds, make sure knots alternate from tight to loose consistently. Avoid long runs of only tight or loose knots. Work hole by hole to create balance.
Shooting strings are key too. Integrate defined yet flexible shooters across the width of the head to enhance structure without limiting feel. Aim for 2-4 evenly spaced main shooters up top.
Double check tension across pinch points as well, like diamonds around the scoop. Leaving too much slack here can lead to premature mesh tears. Reinforce high-wear zones.
Pad placement also impacts overall tension. Mid-low pockets allow the mid-section room to flex for control. High pockets require tighter surrounding strings to hold shape. Account for pocket positioning.
Don’t forget about materials too. Softer meshes like nylon work nicely for mid-section give, while thicker grades like wax mesh boost structure up top. Use mesh stiffness to your advantage.
Make tension adjustments hole-by-hole until the head feels evenly flexible, yet structured in the key areas. Getting everything dialed in takes time and precision – but it’s worth it for consistent performance.
Here are some other useful tips for tuning string tension:
- Skip holes entirely rather than leaving them too loose
- Tie off bottom knots tightly where the head meets the shaft
- Check for loose diamonds after each outing
- Add whip strings across the scoop for durability
- Use an anchor knot tool to distribute tension
- Incorporate thyro-weaves in high-wear areas
- Alternate tension consistently when knotting up mesh diamonds
With the right techniques and hole-by-hole adjustments, you’ll achieve perfectly balanced tension for peak performance in the crease.
Customizing Your Stringing Based on Field Conditions
Whether you’re a seasoned lacrosse goalie or just starting out between the pipes, you know that stringing can make all the difference in your performance. The right stringing set up allows you to move fluidly with the ball, control rebounds, and withstand hard shots. However, most goalies string their sticks once at the start of the season and leave them that way. This static approach often leads to frustration on game days when the field conditions aren’t ideal. Instead, savvy goalies alter their stringing based on the weather, field surface, and opponent’s shooting style. With some pre-planning and extra mesh and leathers, you can customize your stringing on the fly this season.
Start by having a variety of shooting strings, sidewall strings, and leathers available. Bring extras to each game or practice so you can make changes as needed. On hot, humid days, nylon or synthetic blends are preferable over cotton and leather, which can become waterlogged and heavy. Conversely, thicker, wax-coated strings provide extra grip on wet, rainy days. You’ll also want to adjust pocket depth based on surface. A deeper pocket with a wider whip on soft, muddy turf will help control low bounce shots. On slick grass, a shallower pocket with a tighter channel helps grab errant passes and prevents squirting through the strings on high shots.
Shooting style is another key factor. If your upcoming opponent relies heavily on sidearm shots, strengthen your bottom stringing to keep the ball from sneaking under the stick. For teams that shoot high on the goalie’s stick, focus on tightening up the upper half of the head. You can also adjust pocket placement. If you’re facing a shooter who always targets the near post, shift your pocket outward for quicker redirects out of harm’s way. For teams that love skipping pipe shots, center your pocket to get an extra split second to react.
Don’t forget about gauging string tension against shot speed. If your next foe loads up on extra strong shooters, loosening tension slightly helps snag their blistering shots. Going up against less dominant shooting, tighten strings to add more rebound control. Weather can also impact ball speed. On cold days, tighter strings account for the increased velocity of frozen lacrosse balls. When balls get mud-caked in the rain, loosening tension makes it easier to absorb soggy shots.
To get the most out of situational stringing, keep an organized kit with all your supplies. Separate shooting strings, sidewall strings, leathers, interchangeable heads, and necessary tools like pliers, lighter, and stringing needle. Make sure to label supplies with details like material type, thickness, and tension rating. That way, you can easily compare options and choose the best combo for upcoming conditions. Track what works well in certain situations, like synthetic sidewalls for wet turf, to inform future adjustments.
Don’t wait until you’re frustrated mid-game to make a change. At least a day before each matchup, check the weather forecast and scout the other team’s shooters. Based on that intel, select your supplies and restring your stick the night before or at a pregame practice. Keep field surface and shooting tendencies in mind during warm-ups too. If field conditions aren’t what you expected, take a few minutes to tweak your pocket tension, shape, or placement accordingly.
With preparation and a well-stocked stringing kit, modifying your goalie stick doesn’t have to be a big production. Small changes take only 5-10 minutes but can make a big difference in your performance. Don’t settle for stringing that holds you back. This season, take control and customize based on field conditions for your best game yet.
When to Consider Restringing Your Head
As a lacrosse goalie, your head’s stringing is crucial to performance. The right pocket shape, channel, and sidewall tension give you the control needed to stop shots. However, stringing deteriorates over time and use. Frayed shooting strings, stretched mesh, and loosening sidewalls reduce your stick’s effectiveness. Knowing when to restring your head keeps your equipment game-ready all season long.
Inspect your head before and after each game or practice session. Shooting strings take the brunt of impact from balls, so check for fraying, especially around the sidewall knots. Synthetic strings like nylon are more prone to fraying than waxed varieties. If you have multiple broken shooting string strands, it’s time to replace them. For traditional leathers, look for stretching, cracks, and moisture damage. Replacing just the shooters periodically helps extend the life of your sidewalls.
The mesh pocket is another key area. Over time, scooping ground balls and stopping shots stretches the woven nylon. This causes the pocket shape to loosen and makes the ball sit lower in the head. If your pocket feels too deep or the channel is too wide, restringing restores the desired height and width. Watch out for holes developing in the weave too. Snags and gaps lead to poor ball control and leaks. Before a full restring, try tightening the sidewalls to close small holes temporarily.
Keep an eye on sidewall tension as well. Natural materials like traditional leathers or plant-based synthetics stretch and relax over time. Temperature and moisture also impact tension. If you notice the ball is releasing too slowly or sitting too low in the pocket, the sidewalls need tightening. Use a thicker sidewall material or additional sidewall strings to add stability. On the other hand, sidewalls that are too tight hinder quick ball release. To loosen stiff synthetic sidewalls, use steam or heat to relax the fibers.
Hafting, where the mesh meets the plastic head, is a high-wear area. Gaps between the plastic and mesh lead to poor ball control on releases. Tight hafting also reduces the pocket’s hold. Watch for loosening or gaps at these junctions during stringing inspections. If the channel or pocket shape changes despite intact strings, hafting issues are likely the cause. Redoing the hafting ensures full contact between the head and mesh.
Frequent stringing adjustments like tightening shooting strings or sidewalls help extend mesh life. But after a season or two of play, the mesh may be too stretched out or worn to salvage. Switching out the mesh resets the shape and performance. Synthetic mesh lasts around two seasons for high school and youth players. College and professional goalies may need new mesh every season due to more intense use. Some players prefer fresh mesh each year for maximum consistency and performance.
In addition to wear and tear, restringing is useful when you want to modify your pocket based on your style or skill level. As you develop new techniques for challenging shooters, adjusting pocket placement fine-tunes your ball control. If you switch stick brands or head models, restringing helps optimize the pocket for the new head’s shape. Take notes during games on what works well or poor performance areas to inform stringing adjustments between contests.
Rather than waiting for total failure, periodically inspect mesh for holes, assess pocket and channel depth, and check sidewall tension. This helps catch issues before they significantly impact performance. Keep a restringing kit packed with extra shooting strings, sidewalls, scissors, lighter, and needle-nose pliers. By being proactive, you can restring on your own timetable, like the off-season, instead of right before a big game.
With lacrosse goalie success riding so much on your stick’s stringing, don’t settle for lackluster performance. Keep a close eye on wear and make minor fixes as needed. A full restring restores like-new controllability so you can focus on stopping goals, not struggling with your equipment. Master goalies realize proper stringing maintenance is part of delivering a winning game.
Ensuring Proper Stringing Under NCAA Rules

As a lacrosse goalie playing at the college level, you know just how crucial your stick’s stringing is for performance. A perfectly strung pocket gives you the control and ball retention needed to stop blistering NCAA shots. However, you must ensure your stringing stays within the regulations set forth by the NCAA rule book. Learning the ins and outs of these rules helps you optimize your pocket legally for the competitive collegiate game.
The NCAA rules contain very specific guidelines surrounding pocket depth and shape. For goalies, the top of the ball must remain above the bottom of the sidewall when pressure is applied from the sides. The intent of this rule is preventing excessively deep pockets that allow for “ball trapping.” Use a ball and ruler to set your pocket floor just below the NCAA’s 4-inch minimum depth during stringing.
NCAA rules also govern shooting string placement and configuration. You are allowed one straight shooter along the bottom of the head. College goalies often use thick, waxed hockey laces for maximum durability here. For the upper shooting strings, you can have up to three strings that must be 8-12 inches in length and attach to adjacent sidewall holes. They cannot be in a V, U or flat shape across the top of the head. Ensure even gaps and do not bunch or crisscross the shooting strings.
Another rule addresses the sidewalls of the head. Mesh must be attached directly to the sidewalls, known as hafting. This prevents extra strings or materials being layered over the mesh along the sidewalls like in a high-school pocket. Use a basic interlock or single-loop knot to tightly haft the mesh directly to each plastic sidewall hole. Pull the knots tight into the head for a clean finish with no mesh lift.
In addition to pocket specifications, the NCAA regulates stick dimensions. Attack and midfield sticks cannot exceed 72 inches overall. Goalie sticks can reach 72 inches as well but most range from 40-72 inches depending on player height and preference. Heads cannot measure over 6.5 inches across the top or be taller than 10 inches. Ensure any heads you string meet these shape requirements too.
While not directly addressed in the rules, screw systems have become popular for collegiate goalies in recent years. These aftermarket kits replace traditional leathers with nylon screws along the sidewalls. This allows for precise tension adjustment without stretching or weather impacts. While permitted, ensure screws lay flat along the head and do not lift mesh off the sidewalls.
NCAA referees will check pockets prior to games to ensure they meet all specifications. If found illegal, you will need to cut out strings on the field to comply before being allowed to play. This can severely impact your performance, so always double check pocket depth, shooting strings, and sidewall hafting before warm-ups. Carry tools like scissors, pliers, and back-up strings to make quick fixes if needed.
Beyond NCAA regulations, optimize your stringing for collegiate play. Focus on consistency from stick to stick. With NCAA’s substitution rules, you may switch heads frequently within a game. Match pocket shape and tension across all your heads so play feels the same. If you like a shallow pocket for quick outlet passes, string all pockets uniformly shallow. Additionally, dial in the hold. Deeper NCAA pockets allow for more customized hold settings. Tailor it to your competitive level and reaction time.
By mastering NCAA goalie stringing guidelines, you ensure your most valuable piece of equipment is regulation-compliant. Avoid in-game penalties and restringing delays by checking head dimensions, pocket depth, shooting strings, and sidewalls before hitting the field. Your perfectly optimized and fully legal stringing will give your team the best chance at collegiate lacrosse victory.
Finding the Sweet Spot Between Comfort and Performance
As a lacrosse goalie, you rely on your stick to stop blistering shots coming from all angles. The right stringing gives you the control and responsiveness to wrangle even the toughest attempts. However, comfort is also key to maintaining composure in the crease under constant assault. Learning to balance performance and comfort when stringing your head helps your equipment work with you, not against you.
A head strung too loosely may feel nice in your hands but lacks the responsiveness to make quick saves. You want tight sidewall stringing to optimize control. But take care not over-tension the sidewalls creating stiff resistance that tires out your hands and arms over 60 minutes of play. Leave a hint of give for ergonomic comfort without forgoing hold and speed.
Consider shooting string stiffness as well. Soft leathers or synthetics absorb impact nicely but can slow ball release. Waxed hockey laces provide extra rigidity to flick shots away quickly, but may transmit vibration and sting. Mixing string materials and using crossed or layered shooting strings balances cushioning with responsiveness. Pay attention to potential pressure points along your fingers too.
Pocket placement also impacts comfort and performance. Placing the deepest part of the pocket high leads to better ball control for saves above your shoulders. However, this can angle your wrist back sharply during cradle or clears. Dropping the pocket lower in the head can help straighten your wrist for ergonomic cradling but reduces high shot control. Finding a mid-range pocket placement minimizes strain while still allowing you to track shots.
For overall pocket shape, consider adjusting channel width based on hand size. Wider channels support the ball better for superior control but require wider hand spreads that can quickly fatigue your hands. Use a channel width proportionate to the size of your mitt for a secure cradle without unnecessary stretching. Additionally, round out inside channel angles to reduce contact pressure points.
When hafting your mesh to the sidewalls, pull the knots tight but not so taut that the mesh puckers. Overtight knots create hotspots inside your hand overtime. Take care to center the knots within the sidewall holes as well. Off-center knots can rub and irritate your fingers. For comfort across long games, ensure all knots lay flat and even without bulges.
For head dimensions, balance a compact profile for easy scanning with ample surface area for stopping power. Excessively wide or tall heads make visual tracking tougher. But sufficient height helps smother high shots, while wider heads can trap more angled shots. Reference your current performance gaps when selecting a head size to enhance your strengths without introducing discomfort.
Don’t forget your unique physiology when balancing comfort and control. Wider palm widths may benefit from a deeper pocket for secure cradling. Fingers prone to joint hyperextension need lower pocket placement to reduce strain. And goalies with shorter arms favor more narrowly channeled pockets for easy across-body cradling and clearing.
Comfort and performance often overlap when stringing lacrosse goalie heads. For example, tightly hafted sidewalls enhance control while reducing uncomfortable rubbing. Slightly broken-in leathers conform nicely to your hand for both cushioning and hold. And centered string placement allows for maximum pocket effectiveness without anatomical irritation. By carefully tuning your stringing system, your equipment can work with – not against – your body.