How can you enhance your disc golf skills. What are the most effective techniques for improving accuracy and distance. Which equipment choices will elevate your game. Discover expert tips to take your disc golf performance to the next level.
Mastering the Fundamental Disc Golf Grips
Developing a solid foundation in disc golf begins with mastering the essential grips. These techniques are crucial for achieving accurate shots with both power and control. Let’s explore the three primary grips that every disc golfer should know:
The Power Grip
The power grip is ideal for generating maximum spin and distance on your throws. To execute this grip:
- Wrap your fingers tightly around the disc’s rim
- Brace the disc against the pad of your thumb
- Position your pointer and middle finger along the rim’s center for stability
This grip allows you to generate significant snap and spin, making it perfect for long drives and powerful approach shots.

The Fan Grip
For shots that require finesse and accuracy over raw power, the fan grip is your go-to technique:
- Press your thumb gently against the flight plate
- Splay your fingers out in a fan-like pattern on the underside of the disc
- Adjust the angle of your hand to achieve hyzer or anhyzer releases
This grip provides excellent control for touchy upshots and precise putts.
The Modified Fan Grip
Combining elements of both the power and fan grips, the modified fan grip offers versatility for mid-range shots:
- Curl your index finger under the rim
- Fan out the remaining fingers on top of the disc
- Maintain a firm but relaxed grip pressure
This hybrid grip is particularly effective for controlled mid-range throws that require a balance of power and accuracy.
Perfecting Your Stance, Footwork, and Balance
Once you’ve mastered your grip, the next step is to focus on your body positioning and movement. Proper stance, footwork, and balance are essential for transferring energy efficiently from your lower body into smooth, powerful throws.
Optimal Stance for Disc Golf
Your stance forms the foundation of your throw. To achieve the ideal stance:
- Stand with your feet shoulder-width apart
- Position your body perpendicular to the target
- Distribute your weight evenly between the balls and heels of your feet
This balanced stance provides stability and allows for fluid movement throughout your throw.
The X-Step Technique
The X-step is a fundamental footwork pattern that helps build rhythm and timing in your throws. Here’s how to execute it:
- As you begin your reach back, step diagonally across your body with your lead foot
- Plant your lead foot firmly
- Drag your rear foot forward into the power pocket
Practice this movement slowly at first, gradually increasing your speed as you become more comfortable with the technique.
Maintaining Balance Throughout Your Throw
Proper balance is crucial for consistent, accurate throws. To maintain balance:
- Shift your weight onto your plant foot as you reach back
- Drive off the plant foot as you pull through
- Transfer your weight to the lead foot during the follow-through
- Avoid leaning or dipping during the throwing motion
By focusing on balance, you’ll create a smooth transfer of energy from your lower body to your upper body, resulting in more powerful and controlled throws.

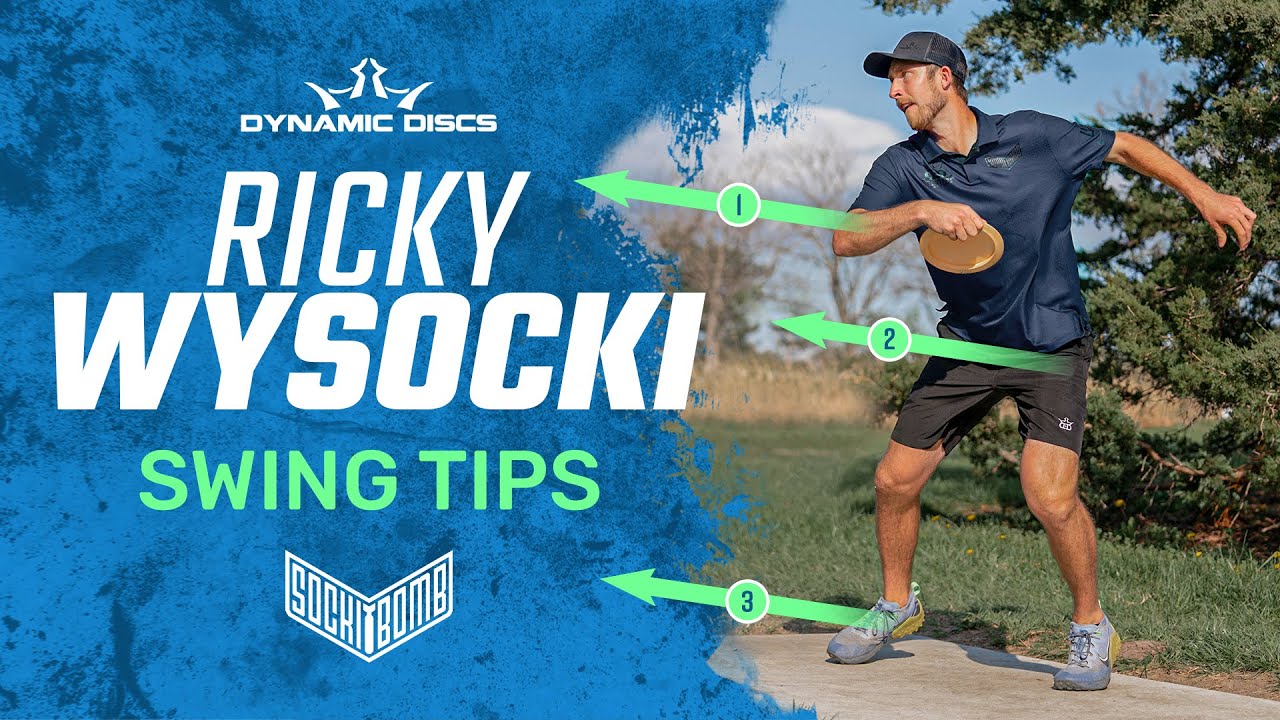
Refining Your Throwing Technique: X-Step, Reachback, and Release
With a solid foundation in grip and stance, it’s time to fine-tune the key components of your throwing motion. The X-step, reachback, and release work in harmony to produce maximum spin and snap on your disc.
Perfecting the X-Step Timing
The X-step is more than just footwork; it’s about timing and power generation. To perfect your X-step:
- Make your movements smooth and athletic
- Use the X-step to load your hips and shoulders back
- Practice maintaining a consistent rhythm
A well-executed X-step sets the stage for a powerful throw by creating torque in your body.
Maximizing Your Reachback
The reachback is where you store potential energy for your throw. To maximize its effectiveness:
- Extend your throwing arm fully back in a straight line
- Keep the disc close to your body
- Rotate your shoulders to increase the range of motion
A full reachback allows you to generate more power and control in your throw.
Executing a Clean Release
The release is where all your preparation comes together. For a clean release:
- Whip the disc forward aggressively on your power pocket’s center line
- Release the disc flat with a clean snap of the wrist for maximum spin
- Follow through fully to maintain balance and direction
A clean release ensures that all the power you’ve generated is transferred efficiently to the disc.
Selecting the Right Discs for Your Skill Level
Choosing appropriate discs is crucial for developing your skills and enjoying the game. Many beginners make the mistake of using high-speed drivers too early in their disc golf journey. Let’s explore how to select discs that match your current skill level and promote improvement.
Starting with Putters and Mid-Range Discs
For beginners, it’s best to start with slower, more controllable discs. Here’s why:
- Putters like the Aviar fly slow and straight, perfect for honing release and accuracy
- Mid-range discs like the DX Roc offer slightly more speed while maintaining control
- These discs allow you to focus on proper technique without the added complexity of high-speed flight patterns
By mastering these slower discs, you’ll build a solid foundation for your game.
Progressing to Fairway Drivers
As your skills improve, you can start incorporating fairway drivers into your bag. Here’s what to consider:
- Fairway drivers like the Leopard offer a nice balance of speed and control
- They allow you to start working on distance shots without sacrificing accuracy
- Use these discs to practice shaping different shot types
Fairway drivers are an excellent stepping stone between mid-range discs and high-speed distance drivers.
When to Introduce Distance Drivers
High-speed distance drivers should only be added to your arsenal once you’ve developed consistent form and control. Here’s when and how to introduce them:
- Wait until you can throw fairway drivers with accuracy and distance
- Start with slower speed distance drivers (speed 9-10) before moving to higher speeds
- Use distance drivers sparingly at first, focusing on control rather than maximum distance
By gradually increasing disc speed as your skills improve, you’ll develop a well-rounded game and avoid forming bad habits.

Understanding Disc Flight Ratings and Plastic Types
To make informed choices about disc selection, it’s essential to understand the key measurements and characteristics that affect disc flight. Let’s break down the most important factors to consider when choosing discs for your bag.
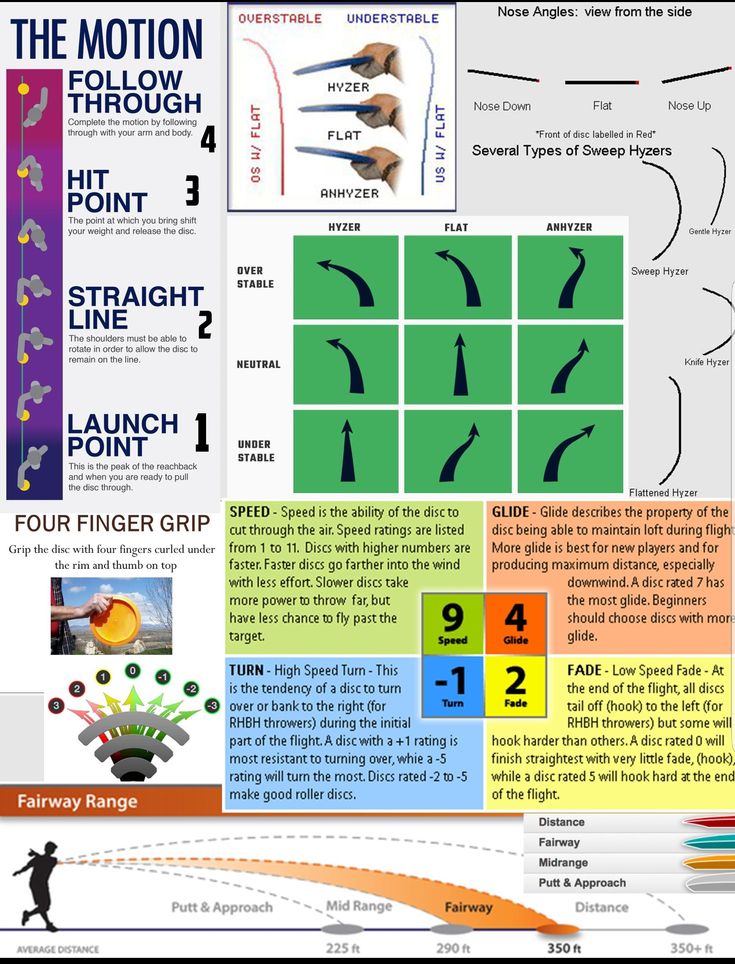
Decoding Disc Flight Ratings
Disc flight ratings provide valuable information about how a disc will behave in the air. The four main ratings are:
- Speed: Indicates how fast you must throw for ideal flight (1-14 scale)
- Glide: Shows the disc’s ability to maintain loft (1-7 scale)
- Turn: Measures the disc’s tendency to turn right during high-speed flight (for right-hand backhand throws) (-5 to +1 scale)
- Fade: Indicates how much the disc will hook left at the end of its flight (0-5 scale)
Understanding these ratings will help you choose discs that complement your throwing style and skill level.
The Impact of Plastic Types on Disc Performance
Different plastic types can significantly affect a disc’s flight characteristics and durability. Here are some common plastic types and their properties:

- DX: Affordable, grips well, but beats in quickly, changing flight characteristics over time
- Pro: More durable than DX, offers good grip, and has a moderate lifespan
- Champion: Very durable, maintains flight characteristics for a long time, but can be slippery when wet
- Star: Combines durability with good grip, offering a balance between Champion and Pro plastics
Experimenting with different plastic types can help you find the perfect balance of durability, grip, and flight stability for your game.
Mastering Different Shot Shapes and Angles
To become a well-rounded disc golfer, it’s crucial to develop a variety of shot shapes and release angles. This versatility will allow you to navigate obstacles and adapt to different course layouts effectively.
Hyzer and Anhyzer Releases
Two fundamental shot shapes in disc golf are the hyzer and anhyzer. Here’s how to execute them:
- Hyzer: Release the disc with the outer edge tilted downward. This creates a fade to the left for right-hand backhand throws.
- Anhyzer: Release the disc with the outer edge tilted upward. This produces a right-turning flight path for right-hand backhand throws.
Mastering these release angles allows you to shape your shots around obstacles and control your disc’s landing angle.
Forehand (Sidearm) Throws
Adding a forehand throw to your arsenal greatly increases your shot options. Here are some key points for developing a strong forehand:
- Keep your elbow close to your body throughout the throw
- Focus on a smooth, whip-like motion rather than muscling the disc
- Practice with understable discs initially to develop proper technique
A reliable forehand throw allows you to attack pins from different angles and navigate tight fairways more effectively.
Specialty Shots: Rollers, Thumbers, and Tomahawks
For truly challenging situations, specialty shots can be invaluable. Here’s a brief overview of some advanced techniques:
- Rollers: Release the disc on a steep anhyzer angle to make it roll along the ground
- Thumbers: Throw the disc vertically with your thumb on the inside of the rim for an overhead shot
- Tomahawks: Similar to thumbers, but with your fingers on the inside of the rim
While these shots are situational, they can be game-changers when used appropriately.
Developing a Consistent Practice Routine
Improving your disc golf game requires dedicated practice. By establishing a consistent routine, you can systematically work on all aspects of your game and track your progress over time.
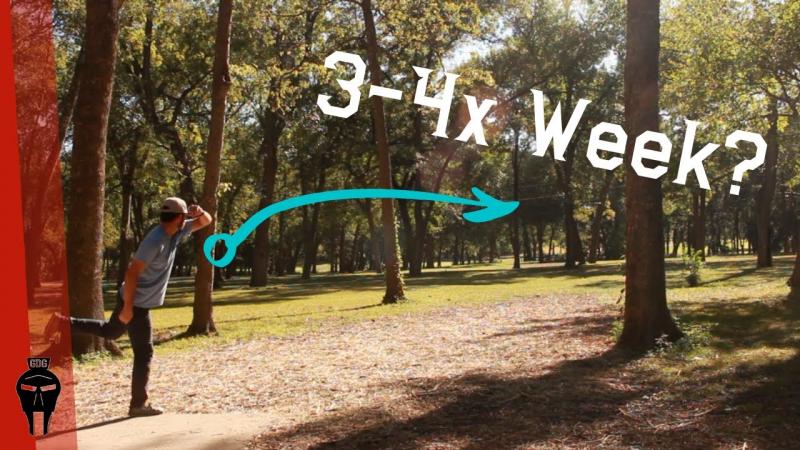
Field Work: The Key to Rapid Improvement
Regular field work is essential for honing your techniques and building muscle memory. Here’s how to make the most of your practice sessions:
- Set up targets at various distances to practice different types of shots
- Focus on one aspect of your technique at a time (e.g., grip, footwork, release)
- Use a variety of discs to understand how they behave in different situations
- Record your throws to analyze and refine your form
Dedicating time to focused field work will accelerate your improvement and help you develop consistency in your throws.
Putting Practice: The Foundation of Scoring
Putting is often the difference between good and great scores. To improve your putting:
- Practice from various distances and angles
- Focus on developing a consistent putting stance and release
- Set goals for each practice session (e.g., make 20 putts from 20 feet)
- Simulate pressure situations by creating putting games or challenges
Regular putting practice will build confidence and consistency, leading to lower scores on the course.

Mental Game and Course Management
Developing your mental game is just as important as improving your physical skills. To enhance your mental approach:
- Practice visualization techniques before each shot
- Develop a pre-shot routine to maintain focus and consistency
- Learn to manage your emotions and stay composed after bad shots
- Study course management strategies to make smarter decisions during rounds
A strong mental game will help you perform at your best, especially in competitive situations.
By implementing these essential tips and dedicating yourself to consistent practice, you’ll see significant improvements in your disc golf game. Remember that progress takes time, so be patient with yourself and enjoy the journey of becoming a better player. As you continue to refine your skills, you’ll experience the satisfaction of watching your scores improve and your ability to tackle challenging courses grow.
Learn the Basic Grips: Power, Fan and Modified Grips
So you just got your first innova dx disc golf set and are itching to get out on the course. But before teeing off, it’s essential to learn the basic grips that will allow you to throw accurate shots with power and control. Mastering the right grip is the foundation of a consistent disc golf game.
The first grip to practice is the power grip, where you wrap your fingers tightly around the disc’s rim and brace the disc against the pad of your thumb. This allows you to generate spin and snap, adding distance to drives and approach shots. Make sure to keep your pointer and middle finger along the rim’s center for stability.
The fan grip is more forgiving, with the thumb pressed gently against the flight plate and fingers splayed for finesse shots. Use this for touchy upshots that require accuracy over distance. Adjusting the angle of the fan allows for hyzer and anhyzer release.
Finally, the modified fan combines attributes of the power and fan grips. The index finger is curled under the rim with the remaining fingers fanned out on top. This utility grip works well for mid-range shots.
Experiment with all three main grips during fieldwork practice to discover which provides the most control. Keeping a firm but relaxed grip pressure is also key, avoiding “death grips” that reduce accuracy.
Focus on Stance, Footwork and Balance
Once you’ve dialed in your grip, proper stancing, balance and footwork will transfer energy from your lower body into smooth throws. Stand with your feet shoulder-width apart, perpendicular to the target. Keep your weight balanced between the balls and heels of your feet.
As you reach back, shift weight onto your plant foot while lifting the lead foot onto the toe. Drive off the plant foot as you pull through, shifting weight again to the lead foot. This motion generates torque while keeping balance.
Use an athletic X-step to build rhythm and timing. As you reach back, step diagonally across your body with the lead foot. Plant it solidly, then drag the rear foot forward into the power pocket. Practice slowly, gradually increasing speed.
Concentrate on balance throughout the entire throw, avoiding leaning or dipping. Proper footwork connects your lower and upper body for fluid transfers of energy.
Perfect Your Throwing Technique: X-Step, Reachback and Release
Once you have a solid foundation, dial in the keys of a proper throwing motion: a dynamic X-step, full reachback, and clean release. These mechanics work in sequence to produce maximum spin and snap.
As discussed above, the X-step timing is critical. Make it smooth and athletic, loading your hips and shoulders back. The reachback uses that stored power, fully extending your throwing arm back in a straight line.
At the hit point, aggressively whip the disc forward on your power pocket’s center line. Release it flat with a clean snap of the wrist for spin. Follow through fully for balance. Repeat this motion through fieldwork to groove muscle memory.
Filming yourself is hugely helpful for identifying flaws. Online video tutorials can also demonstrate proper technique. Small adjustments like lowering the reachback or accelerating the hit point can work wonders.
Choose the Right Discs for Your Skill Level
One mistake beginners often make is throwing high-speed drivers far too early. It’s important to match your disc selection to current skill level. Start with putters and mid-ranges while focusing on fundamentals and build up gradually to faster discs.
Putter discs like the Aviar fly slow and straight, perfect for honing release and accuracy. Try mid-ranges like the DX Roc next, which handle some additional speed. Fairway drivers like Leopards are a nice intermediate option.
Work your way up to higher speed distance drivers like Destroyers or Bosses only after refining your form with slower discs. Learning proper technique is far more important than distance early on.
It’s also smart to choose basic, durable disc plastics like DX and Pro when starting out. As your skills progress, experiment with premium plastics and discs in different stabilities.
Analyze Disc Flight Ratings and Plastic Types
Understanding key disc measurements will allow you to make informed choices for all types of shots. The main ratings to look at are speed, glide, turn and fade.
Speed indicates how fast you must throw for ideal flight. Beginners need lower speeds like 2-5, while 10+ is for powerful experienced players. Glide shows overall flight distance potential. Turn/fade rates show tendency to bank right or left.
Plastic types also impact flight. DX is affordable and beats in quicker. Champion and Star plastics offer durability for predictable flights. Check ratings and plastics to select the right discs.
Practice Throwing Different Angles and Shot Shapes
Expanding your shot-shaping repertoire will prove invaluable on the course. Moving beyond flat releases to intentional hyzer and anhyzer angles will allow you to traverse any obstacle.
Hyzer shots fly diagonally right, anhyzer go left. Adjust your wrist angle and disc position in the power pocket to shape lines. Slight adjustments make all the difference.
Practice manipulating angles in field sessions. Envision specific course scenarios like curved fairways, tunnel shots or tricky approaches. Dialing in controlled angles makes difficult holes far more manageable.
Learning to shape straight, hyzer, anhyzer, flex and turnover lines will build invaluable versatility. Mastering angles together with speed control opens up the full potential of creative shot-shaping.
[Article continues with additional tips on putting, playing in varied conditions, videotaping form, disc golf etiquette and more]
Focus on Stance, Footwork and Balance
Looking to step up your disc golf game this season? While having the right disc golf gear can help, nothing beats solid fundamentals. Three of the most critical aspects of a consistent, powerful disc golf throw are proper stance, footwork, and balance. Master these fundamentals and you’ll gain accuracy, distance and consistency on the course.
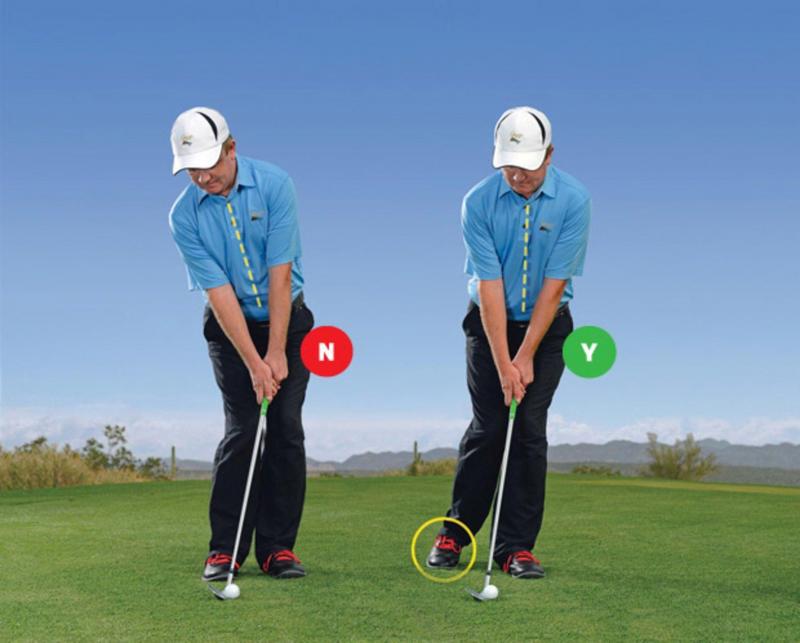
Much like in ball golf, your stance is the foundation of your throw in disc golf. Feet shoulder width apart, staggered stance with your dominant foot back, knees slightly bent – this athletic position keeps you balanced and allows you to engage your core and shift your weight during the throw.
Equally important is proper footwork. The classic mistake is planting your feet and relying solely on arm speed to hurl the disc. To maximize power, you want to engage your lower body. As you pull the disc back, shift your weight to your back foot. Then as you drive forward, shift your weight to your front foot, using your leg muscles to power the throw. This engaged lower body is key for adding velocity.
Finally, balance ties everything together. With poor balance, you’ll wobble and flail, sapping power from your throw. Focus on even weight distribution during your approach and x-step. Bend your knees and lower your center of gravity. Then as you release, driving up and forward into your front foot will keep you balanced and centered.
Implementing these fundamentals takes practice. Here are 15 tips to help refine your stance, footwork and balance:
- Widen your stance for more stability.
- Stagger your feet with your dominant foot back.
- Maintain even bend in both knees.
- Keep your weight centered between your feet.
- Focus eyes down the fairway, not the ground.
- Lean forward slightly from hips for athletic stance.
- Shift weight slowly back as you reach back.
- Drive weight forward as you pull through.
- Lift front heel as you shift forward.
- Use core muscles to prevent rounding.
- Follow through past your front leg.
- Land with weight centered on front foot.
- Keep knees bent after release for balance.
- Practice stationary drills before adding x-step.
- Film yourself to check form and weight shift.
A proper disc golf stance sets the tone for your throwing success. Feet shoulder width apart and staggered, knees slightly bent – this position keeps your centered and balanced. Next, footwork and weight shift are essential, transferring energy from your lower body into the throw. Finally, balance ties it all together. Practice keeping your weight centered as you reach back, then drive forward off your back foot, landing balanced on your front.
It takes time and repetition to lock in good mechanics. Try filming yourself to evaluate areas needing improvement. Stay positive and keep practicing – with refined fundamentals, you’ll be parking holes in no time. Evaluate your stance, footwork and balance next time you play. Keep working on any shaky areas and watch your consistency and distance improve.
With the right practice routines, you can elevate your disc golf game. But ultimately, remember to have fun out there and keep throwing!
Perfect Your Throwing Technique: X-Step, Reachback and Release

An accurate, powerful disc golf throw requires honing key techniques: the run-up x-step, proper reachback, and clean release. Master these mechanics through focused practice and your throwing game transforms. More control. More distance. Lower scores.
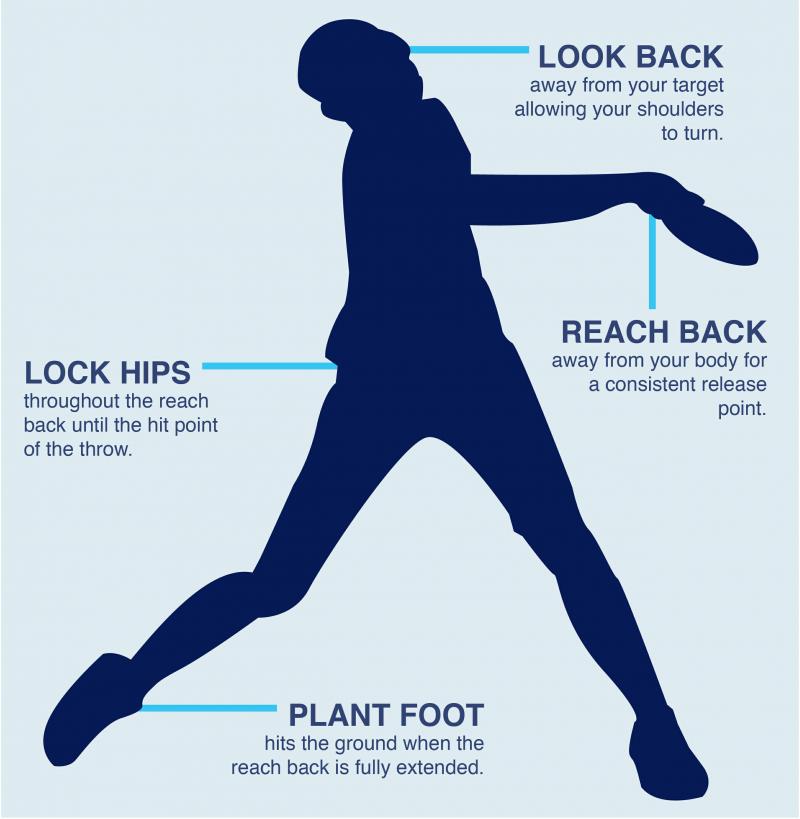
First, let’s break down the x-step. This synchronized stride sets rhythm and builds momentum into your throw. Start staggered, left foot forward for righty backhand throw. Take a small step forward with your right. Then a larger stride with your left as you swivel your hips back. Plant your right foot perpendicular to the target, and let your momentum swing your arm back. The key is timing – smooth accelerating steps that sync with your reachback.
Speaking of reachback, this is where flaws creep in. Reaching back too early or too low causes rounding and robs power. Ideal form: reach straight back, arm at 90 degrees from shoulders, on one plane. Elbow leads higher than wrist, disc flat and close to chest. Shift weight to back foot while reaching back, then power forward driving off your rear leg.
Finally, a clean release. Rip through flat and level, elbow high, hitting the power pocket as hips unwind forward. Let the disc roll off your fingers at a slight hyzer angle. Follow through, brace plant leg, and center weight on front foot. Avoid rounding the shoulder or dipping the wrist – stay on that same flat release plane.
Here are 15 tips to perfect your x-step, reachback and release:
- Start staggered stance, left foot forward (for RHBH).
- Take slow controlled steps to build momentum.
- Accelerate into last step, left foot striding wide.
- Swivel hips back as left leg strides wide.
- Plant final step perpendicular to target line.
- Reach straight back, don’t reach low or early.
- Keep disc flat and close throughout reachback.
- Shift weight to rear leg as you reachback.
- Lead reachback with elbow, wrist lags behind.
- Unwind hips first, then pull through power pocket.
- Release flat and clean on same angle as reachback.
- Let disc roll off last two fingers on release.
- Follow through past front leg after release.
- Transfer weight to plant leg as you release.
- Film yourself and analyze for rounding issues.
It takes practice to engrain optimal throwing technique and timing. Film yourself to check for form flaws. Focus on controlled x-step strides in rhythm with your reachback. Reach straight back, not low or rounded. Unwind hips then pull through the power pocket flat and level. And remember to follow through, bracing your plant leg as you drive weight to your front foot.
Set up a field workout focusing just on dialing these mechanics. Here is a great solo practice routine:
- 5 minutes: Static practice reachback and releases
- 5 minutes: Timing walk-up x-steps with reachback
- 5 minutes: Putting reps
- 5 minutes: Approach shots 50-100 feet
- 5 minutes: Control drivers 150-200 feet
- 5 minutes: Distance drivers 250+ feet
- 5 minutes: Mix of approaches, mid-ranges, drivers
Take video of yourself throwing, both at full run-up speed and stationary. Scrutinize your form on playback. Are you rounding the shoulder? Dipping the wrist? Reaching back too low? Any hitches in the x-step or stride? Refine areas needing tweaking and repeat the next session. With deliberate practice, your technique and timing will become second nature.
Keep your focus on fundamentals – clean x-step, reachback, and release – and the rest will follow. Your throws will fly faster, straighter, and more accurately down the fairway. Distance and control will improve steadily over time. And you’ll watch your scores drop as these mechanics become muscle memory. Stay positive, keep practicing, and have fun developing your disc golf game!
Choose the Right Discs for Your Skill Level
One key to improving your disc golf game is using the right discs for your current skill level. As a beginner, certain disc types will fly better and be more forgiving as you develop. Understanding disc flight ratings helps you choose the ideal packs and sets to progress.
For true beginners, putters and mid-range discs around speed 3-5 are best. Putters like the Innova Aviar or Discraft Roach fly straight and true even when released flat or anhyzer. Mid-ranges like the Innova Mako3 or Discraft Buzzz hold lines well without advanced skill.
Avoid high speed drivers at first. Beginner disc golf sets like the Innova DX 3-disc or Discraft Start Pack feature suitable putters and mid-ranges to learn with. Better to control these slower discs while perfecting your form and release.
As skills improve, add fairway drivers in speed 6-8 ranges. Discs like Innova Leopard or Discraft Stalker offer a bit more distance as you start shaping lines, while still being controllable for newer players. The Innova DX Standard set includes excellent fairway drivers.
Here are 12 tips for choosing the right discs at each skill level:
- Putters only to learn proper release and accuracy.
- Neutral mid-ranges to master clean form and consistency.
- Light weights, 150-165g, are easier to throw for beginners.
- Avoid high speed drivers until you can throw 300ft.
- Learn proper grip, snap, spin before moving up in speed.
- Add neutral fairway drivers around 175g when ready.
- Try understable drivers to compensate for form flaws.
- Choose 9-10 speed control drivers as skills progress.
- Move up to max distance drivers for experienced players.
- Try more overstable discs as accuracy and power increase.
- Mix speeds and stability to shape different lines.
- Choose glow, bright or tie-dye plastic for visibility.
A beginner-friendly set like the Innova DX 3-pack is a smart way to start. It includes:
- Putter – Innova Aviar (straight throwing putter)
- Mid-range – Innova Shark (neutral flyer for beginners)
- Fairway Driver – Innova Leopard (easy to throw driver for starters)
As your skills improve, the Innova DX Standard set adds higher speed fairway and distance drivers:
- Putter – Aviar Putter
- Mid-Range – Shark
- Fairway Driver – Leopard
- Fairway Driver – TeeBird (stable compliment to Leopard)
- Distance Driver – Valkyrie (beginner friendly distance)
Finally, experienced players can step up to high performance sets like the Innova Champion pack. With max speed distance drivers and overstable complimentary discs, these unlock a wider range of lines for precise shaping by advanced throwers.
Don’t get overwhelmed choosing discs as a beginner. Start with putters and mid-ranges to build solid form and consistency. Add fairway drivers once you can shape lines and approaches. Then graduate to high speed distance drivers as your power and accuracy increases. Matching discs to skill level helps you progress smoothly to become a well-rounded disc golfer.
Focus on controlled, flat releases. Pick neutral and understable models while avoiding ultra high speeds at first. Choose lighter weight discs around 150-165g when starting out. Be patient and let your skills develop. With practice, you’ll be ready to unleash those max distance drivers to crush birdies in no time!
Analyze Disc Flight Ratings and Plastic Types
To excel at disc golf, you need to understand how disc flight ratings and plastic types impact performance. Learning the language of speeds, glides, turn and fade will help you choose discs with the optimal flight for different shots.
Speed rating, from 1 to 14, indicates how fast a disc must be thrown to fly properly. Beginners should stick to slower speed discs around 5 or less. Faster discs require more arm speed to stabilize in flight. As your power grows, incrementally move up in speeds.
Glide, rated 1 to 7, is a disc’s tendency to stay aloft and resist dropping. More glide equals more distance when thrown at the proper speed. Make sure to balance glide with accurate speed ratings.
Turn and fade ratings show a disc’s flight shape. Turn, from -5 to 1, tells how much a disc wants to bank right (for RHBH) when thrown hard. Fade, also -5 to 1, indicates finish left at the end of flight. Choose turn and fade combos to match your skills.
Here are 12 tips for selecting discs using flight ratings:
- Speed 1-5 for beginners learning proper throw.
- Mid-range speeds 5-7 once basics are mastered.
- Fairway drivers around speed 8 for controlled distance.
- Max distance drivers 11-14 for experts only.
- Higher glide for newer players to maximize distance.
- stable discs have low turn, moderate fade ratings.
- Understable models have more turn than fade.
- Overstable discs fade harder than they turn.
- Tailwind? Use understable disc to avoid excessive fade.
- Headwind? Choose overstable to resist turning over.
- Hyzer shots = overstable, Anhyzer = understable.
- Learn ratings to shape any line you envision.
Plastic type also impacts disc stability and durability. baseline plastics like DX or Pro-D beat in faster, becoming understable. Premium plastics like Champion or Z hold original stability much longer.
Good starter packs feature discs in baseline plastic so new players can season them to desired flights. The Innova DX Standard set includes:
- DX Aviar Putter – straight, with minimal fade
- DX Shark Mid-range – neutral flight for beginners
- DX Leopard Fairway – understandable driver for new players
- DX TeeBird Fairway – stable flight for controlled lines
- DX Valkyrie Distance – beginner friendly distance driver
As your power and skills progress, try premium plastics for stability even when beaten-in. Champion and Star from Innova, Z and ESP from Discraft – these retain flight characteristics far longer than baseline versions.
Don’t be overwhelmed by flight numbers and plastic types. Start with easy to throw putters, mids and fairways in baseline plastic as you develop. Then incrementally add higher speed drivers in premium blends as your game improves. Learning disc ratings dialects will make choosing the right discs second nature.
Lean on flight ratings to match discs to your current power and technique. Understable models help beginners compensate for form flaws and lack of snap. Analyze wind conditions and shape lines using appropriate stabilities. Mastering disc flight physics helps take your game to the next level. And with the right discs in your bag, you’ll shave strokes and hit more chains in no time!
Practice Throwing Different Angles and Shot Shapes
Disc golf demands creative shot-shaping and angle control to score well. Expand your capabilities by practicing backhand throws on hyzer, flat, and anhyzer angles. Plus, add sidearm and overhand shots to tackle any obstacle.
Hyzer angles have the disc tilting down on the outside edge when released. This produces predictable fade for shots that curve left (RHBH). Stable discs are ideal for hyzer lines to resist turning over.
Flat or straight shots are released level with flat ground. Choose neutral stability discs that fly straight then fade minimally. Your most accurate, controlled throws should be flat releases.
Anhyzer angles have the disc tilting up on the outside edge upon release. This makes the disc bank right initially in flight (RHBH). Understable discs are best for anhyzer lines before fading back left.
Here are 12 tips for practicing various release angles and shapes:
- Hyzer – use overstable discs + tilted outside-down releases.
- Flat – neutral stability, flat even launch.
- Anhyzer – understable models, outside edge up.
- Use angle control on drives, approaches and putts.
- Slight angles for mild shapes, extreme for big bends.
- Hyzer flip – hyzer release with understable disc.
- S-shots – anhyzer to flat to hyzer in flight.
- Sidearm – gripped like backhand, thrown opposite (left to right RHBH).
- Overhead – upside down backhand grip, thrown high.
- Learn upside-down sidearm for extreme anhyzer.
- Use angles to shape around obstacles.
- Master height control – lower flies straighter.
A field is the perfect place to practice different release angles and disc golf shot shapes. Here is a great training routine:
- 10 hyzer angle approaches from 100 feet.
- 10 flat approaches from 100 feet.
- 10 anhyzer angle approaches from 100 feet.
- 10 hyzer drives for distance.
- 10 flat drives for maximum distance.
- 10 anhyzer drives for maximum distance.
- 10 hyzer flips – hyzer to flat.
- 10 S-shots – anhyzer to flat to hyzer.
Mix in some 50-100 foot sidearm and overhand approaches as well. Video your angles and watch playback to analyze consistency. Practice flat releases and hyzer lines first, then work on anhyzer and specialty shots.
Inconsistency comes mostly from poor angle control. If hyzers aren’t fading, you likely released flat. Anhyzers turning and burning means you threw hyzer. Eliminate Off-Axis-Torque and keep your angles tight.
Pick targets that require specific lines, like a tight gap in trees needing a hyzer. Or an anhyzer over bushes with a flat finish. Visualize the exact flight needed, then focus on perfectly executing that angle. On-course practice is invaluable for honing shots.
Angle control is a lifetime skill, always improving as you master nuanced releases. But armed with a range of angles and shot shapes, you can attack any hole or obstacle. Stay creative in your practice and course management. Before long, you’ll have the shot-making skills to save par from anywhere.
Don’t be predictable and one-dimensional. Expand your shots and take your game to the next level. Learning to throw any line you envision is a key disc golf skill. With focused practice, you’ll gain consistency in hyzers, flats, anhyzers, and specialty shape shots. Hit the field and start rounding out your angle control today!
Improve Your Putting Skills
They say drive for show, putt for dough. No truer words in disc golf. Shaving strokes on the green is the fastest way to lower scores. Dial in your putting mechanics and sink more chains with these essential tips.
First, choose a putter that feels right in your hand. Pick a stable, neutral flyer like an Aviar, Magnet or Roach. Get multiples of the same mold for practice consistency. Firm plastic provides clean release, while grippy blends add control.
Next, perfect your stance and grip. Stand perpendicular to the basket, staggered feet shoulder-width. Comfortable athletic position. Hold the disc firm in fingers, not deep in palm. Stack your wrist straight and don’t choke down too tight.
Now refine your putting motion. Start disc at chest level, draw straight back to set aim line. Rock smoothly forward driving elbow up and out. Pop the wrist, release on hyzer just outside the chains. Follow through straight towards basket for spin and accuracy.
Here are 12 tips for improving your circle putting:
- Choose a putter mold that feels right in your hand.
- Use firm plastic for clean release.
- Stack your wrist straight, don’t dip or hinge.
- Draw disc straight back from chest towards belly button.
- Shift weight to back foot on reachback.
- Rock forward, drive elbow up and outside on release.
- Pop your wrist for spin and snap.
- Aim to enter chains at center pole.
- Follow through straight towards the basket.
- Start practice sessions at 5-10 feet distance.
- Gradually work back to circle’s edge at 33 feet.
- Visualize chains rattling before each putt.
Repetition breeds muscle memory. Film yourself putting and scrutinize mechanics on playback. Are you leaning or off-balance? Dippping the wrist? Does follow-through point at chains? Refine any flaws and ingrain proper form through practice.
Set up mini games or competitive drills to keep things fun. Have putting contests with friends. Challenge yourself to hit 10 in a row at increasing distances. Keep track of makes vs. misses stats. Positive reinforcement builds confidence.
On the course, take time to really visualize the putt before stepping up. See the line shape and chains. Trust your practiced motion for consistent execution. Remain focused on the next putt, not previous holes.
Add distance control to your practice routine too. Work on 25-50 foot approach putts and circle edge 33 footers. Lag putt drills build touch for tough par saves. And hitting metal is still success – keep those comebackers close.
Great putters make the game look easy. But skilled putting takes never-ending work. Keep grinding on technique, form and focus. Stay confident over the disc and decisive on the line. Before long, you’ll gain a reputation for always cashing in when circling the basket.
Play in All Weather Conditions

Don’t let weather be an excuse to miss a round! Disc golf can be played year-round if you adopt the right mindset. Learning to adapt to wind, cold, heat, and rain will make you a more versatile player.
First, wind affects discs more than you’d expect. Headwinds slow forward progress, so increase power or use understable plastic to resist turn. Tailwinds speed flight, so opt for overstable discs or less power. Crosswinds push the disc sideways, so adjust your aim.
Next, cold weather reduces plastic flexibility, making discs more overstable. Choose understable models to compensate. It also impacts grip and hand warm-up. Keep multiple discs in your jacket to swap out when one gets too cold. Take time to loosen muscles before full power throws.
Heat and humidity make lightweight discs floppy and understable. Use higher weights for stability. Lighter models also get beat-in quicker in summer heat. Hydrate constantly and seek shade when possible to manage fatigue.
For rainy rounds, towels and umbrella help dry grips and plastic. Consider grip aids like birdie bags for added traction. Water-resistant shoes with good traction prevent slips. Bring extra clothes and socks to manage wetness and chilling.
Here are 12 tips for disking in any weather:
- Headwinds? More stable plastic and added power.
- Tailwinds? Understable plastic and less power.
- Crosswinds? Adjust aim to compensate push.
- Cold temps? Choose flexible understable plastic.
- Warm several discs in your jacket for cold grip.
- Loosen muscles thoroughly before full power.
- Heat/humidity? Opt for max weight drivers.
- Lightweights get too flippy in summer heat.
- Stay hydrated and seek shade in hot weather play.
- Towels and umbrellas help manage wet grips.
- Quality grip aids and shoes prevent slips.
- Bring spare clothes/socks to manage wetness.
Practice in the conditions you play in. Windy day? Work on stability control and aim adjustments. Cold out? Loosen up carefully and get hands warm before full power. Extreme heat? Hydrate and take more breaks. Wet and rainy? Get used to throwing slick plastic.
Mentally embrace whatever elements you face. Don’t complain or make excuses. Channel your inner warrior mindset – storming the course under extreme conditions! Disc golf is a year-round sport if you adopt the right attitude.
Analyze weather forecasts and pack appropriate gear. Be prepared to tweak your disc choices and shot strategies. Remain focused on executing each throw, disregarding conditions. And remember the reward of battling challenges – those hard-fought birdies taste even sweeter!
Don’t shy away when the weather looks menacing. Equip yourself for the conditions and get out there! Adapting your game to wind, cold, heat and rain will make you a better player. Embrace the challenge of discing in any weather. The rewards of year-round play are worth it!
Videotape Your Form and Critique It
One of the best ways to improve your disc golf game is to videotape yourself throwing and then critically analyze your form. Seeing yourself throw from an objective, third-person perspective allows you to spot flaws in your throwing motion, grip, balance, or follow-through that you likely can’t detect just by feel alone. You can record video of yourself at the practice basket or even film your drives during a round. Pay attention to elements like reachback, weight shift, release angle, snap, and follow-through. Compare your footage to pro players with smooth, powerful throws. Critiquing your own video makes it easier to zero in on areas needing improvement.
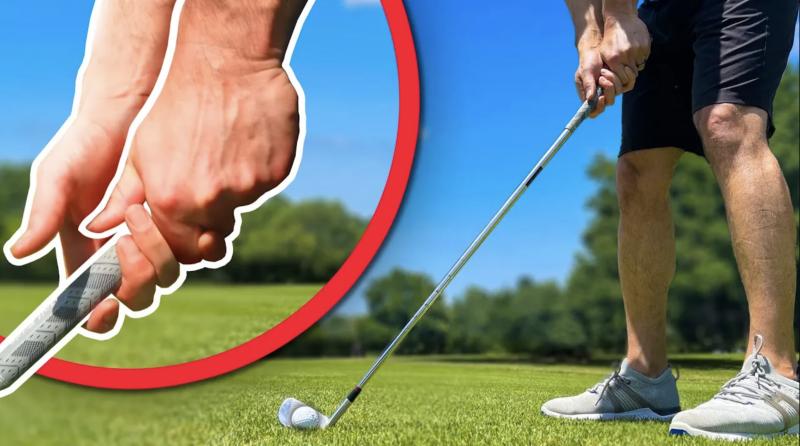
Focus on Your Grip
Having a proper, consistent grip is crucial for accurate, reliable throws. Experiment with different grips like the power grip (fingers curled under the rim) versus the fan grip (fingers spread across the top). For beginners, a neutral, control-focused grip works best. As you advance, try tweaking your grip pressure, position, and angle of attack for different flight shapes. Avoid “death gripping” the disc too tightly – this leads to strained muscles and errant shots. Relax your grip just enough to allow a clean release. Grip too loosely and the disc can slide out early. Find your “Goldilocks” grip that’s just right for comfort, control, and power.
Improve Your Balance
Sound balance and weight transfer during your throw prevents wasted motion and off-axis torque. As you reach back, shift your weight onto your rear leg, loading power into your hips. Then, drive off your rear foot, rotating your hips open while transferring weight to your front leg for a balanced, powerful swing. Bend your knees and keep your center of gravity low for optimal balance throughout your throw. Avoid imbalance issues like “hugging yourself” on the reachback, improper weight shift, or stumbling after release. Ideally, your body should move in one fluid motion on a single axis aligned to your target.
Slow Down Your Run-Up
Rushing your run-up disrupts timing and saps power from your shot. Slow down and focus on smooth, controlled acceleration into the hit point. Start with a slow walk-up, then gradually build speed while maintaining balance and loose muscles. Time your last steps so your front foot plants just as you enter the power pocket. Let your momentum carry you through the throw – don’t muscle the disc. Gradually work up to faster run-ups as your timing improves. Film your run-up to check for proper weight transfer, footwork, and timing.
Loosen Your Arm and Shoulder

Tensing arm and shoulder muscles during your throw costs power and accuracy. Keep your grip arm loose throughout the motion by “cracking the whip” at your wrist on release. Let your upper arm rotate freely in the shoulder socket. Don’t muscle the disc with your arm – let your hips, core, and legs generate speed. Relax muscles not actively involved in the throw. Proper form puts less strain on your joints. Normal soreness after a round is fine, but intense pain indicates poor mechanics.
Lean Back on Reachback
Leaning backward loads power into your core and shoulders for extra snap on release. Shift your weight onto your rear leg on reachback while keeping your spine upright. Tilt from the hips and shoulders – not just bending at the waist. Time the backward lean so you’re centered again as you plant your front foot. Don’t overdo the backward lean and round your shoulders – this causes off-axis torque. Find your optimal reachback lean angle for max power while staying balanced. You can also load power by dropping your rear knee on reachback.
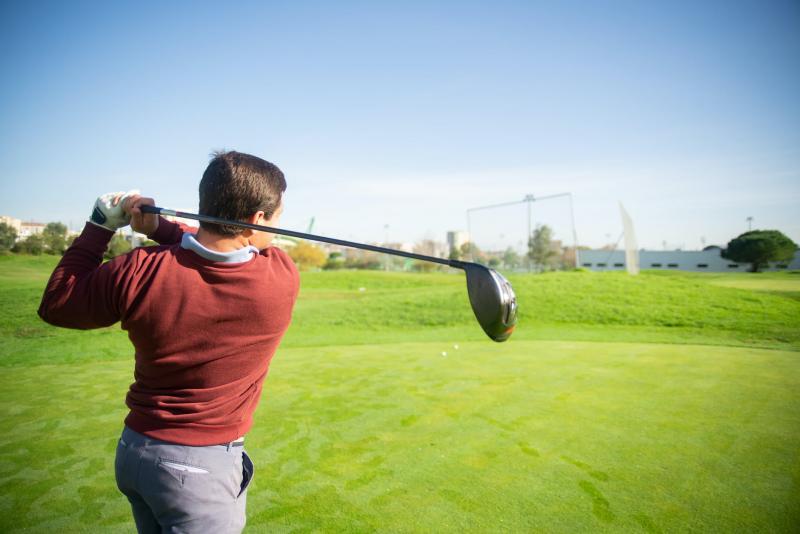
Follow Through Toward Your Target
A full, committed follow-through improves control, consistency, and power transfer. After release, keep your swing arm extended toward the target with your palm rotated up and out. Let your throwing shoulder rotate fully through the motion. Follow-through too short may indicate grip or timing issues. Follow-through too long risks injury and saps power. Follow-through direction not in line with your target often causes accuracy problems. Ideally, your swing arm, hips, and torso rotate in sequence, aligned to your intended flight path.
Use Your Legs and Hips
Power generated solely from your arm results in weak, inconsistent shots. Engage your legs to initiate momentum on the reachback. Then explode from your rear leg as you plant your front foot, launching torque from your hips. Timing this hip rotation just before release adds huge power. Keep your head still and spine straight throughout the motion – don’t dip or lean. Bend knees and ankles to allow free hip rotation. Record your throw to check for proper leg and hip involvement for maximum speed and snap.
Loosen Up First
Launching into full-power drives without warming up raises injury risk and hurts consistency. Take some easy, low-speed practice throws to get loose. Gently stretch your shoulders, back, hips, legs and wrists before teeing off. Doing light aerobic activity like jogging in place can also raise your heart rate and warm up muscles. Proper warm-ups prepare your body for the explosive forces involved in disc golf. Stay hydrated and avoid overexertion in hot weather. Listen to your body and take a break if you feel pain.
Keep Your Eyes on Your Target
Watching your disc fly instead of looking toward your target contributes to off-axis throws. Pick a landing zone and keep your eyes locked there throughout your drive, even during reachback. This keeps your body aligned to the target. Peripheral vision lets you still see the release. Don’t follow the disc with your head – make your body follow your gaze. This engrains muscle memory for accurate releases every time. Have someone else watch your disc’s flight path and report back on any adjustments needed.
Increase Your Stamina
Disc golf involves frequent bursts of high-exertion activity. Building endurance lets you maintain proper form and power throughout an entire round. Do cardio like running, biking, or swimming to raise your stamina. Strength training also helps delay fatigue. Play longer courses focusing on control over max-distance shots. Stay hydrated and consume carbs/protein during long rounds. Know your limits and rest if needed. Consistently elevated heart rate, dizziness, or pain indicates overexertion.
Practice From a Standstill
Mastering the mechanics of a powerful throw from a standstill makes executing while moving easier. Start with your side facing the target, weight on your back foot. Reach back, shift forward, and rotate your hips and shoulders together through release. Follow-through toward your target. Gradually increase power while maintaining smooth form. Only progress to x-step or full run-up once your standstill release is clean and consistent. Return to standstill practice anytime you need to refine your throwing motion.
Record Yourself in Slow Motion
Ultra-slow motion video lets you see details invisible to the naked eye. Use your smartphone’s slo-mo or high-frame rate mode (or rent/borrow a specialty camera) to record yourself driving at 120fps or higher. Be sure to have adequate lighting. Scrutinize the footage frame-by-frame looking for any minor form flaws or muscle engagement timing issues. Seeing your throw slowed down makes it easier to detect and correct subtle mistakes. Compare to pro slow motion footage to mimic proper technique.
Strengthen Your Core
A strong, engaged core transfers power from your lower body to your throwing arm. Do planks, crunches, and medicine ball rotations to build core muscles. On the course, concentrate on keeping your core tight throughout your entire throw, not just at release. Don’t round your lower back – stay centered over your hips. Weak core engagement can cause off-axis torque, nose-up release, or reduced snap. Record your throw to check for proper core bracing. Yoga also improves core strength and body awareness.
With dedicated practice using these tips, you can gain consistency, power, and control to take your disc golf game to the next level. Videotaping yourself provides invaluable objective feedback for refining technique. Patience and perseverance will pay off with better scores and more enjoyment on the course. Enlist coaching help or play with advanced players to accelerate your improvement. With the right mindset and effort, your dream drives will soon become reality.
Play at Different Courses
Want to quickly improve your disc golf skills and shot repertoire? Play rounds at a variety of different courses. Each course has unique challenges and layouts that require you to expand your capabilities. Tight, wooded courses demand accurate tunnel shots and precise disc control. Hilly courses require flexibility in shot shaping, disc selection, and positioning. Open, windy courses test your ability to adapt for variable wind conditions. Playing new courses gives you experience navigating different obstacles and sharpening specialty throws.
Practice Putting Daily
Consistent, confident putting is crucial for lower scores. Dedicate time each day to practice putts from circling in range and beyond. Start close, then work back as you dial in your form and accuracy. Focus on smooth, straight putter release directly at the chains. Develop touch and control to handle headwinds, tailwinds, uphill and downhill putts. Vary stance width, grip pressure and angle of attack. Gauge results and make adjustments. End each session by hitting multiple long putts to build confidence. Frequent putting practice ingrains muscle memory for clutch putts when on the course.
Throw Different Disc Types
Having shot-shaping versatility across speed and stability types lets you handle any scenario. Test-throw understable, overstable and neutral drivers, midranges and putters in fields to learn their tendencies. See how small form tweaks alter flight shapes. Expand your go-to discs across brands and plastics. Blend and cycle discs as they break in. Learning the characteristics of a wider range of disc types gives you more options and unpredictability during competitive rounds.
Practice Sidearm Throws
A sidearm (forehand) throw opens up shots a backhand can’t manage, like low-ceiling tunnels, anhyzer lines and tight doglegs. Start sidearm practice with neutral, understable midranges. Power grip with index finger along disc rim for clean release. Keep disc tilted slightly downward at release, snapping flat across body. Follow-through straight toward target, concentrating on clean exit point. Don’t roll wrist or allow wobble. Once comfortable, move up to fairway drivers. Sidearm mastery means fewer tricky situations where you have no play.
Play in All Weather Conditions
If you only play in nice weather, you’ll struggle in rain, wind, or cold. Play rounds in all seasons to gain experience with wet discs, slick teepads, leaf clutter, and winter layers restricting motion. Learn how your discs fly in strong headwinds and tailwinds. Gauge footing on muddy, snowy or frosty ground. Adapting your run-up, grip, disc selection, and follow-through for conditions prevents weather from ruining your game. If possible, choose plastics, clothing and footwear optimized for your climate.
Practice On Target
Aimlessly hucking drives during solo practice ingrains bad habits. Set up markers, cones, baskets or targets at specific distances and angles. Take focused runs at hitting precise lines, not just distance. Check your angles with a rangefinder. Shift position and footwork until you dial in accuracy. Mimic course scenarios like tricky approaches, technical tunnels, spike hyzers and big anhyzers. Shaping lines accurately under pressure on the course becomes second nature through mindful target practice.
Play with Better Players
Playing rounds with more advanced players hastens your own improvement. Watch and learn from their refined form, disc selection and course management. Ask for feedback on your game. Match their tight drives and confident putting. Adopt their mental tenacity and competitiveness. Being challenged elevates your focus, precision and consistency. Set up your own mini-tournament using handicaps or alternate shot with a top player as your partner to maximize growth potential.
Learn Proper Throwing Form
Sloppy throwing form prevents consistency and saps distance. Study pro technique on YouTube and in person. Mimic their upright posture, clean footwork, smooth acceleration, full reachback and committed follow-through. Your entire body should move in unified sequence, aligned to your line. Keep your head still, grip loose and muscles relaxed until release. Start slow while perfecting each step, then work up to full run-up. Refine form through fieldwork drills and video analysis. Proper mechanics multiply both control and power.
Play Competitive Rounds

Practice alone hones technique, but pressure-tested tournament experience elevates your mental game. Sign up for local leagues and events in your division. Arrive prepared, focused and determined. Apply your skills under pressure, learning from mistakes and successes. Keep composure and don’t dwell on bad shots. Adopt the consistent pre-shot routines of pros. Complete post-round analysis of your performance. Over time, experience in competitive environments will strengthen nerves and concentration to unlock your best ability when it matters most.
Analyze the Courses You Struggle On
Certain course layouts just give you fits for no clear reason. Revisit and analyze these nemesis courses to identify specific causes of struggle. Tour the holes and note mandatory flight shapes, landing zones, situational variables and obstacles requiring specialty shots in your weak areas. Develop and practice targeted shots at home until these vulnerabilities become strengths. You can also scout courses before playing using Google Earth flyover 3D previews. Understanding exactly why you’ve historically struggled at certain courses is key to conquering them.
Work On Distance Control

Spraying drives long or short of targets costs strokes. Practice dialing in consistent distance control from 50 feet out to 400+ feet. Start close until you can land drives on a dime, then work backward. Focus on clean grip, smooth acceleration, braced follow-through and flat release at your ideal power level. For approaches, develop touch by landing short drives next to baskets. Use understable discs at lower power for finesse shots. Refine distance judgment and mid-air adjustment on windy days. Precision distance capability leads to more birdie looks.
Analyze Shot Selection
Smart shot selection separates the pros. Analyze past rounds to see if different disc and shot choices would have lowered scores. Consider alternate routes, stances, landing zones and risk management for tricky holes. Adopt a thoughtful gameplan based on your current capabilities – don’t just grip it and rip it. Spend less time in thickets and more time in the fairway by making informed shot decisions during practice and tournaments.
Practice Putting Uphill and Downhill
Elevation changes on the greens require aim and power adjustments to sink putts. Seek out practice hills to dial in uphill and downhill putting. Putt from below the basket, visualizing how elevation impacts flight plate and entry angle. For downhill putts, maintain a flat release to prevent diving nose-down. Uphill, putt with higher trajectory and pace to compensate. Dialing in elevated putts in practice translates to more consistent makes when terrain gets tricky during rounds.
Implementing these targeted drills and varied practice techniques will expand your skills, mental composure and course management ability. Seeking challenges and focused improvement outside your comfort zone will drive growth you can rely on during tournaments. Stay patient through plateaus by refining form until skills become second nature. With smart, structured practice, your potential is unlimited!
Join a League or Club
Playing disc golf with a consistent group through a league or club accelerates skills through competition, coaching, and camaraderie. Leagues provide organized events, standings, and prizes while cultivating local talent. Clubs offer communal practice, strategy talks, travel, and opportunities to build your network. Both options connect you with players above your current level. Surrounding yourself with passionate, skilled teammates compels you to step up your game through osmosis.
Practice Shaping Lines

Consistently hitting angles, not just distance, makes you a complete thrower. Work on carving hyzer, anhyzer, flex, and turnover lines on the practice field. Start with neutral midranges, then expand your shot-shaping ability into drivers as form improves. Utilize wrist roll, grip, and disc tilt to manipulate release angle. Adjust footing, hip engagement and follow-through to steer lines. Mimic course scenarios like technical tunnels, spike hyzers and flex shots. Fieldwork mastery translates to pinpoint placement during competitive rounds.
Learn Disc Flight Physics
Understanding how spin, speed, glide and stability interact improves disc selection and shot precision. Overstable discs resist turning right, while understable discs turn easily right. High-speed turn masks true stability. Glide helps discs fly truer when thrown smoothly. Headwinds and tailwinds impact stability. Learning disc physics lets you predict flights and expand your toolkit to handle any obstacle.
Practice Scramble Shots
Scrambling saves strokes when drives miss lines. Work on around-objects finesse shots, floaty lob approaches, creative sidearms and specialty grip putts. Toss random objects onto the practice field and creative shots to navigate them. Learn unconventional stances for tricky lies in rough and tight spaces. Develop touch and control for low-ceiling shots. Escaping ugly situations well keeps rounds alive.
Play With Better Players
Playing rounds with more advanced players hastens your own improvement. Watch and learn from their refined form, disc selection and course management. Ask for feedback on your game. Match their tight drives and confident putting. Adopt their mental tenacity and competitiveness. Being challenged elevates your focus, precision and consistency. Set up your own mini-tournament using handicaps or alternate shot with a top player as your partner to maximize growth potential.
Observe Elite Players
Studying professionals in person helps model proper form and competitive mindset. Attend pro tour events and observe their routines, mechanics, and composure under pressure. Notice how they navigate courses, overcome mistakes, and execute specialty shots. Talk to players afterwards for tips. Bring a notebook to capture key lessons. If you can’t attend live events, study footage on YouTube. Isolate techniques and tactics used by elite players that you can incorporate into your own game.
Keep Detailed Statistics
Analytics uncover strengths, weaknesses and tendencies in your game. Track stats like fairways hit, Circle 1 and Circle 2 putting percentage, scrambling rate, strokes gained versus par and C1 strokes per hole. Use UDisc or a scorecard. Review averages and trends over time. Set data-focused goals like improving C1X putting by 2%. Detailed statistics help diagnose issues so you know exactly what to practice.
Play Slow, Control-Focused Rounds
Blasting drives without care leads to sloppy play. Play casual rounds focused on finesse, placement and control instead of all-out distance. Make careful shot selections based on field position, not ego. Focus your mind and body on smooth, balanced throwing motion aligned to targets. Don’t rush – execute each throw with purpose. Remove score from the equation and just work on precision. Control-focused rounds ingrain good habits to harness power efficiently.
Study Your Lie
Rushing shots leads to mistakes. After each drive, study your lie and consider shot options. Evaluate obstacles, available lines, footing, ground slope and other factors that influence selection. Take your time and determine the highest percentage play – not the most aggressive. A cautious lay-up in tricky spots often saves strokes versus a risky power shot. Smart shot study provides clarity for confident, consistent execution.
Learn From Missed Shots
Missing lines and boggies provide valuable lessons if analyzed effectively. Recreate missed shots at the practice basket to diagnose causes – grip, form, footing, disc choice, etc. Determine why your intended line was not executed. Isolate flaws and make focused corrections through fieldwork drills. Importantly, also identify positives from missed shots that went well. Learn as much or more from mistakes and bad shots as from successes.
Play With Better Players
Playing rounds with more advanced players hastens your own improvement. Watch and learn from their refined form, disc selection and course management. Ask for feedback on your game. Match their tight drives and confident putting. Adopt their mental tenacity and competitiveness. Being challenged elevates your focus, precision and consistency. Set up your own mini-tournament using handicaps or alternate shot with a top player as your partner to maximize growth potential.
Practice Hip Engagement
Proper hip mechanics during reachback and uncoiling creates power. Isolate hip action during fieldwork practice. Load into rear hip on reachback then explosively rotate open through release, transferring energy up the kinetic chain. Keep head centered over hips throughout motion – no leaning or rounding. Record video from rear view to ensure clean hip movement. Practice hip drills like Medicine Ball Figure 8’s. Smooth acceleration into braced front hip amplified snap and boosts distance.
Implementing structured practice across skills, analysis, competition and coaching accelerates your improvement timeline. Regularly trying new techniques, drills and mental approaches circumvents plateaus. Film all practice for later review. Embrace failure as a teacher. With focused, purposeful effort, your potential is limitless. Let the journey to peak performance motivate you for a lifetime.
Enter Local Tournaments

Competing in local disc golf events is a trial-by-fire way to quickly improve skills and mental composure. Check tournament listings online, at your local shop, or with the PDGA. Find beginner-friendly events in your area. Sign up for a division matching your ability level – don’t overreach. Arrive prepared, focused and determined to implement your practice. Embrace the nerves and pressure during each throw. Stick to your routine and make committed attacks on lines. Learn from mistakes and build confidence with successes. Keep composure despite bad breaks. The experience gained competing under pressure is invaluable.
Work onConsistency
Erratic shots waste strokes. Strive for reliable repetition in your form, release, and follow-through on all throws during practice. Start with simple standstill shots focusing on smooth acceleration, proper grip and flat release. Increase difficulty gradually as consistency improves. Use the same pre-shot routine before each drive – this builds motor memory. Record yourself to identify flaws causing inconsistency. Consistent execution minimizes costly mistakes on the course.
Practice Forehand Throws
A sidearm (forehand) throw opens up shots a backhand can’t manage, like low-ceiling tunnels, anhyzer lines and tight doglegs. Start sidearm practice with neutral, understable midranges. Power grip with index finger along disc rim for clean release. Keep disc tilted slightly downward at release, snapping flat across body. Follow-through straight toward target, concentrating on clean exit point. Don’t roll wrist or allow wobble. Once comfortable, move up to fairway drivers. Sidearm mastery means fewer tricky situations where you have no play.
Analyze Your Play
Identifying strengths and weaknesses through self-analysis provides focus areas for practice. Review scorecards after rounds to detect patterns. Are you losing strokes off the tee or on approaches? Struggling with long putts or short putts? Crunching statistics like fairway hits, scrambling rate and putts per hole offers insights. Analyze video of drives to diagnose form issues. Dissecting your overall game helps set data-driven improvement goals with purposeful practice.
Practice Backhand Rollers
Backhand rollers are ideal for threading narrow gaps, extending past doglegs, and achieving desired ground play. Release an understable driver flat and low on an anhyzer angle. Let it flip over and roll right along the ground rather than flying. Aim left of targets. Power and OAT determine roll distance. Minimize wobble at release. Experiment with angle of attack and disc types during fieldwork. Nailing rollers converts otherwise impossible lines into high percentage plays.
Watch Instructional Videos
Study professional instructional content to ingrain proper form. Pause, rewind and replay video lessons until each step clicks. Mimic demonstrated techniques like grip, stance, x-step, reachback, brace, release and follow-through. Compare side-by-side with your own footage to spot differences. Take notes and film yourself for review after practice. Consume tips from leading coaches like Heavy Discs, Seabas22 and LoopGhost to build a strong throwing foundation.
Play Different Tee Pad Positions
Don’t just play your typical tee box every round. Move up, down, left or right to force new angles and shot shapes. Approaches look different from alternate pads. You gain confidence in shots outside your comfort zone. Changing tee positions keeps courses fresh and challenging. Professionals use this strategy to stay adaptable. Bring a mini to mark new pads if needed. Variety in routine expands skills and problem-solving.
Practice Putting Zen
“Putting Zen” instills confidence through repetition and mindset. Visualize the chains grabbing every putt before you throw. Focus only on your breath, form, and the basket – block out all distractions. Sink 100 putts in a row from 10-15 feet, then move back farther. Strive for a meditative state of relaxed focus. Detach from outcomes. Just execute the same smooth stroke. Zen states anchor in success and consistency. Missing becomes rare.
Learn discs uses and flights
Knowing the designed purpose and flight tendencies of each disc type improves selection for any scenario. Putters promote control, midranges offer reliability, fairway drivers add distance, and distance drivers deliver maximum speed. Understable discs compensate for flaws while overstable discs resist turning over. Disc down in windy conditions. Learn your discs’ personalities through field practice – how they fly new versus seasoned. Increased disc awareness provides shot-shaping versatility.
Practice Anhyzer Angles
Shaping anhyzers around obstacles opens otherwise unavailable routes to baskets. Release understable discs at hyzer angles to fly left then gently fade right. Step left during release to aim body along line. Power controls distance; angle controls height. Slight anhyzers finesse short drives to landing zones. Steeper anhyzers become flex shots. Anhyzers must be in your arsenal to handle any course.
Pushing your limits in tournaments while applying focused practice builds robust skills and mental composure. Embrace failures, mimic winners, and track measurable progress. Absorb lessons from every shot, good or bad. With a growth mindset and determination, your potential has no bounds.
Follow the Rules – Learn Disc Golf Etiquette
Disc golf is a fantastic sport that combines the thrill of golf with the fun of throwing frisbees. As the sport grows in popularity, more and more courses are popping up across the country. With this growth, it’s important for all disc golfers to follow proper etiquette and rules to ensure everyone has an enjoyable round.
Here are some key disc golf etiquette tips to keep in mind:
- Allow faster groups to play through. If a group catches up to you and is moving faster, let them pass your group.
- Keep noise levels down. Don’t shout or play loud music during a round as it can disrupt other players.
- Give others space when throwing. Make sure the fairway is clear in front and behind you before teeing off.
- Leave no trace. Take all trash with you, fix divots, and don’t alter the course.
- Watch out for pedestrians. Yield to walkers, hikers, and others using park space.
- Practice pace of play. Keep things moving to avoid bogging down the course.
- Allow honors on the tee box. Let the player with the best previous shot throw first.
- Mind your disc. Keep track of throws to avoid hitting other players or park users.
In addition to etiquette, following the official rules of disc golf is key. Here are some of the most important rules to keep in mind:
- Tee off from designated tee areas. Don’t throw from beyond markers.
- Mark your lie with a mini disc. This is your throwing zone.
- Complete each hole in proper order. Don’t skip ahead.
- Only throw from directly behind your marked lie.
- Avoid out-of-bounds areas or take penalty throws.
- Finish by entering the basket from above.
By following disc golf etiquette guidelines and rules, all players can have an enjoyable round. Practicing courtesy, keeping pace, and playing safely will ensure the course is welcoming for everyone from beginners to seasoned players. The sport’s continued growth depends on each player doing their part to care for courses and respect other players. So do your part and follow proper disc golf etiquette!
Looking to Improve Your Disc Golf Game? Try These 15 Essential Tips

Disc golf has exploded in popularity in recent years, with courses popping up in parks across the country. If you’re just getting into disc golf or have been playing for a while and are looking to improve your game, following these essential tips can help take your disc golf skills to the next level:
- Learn proper throwing form. From the grip, stance, x-step to the reach back and follow through, proper mechanics are key for accuracy and distance.
- Start slow and work on control. When starting out, throw putters and mid-range discs at lower speeds to develop consistency.
- Use understable discs at first. Their tendency to turn right (for righties) makes them great for beginners.
- Practice hitting lines, not just distance. Aim for specific gaps between trees and shapes vs. hucking for max distance.
- Play shorter tee pads when possible. This allows you to focus on finesse, not just power.
- Learn disc flight patterns. The four main phases of flight (high speed turn, fade, low speed turn, fade) impact every throw.
- Use the wind. Headwinds slow discs, tailwinds add distance. Crosswinds make discs drift.
- Throw putters often. Improving touch and accuracy within 30 feet leads to lower scores.
- Analyze terrain and plan routes. Consider how the shape of holes and features impact disc path.
- Improve upshots. Be able to throw soft, accurate approaches from 100 feet in.
- Practice scramble shots. Unpredictable lies require creativity – practice early and often.
- Play with better players when possible. This pushes you to elevate your game.
- Film your throws. Seeing video of your form helps ingrain proper mechanics.
- Have fun! Disc golf is meant to be enjoyed. Don’t worry about scores early on.
- Keep trying new discs. The more molds you try, the more you’ll learn what works for your game.
The great thing about disc golf is you can quickly see improvements if you practice the right things. Focus on fundamentals like clean form, finesse shots, and smart course management first. Develop touch and accuracy inside 100 feet. Analyze holes and navigate terrain wisely. Learn disc flights and wind interaction. Improve driving for distance slowly over time. Implement these essential tips during practice rounds or field work and you’ll be amazed at how rapidly your disc golf skills progress. Just remember to have fun, as that is what disc golf is ultimately all about!
Invest in Good Equipment – Discs, Bag, Shoes etc.

Having the right disc golf equipment can make a huge difference in improving your game. Investing in quality discs, a solid bag, and appropriate footwear ensures you have the gear to perform at your best on the course. Here are some key equipment tips for taking your disc golf play to the next level:
Discs:
- Buy discs suited for beginners at first, like understable drivers and fairway drivers to learn proper form.
- Try out discs in baseline plastics first, as they beat in quicker to match beginner arms.
- Pick discs in different plastics and weights to see what feels best in your hand.
- Start with putters and midranges, expanding to fairway drivers and distance drivers as skills progress.
- Have multiples of go-to discs in case of water hazards, tree kicks, or lost discs.
- Mix up disc stability, with understable and overstable discs providing shot variety.
Bags:
- Choose a beginner bag or starter set that can hold 6-12 discs to start.
- Upgrade to a backpack-style bag as your disc collection grows.
- Look for bags with plenty of storage for items beyond discs – towels, water, snacks.
- Select bags with rugged material and reinforcements in high-wear areas.
- Consider choices like waterproof fabric, expandable sides, and padded straps for comfort.
- Choose a bag with strong zippers, Velcro closures, and inner dividers to protect discs.
Shoes:
- Opt for athletic shoes with solid traction to prevent slipping on teepads and in grass.
- High tops provide ankle support for uneven terrain found on many courses.
- Look for lightweight shoes that won’t fatigue your feet during long rounds.
- Water resistant shoes keep feet dry if landing in morning dew or after rain.
- Choose flexible soles allowing pivot on the teebox for proper weight shift.
- Replace cleats or lugs as they wear down for consistent traction throw after throw.
Owning quality equipment tailored to your skill level allows you to gain consistency and confidence on the course. Investing in the right discs, bag, and shoes prevents gear from holding your game back. Don’t try using worn-out equipment that forces you to fight the course. Upgrade your disc golf gear regularly as your skills evolve, and you’ll notice steady improvement over time.
Looking to Improve Your Disc Golf Game? Try These 15 Essential Tips
Disc golf has exploded in popularity in recent years, with courses popping up in parks across the country. If you’re just getting into disc golf or have been playing for a while and are looking to improve your game, following these essential tips can help take your disc golf skills to the next level:
- Learn proper throwing form. From the grip, stance, x-step to the reach back and follow through, proper mechanics are key for accuracy and distance.
- Start slow and work on control. When starting out, throw putters and mid-range discs at lower speeds to develop consistency.
- Use understable discs at first. Their tendency to turn right (for righties) makes them great for beginners.
- Practice hitting lines, not just distance. Aim for specific gaps between trees and shapes vs. hucking for max distance.
- Play shorter tee pads when possible. This allows you to focus on finesse, not just power.
- Learn disc flight patterns. The four main phases of flight (high speed turn, fade, low speed turn, fade) impact every throw.
- Use the wind. Headwinds slow discs, tailwinds add distance. Crosswinds make discs drift.
- Throw putters often. Improving touch and accuracy within 30 feet leads to lower scores.
- Analyze terrain and plan routes. Consider how the shape of holes and features impact disc path.
- Improve upshots. Be able to throw soft, accurate approaches from 100 feet in.
- Practice scramble shots. Unpredictable lies require creativity – practice early and often.
- Play with better players when possible. This pushes you to elevate your game.
- Film your throws. Seeing video of your form helps ingrain proper mechanics.
- Have fun! Disc golf is meant to be enjoyed. Don’t worry about scores early on.
- Keep trying new discs. The more molds you try, the more you’ll learn what works for your game.
The great thing about disc golf is you can quickly see improvements if you practice the right things. Focus on fundamentals like clean form, finesse shots, and smart course management first. Develop touch and accuracy inside 100 feet. Analyze holes and navigate terrain wisely. Learn disc flights and wind interaction. Improve driving for distance slowly over time. Implement these essential tips during practice rounds or field work and you’ll be amazed at how rapidly your disc golf skills progress. Just remember to have fun, as that is what disc golf is ultimately all about!
Watch Instructional Videos, Read Books and Learn from Experienced Players

One of the best ways to rapidly improve your disc golf skills is to utilize the wealth of instructional resources available today. Watching videos, reading books, and learning from more experienced players provides invaluable knowledge to elevate your game. Here are some top recommendations for disc golf learning resources:
Instructional Videos:
- Search YouTube for pro clinic videos to learn proper form and technique.
- Watch compilation videos of top pros throwing in slow motion to analyze movements.
- Find step-by-step video tutorials breaking down x-step, reach back, grip, and more.
- Look for course vlogs by local players to learn the lines and shots for your home course.
- Subscribe to pro players’ channels for insights into mental game, practice routines, etc.
- View videos on disc flight physics to better understand turn, fade, glide and stability.
Books:
- Read books by top pros detailing their tips, tricks, and journey in disc golf.
- Look for books with pictures and illustrations of proper form for reference.
- Find books on disc golf rules, etiquette, and course management strategy.
- Search for guides detailing discs for beginners, plastics, and stability profiles.
- Consider eBooks for convenience and ability to read on phones and tablets.
- Check reviews and ratings to find the most useful and informative books for your skill level.
Experienced Players:
- Ask better players you meet on the course for quick tips and feedback on your game.
- Join a local disc golf club to find mentors and new playing partners to learn from.
- Schedule one-on-one lessons from an experienced player or certified coach.
- Attend clinics put on by local pro players to learn in a group setting.
- Have an experienced player film your drives and approaches to review mechanics and form.
- Join disc golf Facebook groups to ask the community questions and get real-time feedback.
The combination of visual learning from videos, detailed instruction from books, and first-hand guidance from experienced players provides a well-rounded disc golf education. Devote time each week to consuming disc golf instructional content as you would for an academic class or job training. Your game will develop much faster tapping into the vast knowledge that’s available through these invaluable resources.
Looking to Improve Your Disc Golf Game? Try These 15 Essential Tips
Disc golf has exploded in popularity in recent years, with courses popping up in parks across the country. If you’re just getting into disc golf or have been playing for a while and are looking to improve your game, following these essential tips can help take your disc golf skills to the next level:
- Learn proper throwing form. From the grip, stance, x-step to the reach back and follow through, proper mechanics are key for accuracy and distance.
- Start slow and work on control. When starting out, throw putters and mid-range discs at lower speeds to develop consistency.
- Use understable discs at first. Their tendency to turn right (for righties) makes them great for beginners.
- Practice hitting lines, not just distance. Aim for specific gaps between trees and shapes vs. hucking for max distance.
- Play shorter tee pads when possible. This allows you to focus on finesse, not just power.
- Learn disc flight patterns. The four main phases of flight (high speed turn, fade, low speed turn, fade) impact every throw.
- Use the wind. Headwinds slow discs, tailwinds add distance. Crosswinds make discs drift.
- Throw putters often. Improving touch and accuracy within 30 feet leads to lower scores.
- Analyze terrain and plan routes. Consider how the shape of holes and features impact disc path.
- Improve upshots. Be able to throw soft, accurate approaches from 100 feet in.
- Practice scramble shots. Unpredictable lies require creativity – practice early and often.
- Play with better players when possible. This pushes you to elevate your game.
- Film your throws. Seeing video of your form helps ingrain proper mechanics.
- Have fun! Disc golf is meant to be enjoyed. Don’t worry about scores early on.
- Keep trying new discs. The more molds you try, the more you’ll learn what works for your game.
The great thing about disc golf is you can quickly see improvements if you practice the right things. Focus on fundamentals like clean form, finesse shots, and smart course management first. Develop touch and accuracy inside 100 feet. Analyze holes and navigate terrain wisely. Learn disc flights and wind interaction. Improve driving for distance slowly over time. Implement these essential tips during practice rounds or field work and you’ll be amazed at how rapidly your disc golf skills progress. Just remember to have fun, as that is what disc golf is ultimately all about!