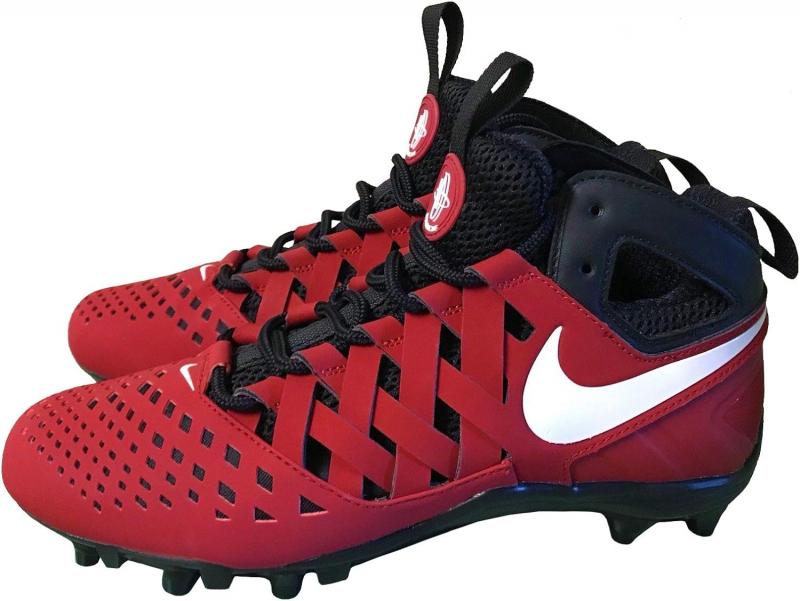
How can you optimize your Nike Huarache lacrosse cleats for peak performance. What are the best techniques for forming the perfect pocket. How does stringing setup impact your playing style. Where should you focus when breaking in new cleats. Which maintenance practices ensure longevity and consistent performance.
Perfecting Your Pocket: The Key to Huarache Excellence
The foundation of any great lacrosse performance lies in the pocket of your stick. For Nike Huarache users, achieving the ideal pocket is a game-changer. Here’s how to master this crucial element:
- Select a strong yet flexible mesh
- Use an interlocking sidewall stringing pattern
- Gradually decrease nylon string width from top to bottom
- Place wider diamonds at the top, tighter at the bottom
- Focus on the lower half of the head when stringing diamonds
How do you break in your new pocket effectively? Repeatedly pound the pocket with a lacrosse ball, concentrating on the sweet spot. This process softens and widens the diamonds, deepening the pocket for optimal ball control.
Stringing Techniques for Superior Performance
The right stringing setup can elevate your game to new heights. Consider these factors when customizing your Huarache cleats:
- Position-specific stringing: Tailor your setup to your role on the field
- Pocket placement: Choose between mid-low or mid-high based on your playing style
- Throat configuration: Opt for a tight “U” for hold or a wide-open throat for quick handling
- Stringing materials: Select between hard meshes for durability or soft meshes for flexibility
- Sidewall interstringing: Decide between tight knots for structure or open knots for a quicker break-in
Why are shooters important in your stringing setup? They add consistency to your shots and can significantly impact ball hold and release. Experiment with different shooter materials and placements to find your perfect combination.
Breaking In Your Huaraches: Tips for Optimal Comfort
A well-broken-in pair of cleats can make all the difference on the field. Follow these steps to ensure your Huaraches mold perfectly to your feet:
- Wear them around the house before hitting the field
- Use a ball or shoe stretcher to target tight spots
- Apply leather conditioner to soften the material
- Gradually increase wear time during practice sessions
- Use thick socks initially to speed up the break-in process
How long should it take to break in your Huaraches? While it varies, most players find their cleats comfortable after 2-3 weeks of consistent wear and proper care.
Maximizing Traction: Cleat Maintenance and Field Awareness
Traction is crucial in lacrosse, affecting your ability to cut, dodge, and change direction quickly. Maintain your Huarache cleats’ traction with these tips:
- Clean cleats after each use, removing dirt and debris
- Check for loose or damaged cleats regularly
- Rotate between multiple pairs to extend their life
- Consider cleat adaptors for different field conditions
- Study the field before games to identify potential traction issues
Is it necessary to use different cleats for various field types? While not essential, having options for turf, grass, and wet conditions can give you a significant advantage in traction and overall performance.
Enhancing Speed and Agility with Proper Fit and Care
Your Huarache cleats are designed for speed, but ensuring a proper fit and care routine can further enhance your agility on the field:
- Measure your feet regularly, as size can change over time
- Allow for a thumb’s width of space at the toe
- Lace your cleats for a snug but not tight fit
- Use athletic tape or moleskin to prevent blisters
- Store cleats in a cool, dry place to maintain shape and prevent odor
How often should you replace your Huarache cleats? While it depends on usage, most players benefit from new cleats every 1-2 seasons to ensure optimal performance and foot support.
Customizing Your Huaraches: Performance Tweaks and Personalization
Make your Huarache cleats truly your own with these customization options:
- Experiment with different lacing techniques for improved fit
- Add cushioned insoles for extra comfort
- Use colored laces or tape for team spirit or personal style
- Apply grip-enhancing products to the upper for wet conditions
- Consider custom orthotics for optimal foot support
Can customizing your cleats really improve performance? Absolutely. Personal tweaks can enhance comfort, fit, and confidence, all of which contribute to better on-field performance.

Game Day Preparation: Maximizing Your Huarache Advantage
Prepare your Huarache cleats for peak performance on game day with these pro tips:
- Clean and inspect your cleats the night before
- Break in a fresh pair of socks to reduce friction
- Apply a water-repellent spray if rain is forecasted
- Pack an extra pair of laces in case of breakage
- Warm up in your cleats to ensure they’re game-ready
Should you have a separate pair of cleats for games and practice? While not necessary, many players find that having a dedicated game-day pair helps maintain peak performance and appearance for important matches.
Advanced Pocket Techniques for Experienced Players
For seasoned Huarache users looking to take their pocket game to the next level, consider these advanced techniques:
- Experiment with hybrid mesh types for unique feel and performance
- Try unconventional stringing patterns like the “Pita Pocket” or “U-Channel”
- Incorporate bagged mesh sections for increased hold in specific areas
- Use a combination of different string materials for optimal tension control
- Explore custom-dyed mesh options for personalized aesthetics and improved visibility
How can advanced pocket techniques impact your playing style? These methods allow for finer control over ball placement, release, and overall stick feel, potentially unlocking new levels of skill and creativity in your game.
Weatherproofing Your Huaraches for All-Season Performance
Don’t let adverse weather conditions hinder your game. Prepare your Huarache cleats for any situation:
- Apply silicone-based waterproofing sprays to the upper material
- Use wax-based products on the laces to prevent water absorption
- Consider swapping in metal studs for better traction on wet grass
- Keep a towel handy to dry off cleats during breaks in play
- Stuff newspaper in cleats post-game to absorb moisture and maintain shape
How often should you reapply weatherproofing treatments? For optimal protection, reapply every 3-4 weeks during the season, or more frequently if you play in consistently wet conditions.
Injury Prevention: Leveraging Huarache Technology
Nike Huarache cleats are designed with player safety in mind. Maximize their protective features with these tips:
- Utilize the built-in ankle support by properly securing all straps
- Gradually increase playing time in new cleats to prevent blisters
- Incorporate balance and proprioception exercises while wearing your cleats
- Use athletic tape to reinforce ankle support for players with previous injuries
- Consider custom orthotics for players with specific foot issues
Can proper cleat usage really reduce injury risk? Absolutely. Well-fitted, properly maintained cleats provide crucial support and stability, potentially lowering the risk of common lacrosse injuries like ankle sprains and foot strains.
Speed Training in Your Huaraches
Enhance your on-field speed with these Huarache-specific training techniques:
- Practice quick cuts and direction changes to break in the cleats’ flexibility
- Perform ladder drills to improve foot speed and cleat responsiveness
- Incorporate plyometric exercises to maximize the cleats’ energy return
- Use resistance bands for lateral movement training in your cleats
- Practice acceleration and deceleration drills to fine-tune traction control
How can speed training in your game cleats improve performance? By training in the same footwear you’ll use in matches, you develop muscle memory specific to your Huaraches, potentially leading to quicker, more instinctive movements during games.
Sustainability and Longevity: Getting the Most Out of Your Huaraches
Extend the life of your Nike Huarache cleats while minimizing environmental impact:
- Rotate between two pairs to allow proper drying and shape retention
- Use eco-friendly cleaning products to maintain the cleats
- Repair minor damage promptly to prevent further wear
- Donate gently used cleats to youth programs or recycling initiatives
- Consider Nike’s recycling program for end-of-life cleats
Is it worth investing in high-quality care products for your cleats? Absolutely. Proper maintenance not only extends the life of your Huaraches but also ensures consistent performance throughout their lifespan, potentially saving money in the long run.
Mental Preparation: The Psychological Edge of Well-Maintained Gear
Never underestimate the mental boost that comes from knowing your equipment is in top shape:
- Develop a pre-game ritual around preparing your cleats
- Visualize successful plays while lacing up your Huaraches
- Use the act of cleaning your cleats as a form of mindfulness practice
- Associate the feel of your well-maintained cleats with peak performance
- Build confidence through consistent care and familiarity with your gear
How does gear confidence translate to on-field performance? Players who trust their equipment often play with greater freedom and assertiveness, potentially leading to improved performance and decision-making during crucial moments.
Advanced Cleat Customization for Position-Specific Performance
Take your Huarache customization to the next level with these position-specific modifications:
- Attackmen: Consider adding extra cushioning in the forefoot for quick cuts
- Defensemen: Reinforce the upper for added protection during checks
- Midfielders: Experiment with different stud configurations for versatile traction
- Goalies: Add grip-enhancing materials to the toe box for improved plant-foot stability
- Face-off specialists: Customize the cleat pattern for optimal push-off power
Are position-specific cleat modifications really necessary? While not essential, these tweaks can provide a competitive edge by addressing the unique demands of each position, potentially enhancing performance in key areas of play.

By implementing these advanced techniques and considering the nuanced aspects of cleat preparation and maintenance, you’ll be well-equipped to maximize the performance of your Nike Huarache lacrosse cleats. Remember, the key to unlocking your cleats’ full potential lies in consistent care, thoughtful customization, and a willingness to fine-tune your approach based on personal experience and playing conditions. With dedication to these principles, you’ll be ready to dominate the field and elevate your game to new heights.
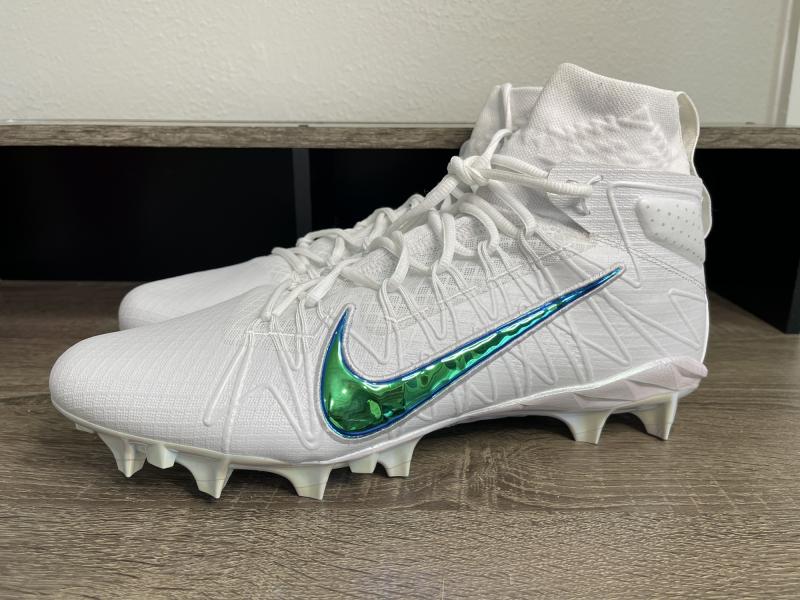
If you’re a lacrosse player looking to get the most out of your Nike Huarache cleats this season, you know that having the right pocket is crucial. A perfectly formed pocket not only gives you superior ball control, but also adds tons of hold and whip on your shots and passes. But achieving that ideal pocket takes time, patience, and the right techniques. Here are some tips to help you form the optimal pocket with your Huaraches:
Perfect The Pocket: Tips For Forming The Optimal Pocket With Your Huaraches
Start by choosing a strong yet flexible mesh and interlocking sidewall stringing pattern. This will give you structure while allowing the pocket to break in. Next, gradually decrease the width of your nylon strings from top to bottom – wider at the throat, tighter at the bottom. This will give you a nice channel.
When stringing the diamonds, place more emphasis on the lower half of the head. Wider diamonds up top open the pocket, while tighter diamonds down low will cup the ball. Go for a gradual progression, not a drastic change.
Once strung, relentlessly pound the pocket with a lacrosse ball. This will soften and widen the diamonds to deepen the pocket. Work it evenly across the width, focusing extra time on the sweet spot.
Adding something like a Signature Skills Ball or StringKing Hard Mesh ball to the pocket when storing your stick will help the pockets mold to a nice shape over time.
When breaking in a new pocket, apply weatherproofing solutions like Mesh Wax or Throne Wax. This lets you pound away without moisture damaging the mesh before it’s game-ready. Reapply after heavy break-in sessions.
Finding the right shooting strings and shooters is key too. Placement near the midline and bottom of the pocket adds grip and confidence for cradling, while shooters interwoven with the mesh will grab and propel the ball.
Lastly, keep adjusting based on your playing style. Loosen up diamonds if you want more hold or tighten if you need more release. Finetune with shooting and tie-off strings until you achieve lacrosse ball handling nirvana!
A custom fitted pocket you can trust is a lacrosse player’s best friend. Follow these stringing and break-in tips to get your Nike Huaraches performing their best this season. With the right pocket, you’ll maximize your accuracy and shot speed while reducing turnovers. Give your game an edge over the competition by taking the time to form an ideal pocket. Your sticks skills will become instinctual with a pocket that suits your strengths. Then you can focus on conquering the field, not battling your gear. Who knows – you may just have a career-best season once you master your pocket.
The stringing setup on your Nike Huarache lacrosse cleats can make or break your game. With so many stringing patterns and styles out there, choosing the right one to match your playing style is crucial for optimizing ball control, hold, and release. Here are some tips to help you find your ideal Huarache stringing setup this season:
Choose The Right Stringing: Finding The Ideal Stringing Setup For Your Playing Style
First, consider your position and role on the field. Attackmen will want a quicker release and mid/low pocket to rip shots on the fly. Meanwhile, middies need an evenly distributed mid-pocket for all-around play. For fogos, a wider throat and mid/high pocket helps scoop ground balls.
Next, factor in pocket placement – mid to low for handling and quick sticks, mid to high for added whip on passes and shots. Make sure the top strings aren’t too tight, or it will choke the pocket and limit ball control.
Throat configuration is also key. A tightly woven or formed “U” provides hold and prevents gravity dumps, while a wide-open throat gives you faster ball handling.
For stringing materials, hard meshes like Throne Mesh give you durability and shape maintenance, while softer meshes like StringKing Type 3F pocket up quicker with more flex and feel.
When interstringing the sidewalls, tight, connected knots maintain pocket structure longer, while more open, unlinked knots will bag out faster depending on your preferences.
Don’t forget about shooters! Weaving hockey laces through the bottom diamonds adds consistency for picking corners. Or go for a straight nylon shooter across the bottom V if you want hold without altering release.
Finally, tweak your setup over time based on performance. If you need more hold, tighten up the mid-diamonds or add another shooter. For quicker releases, open up the throat or connect the sidewalls looser.
With the endless stringing options for Huaraches, experiment to find what works for your play. The right setup will become an extension of your stick skills, putting you in command on the field. Then you can fully unleash your offensive or defensive dominance this season!
So you just got a brand new pair of Nike Huarache lacrosse cleats. The mesh is stiff, the plastic is rigid, and the cleats seem to squeak with every step. How do you break these puppies in before opening day? Here are some key tips to get your Huaraches game-ready before that first whistle blows:
Break Them In: Ways To Get Your Huaraches Game Ready Before The First Whistle
Start by wearing them around the house to help mold the shape. Focus on high impact areas like the heels and toes. Bend and flex them frequently to soften the material.
Once they’re broken in for casual wear, do some light training in them. Jogging, sprints, and agility drills will continue loosening things up. Just don’t overdo it too quickly.
To accelerate the break-in process, soak the mesh pocket in water for 5-10 minutes to soften it, then pound a ball repeatedly into the wet pocket. This will widen the diamonds and deepen the channel.
Use hot water and a hair dryer to heat and bend the plastics to contour your feet. This helps eliminate painful hot spots. Just don’t overheat and warp the cleats.
Sand down any sharp edges on the insides that may cause blisters or irritation using fine grit sandpaper or a nail file. Pay close attention to the heels and sides of the feet.
Once the insides feel comfortable, break in the outside by using them on turf or softer grass fields if possible. This gets the cleat studs properly situated in the sole.
Re-lace the shoes a few different ways to find what feels snuggest for your feet to prevent slippage or looseness while playing.
Wear them sockless around the house to get the inner lining feeling good against your bare feet. Don’t want any surprises on game day.
The final step is a full practice in the cleats at game intensity. Make any final tweaks and get a feel for play in your now broken-in Huaraches.
With a proper break-in, your Huaraches will be ready for peak performance right when the games count. You don’t want to be distracted by gear issues, so put in the work ahead of time. Then you can step on the field with total confidence and focus on dominating the competition!
Lace Them Right: Lacing Techniques For Lockdown And Comfort With Your Huaraches
As any lacrosse player knows, having the right cleats can make all the difference when it comes to your performance on the field. Nike Huaraches have become a go-to choice for many lacrosse players due to their lightweight yet supportive construction. However, if you don’t lace up your Huaraches properly, you won’t get the lockdown and comfort you need to play your best.
Here are 15 tips to help you get the most out of your Nike Huarache lacrosse cleats by lacing them for optimal lockdown and comfort:
1. Start with the right laces
The type of laces you use can impact the fit and feel of your Huaraches. Opt for rounded, waxed laces rather than flat laces – the rounded shape and wax coating will help the laces stay snugly tied. The wax coating also prevents the laces from loosening during play.
2. Loosen the laces fully before putting your foot in
Make sure to loosen the Huarache laces all the way before sliding your foot into the shoe. This allows your foot to enter the shoe smoothly without having to force it in.
3. Pull the laces snugly from the bottom up
Start lacing from the bottom eyelets and work your way up, pulling each cross snugly as you go. This helps lock the midfoot and heel in place before tightening the upper foot.
4. Criss-cross lacing for more lockdown
Using a criss-cross lacing pattern rather than straight up-and-down lacing adds more contact points between the laces and shoe upper. The increased tension from criss-cross lacing improves lockdown in the midfoot.
5. Double up on lower eyelets
Threading the laces through the lower eyelets twice before crisscrossing up the shoe boosts lockdown in the heel and midfoot. The extra tension from the doubled laces keeps the rearfoot from slipping.
6. Leave a little wiggle room on top
While you want the midfoot and heel secured, leaving the top eyelet a bit looser allows the forefoot to move naturally. This helps prevent pinching or loss of circulation.
7. Consider skipping the top eyelet
If the top eyelet presses uncomfortably into the top of your foot, try lacing only through the lower eyelets. This reduces pressure on the forefoot.
8. Tie with double knots
Secure the laces with double knots so they won’t come undone mid-game. A tight double knot is less likely to loosen from constant starting, stopping, and pivoting motions.
9. Use lock lacing for extra security
Thread the laces using a lock lacing technique to all but eliminate any chance of the laces coming untied. Lock lacing involves looping the laces in a way that the knots tighten rather than loosen with pressure.
10. Don’t overtighten
While you want a snug midfoot fit, lacing too tightly can lead to loss of circulation, toenail issues, and other problems. Make sure there is no painful pinching or numbness after lacing up.
11. Retie during games as needed
Expect to pause and retighten your Huarache laces during games as the constant movement can cause the laces to loosen over time. Carry an extra lace just in case one breaks.
12. Relace between games
Don’t just slip your Huaraches off and back on between games or practices. Completely relace them each time to ensure optimal lockdown and support.
13. Try different lacing techniques
From straight bar lacing to heel lock lacing, experiment with different techniques if you don’t feel like you’re getting the right fit from standard criss-cross lacing.
14. Replace old or damaged laces
Inspect your laces regularly and swap them out at the first sign of damage or excessive stretch. Old, warped laces won’t give you the lacing performance you need.
15. Break in new laces slowly
Brand new laces will be overly stiff and take a few lacings to break in. Ease into tighter lacings rather than forcing overly rigid new laces.
Taking the time to properly lace your Nike Huaraches makes a big difference in getting top-notch lockdown and comfort on the lacrosse field. Following these tips will help you customize the fit and feel of your Huaraches through different lacing techniques. With the right laces laced the right way, your Huarache cleats will perform their best game after game.
Get A Custom Fit: Achieving The Perfect Custom Molded Fit For Your Huaraches
One of the best ways to get unbeatable lockdown and comfort from your Nike Huarache lacrosse cleats is to get them custom molded to your feet. While Huaraches mold to your feet over time naturally, getting a professional custom molding takes the fit to another level. Here’s how to achieve the perfect custom fit for your Huaraches.
Custom molding tailors the fit of your Huaraches precisely to the unique contours of your feet. This results in a fit like no off-the-shelf shoe can provide. Follow these tips for getting a flawless custom mold on your Huaraches:
1. Get professionally fitted
For the best custom fit, get professionally molded at a specialty fitting store rather than trying to DIY. Experts will use professional equipment to heat mold and custom fit the shoes to your feet for unparalleled comfort.
2. Wear the right socks
Bring the socks you’ll be wearing for games and practices to wear when getting fitted – this ensures the fit and mold is ideal for your actual athletic socks. Thinner socks worn during fitting can make the shoes too roomy later.
3. Loosen laces fully
Completely loosen the laces on the Huaraches so the material can fully mold to the shape of your foot without any lace tension interfering with the natural shaping.
4. Remove the insoles
Take out the insoles beforehand so the molding can capture the full anatomy of your foot, including the arches, rather than just molding to the surface of the insole.
5. Wear both shoes for molding
Get both the left and right shoes molded at the same time even if only one foot is bothering you. Your feet are likely asymmetrical so each shoe needs an individual mold.
6. Stand with weight on your feet
During the heat molding process, stand with your full weight on your feet to get an accurate molding – don’t sit so your feet spread out wider.
7. Point toes straight ahead
Angle your feet with the toes pointing straight forward rather than letting them naturally splay outward. This will match your positioning when playing.
8. Tighten the laces
Snugly tighten the laces to get the upper material to mold closely to your foot. Just don’t tighten so much you restrict circulation.
9. Let the shoes fully cool
Before taking the freshly molded shoes off, allow them plenty of time to fully cool and set the molded shape. Slow cooling ensures the tightest mold.
10. Consider remodeling every season
As your feet change or shoes break down over a season, go back to get remolded for the same flawless fit game after game, season after season.
11. Break shoes in gradually
Wear the freshly molded shoes for short periods at first to allow your feet to adjust to the custom fit gradually before playing full games.
12. Add supportive insoles
Insert supportive insoles like Superfeet or Spenco to complement the custom fit and fine tune comfort. Use thin insoles to avoid excess snugness.
13. Use molded footbeds for best results
Opt for heat moldable footbeds like ShoeBacca footbeds along with molding the shoes themselves for the most customized and comfortable fit.
14. Remold after any stretching

If the shoes stretch and lose their perfect fit over time, take them back in to get remolded and restore the ideal molded contours.
15. Consider custom orthotics
Get custom orthotic inserts made if you need extra arch support or have foot issues like plantar fasciitis. Use slim orthotics to avoid excess tightness.
Taking advantage of professional custom molding transforms the fit of your Nike Huaraches, providing unbeatable comfort and responsiveness. Follow these tips for getting the ideal custom mold for your feet. With custom molded Huaraches and the right supplementary inserts, you’ll enjoy the benefits of a truly tailored fit you have to feel to believe.
Maximize Traction: Cleat Configuration Tips For Optimal Grip And Explosiveness
Having the right cleat configuration dialed in is crucial for getting the most out of your Nike Huarache lacrosse cleats. With so many studs and options for placement, it can be tricky to know how to set them up optimally. Here are some tips on stud setup and cleat configuration to maximize traction and explosiveness in your Huaraches.
Stud placement makes a major difference in acceleration, cutting ability, stability, and grip. Follow these tips to configure your Huarache cleats for top notch traction and performance:
1. Use the manufacturer stud recommendations
Nike provides specific guidance on ideal stud configurations for different field types. Follow their lacrosse stud setup recommendations for optimal results.
2. Opt for a 7-stud setup
Most players prefer using 7 total studs – four in the rearfoot and three under the forefoot/midfoot. This provides a balance of traction and maneuverability.
3. Place studs at pivot points
Position studs under natural pivot points like the ball of the foot and base of the fifth metatarsal for explosiveness when changing direction.
4. Use longer studs in the heel
Maximize acceleration by using longer studs like 12mm or 13mm studs in the rearfoot for enhanced traction at push off.
5. Go shorter on forefoot studs
Shorter studs like 10mm under the forefoot prevent tripping when toeing off quickly while still providing grip.
6. Add a midfoot stud
Placing a midfoot stud provides stability for lateral cuts and crosse checks without sacrificing mobility.
7. Consider an asymmetric stud pattern
Arranging studs asymmetrically better mirrors your foot’s natural motion and weight distribution through cuts and pivots.
8. Place medial/lateral edge studs carefully
Stud position on the medial and lateral edges affects rollover and release out of cuts. Experiment to optimize for your foot and style.
9. Add toe studs cautiously
Toe studs help with linear speed but can also limit flexibility. Only add them if you play a straight-ahead power game.
10. Mind stud pressure points
Avoid discomfort and metatarsal stress by carefully positioning studs away from bones and nerves.
11. Consider comfort over max traction
Reduce studs or go shorter if less stud pressure feels better, even if it sacrifices some traction.
12. Reconfigure studs regularly
Reevaluate your stud setup at least monthly based on field conditions, game strategy, and your physical needs.
13. Carry replacement studs
Pack extra studs in your bag to swap out and reconfigure cleats between games or during halftime.
14. Keep studs tight and maintained
Check for loose or damaged studs before each use and keep stud threads clean and lubricated.
15. Consider aftermarket studs
For the ultimate customization, look into higher performance aftermarket studs like Speed Booster lacrosse studs.
Dialing in the optimal cleat configuration enables your Nike Huarache lacrosse cleats to deliver peak acceleration, cutting, and responsiveness. Experiment with stud arrangements and types to find your ideal setup. With the right cleat configuration fine tuned to your game, you’ll have all the explosive traction you need.
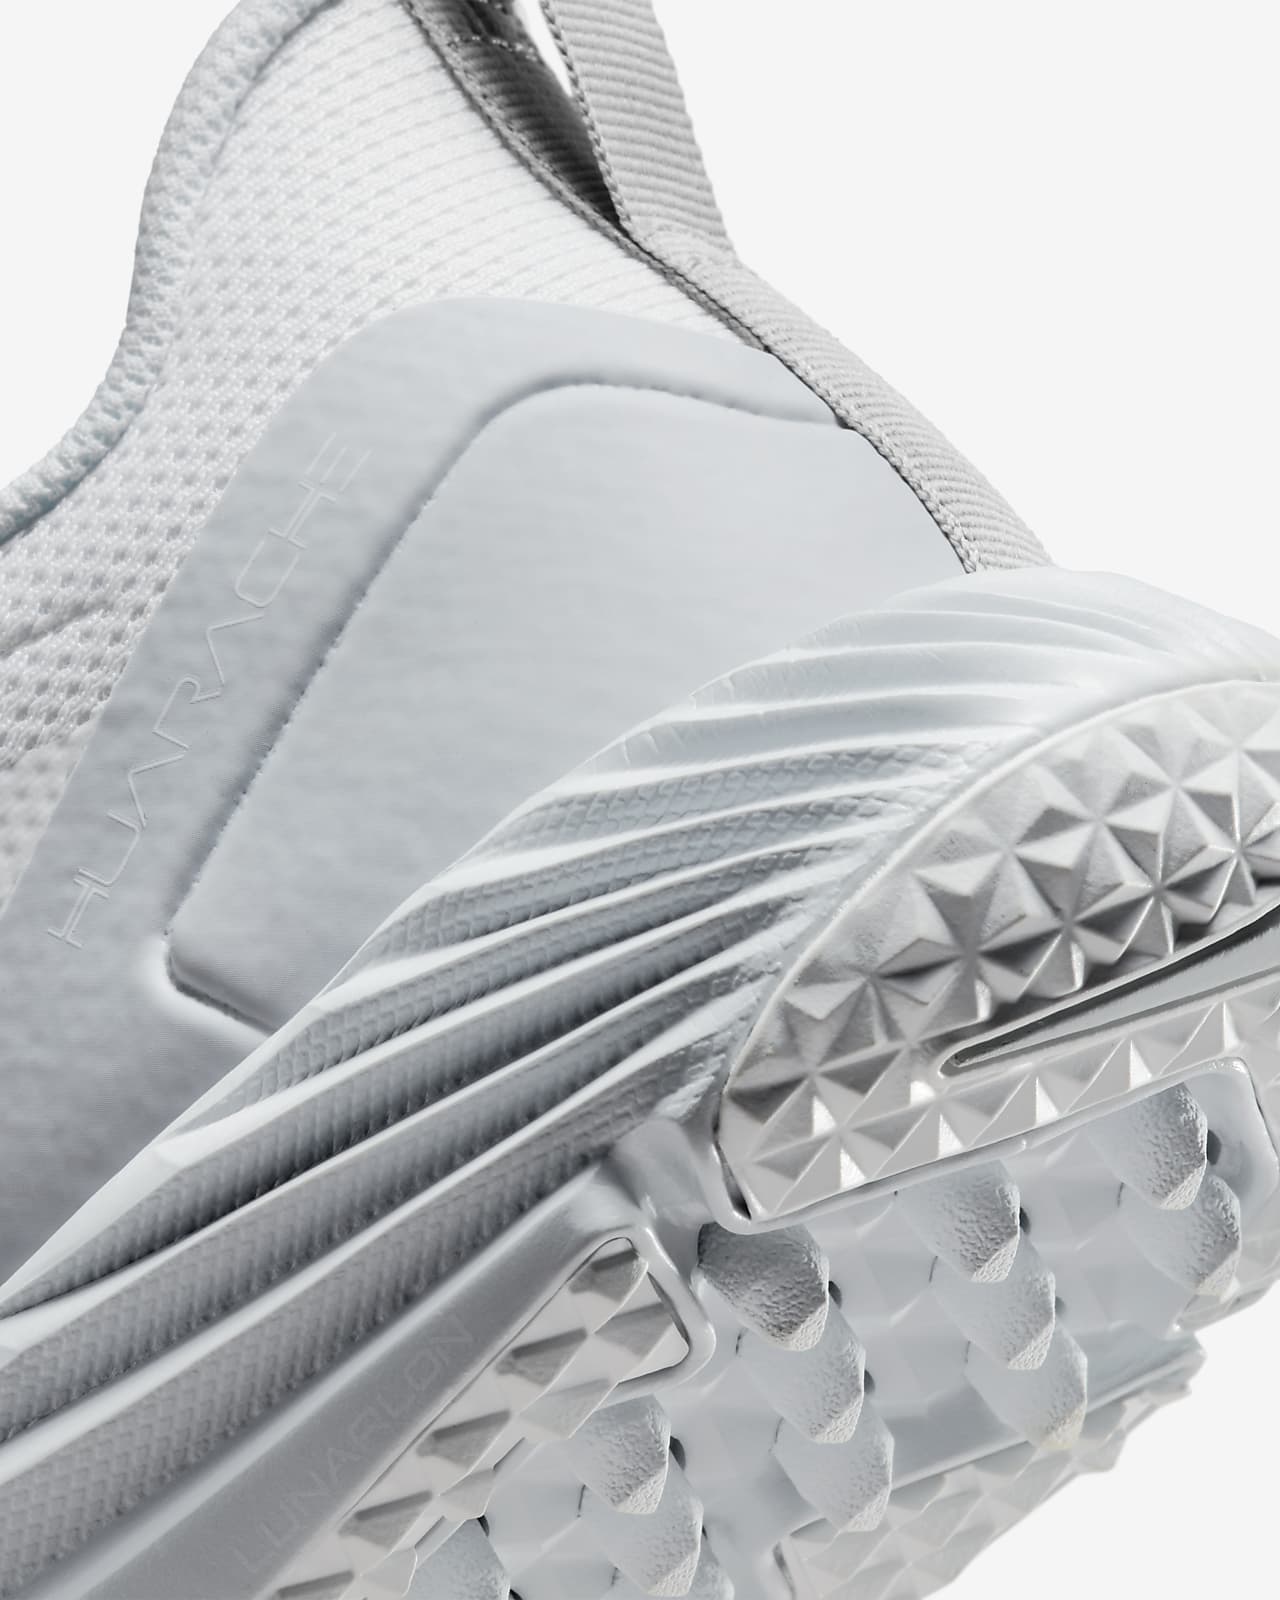
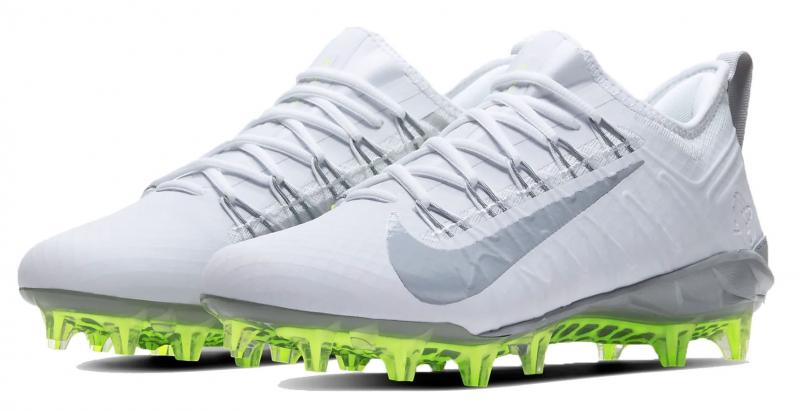
Care For The Upper: Cleaning And Maintaining The Woven Upper Material
One of the signature features of the Nike Huarache lacrosse cleats is the flexible woven upper material. However, this woven construction requires some special care and maintenance to keep your Huaraches in top playing condition. Here are some tips on properly cleaning and caring for the woven upper on your Huaraches.
The woven textile upper of the Huaraches provides a sock-like fit but is also more prone to dirt, stains, and damage than synthetic leather or mesh uppers. Follow these guidelines to keep the woven material clean and intact:
1. Rinse cleats after each use
Rinsing your Huaraches with clean water after practice or games prevents dirt, debris, and sweat from setting into the fabric.
2. Use a soft brush
Gently brush caked on dirt off the woven upper with a soft brush – avoid stiff bristles that could snag or pull the fabric.
3. Spot clean stains
Mix a mild detergent with warm water and use a soft cloth to spot treat any stains. Avoid harsh cleaners.
4. Air dry thoroughly
Allow Huaraches to completely air dry after getting them wet to prevent moisture damage to the woven material.
5. Use a shoe tree for storage
Insert a shoe tree when storing your Huaraches to help the upper material retain its shape and prevent creasing.
6. Apply fabric protector
Spraying a fabric protector like Scotchgard onto the woven upper makes it more stain resistant and easier to clean.
7. Avoid the washing machine
Don’t machine wash Huaraches – the agitation and detergent can damage the woven fabric and pull threads.
8. Skip the dryer
Always air dry Huaraches instead of machine drying them – the high heat can shrink or warp the upper material.
9. Patch small holes immediately
Use a fabric glue or iron-on patch to fix any small holes in the woven upper right away to prevent enlargement.
10. Re-lace carefully
When re-lacing, loosen eyelets slowly and take care not to stress the fabric attachment points.
11. Inspect regularly
Check for fraying, pulled threads, and damaged areas each time you wear your Huaraches to catch issues early.
12. Limit direct heat exposure
Keep Huaraches away from direct heat to avoid accidentally singeing or melting the woven material.
13. Use steam cautiously
Gently steam clean woven uppers if needed using the coolest setting and holding the steam head well away from the surface.
14. Choose edge dressings carefully
Select an edge dressing that penetrates fabric rather than just coating the surface to prevent hardening the material.
15. When in doubt, ask a cobbler

Consult a shoe repair pro if you have any concerns about possible damage or the best care methods.
With the proper cleaning approach and precautions, you can keep the woven uppers of your Nike Huarache lacrosse cleats in excellent condition all season long. Taking good care of the upper now will extend the life of your Huaraches so you get more seasons of top performance.
Replace Insoles Regularly: Why Switching Insoles Can Extend The Life Of Your Huaraches
Most players focus on the exterior of their Nike Huarache lacrosse cleats, but paying attention to the insoles is also essential. Replacing your Huarache insoles regularly can actually help your shoes last longer. Here’s why fresh insoles are the key to maximizing both performance and durability.
Insoles act as the first line of cushioning and support within your Huaraches. Letting them wear out degrades comfort and acceleration. Swapping in new insoles restores vital padding and support underfoot. Here are 15 reasons to replace your Huarache insoles routinely:
1. Insoles lose cushioning

The foam and padding in insoles compresses permanently over time, losing its shock absorption and comfort.
2. They flatten and deform
Repeated impact flattens insoles, allowing less healthy overpronation and reducing stability.
3. bacterias and odors build up
Sweat and bacteria get deeply embedded in old insoles, causing unpleasant odors that are hard to remove.
4. Cushioning breaks down
The materials in insoles deteriorate with moisture exposure, losing their cushioning properties.
5. Sliding increases blister risk
Flattened, worn out insoles allow your feet to slide around inside shoes, creating hotspots and blister risk.
6. Shock absorption decreases
Less able to absorb impact, old insoles increase stresses on joints, tendons, and ligaments.
7. Support declines
Arch support and stability from the insoles diminishes over time as materials compress.
8. They harbor microbes
Bacteria, fungi, and microbes breed in old damp insoles contributing to foot issues.
9. Cleat wear accelerates
Lack of cushioning from worn out insoles causes cleats to wear out faster from harsh impact.
10. Injury risk goes up
Insufficient support from deteriorated insoles can contribute to foot, ankle, and leg injuries.
11. Comfort disappears
Thin, compressed insoles feel rock hard and poke into the bottoms of feet.
12. Acceleration slows
Energy return and explosiveness from push off declines as insoles flatten out.
13. Poor foot health
Lack of cushioning and support from old insoles contributes to issues like plantar fasciitis.
14. Circulation suffers
Excess pressure from worn insoles on feet can restrict blood flow and circulation.
15. Replacement is inexpensive
New replacement insoles provide big benefits for only around $20 – well worth the minor cost.
Don’t let worn out insoles sabotage the comfort, performance, and lifespan of your Nike Huarache lacrosse cleats. Replace insoles regularly to keep your feet fresh and maintain that great Huarache feel.
Use Correctly On Turf: Adjustments And Precautions For Turf Play In Huaraches
Nike Huarache lacrosse cleats work great on grass, but using them on artificial turf fields requires some adjustments and extra precautions. From traction to wear and tear, turf puts different demands on your Huaraches. Here are some tips to help you get the most out of your Huaraches when playing on artificial turf fields.
While lacrosse is meant to be played on grass, many players spend time on turf fields as well. Follow these guidelines to get the most out of your Huaraches on turf:
1. Opt for longer studs
Longer studs like 12mm dig through the turf pile better for traction. Just ensure the longer studs are allowed for your league.
2. Rotate your shoes more
The turf surface wears cleats down faster, so you’ll need to rotate shoes more frequently to extend their usable lifespan.
3. Really loosen up the laces
Make sure to loosen the laces all the way before putting your foot in to prevent undue strain on the upper material.
4. Check for loose studs
Frequently inspect studs and immediately replace any that feel loose to prevent turf damage or injury.
5. Watch for foot fatigue
The harder turf surface can cause more foot fatigue versus grass, so monitor foot health closely.
6. Consider toe protection
Applying a turf toe protector provides extra protection against hyperextension injuries from sudden stops.
7. Keep extra studs handy
Turf leads to more missing or damaged studs, so carry extras and be prepared to replace mid-game if needed.
8. Don’t skip pregame warmups
The unforgiving turf makes proper warmups essential for decreasing injury risks from the harder surface.
9. Maintain good hydration
Dehydration worsens impact stresses, so keep water intake consistent when playing on turf.
10. Pay attention to foot soreness
Monitor hot spots closely and pad areas proactively since abrasions happen quicker on turf.
11. Re-lace carefully
Avoid pulling the upper too tightly when re-lacing to prevent undue strain on the materials.
12. Limit use before grass games
Minimize turf time leading up to important grass games to prevent footwear and foot adjustments.
13. Break them in on grass first
Before playing games on turf, break new Huaraches in on grass fields first whenever possible.
14. Cool down properly afterward
turf puts more demands on feet, so be diligent about cooling down, hydrating, and recovering post-game.
15. Retire once worn down
With accelerated wear on turf, retire Huaraches promptly once excessive breakdown is evident.
Artificial turf fields allow you to get in more playing time, but require extra care of your feet and Huaraches. Keep these tips in mind, and you can optimize your shoe performance and safety on turf with Nike Huarache lacrosse cleats.
Swap Laces Strategically: When To Use Waxed vs Standard Laces With Your Huaraches
The right type of laces can make a big difference in getting top notch lockdown and responsiveness from your Nike Huarache lacrosse cleats. But knowing when to use waxed laces versus standard laces isn’t always straightforward. Here are some tips on strategically switching between waxed and standard laces with your Huaraches.
Waxed laces and standard round cotton laces each have benefits depending on conditions and personal preference. Here is guidance on navigating the choice:
1. Use waxed laces in wet conditions
The water resistant wax coating helps laces maintain grip and stay securely tied in rain, dew, and dampness.
2. Swap waxed laces out in high heat
The wax can soften and get gummy in hot weather, so use standard laces when temperatures climb.
3. Choose waxed for adjustable lacing
The grippy texture of waxed laces makes it easier to adjust tension and re-lace on the fly as needed.
4. Go standard for a lower profile
Standard laces sit flatter and tighter to the shoe for a lower profile and snugger fit.
5. Use waxed laces for ragged cut-ins
The rough wax coating provides extra grip and friction for stopping and cutting aggressively.
6. Choose standard laces for faster break-in
Standard laces soften and shape to your foot faster than slippery new waxed laces.
7. Swap waxed laces between games
Freshen grip in damp conditions by putting in new crisp waxed laces between quarters or halves.
8. Go waxed for more toe protection
Wax laces stay tied better around the shoe collar for added protection against stubbed toes.
9. Use waxed laces for high loads
The wax helps the knot stay tightly closed under high forces from sprinting and jumping.
10. Choose length for your lacing style
Use longer laces if you wrap them around more eyelets for added ankle stability.
11. Keep standard laces clean
Dirt reduces grip on standard laces, so keep them laundered to maintain traction.
12. Break waxed laces in gradually
It takes a few lacings for stiff waxed laces to soften and shape optimally to your foot.
13. Replace laces regularly
Swap old stretched out and flattened laces for fresh new ones each season for ideal lockdown.
14. Carry extra laces
Pack both waxed and standard replacement laces in your gear bag in case laces break mid-game.
15. Don’t overtighten
Overtightening leads to discomfort and circulation loss regardless of lace type.
Experiment with both waxed and standard laces in different conditions to see what works best for your playing style. Strategic lace choices will ensure you get a secure, customized fit all season long.
Tune The Toe Box: Modifying The Toe Box For Comfort And Ball Control
The shape and volume of the toe box on your Nike Huarache lacrosse cleats can significantly impact comfort and ball handling. Luckily, there are some simple modifications you can make to tune the toe box on your Huaraches for optimized fit and ball control.
Follow these tips to customize the toe box area on your Huaraches:
1. Size up if toes feel cramped

Getting a half or full size larger Huarache can add toe box room if your toes feel pinched and uncomfortable.
2. Insert a toe spacer
Placing a gel toe spacer at the cleat tip creates a bit more room for toes to spread out naturally.
3. Pad any hotspots
Adding extra foam padding protects against irritation from pressure points in the toe box.
4. Try thinner socks
Switching to thinner socks reduces bulk in the box so your actual toes have more space.
5. Loosen laces around the collar
Keeping the top laces looser reduces constriction and discomfort across the top of your foot.
6. Stretch the shoe collar
Gently working the collar back and forth helps widen the ankle opening for easier toe box entry.
7. Use removable insoles
Replacing the original insole with a thinner, removable one may free up needed room.
8. Heat mold the toe box area
Heating just the toe box gently expands it, creating a custom fit across your toes.
9. File down inside seams
Carefully filing any interior seam edges smooth prevents abrasion against toes.
10. Use toe guards
Applying gel pads around toes cushions and shields from cleat pressure and poke-through.
11. Avoid curling toes downward
Curling toes downward exacerbates issues from lack of toe box room, so keep toes neutral.
12. Tape small toes together
Buddy taping toes can relieve discomfort from crammed side-by-side toes.
13. Select shoes with a wider fit
Trying the wider or EE width provides more volume space throughout the shoe interior.
14. Loosen toe box slowly over time
Avoid overstretching materials quickly – gently work in incremental increases in space.
15. See a podiatrist if needed
Consult a foot doctor for advice on any persistent pains or fit issues in the toe box.
Getting the toe box fine-tuned just right in your Huaraches improves foot health, dexterity, and ball control. Follow these tips for customizing the fit through the toe area.
Add Ankle Support: Choosing The Right Socks For Stability In Your Huaraches
The socks you choose to wear with your Nike Huarache lacrosse cleats can enhance ankle support and stability or leave you feeling loose and sloppy. Selecting the right socks is key to maximizing the performance potential of your Huaraches. Here are some tips for choosing socks that provide ankle support in your Huaraches.
Socks make a difference in comfort, fit, and safety. Follow these guidelines for picking the best socks for your Huarache cleats:
1. Opt for mid-calf height
Mid-calf socks offer more coverage and compression around the ankles for added support.
2. Choose snug-fitting socks
Well-fitting socks without bulky seams prevent sliding around that can lead to blisters and instability.
3. Look for compression socks
Graduated compression socks improve circulation while locking the foot in place.
4. Select socks with arch support
Arch supporting socks provide a more secure foundation under the midfoot for better stability.
5. Avoid low-cut socks
Low-cut socks allow too much ankle movement and don’t protect from shoe rub and bites.
6. Say no to cotton
Cotton socks absorb sweat and increase sliding around, while performance socks wick moisture.
7. Look for a supportive cuff
Socks with elasticized cuffs or double cuffs minimize migration and keep everything locked in.
8. Get the right thickness
Go with thin socks that don’t crowd the shoe, but avoid flimsy socks with no support.
9. Try synthetic blends
Synthetic sock materials like polyester spandex provide structure without added bulk.
10. Replace socks regularly
Old, worn out socks lose their compression. Rotate new pairs in frequently.
11. No wrinkles or bunching
Smooth-fitting socks prevent added pressure points and friction from creases.
12. Tape over the cuff
If socks are sliding down, use sports tape over the cuff to hold them in place.
13. Consider sock liners
Thin moisture-wicking liners under your regular socks can reduce sliding.
14. Try grip-enhancing spray
Spraying cuffs and heels minimizes downward slippage.
15. Address improper fit
Socks sliding down likely means cleats are too large – get properly refitted to correct sizing.
Finding the right socks brings an added element of stability, support, and injury prevention to your Huarache lacrosse cleats. Shop carefully and get the pair that performs best for you.
Check For Wear: Inspecting For Signs Your Huaraches Need Replacing
Nike Huarache lacrosse cleats are built for performance, but no shoes last forever. Inspecting your Huaraches between games and regularly throughout the season allows you to spot issues before they become problems. Here are 15 signs to check for to know when it’s time to replace your well-worn Huaraches.
Replacing cleats at the right time helps prevent foot pain and injury risk. Watch for these indicators of excessive wear and tear:
1. Holes or tears in the upper
Any holes, rips, or tears in the upper materials mean structure and support are breaking down.
2. Separating sole
Gaps where the upper is separating from the sole make shoes unstable and vulnerable to detachment.
3. Compressed toe box
A collapsed, flattened toe box provides insufficient protection and space for toes.
4. Worn out studs
Rounded, breaking, or missing studs mean reduced traction and compromised performance.
5. Deformed soles
A sole that’s taking on an uneven shape or curving unnaturally indicates cushioning failure.
6. Stiff, crunchy feeling
Inflexible, crunchy upper materials have lost elasticity and are prone to crack or split.
7. Excess odor or dampness
Persistent odors and moisture inside despite cleaning attempts signals material degradation.
8. Lack of heel lockdown
If your heel is sliding, the shoe’s shape and structure have likely broken down.
9. Uncomfortable pinch points
New spots rubbing uncomfortably indicate materials wearing unevenly due to structural failure.
10. Loss of stability
Feeling wobbly or tippy while playing points to sole breakdown.
11. Cloudy eyelets
Eyelet holes stretching out and becoming misshapen make it hard to lace up snugly.
12. Upper stretching permanently
Upper material getting baggy and unable to be relaced to tightness means its elasticity is gone.
13. Reduced acceleratiom
Lack of explosiveness out of cuts likely indicates flattened sole cushioining.
14. Blisters in unusual spots
New hotspots and blister locations signify uneven wear and improper foot support.
15. Just feel “dead”
If shoes just overall feel lifeless and flat, materials are packing out beyond repair.
At the first signs of any of these issues, it’s safest to go ahead and replace your well-worn Huaraches with fresh new ones.
Wash Properly: Cleaning Techniques To Keep Your Huaraches Fresh
Keeping your Nike Huarache lacrosse cleats clean is about more than just appearance – proper washing preserves performance and extends their lifespan. Here are 15 tips on the best practices for safely cleaning your Huaraches without causing damage.
Follow these do’s and don’ts of Huarache cleaning to keep them fresh:
1. Rinse well after every use
Use a hose or faucet to rinse away dirt, debris, and sweat before it dries and sets in.
2. Scrub with a soft brush
Use a soft brush and mild detergent to gently clean the upper, sole, and studs.
3. Remove insoles
Take out the insoles and clean separately so water doesn’t get trapped underneath.
4. Disinfect regularly
Use a disinfecting spray designed for cleats to kill bacteria and odor buildup.
5. Dry thoroughly
Stuff shoes with newspaper or towels to absorb all moisture and air dry fully before wearing again.
6. Spot treat stains
Use a small amount of gentle cleaner and a toothbrush to work out stubborn stains.
7. Avoid machine washing
Don’t toss Huaraches in the washing machine – the agitation can damage materials.
8. Stay away from heat
Keep away from heat to dry like air vents or direct sunlight to prevent material damage.
9. Skip bleach
Bleach can degrade and discolor fabrics – stick to non-chlorine oxygen cleaners if needed.
10. Don’t use stiff brushes
Stiff bristled brushes can snag and tear the woven upper material.
11. Take laces out
Remove laces before washing so dirt and sweat buildup comes out easily.
12. Re-treat waterproofing
Restore water resistance after cleaning with a spray like Scotchgard.
13. Remove odors safely
Avoid harsh chemicals – soak in vinegar water or use baking soda to absorb odors.
14. Replace insoles if too dirty
Throw out and replace insoles if washing can’t get them fully clean.
15. Get help with tough stains
Consult a cobbler if you can’t remove set-in stains safely at home.
With the proper cleaning techniques, you can keep your Nike Huarache lacrosse cleats feeling and performing like new all season long.
Store With Care: How To Maintain Your Huaraches In The Off-Season
The way you store your Nike Huarache lacrosse cleats between seasons can impact their longevity and performance when next year rolls around. Here are 15 tips to follow to make sure your Huaraches stay in top shape during the off-season storage months.
Use these best practices for off-season Huarache storage and maintenance:
1. Clean thoroughly
Start by scrubbing away all built up dirt and sweat residues before packing shoes away.
2. Dry completely
Make sure shoes are 100% dry inside before storage to prevent moisture damage.
3. Disinfect the interior
Spray the insides with a sports shoe disinfectant spray to kill odor and germ buildup.
4. Replace worn laces
Swap out stretched old laces for fresh new ones so they’re ready to perform next season.
5. Add cedar shoe trees
Placing cedar shoe trees inside helps maintain form and absorb moisture.
6. Keep away from direct heat
Don’t store shoes near heat sources that could degrade the materials.
7. Store in a breathable place
Make sure the storage area is well-ventilated and not prone to dampness.
8. Use shoe storage bags
Placing each shoe in a breathable storage bag protects them from dust and pests.
9. Don’t stack tightly
If stacking shoes, leave space between them and don’t pile other heavy items on top.
10. Pad high wear areas
Place padding in areas like the heel and toe box to maintain shape.
11. Avoid temperature extremes
Don’t store shoes in uninsulated attics, garages, or sheds with extreme temps.
12. Check on shoes periodically
Inspect for signs of moisture or pest damage every month or two during storage.
13. Re-treat water protection
Apply a fresh water repellent coating so they’re ready for wet fields next season.
14. Make minor repairs
Fix any loose threads, nicks in materials, or missing grommets before storing away.
15. Consider professional storage
Let a specialty shoe cleaner professionally store cleats if you lack ideal home space.
With the proper off-season maintenance and storage, you’ll keep your Nike Huarache lacrosse cleats in peak condition, season after season.


