How can dip stations transform your upper body workouts. What are the key factors to consider when choosing a dip bar. Why are dips such an effective exercise for building strength and muscle. How to perform dips safely and effectively for maximum results.
Understanding Dip Stations: A Gateway to Superior Upper Body Strength
Dip stations, also known as dip bars, are versatile pieces of exercise equipment designed to facilitate one of the most effective upper body exercises: dips. These stations provide a stable platform for performing dips, an intense bodyweight exercise that primarily targets the chest, triceps, and shoulders while also engaging the core and legs for stabilization.
But why have dip stations gained such popularity among fitness enthusiasts? The answer lies in their ability to deliver remarkable results in upper body strength and muscular development. Dips offer a unique combination of compound movement and bodyweight resistance, making them an excellent choice for both beginners and advanced athletes.
Benefits of Incorporating Dips into Your Workout Routine
- Builds impressive chest, shoulder, and arm strength
- Enhances core stability and overall body control
- Improves functional fitness for everyday activities
- Boosts athletic performance in sports like swimming and gymnastics
- Offers a challenging cardiovascular workout when performed in high-intensity intervals
Can dips really make a significant difference in your fitness journey? Absolutely. When performed consistently and with proper form, dips can lead to substantial gains in upper body strength, muscle definition, and overall athletic performance.
Choosing the Right Dip Station: Key Factors to Consider
With a plethora of dip station options available in the market, selecting the right one can seem daunting. However, by focusing on a few crucial factors, you can make an informed decision that aligns with your fitness goals and practical considerations.
Material and Construction
The durability and stability of a dip station largely depend on its construction material. Steel frames offer excellent strength and longevity but may be prone to rust if exposed to moisture. Aluminum, on the other hand, provides a rust-resistant alternative, making it suitable for outdoor use. Which material is best for you? Consider your intended usage environment and maintenance preferences.
Weight Capacity
Ensure the dip station can support your body weight plus any additional weight you might use for progressive overload. A sturdy station with a high weight capacity not only ensures safety but also allows for long-term use as you grow stronger.
Adjustability
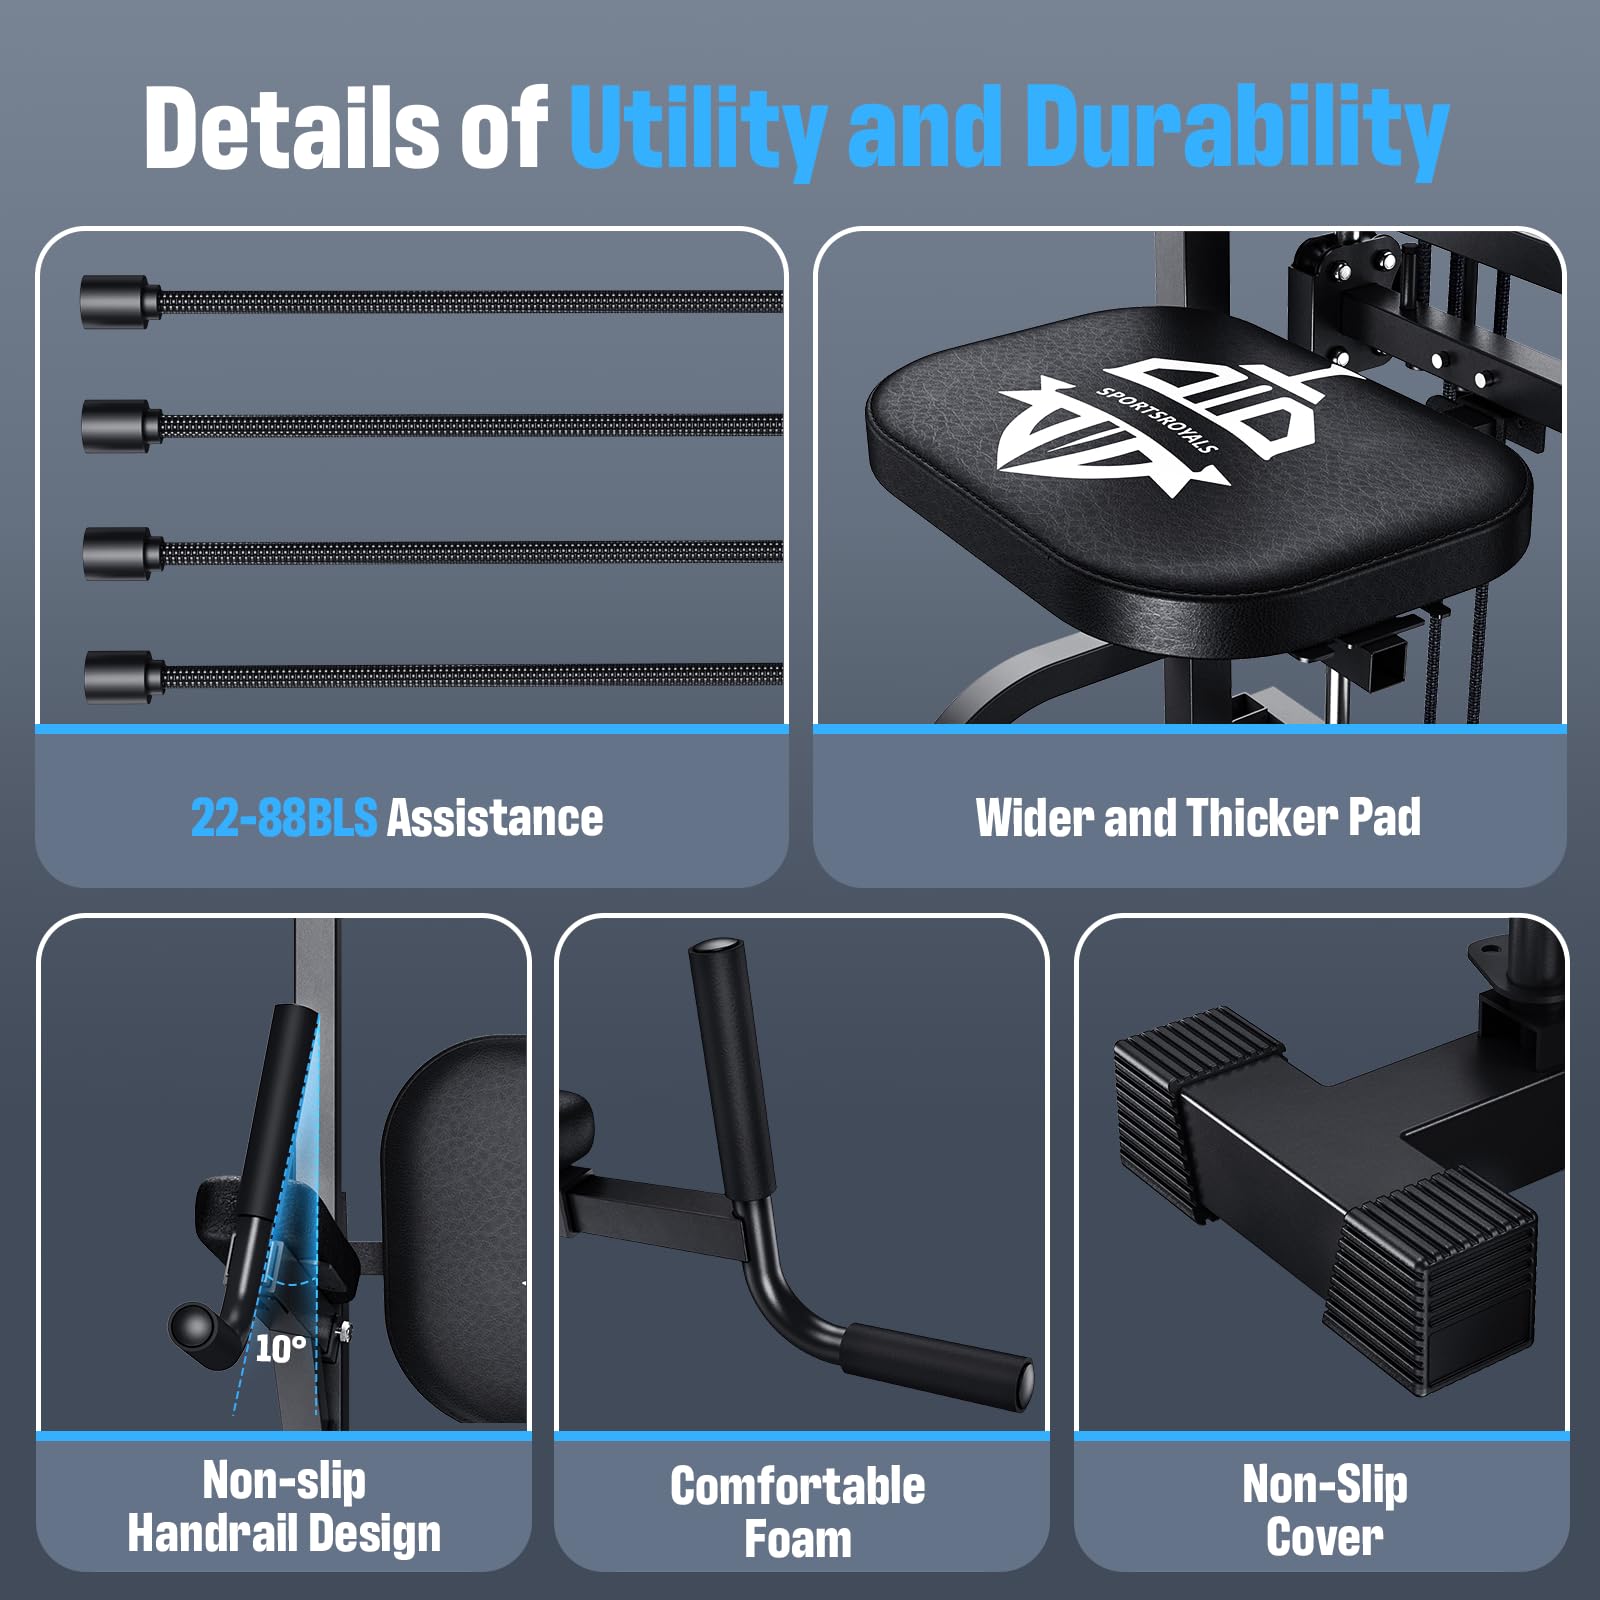
Look for dip stations with adjustable height settings. This feature allows you to customize the station to your body size and exercise variations, ensuring optimal form and reducing the risk of injury.
Grip Design
The grip design can significantly impact your comfort and performance. Neutral or angled grips can help reduce wrist strain, while textured surfaces provide better traction. What’s the ideal grip diameter? Most users find a standard 1.25-inch diameter comfortable, but thicker grips can be beneficial for those with larger hands or looking to challenge their grip strength.
Stability and Footprint
A stable dip station is crucial for safe and effective workouts. Look for models with wide bases or the option to bolt them to the floor. However, balance this with your available space. If you have limited room, consider wall-mounted or foldable options that offer stability without consuming too much floor space.

Mastering Proper Dip Technique: Form and Safety Tips
Performing dips with correct form is essential for maximizing benefits and minimizing injury risk. Here’s a step-by-step guide to executing perfect dips:
- Grip the bars with hands slightly wider than shoulder-width
- Lift yourself so your arms are fully extended, supporting your body weight
- Lower your body by bending your elbows, keeping them close to your body
- Descend until your shoulders are just below your elbows
- Push through your palms to extend your arms and return to the starting position
How can you ensure you’re performing dips safely? Keep these key points in mind:
- Maintain a slight forward lean to engage your chest muscles
- Keep your core tight and legs straight or slightly bent
- Avoid swinging or using momentum; control the movement throughout
- Breathe steadily, exhaling as you push up
Is there a way to make dips easier for beginners? Yes! If you’re new to dips or struggling with full bodyweight, try these modifications:
- Use an assisted dip machine or resistance bands for support
- Practice negative dips (lowering phase only) to build strength
- Perform bench dips to gradually work up to full dips
Progressive Overload: Advancing Your Dip Workouts
As you become proficient in basic dips, it’s crucial to progressively challenge yourself to continue making strength gains. How can you increase the difficulty of your dip workouts?
Increasing Volume
Start by gradually increasing the number of repetitions and sets. Aim to add 1-2 reps per set each week, or an additional set to your workout routine.
Adding Weight
Once bodyweight dips become too easy, consider adding external resistance. This can be done using a dip belt with weight plates or holding a dumbbell between your feet.
Varying Tempo
Experiment with different tempos to challenge your muscles in new ways. Try slow negatives (lowering phase) or pause reps at the bottom of the movement.
Advanced Variations
As your strength improves, you can explore more challenging dip variations:
- L-sit dips for increased core engagement
- Ring dips for enhanced stabilization and range of motion
- Plyometric dips for explosive power development
Integrating Dips into Your Workout Routine
To maximize the benefits of dips, it’s important to incorporate them strategically into your overall workout plan. But how often should you perform dips, and where do they fit in your routine?
Frequency
For most individuals, performing dips 2-3 times per week provides sufficient stimulus for strength gains while allowing adequate recovery. However, this can be adjusted based on your fitness level and goals.
Workout Placement
Dips are typically best performed early in your workout when your muscles are fresh. They can be an excellent exercise to start your chest or triceps training day.
Complementary Exercises
To create a well-rounded upper body workout, combine dips with exercises that target complementary muscle groups:
- Pull-ups or chin-ups for back and biceps
- Overhead presses for shoulder development
- Rows for upper back strength
Common Mistakes to Avoid When Using Dip Stations
While dips are an excellent exercise, improper technique can lead to suboptimal results or even injury. What are some common mistakes to watch out for?
Excessive Range of Motion
Lowering yourself too far can put unnecessary strain on your shoulder joints. Descend only until your upper arms are parallel to the ground or slightly below.
Flaring Elbows
Keeping your elbows close to your body during the movement ensures proper engagement of the triceps and reduces shoulder stress.
Using Momentum
Swinging or using momentum to complete reps reduces muscle engagement and increases injury risk. Focus on controlled, deliberate movements.
Neglecting Warm-up
Proper warm-up is crucial for preparing your shoulders and elbows for the demanding nature of dips. Include dynamic stretches and lightweight mobility exercises before your dip workout.
Maintaining Your Dip Station: Care and Longevity Tips
To ensure your dip station remains a reliable piece of equipment for years to come, proper maintenance is key. How can you keep your dip station in top condition?
Regular Cleaning
Wipe down the bars and frame after each use to remove sweat and prevent rust. For deeper cleaning, use a mild soap solution periodically.
Lubrication
If your dip station has moving parts or adjustable features, apply a silicone-based lubricant to keep them functioning smoothly.
Stability Check
Regularly inspect all bolts and connections, tightening them if necessary to maintain stability and safety.
Storage
If possible, store your dip station indoors or use a protective cover to shield it from the elements, especially if it’s made of materials prone to rust.
By following these maintenance tips, you can significantly extend the lifespan of your dip station, ensuring it remains a valuable asset in your fitness journey for years to come.
If you’re looking to add a challenging upper body exercise to your home gym, dip stations are a fantastic option. But with so many types and brands on the market, how do you choose the right dip bar for your needs? This comprehensive guide will walk you through everything you need to know about purchasing and using dip stations for killer strength training.
What Are Dip Stations & Why Use Them?
A dip station, sometimes called a dip bar, allows you to perform dips – an intense push-up variation working your shoulders, arms, and chest. Dips build serious upper body power while also engaging your core and legs for stabilization. They’re one of the most effective bodyweight exercises out there.
Dip bars come in a variety of designs from simple standalone units to tower stations with pull-up handles. You can pick up an affordable option for under $100 or splurge on a premium station loaded with accessories. Either way, a dip bar is a worthy addition to a home or garage gym.
Beyond building brute strength in your arms, shoulders and back, mastering dips has many benefits including:
- Developing chiseled, powerful pecs
- Toning your triceps and increasing pressing strength
- Improving balance and coordination
- Increasing core stabilization
- Enhancing sports performance for swimming, climbing, gymnastics
- Adding cardio to your routine by pumping out fast dips
If you’ve only done bench presses and push-ups, prepare to be humbled by the unstable, dynamic challenge of dipping your bodyweight. Once you build the strength to bang out 10-15 controlled reps, you’ll be amazed by your new explosiveness and muscular endurance.
Getting Started with Dip Stations

Here’s a quick primer on how to start dipping like a pro:
- Adjust the bar to around shoulder height and mount it with hands placed slightly wider than shoulders.
- Extend arms straight and keep body tight as you slowly lower down until shoulders are just below elbows.
- Push back up powerfully through the palms to return to starting position.
- Avoid “bouncing” out of the bottom – use controlled form and full range of motion.
Aim for 3 sets of 8-12 reps as you’re learning the movement. Weighted dips or gymnastics variations can be added later to increase difficulty.
Choosing the Best Dip Station
With so many dip stand options on the market, it can be tough to select the right model. Keep these tips in mind when shopping around:
- Bar material – Steel offers durability, but aluminum prevents rust if storing outside.
- Grip type – Opt for neutral or angled grip to reduce wrist strain.
- Bar diameter – Standard is 1.25″, but go thicker for comfort.
- Max user weight – Confirm the unit supports your bodyweight plus plates if doing weighted dips.
- Height settings – Multiple adjustments ensure proper fit for different users.
- Stability – Heavy-duty frames prevent shaking or tipping during use.
- Footprint – If space is limited, get a standalone or wall-mounted station.
While standalone bars are most affordable, full rigs like the Rogue Dip & Pull-Up Station allow combining dips with rows, knee raises and more. It all depends on your budget and versatility needs.
Safety Tips

To stay safe and reduce injury risks while dipping:
- Warm up joints before starting and build gradually in volume.
- Maintain proper alignment – don’t let shoulders shrug or round.
- Use controlled form without jerky movements or bouncing.
- If struggling, use an assisted dip machine or slow negatives.
- Stop immediately if feeling pain or discomfort in shoulders.
While an incredibly effective exercise, dips can be taxing on joints. Listen to your body and back off if experiencing any shoulder impingement.
Ready to Start Dipping?
Adding dip stations to your home or garage gym is one of the best ways to build brute upper body strength and power. With so many quality options available, you’re sure to find the perfect dip stand to start sculpting muscle and taking your training to new heights.
Just remember to begin conservatively, use proper form, and give your body time to adapt to this challenging movement. Mastering dips requires patience, persistence and progressive overload. But with the right preparation, it won’t be long until you’re banging out sets and unveiling the sickest shoulders and arms around!
When setting up your home gym, one of the most versatile and effective pieces of equipment to add is a dip station. But with so many types and designs available, how do you determine the right dip bar to meet your needs?
Understanding the pros, cons and features of the various dip station options will help you select the perfect model for your training goals, space constraints and budget.
Different Types of Dip Stations Explained
Here’s an overview of the main dip bar styles and what each has to offer:
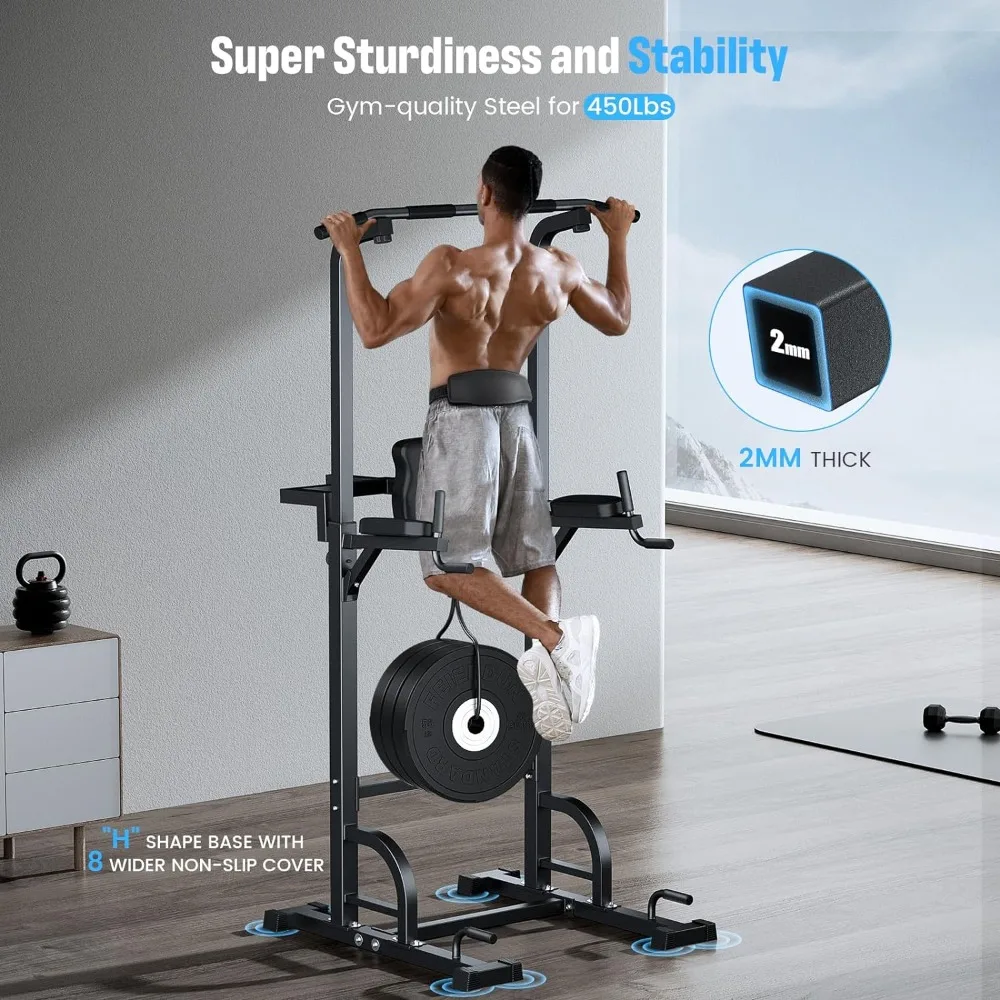
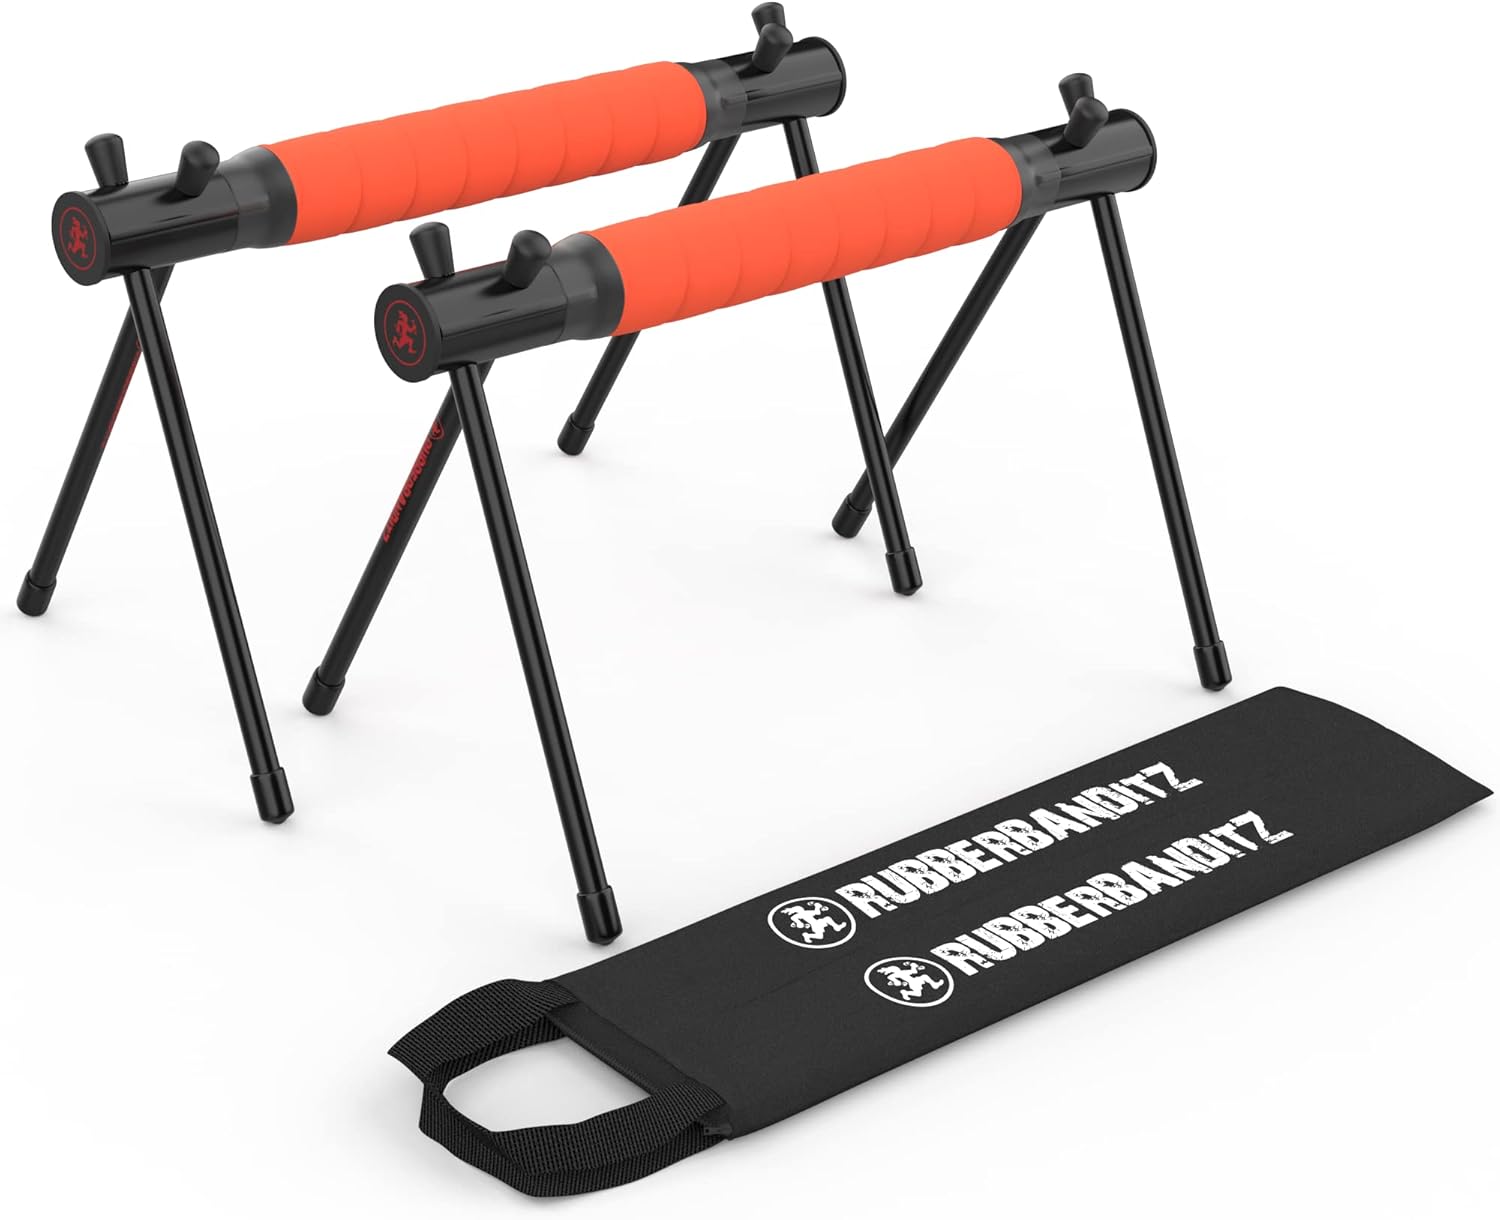
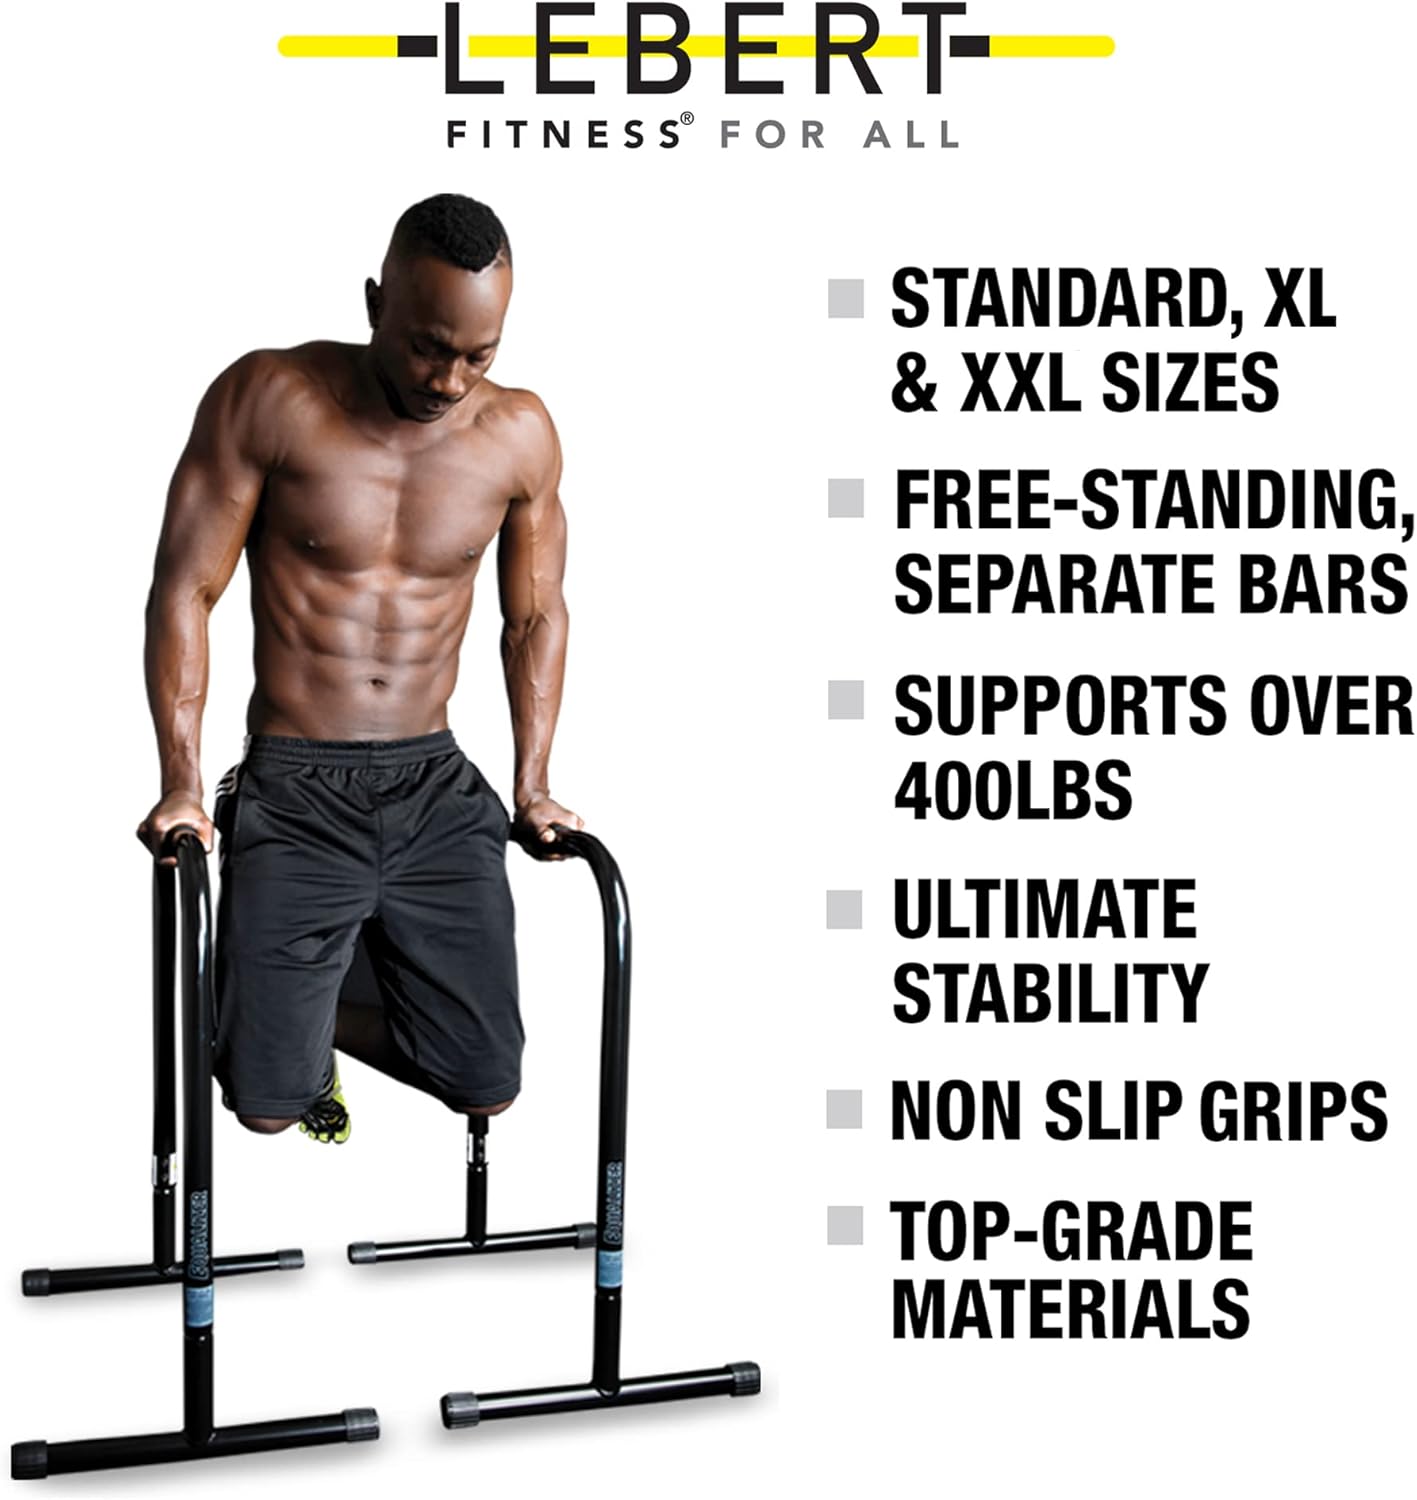
Freestanding Dip Stations
As the name suggests, freestanding dip bars do not require attachment to a wall or ceiling. They have a weighted base for stability, making them easy to move and position.
Pros:
- Very portable and space efficient
- Ideal for home gyms or garages with floor space limitations
- Often adjustable to accommodate different heights
Cons:
- Can shake or wobble during use
- Lower weight capacities than fixed stations
- Limited accessory options compared to full rigs
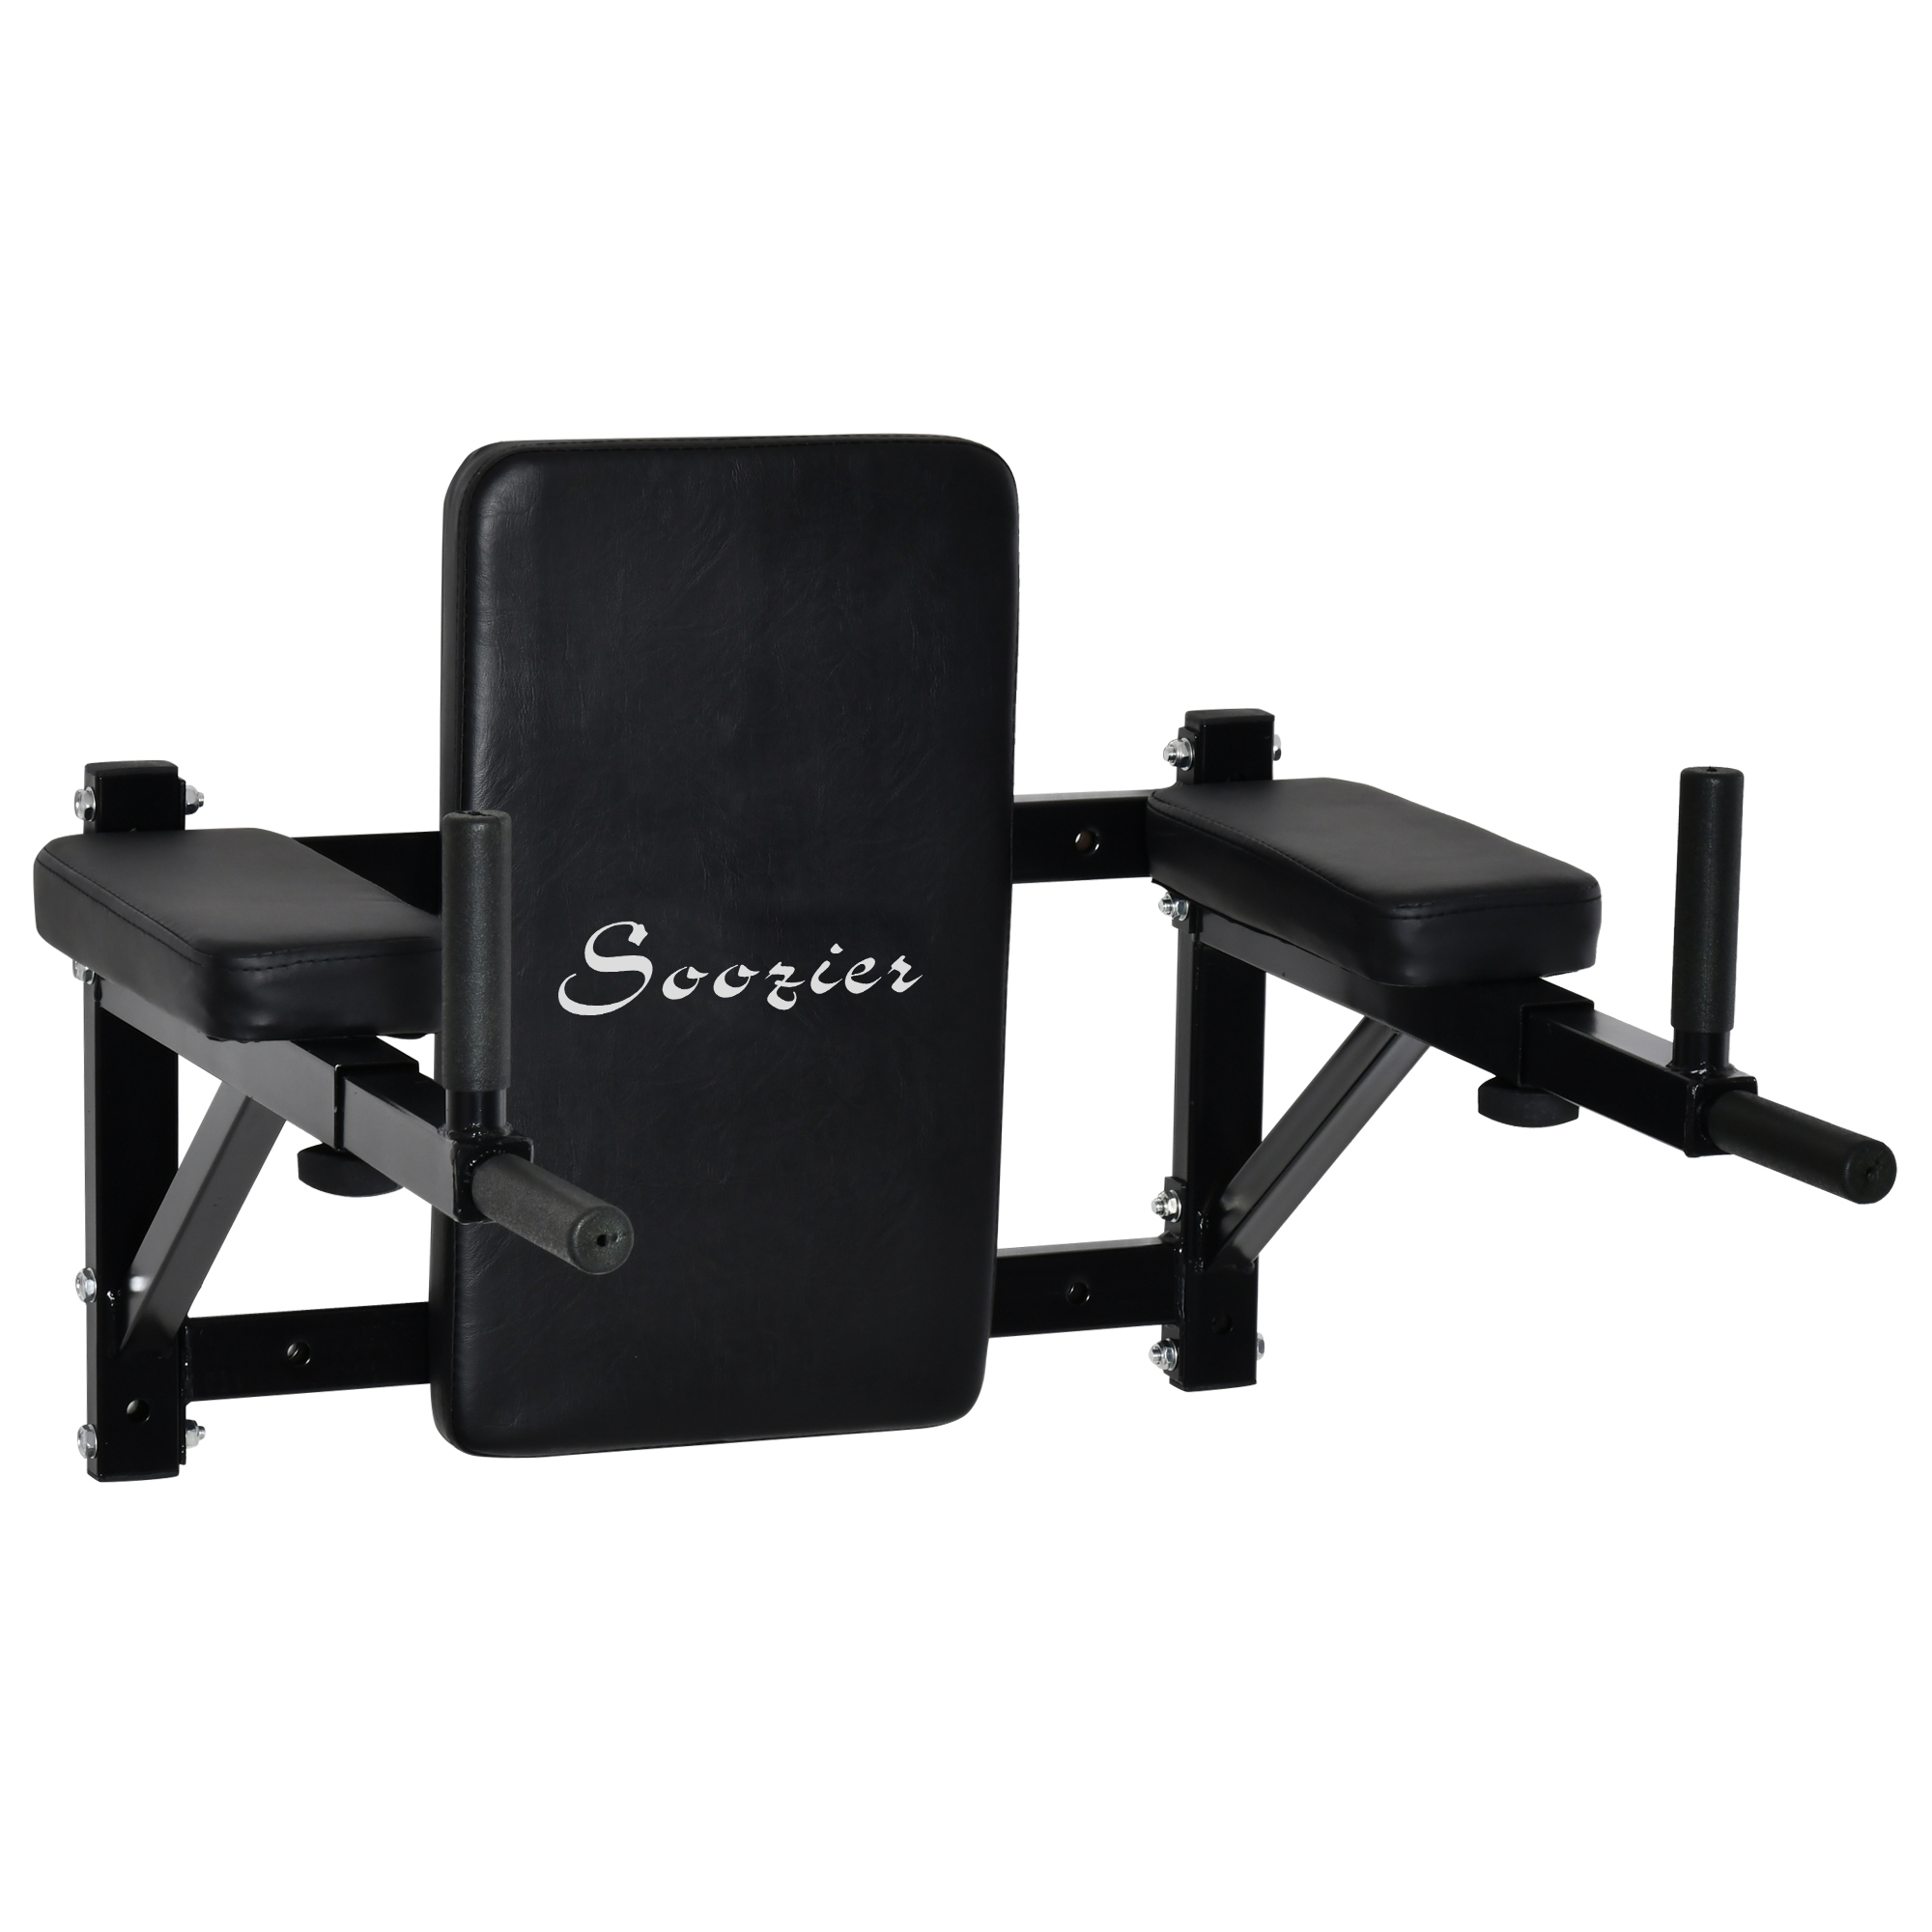
Wall/Corner Mounted Dip Bars
Wall or corner mounted dip stations attach directly to a sturdy wall stud or corner for rock solid stability.
Pros:
- Save floor space by mounting vertically
- Very secure with no shaking
- Often allow combining with pull-up bars
Cons:
- Permanent mounting limits placement flexibility
- Require solid wall studs and proper installation
- Can mar walls or floors during use
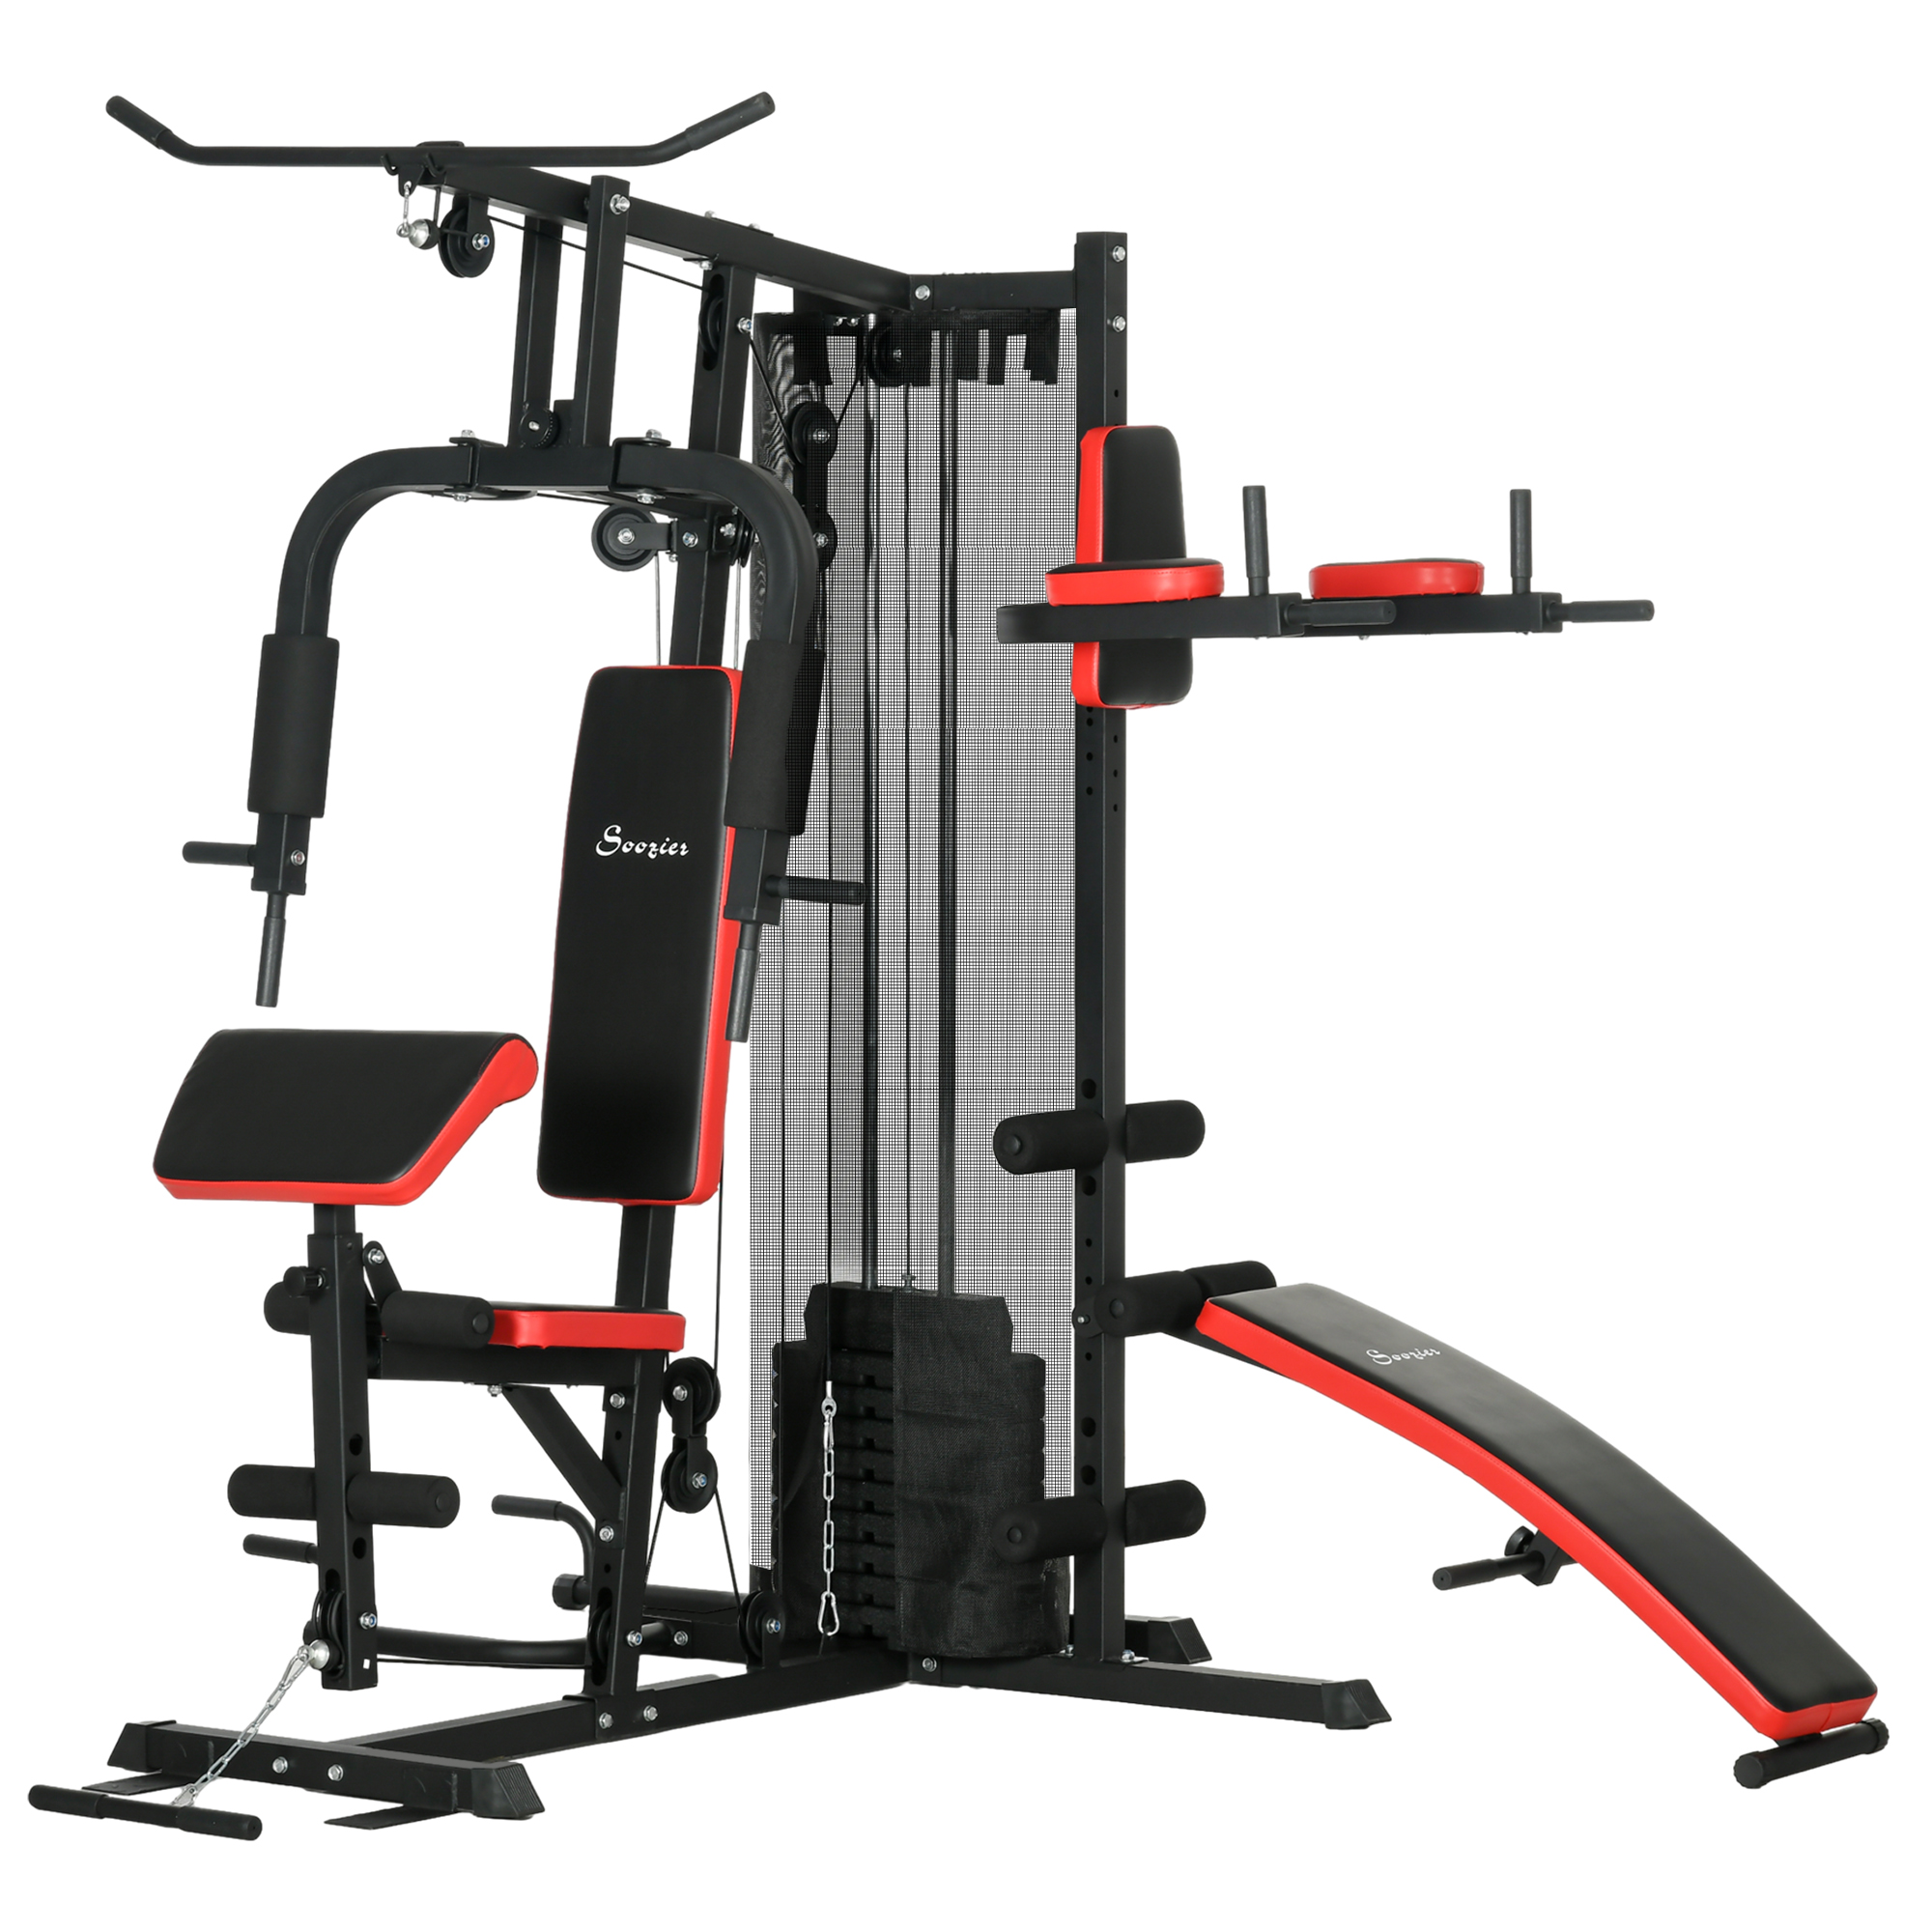
Dip Station Towers

Full dip towers offer the ultimate versatility, combining dip handles with other stations like pull-up bars, abdominal rollers and more.
Pros:
- Provide all-in-one training solution
- Very stable with multiple mounting points
- Allow unlimited pairing of exercises
Cons:
- Large footprint required
- Higher cost than basic standalone units
- Often fixed height without adjustment
Choosing What’s Right For You
Freestanding dip bars provide the most flexibility and affordability for basic dip training. But if you have the space and budget, a full tower opens unlimited possibilities to take your workouts to the next level.
No matter what design you choose, be sure to confirm the maximum user weight capacity before purchasing. This ensures the station can safely support your bodyweight, even when adding plates or bands for weighted dips.
With the right dip stand, you’ll be pumping out high rep sets and building ripped upper body muscle in no time. Just be cautious of shoulder overuse injuries and listen to your body as you increase intensity.
Now get ready to fly like a gymnast and start sculpting some seriously sculpted arms and pecs!
Building your own home gym? Adding a quality dip station should be high on your equipment list. Dips are one of the most effective bodyweight exercises for blasting the chest, arms and shoulders. But finding a sturdy, versatile dip stand online can be challenging with so many brands and options to choose from.
Here’s a look at some of the top dip bars available through online retailers right now:
Where to Buy Quality Dip Stations Online
Rogue Fitness
Rogue is the gold standard when it comes to commercial grade strength training equipment. Their dip bars and stands offer unmatched stability and durability.
Top picks:
- Rogue Matador Dip Station – Freestanding unit perfect for home gyms
- Rogue P-5V Dip & Pull-Up Station – Feature-loaded tower with various grip options
Titan Fitness
For budget-friendly options under $200, Titan Fitness is hard to beat. Their X-3 series offers excellent value for garage gyms.
Top picks:
- Titan Dip Bar Stand Alone – Compact and adjustable freestanding dip station
- Titan Tall Wall Mounted Pull Up & Dip Bar – Space saving wall-mounted design
Rep Fitness
Rep Fitness specializes in affordable, high-quality gear perfect for outfitting a home workout space.
Top picks:
- Rep FitnessDip Attachment – Add dips to your power rack or rig
- Rep PR-5000 Dip Station – Sturdy standalone model with lots of customization
Valor Fitness
Known for innovative designs and premium materials, Valor makes dip stands that will last a lifetime.
Top picks:
- Valor Athletics BWD-9 Dip Station – Robust corner-mounted dip and pull-up tower
- Valor Fitness BD-9 – Solid standalone model with spotter platforms
No matter which brand you choose, be sure to inspect product specs like weight limits, bar types, and height settings. This ensures you get a dip station engineered for your specific needs.
With the right dip bar, you’ll be sculpting and strengthening your upper body in no time. Just be patient as you build up the stabilizing ability to rep out sets of this challenging movement pattern.
Now get ready to take your triceps and pressing power to new heights!
Looking to add a dip station to your home gym setup? While buying online provides convenience, there’s something to be said for seeing equipment firsthand before purchasing.
Luckily, many physical retail stores also stock quality dip bars and stands these days. Here’s a look at some top options for finding dip stations locally:
Finding Local Stores Selling Dip Stations

Sporting Goods Stores
Major sporting goods retailers like Dick’s Sporting Goods, Sports Authority and Modell’s carry a decent selection of dip bars and stands. Just be aware that floor models may be prone to wear and tear from customer use.
While big box stores mainly have budget-friendly generic dip stations, you can sometimes find name brands like Valor Fitness and CAP Barbell as well.
Fitness Equipment Retailers
Stores focused on commercial gym equipment often have premium dip rigs from Rogue, Sorinex and other major brands. You’ll pay more than mass-market options but get commercial-level durability.
Some chains to check are Fitness Armory, Fitness Zone and Fitness Source. Many also offer used equipment sales to save money.
CrossFit Gyms
If you’ve got a few CrossFit boxes in your area, call and ask if they have any used dip bars for sale. Since these gyms go through tons of equipment, you can sometimes find like-new bars at half retail price.
Make sure to test for stability and inspect for damage before purchasing any used dip station.
Craigslist & Facebook Marketplace

These online classifieds and auction sites are treasure troves for finding bargain deals on home gym equipment. Search regularly for dip stations and be ready to buy when deals pop up.
Just be smart when meeting strangers for pickup and bring help if carrying a heavy station.
With some hunting both online and locally, you’re bound to find the perfect dip bar to start sculpting shoulders of steel. Just take it slow adding volume to avoid overuse injuries as your body adapts.
Pretty soon you’ll be dipping through sets like a pro and wowing gym buddies with your newfound upper body power!
With so many types and styles available, choosing the right dip station for your home gym can be tricky. The best dip bar for you will depend on factors like budget, space, planned exercises, and goals.
Here are some key considerations when selecting a dip stand to match your needs:
Choosing the Best Dip Station For Your Needs
Available Space
If working with limited space, compact standalone or wall-mounted stations are ideal. For large areas, consider a full dip tower combo unit.
Portability Needs
Freestanding dip bars allow repositioning easily. Fixed towers provide more stability but lose mobility.
Added Exercises
Do you want to combine dips with pull-ups and knee raises? Opt for an all-in-one tower station.
Durability
Commercial grade steel bars will outlast generic models. Pay more for quality if planning high-volume use.
Weight Capacity
Confirm the dip stand is rated for your current body weight plus added plates if doing weighted dips.
Budget
Quality freestanding stations run $150-$300. Full combo rigs cost $500-$1,000+. Set realistic spending expectations.
Bar Types
Neutral, parallel, and rotating grip bars allow adjusting hand positioning. Go multi-grip for flexibility.
Safety
See that the dip bar has non-slip feet, durable welds, and locks to prevent collapsing.
Your Goals
Are you training for strength, hypertrophy, endurance? Choose a station aligned with your goals.
Taking the time to properly evaluate your needs will ensure you select the perfect dip stand for your specific situation. And be sure to budget in accessories like dip belts and added weight plates too.
With the right dip bar in your arsenal, you’ll be pumping out reps in perfect form in no time on your way to new upper body gains!
Just got a new dip station for your home gym? Awesome! Dips are one of the best bodyweight exercises for building brute upper body strength. But taking time to properly set up and secure your dip stand is crucial for safety and stability during workouts.
Follow these tips when assembling and positioning your new dip bar:
Setting Up Your New Dip Station Safely

Read Instructions Carefully
Don’t skip past the manual. Following directions precisely prevents dangerous mistakes.
Clear the Area
Remove clutter and debris to create a clear workspace for assembly. This also reduces trip hazards.
Gather Tools
Have hex keys, wrenches, and any other tools needed per the instructions handy before starting.
Start with Base
Attach any stabilizer bars or cross members to base first for solid foundation.
Add Dip Bars
With base assembled, bolt dip bars securely into place at desired height.
Tighten All Hardware
Double check every bolt and fastener is tightened fully to prevent loosening.
Anchor If Needed
Consider securing freestanding units to studs or ground for extra stability.
Level It Out
Adjust feet heights as needed to prevent rocking or tipping of the station.
Test It Carefully
Have a partner try using the dip bar first to confirm its safety.
Add Safety Rails

Bolt on spotter stands to catch you if unable to complete a rep.
Rushing the setup process risks damaging equipment or causing injury. Take your time to assemble everything meticulously. Your patience will pay off big when you’re safely cranking out dips in your new home gym oasis!
Just starting out on dip stations and looking for some beginner-friendly movements? Proper form and controlled reps are key to mastering dips safely as you build strength.
Here are some great dip bar exercises for dip station newcomers:
Beginner Dip Station Exercises To Try
Assisted Dips
Loop resistance bands around the dip handles and step into the bands with your feet to provide boosting assistance as you dip down.
Negative Dips
Use a bench or box to elevate yourself to the top dip position. Slowly lower yourself down in 3-5 seconds until shoulders are stretched.
Dip Hold
Hold the top contracted dip position with elbows locked out to build static strength.
Forward Lean Dips
Lean torso slightly forward when lowering down to better target triceps.
Bench Dips
Sit on edge of bench with hands on either side gripping edge. Straighten arms to lift body and bend elbows to dip down.
Half Rep Dips
Perform only top half of dip motion without fully extending elbows to decrease resistance.
Eccentric Dips
Use a stool to get into top dip position. Jump feet back to floor and slowly resist on way down.
Split Stance Dips
Stagger feet one in front of the other during dips for added balance and core work.
Start with just bodyweight and 2-3 sets of 5-8 reps on these dip variations. This builds strength while minimizing shoulder strain as you perfect form.
Gradually increase reps and sets as your muscles adapt. And remember, slow and controlled is key – no kipping!
Once you’ve built a solid strength foundation, it’s time to take your dip station workouts up a notch with these challenging advanced dip variations:
Advanced Dip Bar Exercises For Strength

Weighted Dips
Add a dipping belt with chain to hang extra weight plates for increased resistance.
Ring Dips
Install gymnastic rings on your dip stand for greater range of motion and balance challenge.
Slow Eccentric Dips
Lower yourself down over a 5 count to maximize time under tension.
Explosive Dips
Focus on generating maximum power out of the bottom position for building explosiveness.
Deficit Dips
Elevate feet on a box to increase leverage and difficulty.
Single Arm Dips
Keep one hand on stationary rail while dipping down with the other arm.
Forward Leaned Dips
Shift torso forward when lowering down to blast triceps.
Rotating Dips
Begin with neutral grip then rotate hands outwards at bottom for shoulder mobility.
Dip Shrugs
Add an upward shrug at the top of the movement to activate traps.
Really focus on using full range of motion and avoiding shoulder impingement on advanced dip variations. Keep reps in the 6-10 range for optimal muscle gains.
With smart programming and proper recovery, you’ll be dipping circles around the other gym bros in no time!
One of the best uses for a dip station is crafting high intensity upper body and core focused workouts. Dips naturally train pushing and stabilization muscles groups through a large range of motion.
Here’s how to effectively incorporate dip bars into your training routines:
Using Dip Stations for Upper Body & Core Workouts
Chest and Triceps Blast
Perform 3-4 sets of dips targeting 8-12 reps. Superset with pushups and tricep extensions for pump.
Shoulder and Back Builder
Follow up 3 sets of 8-10 weighted dips by immediately rowing to failure with resistance bands.
Arm Shock Session
Do 100 total reps of various dip variations like forward lean, deficit, and eccentric dips with minimal rest.
Upper Body Power Ladder
Climb “ladder” from 1 rep, 2 reps, 3 reps up to 6-8 reps increasing weight each set.
Core Integration Routine
Perform dips while raising and extending one leg for added glute and abdominal activation.
Dip Giant Set
Link dips with pushups, pull-ups, body saws, and ab rollouts for serious all-over training.
The key is choosing angles and positions that target different muscle groups on dip stations. This provides variation that shocked muscles respond to.
Aprroach dip station training with energy and creativity. You’ll be carving out an award-winning physique in no time!
Looking for new ways to spice up your workout regimen? Adding dip station exercises can provide just the stimulus your routine needs.
Here’s how to effectively incorporate dip bars into your existing fitness plan:
Incorporating Dip Stations Into Your Fitness Routine
Substitute for Push Exercises
Swap out bench presses, shoulder presses or pushups for dips 1-2 times per week for variety.
Superset with Pulling Moves
Pair dips with chinups or inverted rows for contrasting push/pull muscle work.
Combine with Leg Raises
Follow dip sets immediately with hanging leg raises on the same station for core activation.
Use for Burnouts
Finish workouts with 1-2 “max rep” dip burnout sets to exhaust pushing muscles.
Perform On Off Days
Add bodyweight dip “pump” sessions on non-lifting days to spur growth.
Timed Circuits
Move from dips to battle ropes, bike sprints, etc. for timed full-body circuits.
Start by adding dips to your current program 2x per week and assess recovery. Increase dip volume gradually as your joints and connective tissues adapt.
Approach new exercises like dips with patience and restraint to remain injury-free. You’ll be dominating that dip stand in no time on your way to new strength gains!
Just got a new dip station for your home gym? Awesome! Dips are an incredibly effective exercise for building brute upper body strength when programmed correctly.
Follow these tips to maximize results from your dip bar training:
Getting the Most Out of Your Dip Station Workouts

Use Full Range of Motion
Descend until shoulders are stretched below elbows for complete pectoral activation.
Control Tempo
Use a 3 second negative, 1 second pause at bottom, and explosive push for optimal time under tension.
Add Weight
Use a dipping belt with chains or plates to progressively overload strength gains.
Vary Grip Width
Use shoulder-width, wide, and narrow grips to shift emphasis across chest and arms.
Pair with Overhead Pressing
Combine horizontal push of dips with vertical push like overhead press for balanced development.
Watch Your Shoulders
Stop dips immediately if feeling shoulder pain or impingement.
Allow Recovery
Give connective tissues 48-72 hours rest between intense dip sessions.
Use Explosive Power
Drive up forcefully out of bottom position to improve dip strength and power.
Making dips a staple of your upper push days will build serious chest, shoulder and arm mass. Just be patient and progress volume gradually to avoid overuse injuries.
Now get dipping and start sculpting that superhero physique!
Dip stations allow performing one of the most effective upper body exercises out there. But make some common form mistakes, and you risk both injury and reduced results.
Here are key dip station errors to be aware of:
Common Mistakes to Avoid With Dip Stations

Bouncing Out of Bottom
Avoid using momentum to “bounce” back up. Control the eccentric and concentrate.
Limited Range of Motion
Dip down until shoulder joint is below your elbow for full stretch and pec activation.
Leaning Too Far Forward
Keep your torso upright or only slightly angled to keep tension on the chest.
Flared Elbows
Keep elbows tucked close to body. Flaring places strain on shoulders.
Gripping Bars Too Tight
Hold bars gently without over-squeezing to avoid wrist or elbow pain.
Skipping Warm Up Sets
Always do lighter ramp up sets to prep joints and ligaments before going heavy.
Ignoring Shoulder Discomfort
Stop immediately if feeling shoulder impingement. Dips can aggravate this.
Not Engaging Core
Keep core braced to avoid excessive swinging and waste of energy.
Perfecting dip form takes patience, practice and gradually ramping up intensity. But it’s worth taking the time to maximize results while minimizing injury risks.
Keep these mistakes in mind, focus on quality reps, and you’ll be dipping like a pro in no time!
Dip stations allow performing an incredibly effective upper body exercise safely in your own home gym. But anytime you’re lifting and moving heavy weights, caution is required.
Here are some key safety tips for getting the most from your home dip stand:
Safety Tips When Using Dip Bars at Home
Inspect Equipment Thoroughly
Check for loose bolts, frays, or damage before each use to prevent accidents.
Secure Stations Properly
Ensure freestanding units are anchored to floor or walls to prevent tipping.
Use Spotter Stands
Have spotter arms installed to catch you safely if unable to complete a rep.
Go Light With Added Weight
When using weighted dips, be very conservative loading plates to avoid strain.
Don’t Train to Failure
Leave 1-2 reps “in the tank” on sets to avoid shoulder impingement.
Listen to Your Body
Stop immediately if feeling tendon pain or unusual joint discomfort.
Wear Proper Footwear
Opt for grippy, flat-soled shoes to avoid slips while mounting the station.
Have a Spotter If Needed
If attempting heavy weighted dips, use a spotter for safety.
With smart precautions and controlled technique, home dip stations allow you to safely build brute upper body strength. Just be patient and gradually work to higher training volumes.
Now get dipping! Sculpted pecs and arms are calling!
One of the great things about dip stations is they can be modified for any fitness level. Whether you’re just starting out or an experienced athlete, there are ways to adjust dip exercises to match your current strength and goals.
Here are some tips for scaling dip station workouts up or down:
Modifying Dip Station Exercises for Different Fitness Levels

Beginner Modifications
- Assisted dips with resistance bands or partner
- Elevating feet on box to decrease resistance
- Partial or half-rep dips
- Slower tempo with 3-5 second negatives
- Hold top contracted position as active rest
Intermediate Modifications
- Adding small amounts of weight for progressive overload
- Single-arm dips for increased instability
- Forward leans or chest-focused dip angles
- Explosive dips focusing on maximum power
- High rep burnout sets
Advanced Modifications
- Weighted dips with 45+ lbs added
- Ring dips or suspended handle variations
- Slow 5 second negative reps
- Deficit or elevated feet dips
- Chest fly style ring dips
Start conservatively to avoid overfatigue or injury, especially if new to dip exercises. Progressively increase intensity as your body adapts.
With the right modifications, anyone can benefit from and master the king of upper body pushes – the dip!
A quality dip station can provide years of solid performance – but only with proper maintenance and care. Here are some tips for keeping your dip stand in top working order:
Maintenance Tips to Keep Your Dip Station in Top Shape

Inspect Hardware
Periodically check and tighten any loose bolts, nuts or fasteners.
Lubricate Moving Parts
Apply lubricant to rotate collars, wheels or other moving elements.
Touch Up Paint
Use matching touch up paint on any scratches to prevent rusting.
Check Grips
Replace worn or ripped grip tape or handles for optimal safety.
Clean Equipment
Wipe down bars regularly to prevent buildup of dirt, dust and chalk.
Store Properly
If not anchored, stand unit vertically when not in use to maximize space.
Protect Flooring
Use thick mats under and around base to prevent floor scratches.
Watch for Damage
Take unit out of service if you see major dents, cracks or instabilities.
With consistent maintenance and inspection, a quality dip station should deliver many years of solid performance. Protect your investment with proper care.
Now get dipping and start putting that beefed up upper body to work!