How to select the right yarn for football gloves. What is the best way to measure hand size for a custom fit. How to cast on and shape glove fingers. What techniques are used for knitting the palm and thumb gusset. How to add non-slip pads and personalize your handmade football gloves.
Choosing the Ideal Yarn for Football Gloves
Selecting the appropriate yarn is crucial for creating durable and comfortable football gloves. A lightweight wool or wool blend specifically designed for sports apparel is ideal. Look for fingering or sport weight yarns that incorporate nylon or acrylic for added stretch and durability. Popular brands such as Cascade and Berroco offer superwash wools that are perfect for this project.
When choosing yarn, consider the following factors:
- Durability to withstand frequent use
- Breathability to prevent excessive sweating
- Stretchiness for a snug fit
- Warmth for chilly game days
How much yarn do you need for a pair of football gloves? The amount varies depending on the pattern and glove size, but typically you’ll need between 200-300 yards of yarn. Always purchase a little extra to account for gauge swatches and potential mistakes.
Accurate Hand Measurements for a Perfect Fit
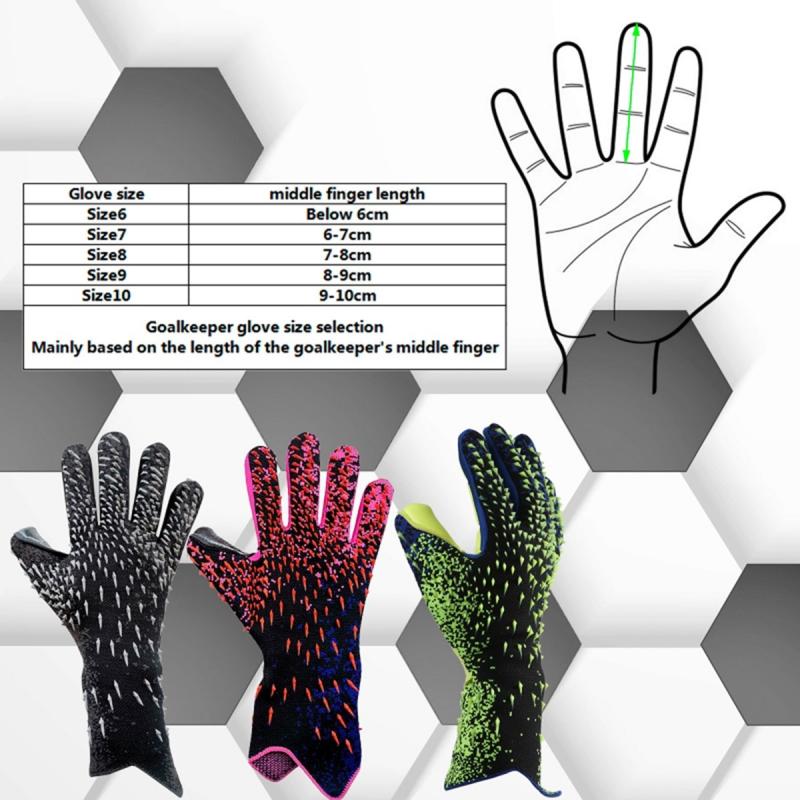
Achieving the right fit is essential for functional football gloves. To ensure accuracy, measure the circumference of your dominant hand just below the knuckles. This measurement will guide you in selecting the correct needle size and customizing finger lengths if necessary.
Follow these steps for precise measurements:
- Trace your hand on paper
- Mark the widest points
- Measure the circumference with a flexible tape measure
- Record measurements for each finger
Why is gauge important when knitting gloves? Gauge determines the size and fit of your finished gloves. Knit a gauge swatch using your chosen yarn and needles to ensure you achieve the correct stitch count per inch as specified in your pattern.
Mastering the Finger-First Knitting Technique
Unlike traditional glove patterns, football gloves are typically knit finger-first to create a seamless interior. This technique requires the use of double-pointed needles or the magic loop method.

To begin knitting the fingers:
- Cast on the required number of stitches for each finger
- Distribute stitches evenly among three or four double-pointed needles
- Join in the round, being careful not to twist stitches
- Begin knitting in rounds, following pattern instructions for decreases at fingertips
Is the magic loop method suitable for beginners? While it may seem intimidating at first, many knitters find the magic loop method easier than juggling multiple double-pointed needles. It allows you to knit small circumferences using a single long circular needle.
Shaping Techniques for Perfectly Contoured Fingers
Proper shaping is key to creating gloves that fit like a second skin. As you knit each finger, you’ll need to incorporate decreases at the fingertip and increases at the base to achieve the right contour.
Follow these tips for well-shaped fingers:
- Use paired decreases (k2tog and ssk) for a symmetrical fingertip
- Space decreases evenly around the finger
- Increase gradually at the finger base to accommodate hand width
- Weave in ends neatly as you connect fingers to maintain a smooth interior
How do you ensure even tension when knitting small circumferences? Maintain consistent tension by keeping your stitches close to the needle tips and avoiding pulling too tightly when switching between needles.

Knitting the Palm: Techniques for Comfort and Durability
Once the fingers are complete, it’s time to focus on the palm of the glove. This section requires a transition to circular needles to accommodate the increased number of stitches.
Key considerations for knitting the palm:
- Choose a stitch pattern that provides grip and flexibility
- Incorporate any desired textures or cables as specified in your pattern
- Refer to your hand measurements to customize width if needed
- Maintain even tension for a professional finish
What stitch patterns work best for football glove palms? Textured stitches like seed stitch or moss stitch can provide extra grip, while ribbing offers flexibility. Some knitters prefer a simple stockinette stitch for a smooth surface that allows for easy addition of non-slip pads later.
Incorporating the Thumb Gusset for Optimal Mobility
A well-designed thumb gusset is crucial for maintaining dexterity in your football gloves. Most patterns will instruct you to begin the thumb gusset when you’ve knit about half of the palm length.
Steps for creating a thumb gusset:
- Increase stitches at the designated point for the gusset
- Continue increasing every other round until you reach the specified number of stitches
- Place gusset stitches on a holder or waste yarn
- Continue knitting the main part of the glove
- Return to the held stitches to complete the thumb later
How can you ensure your thumb gusset doesn’t create holes or gaps? When picking up stitches to work the thumb, pick up an extra stitch or two at the base of the gusset and decrease them in the next round. This helps close any potential gaps.
Finishing Touches: Non-Slip Pads and Personalization
To enhance the functionality and uniqueness of your handmade football gloves, consider adding non-slip pads and personal touches.
Options for improving grip:
- Sew or glue leather patches to fingertips and palm
- Apply silicone dots using fabric paint
- Attach rubber or suede pads with strong fabric adhesive
Personalization ideas:
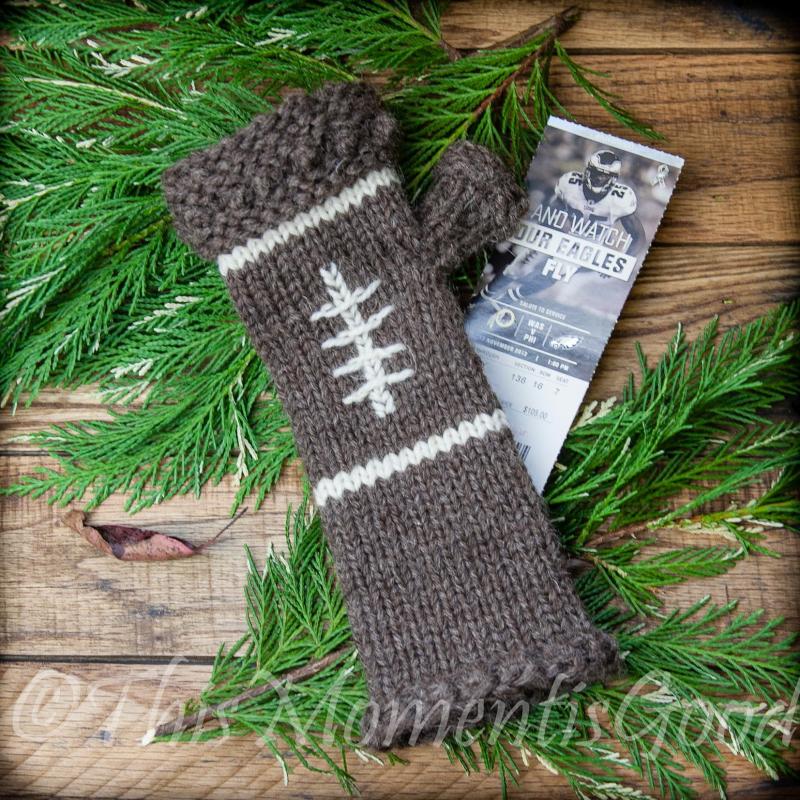
- Embroider your name or number on the wristband
- Knit or sew on a custom label
- Use team colors in your yarn choice or add stripes
How do you ensure non-slip pads stay secure during gameplay? Use a combination of strong fabric glue and reinforcement stitching around the edges of the pads. A zigzag stitch works well for this purpose, providing both strength and flexibility.
Care and Maintenance of Your Handmade Football Gloves
Proper care will extend the life of your knitted football gloves and maintain their performance qualities.
Follow these care instructions:
- Hand wash in cool water with a gentle wool wash
- Alternatively, machine wash in a mesh bag on the delicate cycle
- Gently squeeze out excess water without wringing
- Lay flat to dry away from direct heat or sunlight
- Reshape while damp to maintain proper fit
How often should you wash handmade football gloves? It’s best to wash your gloves after every few uses or whenever they become visibly soiled. Regular cleaning helps prevent odor buildup and maintains the integrity of the fibers.
By following these tips and techniques, you can create a pair of custom football gloves that rival professional quality. Not only will you have the satisfaction of wearing something you made yourself, but you’ll also have gloves that fit perfectly and perform exactly as you need them to on the field. Whether you’re a seasoned knitter or new to the craft, knitting your own football gloves is a rewarding project that combines creativity with functionality.
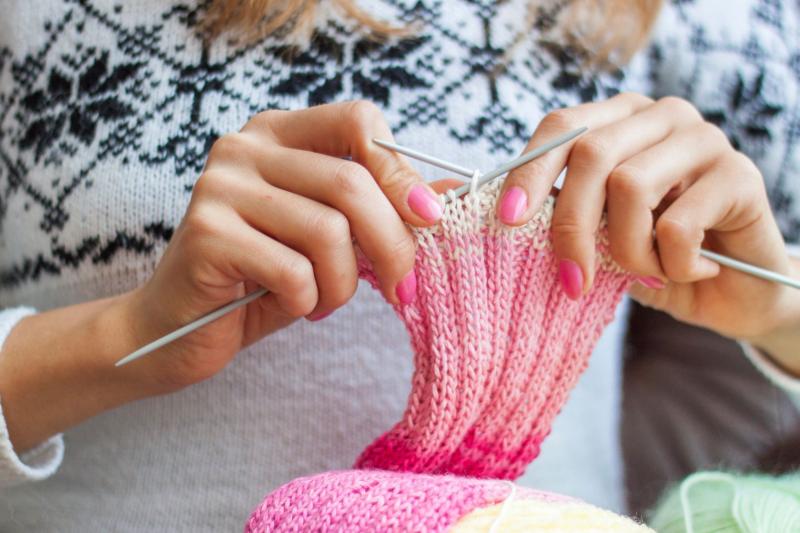
As autumn arrives and football season kicks off, you may be looking for a fun DIY project to support your favorite team. Why not knit your own pair of football gloves right in the comfort of your home? With the right yarn, needles, and techniques, you can craft gloves that will keep your hands toasty on those brisk fall days at the stadium or field. Follow these 15 essential tips to knit your own pair of football gloves just like the pros wear.
Selecting the Right Yarn
The first step is choosing a yarn that will be durable enough for football but still breathable. Look for a lightweight wool or wool blend specifically meant for sports apparel. A fingering or sport weight yarn with some nylon or acrylic blended in will provide both warmth and stretch. Make sure to get enough yardage based on the pattern requirements. Popular brands like Cascade and Berroco offer superwash wools perfect for hardwearing gloves.
Measuring Your Hand Size
It’s crucial to measure your dominant hand circumference right below the knuckles to determine the right glove size. This measurement will be used to choose the correct needle size and customize the pattern’s finger lengths if needed. Trace your hand on paper and mark the widest points to reference. Gauge swatches can also ensure you achieve the right tightness and drape for performance gloves.
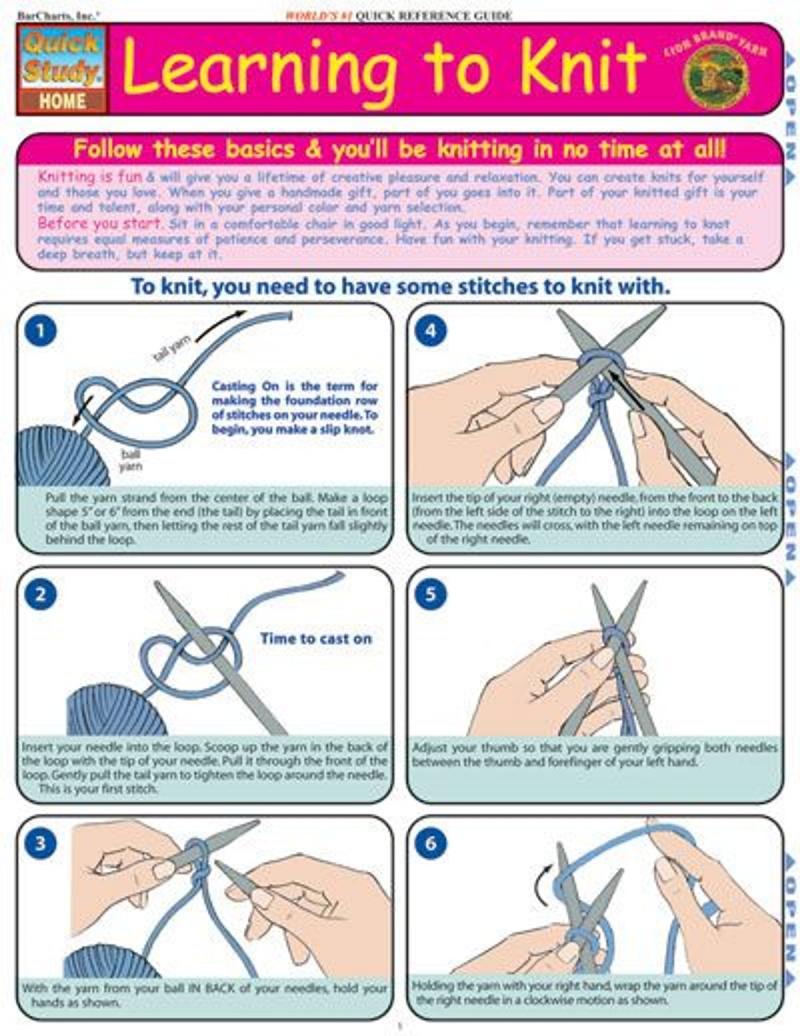
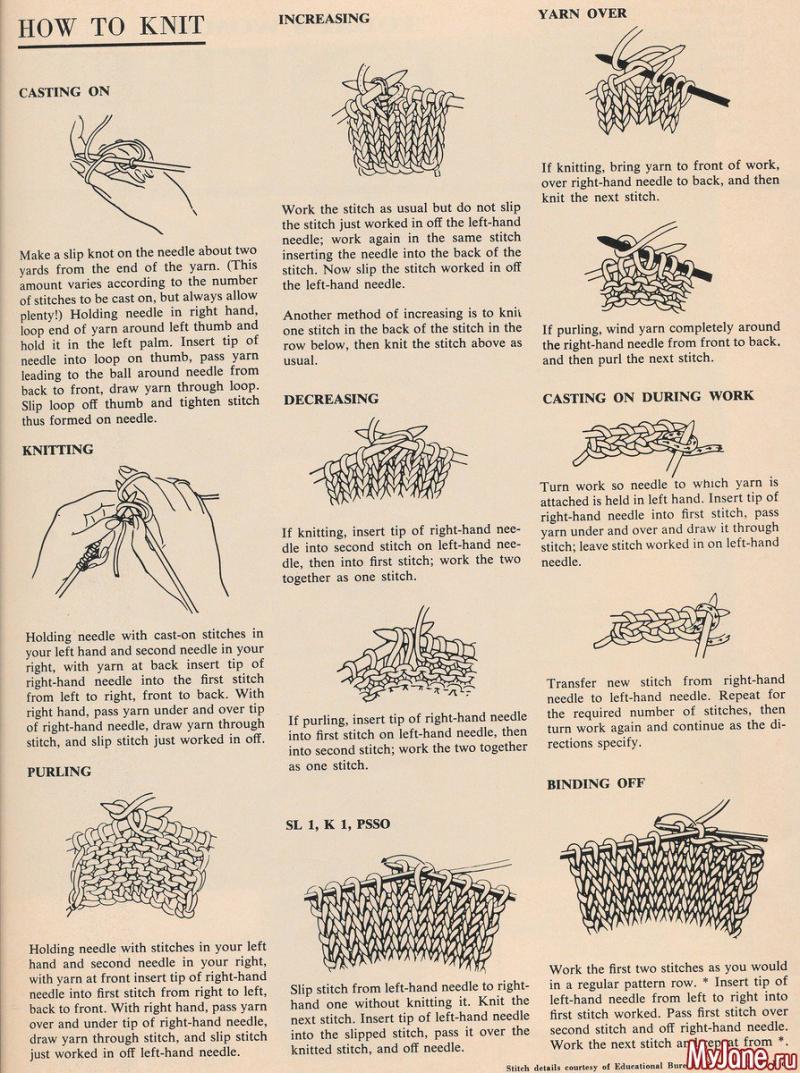
Casting On the Fingers
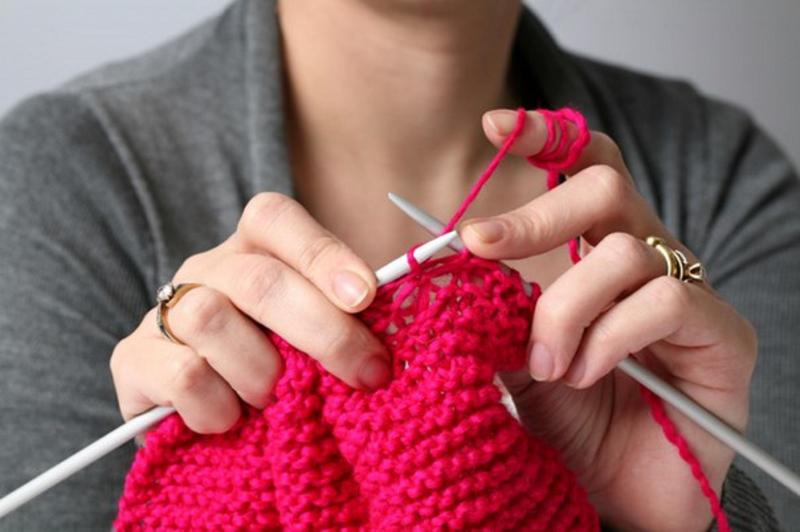
Unlike typical glove patterns, football gloves are knit finger-first for a seamless interior. Use double-pointed needles in your gauge size to cast on stitches for each finger section, keeping the cast on row loose enough to comfortably fit over your fingers. Magic loop knitting is another option for working the fingers individually before joining to knit the whole glove.
Shaping the Fingers
Now you can knit in rounds on the double-pointed needles, decreasing at the fingertip and increasing at the base as indicated until each finger is complete. Make sure to weave in ends neatly as you connect the fingers together. The gloves should have a snug, contoured fit through the hand when the fingers are done.
Knitting the Palm
After finishing the fingers, you will switch to circular needles to knit the palm and back of hand as one piece. Continue knitting in rounds, working any cabling or texture as specified by the pattern. Refer to your hand measurements to customize the width as needed for proper shaping.
Adding Thumb Gussets
No gloves are complete without a comfortable thumb! Most patterns will have you incorporate a thumb gusset when you’ve knit about half of the palm length. You’ll increase stitches on one side for the gusset, then place these stitches on a holder to work later.
Knitting the Wristband
After passing the thumb opening, you can finish the glove wristband to the desired length. Knit in ribbing or other elastic stitches so the cuff fits snugly around your wrist. Refer to a football glove’s wrist length to customize the height.
Picking Up Stitches for Glove Back
Once the palm and wrist are done, you will pick up stitches along the glove edge to begin knitting the back of the hand. Take care to pick up the same number of stitches you cast on for the palm for even shaping.
Decreasing for Shape
Work the back of the hand flat, decreasing to shape the glove around the fingers. You can work short rows to raise the pinky side for a contoured fit. Strategic decreases will mimic the palm’s dimensions on the back of the hand.
Kitchener Stitch to Finish Fingers
The final step is closing the glove fingertips using the Kitchener stitch, grafting the front and back finger stitches together for a seamless look. Weave in all remaining yarn ends inconspicuously for a professional finish inside and out.
Adding Non-Slip Pads to Palms
For extra grip, you can easily sew or glue leather, suede, or rubber pads onto the palm side of your completed gloves. Use fabric glue or a zigzag stitch to reinforce the pads, concentrating on the finger pads and inner palm.
Blocking the Gloves
Soak the finished gloves in wool wash, gently squeeze out excess moisture in a towel, then lay flat to dry, smoothing to finished dimensions. Blocking allows the stitches to relax and evens out any uneven tensions.
Sewing in Labels
Add a personalized touch by sewing in a label with your name or number on the wristband. You can also embroider directly onto the gloves if desired. This will help identify your special handmade gloves.
Washing and Drying Properly
Make sure to wash your wool gloves gently by hand or in a mesh bag on the delicate cycle. Always air dry flat away from direct heat to maintain the wool and shape. Proper care will extend the life of your gloves.
Enjoy Your Homemade Football Gloves!
You did it – your own custom football gloves are ready to wear on the field! Knitting gloves at home lets you control the fit, quality, and style. Your teammates will be impressed with your crafty skills and envious of your one-of-a-kind gloves. Have fun showing your spirit in comfort and warmth this football season thanks to your DIY knitting project.
Measuring Your Hand Size
Knitting your own pair of football gloves can be a fun and rewarding DIY project. With some yarn, needles, and a pattern, you’ll be ready to get started! But before you cast on those first stitches, it’s important to measure your hand size accurately so the finished gloves will fit just right.
Start by tracing your dominate throwing hand on a piece of paper. Make sure to spread your fingers apart so the tracing captures the full width of your palm and fingers. For an even more accurate outline, have someone trace your hand while you hold it in a natural throwing position.
Next, mark the highest point of your palm just below your fingers. This is your hand width measurement. Measure straight across at the widest part of your palm, excluding your thumb. Write down this measurement in inches.
Then measure from the base of your palm heel to the tip of your middle finger. This is your hand length. Make sure not to stretch out your fingers fully – measure in a slightly curved hand position. Record this length measurement as well.
Having both your hand width and hand length measurements will allow you to select the right glove pattern and yarn weight. For most adult hands, the width is around 3.5-4 inches, and length around 7-8.5 inches. But we’re all built differently, so your unique measurements are key!
Choosing a Pattern
Once you’ve got your hand size, it’s time to pick out a knitted glove pattern. Look for a pattern designed specifically for football gloves, as these will have the right shape and protective padding details.
For heavy-duty warmth, consider a pattern with a double layer of fabric over the palms and finger pads. This provides extra protection against tackles and catches. Just be aware that thicker gloves can reduce your dexterity a bit.
Make sure to choose a pattern with some stretch, as football gloves need to flex and move with your hands. Wool or wool blends work well. Stay away from 100% cotton yarns, which don’t have much give.
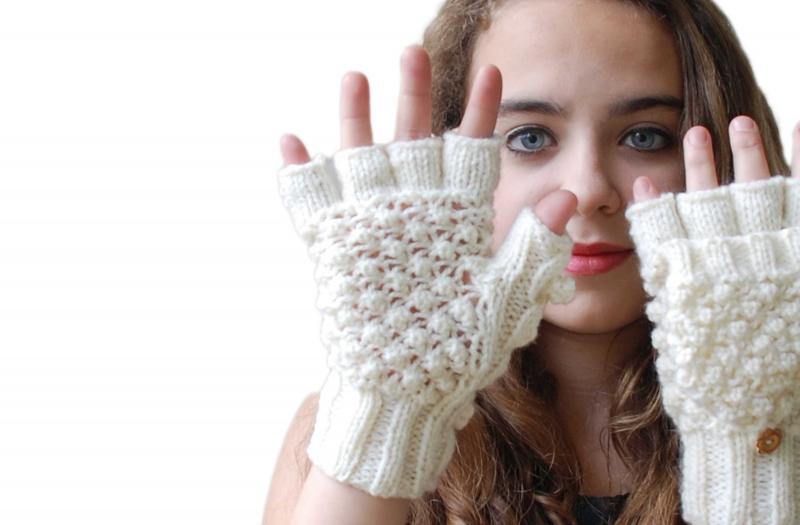
Fingerless gloves patterns are a lighter option if you play skill positions that require more finesse. Just be prepared to get tackled with exposed fingers!
If this is your first time knitting gloves, start with a beginner-friendly pattern without cables or colorwork. Simple stitches will be easier to handle on the small glove pieces.
Selecting Yarn
Pay close attention to the yarn weight and fiber recommended on your pattern. Using the specified yarn will help ensure your gloves turn out at the proper size.
A light or medium weight yarn, like an Aran or worsted weight, allows for good dexterity. Heavy chunky yarns make very thick gloves, so only use these if you need severe cold weather protection or play a position where flexibility isn’t as important.
Wool and wool blends are your best choice for warmth, breathability and stretch. Good options include merino wool, lambswool, cashmere, and alpaca.
Acrylic yarn is budget-friendly, but not as breathable. A wool/acrylic blend gives you the best of both worlds. Cotton yarns lack stretch but can be blended with wool or acrylic.
For recreation league players, inexpensive acrylic or wool yarn is perfect. For heavy high school or college level play, invest in a wool blend with durable stitch definition that will hold up to rough play.
Knitting Your Gloves
Once you have your pattern selected and yarn purchased, it’s time to start knitting! Carefully go through the pattern instructions and familiarize yourself with any new techniques or stitches.
Knit your gloves inside out to give a smoother look to the finished exterior surface. This places the purl bumps on the inside of the glove against your skin.
Work slowly and carefully, especially on the fingers where stitches are dense. Tightly fitted fingers enhance grip ability on the football. But watch that your tension isn’t too tight or the gloves won’t fit over your hands!
Try both gloves on as you go to check for consistent sizing. Count your stitches frequently to avoid accidental increases or decreases in the small circumference.
Finishing techniques like duplicate stitch can add padding to high wear palm areas. Weave ends neatly inside gloves so they don’t scratch against your hands.
Block gently to smooth and shape without flattening texture. This gives the stretchy fabric memory so gloves hold their form.
Get In the Game!
Lace up those football gloves and get ready to hit the field! Stay warm and protect your hands with soft, comfortable gloves you crafted yourself.
Knitting football gloves takes time but gives a fun sense of accomplishment. Don’t get discouraged if your first pair have a few flaws. Like any new skill, your glove knitting abilities will improve with practice.
Soon you’ll be handmaking amazing gloves tailored perfectly to your hands. Who knows, maybe you’ll even start designing your own patterns and selling customized gloves to teammates!
Casting On the Fingers
As any experienced knitter knows, starting a new project can be tricky, especially when knitting something as intricately shaped as football gloves. Casting on for the fingers is one of the most challenging parts of knitting your own gloves.
When casting on stitches for the fingers, it’s important to create a flexible, comfortable opening that won’t be too tight or loose. Tight finger openings restrict movement and cut off circulation. Loose ones lead to dropped stitches and holes.
The thumb gusset is another area that requires careful attention when starting glove fingers. This small piece joins the palm to the thumb opening. Shaping the gusset incorrectly can throw off the entire fit of the glove.
So take things slow and double check your work when casting on fingers. Correct any mistakes right away before they compound and cause bigger issues down the road.
Long Tail Cast On
The long tail cast on is a great method for beginning glove fingers. This stretchy cast on allows the openings to comfortably expand when you put the gloves on, then lightly hug your fingers for a customized fit.
Leave tails at least one inch long after casting on finger stitches. This gives you room to smoothly join the fingers to the hand later. If you’re new to gloves, consider using waste yarn for the finger openings. This makes it easy to rip out and redo if the sizing is off.
Judy’s Magic Cast On
Judy’s magic cast on creates a nearly invisible, very elastic edge perfect for gloves. It’s done using both needle ends, allowing you to precisely control sizing.
Just be sure not to cast on too tightly with this method. Check periodically that you can easily slip a finger through the opening without stretching or distorting stitches.
Two Circular Needles
Casting on with two circular needles allows you to work glove fingers individually. This prevents dropping stitches and losing your place as easily when shifting between fingers.
Try this technique if you’ll be knitting fingers in separate pieces to later sew together. It also helps ensure each finger is sized proportionately to the others.
Waste Yarn Provisional Cast On
The waste yarn provisional cast on is ideal for knitting glove fingers directly onto the hand portion. Simply remove the waste yarn when ready to join. This gives a smooth, nearly seamless transition between fingers and palm.
Be sure to leave long tails and cast on loosely enough for easy removal later. When in doubt, go up a needle size for casting on with waste yarn.
Shaping the Gusset
After casting on, properly shaping the thumb gusset ensures a natural fit through the thumb joint. This small piece seamlessly connects the palm to the thumb opening.
For optimal flexibility and comfort, gradually increase gusset stitches over 2-3 rows. Decrease at the same gradual rate when joining thumb to palm.
Avoid sudden increases or decreases here, which create bulky transitions and pressure points inside the gloves. Take time to smooth out and even the fabric over the thumb gusset.
If possible, try on the glove and make sure you can move all fingers and thumbs freely without any binding or restriction before joining the whole hand.
Perfect Practice Makes Perfect
Learning to neatly cast on and shape fingers for knitted gloves takes practice. Don’t get frustrated if your first few pairs have uneven sizing or uncomfortable openings.
Work slowly, double check as you go, and be willing to rip out and re-do any problem sections. With a bit of patience, you’ll master starting fingers and thumb gussets like a pro.
Just envision how satisfied you’ll feel making a perfectly fitted pair of football gloves using your own custom knitting skills. That first throw with your handmade gloves will make all the effort worthwhile!
Shaping the Fingers
Knitting the individual fingers on a pair of football gloves requires careful shaping and precision. Fingers need to be worked tightly enough so the gloves grip securely, but not so tight that circulation gets cut off.
To achieve the right shape and drape, pay close attention to increases and decreases within each finger. Proper shaping creates a natural curve, prevents bunching, and allows for full range of motion.
Take things slowly when working glove fingers. Because stitches are so small and compact, it’s easy to make accidental shaping mistakes that throw off the entire fit.
Gradual Increases
When starting the fingers, make gradual increases over 2-4 rows to taper each one from palm to tip.
Doing all increases in just the first 1-2 rows creates an unsightly bulge. Distributing increases allows a smoother transition from hand to fitted finger.
Even Decreases
To shape the fingertip, work even decreases over several rows rather than all at once. For example, decrease every 3rd stitch on every 4th row.
This technique narrows the end of the finger in a slow, controlled way. Rapid decreases give an uneven, blunted shape.
Checking Tension
After working an inch or two on each finger, try the glove on and closely check tension. Make sure stitches aren’t too loose and baggy or so tight circulation is restricted.
If needed, adjust your needle size up or down by half a millimeter to fine tune tension. Don’t be afraid to rip out and redo if sizing is clearly off.
Avoiding Gaps and Holes
Dense knitting paired with fingers moving in four different directions makes football gloves prone to accidental gaps and holes forming.
Work slowly and carefully, periodically checking the inside of fingers for holes peeking through before they become big issues.
Maintaining consistent tension is also key to minimizing gaps between stitches. Use a tight gauge but don’t pull so tight that knitting becomes a struggle.
Weaving Ends Securely
Don’t get lazy when weaving in ends inside glove fingers! Short ends or corner-cutting during finish work can lead to holes or snags during wear.
Carefully weave in all ends on wrong side, using a darning needle to hide them between stitches for security. Trim closely so ends don’t poke through to right side.
Invisible Seams
When seaming fingers knit flat, opt for an invisible mattress stitch. This creates a nearly seamless interior join between sides.
Standard seaming techniques like whip stitching add bulk on the inside that can irritate hands during wear. Take time to master the mattress stitch for maximum comfort.
Practice Makes Perfect
Shaping knitted glove fingers requires close attention to detail. But don’t let that intimidate you!
Work slowly, trying fingers on frequently. Be willing to rip out sections if the fit isn’t right. With a bit of practice, you’ll be shaping fingers like a pro in no time.
Just remember, perfectly fitted homemade football gloves will make all that careful knitting work worthwhile once you hit the field.
Knitting the Palm: 15 Tips for Crafting Your Own Football Gloves
If you’re a football player, you know how important it is to have a good pair of gloves. The grip they provide allows you to catch passes and hold onto the ball when running or tackling. But buying gloves can get expensive, especially if you go through multiple pairs in a season.
Luckily, you can save money by knitting your own! With some yarn, knitting needles, and a few simple techniques, you can make football gloves that rival the grip and performance of store-bought ones. Here are 15 tips to help you knit the perfect pair:
1. Choose the right yarn
Look for a yarn with some texture – this will help create grip. Wool or wool blends work very well. Stay away from slippery acrylics. Aim for a medium weight yarn so the gloves aren’t too bulky.
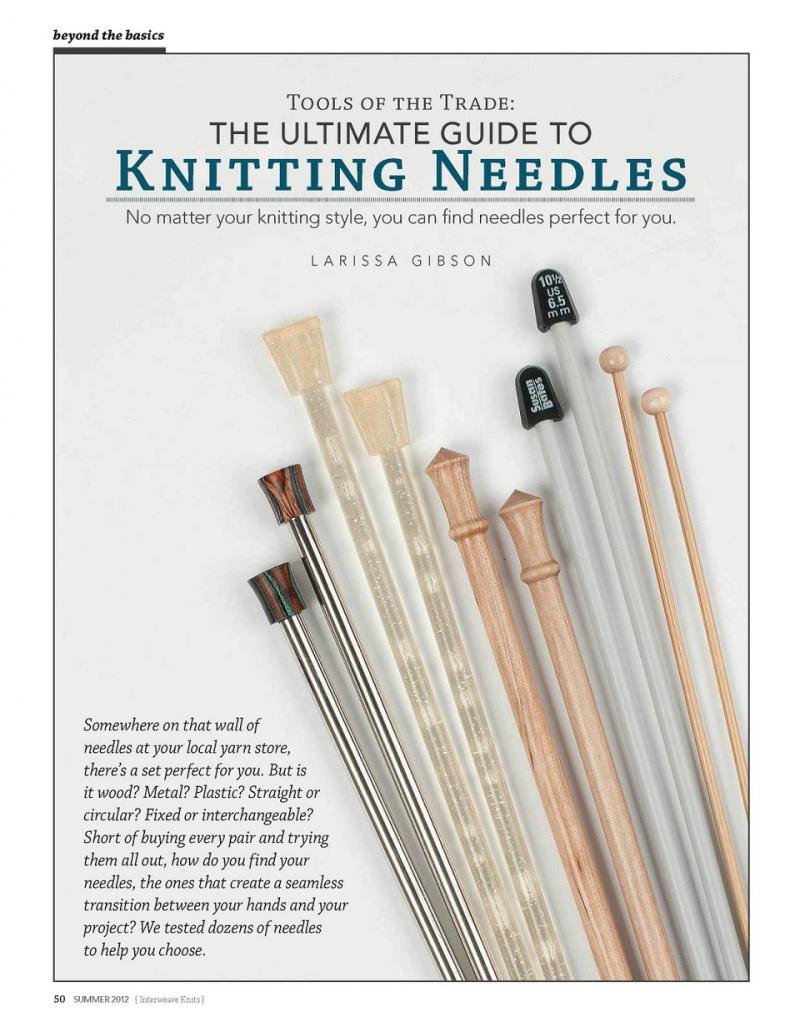
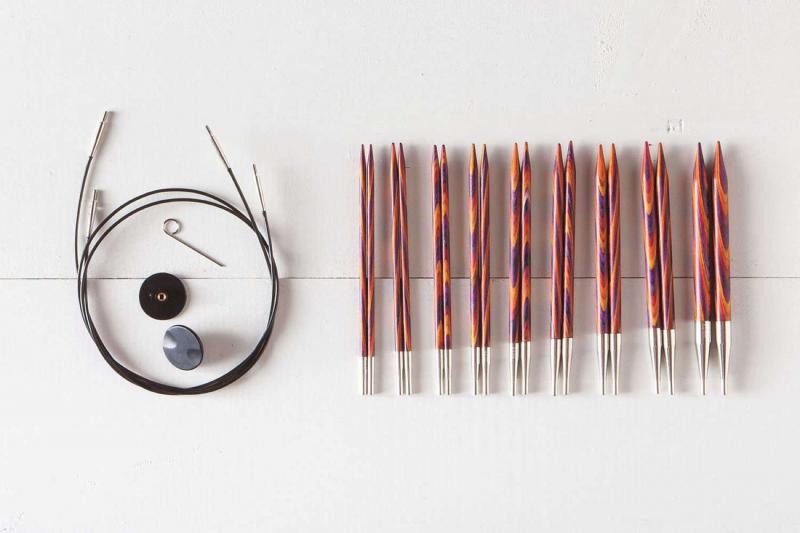
2. Get the right knitting needles
You’ll want a set of double pointed needles in the size recommended for your yarn. Double pointed needles allow you to knit tubes for the fingers easily. Consider getting needles with metal tips to make knitting the small tubes easier.
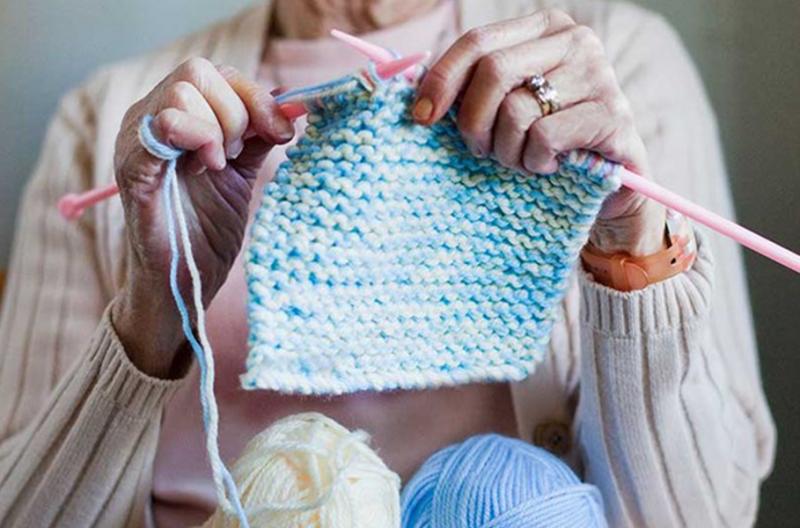
3. Knit a swatch
Before casting on, knit a test swatch with your yarn and needles. Make sure to wash and block it. This will ensure you get the right gauge for a well-fitting glove.
4. Measure your hand
To get the right glove measurements, measure around the widest part of your palm. Add 1-2 inches for a little ease. For finger length, measure from the tip of your middle finger to the base.
5. Cast on stitches for the palm
Using your palm measurement, cast on the appropriate number of stitches. Having a multiple of four stitches makes ribbing easier. Just don’t cast on too tightly.
6. Work in ribbing
Ribbing helps the cuff cling to your wrist. Try 2×2 or 3×1 ribbing. Work it for an inch or two before beginning stockinette stitch.
7. Begin the thumb gusset
After a few inches, increase stitches at the sides to form a gusset – this will become the thumb. Place marker if needed to keep track.
8. Split for the thumb hole
On the next round, increase again, then use the backwards loop method to put half the thumb stitches on a holder. You’ll finish the thumb later.
9. Decrease gusset stitches
Work even for an inch, then decrease to get back to the original stitch count. This shapes the hand part of the glove.
10. Knit the fingers
Divide the palm stitches onto three double pointed needles and join to work in the round. Place markers between fingers. Work each finger tube to the length you need.
11. Shape finger tips
For tapered fingers, decrease the last few rounds. An i-cord bind off works well to close the tips.
12. Finish the thumb
Pick up the thumb stitches from the holder and distribute on dpns. Join and knit to the needed length, decrease for the tip just like the fingers.
13. Weave in ends
Take time to neatly weave in all yarn ends so they don’t come loose while playing. Consider using the Russian join technique for cleaner finishing.
14. Block the gloves
Soak the finished gloves in cool water with a little wool wash. Gently squeeze out water and lay flat to dry, smoothing to finished measurements.
15. Add grip
For extra grip, consider adding a silicone or rubbery dot pattern to the palm and finger pads. This will help you catch those tough passes!
It takes some patience, but knitting your own football gloves allows complete customization. You can try different stitch patterns for the palms or knit team logos into the wrists. Don’t be afraid to experiment with new techniques too – just make sure to knit up a gauge swatch first. With some practice, you’ll be hitting the field in your own hand-knit gloves in no time!
Adding Thumb Gussets: The Key to Knitting Your Own Football Gloves
As any seasoned football player knows, having gloves with a good grip is crucial for success on the field. And while you can buy quality gloves, making your own allows you to customize the fit and features. When knitting football gloves at home, working in a thumb gusset is an important technique for comfort and flexibility.
Adding a gusset creates the space needed when you spread your thumb away from your palm. Trying to make gloves without this extra fabric leads to uncomfortable binding and restricted movement – not ideal when you’re trying to catch a pass! Here are some tips on mastering this glove-knitting skill:
Plan the Gusset Placement
Determine where to place the gusset increases by measuring across your palm. Mark the point between your index finger and thumb – this is where you’ll start the gusset on each side. The increases should spread toward the thumb joint.
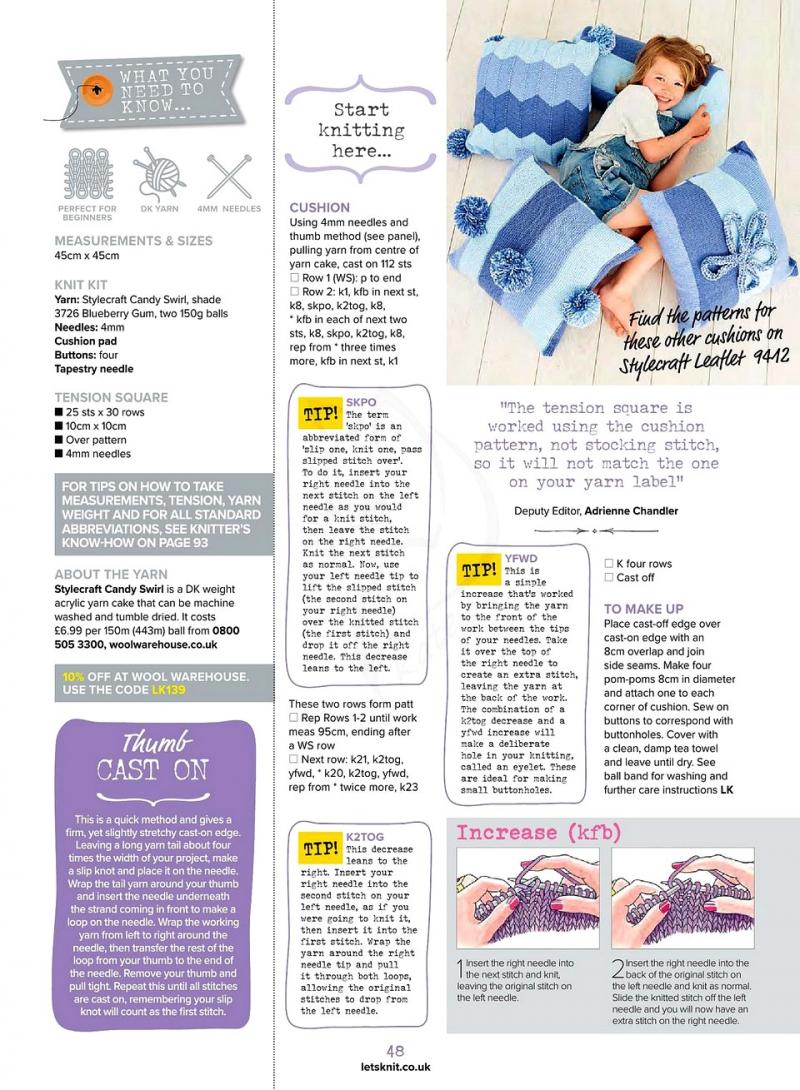
Work the First Increase
Once you’ve knit a few inches past the wrist, work the first gusset increase. Do this by knitting or purling into the front and back of the marked stitch. Place a marker here for reference.
Repeat Increases Evenly
Continue working gusset increases every few rows, keeping them evenly spaced. This gradually adds more fabric right where you need it. Aim for a total of 6-10 increase rows.
Divide for the Thumb
After finishing the increases and knitting another inch, divide for the thumb hole. Put half the gusset stitches onto stitch holders using the backwards loop method. The remaining palm stitches are worked even.
Decrease to Shape the Hand
Once the thumb hole is created, you’ll need to decrease the extra gusset stitches. Work paired decreases on the first few rows to get back to the original palm stitch count.
Finishing the Thumb
Later, the gusset stitches on holders are picked up to finish knitting the thumb tube. This attaches it perfectly to the palm side of the glove.
Tips for the Perfect Gusset
Here are some top techniques for mastering this important part of knitting your own gloves:
- Swatch first – Make sure gauge is accurate before casting on
- Mark placements – Use split ring or safety pin markers to track increases
- Work slowly – Increases and decreases are precision work
- Check fit often – Try on as you go to ensure good shaping
- Pick up neatly – Carefully divide and pick up thumb stitches
While intimidating at first, adding a gusset really takes your glove knitting to the next level. Once you get the hang of it, you can customize glove patterns in all kinds of ways. Here are just a few ideas to try:
- Textured gusset – Use a slip stitch pattern for interest
- Contrasting color – Work gusset in a different yarn color
- Additional padding – Knit a second gusset layer for cushioning
- Reinforced shaping – Increase every row for defined gusset edges
When tackling your next pair of football gloves, embrace the challenge of a thumb gusset. Put these tips into practice, knit up a test swatch, and don’t be afraid to rip out and re-work any tricky sections. Your patience will be rewarded with comfortable, contoured gloves that offer optimal flexibility and feel. Just imagine the catches you’ll make once you perfect these glove-knitting skills!
Whether you’re a wide receiver or linebacker, well-fitting gloves give the grip and control needed to excel on the football field. Making them yourself takes time and practice, but being able to customize the size and features is worth the effort. Mastering key techniques like adding a thumb gusset will level up your glove knitting abilities. Before you know it, you’ll be outfitted in your own handmade football gear ready for game day!
Knitting the Wristband
If you’re a fan of football, you know how important it is for players to have a good grip on the ball. Receivers need to be able to catch those quick passes without dropping the ball, while quarterbacks need to be able to grip and throw the ball accurately. That’s why receivers and QBs wear special gloves with rubber grips on the palms and fingers. But did you know you can make your own custom football gloves at home through knitting? It’s easier than you may think!
Knitting your own football gloves allows you to customize them exactly how you want. You can choose your team colors, add logos or designs, and get the perfect fit for your hands. And while specialty football gloves can be expensive to buy, knitting your own only requires some yarn, needles, and a pattern. Here are 15 tips to help you knit your own pair of football gloves at home.
1. Choose the Right Yarn
Look for a lightweight, breathable yarn that will keep hands cool. Cotton or bamboo yarns work well. Stay away from wool, which can cause fingers to sweat. Opt for yarn that contains some spandex, as that will allow the fabric to stretch over your hands while maintaining shape.
2. Pick Your Thickness
Choose a lightweight or medium-weight yarn for your gloves. Thicker yarns will make the gloves bulky and can impact dexterity when catching. Look for yarn weights between fingering and worsted weights. Steer clear of super bulky yarns.
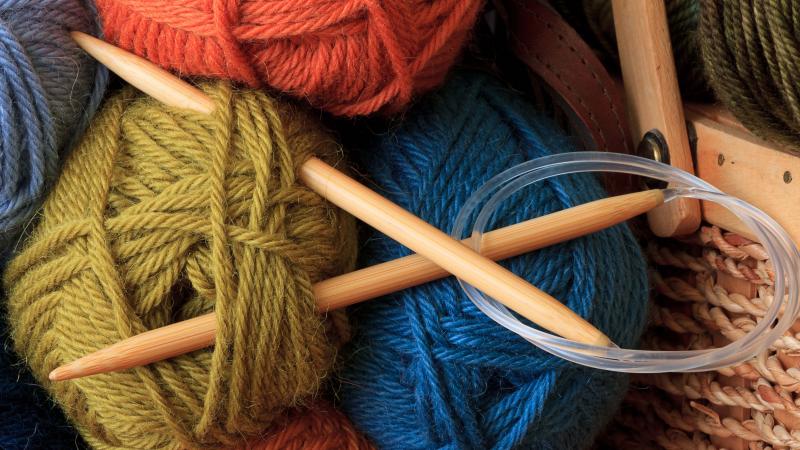
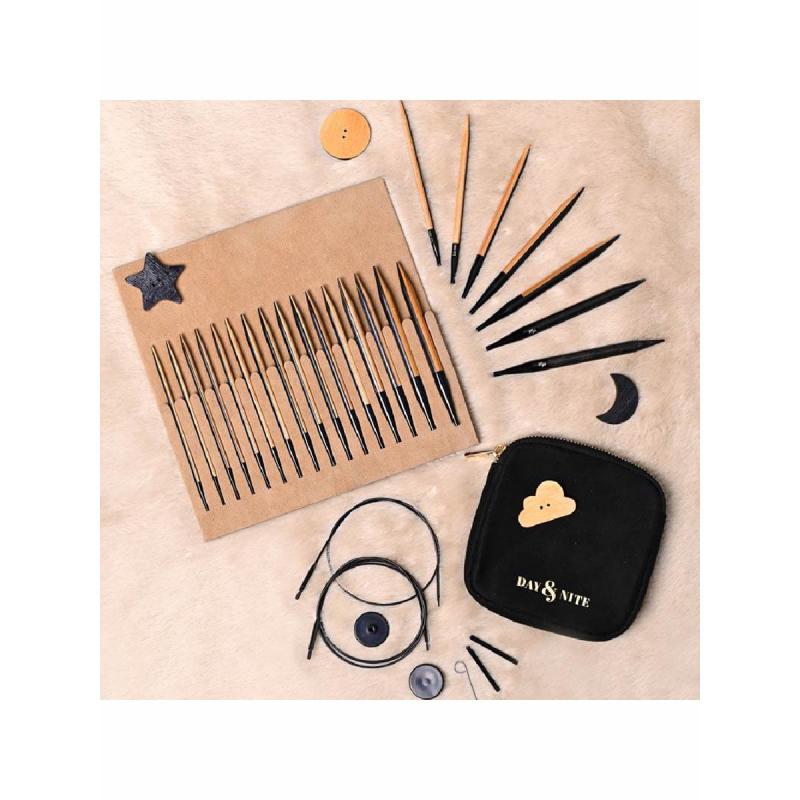
3. Select the Right Needles
Use needles that match the thickness of your yarn – don’t go too big or small. Circular knitting needles work best as you’ll be knitting tubes for the fingers. Try size 5 or 6 for medium or worsted yarn. For lighter yarns, size 3 or 4 needles are ideal.
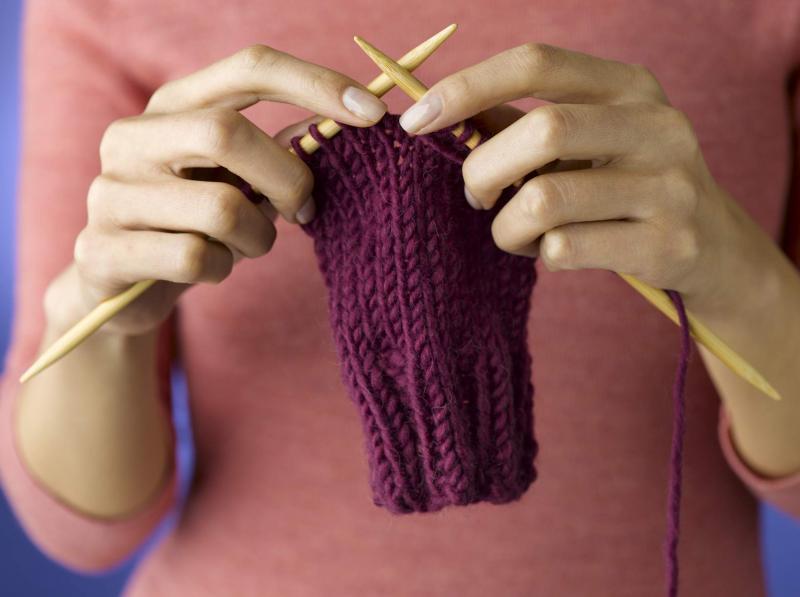
4. Knit in the Round
Knitting your gloves in the round will give you a seamless tube that fits smoothly over your fingers. Use circular needles and knitting in the round techniques like Magic Loop to create each glove finger seamlessly.
5. Follow a Pattern
Find a knitting pattern designed specifically for gloves to make the process easier. Look for one with different sections for the fingers, palm, and wrist/cuff. Patterns help take the guesswork out of glove knitting proportions.
6. Knit a Swatch First
Before jumping into knitting your gloves, knit a small swatch with your chosen yarn and needles. Wash and block the swatch to see how the finished fabric will look and feel. Check that your gauge matches what’s recommended in the pattern.
7. Measure Your Hand
To ensure proper fit, measure around your dominant hand at the palm just below your fingers. Compare to the glove pattern sizing to pick the right size to knit. It’s better for football gloves to be snug rather than loose.
8. Shape the Fingers
Follow the glove pattern’s finger shaping instructions carefully. This will shape each finger tube to mimic the natural tapered shape of your fingers. Properly shaped fingers leads to a more anatomical, contoured fit.
9. Add Rubber Grips
Cut out grippy shelf liner material in palm and finger shapes. Sew the rubbery side to the insides of the palms and bottom of the fingers. This mimics the grip of store-bought football gloves.
10. Choose Team Colors
Use yarn in your team colors or color block with different shades. Add team logos by duplicate stitching over your knit fabric. This allows you to show team spirit with your gloves.
11. Create Stripes or Designs
Jazz up plain gloves by knitting stripes or argyle designs into the palms and backs of hands. Or use decorative techniques like cabling, colorwork, and textured stitches for visual interest.
12. Knit in the Wristband
Bind off and seam the glove palm per pattern instructions. Then pick up stitches around the wrist opening and knit a ribbed cuff band for stability. Make it slightly stretched so it grips your wrist snugly.
13. Pick the Right Closure
Add a velcro closure at the wrist so you can easily slip your gloves on and off. Or use an elastic cord threaded through eyelets to cinch the wristband closed. Avoid buttons or zippers that could irritate skin.
14. Check the Fit
Try on your finished gloves and make sure you can flex and move your fingers comfortably without restriction. The gloves should feel snug but not tight. If needed, stretch out any overly tight spots.
15. Get Grippy
Once your gloves fit well, add grip spray or dip to the palms and fingers. Let dry fully. The texture will help you grip the football better when wearing your new homemade gloves!
With the right yarn, needles, pattern, and techniques, you can craft your own customizable football gloves to catch and throw in. Don’t be intimidated to knit gloves – just take it step-by-step. Before you know it, you’ll have a unique pair of gloves with the perfect fit for game day. So grab your knitting needles and yarn and get ready to complete your own pair of football gloves!
Picking Up Stitches for Glove Back
Football players know the importance of a good grip. Receivers want sticky hands to catch those quick passes. Quarterbacks need to be able to handle and throw the ball with confidence. That’s why you’ll see most players wearing special grip gloves on game days. But did you know you can DIY your own custom football gloves at home through knitting? With some yarn, needles, and basic techniques, you can craft a pair of gloves ideal for your position.
Knitting your own football gloves lets you control the fit, color, and design. You can add your team logos and colors for a spirited look. Or opt for a more neutral style. Choose from a wide selection of breathable yarns to suit your climate. Unlike store-bought gloves, you can customize the shape and grip to match your hands and playing style. Here are 15 handy tips to knit yourself a pair of football gloves for the field or backyard.
1. Pick a Lightweight Yarn
Choose a lightweight, breathable yarn to keep your hands cool. Look for moisture-wicking fibers like cotton, bamboo, or synthetic blends. Stay away from thick or fuzzy yarns that can cause fingers to sweat.
2. Include Stretch
Find a yarn with some spandex or elastic blended in. The stretchiness allows the knit fabric to fit snugly over your hands without restricting movement.
3. Match Your Needle Size
Opt for circular knitting needles in a size that pairs well with your yarn thickness. Following the yarn label’s recommendation helps ensure even knit fabric.
4. Work in the Round
Knitting your gloves in the round creates a seamless tube for a smooth feel. Use circular needles and techniques like Magic Loop for no seams on fingers.
5. Follow a Glove Pattern
Finding a knitted glove pattern takes the guesswork out of sizing and shaping. Look for one with detailed finger, hand, and wrist instructions for success.
6. Swatch First
Before casting on your gloves, knit up a swatch in your chosen yarn and needles. Check that your gauge matches the pattern’s for good sizing.
7. Take Measurements
Wrap a measuring tape around the palm of your hand just below your fingers. Compare to the glove sizes in the pattern and make sure to knit the right fit.
8. Shape Those Fingers
Follow the finger shaping in the pattern carefully. This creates the natural tapered look of actual fingers for better dexterity and fit.
9. Add Grippy Spots
Cut shelf liner grip material into palm and finger shapes. Adhere the rubbery sides to the insides of palms and fingers where you need extra grip.
10. Knit in Team Pride
Use your team’s colors to show spirit, or go for a colorblocked look. Add duplicate stitched logos to the backs or palms for customization.
11. Get Creative with Design
Make your gloves unique by knitting in argyle or striped designs. Add interesting stitches like cables, bobbles, or lace for visual texture.
12. Bind Off the Glove
Once you finish the palm and finger shaping per the pattern, bind off the live stitches and seam up any openings.
13. Pick Up Stitches for Glove Back
With the palm complete, pick up and knit new stitches evenly around the wrist opening for the back of hand. Work in the same pattern as palm.
14. Include a Ribbed Cuff
After completing the glove back, pick up stitches around the entire wrist opening. Work in ribbing to create a snug cuff that grips your wrist.
15. Get a Good Grip
Once the gloves fit your hands, spray or dip palms and fingers in grip coating. Let dry fully before wearing for ideal grippiness on the field.
Homemade football gloves may take some time to knit, but the end result is a custom pair ideal for your specific grip and handling needs. With the right stitches and techniques, you can have game-ready gloves knit in your team colors. So grab those needles and yarn, and get ready to churn out your own personalized football gloves!
Decreasing for Shape
Football is a game of skill and strategy. Receivers rely on sticky fingers to catch passes and hold onto the ball. Quarterbacks need a solid grip to throw tight spirals accurately down the field. That’s why most players sport special grip gloves on game days. But did you know you can DIY your own unique football gloves at home through knitting? With some basic skills, you can create custom gloves tailored to your hands.
Knitting your own football gloves gives you total control over the fit, function, and design. Choose breathable yarns to keep your hands cool and comfy. Add team logos and colors to show spirit. Or go for a more neutral look. With homemade gloves, you can craft the ideal grip and shape for your position. Here are 15 tips to knit up football gloves that are game-ready.
1. Select a Lightweight Yarn
Look for moisture-wicking yarns like cotton, bamboo, or synthetic blends. The lightweight fabrics help prevent sweaty fingers while playing.
2. Add Stretch
Find a yarn with some spandex or elastic blended in. The stretchy element helps the gloves fit snugly over your hands and maintain dexterity.
3. Use the Right Needle Size
Match your needles to the yarn’s recommended size. Circular knitting needles work best for knitting the glove tubes.
4. Work in the Round
Use circular needles and knitting techniques like Magic Loop to create each finger and glove seamlessly in the round.
5. Follow a Glove Pattern
Finding a knitted glove pattern provides guidance on sizing, stitch counts, and construction for success.
6. Knit a Gauge Swatch
Before starting, knit up a swatch in your yarn and check that your stitches match the pattern gauge for good sizing.
7. Take Hand Measurements
Wrap a tape measure around your palm width below your fingers. Compare to glove sizes in the pattern and knit accordingly.
8. Shape the Fingers
Follow the finger shaping instructions in the pattern carefully. Gradually decreasing stitches mimics real tapered fingers.
9. Add Grippy Spots
Cut out grippy shelf liner and adhere the rubbery side to the palm and finger bottoms for extra grip.
10. Show Team Spirit
Use team colors in your yarn choice or color block the gloves. Add logos by duplicate stitching over finished fabric.
11. Get Creative with Stitchwork
Make your gloves unique by adding argyle or stripe colorwork designs. Use cables, lace, or other textures for interest.
12. Bind Off the Palm
Once you finish knitting the shaped palm and fingers, bind off stitches and close up gaps.
13. Pick Up Stitches for Back
After finishing palm, pick up and knit new stitches evenly around wrist opening for the glove back.
14. Knit a Ribbed Cuff
For a snug fit, pick up stitches around the wrist and work in ribbing to create a tight cuff.
15. Add Grip Coating
Finish gloves off with grip spray or dip for palms and fingers. Let dry fully before wearing.
It takes some time and skill, but knitting your own football gloves lets you fully customize the fit and function. With the right yarn, needles, and techniques, you can churn out game-ready gloves in your team’s colors. Don’t be afraid to pick up those needles and get knitting your own football grip gloves!
Kitchener Stitch to Finish Fingers

In football, having a good grip on the ball is everything. Receivers rely on sticky hands to haul in passes. Quarterbacks need to be able to handle the ball with confidence. That’s why most players sport special grip gloves to improve their handling. But did you know you can knit your own custom football gloves at home? With some basic skills and knitting know-how, you can DIY game-ready gloves.
Creating your own football gloves allows you to control the fit, function, and design. Choose breathable yarns to keep your hands cool and comfy. Add your team’s logos and colors for spirited style. Or go for a more neutral look. The benefit of homemade gloves is you can shape and grip them exactly for your position. Here are 15 helpful tips for knitting football gloves that are personalized just for you.
1. Pick a Lightweight Yarn
Look for moisture-wicking lightweight yarns like cotton, bamboo, or synthetic blends. Avoid bulky yarns that could cause fingers to get sweaty.
2. Include Some Stretch
Find a yarn with some spandex or elastic blended in. The stretchiness allows gloves to fit snugly while maintaining flexibility.
3. Use Appropriate Needle Size
Opt for circular knitting needles sized to match the thickness of your chosen yarn. This creates even knit fabric.
4. Work in the Round
Knitting your gloves in the round, seamlessly, gives maximum comfort. Use circular needles and Magic Loop method.
5. Choose a Glove Pattern
Pick a knitted glove pattern with detailed shaping and sizing directions for each part of the glove.
6. Knit a Gauge Swatch
Before casting on, knit up a gauge swatch in your yarn and check that your stitch count matches the pattern.
7. Measure Your Hand Size
Wrap a measuring tape around your palm width below fingers. Compare to glove sizes in the pattern for ideal fit.
8. Shape the Fingers
Follow the finger shaping instructions carefully, decreasing stitches to mimic tapered fingers.
9. Add Grippy Spots
Cut out grip material and adhere to palms and fingers for extra grip and handling.
10. Use Team Colors
Choose yarns in your team’s hues. Add logos by duplicate stitching over finished fabric.
11. Get Creative with Stitchwork
Make your gloves unique by adding argyle or striped designs. Use texture stitches like cables or lace.
12. Bind Off Palm
After finishing the shaped palm and fingers, bind off live stitches and close any gaps.
13. Pick Up Stitches for Back
With palm done, pick up and knit new stitches evenly around wrist opening for glove back.
14. Add a Ribbed Cuff
For a snug fit, pick up stitches around wrist and work in ribbing to create a tight cuff.
15. Kitchener Stitch to Finish Fingers
Use Kitchener Stitch to graft closed the tops of the shaped glove fingers neatly.
While it takes time and skill, knitting your own football gloves lets you customize for ideal performance. With the right stitches and techniques, you can churn out personalized gloves in team colors. Don’t be daunted – grab those needles and get knitting your own football grip gloves!
Adding Non-Slip Pads to Palms
In football, having sure hands is vital to success. Receivers rely on grip to snag those quick passes. Quarterbacks need to handle the ball with confidence and accuracy. That’s why most players wear special grip gloves for better ball control. But did you know you can DIY your own football gloves at home through knitting? With some basic skills, you can craft customized gloves ideal for your position.
Creating your own football gloves allows you to dictate the fit, features, and design. Choose lightweight, breathable yarns to keep hands cool. Add team logos and colors for spirited flair. Opt for neutral colors for versatile wear. The benefit of homemade is you can shape and grip them precisely for your needs. Here are 15 helpful tips for knitting your own football gloves ready for game day.
1. Select a Lightweight Yarn
Look for moisture-wicking yarns like cotton, bamboo, or synthetic blends. Avoid bulky yarns that could cause fingers to sweat.
2. Include Some Stretch
Find a yarn with spandex or elastic blended in. The stretch allows the fabric to fit snugly while maintaining dexterity.
3. Match Your Needle Size
Opt for circular knitting needles sized to match the thickness of your chosen yarn for even knitting.
4. Knit in the Round
Knitting your gloves in the round, seam free, creates maximum comfort. Use Magic Loop method.
5. Use a Glove Pattern
Follow a knitted glove pattern with detailed shaping and sizing directions for best results.
6. Knit a Gauge Swatch
Before starting gloves, knit a swatch in your yarn and confirm your gauge matches the pattern.
7. Measure Your Hands
Wrap a tape around your palm width below fingers. Compare to sizes in the pattern for ideal tailored fit.
8. Shape Fingers
Follow shaping directions carefully, decreasing stitches to mimic real tapered fingers.
9. Add Grip Pads
Cut out non-slip shelf liner pads and adhere to palms and fingers for extra grip.
10. Show Your Team Spirit
Choose yarns in team colors for spirited style. Add logos by duplicate stitching.
11. Get Creative with Patterns
Make your gloves unique by adding argyle, striped, cable, lace, or other texture designs.
12. Bind Off Palm
After finishing the shaped palm and fingers, bind off stitches and close gaps.
13. Pick Up Stitches for Back
With palm done, pick up and knit new stitches evenly around wrist opening for glove back.
14. Add a Ribbed Cuff
For snug fit, pick up stitches around the wrist and work in ribbing to create a tight cuff.
15. Adding Non-Slip Pads to Palms
Apply non-slip pads to finished glove palms and fingers for extra grip and control.
With some knitting skills and techniques, you can create your own customized football gloves. While it takes time and effort, you can knit gloves tailored for your ideal grip and handling. Don’t fret – grab those needles and get crafting your own football gloves!
Blocking the Gloves
In football, having a solid grip on the ball is key. Receivers rely on sticky hands to catch passes. Quarterbacks need a good handle to throw tight spirals. That’s why most players wear special grip gloves for better control. But did you know you can knit your own custom football gloves at home? With some basic skills, you can DIY game-ready gloves tailored to your needs.
Crafting your own football gloves lets you dictate the fit, features, and design. Choose breathable yarns to keep hands cool. Add team colors and logos for spirited style. Opt for neutral hues for versatile wear. The benefit of homemade is you can shape and grip them exactly for your position. Here are 15 helpful tips for knitting football gloves ready for the field.
1. Pick a Lightweight Yarn
Look for moisture-wicking lightweight yarns like cotton, bamboo, or synthetic blends. Avoid bulky yarns that could cause sweat.
2. Include Some Stretch
Find a yarn with spandex or elastic blended in. The stretch allows a snug fit with flexibility.
3. Use the Right Needle Size
Opt for circular knitting needles sized to match your yarn’s thickness for even knitting.
4. Knit in the Round
Knitting seamless tubes for each finger creates maximum comfort. Use Magic Loop method.
5. Follow a Glove Pattern
Use a knitted glove pattern with detailed shaping and sizing directions for best results.
6. Knit a Gauge Swatch
Before starting gloves, knit a swatch in your yarn and check gauge matches the pattern.
7. Measure Hands
Wrap a measuring tape around your palm width below fingers. Compare to pattern sizes for perfect fit.
8. Shape the Fingers
Follow decreasing instructions carefully to mimic real tapered fingers.
9. Add Grip Pads
Apply non-slip pads cut from shelf liner to palms and fingers for grip.
10. Use Team Colors
Choose yarns in team hues. Add logos by duplicate stitching over knit fabric.
11. Get Creative with Patterns
Make unique gloves by knitting in argyle, stripes, cables, lace, or other designs.
12. Bind Off Palm
After finishing shaped palm and fingers, bind off stitches and close gaps.
13. Pick Up Stitches for Back
With palm done, pick up and knit new stitches evenly around the wrist opening.
14. Add a Ribbed Cuff
For snugness, pick up stitches around the wrist and work in ribbing for a tight cuff.
15. Blocking the Gloves
After sewing up gloves, wet block to relax stitches and even out any irregularities.
With some knitting skills, you can create your own customized football gloves ready for game day. Take your time to knit gloves tailored for your ideal grip and handling. Grab those needles and get crafting your own football gloves!
Sewing in Labels
In football, having a good grip is crucial for success. Receivers rely on sticky hands to haul in passes. Quarterbacks need a solid handle to throw accurate spirals. That’s why most players wear special grip gloves for improved control. But did you know you can handcraft your own football gloves at home through knitting? With some basic skills, you can DIY custom game-ready gloves.
Creating your own football gloves allows you to control the fit, features, and design. Choose lightweight, breathable yarns to keep hands cool. Add team colors and logos for team spirit. Opt for neutral hues for versatile use. The benefit of homemade is you can shape and grip them precisely for your needs. Here are 15 helpful tips for knitting your own football gloves ready for the field.
1. Select a Lightweight Yarn
Look for moisture-wicking yarns like cotton, bamboo, or synthetic blends. Avoid bulky yarns that cause sweat.
2. Include Some Stretch
Find a yarn with spandex or elastic blended in. The stretch allows a snug fit with dexterity.
3. Use the Right Needle Size
Opt for circular knitting needles sized to match your yarn’s thickness for even knitting.
4. Knit in the Round
Knitting seamless glove tubes creates maximum comfort. Use Magic Loop method.
5. Follow a Glove Pattern
Use a knitted glove pattern with detailed shaping and sizing directions for success.
6. Knit a Gauge Swatch
Before starting gloves, knit a swatch in your yarn and confirm gauge matches pattern.
7. Measure Your Hands
Wrap a measuring tape around your palm width below fingers. Compare to sizes in pattern for fit.
8. Shape the Fingers
Follow decreasing instructions carefully to mimic real tapered fingers.
9. Add Grip Pads
Apply non-slip pads cut from shelf liner to palms and fingers for grip.
10. Use Team Colors
Choose yarns in team hues. Add logos by duplicate stitching over fabric.
11. Get Creative with Patterns
Make unique gloves by knitting in argyle, stripes, cables, lace, or other designs.
12. Bind Off Palm
After finishing shaped palm and fingers, bind off stitches and close gaps.
13. Pick Up Stitches for Back
With palm done, pick up and knit new stitches evenly around wrist opening.
14. Add a Ribbed Cuff
For snugness, pick up stitches around wrist and work in ribbing for a tight cuff.
15. Sewing in Labels
Add labels with your number or name neatly stitched to the glove cuffs.
With some knitting skills, you can create your own customized football gloves ready for game day. Take time to knit gloves tailored for your ideal grip and handling. Grab those needles and get crafting!
Washing and Drying Properly
In football, having a solid grip is vital for success. Receivers rely on sticky hands to catch passes. Quarterbacks need a good handle to throw accurate spirals. That’s why most players wear special grip gloves for better control. But did you know you can handcraft your own football gloves at home through knitting? With some basic skills, you can DIY customized game-ready gloves.
Making your own football gloves allows you to control the fit, features, and design. Choose lightweight, breathable yarns to keep hands cool. Add team colors and logos to show spirit. Go for neutral tones for versatility. The benefit of homemade is you can shape and grip them precisely for your position. Here are 15 helpful tips for knitting your own football gloves ready for game day.
1. Pick a Lightweight Yarn
Look for moisture-wicking yarns like cotton, bamboo, or synthetic blends. Avoid bulky yarns that may cause sweat.
2. Include Some Stretch
Find a yarn with spandex or elastic blended in. The stretch provides a snug fit with flexibility.
3. Use the Right Needle Size
Opt for circular knitting needles sized to match your yarn’s thickness for even fabric.
4. Knit in the Round
Knitting seamless glove tubes creates maximum comfort. Use Magic Loop method.
5. Follow a Glove Pattern
Use a knitted glove pattern with detailed shaping and sizing directions for success.
6. Knit a Gauge Swatch
Before starting gloves, knit a swatch in your yarn and confirm gauge matches pattern.
7. Measure Your Hands
Wrap a measuring tape around your palm width below fingers. Compare to sizes in pattern for ideal fit.
8. Shape the Fingers
Follow decreasing instructions carefully to mimic real tapered fingers.
9. Add Grip Pads
Apply non-slip pads cut from shelf liner to palms and fingers for extra grip.
10. Use Team Colors
Choose yarns in team hues. Add logos by duplicate stitching over finished fabric.
11. Get Creative with Patterns
Make unique gloves by knitting in argyle, stripes, cables, lace, or other designs.
12. Bind Off Palm
After finishing shaped palm and fingers, bind off stitches and close gaps.
13. Pick Up Stitches for Back
With palm done, pick up and knit new stitches evenly around the wrist opening.
14. Add a Ribbed Cuff
For snugness, pick up stitches around wrist and work in ribbing for a tight cuff.
15. Washing and Drying Properly
Follow yarn’s care instructions to wash and dry gloves without risking damage or shrinking.
With some knitting skills, you can create your own customized football gloves ready for game day. Take time to knit gloves tailored for your ideal grip and handling. Grab those needles and get crafting!
Enjoy Your Homemade Football Gloves!
In football, having a solid grip is key to success. Receivers rely on sticky hands to catch passes. Quarterbacks need a good handle to throw accurate spirals. That’s why most players wear special grip gloves for better control. But did you know you can handcraft your own football gloves at home through knitting? With some basic skills, you can DIY customized game-ready gloves.
Making your own football gloves allows you to control the fit, features, and design. Choose lightweight, breathable yarns to keep hands cool. Add team colors and logos to show spirit. Opt for neutral tones for versatility. The benefit of homemade is you can shape and grip them precisely for your position. Here are 15 helpful tips for knitting your own football gloves ready for game day.
1. Select a Lightweight Yarn
Look for moisture-wicking yarns like cotton, bamboo, or synthetic blends. Avoid bulky yarns that may cause sweat.
2. Include Some Stretch
Find a yarn with spandex or elastic blended in. The stretch provides a snug fit with flexibility.
3. Use the Right Needle Size
Opt for circular knitting needles sized to match your yarn’s thickness for even fabric.
4. Knit in the Round
Knitting seamless glove tubes creates maximum comfort. Use Magic Loop method.
5. Follow a Glove Pattern
Use a knitted glove pattern with detailed shaping and sizing directions for success.
6. Knit a Gauge Swatch
Before starting gloves, knit a swatch in your yarn and confirm gauge matches pattern.
7. Measure Your Hands
Wrap a measuring tape around your palm width below fingers. Compare to sizes in pattern for ideal fit.
8. Shape the Fingers
Follow decreasing instructions carefully to mimic real tapered fingers.
9. Add Grip Pads
Apply non-slip pads cut from shelf liner to palms and fingers for extra grip.
10. Use Team Colors
Choose yarns in team hues. Add logos by duplicate stitching over finished fabric.
11. Get Creative with Patterns
Make unique gloves by knitting in argyle, stripes, cables, lace, or other designs.
12. Bind Off Palm
After finishing shaped palm and fingers, bind off stitches and close gaps.
13. Pick Up Stitches for Back
With palm done, pick up and knit new stitches evenly around the wrist opening.
14. Add a Ribbed Cuff
For snugness, pick up stitches around wrist and work in ribbing for a tight cuff.
15. Enjoy Your Homemade Football Gloves!
Wear and use your customized gloves with pride, knowing you crafted them yourself!
With some knitting skills, you can create your own customized football gloves ready for game day. Take time to knit gloves tailored for your ideal grip and handling. Grab those needles and get crafting!