How to choose the best Brine lacrosse goal for your needs. What factors should you consider when selecting lacrosse equipment. How to maintain proper tension on your Brine lacrosse net. How to safely transport Brine lacrosse goals.
Choosing the Perfect Brine Lacrosse Goal: A Comprehensive Guide
Selecting the right lacrosse goal is crucial for enhancing your game, whether you’re a backyard enthusiast or a professional player. Brine offers a wide range of options to suit various needs and skill levels. Let’s explore the key factors to consider when choosing your ideal Brine lacrosse goal.
Portability: Finding the Right Balance
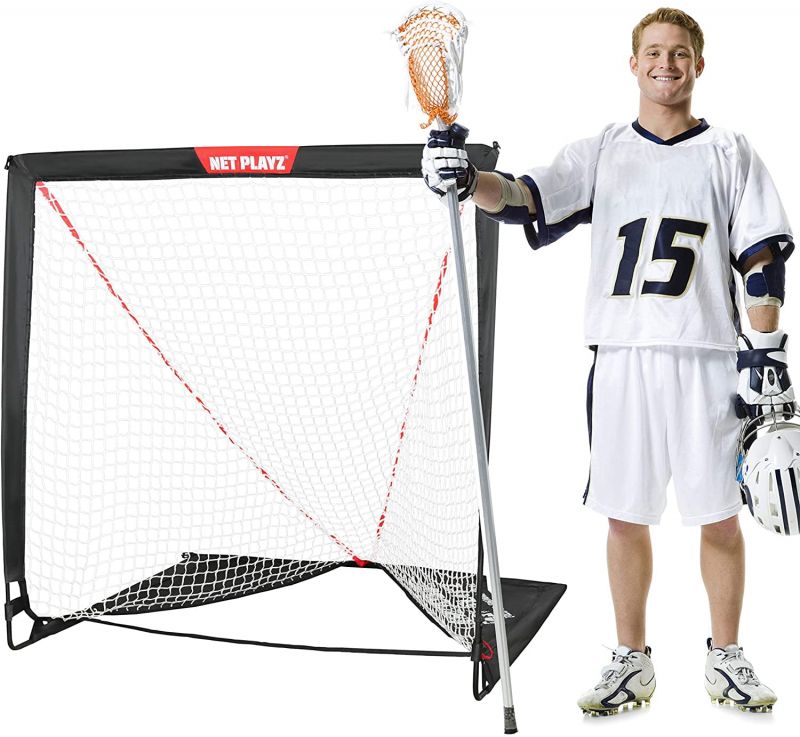
Portability is a crucial factor for many players and teams. Brine’s ultra-light foldable goals with carrying bags are perfect for those who need to set up and break down their equipment frequently. These models allow for easy transport to games or practices, making them ideal for traveling teams or players who don’t have a permanent practice space.

On the other hand, if you have a dedicated playing area, you might prefer Brine’s in-ground anchored goals. While these lack mobility, they offer unparalleled stability, which can be essential for intense practice sessions or competitive play.
Durability: Built to Last
For youth and high school players who use their goals constantly, durability is paramount. Brine’s Pro Series goals are constructed with weather-resistant materials like powder-coated steel, ensuring they can withstand intense play and repeated impacts season after season.
When considering durability, think about the following:
- The frequency of use
- The skill level of players
- Local weather conditions
- Storage options
Investing in a durable goal can save you money in the long run and provide a consistent playing experience throughout its lifespan.
Stability: Ensuring Steady Play
A shaky goal that slides or tips over can disrupt play and potentially cause injuries. For stable recreational play, Brine offers goals with in-ground anchor systems or heavy square steel bases. Their polycarbonate and aluminum goals with wraparound triangle bases are also designed to resist tipping, providing a secure playing experience.

Consider the following questions when evaluating stability:
- Will the goal be used on uneven terrain?
- How intense will the gameplay be?
- Are there strong winds in your area?
Choosing a goal with the right stability features for your environment will enhance safety and improve the quality of play.
Safety: Protecting Players
Player safety should always be the top priority when selecting lacrosse equipment. Brine goals feature softer perimeter padding to prevent injuries from collisions. Additionally, look for finger-safe net designs to reduce the risk of hand injuries during play.
Avoid budget goals that may collapse or deform from repeated hard checks, as these can pose significant safety risks. Investing in a high-quality Brine goal ensures that you’re prioritizing player safety without compromising on performance.
Size: Matching Your Level of Play
While official goals for high school, college, and pro play must meet exact dimension requirements (6×6 feet), youth and backyard models can offer smaller sizing options. These are better suited for developing players who are not yet ready to shoot on a full-sized goal.
Consider the age and skill level of the players when choosing the goal size. Brine offers various options to accommodate different stages of player development, ensuring that everyone can practice and play effectively.
Mastering Net Tension: Optimizing Your Brine Lacrosse Net
Maintaining proper tension on your Brine lacrosse net is crucial for optimal performance. A loose, sagging net can quickly deteriorate ball rebound and accuracy, hindering the development of shooting skills. Let’s explore some expert tips on keeping your Brine lacrosse net taut and game-ready.
The Ball Test: A Simple Tension Check
One of the easiest ways to gauge your net’s tension is by using a lacrosse ball. Place the ball in the center rear of the netting and observe its behavior. If the net is properly tensioned, the ball should hold its position on its own. If it falls through, it’s a clear sign that your net needs tightening.
Lace Maintenance: The Key to Consistent Tension
The laces that secure the net to the goal frame play a crucial role in maintaining tension. Here are some tips for proper lace maintenance:
- Check and tighten laces every few uses
- Keep a lace pull tightener tool in your gear bag
- Replace fraying laces periodically
- Carry backup laces for emergencies
Remember that rain and regular use can continuously loosen lace tension, so frequent checks are essential.
Side Strap Adjustments: Preventing Sagging
The side net attachment straps are often overlooked but play a crucial role in maintaining overall net tension. Keep these straps tightened to the frame to prevent side or corner sagging. Regular adjustments will ensure your net maintains its shape and tension throughout play.
Weather Considerations: Protecting Your Net
Environmental factors can significantly impact your net’s tension and longevity. Consider the following tips:
- Take down nets when not in use to prevent weather damage
- Tighten laces an extra turn on windy days
- Use a goal cover or store nets out of direct sunlight to prevent UV damage
By being mindful of weather conditions and taking preventative measures, you can extend the life of your Brine lacrosse net and maintain optimal tension.
Regular Inspections: Catching Issues Early
Frequent inspections of your net can help you catch and address issues before they become major problems. Look for:
- Small holes or rips that can compromise overall tension
- Signs of UV damage or degradation
- Loose or damaged laces
Addressing these issues promptly will help maintain consistent tension and extend the life of your Brine lacrosse net.
Safe Transportation: Moving Brine Lacrosse Goals with Care
Transporting lacrosse goals requires careful planning and execution to prevent equipment damage and ensure player safety. Whether you’re moving goals for games, practices, or storage, follow these expert tips for safely transporting your Brine lacrosse goals.
Disassembly: The First Step in Safe Transport
Before moving your Brine lacrosse goals, it’s crucial to disassemble them properly. This process involves:
- Separating the goal into its individual frame segments
- Removing nets and padding
- Organizing all components for easy reassembly
Disassembling the goals not only makes them easier to transport but also reduces the risk of damage during transit.

Proper Lifting Techniques: Protecting Players and Equipment
When carrying goal components, it’s essential to use proper lifting techniques to prevent injury and equipment damage. Follow these guidelines:
- Use enough people to carry large frame sections safely
- Bend at the knees when lifting heavy pieces
- Avoid carrying multiple pieces at once
- Communicate clearly with your team during the lifting process
By prioritizing proper lifting techniques, you can ensure the safety of both players and equipment during transportation.
Secure Loading: Preventing Shifts During Transit
When loading Brine lacrosse goals into vehicles, it’s crucial to secure them properly to prevent shifting during transport. Consider the following tips:
- Use truck beds over trailers when possible for added stability
- Carefully stack goal frames to prevent movement
- Use straps or bungee cords to secure components
- Place padding between metal parts to prevent scratching
Proper loading and securing of equipment will help prevent damage and ensure that your Brine lacrosse goals arrive at their destination in perfect condition.

Optimizing Performance: Advanced Tips for Brine Lacrosse Equipment
To get the most out of your Brine lacrosse equipment, it’s essential to go beyond basic maintenance and explore advanced optimization techniques. Let’s delve into some expert strategies for enhancing the performance of your Brine lacrosse goals and nets.
Custom Net Configurations: Tailoring Your Setup
While Brine provides excellent standard net configurations, advanced players might benefit from customizing their setup. Consider experimenting with:
- Different net materials for varied ball rebound
- Adjusting net depth for specific training drills
- Using colored nets or target zones for precision practice
By tailoring your net configuration, you can create a practice environment that specifically targets the skills you want to improve.
Weather-Specific Adjustments: Adapting to Conditions
Different weather conditions can significantly impact the performance of your Brine lacrosse equipment. Consider making these adjustments based on weather:
- Increase net tension in humid conditions to prevent sagging
- Use UV-resistant sprays on nets during hot, sunny periods
- Apply water-repellent treatments for rainy climates
By adapting your equipment to the weather, you can maintain consistent performance regardless of environmental conditions.
Innovative Training Techniques with Brine Lacrosse Goals
Brine lacrosse goals aren’t just for standard practice and gameplay. With some creativity, you can use them to develop innovative training techniques that will elevate your skills to the next level.
Target Practice: Enhancing Accuracy
Improve your shooting accuracy by creating custom targets within your Brine lacrosse goal. Try these ideas:
- Hang colored targets at different points in the goal
- Use removable tape to create temporary target zones
- Set up obstacles within the goal to challenge precision
By incorporating these target practice techniques, you can dramatically improve your shooting accuracy over time.
Rebound Training: Developing Quick Reflexes
Utilize the rebound characteristics of your Brine lacrosse goal to enhance your reflexes and ball control. Consider these drills:
- Practice rapid-fire shots and catches off the goal
- Set up rebound walls at different angles
- Incorporate partner drills using goal rebounds
These rebound training exercises can help improve your reaction time and hand-eye coordination, crucial skills for any lacrosse player.
Maximizing Longevity: Long-Term Care for Brine Lacrosse Equipment
Investing in high-quality Brine lacrosse equipment is just the first step. To ensure your goals and nets stand the test of time, it’s crucial to implement a long-term care strategy.
Off-Season Storage: Protecting Your Investment
Proper storage during the off-season is vital for preserving your Brine lacrosse equipment. Follow these guidelines:
- Clean and dry all components thoroughly before storage
- Store goals and nets in a cool, dry place away from direct sunlight
- Use protective covers for goals if storing outdoors
- Inspect equipment for any damage before storing
By taking these precautions, you can ensure your Brine lacrosse equipment remains in top condition year after year.

Regular Maintenance Schedule: Preventing Issues
Implementing a regular maintenance schedule can help you catch and address potential issues before they become major problems. Consider creating a maintenance routine that includes:
- Weekly tension checks and adjustments
- Monthly deep cleaning of all components
- Quarterly inspections for wear and tear
- Bi-annual replacement of worn parts
A consistent maintenance schedule will not only extend the life of your equipment but also ensure optimal performance throughout its lifespan.
By implementing these advanced tips, innovative training techniques, and long-term care strategies, you can maximize the performance and longevity of your Brine lacrosse equipment. Remember, the key to success in lacrosse lies not just in having the right equipment, but in how you use and maintain it. With proper care and creative utilization, your Brine lacrosse goals and nets will continue to support your growth and development as a player for years to come.

Selecting the Best Brine Lacrosse Goal for Your Needs
When shopping for a new lacrosse goal, considering your specific needs and setup is crucial to choosing the right Brine model. Backyard recreational players have different requirements than high school teams or pro training facilities. Here are some key factors to weigh when deciding which Brine lacrosse goal is the optimal choice for you or your organization:
Portability – If you need to set up and break down your goal frequently, portability is essential. Brine’s ultra-light foldable goals with carrying bags allow for easy transport to games or practices. Bulkier in-ground anchored goals provide supreme stability but lack mobility.
Durability – Youth and high school players who will be using a goal constantly need one made with weather-resistant materials like powder-coated steel that will hold up season after season. Brine’s Pro Series goals are built to withstand intense play and repeated impacts.
Stability – Nothing disrupts play more than a shaky goal that slides or tips over. For stable recreational play, opt for an in-ground anchor system or heavy square steel base from Brine. Their polycarbonate and aluminum goals with wraparound triangle bases also resist tipping.
Safety – Player safety should always be the number one priority. Choose Brine goals with softer perimeter padding to prevent injuries from collisions. Look for finger-safe net designs as well. Avoid flimsy budget goals that can collapse or deform from repeated hard checks.
Size – Official goals for high school, college, and pro play must meet exact dimension requirements (6×6 feet). But youth and backyard models can offer smaller sizing options better suited for developing players not yet ready to shoot on the full-sized goal.
By taking stock of your specific needs in terms of portability, durability, stability, safety, and size, you can select the ideal Brine lacrosse goal set up that will maximize your or your team’s performance this season.
Maintaining Proper Tension on Your Brine Lacrosse Net

One of the most important but often overlooked aspects of caring for your Brine lacrosse net is maintaining proper tension. A loose net that sags quickly deteriorates ball rebound and accuracy for developing shooting skills. Here are some tips on keeping your Brine lacrosse net taut for optimal performance:
Use a lacrosse ball – Place a ball in the center rear of the netting and use it as a tension gauge. The ball should hold its position on its own when properly stretched. If it falls through, the net needs tightening.
Tighten laces frequently – The laces lacing the net to the goal frame should be checked every few uses and tightened as needed. Rain and use continuously loosen lace tension. Keep a lace pull tightener tool in your gear bag.
Adjust side straps – The side net attachment straps also loosen over time. Keep these straps tightened to the frame to prevent side or corner sagging.
Take down net when not in use – Leaving lacrosse nets up during extreme weather when not in use accelerates loosening from wind, rain, and sun exposure. Take nets down between uses.
Replace worn laces – Don’t wait until laces snap to replace them. Swap out fraying laces periodically to ensure consistent tension. Carry backup laces in your equipment bag.
Consider wind – Breezy conditions require tighter lacing to prevent billowing. Tighten laces an extra turn on windy practice and game days.
Inspect for rips – Small net holes or rips compromise overall net tension and must be repaired. Check for damage frequently.
Buy a quality net – Invest in a durable high-grade Brine net made for consistent tension retention. Don’t buy on price alone.
Protect from UV – UV damage accelerates net degradation. Use a goal cover or keep nets out of direct sunlight when stored.
Balance tension – Over-tightening nets strains the lacing system. Find the sweet spot between taut and excessively tight. Err on the loose side.
By continually monitoring and adjusting lacing tension, swapping worn laces, repairing holes, and protecting nets from UV when not in use, you can maintain the consistent tension your Brine lacrosse net needs for honing shooting accuracy.
Transporting Brine Lacrosse Goals Safely
Transporting lacrosse goals to and from the field requires careful planning and execution to prevent equipment damage or player injury. Here are some tips for safely moving Brine lacrosse goals for games, practices, or storage:
Disassemble goals – Take apart goals into their separate frame segments for easier and safer handling. Remove nets and padding.
Carry cautiously – Use enough people to carry large frame sections safely without dropping. Bend knees when lifting. Avoid carrying multiple pieces at once.
Load securely – When transporting in vehicles, carefully load and stack goal frames to prevent shifting. Use truck beds over trailers when possible.
Tie down pieces – Securely tie down goal segments and use padding to prevent scratching. Goal frames banging against each other causes dents.
Fold up nets – Nets and padding should be cleaned first to remove moisture and debris before packing. Fold nets cleanly for storage.
Use storage bags – Place nets and padding in ventilated bags and keep separate from dirty equipment and surfaces.
Check for damage – Before reassembling goals, inspect all sections, joints, nuts/bolts for damage during transport. Repair or replace as needed.
Reinstall padding – Padding gets reinstalled before nets to allow room to relace nets tightly. Replace worn padding.
Anchor securely – Use auger-style ground anchors driven deep into dirt or cement weights. Check for stability before use.
Control wind – Use ballast bags or weights on the rear base bar as needed in windy conditions to prevent tipping.
Watch footing – Move carefully around assembled goals due to protruding anchor bolts. Cover or mark ground holes.
By taking the proper precautions when disassembling, transporting, and reassembling your Brine lacrosse goals, you can help prevent equipment damage while also keeping players safe around the goals during practices and games.
Getting the Most from Your Brine Professional Lacrosse Goal
Brine’s pro-level lacrosse goals are designed for elite play, but you’ll only maximize their performance by properly caring for them. Here are some tips for getting the most out of your investment in Brine professional goals:
Limit use – Professional goals should primarily be used for games/competitions to preserve quality. Use other practice goals for daily drills.
Handle with care – Take extra precaution transporting and storing pro goals to prevent cosmetic damage that could undermine quality.
Protect surfaces – Keep frames covered when not in use and frequently wipe down frame tubes to limit rust and corrosion.
Check hardware – Frequently inspect clips, bolts, and fasteners for loosening that compromises structural integrity.
Detail frames – Touch up scratches, chips or flaking paint to maintain the pro aesthetic. A clean look preserves pride.
Replace pads – Upgrade game pads to thickest models to limit frame vibration noise. Replace immediately if compromised.
Tune net lacings – Keep net lacing knot-free and uniformly tensioned for consistent ball rebound in games.
Anchor optimally – Use maximum recommended anchor weight for your exact ground surface for rock-solid anchoring.
Assess surface – Ensure concrete or turf conditions don’t undermine stability. Address field imperfections.
Replace net promptly – Upgrade game nets every season or sooner for perfect hole-free ball retention.
Garage store – Keep folded/disassembled goals in a garage or shed, not exposed to external elements.
While a hefty investment, pro-caliber Brine lacrosse goals will provide years of elite play if properly maintained and cared for. Follow these tips to maximize your return on investment.
Lacrosse Goal Shooting Targets from Brine
Honing shooting accuracy is a crucial skill in lacrosse requiring countless repetition on the practice field. Brine offers a variety of shooting targets and training aids to help players develop precision shooting technique:
Target net overlays – Mesh netting overlays affix to goals with targets printed on them. Aim small for different difficulty levels.
Corner targets – Mesh pockets attach to the four corners to train shooting to the tough-angle corners.
Pass through targets – Mesh squares attach inside the goal for pass-through shooting practice.
Rebounders – Netting or bungee cord rebounders return your shot to your stick without chasing balls.
Feeder nets – Large catching nets allow coaches to safely feed balls to dodging players for finishing drills.
Goal light – LED strips light up when a shot hits the net for visual feedback. Great for repetitive drilling.
Awareness screens – Mesh screens block vision partially to sharpen shooting instincts and reactions.
Shooting stools – Adjustable stool height and angles develop shooting form from different planes.
Agility cones – Place cones strategically around the goal to weave through before shooting on the move.
Pass feeders – Automatic ball feeders deliver consistent passing to work on catching and quick release shooting.
With Brine’s comprehensive shooting targets and accessories, players can zero in on any shooting skill and get the volume of deliberate repetitions needed to develop consistent, accurate shot-making ability.
Fun Lacrosse Drills Using Brine Nets
In addition to fundamental skill drilling, Brine lacrosse nets can be used creatively to develop players’ overall field vision, awareness, footwork, and conditioning in fun, competitive ways. Here are some engaging lacrosse drills utilizing Brine nets:
Net ball – Place a ball on top of the net and compete to see who can knock it off from varying distances and angles.
Obstacle course – Run an agility ladder, zig-zag cones, and sprint to shoot on goal in a timed obstacle course.
Shootout – Small-sided rapid fire shootouts with no goalies to work on shooting on the run.
Goalie wars – Shooters get one chance to score on opposing team’s goalie in elimination style competition.
Free-for-all – Scatter balls around two opposing nets and battle to see which team scores the most goals in 5 minutes.
Team keep-away – Work on team passing, catching, and moving to maintain possession inside the opposing team’s restraining area.
Net lacrosse – Use outdoor lacrosse nets as miniature vertical goals in competitive 3-on-3 games.
360 shots – Start back to goal, catch a pass, pivot and shoot in one fluid motion.
Deflection challenge – Players deflect skipping passes from coaches into the goal using their sticks.
Dodging gauntlet – Weave through a line of defenders before sprinting to dodge a final defender and shoot on goal.
By bringing out their inner child through competitive fun, players develop lacrosse skills, fitness, and teamwork in exciting new ways with Brine practice nets.
Buying Used vs New Brine Lacrosse Equipment
With the cost of lacrosse gear, buying used equipment can seem appealing. But there are pros and cons to purchasing used vs new Brine lacrosse equipment to weigh.
Used Pros:
- Significant cost savings over new gear
- Opportunity to try gear before investing in new
- Access to discontinued or rare equipment
- Environmentally friendly to reuse vs waste
Used Cons:
- No warranty protection on used gear
- No ability to customize specifications
- Potentially compromised safety and integrity
- Possibility of cosmetic damage or defects
New Pros:
- Full manufacturer warranty and protection
- Latest gear innovations and technologies
- Custom fitting for size, comfort, and performance
- Ideal condition out of the box
New Cons:
- Higher cost investment upfront
- Unknown if gear will meet preferences until used
- Constant newer models soon outdated
For parents equipping growing young players each season, used Brine gear often makes sense. But high school, college, and pro players investing more seriously in performance may want the advantages new provides.
Storing Your Brine Lacrosse Gear in the Off-Season
Properly storing Brine lacrosse gear during the off-season is crucial to ensuring equipment lasts safely from year to year. Follow these tips for optimal off-season storage:
– Clean all equipment thoroughly first – remove dirt, grime, moisture before storage to prevent mildew or corrosion.
– Disassemble goals carefully – take apart, inventory hardware, and inspect for any damage or wear.
– Air dry pads/netting – Never store damp gear; hang to fully air dry nets, pads, gloves, helmets first if washing.
– Store gear dry – Keep all equipment in a clean, dry, cool place. Avoid non-climate controlled spaces with humidity.
– Use breathable bags – Netting and pads need open-mesh bags that allow air circulation to prevent mildew.
– Hang up goals/sticks – Store goal frames vertically and sticks horizontally if possible, not laying flat compressed.
– Wrap sticks loosely – Gloves wrapped too tight around sticks can lead to warped heads; wrap sticks gently.
– No direct sunlight – Keep gear out of direct sunlight which can degrade lacing, mesh, and materials.
– Check for pests – Inspect stored gear periodically for any evidence of mice or insects that could damage equipment.
– Lubricate metal – Coat goal metal tubes with a rust preventing lubricant before storage.
– Inventory gear – Know exactly what you are storing and its condition so no surprises or shortages emerge next season.
With proper prep and storage, your Brine lacrosse gear will be protected during the off-season and ready for peak performance when play resumes.
Protecting Your Brine Net from UV Damage

Lacrosse nets exposed to the sun’s harsh ultraviolet rays day after day deteriorate over time. Here are some tips to minimize UV damage to your Brine lacrosse nets:
– Use UV resistant material – Opt for specialized UV-treated netting made to withstand sun exposure better.
– Hang a sun shade – Drape a tarp or mesh shade cloth over the top of the goal when not in use.
– Rotate goal direction – Change which side faces sun to distribute exposure across the net evenly.
– Take nets down – Removing nets when not practicing significantly reduces UV exposure.
– Store covered – Keep spare nets stored away from sunlight in bags or boxes.
– Apply UV coating – Consider a UV-blocking lacquer or spray made for plastics to the netting.
– Check for fading – Inspect regularly for telltale fading or discoloration signaling net damage.
– Replace when compromised – Don’t wait until it fails; replace nets once UV degradation is observed.
– Shield back side – Hang an old sheet behind the goal to provide UV backup protection.
– Avoid peak hours – Schedule practices early/late when sun is lower to limit most intense exposure.
– Washing resets UV resistance – Regular net washing can help “reset” built-in UV blocking chemicals.
Taking deliberate steps to minimize UV exposure will extend the playable life of your Brine lacrosse nets and reduce replacement costs over time.
Finding Replacement Parts for Brine Goals
Eventually parts like netting, padding, or hardware need replacing on well-used Brine lacrosse goals. Here are some tips for finding replacement parts to extend the life of your Brine goals:
– Check Brine first – Brine sells nets, pads, replacement hardware kits for their goals at brinelacrosse.com or authorized dealers.
– Generic replacements – Universal replacement pads, netting, straps can work but may not fit Brine frames perfectly.
– Buy used parts – Check sidelineswap.com and eBay for used Brine parts salvaged from retired goals.
– Call Brine – Their customer service can help track down discontinued or rare replacement parts still in stock.
– All lacrosse sites – Lacrosse equipment retailers like lax.com or lacrossemonkey.com sell some replacement parts.
– DIY options – For metal hardware, visit a home improvement store to match bolts, hinges, fasteners.
– Ask teams – Schools or clubs retiring old gear may be willing to sell or donate components.
– Bulk buyers – Wholesalers like eLacrosse or Lax World can access larger part inventories.
– Buy new goals – At a certain age it may be more cost effective to buy new Brine goals than continually replacing parts.
– 3D print – For small plastic clips or couplings, 3D printing services can custom fabricate replacements.
With some diligent searching and creativity, you can likely resurrect aging Brine goals with replacement parts rather than new purchases.
Improving Your Game with Backyard Brine Gear

Installing Brine lacrosse gear in your backyard lets you get extra reps in anytime to take your game to the next level. Here are some tips for maximizing your training with backyard Brine equipment:
– Start small – A 6x6ft foldable goal and rebounder is an affordable way to practice shooting and passing.
– Add obstacles – Sprinkle cones around to work on shooting after dodging defenders.
– Build a shed – Store gear safely when not using it and protect from elements.
– Create shooting games – Compete in timed shooting challenges with friends and family.
– Train different angles – Don’t just shoot straight on; practice tough angle corner shots.
– Work both hands – Take double the reps, half with right and half with left hand.
– Focus on weaknesses – Isolate and repeatedly drill skills that need most improvement.
– Recruit helpers – Have friends, parents, or siblings feed you passes to work on shot mechanics.
– Vary distances – Move farther away or closer to goal to diversify shot technique.
– Take video – Record practice to study and self-critique shooting form later.
– Practice dodging – Add a dummy, brother, or lawn mower to dodge before shooting on goal.
With creativity and determination, your backyard Brine gear can become a personalized training field to make you a better player.
Reviews of Top Brine Lacrosse Nets
The lacrosse net is the most abused part of the goal, so choosing a high-quality net is essential. Here are reviews of some top Brine lacrosse net options:
– Brine EZ Goal Net – This affordable net fits most goals and is ideal for youth and basic practice. The 1.5mm knotless polyethylene netting holds up well but lacks durability for elite play.
– Brine Championship Net – A step up with softer 2mm twisted knotted polyethylene for better ball control. The thicker knotted material withstands high school and college club play.
– Brine NCAA Regulation Net – Made to exact NCAA specifications with premium white 3.5mm polyethylene knotted netting. The ultimate in durability and performance for college and pro levels.
– Brine Knotless Competition Net – For a soft feel with elite durability, Brine’s knotless competition mesh uses 4mm twisted filament polyethylene. High abrasion resistance maximizes longevity.
– Brine Training Net – This economy polyester option best suits youth players first learning shooting mechanics. Won’t handle high velocity shots but allows visibility and affordability.
– Brine All Weather Net – For year-round outdoor use, this specialty UV-treated polyethylene net blocks sun damage. Twice the thickness provides a rugged net.
– Brine Kevlar Goal Net – Used in box lacrosse, this ultra strong net provides amazing durability. It’s overkill outdoors but a smart investment for indoor lacrosse arenas.
Whether you need a basic backyard practice net or want pro-level quality, Brine offers lacrosse nets for every level of play.
How to Anchor Your Brine Lacrosse Goal Properly
Proper anchoring is crucial to keeping Brine lacrosse goals secured upright and preventing tip-over injuries. Here are some tips for solid lacrosse goal anchoring:
– Assess ground – Softer soil requires longer auger anchors; concrete may need weighted anchors.
– Auger style – Screw-in earth augers provide most secure in-ground anchoring for soil fields.
– Minimum 18 in – Auger shaft length should be 18+ inches to reach below frost line and prevent loosening.
– Angle backward – Anchor bolts should angle back towards goal frame, not straight down or forward.
– Additional weights – For extra stability, add cinder block weights hanging from the rear crossbar.
– Use all anchors – Anchor each frame section individually rather than trying to share anchors.
– Test stability – Have 3-4 players hang from goal frame simultaneously to test anchoring before use.
– Face into wind – Orient open goal side facing prevailing winds which can generate tipping force.
– Check often – Anchors can loosen over time so regularly confirm goal stability before practices or games.
– Cover holes – Use old tennis balls or foam covers on protruding anchor bolt ends to prevent leg cuts.
– Concrete opciones – Lag bolts embedded into concrete footings or heavy weighted anchors work on hard surfaces.
Taking the time to properly anchor Brine goals using best practices tailored to your field surface will maximize stability and prevent accidents.
Staying Safe with Proper Padding for Brine Goals

Adding protective padding to Brine lacrosse goals is crucial for preventing player injuries from collisions with the metal frames. Here are some tips for safely padding your goals:
– Soft foam only – Avoid hard plastics; use soft, flexible open-cell foam padding only.
– Full wraparound – Pad entire goal frame, not just select sections, so all sides have padding.
– Secure tightly – Use durable zip ties, not tape, to attach padding tightly to metal frame.
– Proper thickness – Opt for maximum 2-inch thickness padding for ideal blend of protection and playability.
– Replace worn – Inspect old pads for tears or thinning foam and replace damaged pads immediately.
– Custom cutouts – Use sharp knife to trim padding for clean light or camera mount cutouts.
– Cover hardware – Pad anchor mounts and protruding bolt ends to prevent cuts and abrasions.
– Contrasting color – Choose bright padding colors for visibility since grey foam blends into galvanized goal posts.
– Shop lacrosse sites – Lacrosse retailers have thicker optimal pads vs. hardware store options.
– Youth focus – Prioritize padding youth goals since beginners lack checked awareness around goals.
– Velcro strapping – Some pads offer Velcro ties rather than glue backing for adjustable attachment.
Taking the time to properly install protective Brine goal padding reduces injuries and lets players compete physically without worry around the crease.