How do you string a lacrosse head like a professional player. What are the essential steps for creating a custom pocket tailored to your position and playing style. Which materials and techniques ensure optimal performance on the field.
Selecting the Ideal Lacrosse Head for Your Position
Choosing the right lacrosse head is crucial for optimizing your performance on the field. Different positions require specific head designs to enhance gameplay. Attackmen and midfielders often gravitate towards narrower heads, which provide superior ball control. Defenders, on the other hand, benefit from wider heads that excel at intercepting passes.
The pocket depth also plays a significant role in position-specific performance. Midfielders typically prefer shallower pockets, enabling quick transitions up and down the field. Attackers, however, tend to opt for deeper pockets, which offer enhanced ball security during aggressive dodges towards the goal.
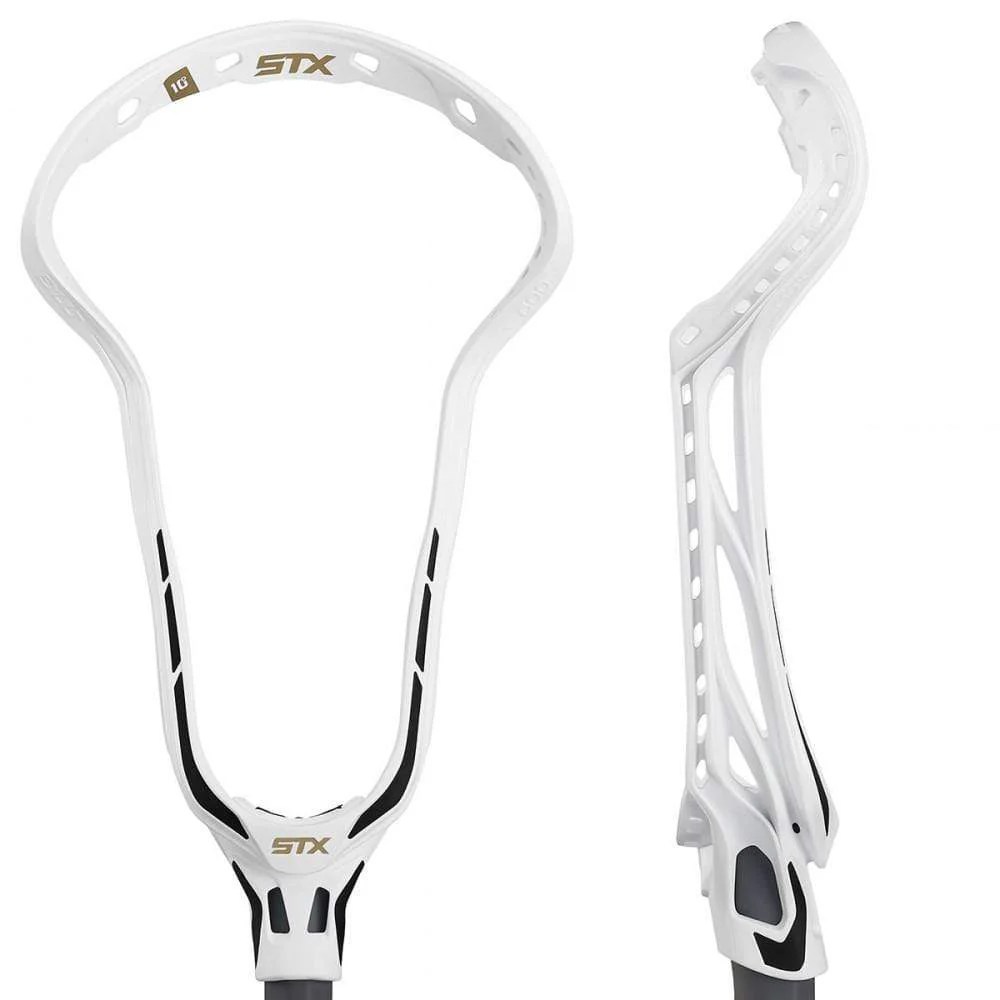
Position-Specific Head Characteristics
- Attackmen: Narrow head, deep pocket
- Midfielders: Narrow to medium head, shallow to medium pocket
- Defenders: Wide head, medium to deep pocket
Is head selection a crucial factor in lacrosse performance? Absolutely. The right head can significantly impact your ability to control the ball, make accurate passes, and execute effective shots. If you’re unsure about which head best suits your playing style, don’t hesitate to consult with experienced teammates or your coach for personalized recommendations.
Mastering Mesh and Sidewall String Selection
The choice of mesh and sidewall strings greatly influences the overall feel and performance of your lacrosse stick. Mesh comes in various materials, colors, and styles, each offering unique characteristics that cater to different playing preferences.
Mesh Types and Their Properties
- Hard Mesh: Offers superior ball control but less whip
- Soft Mesh: Provides more versatility and is often preferred for mid to high pocket setups
When it comes to sidewall strings, the gauge plays a crucial role in determining durability and weight. Thicker gauges, such as 20d nylon, offer enhanced durability, making them ideal for players who engage in more physical gameplay. On the other hand, thinner 16d polyethylene strings help reduce the overall weight of the stick, potentially improving maneuverability.

Finding the perfect combination of mesh and sidewall strings often requires experimentation. To facilitate this process, it’s recommended to purchase mesh and sidewall string spools, allowing you to customize multiple setups until you find your ideal configuration.
The Art of Anchoring the Top String
Properly anchoring the top string is a critical first step in the stringing process. This initial foundation sets the stage for the entire pocket and greatly influences its overall performance and longevity.
Key Steps for Top String Anchoring
- Use sturdy nylon string for maximum durability
- Secure the string with double or triple knotted box stitches
- Space the stitches two diamonds apart for optimal tension distribution
- Ensure each knot is pulled tight to maintain a taut top string
- Leave a one-diamond gap at the throat for future shooting string attachment
Why is proper top string anchoring so important? A well-anchored top string prevents the pocket from losing its shape over time, ensuring consistent performance throughout the season. Skipping or rushing this step can lead to a sloppy pocket that quickly deteriorates with use, ultimately affecting your gameplay.
Crafting the Perfect First Diamond
After securing the top string, the next crucial step is forming the first row of diamonds. This initial row sets the tone for the entire pocket, influencing both its shape and performance characteristics.
Technique for Forming the First Diamond Row
- Begin immediately below the anchored top string
- Pull the mesh tight to ensure proper tension
- String the outside edges first before moving diagonally through the middle
- Maintain symmetry in diamond shape and size for pocket consistency
What’s the significance of uniform diamond size and shape? Consistency in the first row of diamonds is crucial for maintaining even pocket tension and predictable ball release. Variations in diamond size or sidewall tension can alter the stick’s mechanics, potentially affecting your passing and shooting accuracy.
Mastering the Middle Diamond Stringing Technique
As you progress down the head, the middle diamonds form the core of your pocket. Proper stringing technique here is essential for creating a consistent and effective playing surface.

Steps for Stringing Middle Diamonds
- Continue stringing diamonds in straight rows
- Employ an over-under sidewall stringing technique
- Alternate feeding the string over and under mesh knots to secure each row
- Use both hands to maintain even tension and pressure on each stitch
Why is patience crucial when stringing middle diamonds? Rushing through this process can lead to lopsided and bunched rows, compromising the pocket’s performance. Take your time and regularly check for symmetry to ensure a professional-quality result.
The Importance of a Properly Installed Bottom String
The bottom string plays a vital role in reinforcing the pocket’s structural integrity and allowing for fine-tuning of pocket depth. Proper installation of this component is crucial for optimal stick performance.
Bottom String Installation Technique
- Run a nylon string across the head just above the scoop
- Use double or triple box stitches at each sidewall hole for secure attachment
- Leave a two-diamond gap in the middle for future nylon shooter attachment
How does the bottom string contribute to stick performance? This crucial element helps the pocket withstand checks and slashes during gameplay. Additionally, it allows players to adjust pocket depth by loosening or tightening stitches along the row, providing a customizable feel to suit individual preferences.

Enhancing Pocket Control with Strategic Interlock Placement
Interlocks are a key component in creating defined channels and ridges within the pocket. These features play a crucial role in controlling ball positioning during various lacrosse maneuvers.
Interlock Installation Techniques
- Use thin nylon cord for interlock creation
- Feed the cord through openings between diamonds
- Start with a single or double straight across interlock near the middle
- Consider adding an angled “V” interlock for more defined pocket shape
How do interlocks impact ball control? Properly placed interlocks create channels that guide the ball during cradles, holds, and shots. This enhanced control can lead to more accurate passes and shots, giving you a competitive edge on the field.
Fine-Tuning Performance with Shooting Strings
Shooting strings are essential for achieving consistency and control in passing and shooting. Proper installation and adjustment of these strings can significantly impact your overall stick performance.

Shooting String Installation Process
- Use polyethylene shooters for optimal performance
- Install through the gaps in your top string and bottom string
- Secure with triple knots for durability
- Adjust tightness to center the ball in the pocket while allowing clean release
Why is shooting string adjustment crucial? The tension of your shooting strings directly affects the ball’s release point and trajectory. Fine-tuning these strings allows you to customize your stick’s throwing characteristics, potentially improving accuracy and shot speed.
Enhancing Ball Control with a V Channel
A V channel is an advanced stringing technique that can significantly improve ball control and pocket hold. This feature is particularly beneficial for players who prioritize ball security during intense gameplay.
V Channel Creation Steps
- Take two pieces of sidewall string
- Run them from the tip of the head’s scoop inwards at an angle
- Weave the strings between diamonds
- Pull tight so the strings cross in the middle, forming a defined V shape
How does a V channel enhance gameplay? The V-shaped channel cradles the ball during runs, improving hold and control. This feature can be particularly advantageous for attackmen and midfielders who frequently carry the ball through traffic.
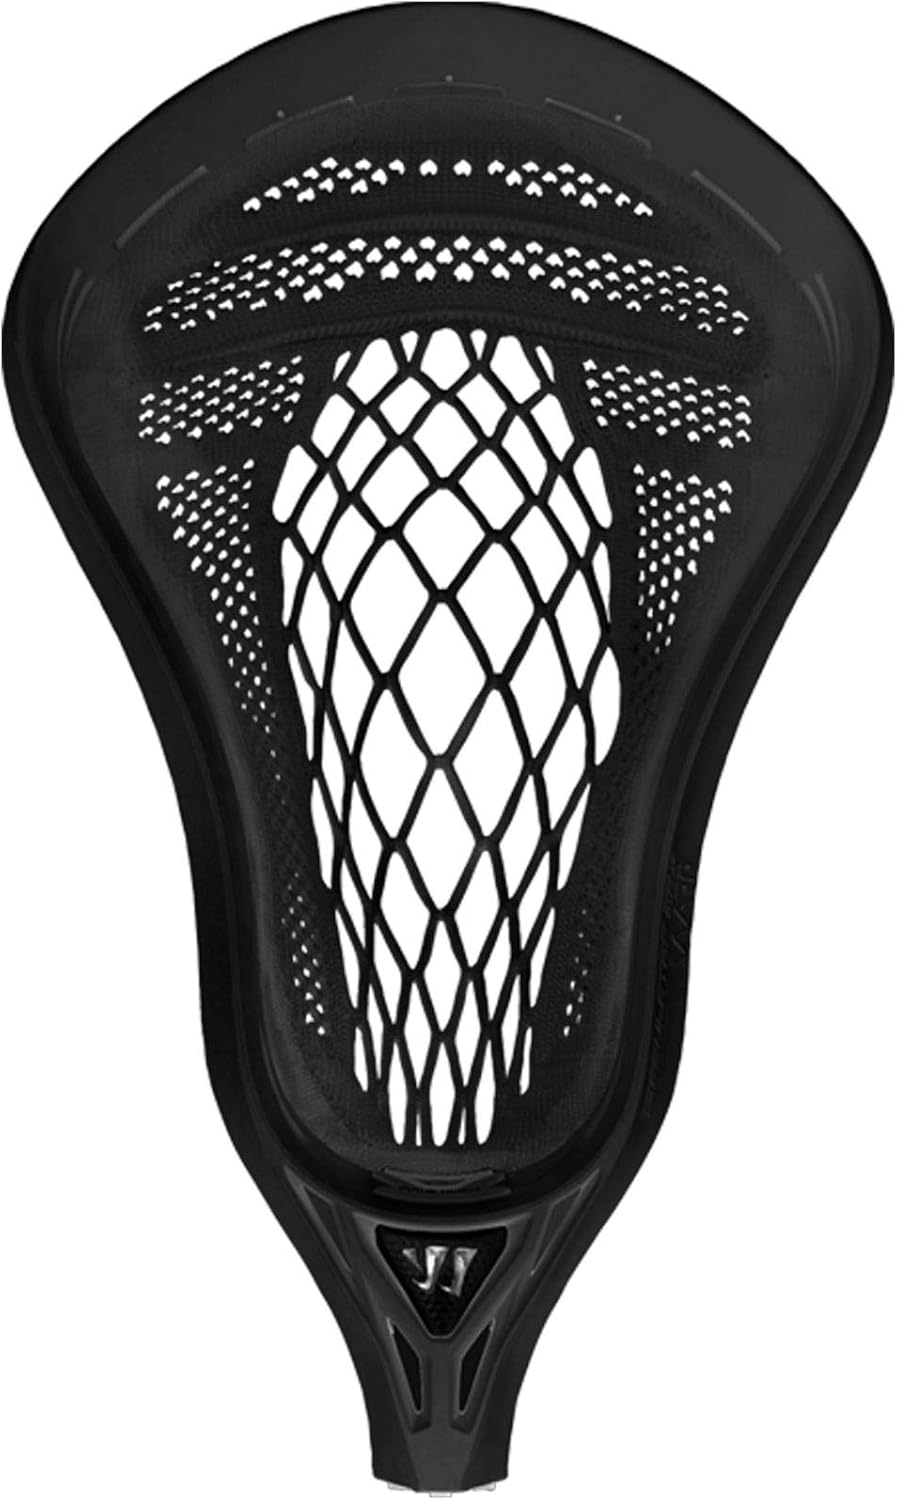
Customizing Pocket Shape with Nylon Side Strings
Optional leather and nylon side strings provide additional means to manipulate pocket shape and performance. These strings allow for fine-tuning of specific areas within the pocket to suit individual playing styles.
Side String Installation Technique
- Run strings vertically from top to bottom
- String around diamond knots for secure attachment
- Selectively adjust tension to bag out the pocket or create deeper channels
Is there a limit to side string adjustments? While side strings offer great customization potential, it’s crucial not to overdo it. Excessive adjustments can render the head illegal for competition. Strike a balance between customization and compliance with lacrosse regulations.
Perfecting Pocket Depth and Shape
Once the main stringing components are in place, fine-tuning the pocket depth and shape is crucial for optimizing stick performance. This adjustment phase allows you to tailor the pocket to your specific playing style and position requirements.
Pocket Adjustment Techniques
- Selectively loosen or tighten diamonds to adjust depth
- Modify sidewall tension to influence pocket shape
- Consider position-specific needs when making adjustments
How do different pocket depths affect gameplay? Shallower pockets typically shift the ball higher in the head, facilitating quicker release – a characteristic often preferred by midfielders. Deeper pockets, on the other hand, improve ball security during physical play, making them popular among attackmen who frequently face defensive pressure.
Field Testing and Final Adjustments
The true test of a well-strung lacrosse head comes on the field. Thorough testing and subsequent adjustments are essential for achieving optimal performance.
Effective Field Testing Methods
- Conduct passing and catching drills to assess pocket performance
- Pay attention to ball placement within the channel during cradles
- Evaluate hold strength during aggressive maneuvers
- Test shooting accuracy and release speed
Why is field testing crucial for pocket optimization? Real-world testing reveals nuances in pocket performance that may not be apparent during the stringing process. This hands-on evaluation allows you to make informed adjustments, ensuring your stick performs optimally under game conditions.

Advanced Stringing Techniques for Elite Performance
As you become more proficient in basic stringing techniques, exploring advanced methods can further enhance your stick’s performance. These techniques often involve intricate combinations of traditional methods and innovative approaches.
Advanced Stringing Concepts
- Multi-layer mesh setups for enhanced ball control
- Hybrid sidewall patterns for unique pocket characteristics
- Custom shooter configurations for tailored release points
- Experimental material combinations for performance optimization
How can advanced stringing techniques impact your game? By mastering these sophisticated methods, you can create a truly customized stick that perfectly complements your playing style. This level of personalization can provide a significant competitive advantage, allowing you to perform at your highest potential on the field.
Maintaining Your Professionally Strung Lacrosse Head
A well-strung lacrosse head requires proper maintenance to ensure consistent performance throughout its lifespan. Regular care and attention can significantly extend the durability of your stringing job and maintain optimal playing characteristics.

Essential Maintenance Practices
- Regularly inspect strings for wear and tear
- Clean the pocket after each use to remove dirt and debris
- Store the stick in a cool, dry place to prevent material degradation
- Periodically re-adjust strings to maintain desired pocket shape
Why is consistent maintenance crucial for lacrosse heads? Proper care not only extends the life of your stringing job but also ensures that your stick maintains its intended performance characteristics. Regular maintenance can prevent unexpected issues during crucial game situations, allowing you to focus on your performance rather than equipment concerns.
Troubleshooting Common Stringing Issues
Even experienced stringers encounter challenges during the pocket creation process. Knowing how to identify and address common issues can save time and frustration, resulting in a better final product.
Common Stringing Problems and Solutions
- Uneven pocket tension: Carefully adjust individual diamonds and sidewall knots
- Excessive whip: Loosen shooting strings or adjust their placement
- Insufficient hold: Deepen the pocket or add strategic interlocks
- Inconsistent release point: Fine-tune shooting string tension and positioning
How can troubleshooting skills improve your stringing results? The ability to quickly identify and resolve issues during the stringing process allows you to create more consistent, high-quality pockets. This skill set is particularly valuable when customizing sticks for teammates or adapting to new head designs.

Exploring Regional Stringing Styles and Trends
Lacrosse stringing techniques often vary by region, with different areas developing unique styles that reflect local playing conditions and preferences. Understanding these regional variations can broaden your stringing repertoire and provide inspiration for custom pocket designs.
Notable Regional Stringing Styles
- East Coast traditional: Emphasizes precise channel creation and deep pockets
- West Coast modern: Focuses on quick release and versatile pocket shapes
- Canadian box lacrosse: Prioritizes extreme hold and ball security
- Midwest hybrid: Combines elements of traditional and modern techniques
How can exploring regional styles enhance your stringing skills? By studying and experimenting with diverse stringing approaches, you can develop a more comprehensive understanding of pocket dynamics. This knowledge allows you to create highly tailored pockets that combine the best elements from various regional styles, potentially giving you a unique advantage on the field.
Stringing a lacrosse head like a pro player is an art form that takes practice and patience. With the right techniques and materials, you can customize your pocket to match your position and playing style. This comprehensive guide will walk you through each step so you can string a precise, consistent pocket every time.
Choose the Right Head for Your Position
The first key decision is selecting a head designed for your position. Attackmen and midfielders often prefer narrower heads for superior ball control, while defenders need wider heads to intercept passes. Shallow pockets help middies quickly transition up and down the field, while deeper pockets give attackers more ball security on dodges to the cage. Consult with teammates or your coach if unsure what works best for you.
Select Mesh and Sidewall Strings
Lacrosse mesh comes in a variety of materials, colors, and styles. Hard mesh has better ball control but less whip, while soft mesh offers more versatility. Mid to high pocket sticks typically use soft mesh for shot speed and hold. For sidewall strings, thicker gauges like 20d nylon provide durability while thinner 16d polyethylene keeps weight down. Finding the right combination takes experimenting, so buy mesh and sidewall string spools to customize multiple setups.
Anchor the Top String
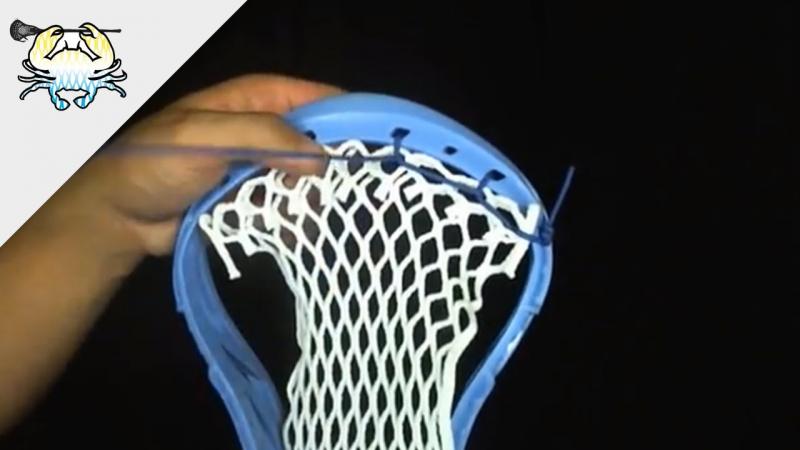
Start stringing at the top to anchor the mesh in place. Use sturdy nylon string and secure with double or triple knotted box stitches spread two diamonds apart. Pull each knot tight so the top string stays taut. Leave a one-diamond gap at the throat to attach the shooting strings later. Skipping this step leads to sloppy pockets that lose shape with use.
Form the First Diamond
After anchoring the top string, begin forming the first row of diamonds immediately below it. Pull the mesh tight and string the outside edges first before moving diagonally through the middle. Keep diamonds symmetrical in shape and uniform in size to maintain pocket consistency. Variations in diamond size or sidewall tension can alter mechanics.
Create Middle Diamonds
Moving downward, continue stringing diamonds in straight rows using an over-under sidewall stringing technique. Alternate feeding the string over and under mesh knots to lock each row in place. Using both hands helps keep even tension and pressure on each stitch. Rushing leads to lopsided and bunched rows, so take your time and check symmetry.
Add Bottom String

Just above the scoop, run a bottom nylon string across using double or triple box stitches at each sidewall hole. Leave a two-diamond gap in the middle for attaching a nylon shooter later. The bottom string reinforces structural integrity to help withstand checks and slashes. It also lets you tweak pocket depth by loosening or tightening stitches along the row.
Install Interlocks
Interlocks are key for creating channels and ridges in the pocket. Feed thin nylon cord through openings between diamonds to control ball positioning on cradles, holds, and shots. Try a single or double straight across interlock near the middle first. You can always add an angled “V” interlock later for more defined pocket shape.
Tie Off the Shooting Strings
Shooting strings give you consistency and control when passing and shooting. Install polyethylene shooters through the gaps in your top string and bottom string using triple knots. Adjust tightness so the ball sits centered in the pocket but can still be released cleanly on passes. Test throwing accuracy to fine tune.
Consider Adding a V Channel
For added ball control, try integrating a V channel into your pocket. Take two pieces of sidewall string and run them from the tip of the head’s scoop inwards at an angle to weave between diamonds. Pull tight so the strings cross in the middle, forming a defined V shape. The channel cradles the ball on runs and improves hold.
Install Nylon Strings Along the Sides
Optional leathers and nylons give you more means to manipulate pocket shape. Run strings vertically from top to bottom, stringing around diamond knots. Pull specific areas tighter as needed to bag out the pocket or create deeper channels. Just don’t overdo it – too many adjustments make the head illegal.
Adjust Pocket Depth and Shape
Once the main strings are installed, tweak depth and shape by selectively loosening or tightening diamonds and sidewall tension. Shallower pockets shift the ball higher for quicker release while deeper setups improve security during physical play. Find your ideal tension based on game needs.
Test the Pocket
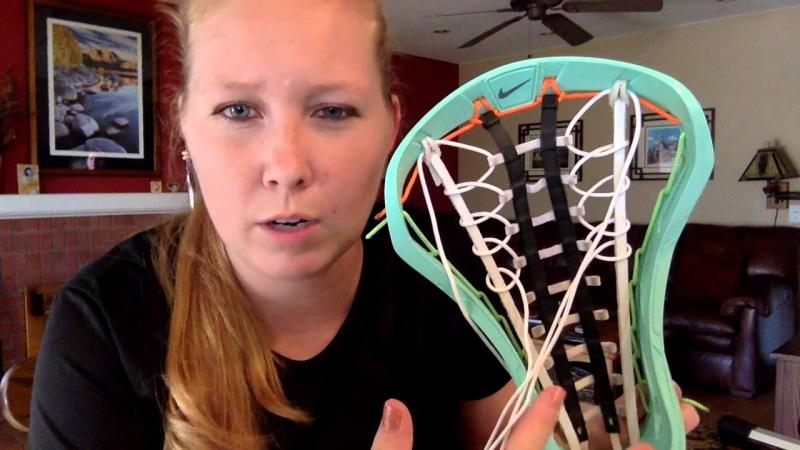
Take the freshly strung head to the field or backyard to test the pocket with passing and catching drills. Pay attention to how smoothly the ball sits in the channel, as well as hold on cradles. Make small tension adjustments until you achieve the desired release speed, accuracy, and security for your game.
Make Final Tweaks
After testing, you may notice certain spots that need slight adjustments. For example, loosen diamonds that prematurely release the ball or tighten areas causing uneven pocket sag. Don’t be afraid to re-string diamonds or sidewalls until the pocket feels perfect.
Break In the Pocket
Once you’ve nailed down the ideal pocket setup, spend time breaking it in with wall ball. The continuous impacts will soften mesh and help the strings settle into place. After a few long sessions throwing, you’ll notice even more consistent channel shape and ball control.
Maintain the Pocket Over Time
Check pocket tension and shape periodically, especially if noticing decreased passing and shooting performance. As mesh wears, diamonds can stretch and strings loosen. Make minor tune-ups as needed to keep your meticulously crafted pocket in top playing form all season long.
When it comes to selecting the mesh and sidewall strings for your lacrosse head, you’ve got options galore. The materials and gauges you choose will directly impact the overall feel and performance of your pocket. While it takes testing different combinations to find your ideal setup, focusing on a few key factors will set you on the right path.
Select Mesh and Sidewall Strings
First, let’s break down the mesh types. Hard mesh has a stiff consistency with tightly woven knots, while soft mesh is more flexible with a looser weave. In general, hard mesh provides superior ball control and hold at the cost of some whip on passes and shots. Soft mesh offers more pocket give for extra velocity on the ball. Mid to high pocket sticks tend to work best with soft mesh, as it allows the ball to sink deeper into the channel.
When it comes to sidewall strings, you similarly have to balance control versus speed. Thicker sidewall materials like 20d nylon are extremely durable and help maintain pocket shape. However, the added weight can slow your stick down a bit. Going with thinner 16d polyethylene sidewalls keeps the weight down for quicker shot and pass release. Unfortunately, thinner strings tend to stretch faster and need replacing more often.
So what’s the best combination? Like a lot of lacrosse gear, that comes down to personal preference and playing style. Middies flying up and down the field may opt for soft mesh and thinner sidewalls for speed. Attackmen weaving through traffic in front of the net may prefer hard mesh with thicker 20d strings for precision shooting. Don’t be afraid to buy spools of different meshes and sidewall strings to test out multiple configurations until you find your go-to materials.
In addition to the main pocket strings, you can add different leathers, laces, and nylons to customize channel shape further. Semi-soft leathers like kangaroo help grip and control the ball, while waxed hockey laces increase hold on shots. Shoelace-like cotton laces give a nice feel for pocketing passes. And optional nylons let you tweak pocket tension in targeted areas as needed. Don’t overdo it though – simpler is often better when stringing up a consistent channel.
While choosing mesh and sidewalls for your stick involves trial and error, taking the time to experiment with pocket materials will pay off big time. Find the right mix of control, feel, speed, and durability to maximize your game on both ends of the field.
A properly anchored top string is the foundation of a consistent, high-performing lacrosse pocket. Taking the time to properly install your top string using sturdy nylon and tight box stitches will prevent warping and misshapen pockets as you put the stick through its paces.
Anchor the Top String
The top string runs horizontally across the top of the head, secured in place with a series of box stitches that weave the nylon through the mesh holes. This is where you’ll start the stringing process. Use high-quality nylon string, like Type 6, for maximum strength and stiffness.
Tie off at one sidewall hole first using a tight triple knot so the starting tail doesn’t pull back through. Move across the head, skipping every other hole, as you make a box stitch through the mesh and back out the adjacent hole. Pull each box tight and snug before moving to the next. Having taut stitches prevents sagging.
When spacing box stitches, a good rule of thumb is leaving an open diamond or two between knots. This spreads tension evenly across the top string for a flat shape. If stitches are too close together, the tension can get focused in one area, leading to premature warping.
Be sure to leave a one diamond gap at the opposite sidewall from your starting knot. This opening allows you to later install a nylon shooter through the top string. Skipping this step can mean having to detach half your top string just to thread in a shooter afterward.
Resist any temptation to rush through anchoring your top string. The steadiness and symmetry here sets the tone for the rest of your pocket. Take your time to tie tight, evenly-spaced box stitches across a high-quality nylon string. This patience pays off in the long run with a sturdy pocket that maintains its structure over years of play.
Once you have a taut, evenly-tensioned top string installed, you can move down the head confidently, stringing diamonds and interlocks to build out your desired pocket. Just don’t forget that gap for the shooter!
With your top string anchored across the head, it’s time to begin forming the first row of diamonds in the mesh. Diamonds are the series of woven holes that make up the netting of a lacrosse head. Stringing clean rows of symmetrical diamonds is crucial for shaping a consistent pocket.
Form the First Diamond
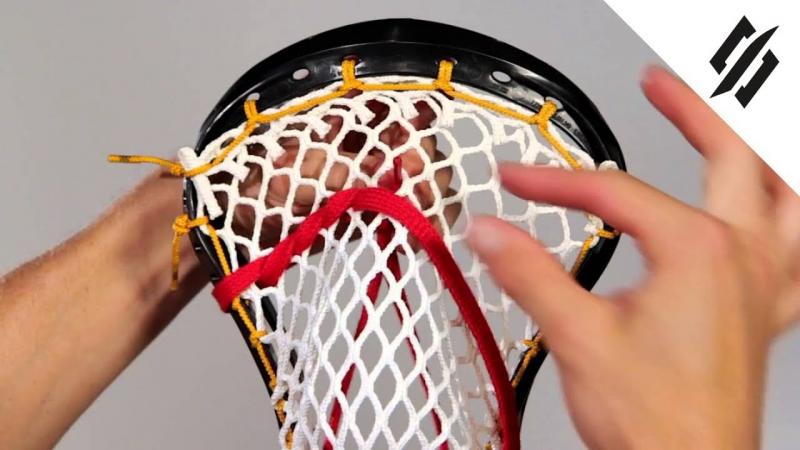
Start right below the top string for your first diamond. Take the sidewall string and thread up through the bottom front of the diamond, then across through the top point and back down through the rear. Pull tight so the diamond is snug and centered.
Next, stitch the sidewall through the outside edges of the diamond, entering and exiting each hole at a perpendicular angle. This locks the diamond in place against the sidewalls. Avoid angling your stitches too far into the head – straight perpendicular lines keep tension even across each row.
As you complete the first diamond, pay close attention to keeping the shape uniform and centered. The four interior lines of the diamond should be equal length, forming a symmetrical row free of bunching or warping.
Maintaining consistency in diamond size and shape gives your pocket reliability and improves ball control. Jagged or off-center rows cause the ball to sit unevenly on catches and cradles. Take it slowly on each diamond and correct any issues before moving downwards.
Patience and precision in diamond stringing separates the average pockets from the great ones. Don’t rush the fundamentals. For your first row, focus on perfecting symmetry and tension before picking up speed. Nail down proper technique here before stringing the remaining diamonds.
With the first diamond formed cleanly, you can move down the head with confidence, using an over-under sidewall stitching pattern to complete subsequent rows. Just always remember – flawless diamonds make for flawless pockets. Take your time and string each one deliberately.
With the first row of diamonds completed, it’s time to fill out the middle section of the head to really define pocket shape and depth. Creating clean, symmetrical middle diamonds ensures consistent ball control and hold on cradles.
Create Middle Diamonds
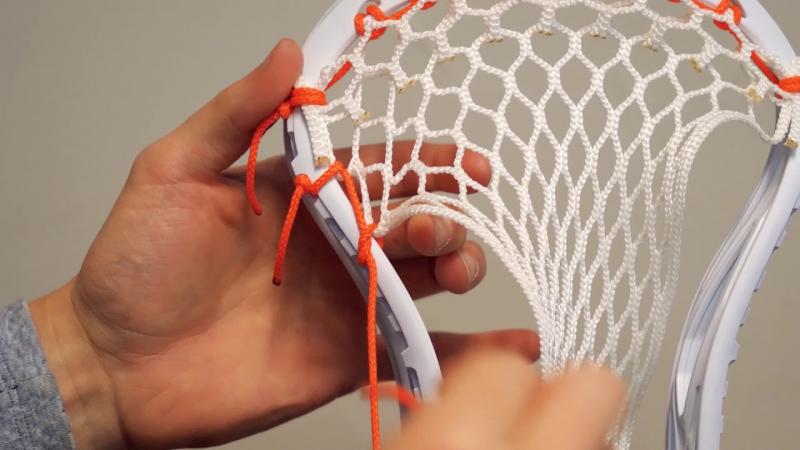
Start stringing your second diamond row right below the first, using the same techniques for shaping and tensioning. Go up through the bottom of the diamond, across the top point, then back down through the rear hole. Snug up the interior diamond lines so they are centered.
When stitching the sidewall string on these middle diamonds, utilize an over-under pattern. Come across the outside of the diamond from under the mesh, then go over the mesh into the next hole. Alternate under and over as you progress across the row. This interlocking technique keeps each diamond locked in place.
As you string each middle diamond, continually check symmetry – the rows should have uniform shape and size. Keep the tension and stitching angles consistent to prevent unwanted bunching or gaps. Having diamonds precisely spaced creates a smooth, consistent pocket surface.
Avoid the temptation to rush through the middle diamonds as you hit a rhythm. Moving too quickly often leads to sloppy rows that undermine pocket consistency. Take your time and use both hands to maintain even tension as you progress.
The middle diamonds define overall pocket shape more than any other area, so flawless technique here is a must. With patience and practice, you’ll be able to quickly string clean middle diamonds for the ideal pocket profile. Just maintain focus and quality craftsmanship on each row.
Once your middle diamonds are dialed in, you can shift focus to sculpting the lower pocket with your bottom string, shooters, and leathers. But never forget – it all starts with clean diamonds in the middle. They are the framework of a great pocket.
Adding a bottom string is a vital step for controlling pocket depth and maintaining structural integrity across the lower half of your stick head. Taking the time to install a straight, stiff bottom nylon string with tight stitches will keep your pocket game-ready through tons of hard play.
Add Bottom String
The bottom string sits just above the scoop of the head, running horizontally across between the sidewall holes. Use a heavy nylon like Type 6 for maximum stiffness. This prevents sagging over time.
Starting at one sidewall, tie off the end with a tight double or triple knot so the string is anchored firmly in place. Move across the head skipping every other hole as you make box stitches down and back up through the mesh.
As you install stitches, leave a gap of one or two diamonds in the center for attaching a nylon shooter later. Pull each box stitch tight and snug before moving to the next. This distributes tension evenly across the length of the bottom string.
Resist any temptation to rush the bottom string installation. Taking your time here ensures each box stitch is knotted securely to withstand slashes and checks. A loose bottom string will lead to premature warping and loss of pocket shape.
The rigidness of the heavy nylon also lets you tweak pocket depth later on if needed. You can subtlety tighten or loosen stitches along the bottom string to raise or lower pocket bag. This fine tuning capability is key.
With a stiff, evenly-tensioned bottom string installed, the lower half of your pocket is primed for dialing in ball control and hold. Just be sure to leave that open diamond or two for your shooter!
Interlocks are key pieces of string that run horizontally between diamonds to help shape and define pocket channels. Installing quality interlocks gives you exact control over ball positioning and hold on all maneuvers.
Install Interlocks
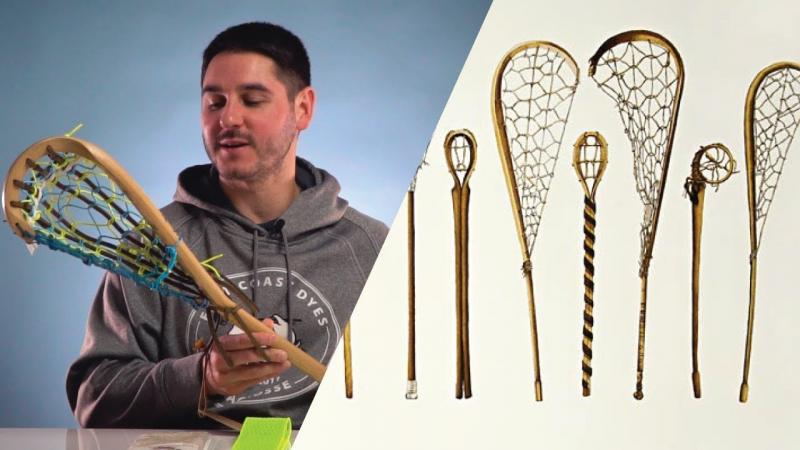
Interlocks can be made from nylon, cotton, leather, or other lacrosse string materials. Nylon cords are a popular choice for their stiffness and durability. Start with a single straight interlock in the mid-section of the head.
Weave the interlock cord over-under through the diamonds along the row, entering and exiting each diamond through the gaps between the knots. Pull tension firm so the cord sits snugly against the mesh diamonds without sagging.
Positioning a straight interlock through the center of the pocket is a common starting point for defining the ball channel. You can always add more interlocks higher or lower as needed to further enhance control.
Once the initial interlock is installed cleanly, test the pocket and observe how the ball cradles and releases. Add a second nylon interlock higher or lower to create a defined ridge for optimized cradling and ball security.
For even more pronounced pocket shape, try weaving two angled interlocks in a V pattern coming up from the scoop. When pulled tight, this centers the ball and improves hold on runs or dodges. Play around with different interlocking patterns to customize performance.
Like diamonds and sidewalls, take time making interlocks uniformly tight and centered. Rushing leads to an irregular ball channel, so focus on precision. Remember, flawless interlocks mean flawless ball control.
Shooting strings are thin nylon cords that run vertically from the top string to the bottom string and control the ball’s release point. Taking time to properly install and adjust your shooters results in consistent accuracy on passes, shots, and clears.
Tie Off the Shooting Strings

Start by cutting two pieces of soft shooting string, like wax-infused polyethylene, roughly twice as long as your head. Use the pre-existing gaps in your top string and bottom string to thread each cord through vertically.
Coming from the bottom, loop the shooter up through the gap in your bottom string, then continue up through the space left in your top string. Leave some slack when first threading to allow tuning of tension.
Where the shooter exits each horizontal string, tie it off securely with a triple knotted box stitch. For optimal consistency, make the knot snug without over-tightening. Shooters that are too loose will shift and unevenly tension the pocket.
With the shooters installed in both gaps, adjust tension gradually by pulling the knots tighter on the top and bottom strings. As you do this, pay attention to how the centered ball releases when passing and shooting. Too much tension cradles well but passes slowly. Too little tension passes fast but lacks control.
Finding the right balance of shooter tension takes trial and error testing. But once dialed in, you’ll see huge improvements in passing and shooting accuracy. Your sticks’ sweet spot will be precisely defined.
Don’t settle for uneven, loose shooters. Consistency in passing and shooting starts here. Take time to tie them off cleanly and find your optimal tension settings. You want the ball to release straight every time when centered in the pocket.
For midfielders and attackmen who want even greater ball control on runs and dodges, integrating a V channel into the pocket is an advanced stringing technique worth considering. Properly executing a defined V channel takes time but can noticeably improve on-field cradling.
Consider Adding a V Channel
Start by cutting two equal lengths of sturdy nylon string. Tie each off at the tip of the scoop, one on each sidewall hole. These will form the angled lines of your V channel.
Running the strings from the bottom of the head, weave each side up through the diamonds at about a 30-45 degree angle towards the middle. Use an over-under pattern stitching through the gaps between diamond knots.
As you crisscross the nylon cords up through the pocket, ensure they mirror each other at equal angles. When they meet near the midline, pull tension and tie them off to form a defined V shape running up the center.
The inverted V channel should have clearly raised lines cradling the ball as you move. It takes precision stringing to make the channel clean rather than bunched or warped. Avoid rushing this step.
With practice, you’ll be able to execute perfectly symmetrical V channels consistently. The result is a pocket that centers the ball on runs for greater security against checks. Especially behind the cage or on end-to-end clears, this control pays off.
While not necessary for all players, the added ball control from a V channel can give midfielders and attackmen confidence to charge through traffic or brush off defenders. For competitive players in these positions, it’s an advanced pocket element worth mastering.
For even greater customization of pocket shape, many lacrosse players add supplementary nylon strings vertically along the sidewalls. Strategically tying these in provides more discrete control over pocket bag and ball channel positioning.
Install Nylon Strings Along the Sides
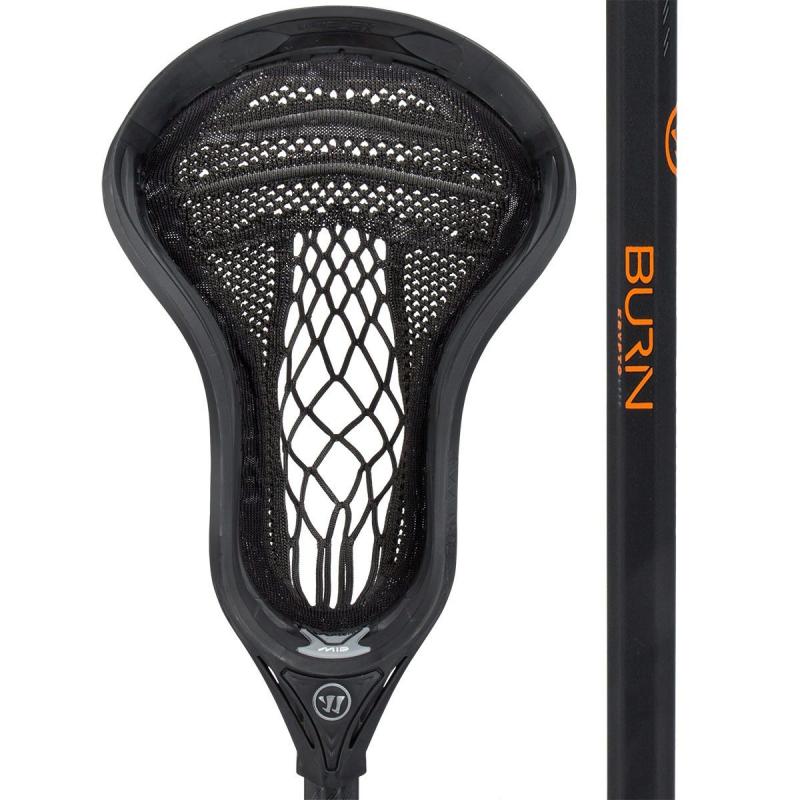
Start by cutting two longer nylon cords, one for each sidewall. Tie each off through a hole at the tip of the scoop, leaving plenty of slack string to work with initially.
Going up the head, weave each vertical nylon over-under as you see fit to pull certain diamonds inward or tighten particular areas. Use your discretion here based on the adjustments your pocket needs.
As you tie the vertical nylons into place, be careful not to over-tighten and warp pocket shape. Less is often more with sidewall stringing. Make subtle adjustments and observe the effects before proceeding.
Great spots to integrate supplemental nylons are around the shooter channels, the lower sidewalls above the scoop, or the first few top diamonds. Small tightening in these areas can bag out the pocket or accentuate channel ridges as desired.
While not strictly necessary, adding customizable control strings down the sidewalls is a key technique top stringers use to perfect pocket performance. Take time to identify any adjustments needed for your pattern and integrate vertical nylons gradually.
With practice integrating vertical nylons, you’ll be able to shape extra definition into your ball channel on command. The expertise gained from this advanced stringing is well worth the effort.
Once the pocket is fully strung, you can make tension adjustments to fine tune the overall depth and profile. Taking time to dial this in results in optimized ball control and hold for your position and playing style.
Adjust Pocket Depth and Shape
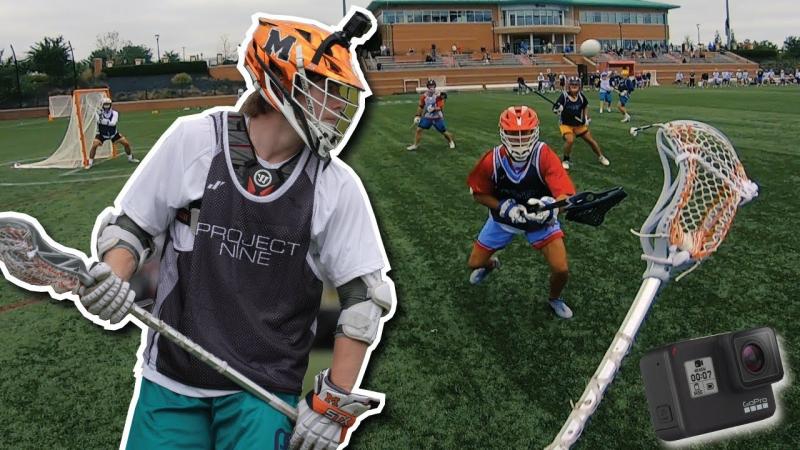
Start by observing how the ball sits in the channel and moves on cradles. Loosen or tighten specific diamonds and sidewalls gradually to achieve your desired depth and bag.
For a quicker release, tighten the first few rows up top to raise ball position higher in the pocket. This helps midfielders quickly pass and transfer on clears. Just don’t over-tighten and create an illegal channel.
To improve hold during physical play, loosen the lower diamonds and sidewalls to allow a deeper pocket set. This lets the ball sink deeper for added security on slashes and checks.
Also examine the side profile for shape consistency. If the pocket becomes too bagged out on one side, tighten the vertical nylons to balance tension. Smooth out any irregular bulges or gaps.
Make all adjustments in small increments, testing after each tweak. Drastic tension changes can ruin pocket mechanics. Finesse it gradually until you achieve just the right profile for passing, cradling, and shooting.
Be patient throughout the fine tuning process. Rushing leads to inconsistent pockets requiring re-stringing. Take your time dialing in the optimal depth and shape. The attention to detail makes a big difference on the field.
How to String a Lax Head Like a Pro Lacrosse Player: A 15-Step Guide
Stringing a lacrosse head is an art form that takes practice and patience to master. As any seasoned lacrosse player knows, the way your stick is strung can make all the difference in your performance on the field. A properly strung head provides the right amount of hold, control, and release for cradling, scooping, passing, and shooting. While there are many ways to string a stick, this 15-step guide will walk you through one popular method for stringing a traditional lacrosse head so you can unleash your inner Paul Rabil.
Before you get started, make sure you have the necessary supplies: lacrosse head (unstrung), lacrosse shaft, sidewall strings, shooting strings, mesh, stringing needle, scissors, lighter, tape, and a stringing kit. Once you have everything you need, follow these steps:
- Prep the head by taping the sidewall holes to prevent stringing mishaps. Use athletic tape and wrap the tape around each plastic sidewall rod 2-3 times.
- Measure and cut 6 sidewall strings at 30 inches each. Melt the ends of the nylon strings with a lighter to prevent fraying.
- String the sidewalls starting with the bottom sidewall holes. Feed the strings through the hole, pulling evenly until centered. Continue stringing each sidewall hole moving up the head.
- Once the sidewalls are strung, lace the mesh to connect it to the sidewall strings following the mesh pattern. Use a stringing needle to weave it through the mesh and sidewall strings.
- When the mesh is laced in, adjust tension on each diamond. Loosen or tighten each one so the diamonds are uniform in size.
- Tie knots at the top of the mesh where it meets the last sidewall string. Make sure the knots are secure.
- Measure and cut 2 shooting strings at 18 inches each. Melt the ends with lighter.
- String 1 shooting string through the sidewall holes starting at the throat of the head looping in and out.
- Weave the second shooting string through the opposite sidewall holes again starting at the throat.
- Use a last string to tie the shooting strings together and adjust tension by pulling the ends of the strings.
- Test the pocket tension by placing a ball in the head. It should sit comfortably in the pocket’s sweet spot.
- Once you have the desired pocket tension, tie knots at the end of each shooting string to lock it in place.
- Melt any additional string ends with the lighter so there are no sharp edges.
- Carefully remove the tape from the sidewalls without disturbing the strings.
- Screw on your shaft and you’re ready to hit the field with your newly strung pocket!
Remember, stringing requires a lot of tweaking to find your ideal setup. Don’t get discouraged if it takes a few tries to get the hang of it. The more heads you string, the better you’ll get. Push and pull the strings until you dial in the perfect pocket for cradling, scooping, passing, and ripping ropes. Before you know it, you’ll be stringing sticks like the pros.
Here are some additional tips to take your stringing skills up a notch:
- Watch stringing tutorials from pros like Epoch Lacrosse, Throne of String, and Stringers Society.
- Experiment with various mesh styles like hard mesh, soft mesh, and pre-waxed hockey mesh.
- Try different shooting string patterns like a double X, triple X, or straight across.
- Adjust sidewall string tension for more hold or whip.
- Use wax string or nylon hockey lace to get unique pocket shapes.
- Shift diamonds during stringing to manipulate pocket placement.
- Custom dye your mesh and strings for that flair of personality.
- Pre-stretch mesh before stringing for a deeper pocket right off the bat.
Mastering the art of stringing takes time, but with the right techniques you’ll be stringing lacrosse sticks with prowess in no time. So grab your stringing kit and let your creativity run wild until you craft your masterpiece. Whether you prefer a tight channel, wide pocket, deep bag, or commanding whip, you can string your head to match your playing style. Show off your stringing skills on the field and give your teammates the edge with custom pockets they can count on game after game.
Make Final Tweaks
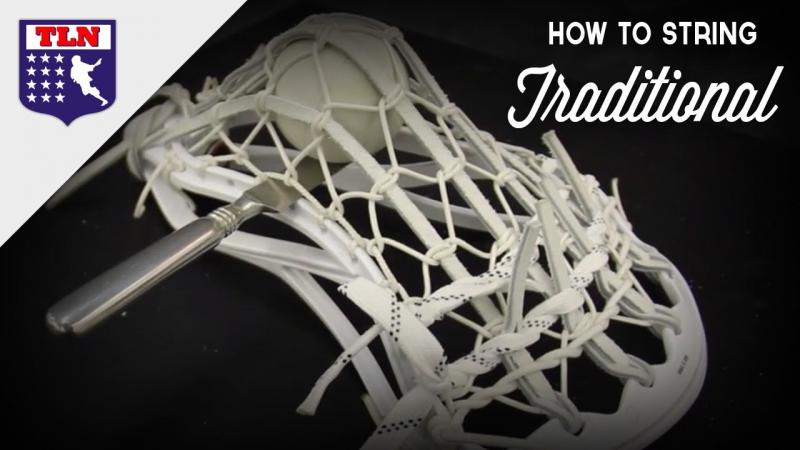
You’ve strung up your lacrosse head and have a decent pocket, but it still needs some final tweaking to really dial it in. Making micro adjustments to the shooting strings, sidewalls, and mesh can take your pocket from good to great. Don’t settle for an average pocket – put in the time making final tweaks to give you that custom feel that boosts your game.
Here are some tips for fine-tuning your lacrosse head pocket:
- Make small adjustments to the shooting strings. Loosening or tightening them, even by a couple millimeters, can adjust hold and release speed.
- If the ball sits too high or low, shift sidewall strings up or down a hole to modify pocket placement.
- For more hold, increase sidewall string tension by pulling the strings tighter through each hole.
- To increase whip, decrease sidewall string tension for a baggier pocket.
- Push additional diamonds down into the pocket to create a deeper bag.
- Pull diamonds up from the pocket for more hold and quicker release.
- Use an awl or pick to widen mesh diamond holes, increasing ball control.
- Add more shooters or runners to shape the pocket and fine-tune release points.
- Re-lace the mesh if needed for a tighter channel or more defined pocket.
- Widen the top of the pocket by adjusting the top string connections.
- Sew or melt stray string ends so they don’t fray or come undone.
- Use string dampeners to keep shooting strings from rattling around.
While making your finishing touches, continually test the pocket with a ball to ensure adjustments are having the desired effect. Start by cradling – the ball should comfortably sit deep in the pocket but still be visible. Next, try quick sticks, catching, and passing to check feel and ball control. Finally, do some shooting to dial in pocket release. If the ball is spraying all over, keeps bouncing out, or flies unpredictably, keep tweaking until you get that buttery release.
Don’t forget to string your stick to match your position and style of play. For example, an attackman may prefer a deeper pocket for cradling and quick sticks, while a midfielder needs a quicker release when ripping shots on the run. Get up close and personal with your pocket so any subtle adjustment gives you exactly what you need on the field.
It’s amazing how just loosening or pulling a string a tiny bit can make a world of difference. Take the time to obsess over the details – it will pay off the first time you scorch one top cheddar thanks to your perfectly crafted pocket. Dial it in so you have total confidence in cradling, passing, catching, and shooting. No more wondering if errant passes are your stick’s fault – take matters into your own hands with surgical stringing precision.
While it’s tempting to call your pocket “good enough,” don’t settle for anything less than lacrosse stick excellence. You don’t want the ball bouncing out at a critical moment. Put in the work adjusting diamonds, sidewalls, shooting strings, and channel width until everything feels effortless. When your pocket truly becomes an extension of your hand, you’ll gain an edge over your defender as you slash to the cage for an epic game-winner.
So grab your trusty stringing kit and don’t stop tinkering until perfection. Tie knots, widen channels, shift diamonds, add shooters, increase whip, tighten sidewalls – do what it takes to put the finishing touches on your masterpiece. You may go through a few mesh and string setups until you land on “the one.” But once you string up that dream pocket, you’ll never look back. Become the locker room stringing expert as teammates beg you to work your magic on their sticks. Then use your perfectly customized pocket to carve up defenses on the road to the championship.
Break In the Pocket
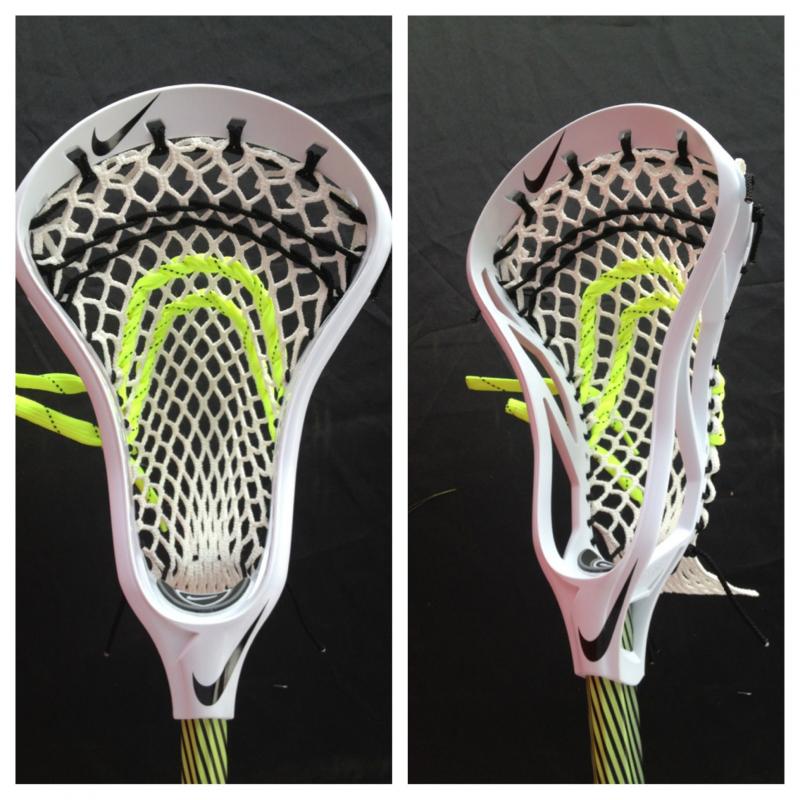
You’ve strung up the perfect pocket and made all your finishing tweaks, but there’s still one important step before taking it onto the field – breaking it in. Taking the time to properly break in your lacrosse head pocket will soften the mesh, shape the natural bag, increase hold, and improve ball control. Don’t just string it and wing it. Follow these tips to get those diamonds dialed in game-ready.
Start by drenching the mesh with water and using a lacrosse ball to push the pocket exactly where you want it. Massage the ball firmly into the sweet spot, forcing the mesh to mold around it. Continue re-wetting and pushing the ball into place until you set the shape. As the mesh dries, the ball’s impression will remain.
Next, use your hands to aggressively squeeze, pull, and manipulate the diamonds. Softening the mesh this way will quicken the break-in process so you don’t have to wait as long for the pocket to settle in. Compress each diamond with your fingers to soften and widen the holes. The more hands-on time you put in working the mesh, the faster it will be gamer-ready.
Once the shaping and softening is done, take the stick out for some wall ball. Rip some reps to continue forming the pocket and dial in that buttery release. Cradle aggressively to get the feel for hold. The friction from the ball rubbing against the mesh will hasten the break-in journey. Continue putting in wall ball work until the pocket feels like home.
If you really want to accelerate the process, use mesh shrink wrap. Soak the head overnight or use a heat gun to tighten the mesh. This forces the diamonds closer together for a snappier pocket right off the bat. Just be careful not to overdo it – too much heat can damage the mesh. Consider leaving shooting strings out during shrinking to avoid them becoming too tight.
While you want to be aggressive during break-in, don’t overdo it to the point you bend the head or warp the sidewalls. Ease into it with some firm wall ball before taking hard rips or checks. Remember, it’s break-in, not break-down. Stay in control.
Don’t rush the journey and certainly don’t take any shortcuts. A properly broken-in pocket requires patience and diligence. But the payoff is crucial as you gain complete trust in your stick. Cradle like a dream, scoop with certainty, pass on point, and snap ropes. The hours spent forming and softening pays dividends in clutch moments when the game is on the line.
Keep tuning the pocket after break-in too. As the mesh ages and stretches from use, maintain that gamer feel by periodically compressing diamonds, adjusting shooting strings, or re-lacing. Don’t get lazy just because the initial work is done. Tune it up regularly so the stick feels like an extension of your hands.
Wielding a perfectly broken-in lacrosse stick is an unbeatable weapon against any defense. They won’t know what hit them after you unleash a barrage of crisp passes, authoritative cradles, and blistering cannons. So take the time to lovingly break in your pocket before stepping on the field. Masterfully crafted and game-tested, your sniper’s tool will give you the confidence to shred even the stingiest defense.
Maintain the Pocket Over Time
You put in the work getting your lacrosse head perfectly strung and broken in. But don’t stop there – maintaining your pocket over time is key for consistent performance. As mesh ages and stretches, the original feel will change. Don’t let your prized gamer go to waste. Get in tune with its needs and your pocket will hold up season after season.
Start by periodically checking for stretched or snapped sidewall strings. As you play and practice, these strings take a beating. Replace any that are frayed or broken to preserve pocket integrity. Keep extra sidewall strings in your bag for quick repairs on the go.
Inspect the shooting strings and knots often too. Shooting strings take the brunt of passes, catches, cradles, and shots. Tighten up or re-tie any loosened knots. Swap out worn shooting strings for fresh ones to keep that crisp release dialed in.
The main area needing TLC is the mesh. Soft mesh will bag out and stretch over time. Gently compressing diamonds with your fingers will tighten things back up. You can also increase tension by adjusting sidewall strings or pulling diamonds up through the top string.
If your gamer is getting wonky despite minor tweaks, consider re-stringing certain areas like the top string or sidewalls while keeping the main pocket intact. This refresher can restore the original feel without starting completely from scratch.
Don’t let dirt, debris, and grime take over. Keep things clean by periodically rinsing your head with water. Gently scrub the mesh and make sure to remove any caked on mud after rainy games. Let the head fully air dry before stringing back up.
Proper storage also prevents premature breakdown. Keep your stick out of extreme heat or cold. Don’t jam it haphazardly into a crowded bag. Use a structured lacrosse head cover for protection.
Take the time after each game and practice to inspect pocket wear and tear. Nip any issues in the bud before they become bigger problems. With consistent maintenance and TLC, your gamer will hold its magic for years, becoming an old reliable friend you just can’t replace.
Don’t take your perfectly crafted pocket for granted. The maintenance required is well worth it when your stick continually performs at the highest level. Stay meticulous and your pocket will hold strong as seasons pass. Players come and go but a properly maintained gamer is forever. Cherish the journey and create lifelong lacrosse memories using a trusty pocket you refuse to retire.

