What are the essential supplies needed for stringing a lacrosse stick. How to remove old strings and install new sidewall strings. What is the proper technique for stringing shooting strings and V’s. How to correctly install mesh and create the main string diamonds. What are the final adjustments needed for optimal pocket performance.
Essential Supplies for Stringing a Lacrosse Stick
Stringing a lacrosse stick requires specific supplies to ensure a proper and durable restring. The key items you’ll need include:
- String (nylon is most common)
- Sidewall string (pre-waxed recommended)
- Mesh (standard hard mesh is versatile)
- Sharp scissors
- Needle nose pliers
Additional helpful tools include a stringing tool, ball reamer, and extra string. Having all supplies organized before starting will streamline the process.
Choosing the Right String and Mesh
The type of string and mesh you select can significantly impact your stick’s performance. Are all strings created equal? Not quite. Nylon string is popular due to its durability and consistent tension. For mesh, standard hard mesh offers a good balance of hold and release, suitable for most players.

Removing Old Strings: The First Step in Restringing
Before installing new strings, it’s crucial to remove the old ones carefully. Begin by cutting out the sidewalls, then progress to the shooting strings, V’s, and finally the main pocket strings. Take your time during this process to avoid damaging the head.
Proper Technique for Cutting Out Old Strings
When removing old strings, precision is key. How should you approach this task? Start at the bottom of the head and work your way up, cutting one string at a time. Use sharp scissors and be mindful of the head’s plastic when cutting close to the stringing holes.
Installing New Sidewall Strings: The Foundation of Your Pocket
Sidewall strings form the backbone of your pocket. To install them:
- Tie one end to the bottom of the head, leaving a few inches extra.
- String upwards through the sidewall holes, maintaining tension.
- Use pliers to grip and pull the string when necessary.
- Tie off at the top, again leaving 2-3 inches extra.
- Repeat on the opposite sidewall.
Achieving Proper Sidewall Tension
Correct sidewall tension is crucial for pocket performance. How tight should sidewall strings be? Aim for a balance – tight enough to provide structure, but not so tight that it warps the head or restricts mesh movement.
Stringing Shooting Strings and V’s: Enhancing Ball Control
Shooting strings and V’s play a vital role in ball control and release. For shooting strings:
- Tie one end to a bottom sidewall hole.
- String across to the opposite sidewall hole.
- Pull tight and tie off.
- Add additional strings at even intervals up the head.
For V’s, tie to one sidewall and string diagonally to the opposite side, adjusting angle and placement to shape your pocket.
Optimizing Shooting String Placement
The placement of shooting strings can significantly affect your shot. Where should you position them for optimal performance? Generally, place the bottom string just above where the ball sits in the pocket, with additional strings spaced evenly up to the middle of the head.
Mesh Installation: Creating the Heart of Your Pocket
Proper mesh installation is crucial for pocket formation. Follow these steps:
- Orient the mesh with wider diamonds at the scoop.
- Attach to sidewalls using sidewall string or simple knots.
- Start at the scoop and work downwards.
- Maintain even tension on both sides.
- Ensure diamonds and sidewalls remain straight.
Adjusting Mesh Tension for Different Playing Styles
Mesh tension affects ball retention and release. How should you adjust it for your playing style? For attackmen, a slightly looser pocket aids quick release. Midfielders might prefer medium tension for versatility. Defenders often benefit from tighter mesh for better ball control during long passes.

Stringing the Top and Creating Main String Diamonds
The top strings and main string diamonds define your pocket’s shape and depth. For top strings:
- Tie to one sidewall and string diagonally across the scoop.
- Criss-cross between sidewalls 2-3 times.
For the main string diamonds:
- Tie to the bottom right sidewall hole.
- String up and over the first shooting string.
- Create 2-4 bottom diamonds for low pocket depth.
- Continue lacing up the head, forming uniform diamonds.
Crafting the Perfect Pocket Shape
The pocket shape dramatically influences stick performance. What factors should you consider when shaping your pocket? Consider your position, playing style, and league regulations. A deeper pocket offers more hold but slower release, while a shallower pocket provides quicker release but less control.
Fine-Tuning Your Pocket: Adjustments and Finishing Touches
After completing the main stringing, fine-tuning is essential for optimal performance. Consider these adjustments:
- Use a ball reamer to maintain consistent diamond width and tension.
- Add sidewall tie-offs to prevent diamond slippage.
- Adjust top string tension to fine-tune pocket depth and ball release point.
- Test the pocket with a ball, making small adjustments as needed.
Common Stringing Mistakes to Avoid
Even experienced players can make stringing errors. What are some common mistakes to watch out for? Uneven sidewall tension, overly tight mesh, and improper shooting string placement are frequent issues. Take your time and double-check your work at each step to ensure a well-strung stick.
Stringing a lacrosse stick is both an art and a science. It requires patience, attention to detail, and an understanding of how each element affects stick performance. By following these steps and fine-tuning based on your playing style, you’ll create a custom-strung stick that enhances your game.
Maintaining Your Newly Strung Lacrosse Stick
Once you’ve successfully restrung your lacrosse stick, proper maintenance is key to preserving its performance and longevity. Consider these maintenance tips:
- Regularly check for loose strings or knots and tighten as needed.
- Clean your mesh after playing in wet or muddy conditions.
- Store your stick in a cool, dry place to prevent warping or string degradation.
- Periodically adjust your pocket to maintain optimal depth and shape.
When to Restring Your Lacrosse Stick
Knowing when to restring is crucial for maintaining peak performance. How often should you restring your lacrosse stick? It depends on usage, but generally, consider restringing every 3-6 months for regular players. Signs that it’s time to restring include frayed strings, inconsistent ball release, or a pocket that won’t hold its shape.

Advanced Stringing Techniques for Experienced Players
As you become more proficient in basic stringing, you may want to explore advanced techniques to further customize your stick. Some advanced stringing methods include:
- Channel stringing for improved ball control
- Custom knot patterns for unique pocket shapes
- Hybrid mesh and traditional stringing combinations
- Specialized pockets for specific positions or playing styles
Experimenting with Different Stringing Patterns
Stringing patterns can significantly impact stick performance. How can you develop a stringing pattern that suits your style? Start by understanding the basics of pocket dynamics, then experiment with different diamond shapes, sidewall patterns, and shooting string configurations. Keep a record of what works best for you in different game situations.
The Impact of Stick Stringing on Playing Performance
The way your stick is strung can have a profound effect on your lacrosse performance. A well-strung stick can improve:
- Ball control and retention
- Passing accuracy and consistency
- Shot power and placement
- Overall feel and confidence with the stick
Adapting Your Stringing to Your Playing Style
Different playing styles benefit from different stringing approaches. How can you tailor your stick’s stringing to complement your game? Consider factors like your position, preferred shot types, and whether you prioritize quick release or ball control. Experiment with pocket depth, shooting string placement, and sidewall tension to find the perfect balance for your style.
Understanding the nuances of lacrosse stick stringing is a valuable skill that can elevate your game. Whether you’re a beginner learning the basics or an experienced player refining your technique, mastering the art of stringing allows you to customize your stick to your exact specifications. Remember, practice and experimentation are key to finding the perfect string job for your playing style.
Legal Considerations in Lacrosse Stick Stringing
When stringing your lacrosse stick, it’s crucial to be aware of and adhere to the rules and regulations set by your league or governing body. Different leagues may have specific requirements regarding:

- Pocket depth
- Shooting string placement
- Overall stick dimensions
- Types of materials allowed
Ensuring Your Stick Meets Regulation Standards
How can you make sure your newly strung stick is legal for play? Familiarize yourself with your league’s specific rules. Most leagues use the “stick test” where the top of the ball should be visible above the sidewall when placed in the deepest part of the pocket. Always check your stick before games to avoid penalties or disqualification.
Stringing a lacrosse stick is a skill that combines technical knowledge with creativity. As you practice and refine your technique, you’ll develop a deeper understanding of how each element of the string job affects your play. This knowledge allows you to continually adjust and improve your stick’s performance, giving you a competitive edge on the field.
Remember, the perfect string job is personal and may take time to achieve. Don’t be afraid to experiment with different techniques and seek advice from experienced players or professional stringers. With patience and practice, you’ll be able to create a custom-strung stick that feels like a natural extension of your arm, enhancing your skills and enjoyment of the game.
Gather Your Supplies – String, sidewall string, mesh, scissors, needle nose pliers
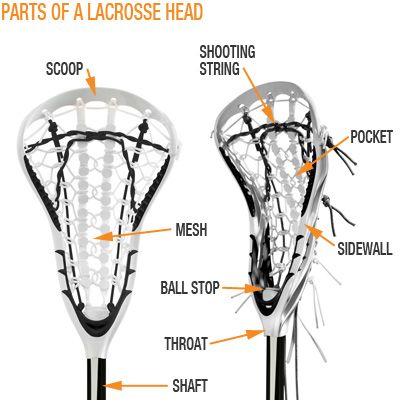
Stringing a lacrosse stick can seem intimidating at first, but with the right supplies and a bit of patience, you’ll be able to restring your head in no time. The most important items you’ll need are string, sidewall string, mesh, scissors, and needle nose pliers. Here’s a quick overview of each:
- String – This is the main string that creates the pockets and channels of the head. Nylon string is most commonly used. Make sure you have enough string for the full restring.
- Sidewall String – This is a slightly thinner string used to attach the mesh to the sidewalls of the head. Pre-waxed sidewall string helps hold knots in place.
- Mesh – The woven mesh that sits inside the head and creates the main pocket for holding the ball. Standard hard mesh is a good all-around choice.
- Scissors – Sharp scissors make cutting string and mesh much easier. Get dedicated stringing scissors if possible.
- Needle Nose Pliers – You’ll need these for tightening knots and pulling strings through openings. Lacrosse-specific stringing pliers are ideal.
In addition to these core items, having spare string, a stringing tool, and a ball reamer on hand can help the stringing process go more smoothly. Take time to gather all your supplies in one place before you start.
Step 1: Cut the Old Strings Out of the Head
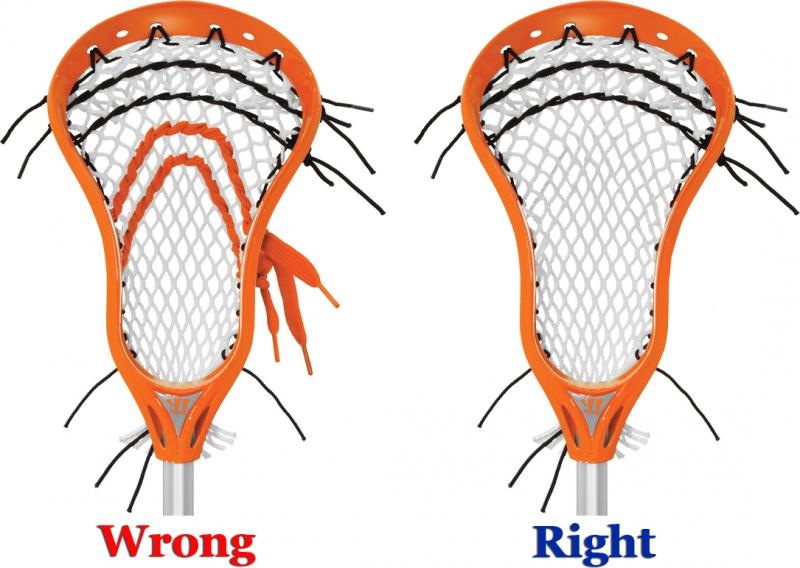
If you’re restringing an existing stick, the first step is removing the old strings. Use your scissors to cut out the sidewalls first, then work on the shooting strings, V’s, and finally the main pocket strings. Taking out the old strings can be tedious, but going slow and carefully cutting each string at a time will prevent any damage to the head.
Step 2: Insert the New Sidewall Strings
Once the old strings are out, you can begin putting the new strings in. Start with the sidewall by tying one end of the sidewall string to the bottom of the head. Keep a couple inches extra string. Then string the sidewall up through the holes, pulling it tight as you go. Use the pliers to grip the string when needed. When you get to the top, tie it off leaving 2-3 inches extra just like the start. Repeat the same process on the other sidewall.
Step 3: String the Shooting Strings and V’s
The shooting strings run horizontally across the head, while the V’s connect the sidewalls in a V-shape. Start with the shooting strings by tying one end at the bottom sidewall hole. String it across through the opposite sidewall hole and pull tight. Tie it off at the bottom hole on that sidewall. Add additional shooting strings at even spaces up the head. For the V’s, tie one end to a sidewall hole and string it diagonally down to the opposite sidewall. Adjust the angle and placement of the V’s depending on your preferred pocket shape.
Step 4: Install the Mesh
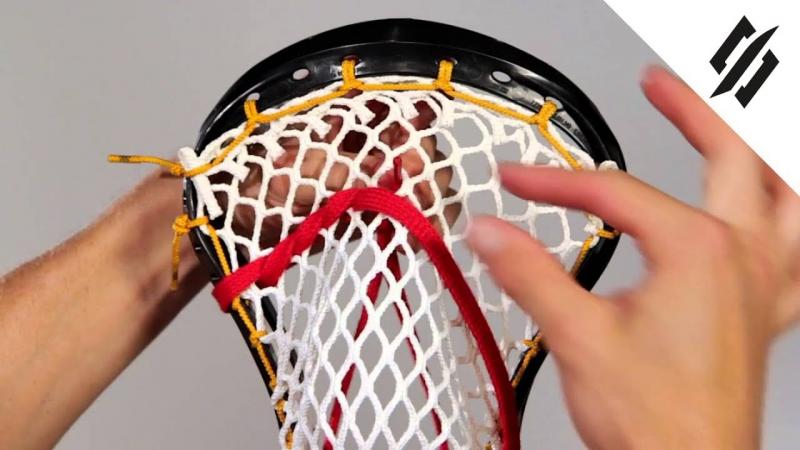
Place the mesh into the head oriented so the wider diamonds are at the scoop and the smaller diamonds run down the head. Attach the mesh to the sidewalls using the pre-threaded sidewall string or simple knots. Start at the scoop and work your way down. Push the mesh into each diamond as you go and keep even tension on the sidewalls. Make sure the diamonds and sidewalls are straight. For bags with stringing holes, use the needle nose pliers to thread the sidewall string through the holes for a secure hold.
Step 5: String the Top Strings
The top strings run diagonally from the sidewalls across the scoop of the head. This helps define the upper part of the pocket. Tie one end of the string to the sidewall, then string it across the mesh and through the opposite sidewall stringing hole. Continue criss-crossing the top string back and forth between sidewalls 2-3 times or until you reach the bottom of the scoop.
Step 6: Create the First Main String Diamond
Turning the head over, tie one end of the main string to the bottom sidewall hole on the right side (if you’re holding the head in your left hand). Bring the string up and over the first shooting string and back down through the next hole. Pull tight so the string locks the first diamond in place. Tie the other end to the corresponding bottom hole on the other sidewall.
Step 7: String the Lower Pockets
Continue lacing the main string up the head in and out of the sidewall holes to form more diamonds. Create 2-4 bottom diamonds for low pocket depth. Keep them uniform in size and shape for consistency. Use a ball reamer inserted in each diamond to maintain the right width and tension. Add additional sidewall tie offs if needed to keep the diamonds from slipping.
Step 8: Complete the Upper Pockets
Once the lower diamonds are set, continue lacing diamonds up the head until you reach the top shooting string. The mid-pocket diamonds control ball feel, while the upper diamonds fine tune pocket depth and hold. Work from sidewall hole to sidewall hole making sure strings lock into place. Insert the ball reamer often to check pocket depth and shape.
Step 9: String the Bottom Shooters
The bottom string gives added stability between the lowest sidewall holes. Tie one end to a sidewall hole near the scoop. Go in and out of the adjacent holes on each sidewall working your way down. When you get to the bottom holes, loop around both and tie it off. Having two stacked bottom strings can help lengthen the pocket.
Step 10: Install the Last Shooting String
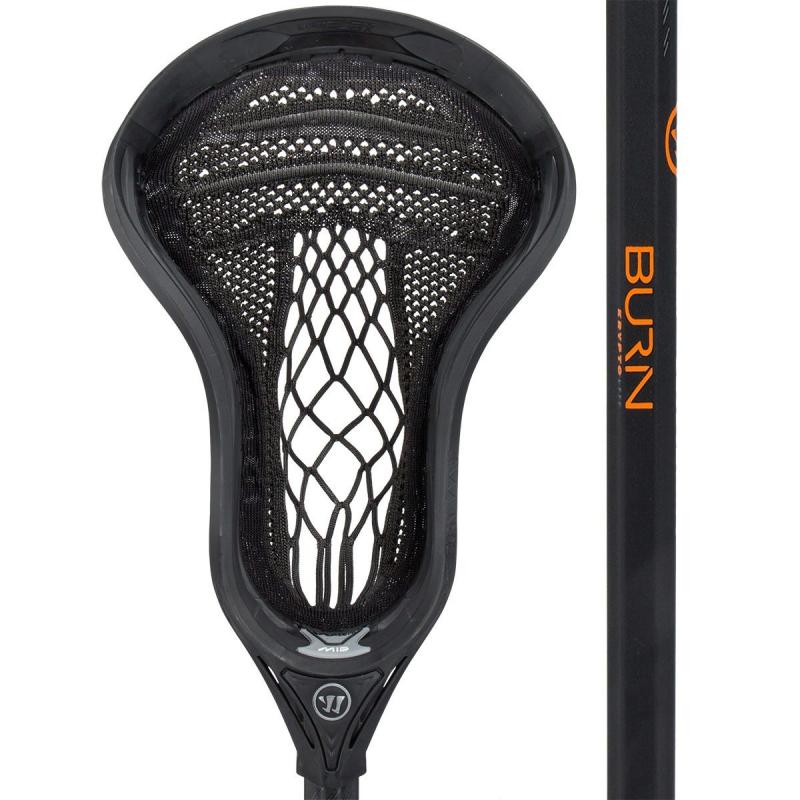
Tie one end of a shooting string into the last pair of unstrung sidewall holes near the scoop. String it through the opposite holes and tie it off. Pull it tight so it crosses just above the topmost main diamond. This defines the very top of the pocket.
Step 11: Check Pocket Depth and Shape
At this point your stringing is complete. Now you need to set the pocket and make any adjustments. Insert a ball and push it down into the pocket molding it to shape. Ideally you want the ball to sit just above the bottom shooting strings. If the pocket is too shallow or too deep, you may need to add or remove diamonds.
Step 12: Perform the Paper Test
Take a piece of paper and fold it into a ball small enough to fit into the head. Place it in the upper third of the head near the scoop then tilt the stick almost vertically. The ball should sit cradled in the pocket, passing the paper test. If not, tighten the shooting strings and top strings until it just holds the ball.
Step 13: Check Sidewall Tension
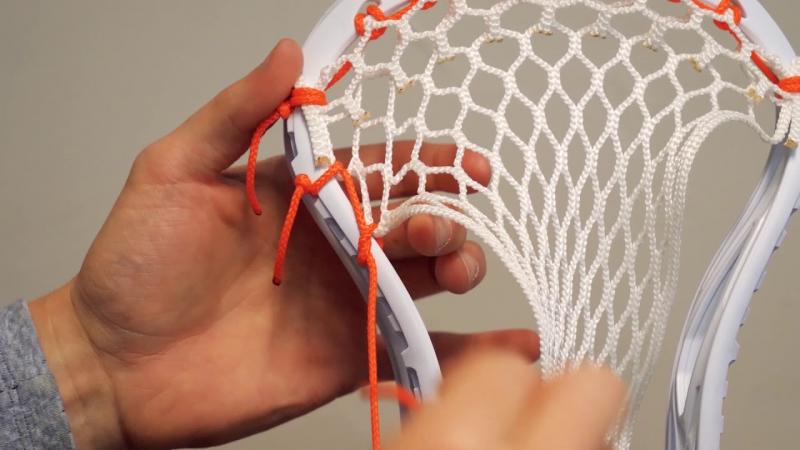
Make sure the sidewalls have even tension on both sides. Hold the head sideways and press a ball against each sidewall, adjusting tension as needed. The sidewalls should have some give but not be too loose. If needed, tighten or loosen the mesh knots to balance sidewall tension.
Step 14: Customize and Finish the Strings
At this point the functioning stringing is complete, but you can make some final custom touches. Burn or singe the string ends to prevent fraying. You can add shooting string leathers for extra grip and hold. Stickers liven up the scoop and sidewalls. Use different colored strings to create unique accents. Personalize the head with your number or name using string and leather patches.
Step 15: Break In the Pocket
Once fully strung, the head needs time to break in before its game ready. Repeatedly pass and catch with the stick to mold the mesh to shape. Cradle and make quick sticks to soften the shooting strings. When throwing passes, the ball should easily sit in the pocket, not bounce or rattle around. After a few hours of use, the pocket will be fully broken in for optimal performance.
With the right materials and proper technique, you can restring your own lacrosse stick without needing to buy a new one. Don’t be intimidated by all the strings, holes, and knots. Take your time, follow the steps, and you’ll have a freshly strung head custom tailored to your preferences. Once you get the hang of it, you’ll be able to restring a stick in under an hour.
Take Out the Old Strings – Remove all old mesh and sidewall strings
Stringing a lacrosse stick is an important skill for any lacrosse player. Having a properly strung stick can give you an edge on the field and make playing the game more enjoyable. While there are many different ways to string a stick, here is a step-by-step guide to stringing a basic lacrosse head for beginners.
The first step when restringing your lacrosse stick is to completely remove all of the old mesh and sidewall strings. Make sure you take out all remnants of the old stringing so you have a clean slate to work with. Use lacrosse stringing pliers to cut out the old strings and pull them out of the sidewall holes. Take your time with this step to ensure no old strings are left in the head.
Install the Top String
Once the old strings are removed, you can start installing the new stringing. The top string runs horizontally along the top of the head, connecting one sidewall to the other. Start by measuring out a length of nylon string about 2-3 inches longer than the width of the head. Use a simple double overhand knot to tie one end of the string to a sidewall hole near the scoop. Thread the string through the adjacent sidewall hole going toward the throat of the stick. Continue threading the top string back and forth until you reach the last sidewall hole.
As you string, pull the top string tight so it creates a defined point along the head. Tie off the end with another double overhand knot. The top string helps define the pocket and gives it structure. Be sure it is pulled tight.
Install the Sidewall Strings
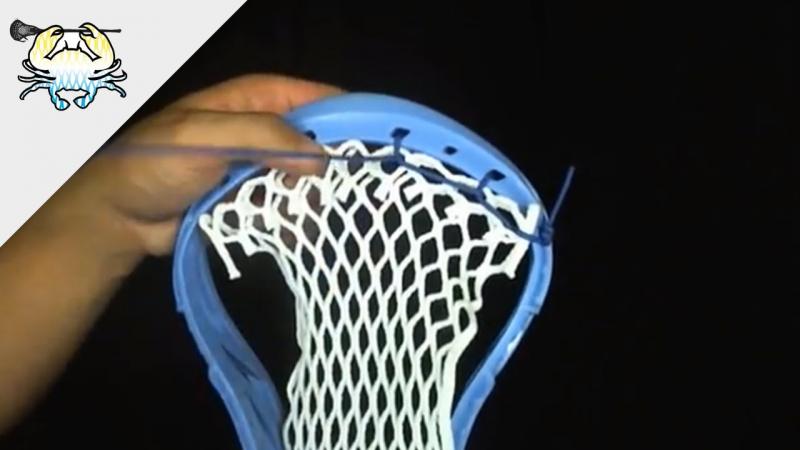
The next step is installing the sidewall strings. These run vertically from the top of the head to the bottom, interlacing with the horizontal lacrosse mesh as you string. Start by measuring out a length of nylon or leather string about 6-8 inches longer than the head. Tie one end to the top of the head right next to the first hole the top string goes through. Thread the sidewall string down through the first mesh diamond, then come back up through the next open sidewall hole.
Continue lacing the sidewall string down through the mesh and up through the sidewall holes until you reach the bottom of the head. The sidewall string should be pulled tight enough so the diamonds stand up vertically, but not so tight that it warps the head. Tie off the end and cut any excess string. Repeat this process to install the remaining sidewall strings until the mesh diamonds are defined.
Install the Shooting Strings
Shooting strings run horizontally about 1-2 diamonds up from the bottom of the head. They help give the pocket its shape and release when shooting. To install shooting strings, tie one end of a nylon string to a sidewall hole. Thread it under the first 1-2 diamonds then come back up through the adjacent sidewall hole.
Pull the shooting string tight so the bottom diamonds are cupped to form the pocket. Tie off the opposite end to secure it. Most heads have 2 shooting strings installed symmetrically across the bottom. Make sure they are consistent for optimal ball control.
Lace in the Mesh
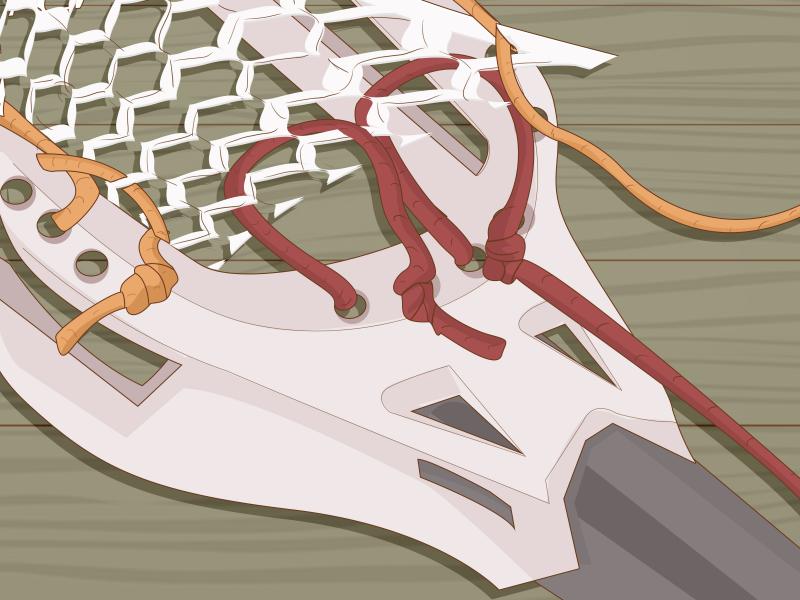
Once the sidewall and shooting strings are installed, you can lace in the mesh. Lay a piece of mesh in the head that is about 2-3 diamonds longer than the width of the head. Starting at the bottom, thread the first mesh diamond through the loop of the bottom shooting string. Next, bring the end of the mesh back up through the second sidewall string diamond opening.
Continue lacing the mesh up through the sidewall strings until you reach the top of the head. The mesh should lay flat running across the width of the head. At the end, tie the mesh off to the last sidewall string at the scoop using a double overhand knot. Trim any excess mesh. Make sure the diamonds are consistent and the pocket looks clean.
Install Nylon Runners
Nylon runners help stabilize the pocket and adjust the channel and hold. They run horizontally interlaced between diamonds like the shooting strings. Start by tying one end of a nylon runner to a sidewall hole above the shooting strings. Weave it under the mesh diamonds in a zig-zag pattern to the opposite sidewall.
Pull the nylon tight so it cups the mesh slightly, then tie it off at the end. Use 2-4 nylon runners evenly spaced between the shooting strings and the midpoint of the head. The runners adjust the pocket shape while adding consistency across the width of the head.
Add Nylon Whip Strings
The final step is installing the nylon whip strings that run down from the scoop. These help secure the ball in the pocket on shots and passes. Measure out a length of hockey lace that runs from the scoop 4-5 diamonds down through the pocket. Tie one end to the scoop using a double overhand knot.
Thread the whip string in and out of the mesh diamonds going down toward the pocket. Pull it snug but not overly tight. Tie off the end to a sidewall hole with another double overhand knot. Add symmetrical whip strings on both sides of the scoop area for full ball control.
Be sure to fully tighten down all knots and cinch up any loose strings. The pocket should have a natural shape with a defined channel and hold. Break in the pocket by passing and catching to get the strings settled in. Adjust the nylon runners or sidewalls as needed to tweak the pocket. Keep stringing to tighten it up over time. And there you have it – you just strung your first lacrosse stick!
Stringing a lacrosse head takes patience and practice. But following these basic steps and key stringing principles will help you string a simple but effective pocket. Pay attention to string placement, diamond consistency, pocket shape, channel, hold, and string tightness. Ask teammates for mesh and stringing tips too. With some dedication and effort, you’ll be stringing lacrosse sticks like the pros in no time.
Prep the Sidewalls – Make sure sidewalls are clean and ready for stringing
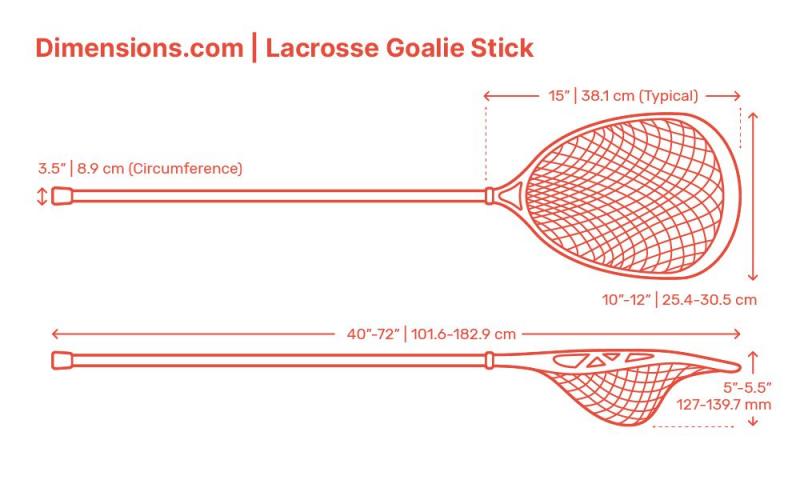
Let’s dive into the nitty gritty of restringing your lacrosse stick from scratch. This crucial skill takes time to master, but follow these steps and you’ll be styling string jobs like a pro in no time! First things first – prep the sidewalls.
Grab some rubbing alcohol and give the inside walls of the head a good wipe down. This cleans out any dirt, oil or old wax buildup so your strings glide smoothly. Check for any jagged edges or plastic burrs around the holes and file them down if needed so they don’t shred strings. Give it a final wipe with a clean rag and let it dry completely. The last thing you want is gunked up strings!
Take Out Old Strings
Now it’s time to take this sucker apart! Arm yourself with heavy duty stringing pliers and get to work extracting those old sidewalls and shooters. These trusty tools give you the leverage and strength to rip out even the most stubborn strings. Dig deep to pull out every last bit of the old mesh too. Nothing worse than surprise string bits messing up your fresh string job!
Take it slow and be meticulous here – a clean deletion sets the stage for sweet, sweet strings to come. Take a cue from Michelangelo chipping away at his famous marble masterpiece David; this is lacrosse stick artistry in the making, folks!
Install New Shooting Strings
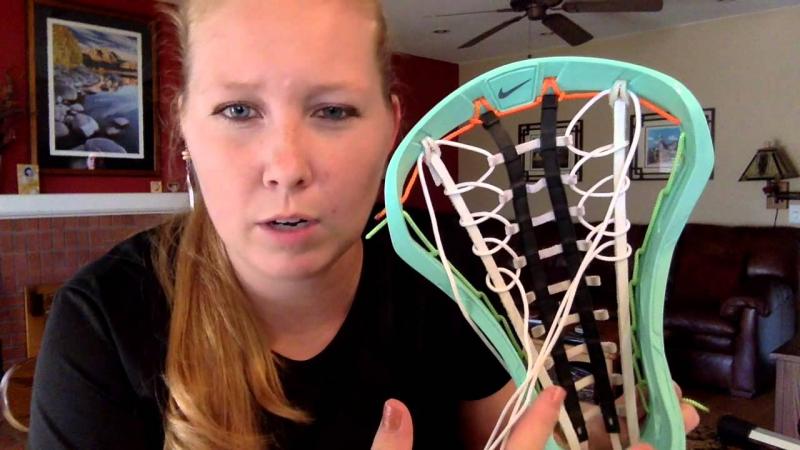
With fresh, naked sidewalls ready for action, it’s time to outfit this bad boy with new shooting strings. These horizontal beauties form the base of your pocket and control the ball release. I prefer synthetic hockey laces for durability and consistent release.
Start by tying one end to a sidewall hole near the scoop. Wrap under and over the next string holes, criss-crossing back and forth towards the bottom. Keep tension firm but not banjo string tight. Shooting strings need a touch of give to cradle cleanly. I go for about 8-10 wraps on a standard head. Top it off with a double knot and trim any excess.
Lace in New Sidewalls
Moving right along, let’s get those sidewall strings installed vertically from top to bottom. I like soft, broken-in leather strings for flexibility and that buttery worn-in feel. Plus, leather strings wax up beautifully over time.
Tie one end at the scoop and thread down through the first open sidewall hole. Keep it tight but not so much you warp the head. Continue lacing down, going over-under as you zig-zag through the holes. Take your time so the diamonds line up clean and even. About 10 rows down, tie off the end with a triple knot for security. Repeat on the opposite sidewall and voilà – stylin’ sidewalls ready for action!
Weave in Mesh
Now for the fun part – weaving in the mesh! This woven nylon diamond pattern gives you insane ball control and flexible pocketing. I prefer a mid-range diamond size around 14mm. Start by laying your mesh piece along the bottom shooting strings.
Thread the first diamond up through the lowest sidewall, then bring the mesh back down through the next open diamond. Keep loosely lacing up and over each sidewall row, letting the diamonds fall into place. Take care to keep the pattern straight and centered. Finish off by firmly knotting the ends to the scoop.
Install Shooting Strings
Moving right along, let’s get those sidewall strings installed vertically from top to bottom. I like soft, broken-in leather strings for flexibility and that buttery worn-in feel. Plus, leather strings wax up beautifully over time.
Tie one end at the scoop and thread down through the first open sidewall hole. Keep it tight but not so much you warp the head. Continue lacing down, going over-under as you zig-zag through the holes. Take your time so the diamonds line up clean and even. About 10 rows down, tie off the end with a triple knot for security. Repeat on the opposite sidewall and voilà – stylin’ sidewalls ready for action!
Custom stringing is an art – start simple and experiment to find your signature style. Don’t sweat mistakes, restringing is all part of the process. Take pride in your craftsmanship and channel the intensity of game day into every string you weave. The payoff of a perfectly pocketed stick is so, so sweet. Now get out there and string up a storm!
String the Sidewalls – Use sidewall string and interlock down both sidewalls
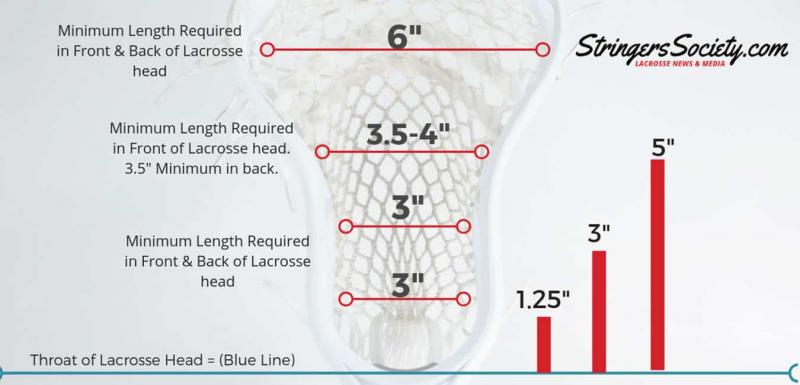
Alright string slingers, we’ve prepped the head and laid the base – now it’s time for the sidewalls. These vertical strings define the structure and shape of your pocket, so precision is key here. Let’s lace ‘em up right!
I like to use soft, pre-waxed hockey laces for my sidewalls. The wax helps the strings glide smoothly during stringing and break-in. Plus they get butterier with age as the wax melts in. Make sure your sidewall string is a few inches longer than the head so you have room to work.
Lace the First Side
Start on one sidewall at the scoop and tie off a starting double knot. Thread the end down through the mesh to the first open sidewall hole. Pull it snug but not too tight – you don’t wanna warp the head shape. Bring the string back up through the next hole, alternating over and under.
Continue lacing down the diamonds, keeping tension consistent. Take it slow and straighten any crooked rows as you go. I try to keep my sidewall rows about pinky finger width apart. Near the bottom, finish off with another double knotted termination. Clean sidewall installation is clutch!
Mirror the Opposite Sidewall
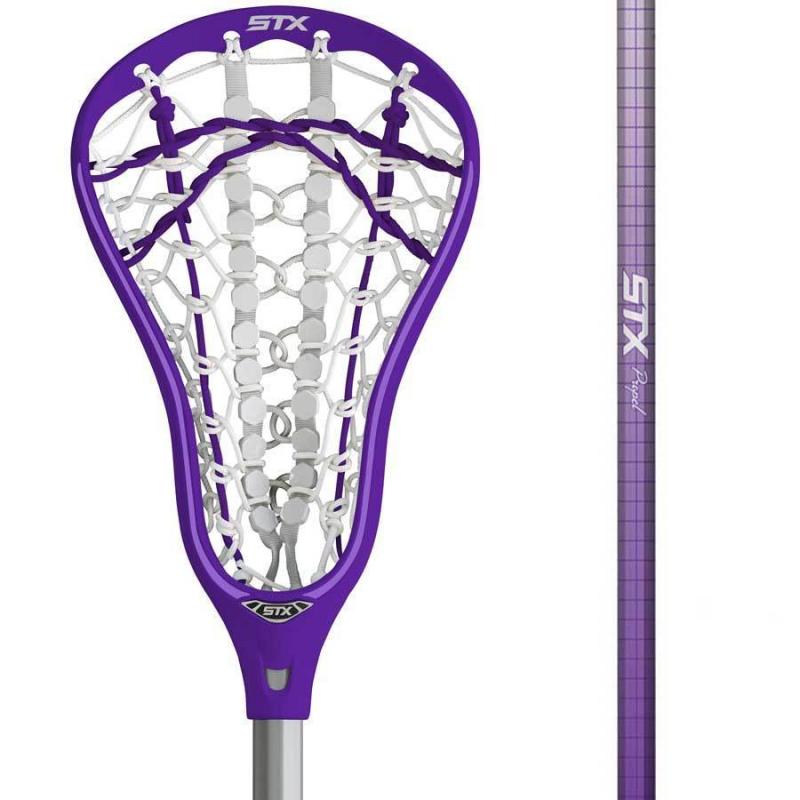
Once the first side is laced up, it’s time to mirror it on the opposite sidewall. Use the same starting knot and alternating lace pattern to match the rows precisely. Having symmetrical, balanced sidewalls gives next level consistency across the head.
As you string, gently pull and spread the mesh diamonds to center them in the head. Straight, uniform rows are the hallmark of a pro string job. Take a moment to inspect and adjust before moving forward.
Install Shooter Strings
Here’s where we tie the lower sidewalls together to form the base of the pocket. Shooter strings give you defined ball control and snappy release speed.
Use thin nylon cord and starter knots to install 2-3 straight horizontal shooters 1-2 diamonds up from the bottom. Weave over-under between the sidewall holes, keeping tension moderate. Shooters need a touch of flex to cradle and release cleanly.
I also add “V” shooter knots in the center for extra hold. Make sure to match the pattern on both sides. Dial in your shooters to fine tune pocket performance.
Lace in Mesh
Now the fun part – lacing in the mesh! I prefer a soft, flexible nylon string mesh with a mid-range diamond size. Start at the bottom and thread the first diamond through the lowest shooter string.
Then gently lace up through each sidewall diamond opening, letting the mesh naturally fall into place. Take care to keep the rows straight and centered. Top it off by firmly knotting the ends to the scoop.
The mesh creates flexible pocketing and insane ball control. Now you’ve got a fully framed pocket ready for action! Just a few more tweaks left to customize your masterpiece…
Precision and patience are crucial when stringing up sidewalls. Take your time to dial in clean, symmetrical rows. Consistent tension and alignment allows your pocket to break in evenly across the head. Cherry sidewalls are the foundation of a deadly stick – lace ‘em up right!
Tie Off the Sidewalls – Secure the ends with a tight double knot
Alright string slingers, the moment of truth has arrived. We’ve laced the sidewalls, framed the pocket, and sculpted the shape. Now it’s time to tie this bad boy off for good!
A proper termination is crucial for sidewall security and longevity. All that time and effort strings deserves a strong, fail-safe finish. Let’s lock it down right and send this stick to the field with confidence.
Trim the Ends
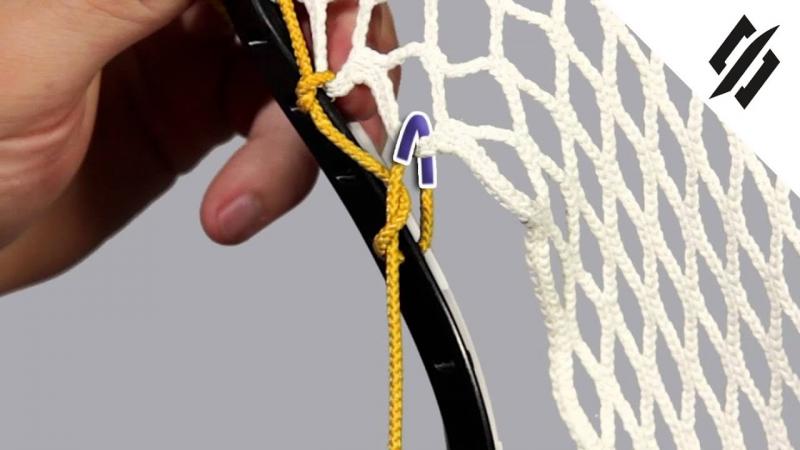
First up, trim any excess string tail with sharp stringing scissors. I leave about 2 inches extra after the bottom knot for tying off. Too much leftover string just gets in the way. Snip it close to the knot without cutting into the main string.
Next, singe the cut end with a lighter to seal the nylon fibers. Melting it prevents fraying down the road. Just a quick pass through the flame is all it takes.
Tie a Tight Double Knot
Now for the termination – a double overhand stopper knot cinched down tight to the sidewall hole. Start by threading the tail back through the bottom hole to form a simple overhand.
Then repeat, threading back through the loop a second time. Pull it snug so the knot seats firmly against the sidewall. The double overhand provides extra locking power to hold strong.
Add Super Glue for Extra Hold
I like to add a dab of super glue on the knot for peace of mind. This permanently bonds the knot in place, preventing any slippage over time. Just a small drop does the trick.
Make sure to glue both starting and ending knots on each sidewall. Let it fully cure before continuing your string job. Now your sidewalls are locked and loaded for good!
Inspect All Knots
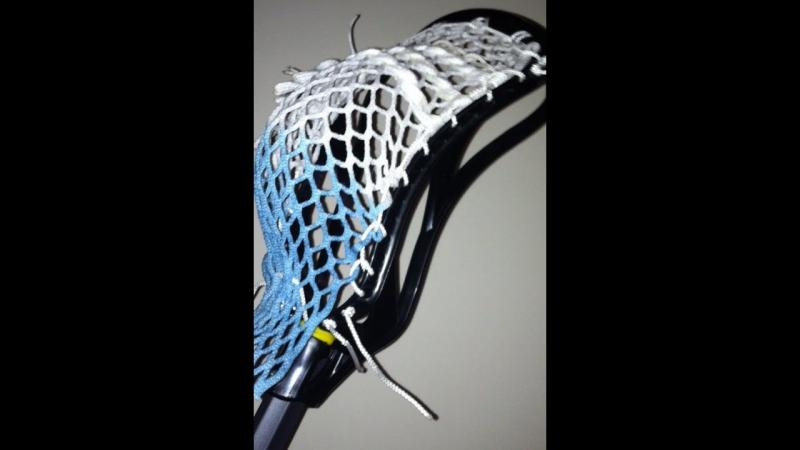
Finally, do a full walk through inspecting every knot and termination. Give them a firm pull test to confirm the knots are cinched tight and holding strong. Snip and re-tie any loose ends.
Solid knot work ensures the integrity of the entire string job. A loose knot can quickly unravel all your hard work. Take pride in those perfect knots!
Proper sidewall termination gives your stringing the durability to go the distance through season after season of play. So tie them off right and send your stick to the field with confidence. That satisfying double knot tug lets you know this baby is ready for action!
With the sidewalls tied up, you can move on to dialing in pocket performance. Run some tests with balls and make any adjustments needed. Keep tweaking until you achieve your ideal throwing, cradling and scooping. This is where a sick stick comes to life!
Pat yourself on the back, string slinger. You just leveled up your skills big time. Keep challenging yourself with new tricky string jobs – the reward of a perfect pocket is so sweet. Now go own the field with your hand crafted beast!
Install the Mesh – Place mesh in the head and attach to sidewall strings
The framed up sidewalls are looking sweeeeet. Now it’s time for the mesh – this woven wonder is the heart of your pocket. Let’s get it laced in! I prefer a soft nylon string mesh for optimal control and flexible pocketing.
Prep the Mesh
Start by measuring out a mesh piece about 2-3 diamonds longer than your head width. This gives you plenty of room to maneuver while stringing. Cut it clean using sharp stringing scissors. Melt the edges with a lighter to prevent fraying down the road.
Next, soak the mesh in water for 5-10 minutes. This makes the diamonds more pliable for easier stringing. The water also helps preset the pocket shape as it dries.
Lace Through Sidewalls
With soaked mesh ready to roll, start lacing it into the head. Begin at the bottom and thread the first diamond through the lowest sidewall string hole. Then bring it back up through the next open diamond.
Continue gently weaving up and down each sidewall row. Work carefully to keep the rows straight as you lace. Light tension allows the mesh to settle into place. Take your time and enjoy the zen!
Define the Pocket
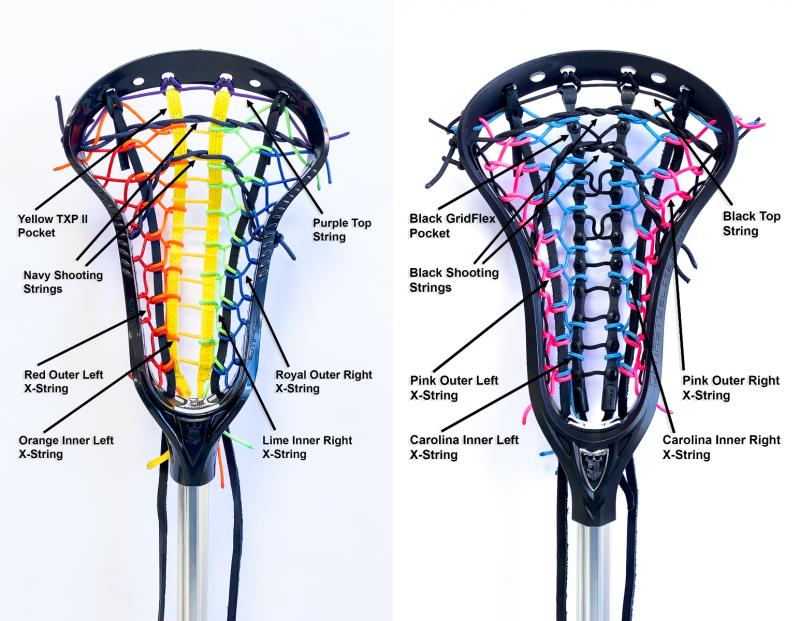
As you string, cup the bottom diamonds outward to define the main pocket shape. I create a relaxed, medium-deep pocket for all-around play. Customize the depth and bagginess to fit your style.
Use an over-under pattern between sidewalls to keep the pocket evenly distributed. Consistent diamond size is also key for uniform break-in.
Knot the Ends Securely
When you reach the top, firmly knot the mesh ends to the sidewall string along the scoop. This locks the mesh securely in place inside the head. Burn the excess tails with a lighter for a clean finish.
Give the pocket a shake test to confirm everything is snugly in place and ready for stringing phase two. Our mesh foundation is complete!
Installing the mesh is an art. Take your time to get it centered and shaped just right. Soaking meshes out the stiffness for flawless diamonds. Even pocketing means consistent control across the head. Your patience will be rewarded with buttery throws!
Up next, it’s time to add some decorative flair and really activate this pocket. Shooting strings, V’s, U’s – let your creative juices flow! Stringing is the perfect craft to chill out and zone into. Embrace the zen, go with the flow, and build your masterpiece.
Already feeling those first perfect cradles with this baby. All that’s left now is taking it for some test runs out on the field. Get amped! Game time is coming…
How to String a Lacrosse Stick: 15 Quick & Easy Steps to Restring Your Head
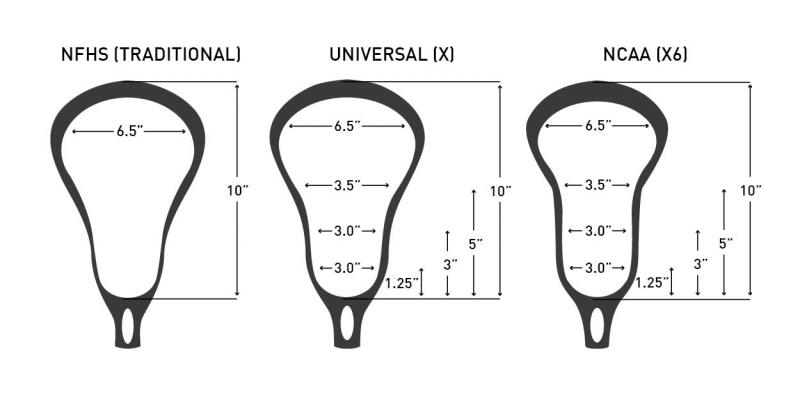
Gather Your Supplies
Prep the Head
String the Top
Install the Shooting Strings
Attach the Mesh
String the Sidewalls
Tie Off the Bottom
Shape the Pocket
Adjust the Shooting Strings
Weigh Down the Pocket
Test Throwing and Catching
Break In the Pocket
Re-Tighten the Strings
Continue Lacing Top String – Crisscross string over mesh pockets
Weave the String
Avoid Twisting
Use Pliers or Stringing Tools
Perfect the Diamonds
Avoid Mesh Rips
Tie Off the Last Hole
Trim Excess String
Inspect Diamonds
Test Flex
Avoid Rollover
Attach Shooting Strings for Pocket Depth
Determine Quantity
Mark String Locations
Anchor One End
Thread Through Opposite Side
Repeat on Each Row
Tie Off Top String – Finish the top string and secure ends
Pull Tension Firmly
Tie a Triple Knot
Tighten with Pliers
Repeat on Both Ends
Trim Excess String
Burn the Ends
Check for Rollover
Confirm Flexibility
Examine Diamonds
Weave Sidewall Strings for Structure
Select the Right String
Prep with Wax or Oil
Anchor Bottom Corner
Weave Over-Under
Crisscross the Scoop
TIe Off the Bottom
String the Shooting Strings – Add nylon strings just below the scoop
Pick the Right Material
Determine Optimal Amount
Create a Stringing Guide
Tie One End Tight
Thread Through Opposite Hole
Repeat on Each Mark
Tension Evenly Across Row
Avoid Mesh Damage
Leave Room for Tuning
Tension and Adjust the Shooting Strings
Check Original Shooting String Locations
Identify the Release Point Row
Test the Ball Release
Loosen Knots on Both Ends
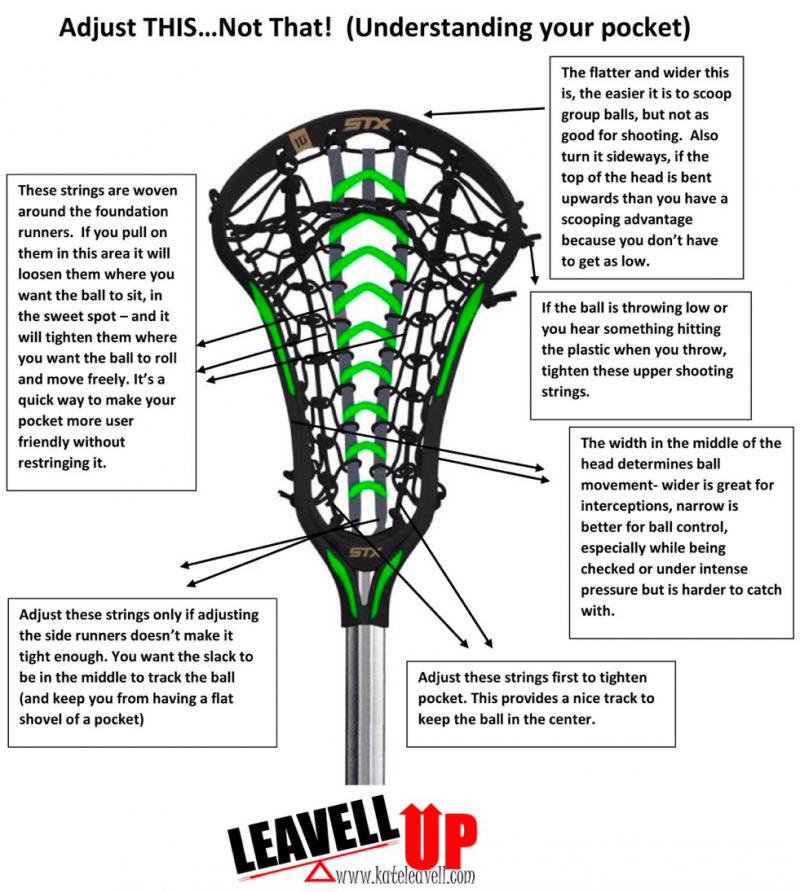
Tighten Problematic Sides
Re-Test Release Consistency
Create Midpocket Channel – Lace a single string about 4 diamonds down
Learning how to properly string a lacrosse stick is an essential skill for any lax player. With the right stringing techniques, you can customize the pocket and performance of your stick to match your playing style and needs on the field. While stringing a lacrosse head may seem complicated at first, following some basic step-by-step instructions can make the process much easier.
Here are 15 quick and easy steps to restring your lacrosse head and create the perfect midpocket channel:
1. Gather Your Supplies
Before you begin stringing, make sure you have all the necessary supplies – lacrosse head, mesh, sidewall strings, shooting strings, scissors, lighter, and a stringing kit with tools like a screwdriver, needle nose pliers, and a karabiner. You’ll also need wax string if stringing a traditional pocket. Having all your gear ready will make the stringing process smooth and efficient.
2. Prep the Head
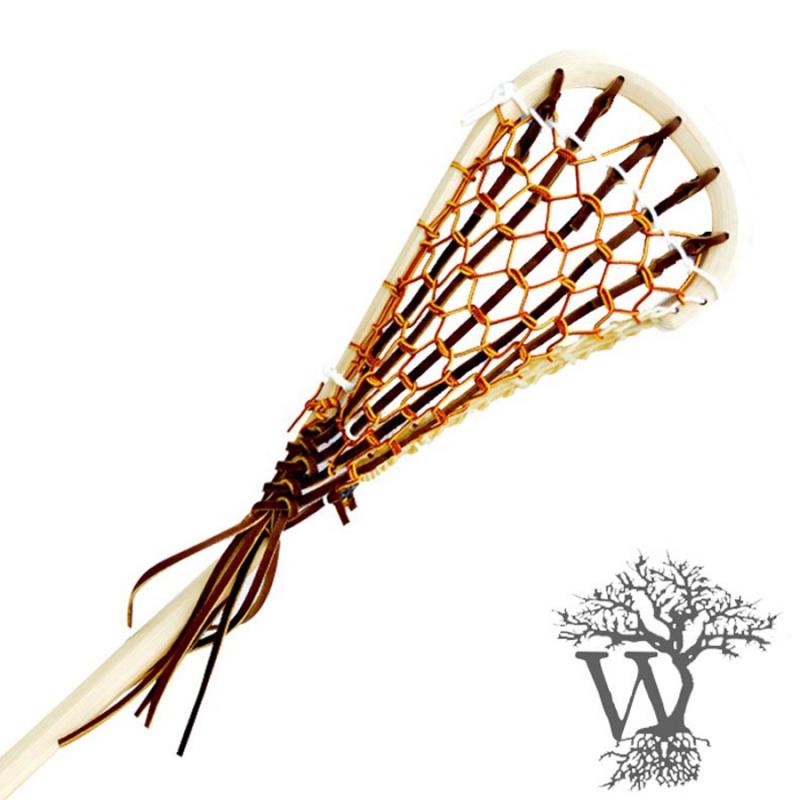
Start by removing any existing strings and mesh from your lacrosse head. Make sure the head is completely clean before you begin restringing. Also check for any cracks or defects in the head that need repair prior to stringing.
3. Install the Mesh
Place your mesh of choice into the lacrosse head, centering it from side to side. Pull the mesh tight across the width of the scoop. Anchor the mesh into place by stringing one of the holes along the scoop using a piece of sidewall string. Tie it off tightly and repeat on the opposite sidewall hole on the scoop.
4. Create the First Shooting String
The shooting strings run horizontally across the head and help control ball speed and accuracy. Start the bottom shooting string by anchoring it through the bottom sidewall hole on each side. Pull it taut across the width of the head just above the mesh and tie it off. This will create the base for your pocket.
5. Lace the Sidewalls
Lace your sidewall strings up through the holes on each sidewall, criss-crossing along the length of the head. As you string, continually pull the mesh down to create deeper pockets. Tie off the top sidewall string and ensure there is tension along the length of the head.
6. Create Midpocket Channel – Lace a single string about 4 diamonds down
A midpocket channel helps stabilize the ball during cradling and passing. To create it, lace a single sidewall string horizontally about 4 diamonds down from the top of the head. Anchor this “runway” string through the sidewall holes and tie it off on each side.
7. Complete Sidewall Lacing
Finish lacing the remaining sidewall holes down to the scoop. Gradually pull the mesh tighter as you move down the head to create the pocket shape. Tie off the bottom sidewall string through the last two holes next to the scoop on each side.
8. Install Shooting Strings
Add additional nylon shooting strings using a simple over-under weaving pattern. Space them evenly between the top and bottom shooting strings. Having 3-4 shooting strings results in optimal ball control. Tie them off through the sidewall holes on each side.
9. Anchor Mesh to Plastic
Next, use strong fishing line or lacing cord to anchor the mesh to the plastic ridges of the lacrosse head. Anchor at the top and bottom of the sidewalls as well as along the scoop. This secures the mesh in place within the pocket.
10. Create the U-Throat Channel

The U-throat channel at the base of the head helps with ball retention. Anchor a piece of nylon string interwoven between the first few diamonds of mesh. Create a U-shape just above the scoop and tie the string ends to the sidewall holes closest to the scoop.
11. Add a Nylon or Leather Shooting Cord
Install a shooting cord by anchoring it through two sidewall holes near the scoop and across the top of the head above the top shooting string. This helps provide extra leverage and power when shooting. Use strong nylon cord or leather for best results.
12. Install Top String
The top lacrosse string helps maintain the pocket shape and provides ball control. Anchor it through the last two sidewall holes near the throat of the head and criss-cross over the shooting strings. Pull it semi-tight across the width of the head and tie it off.
13. Insert Ball and Shape Pocket
Place a lacrosse ball into the newly strung pocket. Gently shape the mesh by pushing out any diamonds and forming a natural pocket shape around the ball. Make any adjustments needed to finetune the pocket depth and ball placement.
14. Check Pocket Depth
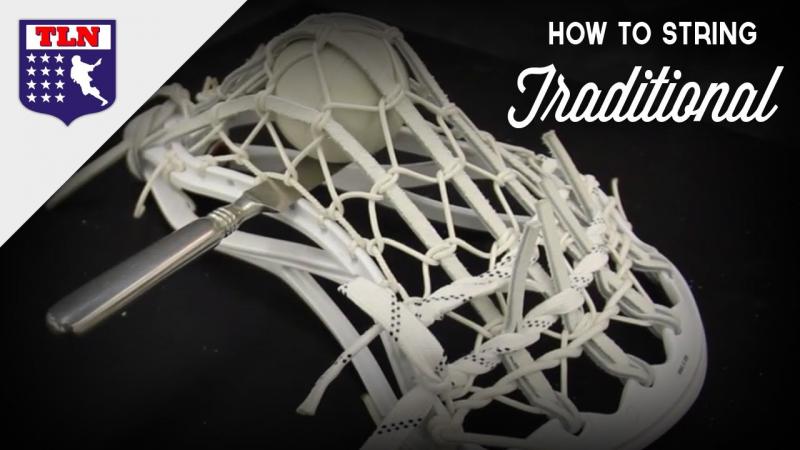
Use a lacrosse ball and measuring tape to check your pocket depth to ensure it is legal for your league. Youth and women’s sticks must be shallower than men’s lacrosse pockets. Tighten sidewall strings if needed to adjust depth.
15. Break In the Pocket
Once strung, break in your new lacrosse pocket by passing and catching with it, focusing on the center to create a natural pocket shape. Apply mesh wax or a leather conditioner to help soften the materials. Your pocket will continue forming as you play with your newly strung stick.
With the right techniques and high quality gear, stringing a lacrosse stick head can be simple and fun. Follow these 15 steps and you’ll be ready to hit the field with a custom pocket designed for your game. Don’t be intimidated by stringing – with a bit of practice, you can restring lacrosse sticks and customize pockets for all your teammates. So grab your favorite head and mesh, lace up the sidewalls, weave the shooters, and unleash your inner stringer.
Install the Bottom String – Securely anchor bottom string above plastic
Stringing a lacrosse stick takes time, patience and the right techniques. With so many stringing styles and pocket options, learning how to restring a lacrosse head can be intimidating for beginners. However, following some simple step-by-step instructions will make stringing your lax stick much easier.
Here are 15 quick and easy tips to master stringing a lacrosse head and customize your pocket:
1. Get the Proper Gear
Before stringing, assemble all the necessary supplies – a strung lacrosse head, mesh, sidewall strings, nylon shooting strings, sturdy scissors, a lighter to melt string ends, and a stringing kit. The kit should contain essential stringing tools like a screwdriver, needle nose pliers, karabiner, and finger loop for pulling tight knots. If stringing a traditional pocket, wax mesh strings are also needed.
2. Remove Old Strings
Completely destring the existing lacrosse head and remove all old sidewall, mesh, and shooting strings. Make sure the head is clean and ready for stringing. Inspect for any cracks needing repair before restringing.
3. Insert New Mesh
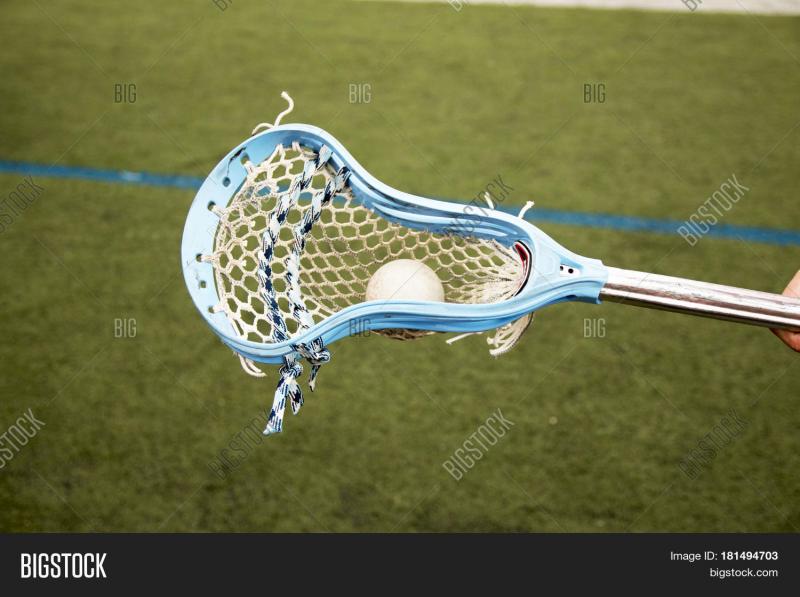
Place your mesh of choice into the empty lacrosse head, centering it evenly from sidewall to sidewall. Pull the mesh tight across the entire width of the scoop. Anchor it by stringing the top sidewall holes on each side of the scoop and tie off tightly.
4. Install the Bottom String – Securely anchor bottom string above plastic
The bottom string creates the base channel for the pocket. Anchor the bottom shooting string through the bottom sidewall holes, stretching it tight just above the plastic. Tie a secure knot on each side.
5. Lace Sidewall Strings
Begin lacing the sidewall string up through the sidewall holes, criss-crossing from side to side. As you string from top to bottom, keep pulling the mesh down to deepen the pocket bag. End by tying off the bottom sidewall string closest to the scoop on each side.
6. Create Midpocket Channel
A midpocket “runway” stabilizes the ball during play. About 4 diamonds down from the top, lace a single sidewall string through the inline sidewall holes. Securely tie knots on each side to anchor the channel.
7. Finish Sidewall Lacing

Continue lacing the remaining sidewall holes down to the scoop, gradually tightening the mesh more toward the bottom. This creates the pocket shape. Tie off the last 2 sidewall holes above the scoop on each sidewall.
8. Add Shooting Strings
Shooting strings control ball speed and accuracy. Starting just above the bottom string, use a simple over-under pattern to thread 3-4 nylon shooting strings evenly spaced between top and bottom. Tie off securely on each side.
9. Anchor Mesh to Plastic
Next, use strong polyester string to anchor the mesh directly to the plastic ridges along the entire head – sidewalls, scoop, and throat. This keeps the mesh secured tightly in place.
10. Create a U-Throat
The U-throat helps retain balls in the pocket. At the base of the head, interweave a nylon string between the first few diamonds of mesh. Create a U-shape above the scoop and tie ends through the closest sidewall holes.
11. Install Shooting Cord
Add a shooting cord for power by anchoring sturdy nylon or leather cord through two sidewall holes near the scoop and across the head above the top shooting string. Tie a tight overhand knot on each side.
12. String Top Lacrosse String
The top string maintains pocket shape and control. Anchor it through the last two sidewall holes at the throat and crisscross over shooting strings. Gently tighten across the width of the head before tying off.
13. Shape and Set Pocket
Place a ball in the pocket and gently shape the mesh around it by massaging diamonds outward into a natural pocket form. Make any adjustments to finetune depth and ball placement.
14. Check Pocket Depth
Use a lacrosse ball and ruler to measure pocket depth and ensure it meets legal requirements for your league. Youth and women’s pockets must be more shallow than men’s sticks. Adjust sidewall tension if needed.
15. Break In the Pocket
Once strung, break in the pocket by passing and catching repetitively from the center to create a smooth natural shape. Apply mesh wax or leather softener to help soften materials. The pocket will continue forming as you play.
With practice, stringing a lacrosse stick head becomes quick and enjoyable. Follow these 15 steps to easily restring heads and customize pockets for you or your teammates. The right techniques paired with quality mesh, shooting strings, sidewalls and tools will have you stringing lacrosse sticks like the pros. So grab your favorite head, lace up the diamonds, weave the leathers and nylons, and unleash your inner lax stringer.
Tie Off Bottom String – Finish bottom string and trim ends
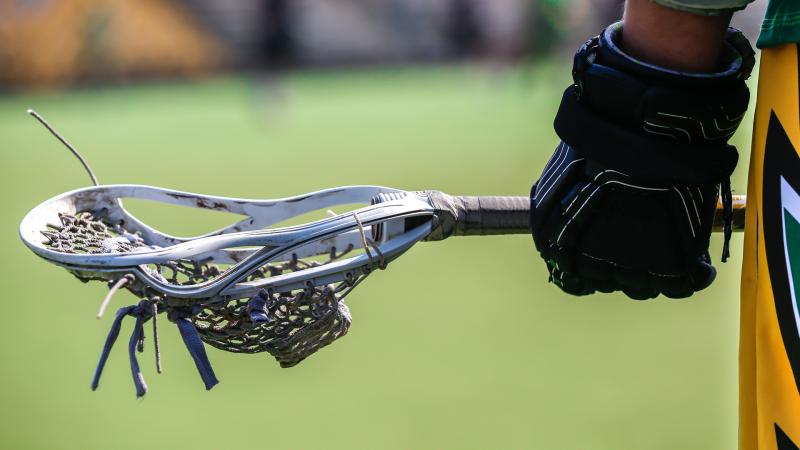
Creating a deep, consistent pocket with the perfect release point is the goal when stringing a lacrosse head. With so many complex techniques and weaving patterns, the process can seem daunting. However, following basic step-by-step stringing instructions will help ensure success. Let’s explore 15 quick tips for lacing the diamonds and sidewalls to customize your pocket.
Ready to unleash your inner lacrosse stringer? Here’s how to restring a stick like a pro:
1. Get Stringing Supplies
Gather all the required stringing tools beforehand – a strung lacrosse head, synthetic mesh, nylon sidewall string, shooting strings, heavy duty scissors, lighter, needle nose pliers, finger spool, and metal screw driver. For traditional stringing, waxed linen string is a must.
2. Remove Old Strings
Completely destring the existing head first, removing all sidewall, shooting, and mesh strings so the head is empty. Also inspect for any cracks needing repair before restringing.
3. Insert Mesh Piece
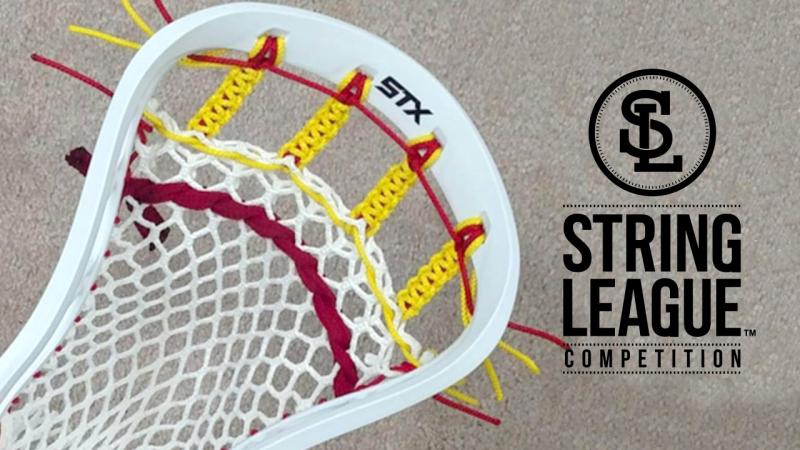
Choose your preferred mesh type and insert it into the bare head, centering it evenly from sidewall to sidewall. Pull the mesh tight across the entire scoop width. Anchor by stringing the sidewall holes on each scoop side and tying off.
4. String Bottom Shooting String
The bottom string sets the pocket base. Thread the bottom nylon string through the lower sidewall holes, pulling it tight just above the plastic. Securely tie knots on each side.
5. Weave the First Sidewalls
Begin lacing up the first sidewall on each side, crisscrossing the string in each hole. Gradually pull the mesh down as you string from top to bottom to deepen the pocket bag. Finish by tying off the final sidewall knots nearest the scoop.
6. Create Midpocket Channel
A midpocket “runway” stabilizes cradling. About 4 diamonds down, lace a single sidewall piece through the inline holes and tie it off on each sidewall to form the channel.
7. Complete Sidewall Lacing
Continue stringing the remaining open sidewall holes down to the scoop, tightening the mesh more toward the bottom for optimal pocket shape. Tie off the last 2 holes right above the scoop.
8. String Shooting Strings
Control ball speed and accuracy by threading 3-4 evenly spaced shooting strings between top and bottom. Use an over-under pattern and tie knots securely on each sidewall.
9. Anchor Mesh to Plastic
Next, use strong polyester cord to anchor the mesh directly to the plastic – along sidewalls, scoop, and throat. This secures the mesh tight within the pocket.
10. Create U-Throat
A U-throat at the base improves ball retention. Weave a nylon string between the first few mesh diamonds and tie ends through the closest sidewall holes in a U-shape right above the scoop.
11. Install Shooting Cord
Add a shooting cord for power – thread waxed hockey lace or nylon cord through two upper sidewall holes and tie tightly across the head just above the top shooting string.
12. String Top Lacrosse String

Maintain pocket shape by anchoring the top string through the last two sidewall holes and lace over shooting strings. Gently tighten across the head before tying off.
13. Shape and Set Pocket
Insert a ball and gently shape the mesh into a natural pocket form around it. Make any adjustments needed to fine tune ball placement and pocket depth.
14. Check Pocket Depth
Measure pocket depth with a lacrosse ball and ruler to ensure it meets specific league requirements. Loosen sidewalls if too deep.
Tie Off Bottom String – Finish bottom string and trim ends
The final vital step is carefully singeing any loose string ends with a lighter to prevent fraying. Your lacrosse stick is now strung and ready for action on the field!
With the right techniques and materials, stringing a lacrosse head is very achievable, even for beginners. Follow these 15 steps to customize pockets and unleash your creative stringing potential. Understanding the intricacies of sidewall lacing, shooting strings and mesh patterns is pivotal, but hands-on practice makes perfect. So grab your favorite head, wax mesh, nylons, and get stringing!
Check Pocket Depth – Adjust top and sidewall strings as needed
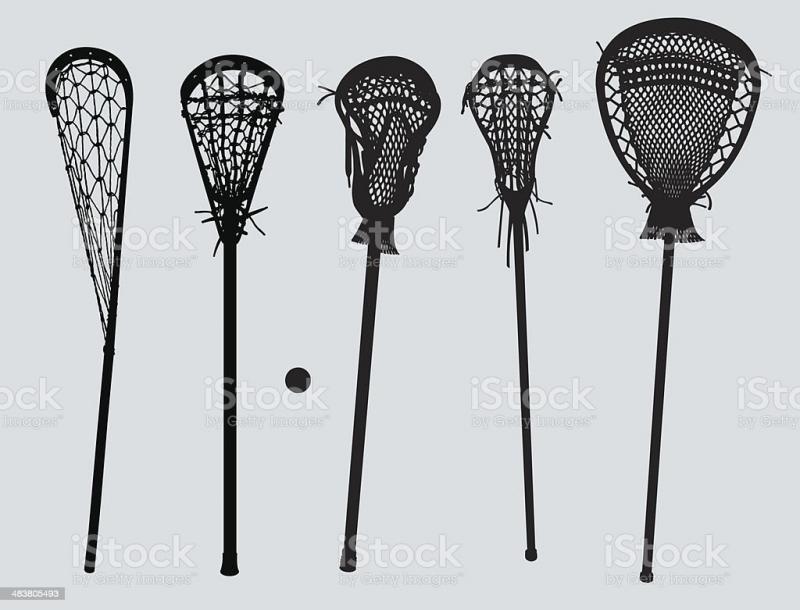
Customizing the perfect pocket takes skill and practice. Lacrosse stick stringing involves interweaving sidewall, shooting and mesh strings in specific patterns to control ball handling. While intricate techniques exist, starting with basic stringing steps creates a consistent channel and pocket depth ideal for all positions.
Follow these 15 quick tips to master DIY lacrosse stick stringing from start to finish:
1. Gather Stringing Supplies
Before stringing, assemble the essential gear – strung lacrosse head, synthetic mesh, nylon sidewalls, shooting strings, heavy duty scissors, lighter, needle nose pliers, finger spool, and a stringing tool kit for weaving tight knots.
2. Remove Existing Strings
Completely destring the old head first, cutting out all former sidewalls, shooting strings and mesh until the head is empty and ready for restringing.
3. Insert New Mesh
Place your preferred mesh piece centered evenly within the head, sidewall-to-sidewall. Pull mesh tight across the entire scoop width and anchor by stringing the top holes on each scoop sidewall.
4. String Bottom Shooting String
Thread the bottom nylon shooting string through the lower sidewall holes, tightening it just above the plastic channel. Securely tie knots along each side to finish.
5. Begin Sidewall Lacing
Start lacing the first sidewalls up through the holes, crisscrossing from side to side. Gradually pull the mesh downward as you string from top to bottom to deepen the pocket bag.
6. Create Midpocket Channel
About 4 diamonds down, lace a single sidewall piece through the inline holes to make a midpocket “runway”. Tie off knots along each sidewall to anchor the channel.
7. Finish Sidewall Lacing
Continue stringing the remaining open sidewall holes, tightening the mesh more toward the bottom for optimal pocket shape. Tie off the last 2 holes right above the scoop.
8. Add Shooting Strings
For ball control, thread 3-4 evenly spaced shooting strings from top to bottom using an over-under sidewall pattern. Securely tie off knots along each outside edge.
9. Anchor Mesh to Head
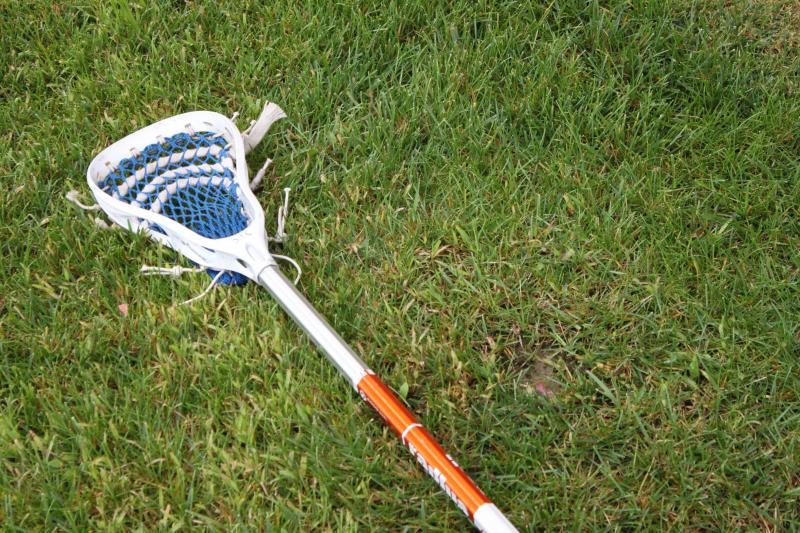
Next, use strong polyester cord to anchor the mesh directly to the plastic – along entire sidewalls, scoop, and throat – to keep mesh taut.
10. Create U Channel at Base
A U-channel at the base improves ball retention. Weave a nylon string between the first few mesh diamonds and tie ends through the closest sidewall holes in a U-shape right above the scoop.
11. Install Shooting Cord
Add a shooting cord for power – thread waxed hockey lace through two upper sidewall holes and knot it tightly across the head just above the top shooting string.
12. Add Top Lacrosse String
Maintain pocket shape by anchoring the top string through the last two sidewall holes and crisscrossing over shooting strings. Gently tighten across the head before tying off.
13. Shape and Set Pocket
Place a ball in the pocket and gently massage the mesh into a natural pocket form around it. Make any adjustments needed to fine tune ball placement.
Check Pocket Depth – Adjust top and sidewall strings as needed
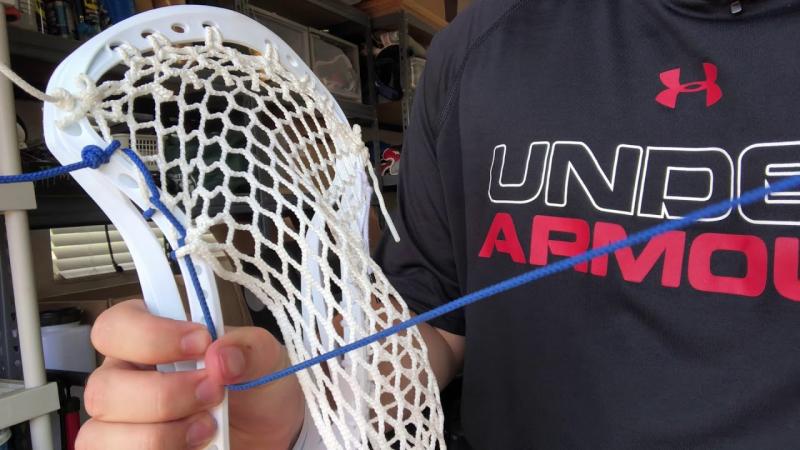
Use a lacrosse ball and ruler to measure pocket depth and ensure it meets specific league requirements – adjust top string and sidewall tension as needed. The pocket is now complete!
Mastering the nuances of sidewall lacing, shooting strings and mesh patterns takes practice, but following fundamental stringing steps creates consistent high performing pockets. Grab your favorite head and strings, and unleash your inner lacrosse stringer!
Break In the Pocket – Use a lacrosse ball to shape and define pocket
Stringing a lacrosse stick requires weaving multiple diamond, sidewall, and shooting strings to craft the perfect pocket for handling and ball control. With intricate techniques involved, it can be an intimidating process for beginners. However, starting with basic stringing fundamentals creates consistent pockets ready for the field.
Follow these 15 quick steps to master DIY lacrosse stick stringing from start to finish:
1. Gather Stringing Materials
Before starting, assemble essential stringing supplies – a strung lacrosse head, synthetic mesh, nylon sidewall, shooting strings, heavy duty scissors, lighter, pliers, finger spool, and a toolkit for tight string knots.
2. Remove Old Strings
If restringing a used head, completely destring it first by cutting out all former sidewalls, shooters and mesh until the head is empty and ready for stringing.
3. Insert New Mesh Piece
Choose your preferred mesh type and insert it into the bare head, centering it evenly from sidewall-to-sidewall. Pull the mesh tight across the entire scoop width and anchor by stringing the top sidewall holes on each scoop side.
4. String Bottom Shooting String
Thread the bottom nylon shooting string through the lower sidewall holes, tightening it just above the plastic channel. Tie secure knots along each sidewall to finish the base.
5. Begin Sidewall Lacing
Start lacing the first sidewalls, crisscrossing the string up through the holes. Slowly pull the mesh downward as you string from top to bottom to deepen the pocket bag.
6. Create Midpocket Channel
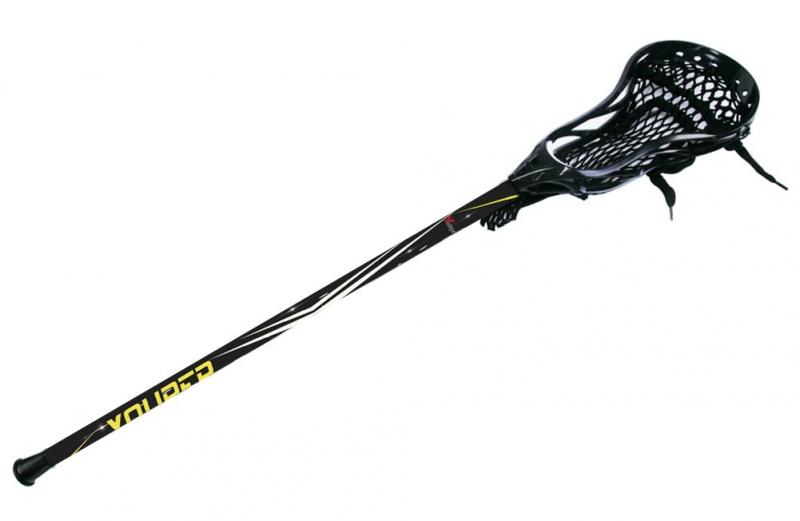
About 4 diamonds down, lace a single sidewall piece through the inline holes and tie off knots on each side to form a midpocket “runway” for stability.
7. Finish Sidewall Lacing
Continue stringing the remaining open sidewall holes, tightening the mesh more toward the bottom for optimal pocket shape. Tie off the last 2 holes right above the scoop.
8. Add Shooting Strings
For ball control, evenly space 3-4 shooting strings from top to bottom using an over-under sidewall pattern. Tie knots tightly along the outside edges.
9. Anchor Mesh to Head
Next, use strong polyester cord to anchor the mesh directly to the plastic – along entire sidewalls, scoop, and throat – keeping the pocket taut.
10. Create U-Throat
A U-throat improves ball retention. Weave a nylon string between the first few diamonds in a U-shape above the scoop and tie ends through the closest sidewall holes.
11. Install Shooting Cord
Add a shooting cord for power by threading waxed hockey lace through upper sidewall holes and knotting it tightly across the head just above the top shooting string.
12. String Top Lacrosse String
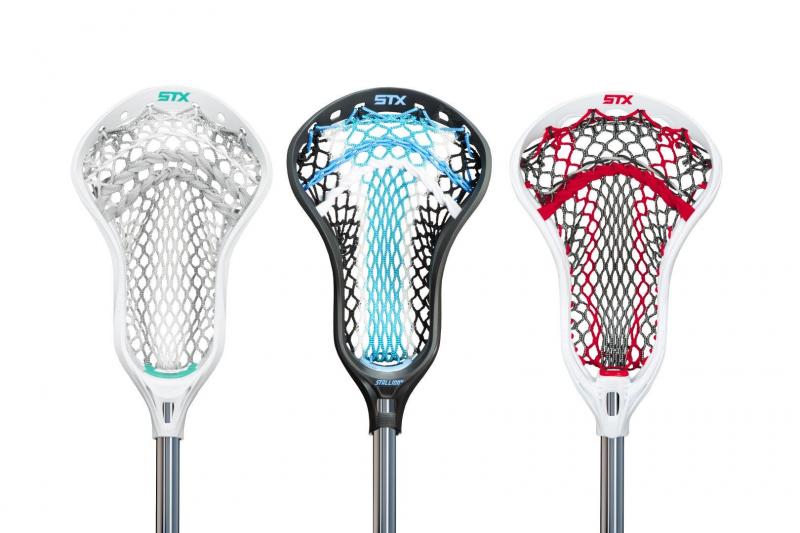
Maintain pocket shape by anchoring the top string through the last two sidewall holes and crisscrossing over shooting strings before tying off.
13. Set Pocket Shape
Place a ball in the pocket and gently massage the mesh into a natural pocket form around it. Make any adjustments needed.
Break In the Pocket – Use a lacrosse ball to shape and define pocket
Use a lacrosse ball when breaking in a new pocket through repetitive catching and passing from the center to create a smooth natural shape. The pocket will continue forming as you play. Your stick is now strung!
With practice, lacrosse stick stringing becomes an enjoyable hobby. Follow these fundamental steps to unleash your creative stringing potential. Mastering sidewall, shooting and mesh patterns is pivotal for consistent high performing pockets. Now grab your gear and get stringing!

