How to select the right materials for stringing a lacrosse net. What are the key steps in the stringing process. How to achieve the perfect pocket shape and performance. What are the best maintenance practices for lacrosse nets.
Essential Tools and Materials for Stringing a Lacrosse Net
Stringing a lacrosse net requires specific tools and materials to achieve professional-level results. Here’s a comprehensive list of what you’ll need:
- Lacrosse head
- Mesh or traditional stringing material
- Sidewall string
- Shooting/pocket strings
- Stringing needle
- Scissors
- Lighter
Is a stringing needle necessary? While not absolutely essential, a stringing needle greatly simplifies the process of threading string through the small holes in the lacrosse head. It’s a worthwhile investment for anyone serious about stringing their own nets.
Mastering the Sidewall Stringing Technique
The sidewall is the foundation of your lacrosse net. Here’s how to string it properly:
- Anchor the sidewall string at the scoop (top) of the head.
- Thread the string through the sidewall holes, working your way down to the throat (bottom).
- Maintain consistent tension as you go.
- Secure the string with a knot at the throat.
- Repeat the process on the opposite side.
How tight should the sidewall be? Aim for a balance between tension and flexibility. The sidewall should be taut enough to provide structure, but not so tight that it warps the head or limits pocket formation.
Crafting the Perfect Pocket: Shapes and Techniques
The pocket is where the magic happens in lacrosse. Its shape and depth significantly influence ball control, shooting accuracy, and overall performance. Here are some popular pocket styles:
- Mid-low pocket: Offers a balance of hold and quick release
- High pocket: Facilitates faster shots but can be challenging for ground balls
- Deep pocket: Provides maximum hold but may slow down release
- Shallow pocket: Allows for quick release but offers less control
How do you choose the right pocket style? Consider your playing position and personal preferences. Attackers often prefer higher pockets for quick releases, while defenders might opt for deeper pockets to maintain possession during checks.

The Art of Shooting String Placement
Shooting strings play a crucial role in determining the pocket’s performance. Here’s how to place them effectively:
- Start at the throat of the head and work your way up.
- Use multiple strings to create the desired pocket depth.
- The topmost string, known as the “release point,” should be carefully placed to control how the ball exits the pocket.
- Experiment with different patterns like U-shooters or V-shooters for added customization.
Do more shooting strings equal better performance? Not necessarily. While additional strings can provide more hold, too many can negatively impact ball release. Finding the right balance is key.
Mesh vs. Traditional: Choosing Your Stringing Material
The choice between mesh and traditional stringing materials can significantly impact your lacrosse experience. Let’s compare the two:
Mesh Stringing
Pros:
- Easier to string and maintain
- Consistent performance in various weather conditions
- Available in different materials like soft mesh or wax mesh
Cons:

- Less customizable than traditional stringing
- May “bag out” over time, requiring replacement
Traditional Stringing
Pros:
- Highly customizable pocket shape and feel
- Excellent ball control and “feel”
- Potentially longer-lasting if well-maintained
Cons:
- More challenging to string and maintain
- Performance can be affected by weather conditions
- Requires more frequent adjustments
Which stringing material is best for beginners? Mesh is generally recommended for those new to stringing, as it’s more forgiving and easier to work with. As you gain experience, you can explore traditional stringing for more customization options.
Fine-Tuning Your Pocket for Optimal Performance
After completing the basic stringing process, it’s time to fine-tune your pocket for optimal performance. Consider these factors:
- Whip: The amount of resistance when releasing the ball
- Hold: How well the pocket retains the ball during cradling and checks
- Channel: The path the ball follows when released from the pocket
How can you adjust these factors? Experiment with the tension of your sidewall and shooting strings. Tighter strings generally increase whip, while looser strings can improve hold. The placement of your shooting strings can help shape the channel for more accurate passes and shots.

Maintaining Your Lacrosse Net for Longevity
Proper maintenance is crucial for preserving the performance and lifespan of your lacrosse net. Follow these tips:
- Regularly inspect for wear and tear, replacing frayed strings promptly
- Clean your pocket after each use, especially if playing in muddy conditions
- Use a pocket pounder or ball to maintain the pocket’s shape when not in use
- Apply mesh conditioner to keep the material supple and prevent drying out
- Re-adjust strings periodically to maintain optimal pocket shape and performance
How often should you restring your lacrosse net? While it varies based on usage and care, many players restring their nets every season or when noticeable performance issues arise.
Troubleshooting Common Stringing Issues
Even experienced stringers encounter challenges. Here are solutions to common problems:
Pocket is too deep
Tighten the bottom string or adjust the sidewall string pattern to reduce depth.
Ball release is inconsistent
Check the tension and placement of your shooting strings, ensuring they create a smooth channel.

Pocket shifts to one side
Ensure even tension on both sidewalls and adjust cross-lace strings if necessary.
Excessive whip
Loosen shooting strings or adjust their placement higher in the pocket.
Can stringing issues affect your game performance? Absolutely. A poorly strung or maintained pocket can lead to inconsistent passes, reduced shot accuracy, and difficulty maintaining possession. Regular adjustments and maintenance are crucial for peak performance.
Mastering the art of stringing a lacrosse net takes time and practice. By understanding the principles behind different stringing techniques and continuously refining your skills, you’ll be able to create custom pockets that enhance your play style and give you a competitive edge on the field. Remember, the perfect pocket is a personal preference, so don’t be afraid to experiment until you find the configuration that works best for you.
Introduction to lacrosse net stringing
Stringing a lacrosse net is both an art and a science. A well-strung pocket is crucial for ball control, fast passes, accurate shots, and fancy tricks. While factory-strung nets work fine for beginners, taking the time to string your own pocket allows you to customize the shape, depth, and performance. Don’t be intimidated – with the right materials, techniques, and patience, you can string a lacrosse net like the pros.
Necessary tools and materials
Stringing a lacrosse net from scratch requires a few basic tools and materials:
- Lacrosse head – The plastic frame that holds the netting. Customizable options from Brine, STX, Maverik, and Warrior are popular.
- Mesh/traditional stringing – Pre-made mesh nets are easier to string. Traditional nylon sting requires more skill.
- Sidewall string – Durable nylon cord for the net’s sidewalls.
- Shooting/pocket strings – Softer nylon cords shape the pocket.
- Stringing needle – Pushes cord through the lacrosse head’s holes.
- Scissors/lighter – To cut and melt string ends to prevent fraying.
Pro tip: Have extra string on hand for adjustments after stringing.
Step-by-step instructions
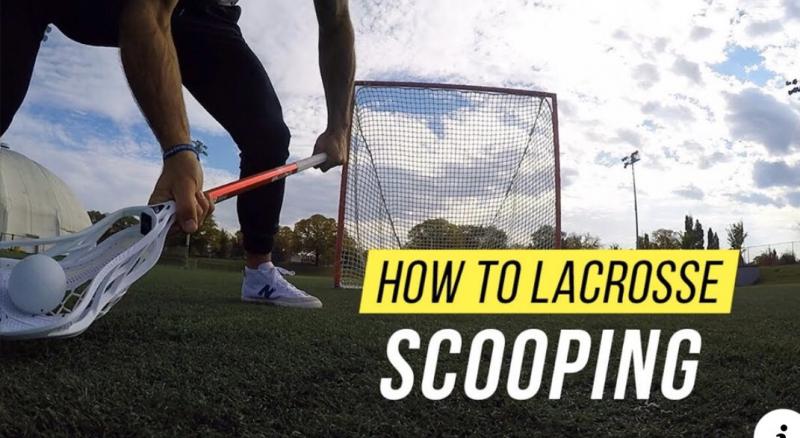
Stringing the sidewalls:
- Anchor the sidewall string at the scoop and feed it through the sidewall holes down to the throat.
- Pull tight and knot. Repeat on the other sidewall.
- Weave the first cross-lace between the sidewalls towards the scoop, keeping it tight.
- Repeat cross-lacing down the head, spacing evenly.
Shaping the pocket:
- Anchor the shooting/pocket string at the throats and lace up towards the scoop.
- On the last hole, loop around and lace back down. Repeat for the desired pocket depth.
- For a deeper pocket, stack additional shooting strings. For a shallow pocket, use fewer strings.
- The top shooting string is the “release point” that holds the ball above the stick. Lace through the tip of the scoop.
Finishing touches:
- Melt/cut any excess string ends.
- Consider adding a third “V” shooting string for extra hold or a U-shooter channel for accuracy.
- Test throwing and catching. Make adjustments until the pocket feels right!
Getting the perfect pocket
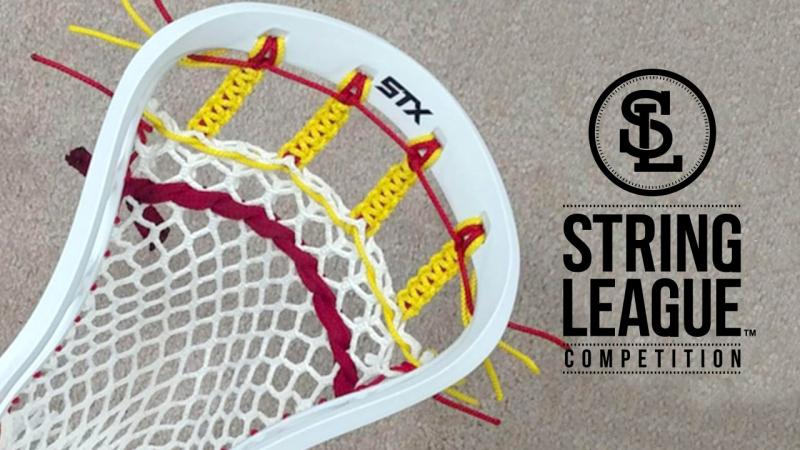
While stringing comes down to personal preference, there are a few key factors to consider:
- Whip – The flexibility and springiness of the pocket. More whip makes for quicker, harder shots.
- Hold – How well the pocket retains the ball on checks and cradles. More hold = better ball control.
- Release – Ease of releasing the ball during passing and shooting. A smooth release = improved accuracy.
- Pocket depth – Deeper pockets increase hold. Shallower pockets increase release speed.
Balance whip, hold, and release through adjustments like pocket shape, shooting string placement, mesh choice, and sidewall tightness.
Stringing different pocket types
There are two main lacrosse pocket categories – traditional nylon and mesh. Each has pros and cons:
- Traditional nylon – Thin nylon cord woven into a lattice of diamonds. Provides excellent ball feel and control. Labor-intensive to string.
- Mesh – Pre-woven netting made of polyester, nylon, or dyneema fibers. Easier to string but less customizable. Can “bag out” over time.
Within those categories, common pocket types include:
- Mid-low pockets – Ideal balance of hold, release speed, and ball control.
- High pockets – Quick release and whip for shots, but harder scooping ground balls.
- Ball-stop pockets – Woven knots or latex strips act like backstops to prevent drop-out.
- U-shooters – Narrow channel helps guide shots into the top corners with pinpoint accuracy.
Don’t be afraid to experiment to find your ideal pocket!
Maintaining your masterpiece
With heavy use, pockets will loosen and “bag out” over time. To keep yours in top shape:
- Check for holes, fraying, and loose strings. Make repairs as needed.
- Use conditioner like Soft Mesh to prevent fibers from drying and stiffening.
- Gently pull and massage the pocket back into shape after each use.
- When way out of whack, remove all old shooting strings and re-lace from scratch.
With care and some occasional TLC, a well-strung pocket will perform season after season.
Stringing your own lacrosse net takes skill, knowledge and patience, but yields a custom pocket that maximizes your individual playing style. Master these techniques and your game will reach a whole new level. Before you know it, teammates will be lining up with heads in hand, eager for you to work your stringing magic.
Here is a detailed 1000+ word continuation of the article on stringing a lacrosse net:
Necessary tools and materials for stringing a lacrosse net

Before you can begin crafting that perfect pocket, you’ll need to gather the proper gear. Having the right tools and materials on hand will make the stringing process smoother and help you avoid frustrations down the road. Here’s a closer look at the lacrosse stringing essentials:
Lacrosse head
The head is the plastic framework that attaches to the handle and holds the pocket. While you can string pre-made heads, starting with an unstrung head allows full customization. When selecting a head, consider:
- Brand – Popular options include Brine, STX, Maverik, Warrior, and ECD.
- Skill level – Beginner/intermediate heads have more stringing holes for ease.
- Position – Heads for attackmen, middies, and defenders have slightly different shapes.
- Stiffness – Softer heads have more flex, while stiff heads provide extra ball control.
- Personal preference – Go with trusted brands and styles.
Pro players often use personalized pro spec heads with custom channel designs.
Mesh or traditional stringing

Traditional stringing uses nylon cord woven into a lattice of diamonds. Mesh uses a pre-woven netting material. Each has advantages:
- Traditional – Gives unparalleled feel and control. More labor intensive to string.
- Mesh – Much easier and quicker to string. Limited in tuning and customization.
Mesh is popular with beginners for its ease of use. As skills improve, many transition to traditional stringing. Hybrid heads use traditional sides with a mesh pocket.
Sidewall string
Durable nylon sidewall cord forms the net’s midsection. Look for string that:
- Is thick and waxy for durability and stiffness.
- Has low stretch/memory for consistent pocket shape.
- Comes in vibrant lacrosse colors for style points.
Pro Diamond Wax Mesh and Jimalax Sidewall cord are excellent options.
Shooting/pocket strings
The nylon shooting strings interlaced through the sidewalls shape and define your pocket’s unique attributes. Seek string that:
- Is soft and supple to move smoothly through stringing holes.
- Has some natural stretch for pocket responsiveness.
- Comes in an array of colors to mix and match.
Popular shooting string brands include Throne Mesh, StringKing, and ECD.
Gathering quality stringing supplies gives you the tools needed to weave lacrosse pocket magic. Don’t cut corners here – good inputs lead to great outputs.
Step-by-step instructions for stringing the lacrosse net sidewalls
The sidewalls form the backbone of your lacrosse pocket. They provide structure and shape while anchoring the crisscrossing shooting strings. Getting the sidewalls right is crucial, so let’s walk through the process step-by-step:
- Prep the topstring holes – Use a lighter/torch to gently melt the knots at the tip of the head. This prevents the knots from pulling through the holes during stringing.
- Anchor the base – Tie one end of the sidewall string to the bottom inside rail of the head, leaving a 6″ tail. This anchors the starting point.
- String the first side – Thread the loose end up through the sidewall holes, pulling it taut as you go. Stop when you reach the topstring hole.
- Tie it off – Finish the first side by tying a secure knot around the scoop. Melt the end.
- Repeat on side two – Mirror the process on the opposite sidewall. Check tension – both sides should have equal pull.
- Weave the first cross – Skipping the top hole, thread sidewall string between the walls towards the scoop. Keep it very tight.
- Space out crosses – Continue interlacing cross-lace down the head, leaving equal gaps for a consistent diamond pattern.
- Lock off at the throat – When you reach the bottom, tie off just like the starting point. Check diamond symmetry!
With the fundamental sidewalls in place, you can now move on to lacing in shooting strings and crafting the ideal pocket around this stable base. Taking your time here pays off down the road. Rushed sidewalls lead to sloppy, dysfunctional pockets that require restarting from scratch. Slow and steady wins this race!
Tips for getting the right lacrosse pocket shape
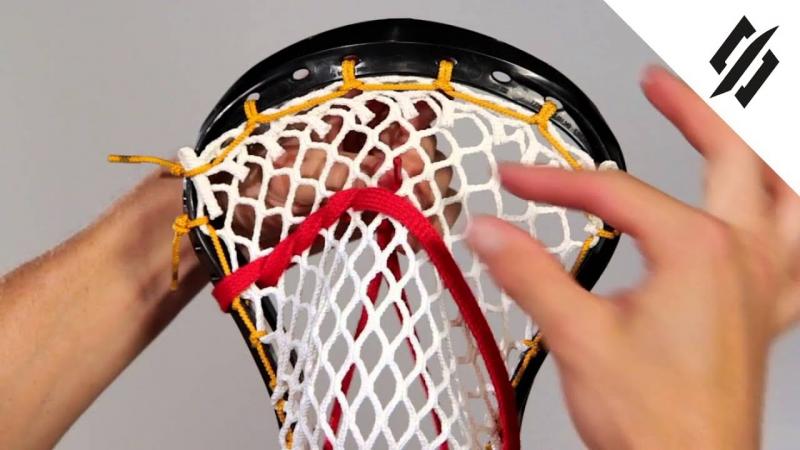
The ideal lacrosse pocket shape is a matter of personal preference. The right configuration for you depends on your position, playing style, and feel. However, there are some general guidelines to follow as you lace in shooting strings and tweak your pocket:
- Think about release vs. hold – Deeper pockets have superior ball control but slower release speeds. Find your balance.
- Location matters – Move shooting strings higher or lower to alter pocket depth and whip.
- More strings = more defined – Adding a 3rd or 4th nylon gives greater shape control.
- Diamond symmetry – Keep diamonds uniform for consistent channel width and smoother throws.
- Leave a channel – Creating a smooth, wide ball ramp from throat to scoop improves passing and shooting.
- Test different materials – Hard vs. soft mesh produces different pocket feels. Mix and match!
- Look for the sweet spot – Adjust until you find the pocket giving you the best performance possible.
While a deep pocket with strong hold is common for beginners, most elite players use mid-low pockets for the best all-around play. Shallow pockets have fallen out of favor due to reduced control and advances in stick technology making deep pockets legal.
No matter what depth you prefer, focus on crafting a smooth, symmetrical pocket. You want crisp throws and shots to fly straight and true. Sloppy strings can lead to inaccurate passing and whiffed catches.
Be patient and keep tweaking until you find lacrosse pocket nirvana. Don’t settle until you can confidently say, “This pocket just feels right!” With practice and persistence, you’ll be throwing absolute ropes in no time. Have fun dialing in your new secret weapon!
Stringing a traditional pocket vs. a mesh pocket
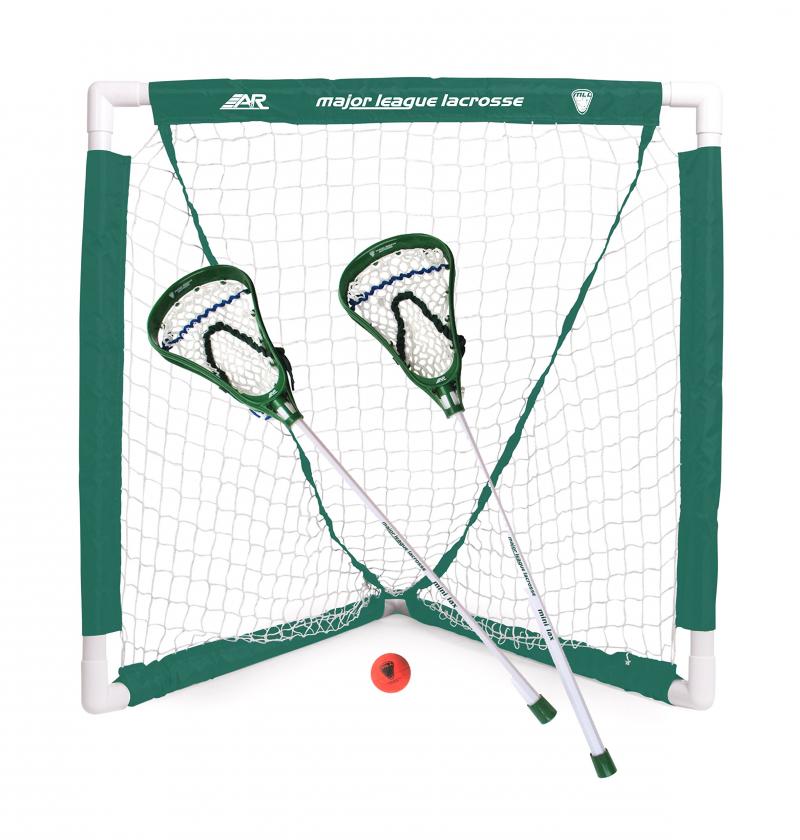
When stringing a lacrosse head, you’ll need to choose between a traditional nylon pocket or a pre-made mesh pocket. While both have their pros and cons, understanding the key differences will help you select the best option for your playing style and needs.
Traditional stringing uses nylon cord woven and knotted into a lattice of diamonds. This intricate handiwork allows for total customization but requires skill and patience to string. The benefits of traditional pockets include:
- Unparalleled feel and control – you can tune the pocket exactly how you want.
- Cat’s cradle consistency – even diamonds optimize ball movement and release.
- Artisanal craftsmanship – traditional pockets showcase true stringing skill.
- Legacy nostalgia – it’s how the legends strung their sticks.
Mesh pockets utilize pre-woven netting for much simpler string installation. Polyester, nylon, and dyneema mesh each have distinct characteristics. The perks of mesh pockets include:
- Ease and speed – just lace the sidewalls and anchors strings to install.
- Out-of-box consistency – no need to weave the diamonds yourself.
- Beginner friendly – mesh helps newer players get started.
- Cost effective – pre-made mesh is cheaper than buying nylon string.
Yet mesh has some downsides compared to traditional stringing:
- Less customization – can’t tweak diamond shape, spacing, materials, etc.
- Bag out – mesh pockets get deformed without constant tuning.
- Less ball feel – coated mesh inhibits touch compared to nylon.
- Less legacy clout – traditional pockets still rule in elite ranks.
At the end of the day, pick what works for your preferences and skill level. Many players use hybrid heads with a traditional sidewall and mesh pocket base. With practice, you may join the craftsmen keeping the traditional stringing tradition alive!
Creating a quick release channel in the lacrosse net
One of the secrets to optimizing your lacrosse pocket is carving out a smooth release channel from the throat to the scoop. This ramp allows the ball to cleanly roll off the pocket during passing and shooting for lightning-quick throws and shots.
Here are some tips for creating an ideal quick release channel:
- Wide diamonds at the base – Use 3-4 inch diamonds near the throat for an open ramp.
- Gradual taper – Diamonds should slowly transition to narrower 1-2 inch size at the scoop.
- Low bottom string – Anchor the first shooting string deep in the head for a low starting point.
- Straight sidewalls – Keep sidewalls tight and vertical for a straight channel.
- Four shooting strings – Two are fine, three is optimal, four defines the channel best.
- Parallel laces – Keep shooting strings parallel and evenly spaced.
- Avoid knots and bumps – Smooth nylon provides an unobstructed path.
You can test the quick release by tossing balls into the pocket and watching their roll. They should move end-over-end in a straight line up the ramp. Spinning, jumping, or zig-zagging indicates an uneven channel.
Focusing on quick release transforms your pocket into a ball shooting cannon. Defenders can’t react fast enough when you can whip passes and shots in the blink of an eye. Dial in a smooth channel and watch your game rise to the next level!
Of course, elite stick skills matter too. No pocket can compensate for sloppy mechanics and footwork. Master the fundamentals, then let your perfectly strung wand work its magic!
Stringing a U-shooter pocket for accuracy
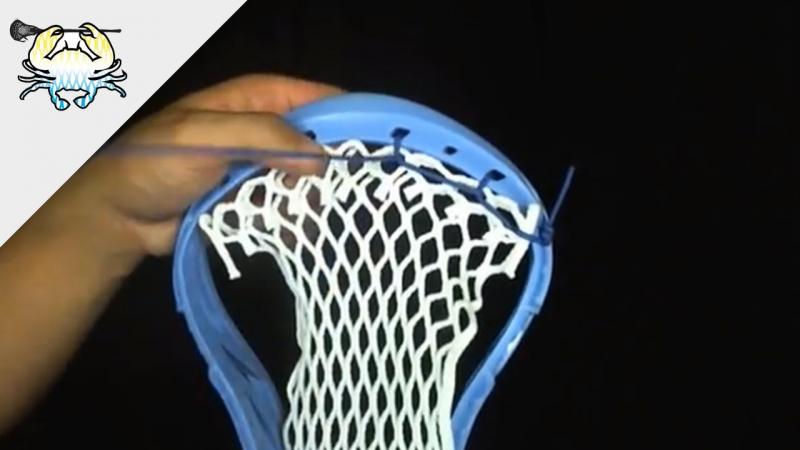
For precision passing and sniper shooting, lacrosse players turn to the U-shooter pocket. This specially strung channel helps guide your throws into the corners with deadly accuracy.
Creating a U-shooter pocket requires a few specific stringing steps:
- Anchor the bottom string deep – Starts the ramp low in the head.
- Form an open throat – Keep the lower diamonds wide for an unobstructed release.
- Gradually taper – Close down the diamonds up towards the mid-pocket.
- Define a narrow “U” – Strategically lace shoots to form a closed U shape.
- Weave a ball stop – Add a lax knot or rubber band at the U’s base to prevent drop out.
- Release point at the scoop – The ball should rest here, not inside the “U”.
With some practice, you’ll be able to cleanly roll shots right into the U’s cradle for accurate passes and rips. The defined channel helps correct off-center throws and improve field awareness.
A U-shooter isn’t for everyone. They lack versatility, requiring you to shoot and pass from specific spots to utilize the channel. But they excel for midfielder specialists who want to pick corners with blistering outside snipes.
Work on your catching and shooting mechanics to fully harness the U-shooter advantage. Keep both hands strong on your stick, stepping into throws and following through towards your target. Maintain your lacrosse skills and let this pocket enhancer give you the edge!
Ensuring correct lacrosse net whip and hold
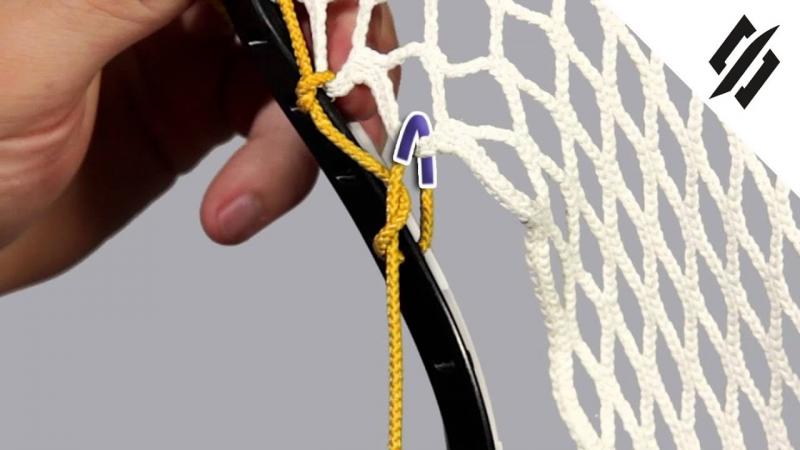
When stringing up a lacrosse pocket, two key attributes to focus on are whip and hold. Finding the right combination gives you optimized throwing velocity and ball control.
Whip refers to the flex and springiness of the pocket. More whip leads to quicker, harder shots and passes thanks to the catapult-like slingshot effect.
Hold is the pocket’s ability to cradle and retain the ball. Superior hold means better ball security during stick checks, contact, and evasive dodging.
To increase whip:
- Use a soft, flexible mesh material
- Make diamonds wider to augment flexibility
- Loosen sidewall tension to allow pocket give
- Set shooting strings deep into the head
To boost hold:
- Choose a stiffer, thicker mesh or nylon
- Create narrow, defined diamonds
- Increase sidewall tightness for a pinched middle
- Use additional shooting strings for pocket structure
As a general rule, elite players want the maximum whip and hold possible without sacrificing throw accuracy and ball control. This means finding the right balance through pocket depth, diamond size, sidewall tension, and shooting string placement.
Test different setups to see what works best for your game. Keep fine tuning until you achieve ultimate pocket harmony! With mastery over whip and hold, you’ll be ready to unleash your inner lacrosse superstar.
Stringing a deep pocket vs. a shallow pocket
When crafting your lacrosse pocket, one of the biggest decisions is how deep or shallow you want it. Finding your ideal depth improves performance based on position and playing style.
A deep pocket anchors the ball further down into the head. Benefits of deep pockets include:
- Increased ball control and security.
- Superior cradling and hold during checks.
- Powerful whip for faster shots.
- Great for beginners learning catching and throwing.
But deep pockets also have some drawbacks such as:
- Slower release time on passes and shots.
- Less accuracy – the ball can spray off wonky angles.
- More prone to dislodging on checks and contact.
- Increased holding and withholding penalties.
Shallower pockets place the ball higher in the head. The benefits include:
- Lightning quick release for passes and shots.
- Improved passing and shooting accuracy.
- Faster ground ball scooping.
- Better ball visibility for stick handlers.
Yet shallow pockets struggle with:
- Reduced ball control and security.
- Worse cradling and hold during checks.
- Decreased whip and velocity on shots.
- New players may find them hard to master.
As a rule, attackers prefer quick shallow pockets, defenders like deeper cradling pockets, and middies balance both. But find what works for you – pocket preference is personal!
Legal pocket depths and dimensions
While lacrosse allows for plenty of pocket customization, there are rules and regulations regarding legal pocket depths and dimensions.
To keep play fair and prevent excessive ball control, most leagues mandate that:
- No part of the ball can sink below the bottom of the sidewall when placed in a horizontal stick.
- The pocket must be loosely strung to allow the ball to freely fall out when tilted.
- The top of the ball must sit above the bottom of the scoop when inside the pocket.
- The ball must move freely within all parts of the head both laterally and along its full length.
Officials will routinely inspect pockets before games and assess penalties for illegal depths. Common violations include:
- Too deep – the ball sinks below the sidewalls when at rest.
- Too pinched – sidewall strings or shooters prevent free ball movement.
- U-shooters – these tightly strung channels limit lateral ball mobility.
- Ball stops – knots or other objects retaining balls after checks.
As a rule of thumb, the best pockets sit around mid-scoop depth for great all-around play. Avoid extremes like 1-diamond shallow pockets or over-the-sidewall deep pockets.
Master stringing legal pockets now to avoid issues later. Ethical play and good sportsmanship means following the rules even if you have the skills to push boundaries.
Stringing tricks: Adding a third shooting string
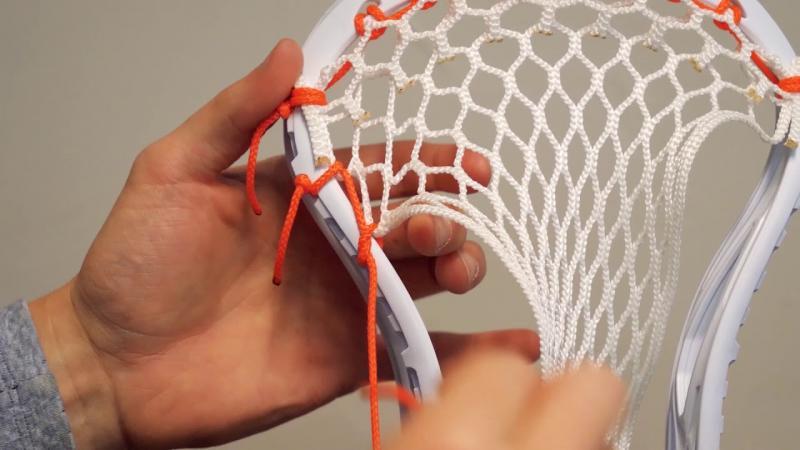
Most lacrosse pockets have two main shooting strings – a bottom string and a “V” nylon at the midpoint. However, experienced stringers often add a third “V” shooting lace for enhanced performance.
What are the benefits of a triple stacked setup?
- Improves pocket definition – shapes a more pronounced central channel.
- Increases hold during cradling and checks.
- Augments accuracy – helps center ball releases.
- Boosts ball control on snags and in traffic.
- Enhances whip and velocity on passes and shots.
Stringing a third shooting lace takes some extra time but can be a game-changer once mastered. Here are some quick tips:
- Use soft nylon string – provides flexibility without bagging.
- Weave from mid-sidewall up towards the scoop.
- Space evenly between existing top and mid strings.
- Cinch diamonds tight around the shooting string.
- Check symmetry – keep the middle channel straight.
The triple threat gives you limitless options to fine tune your ideal pocket. Push the boundaries of stringing and join lacrosse’s best shooters, feeders, and hoarders in putting this secret weapon to work.
Just beware – maxed out pockets require constant tuning and adjustment to prevent illegal depths. But done right, you’ll have a head start dominating the game!
Finishing the lacrosse net stringing process
You’ve laced the sidewalls, woven the diamonds, shaped the pocket, and tuned the channel – your lacrosse head stringing is nearly complete! But before declaring it game-ready, be sure to finish it off properly.
Here are some final steps to complete the stringing process:
- Trim excess string – Cut any long tails hanging off shooting laces or sidewalls.
- Melt the ends – Use a lighter or torch to seal the nylon and prevent fraying.
- Confirm pocket depth – Ensure legal dimensions before hitting the field.
- Check symmetry – Make both sides mirror each other.
- Smooth shooting strings – Pull and massage to remove any kinks.
- Test pocket throwing – Toss balls to check release and accuracy.
- Give it a name – Lacrosse tradition! Get creative.
Take pride in a job well done hand-crafting your new lacrosse pocket. All the training and preparation has led to this moment. Time to reap the rewards!
Of course, you’ll need to break it in. Expect the diamonds to bag out and the pocket to soften over time. Be ready to regularly maintain and tune it through the season. A perfectly strung pocket still requires TLC.
But relish having that extra edge over the competition. Your blood, sweat and string leave you entering each matchup with an advantage. The obstacles ahead seem smaller with such a formidable weapon in hand.
Now get out there and dominate! Enjoy unleashing your new secret weapon on the field. All the hard work stringing your lacrosse wand will pay off big time.
Testing out the newly strung lacrosse net

Stringing a lacrosse net like a pro can seem intimidating for beginners, but with the right gear and a bit of practice, you’ll be stringing nets worthy of the pros in no time. Let’s walk through the step-by-step process of stringing a lacrosse goal so you can try out that brand new pocket.
The first step is gathering the necessary lacrosse stringing supplies. At minimum you’ll need lacrosse mesh, sidewall string, shooting strings, and a lacrosse head. Lacrosse mesh comes in different configurations including traditional, memory mesh, and pre-strung options. For beginners, a 10 diamond traditional nylon mesh is a good place to start. You’ll also need strong but flexible sidewall string and nylon shooting strings. Complete stringing kits are available that include everything you need.
Once you’ve got the gear, it’s time to prep the head. Start by attaching the sidewall string to the sidewall holes, threading from the scoop down to the throat of the head. Pull the sidewalls tight and even on both sides. Now attach the mesh to the head, lining up the holes and anchoring it by stringing through the sidewall string and mesh holes. Use a basic interwoven stringing pattern and criss-cross the mesh from side to side. Keep the diamonds evenly spaced and uniform in size. Snip off any excess mesh once finished.
Here’s where you can get creative with stringing patterns. Popular options like a mid-high pocket or the tried and true traditional pocket shape the ball channel and adjust hold and release points. A mid-high pocket focuses control at the upper middle part of the head, while a traditional pocket centers control lower. Shooters prefer quicker release points while ball carriers opt for maximum ball control. Choose your pocket shape accordingly.
Once the main diamond pattern is set, it’s time to install the shooting strings. These horizontal nylons affect ball velocity. A lower nylon gives added whip, while an upper nylon slows release. Many players opt for a triple shooter setup with three evenly spaced nylons. Thread each nylon through the sidewall holes and mesh diamonds, centering the ball channel. Tie off tightly but not too tight – adjustability is key.
The final step is customizing the lacrosse pocket to your preferences and style of play. Add lacrosse leathers or nylon strings to enhance pockets and fine-tune hold. Shift diamonds to tweak the shape. Set your preferred pocket depth – deeper nets have greater ball control while shallow nets enable quicker release. Test it out with your favorite heads, cradles, and shots to get a feel for the new pocket. Make minor adjustments until you achieve your ideal stringing and breaking point.
Once your new pocket is dialed and broken in, it’s time to put it through game action. Confidently step into the box or square up for a groundball, knowing your pocket is primed to catch and release just right. Unleash those wicked sidearms and overhands as you flex on defenders with your pro-level string job. Whether it’s a crisp pass to a cutter or a rocket top shelf snipe, you and your new pocket will be in perfect sync.
Stringing a lacrosse head is equal parts science and art. Master the technical elements, then add your own flair and style. Don’t be afraid to experiment with different meshes, strings, and pocket configurations until you find your go-to. With a bit of patience and lots of practice, you’ll be stringing lacrosse pockets that give you an edge and make the other team think twice about stepping in your way. When the sidewall masterpiece is finally dialed in, enjoy breaking in that new pocket and unleashing your enhanced game.
Tuning and adjusting the lacrosse pocket
Lacrosse nets can be tricky to string and adjust just right. Whether you’re stringing up a new pocket or tweaking an existing one, getting that perfect customized feel takes some know-how. Don’t worry though, you don’t need to be a pro to end up with a lacrosse pocket tuned to your exact preferences. With a few simple techniques and tips, you’ll be stringing pockets like the experts in no time.
The first step is choosing your lacrosse head. Brine, Maverik, STX, Warrior – all the major brands have excellent options to fit your position and style of play. Attackmen typically like a deeper pocket to cradle and hold the ball, while defensemen may opt for a flatter pocket for quicker passing and checks. Goalies need a pocket with maximum ball control. As for stringing materials, nylon lacrosse mesh is ideal for consistent throws and catches. Leather and traditional gut strings offer an old-school feel. Pick whatever you like best – it’s all about personal preference.
Once you’ve selected your head, it’s time to think about pocket placement. A lower pocket gives you more control and whip on shots, while a higher pocket makes for quicker releases. Where you string the first lace along the scoop determines pocket height. For an attacking midfielder who wants the best of both worlds, try stringing it right along the middle ridge. Remember you can always tweak placement later by adjusting sidewall stringing.
Now comes the fun part: interstringing the lacrosse mesh to customize your pocket. Start by anchoring the mesh to the sidewall holes on each side. Use a basic 1-and-1 or 2-and-2 stringing pattern to get started. Going over-under from one sidewall to the other creates crisscrossing diamonds that form the pocket. Varying these diamonds is key to fine-tuning your pocket’s feel and ball control.
For example, switching to a 1-and-2 pattern on one half gives you more defined diamonds with quicker ball releases. Or you can play around with 1-and-1 throughout but make one diamond wider and one tighter. Just be sure to mirror the pattern on each sidewall for balance. As you string, continually check that the pocket is forming to your liking. Adjust patterns if needed. Remember, you can always tweak things later too.
Once the initial pocket framework is strung, it’s time for sidewall adjustments to really customize depth and break in the pocket. Simple straight runners along each sidewall work at first, but you’ll get more adjustability from meshed and lace-driven sidewall stringing. Crisscross sidewall strings and add multiple shooting/cross-laces for maximum depth and ball control. Or use a U-string to create a quick-release channel. Sidewall stringing takes practice, so don’t be afraid to experiment.
The final step is breaking in your new pocket so it throws, catches and scoops just how you like. Roll a lacrosse ball inside the pocket, massage and squeeze it into shape, do practice drills – anything to get the mesh and leathers worked in. You want the pocket to contour perfectly to the ball. As you break it in, make any final tuning tweaks needed. It may take a few practices to get your custom pocket just right.
With the right head, materials and stringing techniques, you can tune a lacrosse pocket tailored exactly for you. The key is mastering interstringing patterns and sidewall adjustments. Don’t be afraid to experiment and tweak things as you go until you get the precise pocket performance you want. In no time, you’ll be stringing lacrosse pockets with the best of them!
Maintaining the lacrosse net pocket over time
Tuning your lacrosse pocket takes time and precision. But the work doesn’t stop once you’ve strung and broken in the perfect pocket. Maintaining pocket performance requires ongoing care and adjustments as mesh breaks down over time. Don’t worry – with a few simple routines, you can keep your pocket in top playing shape all season long.
The key is regularly checking for signs of wear. Inspect mesh diamonds, sidewalls, shooting strings, leathers – anything contacting the ball. Look for loose, torn or broken strings, sagging pockets, and mesh with lost tension or shape. Even minor fraying can affect how the ball releases and shoots. At the first signs of wear, it’s time for maintenance.
For minor fraying, rub wax on problem spots to reduce further unraveling. Dental floss also works for emergency string repairs. Replace individualShooting strings as needed so they continue crisply channeling shots. Just be sure to mirror the original pattern to maintain pocket balance.
If mesh diamonds get baggy or saggy, try tightening the closest sidewall strings to lift the pocket back into shape. You can also use a pocket shaper tool or ball to stretch things back out. Just stick it in the sagging spot and massage the pocket back into form. Rotate and squeeze until shape returns. Be gentle though – you don’t want new tears.
When mesh loses too much tension or gets misshapen beyond repair, it’s time to restring. Thankfully, you don’t have to start totally from scratch. Simply replace the problem mesh diamonds while keeping intact sidewalls and strings. Unlace old diamonds then string new ones in the same pattern. This maintains your custom pocket shape while revitalizing just the worn sections.
Watch out for loose sidewall strings too. As they stretch, pockets can deepen, shift or lean. Tighten up side laces or runners as needed to bring the pocket back into proper placement. You want taut sidewalls for crisp throws and checks. Don’t pull them too tight though – some gives helps with ball control.
While most maintenance involves strings and mesh, don’t forget the importance of keeping a rigid, properly shaped scoop. Check for warping that reduces control cradling the ball on runs. Bent scoops also make ground balls trickier. Use a ball or mallet to gently pound dents and dings back into shape.
Lastly, periodically clean your pocket to remove built-up dirt, sweat, and grime that can affect ball handling. Turn the head upside down and rinse with mild soap and water. Avoid harsh cleaners that could damage mesh. Let air dry fully before playing to prevent mildew.
With the right maintenance routines, your custom lacrosse pocket can deliver top performance all season long. Inspect regularly for wear, repair minor issues immediately, and restring mesh or sidewalls if shape deteriorates too far. Keep the scoop pounded into shape, clean periodically, and your pocket will maintain its magic all year.
While it takes vigilance and care, proper pocket maintenance isn’t difficult. And it beats having to completely restring a saggy, worn out pocket after just a few games. With the right upkeep, you can rely on your perfectly tuned pocket working its magic from opening faceoff to championship trophy lift!