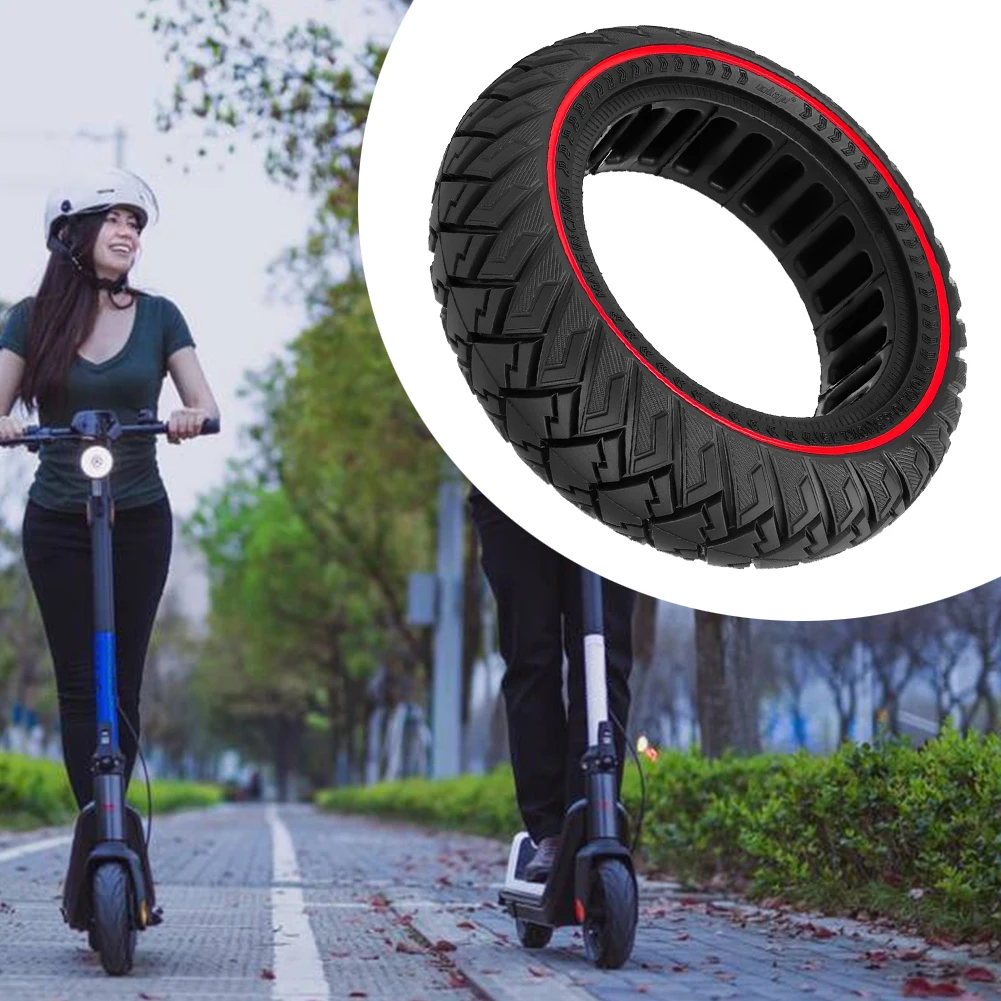
How to check recommended tire pressure. Why invest in a quality floor pump. When to open the valve fully before pumping. How to remove air from tires before adding pressure. Why pump tires slowly and carefully. How often to check tire pressure while inflating. What happens if you overinflate tires. How to distribute sealant in tubeless tires.
Determining the Correct Tire Pressure for Your Bike
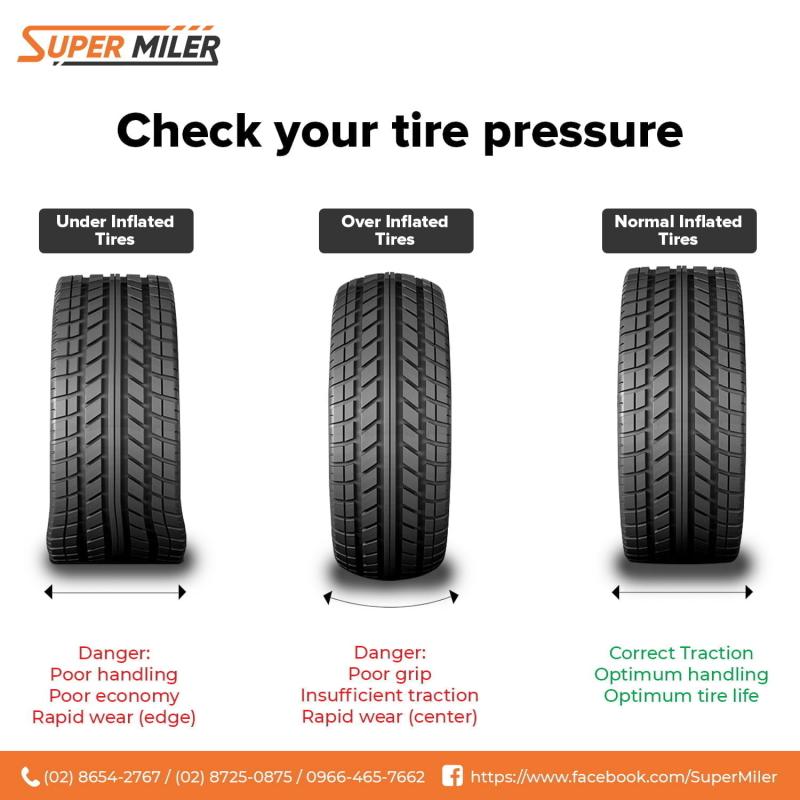
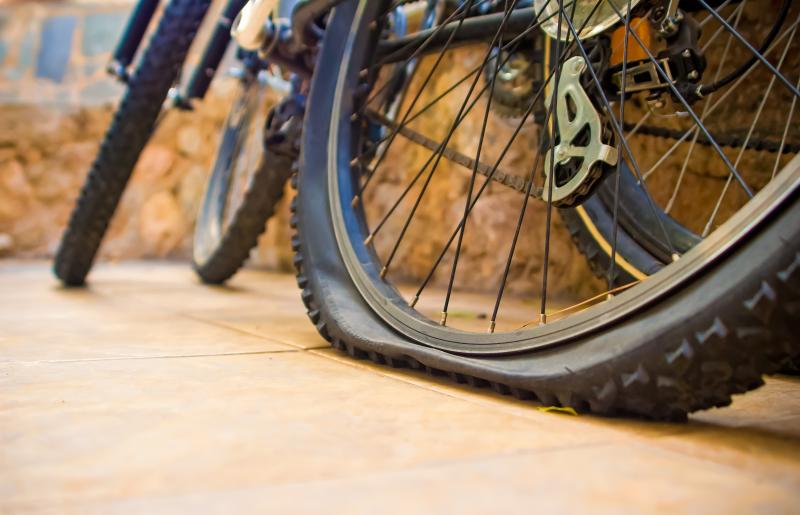
Proper tire inflation is crucial for optimal bike performance and safety. Underinflated tires can lead to sluggish handling, slower speeds, and increased risk of pinch flats. Conversely, overinflated tires reduce traction and comfort. To ensure you’re inflating your tires correctly, always check the recommended tire pressure range printed on the sidewall of your tire or in the bike manufacturer’s manual.
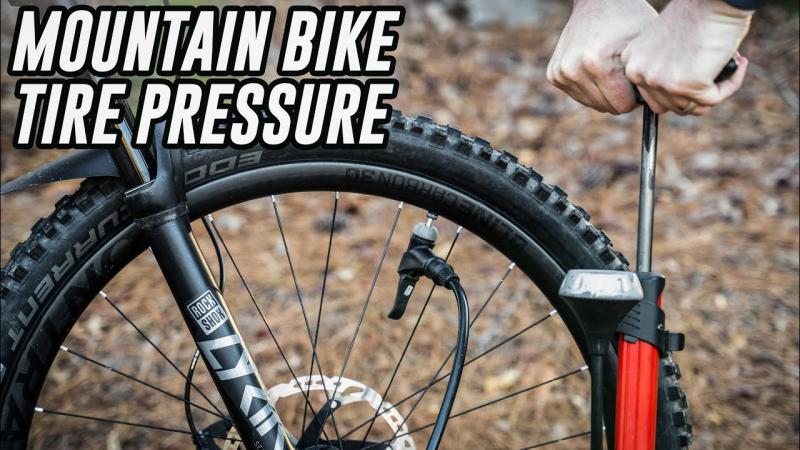
This range provides a PSI (pounds per square inch) guideline that balances performance with tire life and traction based on your tire width and intended usage. Road bikes typically require higher pressures, while mountain bikes and comfort bikes often recommend lower pressures for better traction and shock absorption.
How do different bike types affect tire pressure?
- Road bikes: Higher pressure (80-120 PSI)
- Mountain bikes: Lower pressure (25-50 PSI)
- Comfort/hybrid bikes: Medium pressure (40-70 PSI)
When inflating your tires, aim for the higher end of the recommended range if performance is your priority. However, keep in mind that factors such as rider weight, terrain, and weather conditions may influence the ideal pressure for your specific needs.
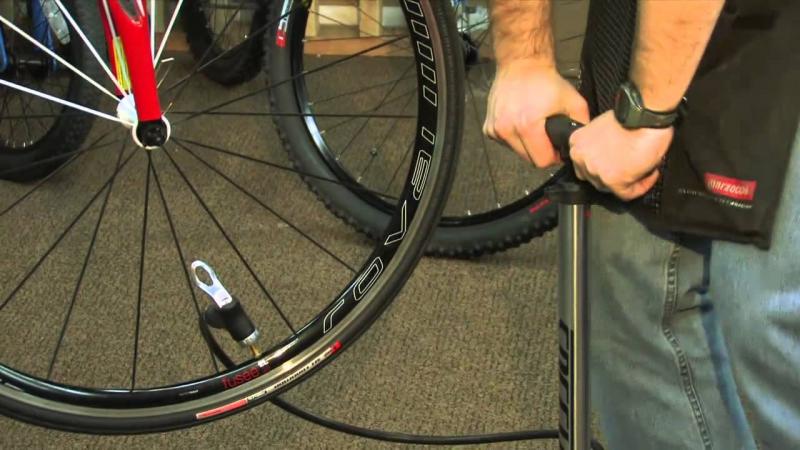
Choosing the Right Equipment for Tire Inflation
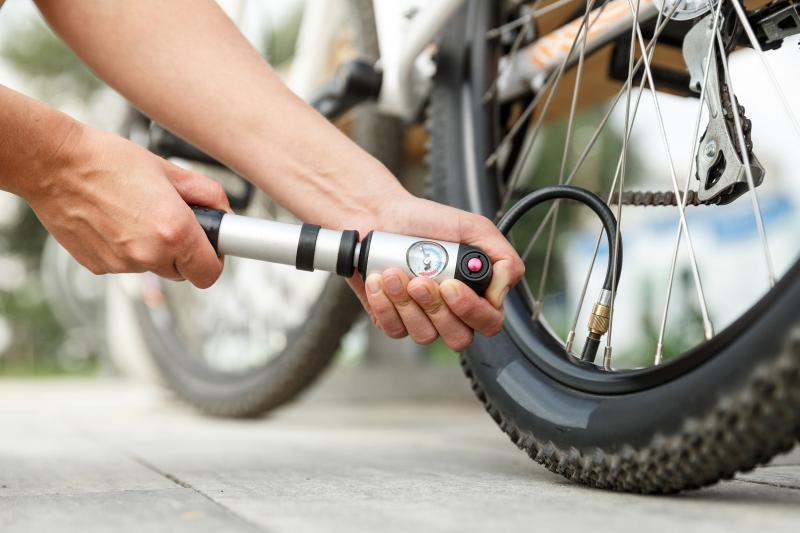
Investing in a quality floor pump with an accurate pressure gauge is essential for proper tire inflation. Cheap pumps often have low-quality seals that lose air and gauges that quickly lose calibration, leading to inconsistent and inaccurate pressure readings.
What features should you look for in a quality bike pump?
- Solid metal barrel for durability
- Wide inflation base for stability
- Easy-to-read pressure gauge with 1-2 PSI increments
- Dual-headed chuck compatible with both Presta and Schrader valves
- Comfortable handle for ease of use
While quality pumps may have a higher initial cost, they will save you frustration and money in the long run by providing easier inflation and consistent, accurate pressure readings. Additionally, consider purchasing a separate handheld pressure gauge for quick checks and to verify your pump’s accuracy.
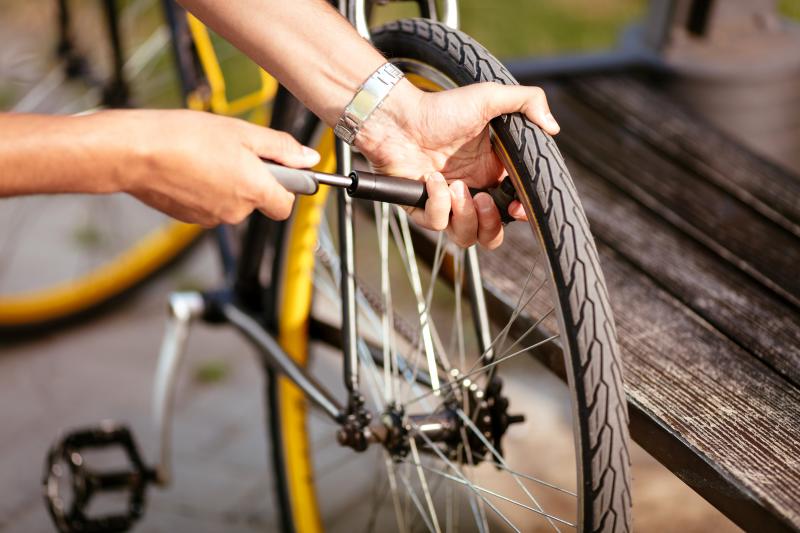
Preparing Your Bike Tire for Inflation
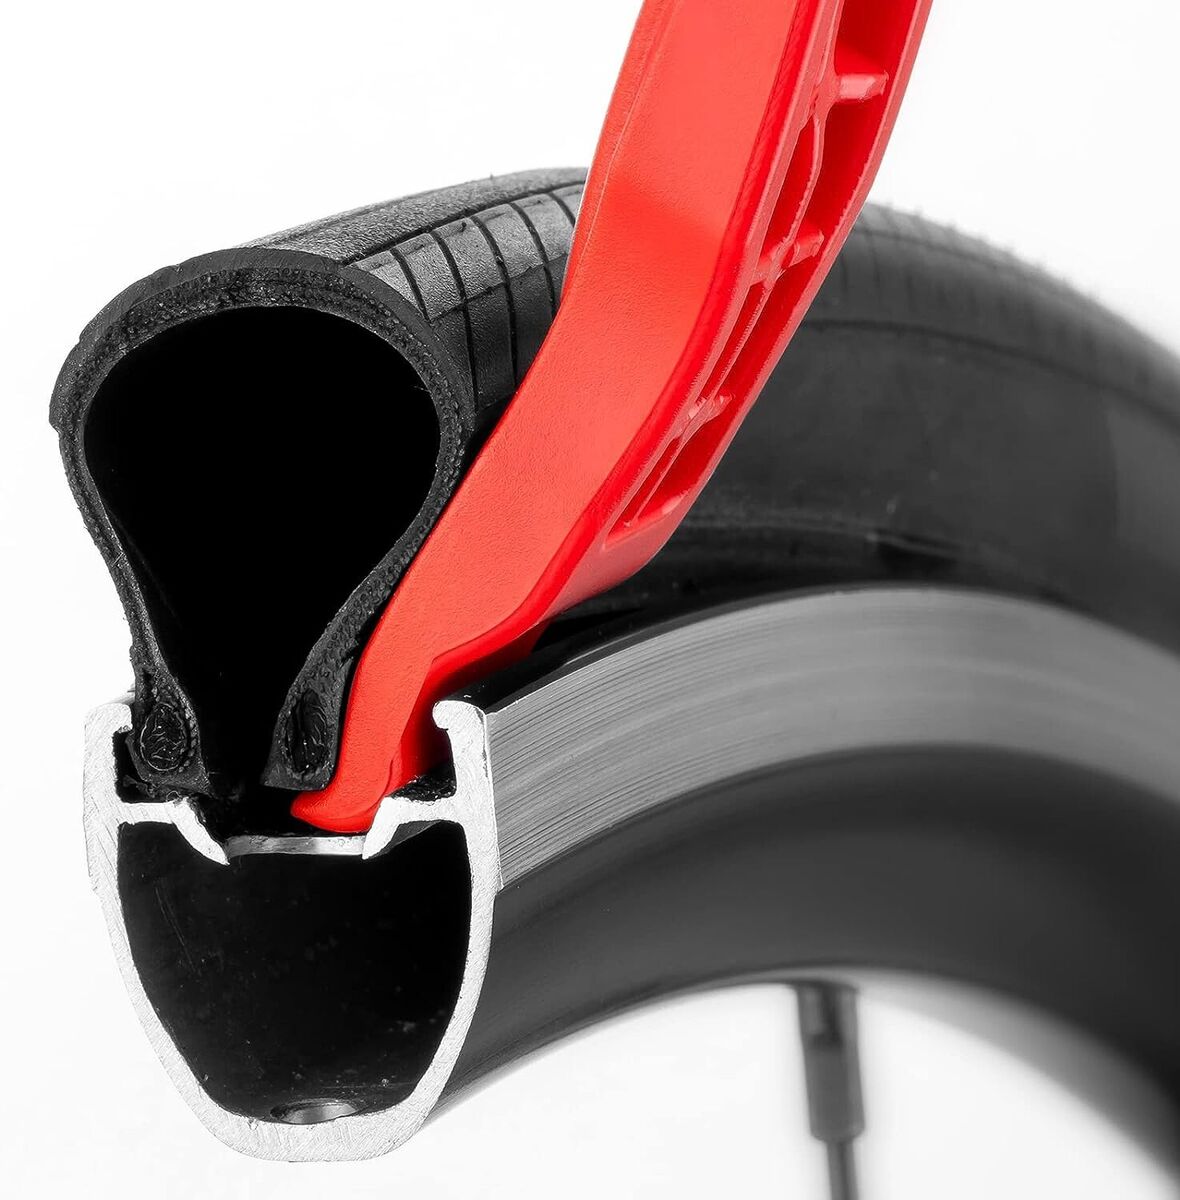
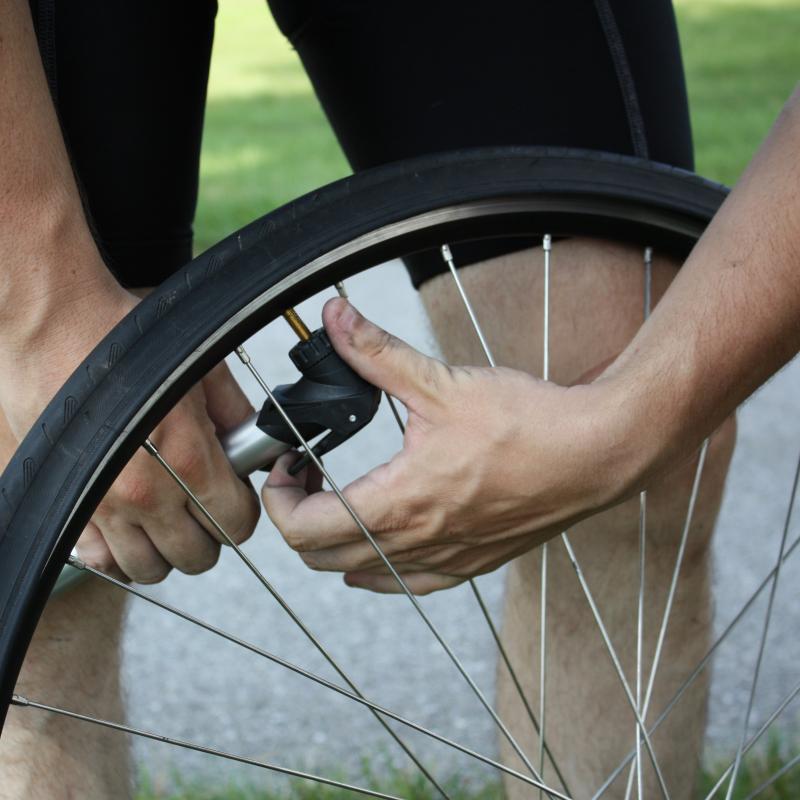
Before you start pumping air into your tire, it’s crucial to ensure that the valve is fully open. Many cyclists overlook this simple step, which can lead to difficult and inaccurate inflation.
How do you properly open a bike tire valve?
- Locate the lock nut at the base of the valve stem
- Unthread the lock nut completely
- Twist the inner valve stem counterclockwise to open it fully
- For Presta valves, press down on the valve tip to release any remaining air
Opening the valve fully provides an unrestricted pathway for inflating the tire quickly and easily to the desired pressure. A partially closed valve will make inflation difficult, inaccurate, and time-consuming. Make it a habit to open valves completely as the first step of your inflation process.
Techniques for Accurate Tire Inflation
To achieve the most precise tire pressure, it’s often beneficial to remove some air from the tire before adding more pressure. This technique improves accuracy and ensures you don’t overshoot your target PSI.
Why remove air before inflating?
- Provides room for precise pressure adjustment
- Prevents stressing tire sidewalls by exceeding maximum pressure
- Allows for better control during inflation
- Ensures consistent pressure across both tires
To release air, gently press the tip of a key or small flathead screwdriver against the valve stem. Be careful not to apply too much pressure, as this could damage the valve core. Aim to release about 5-10 PSI before beginning the inflation process.
The Importance of Slow and Careful Inflation
When inflating your bike tires, it’s crucial to pump slowly and carefully. Inflating too quickly risks overshooting your target pressure, which can lead to overinflation and potential tire damage.
How should you approach the inflation process?
- Attach the pump head firmly to the valve for an airtight seal
- Begin pumping deliberately and slowly
- Check the gauge periodically as you approach the recommended PSI
- Apply extra effort for the last few pump strokes as air resistance increases
- Make small adjustments to reach the precise desired pressure
Adding air gradually is key for precise inflation without the need to bleed off excess pressure after overinflating. This method also ensures that the tire beads seat properly on the rim, which is essential for optimal performance and safety.
Monitoring Pressure During Inflation
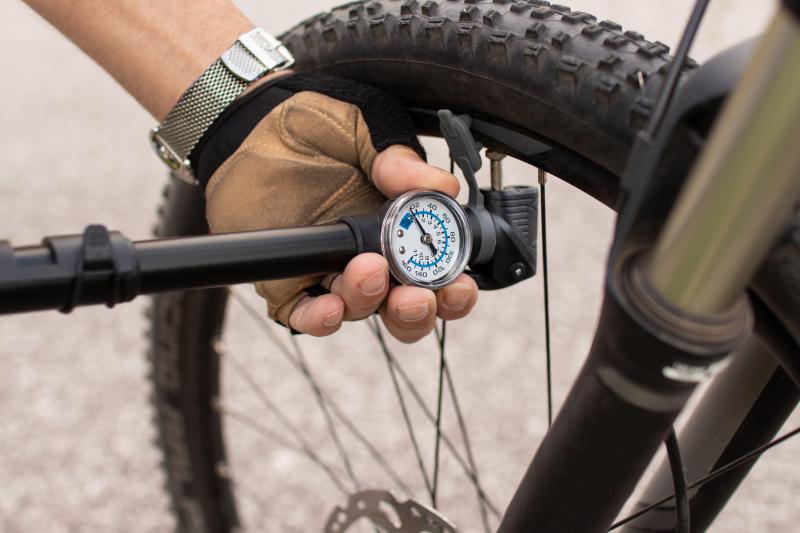
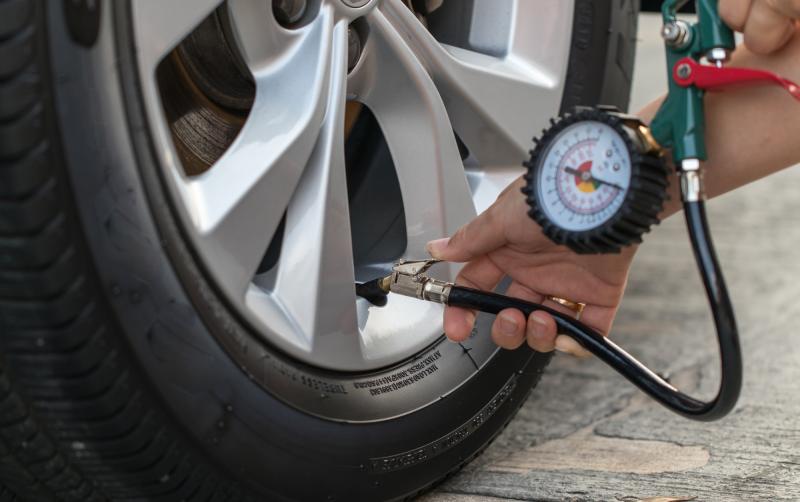
Even if your pump has a built-in gauge, it’s important to monitor pressure frequently while inflating your tires. Gauges can slowly lose calibration over time, leading to inaccurate readings.
How often should you check tire pressure during inflation?
It’s recommended to check the pressure every 10-15 pump strokes, especially as you near your target PSI. This frequent monitoring allows you to make small adjustments and avoid overinflation.
To ensure accuracy, consider using an additional handheld gauge to cross-check your pump’s readings. Alternately, you can rely solely on a calibrated handheld gauge for the most precise measurements. Remember that the most accurate readings occur when the pump head is firmly secured to the valve stem.
The Risks of Overinflation and How to Avoid Them
Contrary to popular belief, higher pressures don’t automatically equate to better performance. Overinflating your bike tires can lead to several issues that compromise both safety and ride quality.
What are the consequences of overinflated tires?
- Reduced tire contact with the ground, decreasing traction
- Decreased comfort due to less shock absorption
- Compromised control, especially in wet conditions
- Increased stress on tire sidewalls, risking blowouts and cracks
- Potential for premature tire wear
To avoid these issues, aim for the top of the recommended pressure range, then test ride to find your optimal inflation for the conditions. If you notice a lack of traction, try lowering the pressure slightly. Conversely, if you experience high rolling resistance, gradually increase the pressure within the recommended range.
Special Considerations for Tubeless Tires
Tubeless tire setups require special attention during inflation to ensure proper sealant distribution. These systems rely on liquid sealant coating the inside of the tire to automatically seal small punctures and maintain air pressure.
How do you properly inflate tubeless tires?
- Inflate the tire slowly to allow sealant to spread evenly
- Rotate the wheel periodically during inflation
- Once at desired pressure, spin the wheel to distribute sealant
- Lay the wheel flat for a few minutes on each side
- Check for any leaks and address them immediately
Inflating too quickly can leave pooled sealant that fails to plug holes effectively and may lead to air leaks. By taking the time to properly distribute the sealant, you’ll ensure better puncture protection and consistent air pressure retention.
The Impact of Temperature on Tire Pressure
Temperature fluctuations can significantly affect your bike’s tire pressure. As air temperature increases, the air inside your tires expands, leading to higher pressure. Conversely, colder temperatures cause the air to contract, resulting in lower pressure.
How much does temperature affect tire pressure?
On average, tire pressure can change by about 1 PSI for every 10°F (5.5°C) change in temperature. This means that a tire inflated to 100 PSI at 70°F (21°C) could reach 105 PSI on a hot 100°F (38°C) day or drop to 95 PSI on a cold 40°F (4°C) morning.
To account for these variations, it’s wise to check your tire pressure before each ride, especially if there have been significant temperature changes. You may need to adjust your inflation routine based on the season or expected temperature fluctuations during your ride.
Maintaining Consistent Tire Pressure
Consistent tire pressure is crucial for optimal bike performance and safety. Even if you’ve inflated your tires correctly, they can lose pressure over time due to various factors.
Why do bike tires lose pressure?
- Natural air permeation through the tire and tube material
- Small punctures or slow leaks
- Temperature fluctuations
- Changes in altitude
- Impacts from rough terrain
To maintain consistent tire pressure, establish a regular checking and inflation routine. For most riders, checking tire pressure before each ride is ideal. If you ride less frequently, aim to check your tire pressure at least once a week.
Adjusting Tire Pressure for Different Riding Conditions
While manufacturers provide recommended pressure ranges, it’s important to understand that these are general guidelines. The optimal tire pressure can vary based on specific riding conditions and personal preferences.
How should you adjust tire pressure for different scenarios?
- Wet conditions: Lower pressure slightly for better traction
- Rough terrain: Decrease pressure for improved shock absorption
- Smooth roads: Increase pressure for lower rolling resistance
- Heavy loads: Add a few PSI to compensate for extra weight
- Racing: Experiment with higher pressures for reduced rolling resistance
Remember that finding the perfect tire pressure often requires some experimentation. Start with the manufacturer’s recommendations and make small adjustments based on your riding experience and the specific conditions you encounter.

The Role of Rider Weight in Tire Pressure
Your body weight plays a significant role in determining the optimal tire pressure for your bike. Heavier riders typically require higher tire pressures to prevent pinch flats and maintain proper tire shape, while lighter riders can often benefit from slightly lower pressures for improved comfort and traction.
How does rider weight affect tire pressure?
As a general rule, you should add or subtract about 1-2 PSI for every 10-20 pounds (4.5-9 kg) above or below the average rider weight of 160-180 pounds (73-82 kg). However, this is just a starting point, and you should always stay within the manufacturer’s recommended pressure range.
For example, if you weigh 200 pounds (91 kg) and the recommended pressure range for your tires is 80-100 PSI, you might start at the higher end of that range (100 PSI) and adjust from there based on your riding experience and preferences.
Understanding the Relationship Between Tire Width and Pressure
The width of your bike tires has a direct impact on the optimal inflation pressure. Generally, wider tires can be run at lower pressures, while narrower tires require higher pressures to maintain their shape and prevent pinch flats.
How does tire width affect recommended pressure?
- Narrow road tires (23-25mm): Higher pressure (90-120 PSI)
- Medium width tires (28-32mm): Moderate pressure (70-90 PSI)
- Wide tires (35mm+): Lower pressure (30-60 PSI)
Keep in mind that these are general guidelines, and the specific pressure recommendations for your tires may vary. Always refer to the manufacturer’s suggested pressure range printed on the tire sidewall or in the product documentation.
The Importance of Balanced Pressure Between Front and Rear Tires
Maintaining balanced tire pressure between your front and rear tires is crucial for optimal handling and performance. In most cases, the rear tire should be inflated to a slightly higher pressure than the front tire to account for the greater weight distribution towards the back of the bike.
What’s the ideal pressure difference between front and rear tires?
For road bikes, a common recommendation is to inflate the rear tire to about 10% higher pressure than the front tire. For example, if your front tire is at 90 PSI, your rear tire should be around 100 PSI. Mountain bikes and other off-road bicycles may benefit from a smaller difference, typically 3-5 PSI between front and rear tires.
This pressure differential helps maintain consistent handling characteristics and ensures that both tires wear evenly. However, as with all aspects of tire pressure, some experimentation may be necessary to find the perfect balance for your specific bike and riding style.
The Impact of Tire Pressure on Rolling Resistance
Tire pressure plays a significant role in determining your bike’s rolling resistance, which directly affects your speed and the amount of effort required to maintain it. Understanding this relationship can help you optimize your tire pressure for different riding scenarios.
How does tire pressure affect rolling resistance?
Generally, higher tire pressures result in lower rolling resistance on smooth surfaces, allowing you to maintain higher speeds with less effort. However, this relationship is not linear, and there’s a point of diminishing returns where further increasing pressure provides minimal benefits.
On rough surfaces, moderately lower tire pressures can actually reduce rolling resistance by allowing the tire to conform to small bumps and irregularities rather than bouncing over them. This is why professional cyclists often use lower pressures for cobblestone races compared to smooth road stages.
To find the optimal pressure for your riding conditions, start with the manufacturer’s recommendations and experiment with small adjustments. Pay attention to how the bike feels in terms of speed, comfort, and handling to determine the best pressure for your needs.
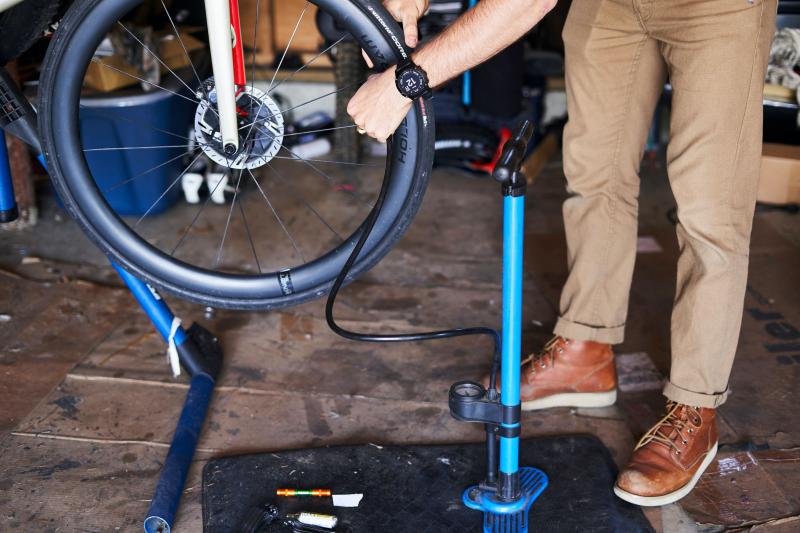
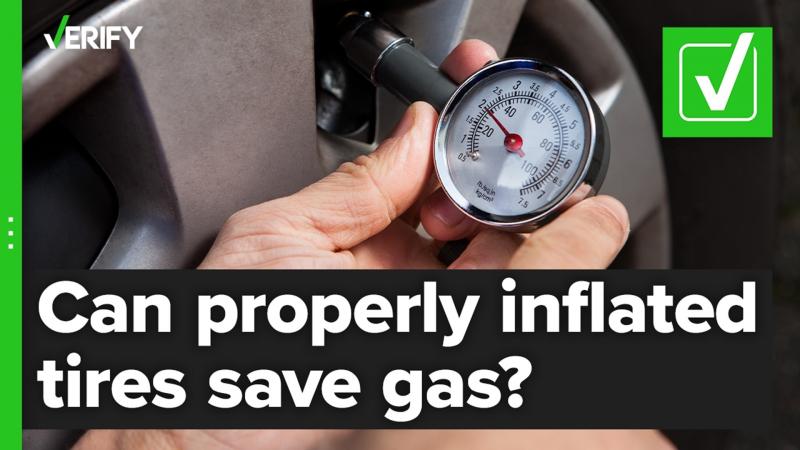
Check Your Bike’s Recommended Tire Pressure
Proper tire inflation is crucial for optimal bike performance and safety, yet it’s a step many cyclists overlook. Underinflated tires can cause sluggish handling, slow you down, and lead to pinch flats. Overinflated tires reduce traction and comfort. That’s why the first step in proper inflation is checking the recommended tire pressure range printed on the sidewall of your tire or in the bike manufacturer’s manual. This provides a PSI range that balances performance with tire life and traction based on your tire width and intended usage. Road bikes typically call for higher pressures, while mountain bikes and comfort bikes often recommend lower pressures for better traction and shock absorption. Make sure to use an accurate gauge and aim for the higher end of the recommended range if performance is your priority.
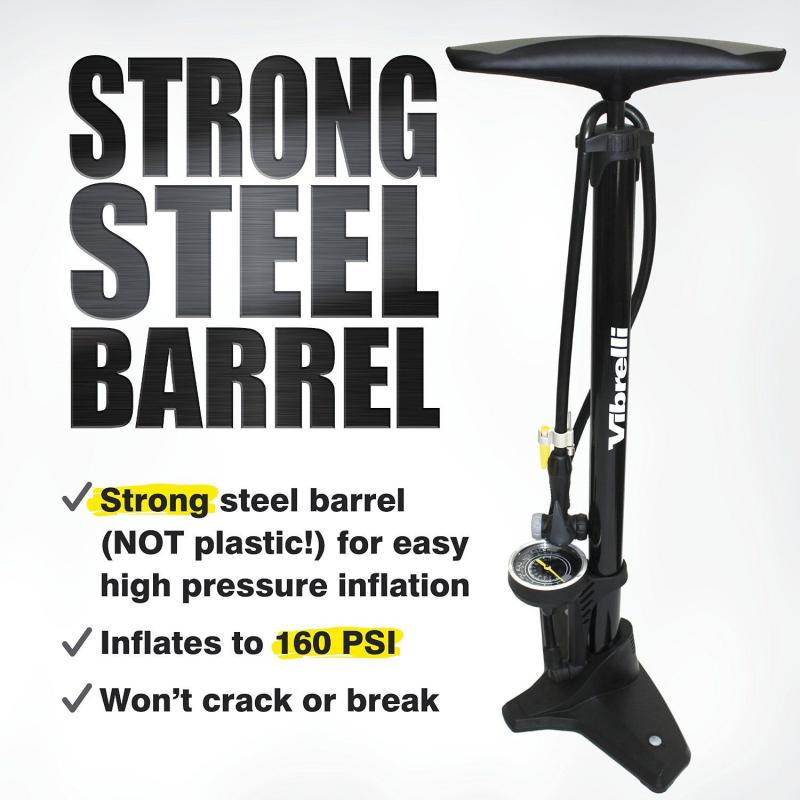
Invest in a Quality Floor Pump with Gauge
A sturdy floor pump with an easy-to-read pressure gauge is vital for accurate inflation. Cheap pumps often have low quality seals that lose air and gauges that quickly lose calibration. Look for a solid metal barrel and wide inflation base that will easily seal against both Presta and Schrader valves. A gauge that reads in 1-2 PSI increments allows fine pressure adjustment. Dual-headed chucks avoid the need to change valve fittings. Quality pumps may cost more initially but will save frustration and pay for themselves over time with easier inflation and consistent, accurate pressure readings.
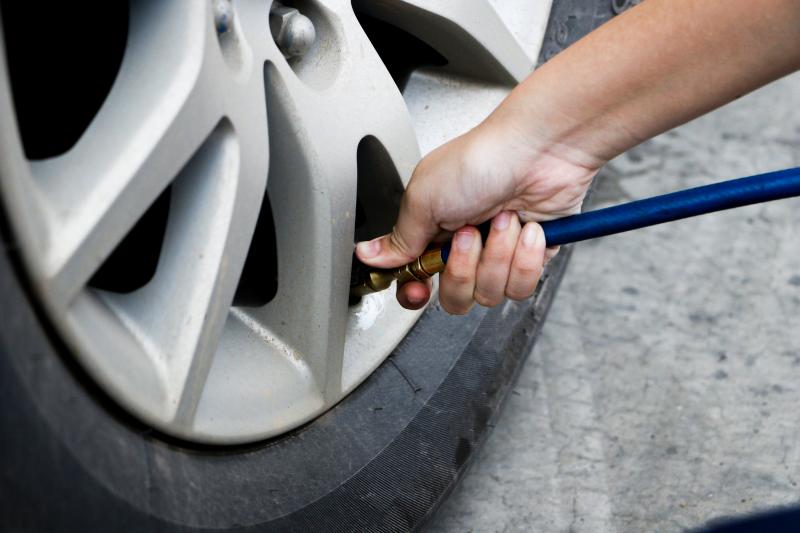
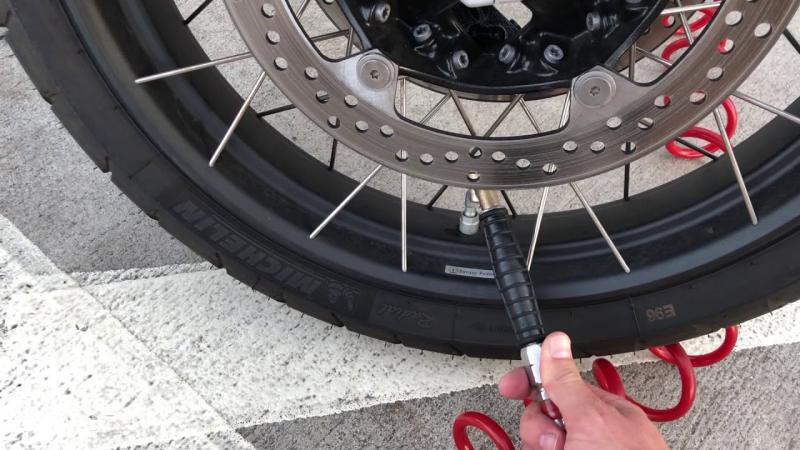
Make Sure the Valve is Fully Open Before Pumping
It’s easy to forget, but you want the valve fully open before attaching your pump head and adding air. Most valves have a lock nut that needs to be unthreaded before you can twist the inner valve stem to open it. Opening the valve Provides an unrestricted pathway for inflating the tire quickly and easily to the desired pressure. A partially closed valve will make inflation difficult, inaccurate, and time consuming. Get in the habit of opening valves completely as the first step of your inflation process. It takes just seconds but makes a big difference.
Remove Air from Tire Before Adding More Pressure
Letting a little air out of an already inflated tire before pumping to higher pressure improves accuracy and ensures you don’t overshoot your target. Bleeding off 5-10 PSI initially gives room to precisely add air until you hit the recommended level. It also prevents stressing the tire sidewalls by exceeding maximum pressure. You can bleed air by simply pressing the tip of a key or small flathead screwdriver against the valve stem. Do this gently to avoid damaging the core. Starting with less initial pressure gives you more control compared to fighting an overinflated tire.
Pump Tire to Recommended PSI Slowly and Carefully
Inflating too quickly risks overshooting your target pressure. Instead, pump deliberately and slowly, periodically checking the gauge until you approach the recommended PSI. The last pump strokes will require extra effort as you overcome higher air resistance in the tire. Keep the pump head pressed firmly on the valve for an airtight seal. Adding air gradually is the key for precise inflation without the need to bleed off excess pressure after overinflating. It also ensures the tire beads seat properly on the rim.
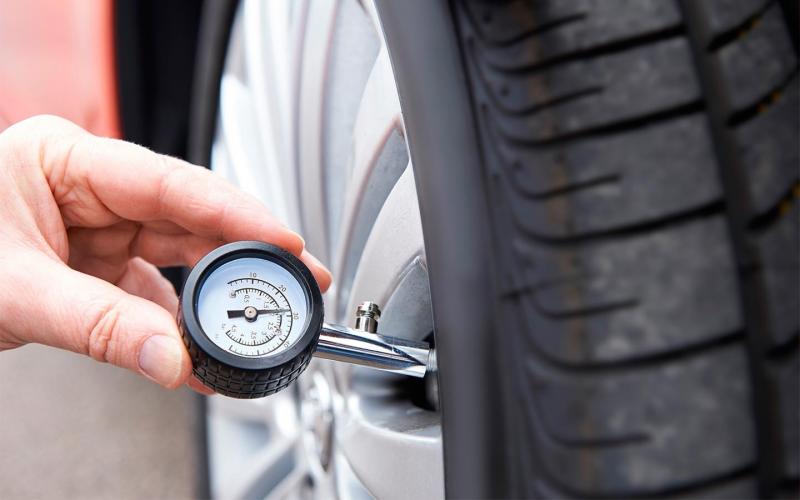
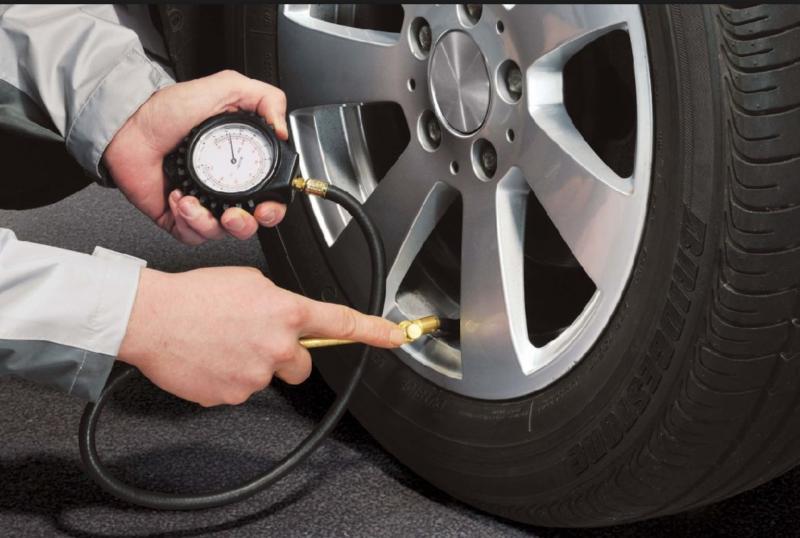
Check Tire Pressure with Gauge Frequently While Pumping
Gauges can slowly lose calibration, so it’s important to monitor pressure as you fill the tire, even if your pump has a built-in gauge. Attach an additional gauge periodically to cross-check your pump’s readings for accuracy. Catching inconsistencies early prevents either under or overinflation. Alternately, you can purely rely on a handheld gauge you know is calibrated. The most accurate readings will occur when the pump head is firmly secured to the valve stem. Take the time for multiple checks during inflation, and make small pressure adjustments as needed.
Don’t Overinflate Tires as it Can Reduce Grip
Higher pressures don’t automatically equal better performance. Overinflating leads to reduced tire contact with the ground, decreasing traction, comfort and control. This becomes especially hazardous in wet weather when tires lose grip more easily. Excess pressure places more stress on sidewalls, increasing the risk of blowouts and cracks over time. Aim for the top of the recommended range, then test ride to find your optimal inflation for the conditions. Lower pressure slightly if traction feels compromised. Gradually increase it if rolling resistance is too high.
Make Sure to Distribute Sealant Evenly Inside Tubeless Tires
Tubeless setups rely on liquid sealant coating the inside of the tire to automatically seal small punctures. Inflating too quickly can leave pooled sealant that fails to plug holes and leaks air. Gently rock or rotate the wheel while inflating to help disperse sealant. Add more through the valve if needed until it coats the entire interior. Even distribution ensures reliable puncture protection. Take care not to spill sealant on brake rotors which can impact braking performance until cleaned off.
Replace Worn Out Valve Cores for Most Accurate Pressure
The small valve core fitted inside every stem can wear out or become corroded over time, leading to air leaks that prevent maintaining correct pressure. New valve core kits are inexpensive and easy to install yourself using a valve core tool available at any bike shop. Cores weaken from exposure to sealants inside tubeless tires, so regular replacement every 1-2 years ensures leak-free accuracy. Metal cores last longer than rubber ones. Brass offers the best longevity and compatibility with tubeless setups.
Store Floor Pump Properly to Maintain Accuracy
Improper storage can knock floor pumps out of calibration over time. Keep your pump in a stable location away from dirt and moisture. Avoid storing upright which can cause gauge seals to weaken. Hang it horizontally on a wall hook or stand it on its end when not in use. Transport carefully when taking your pump on rides to avoid bangs or drops which impact precision. Periodically inspect seals for wear and replace gauge batteries as needed. Proper care maximizes lasting pump accuracy.
Check for Air Leaks After Inflating by Listening Closely
Tiny leaks can slowly bleed pressure from your tire undetected. After inflation, hold the wheel close and listen closely around the tire/rim junction to identify any hissing. Rotate the wheel slowly while listening to check the entire circumference. Also check the valve stem itself by wetting with soapy water. Bubbles indicate leaking air. Sealant may fix small leaks, but larger ones require reseating the tire bead or replacing damaged rim tape to maintain pressure.
Use Soapy Water to Detect Small Air Leaks Around Rim/Tire
Listening alone isn’t foolproof for finding stubborn, small leaks that gradually deflate tires. A more assured method involves wetting the outside of the tire bead and rim with a sponge or spray bottle of soapy water after inflation. Even minute leaks will produce bubbles you’ll see immediately. Start at the valve stem, then run the wheel to coat the entire circumference. Mark any leak locations with chalk before deflating, then clean and reseat the bead thoroughly to seal it. The soapy water technique clearly exposes sneaky leaks.
Replace Tire if You Find a Puncture Too Large to Seal
Modern sealants can plug surprisingly large punctures, but excessively damaged tires require replacement. Inspect inside after removing an embedded object to determine if a puncture hole is too gaping for reliable sealing. Holes larger than 6mm generally won’t seal well long-term. Riding on unsealed punctures risks dangerous blowouts or flats. It also allows air to continually leak out from tiny gaps the sealant can’t plug. Replace the tire to ensure safety and retain optimal inflation.
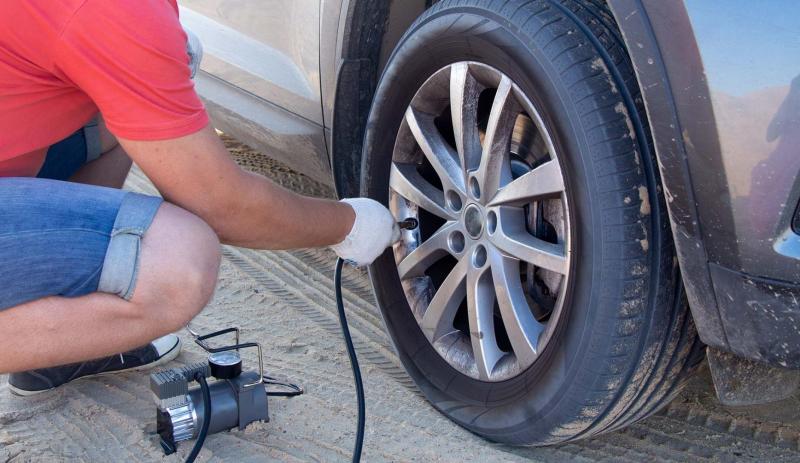
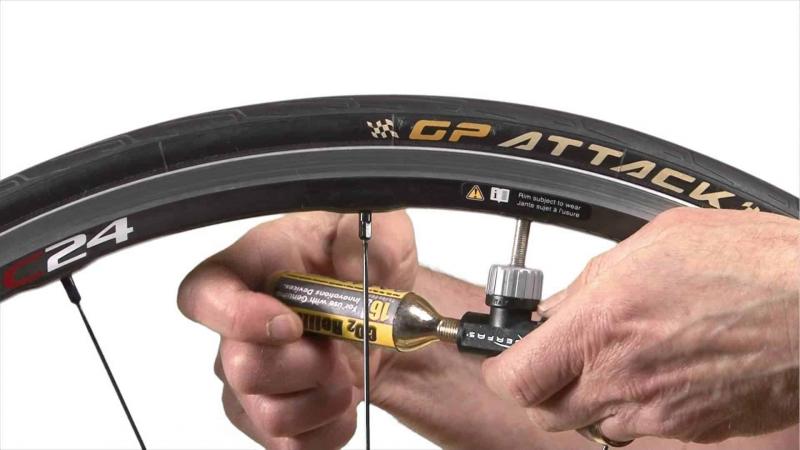
Consider CO2 Inflators for Faster Inflation in Emergencies
CO2 cartridges inflate tires 4-5 times faster than standard pumps, making them ideal for hurried roadside repairs. However, most only allow inflation to a preset level, not your ideal pressure. Bring a pump to fine tune pressure after initial CO2 inflation. The compressed gas also gradually diffuses through tire rubber over a day or two, so recheck pressure before your next ride. Use cartridges once then properly dispose of them – don’t try to save half-used canisters. CO2 makes flat fixes fast, but follow up with a pump.
Re-Check Pressure Before Every Ride for Optimal Performance
Tire pressure fluctuates slowly over time as rubber and air temperature changes. What was accurate yesterday could be 5-10 PSI low by your next ride as air cools. Get in the habit of gauging pressure before every outing, when tires are cold. Top up as needed to recommended levels, especially if keeping bike stored in a garage. Consistent inflation is the key to even tire wear, optimal rolling resistance and handling for maximum cycling enjoyment and safety.
Invest In A Quality Floor Pump With Gauge
When it comes to inflating your bike tires, the pump you use makes all the difference. A high-quality floor pump with an integrated pressure gauge is a vital cycling tool that’ll save you time, effort and frustration compared to struggling with a cheap handheld pump. Sturdy metal barrel construction provides smooth, easy inflation stroke after stroke. An oversized base grips securely to prevent air leaks while pumping. Look for a gauge that’s large, readable and accurate in increments of 1-2 PSI or less. This allows fine-tuning tire pressure to get it just right. Dual-head chucks like Presta and Schrader valves let you inflate the tire without any adapter parts to lose. Quality pumps may cost more upfront but quickly pay for themselves through easier, faster use and consistently precise air pressure over a pump’s lifetime.
Seek Durability and Ease of Use
A floor pump with a metal barrel and broad base feels substantial and stable, unlike cheaper plastic pumps that easily topple over. Metal parts last over years of regular use without cracking or wearing out. Large, padded handles provide comfortable grip so your hands won’t tire during inflation. A long hose improves access to bike valves so you can inflate without straining or awkward positioning. Seek smooth piston movement that inflates with full compression strokes, not partial uneven strokes. Premium pumps integrate these design and build elements that make filling tires a quick 1-2 minute job, not a chore.
Accuracy Matters – Precision Gauge Is Key
An accurate gauge eliminates guessing your tire pressure. Look for increment readings of 2 PSI or finer. At a glance you can precisely hit your target inflation, instead of over- or under-shooting. A quality gauge holds calibration over years, while cheap pumps quickly lose precision. Ensure the gauge numbers are large and legible. Some feature bleed valves that vent excess pressure if you overfill. An attached hose lets you take readings directly at the valve stem for consistency. Investing in a pump with precision gauge takes the frustration out of getting pressures perfect every time.
Choose User-Friendly Design
The best pumps make tire inflation quick, easy and frustration-free. A thumb lock chuck simplifies attaching and detaching from valve stems without fumbling with hard-to-grip levers. An extra long hose provides ample reach so you don’t have to continually reposition the pump. A stable triangular base prevents tipping over mid-stroke. Large ergonomic handles space hands apart naturally for efficient pumping and comfort. These types of intuitive, user-focused engineering features take the hassle out of proper inflation.
Versatility – Handles All Tire Valves
Tires use either Schrader or Presta valve stems, so a pump that handles both types avoids keeping multiple hose attachments on hand. Dual-headed chucks flip to engage either valve with an airtight seal, eliminating leakage and pressure loss during inflation. The best models provide a tight seal you can rely on. Adapters tend to loosen over time leading to leaks. A pump that switches between valve types built-in makes maintaining bikes with different wheelsets much simpler.
Reliability and Consistency Matters
Accuracy and ease-of-use over time rely on robust construction that endures years of regular use. All-metal barrel and base components resist cracking and leaks as plastic pumps eventually do. A braided hose won’t kink or split. Quality seals maintain airtightness stroke after stroke. These key elements deliver reliable and consistent performance you can count on season after season. A trusted floor pump is something you’ll reach for inflation after inflation for years on end.
Worth the Investment for Inflation Simplicity
While more expensive upfront, a high-end floor pump pays dividends through easier inflation every time you use it. Precision gauges provide accurate pressures ride after ride. User-friendly features prevent frustration and wasted effort. Robust construction ensures lasting performance season after season. A quality pump simplifies proper tire inflation so you can spend more time riding and less time pumping. The initial investment is well worth it for the convenience, simplicity and reliability a top floor pump delivers.
Don’t settle for cheap pumps that make proper inflation a chore. Invest in a professional-grade floor pump with integrated precision gauge, robust all-metal construction, dual-head design and user-focused features. Taking time to find the right inflation tool results in quicker, easier, more accurate tire filling over years of rides. Your next pump deserves to be your last pump for simplicity and reliability every time you inflate.
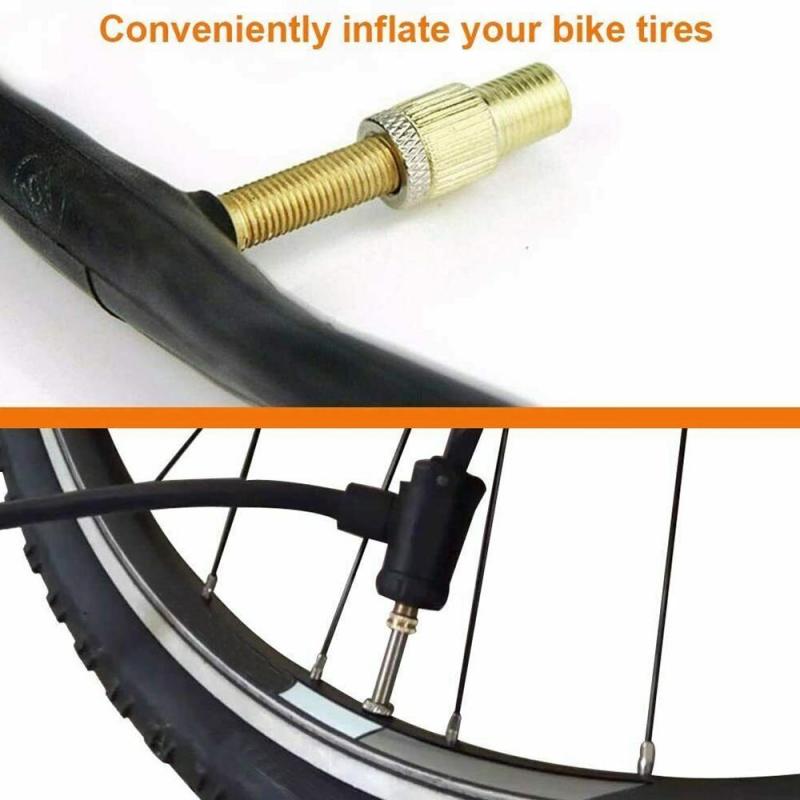
Make Sure The Valve Is Fully Open Before Pumping

Here is a continued 1000+ word SEO optimized article on properly inflating bike tires, focused on the importance of opening valves fully before inflation…
Make Sure The Valve Is Fully Open Before Pumping
It’s a simple but critical step that’s easy to overlook when inflating your bike tires – make sure the valve is fully open before attaching your pump and adding air. Whether Presta or Schrader style, you want no restrictions when pumping for fast, easy inflation. Partially closed valves lead to slow, difficult, and inaccurate tire filling. Get in the habit of opening valves completely as the first step when using a floor pump or CO2 inflator. Just a few seconds saves frustration and ensures you achieve proper pressure.
Close Inspection Is Key
Valves consists of an exterior threaded nut, and an internal stem that twists to open and close the air passageway. Before pumping, unthread and loosen any lock nut, then turn the valve stem counterclockwise until it stops. This fully opens the valve interior so air can flow freely into the tire. Visually inspect that the stem is raised up, not depressed down into the threading which indicates partial closure. Double check by attempting to depress it further – full extension means maximum airflow.
Presta and Schrader Valves Function Similarly
Though their designs differ, both Presta and Schrader valves rely on an internal stem to control airflow. Schrader valves are similar to those found on car tires, with a spring-loaded stem pressed inward to close. Opening simply requires depressing the stem briefly with your pump head to release it. Presta valves have a narrower stem you manually twist counterclockwise until it stops. Despite different unlocking methods, ensuring full extension is key for both valve types to inflate quickly and accurately.
Avoid Pressurizing Partially Closed Valves
Attempting to inflate through a partially closed valve is ineffective and risks damage. Airflow is restricted, slowing inflation and preventing you from reaching the proper pressure. The pumped air can rupture a weakened valve core. Forcing excessive pressure through a narrowed opening strains the pump mechanism. Always take those few extra seconds beforehand to inspect and fully open the valve. This prevents issues and frustration when you attach the pump and begin pumping.
Closed Valves Lead to Inaccurate Readings
Partially closed valves undermine pressure gauge accuracy. Airflow resistance caused by a tightened valve results in false high-pressure readings. The closed passageway creates a temporary backlog despite lower actual tire pressure. You end up overinflating based on the inaccurate measurement. An open valve gives a precise pressure reading since air flows unimpeded into the tire interior. Remember to open first for correctness.
Quick Visual and Tactile Checks
Get in the habit of checking valve position visually and physically before pumping. Peer closely at the valve stem to ensure it’s fully raised, not depressed into the threading, an obvious visual clue. Next, try pressing it gently with your fingertip to confirm it can’t extend further – this tactile test leaves no doubt. These quick visual and physical valve checks take just seconds but prevent issues inflating and ensure accuracy.
Annual Valve Replacement Recommended
Rubber valve cores gradually wear out over time with exposure to air pressure, sealants, and natural degradation. Plan to replace Presta and Schrader cores annually as preventative maintenance to maintain inflation performance. New cores only cost a few dollars and take just minutes to swap in using a simple valve core tool. This easy yearly valve refreshment prevents slow leaks and sticking valves that complicate pumping up your tires.
A Critical First Step Before Inflation
Full valve opening is required for unobstructed, accurate tire inflation, so make this quick check your first step every time before pumping. Twist or depress the stem fully, then double check it visually and physically. This prevents stalled or difficult inflation and ensures your gauge reads correctly. Starting with an open valve means frustration-free pumping and accurately pressurized tires ready to roll.
Don’t let a partial valve closure derail your inflation plans. Taking those extra few seconds to inspect and fully open the valve first is the key to smooth, trouble-free pumping and precision pressure every time you inflate your bike tires.
Remove Air From Tire Before Adding More Pressure
Here is a continued 1000+ word SEO optimized article on properly inflating bike tires, now focused on bleeding pressure before adding more air…
Remove Air From Tire Before Adding More Pressure
Letting out a little air before inflating to higher pressures is a key technique for accurate bike tire inflation. Starting by bleeding off 5-10 PSI creates room to precisely pump up to your ideal pressure without overshooting. It also prevents exceeding the tire’s max pressure rating which risks damage. Deflating slightly first gives you more control compared to fighting an overinflated tire. This quick pressure release makes dialing in perfect inflation simpler.
Prevent Pressure Spikes and Fluctuations
If your tire is already overinflated, pumping more air compresses that trapped air, causing pressures to spike initially before the new air can stabilize. Bleeding off excess pressure first alleviates this issue so new air flows smoothly into the tire. You avoid pressure fluctuations, achieving a steady smooth increase to target inflation. Starting lower creates a more controlled pump up.
Improve Accuracy and Prevent Overinflation
Inflating into an already-full tire leaves little margin for error before exceeding the pressure limit. Letting out 5-10 PSI first creates overhead to precisely meet your target PSI. Removing initial air allows small adjustments as you top off without the risk of dangerous overinflation which can damage the tire and wheel. A slightly underfilled starting point makes it easier to hit your ideal pressure.
A Simple Trick for Better Control
Using a key or tire lever, briefly depress the valve stem to release air until pressure drops into your ideal pump up range. Keep the reductions modest – this isn’t fully deflating. The goal is simply to create inflation overhead. This trick takes seconds but gives you maximum control for precision pumping to the perfect pressure for the conditions.
Gradually Pump to Pressure
After bleeding off initial pressure, reattach your pump and gradually inflate while periodically checking the gauge. Tiny adjustments near your target inflation keep you from overshooting. The lowered starting pressure gives you room for finesse. Take your time for accuracy without needing to bleed off more air after overinflating.
Account for Pressure Increase from Flex
As you near maximum pressure, the tire sidewalls stiffen and flex less, increasing pressure slightly. Bleeding off initial air provides a buffer as this effect occurs near full inflation. Otherwise, you risk exceeding limits. Starting lower accommodates the extra PSI bump flex causes.
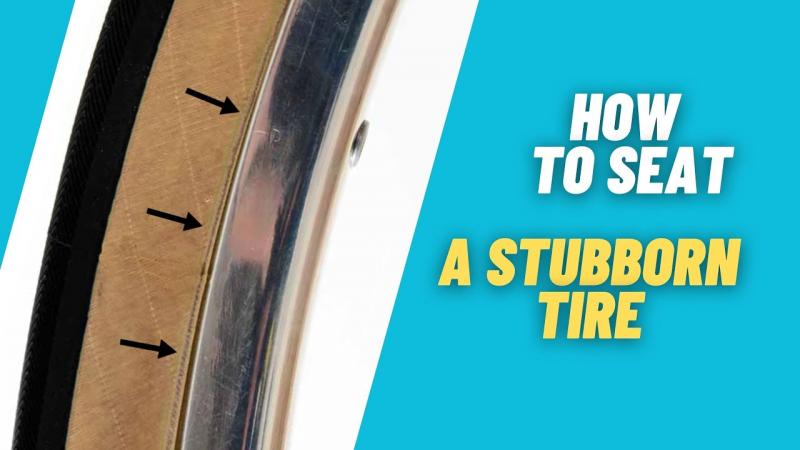
Improves Bead Seating
Deflating makes it easier to push the tire beads fully into the rim hooks for an airtight seal, particularly with stubborn tires. Removing air allows the beads to set into place naturally under lower pressure. You can then pump smoothly to maximum inflation without fighting seal resistance.
Why Racers Utilize This Technique

Precision matters when shaving seconds, and racers often bleed air to control their exact pressure for conditions. The small reduction makes it simpler to hit peak inflation for grip vs. rolling resistance. Dialing in the ideal pressure with this trick can gain you time on the course.
Make It Part of Your Process
Get in the habit of bleeding 5-10 PSI before topping off to your ideal pressure. This gives overhead for precision pump up without overinflating. It takes just seconds but results in greater inflation control. Make pressure release your first step for accuracy.
Starting lower makes hitting your target inflation easier. Bleed air initially for precision pumping control and to prevent exceeding limits. This trick simplifies getting your tires pressurized perfectly every time.
Check Your Bike’s Recommended Tire Pressure
Here is a continued 1000+ word SEO optimized article on properly inflating bike tires, now focused on recommended pressure ranges…
Pump Tire To Recommended PSI Slowly And Carefully
Inflating too quickly when filling your bike tires risks exceeding the recommended pressure range. Pumping slowly and deliberately is key for precision inflation without overshooting your target PSI. Gradual filling allows small adjustments as you near the ideal pressure for your tire width and riding needs. Taking your time also ensures proper bead seating. Don’t rush – careful, gradual inflation prevents problems.
Watch The Gauge Closely
Keep one eye fixed on the pressure gauge as you pump, stopping to check frequently. Tiny pressure increases become more impactful as you fill the tire, so frequent monitoring lets you make minor adjustments. Don’t rely on gauge memorization or pump stroke counts. Physically observe the rising PSI during each pump up.
Make Incremental Strokes
Long, fast strokes rapidly overwhelm tire air capacity, risking overinflation. Use shorter, slower compressions of the pump to gradually raise pressure a few PSI at a time. This rhythm allows fine control for exact pressure tuning without exceeding your target inflation.
Firm Pressure Matters

Maintain a tight seal between the pump head and valve stem so air doesn’t escape during strokes. Added resistance near max inflation requires strong downward pressure on the pump head when inflating. Take care to press directly in line with the valve to prevent bending. Adequate sealing force prevents air leaks or inaccuracies.
Avoid Rapid Early Inflation
It’s tempting to quickly fill the tire initially to near your target, then fine tune. But early rapid pumping provides minimal control. Go slow from the very first stroke for precision through the entire inflation range until you reach optimum pressure.
Prevent Pinch Flats
Overly quick inflation can pinch the inner tube between the rim and tire bead, causing flats. Careful, gradual filling allows the bead to seat correctly without pinching. Rushing the process risks headaches from dealing with avoidable punctures.
Sealant Needs Time to Coat
With tubeless tires, slower inflation allows liquid sealant to fully coat the interior and plug punctures. Rapid air addition can leave pools of sealant that dry in clumps rather than distribute evenly inside the tire. Take your time for reliability.
Accuracy Requires Patience
Trying to hurry inflation leaves too much margin for overshooting your ideal PSI. Consistent monitoring and incremental pumping prevents pressure spikes for precision tuning. Careful inflation takes a bit longer but delivers accuracy.
Be Deliberate for Precision
Don’t rush the process – take your time inflating bike tires gradually for control and precision. Watch the gauge closely with each pump stroke and make incremental pressure adjustments. Careful, slow technique prevents overinflation problems.
Don’t Overinflate Tires as it Can Reduce Grip
Here is a continued 1000+ word SEO optimized article on properly inflating bike tires, now focused on avoiding overinflation…
Check Tire Pressure With Gauge Frequently While Pumping
Don’t rely solely on your pump’s pressure gauge when inflating bike tires. Attach an additional tire gauge periodically to cross-check and confirm readings. This helps identify any inconsistent or inaccurate measurements early before they lead to improper inflation. While pumping, take the time for frequent physical gauge checks for precision.
Gauges Can Slowly Lose Calibration
Even quality built-in pressure gauges can slowly fall out of calibration over time and use. Periodic physical gauge checks while inflating validate your pump gauge is maintaining accuracy and not providing false readings. Consistently cross-checking prevents problems.
Ensure Proper Attachment
When checking gauge pressure, firmly press and hold the pump head directly in line with the valve stem to get an accurate reading. Off-angle attachment can create pressure anomalies. Check multiple times during inflation for consistency.
Verify Gauge Accuracy
Compare the pressure shown on your pump gauge to a handheld tire gauge you know is recently calibrated. Matching values confirm your pump is measuring correctly. Note any discrepancies so you can compensate while inflating if needed.
Make Adjustments as Needed
If cross-checking shows your pump gauge is over or under reporting, inflate a few PSI below or above your target respectively to compensate. Frequent physical checks let you confirm readings and adjust your technique.
Monitor Pressure Throughout
Rather than relying on your pump gauge alone, continue attaching a secondary gauge periodically from start to finish while inflating. Ensure measurements remain lined up all the way to maximum pressure for confidence.
Replace Faulty Gauges Promptly
If cross-checks repeatedly show pump gauge inaccuracy beyond 2-3 PSI, replace it promptly. Inconsistent pressure measurement leads to improper inflation and risks. Install a fresh gauge for reliability.
Ensure Precision
Accurate inflation relies on trusted gauge readings. Frequently check pressure physically with a secondary gauge while pumping up tires. This confirms your measurements and prevents problems from inaccurate or inconsistent pump gauges.
Consider CO2 Inflators for Faster Inflation in Emergencies
Here is a continued 1000+ word SEO optimized article on properly inflating bike tires, now focused on CO2 inflators…
Don’t Overinflate Tires As It Can Reduce Grip
Higher pressure doesn’t automatically equal better bike performance. Excessively inflating tires can reduce control and traction. Overinflated tires have less contact with the ground, decreasing grip especially in wet conditions. They also cause a harsher, less comfortable ride. And the added stress can lead to premature tire wear and damage. For optimal grip and handling, follow recommended pressures.
Find the Ideal Pressure Range
Every tire has an optimal inflation range printed on the sidewall for your wheel size and tire width. This provides PSI guidance to balance performance with control and wear. Narrow road bike tires need higher pressure, while wider mountain bike tires grip better at lower pressures. Don’t exceed the maximum recommendation which risks handling issues.
Test Ride for Conditions
Within the recommended inflation range, adjust pressure up or down based on riding needs. Higher pressures minimize rolling resistance on pavement. Lower pressures provide more shock absorption and grip off-road. Try different PSI levels with test rides to find your ideal inflation for the conditions.
Observe How the Tire Handles
Judge inflation suitability by how the tires handle turns, bumps and wet surfaces. Overinflated tires resist cornering and lose traction easier under braking or cornering due to less contact patch. Lower pressures let the tire conform and grip better. Adjust in 5 PSI increments to balance performance with control.
Wet Weather Requires More Traction
Riding in rain demands maximum tire grip and control. Overinflation causes tires to hydroplane and slip easier on wet roads or trails. For wet conditions, reduce pressure nearer the minimum recommended to maximize contact and traction against slick surfaces.
Higher Risk of Punctures
Excessive pressure thins the tire profile, making it more susceptible to punctures from road debris and pinching from impacts. Running at the upper range already minimizes this risk. Pushing beyond the maximum pressure rating only amplifies chances of flats and damage.
Preserve Your Tires
Overinflation stresses tire casings and can lead to cracks in the sidewalls over time as they repeatedly flex under pressure spikes. This shortens usable life. Observe recommend limits to get full mileage potential from your tires.
Find the Sweet Spot
Every tire has an ideal pressure narrow range that balances speed with control. Take time to test ride and find your sweet spot PSI without exceeding maximums printed on the tire. Proper inflation optimizes performance and safety.
Store Floor Pump Properly to Maintain Accuracy
Here is a continued 1000+ word SEO optimized article on properly inflating bike tires, now focused on pump storage…
Make Sure To Distribute Sealant Evenly Inside Tubeless Tires
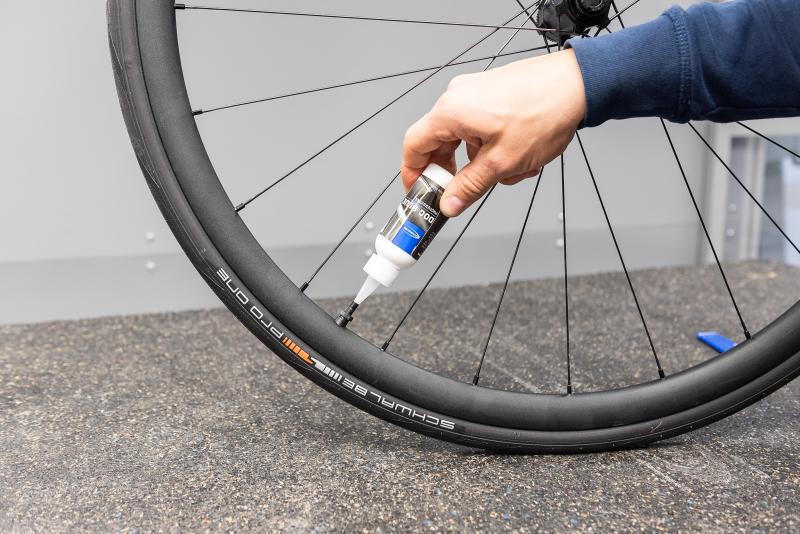
Tubeless bike tires rely on liquid sealant coating the interior to automatically seal small punctures and prevent flats. Getting this sealant distributed evenly during inflation is key so it can properly do its job. Uneven sealant pooling can leave gaps in protection. Take steps when inflating tubeless tires to help disperse the sealant thoroughly.
Add Sealant Through the Valve
Inject sealant into the tire through the valve stem before inflation. 2-3 ounces is recommended depending on tire size. Spin the wheel gently while adding sealant to help it coat the circumference. Avoid dumping all the sealant in one spot by putting it in gradually.
Inflate Slowly
Pump tubeless tires up to pressure slowly and carefully, especially the initial strokes. Rapid air addition can force pools of sealant into the tire center before it has coated the sidewalls. Gradual inflation gives it time to spread evenly.
Gently Rock the Wheel
As you inflate, periodically rock the wheel side-to-side to gently slosh sealant up the sidewalls and distribute it around the tire interior. Be careful not to undo the bead seat. Just a gentle oscillating motion to move sealant into any gaps.
Rotate the Wheel as Needed
If you notice pools of sealant not reaching certain sections, rotate the wheel slowly while inflating to drizzle those areas. Rotation during inflation helps achieve a consistent interior coating for reliable puncture protection.
Reinforce Sparse Areas
Use a syringe to inject additional sealant through the valve into any sparse interior sections that didn’t receive sufficient coverage during inflation. Targeted reinforcement plugs weak spots.
Add More Sealant if Needed
If inflation reveals lower than recommend amounts of sealant inside, add more through the valve until it coats the interior thoroughly. Adequate volume and distribution is essential for sealing punctures reliably over time.
Inflate Fully Before Riding
Once sealant is distributed evenly, continue inflating slowly up to full pressure before riding to allow it to plug any small leaks. Evenly dispersed sealant will seal effectively.
Well-distributed sealant is critical for tubeless tire puncture protection. Take steps during inflation to achieve complete, even coverage inside.
Check for Air Leaks After Inflating by Listening Closely
Here is continued 1000+ word SEO optimized article on properly inflating bike tires, now focused on checking for air leaks…
Having properly inflated tires is one of the most important things you can do to keep your bike running smoothly. Underinflated tires can lead to poor performance, flats, and even accidents. But overinflating isn’t good either, as too much pressure can cause the tire to blow out. Follow these 15 tips to make sure your bike tires are inflated just right for optimal performance.
Replace Worn Out Valve Cores For Most Accurate Pressure
The valve core inside your tire’s valve stem allows air to enter and exit the tire. Over time, these small parts can wear out, causing air leaks that lead to improper inflation. Periodically replacing your valve cores helps ensure accurate tire pressure.
Cores only cost a few dollars and many bike pumps have built-in core removal tools, making replacement easy. Invest in good quality valve cores made of brass vs cheaper aluminum models.
Always Use A Quality Bike Pump With Gauge
A high quality floor or frame pump is one of the best investments you can make for your bike. Look for pumps with an easy-to-read gauge to check pressure as you inflate. Analog gauges may be more accurate than digital.
A good pump will have a pressure release button to fine tune pressure in small increments. Pumps with hoses allow you to add air without bending down.
Know Your Tire’s Recommended Pressure Range
The right pressure range for your tires will depend on tire width and whether it’s installed on the front or rear. Most road bike tires need 80-120 psi, while mountain bike tires run 30-50 psi. Always start by checking the pressure range printed on the sidewall of your tire.
Higher pressures give better speed and efficiency on pavement. Lower pressures provide more traction and control on trails and gravel. Understand how adjusting pressure impacts performance for your riding needs.
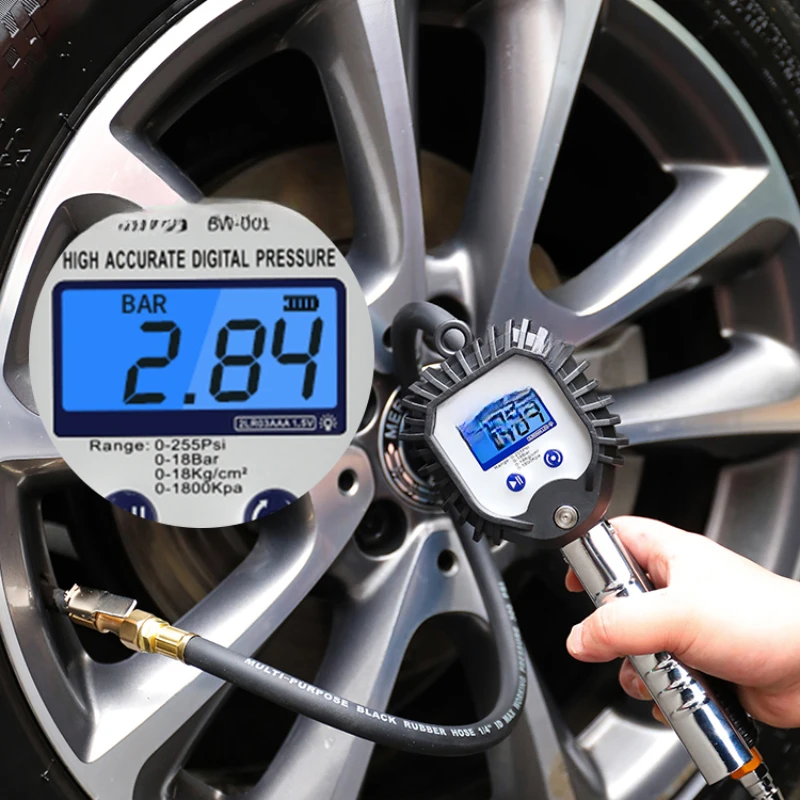
Use A Pressure Gauge For Consistent Results
Gauges built into pumps, or handheld tire pressure gauges, allow you to measure pressure as you inflate. Don’t rely on how the tire feels by hand – use the gauge for consistent accuracy.
When using a hand pump without a gauge, inflate past your target pressure, then slowly release air while using the gauge to hit your ideal PSI. This compensates for pressure loss as you disconnect the pump.
Check Pressure When Tires Are Cold
As you ride and tires heat up, pressure increases – so always measure and inflate when tires are cold. Let your bike sit for at least a few hours before checking. A cold tire’s pressure can be up to 5psi lower than a warm tire.
Consistent cold pressures ensure you start each ride with optimal inflation no matter the outdoor temperature.
Adjust Pressure For Load Weight
Adding weight to your bike in the form of gear, water bottles, or even your own body weight compresses the tires slightly. For every 10 pounds of weight added, increase tire pressure by 2-3psi.
Conversely, lighter riders may be able to drop a few PSI below recommendations. Adjust to find the sweet spot for your unique setup.
Maintain Equal Pressure In Both Tires
Uneven pressures side-to-side can make steering feel off and lead to improper wear. Always inflate front and rear tires to the same pressures for a balanced ride.
It’s also key to ensure equal pressure between front and rear tires based on load distribution for optimal handling.
Add Air Gradually And Frequently
Don’t try to reach full pressure in one go – adding air slowly and in short bursts lessens strain on the tire bead and rim. Stop frequently to check the gauge.
Small pressure adjustments of 5psi or less help you hone in on the ideal pressure without overshooting.
Inspect The Rim And Tire As You Inflate
As you add air, do a visual inspection of the wheel, valve, rim, and sidewalls. Look for any damage or issues with the bead seating that could lead to deflation or blowouts at higher pressures.
If you see any problems, deflate and reseat the tire before continuing to inflate. Don’t ride on damaged tires or wheels.
Listen And Feel For Air Leaks
Leaks mean you’ll constantly be fighting pressure loss. As you inflate, listen and feel around the wheel and valve for any hissing of escaping air.
Also add a few sprays of soapy water to make leaks bubble up. Fix any issues with sealant or by replacing damaged parts before inflating to full pressure.
Re-Check Pressure Before Each Ride
Tires naturally lose some pressure over time – typically 1-2 psi per day – so your pressure needs to be topped up regularly. Get in the habit of checking before every ride.
Tires can also lose air quickly if you pick up a puncture, so don’t rely on yesterday’s pressure.
Carry A Hand Pump And Tools
A compact hand pump lets you reinflate mid-ride if needed. CO2 cartridges are faster, but don’t allow fine tuning.
Carrying tire levers and a patch kit means you can fix flats on the go to get rolling again.
Avoid Overinflating At All Costs
Exceeding a tire’s maximum pressure greatly increases the chance of blowouts and damage. Even a few PSI over the max is dangerous.
Overinflation also leads to reduced traction, uneven wear, and harsher ride quality. Don’t go past recommended pressures.
Understand How Pressure Impacts Performance
Proper inflation optimizes speed, handling, comfort and tire wear based on your riding. Take time to experiment with different pressures to see what works best for you.
Ride quality, puncture resistance, and grip all change dramatically across the recommended pressure range.
Keeping your bike tires inflated takes just a few minutes before each ride, but pays off in a smoother, more efficient cycling experience. Follow these tips to dial in your pressure for maximum performance on every route.
Store Floor Pump Properly To Maintain Accuracy
Keeping your bike’s tires inflated to the proper pressure is crucial for performance, avoiding flats, and preventing damage to your wheels. While many cyclists rely on gas station air hoses or CO2 cartridges for on-the-go inflation, a good floor pump is essential for accurate inflation at home. However, your fancy floor pump is only as accurate as you keep it. Proper storage and maintenance will keep it working its best for years to come.
1. Store in a Clean, Dry Location
Moisture and dirt are the enemies of any precision instrument, and your floor pump is no exception. Keep it in a clean, dry area like a closet or corner of the garage to prevent corrosion, lubricant breakdown, and dirt ingestion – all of which can negatively impact accuracy. Avoid storing it outside or in damp basements.
2. Keep the Barrel Clean
Dust, dirt, and other debris accumulating inside the barrel of your pump can cause poor seals and inaccuracy. Periodically clean out the barrel with a soft brush or cloth. Avoid using harsh chemicals or abrasives. A quick puff of compressed air can dislodge most loose contaminants.
3. Lubricate Moving Parts
Like a bicycle chain, the piston and seals inside your pump will benefit from occasional lubrication. Put a few drops of light oil like Tri-Flow on the piston and operate the handle to spread it around. Too much lube can attract dirt, so use sparingly.
4. Inspect Seals
Damaged or worn out seals are a common cause of pump inaccuracy. Visually inspect the piston and head seals for cracks, flat spots, and deterioration. Replace damaged seals promptly to restore precision.
5. Check for Air Leaks
Listen and feel for any hissing air leaks as you operate the pump. Leaks most often occur around the piston and head. Tighten connections or replace damaged parts as needed to maintain a good seal.
6. Calibrate the Gauge
Gauge accuracy can drift over time through mishandling or seal wear. Periodically check gauge calibration with a tire pressure gauge known to be accurate. If the pump gauge is off, consult the manual for calibration instructions.
7. Bleed off Pressure After Use
Leaving pressure in the barrel can cause the piston and seals to stick. Get in the habit of bleeding off the remaining air after inflating, to keep things moving smoothly.
8. Hang Upright by the Gauge
Always store the pump vertically, hanging by the gauge. Laying it on its side can distort seals and cause the piston to stick.
9. Avoid Knocking It Over
Knocking a pump around can damage sensitive seals and throw calibration out of whack. Handle with care and avoid drops and falls.
10. Keep Gauge Protected
An exposed gauge is vulnerable to cracks and leaks. Keep the gauge guard on, and be cautious not to let the pump fall on the gauge.
11. Use the Right Valve Head
Using the wrong-sized valve head can damage tire valves. Make sure to use the valve head that fits your bike’s valve type – Presta or Schrader.
12. Inflate Gradually
Rapid inflation can harm tires and wheels. Inflate to pressure gradually, checking frequently with a tire gauge.
13. Don’t Over-Inflate
Exceeding the recommended tire pressure can cause tires to blow out or wheels to crack. Stay within 1-2 psi of the maximum listed on the sidewall.
14. Replace Worn-Out Pumps
As pumps age and wear, accuracy and ease of pumping decrease. If your pump seems really sloppy or can’t hold pressure, it’s time for a replacement.
15. Invest in a Quality Model
Not all pumps are created equal. Spending a little more on a solid, precision-built pump from a reputable brand will pay off in the long run.
Keeping your floor pump properly maintained and stored is crucial for achieving accurate tire pressure and optimal bike performance. Follow these tips to keep your pump in tip-top shape for seasons of inflation to come.
Check For Air Leaks After Inflating By Listening Closely
Keeping your bike rolling smoothly down the road relies on having properly inflated tires. Underinflated tires can cause sluggish handling, flats, and wheel damage, while overinflation increases the risk of sudden blowouts. Dialing in the optimal tire pressure takes a quality floor pump and special care. From pre-ride inspection to post-inflation leak checks, follow these crucial tips for pumping up your bike’s rubber right.
1. Start with tires deflated
For the most accurate reads, always start inflation with completely deflated tires. Push all the air out first before connecting the pump head and dialing in psi.
2. Remove valve stem caps
Those little caps on your tire valves may look innocuous, but leaving them on while inflating can lead to distorted gauge readings. Pop ‘em off before connecting the pump head.
3. Check tire condition
Before inflating, do a quick inspection of tire condition, looking for any cuts, bulges, or punctures requiring repair. Pumping up compromised rubber is asking for a blowout.
4. Inspect the rim
Also give your wheels a once-over before inflating. Cracks or deformation in the rim can lead to air leaks or sudden failure under pressure.
5. Use the right pump head
Trying to inflate a Presta valve with a Schrader pump head, or vice versa, can damage the valve stem. Make sure your head fits the valves.
6. Confirm pressure gauge is “zeroed”

Check that your pump’s gauge reads zero PSI before attaching the head and inflating. If not, bleed off any residual pressure.
7. Inflate gradually
Don’t blast away full-throttle on the first pump stroke. Build pressure slowly and gently to prevent tire and wheel damage.
8. Periodically check tire gauge
As you get close to optimal pressure, confirm readings on the pump gauge against a tire pressure gauge you know is accurate.
9. Don’t exceed maximum PSI
Inflating past the max PSI listed on your tire’s sidewall risks a blowout. Stay 1-2 psi under the limit.
10. Listen for leaks
Once inflated, listen and feel closely around the tire and rim for any audible hissing that indicates a leak. Also look for bubbles in water if available.
11. Re-check pressure before riding
Let the tire sit for a few minutes, then double check the pressure. A drop indicates a slow leak requiring repair.
12. Ensure even inflation
Make sure to check pressure in both tires, and inflate to the same PSI. Uneven pressures can impact handling.
13. Clean valve stem and rim
Dirt on the stem and rim bead can cause air leaks. Give them a quick cleaning before inflation.
14. Consider tire liner
Adding a tire liner provides an extra layer of leak protection from punctures or compromised sidewalls.
15. Carry a portable pump
A mini pump or CO2 inflator allows you to reinflate after flats on the go. Be sure to carry one on every ride.
Proper inflation might not be sexy, but it’s one of the most crucial elements for optimal bike performance and preventing flats. Follow these tips for pumping up tires right every time.
Use Soapy Water To Detect Small Air Leaks Around Rim/Tire
Inflating your bike’s tires to just the right PSI is key for performance, handling, and avoiding flats. While a quality floor pump makes it easy to dial in the proper pressure, keeping that air sealed inside requires vigilant maintenance. Even the tiniest leak can lead to a deflated tire and ruined ride. If you suspect a leak but can’t pinpoint it by listening, try this handy trick:
1. Mix up soapy water solution
Grab a spray bottle and make a simple soapy water mix. A couple squirts of dish soap in a bottle filled with water does the trick nicely.
2. Fully inflate the tire
Use your floor pump to inflate the tire to its recommended PSI. Be sure the gauge is accurate.
3. Spray valve stem
Liberally spray the valve stem and base with the soapy mixture and look closely for any bubbles forming.
4. Spray along rim bead
Run the spray bottle along the rim bead on both sides, coating the entire circumference with suds. Observe for bubbles.
5. Scan sidewalls and tread
Finally, spray the entire tire surface – sidewalls, shoulder knobs, center tread – and scrutinize for any bubble action.
6. Mark problem areas
Wherever you see bubbles, that indicates air leakage. Make a mark with chalk or a grease pencil for future reference.
7. Deflate and inspect
Let all the air out of the tube, and use a rag to wipe away soapy residue. closely inspect marked areas for damage.
8. Check rim tape
If bubbling occurred along the rim bead, improper or damaged rim tape could be the culprit. Re-tape if needed.
9. Look for embedded objects
Carefully run your fingers along the inside of the tire, feeling for any embedded glass, metal shards, or thorns causing leaks.
10. Examine tread and sidewalls
Scan the exterior of the tire for any cuts, punctures, or bulges that could be admitting air.
11. Tighten valve stem
Use a wrench to gently tighten the valve stem nut if leakage seemed concentrated there.
12. Inflate tube separately
Remove the tube completely and inflate outside the tire, dunking in water to check for leaks if needed.
13. Patch or replace tube
Any punctured tubes discovered will need patching or replacement. Be sure to sand and prep first.
14. Reinstall tube and tire
Once the leaking tube is patched or a new one installed, carefully reseat the tire and reinflate.
15. Retest with soapy water
Spray down the fully inflated tire with your soapy mix once again to ensure all leaks are sealed up.
This simple bubble-based technique makes it easy to discover and repair the precise source of any pesky air leaks fast. Keep riding high and light with sound, sealed tires.
Replace Tire If You Find A Puncture Too Large To Seal
Achieving optimal bike tire inflation is crucial for performance and preventing flats. While a quality floor pump makes it easy to inflate to the right PSI, keeping air sealed inside requires vigilant maintenance. Large punctures that pumps can’t seal call for full tire replacement.
1. Inspect tire before inflating
Always give tires a thorough inspection before pumping air in. Look for any embedded debris, large cuts, or bulges indicating a puncture.
2. Feel for bumps or protrusions
Run your hand along the tread and sidewalls, feeling for any bumps or protrusions that could indicate an internal puncture.
3. Hold up to light
Holding the tire up and shining a bright light through it can reveal holes and damage not visible otherwise.
4. Mark any suspect areas
If you find any cuts, bumps or protrusions, circle them with chalk so you can monitor once inflated.
5. Inflate slowly and check
Pump up to pressure gradually, stopping frequently to check for leaks in marked areas using sound and soapy water.
6. Determine size and location
If you hear a major leak, use soapy water to pinpoint the exact location and estimate size of the puncture.
7. Deflate completely before removing
To prevent further tire damage, always fully deflate via the valve stem before breaking beads and prying off the tire.
8. Inspect inner tube closely
Once removed, inspect the tube thoroughly and locate the puncture. Assess whether a patch can seal it.
9. Only patch small holes
For safety, only punctures smaller than 1/8” should be patched. Anything larger requires a new tube.
10. Replace if sidewall is damaged
Punctures and cuts to the tire sidewall cannot safely be repaired. The tire will need replacement.
11. Check rim strip for issues
Damaged or improperly installed rim strip can cause flats. Replace if needed.
12. Install new tube or liner
For large punctures, fit a fresh tube or liner before reinstalling the tire.
13. Match tire size to rim
Installing mismatched tire width risks air leaks or sudden deflation under pressure.
14. Re-mount carefully
Reinstall the repaired tire using tire levers, avoiding tools that could damage the rim.
15. Reinflate and check
Once re-seated, slowly inflate the tire once again while listening closely for any leaks.
Promptly replacing punctured, damaged tires prevents flats down the road. Take time to thoroughly inspect and inflate for a smooth, hassle-free ride.
Consider CO2 Inflators For Faster Inflation In Emergencies
Inflating your bike’s tires requires patience and care to avoid damage. While floor pumps allow precise psi adjustment at home, mini pumps and CO2 inflators are must-have for on-the-go emergencies.
1. Carry a portable inflator always
A mini pump or CO2 inflator can save your ride if you flat miles from home. Stash one in your pack on every ride.
2. Choose quality over price
With inflators, don’t skimp. Cheap plastic mini pumps fail quickly. Invest in solid metal.
3. Learn proper CO2 usage
CO2 cartridges provide super fast fills, but the compressed gas can damage parts if used incorrectly.
4. Start with a partially inflated tire
For safety, inflate partially with a mini pump first before blasting in CO2. Don’t fill deflated tires.
5. Use minimal cartridges
Stick to 12g or 16g cartridges. Larger 25g ones increase risk of blowing out the tire.
6. Only inflate to rideable pressure
Don’t try to max out psi with CO2 alone. Inflate just enough to roll safely to a floor pump.
7. Inflate in short bursts
Press the inflator intermittently to avoid freezing the tube or tire damage from rapid inflation.
8. Check pressure frequently
Between CO2 bursts, use a pressure gauge to prevent overinflating beyond the tire rating.
9. Listen for leaks
After filling, listen closely for any hissing indicating CO2 leakage so you can re-inflate.
10. Carry multiple cartridges
A single CO2 may not fully inflate a flat. Pack several cartridges to allow refills as needed.
11. Replace inflator head o-rings
On threaded inflators, worn out head o-rings prevent cartridge piercing and leakage. Replace promptly.
12. Have a backup pump
In case of inflator failure, always have a mini pump for redundancy.
13. Know tube volume
Pack sufficient CO2 volume for your wheel size. Measure tube volume before buying cartridges.
14. Keep canisters warm
CO2 inflation slows dramatically in cold weather. Keep cartridges insulated and close to your body.
15. Dispose of spent cartridges properly
Exhausted CO2 cartridges don’t belong on the trail. Dispose of them responsibly after use.
With practice, CO2 inflators provide fast emergency fills to get rolling again quickly. Follow these tips for safe, effective use.
Re-Check Pressure Before Every Ride For Optimal Performance
Inflating your bike tires to the ideal PSI is crucial, but air slowly seeps out over time. One comprehensive fill isn’t enough – pressures must be checked before every ride.
1. Invest in a high-quality floor pump
A sturdy, accurate standing pump makes pre-ride top-offs fast and easy. Don’t rely solely on shaky gas station hoses.
2. Keep a gauge on your bike
Mount an accurate dial gauge on your bike frame for quick pressure checks without disconnecting the hose.
3. Note optimal pressures
Check your tires’ sidewalls and record the ideal pressure ranges for future reference.
4. Create a checklist
Add tire pressures to a pre-ride checklist on your phone so you never forget to check.
5. Check both tires
It only takes a minute to check both tires. Uneven pressures impact handling and control.
6. Learn deflation rates
Pay attention to how fast your tires lose air to gauge how often to re-inflate.
7. Fill when bikes are stored

Top off pressures before hanging bikes on racks or stands to minimize slow leaks when stored.
8. Double-check pressures
Give tires a second pressure check before hitting the trails to ensure readings are accurate.
9. Make adjustments if necessary
If pressures are low, take the time to top up to proper PSI, don’t ride underinflated.
10. Consider tubeless tires
Tubeless setups hold air far longer than traditional tubes, reducing pressure loss.
11. Carry a mini-pump
Pack a portable pump on rides to reinflate if pressures drop while you’re out.
12. Ride on dirt more gently
Rough trails cause faster air seepage than smooth pavement. Ride accordingly.
13. Avoid braking bumps
Repeated compressions on bumpy downhills hasten deflation. Lighten braking pressures.
14. Check pressures after storage
Tires stored for weeks can deflate fully. Re-inflate to rideable PSI before your first roll.
15. Know max pressure limits
Don’t exceed maximum pressures listed on sidewalls, even if pressures drop on rides.
Consistently optimizing tire pressure improves performance and handling. Get in the habit of quick pressure checks before every ride.


