How can you improve your lacrosse skills at home. What materials do you need to build a DIY lacrosse goal. Why is PVC pipe an excellent choice for backyard lacrosse goals. How do you assemble a PVC lacrosse goal. What are the key steps in creating a professional-quality lacrosse goal for home practice.
The Benefits of PVC Pipe for DIY Lacrosse Goals
PVC pipe stands out as an exceptional material for constructing lacrosse goals in your backyard. Its durability, weather resistance, and lightweight nature make it ideal for withstanding repeated shots and various weather conditions. But why exactly is PVC such a great choice?
PVC, or polyvinyl chloride, is a thermoplastic material widely used in plumbing and drainage systems. Its properties make it perfect for outdoor sports equipment like lacrosse goals:
- Excellent durability
- Resistance to weathering, rust, and corrosion
- UV-resistant, preventing degradation from sun exposure
- Smooth, non-porous surface that resists dirt and mildew
- Lightweight and easy to work with
- Affordable compared to pre-made metal goals
These characteristics ensure that your DIY lacrosse goal will last for years, providing a reliable training tool for honing your skills.
Choosing the Right PVC Specifications for Your Goal
When selecting PVC pipe for your lacrosse goal, you’ll encounter two main specifications: Schedule 40 and Schedule 80. Which one should you choose?
Schedule 40 PVC is thinner and lighter, making it suitable for most home practice needs. It offers adequate sturdiness while keeping the goal’s weight manageable. Schedule 80, on the other hand, has thicker walls, providing increased structural integrity. This makes it an excellent choice for competitive club teams or school squads that require more robust equipment.
Consider the following factors when deciding between Schedule 40 and Schedule 80:
- Intended use (casual practice vs. intense training)
- Desired portability
- Budget constraints
- Local weather conditions
Regardless of your choice, both types offer significant cost savings compared to purchasing pre-made metal goals.
Essential Tools and Materials for Building Your PVC Lacrosse Goal
Before you begin construction, gather the necessary tools and materials. Having everything on hand will streamline the building process and ensure you can complete your goal without interruptions.

Tools:
- Miter saw with a fine-tooth blade
- Measuring tape
- Sandpaper (medium grit)
- Safety goggles
- PVC pipe cutter (optional, for smaller diameter pipes)
Materials:
- PVC pipes (Schedule 40 or 80, depending on your preference)
- 90-degree PVC elbows
- PVC T-joints
- PVC 4-way crosses
- PVC cement
- Foam padding (pool noodles or camp pad sections)
- Duct tape
- Clear mason line or fishing line (for netting)
- Sand, gravel, or concrete (for base weight)
- Spray paint (optional, for customization)
With these tools and materials at your disposal, you’re ready to start building your professional-quality lacrosse goal.
Step-by-Step Guide to Assembling Your PVC Lacrosse Goal
Creating your own lacrosse goal from PVC pipe is a straightforward process. Follow these steps to assemble a sturdy, regulation-sized goal for your backyard practice sessions.
- Measure and cut the PVC pipes:
- Cut two posts to the regulation height (usually 6 feet)
- Cut one crossbar to the regulation width (typically 6 feet)
- Cut additional pieces for the base, depending on your design
- Sand any rough edges on the cut pipes to prevent injury and ensure smooth assembly.
- Dry fit the pieces together using elbows and T-joints to test the structure:
- Use 90-degree elbows to connect the posts to the crossbar
- Employ T-joints or 4-way crosses to connect the crossbar and base pipes
- Once satisfied with the fit, apply PVC cement to permanently join the pieces:
- Apply a thin coat of cement inside pipe fittings and sockets
- Quickly insert pieces at proper angles, twisting slightly to spread the cement
- Hold in place for a few seconds to allow initial bonding
- Wipe away any excess cement before it dries
- Allow the cement to cure for at least 30 minutes before applying any force to the structure.
- Add foam padding to the goal frame for safety and noise reduction:
- Wrap pool noodles or camp pad sections around the posts and crossbar
- Secure the padding with duct tape
- Create the goal netting using clear mason line or fishing line:
- Tie off the line tightly at each corner of the goal
- Crisscross the line between posts and crossbar to form a net
- Ensure the netting is taut to accurately simulate game conditions
- Stabilize the goal by weighing down the base:
- Fill base pipes with sand, gravel, or concrete
- For a portable option, consider attaching caster wheels to the base
By following these steps, you’ll create a durable and functional lacrosse goal that rivals professional equipment at a fraction of the cost.

Enhancing Your PVC Lacrosse Goal for Optimal Performance
Once you’ve assembled your basic PVC lacrosse goal, consider these enhancements to improve its performance and longevity:
1. Reinforcing Joints for Added Stability
While PVC cement creates strong bonds, you can further reinforce high-stress areas:
- Use PVC-specific epoxy on critical joints
- Add metal brackets at corners for extra support
- Consider using threaded PVC fittings for adjustable tension
2. Implementing a Shot Target System
Enhance your practice sessions by adding target zones within the goal:
- Attach colored tape or paint squares in the corners
- Hang removable target sheets with specific scoring zones
- Install a rebounding system for solo practice
3. Weatherproofing Your Goal
Protect your PVC goal from the elements to extend its lifespan:
- Apply UV-resistant clear coat to prevent sun damage
- Use waterproof sealant on joints to prevent water infiltration
- Consider a weather-resistant cover for off-season storage
These enhancements will transform your DIY PVC lacrosse goal into a professional-grade training tool, helping you master your skills like the pros.

Training Techniques to Maximize Your PVC Lacrosse Goal
Now that you have your custom PVC lacrosse goal, it’s time to put it to good use. Implement these training techniques to improve your skills and make the most of your backyard practice sessions:
1. Precision Shooting Drills
Enhance your shooting accuracy with these exercises:
- Corner-to-corner shooting: Aim for specific corners of the goal
- Rapid-fire practice: Set a timer and see how many accurate shots you can make
- Moving target practice: Have a partner hold a small target within the goal
2. Dodging and Shooting Combinations
Improve your footwork and shooting in one drill:
- Set up cones for dodging patterns
- Practice different dodge moves followed by quick shots on goal
- Vary your shooting stance and angle after each dodge
3. Rebounding and Quick-stick Drills
Work on your hand-eye coordination and quick release:
- Throw the ball against the goal and catch the rebound
- Practice quick-stick shots off the rebound
- Increase speed and vary angles as you improve
4. Goalie Simulation
If you’re an offensive player, simulate goalie presence:

- Hang a goalie cutout or sheet within the goal
- Practice shooting around the simulated goalie
- Vary the goalie’s position to challenge different shot selections
By incorporating these drills into your routine, you’ll see significant improvements in your lacrosse skills, all from the comfort of your backyard.
Maintaining and Upgrading Your PVC Lacrosse Goal
To ensure your DIY lacrosse goal remains in top condition and continues to meet your evolving training needs, consider the following maintenance and upgrade tips:
Regular Maintenance
Perform these tasks to keep your goal in prime condition:
- Inspect joints and fittings for any signs of wear or loosening
- Clean the PVC surface regularly to prevent dirt buildup
- Check and tighten the netting as needed
- Replace foam padding when it shows signs of degradation
Seasonal Care
Protect your goal during off-seasons:
- Store the goal in a sheltered area during harsh weather
- Apply a fresh coat of UV-resistant clear coat annually
- Drain any water from base pipes to prevent freezing and cracking
Potential Upgrades
As your skills improve, consider these upgrades:

- Install an electronic shot counter for precise training metrics
- Add adjustable legs for uneven terrain or to change goal height
- Implement a ball return system for more efficient solo practice
By maintaining and upgrading your PVC lacrosse goal, you’ll ensure it remains a valuable training tool for years to come, adapting to your growing skills and changing practice needs.
Customizing Your PVC Lacrosse Goal for Personal Style
While functionality is paramount, adding a personal touch to your DIY lacrosse goal can make your practice sessions more enjoyable and motivating. Consider these customization options to make your goal stand out:
Color Coordination
Use spray paint designed for plastics to give your goal a unique look:
- Paint the entire goal in your team’s colors
- Create a two-tone design with contrasting colors for posts and crossbar
- Add stripes or patterns for a more dynamic appearance
Personalization
Make the goal truly yours with these ideas:
- Stencil your name or number onto the posts
- Attach motivational quotes or team slogans to the crossbar
- Create a custom logo and apply it to the goal
Functional Aesthetics
Combine style with practicality:

- Use reflective tape for low-light visibility
- Incorporate glow-in-the-dark elements for night practice
- Add measuring marks on posts for height reference during training
By personalizing your PVC lacrosse goal, you’ll create a unique training tool that reflects your personality and passion for the sport.
Lacrosse is a fast-paced sport that requires precision passing and shooting skills. Mastering these abilities takes countless hours of practice. Setting up lacrosse goals in your own backyard allows you to get extra training beyond team practices. While regulation lacrosse goals can be expensive, building your own custom goals from PVC pipe is an affordable DIY alternative. PVC offers durability and weather resistance for withstanding repetitive lacrosse shots in the elements. With just a few tools and materials, you can create professional-quality goals to elevate your skills.
PVC Pipe is Durable Yet Lightweight for Lacrosse Goals
PVC, or polyvinyl chloride, is a popular plastic piping material used for plumbing and drainage systems. The thermoplastic material is lightweight, easy to work with and offers excellent durability. PVC pipe withstands weathering, rust, rotting and corrosion far better than materials like wood, steel or iron. Even intense UV radiation from the sun won’t cause PVC to degrade or become brittle over time. The smooth, non-porous surface of PVC pipe resists collecting dirt or mildew like other plastics. These favorable properties make PVC the ideal material for creating sturdy yet portable lacrosse goals to practice shots in your backyard.
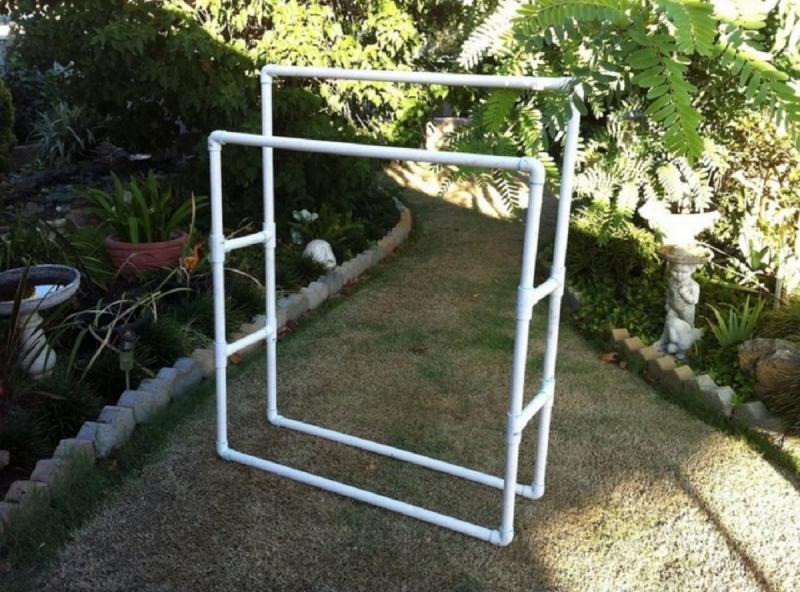
Schedule 40 and Schedule 80 are two PVC specifications to consider for goals. Schedule 40 is thinner but provides adequate sturdiness for most home practice needs. Schedule 80 has thicker walls for increased structural integrity, making it ideal for competitive club teams or school squads. Both types are inexpensive compared to purchasing pre-made metal goals. Measure the size of your practice space beforehand to calculate the PVC pipe lengths needed for the crossbar, posts and base. Use elbow and T-joint PVC fittings to connect the pipe pieces into a rigid frame.
Cut PVC to Size for Crossbars and Goal Posts

A miter saw with a sharp fine-tooth blade easily cuts through PVC pipe for custom sizing on all individual pieces. You’ll need two posts and one crossbar cut to proper regulation lacrosse goal dimensions. Wear protective goggles when cutting PVC to avoid eye injury from debris. Measure twice and cut once to avoid wasting material. Sand any rough edges smooth with medium grit sandpaper.
Connect PVC Pieces with Elbows and T-Joints
Fit the cut PVC pipes together into a goal frame using 90-degree elbows, T-joints and 4-way crosses. Dry assemble first before permanently cementing to test the structure. Place an elbow pointing vertically on each side to attach the posts to the crossbar. Use a T-joint or 4-way cross in the middle to connect the crossbar and base pipes. PVC cement chemically fuses joints together for superior strength. Apply cement to inner socket surfaces and quickly push pieces together, twisting slightly to spread cement evenly before it dries.
Add Foam Padding for Safety and Noise Reduction
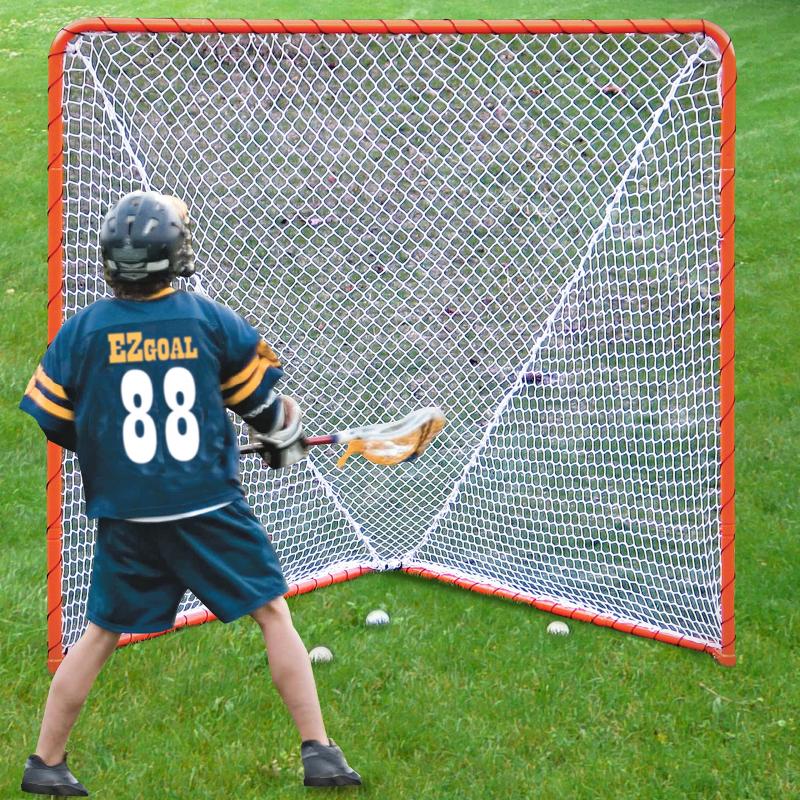
Although PVC holds up well to lacrosse ball impacts, adding foam padding around the goal frame protects against accidental injury from collisions. Use thick pool noodle foam or camp pad sections wrapped in duct tape. This cushioning also dampens noise from repetitive shots, keeping backyard practice from disturbing neighbors. Replace padding periodically as foam degrades over time.
Weighing down the base of your PVC goal keeps it fixed in position during intense shooting practice. Fill a sturdy base pipe with sand, gravel or concrete to prevent tipping over. Allow concrete to fully cure before applying force against the goal frame to prevent cracks. Or, opt for a portable design by attaching caster wheels to the base for easy mobility.
Make Transparent Netting from Mason Line for Visibility
Don’t forget to string netting along the back and sides of the goal frame. For the best visibility while practicing shots, use clear mason line or fishing line rather than traditional white netting. Tie off tightly at each corner and crisscross between posts and crossbar. Transparent netting doesn’t obstruct your view of hitting different targets inside the goal. Replace netting once it starts to sag or deteriorate from weathering.
Use PVC Cement for Permanent Connections
While some pieces can be left detachable for transport, use PVC cement to permanently fuse the main goal frame joints. This prevents loosening or collapse during aggressive shooting practice. Apply a thin coat of cement inside pipe fittings and sockets before quickly inserting pieces at proper angles. The cement fuses surfaces together as it cures for an incredibly strong bond within 30 minutes. Wipe away excess adhesive before it dries. Fuse elbows to posts, T-joints to crossbars and connectors to base pipes to create a rigid structure able to withstand thousands of shots over time.
Paint Your PVC Goal with Exterior Acrylic Paint
Though white PVC works fine, adding color makes your homemade lacrosse goal look more professional. Use acrylic paint with UV resistance designed for outdoor use on plastic surfaces. Thin paint slightly with water so it flows on smoothly without glops or drips. Lightly sand PVC pipes beforehand to help paint adhere tightly. Spray paint formulated for plastics also works well for an even coating that dries faster than brushed acrylics. Paint the goal frame in your team colors or add your logo for authenticity.
Add Targets Inside Goal to Improve Aim
Simply shooting into an open goal gets boring quickly. Challenge yourself to sharpen shooting accuracy by hanging targets inside the goal for specific practice. Attach numbered canvas sheets or paste large images of players in different positions around the net. Aim for the corners, upper shelf or five-hole in the netting to rehearse different types of lacrosse shots. Move targets frequently to keep your brain engaged. Track shot percentage at each target zone to assess improvements over time.
Make Your Goal Portable with Wheels for Mobility
Outfit your PVC lacrosse goal with heavy-duty wheels to make it mobile for easy storage or transport. Attach industrial casters or in-line skate wheels with bolts reinforced by corner gussets for smooth rolling. Stabilize the goal by lowering built-in legs or weighted sandbags when positioned for practice. Now you can move your goal aside when not in use or take it on the road for team tournaments. Ensure the base is wide enough not to tip when tilted during transport.
Customize Your Goal with Team Logos and Colors
Personalize your DIY PVC lacrosse goal with your team name, logo or mascot. Order high-quality vinyl decals cut to size online or at your local print shop. Prepare the surface beforehand by lightly sanding and cleaning PVC pipes where decals will adhere. Apply vinyl graphics in your team colors for an authentic look while practicing shots in your own backyard arena. The possibilities for customization are endless.
Maintain Your PVC Goal to Prevent Cracks and Damage
Like any outdoor sport equipment, PVC lacrosse goals require periodic inspection and maintenance. Check for cracks or loosening joints before each practice session. Retouch chipped paint to prevent moisture intrusion. Replace deteriorated foam padding to maintain safety. Keep netting taut and transparent for optimal visibility. Drain or blow out rainwater that collects inside pipes to prevent interior corrosion. With proper care, your homemade PVC lacrosse goal will provide years of reliable performance.
Constructing your own lacrosse goal from PVC pipe allows endless practice opportunities right in your own backyard. Follow these tips to build durable goals that withstand weather and repeated shots. Add your own creative touches with padding, paint and decals to match your team pride. Maintain your PVC goal properly so it performs reliably for many seasons. Now you can hone your passing, catching and shooting skills anytime with a professional-grade setup using affordable DIY materials. Train like the pros rely on their own practice goals and bring your game to the next level.
Choose Schedule 40 or 80 PVC for Strength and Longevity
If you want to take your lacrosse skills to the next level, setting up a lacrosse goal in your backyard can be a game-changer for improving your shooting, dodging, and goalie skills. With some PVC pipes, connectors, and netting, you can build your own professional-style lacrosse goal to practice like the pros right at home.
When embarking on a backyard DIY lacrosse goal project, one of the first decisions you’ll need to make is whether to use Schedule 40 or Schedule 80 PVC pipes. Both types of PVC are durable plastic materials that can stand up to the impacts from lacrosse balls over time. However, there are some key differences between Schedule 40 and 80 that are important to consider.
Schedule 40 PVC is the lighter duty option. It has thinner walls than Schedule 80, making it easier to cut and assemble. Schedule 40 is perfectly suitable for most home lacrosse goals where you’ll be practicing your shooting and goalie skills alone or with a friend or two. It provides a good mix of strength while keeping the goal lightweight for mobility.
For more heavy-duty goals that need to withstand hours of shooting practice daily by high school or college-level players, Schedule 80 PVC’s thicker walls make it the top choice. Schedule 80 is about twice as thick as Schedule 40, providing unbeatable strength and durability. This comes at the expense of being a bit more challenging to manipulate and cut during assembly. Schedule 80 goals will also be heavier, although still movable if needed.
Both types of PVC pipe are weather and UV resistant, so they can hold up to sun and rain exposure in your backyard. Over time, Schedule 80 will resist dents and impacts for longer than Schedule 40. For most casual to intermediate players just looking to sharpen their skills at home Schedule 40 PVC lacrosse goals are the ideal blend of affordability, strength, and ease of construction.
Construct a Durable PVC Lacrosse Goal Frame

Once you’ve selected your PVC pipe (Schedule 40 is recommended for most home goals), it’s time to start building the frame. You’ll need several 10-foot lengths of 1.5” or 2” PVC pipes along with corner connectors to join them together. Most goals are built using a rectangular shape about 6 feet tall by 6 feet wide, but you can adjust the dimensions if needed.
Start by connecting the vertical pipes to create the left and right goal posts using a T-shaped PVC connector at the top and bottom. Next, join a cross-connector to the bottom of each post so you can add a horizontal bottom pipe between them to stabilize the frame. Finally, use elbow connectors to join a horizontal crossbar between the tops of the posts finishing the structure.
Be sure to fully insert each pipe into the fittings and consider using PVC cement to permanently bond them together. This ensures a rigid structure that won’t bend or sag over time. Take your time securing each joint to create a perfectly symmetrical goal frame.
Add Netting and a Shooter
With the frame built, it’s time for the fun part – adding netting and a shooter! For the netting, use a strong UV-treated nylon mesh that won’t quickly degrade from sun exposure. Stretch the netting over the frame and secure it using cable ties or rope threaded through holes drilled in the pipes. Leave enough excess net at the bottom to form a bag to catch shots.
For even more goalie practice, consider adding a shooter target board made from plywood to the center of the frame. Paint or wrap the shooter in white to make it visible. You can add carpet or turf to the shooter to dampen noise and bounce-outs.
Some other optional accessories are PVC ball stops to mount inside the frame so you don’t have to constantly chase missed shots. PVC tees work great for this. You can even add wheels to make repositioning your lacrosse goal a one-person job.
Take Your Skills to the Next Level
Once your PVC lacrosse goal is complete, it’s time to put in the practice and see your skills skyrocket! Work on your shooting accuracy and power from multiple angles. Test your goalie reactions and stick saves. Or just enjoy a friendly scrimmage in the backyard.
Some key lacrosse training tips using your DIY PVC goal include:
- Practice dodging and shooting on the run up to 10 yards out. Focus on good shooting form and accuracy after the dodge.
- Do rapid-fire shots alternating corners. Shoot for 30-60 seconds focusing on quick stick and release.
- As a goalie, have a partner take close-range shots aiming for different targets like side posts or top corners. React and move explosively to make saves.
- Work on pick-and-rolls with a partner to improve team passing and catching skills while on the move.
The training possibilities are endless with a backyard lacrosse goal. Whether you’re just starting out or want to take your established skills up a notch, a DIY PVC lacrosse goal will transform your practice time. In no time, you’ll start to notice improvements in your shooting accuracy, power, and quickness as a shooter. As a goalie, your reaction time, footwork, and stick skills will reach new heights. Just like the pros, your own home lacrosse field will make you love practice time.
Determine the Right Size PVC Pipe for Your Needs
Constructing your own PVC lacrosse goal can take your backyard practice sessions to the next level. With a few simple supplies, you can build a durable DIY goal for sharpening shooting, dodging, and goalie skills. One key decision in the planning process is determining the best size PVC pipe to use for your homemade lacrosse goal.
The most common options are 1.5” and 2” diameter PVC pipes. Both can work well for assembling at-home lacrosse goals. However, there are some differences to consider when deciding which size is right for your specific needs and skill level.
Here are a few factors to help choose the ideal PVC pipe size:
Goal Stability
Wider 2” PVC pipe will provide more stability and be less likely to sway or move when under impact from shots. The added girth helps withstand force better, which is ideal for goals that will see heavy use. For more casual practice by younger players, 1.5” PVC pipes offer adequate durability while keeping the goal lighter.
Goalie Visibility

Some goalies feel that 2” pipes partially obstruct sight lines making it a fraction harder to track shots. This is especially true for smaller youth goalies. The slightly narrower 1.5” pipes provide a bit better visibility through the goal frame. For goalies still developing positional skills, this can be beneficial.
Shooting Target Area
The wider 2” pipe frames present a bigger shooting target with more netting area. For players with strong, accurate shots this provides a challenge by giving a larger goal space to aim at. The smaller 1.5” frame reduces this target area slightly, making precision shooting practice easier.
Cost and Assembly
1.5” PVC pipe is more readily available at most hardware stores, typically a bit cheaper per foot than 2” pipe. The smaller diameter PVC is also easier to work with when cutting and assembling connectors. However, for high school or college players, the added cost and assembly effort of 2” is likely worth it for increased durability.
Weighing all these factors will help determine the right PVC pipe choice for your needs. Here are some quick sizing recommendations based on skill level:
- Youth and beginners – 1.5” Schedule 40 PVC recommended
- Intermediate and high school players – Either 1.5” or 2” Schedule 40 PVC
- College and pro-level use – 2” Schedule 80 PVC ideal for strength
Assemble a Durable PVC Goal Frame
Once you’ve selected the right PVC pipe size, it’s time to start building. Most goals use a simple rectangular frame with two vertical posts and horizontal crossbars on top and bottom. PVC fittings like elbows, Ts, and crosses are used to connect the pipes.
Cut the pipes to the desired lengths with a hacksaw or PVC cutter. Roughly 6 foot tall pipes allow for a regulation-height goal. Clean up any burrs or edges with sandpaper.
Fully insert pipes into the fittings and fittings into other fittings at each joint. For added strength, use PVC cement to permanently bond the joints together. Take your time to ensure proper alignment and right-angle connections.
Allow the PVC cement to fully cure before attaching netting and using your goal. The complete frame should now be rigid and ready for years of practice.
Add Netting and Accessories
No lacrosse goal is complete without netting! Stretch a strong nylon net over the PVC frame. Use zip ties or nylon rope threaded through drilled holes in the pipes to securely attach it.
Consider adding some optional accessories like a shooter target board, PVC ball stops or returners, and wheels for mobility. These extras help take your home lacrosse field to the next level.
Unleash Your Lacrosse Skills
Your own full-sized DIY PVC lacrosse goal allows you to practice shooting, passing, and goalie skills anytime. No more relying on trips to the community field for practice time!
Here are some drills to maximize your training with a backyard PVC goal:
- Shooting accuracy – Alternate shots left corner, right corner, high, low, rebound
- Increase shot power – Move further back to improve shooting range
- Dodging – Work on change of direction while approaching goal
- Goalie reactions – Have a partner take rapid shots to different targets
With your custom-built PVC lacrosse goal ready for action, you’ll wonder how you ever practiced without it. Choose the right size PVC pipe, assemble with care, and enjoy sharpening your lacrosse skills like the pros in your own backyard.
Cut PVC to Size for Crossbars and Goal Posts
With the right tools and know-how, you can build your own lacrosse goals in the backyard using PVC pipe. PVC lacrosse goals allow you to practice shooting and improve your skills from the comfort of home. By following a few simple steps, you’ll have regulation-size goals ready for drills and scrimmages in no time.
The first step is determining the dimensions you need for the goal framework. Regulation men’s lacrosse goals are 6 feet high by 6 feet wide. The triangular base should be around 60 inches wide. You’ll need ten feet of 3/4-inch PVC pipe to construct each goal frame. Measure and mark the PVC to cut it down to the lengths you’ll need. You’ll want two 6-foot pieces for the vertical posts, one 5-foot piece for the crossbar, and two additional 3-foot pieces to connect the posts to the base.
Be sure to use a miter box or PVC cutter when you cut the PVC so you get straight cuts at 90 degree angles. This ensures proper goal construction. Wipe away any burrs or shavings after cutting. With the PVC cut to size, lay out the pieces on the ground in the goal frame shape to test the fit before permanently connecting them.
For the base, cut two equilateral triangles out of scrap plywood. Each triangle should measure 20 inches on each side. Drill pilot holes in the plywood and the ends of the 3-foot PVC pieces. Attach the base triangles to the posts using nuts and bolts or screws. This gives the goals stability when anchored in the ground or weighted down with sandbags.
Use PVC cement to permanently connect the uprights, crossbar, and base pieces. Apply a thin coat of cement to the inside of the fittings and outside of the pipe ends. Quickly push the pieces together, twisting slightly to secure. Hold them together for 30 seconds while the cement sets. Wipe away any excess.
Allow the cement to cure for at least 24 hours before attaching the netting. Square knotted nylon lacrosse netting is recommended for durability. Use zip ties or strong cord to attach it to the PVC frame and draping in the proper pocket shape.
For extra stability, drive two landscaping stakes into the ground outside the base at 45 degree angles. Attach jump ropes or bungee cords from the stakes to the goal frame. This helps anchor the goals so they don’t shift or tip over easily when adjusting for wind or hard shots on goal.
PVC lacrosse goals are a budget-friendly alternative to buying metal goals. The white PVC blends into most backdrops and makes shots off the pipe easy to track. The goals are also lightweight, so you can move them around your yard to practice shooting on the run or from different angles.
With a few additional materials, you can build yourself a true DIY lacrosse workout space:
- Hang a large backyard soccer net behind the goals to catch wild shots and save retrieval time.
- Set up agility ladders, cones, and turf strips to sharpen your footwork with quickness drills.
- Attach a ball return net or backstop to practice passing and catching alone.
- Add a shooting tarp above the top corners to work on high shots and overhand wind-up technique.
The right training tools allow you to break the game down into individual skills and focus on improving. With regular practice on your home PVC lacrosse goals, you’ll gain shooting confidence and be game-ready in no time.
Shoot Like the Pros
Once your PVC lacrosse goals are up, it’s time to perfect your shooting. Shooting doesn’t just rely on strength – accuracy is just as important. Master these shooting techniques to become a scoring threat from anywhere on the field:
- Sidearm: Hold the stick horizontally and step towards the target as you shoot for velocity and precision up close.
- Overhand: Wind up with your stick vertical behind your ear and follow through fully for maximum power on long distance shots.
- Bounce shot: Fire low bouncing shots that roll past defenders and goalies hugging the ground on reaction saves.
- Behind-the-back: Twist your body and shoot blind over your shoulder to surprise the defense when cutting across the crease.
- Quick stick: Make one-touch catches and immediate shot releases in tight quarters around the crease before defenders can react.
Accuracy is all about consistent form and technique. Utilize the entire goal mouth by working on pinpoint shots to all corners and levels of the goal. Master shooting on the run and pivoting into shots from awkward angles. Lacrosse goals have far more empty space than ball-stopping goalies. Learn to recognize and exploit shooting windows before they disappear.
Don’t forget to practice important shooting fundamentals. Cradle and switch hands smoothly to set up your shooting side. Transfer your weight from your back foot to your front foot during shots to maximize power. Follow through with your bottom hand directly at your target with the stick head pointed straight for accuracy. Keep your eyes focused on spots just inches above where you want the ball to go.
Repetition and muscle memory are key. The more time you spend honing your shot, the more confident and dangerous a scorer you’ll become in game action. Don’t just stand in one spot – move around for shots on the run, practice dodges into quick releases, and work on shooting from your knees to mimic field play.
Drills to Dominate
Complement your shooting practice with drills that build complete offensive skills. Work on techniques that help create and finish scoring chances.
Dodging: Set up stationary defenders made of cones or flags. Practice changing pace and sideways stick moves to beat defenders one-on-one and get to the net. Work on ducking shoulder fakes, roll dodges, face dodges, and split dodges.
Catching in Traffic: Have a partner or rebounder rapidly feed you passes as you fight to gain position for catches in the crease. Quickly secure the ball and work on shooting in one motion before “defenders” can react.
Outlet Passing: Make clearing outlet passes against pressure to hit a stationary target downfield. Use proper mechanics like stepping into throws and following through.
Agility: Set up a ladder drill with cones or tape to improve coordination. Laterally shuffle, grapevine step, hop scotch, and run through patterns to sharpen change-of-direction speed.
By mastering these drills, you’ll gain confidence moving with the ball against pressure. The quickness and stick skills boost scoring chances in crowded situations around the goal.
Unleash Your Inner Hector the Rejector
Great offense also requires an elite goalie. After a shooting workout, swap positions and strap on goalie gear to experience defending the net yourself. Face shots from different angles and distances. Learn to move laterally, come out to challenge shooters, and make reaction saves.
Positioning is critical for goalies. Stay centered within the pipe and remain square to the ball. Cut down shooting angles but avoid overcommitting. Quick lateral steps allow you to take away target areas as the ball moves. Keep your stick positioned in front of your body in the blocking “T” position.
Master the advanced shot-stopping techniques of lacrosse’s top goalies:
- Step saves: Step toward the shot and use your momentum to help make the save and control rebounds.
- Outlet passing: After saves, start fast breaks by hitting leading downfield pass targets.
- Behind-the-head saves: When beaten on high shots, snap your stick hand behind your helmet to snag the ball.
- Two-minute drill: Rapidly face continuous shots without rest to build stamina and reflexes.
Even basic goalie training gives you insight into offensive strategy. By learning defensive perspective, you recognize the open shooting windows and tendencies that make a scorer tough to stop. Apply this knowledge to become a versatile scoring and passing threat.
With lacrosse goals made from basic PVC pipe and some DIY spirit, you can bring the excitement of the lacrosse field to your own backyard. Construct goals customized to your space, then master shooting accuracy and goalie skills for well-rounded training. The more you practice deking defenders and sniping shots on net, the more dangerous a scorer you’ll become when real games begin. Don’t just play lacrosse – dominate it with your own home lacrosse field!
Connect PVC Pieces with Elbows and T-Joints
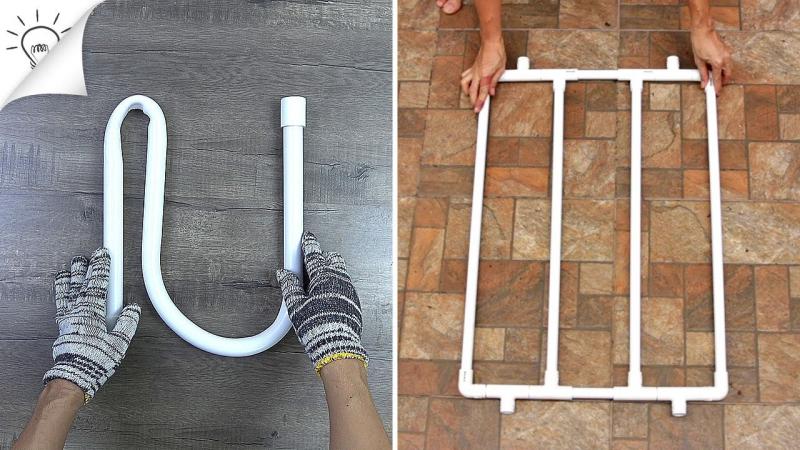
Constructing your own lacrosse goals out of PVC pipe provides an affordable and customizable way to practice shooting in your backyard. With some basic PVC fittings, you can easily assemble a durable frame to elevate your home training. Let’s walk through how to connect the PVC pieces to form the goal structure.
The most important fittings for assembling the goal framework are 90-degree elbows and T-joints. Elbows allow you to make right-angle connections between the vertical posts and crossbar. T-joints let you attach the base and connect the posts to the triangular support structure.
Make sure the elbow and T-joint fittings match the diameter of the PVC pipe you are using. Most goals use 3/4-inch or 1-inch PVC. The fittings should have pre-drilled holes to insert the pipe. Apply PVC cement to permanently bond them.
To attach an elbow, apply a thin layer of cement into the fitting socket and on the end of the pipe. Quickly insert the pipe into the fitting, twisting it slightly to spread the cement evenly. Hold the elbow and pipe together for 30 seconds while the cement sets. The bonds will be fully cured in 24 hours.
Use elbows to connect the two vertical posts to the top crossbar. Position the elbows on the ends of the crossbar and perpendicular posts so they meet at 90 degree angles. This forms the top plane of the goal frame. Repeat the cementing steps to permanently attach the elbows.
For the base, use T-joints to connect the vertical posts to the horizontal support pipes. The posts should slide into two ends of the T-joint, with the third end getting attached to the base support pipe. Align the fittings so the base forms a triangular shape and all pipes are cemented into place.
Once assembled, the PVC elbows and Ts allow you to break the goal frame down for compact storage by detaching the pieces. But the permanent fittings make the structure rigid and prevent sagging when in use for hard shots.
In addition to the basic frame, you can use PVC fittings to add enhancements and customize your lacrosse goal setup:
- Attach caps and plugs to open ends of pipes to prevent sharp edges.
- Use three- and four-way elbows to create shooting targets and passing outlets.
- Connect smaller diameter PVC with reducers to build a rebounder frame.
- Add PVC tees and couplings to extend the goal mouth wider.
- Attach ball return pipes along the alley with elbows and Ts.
So grab some PVC cut to size, cement, and essential elbow and T-joint fittings from your local hardware store. Get creative assembling the pieces to build goals perfect for your practice space. With the right PVC connections, you can construct sturdy lacrosse goals for working on your shooting and goalie skills anytime.
Wind Up for Power Shooting
Once the net is hung on your DIY PVC lacrosse goal, it’s time to start sniping shots. Unleash your most powerful blasts using the overhand wind-up shooting technique. This full-body motion generates maximum velocity for long-range strikes.
Stand sideways to the goal with your shooting side foot placed forward. Bring your stick straight back over your shoulder, keeping both hands spread wide apart. Shift your weight onto your back leg as you build up potential energy in your wind-up.
Drive off your back foot and rotate your hips and shoulders towards the goal as you whip the stick forward. Extend your bottom hand out fully toward your target. The top hand acts as a guide, while the bottom provides all the power through the ball.
Follow through completely, with the head of your stick ending up pointed straight at the spot you’re aiming for. Continue your momentum through the shot, taking a step forward to maintain balance.
The key is transferring all your built-up energy from the wind-up into ball acceleration as you shoot. A smooth powerful motion results in the hardest shots. Practice from different angles and distances from the goal to control your shooting range.
This overhand cranking motion takes time to master. But once you’ve built up strength and shooting rhythm, you can absolutely pepper the net from way outside the crease. Goalies struggle to react to blistering overhand shots from up top or on the wings.
Pair your long-distance shooting with finesse moves like shot fakes, head fakes, and stutter steps. Defenders have trouble blocking powerful shots they can’t anticipate, giving you shooting lanes to the corners.
With PVC practice goals, you can shoot overhand as much as you want without annoying the neighbors. Dial in your form and power for those clutch highlight-reel goals. Your defense and goalie will thank you!
Drill Defensive Footwork
Great offense also requires playing tenacious on-ball defense. Your backyard goals are perfect for footwork and body position drills to lock down opponents.
Set up markers or cones in an arc around the goal crease to simulate an offensive player’s dodge approach. Start backpedaling on an angle to force the player outside the arc. Keep your knees bent, back straight, and head on a swivel.
As the player nears the goal, drop step back to maintain optimal body position. Don’t reach with your stick – use your feet to adjust angles. Time poke checks only when you have clear shaft positioning for a turnover.
Work on lateral shuffle steps to move across the crease with dodging players. Open your hips and drive off the outside foot to accelerate. Contest shots by walling up defenders with solid footwork and smart stick positions.
Foot fire agility drills also boost your speed and reaction time on defense. Jump feet-first over a rope ladder on the ground in front of the goal. This works on coordination while conditioning your legs for the rigors of covering shifty cutters.
Even when you don’t have shooting partners, creatively use your home goals for defensive drills. Chase down bounced alley passes you shoot yourself. Or self-pass off the pipes while recovering to play deny defense. Go one-on-one against the goal imagining defenders and working on shutdown D.
Your backyard lacrosse workshop allows endless repetitions to ingrain proper defensive technique. Mastering these fundamental drills creates instinctual movements to shut down dodges and outlet passes.
Tend Goal Like a Big-Time College Netminder
To round out your lacrosse skills, grab your goalie gear and get in the cage! Seeing the field from the goalie’s perspective improves your shooting by exposing angles and tends.
Start with positioning and movement. Stay centered in the crease while dropping into an athletic stance. Keep your knees bent and hands free to react. Move laterally with small shuffle steps to set up square to the ball.
Cut down shot angles by coming out farther from the pipe to challenge shooters. But avoid overcommitting outside the goal so they can’t wrap around you.
Work on technique for making saves – snap your wrists to punch the ball away or use quick cradle pulls to secure rebounds. Clear the ball upfield with precise outlet passes to transition from defense to offense.
Call out shot locations to yourself to improve communication and focus. Mimic college goalies directing their defense like a field general.
Mix in agility drills like lateral shuffles across the crease and medium-range sprints to snag high shots. Your endurance and quickness are just as vital as technique.
Test your skills with shooting gauntlet and two-minute drills. Rapidly face nonstop shots from close, mid-, and long-range. Dig in mentally and physically until making saves becomes instinctual.
Goalie training back home makes you better all over the field. You gain new perspective on the subtleties that make shots hard to stop. Apply that knowledge to take away openings as a defender or exploit them as a dodging scorer.
DIY PVC lacrosse goals built just the way you want make honing your skills a cinch. Use them for shooting reps, footwork drills, reaction saves, and one-on-one competitions that improve every aspect of your game. The training you log at home gives you an edge over the competition when it matters most on game day!
Add Foam Padding for Safety and Noise Reduction

Looking to take your lacrosse skills to the next level this summer but don’t have access to a field or team practices? Don’t sweat it! You can train like a pro right in your own backyard with some creativity, a bit of DIY spirit, and materials you likely already have on hand. The secret? Building your own PVC pipe lacrosse goal so you can practice shooting whenever you want.
Constructing a homemade PVC lacrosse goal is a fun weekend project that can pay dividends all summer long. Having your own net to shoot at makes it easy to get extra reps in on your own time. You’ll be able to work on your shooting accuracy, power, and techniques without needing a goalie or teammates around.
The best part? Building a PVC pipe lacrosse goal is simple and affordable. With some basic tools, sturdy materials, and a bit of elbow grease, you can put together a regulation-sized net capable of withstanding all your blistering shots. Let’s go over the steps so you can start training like the pros in your own backyard.
Gather the Necessary Supplies
PVC pipe is the ideal material for a DIY lacrosse goal because it’s lightweight, weather resistant, and easy to work with. You just need a few basic supplies:
- 10′ sections of 3/4″ and 1/2″ PVC pipe
- PVC joints – elbows, tees, and crosses
- PVC cement
- Netting or other material for the goal
- Foam padding
- Zip ties
For a regulation goal measuring 6’x6′, you’ll need four 10′ sections of 3/4″ pipe and two 10′ sections of 1/2″ pipe. The 3/4″ pipe will form the frame, while the thinner 1/2″ pieces will secure the netting. Gather the rest of your supplies – PVC joints, cement, net material, zip ties, and foam padding. Then clear out a space in your yard and get ready to put it all together.
Construct the PVC Pipe Frame
Start by cutting the four 10′ sections of 3/4″ PVC pipe into two 6′ pieces and two 4′ pieces – these will form the uprights and crossbar of your frame. Use the PVC elbow and tee joints to connect them into a rectangular shape. Measure carefully and use the PVC cement to permanently join the pipes and fittings.
For stability, drive about 1′ of each upright piece into the ground before cementing the joints. This gives your frame a sturdy base. Check that the frame is square by measuring the diagonals – they should be equal. Let the cement cure fully before moving on.
Add the Netting
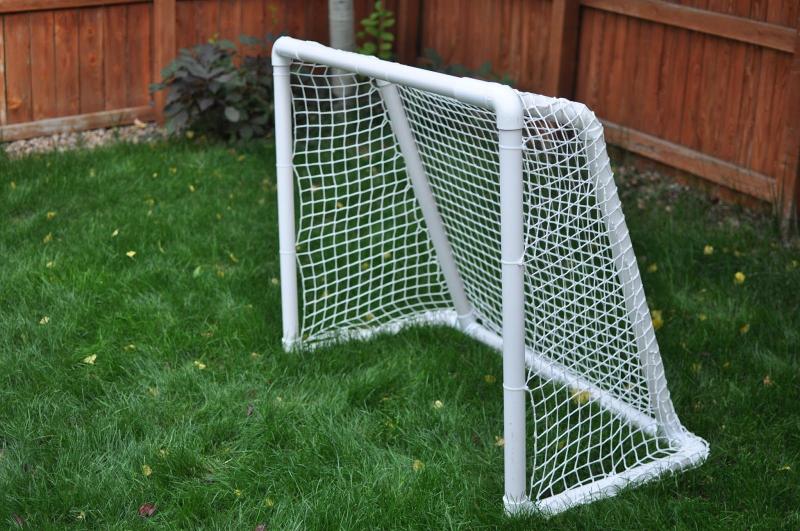
For the netting, cut your 1/2″ PVC pipe into pieces that span the inside width and height of the frame. Use the small PVC joints to attach these pieces to the interior of the frame, creating a grid to attach the netting material. Space the horizontal supports every 8-12 inches.
Once the grid is installed, attach your netting material. Heavy-duty nylon, mesh tarps, or even an old lacrosse goal net can all work. Stretch the material tight and use zip ties to firmly secure it to the PVC grid along each edge and seam. Trim off any excess when finished.
Install Foam Padding
To finish it off, pad the goal frame to prevent injury and dampen noise. Use camping mat foam, pool noodles, or pipe insulation and zip tie it along the top crossbar and uprights. This keeps the goal protected when errant shots hit the frame. The foam also reduces noise from hard shots, keeping backyard practice from disturbing the neighbors!
Get Out There and Shoot
Now the fun starts – it’s time to grab your stick and start firing away! Place your new DIY PVC lacrosse goal in a spot with a solid backstop to catch any missed shots. Work on shooting from different angles and distances, improving your accuracy. As your skills progress, challenge yourself by aiming for top corners or quickly shooting off of cuts and dodges.
Your homemade PVC pipe lacrosse goal opens up a whole new world of training possibilities. No longer do you need a full team to practice – just head to the backyard and shoot anytime. Dial in your technique and power by taking hundreds of shots each day, all on your own schedule. With some dedication and quality time shooting on your home turf, you’ll have your skills dialed-in and be ready to shine when lacrosse season picks back up!
So give your DIY spirit some exercise, construct your own PVC lacrosse goal, and start training like a pro today. Don’t have a backyard? Get creative – set up passing and shooting drills in the driveway or a local park. Find walls and other backstops to practice ricocheting blistering shots. Wherever you are, put in the extra reps on your own time. When lacrosse season rolls around again, all that practice on your homemade pvc lacrosse goal will have you ready to dominate!
Weigh Down the Goal Base for Stability
Looking to take your lacrosse game up a notch but don’t have access to a field or team practices? No worries! With some basic DIY skills and materials you likely have on hand, you can construct your own professional-grade PVC pipe lacrosse goal right in your backyard. This allows you to get in extra shooting practice on your own schedule.
Building a PVC lacrosse goal is a straightforward weekend project that pays dividends all summer long. Having a regulation-sized net to shoot at in your yard makes it simple to sharpen your accuracy, power, and technique anytime. No need to wait for team practices or try to reserve a field.
The best part is that a DIY PVC lacrosse goal is affordable and achievable for any skill level. With standard supplies, basic tools, and a little bit of gumption, you’ll have a sturdy net capable of handling all your blistering shots in no time. Let’s go over the process step-by-step so you can start training like a pro from home.
Get the Necessary Materials
Since PVC pipe is lightweight, weather resistant, and simple to use, it’s the perfect material for a homemade lacrosse goal. You just need a few key supplies:
- 10′ sections of 3/4″ and 1/2″ PVC pipe
- PVC fittings – elbows, tees, crosses
- PVC cement
- Netting or other material for goal
- Zip ties
- Weights for base (sandbags, etc.)
For a regulation 6’x6′ goal, get four 10′ lengths of 3/4″ pipe and two 10′ lengths of 1/2″ pipe. The thicker 3/4″ PVC will form the frame, while the 1/2″ pieces will attach the netting. Round up PVC fittings, cement, net material, zip ties, and weight plates or sandbags to stabilize the base. Then clear some yard space and get building!
Assemble the PVC Frame
Start by cutting the four 10′ sections of 3/4″ pipe into two 6′ uprights and two 4′ crossbars. Use the PVC elbows and tees to connect them into a rectangular goal frame. Carefully measure and cement the pipe joints permanently.
To stabilize the base, drive the uprights 1′ into the ground before cementing. This anchors the frame. Double check it’s square by measuring the diagonals – they should be equal. Allow cement to fully cure before moving on.
Attach Netting Material
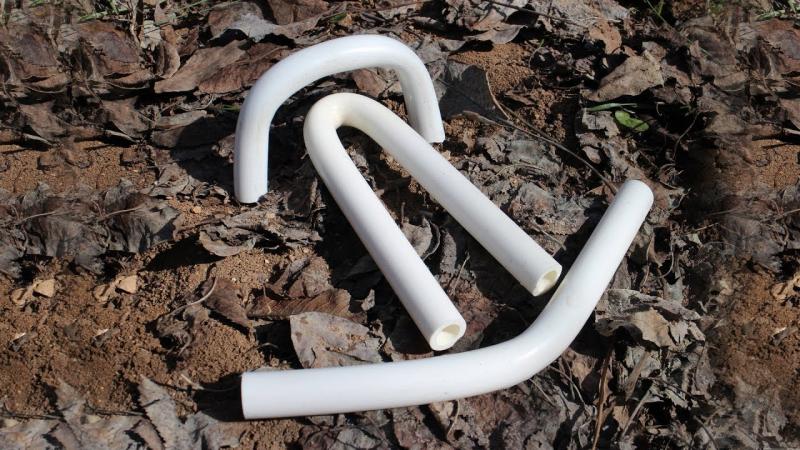
To attach netting, cut the 1/2″ PVC lengths to span the inner frame width and height. Use small PVC connectors to attach these to the interior frame, making a grid for the netting. Space horizontal supports 8-12 inches apart.
Once grid is installed, attach your net material. Durable nylon, mesh tarps or an old goal net will work. Stretch material tight and firmly zip tie it to the PVC grid along edges and seams. Trim any excess when finished.
Weigh Down the Base
Finally, weigh down the base for maximum stability. Use sandbags, rubber mulch, or other heavy objects to press down the uprights driven into the ground. The weight keeps the goal planted firmly in place – no tipping! You can also zip tie or bungee weight plates onto the bottom frame for extra anchoring.
Start Shooting
Now the fun starts – grab your stick and fire away! Position your DIY PVC lacrosse goal with a solid backstop to catch misses. Practice shots from different angles, distances, and on the run. As skills improve, challenge yourself by picking corners or quickly shooting after dodges.
Your homemade PVC pipe lacrosse goal opens a whole new world of solo training. No longer wait for team practices – just head to the backyard and shoot on your own schedule. Dial in technique and power by taking hundreds of repititions daily. With dedicated practice on your personal turf, you’ll shine when lacrosse season resumes!
Put those DIY vibes to work, construct your own PVC lacrosse goal, and start training like a pro today. No backyard? Get creative – practice passing and shooting drills in the driveway or local park. Find backstops and work on ricocheting blistering shots off them. Wherever you are, maximize your own practice time. Come game time, all those extra reps on your DIY pvc lacrosse goal will have you ready to dominate!
Make Transparent Netting from Mason Line for Visibility
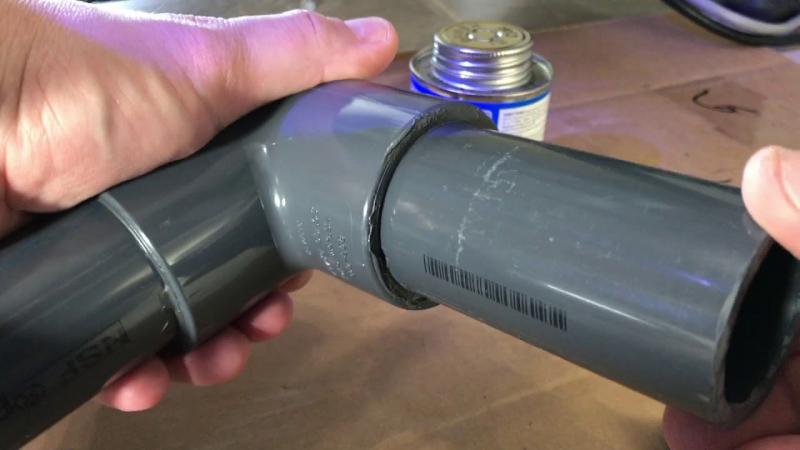
Want to improve your lacrosse skills but don’t have regular access to a field or team practices? No problem! With some DIY moxy and common materials, you can construct your own professional-caliber PVC lacrosse goal right in your backyard. This allows you to get extra shooting reps anytime you want.
Building a PVC lacrosse goal is a straightforward weekend project that will pay off all summer long. Having a regulation-sized net to shoot at makes it easy to sharpen your accuracy, power, and technique on your own schedule. No reliance on team practices or trying to reserve a field.
Best of all, a homemade PVC lacrosse goal is affordable and achievable for any skill level. With standard supplies, basic tools, and some elbow grease, you’ll have a sturdy net ready for all your blistering shots in no time. Let’s review the process so you can start training like a pro from home.
Obtain the Necessary Materials
Since PVC is lightweight, weatherproof, and simple to work with, it’s ideal for a DIY lacrosse goal. You just need a few key supplies:
- 10′ sections of 3/4″ and 1/2″ PVC pipe
- PVC fittings – elbows, tees, crosses
- PVC cement
- Mason line or rope for netting
- Zip ties
For a regulation 6’x6′ goal, get four 10′ lengths of 3/4″ pipe and two 10′ lengths of 1/2″ pipe. The thicker 3/4″ PVC will form the frame, while the 1/2″ pieces will secure the netting. Round up PVC fittings, cement, mason line, zip ties, and get to work!
Construct the PVC Pipe Frame
Start by cutting the four 10′ sections of 3/4″ pipe into two 6′ uprights and two 4′ crossbars. Use the elbows and tees to connect them into a rectangular goal frame. Carefully measure and permanently cement the joints.
For stability, drive the uprights 1′ into the ground before cementing. Double check the frame is square by measuring the diagonals – they should be equal. Allow cement to fully cure before continuing.
Make Transparent Netting from Mason Line
For the netting, cut 1/2″ PVC lengths to stretch across the inner width and height of the frame. Use small PVC connectors to attach these to the interior frame, creating a grid to secure the netting material. Space horizontal supports every 8-12 inches.
For maximum visibility, use mason line or thin rope instead of opaque netting. Tie the line to the top of the frame, then crisscross it between each horizontal support. Pull it taut and firmly zip tie the intersections to the PVC grid. The tight diamond pattern creates a see-through net!
Start Shooting at Your Goal
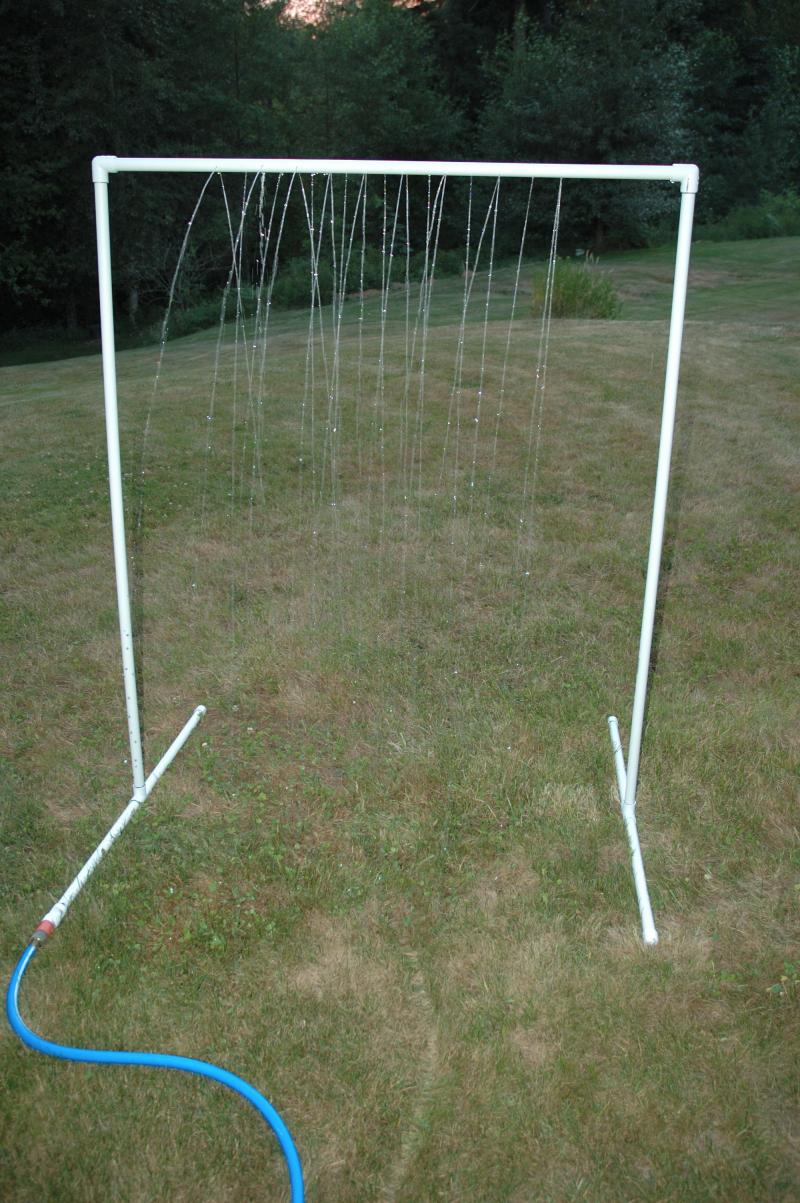
Now the fun starts – grab your stick and fire away! Position your DIY PVC lacrosse goal with a solid backstop to catch misses. Practice shots from different angles, distances, and on the run. As skills improve, challenge yourself by picking corners or quickly shooting after dodges.
Your homemade PVC pipe lacrosse goal opens a whole new world of solo training. No longer wait for team practices – just head to the backyard and shoot anytime. The transparent mason line netting provides instant feedback on accuracy. Dial in technique and power by taking hundreds of repetitions daily. With dedicated practice on your personal turf, you’ll shine when lacrosse season resumes!
Put those DIY chops to work, construct your own PVC lacrosse goal with mason line netting, and start training like a pro today. No backyard? Get creative – practice passing and shooting drills in the driveway or local park. Find backstops and work on ricocheting blistering shots off them. Wherever you are, maximize your own practice time. Come game time, all those extra reps on your DIY pvc lacrosse goal will have you ready to dominate!
Use PVC Cement for Permanent Connections
Want to improve your lacrosse skills but don’t have regular access to a field or team practices? No worries! With some DIY spirit and common materials, you can build your own professional-grade PVC lacrosse goal right in your backyard. This allows you to get extra shooting reps whenever you want.
Constructing a PVC lacrosse goal is a straightforward weekend project that will pay dividends all summer long. Having a regulation-sized net to shoot at makes it simple to hone your accuracy, power, and technique on your own schedule. No need to wait for team practices or try to reserve a field.
Best of all, a homemade PVC lacrosse goal is affordable and achievable for any skill level. With standard supplies, basic tools, and some gumption, you’ll have a sturdy net ready for all your blistering shots in no time. Let’s go over the process so you can start training like a pro from home.
Obtain the Necessary Materials
Since PVC is lightweight, weatherproof, and simple to use, it’s perfect for a DIY lacrosse goal. You just need a few key supplies:
- 10′ sections of 3/4″ and 1/2″ PVC pipe
- PVC fittings – elbows, tees, crosses
- PVC cement
- Netting or other material
- Zip ties
For a regulation 6’x6′ goal, get four 10′ lengths of 3/4″ pipe and two 10′ lengths of 1/2″ pipe. The thicker 3/4″ PVC will form the frame, while the 1/2″ pieces will secure the netting. Gather the rest of the materials – fittings, cement, netting, zip ties – and get building!
Construct the PVC Pipe Frame
Start by cutting the four 10′ sections of 3/4″ pipe into two 6′ uprights and two 4′ crossbars. Use the elbows and tees to connect them into a rectangular goal frame. Carefully measure and use PVC cement to permanently join the pipe fittings.
For stability, drive the uprights 1′ into the ground before cementing. Double check the frame is square by measuring the diagonals – they should be equal. Allow cement to fully cure before moving on.
Use PVC Cement for Permanent Connections
To attach the netting, cut 1/2″ PVC lengths to span the inner width and height of the frame. Use small PVC connectors to attach these to the interior frame, creating a grid for the netting. Space horizontal supports every 8-12 inches.
Be sure to use PVC cement at each joint in the grid so the connections are permanent. Once grid is installed, attach your net material. Durable nylon, mesh tarps or an old goal net will work. Stretch material tight and firmly zip tie it to the PVC grid along edges and seams.
Start Firing Away at Your Goal
Now the fun starts – grab your stick and let it rip! Position your DIY PVC lacrosse goal with a solid backstop to catch misses. Practice shots from different angles, distances, and on the run. As skills improve, challenge yourself by picking corners or quickly shooting after dodges.
Your homemade PVC pipe lacrosse goal opens up solo training possibilities. No longer wait for team practices – just head to the backyard and shoot anytime. The PVC cement ensures your goal stays sturdy session after session. Dial in technique and power by taking hundreds of reps daily. With regular practice on your personal turf, you’ll be game ready in no time!
Put those DIY chops to work, construct your own PVC lacrosse goal with PVC cement, and start training like a pro today. No backyard? Get creative – practice passing and shooting drills in the driveway or local park. Find backstops and work on ricocheting blistering shots off them. Wherever you are, maximize your own practice time. Come game time, all those extra reps on your DIY pvc lacrosse goal will have you ready to dominate!
Paint Your PVC Goal with Exterior Acrylic Paint
Want to improve your lacrosse skills but don’t have regular access to a field or team practices? No problem! With some DIY know-how and common materials, you can construct your own professional-grade PVC lacrosse goal right in your backyard. This allows you to get extra shooting reps whenever you want.
Building a PVC lacrosse goal is a straightforward weekend project that will pay dividends all summer long. Having a regulation-sized net to shoot at makes it simple to sharpen your accuracy, power, and technique on your own schedule. No reliance on team practices or trying to reserve a field.
Best of all, a homemade PVC lacrosse goal is affordable and achievable for any skill level. With standard supplies, basic tools, and some elbow grease, you’ll have a sturdy net ready for all your blistering shots in no time. Let’s review the process so you can start training like a pro from home.
Obtain the Necessary Materials
Since PVC is lightweight, weatherproof, and simple to use, it’s ideal for a DIY lacrosse goal. You’ll need:
- 10′ sections of 3/4″ and 1/2″ PVC pipe
- PVC fittings – elbows, tees, crosses
- PVC cement
- Netting or other material
- Exterior acrylic paint
- Paint brushes, rollers
For a 6’x6′ goal, get four 10′ lengths of 3/4″ pipe and two 10′ lengths of 1/2″ pipe. The thicker 3/4″ PVC will form the frame, while the 1/2″ pieces will secure the netting. Get the rest of the supplies, then let the building begin!
Construct the PVC Pipe Frame
Start by cutting the four 10′ sections of 3/4″ pipe into two 6′ uprights and two 4′ crossbars. Use the elbows and tees to connect them into a rectangular goal frame. Carefully measure and cement the pipe joints permanently.
For stability, drive the uprights 1′ into the ground before cementing. Double check the frame is square by measuring the diagonals – they should be equal. Allow cement to fully cure before moving on.
Paint Your PVC Goal with Exterior Acrylic Paint
Before attaching the netting, give your PVC goal frame a fresh coat of paint. Exterior acrylic paint works great since it adheres to plastic and handles outdoor exposure. Lightly sand any PVC joints to help the paint bind.
Use acrylic paint brushes and rollers to apply 2-3 even coats, allowing each to fully dry. Vibrant colors like red, yellow, or orange make your goal visible and fun. Paint the edges and corners neatly – your blistering shots will quickly chip the paint, revealing the white PVC beneath!
Start Firing Away at Your Goal
Once paint is dry, attach your netting material. Cut 1/2″ PVC pieces to create an inner grid and firmly zip tie the netting to it. Now the fun starts – grab your stick and let it rip! Position your DIY PVC lacrosse goal with a solid backstop to catch misses. Practice shots from all angles, distances, and on the run.
Your homemade PVC pipe lacrosse goal opens up solo training possibilities. No longer wait for team practices – just head to the backyard and shoot anytime. The bright paint job keeps your eye focused. Dial in technique and power by taking hundreds of reps daily. With regular practice on your personal turf, you’ll be game ready in no time!
Put those DIY chops to work, construct and paint your own PVC lacrosse goal, and start training like a pro today. No backyard? Get creative – practice passing and shooting drills in the driveway or local park. Find backstops and work on ricocheting blistering shots off them. Wherever you are, maximize your own practice time. Come game time, all those extra reps on your DIY pvc lacrosse goal will have you ready to dominate!
Add Targets Inside Goal to Improve Aim
Want to step up your lacrosse game but don’t have access to a field or team practices? No problem! With some DIY skills and common materials, you can build your own professional-grade PVC lacrosse goal right in your backyard. This allows you to get extra shooting reps whenever you want.
Constructing a PVC lacrosse goal is a straightforward weekend project that will pay dividends all summer long. Having a regulation-sized net to shoot at makes it simple to hone your accuracy, power, and technique on your own schedule. No reliance on team practices or trying to reserve a field.
Best of all, a homemade PVC lacrosse goal is affordable and achievable for any skill level. With standard supplies, basic tools, and some elbow grease, you’ll have a sturdy net ready for all your blistering shots in no time. Let’s review the process so you can start training like a pro from home.
Obtain the Necessary Materials
Since PVC is lightweight, weatherproof, and simple to use, it’s perfect for a DIY lacrosse goal. You’ll need:
- 10′ sections of 3/4″ and 1/2″ PVC pipe
- PVC fittings – elbows, tees, crosses
- PVC cement
- Netting or other material
- Paint and targets for inside goal
For a regulation 6’x6′ goal, get four 10′ lengths of 3/4″ pipe and two 10′ lengths of 1/2″ pipe. The thicker 3/4″ PVC will form the frame, while the 1/2″ pieces will secure the netting. Gather the other supplies, then let the building begin!
Construct the PVC Pipe Frame
Start by cutting the four 10′ sections of 3/4″ pipe into two 6′ uprights and two 4′ crossbars. Use the elbows and tees to connect them into a rectangular goal frame. Carefully measure and cement the pipe joints permanently.
For stability, drive the uprights 1′ into the ground before cementing. Double check the frame is square by measuring the diagonals – they should be equal. Allow cement to fully cure before moving on.
Add Targets Inside Goal to Improve Aim
Here’s a pro tip to take your shooting practice to the next level – add targets inside your DIY goal! Use paint or tape to mark aiming points in the corners and high/low areas. Paint smaller “bullseye” targets to sharpen your precision.
Challenge yourself during shooting drills by calling out specific targets to hit. Go 5-for-5 on the top left corner before moving to another spot. This builds muscle memory for placing shots exactly where you want.
As your accuracy improves, shift the targets around to keep things challenging. The inside targets provide instant visual feedback on the precision of each shot, helping ingrain proper shooting form.
Start Firing Away at Your Goal
Once complete, start ripping shots! Place your DIY PVC lacrosse goal with a solid backstop to catch misses. Practice shots from all angles, distances, and on the run. Focus on hitting your interior targets and corners.
Your homemade PVC pipe lacrosse goal opens up solo training possibilities. No longer wait for team practices – just head to the backyard and shoot anytime. The interior targets will quickly improve your aim. Dial in technique and power by taking hundreds of reps daily. With regular practice on your personal turf, you’ll be game ready in no time!
Put those DIY skills to work, construct your own PVC lacrosse goal with targets, and start training like a pro today. No backyard? Get creative – practice passing and shooting drills in the driveway or local park. Find backstops and work on ricocheting blistering shots off them. Wherever you are, maximize your own practice time. Come game time, all those extra reps on your DIY pvc lacrosse goal will have your aim on point and ready to dominate!
Make Your Goal Portable with Wheels for Mobility

Want to improve your lacrosse skills but don’t have regular access to a field or team practices? No worries! With some DIY know-how and common materials, you can construct your own professional-grade PVC lacrosse goal right in your backyard. This allows you to get extra shooting reps whenever you want.
Building a PVC lacrosse goal is a straightforward weekend project that will pay dividends all summer long. Having a regulation-sized net to shoot at makes it simple to sharpen your accuracy, power, and technique on your own schedule. No reliance on team practices or trying to reserve a field.
Best of all, a homemade PVC lacrosse goal is affordable and achievable for any skill level. With standard supplies, basic tools, and some elbow grease, you’ll have a sturdy net ready for all your blistering shots in no time. Let’s review the process so you can start training like a pro from home.
Obtain the Necessary Materials
Since PVC is lightweight, weatherproof, and simple to use, it’s perfect for a DIY lacrosse goal. You’ll need:
- 10′ sections of 3/4″ and 1/2″ PVC pipe
- PVC fittings – elbows, tees, crosses
- PVC cement
- Netting or other material
- Wheels and axle
For a regulation 6’x6′ goal, get four 10′ lengths of 3/4″ pipe and two 10′ lengths of 1/2″ pipe. The thicker 3/4″ PVC will form the frame, while the 1/2″ pieces will secure the netting. Gather the other supplies, then let the building begin!
Construct the PVC Pipe Frame
Start by cutting the four 10′ sections of 3/4″ pipe into two 6′ uprights and two 4′ crossbars. Use the elbows and tees to connect them into a rectangular goal frame. Carefully measure and cement the pipe joints permanently.
For stability, drive the uprights 1′ into the ground before cementing. Double check the frame is square by measuring the diagonals – they should be equal. Allow cement to fully cure before moving on.
Make Your Goal Portable with Wheels
Here’s a great way to make your PVC goal mobile – attach wheels! Install an axle with wheels on one end of the bottom goal frame before cementing it in place.
Wheels allow you to tilt and roll the goal anywhere in your yard, driveway, or down to the park. No need to deconstruct and rebuild each time you practice. Just wheel it to a new backstop or shooting position!
Start Firing Away at Your Goal
Once complete, start ripping shots! Position your wheeled DIY PVC lacrosse goal with a solid backstop. Practice shots from all angles, distances, and on the run. When you want to switch it up, tilt the goal back and wheel it to a new spot.
Your homemade mobile PVC pipe lacrosse goal opens up training possibilities. No longer anchored in one spot – roll it into the ideal position sunlight or background. Dial in technique and power by taking hundreds of reps daily. With regular practice on your personal portable turf, you’ll be game ready in no time!
Put those DIY chops to work, construct your own wheeled PVC lacrosse goal, and start training like a pro today. No backyard? Wheel it to the driveway or local park for shooting practice. Find new backstops and work on ricocheting blistering shots off them. Wherever you are, maximize your own practice time. Come game time, all those extra reps on your DIY mobile pvc lacrosse goal will have you ready to dominate!
Customize Your Goal with Team Logos and Colors
Want to step up your lacrosse game but don’t have regular access to a field or team practices? No problem! With some DIY skills and common materials, you can build your own professional-grade PVC lacrosse goal right in your backyard. This allows you to get extra shooting reps whenever you want.
Constructing a PVC lacrosse goal is a straightforward weekend project that will pay dividends all summer long. Having a regulation-sized net to shoot at makes it simple to hone your accuracy, power, and technique on your own schedule. No reliance on team practices or trying to reserve a field.
Best of all, a homemade PVC lacrosse goal is affordable and achievable for any skill level. With standard supplies, basic tools, and some elbow grease, you’ll have a sturdy net ready for all your blistering shots in no time. Let’s review the process so you can start training like a pro from home.
Obtain the Necessary Materials
Since PVC is lightweight, weatherproof, and simple to use, it’s perfect for a DIY lacrosse goal. You’ll need:
- 10′ sections of 3/4″ and 1/2″ PVC pipe
- PVC fittings – elbows, tees, crosses
- PVC cement
- Netting or other material
- Paint and team logos/colors
For a 6’x6′ goal, get four 10′ lengths of 3/4″ pipe and two 10′ lengths of 1/2″ pipe. The thicker 3/4″ PVC will form the frame, while the 1/2″ pieces will secure the netting. Gather the other supplies, then let the building begin!
Construct the PVC Pipe Frame
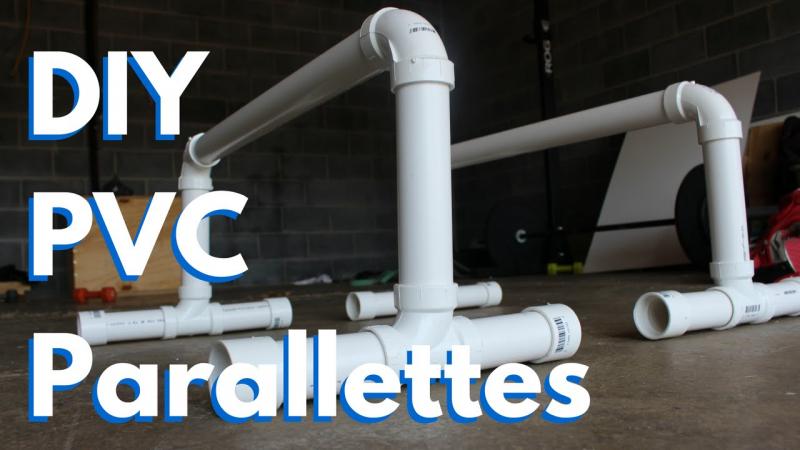
Start by cutting the four 10′ sections of 3/4″ pipe into two 6′ uprights and two 4′ crossbars. Use the elbows and tees to connect them into a rectangular goal frame. Carefully measure and cement the pipe joints permanently.
For stability, drive the uprights 1′ into the ground before cementing. Double check the frame is square by measuring the diagonals – they should be equal. Allow cement to fully cure before moving on.
Customize Your Goal with Team Logos and Colors
Personalize your DIY lacrosse goal with your team’s logo and colors! Use exterior paint to give the PVC goal frame your team’s dominating colors. Then get creative – use vinyl decals, duct tape, or freehand painting to add your team name and logo onto the goal frame.
Seeing your team’s colors and emblem every time you practice will get you fired up to train harder. No better motivation than your team pride!
Start Firing Away at Your Goal
Once complete, start ripping shots! Place your customized PVC lacrosse goal with a solid backstop. Practice shots from all angles, distances, and on the run. Keep your team’s colors and logo in sight as you dial in your technique and power.
Your homemade PVC pipe lacrosse goal opens up solo training possibilities. No longer wait for team practices – just head to the backyard and shoot anytime. With your team pride on full display, you’ll be motivated to put in extra reps. Come game time, all those shots on your customized DIY pvc lacrosse goal will have you ready to represent!
Maintain Your PVC Goal to Prevent Cracks and Damage
Want to improve your lacrosse skills but don’t have regular access to a field or team practices? No worries! With some DIY know-how and common materials, you can construct your own professional-grade PVC lacrosse goal right in your backyard. This allows you to get extra shooting reps whenever you want.
Building a PVC lacrosse goal is a straightforward weekend project that will pay dividends all summer long. Having a regulation-sized net to shoot at makes it simple to sharpen your accuracy, power, and technique on your own schedule. No reliance on team practices or trying to reserve a field.
Best of all, a homemade PVC lacrosse goal is affordable and achievable for any skill level. With proper maintenance, your DIY PVC goal will provide years of reliable shooting practice. Let’s review how to keep it in top condition.
Inspect Your Goal Frequently
Periodically inspect your PVC goal for any cracks, dents, or damage. Your blistering shots will eventually take a toll, so catch issues early. Check that PVC cement connections are intact and netting is securely fastened.
Repair Cracks and Dents
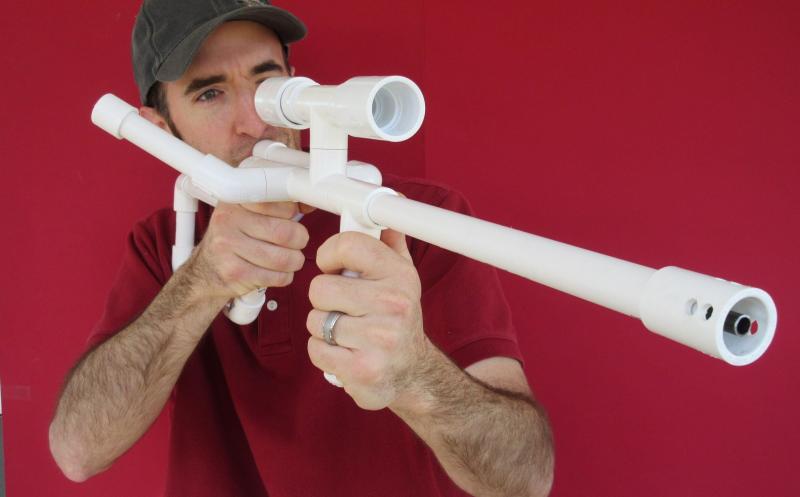
If cracks or dents appear in the PVC pipes, use epoxy adhesive to seal and reinforce them. Sand damaged areas first to help bonding. Small cracks can be patched with PVC tape as well. Replace any pipes or fittings that become badly damaged.
Re-Cement Loose Joints
If PVC joints start detaching, thoroughly clean with sandpaper and re-cement them. Allow full 24 hours to cure. Add joint braces or zip ties for extra reinforcement. This will keep connections solidly bonded.
Retighten and Patch Netting
Check netting for rips or loose attachment points. Firmly re-tighten any loose netting to the PVC frame with durable zip ties. Use heavy thread to sew smaller net holes or attach replacement mesh patches over larger torn areas.
Maintain Your PVC Goal to Prevent Cracks and Damage
With regular inspection and maintenance, your DIY PVC lacrosse goal will handle years of heavy use. Periodic repairs to cracks, dents, and netting will keep it in top playing condition. Don’t wait for damage to compound – fix issues promptly as they arise.
Proper maintenance ensures your homemade PVC pipe lacrosse goal stays around for the long haul. Keep it in shape so you can keep honing your skills anytime you want in your own backyard. With continued care, your DIY pvc lacrosse goal will be pumping in laser shots for seasons to come!
Enjoy Backyard Lacrosse Practice Using Your DIY PVC Goal
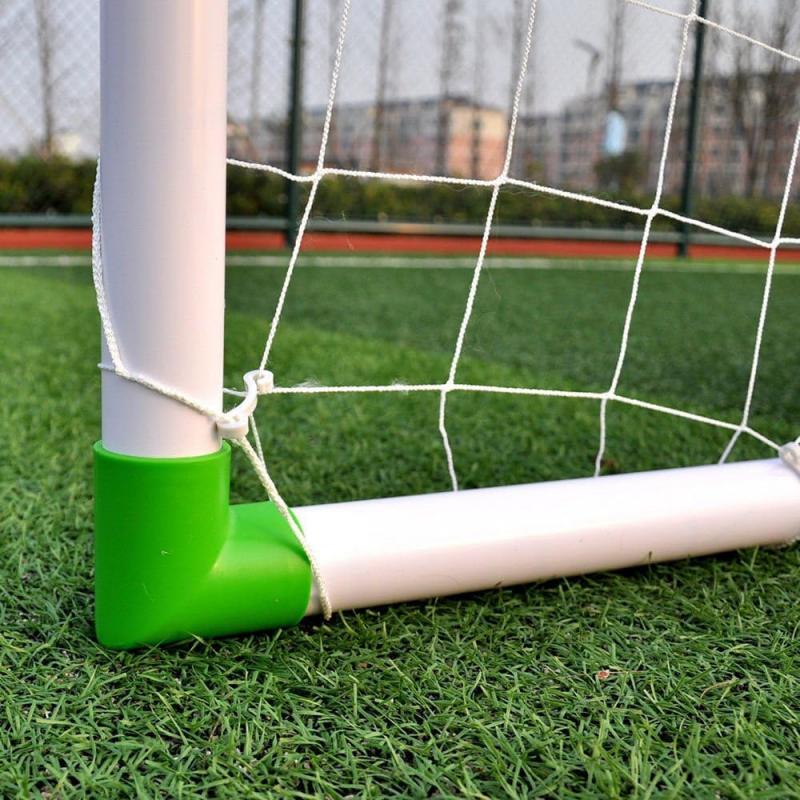
Want to step up your lacrosse game but don’t have regular access to a field or team practices? No problem! With some DIY skills and common materials, you can build your own professional-grade PVC lacrosse goal right in your backyard. This allows you to get extra shooting reps whenever you want.
Constructing a PVC lacrosse goal is a straightforward weekend project that will pay dividends all summer long. Having a regulation-sized net to shoot at makes it simple to hone your accuracy, power, and technique on your own schedule. No reliance on team practices or trying to reserve a field.
Best of all, a homemade PVC lacrosse goal opens up tons of backyard practice possibilities. Grab your stick and start enjoying solo drills and shooting games anytime!
Practice Shooting from Different Angles
With a goal in your yard, you can work on shooting from any spot you want. Practice sidearm rockets, overhands from behind the crease, and skip shots from deep. Vary your shooting angle and move around the goal to become a versatile scoring threat.
Improve Shooting Speed and Power
Unleash your fastest shots without worrying about a goalie. Wind up and work on shooting with maximum velocity. Shoot low rockets and precisely pick corners. The PVC pipe construction can take blistering 100+ mph shots!
Enjoy Competitions Playing Wall Ball
Challenge friends to wall ball competitions using the goal and backstop. Alternate catching ricochets and quickly shooting for points. Vary rules – shots off side posts or crossbar can subtract points. Get creative!
Enjoy Backyard Lacrosse Practice Using Your DIY PVC Goal
Your customized DIY PVC lacrosse goal enables endless backyard practice possibilities. Shoot anytime without needing a team. Dial in all aspects of your scoring game – accuracy, power, quick release, variety. Maintain your skills over the offseason by training on your own turf.
No need wait for the next team practice – grab your stick and head to the yard for some extra reps. Whether working on shooting fundamentals or playing competitive wall ball, a DIY PVC goal makes honing your skills fun. Construct your own goal today and enjoy the benefits all season long!

