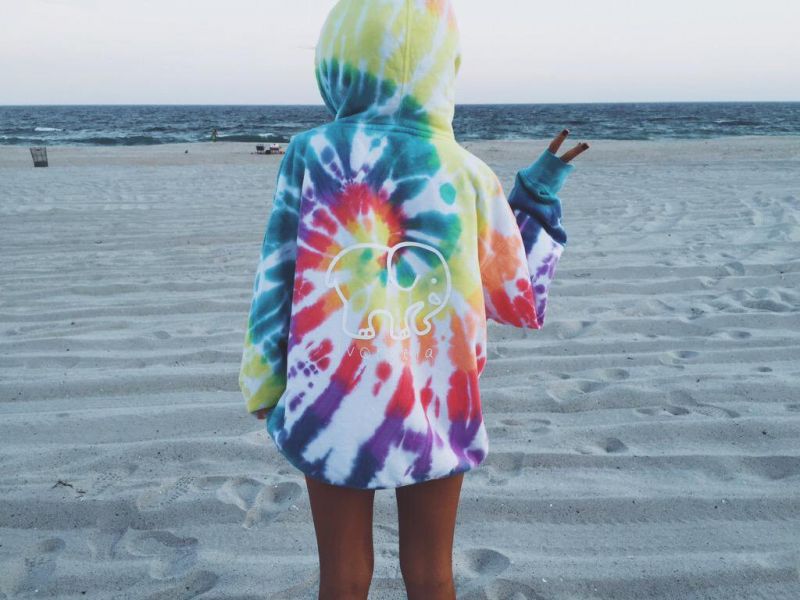
How to Make Your Own Trendy Tie Dye Hoodies for WomenHow to Make Your Own Trendy Tie Dye Hoodies for Women
Choose Your Fabric for Tie Dye
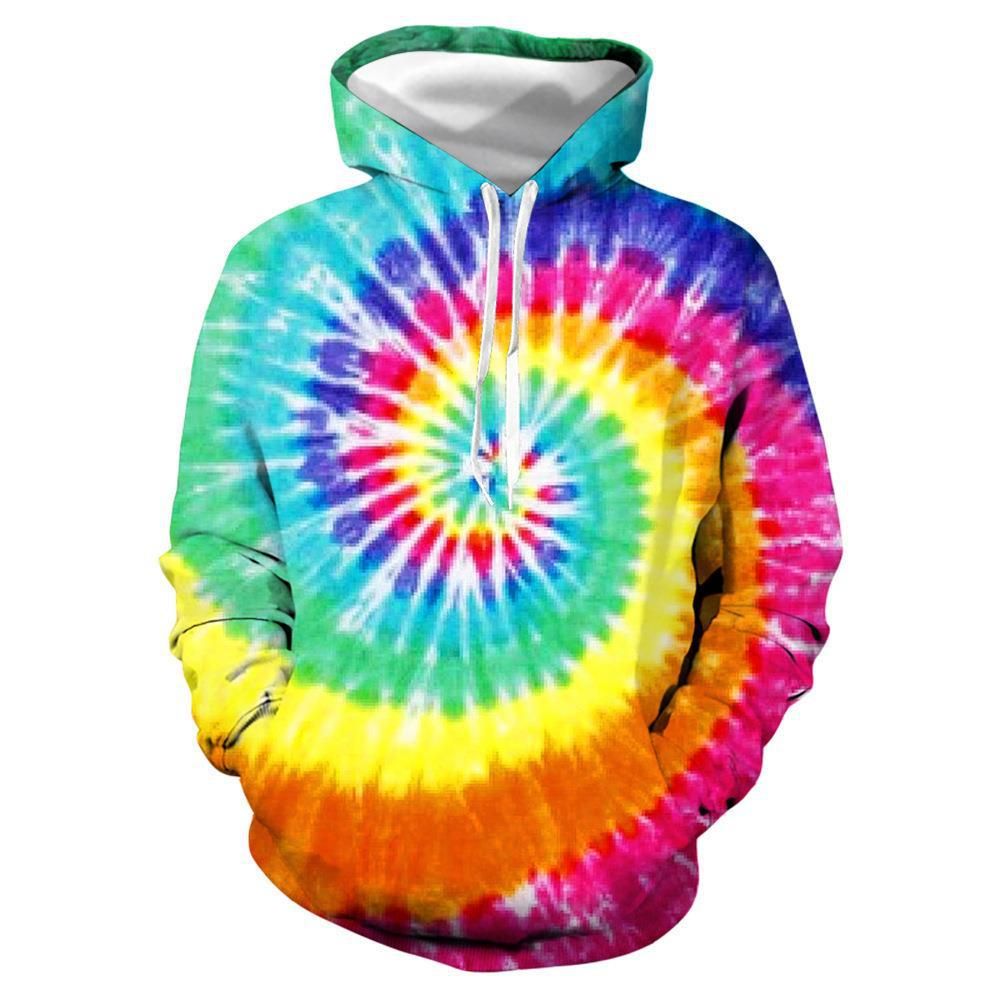
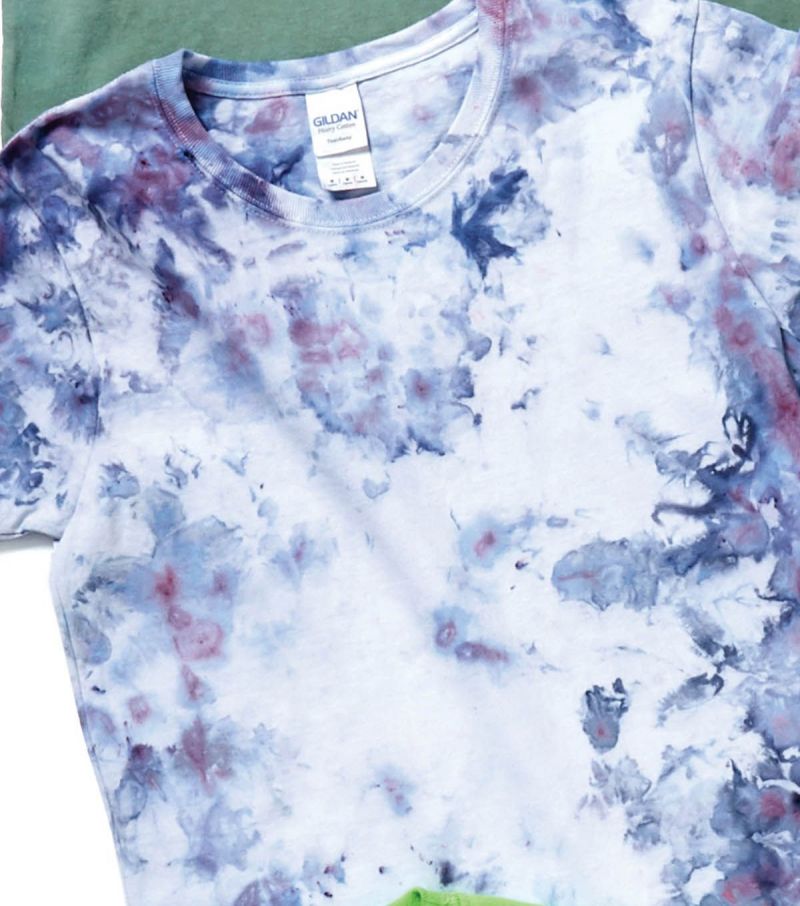
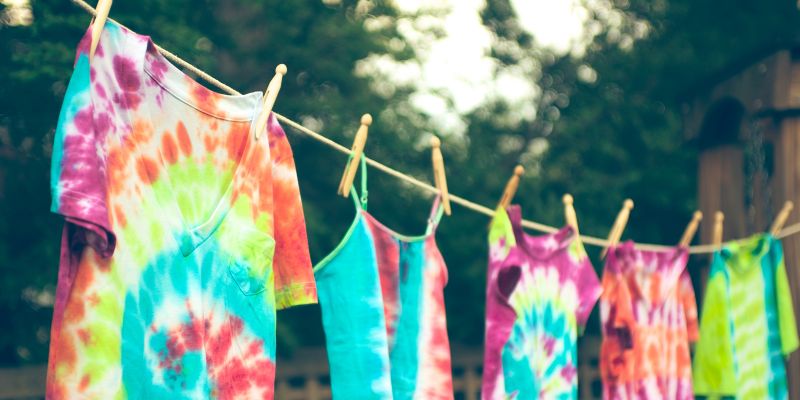
When embarking on a tie dye project, the first step is selecting the right fabric. Cotton is the most commonly used material for tie dye since it absorbs dye well and produces vivid colors. Hoodies are typically made of a cotton/polyester blend, which also readily accepts dye.
For the best results, look for hoodies made of 100% pre-washed cotton. Stay away from performance fabrics like hydrophobic polyester that resist absorbing dye. The fabric content of the hoodie will be listed on the tag. Examine the material closely and stretch it out – pure cotton will feel soft and natural, while polyester will have a cooler, slicker feel.
Besides the fabric content, also consider the weight and weave of the cotton hoodie. Medium weight fabrics around 5-6 oz will yield better effects than ultra-light t-shirt material. A tighter knit is also preferred, as loose knits will allow more dye to leak through.
Once you have a high-quality plain cotton hoodie, wash it by itself with detergent and no fabric softener before tie dyeing. Fabric softeners leave a coating that inhibits dye absorption. Pre-washing removes sizing compounds that also block dyes. The hoodie should be washed in hot water and dried on high heat to maximize shrinkage now, rather than later when decorated.
With the right cotton hoodie fabric selected and prepped, you’re ready to move onto gathering dye supplies. Taking the time to find a durable and dye-ready blank hoodie will ensure vivid results when tie dyeing. The quality of the starting material makes a big difference in how well the dyes set and how intense the finished colors turn out.
Prepare Dye and Supplies for Tie Dye
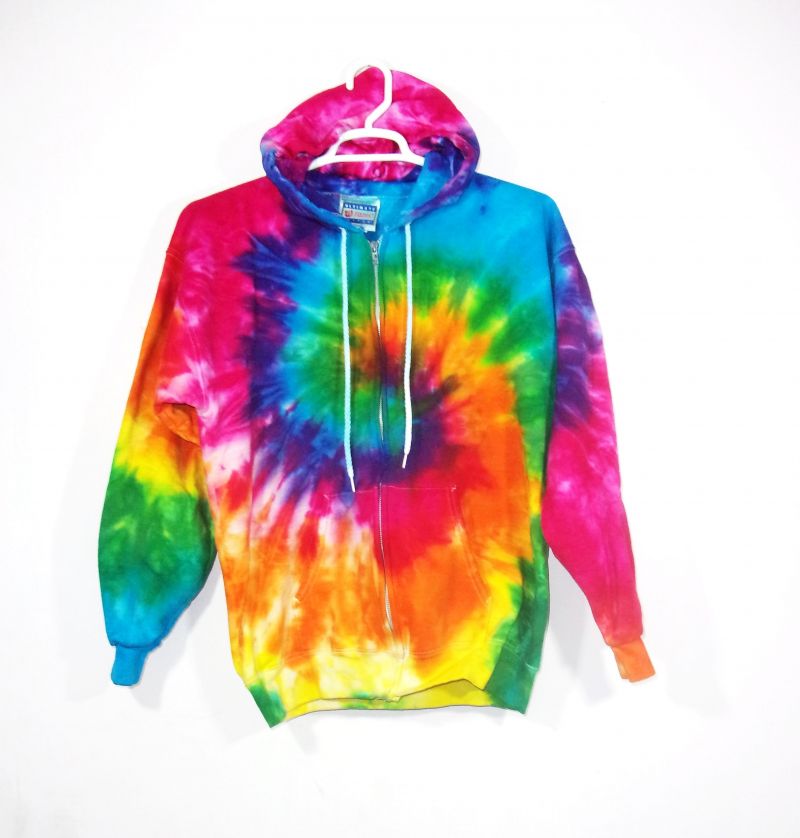
Once you have chosen and prepped your fabric, the next step is gathering the necessary dyes and supplies for tie dyeing hoodies. To achieve the iconic vibrant rainbow tie dye look, you will need fiber-reactive procion dyes which permanently bond with cotton, wool, and other natural fabrics. Procions come in powder or liquid form and must be mixed with water and a fixative like soda ash before applying.
For tie dye beginners, it’s easiest to start with a tie dye kit that provides pre-measured dyes, soda ash, gloves, squeezey bottles, and rubber bands all in one package. This takes the guesswork out of measuring dye powders and mixing chemical solutions. Procion dyes sold specifically for tie dye typically come in primaries like cyan, magenta, yellow, plus black and shades like grape, turquoise, and lime. For a full rainbow palette, get a kit with at least 6-8 different dye colors.
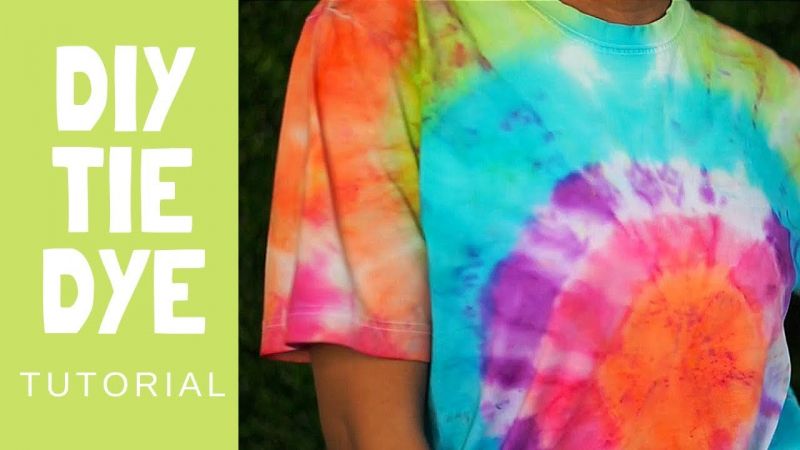
Besides dyes, some other supplies you’ll need include. DIY Trendy Tie Dye Hoodies for Women: A Comprehensive Guide
How to choose the right fabric for tie-dye hoodies. What supplies are needed for tie-dyeing. How to create unique tie-dye patterns. What are the best techniques for applying dye to hoodies. How to set and care for tie-dye creations. What are some trendy tie-dye color combinations for women’s hoodies. How to troubleshoot common tie-dye issues.
Selecting the Perfect Fabric for Tie-Dye Hoodies
The foundation of any successful tie-dye project lies in choosing the right fabric. For hoodies, cotton reigns supreme due to its excellent dye absorption properties. However, cotton/polyester blends can also yield satisfactory results.
When selecting a hoodie for tie-dyeing, consider the following factors:
- Fabric composition: Opt for 100% pre-washed cotton or high cotton content blends
- Weight: Medium-weight fabrics (5-6 oz) tend to produce better effects
- Weave: Tighter knits prevent excessive dye leakage
- Pre-treatment: Wash the hoodie in hot water without fabric softener before dyeing
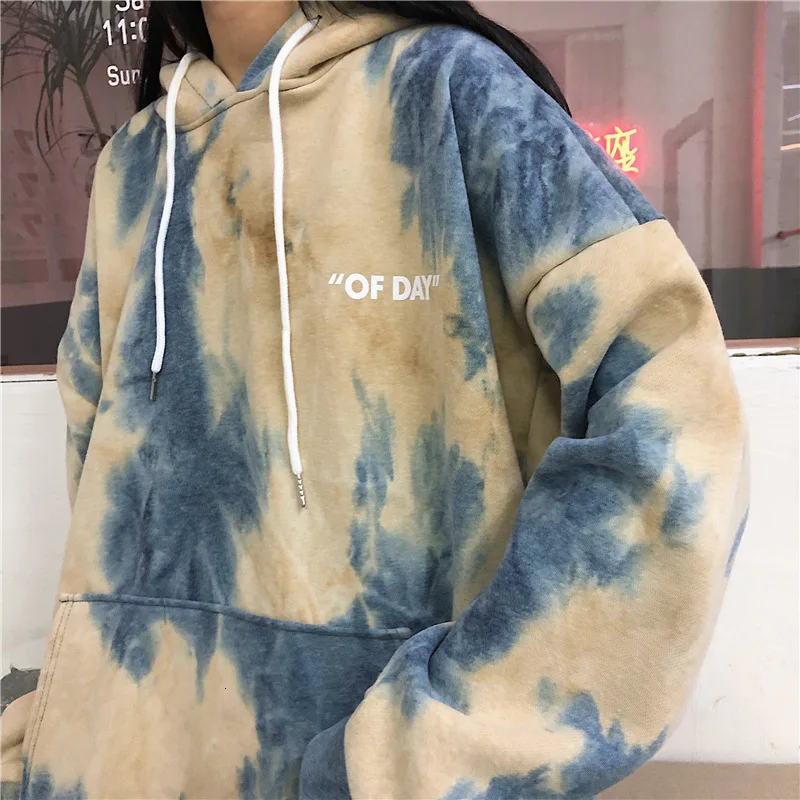
Can you tie-dye any color hoodie. While light-colored or white hoodies are ideal, you can tie-dye darker colors for subtle effects. Keep in mind that the original color will influence the final result.
Essential Supplies for Tie-Dye Success
To create vibrant, long-lasting tie-dye hoodies, you’ll need to gather the right supplies. Here’s a comprehensive list of items to prepare:
- Fiber-reactive procion dyes (powder or liquid form)
- Soda ash fixative
- Urea (for dye thickening)
- Squeeze bottles for dye application
- Rubber gloves
- Rubber bands, zip ties, or string for binding
- Plastic drop cloths
- Drying rack or poles
For beginners, a tie-dye kit can simplify the process by providing pre-measured dyes and essential supplies in one package.
Preparing Your Dye Solutions
To achieve optimal color saturation, follow these steps when mixing your dyes:
- Combine procion dye with warm water according to package instructions
- Add soda ash fixative and stir until fully dissolved
- Incorporate a teaspoon of urea per cup of dye to thicken the mixture
- Transfer prepared dyes to labeled squeeze bottles for easy application
Mastering Tie-Dye Folding Techniques
The art of tie-dye lies in the way you manipulate the fabric before applying dye. Different folding and binding techniques create unique patterns and designs. Here are some popular methods to try:
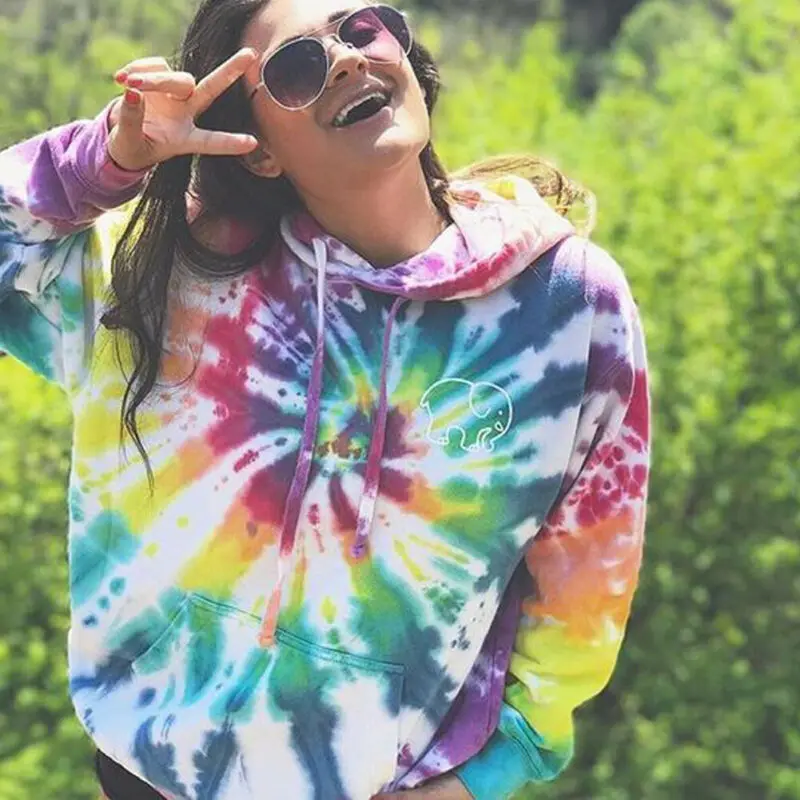
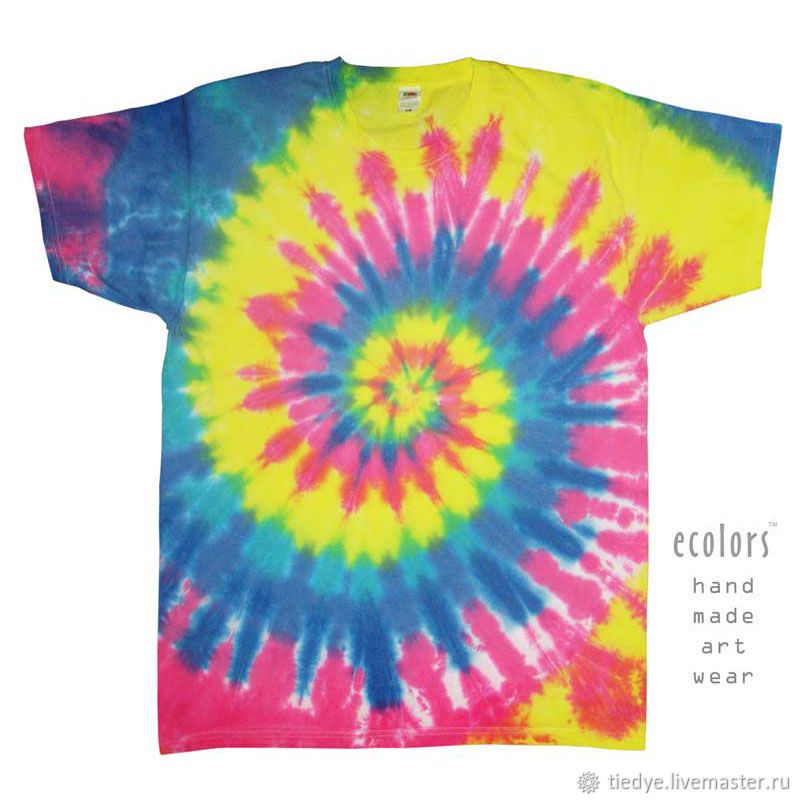
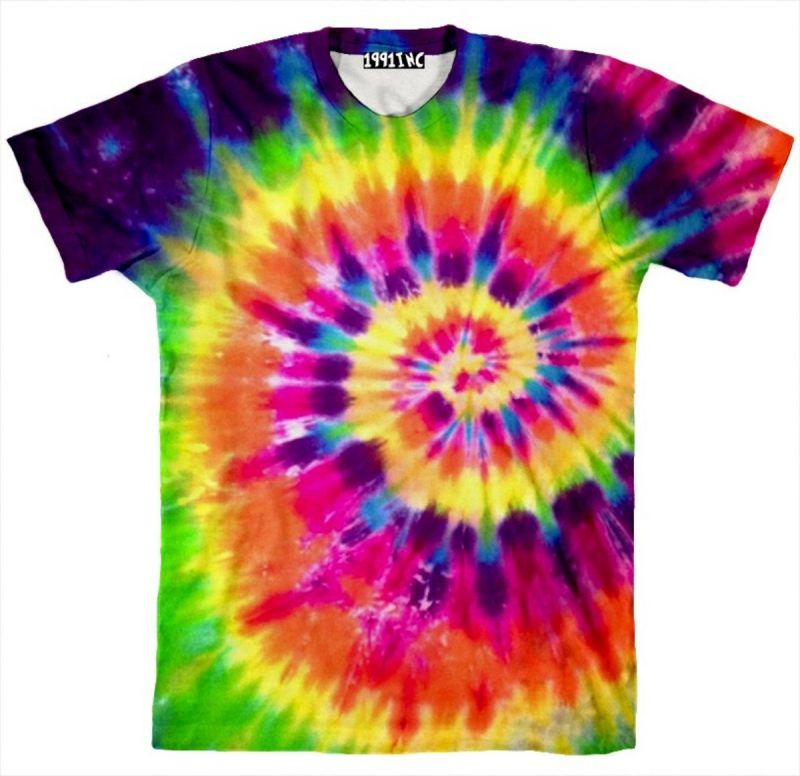
- Bullseye swirls: Twist fabric into a tight spiral and secure with rubber bands
- Stripes: Accordion fold the fabric and clamp with clothespins
- Rays: Pleat the fabric and bind the tips
- Diamonds: Fold the fabric into triangles
- Hearts: Create a heart shape and bind the center seam
How tight should you tie your fabric for tie-dye. The tighter you bind your fabric, the more white space you’ll create in your design. Experiment with different levels of pressure to achieve varied effects.
Applying Dye: Techniques for Vibrant Results
Once your hoodie is folded and bound, it’s time to apply the dye. Follow these tips for best results:
- Work in a well-ventilated area or outdoors
- Wear gloves and protect your work surface
- Apply dye generously, ensuring it penetrates all layers of fabric
- Use contrasting colors for bold designs
- Experiment with color blending for unique effects
How long should you let tie-dye sit. For most procion dyes, allow the dyed fabric to sit for 6-8 hours or overnight for maximum color saturation. Some quick-set dyes may require less time – always check the manufacturer’s instructions.

Color Combination Ideas for Women’s Hoodies
Create trendy tie-dye hoodies by experimenting with these popular color combinations:
- Pastel dreams: Soft pink, lavender, and mint green
- Sunset vibes: Orange, yellow, and deep purple
- Ocean breeze: Turquoise, navy, and white
- Earth tones: Rust, olive green, and mustard yellow
- Monochromatic magic: Various shades of a single color
Setting and Caring for Your Tie-Dye Creation
To ensure your tie-dye hoodie retains its vibrant colors, follow these post-dyeing steps:
- Rinse the hoodie in cold water until the water runs clear
- Remove rubber bands or binding materials
- Wash the hoodie separately in cold water with a mild detergent
- Hang to dry or tumble dry on low heat
- Iron the hoodie if desired, using a pressing cloth to protect the fabric
How do you keep tie-dye from fading. To maintain the vibrancy of your tie-dye hoodie, wash it in cold water with like colors, and avoid using harsh detergents or bleach.
Troubleshooting Common Tie-Dye Issues
Even experienced tie-dye enthusiasts encounter challenges. Here are solutions to common problems:
Dull or Faded Colors
If your tie-dye results lack vibrancy, consider these factors:
- Dye quality: Use fresh, high-quality dyes for best results
- Fabric preparation: Ensure the hoodie is thoroughly pre-washed
- Dye concentration: Increase the amount of dye powder in your mixture
- Setting time: Allow the dye to set for the full recommended duration
Uneven Color Distribution
To achieve more uniform color application:
- Apply dye evenly and generously
- Flip the hoodie periodically during the setting process
- Use squeeze bottles for precise dye application
Bleeding Colors
To prevent colors from bleeding into each other:
- Allow each color to dry slightly before applying adjacent colors
- Use color barriers or leave white space between different hues
- Rinse thoroughly in cold water before washing
Advanced Tie-Dye Techniques for Unique Hoodie Designs
Once you’ve mastered the basics, explore these advanced techniques to create one-of-a-kind tie-dye hoodies:
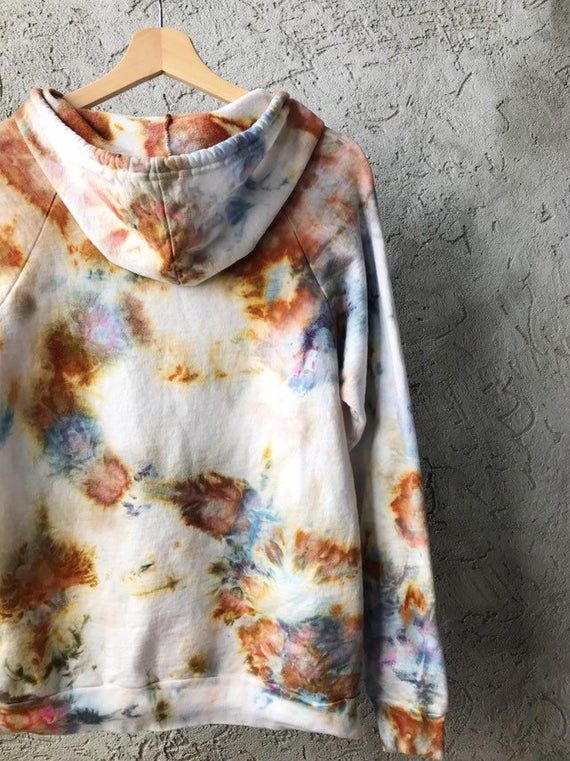
Ice Dyeing
Ice dyeing creates a watercolor-like effect:

- Scrunch the hoodie and place it on a rack over a container
- Cover the fabric with ice cubes
- Sprinkle powdered dye over the ice
- Allow the ice to melt, carrying the dye through the fabric
Reverse Tie-Dye
Create unique patterns on dark-colored hoodies:
- Apply a bleach solution to a dark hoodie using tie-dye techniques
- Rinse thoroughly and neutralize with hydrogen peroxide
- Optionally, apply dye to the bleached areas for added color
Shibori Techniques
Explore Japanese Shibori folding methods for intricate patterns:
- Itajime: Fold and clamp fabric between shapes
- Arashi: Wrap fabric around a pole and scrunch
- Kumo: Create spider-web patterns with small pleats
How can you create ombre effects in tie-dye. To achieve an ombre look, gradually dilute your dye solution as you apply it to the fabric, creating a gradual transition from dark to light.
Customizing Your Tie-Dye Hoodie
Take your tie-dye hoodie to the next level with these customization ideas:
- Add fabric paint details or metallic accents
- Embroider designs over the tie-dye pattern
- Attach patches or appliqués
- Cut and distress the fabric for a grunge look
- Incorporate stenciled designs using fabric paint
Can you combine tie-dye with other fabric decoration techniques. Absolutely! Tie-dye can be paired with screen printing, block printing, or even batik for unique, multi-layered designs.

Eco-Friendly Tie-Dye Options
For environmentally conscious crafters, consider these natural dye alternatives:
- Turmeric: Creates yellow hues
- Avocado pits and skins: Produces pink tones
- Indigo: Offers various shades of blue
- Beetroot: Yields red and pink colors
- Black beans: Creates gray and blue tones
While natural dyes may not be as vibrant or colorfast as synthetic options, they offer a unique, earth-friendly approach to tie-dyeing.
Styling Your Tie-Dye Hoodie
Once you’ve created your perfect tie-dye hoodie, it’s time to show it off! Here are some stylish ways to incorporate your creation into your wardrobe:
- Pair with high-waisted jeans and sneakers for a casual look
- Layer over a dress for a bohemian vibe
- Combine with leather leggings and boots for an edgy ensemble
- Wear with a midi skirt and sandals for a playful outfit
- Use as a statement piece over a monochromatic outfit
How can you dress up a tie-dye hoodie for a more formal occasion. Elevate your tie-dye hoodie by pairing it with tailored trousers, heels, and statement jewelry for a unexpected twist on smart-casual attire.

Seasonal Tie-Dye Trends
Adapt your tie-dye creations to suit different seasons:
- Spring: Pastel colors and floral-inspired patterns
- Summer: Bright, bold hues and beachy designs
- Fall: Earth tones and ombre effects
- Winter: Jewel tones and snow-inspired ice dye techniques
Tie-Dye as a Creative Outlet
Beyond fashion, tie-dyeing offers numerous benefits as a creative hobby:
- Stress relief through artistic expression
- Opportunity for mindfulness and focus
- Chance to create unique, personalized gifts
- Potential for upcycling and repurposing old clothing
- Avenue for social connection through crafting groups or workshops
How can tie-dyeing be used as a team-building activity. Organize a tie-dye party or workshop where participants can create matching hoodies, fostering creativity and collaboration in a fun, relaxed setting.
Tie-Dye in Contemporary Fashion
Explore how tie-dye has evolved in modern fashion:
- High-end designer interpretations of tie-dye
- Tie-dye in streetwear and athleisure
- Digital tie-dye prints and patterns
- Tie-dye accessories and home decor items
- Tie-dye as a symbol of individuality and self-expression
By mastering the art of tie-dye, you’re not just creating a trendy hoodie – you’re participating in a rich tradition of fabric art that continues to evolve and inspire. Whether you’re drawn to classic rainbow swirls or sophisticated monochromatic designs, tie-dye offers endless possibilities for creative expression and personal style.
Choose Your Fabric for Tie Dye
When embarking on a tie dye project, the first step is selecting the right fabric. Cotton is the most commonly used material for tie dye since it absorbs dye well and produces vivid colors. Hoodies are typically made of a cotton/polyester blend, which also readily accepts dye.
For the best results, look for hoodies made of 100% pre-washed cotton. Stay away from performance fabrics like hydrophobic polyester that resist absorbing dye. The fabric content of the hoodie will be listed on the tag. Examine the material closely and stretch it out – pure cotton will feel soft and natural, while polyester will have a cooler, slicker feel.
Besides the fabric content, also consider the weight and weave of the cotton hoodie. Medium weight fabrics around 5-6 oz will yield better effects than ultra-light t-shirt material. A tighter knit is also preferred, as loose knits will allow more dye to leak through.
Once you have a high-quality plain cotton hoodie, wash it by itself with detergent and no fabric softener before tie dyeing. Fabric softeners leave a coating that inhibits dye absorption. Pre-washing removes sizing compounds that also block dyes. The hoodie should be washed in hot water and dried on high heat to maximize shrinkage now, rather than later when decorated.
With the right cotton hoodie fabric selected and prepped, you’re ready to move onto gathering dye supplies. Taking the time to find a durable and dye-ready blank hoodie will ensure vivid results when tie dyeing. The quality of the starting material makes a big difference in how well the dyes set and how intense the finished colors turn out.
Prepare Dye and Supplies for Tie Dye
Once you have chosen and prepped your fabric, the next step is gathering the necessary dyes and supplies for tie dyeing hoodies. To achieve the iconic vibrant rainbow tie dye look, you will need fiber-reactive procion dyes which permanently bond with cotton, wool, and other natural fabrics. Procions come in powder or liquid form and must be mixed with water and a fixative like soda ash before applying.
For tie dye beginners, it’s easiest to start with a tie dye kit that provides pre-measured dyes, soda ash, gloves, squeezey bottles, and rubber bands all in one package. This takes the guesswork out of measuring dye powders and mixing chemical solutions. Procion dyes sold specifically for tie dye typically come in primaries like cyan, magenta, yellow, plus black and shades like grape, turquoise, and lime. For a full rainbow palette, get a kit with at least 6-8 different dye colors.
Besides dyes, some other supplies you’ll need include:
* Rubber gloves to protect your hands from stains
* Soda ash dye fixative
* Urea to thicken dye for saturation
* Squeeze bottles for dye application
* Zip ties, rubber bands, or string for binding
* Plastic drop cloths to protect work surfaces
* A rack or poles for hanging the dyed item to dry
To prepare the dye baths, mix the procion dyes with warm water following kit instructions. Thoroughly stir in the recommended amount of soda ash fixative until dissolved. For best results, add a teaspoon of urea per cup of dye to thicken the mixture slightly. This helps the dye fully saturate the twisted and tied fabric. Pour the prepared dyes into labeled squeeze bottles for controlled application.
Assembling all the required dyes, additives, tools, and protective gear may seem daunting at first. But sourcing a starter tie dye kit online makes the process straightforward even for beginners. With quality dyes and accessories in hand, you’re ready to move on to the fun, creative part – tying and dyeing the hoodie!
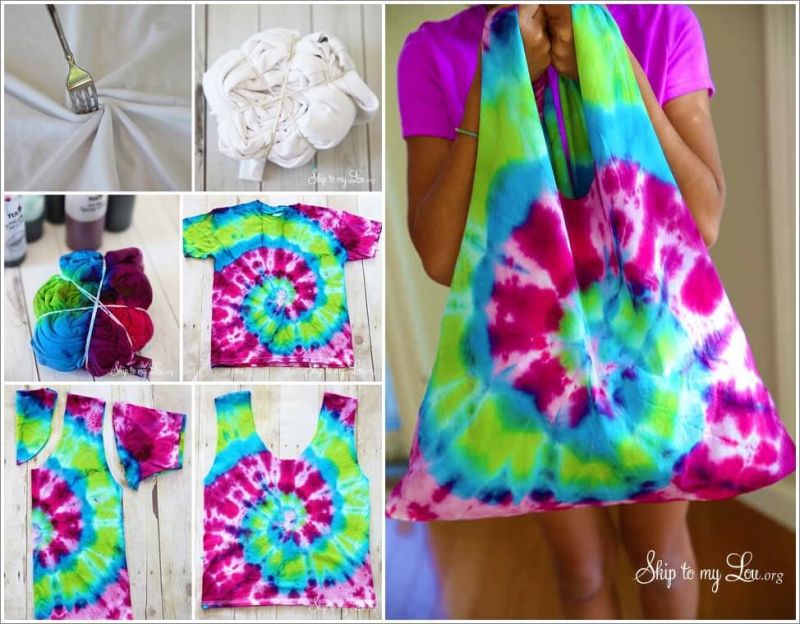
Fold and Tie the Fabric for Tie Dye
Once you have prepped your hoodie fabric and mixed up vivid dye colors, it’s time to start folding, twisting, and tying the hoodie to create the iconic tie dye patterns. The way you manipulate and bind the fabric before dyeing determines the final design.
Start by thoroughly wetting down the wrung-out hoodie and laying it flat. For bold symmetrical patterns, fold the fabric into accordion pleats, make diagonal folds, or scrunch areas up into circles. For stripes and swirls, twist the fabric into tight spirals and coils. Use rubber bands or string to tightly bind the folded and twisted areas – this prevents the dye from reaching the fabric underneath.
Some classic tie dye folding techniques include:
– Bullseye swirls – Twist fabric into a tight spiral and bind rings around it
– Stripes – Fold fabric into sections and clamp with clothespins
– Rays – Pleat fabric and bind tips
– Diamonds – Fold fabric into triangles
– Hearts – Fold into heart shape and bind center seam
Endless pattern variations are possible by altering the folds and tie placements. Keep these tips in mind for best results:
– Bind ties very tightly – the more pressure, the crisper and sharper the design
– Vary tie widths and spacing – closer ties create finer patterns
– Use strong sinew, rubber bands or clamps – flimsy ties may loosen and bleed
– Make folds and ties symmetrical for bolder effects
– Allow some untied space for solid colored areas
– Focus ties on certain sections for placement control
Taking the time to carefully bind the entire hoodie results in sharper contrasts where the saturated dyes stop at the ties. Let your creativity run wild and experiment with different folding techniques to achieve unique patterns and designs!
Apply the Dye for Tie Dye
After tightly binding your twisted, folded, and scrunched fabric, you’re ready for the fun part – applying the vivid dyes! Prepare your dyeing station by laying down plastic drop cloths and put on protective gloves and apron.
Start by dampening the tied hoodie again before dyeing. Then apply the dye colors from lightest to darkest in a sequence that makes sense for the pattern. For example, dye yellow first for sunburst designs, followed by darker orange and red dyes radiating from the center. Focus darker colors on the inner ties and lighter dyes on the outer rings.
Use the squeeze bottles to carefully control dye flow and placement. Drizzle, spray or squirt the procion dyes directly onto the bound and folded fabric. Apply dye liberally and thoroughly saturate each section, especially near tie bounds. The more saturated the fabric, the more intense and vivid the final color.
Work in small sections, applying 1-2 colors at a time before moving to the next tied area. Overlap colored areas slightly for blending effects. Cover all tied and bound sections with dense dye for full pattern development.
Tip the squeeze bottles to drizzle dye from different angles and heights for variations in color density and bleeding. Spritz dye intermittently for mottled effects. Let colors fully soak in for 10 minutes before adding another layer.
After applying all the colors, place the dyed hoodie in a plastic bag. Knead the bag for even dye penetration and distribution. Reapply more dye as needed to any light spots. Seal the bag and let the hoodie soak for at least 8 hours or overnight before rinsing.
With the right sequence of colorful dye application and full saturation, you’ll end up with eye-catching designs! Now just rinse, unwrap, and watch the vibrant patterns emerge.
Rinse and Unwrap the Tie Dyed Fabric
After letting the tied and saturated fabric soak overnight, the next step is rinsing to reveal the finished tie dye patterns. This is the big reveal, so take your time to appreciate the process of watching the designs emerge!
Rinse the dyed hoodie under a cold tap, running the water through the fabric until it runs clear. Don’t wring or wash vigorously, as this may cause dyes to bleed across pattern boundaries you created.
Gently remove the rubber bands or ties binding the fabric. Unfold each section slowly, taking care not to pull too hard. The hoodie will still be quite delicate at this point.
Gradually the colors and patterns will be unveiled as the fabric is untied and unfolded. Notice how the tightly bound areas resisted taking the dyes, creating defined white spaces and crisp motif outlines. Appreciate the clever folding techniques and skilled dye placement that went into creating the unique designs.
Use your hands to gently coax any stubborn folds open. Rinse under cold water again to remove residual dye as the fabric relaxes and straightens out. Avoid hot water, as it can cause dye to spread from tied areas.
Inspect for any defects needing touch-ups, like uneven dye application. Re-bind small areas with sinew or clamps and use a dye applicator bottle to precisely touch up imperfections.
When fully unfolded, the hoodie will be quite damp, crumpled and dyed in irregular patterns at this stage. But the colors should look vivid within the motif boundaries. Allow the fabric to completely air dry before final washing and drying to set the dyes.
Unwrapping the bound up fabric to reveal the final designs is one of the most exciting steps. With patience and care, your unique colorful patterns will be ready to wear after washing.
Wash and Dry the Tie Dyed Fabric
After rinsing, inspecting, and allowing the fabric to fully air dry, the final step is washing and drying the tie dyed hoodie to set the colors and make it wearable.
Wash the dyed hoodie separately in hot water with Synthrapol dye fixative or mild detergent. Avoid using fabric softener or bleach. Agitate the hoodie gently, allowing the water to flow through the fibers to flush excess dye and fully saturate the fabric.
It’s important to wash in hot, rather than cold water, to make the procion dyes bond permanently within the cotton. The heat causes a chemical reaction that sets the dyes into the fibers for colorfast results. Washing in cold water can allow dye to continue bleeding from the fabric over time.
Check the rinse water – it may be quite colorful at first as any loose dye washes out. Keep rinsing and washing until the water runs clear. This ensures all excess dye is removed so it won’t stain other laundry.
For best results, wash the hoodie 2-3 times to fully set the dyes and eliminate any chance of further color bleeding. If needed, you can use a dye retardant like Retayne in the second wash cycle to further bind any lingering loose dye.
After washing, dry the hoodie right away on a high heat setting. The heat will continue bonding the dye with the fabric fibers for maximum vibrancy and color retention over time. Avoid air drying, as this can also cause dyes to fade faster.
Once washed and dried, your tie dye hoodie is ready to wear! The colors should now be brilliant, saturated, colorfast, and machine washable thanks to the hot dye setting process. Enjoy showing off your vibrant hand-dyed creation!
Consider Design Options for Tie Dye
One of the best things about tie dye is the endless possibilities for creating unique patterns and designs. Before binding and dyeing your hoodie, take some time to consider what colors and motifs you want to achieve.
Think about using complementary color schemes for visual impact. Analogous warm colors like red, orange, and yellow complement each other nicely, as do cool hues like blues and greens. You can also create bold contrast with opposites like purple and yellow.
Study traditional pattern styles like spirals, stripes, circles, and teardrops for ideas. Combining geometric and organic shapes works well. Draw quick sketches to map out planned designs first.
Consider symmetry and balance with the patterns.An overall radial or mirrored effect looks more cohesive than random splotches. But irregular abstract shapes can also have artistic impact.
Frame focal motifs with negative space – this helps central designs stand out. Allow some sections to stay white or pale for contrast. Outline patterns in black dye for definition.
Add whimsical style with curved lines, paisleys, hearts, waves, wormholes, and other freeform shapes. Create gradients by carefully overlapping colored areas.
Placement is also important. Center bold patterns and vary scale for interest. Use smaller repeated motifs as accents. Consider personalizing with initials or words using ties and dye.
Making a plan for the color palette, motifs, symmetry, and composition will help tie dye beginners achieve the stylish boho look. But spontaneous creativity often leads to the best results! Let tie dyeing unleash your inner artist.
Create Ombre and Gradient Effects with Tie Dye
One trendy and stylish technique in tie dye is creating ombre or gradient effects. This involves gradually blending two or more colors to produce a fade rather than harsh delineations.
Achieving an ombre effect takes careful planning and dye application. Start by choosing two or more colors that complement each other and flow nicely when blended, like purple to blue or red to orange.
Fold the hoodie into wide pleats or sections, securing ties at intervals every few inches. Make the folds cascade down the garment to facilitate a vertical fade.
Apply the lightest shade to the top section, above the first tie. Work downward applying the next color below the next tie. Overlap dyes above and below each bound section for smooth blending between hues.
Use a spray bottle and very light misting of dyes to feather and diffuse boundaries between colors. Layer sheer color washes to create seamless fading down the fabric.
You can also twist the hoodie into a spiral, securing ties at intervals. Apply lightest dye at the outermost coil, gradually using darker colors as you spiral inward.
Rinse, unwrap, and wash to reveal the ombre design. The gradient effect adds visual interest and depth to tie dye. Blending a hoodie from dark to light purple makes an especially trendy ombre tie dye project.
With careful dye application and strategic binding, you can create gorgeous cascading color flows. Ombre tie dye takes more work but delivers a stylish payoff!
Use Different Dye Colors for Tie Dye
One of the most creatively fun aspects of tie dye is experimenting with different vivid dye colors to achieve unique effects. The dye palette you select can make a major impact on the style and mood of the finished design.
For a bold, funky look, use a full spectrum of primary colors like red, blue, and yellow. Combining complementary hues like violet and yellow or orange and green also packs visual impact.
Try nontraditional shades like fuchsia, turquoise, lime green, and bright coral for psychedelic results. Soft pastels like lilac, mint, and peach create a more delicate look.
Using only analogous hues like different shades of blue or green results in a more soothing, harmonious style. Monochromatic tie dye in cascading values of one color makes a subtle statement.
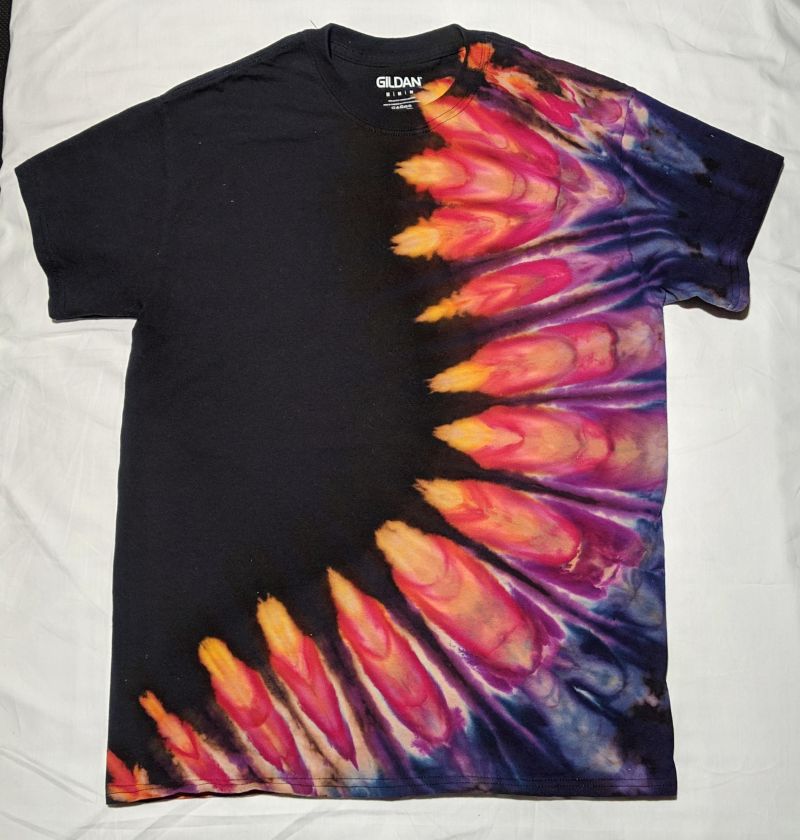
Don’t forget classic black dye for dramatic contrast outlines, deepening colors or creating skull, yin-yang and tabby cat patterns. Using black dye outlined with white space takes skill but looks impressive.
Metallic dyes add glam shimmer effects to tie dye. Iridescent and neon reactive dyes produce a brilliant glow under black light. It’s endlessly fun to mix and match dyes for custom palettes.
For white hoodies, choose darker saturated colors like jewel tones and brights. On black hoodies, go for intense fluorescent or iridescent dyes that pop against the darkness.
Getting creative with colors is part of the appeal and artistry of tie dye. Curating a color scheme that expresses your style is key to making memorable designs.
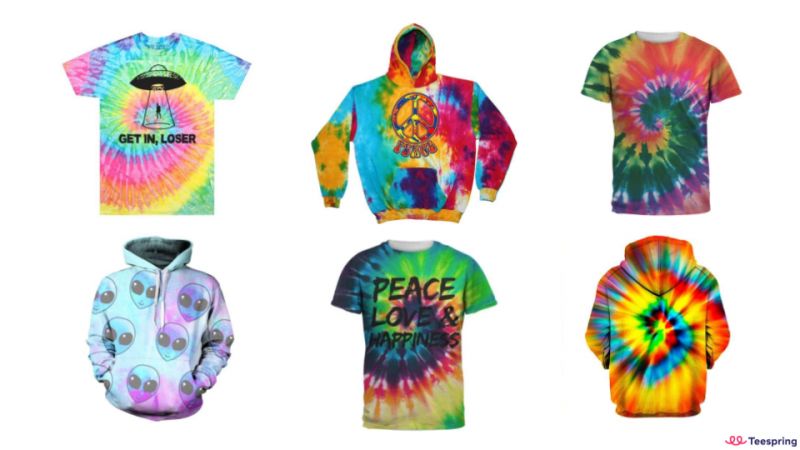
Add Graphics or Text to Tie Dye
Adding graphics, letters, or words takes tie dye designs to the next level. With some strategic planning and skill, you can incorporate custom graphics and text for a personalized twist.
Cut stencils from foil, plastic or cardboard to mask off sections before dyeing. Apply dye over and around the stencils to produce crisp lines, geometric patterns and motif outlines.
Use ties, clamps and resist techniques to create specific letter or number shapes on the hoodie before dyeing. Work carefully, as any missed folds or gaps in ties will blur the designs.
Another option is dyeing the fabric first, then using fabric paint or markers to hand letter names, phrases, and doodles. Freehand paint directly on the tie dye with acrylics or fabric markers.
Add iron-on vinyl cut-outs for sharp graphic effects. Fuse the vinyl on after dyeing to avoid leaching of the adhesive chemicals into the fabric.
Print designs, photos or text onto special transfer paper, then iron to affix the image. Make custom graphic tie dye hoodies for sports teams, school clubs, or promoting brands.
Sublimation printing infuses fabric with full-color digital prints. But this requires a special polyester athletic hoodie rather than plain cotton.
Get creative embellishing your tie dye with unique graphics or text for a fully customized creation! Add a name, inspirational phrase or fun image to make it truly personal.
Distress and Fade for Vintage Tie Dye
For a cool faded, vintage look, consider distressing and aging your finished tie dye hoodie. Making new hoodies look old and worn adds stylish character.
Add some natural fading by drying the dyed hoodie in direct sunlight. The UV exposure will gently deteriorate and mute the fabric dyes over time.
For quick fading, dab bleach onto the tie dyed fabric using a sponge. Work in small sections to control the lightening effects. Rinse immediately once desired color removal is achieved.
Use fine grit sandpaper or an old washboard to lightly abrade the surface fibers, causing pills and faded whiteness. Focus on distressing edges and seams.
Increase softness and pilling by washing the hoodie several times on a hot tumble dry cycle. The heat and agitation degrades fibers.
For thin blotchy bleaching, spritz lemon juice or hydrogen peroxide over the design. It naturally removes dye and creates an aged, acid washed effect.
Use sharp scissors to trim strings and create tasteful holes or ragged edges. Fraying the sleeves and hems looks grungy and worn-in.
Aging new tie dye hoodies with distressing techniques creates an instant vintage vibe. For best results, fade and abrade strategically to accentuate the original bright dyed motifs.
Make Matching Sets with Tie Dye
For a pulled-together boho look, consider tie dyeing a matching set. Coordinating hoodies, t-shirts, pants, or accessories makes an eye-catching statement.
Match the scale and placement of motifs across the set. For example, create a large central spiral on both a hoodie and T-shirt. Echo colors across pieces as well.
Dye sets during the same session with the same technique for cohesive results. Bind and dye corresponding sections simultaneously.
Use identical materials, dyes, process and drying to ensure the pieces develop evenly and have the same hand and texture.
For seamless blending, tie adjoining garments tightly together at the hems or waists before dyeing. Bind and pleat them as one large piece.
Consider shibori techniques like shaped resist or pole wrapping to make organic freeform patterns flow appealingly across the set.
Match accessories like bandannas, leggings, or sneakers to the main garments. Tie dye shoelaces, wristbands, or socks for cute coordinated accents.
Fashion a boho girlfriend look with matching his-and-hers tie dye tees. Create cute coordinated mother-daughter outfits as bonding projects.
Twinning in tie dye is an adorable idea! Dye companion pieces simultaneously to complement and complete the look.
Customize Tie Dye with Personal Touches
Personalizing your tie dye hoodie with custom details makes it extra special. Add your own flair to make it truly one-of-a-kind.
Consider embroidering your name, initials, favorite number, or other text on the hoodie after dyeing. Choose thread colors that complement the tie dye palette.
Use fabric paint to draw, stencil or freehand doodle additional whimsical imagery like flowers, critters, or hearts. Add iron-on appliques for interest.
Sew decorative ribbons, lace, rickrack or colorful trims around the sleeves, pockets, hood and hems. Fringe the edges for a boho vibe.
Adorn with embroidered or fabric patches, buttons, studs or decorative pins. Affix them strategically to enhance areas of open space.
Add shine and texture with fabric paints that incorporate glitter particles or dimensional puffy elements. Outline key motifs with glitter glue.
Consider beading or stitching folk-art inspired floral motifs. Use the tie dye pattern as the “canvas” for embroidery.
Make it music festival ready with fun dangling wristbands, decorative body chains, and temporary tattoos or body gems.
Personalize your tie dye hoodie to showcase your creativity and unique spirit! Handcrafted touches make it seriously special.
Experiment with Patterns and Shapes in Tie Dye
One of the best parts of tie dye is seeing the designs emerge after unfolding the bound and dyed fabric. Experimenting with different patterns and shapes keeps the process exciting.
Try classic sunburst and bullseye motifs by twisting and binding the hoodie into concentric circles. Vary the tie spacing for geometric interest.
Bold bands and stripes result from tightly pleating the fabric into even sections before dyeing. Stripes look best on long sleeves and hoodie bodies.
Love the look of swirls and paisleys? Twist fabric into spirals and curve the stripes for a psychedelic tye-dye look.
Scrunch sections into circles secured by rubber bands to make organic polka dots and flower shapes. Try wavy variations like pebbles in a pond.
Fold into triangle and diamond shapes, binding small sections to create kaleidoscope or mosaic patterns. Interlock the shapes for jazzier effects.
Craft moon and starburst shapes by stitching sinew ties through the center of folded fabric wedges before saturating with dye.
Let the hoodie details guide the binding shapes – cinch the waistband into gathers, swirl the hood lining, knot the drawstrings.
Tie dyeing is the perfect art form for imaginative free play and improvisation. Keep exploring new ways to fold, wrap, and bind for magical results!