How can you choose the right Maverik Bounce Back Lacrosse Goal. What factors should you consider for optimal goal placement. Why is adjustability crucial for skill development. How does a quality bounce back goal improve your shooting accuracy. What are the key steps to master lacrosse skills using a Maverik goal.
Selecting the Ideal Maverik Bounce Back Lacrosse Goal
Choosing the right Maverik Bounce Back Lacrosse Goal is crucial for improving your skills. These goals are designed with a patented wheel system that allows for precise angle and tension adjustments, ensuring optimal ball rebound. This feature significantly enhances your shooting and scoring abilities.
When selecting a Maverik goal, consider the following factors:
- Portability: Foldable models offer flexibility for practice in various locations.
- Adjustability: Look for goals with multiple tilt positions and tension settings.
- Durability: Ensure the goal is constructed with industrial-grade materials for longevity.
Investing in a quality Maverik bounce back goal can dramatically transform your game. Many players have experienced significant improvements in their performance after consistent practice with these goals.
Optimizing Goal Placement for Effective Practice
The placement of your Maverik bounce back goal plays a crucial role in maximizing your practice sessions. To get the most out of your training, consider these placement strategies:
- Position the goal about 15 yards away to simulate prime scoring range.
- Ensure a clear line of sight for unobstructed shots.
- Allow ample space around the goal for practicing shots from various angles.
- Angle the goal towards open space to work on unconventional shot types.
Proper goal placement not only enhances your shooting accuracy but also helps develop versatility in your shot selection. This can give you a significant advantage during actual game situations.
Securing Your Bounce Back Goal
Safety is paramount when using a bounce back goal. To prevent accidents and ensure stability:
- Use landscape staples to anchor the goal’s legs into the ground.
- Check the stability of the goal before each practice session.
- Avoid setting up on uneven terrain.
Harnessing the Power of Adjustability
One of the key features of Maverik bounce back goals is their adjustability. This allows players to customize their practice sessions based on their skill level and specific training needs.
![]()
How can adjustability enhance your practice?
- Beginners can set softer rebounds to build confidence and technique.
- Advanced players can increase tension for more challenging, game-like rebounds.
- Various tilt positions simulate different shot angles encountered in matches.
By gradually increasing the difficulty as your skills improve, you can continually challenge yourself and avoid plateauing in your development.
Developing Quick Hands and Accurate Shots
A bounce back goal provides instant feedback, allowing you to rapidly improve your catching and shooting skills. Here’s how to make the most of this feature:
- Practice quick-stick drills to enhance hand speed and coordination.
- Focus on hitting specific corners of the goal to improve accuracy.
- Work on catching and releasing shots quickly to simulate game pressure.
- Experiment with different shot types (overhand, sidearm, underhand) to expand your arsenal.
Consistent practice with a bounce back goal can significantly improve your reaction time and shooting precision, making you a more formidable player on the field.

Simulating Game Scenarios for Enhanced Performance
To truly elevate your game, use your Maverik bounce back goal to recreate common game scenarios. This approach helps bridge the gap between practice and actual match performance.
Consider incorporating these drills into your routine:
- Rapid-fire shooting to simulate high-pressure situations.
- Practice shooting while on the move to mimic game-like conditions.
- Work on shooting from behind the goal to improve your skills as an attackman.
- Practice one-handed shots to prepare for situations where you’re being closely defended.
By regularly challenging yourself with these game-like scenarios, you’ll develop the muscle memory and instincts needed to excel in actual matches.
Maximizing Practice Efficiency with Solo Drills
One of the greatest advantages of a Maverik bounce back goal is the ability to conduct effective solo practice sessions. This allows you to put in extra work even when teammates aren’t available.
Here are some solo drills to improve your skills:
- Wall ball variations using the bounce back feature.
- Timed shooting drills to improve speed and accuracy.
- Practicing different release points to become less predictable.
- Working on your weak hand to become a more versatile player.
Consistent solo practice with your bounce back goal can give you a significant edge over competitors who only practice during team sessions.
Tracking Progress and Setting Goals
To maximize the benefits of your Maverik bounce back goal, it’s essential to track your progress and set specific, measurable goals. This approach helps maintain motivation and ensures continuous improvement.
Consider implementing these strategies:
- Keep a practice log to record your sessions and performance.
- Set weekly or monthly goals for shot accuracy or speed.
- Use video recording to analyze and refine your technique.
- Challenge yourself with progressively difficult drills as you improve.
By regularly assessing your progress, you can identify areas for improvement and celebrate your achievements, fueling your motivation to continue developing your skills.

Leveraging Technology for Skill Analysis
In today’s digital age, various technological tools can complement your Maverik bounce back goal practice:
- Shot speed radar guns to measure and improve shot velocity.
- Mobile apps for tracking practice statistics and progress.
- Slow-motion video analysis to fine-tune shooting technique.
Integrating these tools with your bounce back goal practice can provide valuable insights and accelerate your skill development.
Incorporating Team Drills with the Bounce Back Goal
While solo practice is invaluable, incorporating team drills with your Maverik bounce back goal can further enhance your skills and team dynamics. These drills simulate game-like passing and shooting scenarios, improving overall team performance.
Consider these team-oriented drills:
- Rapid-fire passing and shooting drills to improve communication and timing.
- Pick and roll exercises to enhance offensive strategies.
- Defensive slide drills using the goal as a reference point.
- Fast break simulations to improve transition play.
By incorporating these team drills, you not only improve individual skills but also enhance team cohesion and strategic play.
Adapting Drills for Different Positions
The versatility of the Maverik bounce back goal allows for position-specific training:
- Attackmen can focus on quick releases and shooting accuracy.
- Midfielders can practice shooting on the run and rapid transitions.
- Defenders can work on clearing passes and long-distance shots.
- Goalies can use the goal for reaction drills and outlet passes.
Tailoring your drills to your specific position ensures that your practice directly translates to improved on-field performance.
Maintaining Your Maverik Bounce Back Goal
To ensure longevity and optimal performance of your Maverik bounce back goal, proper maintenance is crucial. Regular upkeep not only extends the life of your equipment but also ensures consistent and accurate rebounds during practice.
Follow these maintenance tips:
- Regularly inspect the goal for any wear and tear.
- Tighten any loose bolts or connections.
- Clean the netting and frame to prevent debris buildup.
- Store the goal in a dry place when not in use to prevent rust and weathering.
- Lubricate moving parts, such as the adjustment mechanisms, to maintain smooth operation.
Proper maintenance ensures that your Maverik bounce back goal remains a reliable training tool for years to come, providing consistent performance throughout your lacrosse journey.

Seasonal Considerations for Outdoor Goals
If you keep your bounce back goal outdoors year-round, consider these seasonal maintenance tips:
- In winter, remove snow and ice to prevent damage to the frame and netting.
- During spring and fall, check for and remove any fallen leaves or debris.
- In summer, ensure the goal is not exposed to excessive direct sunlight, which can degrade the netting.
By adapting your maintenance routine to the seasons, you can protect your investment and ensure your goal remains in top condition regardless of weather conditions.
Customizing Your Training Regimen
As you become more proficient with your Maverik bounce back goal, it’s important to continually evolve your training regimen. Customization keeps your practice sessions challenging and ensures continued skill development.
Consider these approaches to customize your training:
- Alternate between high-intensity and precision-focused sessions.
- Incorporate conditioning exercises between shooting drills for a full-body workout.
- Practice situational shooting, such as man-up or man-down scenarios.
- Challenge yourself with time-based drills to improve speed and decision-making.
- Simulate different field positions to enhance versatility.
By regularly adjusting and customizing your training regimen, you can address specific weaknesses, build on your strengths, and continue to challenge yourself as your skills improve.
Creating a Balanced Practice Schedule
To maximize the benefits of your Maverik bounce back goal, create a balanced practice schedule that addresses all aspects of your game:
- Allocate time for both offensive and defensive drills.
- Balance individual skill work with team-oriented exercises.
- Include sessions focused on mental preparation and strategy.
- Plan rest days to prevent burnout and allow for proper recovery.
A well-structured practice schedule ensures comprehensive skill development and helps prevent overuse injuries, allowing for sustainable long-term improvement.
Leveraging Your Improved Skills in Game Situations
The ultimate goal of practicing with a Maverik bounce back goal is to translate your improved skills into better performance during actual games. As you develop your abilities, it’s crucial to focus on applying these skills effectively in match situations.
Here are strategies to bridge the gap between practice and game performance:
- Visualize game scenarios during practice to mentally prepare for real situations.
- Participate in scrimmages to apply your skills under game-like pressure.
- Analyze game footage to identify areas where your improved skills can make the most impact.
- Communicate with coaches about how to best utilize your enhanced abilities within the team strategy.
- Stay confident in your skills and trust the training you’ve put in with your bounce back goal.
By consciously focusing on applying your improved skills during games, you can maximize the impact of your training and become a more valuable asset to your team.

Adapting to Different Defensive Strategies
As your shooting and ball handling skills improve, you may face varying defensive strategies from opponents. Use your enhanced skills to adapt and overcome these challenges:
- Practice quick releases to counter aggressive defenders.
- Develop deceptive shots to outmaneuver zone defenses.
- Work on off-ball movement to create scoring opportunities against tight marking.
- Improve your weak hand to become less predictable on the field.
By preparing for different defensive scenarios during your bounce back goal practice, you’ll be better equipped to handle any situation that arises during a game.
Inspiring the Next Generation of Lacrosse Players
As you develop your skills with the Maverik bounce back goal, consider sharing your knowledge and passion with younger or less experienced players. This not only helps grow the sport but also reinforces your own understanding and mastery of lacrosse fundamentals.
Ways to inspire and mentor others include:
- Organizing small group training sessions using your bounce back goal.
- Sharing practice tips and drills on social media or lacrosse forums.
- Volunteering as a coach for youth lacrosse programs in your community.
- Demonstrating proper technique and sharing the benefits of consistent practice.
By becoming a mentor and inspiration to others, you contribute to the growth of the lacrosse community while also reinforcing your own skills and knowledge.
Creating a Lacrosse Practice Community
Consider establishing a local practice group centered around your Maverik bounce back goal. This can create a supportive environment for skill development and foster a sense of community among lacrosse enthusiasts:
- Organize regular practice meetups in your backyard or local park.
- Create friendly competitions or challenges using the bounce back goal.
- Share and exchange drill ideas with other players.
- Use social media to coordinate sessions and share progress updates.
Building a practice community not only enhances your own training but also creates a motivating and supportive network of fellow lacrosse players.
Choose the Right Maverik Bounce Back Lacrosse Goal
As a lifelong lacrosse player and coach, I’ve seen firsthand how having your own bounce back goal can transform your game. I used to spend hours shooting on a rickety hand-me-down goal that barely bounced the ball back to me. But once I saved up and bought my own Maverik goal, it was a total game-changer!
Maverik’s bounce back goals are specifically designed for maximum rebound. Their patented wheel system lets you dial in the perfect angle and tension so the ball rockets back to you every time. No more chasing stray shots across the yard! This thing will make you a better shooter and scorer, guaranteed.
But with a bunch of different models to choose from, how do you pick the right one? Let me break it down for you…
Portability is Key
First off, consider how portable you need it to be. Maverik’s foldable goals are super easy to set up and break down solo. I like to wheel mine out to the backyard, school yard, or park whenever I get the itch to shoot around. Other models like the fixed pipe or in-ground goals don’t offer that flexibility.
Adjustability is Crucial

You also want a goal with maximum adjustability. My Maverik goal has several tilt positions and tension settings so I can dial in everything from soft bounce-back for beginners to tourney-level rocket rebounds. This really mimics catching wicked shots from different angles during games. Maverik’s wheel system makes it so easy to find the perfect challenge for your skill level.
Built to Last
Of course, you need it to stand up to heavy use too. My goal is on its third season getting hammered daily by myself, my kids, and all the neighborhood lax bros and it’s still going strong. Maverik uses industrial-grade materials so it can handle the wear and tear. Lesser goals would’ve already bit the dust after the beating mine has taken.
So if you really want to take your game to the next level, invest in a quality Maverik bounce back goal. Take it from me – I went from warming the bench to leading scorer on my high school team after a summer of shooting on my Maverik. All those extra reps made my hands silky smooth and my shot pinpoint accurate. I was catching and releasing so fast the goalie never stood a chance!
Now I make sure to tell all the kids I coach that a bounce back goal is the fastest way to develop next-level stick skills. You can practice quick feeds, work on hitting corners with your shots, and develop lightning fast hands. Having that instant feedback of the ball rocketing back makes you focus in and dial in your technique. Especially if you’re a competitive player, a Maverik goal will get you playing at the top of your game.
Placement Matters
To get the full benefit, you’ve gotta position your Maverik goal in the perfect spot. I like to set mine up about 15 yards out with a clear line of sight. This simulates prime scoring range during a game. If you can snipe shots from that distance into the corners at high speed, you’ll be a nightmare for goalies to stop.
Also make sure you’ve got room to shoot from any angle. I angle my goal toward open space in my yard so I can practice wicked sidearm or overhand shots. Working on those unconventional angles has given me a few sneaky go-to moves to unleash when I’ve got the ball behind the cage.
Secure the Base
Since you’ll be firing shots at top speed, it’s crucial to anchor the base so there’s no tipping. I use landscape staples driven into the ground around the legs to keep it locked in place. You don’t want the thing crashing down mid-shot! Safety first when it comes to securing your goal.
With my Maverik goal dialed in, I get the perfect rapid-fire rebound training at game speed. I’ll spend an hour or more out there refining my quick-stick handles, faking out the goalie, and nailing top shelf snipes. All that quality practice has translated directly into dominating games.
So invest in the right bounce back goal and watch your skills skyrocket. Maverik’s patented adjustable design will optimize your training and take your game to the next level. Just find that smooth stroke and let the goals rain down, my friends!
Pick the Perfect Placement for Maximum Practice
When I first got my Maverik bounce back lacrosse goal, I made the mistake of just setting it up anywhere in my backyard without much thought. But I quickly realized placement is everything if you really want to maximize your practice.
The key is finding a spot with the most open space around it. You want room to maneuver for shots from any angle and distance. Don’t cram it in right up against a fence or wall. Give yourself enough of a clearing so you can really wind up and practice your hardest shots.
I like to set mine up near the edge of my yard pointed at a wide open grassy area. This allows me to get a running start and work on shooting on the run at full speed. Mimicking fast breaks during a game has made me lethal when I get a step on a defender.
Also consider the surface underneath. You’ll get the best rebound on a flat, smooth spot rather than uneven ground or an area with divots. I try to set up on the nicest grass in my yard to get that true bounce back.
Angling the goal is key too. I position mine so I can shoot from either side, practicing righty and lefty shots. This has paid off big time in games when I can switch hands based on the defender or angle to the goal.
I like to move it around my yard to change up the variability too. Shooting from different distances and angles is great for improving stick skills. One day I’ll place it for close rapid fire shots, the next farther away to nail those long rainbow snipes.
Wind direction matters as well on blustery days. Angle the goal so shots are with the wind for extra zip. This builds arm strength and perfects accuracy when you have to overpower the elements.
Most importantly, make sure your placement is safe. Set up with a buffer space behind the goal in case you miss long. I also keep it far away from the house, garage or anything you don’t want destroyed by errant shots.
Dialing in placement has upped my practice big time. I’m catching passes and shooting from any spot just like in a game thanks to all that variability. Don’t just set your Maverik goal randomly – put in the thought to get the most out of your training and take your skills to the next level!
Anchor the Base Securely for Safety and Stability
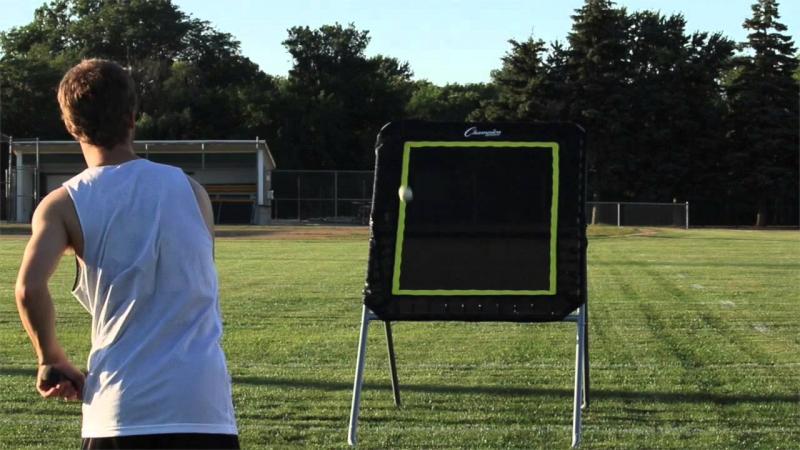
Looking to immediately improve your lacrosse skills? One of the best drills you can do is mastering the bounce back goal from Maverik Lacrosse. This specially designed goal has a tight net that causes shots to bounce right back to you, allowing for rapid fire shooting practice. With consistent repetition, the Maverik bounce back goal can quickly improve your shooting accuracy, power, and overall offensive game.
But before you start rifling shots, you need to properly set up the Maverik bounce back goal for maximum safety and performance. Proper assembly and anchoring keeps the goal sturdy and helps the net retain its tightness. Follow these 15 steps to securely anchor your base and get the most out of your Maverik bounce back goal.
1. Choose a Flat Surface
Find a flat, level surface like a driveway, tennis court, or blacktop area to set up your Maverik bounce back goal. An uneven surface can cause the goal to tip over from the force of your shots. And make sure you have adequate space around the goal for shooting.
2. Keep It Straight
When positioning the goal, align it so the net is completely perpendicular to the playing surface. If the goal is crooked, shots may careen off in unintended directions instead of bouncing straight back.
3. Mind the Wind
On windy days, position the goal so the net opening faces away from the wind direction as much as possible. This prevents the wind from catching the net and disrupting the rebound of your shots.
4. Load the Base with Sand
For optimal stability, fill the base completely with play sand before attaching it to the goal frame. Sand conforming around the interior edges keeps the base firmly planted.
5. Optional: Add Extra Weight
For even more stability in windy conditions, you can add dumbbell plates or other weights on top of the sand inside the base. Just leave enough clearance to attach the goal frame.
6. Attach the Frame
With the weighted base in position, lift up the goal frame and slide the vertical posts into the receptacles on the base. Push down firmly until the posts are fully seated.
7. Lock It In
Secure the goal frame to the base using the locking pins attached to each receptacle. Insert the pins through the vertical posts and lock them into place.
8. Check Alignment
Before proceeding, recheck that the goal frame is completely vertical and perpendicular to the playing surface. Adjust if needed before attaching the net.
9. Attach Back Support Bar
To help keep the net taut and upright, attach the included back support bar between the vertical posts across the top. Secure it using the fasteners provided.
10. Unfurl Net & Attach to Top
Unwrap the Maverik bounce back net and unfurl it in front of the goal frame. Pull the top of the net over the upper goal frame and attach it using the integrated Velcro strips.
11. Feed Net Through Frame
With the top secured, feed the remainder of the net through the goal opening from front to back until the bottom edge emerges from the rear.
12. Attach Net to Base
Wrap the elasticated bottom of the net around the weighted base and secure it in place using the Velcro strips.
13. Adjust Bungee Tension
The bungee cords laced around the net perimeter provide tension to make shots rebound true. Adjust and secure them until the net is uniformly taut across the goal frame.
14. Secure Excess Net
Wrap any excess net evenly around the goal frame and fasten it in place with the attached Velcro straps so it doesn’t sag or blow around.
15. Angle Slightly Back
For ideal shot rebound, angle the entire goal assembly slightly backwards. This encourages shots to bounce directly back instead of downward.
With your Maverik bounce back goal now properly anchored and assembled, you’re ready to start honing your shooting skills. Remember to always place it safely away from potential hazards and use appropriate balls or soft indoor balls for longer net life. Master this versatile practice tool and your lacrosse abilities will rapidly improve!
Position the Wheel System for Variable Rebound
Looking to take your lacrosse game to the next level? Mastering the Maverik bounce back goal can help you improve your skills in just 15 easy steps. This adjustable goal system allows you to vary rebound speed and angle so you can practice passing, shooting, and scooping in a realistic game setting.
Step 1: Set Up the Goal Frame
Stability is key for getting the most out of your bounce back goal system. Set up the frame on a flat, level surface and make sure all joints are tightened and secured. For outdoor use, consider anchoring the base with stakes or sandbags to prevent tipping or sliding.
Step 2: Attach the Netting
Most Maverik bounce back goals come with netting that attaches to the frame with a Velcro-like fastening system. Take your time attaching the netting to ensure full coverage and minimize gaps where balls can sneak through. Make sure the netting is taut but not overly stretched.
Step 3: Position the Wheel System
The key innovation of the Maverik bounce back goal is the wheel rebound system. This mechanism attaches behind the netting and uses adjustable wheels to control the ball return. Position this system at the optimal height to match your skill level and desired rebound type. Higher positioning yields faster, more immediate bounces while lower positioning creates slower, more angled returns.
Step 4: Start With Basic Passing
Now it’s time to put your new goal system into action! Have a partner stand behind the goal and start with simple catch-and-release passes back and forth. Concentrate on quick but controlled stick movement and cradling the ball smoothly into the pocket. You’ll quickly get a feel for how the ball rebounds off the netting and wheels.
Step 5: Move Around the Arc
After getting comfortable directly in front, start passing the ball while moving around the goal. Shift positions at 45 degree increments, passing clockwise and counterclockwise. This helps you practice accuracy from different angles and stances.
Step 6: Speed Up the Pace
Once your passing accuracy is solid, it’s time to pick up the pace! Challenge your partner to pass more quickly, simulating the speed and unpredictability of game-time play. Focus on making clean one-touch catches and releases as the ball zips around the goal.
Step 7: Vary Passing Modes
For an added challenge, expand the types of passes you exchange around the goal. Mix in overhand rifle passes along with underhand scoops. Vary pass height from waist level to up high requiring a stick extension. Keep your partner guessing to sharpen reaction time and hands.
Step 8: Practice Your Cradling
Set up about 10 yards out from the goal and take turns cradling the ball down the alley and shooting on net. Concentrate on keeping the ball secure in your stick while running at full speed. Experiment with different cradling styles like the traditional single hand or the ever-popular Canadian cradle.
Step 9: Shoot, Scoop, and Score
Now it’s time to practice the full scoring sequence. Take turns shooting on goal, tracking the rebound, scooping the loose ball, and scoring on the run. This challenging drill strengthens shooting mechanics while reading ball bounces off the goal system.
Step 10: Work on Quick Stick Redirects
Have your partner stand behind the goal and make hard passes off the bounce back surface to receive one-timer shots. Aim not just to make contact but to cleanly catch and redirect the ball in one swift motion. This develops quick stick skills and instinctive shooting reaction time.
Step 11: Vary Wheel Angles
By adjusting the rebound wheels to different heights and angles, you can make the bounce back sequence more challenging and realistic. Try sharp downward ball kicks or wide sideways ricochets to keep your body and stick moving. React quickly as erratic passes come flying from all directions.
Step 12: Practice Agility Drills

Set up diagonal cones about 10 yards out from the goal. As your partner fires rebound passes, dart in and out of the cones at sharp angles before catching and shooting in motion. The lateral agility work helps mirror the constant direction changes of live game action.
Step 13: Work Both Hands
For complete stick skills, it’s essential to practice passing, cradling, and shooting with both hands. Set up centered on the goal and alternate hands on each rep to build dexterity. Vary the wheel angle to create uncertainty and quick adaptations.
Step 14: Compete in Contests
Now that you’ve built skills through isolated drills, it’s time for some competitive fun! Have contests like rapid fire shooting, rebound collections, or crazy angle ricochet goals. Keep score to raise intensity and make each drill more game-like.
Step 15: Mimic Game Situations
Finally, combine shooting, passing, agility work, and conditioning into competitive 5-on-5 type scenarios. Use the full arc around the goal to move the ball quickly and create scoring chances under pressure. The Maverik bounce back goal system lets you rehearse real-game situations to be confident and prepared.
There you have it – 15 actionable steps to take your lacrosse abilities to the next level with the Maverik bounce back goal! Consistent practice with this adjustable rebounding net hones skills used in every area of the field. Work on these drills for just 30 minutes a day and you’ll notice improvements in passing, catching, cradling, shooting, scooping, footwork, and stamina. With heightened reflexes and confidence, you’ll dominate the competition in no time!
Adjust the Tilt for Different Shot Angles
Looking to gain an edge over your lacrosse competitors? Mastering the Maverik bounce back goal can rapidly improve your skills with just 15 straightforward steps. This adaptable goal system lets you adjust rebound angle and speed to practice passing, cradling, shooting and scooping in a game-realistic setting.
Step 1: Ensure Stable Positioning
The foundation of any effective bounce back goal system is stability. Set up on a flat surface and secure all joints and connections. Consider weighting the base or staking down for outdoor use. Proper positioning prevents wobbling and sliding during intense practice.
Step 2: Attach Netting Snugly
Most Maverik bounce backs come with detachable netting that fastens into place with heavy-duty Velcro strips. Take care attaching the net all around the goal frame to minimize gaps where balls can escape. Pull the net taut but not to the point of sagging or stress.
Step 3: Set Rebound Wheels Strategically
The core of the Maverik bounce back is the adjustable rebound wheel system. Mounting this higher on the frame creates quicker bounces, while lower placement produces slower, angled returns. Position wheels where you want ball contact for your skill level and drill type.
Step 4: Dial in With Simple Passing

With setup complete, it’s go time! Have a partner stand behind the goal and start by passing back and forth. Concentrate on smooth cradling into the pocket and crisp catches and releases. Get a feel for how the ball caroms off the netting and wheels.
Step 5: Circle the Arc
Now move around the goal arc passing the ball at different angles – start at 45 degrees then shift positions incrementally. This challenges your passing precision from varied stances and body positions.
Step 6: Increase Passing Speed
When your accuracy is locked in, pick up the pace! Challenge your partner with quicker passes to mimic real-game intensity. Strive for one-touch receptions and releases as the action accelerates.
Step 7: Vary Passing Style
Mix up your passing modes for a multi-dimensional workout. Try scoop passes low to the ground together with high rocket overhand feeds. Keep your partner on their toes with unpredictable speed, height and location.
Step 8: Cradle and Shoot Drills
Set up about 10 yards out and take turns cradling top speed down the alley and firing on net. Focus on ball security in your stick while running at full tilt. Try out traditional and Canadian cradling patterns to find your best option.
Step 9: Shoot, Scoop and Score
Now link shooting and scooping in dynamic scoring sequences. Fire shots then track the rebound, quickly scoop the loose ball, and finish on the run. This engages your full scoring skill set in one intense drill.
Step 10: One-Touch Shooting
Have your partner rapidly pass balls off the bounce back surface for one-timer shots. Master cleanly fielding tough passes and redirecting them toward the goal in one smooth, instinctive motion. This hones quick-stick reflexes and reaction time.
Step 11: Adjust Rebound Angles
By tweaking the wheel positions up or down, you can vary the rebound angle and degree of unpredictability. Try varying trajectories from straight-on ricochets to downward skips to sideways kicks to challenge your adaptability.
Step 12: Agility Cone Drills
Set up a zig-zag agility ladder about 10 yards out from the goal frame. Dart laterally in and out of the cones as your partner fires off angled passes to keep you moving. This enhances real-game footwork and directional agility.
Step 13: Train Both Hands
Complete lacrosse mastery requires competency with both hands. Alternate stick hands on each rep as balls bounce back from varied angles. This builds dexterity and versatility to handle anything in game action.
Step 14: Competitive Contests
Up the intensity with fun competitions like shots on goal in 30 seconds, crazy bounce rebound collections, or absurd angle carom shots. Use contests and scoring to drive skills development through motivated repetition.
Step 15: Simulate Game Situations
Finally, combine shooting, passing, movement and conditioning drills into competitive simulated game play. Use the full goal arc to move the ball quickly and generate scoring chances under pressure. The Maverik bounce back allows you to rehearse real-game techniques for optimal preparation.
There you have it – 15 tips to take your lacrosse game to the next level using the Maverik bounce back goal system. Frequent practice with this adjustable rebounder will accelerate skills in shooting, passing, scooping, footwork and fitness. Commit just 30 minutes a day and you’ll notice dramatic improvements within weeks. With enhanced reflexes and confidence, you’ll be ready to dominate on game day!
Dial in the Tension to Match Your Skill Level
Looking to take your lacrosse game to the next level? One of the best training tools you can add is the Maverik bounce back goal. This adjustable rebounder allows players of all ages and skill levels to get quality reps in their backyard or local park.
The beauty of the bounce back goal is you can dial in the tension to match your abilities. As your skills progress, increase the tension for a greater challenge. Here’s a step-by-step guide to help you master the Maverik bounce back goal and elevate your lacrosse skills.
1. Start with the basics
Before diving into drills, take some time to get a feel for the goal. Fire some passes and shots at different speeds and angles to get accustomed to how the ball rebounds. Pay attention to the tension setting and get a sense of how the ball reacts. This will help you learn how to control your rebounds as you move into structured drills.
2. Position yourself for success
Set up 3-5 yards away from the goal initially. This close range will allow you to get your form down and gain confidence. Position yourself at a slight angle for the best rebound opportunities. Keep your feet staggered and knees bent in an athletic stance.
3. Perfect your passing

Use the bounce back goal to sharpen your passing accuracy. Start with simple chest passes back and forth. Focus on form – stepping towards your target, rotating your hips and following through. Vary the pace and location of your passes. How quickly can you adjust and make an accurate pass off the rebound?
4. Add movement
Now mix in lateral movement to simulate game situations. After passing the ball, slide side-to-side before receiving the rebound. Shuffle to the right and left followed by a quick change of direction. Jump and twist your body mid-air for advanced agility work.
5. Crank up the heat
Pick up the pace by rapid firing 10-15 passes without stopping. Concentrate on mechanics and accuracy. Can you maintain proper form at high speeds? Getting into a smooth rhythm and grooving with the goal is incredibly satisfying.
6. Unleash your cannon
It’s time to start ripping some shots! From 5 yards out, practice overhand shooting using proper form. Follow through towards your target. Vary shooting locations – corners, mid-net, low to high. How much velocity can you generate while maintaining control?
7. Move back
As your shooting skills improve, take a few steps back to create a greater challenge. Keep your upper body over the ball and get as much power from your legs as possible. Snap your wrists and point that elbow up. Remember to follow through.
8. Work on quick sticks
Quick stick shooting helps develop lightning fast reflexes. Instead of cradling the ball after receiving the rebound, release it immediately back towards the goal. Concentrate on making solid contact in one fluid motion. Turn and shoot in one smooth sequence.
9. Practice off-hand shooting
Don’t neglect your weak hand! Spend time each session shooting with your off-hand. Many defenders won’t see it coming in a game situation. Get creative banking shots off the rebound with sidearm and underhand strokes.
10. Play out of the X
The X position behind the crease is a scoring hot spot for dodgers. Work on catching the ball and quickly transitioning into a dodge. Rip, swim and face dodge your imaginary defender before burying a shot.
11. Scoop and score
Gathering tough ground balls is a critical skill. Let grounders bounce and practice scooping them with proper form – head down, butt down, follow through. Quickly transition into a shot once securing possession.
12. Perfect your delivery
Precision passing is vital for an efficient offense. From 8-10 yards, fire passes into the goal working on both accuracy and touch. Lead your target and hit specific locations. Vary speed and concentrate on a smooth release.
13. Add defenders
Once you’ve dialed in your skills, add friends or teammates to play defense. Nothing simulates the pressure of live competition. Now you’ll need to incorporate fakes, draws and other tactics to create space for shots.
14. Crank up the tension
As your skills progress, increase the tension for a greater rebounding challenge. This will force you to put a little extra oomph on your shots and passes. Staying smooth under pressure is key to taking your game up a notch.
15. Have fun!

Most importantly, enjoy the process and rejoice in small daily improvements. Cranking shots and pushing your limits does wonders for confidence. The bounce back goal is a blast – use it as a personal playground to develop your athleticism and stick skills.
Mastering the Maverik bounce back goal takes repetition, but is incredibly rewarding. Follow these steps to gain confidence, improve accuracy, increase power and take your lacrosse abilities to the next level. Dial in the tension to create the perfect challenge for your skill set. See you at the bounce back goal!
Practice Quick Stick Ball Control and Cradling
Looking to elevate your lacrosse game? One of the most effective training tools is the Maverik bounce back goal. This adjustable rebounder allows you to sharpen essential stick skills like quick stick ball control and cradling.
The beauty of the bounce back goal is you can dial in the tension to create the perfect challenge for your abilities. As your skills progress, increase the tension for greater difficulty. Here’s a 15 step guide to help you master quick stick and cradling using the Maverik bounce back goal.
1. Warm up properly
Always dedicate 5-10 minutes to dynamic stretching and warming up before practice. Jogging, high knees, butt kicks and karaoke will get your blood pumping and muscles primed to perform.
2. Get a feel for the goal
Take some time to get accustomed to how the ball rebounds at different speeds and angles. Test out various tension settings. Pay attention to how the ball reacts so you can learn to control your rebounds.
3. Position yourself for success
Set up 3-5 yards away from the goal initially. Keep your feet staggered and knees bent in an athletic stance. Standing at a slight angle will give you the best rebounding opportunities.
4. Quick stick close-range shots
Practice catching the rebound and immediately shooting in one fluid motion. Concentrate on fast hand release and avoiding any extra cradles. Develop lightning quick reflexes and hand-eye coordination.
5. Quick stick with movement
Add lateral shuffle steps in between quick stick attempts. Mix in crossovers, jump stops and sprints to receive the ball on the move. Vary your shooting angle and location on each rep.
6. Rapid fire sequences
Set up sequences combining 10 quick stick shots followed immediately by 10 cradle shots. The rapid transitions will build stick skills and stamina. Remember to maintain mechanics.
7. Work your off-hand
Dedicate time each session to quick sticking with your weak hand. Unleash sneaky off-hand shots in games that defenders won’t see coming. Get creative banking tricky off-hand shots.
8. Scoop and quick stick
Practice scooping tough ground balls and transitioning immediately into quick stick shots. Concentrate on securing possession while keeping your head up.
9. Add some style
Once you’ve mastered the basics, add some flair into your quick stick shooting. Go behind-the-back, through-the-legs or shoot no-look. Just don’t get too fancy and lose accuracy!
10. Rapid fire cradling
Set up 10 yards from the goal and focus on receiving crisp rebounds, cradling the ball smoothly, then unleashing a shot. Cradle right, left, then split your defender’s legs!
11. Zig-zag cradle approach

Cradle towards the goal in a zig-zag pattern to simulate dodging defenders. Make sharp changes of direction and vary speeds. Finish with a little shake-and-bake before you shoot.
12. Cradle and shoot on the run
Simulate fast break situations by cradling the ball towards the goal at top speed. Focus on protecting stick with your body as you sweep to shoot on the run.
13. Add pump fakes
Incorporate pump fakes during your cradling approach to fake out imaginary defenders. Sell the fake then blow by defenders with an acceleration burst.
14. Behind-the-back cradling
Switch up your style by cradling the ball behind your back. Protect the ball while scanning the field. Explode out of it for a wicked sidearm launch.
15. Have fun!
Most importantly, keep sessions lively and engaging. Cranking shots and pushing your limits does wonders for confidence. Mastering quick stick and cradling skills takes repetition, so enjoy the process.
Following these steps will help you gain rapid reflexes, soft hands, and fluid agility. Quick stick and cradling mastery is vital for raising your lacrosse game. Dial in the perfect tension on your Maverik bounce back goal to provide a challenging workout. Sharpen your skills and dominate the competition!
Work on Pinpoint Passing Accuracy
Looking to sharpen your lacrosse passing game? The Maverik bounce back goal is an excellent training tool for honing pinpoint accuracy. Adjust the tension to create the perfect rebound for your skill level and get quality reps.
Precise passing is a vital skill for executing efficient offense. Whether it’s quick ball movement, leading cutters or hitting shooters in stride, every possession requires technical passing proficiency. Here’s a 15 step guide to boost your passing accuracy using the Maverik bounce back goal.
1. Warm up your arms
Get your arms and shoulders loose and ready to deliver crisp passes. Perform arm circles, pendulums and light band exercises before starting practice.
2. Focus on mechanics
Every pass should start with proper mechanics – grip, stance, motion. Hold the bottom hand near the butt end and top hand halfway up the shaft. Keep feet staggered and weight centered.
3. Chest passes
Start with simple chest passes to get in rhythm. Concentrate on form – step towards target, rotate core, follow through and snap elbows. Vary speed and location.
4. Quick sticks
Perform quick stick passes to train fast-twitch muscle fibers. Receive the rebound and immediately snap the ball back on target in one crisp motion.
5. Over the shoulder
Whip over the shoulder passes to simulate clearing situations. Work both right and left hands. Get your off-hand passing up to par.
6. Behind the back
Step across body and fling behind the back passes to mix things up. Protect the stick while scanning the field before zipping the ball on net.
7. Shooter’s position
Practice hitting a stationary target from the shooter’s sweet spot 5 yards away. Lead the receiver and hit them in the chest every time.
8. Laterally
Slide side to side before passing to simulate moving the ball against pressure defense. Concentrate on smooth footwork and ball security.
9. Jump passes
Add some pizzazz by jumping diagonally and firing passes. Load up your back leg and explode off your front foot upwards.
10. Change of pace
Vary pass speed – three hard, two soft, one hard. Mix in change of pace and location to keep the defense guessing.
11. Rapid fire
Test quickness and stamina with rapid fire passing sequences. Can you maintain accuracy at high speeds? Take brief rest periods as needed.
12. Scoop and pass
Gather tough ground balls while under pressure then quickly outlet accurate passes. Mimic game speed by sprinting before receiving the pass.
13. Add defenders
Nothing beats live competition. Recruit a teammate to play defense and force you to pass under duress. Work on selling fakes and finding windows.
14. Pass and move
Pass to targets on the move to lead receivers properly. Sprint towards the ball and meet the pass in stride without breaking momentum.
15. Track your progress
Measure passing accuracy percentage each session to benchmark improvement over time. Strive for at least 80% under game conditions.
Mastering accurate passing requires developing soft hands and neural connections through repetition. Follow these steps to gain confidence, improve mechanics and develop pinpoint precision. Crank up the tension on your Maverik bounce back goal to elevate your game to the next level!
Hone Shooting Consistency with Repeated Attempts
Developing a consistent and accurate shot is crucial for any lacrosse player. While natural talent and good technique are important, nothing beats repeated practice when it comes to honing shooting skills. This is where a tool like the Maverik bounce back goal can make a dramatic difference in improving your consistency as a shooter.
The Maverik bounce back goal is specially designed to let players take shot after shot, without having to retrieve balls or chase rebounds. The goal absorbs shots and instantly returns the ball to the shooter’s stick, allowing for rapid fire shooting practice. This type of repetitive shooting motion is key for developing muscle memory and ingraining good shooting mechanics.
Here are 15 tips to master the Maverik bounce back goal and improve your shooting consistency:
1. Start close
When first starting out, position yourself 5-10 yards from the goal. This close range will allow you to focus on your shooting form and get a feel for the ball rebound. As you improve, gradually increase the distance.
2. Focus on mechanics
Concentrate on proper shooting technique every rep. Keep your elbows tight, transfer weight from your back foot, follow through towards the target. The goal is perfect practice that gets embedded into muscle memory.
3. Take 100 shots a session
To truly see results, you need a high volume of shots every practice. Shoot for sets of 100 per session, taking brief breaks as needed. This amount of repetition will quickly improve consistency.
4. Alternate shot placement
Don’t just shoot for the same spots every time. Take shots aimed high, low, left, right, and dead center on the goal. Mixing up placement will improve shooting accuracy.
5. Move around
Take shots from different angles and positions, not just dead center. Shoot on the run, roll back for a shot after a dodge, or drift left/right. Mimicking game scenarios builds applicable shooting skills.
6. Shoot off bad passes
Have a teammate make errant passes that you must catch and shoot in one motion. This simulates catching tough feeds in game situations and shooting through contact.
7. Focus when fatigued

Take repetitions even when tired at the end of practice. Shooting well through fatigue requires extra concentration and mechanics focus.
8. Compete for accuracy
Turn shooting practice into a game by competing against teammates. See who can hit the most goals out of 10 shots or get the smallest shooting groups from 20 yards.
9. Visualize game situations
Picture actual game scenarios as you shoot, like scoring after a fast break or beating the goalie top shelf. Visualizing helps ingrain shooting skills for real gameplay.
10. Shoot with both hands
Don’t just practice your dominant hand. Develop equal shooting proficiency with your off-hand through reps on the bounce back.
11. Start sessions shooting
Warm up by shooting, when your energy and focus are highest. Those first reps help calibrate your mechanics for the rest of practice.
12. End sessions shooting
Similarly, finish each practice with shooting drills. Those last reps reinforce proper technique going into your next session.
13. Shoot on your own
Get extra reps in on off days. Even just 15-20 minutes helps maintain and build consistency over time.
14. Focus on areas of weakness
We all have shooting flaws. Use the bounce back goal to focus on personal problem areas like low shots, off-hand, quick releases, etc.
15. Stick with it
Shooting excellence requires persistence and patience. Stick to your shooting routine and keep up the quality reps, the improved consistency will come.
Mastering the Maverik bounce back goal requires discipline and diligent effort. But the highly repetitive nature of this practice tool can rapidly improve shooting efficiency, accuracy, and consistency.Apply these tips and watch your on-field shooting performance reach new heights.
Vary Shot Speed and Placement to Beat the Goalie
Looking to immediately improve your lacrosse skills? One of the best drills to master is the Maverik bounce back goal. This versatile practice tool allows you to develop your shooting accuracy, power, and placement. With some focused reps, you’ll be firing shots past goalies in no time.
Here are 15 tips to help you get the most out of the Maverik bounce back goal and rapidly elevate your shooting game:
1. Start Close

When you first start working with the bounce back goal, begin by standing or kneeling 5-10 feet away. This close distance allows you to dial in your shooting form and develop consistency. Take 20-30 shots from this range before slowly moving back.
2. Focus on Form
Concentrate on proper shooting mechanics every rep. Keep your hands out in front of your body, transfer weight from your back foot to your front foot during the shot, and follow through high towards the target. The bonus with the bounce back goal is you get instant feedback on poor form based on how the ball rebounds.
3. Increase Power Gradually
Once you feel comfortable shooting from close range, start to increase power bit by bit. Drive from your legs and core for added velocity. But don’t overdo it too quickly – accuracy is still the primary goal. Dial in your form at 75% power before cranking at 100%.
4. Move Around the Arc
After dialing in your form up close, start backing up further from the goal. Shoot from the corners, the wings, and straight away. Shift your angle and stance as you go. Moving around the arc simulates the different looks you’ll get in game situations.
5. Practice Quick Stick Shots
Incorporate quick stick reps to train faster releases. Have a partner or coach rapidly pass balls from different spots so you can catch and shoot in one fluid motion. Quick sticks shots are vital when catching the goalie off guard on cuts and rolls to the cage.
6. Vary Shot Placement
One of the biggest advantages of the Maverik bounce back goal is the ability to target different zones. Aim high, low, left, and right. Shooters often fall into patterns with shot placement. Mix it up to keep goalies guessing.
7. Change Release Points
Alter your release point on shots to mirror game situations. Shoot sidearm like you would on the run. Shoot overhand while leaning in like off an inside cut. Changing the plane helps challenge your stick skills.
8. Move While Shooting
Stationary shots are helpful for fundamentals. But adding movement is key. Shoot on the run, after cuts, and off pivots. You won’t always be set in games, so practice shots from all angles and body positions.
9. Shoot Against Resistance Bands
Attach resistance bands to the goal frame. Having to shoot against tension improves shot power and trains explosiveness. But keep the tension light at first to get used to driving shots with added resistance.
10. Practice Recovery Shots
Develop the skill of shooting immediately after picking up ground balls. Scoop and fire quickly in one motion. This mimics rebound situations in front of the goal. Regaining possession and scoring before the defense recovers is crucial.
11. Shoot Off Pass Rebounds
Capitalize on errant passes by bouncing shots in off bad passes. Control the rebound by angling your stick backwards. This trains you to make the most of broken plays.
12. Go Back and Forth
After shooting sequences, sprint to rebound your misses and hustle back for another shot. This combination of conditioning and shooting boosts in-game stamina. You’ll be prepared to run the field and score in transition.
13. Compete in Contests
Turn solo shooting sessions into friendly competitions. Challenge yourself to hit 10 high shots in a row or get 3 low corners in 30 seconds. Creative games break up repetition.
14. Visualize Game Situations
As you shoot, picture the game scenarios that require these skills. Visualizing defenders, cuts, recoveries, rebounds etc. reinforces the in-game applications.
15. Mix It Up
Vary your bounce back goal shooting drills each session. Change distances, movement, footwork, positioning, and contests to keep it engaging. This develops well-rounded scoring abilities.
Mastering the Maverik bounce back goal takes consistent practice and creativity. But you’ll be amazed at how quickly your shooting improves following these tips. Dial in your form, increase power, change angles, incorporate movement, and simulate game situations for rapid results. With the right repetitions, beating the goalie will soon come naturally.
Develop Advanced Techniques Like Behind-the-Back
Lacrosse is a fast-paced, high-energy sport that requires a diverse set of skills. From cradling and shooting to dodging and checking, lacrosse players are always working to improve their game. One of the most advanced techniques in lacrosse is the behind-the-back shot. This flashy move can be used to create space from defenders or catch the goalie off guard. Mastering the behind-the-back shot takes time and practice, but it’s an impressive weapon to add to your lacrosse arsenal.
Here are 15 steps to help you learn and perfect the behind-the-back shot:
- Get the right stick & equipment. You’ll need a strung lacrosse stick that’s comfortable for behind-the-back handling. Pocket depth, head shape, shaft length & flexibility matter here. Protective gear like gloves helps too.
- Cradle behind your back. Stand tall, keep your knees bent. Bring the head of the stick under your dominant arm and across your back. Cradle the ball smoothly BTB to get a feel for it.
- Transfer hands BTB. Grow comfortable moving the stick between hands behind your back to maintain control. Don’t rush – precision is key.
- Work both hands. Practice cradling, catching & switching hands BTB with both your dominant & weak hand. You never know when you’ll need to shoot BTB off either side.
- Step & shoot. Take a step towards the goal as you bring your stick back around your shoulder for a BTB shot. Transfer momentum from your step into your shooting motion.
- Shoot close first. Start attempting BTB shots just 5-10 yards from the goal. As you gain confidence in the motion, you can move farther out.
- Accuracy over power. Focus on developing a smooth BTB shooting motion and hitting your target first. As the technique improves, you can add more power.
- Utilize fakes. Incorporate pump fakes, lunges & head fakes as you step into your BTB shot. This helps sell the move & freeze defenders.
- Master your angles. Take BTB shots from different angles – sidearm, overhand, 3/4 arm slot. Find what works best for power & accuracy.
- Practice shooting on the run. Mimic game situations by catching passes & shooting BTB while on the move. This is harder but crucial.
- Drill BTB shooting. Do repetitive shot drills – 300 BTB reps per week improves muscle memory. Have a partner feed you passes.
- Strengthen your shoulders/core. Build shoulder, arm, core & back strength for added power and stability on BTB shots.
- Watch lacrosse film. Study how the pros utilize BTB shots. Analyze their positioning, mechanics & release point.
- Break it down step-by-step. Isolate each part of the BTB shot – cradle, transfer, step, shoot. Master each piece, then connect them.
- Be patient & persistent. Like any advanced skill, mastery takes time and reps. Stick with the process and keep grinding.
With consistent practice and focus on technique, the behind-the-back shot can eventually become a go-to weapon. Integrating fakes and continuing to work on accuracy will make the move even more dangerous. Creativity and precision are key. Mastering the behind-the-back shot takes dedication, but it adds an exciting new dimension to your game. Whether trying to create space for a quick stick or surprising the goalie top-shelf, use this flashy move to take your lacrosse skills to the next level.
Master Quick Redirects and Tight Catches on Rebounds
Looking to immediately step up your lacrosse game? Mastering the Maverik bounce back goal can help you quickly improve your hand-eye coordination, reaction time, and rebounding catches. While not an overnight fix, dedicating 15-20 minutes per day to working with the bounce back goal can pay huge dividends in just a couple weeks.
The beauty of the Maverik bounce back goal is its simplicity. Set it up in your backyard, driveway or local park and you have an instant partner to sharpen your game. The goal absorbs the impact of your shots and rebounds them quickly back to you, forcing you to react and make tight catches you wouldn’t normally practice on your own. Here are 15 tips to master the Maverik bounce back goal and see your skills skyrocket:
1. Warm Up First
Always warm up for 5-10 minutes before diving into drills with the bounce back goal. Some light jogging, dynamic stretches for your arms and legs, and a few casual shots on a regular goal will get your muscles loose and prevent injuries.
2. Start Close
When first using the bounce back goal, begin just 3-5 feet away. This allows you to get comfortable tracking the ball off the rebound. As your hand-eye coordination improves, gradually move further back to increase the challenge.
3. Focus on Your Hands
Keep your eyes locked on the ball but train your hands to react quickly and “feel” the rebounds. Having soft hands with fast reflexes is crucial for securing tough rebounds and loose balls in lacrosse.
4. Work Your Angles
Take shots from sharp angles a few feet from the goal to get comfortable quickly turning your stick and body into position to field the rebound. Change angles often to become adept at adjusting on the fly.
5. React Fast
As soon as the ball hits the bounce back, snap into position and make the catch. The longer you wait, the more difficult and unrealistic the drill becomes. Develop fast-twitch muscles by reacting instantly.
6. Cradle Smoothly
Focus on soft, controlled cradling after the catch to keep the ball secure. No wild swinging or clutching allowed! Master smooth cradling to maintain possession for quick outlet passes or dodges after rebounds.
7. Add Footwork

Once you feel comfortable making clean catches, add in lateral shuffles, crossovers, and quick changes of direction after fielding the ball. This mimics rebounding in game situations.
8. Work Both Hands
Catching righty is great but developing equal dexterity with your left hand is a game-changer. Force yourself to receive half the rebounds with your weak hand to become truly ambidextrous.
9. Vary Shot Strength
Mix in some soft bounce shots along with harder feeds off the bounce back. You have to handle everything from slow rollers to blistering point-blank saves, so practice the full spectrum.
10. Move Around
Don’t root yourself in one spot. React to the rebound then reposition yourself 8-10 feet away for the next rep. This improves conditioning while forcing you to make catches on the move.
11. Add Defenders
Have a teammate or parent lightly defend you after rebounds to simulate being pressured. Work on shielding the ball with your body and stick while maintaining control.
12. Experiment With Placement
Aim high, low, left, right, and dead center on the bounce back to field a wide variety of challenging rebounds. You never know what kind of crazy deflections you’ll get in a game!
13. Focus on Quick Stick
Catch and shoot as rapidly as possible from different angles and distances. Quick passing after rebounding takes advantage of defenses in chaos.
14. Alternate Drills
Mix in other skills like dodges, rolls, and outlet passing after securing the rebound. Mimic all the quick decisions required in live game action.
15. Cool Down
Always take 5 minutes after your bounce back workout to gently stretch your muscles again and bring your heart rate down. Proper warm-ups and cool downs prevent injuries and aid recovery.
Following these tips for 15-20 minutes per day can work wonders for your lacrosse game in just a couple weeks. The Maverik bounce back goal provides endless repetitions to refine your hand-eye coordination, reaction time, footwork, and rebounding that you simply can’t duplicate on your own. Incorporate the bounce back into your regular training regimen and watch your skills skyrocket!
Train Rapid Fire Shooting for In-Game Situations
Want to immediately step up your lacrosse skills? Mastering the Maverik bounce back goal can rapidly improve your shooting accuracy, power, and stamina for in-game situations. While not an overnight miracle worker, committing 15-20 minutes per day to drills with the bounce back goal can deliver huge boosts in just a couple weeks.
The simplicity of the Maverik bounce back goal makes it an ideal training tool. Set it up anywhere and you instantly gain a partner to sharpen your shooting game. The goal rebounds your shots right back to you, enabling repetitive shooting practice you can’t recreate solo. Follow these 15 tips to gain firepower fast with the Maverik bounce back goal:
1. Loosen Up First
Always take 5-10 minutes to stretch and warm up before starting bounce back drills. Light jogging, arm circles, twisting, and basic shot practice gets your body ready for action.
2. Begin Up Close
Start shooting just 3-5 feet out to get the feel of shots and rebounds. As your accuracy improves, take gradual steps back to increase difficulty and simulate longer in-game shots.
3. Power Positioning
Focus on footwork and body positioning to generate maximum power. Rotate hips and core, shift weight forward, and follow through completely with your bottom hand.
4. Rapid Fire
Shoot as quickly as you can while maintaining accuracy. The bounce back gives endless reps to build shooting stamina you just can’t match in regular practice.
5. Go High and Low
Work on locating top and lower corners with precision. Bouncing shots in the corners taxes goalies and boosts your scoring chances in games.
6. Shoot on the Move
Practice shooting after dodges, rolls, and cuts at different speeds and angles. Simulate how you’ll actually receive and release the ball in live game situations.
7. Vary Release Points
Mix sidearm wind-ups with over-the-top releases and anywhere in between. Great shooters are comfortable shooting from multiple launch points.
8. Quick Stick Shooting
Catch and release as rapidly as possible from in close. Develop lightning-quick reflexes to capitalize on rebounds and fast breaks.
9. Work Both Hands
Devoting equal reps to righty and lefty shots makes you doubly dangerous. Defenders can’t cheat your weak hand if it’s just as potent.
10. Change Shot Speed
Alter shot velocity from blistering cranks to soft touch changes. Keep goalies guessing by shooting across the entire speed spectrum.
11. Shoot Through Fatigue
Keep bombing away even as your legs and arms fatigue. Pushing past tiredness expands your shooting endurance for late-game situations.
12. Add Defenders
Have teammates or parents apply light defensive pressure as you shoot. Practice releasing under duress to mimic chaotic game action.
13. Focus on Follow-Through
Extend your shooting finish toward the target, even after the ball is released. This engrains proper follow-through crucial for accuracy.
14. Play Catch With Rebounds
Let the ball bounce back then snatch it and immediately rocket your next shot. This trains fast-twitch responses and stamina.
15. Cool Down
Always take 5 minutes after bounce back shooting to gently stretch again and lower your heart rate. Proper warm-ups and cool downs prevent injury and speed recovery.
Just 15-20 minutes daily with the Maverik bounce back goal can rapidly ramp up your shooting skills. The nonstop repetitions sharpen accuracy, power, quickness, endurance, and agility needed to overpower goalies. Make the bounce back a regular part of your practice routine and watch your scoring prowess soar!
Partner Up for Passing, Catching, and Two-Man Plays
Looking to immediately elevate your lacrosse game? Mastering the Maverik bounce back goal with a partner provides limitless reps to refine passing, catching, and two-man plays. Just 15-20 minutes per day can deliver rapid results in a couple weeks.
While the bounce back is great solo, teaming up unlocks its full potential. Having a partner turn drills into live passing, catching, and attack or defend simulations impossible to recreate alone. Grab a teammate, parent, or friend and utilize these 15 tips to gain an instant edge:
1. Loosen Up
Always warm up thoroughly before taking on bounce back drills. Light cardio, dynamic stretches, and casual passing/catching prevents injuries.
2. Start Simple
Begin just 5-10 feet from the goal with basic passing and catching. Get your timing and rhythm down before moving further out.
3. Work Both Hands
Demand your partner feed you 50/50 off-hand to develop equal dexterity with your weak hand. No excuses!
4. Keep it Quick
Pass back and forth rapidly once warmed up. Quick ball movement makes defenses scramble in live action.
5. Vary Distances
Move further apart and hit each other with longer passes. Mix in some bombs with shorter quick sticks to practice the full passing spectrum.
6. Change Angles
Work sidearm feeds along with over-the-top passes. Great stick handlers master every release point.
7. Pass on the Move
Pass back and forth while dodging, cutting, and juking. Mimic passing in chaotic game situations.
8. Work Through Traffic
Have a third person lightly defend the passing lanes to replicate congested defenses.
9. Catch in Transition
Make catches while spinning, switching hands, or dodging away. Develop smooth transitions for quick counters.
10. Add Shot Finishes
Incorporate catch-and-shoot reps to complete attacking possessions. Vary shot speed, location, and technique.
11. Two-Man Game
Run give-and-go’s, picks, and two-man cut combos to refine quick passing chemistry.
12. Defensive Communication
Defend each other after passes using proper positioning, footwork, and vocal cues.
13. React to Bad Passes
Deliberately make some errant passes. Work on defending and recovering loose balls.
14. Full Possession Simulations
Free play entire offensive and defensive possessions at game speed from start to finish.
15. Cool Down
Always cool off with light cardio and stretching. Failing to cool down properly leads to next day soreness.
Just 15-20 minutes daily with a partner and the Maverik bounce back goal can transform your passing, catching, and two-man game. The constant reps develop quick reflexes, hands, chemistry, and decision-making that separate good players from great ones. Make two-man bounce back drills part of your regular routine and accelerate your development!
Track Your Rebounds and Makes for Motivation to Improve
Lacrosse is a fast-paced, exciting sport that requires skill, finesse, and determination. As a lacrosse player, improving your game takes dedication and hard work. One great way to boost your skills is by practicing with the Maverik Bounce Back goal. This specialized lacrosse goal has a unique net that causes any missed shots to bounce right back to you, allowing you to take shot after shot without chasing rebounds. Using the Maverik Bounce Back goal can help you master key lacrosse shooting skills and motivate you to keep improving.
Here are 15 steps you can take to immediately improve your lacrosse skills using the Maverik Bounce Back goal:
- Warm up first. Take 5-10 minutes to lightly stretch and jog to get your muscles warm and prevent injury.
- Start close to the goal. Begin by taking shots from 5-10 yards away, focusing on good shooting form before moving back.
- Position your hands correctly on the stick, with your dominant hand above the other for maximal control.
- Get in an athletic stance, with knees bent and head up looking at the goal.
- Cradle the ball in your stick pocket to build momentum before shooting.
- Transfer your weight from your back foot to your front foot as you shoot.
- Follow through completely, pointing the head of your stick towards your target.
- Focus on accuracy over power at first, hitting your aimed spots consistently.
- Gradually take shots from farther out, increasing distance as your skills improve.
- Work on different types of shots – overhand, sidearm, bouncing, etc.
- Practice quick stick shots, catching and releasing in one fluid motion.
- Do repetition drills of 5-10 shots each from the same spot.
- Simulate game situations by dodging and shooting on the run.
- Vary your angles and move around the goal crease area.
- Keep track of your makes vs. misses and rebound percentages.
The key benefit of the Maverik Bounce Back goal is that it automatically rebounds any misses right back to you. This allows you to immediately take another shot without wasting time chasing balls or having someone pass to you. More shot repetitions means faster skill development. The goal’s durable net also provides helpful feedback by bouncing back shots that likely would have missed the net altogether.
Seeing that instant visual feedback can motivate you to focus more, refine your technique, and keep practicing until you improve your shooting accuracy. As your rebound and make percentages increase with practice, you’ll gain tangible proof that your skills are getting better.
Setting goals for your rebound and make percentages, then tracking your daily and weekly progress, is a great way to stay motivated too. For example, you could aim for 60% makes and 40% rebounds out of 100 shots. Or try to decrease your rebounds by 5% each week. Watching those numbers steadily improve thanks to focused practice with the Maverik Bounce Back goal will inspire you to keep honing your skills.
Here are some more tips for making the most of the Maverik Bounce Back goal to boost your lacrosse shooting skills:
- Mix up your power levels – don’t just blast every shot
- Practice both catching and throwing quickly in one motion
- Work on Accuracy first, then add more speed and power
- Use good follow-through and point at your target
- Practice shooting from different angles and positions
- Do repetition drills for muscle memory
- Visualize each shot going into the goal before shooting
- Analyze and correct flaws in technique
- Stay mentally focused and block out distractions
- Keep sessions short but intense for best skill development
With focused, regular practice using the unique Maverik Bounce Back goal, you’ll be amazed at how quickly your shooting and overall lacrosse skills will improve. As you watch your rebound percentage shrink and your makes grow consistently, you’ll gain confidence and motivation to keep sharpening your game. Dominate the field and become the MVP you know you can be this season with the Maverik Bounce Back goal!


