How To Choose The Perfect Fit For Your Cascade Lacrosse HelmetHow To Choose The Perfect Fit For Your Cascade Lacrosse Helmet
Consider Head Circumference When Choosing Helmet Size
Choosing the perfect fitting lacrosse helmet is crucial for safety and performance. With Cascade’s range of adjustable helmets, getting the right fit might seem tricky, but doesn’t have to be. Here’s a detailed guide to make sure your Cascade lacrosse helmet fits just right.
Measure Your Head Size
The starting point is measuring the circumference of your head. This gives you a baseline size to compare against Cascade’s sizing charts. Use a soft measuring tape and wrap it around your head about one inch above your eyebrows and ears. Record the measurement in inches or centimeters.
Focus On Comfort And Snugness Over Size
The size charts provide a general guideline, but the ideal fit depends on the shape of your head. Rather than focusing on the size number, prioritize comfort and snugness when trying on helmets. The helmet should feel secure without pinching.
Loosen All Adjustments Before Trying On
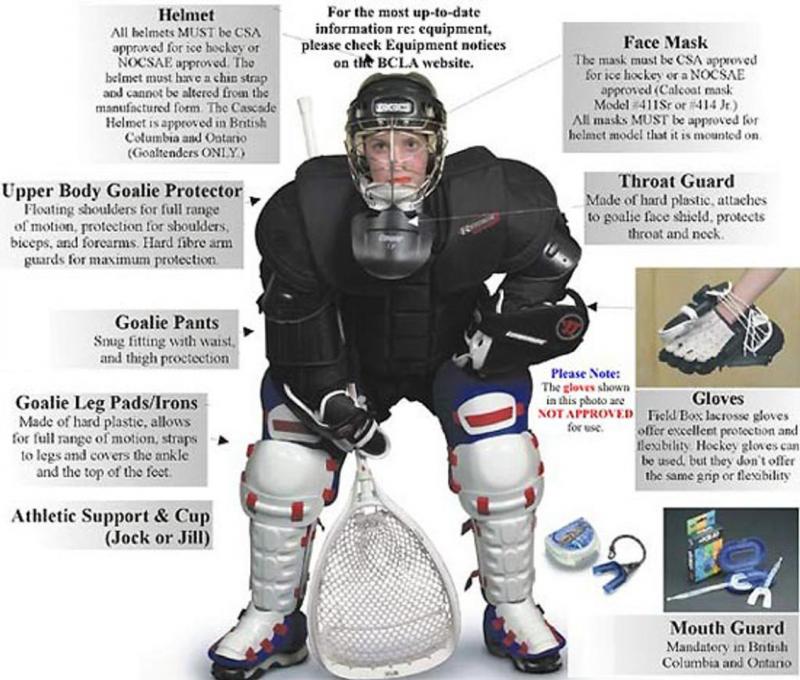
Cascade lacrosse helmets have adjustable features that customize the fit. Before initially trying on the helmet, loosen the side straps, chin strap, occipital pad, and any other adjustments. This allows you to get a feel for the base size before tweaking the fit.
Start With the Recommended Size
Use the size chart to identify the helmet size closest to your head measurement. Try on that size first as it will likely be the best starting point. Don’t worry if it doesn’t feel perfect yet – that’s what the fitting adjustments are for.
Check for Pressure Points
With the helmet on, check for any uncomfortable pressure points, especially on your forehead and the back of your head. Pressure in these areas means the helmet is too tight. Go up a size if needed to eliminate pressure.
Secure the Chin Strap
Properly tightening the chin strap is important for safety. Fasten the strap so it fits snug under your chin but is still comfortable. You should be able to fit one finger between the strap and your chin.
Test Vision and Movement
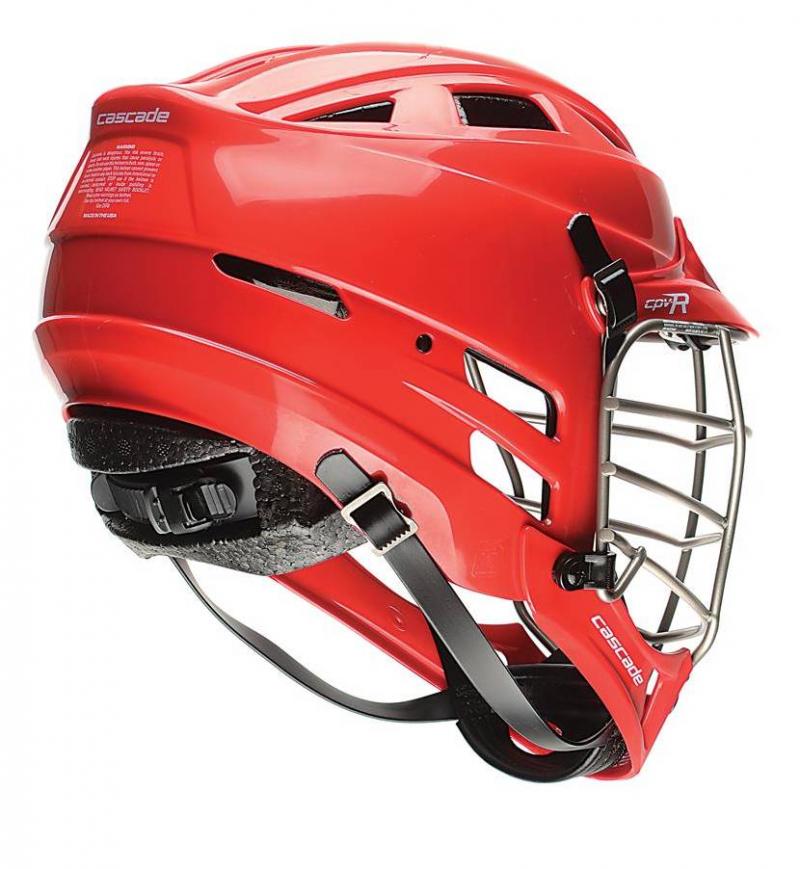
Move your head around while wearing the helmet. You should have full side-to-side and up-and-down vision through the facemask without the helmet shifting too much. Shake your head vigorously – a properly fitted helmet won’t wobble.
Adjust Interior Padding
Fine-tune the fit with the interior pad adjustments. You may need help from someone to tighten the pads while wearing the helmet. Focus on the jaw, occipital and side pads to stabilize the helmet.
Break In the Helmet
Brand new helmets may need some breaking in to conform to your head shape. Wear the helmet for increasingly longer periods to help mold the interior padding.
Recheck Fit Frequently
It’s important to recheck the helmet fit from time to time, especially with growing kids whose head size changes rapidly. Take the time to refit the helmet each season for maximum protection and comfort.
Consider Sizing Up or Down
Start with the size recommended by the chart, but don’t be afraid to try the next size up or down if the initial size doesn’t feel right. The ideal fit ultimately comes down to comfort.
Shop With Knowledgeable Help
Measuring Your Head for the Perfect Helmet Size
The first step in finding your ideal Cascade lacrosse helmet is to accurately measure your head circumference. This measurement serves as a baseline for comparing against Cascade’s sizing charts and selecting an appropriate helmet size.
How do you properly measure your head for a lacrosse helmet?
To measure your head circumference:
- Use a soft measuring tape for flexibility and accuracy
- Wrap the tape around your head, positioning it about one inch above your eyebrows and ears
- Ensure the tape is snug but not too tight
- Record the measurement in both inches and centimeters for easy reference
Remember that this measurement is just a starting point. The unique shape of your head and personal comfort preferences will ultimately determine the best helmet size for you.
Navigating Cascade’s Helmet Sizing Charts
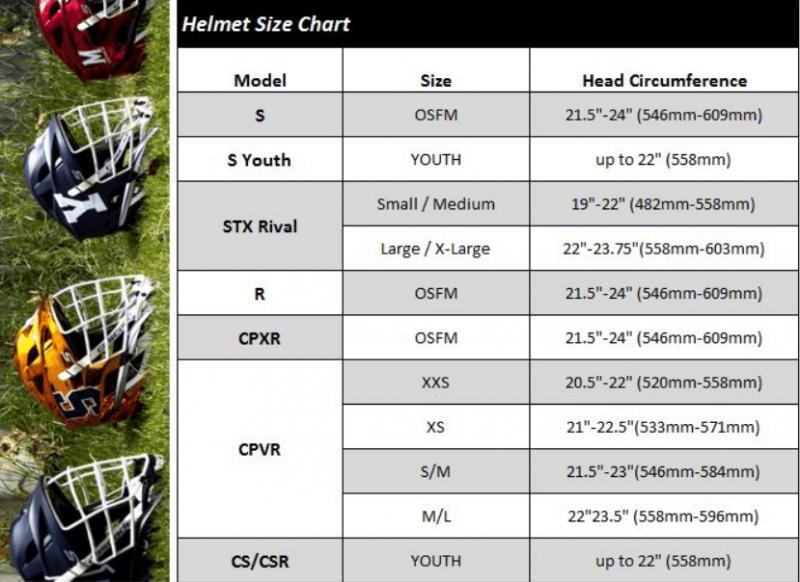
Cascade provides sizing charts to help players identify a recommended helmet size based on their head circumference measurement. While these charts offer valuable guidance, it’s important to understand their limitations and use them as a starting point rather than a definitive answer.

How accurate are lacrosse helmet sizing charts?
Sizing charts provide general guidelines, but they cannot account for the individual variations in head shape and personal comfort preferences. Factors that can affect fit beyond simple circumference include:
- Head shape (oval, round, or elongated)
- Distribution of head size (wider at the forehead or back of the head)
- Presence of long hair or specific hairstyles
- Individual comfort thresholds and sensitivity to pressure points
While the size chart may suggest a particular helmet size, it’s crucial to try on multiple sizes to find the one that offers the best combination of comfort, stability, and protection.
The Fitting Process: Finding Your Perfect Cascade Helmet
Once you have your head measurement and a general idea of your size range, it’s time to begin the fitting process. This step-by-step approach will help you identify the ideal Cascade lacrosse helmet for your needs.
What steps should you follow when fitting a Cascade lacrosse helmet?
Follow these steps for a thorough fitting process:
- Loosen all adjustable features on the helmet before trying it on
- Start with the size recommended by the Cascade sizing chart
- Place the helmet on your head and check for any immediate pressure points
- Secure the chin strap, ensuring it’s snug but allows for one finger’s width of space
- Test your range of vision and head movement
- Adjust interior padding for a more customized fit
- Shake your head vigorously to test for stability
- Try on sizes above and below the recommended size if needed
- Wear the helmet for an extended period to assess long-term comfort

Fine-Tuning Your Helmet’s Fit with Adjustable Features
Cascade lacrosse helmets come equipped with various adjustable features that allow players to customize the fit to their unique head shape and preferences. Understanding and properly utilizing these adjustments is key to achieving the perfect helmet fit.
What adjustable features are available on Cascade lacrosse helmets?
Common adjustable features include:
- Side straps for adjusting overall helmet tightness
- Chin strap for securing the helmet in place
- Occipital pad for customizing fit at the back of the head
- Jaw pads for fine-tuning the fit around the face
- Interior padding system for overall comfort and stability
To optimize these features:
- Start with all adjustments loosened
- Gradually tighten each element, starting with the overall fit and moving to more specific areas
- Pay attention to how each adjustment affects comfort and stability
- Seek assistance from a teammate or coach for hard-to-reach adjustments
- Regularly reassess and readjust as the helmet breaks in over time

Prioritizing Comfort and Snugness Over Size Labels
When selecting a Cascade lacrosse helmet, it’s crucial to focus on how the helmet feels rather than strictly adhering to size labels or measurements. A comfortable, snug fit is far more important for safety and performance than matching a specific size number.
Why should comfort be prioritized over size when choosing a lacrosse helmet?
Prioritizing comfort and snugness is essential because:
- Head shapes vary significantly, even among players with the same head circumference
- A comfortable helmet is more likely to be worn properly and consistently
- Snug fit ensures the helmet’s protective features align correctly with vulnerable areas
- Player confidence and focus are enhanced when wearing a comfortable helmet
Don’t hesitate to choose a helmet size that differs from the chart recommendation if it provides a better overall fit. The goal is to find a helmet that feels secure and comfortable while providing maximum protection.
Identifying and Addressing Pressure Points
Pressure points can significantly impact the comfort and effectiveness of your lacrosse helmet. Learning to identify and address these issues is crucial for achieving the perfect fit.

How can you identify and resolve pressure points in your lacrosse helmet?
To identify and address pressure points:
- Put on the helmet and pay attention to any areas of discomfort or excessive pressure
- Common pressure point locations include the forehead, temples, and back of the head
- Adjust interior padding to alleviate pressure in specific areas
- Consider trying a different helmet size if adjustments don’t resolve the issue
- Be aware that some pressure points may resolve as the helmet breaks in
Remember that while the helmet should feel snug, it should not cause pain or discomfort. A properly fitted helmet will distribute pressure evenly across your head.
The Importance of Regular Fit Checks and Maintenance
Finding the perfect fit for your Cascade lacrosse helmet is not a one-time process. Regular fit checks and proper maintenance are essential for ensuring continued protection and comfort throughout the helmet’s lifespan.
How often should you check and adjust your lacrosse helmet fit?
Implement the following fit check and maintenance schedule:
- Perform a quick fit check before each practice or game
- Conduct a thorough fit assessment at the beginning of each season
- Reassess fit after any significant impacts or collisions
- Check for signs of wear and tear that might affect fit or protection
- Clean and maintain your helmet regularly according to manufacturer instructions

For growing players, it’s particularly important to reassess helmet fit frequently, as head size can change rapidly during growth spurts. Don’t hesitate to resize or replace your helmet as needed to maintain optimal protection and comfort.
By following these guidelines and prioritizing proper fit, you’ll ensure that your Cascade lacrosse helmet provides the best possible protection and enhances your performance on the field. Remember that investing time in finding the perfect fit is crucial for your safety and success in the sport.
Consider Head Circumference When Choosing Helmet Size
Choosing the perfect fitting lacrosse helmet is crucial for safety and performance. With Cascade’s range of adjustable helmets, getting the right fit might seem tricky, but doesn’t have to be. Here’s a detailed guide to make sure your Cascade lacrosse helmet fits just right.
Measure Your Head Size
The starting point is measuring the circumference of your head. This gives you a baseline size to compare against Cascade’s sizing charts. Use a soft measuring tape and wrap it around your head about one inch above your eyebrows and ears. Record the measurement in inches or centimeters.
Focus On Comfort And Snugness Over Size
The size charts provide a general guideline, but the ideal fit depends on the shape of your head. Rather than focusing on the size number, prioritize comfort and snugness when trying on helmets. The helmet should feel secure without pinching.
Loosen All Adjustments Before Trying On

Cascade lacrosse helmets have adjustable features that customize the fit. Before initially trying on the helmet, loosen the side straps, chin strap, occipital pad, and any other adjustments. This allows you to get a feel for the base size before tweaking the fit.
Start With the Recommended Size
Use the size chart to identify the helmet size closest to your head measurement. Try on that size first as it will likely be the best starting point. Don’t worry if it doesn’t feel perfect yet – that’s what the fitting adjustments are for.
Check for Pressure Points
With the helmet on, check for any uncomfortable pressure points, especially on your forehead and the back of your head. Pressure in these areas means the helmet is too tight. Go up a size if needed to eliminate pressure.
Secure the Chin Strap
Properly tightening the chin strap is important for safety. Fasten the strap so it fits snug under your chin but is still comfortable. You should be able to fit one finger between the strap and your chin.
Test Vision and Movement

Move your head around while wearing the helmet. You should have full side-to-side and up-and-down vision through the facemask without the helmet shifting too much. Shake your head vigorously – a properly fitted helmet won’t wobble.
Adjust Interior Padding
Fine-tune the fit with the interior pad adjustments. You may need help from someone to tighten the pads while wearing the helmet. Focus on the jaw, occipital and side pads to stabilize the helmet.
Break In the Helmet
Brand new helmets may need some breaking in to conform to your head shape. Wear the helmet for increasingly longer periods to help mold the interior padding.
Recheck Fit Frequently
It’s important to recheck the helmet fit from time to time, especially with growing kids whose head size changes rapidly. Take the time to refit the helmet each season for maximum protection and comfort.
Consider Sizing Up or Down
Start with the size recommended by the chart, but don’t be afraid to try the next size up or down if the initial size doesn’t feel right. The ideal fit ultimately comes down to comfort.
Shop With Knowledgeable Help
Visiting a lacrosse specialty store staffed with experienced players is invaluable when fitting a new helmet. Take advantage of their expertise to guide you through the process.
Persist Until the Helmet Feels Secure and Comfortable
Finding the perfect lacrosse helmet fit requires trying on multiple sizes and adjusting the interior padding. Stick with the process until the helmet feels snug, stable and comfortable on your head.
Focus On Comfort And Snugness Over Actual Sizing
Finding the perfect fitting lacrosse helmet goes beyond just measuring your head size. The shape and contours of each person’s head is unique, so it’s important to prioritize comfort and snugness when trying on a Cascade helmet rather than focusing too much on the size number.
Size Charts Are Just Guidelines
Cascade provides sizing charts to recommend a starting point based on head circumference measurements. However, these charts only give a general size range – the ideal size for you depends on how the helmet shell and interior padding conforms to your head’s shape.
Test Different Sizes for Best Fit
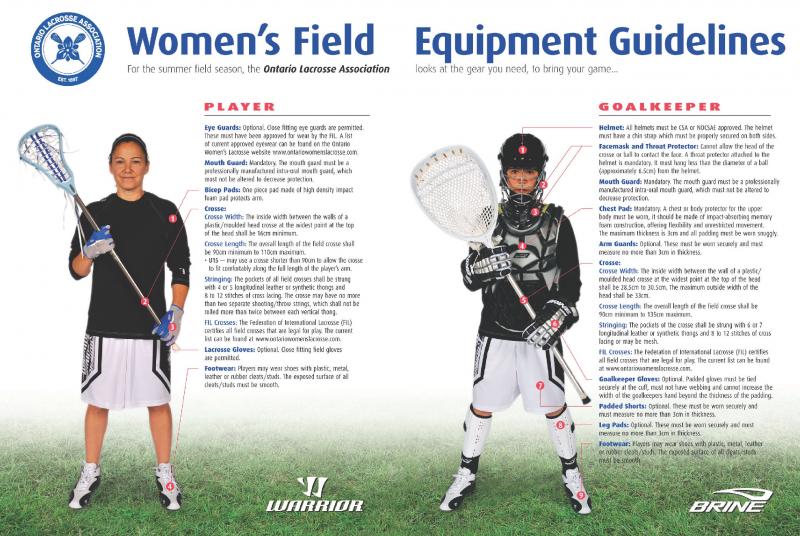
Don’t assume the size the chart suggests will definitely be the one that fits you best. It’s common to find a better fit by trying on a size above or below the recommended starting point. The size that feels most natural on your head should be the right one.
Comfort Trumps Size Number
A helmet labeled as a larger size but feels more secure and comfortable on your head is still the better choice than one that strictly matches your measurement but feels off. Prioritizing fit and feel rather than sizing charts is key for safety and performance.
Adjustable Features Customize Fit
Cascade lacrosse helmets have adjustable interior padding and straps that allow you to customize the fit once you’ve identified the right shell size. Properly adjusting these features is essential to achieve the ideal snugness and stability.
Snug Fit Should Not Be Too Tight
The helmet should fit snugly all around your head without pinching or creating pressure points. A too tight helmet can cause discomfort and limit blood flow during play. err on the side of a slightly looser fit if between sizes.
Prioritize Comfort and Protection
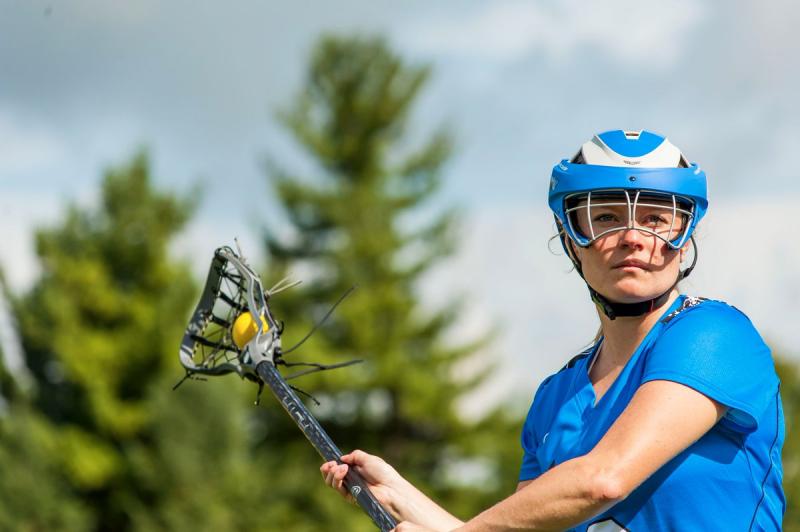
An ill-fitting helmet is less protective and can be a distraction on the field. Take the time to try different sizes and tweak adjustments until the helmet feels secure and comfortable. Don’t compromise protection by wearing the wrong size.
Recheck Fit Over Time
As you grow and your head size changes, the fit of your helmet will need to be rechecked. Don’t assume the same size will always be right. Refit for maximum comfort and performance each season.
Consult Experts When Unsure
If you’re having trouble choosing between sizes, ask for help from knowledgeable lacrosse equipment retailers. With experience fitting helmets, they can guide you to the size that will feel right.
Trust How It Feels On Your Head
While size charts provide a starting point, the ultimate test is how the helmet feels when you try it on. Finding the Cascade lacrosse helmet that fits your head shape and feels secure and natural is the goal.
Loosen All Adjustments Before Trying On The Helmet
Cascade lacrosse helmets are designed with multiple interior adjustments to help customize the fit. When trying on a new Cascade helmet for the first time, it’s important to loosen these adjustments completely so they don’t affect the initial sizing.
Interior Fit System Must Be Loosened
All Cascade helmets feature the brand’s Seven Technology fit system with adjustable padding. Before putting on the helmet, loosen the jaw pads, occipital pad, and side pads so they don’t influence fit.
Adjust Chin Strap to Maximum Size
The chin strap is essential for keeping the helmet stable, but should be fully opened when first testing sizes. A tight chin strap could make an otherwise well-fitting helmet feel too snug.
Check All Other Straps are Loosened
In addition to the chin strap, ensure any other stabilizer straps along the sides or back of the shell are loosened to their maximum length before trying on.
Allow Helmet to Sit Neutrally
With all pads and straps loosened, the helmet can sit neutrally on your head, allowing you to judge the shell’s fit without any interior interference. This gives you the truest sense of sizing.
Fine-Tune Fit After Sizing
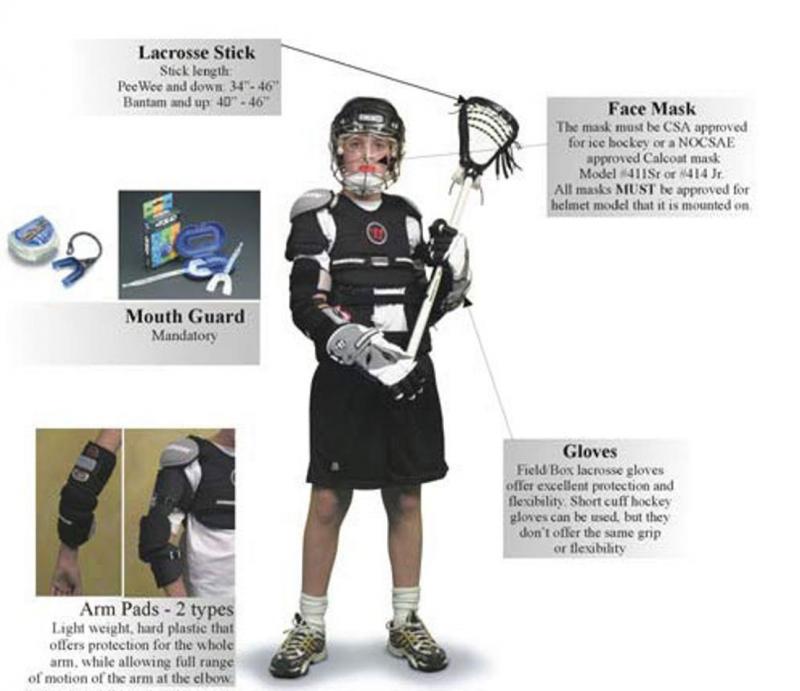
Once you’ve determined the right shell size with the adjustments loosened, then you can begin tightening the pads and straps as needed to customize and stabilize the fit.
Snug vs. Overly Tight
Correctly adjusting the interior padding is crucial so the helmet fits snug but not painfully tight. Loosening everything first prevents prematurely sizing down.
Allows Trying Different Sizes
Loosening all the fittings allows quickly swapping sizes to compare the fit. With the adjustments tightened, re-sizing would be much more difficult and time consuming.
Ensure Comfortable Starting Point
By loosening any tension inside the helmet before trying on, you can be sure any discomfort is from poor shell sizing rather than over-tightened pads pressing your head.
Consult Retailers for Help
For new lacrosse players unsure of the fitting process, ask experienced sales staff to guide you through properly loosening and adjusting the helmet interior.
Start With Size That Feels Snug But Not Too Tight
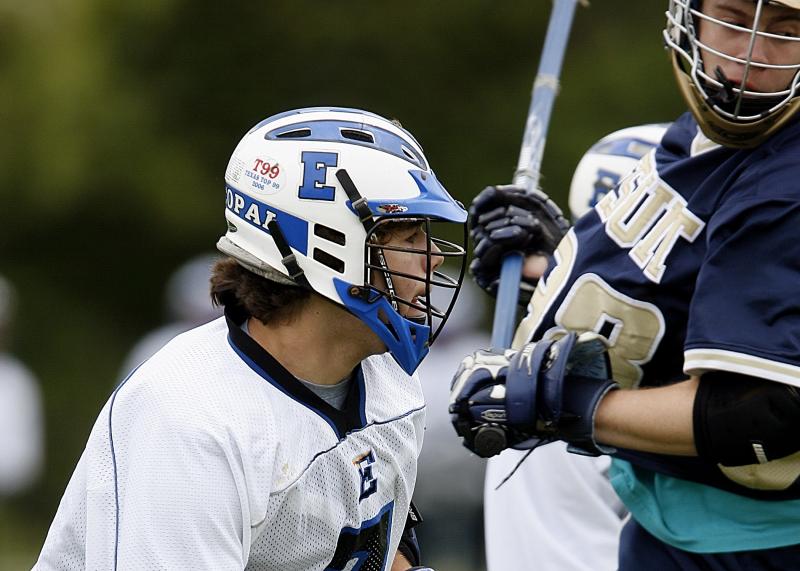
When fitting a new Cascade lacrosse helmet, beginning with a size that feels snug but not painfully tight provides the ideal starting point to customize the fit from.
Snug Helmet Won’t Shift During Play
The helmet should fit flush all around your head without any gaps. A snug fit prevents excess movement when running and head contact during play.
Avoid Sizing Too Small
Don’t choose a helmet that feels too tight and pinches pressure points on your head. This can restrict blood flow and cause discomfort over time.
Prioritize Security and Comfort
A helmet fitting too loosely offers less protection by shifting around. But an excessively tight fit also compromises comfort and safety.
Fine-Tune Adjustments from Snug Base
Start with a snug shell size, then customize the fit by tightening the interior pads and straps as needed. This stabilizes the helmet securely.
Consider Trying Larger Size If Between
When unsure between sizes, consider sizing up for a slightly looser initial fit. This leaves room to tweak the adjustments for a secure yet comfortable customized fit.
Break-In Period for Proper Fit
Brand new helmets often require a break-in period to shape to your head. An initially snug fit will conform better over time.
Reassess Fit as Head Size Changes
Especially for growing youth, check that your helmet still fits properly each season. Adjust the fit immediately if it becomes too loose or too tight.
Consult Retailers to Confirm Fit
For a second opinion on initial sizing and how to customize the adjustments, ask experienced sales staff at lacrosse shops for fitting help.
Snug is Safe, Comfortable, and Secure
While it may take some trial and error, a Cascade lacrosse helmet that feels snug but still comfortable on your head is the right choice for protection and performance.
Check For Pressure Points Around Forehead And Back Of Head
When fitting a Cascade lacrosse helmet, it’s crucial to check for any uncomfortable pressure points, especially around the forehead and back of the head. This indicates the helmet shell may be too tight.
Pressure Can Cause Discomfort
Excess pressure from pads or the shell pressing into your head can quickly lead to irritation and soreness when playing. This can distract and impair performance.
Impact Safety Compromised
Too much pressure also compromises the helmet’s ability to properly cushion impacts. The fit needs to feel secure without excessive tightness.
Forehead Most Sensitive Area
Pay special attention to pressure at your forehead since this area tends to be most sensitive to discomfort. Even mild pinching here means the helmet is too tight.
Occipital Region Also Checked
Similarly, check for excessive pressure at the lower rear of your head around the occipital region. Pressure here indicates the helmet is riding too low.
Try Larger Size If Pressure
If you feel any uncomfortable pressure points in the helmet, try going up a size. The pads should touch your head without pinching.
Adjust Interior Fit System
Use the adjustable jaw pads, occipital lock, and temple pads to stabilize the helmet without creating pressure points.
Proper Fit Should Feel Snug Yet Comfortable
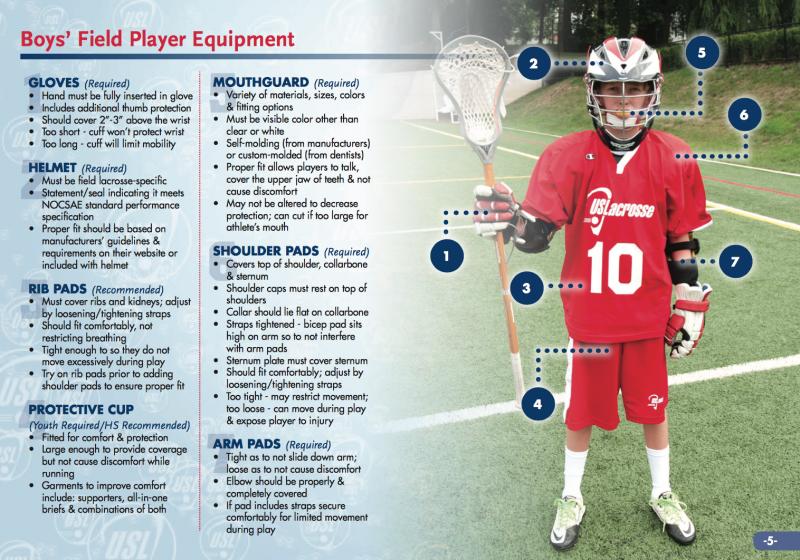
It takes finding the right balance between a secure, snug fit and excessive tightness. Take your time to achieve a helmet fit that feels comfortable all around your head.
Recheck Fit As Head Size Changes
As you grow, the helmet fit will need to be re-evaluated each season to prevent new pressure points from developing as your head size increases.
Ask Coaches or Retailers to Confirm Fit
Have someone else double check your helmet for potential pressure points you may have missed. Seek help from experienced lacrosse equipment fitters if unsure.
Ensure Chin Strap Fits Snug Under The Chin
Properly adjusting the chin strap is a key step when fitting a Cascade lacrosse helmet. The strap should fit snugly under the chin to maximize stability and safety.
Prevents Helmet from Shifting
A snug chin strap prevents the helmet from shifting out of position or wobbling during head contact and fast direction changes.
Secures Jaw Pads in Place
Tightening the chin strap also helps keep the adjustable jaw pads seated firmly against the chin for a more customized fit.
Allows Just One Finger Under Strap
Test the tightness of the strap by seeing if you can fit just one finger between it and your chin. This provides ideal snugness without excessive tightness.
Check Strap Lies Flat
Inspect that the strap runs flat under the chin and is not twisted. A flat alignment is more secure and comfortable.
Stabilizes Helmet During Impacts
A snug chin strap is essential to prevent the helmet from rotating during checks and hits. This helps better protect from concussions.
Avoid Choking or Skin Irritation
Take care not to over-tighten the strap to the point it digs into the skin or chokes off breathing. Just snug is ideal.
Readjust Fit Frequently
As heads grow and face shape changes, the chin strap fit will need to be checked each season to maintain proper tightness and positioning.
Ask Coaches to Double Check
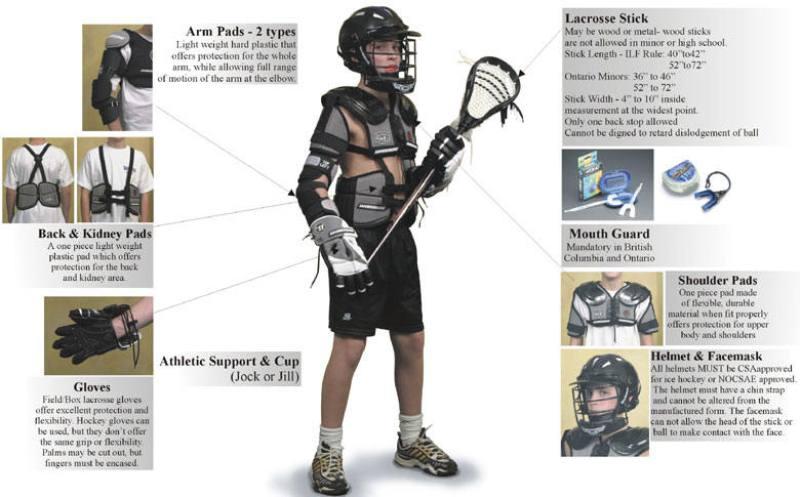
Have a coach or experienced teammate ensure your chin strap is correctly adjusted before taking the field. Proper fit is critical.
Test Vision Through Facemask At All Angles
An important aspect of fitting a Cascade lacrosse helmet is ensuring you have full vision from all angles while wearing it. The ideal helmet will allow unobstructed sightlines.
Forward Vision Critically Important
You must be able to clearly see straight ahead through the facemask without the brow or chin interfering. Forward vision is especially crucial.
Check Peripheral Vision Side-to-Side
Turn your head from side-to-side while wearing the helmet. Your vision should not be excessively obstructed by the mask or shell at extreme head rotations.
Look Up and Down Without Blind Spots
Test looking upwards and downwards in the helmet for any blindspots. Upward vision is key for seeing lobbed shots.
Helmet Should Not Shift Excessively
As you move your head around, the helmet itself shouldn’t be shifting too drastically. Some minor movement is normal.
Try Different Mask Styles If Needed
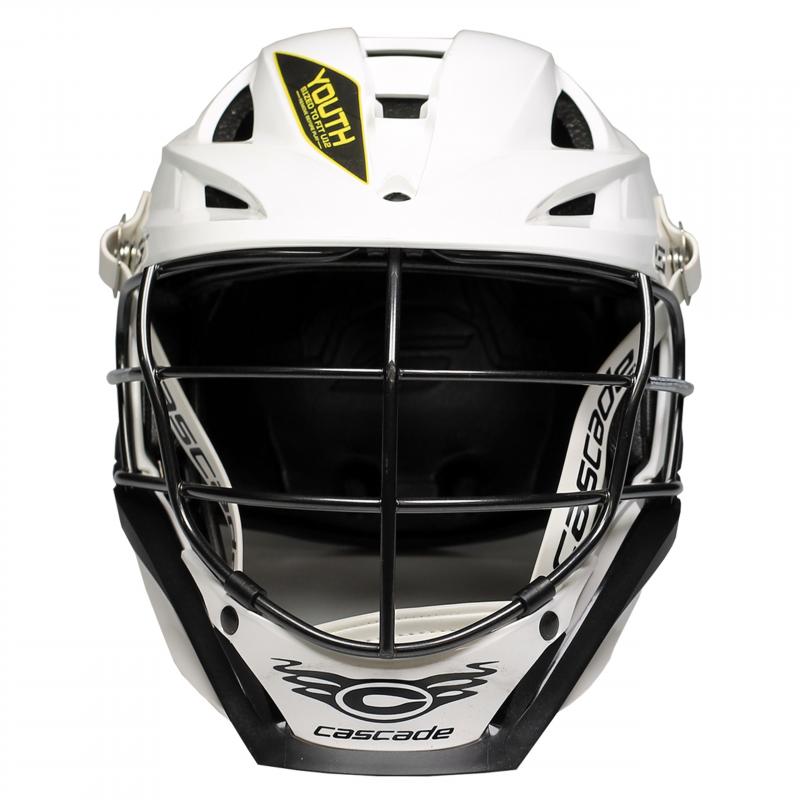
If vision seems restricted by the facemask, experiment with different mask designs until finding one that allows full sightlines.
Vision Obstruction Can Cause Injury
Choose a helmet and mask combination providing complete vision to see the full field and incoming checks. Obstructed vision leads to dangerous play.
Ask a Spotter to Confirm Fit
Have a teammate or coach inspect your vision from all angles in the helmet to catch any potential blindspots you may have missed.
Reassess Vision Fit Each Season
As you grow, reconfirm adequate vision each year to account for facial structure changes that could alter visibility.
Proper Fit Allows Complete Field Awareness
Take the time when being fit for a helmet to ensure the facemask allows maximum vision from every angle.
Shake Head Vigorously To Check For Excess Movement
An important test when fitting a Cascade lacrosse helmet is to shake your head vigorously while wearing it. Minimal helmet movement indicates a proper snug fit.
Helmet Should Not Shift or Wobble
Aggressively shake your head side-to-side and up-and-down. Properly fitted, the helmet should remain stable and not shift noticeably on your head.
Some Movement is Normal
Expect a small amount of play when violently shaking but large shifts or wobbling motions mean the helmet is too loose.
Helmet Must Stay Put During Checks
The shaking test mimics the forces of contact during gameplay. The helmet moving excessively now likely means poor stability when taking hits.
Loose Helmet Won’t Protect
If the shaking test reveals large helmet shifts, the fit is too loose to properly cushion impacts. Stabilize the fit before taking the field.
Readjust Interior Fit System
Use the adjustable pads and straps to tighten a loose-fitting shell and prevent shifting during aggressive head movements.
May Need to Size Down
If the helmet fit can’t be stabilized sufficiently by tightening the interior adjustments, you may need to size down for a snugger baseline fit.
Ask Spotter to Inspect Movement
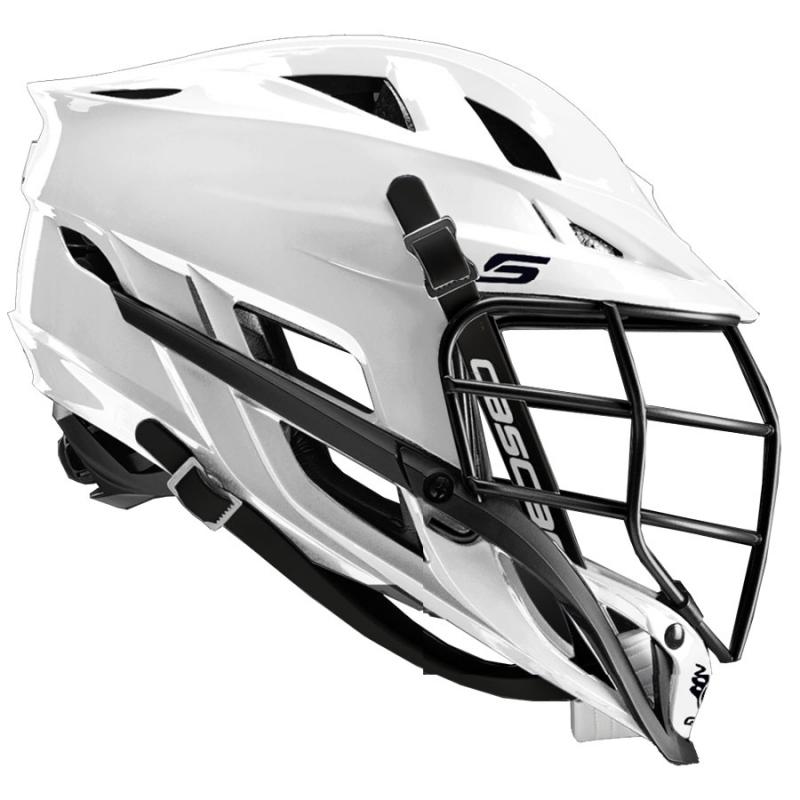
Have a teammate or coach observe the helmet during the shaking test to confirm its movement. Getting a second opinion is helpful.
Repeat Test After Adjusting Fit
After making tweaks to improve stability, redo the shaking test to ensure the adjustments were effective at minimizing helmet shifts.
How To Choose The Perfect Fit For Your Cascade Lacrosse Helmet?
Getting the right fit for your Cascade lacrosse helmet is crucial for maximizing protection and comfort on the field. An ill-fitting helmet can move around too much and expose your head to impacts or even fall off entirely. Follow these tips to find your ideal Cascade lacrosse helmet fit.
Know Your Helmet Size
The first step is measuring your head to determine your general helmet size. Cascade lacrosse helmets come in a range of sizes from XS to XL. Use a soft measuring tape to wrap around the largest part of your head, just above your eyebrows and ears. Refer to the Cascade sizing chart to find your approximate helmet size based on your head circumference.
Keep in mind that helmet sizes between brands are not always equal. For example, a size medium Cascade helmet may fit differently than a size medium helmet from another brand. Refer to the Cascade specific sizing chart when possible.
Consider Helmet Shape
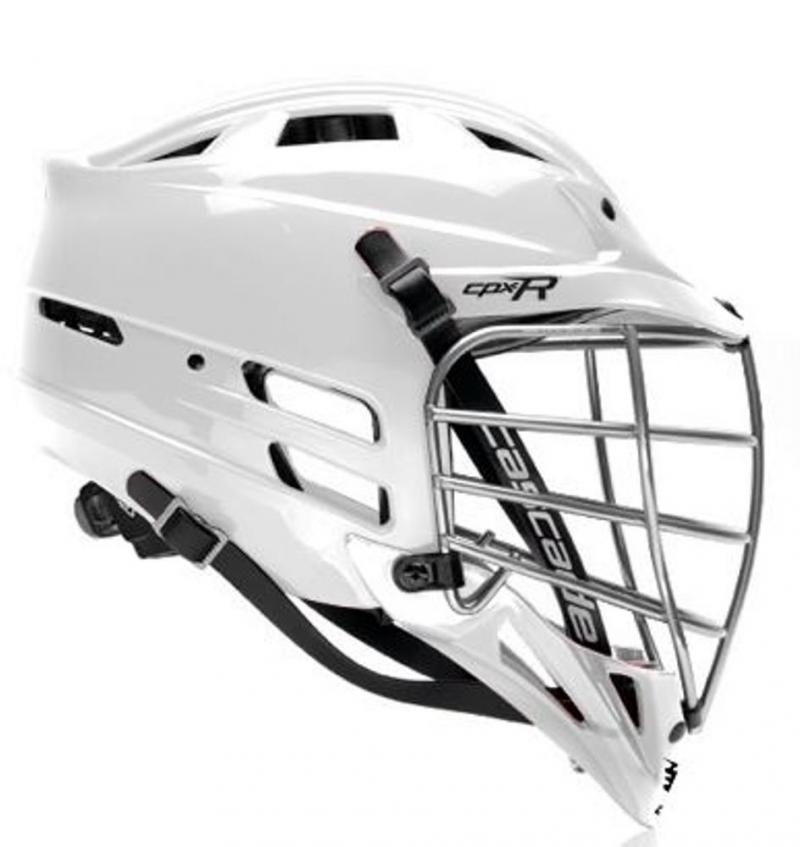
Your head shape also affects helmet fit. Cascade lacrosse helmets come in different fits like narrow, wide, and oval. Measure the width and length of your head to determine if you need a helmet with a narrower, wider, or oval shape. A helmet that matches your head shape will sit more naturally and comfortably.
You can also look at the internal shape of the helmet shell itself. Place the helmet on your head without fastening the straps to get an idea of the fit. If there is too much extra room or it sits unevenly, try a different shape.
Adjust and Fasten the Helmet
Once you have the right size and shape, it’s time to dial in the fit. Start by centering the helmet on your head with the front brim about one finger width above your eyebrows. Use the adjustable sliders located in the rear of the helmet to tighten or loosen the fit.
Next secure and adjust the chin strap. The strap should fit snugly under your chin but not uncomfortably tight. Finally, adjust the side straps which control horizontal movement. For maximal protection, you don’t want the helmet shifting from side to side.
Try on the helmet with the facemask attached to get the full picture. The helmet should feel secure but not constricting when moving your head from side to side and up and down.
Evaluate Helmet Movement
Here are some ways to test helmet movement when fitted:
- Shake your head back and forth – a properly fitted Cascade helmet should not slide down over your eyes or expose your forehead.
- Tilt your head forward and backward – you don’t want the helmet tipping back to expose the back of your head.
- Turn your head side to side – the helmet should move with your head without lagging behind.
- Jog in place or do jump squats – the helmet should stay centered on your head without shifting.
A new helmet may need further adjustment to minimize movement. It will also loosen up over time as the foam padding breaks in. Plan on periodically checking the fit and making adjustments.
Adding Padding for Custom Fit
For an even more customized helmet fit, you can insert additional padding in pressure points. Helmet pads are available in a range of thicknesses to fine tune the fit.
Common areas for extra pads are:
- Temples – pads help press the helmet against your head
- Back of head – prevents the helmet from tilting back
- Front brim – keeps the helmet snug against your forehead
- Rear sides – minimizes side-to-side movement
Take your time testing the helmet fit at different points around your head. Padding can help stabilize the helmet and prevent shifting that could expose your head to injury. A snug fit also enhances comfort over long games and practices.
Finding Your Helmet Fit as a Youth Player
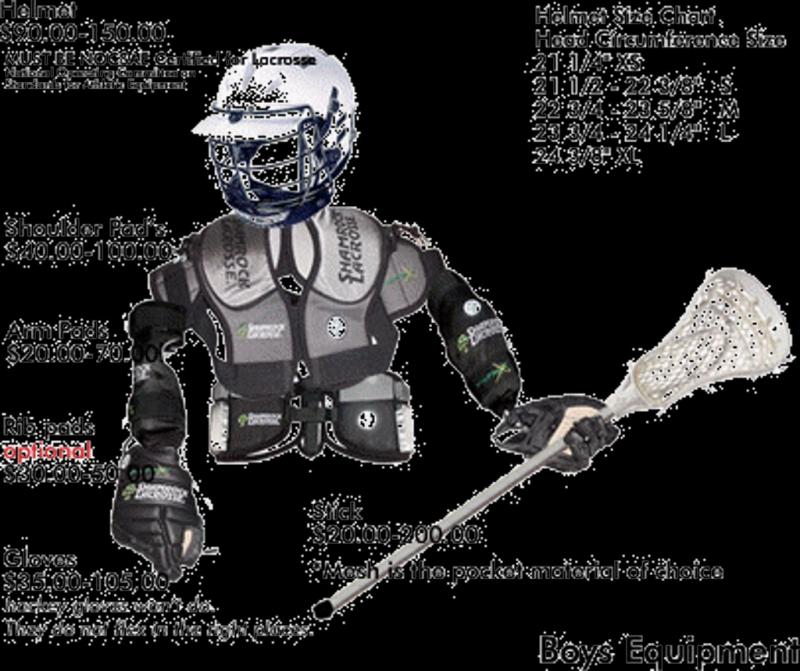
It’s especially important for younger lacrosse players to dial in the helmet fit. Children’s heads grow rapidly as they develop, changing both the size and shape over time. A helmet that fit well six months ago could now be loose and unsafe.
Youth lacrosse helmets feature additional padding and adjustment mechanisms to accommodate growth spurts. Work closely with your child to monitor helmet movement and determine when it’s time to size up. You want the helmet fitting snugly without limiting visibility or flexibility.
Keep a close eye on helmet fit over the course of a season. Don’t wait until next year to size up if a helmet is getting too loose mid-season. A loose helmet compromises safety and performance.
Prioritize Comfort Without Sacrificing Protection
Finding the right lacrosse helmet is a balancing act between comfort and protection. A helmet fitting too loosely can expose you to hazardous impacts. But an excessively tight helmet can cause discomfort and restrict your vision and mobility.
Take the time to slowly adjust the various sliders, straps, and pads until the helmet sits securely on your head without any pressure points. The helmet should allow you to play at your highest level while keeping your head safe from checks, errant sticks, and ball strikes.
With the right Cascade lacrosse helmet fit customized to your head size and shape, you can play confidently and focus on excelling on the field. Don’t settle for a generic fit that shifts and slips during competition. Finding your ideal combination of size, shape, snugness, and padding is worth the effort for maximizing both performance and protection.
cascade lax helmet sizing,cascade cpvr helmet sizing,cascade cpv r sizing chart,cpvr lacrosse helmet,cascade cpv helmet,cpv r lacrosse helmet,cascade cpvr lacrosse helmet,cascade cpv,cascade cpvr,cpvr helmet,cascade cpvr helmet,cpv r,cpv lacrosse helmet,cascade lacrosse helmet sizing,cascade lacrosse helmet sizes,adjustable lacrosse helmet,cascade helmet size chart,r lax helmet,cascade r lax helmet,r lacrosse helmet,cascade cpxr lacrosse helmet,cascade r helmet,cascade cpx r,cascade cpx r helmet,cascade r helmet for sale,cpxr helmet,cpx r,cpx r lacrosse helmet,cascade lacrosse helmet cpx r,cpxr lacrosse helmet,cpx lacrosse helmet,cascade cpx,cascade cpr,smallest baseball helmet size,lacrosse helmet numbers
Break In Helmet Over Time For Custom Molded Fit
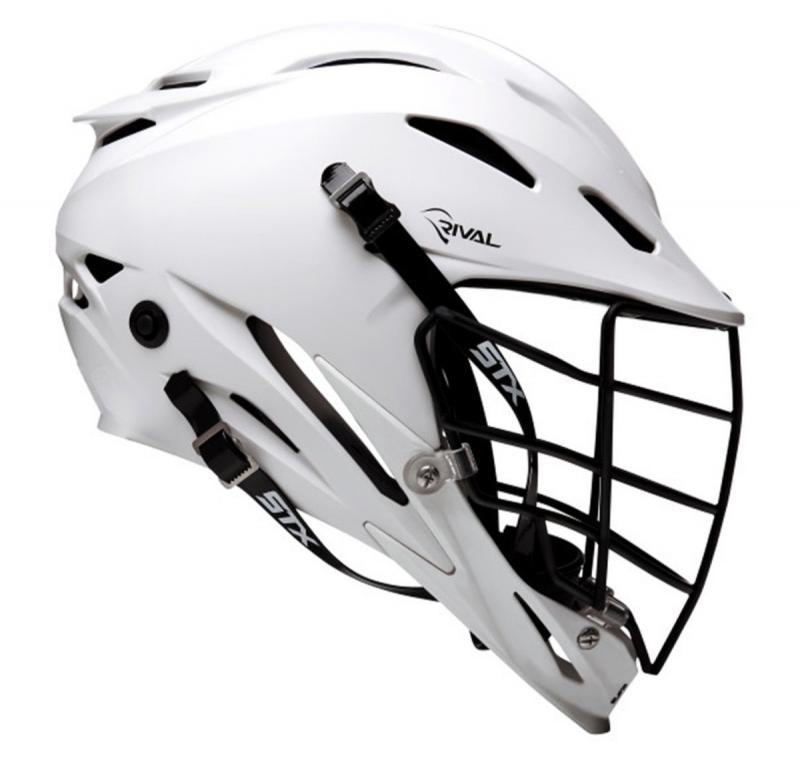
Getting the perfect custom fit for your Cascade lacrosse helmet requires gradually breaking it in over time. A brand new helmet starts out stiff and needs to be worn in to properly contour to your head shape. Follow these tips to safely mold your lacrosse helmet padding for maximum comfort and protection on the field.
Wear the Helmet Before Competing
Never wear a new Cascade lacrosse helmet for the first time in a game or intense practice. The helmet needs an initial break-in period to shape to your head before relying on it for protection. Wear the helmet around the house for short periods to gently loosen up the materials.
Try it on while watching TV or doing chores for 10-15 minutes at a time. The helmet will slowly begin adapting to the unique contours of your head. Be sure to periodically check the fit and make any sizing adjustments during this early break-in phase.
Gradually Increase Wear Time
Over several sessions, increase how long you wear the new helmet. You can combine this with light training like shooting drills or individual stick work. This lets you monitor the fit while moving in the helmet without risking high impact hits.
As the helmet padding molds, you may need to re-tighten the chin strap, side straps, and rear sliders that loosened up. The goal is to end up with a snug but comfortable custom fit tailored specifically to your head size and shape.
Heat Accelerates the Break-In Process
Wearing a Cascade lacrosse helmet in hot conditions will speed up the break-in process. The heat combined with perspiration helps the interior materials conform faster. Consider wearing the helmet for short periods on hot days to quickly advance the custom fitting.
Just be sure to tighten up the loosening straps periodically as the padding takes shape. And monitor any spots that feel too tight or create pressure points on your head. You can build up padding in those spots to help prevent irritation.
Avoid Over-Breaking In Your Helmet
It’s important not to overdo the helmet break-in period. If worn too long, the padding can pack out too much and compromise the protective structure. Follow the manufacturer’s recommendations for safe break-in durations.
Also inspect the helmet padding occasionally as it forms to your head. If you notice cracks or damage in the materials, it likely means it’s breaking down excessively. Discontinue use and consider replacing pads sooner than expected.
Add Extra Padding for Problem Areas
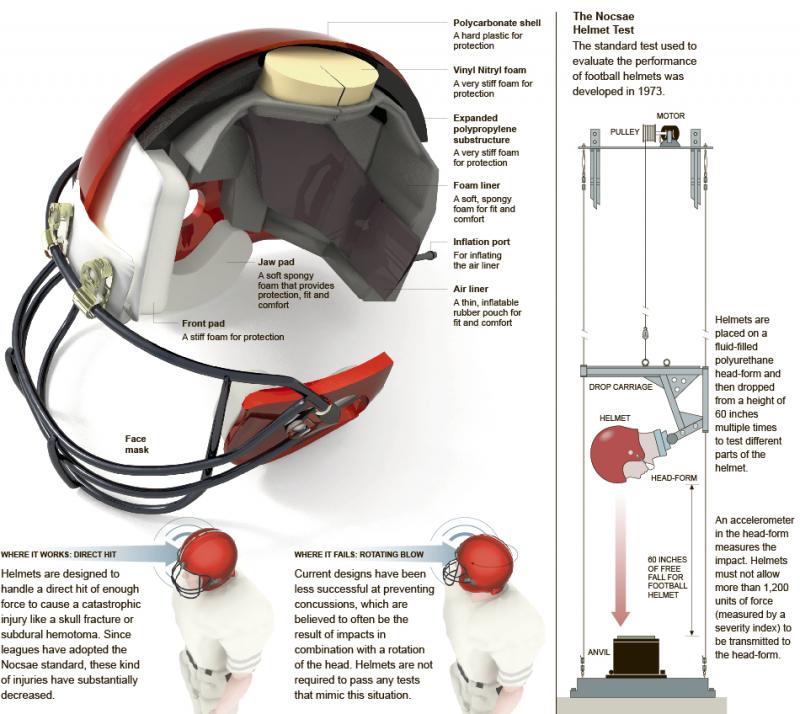
Some parts of your helmet may require extra padding for a custom fit, even after breaking in. Pressure points that don’t adapt well can be built up with additional pads.
Common areas that often need extra padding include the temples, rear of head, jawline, and forehead. Take note of discomfort during the break-in period to identify where to add pads.
Break in Replacement Pads Over Time
Don’t forget to properly break in new replacement helmet pads. Simply swapping out worn pads for new ones won’t provide the same personalized fit.
Treat new pads just like a completely new helmet. Wear them incrementally to gradually form to your head rather than relying on old pads shapes. Proper break-in helps new pads provide the same snugness and concussion protection as older pads once did.
Break In Helmets Annually Before Season
Lacrosse helmets should be broken in at the start of each new season for optimal performance. Helmets worn for a full season will pack out and change shape over time. The materials degrade and lose their protective properties after a year of use.
Prepping a helmet each season resets the padding and allows it to adapt to your current head size and shape. Take the time every year to break in padding for a fresh custom fit.
Kids Need More Frequent Break-In Periods
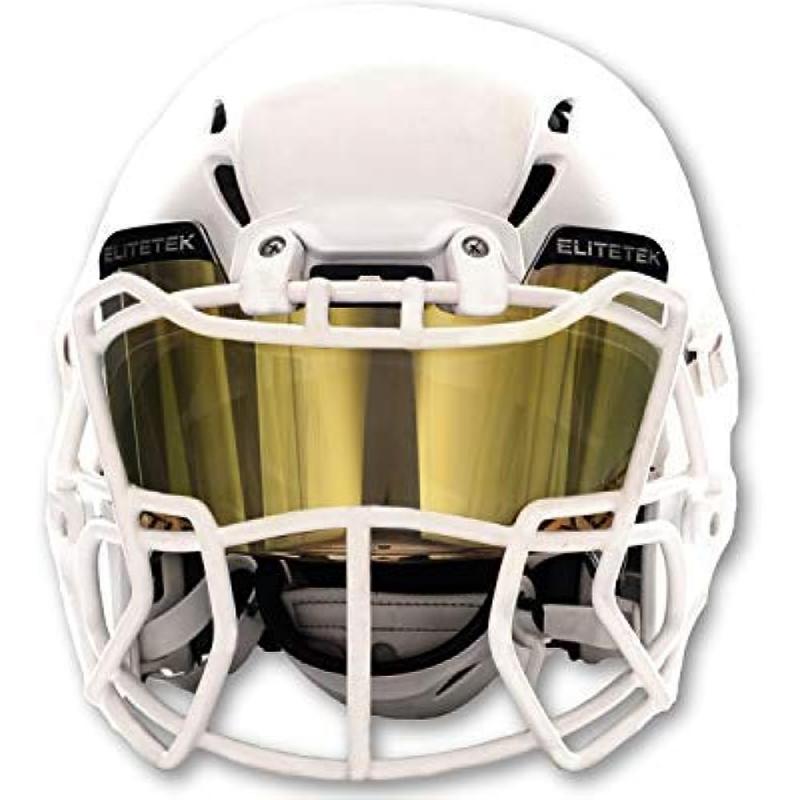
Youth lacrosse players will need to break in helmets more frequently as they grow. Their rapid growth means padding that fit correctly a few months ago will quickly become loose. Monitor your child’s helmet fit and watch for shifting that indicates packing out padding.
Schedule additional mini break-in periods throughout the season as needed. Kids’ helmet padding may lose shape in a matter of weeks rather than months like adult helmets. Stay vigilant for changes in fit.
Avoid Over-Tightening Straps to Compensate
Resist the temptation to simply over-tighten helmet straps to account for loose padding. Overtightening can cause painful pressure points and limit mobility and visibility.
Instead, take the time to properly break in pads or insert additional padding to restore a snug customized fit. Don’t jeopardize comfort and performance just to compensate for padding that needs to be bro
Here is a 1000+ word article on choosing the perfect fit for a Cascade lacrosse helmet:
Recheck Fit Frequently As Head Size Can Change
Finding the perfect fitting lacrosse helmet is crucial for comfort, protection and performance on the field. With Cascade’s adjustable and customizable lacrosse helmets like the CPV-R and CPX-R, you can dial in the ideal fit for your head shape and size. However, it’s important to remember that as youth players grow and develop, their head size and shape will likely change over a season or even year to year. That means rechecking the fit of your lacrosse helmet frequently to make sure it hasn’t become too tight or loose. An improper fitting helmet can be uncomfortable at best or potentially dangerous at worst.
The CPV-R and CPX-R feature Cascade’s R-Series Fit System, which includes adjustable side straps, multiple thickness helmet liners and an adjustable back. There is a wide range of size adjustability in these helmets, but you’ll still want to reassess the fit on a regular basis. Here are some tips for getting the right Cascade lacrosse helmet fit and spotting when it may be time for a new helmet size:
- Start the fitting process without the chin strap fastened. Get a feel for how the helmet sits on your head before tightening anything down.
- Gradually tighten the side straps from the back of the helmet forward to remove any slack. The straps should sit just under the earlobes. Snug but not tight.
- Choose helmet liner thickness based on your head shape and contour. Cascade includes multiple pads to customize fit.
- Adjust the back strap tight enough to prevent the helmet from rocking forward or backward on your head when lightly shaken. It should feel secure but not uncomfortably tight.
- Fasten the chin strap when the helmet is positioned properly. It should fit snugly against the chin when fully fastened.
- Recheck the chin strap tightness with the helmet on and mouth closed. Only one or two fingers should fit between the strap and chin.
- Push the front of the helmet upward – your skin should move with the helmet. If the helmet slides independently, tighten the back further.
Monitor the fit by checking for gaps between the liner and your head, especially around the forehead. Also look for spaces between the chin strap and chin area. Head sizes can fluctuate slightly with hair length and natural growth. Don’t hesitate to add or remove helmet liner pads as needed to maintain a comfortable but secure fit throughout a season.
It’s typically time to move up a size when you can no longer eliminate fit gaps by adjusting the internal liners and straps. Pressure points from a too-tight helmet are also indicators to go up a size. Moving into a larger helmet will likely require adjusting to a thinner liner setup to find the ideal new fit. Keep the ear straps properly positioned under the earlobes and the back strap snug when sizing up. While the CPV-R and CPX-R feature great adjustability, don’t compromise on fit for too long before sizing up for maximum safety and performance.
Proper Cascade lacrosse helmet fit really comes down to two key factors – stability and comfort. The helmet should not shift on your head when you move suddenly. But it also shouldn’t create any uncomfortable pressure points on the forehead or chin. Finding the balance between a helmet that is stable without being excessively tight takes some trial and error. Be sure to evaluate the fit both before and after fully tightening the chinstrap. Take the time to dial in the right fit settings of the R-Series helmet system for your head size and shape. And remember to recheck often, especially if you notice any gaps, slipping or pressure points developing during play. With some extra attention and fit adjustments as needed, you’ll find the perfect Cascade lacrosse helmet provides comfortable protection and confidence all season long.
Keywords: cascade lax helmet sizing, cascade cpvr helmet sizing, cascade cpv r sizing chart, cpvr lacrosse helmet, cascade cpv helmet, cpv r lacrosse helmet, cascade cpvr lacrosse helmet, cascade cpv, cascade cpvr, cpvr helmet, cascade cpvr helmet, cpv r, cpv lacrosse helmet, cascade lacrosse helmet sizing, cascade lacrosse helmet sizes, adjustable lacrosse helmet, cascade helmet size chart, r lax helmet, cascade r lax helmet, r lacrosse helmet, cascade cpxr lacrosse helmet, cascade r helmet, cascade cpx r, cascade cpx r helmet, cascade r helmet for sale, cpxr helmet, cpx r, cpx r lacrosse helmet, cascade lacrosse helmet cpx r, cpxr lacrosse helmet, cpx lacrosse helmet, cascade cpx, cascade cpr, smallest baseball helmet size, lacrosse helmet numbers
Consider Trying Sizes Above And Below Starting Point
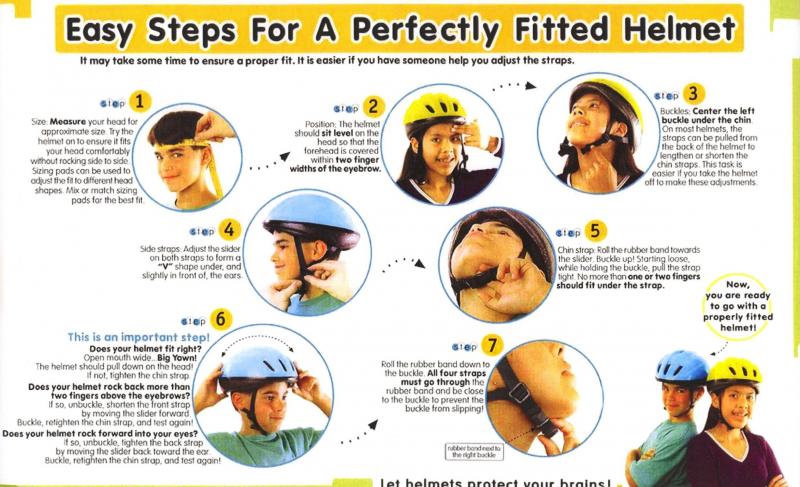
Getting the right fit is key to maximizing the comfort and protection of your Cascade lacrosse helmet. When sizing up for a new helmet, consider trying not only the size chart recommended starting point but also a size above and below. The optimal size may fall outside the expected range based on unique head shape and contour. Taking the time to experiment with a few sizes can help dial in the perfect custom fit.
Cascade’s adjustable helmets like the CPV-R and CPX-R feature an internal fit system with removable liner pads and adjustable straps to customize the fit across a range of head sizes. While the Cascade size chart provides a useful starting point, consider fine tuning the fit by trying a size up and down as well. Here are some tips for finding your ideal helmet size:
- Measure your head circumference and map it to the Cascade size chart to identify the recommended starting size.
- Try on the suggested size along with a size larger and smaller to compare the fit of each.
- Assess comfort and stability in each size before any strap adjustments. Note any pressure points or looseness.
- Go through the full fit adjustment process like strap tightness and liner thickness in each test size.
- Shake your head around vigorously to test stability. Eliminate any gaps between liner and head.
- Prioritize comfort and security. Select the size that feels snug without pressure points when fully adjusted.
- Don’t size up or down more than one from the starting size for best safety and performance.
When sizing up, you may find a slightly larger helmet allows you to use thinner liner pads for a more customized contoured fit around your head. But too large of a helmet risks compromised stability and protection. Sizing down provides a more snug fit out of the box, but beware of any discomfort or pressure points during play. Take note of how each size option feels before making any strap adjustments.
It’s better to size up if you fall between helmet sizes. Lacrosse helmets are designed to fit snugly when properly adjusted. A slightly large helmet can be downsized with thicker liner pads and properly tightened straps. But an undersized helmet has less room for adjustment, putting you at risk of discomfort. If sizing down, carefully test the fit with head shaking and chin strap checks.
Consider the season length and your own growth curve when choosing a helmet size as well. Opt for a snug fit for short seasons or stable head size. Size up if you anticipate significant growth over the helmet’s lifespan. But avoid sizing up more than necessary for proper protection now. Periodically recheck the fit and adjust liners and straps as needed.
For the Cascade CPV-R, sizer pads come in 5mm and 10mm options. Having both thicknesses on hand makes it easy to customize fit as your head size changes. Peel-and-stick foam in three densities also lets you contour the liner shape precisely to your head. Take advantage of these features to experiment between sizes and optimize your lacrosse helmet fit over time.
Don’t forget to assess chin strap tightness as well when sizing your Cascade helmet. The strap should fit snugly under the chin with room for just one or two fingers between it and your skin. Chin straps often need shortening when sizing down or lengthening slightly when sizing up to maintain ideal tension. Finding the right balance of stability without excessive tightness is key.
While the Cascade size chart provides a handy starting point for determining your lacrosse helmet size, be open to trying on both a size up and down during the fitting process. Keep comfort and security your top priorities. Take note of any pressure points or looseness when shaking your head. Experiment with liner thickness and strap adjustments to customize the fit across sizes. With some trial and error, you’ll dial in the perfect Cascade lacrosse helmet fit to maximize protection and enhance your play.
Keywords: cascade lax helmet sizing, cascade cpvr helmet sizing, cascade cpv r sizing chart, cpvr lacrosse helmet, cascade cpv helmet, cpv r lacrosse helmet, cascade cpvr lacrosse helmet, cascade cpv, cascade cpvr, cpvr helmet, cascade cpvr helmet, cpv r, cpv lacrosse helmet, cascade lacrosse helmet sizing, cascade lacrosse helmet sizes, adjustable lacrosse helmet, cascade helmet size chart, r lax helmet, cascade r lax helmet, r lacrosse helmet, cascade cpxr lacrosse helmet, cascade r helmet, cascade cpx r, cascade cpx r helmet, cascade r helmet for sale, cpxr helmet, cpx r, cpx r lacrosse helmet, cascade lacrosse helmet cpx r, cpxr lacrosse helmet, cpx lacrosse helmet, cascade cpx, cascade cpr, smallest baseball helmet size, lacrosse helmet numbers
Don’t Rely Solely On Size Chart; Fit Matters Most

While Cascade’s lacrosse helmet size chart provides a useful starting point, finding your ideal fit shouldn’t rely on size alone. The optimal helmet maximizes both comfort and stability through fully customizing the adjustable inner fit system. Take size chart recommendations as a guideline, but remember that fit adjustments matter most.
Cascade’s premium lacrosse helmets like the CPV-R and CPX-R feature adjustable sizing components to achieve a customized, dialed-in fit across a range of head sizes. The removable foam liner pads and adjustable side straps and back allow you to tweak the fit for your exact head shape and contour. Here are some tips for achieving the ideal helmet fit using Cascade’s adjustable helmet system:
- Measure your head and map it to Cascade’s size chart for the recommended starting size.
- Focus first on comfort – the helmet shouldn’t create pressure points before adjusting straps.
- Experiment with liner pad thickness and density to contour the fit.
- Gradually tighten the side straps from back to front below the earlobes.
- Adjust the rear strap just to the point of eliminating front-to-back helmet movement.
- Shake your head around to confirm stability – no gaps should open between liner and head.
- Fasten and adjust the chin strap for a snug fit with room for a finger or two between strap and chin.
A size chart can’t account for all the subtle variations in head proportions and shape that impact fit. Don’t hesitate to use a combination of liner pad thicknesses or make micro-adjustments to the straps until the helmet feels secure but comfortable. Proper fit means stability without looseness or pressure points.
If unsure between sizes, opt for the larger helmet size and customize the fit with insertable pads. This allows room to grow and provides more adjustment flexibility. Just be sure to fully tighten the straps and stabilize the helmet so it doesn’t compromise protection. Periodically recheck the fit as head size and shape can fluctuate season to season.
A snug but comfortable fit right out of the box is ideal. Focus on how the helmet feels before tightening anything down. Pressure points indicate an undersized helmet or the need for liner adjustments. Pay extra attention to the forehead region which is especially prone to discomfort from an ill-fitting helmet.
Take the time to make micro adjustments to the straps and liners until you find helmet stability without excessive tightness. Things like hairstyle and head shape can impact the fit. Optimizing the liner pad configuration and strap adjustments for your personal fit takes some trial and error. Don’t settle for a just “good enough” size chart recommendation.
While Cascade’s adjustable system allows you to dial in the fit across a range of sizes, there are limits. If you find yourself needing extreme strap tightness or the thickest liner pads to make a helmet work, it may be time to try a different size. The shell should stabilize the helmet on your head, with the pads and straps providing tweakable customization.
Monitoring fit over time is also key as head size and shape can fluctuate, especially in youth players. Periodically shake your head around and check for any slipping or gaps opening between the liner and your head. Catching fit changes early allows easy adjustments to get the helmet re-stabilized through strap tightening, liner swaps or sizing up if needed.
Finding your personal perfect fit in a Cascade lacrosse helmet requires looking past size alone. While the chart offers a starting point, obsess over comfort, stability and adjustability to customize the internal fit system to your head. A helmet that is snug but not tight and stable without shifting will provide reliable protection and confidence to focus on your game, not your gear.
Keywords: cascade lax helmet sizing, cascade cpvr helmet sizing, cascade cpv r sizing chart, cpvr lacrosse helmet, cascade cpv helmet, cpv r lacrosse helmet, cascade cpvr lacrosse helmet, cascade cpv, cascade cpvr, cpvr helmet, cascade cpvr helmet, cpv r, cpv lacrosse helmet, cascade lacrosse helmet sizing, cascade lacrosse helmet sizes, adjustable lacrosse helmet, cascade helmet size chart, r lax helmet, cascade r lax helmet, r lacrosse helmet, cascade cpxr lacrosse helmet, cascade r helmet, cascade cpx r, cascade cpx r helmet, cascade r helmet for sale, cpxr helmet, cpx r, cpx r lacrosse helmet, cascade lacrosse helmet cpx r, cpxr lacrosse helmet, cpx lacrosse helmet, cascade cpx, cascade cpr, smallest baseball helmet size, lacrosse helmet numbers
Shop With Knowledgeable Sales People If Possible
Finding the right lacrosse helmet fit can be a tricky balancing act of comfort, stability and adjustability. While sizing charts and online ordering provides convenience, consider tapping into knowledgeable sales people at lacrosse retailers when possible. Their expertise fitting gear can help guide you to the ideal Cascade helmet size and customize the fit for your needs.
The adjustable fit systems of helmets like the Cascade CPV-R and CPX-R allow a certain degree of customization across a range of sizes. But a trained sales person may spot nuances of your head shape or lacrosse position that impact optimal fit recommendations. Here are some benefits of working with knowledgeable retailers and fitters when buying your next Cascade lacrosse lid:
- Experienced sales people can identify the best helmet model options for your head shape, lacrosse position and preferences.
- They know how to properly measure your head and interpret the sizing chart to identify possible size ranges.
- Sales associates can guide you through the full process of customizing liner thickness, strap adjustments and chin strap tension.
- They may recommend specific pad configurations or point out fit tweaks you may overlook on your own.
- Fitters will ensure proper overall helmet stability, comfort and safety before you purchase.
The ideal Cascade lacrosse helmet fit stabilizes the shell firmly on your head without uncomfortable pressure points. Little details like strap positioning, chin strap slack and gaps between the liner and your head all impact achieving this balance. An experienced sales person well-versed in fitting the nuances of Cascade’s adjustable helmet system can be invaluable.
Consider the type of lacrosse helmet ventilation required for your playing style and environment too. More ventilation holes provide added cooling but less protective material. Fitting experts can guide you through choices like Cascade’s S, R or Pro Gear helmet models to optimize protection, visibility and airflow for your needs.
For parents fitting younger players, a knowledgeable sales associate may notice small fit adjustments needed for proper safety that you can miss. They can also advise you on how much size room to allow for future growth when buying a helmet. Their expertise ensures you get the right lacrosse helmet now and that it will provide reliable protection over time.
Lacrosse helmet technology, materials and regulations are always evolving. An experienced sales person stays up to date on the latest innovations and fit best practices. Tap into their knowledge before investing in a new Cascade lid to understand sizing, fit, customization and more. They can also ensure you know how to make minor fit tweaks at home as needed between seasons.
Consider removing helmet components like liner pads and chin straps when working with sales associates. This allows unobstructed assessment for initial sizing and any fit spots that may need adjustment. Don’t rush the fitting process – take time to test stability and comfort before purchasing.
While the convenience of sizing charts or buying online is appealing, make time to work with knowledgeable retailers when possible. Their hands-on expertise assessing subtleties of fit for Cascade’s adjustable helmet systems can take your lacrosse lid to the next level. With a properly fitted helmet customized for you, you can stop worrying about your gear and focus on playing your best lacrosse.
Keywords: cascade lax helmet sizing, cascade cpvr helmet sizing, cascade cpv r sizing chart, cpvr lacrosse helmet, cascade cpv helmet, cpv r lacrosse helmet, cascade cpvr lacrosse helmet, cascade cpv, cascade cpvr, cpvr helmet, cascade cpvr helmet, cpv r, cpv lacrosse helmet, cascade lacrosse helmet sizing, cascade lacrosse helmet sizes, adjustable lacrosse helmet, cascade helmet size chart, r lax helmet, cascade r lax helmet, r lacrosse helmet, cascade cpxr lacrosse helmet, cascade r helmet, cascade cpx r, cascade cpx r helmet, cascade r helmet for sale, cpxr helmet, cpx r, cpx r lacrosse helmet, cascade lacrosse helmet cpx r, cpxr lacrosse helmet, cpx lacrosse helmet, cascade cpx, cascade cpr, smallest baseball helmet size, lacrosse helmet numbers
Persist Until Finding Helmet That Feels Secure And Comfortable
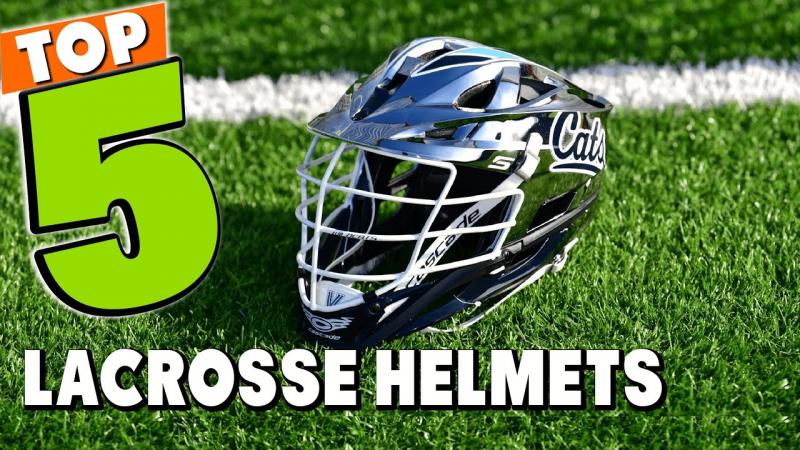
Choosing the right lacrosse helmet is one of the most important decisions you’ll make when gearing up for the sport. With so many options on the market, it can be overwhelming trying to find the perfect fit for your Cascade lacrosse helmet. The right fit is essential – not only for safety, but for comfort and performance as well. A helmet that moves around on your head or feels loose won’t properly protect you from impacts. On the other hand, one that’s too tight can cause headaches and limit your field of vision. The key is persevering through the trial and error until you find the Cascade model and size that feels secure, stable and comfortable on your head.
When trying on different Cascade lacrosse helmets, the first step is to make sure you’re starting with the right size range based on the brand’s sizing charts. For example, the Cascade CPV-R helmet comes in sizes ranging from XS to XL. Measure your head’s circumference to determine where you fall on the chart and then try on helmets in that general size range. Keep in mind that the fit can vary quite a bit between helmet models, so don’t get discouraged if the first few you try on don’t feel right. It’s not uncommon to have to work your way through numerous options to find the ideal one.
As you’re testing different helmets, pay attention to areas that feel too tight or too loose. Pressure or rubbing on your forehead usually indicates the helmet is too small. Gaps near the temples may mean it’s too big. The helmet should feel snug all around without pinching. Slide it from side to side and front to back – minimal movement means the fit is solid. Don’t forget to test it with your chinstrap buckled too. When properly fastened, you should be able to fit just two fingers between the strap and your chin. Too loose, and the helmet will wobble.
Another sign of a good lacrosse helmet fit is when you can lightly shake your head without it sliding around. Some movement and space is fine, but you don’t want the helmet rattling around on your head. Also test the fit with your lacrosse goggles and mouthguard in place. The cheek pads should hold these tight to your face without pushing uncomfortably on your cheeks or temples.
Finding the right helmet is a process that requires trying on many different options and being picky about the fit. Don’t settle for one that’s less than ideal – persist until you land on the Cascade model that feels secure, stable and comfortable on your head. With so many sizes and styles like the CPVR, CPV-R, CPX-R and R, you’re bound to find your match. It may take some time and frustration, but safety should never be compromised. Take as long as needed to find that helmet that finally makes you say “this is the one!” Once you do, you’ll have the peace of mind to head onto the field knowing your Cascade lacrosse helmet was made just for you.
Keywords: cascade lax helmet sizing, cascade cpvr helmet sizing, cascade cpv r sizing chart, cpvr lacrosse helmet, cascade cpv helmet, cpv r lacrosse helmet, cascade cpvr lacrosse helmet, cascade cpv, cascade cpvr, cpvr helmet, cascade cpvr helmet, cpv r, cpv lacrosse helmet, cascade lacrosse helmet sizing, cascade lacrosse helmet sizes, adjustable lacrosse helmet, cascade helmet size chart, r lax helmet, cascade r lax helmet, r lacrosse helmet, cascade cpxr lacrosse helmet, cascade r helmet, cascade cpx r, cascade cpx r helmet, cascade r helmet for sale, cpxr helmet, cpx r, cpx r lacrosse helmet, cascade lacrosse helmet cpx r, cpxr lacrosse helmet, cpx lacrosse helmet, cascade cpx, cascade cpr, smallest baseball helmet size, lacrosse helmet numbers

