How can you build your own lacrosse stick. What materials do you need for a custom lax stick. Which steps are involved in creating a personalized lacrosse gear. How to string a lacrosse head for beginners. What are the key components of a DIY lacrosse stick.
Essential Components for Building a Custom Lacrosse Stick
Creating your own lacrosse stick is an exciting venture that allows players to tailor their equipment to their specific needs and preferences. Before diving into the construction process, it’s crucial to understand the key components that make up a lacrosse stick. These elements not only contribute to the stick’s functionality but also play a significant role in a player’s performance on the field.
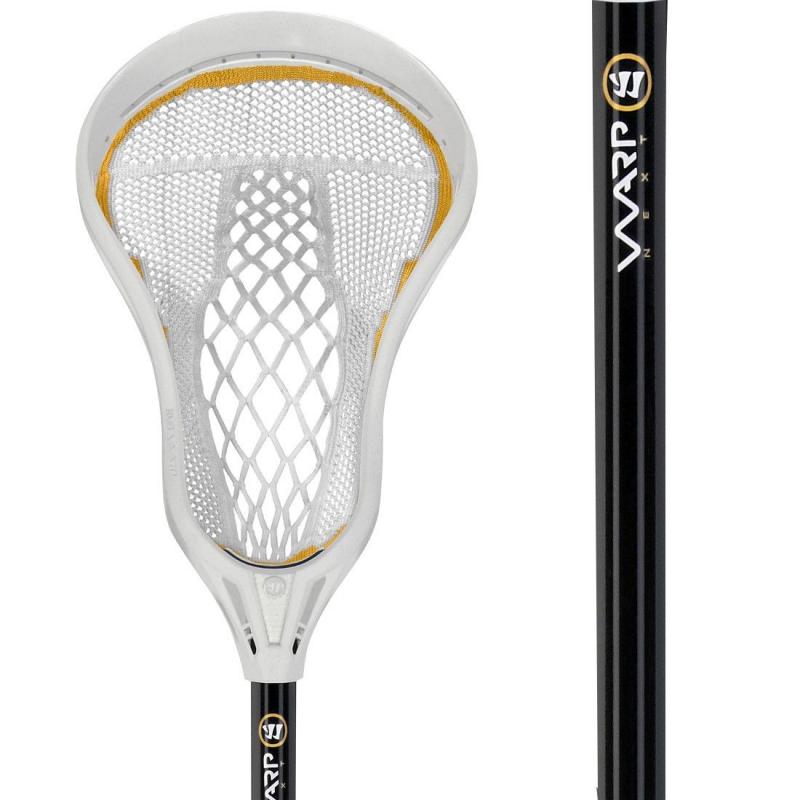
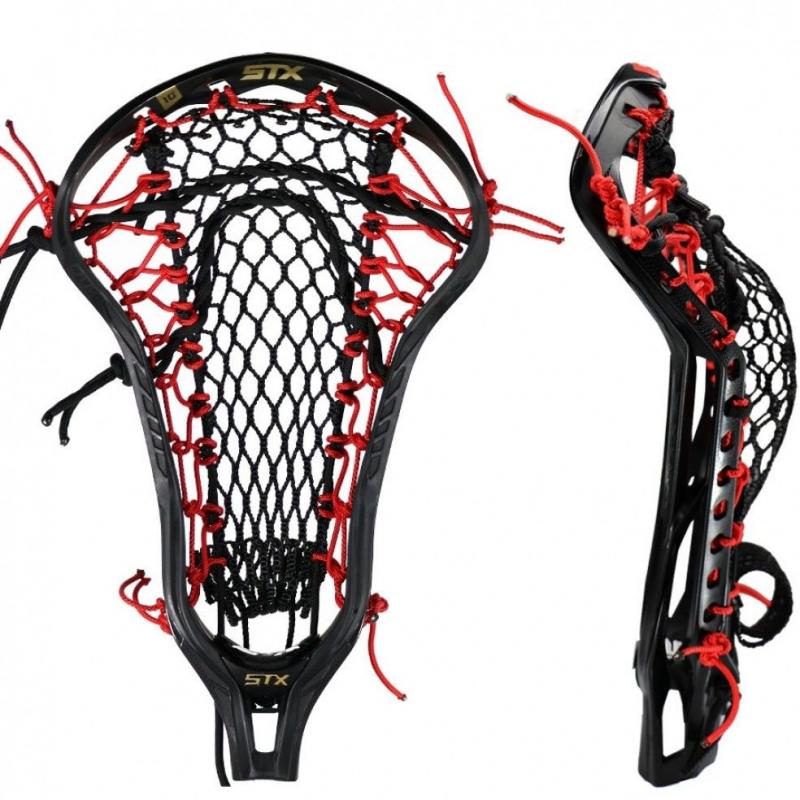
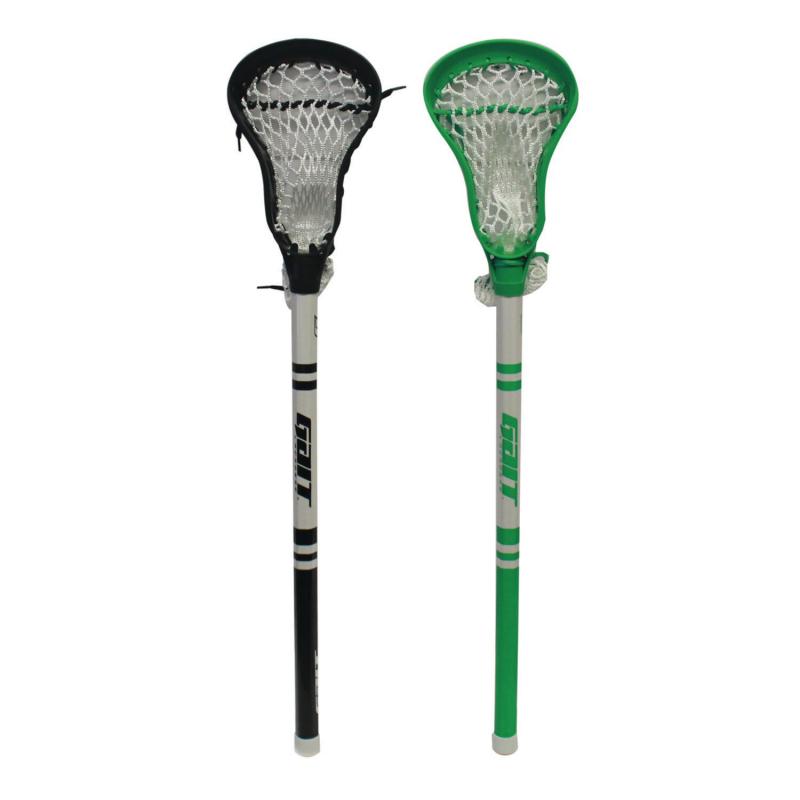
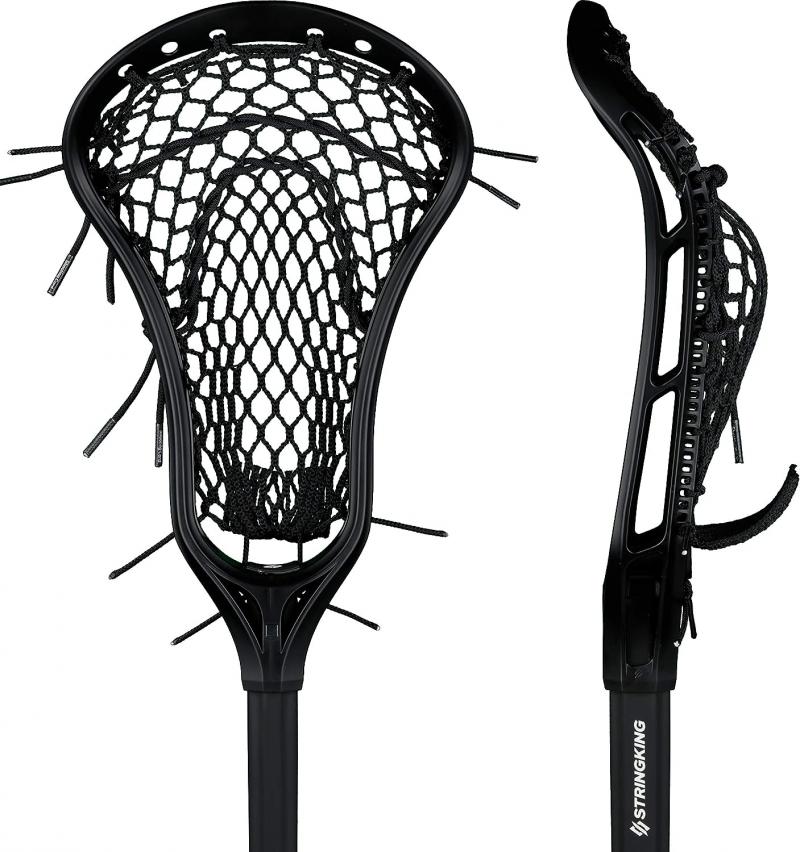
Lacrosse Stick Head
The lacrosse stick head is arguably the most critical component of your custom lax gear. It’s the part that cradles the ball and determines how you catch, carry, and release it during play. When selecting a head for your DIY project, consider the following factors:
- Position-specific designs (attack, midfield, defense, goalie)
- Pocket depth and style preferences
- Stringing options (pre-strung vs. unstrung)
- Material composition (typically plastic or composite)
- Weight and durability
- Compliance with NOCSAE safety standards
Is there a difference between heads for different playing positions? Indeed, attackmen and midfielders often prefer heads with a medium to shallow pocket for quick ball release, while defenders typically opt for deeper pockets to enhance ball control during checks and clears.
Lacrosse Shaft
The shaft is the handle of your lacrosse stick and plays a crucial role in your overall control and power. When choosing a shaft for your custom stick, consider these aspects:
- Material options (aluminum, alloy, titanium, carbon fiber, composite polymers)
- Length requirements based on position and league regulations
- Flex and stiffness ratings
- Grip texture and comfort
- Weight distribution
Do different shaft materials affect performance? Absolutely. While aluminum and alloy shafts are cost-effective options suitable for beginners, carbon fiber and composite shafts offer enhanced durability and performance, albeit at a higher price point.
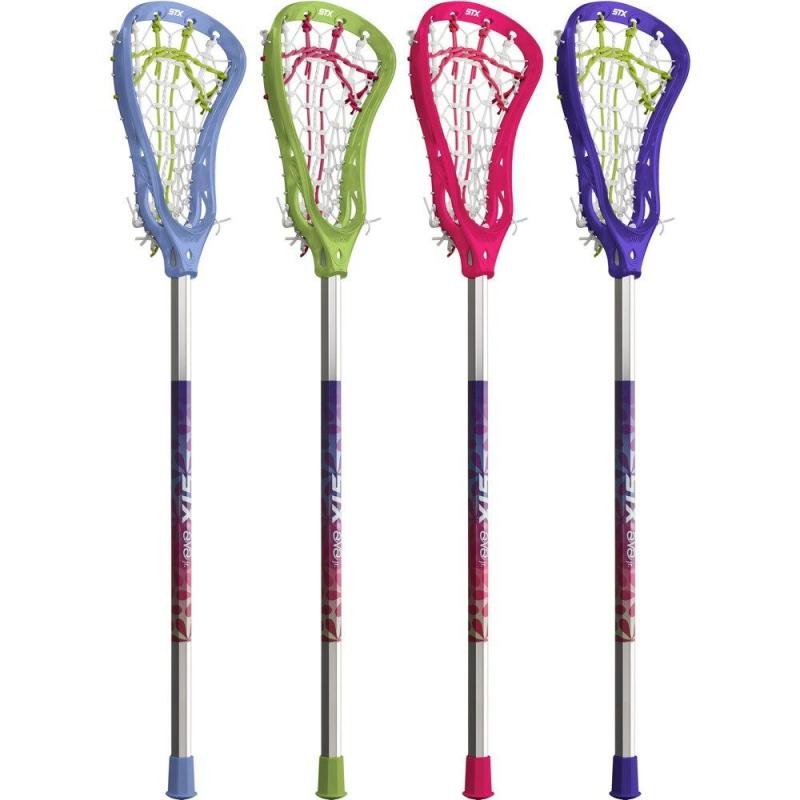
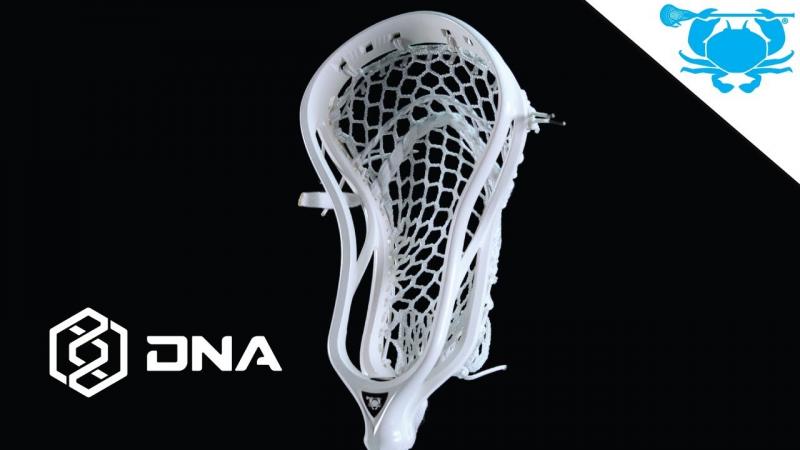
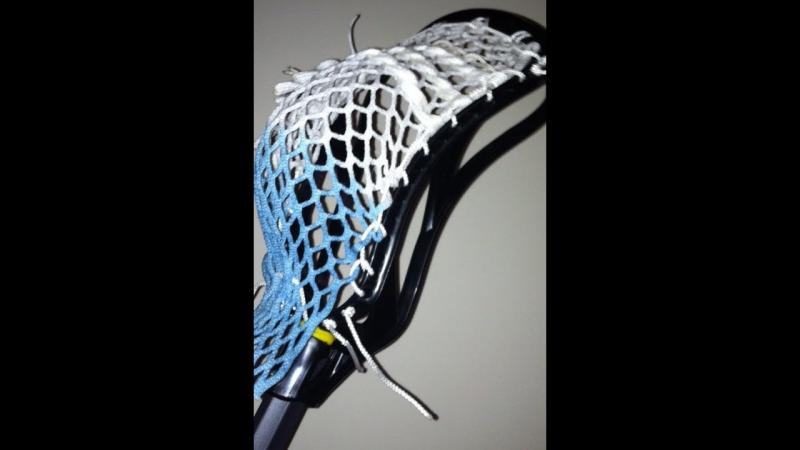
Mesh and Strings
The mesh and strings form the pocket of your lacrosse stick, which is essential for ball control, accuracy, and shooting power. When selecting these components, keep in mind:
- Mesh types (soft vs. hard, different gauge thicknesses)
- Sidewall string length and material
- Shooting string options
- Color preferences for personalization
What’s the difference between soft and hard mesh? Hard mesh tends to maintain its shape better and is less affected by weather conditions, while soft mesh offers more pocket customization options and a softer feel on the ball.
Step-by-Step Guide to Building Your Lacrosse Stick
Now that we’ve covered the essential components, let’s dive into the step-by-step process of building your custom lacrosse stick. This guide will walk you through each stage, from preparing your materials to fine-tuning the finished product.
Preparing Your Materials
Before you begin the assembly process, gather all necessary materials and tools:
- Lacrosse head (unstrung or pre-strung)
- Shaft
- Mesh
- Sidewall strings
- Shooting strings
- Lacrosse head screw
- Scissors or string cutter
- Lighter (for sealing string ends)
- Optional: stick tape, stringing jig
Should you choose a pre-strung or unstrung head for your first DIY lacrosse stick? For beginners, an unstrung head often provides a better learning experience and allows for more customization. However, if you’re not confident in your stringing abilities, a pre-strung head can be a good starting point.

Attaching the Head to the Shaft
The first step in assembling your lacrosse stick is connecting the head to the shaft:
- If desired, apply stick tape to the top of the shaft for improved grip
- Align the head with the shaft, ensuring the pocket is angled slightly back when viewed from the side
- Insert the lacrosse head screw through the designated hole in the head and into the shaft
- Tighten the screw securely, but be careful not to overtighten and damage the head or shaft
Why is the angle of the head important? The slight backward angle of the head helps to create a natural pocket and improves ball retention during play.
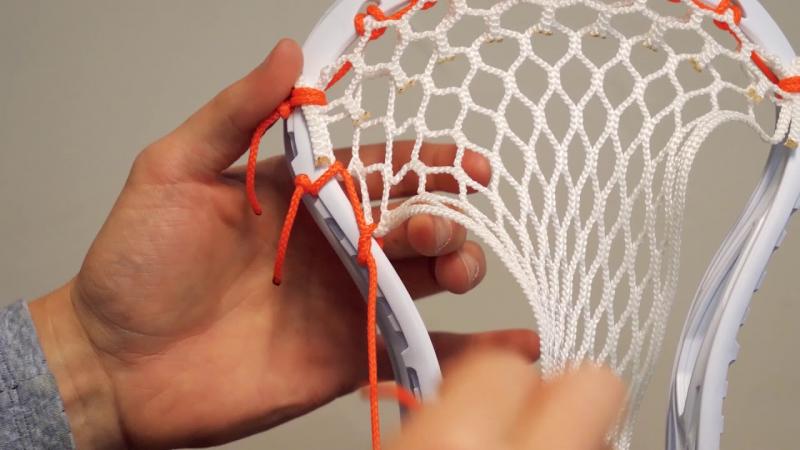
Stringing Your Lacrosse Stick: A Comprehensive Guide
Stringing your lacrosse stick is a crucial step in creating a custom piece of equipment that suits your playing style. This process requires patience and attention to detail, but with practice, you’ll be able to create the perfect pocket for your game.
Top String Installation
Begin the stringing process by installing the top string:
- Thread the sidewall string through the top holes of the head, starting from the bottom and working your way up to the scoop
- Ensure the string is pulled tightly and evenly across the top of the head
- Secure the string with a knot at each end
Why is the top string important? The top string provides the foundation for your pocket and helps maintain the shape of the head during play.
Mesh Attachment and Sidewall Stringing
Next, you’ll attach the mesh and string the sidewalls:
- Anchor the mesh about 5 diamonds down from the top, centered across the head
- Begin stringing the sidewalls, weaving through each diamond from top to bottom
- Maintain even tension on both sides to ensure a balanced pocket
- Tie off the sidewall strings at the bottom when finished
How does sidewall string tension affect pocket performance? Tighter sidewall stringing typically results in a shallower pocket with quicker release, while looser stringing allows for a deeper pocket with more hold.
Installing Shooting Strings
The final step in stringing your lacrosse stick is installing the shooting strings:
- Anchor shooting strings at strategic points along the sidewall, typically at holes 1 and 3, then 5 and 7
- Weave the strings through the mesh diamonds, creating a “V” or “U” shape
- Adjust the tension of the shooting strings to achieve desired ball control and release
What role do shooting strings play in stick performance? Shooting strings help control the release point of the ball and can affect the amount of whip (downward ball trajectory) when shooting.
Fine-Tuning Your Custom Lacrosse Stick
After completing the basic stringing process, it’s time to fine-tune your lacrosse stick to optimize its performance:
- Test the pocket depth and adjust as needed to comply with league regulations
- Experiment with shooting string placement and tension to achieve desired ball control and release
- Break in the pocket by repeatedly catching and throwing with your new stick
- Make minor adjustments to sidewall tension if necessary to perfect the pocket shape
How long does it take to properly break in a new lacrosse stick? While initial break-in can occur within a few practice sessions, it may take several weeks of consistent use for a pocket to fully settle into its optimal shape and performance.

Maintenance Tips for Your DIY Lacrosse Stick
To ensure your custom lacrosse stick maintains its performance and longevity, consider these maintenance tips:
- Regularly check and tighten screws and string knots
- Clean your stick after use, especially if playing in wet or muddy conditions
- Store your stick in a cool, dry place to prevent warping or damage to the materials
- Periodically inspect the mesh and strings for wear and replace as needed
- Re-adjust strings and shooting cords as they naturally stretch over time
How often should you replace the mesh on your lacrosse stick? While it varies based on usage and care, most players find they need to replace their mesh every 6-12 months to maintain optimal performance.
Advanced Customization Techniques for Experienced Players
As you become more comfortable with building and maintaining your own lacrosse stick, you may want to explore advanced customization techniques:
- Experimenting with different mesh types (e.g., wax mesh, rubberized mesh) for varying weather conditions
- Trying out alternative stringing patterns like traditional leather or hybrid pockets
- Customizing shaft wraps or adding grip enhancements
- Exploring weight reduction techniques for shafts and heads
- Implementing position-specific stringing techniques for optimal performance
Can custom stringing patterns significantly impact a player’s performance? Indeed, advanced stringing techniques can fine-tune aspects like ball retention, release speed, and shooting accuracy, potentially giving players a competitive edge when mastered.

Legal Considerations and Equipment Regulations
When building your own lacrosse stick, it’s crucial to be aware of and adhere to equipment regulations set by governing bodies such as US Lacrosse, the NCAA, or your local league. Key considerations include:
- Stick length requirements for different positions and age groups
- Pocket depth restrictions
- Head dimensions and pinch test requirements
- Shaft material and construction regulations
- Any specific rules regarding custom modifications
Are there penalties for using non-compliant equipment in official games? Yes, using lacrosse sticks that don’t meet regulations can result in penalties, removal from the game, or even forfeiture, depending on the severity of the infraction and the governing body’s rules.
Building your own lacrosse stick is a rewarding process that allows players to create gear tailored to their unique playing style and preferences. By understanding the components, following the step-by-step guide, and considering maintenance and legal aspects, you can craft a high-performance stick that enhances your game on the field. Remember, perfecting your custom lacrosse stick is an ongoing process of refinement and adjustment as you grow as a player.

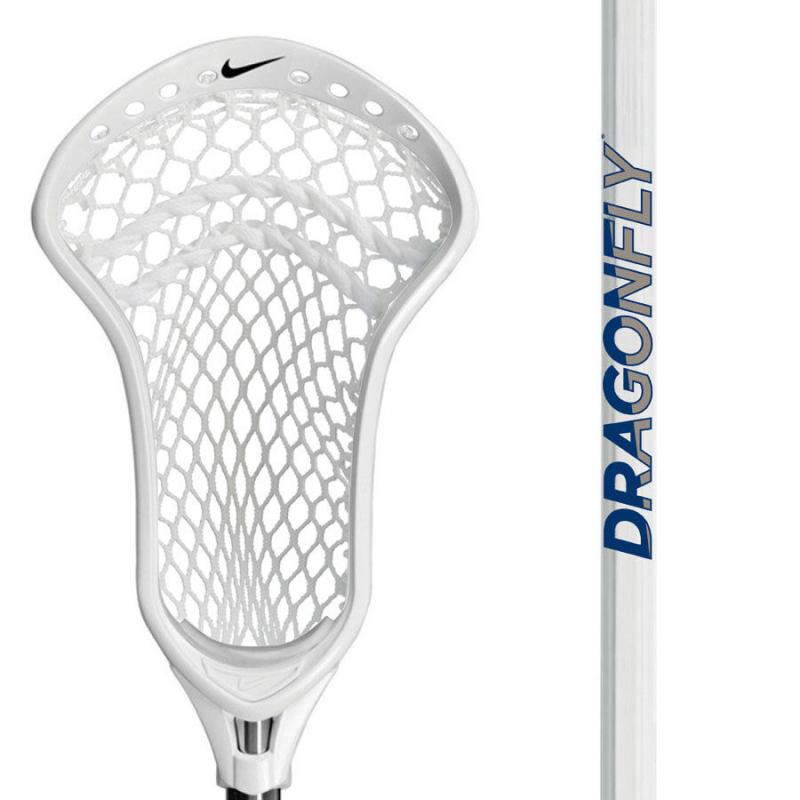
Choose The Lacrosse Stick Head You Want To Build On
Building your own lacrosse stick can be a fun DIY project that allows you to customize your gear exactly how you want. With just a few basic supplies, you can create a one-of-a-kind lax stick that fits your playing style and preferences. Here’s a step-by-step guide to building your own lacrosse stick for beginners.
Step 1: Get a Lacrosse Stick Head
The first thing you’ll need is a lacrosse head. You can buy a pre-strung head or an unstrung head, depending on your stringing abilities. For beginners, an unstrung head is often easier to string yourself. Some popular lacrosse head brands include Maverik, STX, Nike, Warrior, Brine, and ECD. Consider the position you play and your desired pocket style when choosing a head. Attackmen and midfielders generally use a medium to shallow pocket for quick ball release while defenders rely on a little deeper pocket for control. Make sure to get a head that meets NOCSAE standards for safety.
Step 2: Choose a Lacrosse Shaft
Next up is picking out a shaft. Lacrosse shafts come in a variety of materials like aluminum, alloy, titanium, carbon fiber, and composite polymers. Aluminum and alloy are affordable options good for beginners, while composite and carbon fiber shafts offer more durability and performance at a higher price. Length and flex are other key factors. Attack shafts are typically 40-42 inches while defense can go up to 72 inches. The flex or stiffness rating affects how the shaft bends on checks or shots. A stiffer flex works well for defensive players.
Step 3: Pick Lacrosse Mesh and Strings
Now it’s time to get the lacrosse mesh and sidewall strings to complete the pocket. Mesh comes woven or unwoven, in different gauge thickness and colors. Hard mesh holds its shape better while soft mesh offers more pocket customization. Nylon strings are a universal choice but you can also find options like Dyneema composite fiber for increased durability. Get a fixed length of sidewall string based on your head’s stringing holes. You’ll also need shooting strings and tie-off laces.
Step 4: Prepare the Head and Shaft
Before stringing, prep the pieces by taping the shaft if desired and attaching the head. Place tape at the top of the shaft for grip or along the entire length for durability. Use a lacrosse head screw to firmly fix the head in place. Place the head on so the pocket is angled slightly back from the shaft when looking down from the side. Make sure the screw is tight.
Step 5: String the Top Lacrosse Strings
Time to start stringing your DIY lacrosse stick! Begin with the top sidewall by threading the string through the sidewall holes from the bottom of the head up to the scoop. Pull tightly and knot off. On a 10-diamond mesh, attach the shooting string at holes 4 and 9. Weave through the first mesh diamond and attach at the adjacent hole. Continue weaving up and down.
Step 6: Install the Midsection Strings
The next step is to install the mesh into the head. Start by anchoring the mesh 5 diamonds down from the top, centered across the head. Then string the sidewalls through each diamond from top to bottom. Ensure tension is even on both walls. Tie off at the bottom when finished. This secures the mesh in place.
Step 7: Add Bottom Lacrosse Strings
Moving down, thread your lower sidewall up from the bottom of the head through the remaining diamonds and tie it off at the top. Next loop the shooting string in at holes 4 and 9 like the top. Weave through 5 diamonds and tie off. The sidewall and shooting strings should interlock for support.
Step 8: Install Lacrosse Shooting Strings
Almost done! All that’s left is installing the shooting/V-strings to define the pocket shape. Start by anchoring strings at holes 1 and 3, then 5 and 7. Weave down through the mesh diamonds back up to the adjacent holes. Add additional V’s as desired for more hold and depth.
Step 9: Finish It Off
Finish up your custom lacrosse stick by tying lace around the bottom of the head to close it off. Trim any excess string tails. Now you can test it out and make minor adjustments to get the pocket and hold just right. Adjust the shooting strings for more or less hold and whip. Enjoy your new one-of-a-kind lax stick!
Tips for Building Your Own Lacrosse Stick
Here are some extra tips to help make your DIY lacrosse stick project go smoothly:
- Watch stringing tutorials online for visual guidance
- Invest in quality mesh and strings for durability
- Make sure your sidewall strings are evenly tensioned
- Loosen shooting strings for more whip, tighten for more hold
- Use a stick stringing jig for easier stringing
- Check pocket depth requirements for your league
- Try an unstrung head first before a pre-strung model
- Get input from teammates on good stick features
- Don’t rush the stringing process, take your time
- Carefully tighten the head to the shaft for stability
Building your own lacrosse stick is a rewarding process that lets you engineer the exact features, look, and feel you want in a stick. Whether you want to save money, get extra customization, or just enjoy a fun DIY challenge, designing your own lax stick is an awesome way to get more connected with your gear. Follow the step-by-step guide above and you’ll be throwing and scooping with your homemade stick in no time! Enjoy the process and the added meaning of using a lax stick you personally built from the ground up.
Pick Out The Lacrosse Shaft You’ll Attach The Head To
If you want to build your own lacrosse stick, the first step is to pick out the shaft that you’ll attach the head to. The shaft is the handle portion of the stick, and it’s important to find one that feels comfortable in your hands. There are a few things to consider when choosing a shaft:
- Length – Youth shafts are typically 40-60 inches, while high school and college players often use 60-72 inch shafts. Goalies use even longer shafts. Choose a length based on your height and position.
- Weight – Shafts can be made from lightweight aluminum, stronger titanium, or composite materials. Lighter shafts are quicker, while heavier shafts offer more durability.
- Flex – The flexibility and stiffness of the shaft impacts passing, shooting, and handling. Mid-flex shafts around 70 flex are a good all-around option.
- Grip – Many shafts have a textured grip, while others are smooth. Make sure the grip allows you to cradle comfortably.
- Brand – Popular brands like Maverik, STX, and Warrior all make quality shafts to choose from.
Once you decide on a shaft, you can move on to picking out a head to pair with it. Heads consist of a plastic frame strung with mesh or traditional leathers and nylon strings. Keep reading for tips on choosing the perfect head to customize your lacrosse stick.
Select The Type Of Head You Want
Lacrosse heads come in three main types – attack, midfield, and defense. Attack heads have narrower shapes for increased ball control, while defense heads have wider heads best for checking. Midfield heads are a versatile in-between option. Think about your position and needs when deciding which type of head to use for your custom stick.
Consider Head Shape And Dimensions
Along with type, the specific shape and dimensions of the head will impact performance. Key dimensions include:
- Width – The width between sidewalls affects handling, control, and checking ability.
- Pinch – The narrowest point impacts ball retention.
- Scoop – The curved lip that affects ground ball pickup and passing.
- Offset/Cant – Angling the head affects pocket placement.
Narrower heads tend to be best for offensive players, while wider heads with larger scoops excel at defense. Goalies also use oversized heads for maximum blocking area. Choose a head with dimensions that align with your position and needs.
Pick Your Preferred Sidewall And Scoop Style
Today’s lacrosse heads come available with different sidewall configurations that impact stiffness, durability, and weight:
- Open – Features large triangular cutouts for decreased weight.
- Semi-open – Provides some cutouts while maintaining stiffness.
- Closed – Solid sidewalls with maximum stiffness and durability.
The scoop or lip of the head also varies, with some designed for quick ground balls while others focus on passing and shooting accuracy:
- Curved – Rounded scoops make picking up ground balls easier.
- Flat – Straight scoops improve passing control and shot accuracy.
- Hybrid – Mixes curved and flat scoop edges.
Choose The Type Of Pocket You Want
Traditional stringing uses leather and nylon string to form mesh pockets, while contemporary mesh heads use pre-woven mesh inserts. Mesh pockets tend to have a quicker release while leathers offer superior ball control and a customizable stringing. Make sure to match your pocket to the type of head and your playing style needs.
Now that you’ve chosen a shaft and head, it’s time to put them together to make your own lacrosse stick…
Attach The Head To The Shaft

Once you have a shaft and compatible head, attaching them together is simple. First, slide the plastic head adapter over the shaft’s handle. Next, screw the head into place using a few turns. Use a vise or have a friend help hold the pieces steady as you tighten down by hand. Make sure the head is centered and straight on the shaft with a firm seat. Do not over tighten the screw.
String The Head Pockets
With the head secured, it’s time to string it up with either traditional leathers or a mesh insert. Stringing is an art form that takes practice – if it’s your first time, don’t be afraid to ask for help from a teammate or coach. There are also plenty of great stringing tutorials online to help guide you through the process step-by-step for your chosen pocket style.
Key stringing tips:
- Use a mesh insert kit or pre-waxed strings and leathers.
- Keep even tension and rows spaced 3-4 diamonds apart.
- Anchor the bottom strings securely around the plastic.
- Interlock the sidewall knots for added stability.
- Follow patterns from an online guide or existing stick.
Take your time stringing to get the pocket formed just the way you like. This personal customization is part of what makes building your own lacrosse stick so enjoyable.
Break In The Pocket
Once strung, a new pocket needs to be broken in properly so it forms to the ball and throws smoothly. Breaking in can take a few weeks of regular wall ball reps to get it game-ready. Here are some tips to speed up the break in time:
- Roll a ball around forcefully by hand to soften mesh.
- Use a lacrosse ball or ball bearing in the pocket while not playing.
- Frequently pass and catch against a wall to mold the pocket.
- Shoot repeatedly into a rebounder or goal to strain the leathers.
- Play catch frequently to keep the ball in your stick.
- If needed, tweak the sidewall strings for deeper pockets.
Be patient, it will take some hours of use for even factory-strung sticks to be fully broken in. The effort is well worth it once your pocket is ready for game time!
Customize The Details
Adding personal flair is part of the fun of designing your own lacrosse stick. Use tape, stickers, stencils, paint pens and more to make it uniquely yours. Some ideas:
- Tape the handle with colorway or pattern.
- Stencil or use paint pens for designs and names.
- Decorate the sidewalls with team logos or numbers.
- Attach feathers or chaotic elements with string or tape.
- Add stickers on the shaft and head for style.
There are no rules, so get creative with colors, patterns, inspirational phrases or anything else that shows off your personality! Just be careful not to add anything that could hinder performance or handle comfort.
Enjoy Your Custom Complete Stick!
Once your pocket is broken in and details are personalized, it’s time to hit the field with your new custom lacrosse stick! Take pride in the fact that you built it yourself just the way you like. Having that perfect pocket and balance tailored specifically to you will help take your game to the next level.
The process of researching components, assembling the stick, stringing the head, and breaking it in properly provides invaluable stick skills. Plus it enables you to make modifications and repairs down the road. So grab a shaft, experiment with heads and leathers/mesh, and enjoy designing a stick that is uniquely yours!
Gather The Proper Supplies For Assembling Your Lacrosse Stick
If you want to make your own lacrosse stick, the first thing you’ll need is to gather the right supplies. Building a custom lacrosse stick takes more than just a shaft and head – you’ll need strings, tools, tape, and more. Here’s a checklist of must-have items to assemble before starting the build.
Lacrosse Shaft

The lacrosse shaft is the handle of the stick that you’ll attach the head to. When choosing a shaft, consider the length, weight, flex, grip, and brand that suits your needs and budget. Youth shafts are typically 40-60 inches while adult shafts reach 60-72 inches. Lighter aluminum or composite shafts offer quickness, while durable titanium shafts provide strength. Choose a grip and flex that feels good in your hands.
Lacrosse Head
Lacrosse heads consist of the plastic frame that you string the pocket in. Opt for an attack, midfield or defensive head style based on your position. Narrower heads provide control for offense while wider heads excel at defense. Ensure the head shape, width, pinch, and scoop align with how you want to string and perform. Heads come ready to be strung or pre-strung with mesh.
Strings And Leathers
To form the pocket in the head, you’ll need lacrosse leathers, nylons, and meshes. Pre-waxed hockey laces make excellent leather stringing material. Some common leathers are kangaroo, calfskin, and premium cowhide. For mesh, use a pre-woven mesh kit or string your own nylon laces in a traditional pocket pattern.
Pocket Tools
Stringing the pocket takes specialized knots, weaves, and tension, so be sure to have stringing tools on hand. A strong pair of stringing pliers allows you to pull knots tight and get leverage. Needles help thread through holes and weave over/under. A pocket pounder compresses mesh uniformly. Sidewall stringers aid knotting between holes.
Customization Supplies
To give your stick that personal flair, stock up on decoration supplies like tape, paint pens, decals, and more. Tape comes in a rainbow of colors to wrap the handle grip. Paint pens allow you to stencil designs on the plastic. Stickers and decals can customize the sidewalls and shaft. Get creative with the possibilities!
Safety Gear
Building and stringing a lacrosse stick takes tools and effort, so be sure to use protective gear. Fingerless gloves allow free movement while saving your hands. Eye protection like safety glasses helps avoid eye pokes from strings. Use care handling sharp stringing needles.
Once you’ve gathered all the needed gear, you’re ready to start assembling and building your own lacrosse stick. Having the right high-quality equipment makes the process much smoother for beginners and experienced stringers alike. Invest in quality materials so your custom stick lasts for seasons to come!
Assemble The Pieces With Care And Patience
Now it’s time for the fun part – putting all the pieces together to create your own lacrosse stick! Have patience and follow these steps carefully when assembling your custom stick:
- Slide the plastic adapter collar over the end of the shaft. Align it evenly.
- Insert the shaft into the back of the head. Ensure it’s centered.
- Begin hand tightening the screw into the adapter, checking alignment.
- Use controlled force to tighten down the screw fully. Do not overtighten!
- Visually inspect that the head is centered and straight on the shaft.
- Rotate the head to ensure it has a smooth, even motion when turning.
Having a teammate or coach help guide you through the assembly can be useful your first time. Use a vise to securely hold the pieces in place when tightening down the screw. If you notice the plastic adapter cracking or warp, stop tightening and try again. Take your time securing the head properly at this stage.
Be Patient While Stringing The Pocket

One of the most rewarding parts of building your own lacrosse stick is stringing up the pocket precisely how you want it. Be prepared to be patient – proper stringing takes time and practice. Follow online guides and patterns closely your first time stringing. Key tips for beginners:
- Anchor bottom strings tightly but don’t overpull.
- Use a pocket pounder to set diamond rows evenly.
- Avoid skipping holes on initial sidewall stringing.
- Keep mesh diamond rows uniform with even tension.
- Weave shooting strings 1/2 diamond up from bottom row.
Don’t rush the stringing process – take breaks when needed. Having a correctly strung pocket improves performance, so take pride in your work. Ask coaches and experienced teammates for help evaluating your stringing and suggest tweaks. The right pocket takes your custom stick to the next level.
Personalize Your Stick With Custom Graphics
After assembling and stringing your stick, it’s time for the best part – making it your own with custom graphics! Here are some ideas to make your lacrosse stick unique:
- Add color by wrapping the handle grip with team tape.
- Stencil your name, number or designs with paint pens.
- Apply decals or stickers on the shaft and sidewalls.
- Attach feather charms or other chaotic elements with string.
- Weave colored leathers into the traditional pocket.
Let your personality shine through with colors, patterns, inspirational phrases, or anything else that makes your custom stick special. Just be careful not to add anything that inhibits handling or harms playability.
Break In The Pocket Properly
Before game action, a new pocket needs to be broken in through hours of play. Use these tips to hasten the break in time:
- Frequently pass against a wall to mold the pocket.
- Toss balls in by hand and move them around.
- Shoot repeatedly into a rebounder or goal.
- Play catch often to keep the ball in the pocket.
- Make small stringing tweaks as needed.
With some dedication and wall ball time, your pocket will soon be game-ready. Then you’ll be fully ready to hit the field with your new custom complete lacrosse stick!
Prep The Lacrosse Stick Head For Assembly By Drilling Holes
Building your own lacrosse stick can be a fun and rewarding project. With just a few basic tools and materials, you can create a fully customized lax stick tailored to your preferences and playing style. While it does take some time and effort, assembling your own lacrosse stick enables you to pick the exact head, shaft, and specs that you want. Ready to get started? Here are 14 easy steps to follow for beginners looking to build their own lacrosse stick from scratch.
Step 1: Choose Your Lacrosse Head

The first step is selecting the lacrosse head you’ll use for your DIY stick. You can choose a pre-strung head or buy an unstrung head and string it yourself later. Consider the position you play and your skill level when picking a head style and brand. For example, attackers may want a more pinched, narrow head for improved ball control and quick passing, while defenders can opt for a wider head design optimized for checking. Popular head brands like STX, Maverik, and Warrior all offer great options across a range of price points.
Step 2: Pick The Right Shaft
Next up is finding the perfect shaft to pair with your lacrosse head. Shafts come in a variety of materials, flex options, and weights. Common shaft materials include lightweight aluminum, durable composite, and flexible titanium alloy. Midfielders may prefer more flexible shafts for increased passing and shooting power, whereas defenders can go for stiffer shafts ideal for stick checks. Be sure to get a shaft with the proper lacrosse stick dimensions allowed for your level of play.
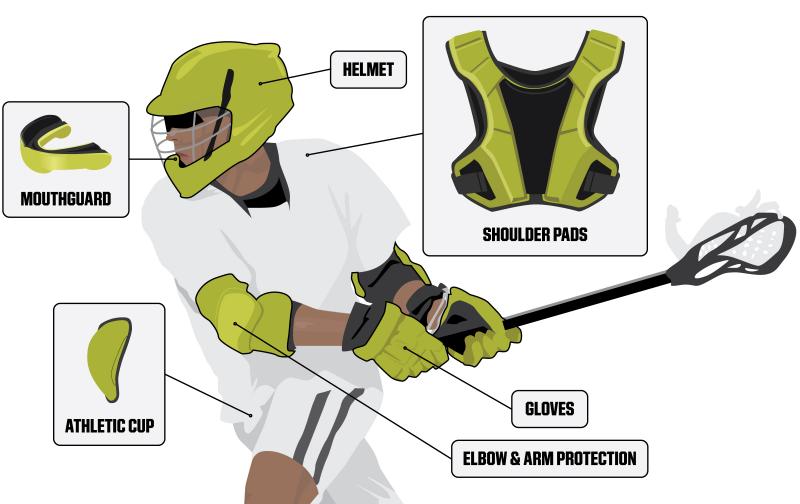
Step 3: Get Protective Gear

Since you’ll be drilling and cutting materials to assemble your lacrosse stick, it’s important to wear proper protective gear. Safety goggles, work gloves, and a dust mask are essential to prevent injuries while you work. You may also want to cover your clothes and work area to avoid getting debris everywhere.
Step 4: Gather Your Lacrosse Stick Building Materials
Before starting the build, collect all the necessary materials:
- Lacrosse head
- Shaft
- Gloves
- Safety goggles
- Dust mask
- Marker
- Power drill with drill bits
- Hacksaw
- Sandpaper
- Screwdriver
- Screws
- Wood glue or epoxy
- String
- Leather, nylon, or mesh lacings
Having these supplies ready beforehand makes the assembly process smoother.
Step 5: Mark Where the Drill Holes Go
Take the shaft and use a marker to indicate where you’ll drill the holes later. Most shafts need two holes drilled – one near the top and one further down around the middle. Refer to the manufacturer’s guide for exact hole placement. Mark the drill points on opposite sides of the shaft for symmetry.
Step 6: Clamp the Shaft in Place
Clamp down the shaft securely to keep it fixed in position while drilling the holes. You can use a heavy duty vice or get creative by wedging the shaft between two solid objects like heavy books or weights. The key is preventing unwanted shaft rotation as you drill.
Step 7: Drill the Necessary Holes
Next, take a power drill with the right sized bit and carefully drill holes in the marked spots on the shaft. Apply firm pressure but don’t force the drill. Let the tool do the work. Drill slowly and smoothly for clean hole edges.
Step 8: Sand the Drill Holes
Use a piece of sandpaper to smooth and round out the newly drilled shaft holes. This prevents the sharp hole edges from splitting over time. Sand until the holes have beveled edges.
Step 9: Cut the Shaft If Needed
For a custom shaft length, measure how much you want to trim off the end and mark a cut line with your marker. Clamp the shaft back in place. Then use a hacksaw to slowly saw along the cut line. Keep the blade straight and saw smoothly without forcing it.
Step 10: Sand the Cut End
Just like the drill holes, take some sandpaper and smooth out the shaft’s cut end. Round off the edges for a clean finish. Wipe away any debris when done sanding.
Step 11: Join the Head and Shaft
The fun part is finally attaching the lacrosse stick head to the prepared shaft. Feed the top of the shaft up through the head’s socket. Align the drill holes with the head’s screw holes. Add some wood glue or epoxy around the insertion point to strengthen the bond.
Step 12: Secure With Screws
Insert screws through the aligned holes and tighten using a screwdriver. Don’t over tighten. Wipe away any excess glue squeeze-out. Allow the epoxy or wood glue to fully cure for maximum adhesion.
Step 13: String the Head
For an unstrung head, it’s time to string it up with nylon, leather, or mesh lacings. There are many great stringing tutorials online to teach proper pocket stringing technique. Take your time interweaving the sidewall, cross, and shooter strings to produce the optimal pocket for handling and release.
Step 14: Customize and Play
Finally, personalize your DIY lacrosse stick however you like. Add tape to give the stick your own style. Once the epoxy/glue cures fully, you’re ready to hit the field and break in your new custom lax stick! With the proper materials, tools, safety precautions, and techniques, building your own one-of-a-kind lacrosse stick is totally achievable for beginners. The ability to choose from countless head, shaft, and stringing options lets you engineer the perfect stick tailored to your preferences. So grab your gear and get building – you’ll be scooping and scoring with your self-made lacrosse stick in no time!
Insert The Screw Into The Butt End Of The Lacrosse Shaft
Constructing your own customized lacrosse stick is a rewarding DIY project for any lax enthusiast. Though it requires some specialized gear and a bit of handiwork, assembling a stick tailored to your preferences and play style is totally doable for beginners. With just a few easy steps, you’ll be scooping ground balls and dialing in shots with your self-made lacrosse weapon in no time! Here’s a quick guide to walk you through the entire process from start to finish.
Step 1: Get the Necessary Materials
First things first – gather up all the vital ingredients for assembling your one-of-a-kind lacrosse stick:
- Lacrosse head (unstrung or pre-strung)
- Shaft
- Safety goggles
- Work gloves
- Dust mask
- Marker
- Power drill with bits
- Hacksaw
- Sandpaper
- Screwdriver
- Screws
- Glue (wood or epoxy)
- String
- Sidewall, shooter laces
Having all your materials lined up ahead of time makes the process smooth and efficient.
Step 2: Mark the Shaft Holes
Take your shaft and use the marker to indicate exactly where you’ll drill the holes later on. Most shafts require two holes – one towards the top and one further down around the middle area. Consult the manufacturing specs for precise hole placement. Be sure to mark the spots on opposite sides for symmetry.
Step 3: Secure the Shaft
Before drilling, securely clamp the shaft in place to prevent unwanted rotation as you work. Use a heavy-duty vice or wedge the shaft snugly between two solid objects like heavy books or dumbbells. The key is keeping the shaft fixed and stable.
Step 4: Carefully Drill the Holes
Now take a power drill equipped with the proper sized bit and carefully bore out holes where you marked the shaft. Apply steady pressure but don’t force the drill. Allow the tool to do the cutting. Drill slowly and smoothly for clean hole edges.
Step 5: Smooth the Holes
Use some sandpaper to round out and smooth the freshly drilled holes in the shaft. This helps prevent splitting from the sharp hole edges over time. Sand until the holes have nice beveled edges.
Step 6: Cut the Shaft (If Needed)
For a custom shaft length, determine how much you want to trim off the end and mark a straight cut line with the marker. Clamp the shaft securely again. Use a hacksaw to slowly saw along the marked cut line. Keep the blade perpendicular and saw smoothly without forcing.
Step 7: Sand the Cut Edge
Take some sandpaper and smooth out the shaft’s cut end. Round off any rough spots for a clean uniform finish. Wipe away debris when finished sanding to prep for assembly.
Step 8: Join the Head and Shaft
Now for the fun part – joining the lacrosse stick head to the prepared shaft. Feed the top of the shaft up into the head’s socket. Line up the drilled shaft holes with the corresponding screw holes in the head. Add some wood glue or epoxy around the insertion point for extra strength.
Step 9: Insert the Securing Screws
Place screws through the aligned holes and tighten down using a screwdriver. Don’t over tighten. Wipe away any excess glue squeeze-out with a rag. Allow the glue or epoxy to fully cure for maximum durability.
Step 10: String the Head
For an unstrung head, it’s time to interweave the sidewall, shooter, and pocket strings. There are many great online stringing tutorials to teach proper stringing methods. Take it slow, adding one lace at a time until the pocket takes shape.
Step 11: Customize the Details
Add your own personal flair by taping the shaft in cool colors/designs. Once fully cured, the epoxy will securely lock the head in place, ready for action. Break in the pocket with some catch and cradle reps before taking it live.
Step 12: Get After It!
Now that all the parts are assembled, glued, screwed, and stringed, you’re ready to put your custom lacrosse stick to use! With the right materials, tools, and techniques, building your own stick is very achievable for new players. Choosing your preferred specs makes it uniquely yours. So grab your gear and get building. You’ll be throwing crispy dimes and picking corners in no time with your brand new hand-crafted lacrosse stick!
Constructing a fully customized lacrosse stick takes some work, but the payoff is having your ideal specs tailored to your position, skill level, and playing style. With the right components and safety precautions, assembling a quality lacrosse stick on your own is totally doable for beginners. Follow the steps closely, take your time, and you’ll have an awesome new lax weapon ready for action on the field. So get creative with stringing styles, tape jobs, and color coordination to build a stick that’s uniquely you!
Line Up The Holes In The Head With The Screw In The Shaft
Building a custom lacrosse stick from scratch is a fun DIY project that lets you engineer the perfect stick tailored to your preferences. With the right gear, materials, and techniques, crafting your own lax weapon is totally doable for beginners. Follow this easy 14-step guide to assemble a high-performance lacrosse stick designed specifically for your playing style.
Step 1: Select a Lacrosse Head
First up, choose the lacrosse head you’ll use for your homemade stick. Consider factors like skill level, position, and budget when picking between pre-strung or unstrung heads. Narrower, more pinched head styles promote excellent ball control and quick passing, ideal for midfielders and attackers. Wider head shapes make scooping ground balls easier and provide a larger sweet spot for less-accurate shooters.
Step 2: Get the Right Shaft
Next, pair your lacrosse head with a compatible shaft cut to your desired length. Shafts come in different materials, flex options, and weights to suit your preferences. Midfielders tend to like more flexible shafts for increased passing and shooting power, while defenders can benefit from stiffer shafts that provide better checking strength.
Step 3: Gather Materials and Tools
Before starting assembly, gather all the necessary materials and tools:
- Safety goggles, gloves, and dust mask for protection
- Marker to indicate drilling/cutting spots
- Power drill with bits to bore holes
- Hacksaw for cutting shaft
- Sandpaper to smooth cut edges
- Screwdriver and screws to join head/shaft
- Wood glue or epoxy for added durability
Step 4: Mark Where to Drill Holes
Take the shaft and use the marker to mark where you’ll drill the holes later. Most shafts require two holes – one near the top and one further down. Consult specs for exact hole placement. Mark both holes on opposite sides for symmetry.
Step 5: Clamp the Shaft Securely
Before drilling, firmly clamp the shaft in place or wedge it between two heavy objects. This prevents unwanted rotation as you drill the shaft holes.
Step 6: Drill Holes Carefully
Now take a power drill with the right sized bit and carefully bore out the marked holes. Apply steady pressure but don’t force the drill. Drill slowly for clean hole edges.
Step 7: Smooth Hole Edges
Use sandpaper to round and smooth the freshly drilled shaft holes. This helps prevent splitting from sharp edges over time. Sand until the holes have nice beveled edges.
Step 8: Cut Shaft if Needed
For a custom shaft length, mark a straight cut line where you want to trim the end. Clamp the shaft and use a hacksaw to slowly cut along the marked line. Keep the blade perpendicular as you saw.
Step 9: Sand Cut Edge
Take sandpaper and smooth out the shaft’s cut end after sawing. Round off any rough spots for a clean uniform finish. Wipe away debris when done.
Step 10: Insert Shaft into Head
Now insert the prepared shaft up into the socket of the lacrosse head. Make sure to align the drilled shaft holes with the corresponding screw holes in the head.
Step 11: Apply Glue
Put some wood glue or epoxy around the shaft insertion point in the head. This adds extra strength and durability to the joint.
Step 12: Insert Securing Screws
With the holes aligned, insert screws through the holes and tighten using a screwdriver. Don’t overtighten. Allow the glue to fully cure before playing for maximum strength.
Step 13: String the Head
For an unstrung head, it’s time to interweave the sidewall, shooter, and pocket laces using your preferred stringing method. Take it slowly, adding one string at a time.
Step 14: Personalize and Play
Customize your lacrosse stick with tape, paint, or stickers. Once fully assembled and cured, it’s ready to use on the field! With the right materials, safety gear, and techniques, building a custom lacrosse stick is very doable for beginners. The ability to choose your preferred components makes the stick uniquely yours. Get out there and start throwing crispy dimes with your new hand-crafted lax weapon!
Constructing your own one-of-a-kind lacrosse stick takes some effort, but the end result is a lax tool engineered specifically to your preferences. Follow the assembly steps closely using proper protective gear for safety. Take your time securing the head to the shaft and stringing the pocket. And be sure to make it your own with custom graphics. In no time, you’ll be scooping, cradling, and scoring goals with your self-made lacrosse stick!
Use A Screwdriver To Attach The Head To The Shaft

Building your own custom lacrosse stick from the ground up is an engaging hands-on project for lax enthusiasts. With some basic DIY skills and the right gear, assembling a personalized high-performance lacrosse stick tailored to your preferences is totally achievable. Follow this handy step-by-step guide to construct the stick of your dreams in no time!
Step 1: Get Your Materials
First, gather up the essential components and tools needed:
- Lacrosse head (unstrung or pre-strung)
- Compatible shaft
- Safety – goggles, gloves, dust mask
- Marker to indicate hole spots
- Power drill and drill bits
- Hacksaw for cutting
- Sandpaper for smoothing
- Screwdriver for assembly
- Screws to secure head
- Wood glue or epoxy
- Sidewall, shooter, and pocket laces
Having these items ready makes the process smooth and efficient.
Step 2: Mark Drill Holes
Take the shaft and use the marker to indicate where you’ll drill the holes later. Most shafts need two holes – one towards the top and one further down. Refer to specs for precise placement. Mark the spots on opposite sides for symmetry.
Step 3: Secure the Shaft
Before drilling, firmly clamp the shaft or wedge it between books/weights to prevent unwanted rotation as you work. Keeping the shaft fixed is key for clean drill holes.
Step 4: Carefully Drill Holes
Now take a power drill with the proper sized bit and slowly bore out the marked holes in the shaft. Apply steady pressure but don’t force the drill. Allow it to do the cutting. Drill smoothly for clean edges.
Step 5: Smooth Holes
Use sandpaper to round and smooth the freshly drilled holes in the shaft. This helps prevent splitting from sharp edges over time. Sand until the holes have nice beveled edges.
Step 6: Cut Shaft (If Needed)
For a custom shaft length, measure how much to trim off the end and mark a straight cut line. Clamp the shaft and use a hacksaw to slowly cut along the marked line, keeping the blade perpendicular.
Step 7: Sand Cut Edge
Take sandpaper and smooth out the shaft’s cut end after sawing. Round off any rough spots for a uniform finish. Wipe away debris when done.
Step 8: Join Head and Shaft

Now insert the prepared shaft up into the socket of the lacrosse head. Make sure to align the drilled shaft holes with the corresponding screw holes in the head.
Step 9: Add Glue
Put some wood glue or epoxy around the shaft insertion point in the head. This adds extra strength and durability to the joint.
Step 10: Screw Head to Shaft
With the holes aligned, use a screwdriver to securely screw the head to the shaft. Don’t overtighten. Allow the glue to fully cure before use.
Step 11: String the Head
For an unstrung head, it’s time to interweave the sidewall, shooter, and pocket laces using your chosen stringing method. Consult tutorials for guidance on proper stringing technique.
Step 12: Customize and Play!
Make it your own with cool colors, tape, or graphics. Once fully assembled and cured, it’s ready to hit the field! Building your own lacrosse stick takes effort but lets you engineer the perfect specifications tailored to your preferences and playing style. Get out there and start firing bullets with your new hand-crafted lax weapon!
Assembling a custom lacrosse stick from scratch is very rewarding. With some basic tools, materials, and safety precautions, engineering your own lacrosse stick is an achievable DIY project for beginners. Carefully join the drilled/cut shaft to the head using screws, glue, and clamps. Take your time stringing the pockets and customizing the details. In no time you’ll be tossing crisp passes, burying goals, and playing like a pro with your handmade lacrosse stick!
Make Sure The Head Is Securely Fastened To The Shaft
Building your own custom lacrosse stick from scratch is a great way to engineer a high-performance lax tool tailored exactly to your preferences. With some DIY skills and the right gear, assembling an awesome lacrosse stick designed for your playing style is totally doable. Follow these easy steps to put together a slick handmade lacrosse stick in no time.
Step 1: Get Your Materials
First up, gather the necessary components and tools:
- Lacrosse head (unstrung or pre-strung)
- Compatible shaft
- Safety – goggles, gloves, dust mask
- Marker for marking holes
- Power drill with drill bits
- Hacksaw for cutting shaft
- Sandpaper for smoothing
- Screwdriver for assembly
- Screws to secure head
- Wood glue or epoxy
- Sidewall, shooter, pocket laces
Having these items ready makes the process smooth and efficient.
Step 2: Mark Shaft Holes
Take the shaft and use the marker to indicate where you’ll drill holes later. Most shafts need two holes – one near the top and one further down. Consult specs for exact placement. Mark the spots on opposite sides for symmetry.
Step 3: Secure the Shaft
Before drilling, firmly clamp the shaft or wedge it snugly between books/weights. This prevents unwanted rotation as you drill the holes.
Step 4: Carefully Drill Holes
Now use a power drill with the right sized bit to slowly bore out the marked holes. Apply steady pressure but don’t force the drill. Allow it to do the cutting. Drill smoothly for clean hole edges.
Step 5: Smooth Hole Edges
Use sandpaper to round and smooth the freshly drilled shaft holes. This prevents splitting from sharp edges over time. Sand until the holes have nice beveled edges.
Step 6: Cut Shaft if Needed
For a custom shaft length, measure how much to trim off the end and mark a straight cut line. Clamp the shaft and use a hacksaw to slowly cut along the marked line, keeping the blade perpendicular.
Step 7: Smooth Cut Edge
Use sandpaper to smooth out the shaft’s cut end after sawing. Round off any rough spots for a uniform finish. Wipe away debris when done.
Step 8: Join Head and Shaft
Now insert the prepared shaft up into the socket of the lacrosse head. Make sure to align the drilled shaft holes with the corresponding screw holes in the head.
Step 9: Apply Glue
Put some wood glue or epoxy around the shaft insertion point in the head. This adds strength and durability to the joint.
Step 10: Screw Head to Shaft
With the holes aligned, use a screwdriver to securely screw the head to the shaft. Don’t overtighten. Allow the glue to fully cure before use.
Step 11: String the Head
For an unstrung head, it’s time to interweave the sidewall, shooter, and pocket laces using your preferred stringing method. Consult tutorials for proper technique.
Step 12: Customize and Play!
Add your own personal flair with tape, colors etc. Once fully assembled and cured, it’s ready to use! Building your own lacrosse stick takes some effort but lets you engineer the perfect specs tailored to your game. Get out there and start sniping corners with your new hand-crafted lax weapon!
Assembling a custom lacrosse stick from scratch takes time and care, but the reward is a high-performance stick built for your personal playing style. Follow each step closely for proper head attachment and safety. Add your own flair with stringing and graphics. Before you know it, you’ll be cradling, scooping, and scoring like a pro with your homemade lacrosse stick!
String The Lacrosse Head Pockets To Your Liking
Constructing your own custom lacrosse stick is a great DIY project for lax players looking to engineer the perfect stick tailored to their game. With the right materials, tools, and techniques, assembling a high-performance lacrosse stick designed specifically for you is totally doable for beginners. Follow these easy steps to put together your dream lax stick in no time!
Step 1: Get Your Gear
First up, gather the necessary components and tools:
- Lacrosse head (unstrung or pre-strung)
- Compatible shaft
- Safety – goggles, gloves, dust mask
- Marker to indicate holes
- Power drill and drill bits
- Hacksaw for cutting shaft
- Sandpaper for smoothing
- Screwdriver for assembly
- Screws to secure head
- Wood glue or epoxy
- Sidewall, shooter, pocket laces
Having these items ready makes the build process smooth and efficient.
Step 2: Mark Shaft Holes
Take the shaft and use a marker to indicate where you’ll drill holes later. Most shafts need two holes – one near the top and one further down. Check specs for exact placement. Mark the spots on opposite sides for symmetry.
Step 3: Secure the Shaft
Before drilling, firmly clamp the shaft or wedge it between books/weights to prevent unwanted rotation.
Step 4: Carefully Drill Holes
Now use a power drill with the proper bit to slowly bore out the marked holes. Apply steady pressure but don’t force the drill. Allow it to do the cutting. Drill smoothly for clean edges.
Step 5: Smooth Hole Edges
Use sandpaper to round and smooth the freshly drilled shaft holes. This prevents splitting from sharp edges over time. Sand until the holes have nice beveled edges.
Step 6: Cut Shaft if Needed
For a custom length, determine how much to trim off the end and mark a straight cut line. Clamp the shaft and use a hacksaw to slowly cut along the marked line, keeping the blade perpendicular.
Step 7: Smooth Cut Edge
Use sandpaper to smooth out the shaft’s cut end after sawing. Round off any rough spots for a uniform finish. Wipe away debris.
Step 8: Join Head and Shaft
Now insert the prepared shaft into the lacrosse head socket. Align the drilled shaft holes with the corresponding screw holes in the head.
Step 9: Apply Glue
Put wood glue or epoxy around the shaft insertion point for added strength and durability.
Step 10: Screw Head to Shaft
With the holes aligned, use a screwdriver to securely screw the head to the shaft. Allow the glue to fully cure before use.
Step 11: String the Pockets
For an unstrung head, it’s time to interweave the sidewall, shooter, and pocket laces to your preferences. Consult stringing tutorials for guidance on technique.
Step 12: Customize and Play!
Personalize your lacrosse stick with tape, colors etc. Once assembled and cured, it’s ready to use! Building your own stick takes some effort but lets you engineer the perfect specs for your game. Get out there and start dishing dimes with your new hand-crafted lax stick!
Assembling a custom lacrosse stick from scratch takes careful work, but the payoff is a high-performance stick tailored to your playing style. Follow each step closely for proper construction and safety. Take time shaping the pockets through stringing. Before you know it, you’ll be cradling, scooping, and ripping corners like a pro with your hand-built lacrosse stick!
Consider Customizing The Lacrosse Stick Further With Dye or Tape
Assembling your own custom lacrosse stick from scratch is a rewarding DIY project for lax enthusiasts. With some basic gear and materials, engineering a high-performance lacrosse stick tailored to your preferences and playing style is totally achievable for beginners. Follow these easy steps to put together a slick handmade lacrosse stick in no time!
Step 1: Gather Materials
First up, get all the necessary components and tools:
- Lacrosse head (unstrung or pre-strung)
- Compatible shaft
- Safety – goggles, gloves, dust mask
- Marker for marking holes
- Power drill and drill bits
- Hacksaw for cutting shaft
- Sandpaper for smoothing
- Screwdriver for assembly
- Screws to secure head
- Wood glue or epoxy
- Sidewall, shooter, pocket laces
Having these ready makes the process smooth and efficient.
Step 2: Mark Shaft Holes
Take the shaft and use a marker to indicate where you’ll drill holes later. Most shafts need two holes – one near the top and one further down. Check manufacturer specs for exact placement. Mark the spots on opposite sides for symmetry.
Step 3: Secure the Shaft
Before drilling, firmly clamp the shaft or wedge it snugly between books/weights. This prevents unwanted rotation during drilling.
Step 4: Carefully Drill Holes
Now use a power drill with the proper bit to slowly bore out the marked holes. Apply steady pressure but don’t force the drill. Allow it to do the cutting. Drill smoothly for clean edges.
Step 5: Smooth Hole Edges
Use sandpaper to round and smooth the freshly drilled shaft holes. This prevents splitting from sharp edges over time. Sand until the holes have nice beveled edges.
Step 6: Cut Shaft if Needed
For a custom length, determine how much to trim off the end and mark a straight cut line. Clamp and use a hacksaw to slowly cut along the marked line, keeping the blade perpendicular.
Step 7: Smooth Cut Edge
Use sandpaper to smooth out the shaft’s cut end after sawing. Round off any rough spots for a clean uniform finish. Wipe away debris when done.
Step 8: Join Head and Shaft

Now insert the prepared shaft into the lacrosse head socket. Make sure to align the drilled shaft holes with the corresponding screw holes in the head.
Step 9: Apply Glue
Put wood glue or epoxy around the shaft insertion point for added strength and durability.
Step 10: Screw Head to Shaft
With the holes aligned, use a screwdriver to securely screw the head to the shaft. Allow the glue to fully cure before playing with it.
Step 11: String the Pockets
For an unstrung head, interweave the sidewall, shooter, and pocket laces using your chosen stringing method. Consult online stringing tutorials for guidance.
Step 12: Customize and Personalize
Make it your own with dye, tape, paint etc. Once fully assembled and cured, it’s ready to use! Building your own stick takes effort but lets you engineer the perfect specifications tailored for your game.
Step 13: Take It to the Field!
Get out there and start tossing crisp passes, scooping ground balls, and sniping corners with your new hand-crafted lax weapon! With the right techniques and care, assembling a custom lacrosse stick is very achievable for beginners.
Constructing your own lacrosse stick from scratch takes time but allows full customization based on your preferences. Follow each step closely and safely. Add your own personal flair at the end. In no time, you’ll be cradling, juking, and scoring like a pro with your homemade lacrosse stick!
Break In The New Lacrosse Stick Before Using In Games
Assembling your own custom lacrosse stick from scratch is a great DIY project for lax enthusiasts. With some basic materials, tools, and skills, engineering a high-performance lacrosse stick tailored to your preferences is totally doable. Follow these easy steps to put together an awesome handmade lacrosse stick in no time!
Step 1: Get Your Gear
First up, gather the necessary components and tools:
- Lacrosse head (unstrung or pre-strung)
- Compatible shaft
- Safety – goggles, gloves, dust mask
- Marker for marking holes
- Power drill and drill bits
- Hacksaw for cutting shaft
- Sandpaper for smoothing
- Screwdriver for assembly
- Screws to secure head
- Wood glue or epoxy
- Sidewall, shooter, pocket laces
Having these items ready makes the build process smooth and efficient.
Step 2: Mark Shaft Holes
Take the shaft and use a marker to indicate where you’ll drill holes later. Most shafts need two holes – one near the top and one further down. Consult specs for precise placement. Mark the spots on opposite sides for symmetry.
Step 3: Secure the Shaft
Before drilling, firmly clamp the shaft or wedge it snugly between books/weights to prevent unwanted rotation.
Step 4: Carefully Drill Holes
Now use a power drill with the proper bit to slowly bore out the marked holes. Apply steady pressure but don’t force the drill. Allow it to do the cutting. Drill smoothly for clean edges.
Step 5: Smooth Hole Edges
Use sandpaper to round and smooth the freshly drilled shaft holes. This prevents splitting from sharp edges over time. Sand until the holes have nice beveled edges.
Step 6: Cut Shaft if Needed
For a custom length, determine how much to trim off the end and mark a straight cut line. Clamp and use a hacksaw to slowly cut along the marked line, keeping the blade perpendicular.
Step 7: Smooth Cut Edge
Use sandpaper to smooth out the shaft’s cut end after sawing. Round off any rough spots for a clean uniform finish. Wipe away debris when done.
Step 8: Join Head and Shaft
Now insert the prepared shaft into the lacrosse head socket. Make sure to align the drilled shaft holes with the corresponding screw holes in the head.
Step 9: Apply Glue
Put wood glue or epoxy around the shaft insertion point for added strength and durability.
Step 10: Screw Head to Shaft
With the holes aligned, use a screwdriver to securely screw the head to the shaft. Allow the glue to fully cure before playing with it.
Step 11: String the Pockets
For an unstrung head, interweave the sidewall, shooter, and pocket laces using your chosen stringing method. Consult tutorials for guidance on technique.
Step 12: Customize
Add your own personal flair with tape, colors etc. Once fully assembled and cured, it’s ready to use!
Step 13: Break It In
Take some time just passing and catching with your new stick to break it in before using in games. This helps polish the pocket and get the feel dialed in.
Step 14: Dominate the Field!
You built a fully custom lacrosse stick tailored to your specs and playing style. Now get out on the field and start dishing dimes, burying goals, and taking over games with your new hand-crafted lax weapon!
Assembling your own lacrosse stick takes care and patience, but allows you to engineer the perfect stick for your game. Follow each step closely and safely. Break in the pockets before taking it live. In no time, you’ll be cradling, scooping, and sniping like a pro with your homemade lacrosse stick!
Practice With Your Custom Lacrosse Stick To Get Used To It
Assembling your own custom lacrosse stick from scratch is a great DIY project for lax enthusiasts. With some basic gear and skills, engineering a high-performance lacrosse stick tailored to your preferences is totally achievable. Follow these easy steps to put together an awesome handmade lacrosse stick in no time!
Step 1: Gather Materials
First up, get all the necessary components and tools:
- Lacrosse head (unstrung or pre-strung)
- Compatible shaft
- Safety – goggles, gloves, dust mask
- Marker for marking holes
- Power drill and drill bits
- Hacksaw for cutting shaft
- Sandpaper for smoothing
- Screwdriver for assembly
- Screws to secure head
- Wood glue or epoxy
- Sidewall, shooter, pocket laces
Having these items ready makes the build process smooth and efficient.
Step 2: Mark Shaft Holes
Take the shaft and use a marker to indicate where you’ll drill holes later. Most shafts need two holes – one near the top and one further down. Check specs for exact placement. Mark the spots on opposite sides for symmetry.
Step 3: Secure the Shaft
Before drilling, firmly clamp the shaft or wedge it between books/weights to prevent unwanted rotation.
Step 4: Carefully Drill Holes
Now use a power drill with the proper bit to slowly bore out the marked holes. Apply steady pressure but don’t force the drill. Allow it to do the cutting. Drill smoothly for clean edges.
Step 5: Smooth Hole Edges
Use sandpaper to round and smooth the freshly drilled shaft holes. This prevents splitting from sharp edges over time. Sand until the holes have nice beveled edges.
Step 6: Cut Shaft if Needed
For a custom length, determine how much to trim off the end and mark a straight cut line. Clamp and use a hacksaw to slowly cut along the marked line, keeping the blade perpendicular.
Step 7: Smooth Cut Edge
Use sandpaper to smooth out the shaft’s cut end after sawing. Round off any rough spots for a clean uniform finish. Wipe away debris when done.
Step 8: Join Head and Shaft
Now insert the prepared shaft into the lacrosse head socket. Align the drilled shaft holes with the corresponding screw holes in the head.
Step 9: Apply Glue
Put wood glue or epoxy around the shaft insertion point for added strength and durability.
Step 10: Screw Head to Shaft
With the holes aligned, use a screwdriver to securely screw the head to the shaft. Allow the glue to fully cure before playing with it.
Step 11: String the Pockets
For an unstrung head, interweave the sidewall, shooter, and pocket laces using your chosen stringing method. Consult tutorials for guidance on technique.
Step 12: Customize
Add your own personal flair with tape, colors etc. Once fully assembled and cured, it’s ready to use!
Step 13: Practice With It
Take some time just passing and shooting with your new stick to get comfortable with it before games.
Step 14: Dominate!
You built a fully custom lacrosse stick tailored to your game. Now it’s time to hit the field and start dishing dimes, burying goals, and taking over games with your new hand-crafted lax weapon!
Assembling your own lacrosse stick takes effort but allows full customization for your preferences. Follow each step closely and safely. Practice to get dialed in before taking it live. In no time, you’ll be scooping, cradling and sniping like a pro with your homemade lacrosse stick!
Make Adjustments To The Pocket or Head If Needed
Building your own lacrosse stick can be a fun and rewarding process for any lax enthusiast. With just a few simple materials and tools, you can fully customize and design a lacrosse stick to match your playing style and preferences. While it does require some basic DIY skills, constructing a lacrosse stick is an achievable weekend project even for total beginners. Follow these 14 easy steps to build your own complete lacrosse stick from scratch.
Step 1: Get the Required Materials
First, you’ll need to gather the necessary materials. At minimum, you’ll need a lacrosse shaft, lacrosse head, leather laces or nylon mesh, and screw. You can purchase these components separately from most sporting goods stores or lacrosse specialty shops. Make sure to get the right sizes – attack sticks need a 30-inch shaft while defense sticks need a 60-inch shaft. For beginners, a pre-strung head may be easiest to start. Advanced players can buy an unstrung head and string it themselves.
Step 2: Prepare the Shaft
Once you have the materials, you’re ready to start constructing. First, prepare the shaft by sanding down any burrs or rough edges using medium grit sandpaper. This helps provide a smooth surface for attaching the head. Be sure to thoroughly clean the shaft when done sanding to remove any dust or debris before the next step.
Step 3: Apply Tape to the Top
Take athletic tape and tightly wrap the top 4-6 inches of the shaft. This tape will help reinforce this part of the shaft when attaching and securing the head. Make sure the tape is smoothed down completely with no wrinkles or air bubbles.
Step 4: Insert Shaft into Head
Slide the taped end of the shaft into the wider open end of the lacrosse head. Push it all the way until the end hits the neck of the scoop. Having a partner can help align these pieces. Ensure the shaft is centered in the head hole before moving on.
Step 5: Drill Guide Hole
With the shaft inserted, use a drill to make a guide hole through both sides of the plastic head, going through the tape and shaft underneath. Position this hole an inch or two down from the scoop neck. Be very careful to drill straight and not let the bit wander.
Step 6: Secure With Screw
Take the screw and tighten it through the guide hole, essentially using it as a rivet to hold the shaft to the head. Make sure to get the screw very snug but be cautious not to over tighten and crack the plastic. The tape should help disperse pressure from the screw head.
Step 7: String Mesh or Leathers
If you purchased an unstrung head, it’s time to string the mesh or leathers through the sidewall holes. Look up lacrosse stringing tutorials online to learn proper techniques. For beginners, using a pre-strung head is easiest. Make sure the pocket is legal and provides good ball control.
Step 8: Check Overall Alignment
Before finishing up, check that the head is centered and aligned correctly on the shaft with no crookedness. Spin the stick to ensure the mesh pocket stays centered. Realign and tighten the screw again if needed.
Step 9: Tape Below Throat
Take more athletic tape and tightly wrap it around the shaft a few inches below the plastic throat of the head. This helps secure the bottom. Wrap another layer above the first for added strength and protection from checks.
Step 10: Add Butt End Cap
For safety, slide a rubber lacrosse butt end cap onto the bottom end of the shaft. Push it on as far as it will go. This caps off the stick and provides padding against the ground.
Step 11: Personalize (Optional)
Now is the chance to add custom details. You can tape the shaft in your team colors or apply decals. Use paint pens to put your number or name on the shaft. Get creative with stringing colors and designs in the head mesh as well.
Step 12: Check Pocket Depth
Before playing with your DIY stick, check that the pocket depth and ball hold meet official lacrosse rules. Use a lacrosse ball and ruler to test this. Adjust the stringing if needed to make the pocket more shallow according to regulations.
Step 13: Play Catch
It’s finally time to try out your creation! Have a catch session with a friend or team member to get a feel for how the stick handles and throws. Make any tweaks to the pocket or taping as needed. Enjoy!
Step 14: Maintain Your Stick
Be sure to periodically check that all parts of the lacrosse stick remain secure, such as the screw and tape. Maintain the pocket by resetting or tightening strings as they stretch and wear. Touch up tape and other details as required. Proper maintenance will keep your custom stick in top playing condition.
Building a lacrosse stick is an enjoyable craft that engages your DIY skills while allowing full customization. With the right materials and a bit of determination, anyone can construct their dream lax stick from the ground up. Follow these easy steps and enjoy the pride and excitement of playing with gear you created. So grab a shaft and head, pull out the drill, and get building your own one-of-a-kind lacrosse stick today!
Enjoy Your New Custom Lacrosse Stick On The Field!
Hey lax friends, are you looking for a fun DIY project to fully personalize your lacrosse gear? Building your own custom lacrosse stick from scratch can be an awesome way to get the exact features and style you want. With some basic materials and tools, even newbies can construct a unique and high-performing lax stick. Let’s walk through how to create a one-of-a-kind lacrosse stick in 14 straightforward steps.
Step Numero Uno: Gather The Gear
First up, you’ll need to get the core ingredients – a shaft, head, laces/mesh, and screw. Swing by your local sporting goods shop or lacrosse specialty retailer to grab these. Make sure to get the right shaft length for your position. Attackers usually need a 30-inch shaft, while defenders need a longer 60-inch shaft. New players may want to start with a pre-strung head to make stringing easier.
Step 2: File That Shaft
Once you’ve got the goods, prep the shaft by filing down any rough spots or burs using some mid-grit sandpaper. This helps create a smooth surface for attaching the head later. Be sure to really clean off all sawdust or bits after filing so the shaft is pristine.
Step Tres: Wrap That Top

Get some athletic tape and tightly wrap the top 4-6 inches of the shaft. This tape will strengthen the shaft when you connect the head and keep things secure. Make sure the tape is laid down flat with zero air pockets or wrinkles.
Step 4: Insert Shaft Into Head Hole
Now comes the fun part – slide the taped end of the shaft into the wide opening of the lacrosse head. Keep pushing until the shaft hits the back of the scoop neck. Having a buddy help align the pieces makes this easier. Make sure the shaft is centered before moving forward.
Step Cinco: Drill Pilot Hole
With the shaft inserted in the head, use a power drill to make a guide hole going through both plastic sides of the head and the tape/shaft inside. Position this hole an inch or two below the scoop neck. Drill straight and steady to avoid wandering.
Step 6: Lock It Down With Screw
Pop that screw through the freshly drilled guide hole to lock the shaft and head together. Crank it down snugly but not so hard that you crack the plastic. The tape should help disperse pressure from the screw head.
Step Lucky Number 7: Lace The Mesh/Leathers
If you bought an unstrung head, it’s go time to string up the sidewall holes with mesh or leathers. Look up lacrosse stringing guides for the proper techniques. Using a pre-strung head is easiest for new builders.
Step 8: Verify Alignment
Before wrapping things up, check that the head is straight and centered on the shaft with no crookedness. Spin the stick to confirm the pocket stays centered. Realign and re-tighten if needed.
Step 9: Tape Below The Throat
Wrap more athletic tape tightly around the shaft a few inches under the plastic head throat. This stabilizes the bottom. For extra strength, add a second layer of tape above the first.
Step 10: Plug The Bottom
For safety’s sake, put a rubber lacrosse butt end cap on the bottom end of the shaft. Push it down as far as possible. This finishes the stick and cushions ground contact.
Step Once: Add Custom Touches
Now’s your chance to personalize with color, designs, etc! Tape the shaft in team colors or apply cool decals. Paint your number/name with paint pens. Get creative with the head pocket string colors and styles too.
Step 12: Confirm Legal Pocket Depth
Before playing, validate the pocket depth and ball hold meet official lax rules. Test with a ball and ruler. Loosen strings if needed to make the pocket more shallow per regulations.
Step 13: Toss It Around
Woot woot – time to test drive your new custom stick! Have a catch session with teammates to get a feel for handling and throwing. Make pocket or tape tweaks as needed. Get out there and give it a whip!
Step 14: Maintain Your Masterpiece
Be sure to check periodically that all parts like the screw and tape remain secure. Maintain the pocket by adjusting/tightening strings as they wear. Freshen up tape and decorations as required. Proper care keeps your stick primed for play.
Building your own lacrosse stick is an awesomely gratifying project for lax enthusiasts. With some basic DIY skills and materials, you can create a truly one-of-a-kind lax stick tailored to your preferences. Just follow these easy 14 steps and soon you’ll be throwing, catching, and scooping with confidence using a stick you built from scratch. The sense of personal accomplishment out on the field with gear you customized yourself is such a cool feeling. So grab a shaft, lace a pocket, and get out there enjoying your unique hand-built lacrosse stick! Lax on, friends.


