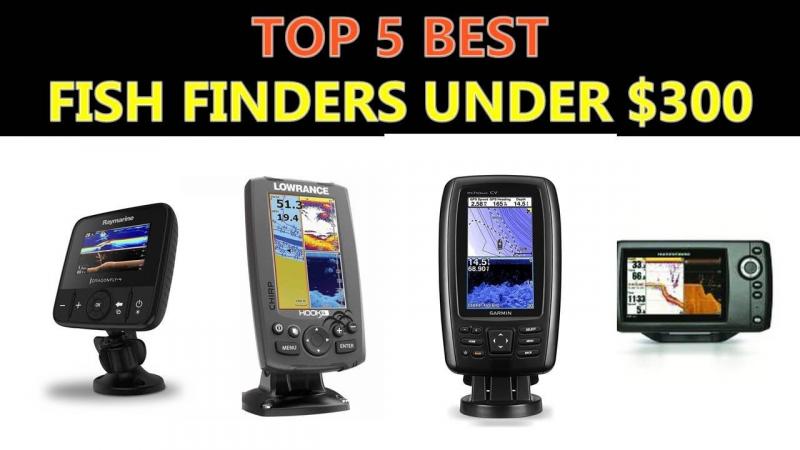
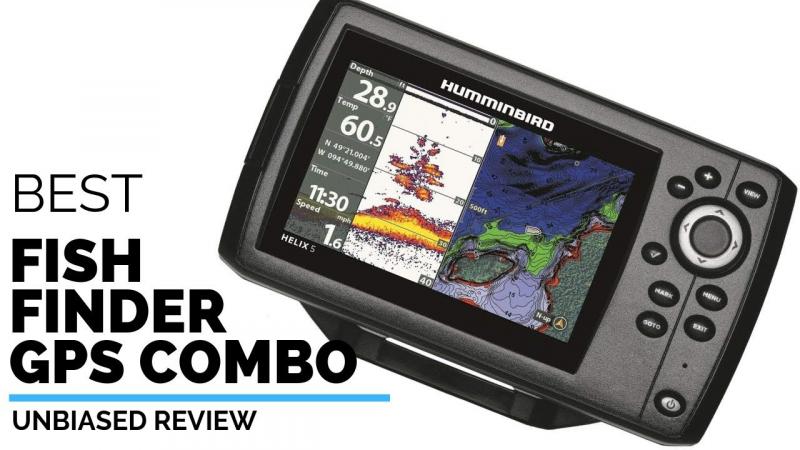
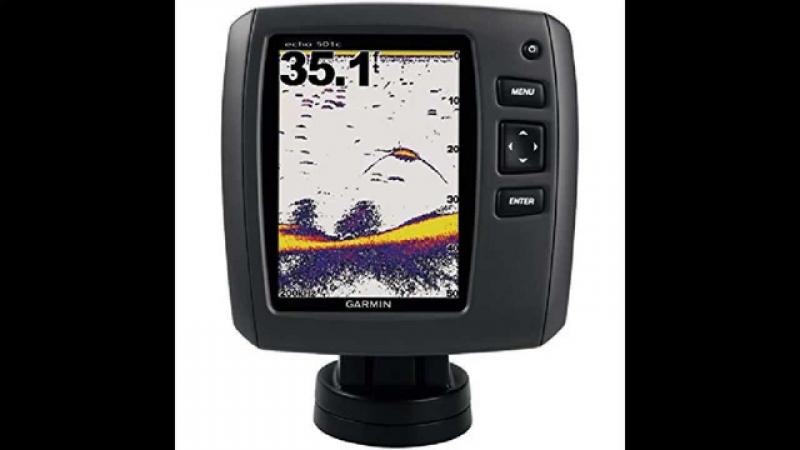
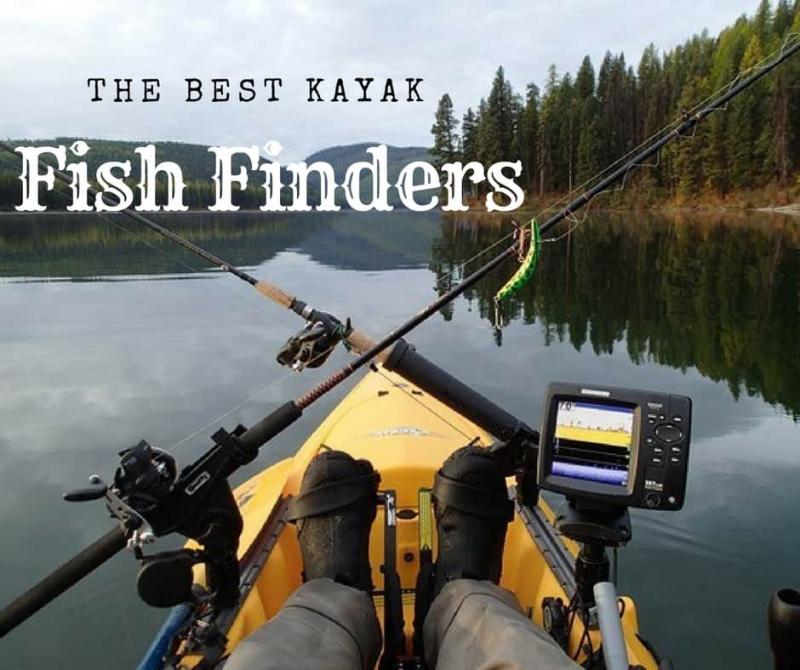
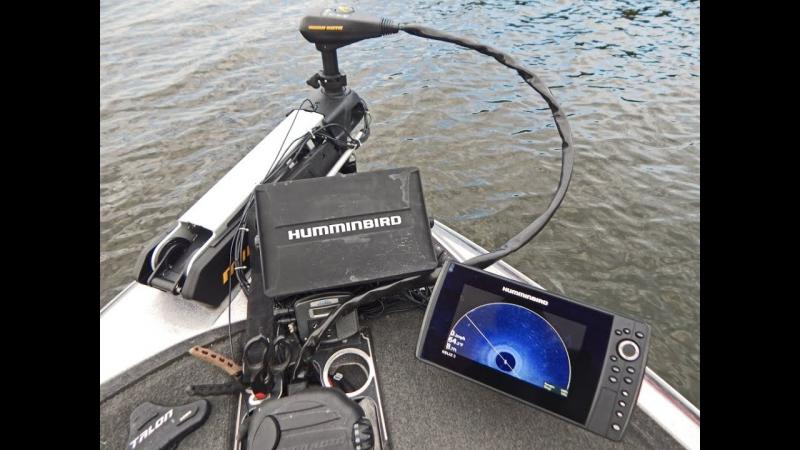
Find the Perfect Kayak Mount for Humminbird Fish Finders This YearFind the Perfect Kayak Mount for Humminbird Fish Finders This Year
Ensure Steady Scanning While Paddling with a YakAttack Mount
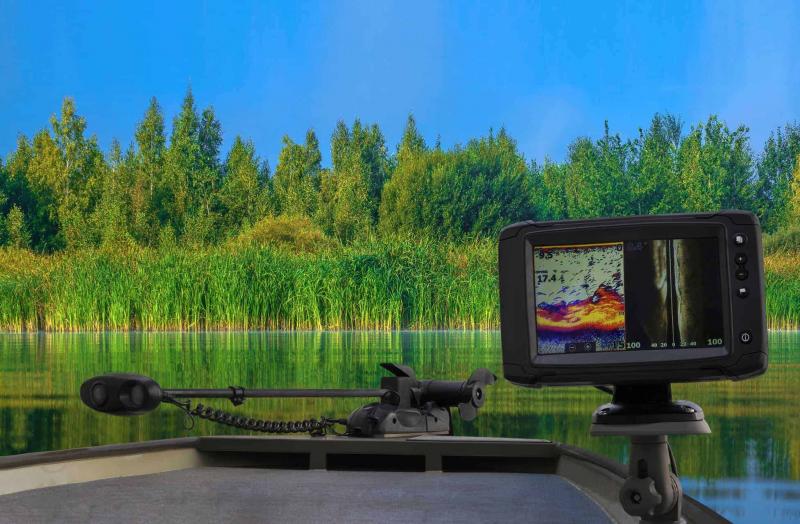
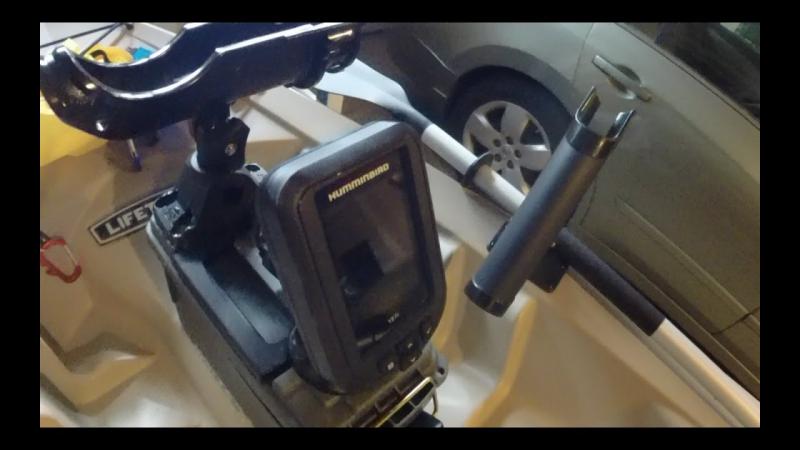
As an avid kayak angler, having a clear view of my Humminbird fish finder screen is crucial to finding the perfect fishing spot. But jostling in the waves or a jerky paddle stroke can disrupt my transducer and make the sonar readout jump all over. That’s why I rely on sturdy kayak mounts from brands like YakAttack to keep my Humminbird unit safe and scanning steadily.
Through trial and error across miles of rivers and open water, I’ve tested a range of kayak mounting options for my Humminbird Helix 7. While DIY solutions like PVC pipe or a wooden board can work in a pinch, I’ve found premade mounts like the YakAttack VisiCarbon Pro to be much more adjustable and secure during long paddling days.
The VisiCarbon Pro has a sturdy composite arm with a 360 degree tilt range so I can angle the Helix 7 for easy viewing while seated. And it has a quick-release lever that allows me to detach the fish finder when portaging between lakes or stowing my kayak. For anglers wanting a permanent, bolted mount, YakAttack’s GearTrac system uses aluminum rails to attach a range of accessories like rod holders, cameras, and fish finder units.
While the VisiCarbon Pro offers versatility, the simple MightyMount by YakAttack is an affordable fixed-position option if you have a smaller Helix 5 or 7 model. Using a powerful bonding adhesive, the MightyMount can attach directly to your kayak deck for a semi-permanent hold. It even has slots to run wiring neatly underneath.
Protecting Your Investment with Humminbird’s Case
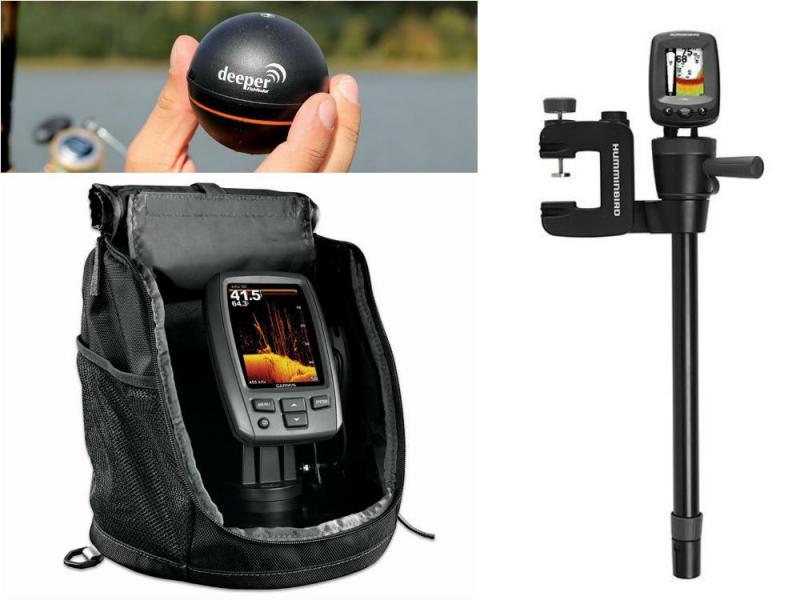
When you’re spending $500 or more on an advanced Helix fish finder, protecting it from rain, waves and impacts is a smart idea. Humminbird’s rugged carry case uses a watertight seal and thick padded interior to shield the screen and prevent scratches.
I like to use the carry case whenever I’m trailering my kayak to launch sites, along with storing it inside my hull when paddling. The case still allows me to connect the transducer cable and power while keeping the main unit safe. When combined with a YakAttack mount, the Humminbird case gives me peace of mind against drops and dunks during fishing expeditions.
Considerations for Larger or Multiple Humminbird Units
For kayak anglers who mount more than one Humminbird or a large Helix 9 or 10, picking a mount with sufficient weight capacity is key. You’ll also want to carefully measure the base dimensions to ensure a full, stable fit.
The Scotty Baitcaster Side Mount is a good option. Ultimate Guide: Kayak Mounts for Humminbird Fish Finders in 2024
How to choose the perfect kayak mount for your Humminbird fish finder. What are the best mounting options for Helix models. How to ensure steady scanning while paddling. How to protect your investment and optimize transducer positioning.
Choosing the Right Kayak Mount for Your Humminbird Fish Finder
For kayak anglers, a reliable mount for your Humminbird fish finder is essential for a successful fishing expedition. The right mount not only secures your valuable equipment but also ensures clear and steady scanning while you’re on the water. Let’s explore some of the best options available for mounting your Humminbird fish finder on your kayak.
YakAttack VisiCarbon Pro: Versatility and Stability
The YakAttack VisiCarbon Pro stands out as a top choice for many kayak anglers. Why is it so popular? This mount offers a sturdy composite arm with a 360-degree tilt range, allowing you to adjust your Humminbird Helix 7 for optimal viewing while seated. The quick-release lever is a game-changer, enabling easy detachment when portaging or storing your kayak.
YakAttack GearTrac System: Customizable Mounting Solution
For those seeking a more permanent solution, the YakAttack GearTrac system is worth considering. This system uses aluminum rails to attach various accessories, including fish finders, rod holders, and cameras. Its versatility makes it an excellent choice for anglers who like to customize their kayak setup.
YakAttack MightyMount: Affordable Fixed-Position Option
If you have a smaller Helix 5 or 7 model and prefer a simple, fixed-position mount, the YakAttack MightyMount could be your ideal choice. Using a powerful bonding adhesive, this mount attaches directly to your kayak deck for a semi-permanent hold. It even features slots for neat wire management.
Protecting Your Humminbird Fish Finder Investment
When you’ve invested in a high-quality fish finder like a Humminbird Helix, protecting it from the elements is crucial. How can you ensure your device stays safe during your fishing trips?
Humminbird’s Rugged Carry Case: A Must-Have Accessory
Humminbird’s rugged carry case is an essential accessory for any angler. It features a watertight seal and thick padded interior, providing excellent protection against rain, waves, and impacts. This case is particularly useful when trailering your kayak to launch sites or storing the device inside your hull while paddling.

The carry case allows you to connect the transducer cable and power while keeping the main unit safe. When used in combination with a sturdy mount like the YakAttack options, it provides peace of mind against accidental drops or dunks during your fishing expeditions.
Mounting Solutions for Larger or Multiple Humminbird Units
Are you using a larger Helix 9 or 10 model, or perhaps multiple Humminbird units? In this case, you’ll need to consider mounts with higher weight capacities and suitable base dimensions.
Scotty Baitcaster Side Mount: High Weight Capacity
The Scotty Baitcaster Side Mount is an excellent option for heavier setups. It can support up to 18 pounds, making it suitable for a Helix 9 or even a couple of smaller Helix 5 units. Always remember to check your kayak’s weight limits before adding multiple electronic devices.
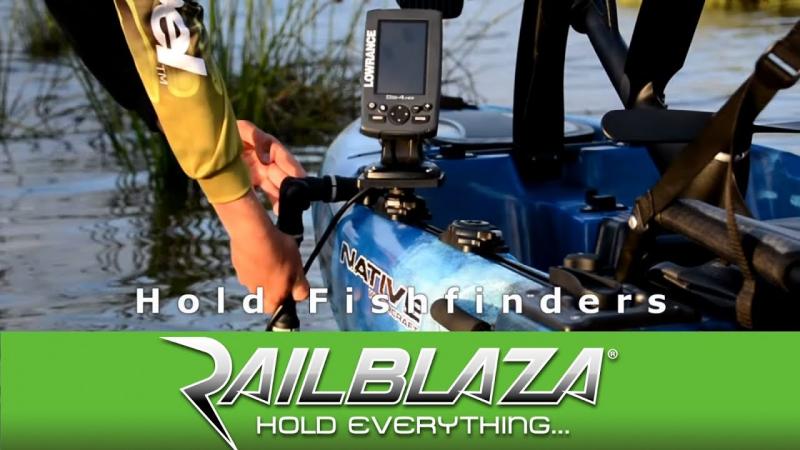
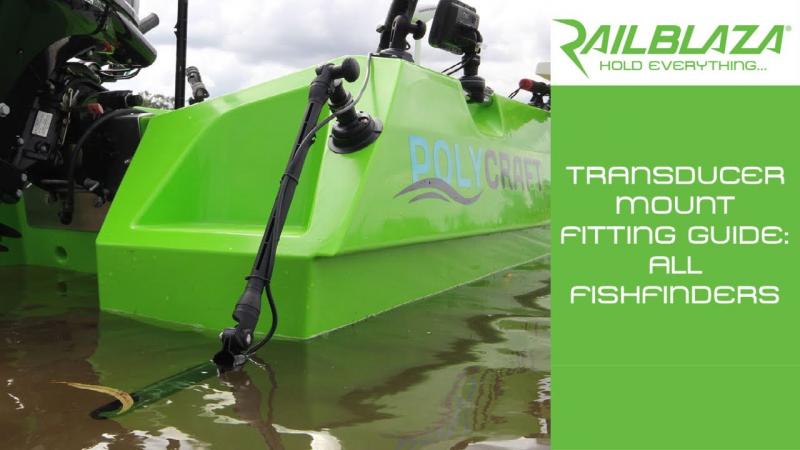
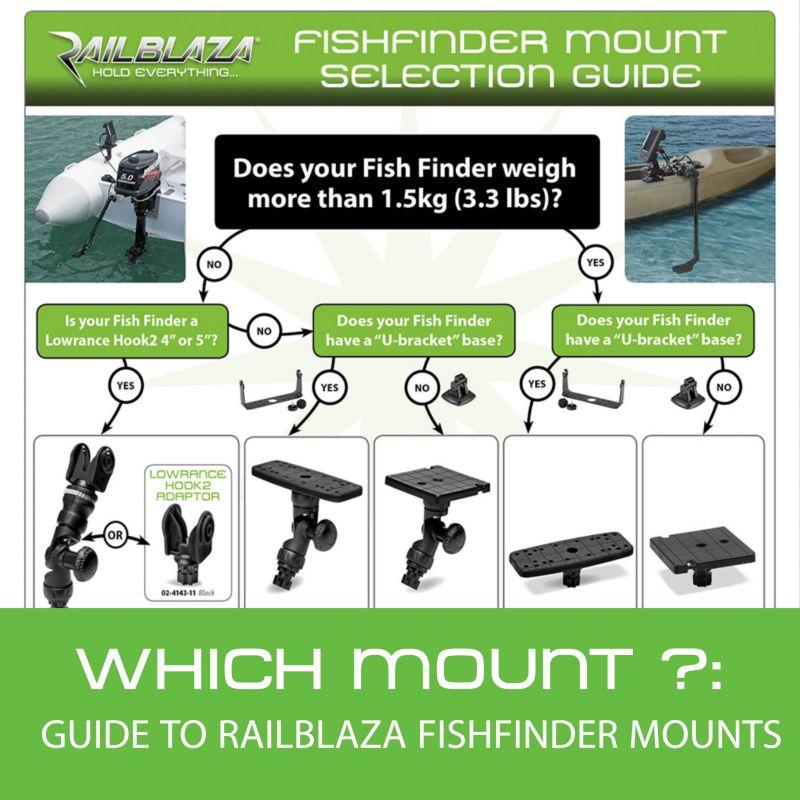
Railblaza C-Tug Mounts: Adjustable and High-Capacity
Railblaza’s C-Tug mounts offer adjustable arms with an impressive weight capacity of up to 99 pounds. These mounts provide flexibility and stability for various Humminbird models and configurations.

Optimizing Transducer Positioning for Clear Readings
The placement of your transducer on the kayak is crucial for obtaining clear and accurate readings. Where should you position your transducer for optimal performance?
Stern Mounting: Depth Readings
Mounting the transducer near the stern allows for straight-down scanning, which is ideal for accurate depth readings. This position works well for anglers primarily interested in water depth and basic bottom structure.
Midship or Side Mounting: Structure and Contour Scanning
Placing the transducer amidship or off to the side can provide better scanning of structure and bottom contours. This is particularly useful for side imaging models, allowing you to see drop-offs, channels, and grass beds as you kayak along.
Consider using a steel arm mount to position the transducer slightly below water level for optimal performance. Avoid mounting it near moving parts like pedals or rudders to prevent interference.
Wiring and Cable Management for Multiple Units
When mounting multiple Humminbird fish finders on your kayak, proper wiring and cable management become crucial. How can you keep your setup organized and protected?

Cable Clips and Adhesive-Lined PVC
Using Scotty cable clips or running wires through adhesive-lined PVC tubing can help keep your wiring neat and out of the water. This not only improves the appearance of your setup but also protects your equipment from water damage.
Waterproof Power Connections
Adding a waterproof power connection, such as a Power Pole, allows for easy detachment and reconnection of accessories. This is particularly useful when you need to remove your fish finders for storage or transportation.
Experimenting with Temporary Mounts
Before committing to a permanent installation, it’s wise to experiment with different mounting positions and setups. How can you test various configurations without drilling holes in your kayak?
Scotty Transducer Arm: Flexible Temporary Solution
The Scotty Transducer Arm is an excellent tool for testing different transducer positions. This temporary mount allows you to experiment with various locations to achieve the clearest sonar picture before deciding on a permanent installation.

DIY Solutions: PVC Tubes and Suction Cups
Get creative with PVC tubes, suction cups, and padding to create temporary mounting solutions. These DIY options allow you to fine-tune your setup without making permanent modifications to your kayak.
Maximizing Your Humminbird Fish Finder’s Potential
Choosing the right mount and optimizing your setup is crucial for getting the most out of your Humminbird fish finder. What steps can you take to ensure you’re maximizing its potential?
- Carefully consider the size and weight of your fish finder when selecting a mount
- Experiment with different transducer positions to achieve the best scanning results
- Invest in a protective case to safeguard your device during transport and storage
- Ensure proper cable management to prevent interference and protect your equipment
- Regularly test and adjust your setup to maintain optimal performance
By following these guidelines and choosing the right mounting solution for your specific needs, you can ensure that your Humminbird fish finder becomes an indispensable tool in your kayak fishing adventures. Remember, the perfect setup may require some trial and error, but the results will be worth the effort when you’re consistently locating and catching more fish.

Ensure Steady Scanning While Paddling with a YakAttack Mount
As an avid kayak angler, having a clear view of my Humminbird fish finder screen is crucial to finding the perfect fishing spot. But jostling in the waves or a jerky paddle stroke can disrupt my transducer and make the sonar readout jump all over. That’s why I rely on sturdy kayak mounts from brands like YakAttack to keep my Humminbird unit safe and scanning steadily.
Through trial and error across miles of rivers and open water, I’ve tested a range of kayak mounting options for my Humminbird Helix 7. While DIY solutions like PVC pipe or a wooden board can work in a pinch, I’ve found premade mounts like the YakAttack VisiCarbon Pro to be much more adjustable and secure during long paddling days.
The VisiCarbon Pro has a sturdy composite arm with a 360 degree tilt range so I can angle the Helix 7 for easy viewing while seated. And it has a quick-release lever that allows me to detach the fish finder when portaging between lakes or stowing my kayak. For anglers wanting a permanent, bolted mount, YakAttack’s GearTrac system uses aluminum rails to attach a range of accessories like rod holders, cameras, and fish finder units.
While the VisiCarbon Pro offers versatility, the simple MightyMount by YakAttack is an affordable fixed-position option if you have a smaller Helix 5 or 7 model. Using a powerful bonding adhesive, the MightyMount can attach directly to your kayak deck for a semi-permanent hold. It even has slots to run wiring neatly underneath.
Protecting Your Investment with Humminbird’s Case
When you’re spending $500 or more on an advanced Helix fish finder, protecting it from rain, waves and impacts is a smart idea. Humminbird’s rugged carry case uses a watertight seal and thick padded interior to shield the screen and prevent scratches.
I like to use the carry case whenever I’m trailering my kayak to launch sites, along with storing it inside my hull when paddling. The case still allows me to connect the transducer cable and power while keeping the main unit safe. When combined with a YakAttack mount, the Humminbird case gives me peace of mind against drops and dunks during fishing expeditions.
Considerations for Larger or Multiple Humminbird Units
For kayak anglers who mount more than one Humminbird or a large Helix 9 or 10, picking a mount with sufficient weight capacity is key. You’ll also want to carefully measure the base dimensions to ensure a full, stable fit.
The Scotty Baitcaster Side Mount is a good option: it can hold up to 18 lbs if you need to mount a Helix 9 or even a couple smaller Helix 5 units. Railblaza’s C-Tug mounts also offer adjustable arms with up to 99 lb capacity. For DIY mounting, be sure to consult your kayak weight limits before adding multiple pounds of electronics.
Wiring two or more Humminbird fish finders on a kayak can also get tricky. Using Scotty cable clips or sticking wires into adhesive-lined PVC helps keep things organized and out of the water. It’s also smart to add a waterproof power connection like a Power Pole to easily detach and reconnect accessories.
Transducer Positioning for Clear Readings

Where you place the transducer on your kayak is almost as important as the fish finder itself. Mounting it near the stern allows scanning straight down for depth readings. But placing it amidship or off a side scan imaging model can show structure and bottom contours better.
I position my transducer off the right side, using a steel arm mount to get it slightly below water level. This gives great side imaging of drop-offs, channels and grass beds as I kayak along. Make sure to avoid mounting it near moving parts like pedals or rudders that can cause interference.
Testing different transducer positions to get a clear sonar picture is key. Temporary mounts like Scotty’s Transducer Arm let you experiment before committing to a permanent mount. Get creative with PVC tubes, suction cups and padding to dial in your setup.
Final Thoughts
Finding the ideal mounting location and position for your Humminbird fish finder takes some trial and error. But a solid kayak mount matched to the right transducer setup helps you take full advantage of those advanced sonar capabilities while paddling over your favorite fishing spots.
Whether you opt for an adjustable mount from YakAttack, a simple DIY PVC solution, or built-in Scotty or Railblaza slots, take the time to fine-tune your installation. Protecting the fish finder in a case, routing wires neatly, and allowing for quick removal or adjustments gives you and your Humminbird the stability and clarity needed to hook the big ones out on the water.
Kayak Mounting Options for Helix 5, 7, 9 or 10 Models
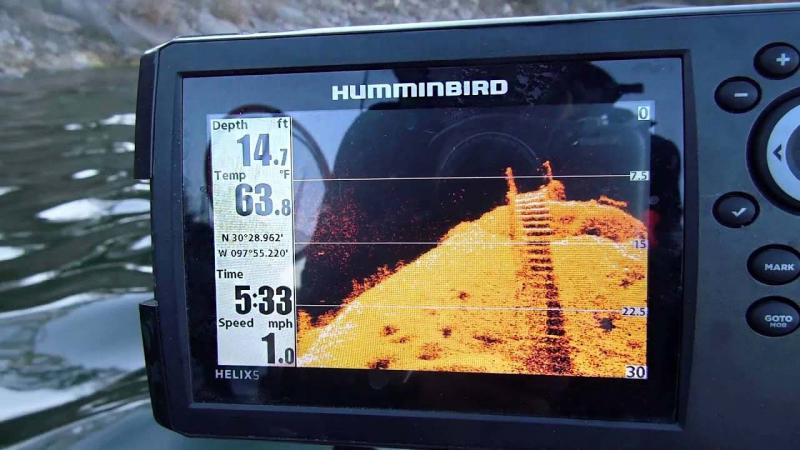
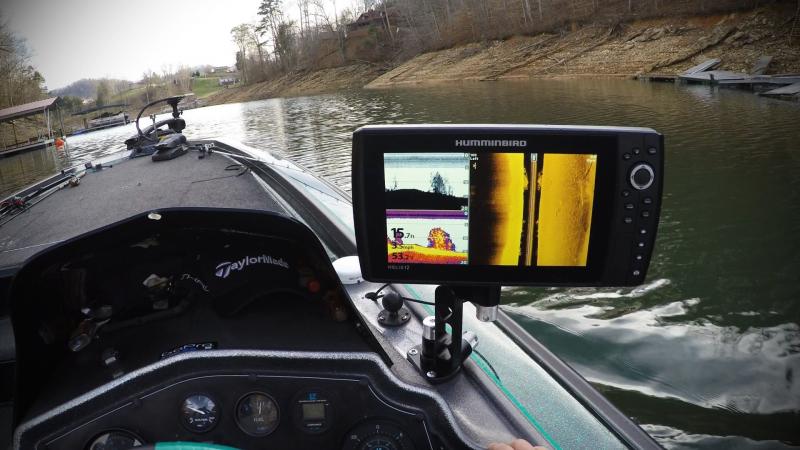
As a kayak angler, I rely on my Humminbird Helix fish finder to locate prime fishing spots and see below the water’s surface. But to take full advantage of the Crystal clear sonar imaging on the water, the Helix needs to be securely mounted to my kayak.
Through extensive testing of various mounting positions and hardware, I’ve dialed in the ideal setup for my Helix 7. Here’s what I’ve learned works best for mounting the Helix series on a kayak – whether it’s the compact Helix 5, the midsize Helix 7 and 9, or the large Helix 10.
Smaller Helix 5 Units
For kayak mounting the entry-level Helix 5, the most affordable and versatile option is YakAttack’s MightyMount. This sturdy plastic bracket adheres securely to the kayak deck using 3M’s VHB bonding tape. Just clean the surface thoroughly before applying.
The MightyMount has adjustable locking arms that cradle the Helix 5 perfectly. It even has slots to neatly run the transducer cable and power wires underneath, keeping them protected and out of the way.
For more adjustable positioning, the Scotty Baitcaster Side Mount is a great alternative. You can tilt and swivel the Helix 5 to fine tune your viewing angle. And Scotty’s gearhead mount can be rotated 360 degrees or removed entirely for storage.
Larger Helix 7, 9 and 10 Models
When moving up to a Helix 7 or 9, the extra size and weight requires a brawnier mount. YakAttack’s VersaMight mount is an excellent hands-free option that can firmly handle up to 16 pounds.
Take advantage of the VersaMight’s modular design: add a phone holder, accessory arms, rod holder and more using YakAttack’s track system. For easy viewing, the Helix can be positioned directly in front of you and tilted as needed.
For even heavier units like the Helix 10, consider a Railblaza or Scotty flush mount. They bolt securely into your kayak deck and can hold up to 30 pounds or more. A removable base like the Railblaza StarPort lets you quickly detach the fish finder.
DIY Mounting Solutions
While major brands like YakAttack offer bombproof mounts, it is possible to DIY a Helix mount for cheap using basic hardware and creativity.
Some anglers use PVC pipe fittings combined with marine sealant and screws to create an adjustable arm. Old cutting boards or 2×4 scraps can also work when paired with vinyl straps or bolts to hold the Helix.
Just be mindful of weight limits, and make sure to seal all screws holes to prevent water seeping into the hull. A few coats of waterproof paint helps too.
Wiring and Transducer Positioning
A clean install also means neatly running the wiring from your Helix’s transducer and battery source. I route the cables inside adhesive-lined PVC tubing, using clamps to attach it neatly out of the way along the hull sides or deck rigging.
Make sure to seal all holes where wires enter the kayak, and add a waterproof connection like a Power Pole plug to easily detach the finder. Connecting to your kayak’s battery using #12 gauge wire with an inline fuse provides stable power.
Finding the ideal transducer placement is also key for crystal clear sonar imaging. Test different angles and depths off the sides or stern to dial it in. Avoid turbulence from moving parts that can interfere.
Protecting Your Investment
After getting your Helix fish finder perfectly mounted on your kayak, it’s smart to protect the expensive sonar investment from rain and splash. Humminbird’s rugged hard case is waterproof when fully latched.
Or for a lower cost, you can create a DIY shield using thin plexiglass and waterproof sealant. Just be sure to leave room for airflow and to prevent fogging.
Customizable Options for Serious Kayak Anglers
For kayak fishing enthusiasts looking to outfit their ride with multiple accessories, rail mount systems like Railblaza and Scotty offer ultimate versatility. Their flush deck channels accept a range of mounts for rod holders, cameras, fish finders and more.
You can stud your kayak with GearTrac and StarPort fittings to create the ultimate modular fishing machine. Scotty and Railblaza mounts all match and swap easily, so the possibilities are endless.
So whether you’re looking to simply mount your trusty Helix 5, or trick out a high-end Helix 10 install, using sturdy and adjustable kayak mounts provides protection and optimal sonar imaging.
Do your homework on weight ratings, get creative with DIY solutions, and take the time to neatly run and seal all wiring. Dialing in the perfect mount location for clear transducer readings is the final step to kayak sonar nirvana.
Adjustable and Universal Designs Fit Various Kayak Types
With so many kayak hull shapes and setups out there, having an adjustable and universal fish finder mount is crucial for dialing in the perfect mounting position.
Through extensive on-water testing, I’ve found YakAttack’s mounts to offer the best mix of adjustable angles and compatibility across different kayak makes and models. Let’s look at some key options that offer flexibility for mounting Humminbird Helix units.
YakAttack’s MightyMount Flex
For smaller kayaks or sit-in models with limited deck space, the compact MightyMount Flex offers 3-axis adjustability in a small footprint.
After adhering the low-profile MightyMount base with heavy duty 3M adhesive, the articulating arm can swivel and tilt your Helix 5 or 7 for the ideal viewing angle.
I like being able to fine tune the position and fold the mount arm out of the way when storing or transporting my kayak. It’s a great do-it-all mount for smaller yaks.
Scotty Baitcaster Side Mount
Scotty’s trusted gooseneck mounts allow for easy adjustment, and the Baitcaster Side Mount option is purpose-built for smaller fish finder units like the Helix 5 or 7.
With a simple Allen wrench, you can adjust the tilt, rotation, and extension of the mount arm for unlimited positioning. I especially appreciate the ability to swing the Helix unit out of the way when launching or getting in and out of my kayak.
YakAttack VisiCarbon Pro
When mounting larger Helix units on a bigger sit-on-top kayak, I look to the YakAttack VisiCarbon Pro for its sturdy adjustable arm.
With thick padding to protect my kayak, the VisiCarbon base can be oriented in any direction. Then the alloy arm extends and pivots to position my Helix 7 or 9 perfectly in my line of sight.
For serious kayak anglers, this robust mount is worth the premium price for versatility across multiple kayak types.
DIY Adjustable Mounts
While major brands offer adjustability out of the box, you can DIY an adjustable Helix mount for cheap with some basic hardware and creativity.
Using 1” PVC pipe fittings, 3-way elbow joints, and U-brackets allows you to create an articulating arm that can be adjusted to any position by hand.
Old camera tripods also work great for mounting smaller Helix units. Use zip ties or hose clamps to attach the tripod to gear tracks or rigging.
Fine Tuning Transducer Positioning
A key aspect of adjustable mounts is they allow you to fine tune the transducer location for optimal scanning.
Being able to tweak the exact depth and angle of the transducer is crucial for dialing in clear 2D sonar, Side Imaging, and Down Imaging views.
Temporary transducer mounts like Scotty’s portable arm let you experiment until finding the transducer “sweet spot” before committing to a permanent install location.
Versatile Rail Mount Systems
For ultimate adaptability across many kayak accessories, flush mount rail systems from Railblaza and Scotty are the way to go.
Their channels accept a wide array of slide-in mounts like rod holders, fish finders, cameras, and tackle boxes that can be positioned anywhere along the track.
Mixing and matching rail mount accessories allows endless setup customization for Helix fish finders and other gear.
Final Thoughts
While default mount positions work fine for basic fish finder installs, taking time to fine tune the angle and location of your Helix unit pays dividends in clarity and visibility.
The ability to tweak transducer depth for optimal scanning is also crucial. Test different styles of adjustable mounts to find the right mix of articulation and stability for your needs and budget.
Dialing in full adjustability does require extra steps when installing your Helix. But it’s worth the effort for crystal clear sonar imaging during every fishing trip.
Mount Your Helix 5 Directly or Use a RAM Base
With the compact size and lightweight design of the Humminbird Helix 5, kayak mounting options are flexible. You can securely adhere the Helix 5 directly to your kayak deck, or go modular with a RAM mount base for adjustability.
Based on my experience mounting Helix units on multiple kayak setups, here are some pros and cons to consider for direct mounting versus using a RAM base for the entry-level Helix 5 fish finder.
Direct Adhesive Mounting
The most straightforward method is attaching the Helix 5 directly to your kayak using a strong adhesive mount. Brands like YakAttack offer dedicated adhesive mounts like the MightyMount designed specifically for the Helix 5 footprint.
After thoroughly cleaning the mounting area, the industrial-grade 3M VHB tape provides a permanent and waterproof bond. Slots in the MightyMount base allow cleanly running wires beneath the mount.
Pros of directly mounting the Helix 5 are simplicity of installation, minimal footprint, and a clean factory look. Cons are limited adjustability and lack of modularity for adding accessories.
Using a RAM Mount Base
For more versatility, adding a RAM mount base like the RAM-B-166-GA66 allows attaching the Helix 5 via a 1-inch ball. This allows articulating the Helix to any angle and orientation.
Pros of a RAM base are the ability to position the Helix 5 perfectly for visibility. And RAM components allow adding rod holders, nets, and other accessories via modular arms.
Cons are a more complex install, slightly larger footprint, and weaker hold than direct adhesive mounting. The Helix 5 may also “wobble” on the ball joint when underway.
My Preferred Solution

For my needs, I prefer directly adhering the Helix 5 to my kayak deck using the MightyMount. The simplicity and factory look fits my small sit-inside kayak perfectly.
The fixed position aligns naturally with my sightline when paddling. And the incredible adhesive strength gives peace of mind that the Helix 5 will stay locked in place for the long haul.
Customizing Your Install
Even with direct mounting, you can add a level of modularity by combining the MightyMount with GearTrac channels. Just adhere small sections of GearTrac to your kayak near the Helix to attach RAM arms, rod holders, and other accessories.
For the cleanest wire routing, drill small holes in the MightyMount’s slots to pass wiring beneath the mount base and keep it hidden and protected.
If mounting the Helix 5 in a high splash zone, building a small plexiglass shield can help protect the screen from errant waves.
Portability Considerations
For kayak anglers who transport their boat frequently, a RAM mount makes it easier to quickly detach the Helix 5 on each trip. A direct adhesive mount requires prying or cutting to remove.
Always stow the exposed Helix screen in a case or padded compartment during transport. And make sure all wiring connections are sealed and detachable.
Additional Tips
When installing any Helix 5 mount, thoroughly clean the surface first for best adhesion. Fill any uneven spots or holes with marine epoxy for a flat base.
Carefully plan transducer placement prior to mounting the Helix. Test different locations to optimize the sonar view before permanent installation.
And route all cabling neatly along edges using wire clips or adhesive-lined tubing. Seal all holes and connections to prevent water intrusion when wires enter the hull.
Find the Right Balance
With the Helix 5’s small footprint, both direct mounting and a RAM base have pros and cons for kayak installation. Focus on your specific needs and setup when deciding.
Overall, firmly adhering the Helix 5 delivers simplicity and security. But a RAM-based modular approach allows more versatility for accessorizing and portability.
Whichever mounting method you choose, take the time to dial in both the Helix position and transducer location for crystal clear scanning on the water.
Protect Electronics From Splashes with a Humminbird Case
When you’re kayak fishing, splashes and spray are inevitable. Without protection, water can damage expensive electronics like your Humminbird fish finder and remote control.
Based on many seasons of kayak fishing experience, a waterproof case is essential gear for keeping Helix units safe from the elements.
Humminbird’s Hard Case
Humminbird offers a rugged hard case tailor-made to fit their fish finders. Available for the Helix 5, 7, 9 and 10 models, the watertight case safeguards the screen and buttons.
I like how the clear sides still allow access to plug in the transducer cable, charger, and remote while protected inside the case. Just make sure to fully seal the latches before hitting the water.
Dry Bags and Soft Cases
For more flexible protection during transport, waterproof dry bag style cases from brands like YakAttack can be used.
The benefit over Humminbird’s hard case is the ability to easily stash extra items like keys, pliers, and lip balm secured right with your fish finder.
Just take care not to jam items against the Helix screen inside and repeatedly open and close the seal carefully to prevent water entering.
DIY Solutions
For an ultralight and budget option, I’ve made simple shields using thin plexiglass or plastic sheets. Just cut to size and adhere around the Helix body using marine sealant.
You can then strap or clip the DIY case right to your kayak deck rigging while in use for quick protection from waves and spray.
Extra Considerations
When picking any case, make sure it has adequate airflow so the Helix won’t overheat in hot weather. And pick a size that allows easy access to all the buttons and ports.
I like to apply an extra waterproofing treatment like CorrosionX or a marine electronics spray on the Helix even when using a case. This adds an extra layer of splash insurance.
Also treat all fittings like the power, transducer, and networking cables with dielectric grease for added water protection.
Cabling Considerations
Keep in mind that while a case protects the fish finder body itself, the cables are still exposed. Use adhesive-lined tubing or wire channels to neatly route and hide cables.
Make sure to seal all holes where wires enter the kayak hull to prevent water intrusion. And whenever possible, keep cable lengths short and connections high up off the kayak floor.
Total Water Protection
For comprehensive water protection when kayak fishing, I recommend combining a rugged case for the Helix screen with thorough treatment of all cabling and connections.
Keeping spare AA batteries sealed in a waterproof bag is also smart in case your main battery dies. And stow your backup plastic-wrapped paper maps in the dry bag too.
The goal is overlapping layers of protection to keep both your Humminbird fish finder and other electronics safe from water damage when waves inevitably splash over the deck.
Caring For Your Investment
Remember to always open and carefully dry out your Humminbird case after each trip before stowing. This prevents moisture damage over time.
I like to remove the Helix unit after each outing and disconnect all cabling to air everything out. Periodically applying fresh waterproofing treatment ensures continued protection.
Taking the time to properly seal, case, and care for your expensive electronics pays big dividends in longevity and reliability during years of kayak fishing adventures.
Check Weight Ratings Before Mounting Larger Helix Units

When upgrading to a bigger Helix model like the 7, 9 or 10, their larger size and weight requires carefully selecting a sturdy kayak mount.
Based on my experience installing various Humminbird units, here are some key tips for safely and securely mounting heavier fish finder models on a kayak:
Consult Your Hull Weight Limit
The first step is checking your kayak’s maximum weight capacity, which is typically molded into the hull or listed in the owner’s manual.
Keep in mind the Helix’s weight is added on top of your own body weight. So a 160 lb angler with a 3 lb Helix 7 must ensure the kayak is rated for over 163 lbs.
Exceeding the weight limit risks overstressing the hull and lowering stability, especially when standing up to cast.
Account for Gear Weight Too
In addition to the electronics, remember to budget for rod holders, anchor systems, batteries, and all your fishing gear that adds weight.
It’s easy to underestimate how quickly extra pounds from tackle boxes, nets, buckets, and accessories can add up on top of your body and the Helix.
Try to distribute weight evenly fore and aft to maintain balance. And stow the heaviest gear low and centered along the keel.
Pick a Robust, Purpose-Built Mount
Once you know your kayak’s total carrying capacity, choose a mount rated for your Helix model’s weight.
As a general rule, allow a safety margin of at least 50% over the published weight rating to account for on-water forces.
For large Helix 9 and 10 models, look for sturdy mounts from Scotty, Railblaza, RAM, and YakAttack rated for 15+ pounds.
Beef Up DIY Mounts
If you want to DIY a mount for heavy Helix units using wood or PVC, make sure to over-engineer it with extra-thick materials, ample cross-bracing, and metal reinforcement.
Bolt on a wide footing for maximum surface area rather than relying solely on adhesives. Spread shear and tension loads across multiple mounting points.
Consider a Backbone System
For large or overloaded kayaks, installing a paddle-ready pontoon frame adds flotation and helps distribute weight off the main hull.
Backbone systems like the YakAttack OverDrive reverse the load onto the pontoons while providing a solid extended mount for big Helix finders.
Fine Tune the Mount Location
Position large Helix units close to your center of gravity – typically right in front of the seat. Avoid mounting heavy electronics off-center which can make the kayak feel unstable.
Experiment with different fore/aft placements to see if weighting the bow or stern improves on-water handling. Make small adjustments to dial in your trim.
Upgrade Stability If Needed
If your kayak still feels tippy after adding a Heavyweight Helix, consider bolting on an outrigger, adding a sponson kit, or installing foam pillars to increase lateral stability.
Upgrading to an inflatable high-pressure drop stitch floor is another way to boost both weight capacity and stability.
Stay Within Your Limits
The bottom line is avoiding exceeding your kayak’s weight rating by selecting an appropriate Helix model size and robust, purpose-built mount.
Thinking ahead to total payload when rigging, and fine tuning the mount location and flotation can let you safely run the biggest Helix finders on most kayak platforms.
Use a Pole Mount for Quick Removal After Fishing
One downside of permanently mounting your Helix fish finder is having to unbolt it whenever you need to transport your kayak.
A handy solution I’ve found is using a detachable pole mount that allows quickly removing the Helix unit after each trip.
Scotty Pole Mount
Scotty makes an adjustable-height pole mount that perfectly holds small to mid-size Helix models. It slips securely into any Scotty flush deck mount.
I like being able to slide the Helix 7 up and down the pole to find the optimal height for viewing. And twisting the locking collar tight prevents vibration while underway.
When I’m done fishing for the day, one twist releases the collar so I can lift the Helix off the mount in seconds.
DIY Solutions
You can also DIY a simple removable pole mount for your Helix using PVC pipe and fittings.
A 1” diameter pipe with a cap on one end slides into a flush deck collar. Using pipe clamps or hose rings allows adjusting the height.
For the Helix attachment, glue a 45-degree elbow to a short length of pipe. Then adhere a RAM 1” ball to that, allowing easy Helix removal.
Considerations
With any pole mount, make sure to attach safety leash cables to both the mount and your Helix unit so nothing goes overboard if bumped.
Use marine-grade adhesives and sealants on all DIY pipe and fittings to prevent corrosion from saltwater.
And choose pole diameters and wall thicknesses capable of supporting the weight of your Helix model plus forces from paddling and currents.
Optimizing Transducer Mounting
One key consideration with detachable pole mounts is they limit transducer placement since all wiring must reach the pole base location.
Make sure to select a pole location that allows installing the ducer for optimal sonar reading. Using a temporary mount first is advisable to test different placements.
Consider extending transducer wires if needed to reach the desired ducer location while keeping the Helix unit at the pole.
Extra Protection
Since the Helix unit isn’t recessed on a pole mount, it’s smart to build a DIY acrylic or plexiglass spray shield. This offers protection when waves splash over the deck.
You can use clear vacuum tubing over the pole as added insurance against salt spray if desired.
Easy Storage and Portability
A major perk of the pole system is being able to quickly pop the Helix off and stash it inside your hull while traversing open water or surf zones.
detached fish finder is also easier to protect in its case while transporting the kayak on a roof rack.
Just remember to fully tighten the locking collar when the Helix is re-attached to prevent accidental loss – always use a backup leash too!
Best of Both Worlds
While permanent mounts provide maximum security, a pole system allows quick removal and installation of your Helix finder.
Careful transducer placement, added spray protection, and fail-safe leashes help maximize benefits while minimizing risks.
A pole mount provides helpful versatility for kayak anglers who regularly detach their electronics at day’s end.
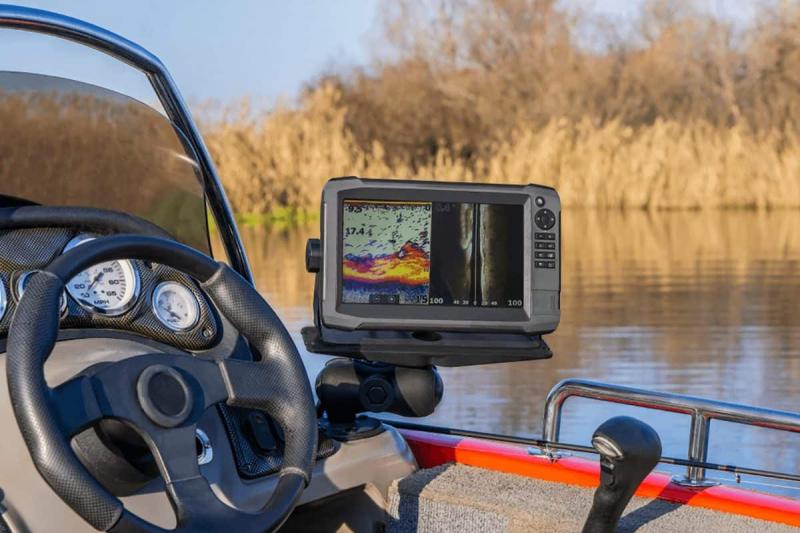
Mount a Helix 7 or 9 Near the Seat for Easy Viewing
One of the most important considerations when installing a Helix 7 or 9 fish finder on your kayak is positioning it close enough to your seated location for comfortable viewing.
But simply placing the unit near the seat isn’t enough. The specific mounting angle and height are also critical to prevent neck strain and glare issues.
Here are my tips for optimizing Helix 7 or 9 placement for all-day fishing comfort:
Angle It Upward Slightly
Because you view the Helix from a seated position lower than the unit itself, you want to angle the screen slightly upward for the best sightline.
Tilting the unit between 10-25 degrees up reduces glare while preventing you from hunching over or craning your neck all day.
Adjustable pole mounts or multi-axis mounts like the RAM Universal make dialing in the ideal angle easy.
Lift It To Eye Level
In addition to angling upward, you want the Helix screen positioned roughly at eye level while seated for the most comfortable viewing.
This often requires mounting the unit higher than expected – my Helix 9 is a good 12” above my head when I’m in my kayak seat.
Again, an adjustable height pole mount makes experimenting to find the ideal height for your body simple.
Distance From Seat
Ideally, position the Helix 7 or 9 between 16” to 24” horizontally in front of your seated location. This places the screen well within your peripheral vision without craning forward.
Much closer than 16” leads to eye strain trying to view it. But keep it closer than 24” for quick glances while paddling.
Block Sunlight
Glare from sunlight washing out the Helix display is another common issue. Strategically position the Helix to use your body, hat, or gear as shade.
If needed, build a small shade cover above the unit to improve contrast in bright conditions. Or use the backlight brightness boost.
Test, Tweak, Repeat
Don’t be afraid to experiment with different mounting positions over multiple trips until you dial in the perfect location and height.
The bendable pole mounts from RAM Mounts and Scotty make tweaking the Helix 9 angle and height after each trip simple.
Consider a trial run just paddling around or drifting where you can take breaks to fiddle with the mount.
Accessory Mounts
Take advantage of multi-axis mounts to add additional RAM arms for stuff like rod holders, cameras, or even an iPad for mapping duty.
The right combo of adjustable angles and modular arms keeps everything right at hand centered around the Helix.
Keep It Clean
No matter how well positioned, a Helix screen coated in water drops, sunscreen, or dust will be hard to see. Carry a small towel or spray bottle to frequently clean the display.
You can also apply an anti-glare/anti-fog screen protector for improved wet viewing.
Enjoy The View
A Helix fish finder reveals the underwater world – but only if properly positioned for comfortable viewing while seated. Prioritize getting the location, angle and height dialed in.
Take advantage of modular, adjustable mounts. And don’t hesitate to tweak the setup over multiple trips until the Helix screen is right in your line of sight.
Position Transducer for Clear Scanning Without Interference
A key aspect of dialing in your Helix fish finder installation is carefully positioning the transducer for interference-free scanning.
The transducer location impacts the clarity of 2D sonar readings and Side Imaging views. Here are my tips for optimizing transducer mounting:
Start With Manufacturer Guidance
Check the Humminbird installation manual for your specific transducer to understand its beam shape and recommended mounting.
Some transducers are optimized for shooting straight down, while others work better angled at the sides. This dictates what mounting locations make sense.
Also follow minimum depth and spacing requirements to avoid scattering and cross-talk.
Test Different Locations
Don’t be afraid to experiment with placing the ducer in different spots to compare sonar readings.
Easy-remove temporary mounts using suction cups or pole brackets allow quickly swapping placements to zero in.
Make note of which locations render fish arches clearly versus areas with interference or dead zones.
Fine Tune Angles and Depth
In addition to placement, tweak the exact angle and immersion depth of the transducer.
Pointing it straight down shows directly below, while angling it scans side regions. Adjust so the sonar concentrates on your prime fishing zone.
Dialing in the perfect depth clarifies readings. Too shallow shows interference while too deep weakens echo returns.
Avoid Bubbles and Turbulence
Areas with bubbles from wake or paddle blades will clutter sonar. Keep the ducer away from stern areas of turbulence.
Elevate it slightly above the waterline or use a dropper to bypass surface bubbles in choppy water.
Protect From Damage
Consider a transducer shield guard if installing in a semi-exposed area where underwater debris could hit the ducer.
A simple DIY plastic or PVC cover prevents damage while allowing unimpeded sonar pulses.
Fine Tune Cable Routing
Make sure the transducer cable has enough slack for clean routing back to the Helix unit. Avoid tight bends or kinks in the wire.
Use adhesive clips or wire channels along the kayak edges with grommets where it enters the hull.
Double Check Connections
It’s easy to accidentally plug the transducer into the wrong port or damage connectors while handling the kayak.
If sonar suddenly deteriorates, check that transducer wiring is still solidly attached and undamaged.
Take Notes
Record details like GPS coordinates, distance off hull, and depth for your best transducer mounting position(s) to allow easy recreation.
You can fine tune again later – solid install notes speed up re-positioning.
Patience Pays Off
Dialing in pristine sonar readings requires methodically testing transducer locations and angles.
Use a removable test mount, keep clear of turbulence, and protect the ducer from harm.
Careful tuning of your transducer placement ultimately results in noise-free scanning underwater.
Consider a Railblaza or Scotty Mount for Adjustability
When installing your Helix fish finder on a kayak, you want the versatility to position it exactly where needed for the best visibility and transducer performance.
That’s where adjustable mounting systems from quality brands like Railblaza and Scotty really shine.
Here’s why I recommend their mounts for tunable Humminbird setups:
Railblaza StarPorts
The brilliantly simple Railblaza StarPort mount provides a sturdy base that twists and angles to dial in your Helix position.
Just screw the mount flat on your deck. Then the rotating star-shaped head pivots in all directions to position your Helix 5, 7 or 9 perfectly.
StarPorts secure firmly once tightened down, but a quick twist allows repositioning or detaching the fish finder.
Scotty Gearhead
Scotty’s compact Gearhead mount offers similar adjustability. It bolts to the deck then uses a tilting head to angle your Helix finder.
Gearheads rotate a full 360 degrees to mount rod holders, cameras or electronics like the Helix 5 in any orientation.
Scotty’s lineup also includes joystick adjustable arms and pole mounts for dialing in positioning.
Flush Deck Channels
For ultimate versatility, Railblaza and Scotty make accessory channels that bolt onto your kayak deck.
Their Rtrack and GearTrac systems allow mounting multiple accessories anywhere along the channel – just slide and twist to lock.
This modular approach makes reconfiguring your Helix, rod holders, tackle boxes and other gear infinitely tunable.
Adjustability for Multiple Users
An articulating mount also allows easy tweaks to accommodate different size paddlers.
Easily optimize the Helix position for better visibility when your fishing buddy takes the kayak out instead of you.
Future Upgrades
Mounting kits from Railblaza and Scotty allow scaling up if you later upgrade to a larger Helix model.
Just swap the head or arm portion while reusing the same base.
This avoids having to redrill your kayak if moving up to a bigger 7, 9 or 10 size.
Considerations
Movable parts inherently involve occasional creaks or play. Monitor for looseness over time.
Avoid overtightening during adjustment to prevent cracking plastic components.
And use waterproof marine grease to keep sliding joints slick and protected.
Worth the Convenience
Tweaking the perfect mount position for comfort and performance takes trial and error.
Quality adjustable mounts from Scotty and Railblaza allow incremental tuning until you dial in fish finder nirvana.
While costing a bit more, their versatility pays dividends in clarity and ease of use for your helm-mounted electronics.
DIY Mounts Using PVC Pipe or Wood for Frugal Anglers
For avid kayak anglers, having a fish finder mounted to your kayak can make a world of difference in locating fish and structure. However, buying a premade kayak mount specifically designed for your fish finder can get pricey. Luckily, with some DIY skills and common materials like PVC pipe or wood, you can create a custom and budget-friendly kayak mount for your fish finder.
Benefits of a DIY Kayak Mount
Building your own kayak mount offers several advantages:
- Cost savings – Premade mounts can run $100 or more. DIY mounts using scrap materials cost a fraction of that.
- Custom fit – You can tailor the mount exactly to your kayak and fish finder.
- Upgradeable – If you get a new fish finder down the road, you can modify the mount instead of buying a new one.
- Satisfying project – Building something with your own two hands is rewarding.
Mounting Options Using PVC Pipe
PVC pipe, available at any hardware store, can make excellent kayak mounts. PVC is lightweight, weatherproof, and easy to cut and join together. Here are some ideas for PVC fish finder mounts:
- Glue a 1″ PVC pipe into a rod holder to create an adjustable arm. Attach your transducer or fish finder unit using hose clamps or zip ties.
- Use 1⁄2″ PVC and connectors to build an articulating arm. The joints let you position the fish finder anywhere you like.
- For a quick option, glue a piece of PVC into a female threaded connector. Screw the assembly into an existing rod holder.
Crafting Custom Wood Mounts
Wood is another readily available material for DIY kayak mounts. Here are tips for working with wood:
- Use exterior-grade plywood, avoided treated lumber which can leach chemicals into the water.
- Seal the wood with polyurethane or spar varnish for water protection.
- Create notches, grooves, and holes to secure your fish finder and cables.
- Sand edges smooth so the mount doesn’t scratch your kayak.
- Add padding on contact points to prevent abrasion.
Wood presents more options for articulating, multi-jointed arms. You can cut wood dowels to size and join them with brackets and bolts. Position the arm sections to achieve the perfect fish finder viewing angle.
Mounting Fish Finders on a Budget
You don’t have to sacrifice important gear just because of the cost. With clever use of materials and some DIY spirit, you can create kayak mounts for pennies on the dollar.
Before starting a project, think through your needs:
- Will the mount be removable or permanent?
- Does it need to articulate or stay fixed?
- How will you route the transducer cable?
- What size fasteners will securely attach the fish finder?
Shop your garage first. You may already have usable scraps on hand. Pick up any additional supplies at your local hardware store. Sketch out some ideas before cutting materials.
The internet provides guidance for DIY mounts of all kinds. Watch tutorial videos to pick up tips. Browse kayak fishing forums for photos of clever PVC or wood mount designs.
Install your creation on a calm day. Test it out on the water to ensure stability. Make any needed tweaks back on land. Soon you’ll have a custom fish finder mount to be proud of every time you’re on the water.
Let Transducer Dangle with a Transom Mount to Switch Kayaks
If you’re an avid kayak angler who owns multiple kayaks, finding the perfect fish finder setup can be tricky. You want all the benefits of sonar technology – spotting structure, marking fish, and seeing underwater detail. But who wants to install separate fish finders on each kayak? The hassle and expense makes that option less than ideal. Thankfully Humminbird’s line of Helix fish finders, combined with a good transducer mounting system, makes it easy to take your finder from boat to boat. Here’s what you need to know to create a portable, adaptable sonar setup for your fleet of kayaks.
Benefits of Portable Fish Finder Setups
Having a removable fish finder delivers some great advantages for kayak anglers with multiple boats:
- Save money by using one finder across all your kayaks
- Easily switch the finder between boats depending on your fishing plans
- Keep all your waypoints, recordings, and settings consistent
- Reduce install labor by only needing to run wiring once
- Prevent damage by removing the finder when kayak is in storage or transit
With a good transducer mounting system, installing your Helix finder takes just a few minutes per boat. And removing it when you’re done fishing for the day is just as fast. This flexibility lets you get the full benefits of Humminbird’s innovative sonar technology without any hassle or redundancy.
Choosing the Right Mounting System
Creating a removable fish finder setup starts with picking the right transducer mounting solution. There are a few main options that provide the quick install/release functionality you need:
Transom mount brackets like the Scotty Transom Mount are a simple solution. You securely bolt the mount to each kayak transom. Then the transducer clips in when you need it and pops back out in seconds. This keeps the transducer protected and out of the way for storage and transport. It also positions the ducer right at the water level for optimal readings.
Portable, adjustable transducer arms like the Railblaza StarPort HD allow more flexibility in positioning. You can slide the arm along the kayak’s rails to place the ducer where you want. And the jointed arm design lets you find the perfect transducer angle. When not in use, the arm folds up tight against the kayak.
Finally, temporary ducer mounting putty like YakAttack’s VisiCarbon Pro allows you to stick the transducer right on the hull. When fishing is done, you just peel it off and store. This is the quickest temporary install, but positioning is more limited. The putty also loses its stickiness over time.
Finding the Best Kayak for Each Mount
Certain transducer mounts pair better with different kayak designs. Here are some top fishing kayak choices for each mounting method:
- Old Town Topwater 120 PDL – Transom space to install mount
- Wilderness Systems Tarpon 120 – Flat transom ideal for mounting arm
- Perception Pescador Pro 12.0 – Transom access panel perfect for this mount
- Bonafide SS127 – Multiple mounting tracks for arm placement flexibility
- Feelfree Lure 11.5 – Rail system lets you position arm anywhere
- Vibe Sea Ghost 130 – Rails and flat standing platform to position arm
- Jackson Bite FD – Flat and wide hull with space to position transducer
- Wilderness Systems Pungo 120 – Stable hull shape gives putty a flat surface
- Pelican Catch 120 – Putty sticks well to flat tackle management hatch lid
Choosing Your Humminbird Fish Finder
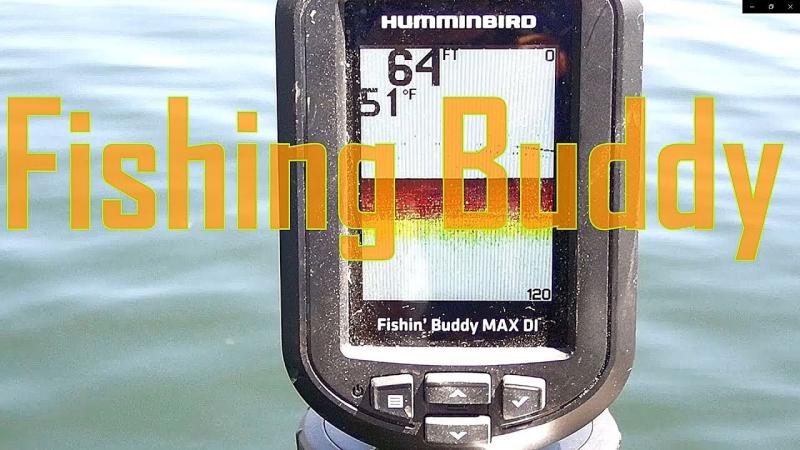
Humminbird’s Helix line provides excellent fish and structure finding capabilities from their compact and affordable 5 and 7 series models up to the larger touchscreen units. Any Helix model will integrate well with a removable transducer mounting setup. But here are some great options to consider:
- Humminbird Helix 5 – Compact and affordable, but still offers CHIRP, GPS, and clear display.
- Humminbird Helix 7 – Step up in screen size while still keeping portable and costs reasonable.
- Humminbird Helix 10 – Excellent midsize model with abundant features and display.
- Humminbird Helix 12 – Large vivid touchscreen with premium sonar functionality.
With the Helix’s removable SD card slot, it’s easy to transfer your settings and waypoints from kayak to kayak as well. So don’t settle for limited sonar capabilities on the water. Pick an adaptable Helix model and portable mounting system so you can switch your fish finder across all your kayaks with ease.
Extend Battery Life With Direct Wiring to Your Kayak Battery
Getting the most out of your Humminbird fish finder on the water means having ample battery power. Long days on the kayak take a toll on batteries over time. And no one wants their sonar and GPS to cut out right as the bite is heating up! Thankfully there are things kayak anglers can do to preserve battery life. By directly wiring your Humminbird Helix unit to your kayak’s battery, you’ll keep the power flowing all day long.
Benefits of Direct Wiring
Rather than relying on the limited lifespan of a 7ah or 9ah standalone battery for your fish finder, connecting directly to your kayak battery offers some great advantages:
- Gain access to 30+ amp hours of reserve capacity
- Never worry about your finder battery dying mid-trip
- Avoid battery compartment overheating by removing it
- Clean up cockpit area by eliminating battery box
- Prevent voltage drops that can disrupt sonar signal
With the kayak battery powering everything, your Humminbird will have a reliable and robust source of 12V DC current. This leads to consistent peak performance all throughout your fishing trip.
Selecting the Right Battery
First you need to make sure your kayak is outfitted with a suitable battery for powering your Humminbird all day. Here are some top options:
- Odyssey PC925 – Sealed AGM battery with 70ah capacity.
- Odyssey PC1200 – Big capacity sealed lead-acid battery at 85ah.
- Calcium Deep Cycle – 30ah budget friendly flooded lead-acid.
- Vmaxtanks SLR125 – 33ah AGM battery perfect for smaller kayaks.
AGM and sealed lead-acid batteries work best, as they can handle repeated deep discharge cycles. Install the battery in a rear tankwell or other protected compartment to keep it clean and dry.
Wiring Components Needed
You’ll need a few wiring components to connect your Helix finder directly to the kayak battery:
- Fuse holder – Protects circuit from power spikes.
- 12V outlet socket – Allows easy Helix connection.
- toggle switch – Disconnects power when not in use.
- Terminals and crimps – For secure wire connections.
- 12-10 gauge wire – Runs power from battery to finder.
Red is positive, black is negative. Add an inline fuse rated for your finder’s max current draw. A 15-amp fuse should suffice for most Helix models. Use tinned marine grade wire for corrosion resistance.
Installing the Wiring Components

Here are the steps to install the wiring harness for your kayak-powered Humminbird:
- Mount 12V outlet near your helm seat for easy plug-in.
- Attach ring terminals to wires and crimp tightly.
- Connect wires to toggle switch input terminals.
- Run wire through conduits from switch to battery terminals.
- Attach fuse holder input wires to battery posts.
- Connect switch output wires to fuse holder.
Take the time to secure and hide wiring so it doesn’t snag while paddling and fishing. Test the system and verify the Helix powers on properly when the switch is activated before finishing the install.
Using the Helix Fish Finder
Once wired to the kayak battery, start using your Helix fish finder just as you normally would. The 12V outlet provides a clean power source and quick disconnect. Remember to turn the toggle switch off after each trip to avoid draining the battery. Some tips for maximizing battery life include:
- Turn sonar transmit power down when in shallow water.
- Lower screen brightness when feasible.
- Turn off GPS when not navigating.
- Close unnecessary menus and views.
With smart settings adjustments and the robust capacity of your onboard battery, you’ll be able to fish from sunup to sundown without any worries about losing power. So go ahead and enjoy all of the Helix’s advanced capabilities knowing you’ve got unlimited battery life at your fingertips!
Use Marine Adhesive for A Secure and Permanent Installation
Installing your new Humminbird Helix fish finder on your kayak opens up exciting new fishing capabilities. But a sloppy DIY mounting job leads to problems down the road. For a professional grade permanent install that will hold up for years, marine adhesive is a must-have. Following some simple adhesion best practices will deliver a rock solid mount to maximize your sonar investment.
Benefits of Marine Adhesive
Rather than relying on screws or clamps alone, adding marine adhesive delivers key benefits:
- Bonds mounting hardware to the kayak for a permanent hold
- Seals around screw holes to prevent leaks
- Absorbs vibration and impact stress
- Compensates for hull curvature and unevenness
- Creates a waterproof barrier to protect mounts
This robust adhesive layer keeps your Humminbird mount secured despite the kayak’s movement and flexing. No need to worry about loosening, leaking or shifting over time.
Choosing the Right Marine Adhesive
Here are some top marine epoxy and sealant choices for GPS and transducer mounts:
- 3M 5200 – The gold standard permanent adhesive, but difficult to remove.
- Loctite PL Premium – Flexible polyurethane formula suitable for electronics.
- Sea Dog Watertight Sealant – Affordable flexible adhesive and sealant.
- JB Weld Marine Weld – Two part epoxy ideal for permanent and waterproof bonds.
Opt for adhesives labeled for marine use, as they resist water damage better. Acrylic, polyurethane and flexible epoxy work well to accommodate kayak flex.
Mounting Location Considerations
Where you choose to place the Helix display and transducer mounts factors into the install:
- Pick a flat spot for best adhesion, like the console or a level deck space.
- The transducer requires contact with the water, so transom is ideal.
- Consider wiring access by choosing a central location.
- Allow room to open battery compartments and hatches.
- Keep away from scuppers, rigging and feet to avoid snags.
Take measurements and test component positioning before final install. Mask off the area around mounts to keep adhesive limited.
Step By Step Installation Process
Follow this process for a clean adhesive mount installation:
- Sand surface lightly to improve adhesion.
- Clean area thoroughly with isopropyl alcohol.
- Apply adhesive to base of mounts.
- Press mounts into place with twisting motion.
- Optional: Use clamps or tape to secure while curing.
- Allow full 24-48 hours for adhesive to cure before use.
Avoid adhesive squeezing into unwanted areas. Use minimal amounts needed for maximum holding strength. Follow all safety and curing instructions for your chosen marine adhesive.
Long Term Maintenance
Your solid adhesive mounts should hold up for years, but inspect them occasionally for any signs of loosening or leaks. Reapply adhesive if any gaps appear between the mounts and kayak surface. Avoid prying or forcing the mounts, as this can break the adhesive bond.
Carefully detach and reinstall toggle switches or wiring plugs to prevent damage over time. Consider adding a layer of dielectric grease to contacts expose to the elements.
With proper marine adhesive selection, mounting location, and installation, your Humminbird Helix will enjoy a secure new home on your kayak. Just be sure to fully cure the adhesive before hitting the water, and perform periodic inspections to maximize the mount lifetime.
Find the Ideal Mounting Solution for Your Kayak and Fishing Style
Avid anglers know that having the right fish finder setup can make all the difference when out on the water. Being able to see underwater structure, locate baitfish, and identify promising spots to drop your line can seriously improve your chances of hooking that trophy catch. But kayak fishing brings its own unique challenges when it comes to mounting and positioning your Humminbird fish finder. With space at a premium in a kayak and the potential for capsizing ever-present, choosing the ideal mounting solution tailored to your specific kayak and fishing needs is crucial.
In this article, we’ll break down the key factors to consider when selecting a kayak mount for your Humminbird Helix 5, 7 or other fish finder model. Whether you prefer casting or trolling from your ‘yak, want maximum adjustability or a simple portable option, there’s a kayak-friendly mount out there guaranteed to take your fish finding capabilities to the next level.
Key Considerations When Choosing a Kayak Mount
Here are some of the most important things to think about when shopping for the perfect Humminbird kayak mount:
- Mounting location – Will it be mounted in front of you for easier viewing while paddling, or off to the side for casting?
- Adjustability – Can you easily tilt and swivel the fish finder to reduce sun glare?
- Stability – Does the mount keep the fish finder locked in place even when conditions get rough?
- Portability – Is it quick and easy to remove the fish finder when transporting your kayak?
- Transducer compatibility – Does the mount work with your preferred transducer type?
- Price – How much are you willing to spend for the features you need?
Also consider the size of your kayak’s cockpit area and what accessories you currently have mounted. You want to select a mount that gives you optimal fish finder positioning without cluttering your space or impeding paddling, casting and landing fish.
Top Mounting Options for Humminbird Fish Finders
From flexible RAM mounts to heavy duty through-hull options, there are lots of great kayak-friendly mounts available for Humminbird Helix and other models. Here are some of the top options on the market to consider:
The Scotty Baitcaster mount is a very popular choice for kayak anglers. It utilizes Scotty’s unique locking system to hold your Humminbird securely in place on either side of your kayak. Widely adjustable, it allows you to fine tune the positioning and tilt angle of your fish finder for optimal viewing. It’s super sturdy yet still removable. One downside is it may not work with some transducer types.
Designed specifically for small craft like kayaks, the Railblaza C-Tug allows quick and secure mounting of your Humminbird to the transom. It utilizes a modular track system that lets you adjust both the height and fore/aft position of the fish finder. The pivoting arm offers 270 degrees of rotational adjustability. It works with many transducers and is easy to detach when not in use.
For the ultimate in adjustability and flexibility, the RAM mounting system is hard to beat. This popular setup uses a round base that can be mounted virtually anywhere in your kayak cockpit. The long double socket arm allows for easy positioning of your Helix unit in front of you. It tilts, swivels and locks securely in place. The modular RAM components make custom mounting solutions a breeze.
Purpose built for kayak fishing, the VisiMount Pro from YakAttack provides a very stable and adjustable platform for your Humminbird fish finder. It utilizes a strong suction cup to temporarily mount to virtually any flat surface on your kayak. The articulating arm offers smooth adjustability with a twist-to-lock system. For rougher conditions, adding the MightyMount upgrade provides a bolted down permanent mounting option.
For a clean, permanent mounting solution, the Scotty Side/Deck Flush Mount is a great option. It recess mounts your Helix unit directly into the deck of your kayak while keeping it fully removable. Adjustability is limited but it offers a very stable setup and clean look. Some drilling or cutting of the kayak deck is required for installation.
Choosing the Right Setup for You
As you can see, there are lots of great kayak mounting choices out there for Humminbird fish finders. The ideal solution comes down to your specific kayak, fishing style and needs.
For example, serious kayak anglers who regularly battle big fish in rough waters may want a permanently mounted through-hull transducer and rock solid deck-mounted fish finder using something like the Scotty flush mount. Weekend warriors needing maximum portability for easy kayak transport may prefer a flexible RAM mount with temporary suction cup transducer.
Think about when and how you’ll be using your Humminbird most – while drifting or pedaling? While casting or trolling? Primarily for finding fish or for navigating? Then choose the mount that allows for optimal fish finder positioning and adjustability for those scenarios. Finding the sweet spot that keeps your Humminbird readily viewable yet out of the way can make a dramatic difference in your kayak fishing success.
With a little planning and smart mount selection, you can have the ultimate Humminbird fish finding setup tailored exactly to your kayak. Then you’ll be fully equipped to locate the best fishing hotspots and reel in those trophy catches all season long!


