How to transform your Cascade S lacrosse helmet into a personalized masterpiece. What materials and techniques are needed for a professional-looking customization. Why proper preparation is crucial for a successful helmet makeover.
The Rise of the Cascade S Lacrosse Helmet
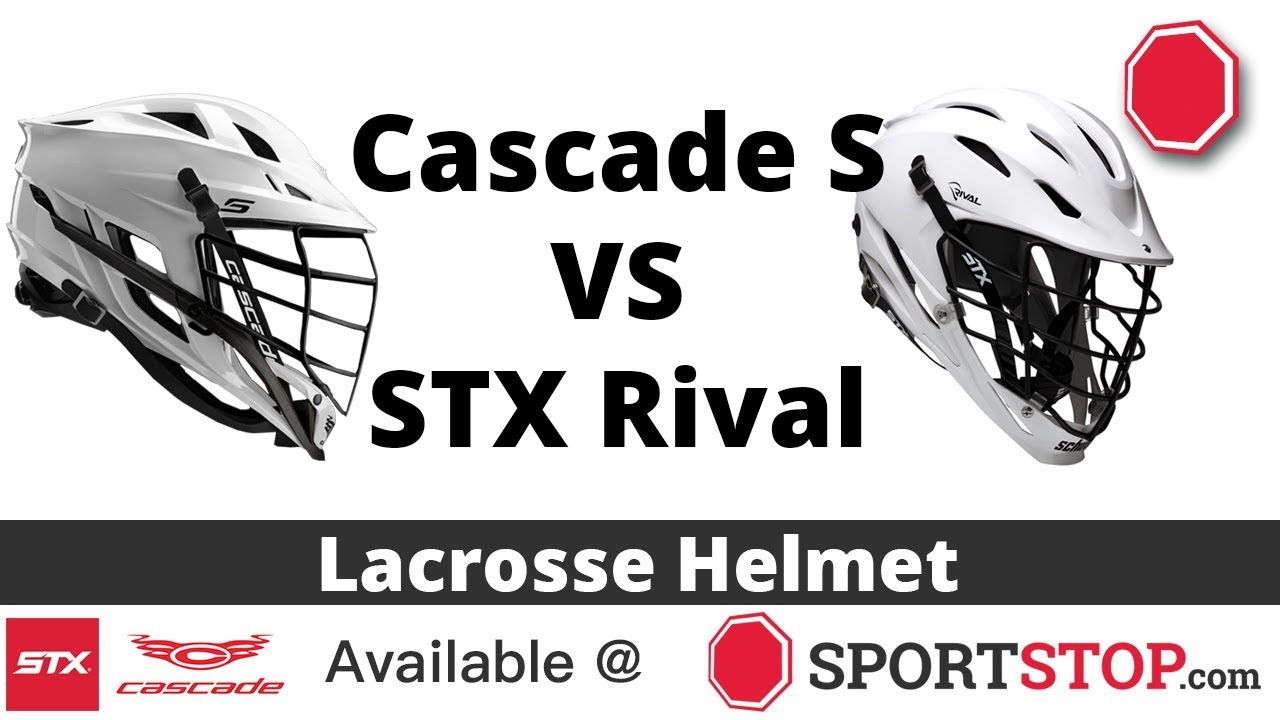
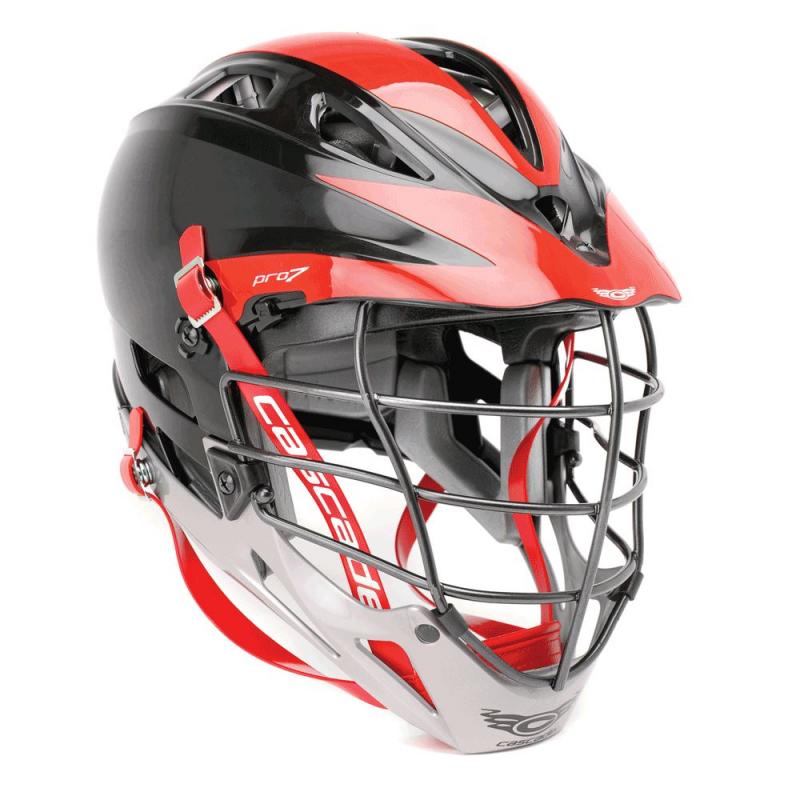
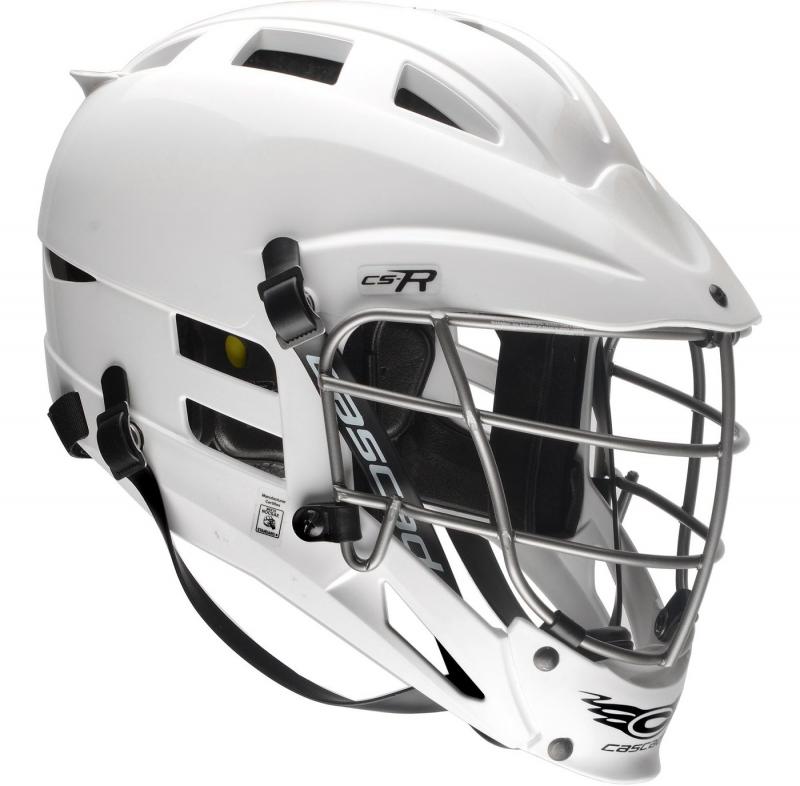
The Cascade S lacrosse helmet has revolutionized protective gear in the sport, becoming a favorite among players at all levels. Its innovative design combines superior safety features with unparalleled comfort and style. But what truly sets the Cascade S apart is its vast potential for customization, allowing players to express their individuality on the field.
Why has the Cascade S gained such popularity? Its lightweight yet durable construction provides excellent protection without hindering performance. The helmet’s sleek profile and advanced ventilation system ensure players stay cool and focused during intense gameplay. Moreover, the ability to personalize every aspect of the helmet, from the shell to the face mask, has made it a canvas for creativity in the lacrosse community.
Preparing Your Helmet for Customization
Before diving into the exciting world of helmet customization, proper preparation is essential. This process involves carefully stripping the helmet of its factory finish to create a blank canvas for your artistic vision.
Stripping the Shell Safely
How do you safely remove the factory graphics and clear coat? Follow these steps:
- Remove the chin strap and any accessories attached to the helmet.
- Use a heat gun to warm the graphics, making them easier to peel away.
- Gently remove the graphics, taking care not to damage the underlying shell.
- Clean the helmet with acetone or paint thinner to remove any residual adhesive.
- Inspect the shell for cracks or defects, repairing any issues before proceeding.
Is it necessary to strip the helmet completely? Yes, a clean slate ensures better adhesion for new paint or tape and allows for a more professional-looking final result.
Essential Tools and Materials for Customization
Selecting the right supplies is crucial for achieving a high-quality customized helmet. Here’s a comprehensive list of materials you’ll need:

Taping Options
- Masking tape
- Vinyl wrap tape
- Helmet wrap kits
Painting Supplies
- Lacquer-based spray paints
- Lacquer thinner
- Primer
- Clear coat
Additional Tools
- Sandpaper (various grits)
- Tack cloth
- Painter’s tape
- Heat gun
- Painting respirator
- Razor blades
Where can you find specialized customization supplies? Many online retailers and lacrosse equipment stores offer kits specifically designed for helmet customization. These kits often include all the necessary materials and can be a great starting point for beginners.
Mastering the Art of Helmet Taping
Taping your Cascade S helmet offers endless possibilities for personalization. This method is particularly popular due to its versatility and relatively low learning curve.
Step-by-Step Taping Process
- Clean the helmet thoroughly and ensure it’s completely dry.
- Plan your design, using painter’s tape to outline sections if needed.
- Start applying tape in small sections, removing the backing carefully.
- Use a razor blade to trim tape edges precisely.
- Press down firmly on the tape to ensure proper adhesion.
- Score carefully around vents, visor screws, and moving parts.
- Apply a clear coat for added durability and shine.
How long does the taping process typically take? Depending on the complexity of your design, taping a helmet can take anywhere from a few hours to several days. Patience is key to achieving a professional-looking result.
Painting Techniques for a Flawless Finish
While painting requires more skill than taping, it offers a smooth, sleek finish that many players prefer. The key to a successful paint job lies in meticulous preparation and the use of high-quality products.
Painting Process Overview
- Scuff the stripped shell with fine-grit sandpaper.
- Clean the surface with a tack cloth to remove dust.
- Apply 2-3 thin coats of primer, allowing proper drying time between each.
- Spray on several thin layers of lacquer paint until fully covered.
- Allow recommended drying time between coats.
- Finish with 2-3 coats of clear lacquer for protection.
How can you prevent paint drips and runs? Work in a well-ventilated area, apply thin, even coats, and maintain the recommended distance between the spray can and the helmet. Never rush the drying process, as this can lead to imperfections in the finish.
Adding Personality with Custom Graphics and Accents
A white base provides the perfect canvas for showcasing your creativity and team spirit. From team logos to personal designs, the possibilities are limitless.

Ideas for Customization
- Apply eye-catching decals along the rear helmet line.
- Use lacquer paint pens to add names, numbers, or slogans.
- Paint vents in team colors for a subtle accent.
- Add racing stripes or other geometric patterns.
- Stencil on your jersey number or team emblem.
- Replace standard visor screws with colorful alternatives.
How can you ensure your custom graphics are durable? After applying decals or hand-painted designs, seal them with a clear coat to protect against wear and tear during gameplay.
Accessorizing Your Customized Helmet
To complete your helmet’s transformation, don’t forget to consider accessories like chin straps and face masks. These elements can enhance your overall design and provide additional opportunities for personalization.
Chin Strap Customization
Many lacrosse specialty stores offer adjustable chin straps in various colors. For a truly unique look, you can even spray paint your chin strap to match your helmet design. Ensure any paint used on the chin strap is flexible and won’t crack or peel with use.
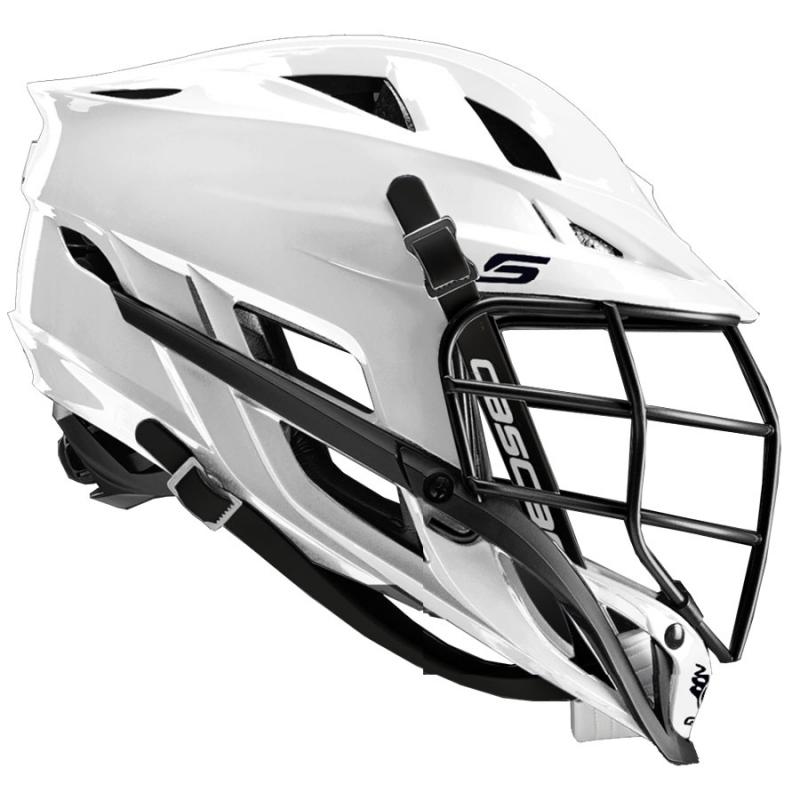
Selecting the Perfect Face Mask
The face mask is a crucial component of your helmet’s overall aesthetic. Options include:
- Chrome finishes for a sleek, modern look
- Solid black for a classic appearance
- Colorful metallic finishes to complement your design
- Printed patterns for added flair
Can you mix and match pieces from different brands? Absolutely! Many players combine elements from various manufacturers to create a truly one-of-a-kind helmet setup.
Protecting Your Masterpiece: The Importance of Clear Coat
The final step in customizing your Cascade S helmet is applying a protective clear coat. This crucial layer safeguards your hard work against wear, fading, and damage during play.
Clear Coat Application Tips
- Lightly scuff the painted or taped surface with fine-grit sandpaper.
- Clean the helmet thoroughly with a tack cloth.
- Apply 2-3 light mist coats of lacquer-based clear coat.
- Allow proper drying time between each coat.
- Avoid over-spraying, as thick layers can bubble and peel.
How many coats of clear lacquer are necessary? Typically, 2-3 thin coats provide adequate protection without compromising the helmet’s appearance or structural integrity.
By following these comprehensive guidelines, you can transform your Cascade S lacrosse helmet into a unique piece of equipment that not only protects you on the field but also showcases your personal style and team spirit. Remember, the key to a successful customization lies in patience, attention to detail, and using high-quality materials. With practice and creativity, your helmet will become a true reflection of your passion for the game.
Introduce the Cascade S and its popularity among lacrosse players
The Cascade S lacrosse helmet has become the gold standard in lacrosse protective gear over the past decade. Its sleek yet protective design offers top-tier safety without sacrificing comfort or style. Lacrosse enthusiasts love the customization options the S provides – from changing visors to swapping face masks. But one of the most popular ways to put your own stamp on a Cascade S is to customize the helmet shell itself.
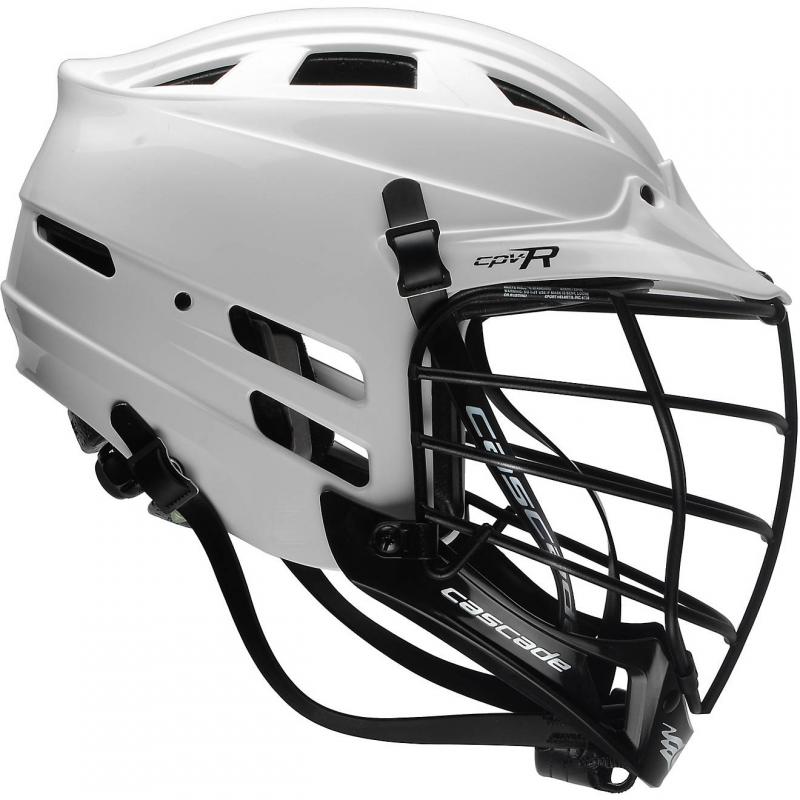
Painting or taping your helmet white opens up a world of possibilities for personalization. A white base allows team logos, designs, and accent colors to really pop. It also gives off an intimidating, stormtrooper vibe on the field. However, transforming your shiny new lid into a blank white canvas takes some care and precision.
Stripping the shell safely is step one
Before applying any new paint or tape, you’ll need to strip the factory graphics and clear coat. Taking shortcuts here can damage the shell material, so caution is key.
Start by removing the chin strap and any attached accessories. Then use a heat gun to warm the graphics, slowly peeling them away from the shell beneath. Next, scrub the helmet with acetone or paint thinner to remove leftover adhesive residue.
With the shell stripped bare, inspect for any cracks or defects. The integrity of the helmet must remain intact for safety, so repair any flaws before proceeding.
Picking the right tools and materials is essential
For a smooth painted or taped finish, choose quality supplies designed specifically for plastic surfaces. Investing in the right tools will save headaches down the road.
Taping options: Masking tape, vinyl wrap tape, helmet wrap kits
Paint options: Lacquer-based spray paints, lacquer thinner, primer, clear coat
Other: Sandpaper, tack cloth, painter’s tape, acetone, heat gun, painting respirator
Shop around online to find lacrosse customizers selling specialized tape and paint kits. They’ll include everything needed to get it done right.
Applying tape takes time and patience
Starting with a blank canvas means taping up your helmet offers endless possibilities. Vibrant colors, funky patterns, team logos – if you can imagine it, you can likely tape it.
Take your time removing backing and applying tape in small sections. Use razor blades to trim tape edges. Press down firmly to adhere tape and carefully score around vents, visor screws, and moving parts.
Finish by applying a clear coat to add durability and sheen. Spray in light coats, allowing proper drying between.
Painting requires proper preparation and products
Painting a lacrosse helmet takes more skill but offers a smooth, sleek finish. Prep work is crucial for good adhesion and preventing drips or runs.
Lightly scuff the stripped shell with fine sandpaper. Then clean with a tack cloth. Apply 2-3 thin mist coats of primer, allowing proper dry time between coats.
When primed, spray on several thin lacquer paint layers until fully covered. Again, patiently allow the recommended drying time between coats. Finish with 2-3 coats of clear lacquer.
Removing face masks and vents prevents splatters and clogs. Drape painter’s tape around edges for clean lines. Wipe away any drips immediately and never rush the drying.
Add personality with color accents and custom graphics
A white helmet is the ideal canvas to make your mark. Lacrosse fanatics express themselves by decking out their lids in team colors and one-of-a-kind designs.
Rep your team pride with eye-catching decals along the rear helmet line. Paint on names, numbers, slogans, or inside jokes using lacquer paint pens. Swap out visor screws for colorful alternatives.
Some other ideas: Paint the vents in team colors, add racing stripes, or stencil on your jersey number. Let your imagination run wild!
Trick out the chin strap and mask for the full effect
Completing the look means accessorizing beyond the shell itself. Custom chin straps and face masks can really make your helmet pop.
Lacrosse specialty stores sell adjustable straps in a rainbow of colors. Or go bold by spraying your strap to match a painted design.
Finding a face mask that complements your helmet is key. Chrome, solid black, even colorful metallic and printed masks are available. Don’t be afraid to mix and match pieces from various brands.
Seal the deal with a protective clear coat
No helmet makeover is complete without a clear coat sealing the deal. This keeps paint and graphics from wearing or fading over time.
Use a lacquer-based clear coat, applying around 2-3 light mist coats. Be sure to prep first with fine scuff sanding and tack cloth cleaning. Follow all drying times.
Avoid over-spraying clear coat, as thick layers will bubble and peel. You want just enough to protect the helmet while maintaining visibility and venting.
Safety first – check comfort and compliance
Before taking your transformed helmet onto the field, ensure safety standards are still met. Customization should never interfere with foam pads or inner lining.
Reinstall all components like masks and visors correctly after painting. Make sure any added paint or tape does not block vent holes or loosen parts.
Test the fit afterward and check for impaired vision or discomfort. Address any issues immediately to avoid injury.
Change designs over time by tweaking or removing finishes
One advantage of lacrosse helmet makeovers is the ability to easily change them up each season.
Vinyl tape can be carefully peeled off without damage. Paint can be stripped for a whole new look.
Use the same safe removal methods described earlier, utilizing heat guns, acetone, etc. Start fresh by sanding away remaining tape adhesive or paint.
Teen players often overhaul their helmets year to year as tastes and styles evolve. Have fun changing the design as often as you’d like.
Keep that white helmet gleaming with proper cleaning
A custom lacrosse helmet only looks great with consistent care and cleaning. Over time, dirt, scratches and scuffs can occur.
Use a gentle cleaner and microfiber cloth to wipe down the helmet after each use. Avoid harsh chemicals that could damage paint or graphics.
For deeper cleaning, use a plastic-safe foaming cleaner. Rinse thoroughly. Re-apply clear coat if needed to refresh the look.
Coordinate your gloves, pads, cleats, and more
For maximum effect, extend your helmet design across other gear like pads, gloves, bags, and cleats. Visually echoing colors and patterns pulls the whole look together.
Many brands offer complementary products so mixing and matching is easy. Customizers can often color-match paints and tapes across equipment as well.
On game days, don your dazzling helmet with pride. A lacrosse wardrobe this coordinated is sure to elicit envious looks.
Final thoughts
With some careful prep and the right tools, transforming a Cascade S into a blank canvas is achievable for any player. Let your personality shine through with a one-of-a-kind white lacrosse helmet makeover.
Just be sure to seal the deal properly for lasting durability. And above all, never sacrifice safety for style when crafting your custom lacrosse look.
Discuss the benefits of a white helmet color
When customizing a Cascade S, one of the most sought-after looks is an all-white shell. While bold team colors and designs have their merits, there are several advantages to going with white as the base.
Firstly, white helmets simply look incredibly sleek, especially paired with contrasting facemasks. The stormtrooper vibe gives off an intimidating, no-nonsense feel on the field.
White also makes the perfect canvas to layer on accent colors, stripes, logos and more. Vibrant graphics really pop against a white background, creating eye-catching lacrosse lids.
There’s also some science behind white helmet colors improving visibility. Studies have shown white gear allows players to more easily track teammates on the field peripherally. Increased visibility could potentially help reduce collisions.
White helmets also don’t absorb as much heat from sunlight as darker colors. This keeps players cooler and more comfortable on hot, sunny game days.
And of course, white lacrosse helmets simply ooze old-school swagger. They conjure images of legendary players from generations past decked out in classic white Schutt and Cascade lids.
Start with a high-quality white wrap kit
Rather than painting, starting with a pre-made white helmet wrap kit gets you to the blank canvas stage quickly. These sets provide everything needed for a smooth finish.
They include sheets of durable vinyl helmet wrap material, application solution, squeegees, and trim tools. Multiple sets may be needed for full coverage.
White helmet wrap kits take patience to install smoothly but provide a fast track to the perfect white lid.
Take time removing factory graphics for a flawless foundation
As mentioned earlier, properly stripping the original finish is crucial before respraying or wrapping in white. Rushing this risks imperfections.
Slowly heat and peel decals, being careful not to damage the shell. Use plastic razor scrapers on stubborn spots.
Thoroughly clean all residue adhesive with acetone or paint thinner. Any remaining tackiness will ruin the white finish down the road.
Sand and prime for maximum paint adhesion
Prepping for spray paint requires lightly sanding the bare helmet to help the lacquer adhere properly. Start with 600 grit and work up to 1000.
After a final cleaning, apply two coats of adhesion-promoting primer. Lacquer paint bonds best over a coat of compatible primer.
Rushing to simply spray paint over factory graphics spells disaster. Proper prep makes all the difference for a smooth, lasting finish.
Carefully layer tape and wrap leaving no bubbles or ripples
Helmet wrap kits involve meticulously layering precut vinyl sheets over every inch of the lid. Take it slow.
Use the included applicator solution to slick the surface so the wrap can shift into place. Carefully squeegee out any air pockets or bubbles as you go.
Around visor screws, vents, and moving parts, make small X-acto slices so the wrap can flex naturally. Don’t leave creases or ripples.
Clear coat adds protection for the long haul
No white makeover lasts without a clear coat to protect paint and graphics from scratches and wear.
Use thin, even mist coats of a compatible lacquer clear coat. Two to three layers provides ideal protection without looking thick or tacky.
On wraps, spray clear coat over the vinyl finish to seal the deal. This prevents fading and makes removing the wrap later much easier.
Re-apply fresh clear coat each season for maximum durability. On paint jobs, scuff and re-coat as needed over the years.
Minimal designs have maximum impact
When starting with a white helmet palette, less can be more in terms of adding team colors and graphics.
Simple but bold stripes along the rear helmet line pack a major visual punch. Leave the rest white for a classic throwback look.
Stick to two or three team colors only. Complex designs can clash against white. Keep logos and accents big and legible from a distance.
Or go for the ‘ghosted’ approach, using matte decals and designs in lighter shades that subtly stand out against the white.
Safety checks ensure the helmet still performs
Before taking a customized lid out on the field, check for any potential safety risks or comfort issues.
Ensure wrap or paint hasn’t weakened the shell or made it more prone to cracking. Verify all components like pads and visors still fit and function correctly.
Test vision, ventilation, and fit with the redesigned helmet on. Address any problems like impaired sight lines or discomfort immediately.
Minor tweaks to paint or graphics may be required to ensure the helmet still protects properly after customization.
With some informed planning, you can design a showstopping white lacrosse helmet that still offers crucial impact protection out on the field.
Explain how to remove factory graphics safely
Transforming a shiny new Cascade S into a blank canvas for customization starts with safely removing the factory graphics. This process requires some care to avoid damaging the helmet shell.
Start by detaching any chin straps, masks, or accessories attached to the helmet. You’ll have easier access to the entire shell this way.
Use a heat gun to gently warm the plastic shell and factory decals. As the adhesive softens, slowly peel decals away at a shallow angle.
For smaller decals or intricate graphics, use a plastic razor blade to help lift edges. Just be cautious not to dig into the shell.
Next comes tackling leftover sticky residue. Use isopropyl alcohol or acetone applied with a cloth to scrub away any remaining adhesive. This prevents graphics from re-adhering later.
Avoid harsh chemicals like paint thinner for this step, as they could damage or soften the helmet material. Take your time removing every last bit of residue.
Once stripped, examine the naked shell for any cracks, gouges or other defects needing repair before painting or wrapping.
Let solvents do the work dissolving strong adhesives

Some factory graphics use stubborn adhesives that resist heat or scraping. Solvents help safely dissolve the glue so decals peel away effortlessly.
Test solvents like isopropyl alcohol, acetone or mineral spirits on a small area first. Gently rub with a cloth, allowing time for them to penetrate and loosen the adhesive.
With the decals softened, warm them again with a heat gun and slowly peel away from the shell. The process just requires additional time and patience.
Avoid scraping orscratching the shell surface
It may be tempting to speed things up by forcefully scraping at decals with the edge of a razor blade. But this risks marring or gouging the helmet’s surface.
All scraping motions should be shallow and against the decal edges. Never dig the blade directly into the shell material.
If decals won’t lift easily with solvents and warming, apply more heat and reintroduce the solvent to further soften the adhesive. Forced scraping causes irreparable damage.
Take precautions when using chemical solvents
Chemical solvents like acetone, mineral spirits, and lacquer thinner can be hazardous if used improperly. Take safety measures when handling.
Work in a well-ventilated area and use appropriate skin and eye protection. Limit exposure to fumes.
Never soak helmet decals directly in solvents as they could penetrate interior foam or damage the shell material. Instead, apply solvents sparingly with a cloth.
Read all warning labels and heed proper usage directions. Be patient – let the chemicals do the work dissolving adhesive versus aggressively scraping.
Repair any shell flaws before customizing
Inspect the stripped helmet closely under bright light for any small cracks, holes, or other damage that may have occurred.
Repair any flaws using epoxy resin specifically formulated for plastic. Avoid superglues or duct tape, which won’t bond helmet surfaces reliably.
Proper shell repair now prevents bigger headaches after spending hours customizing a compromised helmet. It ensures your lid remains safety certified for play.
With the shell restored to flawless condition, you’re ready to tape, paint, wrap or customize freely knowing the foundation is solid.
By removing factory graphics cautiously and fixing any existing defects, your blank Cascade S canvas will be prepped for endless custom lacrosse style.
Recommend tools needed to customize the helmet (tape, paint, decals etc.)
Customizing a lacrosse lid requires having the right supplies on hand for the material and technique chosen. Investing in quality tools suited for helmet surfaces ensures you can create designs safely with stellar results.
For taping:
- Helmet wrap kits with vinyl sheets, solution, squeegees
- Masking tape, preferably for curves
- Striping tape in team colors
- Helmet wrap application tools like felt squeegees
For painting:
- Primer formulated for plastic
- Lacquer-based spray paints and clear coat
- Sandpaper, 600-1000 grit
- Tack rags
- Painter’s tape
- Acetone or paint thinner
- Respirator mask
For decals and touches:
- Helmet sticker kits
- Lacrosse logo and number decals
- Paint pens for custom details
- Colored helmet hardware like visor screws
Other essentials:
- Plastic razor blades
- X-Acto knives
- Paper cutter or vinyl cutter
- Heat gun
- Isopropyl alcohol
- Microfiber cloths
Buy products designed for helmet use
Using art or automotive grade paints and tapes leads to disappointing results on helmets. Purchase materials specifically made for decorating plastic gear.
Seeking out trusted brands ensures you get supplies formulated to flex and adhere smoothly over compound curves and textures.
Quality tape eliminates bubbles and lifting
Cheaper vinyl tapes cling inconsistently and lift over time. Invest in premium helmet wrap tape kits that lay down smoothly with no bubbles or creases.
The tape should gently stretch and conform over complex helmet contours without the need for cuts or seams.
Sandpaper preps the shell for paint adhesion
Lightly scuffing the helmet with fine 600-1000 grit sandpaper allows spray paint to bond tightly. Skipping this step risks chipping and peeling.
Work in small areas to create just enough roughness for paint to adhere without damaging the shell material.
Primer enhances paint bond and color vibrancy
Quality primer coats help the finish paint coat stick while providing an even base color. Primers made for plastic gear work best.
Applying lacquer paints directly over factory graphics spells certain failure down the road. Primer is essential.
Researching the optimal products for helmet finishes prevents wasting time and money on the wrong tools and materials.
Provide tips for taping or painting the shell white
Achieving a smooth, flawless white lacrosse helmet requires careful prep and technique whether taping or spray painting. Keeping these tips in mind helps ensure eye-catching results.
For taping:
- Thoroughly clean the shell first for maximal tape adhesion
- Use a heat gun during application to make tape more pliable
- Measure and cut tape lengths using a sharp blade before adhering
- Apply tape slowly, rubbing out air pockets as you go with a felt squeegee
- Use an X-Acto knife to slit tape at visor screws, vents, and moving parts
- Apply a lacquer clear coat over the full taped helmet to seal and protect the finish
For painting:
- Sand the shell lightly with 600 grit sandpaper before priming
- Apply two coats of plastic adhesion-promoting primer
- Use multiple thin mist coats of lacquer spray paint to build up white coverage evenly
- Allow proper drying time between coats as specified on the can directions
- Mask off visors, vents, and edges with painter’s tape for clean paint lines
- Finish with 2-3 coats of clear lacquer for protection
Stretch and heat tape for smooth wrapping
Pre-stretching helmet wrap tape by hand and warming it with a heat gun allows the material to form around compound curves flawlessly.
The warmth also lets you peel and reposition tape pieces until they lay just right with no bubbles beneath.
Limit seams using longer tape strips
Measure and cut larger tape segments that can cover multiple helmet panels in one piece. This minimizes seams.
Strategically place the few necessary seams along ridges and edges to help conceal them. Careful planning reduces overlaps.
Thin coats prevent paint drips and sags
When spray painting lids white, use several thin mist coats rather than trying to get full coverage in one thick coat.
Thin even layers look smoother and are less likely to sag or drip on vertical surfaces before drying.
Mask off elements staying original colors
Prevent overspray and paint buildup on facemasks, vents, and visor mounts by carefully masking them off with painter’s tape.
This keeps these components in their original colors while allowing the shell to be painted cleanly white.
Taking the time to properly prep surfaces and apply quality materials in thin layers leads to custom white lacrosse helmet finishes that impress.
Suggest accent colors that will pop against the white

A fresh white helmet provides the perfect canvas to make school colors, designs, and accents really stand out. Certain shade combos create instant eyecatching style.
Deep hues like navy, forest green, burgundy, and metallic colors contrast flawlessly against a white background. They attract attention from all angles.
Combining just two or three team colors keeps the look bold yet clean. Avoid busy color schemes that clash with white.
Brighter shades can work too if balanced well. Electric yellow, neon orange, bright turquoise, or lavender accents make bold statements.
Use color to accentuate helmet features
Strategic color blocking on specific helmet parts draws the eye. Outline visor screws, vents, and rear helmet lines in a contrasting color.
Paint the facemask or add helmet stripes in a secondary color that complements the white shell.
Incorporate metallic finishes for flash
Metallic silver, gold, blue, purple or red used minimally as accents give off an edgy vibe against white. They add visual depth and interest.
Metallic paint pens allow hand painting small logos and designs with a chrome-like finish. Use metallics sparingly for ideal effect.
Echo colors on multiple gear pieces
Carrying accent colors over onto gloves, pads, practice jerseys, bags and more creates a fully unified custom look.
Coordinate helmet colors with tape or embroidery on various lacrosse gear. Consistent hues tie everything together.
Experiment with colorblocking and gradients
For unique style, try colorblocking helmet sections in different tones. Or utilize paint fades and gradients across large areas.
These advanced effects make for eye-catching lacrosse lids. Just maintain color scheme cohesion for the boldest impact.
Trusting basic color theory principles helps guarantee your white helmet and bold accents achieve a cohesive, polished aesthetic on the field.
Advise on adding custom decals and logos
Logos, numbers, slogans – custom vinyl decals let players emblazon their helmets with personal flair. Properly applying and sealing decals ensures they withstand the rigors of gameplay.
Have any important decal designs, names or numbers copied or digitally printed onto helmet-grade vinyl by a sign shop. Outdoor-rated vinyls endure better than basic stickers.
Thoroughly clean the shell first where decals will be placed. Gently heat the helmet surface to help them adhere smoothly and permanently.
Slowly remove decal backings, keeping designs intact. Carefully position and press down firmly. Use a squeegee to smooth and seal edges.
For extra insurance, seal decals by spraying clear lacquer over the top. This prevents lifting or peeling from helmet impacts.
Less is more with logos and text
Visually busy decals compete with the helmet design. Keep logos, numbers and wording simple and sparse for best results.
Place larger primary decals on side panels, avoiding curved areas. Use smaller accents across the back or chin.
Paint pens enhance and personalize decals
Hand paint player numbers, names or accents onto printed vinyls before adhering. Paint pens easily write on slick surfaces.
Outline decals in a contrasting color for added pop. Match painted accents to facemask or chin strap hues.
Properly prep curved surfaces
Applying decals smoothly across rounded helmet sections takes finesse. Generously heat curves to soften the vinyl and underlying shell.
Gently stretch decals around contours as you adhere them. Work slowly and reposition as needed until perfectly set.
With deliberate designs and care applying decals, you can embellish blank white lacrosse lids with eye-catching logos and classic style.
Share ideas for personalizing the chin strap and face mask
Completing the custom lacrosse lid look means accessorizing with a personalized chin strap and coordinated face mask.
Replacing the standard strap with an adjustable nylon or leather strap in a cool color adds flair. Or choose a printed strap with checkered, camo or paisley patterns.
For easy color matching, use lacquer paint pens to paint or hand-detail the original strap. Thin coats prevent stiffness.
Face mask possibilities are endless too. Opt for a chrome, flat black, or color metallic cat-eye look. Or attach a printed mask with tribal, flag or animal graphic designs.
You can also remove the standard mask and replace it with a custom printed 3D face mask. These innovative masks make bold statements.
Add length and style with a braided leather lace
Swap out the basic nylon chin strap for a woven leather lace strap in colors like black, brown or tan. This adds a vintage vibe.
Leather laces allow length adjustability for comfort. Weave lengths through vents for security and a unique look.
Use coordinating helmet hardware components
Swap plastic chin strap clips, visor bolts and vent screws for colored aluminum versions echoing helmet paint hues.
Anodized or powder coated hardware in bright metallic shades adds an intriguing accent touch. Match or complement shell colors.
Don’t neglect the back of the helmet
The rear shell area offers prime real estate for personalization too. Add name, number or inspirational quote decals across the back.
Paint on your jersey number large enough to see from the stands. Or apply a bold slogan expressing your lacrosse mentality.
Wielding tape, paint, and decals for next-level customization, any blank white helmet can become an edgy extension of your lacrosse style.
Explain how to properly clear coat the finished helmet
A clear coat finish protects the paint, graphics and decals on your customized lacrosse lid. Applying clear coat properly ensures the design holds up all season long.
Plan to spray at least 2-3 thin mist coats of a compatible lacquer clear coat for best coverage and durability.
The helmet must be completely clean before clear coating. Gently scrub with isopropyl alcohol and allow to fully dry.
Lightly scuff any paint with 600 grit sandpaper first to help the clear coat adhere. Wipe clean with a tack cloth after sanding.
Position the helmet securely on a stand or holder to allow access to all areas. Drape painter’s tape around edges if needed.
Shake the clear coat can vigorously for 2 minutes before spraying. Hold 10-12 inches away and apply even mist coats across all painted surfaces.
Between coats, allow 5-10 minutes drying time or as directed on the can. Gently heat drying with a blow dryer speeds the process.
Inspect closely and add additional light coats to any thin or missed spots. The final clear coated finish should look smooth and consistent.
Don’t overdo it with clear coat
Applying excessive clear coat leads to runs, drips and visible brushstrokes as it dries. Stick to 2-3 thin, even coats only.
Over-application also causes yellowing and clouding over time. Too much clear coat ultimately looks worse.
Allow proper cure time before use
Most lacquer clear coats take 24-48 hours of cure time until fully hardened. Gently handling the helmet until completely set prevents ruining the finish.
Rushing to bolt on facemasks or chin straps too soon risks sticking to uncured clear coat layers.
Refresh clear coat between seasons
As lacrosse helmet finishes wear from use and UV exposure, plan to re-apply fresh clear coat each new season.
This ensures graphics remain crisp and the finish retains its protective qualities over years of play.
With conscientious preparation and application of clear coat, your helmet makeover will stay looking bold and beautiful all season long.
Caution against damaging foam or safety components
While personalizing your lacrosse helmet, it’s crucial not to compromise the protective qualities and safety certifications in any way.
The inner foam padding and suspension system absorb impact and cushion blows to the head. Paints, adhesives or drilling holes could render them ineffective.
Never remove or alter the factory-installed foam or interior harness system. Only swap removable components like facemasks and visors.
Use extreme care around ventilation holes – don’t allow paints or solvents to seep inside. Blocking air flow reduces safety.
Avoid paints and solvents on inner surfaces
Painting the shell risks splatter and overspray reaching the helmet interior if you’re not extremely careful.
Chemical solvents used to remove decals or residue can also harm foam and fabric linings if used improperly.
Completely mask off all interior surfaces before painting. Check for paint seepage once finished and remove immediately.
Prevent added weight from paint buildup
Excessive layers of paints and clear coats make helmets dangerously heavier. This strains neck muscles and offsets the balance.
Use the minimum light mist coats needed to achieve desired colors. Don’t go overboard just to correct drips or unevenness.
Ensure proper air ventilation
Blocking side vents with paint, decals or tape interferes with helmet airflow and potentially overheats players.
Carefully cut any taped graphics around vents. Paint vent areas last and remove any accidental overspray.
Customization should never take precedence over safety. Take precautions so creative touches don’t become dangerous liabilities.
Advise testing comfort and fit after customizing
Getting a new lacrosse helmet can be an exciting experience, especially if you choose to customize it and make it your own. The Cascade S is a popular choice among lacrosse players at all levels, known for its lightweight yet protective design. If you decide to deck out your new white Cascade S with some personal flair, there are several things to keep in mind to ensure proper fit and comfort once the customization is complete.
When ordering a custom lacrosse helmet, it’s important to first select the correct size based on the manufacturer’s sizing charts. Even though you plan to customize it later, you want the base helmet to fit properly off the shelf before adding any decals, visors, or additional padding. Be sure to measure your head circumference accurately to choose the size that will provide a snug yet comfortable fit right out of the box.
Many lax players love to add decals and designs to their helmets to show off team pride or just get a unique look on the field. When applying decals, stick to smooth surfaces like the side panels or visor rather than areas that need to flex and move. Avoid wrapping decals all the way around curved edges or covering ventilation holes, as this can constrict movement. Apply decals smoothly and securely, but don’t overstretch the material or create bubbles that could cause discomfort.
Adding a tinted visor is another popular customization for lacrosse helmets like the Cascade S. Visors can help reduce glare on sunny days but shouldn’t interfere with your field vision or peripheral sightlines. Carefully apply the adhesive visor without pulling too tightly or creating distortions. You want it to lay smoothly across the opening. Test it out in daylight to ensure it provides the visibility and eye protection you need.
To pump up team spirit, many players add custom padding or chin straps in team colors. Make sure any padded additions are secured well and don’t protrude in a way that would impact fit. Chin straps should lie smoothly under the chin and not create pressure points. If your custom padding makes your helmet fit too snugly, you may need to remove some of the factory padding to compensate.
Lacrosse ear guards also provide opportunities for customization in team colors or patterns. Ensure any aftermarket ear guards you install fit properly within ear openings and don’t put pressure on parts of the ear. Ill-fitting ear guards can cause significant discomfort during play. Take the time to adjust until the ear guards sit well within your Cascade S helmet.
To complete the look, adding custom nameplate decals can let everyone know your name and number. Place these decals strategically out of the way of ventilation openings or areas that flex. Avoid large name plates that wrap from one side to the other, as these can impede movement. A properly placed name decal will let you show off your identity without compromising fit.
Before taking your customized Cascade S onto the field, spend some time testing the fit and ensuring comfort. Wear it around the house for short periods, being mindful of any tight spots or rubbing that could become irritating with active play. If you notice the helmet rocking side-to-side or tilting back, you may need to readjust interior padding to stabilize the fit.
Getting the right lacrosse helmet fit is critical for protection. Even if you customize with decals, visors, padding, and other add-ons, the helmet shape and interior foam should still conform comfortably to your head. Take the time to test out your new custom white Cascade S with some practice to ensure optimal comfort and performance.
With the right custom elements added thoughtfully, your white Cascade S can become an extension of your identity while still providing the top-tier protection you expect from Cascade. A properly fitted and customized helmet gives you the best of both worlds – stylish aesthetics and functional performance. Break in your new custom gear before game time so you can hit the field with confidence and focus on playing your best.
Discuss removing or altering custom finishes later on
When you first customize your new white Cascade S lacrosse helmet, it’s easy to get carried away with decals, designs, and other personal touches. But after some time playing in your decked-out lid, you may find that some of those custom elements need to be changed or removed altogether.
Lacrosse helmets take a beating during high-intensity games and practices. All that wear and tear can cause certain custom add-ons to lift, peel, or fall off over time. Vinyl decals and stickers in particular can start peeling at the edges or lose adhesion from helmet flexing and contact. Regularly check all your custom decals for any lifting, bubbling, or peeling that compromises stickiness.
If you notice a decal coming loose, remove it completely and clean the surface thoroughly. Apply a fresh new decal in that spot using the manufacturer’s recommended adhesive promoter and application technique. Take care not to wrap decals around curved edges or cover ventilation holes that could obstruct helmet function.
Tinted visors are another popular custom element that may need maintenance. Helmet visors can become scratched or fogged with use, distorting vision. Carefully remove the old visor and replace it with a fresh replacement for optimal visibility. When applying the new visor, avoid pulling it overly tight or creating distortions in the shape.
Over time, the sun’s UV rays can also cause tinted visor color to start fading. If your custom colored visor seems less vibrant or changes hue, a replacement will bring back that bold customized look. Just be sure the new visor tint doesn’t obstruct your vision or reduce light transmission too much.
Custom padding and chin straps are trickier to change once your helmet is broken in. But if these elements are visibly damaged or deteriorating, they may need replacement. Swap out dingy chin straps for clean new ones in your custom colors. Shop for replacement padding sets if the original foam compresses too much over time.
If the fit of your helmet changes with use, you may need to remove some interior padding to maintain the ideal snug fit. Carefully remove and replace foam padding closest to pressure points or discomfort. Never remove padding that compromises the helmet’s protective abilities.
Ear guards often see a lot of wear and tear as well. The repetitive contacts of play can cause ear guards to tear or deform, affecting comfort and fit. Check for splitting seams, foam compression, or loose-fitting guards. Replace damaged ear guards with new ones that insert securely into the ear openings as designed.
To avoid damage, lacrosse helmets must be stored properly when not in use. The helmet’s shape can become accidentally deformed if tossed in a bag or crammed into a crowded locker. Store your Cascade S on a wide, sturdy shelf or use a helmet rack to maintain its structural integrity.
Even with proper care, the customs on your Cascade S won’t look brand new forever. But some players like the battle-scarred look of a well-worn helmet. If signs of wear don’t obstruct visibility or compromise safety, you may choose to embrace the weathered aesthetics.
However, most manufacturers recommend replacing lacrosse helmets every two years or so. The materials degrade with use and may not rebound as well after repeated impacts. When it’s time for a new lid, you’ll get to customize all over again!
Your white Cascade S lacrosse helmet is your own personal statement out on the field. Like any prized sporting equipment, take some time to regularly inspect and maintain those custom elements you added. Address any looseness, tearing, or wear immediately so your customization always looks on point.
With a little care and maintenance, your pimped out Cascade S will represent your style and spirit game after game. And when it’s finally time to retire that battered helmet, have fun designing the next customized lacrosse lid that showcases your passion for the sport.
Recommend properly cleaning and maintaining the helmet
A custom painted and decaled lacrosse helmet like the Cascade S represents your personal style. But to keep it looking fresh, that helmet needs proper periodic cleaning and maintenance. Following the manufacturer’s care guidelines helps preserve the paint, decals, padding, and structural integrity of your customized lid.
Start by regularly removing and hand washing the helmet liner and chinstrap. Use mild soap and cool water, then let the parts fully air dry before reinstalling. This helps eliminate odor-causing bacteria from sweat and dirt accumulation.
About once a month, do a thorough exterior cleaning of the shell. Remove any loose dirt first with a soft brush or microfiber cloth. Then use a gentle all-purpose cleaner on the exterior surfaces, avoiding harsh chemical cleaners that could damage paint or decals.
If your helmet has a polycarbonate shell, ammonia-based cleaners are not recommended as they can weaken the material over time. Follow any special cleaning directions for your particular helmet material and custom finishes.
When cleaning the shell exterior, use smooth circular scrubbing motions and uniform pressure. This will lift dirt from the indentations in the shell pattern without abrasion. Rinse thoroughly with clean water and pat dry with a soft towel.
Inspect decals during cleaning for any signs of wear, lifting edges, or reduced adhesion. Reapply or replace decals promptly to prevent loss. Avoid picking at peeling edges, which can tear decals.
Use a dry soft cloth to gently wipe tinted visors, removing dust and grit that can scratch the surface. Visor scratches can quickly obscure vision, so address any minor scratches right away with light buffing and polishing.
For deeper cleaning, tinted visors can be removed and submerged in warm water mixed with a small amount of dish soap. Let soak briefly then rinse under cool water. Dry with a microfiber lens cloth to avoid scratches.
Foam padding on the helmet interior is best spot cleaned as needed with a little mild soap solution on a damp sponge or cloth. Don’t remove this padding for washing, as getting it completely dry before reinstalling is difficult.
Air dry your helmet thoroughly after cleaning, both inside and out. You want no moisture lingering to allow mold or mildew growth. Place it on a vented helmet stand or store with the vents open until fully dry.
Proper helmet storage between games and practices helps maximize the life of your custom lacrosse lid. Choose a room temperature area away from direct sun, as heat and UV light accelerates degradation.
Never stack gear bags or other equipment on top of your stored helmet. The weight can misshape the shell or visor. Use a helmet rack or shelf space where it won’t fall or suffer impact.
Regular inspection is also key for well-maintained gear. At least monthly, check for signs of wear including: chipped or worn paint, loose or missing screws, stretched chin straps, deteriorating padding, and any cracks or dents in the shell.
Replace parts promptly as needed, following all manufacturer instructions carefully. Never try homemade repairs on a damaged shell, as these will compromise safety.
With routine cleaning and attentive inspections, your customized Cascade S can deliver season after season of reliable performance and stand out style. Take good care of your helmet and it will take good care of you game after game.
List ideas for coordinating your gloves, pads, cleats etc.
You chose the white Cascade S for your new lacrosse helmet and customized it to perfectly express your style. Now it’s time to coordinate the rest of your gear for a pulled-together game day look.
Matching jersey colors are an obvious place to start. Choose gloves in your team colors or complementary shades that will look cohesive. Lacrosse gloves come in a wide range of hues from basic black to bright patterns.
Consider mimicking accents you added to your helmet, like neon green strapping or side stripe decals. Carry those pops of color onto your gloves for visual unity. This allows creative personalization while maintaining team uniformity.
Your protective pads also offer real estate for matching colors to your lid. Arm pads, shoulder pads, and elbow pads come in all white for clean coordination. Or opt for bold accent colors that tie back to your helmet decals.
For pads with removable outer sleeves, choose colors to coordinate with the white shell of your Cascade S. Mix and match pad covers in complementary tones so your look flows in a natural way.
Cleats are another opportunity to extend your customized style. White cleats are the perfect clean neutral to match an all-white helmet. Or introduce your helmet’s accent colors onto the cleats with colored laces, graphics, or accented uppers.
Don’t forget your protective cup and shorts when color coordinating. Choose a cup in white or patterned with helmet-matching colors. Lacrosse shorts in white or team colors tie the whole look together.
A stained lax pinnie in team colors is a great way to bring cohesion from head to toe. Opt for a short sleeve pinnie to show off helmet-coordinating arm pads and gloves.
Use your gear bag to cap off a unified look. White lacrosse bags with colored accents or patterns complement a white Cascade S helmet. Stick with your helmet color scheme for equipment bags, backpack straps, and duffel designs.
Get creative mixing materials for interest. Pair leather lacrosse gloves with stretchy woven shorts and breathable mesh cleats. Textural contrasts keep your look from being one-note.
Don’t forget small accessories in tying your gear together. Custom dyed or patterned sock match helmet colors and personality. Headbands, wristbands, and other accessories integrate colors in subtle ways.
Your white Cascade S lacrosse helmet makes a bold style statement. Carrying that look through smart coordination creates aesthetic harmony. But don’t sacrifice comfort or performance just to match colors. Mix up your gear for style and customized play.
Inspire readers to make their helmet one-of-a-kind and express themselves

Your new lacrosse helmet offers the perfect canvas to showcase your personal style. With the endless customization options available today, you can deck out your white Cascade S with team spirit, lucky numbers, creative designs, and unique flair all your own.
Start by envisioning the look, theme, or vibe you want to create. Jot down ideas – school colors and mascots, favorite numbers and symbols, inspirational words, inside jokes with teammates. The possibilities are endless!
To infuse your helmet with team pride, collaborate with fellow players to do coordinated colors and designs. Apply decals, striping, or pad accents in your school colors. Use your mascot, logo, or monogram as repeat motifs. Show your spirit together in custom style.
For individual custom touches, add your jersey number in bold graphics or subtle accents. Apply an inspirational phrase like “Go Big or Go Home” or “Play Hard.” Showcase your lucky number discreetly on the back rim or chin strap.
Celebrate your heroes by applying decals of pro lax players you idolize or coaches who influenced you. Pay tribute to a beloved family member who supported your lacrosse dreams with a subtle name or quote.
Express your quirky personality. Turn your helmet into a lacrosse pineapple or tiger if that’s your spirit animal. Apply funky patterns, crazy colors, and fun graphics that give teammates a glimpse into your soul.
And don’t forget to coordinate your helmet with the rest of your gear for a signature look. Mix and match colors on pads, gloves, cleats, bags and other equipment for personalized style from head to toe.
However you choose to customize your new white Cascade S, make it a reflection of your inner passion for the sport. Deck it out in a way that motivates and inspires you each time you put it on. Let your lacrosse helmet become an extension of your identity.
Before you know it, your unique helmet will be a fan favorite and you’ll be asked constantly where you got it designed. You’ll forge new bonds with other players who admire your personal touches and custom work. And most importantly, you’ll feel like a total rock star taking the field in your one-of-a-kind lid.
Don’t settle for some boring off-the-shelf helmet that blends in. Take the time to customize your new white Cascade S into the ultimate representation of your lacrosse journey. Let it tell your story in a way that makes you smile every time you strap it on. The possibilities for creative expression are endless – now go forth and customize!


