How can you optimize your Cascade XRS lacrosse helmet for the perfect fit and performance. What are the key adjustments and customizations to enhance your gear. Which accessories and modifications will take your helmet to the next level.
Finding the Ideal Shell Size for Your Cascade XRS
Selecting the correct shell size is paramount when customizing your Cascade XRS lacrosse helmet. A proper fit ensures maximum protection and comfort during gameplay. To determine your ideal shell size, follow these steps:
- Measure your head circumference about one inch above your eyebrows
- Consult Cascade’s sizing chart to match your measurement to the appropriate shell size
- Try on multiple sizes to find the best fit
- Check for snug contact around your temples without excessive pressure
- Test the helmet’s stability by simulating lacrosse movements
Is a slightly tight fit normal for a new helmet? Yes, Cascade’s XRS helmets are designed to fit snugly at first and gradually mold to your head shape over time. This ensures a custom fit that provides optimal protection as you break in the helmet.
Choosing the Perfect Facemask for Your Playing Style
The facemask you choose can significantly impact your field vision, protection level, and overall performance. Consider these factors when selecting your XRS facemask:
- Narrow vs. wide design
- Bar spacing
- Chin cup length and angle
- Specialized technologies like Cascade’s Seven Technology
Do narrower facemasks offer better visibility? Generally, yes. Narrower facemasks like the SE model provide minimal obstruction for optimal field vision. However, they offer less facial protection compared to wider designs. Consider your position, playing style, and league requirements when making your choice.
Optimizing Chin Strap and Liner System for a Secure Fit
Properly adjusting your chin strap and liner system is crucial for maintaining a secure and comfortable fit during intense gameplay. Follow these steps to dial in your XRS:
- Fasten the chin strap loosely, then gradually tighten
- Ensure you can still talk and breathe normally
- Adjust the liner system using the 4 adjustment screws
- Test the fit by moving your head in various directions
- Fine-tune adjustments until you achieve the ideal snug fit
Should the liner feel tight when first adjusted? Yes, it’s normal for the liner to feel snug initially. The material will relax and mold to your head shape over time, creating a custom fit. Removing the liners periodically can accelerate this break-in process.
Enhancing Style and Functionality with Helmet Accessories
Customizing your Cascade XRS with accessories allows you to express your personal style while improving functionality. Consider these popular add-ons:
- Visors (clear or tinted)
- Facemask covers
- Upgraded chin straps
- Helmet decals and stickers
Can accessories impact performance? Absolutely. For example, a clear polycarbonate visor can protect your eyes from glare and errant sticks, potentially improving your on-field performance. Similarly, an antimicrobial chin strap can enhance comfort and hygiene during long practices or games.
Fine-Tuning Ventilation for Optimal Comfort
Proper ventilation is crucial for maintaining comfort and focus during intense gameplay. The Cascade XRS offers several options for customizing airflow:
- Choose a facemask with appropriate bar spacing
- Opt for a shorter chin cup for increased lower ventilation
- Consider removing or modifying certain padding elements
- Explore aftermarket ventilation accessories
Does increased ventilation compromise protection? Not necessarily. While more open designs may slightly reduce protection in specific areas, they can significantly improve comfort and reduce fatigue during play. It’s essential to strike a balance between ventilation and protection based on your individual needs and playing style.
Customizing Padding for Personalized Comfort and Protection
The internal padding of your Cascade XRS plays a crucial role in both comfort and protection. Here are some ways to customize your helmet’s padding:
- Experiment with different thickness options for cheek pads
- Add or remove padding in specific areas to address pressure points
- Consider upgrading to premium padding materials for enhanced comfort
- Explore custom-molded padding options for a truly personalized fit
Is it safe to modify the original padding? While minor adjustments are generally acceptable, it’s crucial to maintain the helmet’s overall protective integrity. Consult with a professional or Cascade customer support before making significant changes to ensure you’re not compromising safety.
Enhancing Vision and Performance with Eyewear Integration
For players who require corrective lenses or prefer additional eye protection, integrating eyewear with your Cascade XRS is essential. Consider these options:
- Explore sports goggles designed to fit comfortably under lacrosse helmets
- Consider prescription inserts that attach directly to your facemask
- Investigate custom-molded sports glasses that integrate seamlessly with your helmet
- Test different visor tints to optimize visibility in various lighting conditions
Can wearing glasses affect helmet fit? Yes, wearing glasses or goggles can impact how your helmet fits. It’s essential to account for your eyewear when selecting your shell size and adjusting internal padding. Some players may need to size up to accommodate their glasses comfortably.
Optimizing Weight Distribution for Enhanced Performance
The way weight is distributed across your Cascade XRS can significantly impact your comfort and on-field performance. Consider these strategies for optimizing weight distribution:
- Choose lighter facemask options if weight is a concern
- Explore carbon fiber or other lightweight shell materials
- Carefully consider the weight of any accessories before adding them
- Experiment with different padding configurations to balance protection and weight
Does a lighter helmet always mean better performance? Not necessarily. While a lighter helmet can reduce fatigue over long periods, it’s crucial to maintain adequate protection. The key is finding the right balance between weight reduction and protective capabilities that suits your playing style and position.
Incorporating Team Branding and Personal Flair
Your Cascade XRS helmet presents an excellent canvas for showcasing team spirit and individual style. Here are some ways to personalize your helmet’s appearance:
- Apply team logo decals to the shell
- Choose facemask covers in team colors
- Add personalized name or number decals
- Explore custom paint jobs for a truly unique look
- Incorporate motivational quotes or personal mantras with small decals
Are there regulations regarding helmet customization? Many leagues and teams have specific rules about helmet modifications and decorations. Always check with your coach or league officials before making significant changes to ensure compliance with regulations.
Enhancing Communication with Helmet Audio Systems
Clear communication on the field can give your team a competitive edge. Consider these options for integrating audio systems into your Cascade XRS:
- Explore compatible in-helmet speaker systems
- Investigate bone conduction technology for audio without obstructing ears
- Consider wireless communication systems for coach-player interaction
- Test different microphone placements for optimal voice clarity
Are helmet audio systems legal in all leagues? No, the legality of helmet audio systems varies depending on the league and level of play. Always check your league’s regulations before installing any communication devices in your helmet.
Maximizing Helmet Longevity with Proper Care and Maintenance
Proper care and maintenance of your Cascade XRS can significantly extend its lifespan and maintain its protective capabilities. Follow these tips to keep your helmet in top condition:
- Clean the shell and facemask regularly with mild soap and water
- Disinfect internal padding to prevent bacterial growth
- Inspect all screws and fasteners regularly, tightening as needed
- Store your helmet in a cool, dry place away from direct sunlight
- Replace any damaged components promptly
How often should a lacrosse helmet be replaced? While there’s no universal rule, many manufacturers recommend replacing helmets every 2-3 years or immediately after a significant impact. Regular inspections and adherence to manufacturer guidelines are crucial for maintaining optimal protection.
Exploring Cutting-Edge Technologies for Enhanced Protection
As lacrosse helmet technology continues to evolve, new innovations offer improved protection and performance. Consider these cutting-edge features when customizing your Cascade XRS:

- Impact-absorbing gel inserts
- Multi-directional Impact Protection System (MIPS)
- Smart helmet sensors for impact monitoring
- Advanced composite materials for improved strength-to-weight ratio
Are these advanced technologies worth the investment? For many players, especially those in high-impact positions or with a history of concussions, these technologies can provide valuable additional protection. However, it’s essential to weigh the benefits against the cost and ensure any modifications comply with league regulations.
Fine-Tuning Fit and Comfort Over Time
Achieving the perfect fit with your Cascade XRS is an ongoing process. As you use your helmet, pay attention to these aspects and make adjustments as needed:
- Monitor for any developing pressure points or discomfort
- Reassess fit after significant changes in hairstyle or head shape
- Periodically check and adjust chin strap tension
- Evaluate the need for padding replacement as materials compress over time
- Consider seasonal adjustments for changing weather conditions
How often should you reassess your helmet’s fit? It’s a good practice to check your helmet’s fit at the beginning of each season and periodically throughout the year, especially after any impacts or changes in your physical condition.

Balancing Protection and Mobility for Optimal Performance
Finding the right balance between protection and mobility is crucial for maximizing your on-field performance. Consider these factors when fine-tuning your Cascade XRS:
- Experiment with different chin strap positions to find the ideal balance of security and jaw mobility
- Test various facemask designs to optimize field vision without sacrificing protection
- Explore lightweight padding options that maintain protection while reducing bulk
- Consider your playing position and style when prioritizing certain protective elements
Does prioritizing mobility always mean sacrificing protection? Not necessarily. Modern helmet designs and materials often allow for excellent protection without significantly impeding mobility. The key is finding the right combination of features and adjustments that work best for your individual needs and playing style.
By implementing these 15 essential tweaks and customizations, you can transform your Cascade XRS into the ultimate lacrosse helmet tailored specifically to your needs. Remember to prioritize safety and compliance with league regulations while exploring these options to enhance your gear. With the perfect combination of fit, function, and style, you’ll be well-equipped to perform at your best on the lacrosse field.
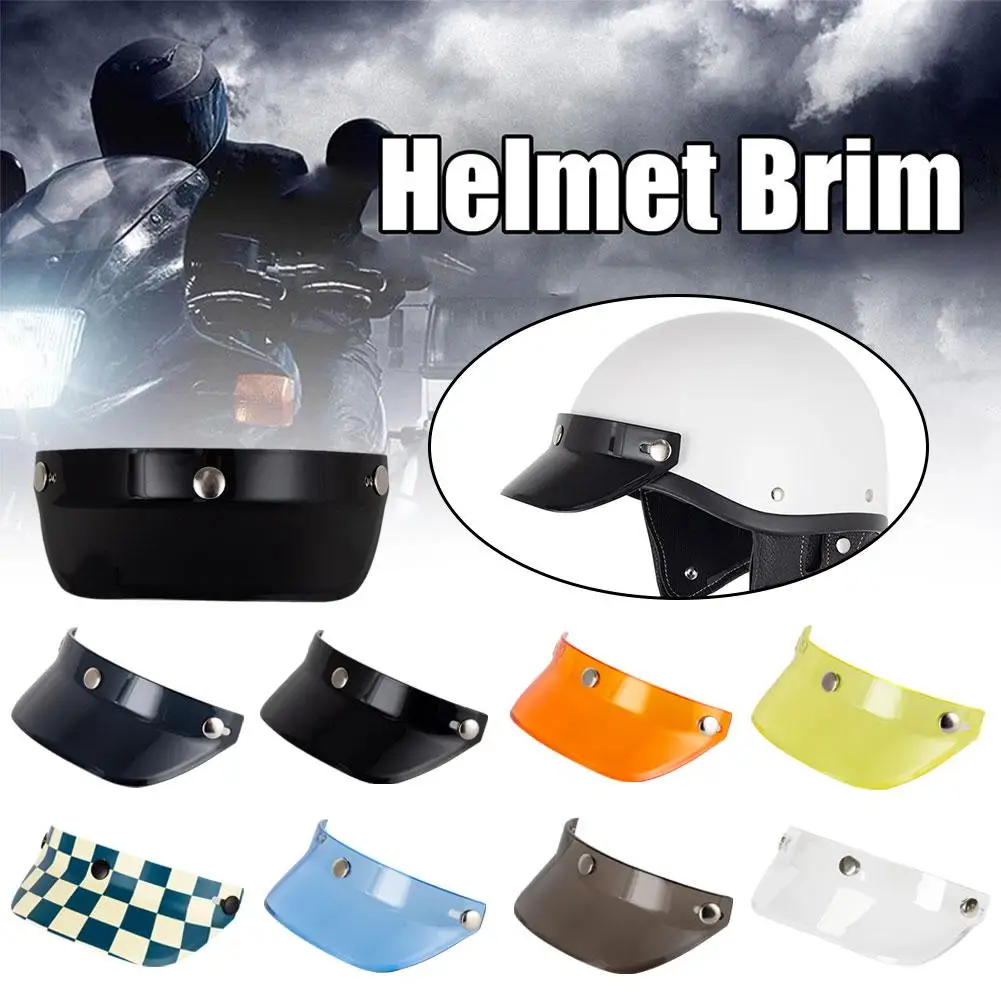
Pick the Right Shell Size
When it comes to finding the perfect lacrosse helmet, getting the right shell size is crucial. The shell is the hard outer layer that protects your head, so you’ll want it to fit snugly without being too tight. Cascade’s XRS helmet comes in a range of shell sizes to accommodate different head shapes and sizes.
To determine your shell size, first measure the circumference of your head about one inch above your eyebrows. Compare this measurement to Cascade’s sizing chart. Keep in mind that helmet sizes can vary slightly between brands, so be sure to consult Cascade’s specific measurements.
In general, smaller shell sizes like S/M will fit head circumferences 21.75 inches and under. Size L/XL is ideal for circumferences up to 23 inches. And XXL shells cater to 23-25 inch measurements. Cascade’s helmets are designed to fit slightly snug at first and then mold to your head shape over time.
It’s also important to consider the fit across your temples. Temple pads inside the helmet should make firm contact without squeezing too tightly. You don’t want any gaps between the pads and your head. Pressure points in specific areas likely means the shell size is off.
Try on several shell sizes to get a feel for the best fit. Move your head around and simulate lacrosse movements to test comfort and security. The helmet should feel stable without shifting or wobbling excessively. Order online only after you’ve determined your ideal shell size.
Dial in the Right Facemask
Just as critical as shell size is choosing the right facemask for your playing style and preferences. Cascade offers an array of facemasks with differing styles and field vision.
Narrower facemasks like the SE allow minimal ball and stick obstruction for optimal visibility. But they offer less facial protection from checks and collisions. Wider facemasks provide more coverage and check absorption, limiting vision slightly more.
Evaluate the facemask’s bar spacing as well. Closer bar spacing gives added protection but reduces ventilation and breathability during intense gameplay. More open bars increase airflow but leave you more exposed to stick and ball contact.
Longer chin cups extend farther down to protect the jawline, while shorter cups allow more ventilation and mobility. You can also choose between flat and angled chin cups to find your best fit.
Consider specialized facemasks like Cascade’s Seven Technology that compress and recoil upon impact to divert energy away from your face. This innovative technology helps reduce the force of checks for improved protection.
Work with your coach to select the right facemask for your skill level, age group requirements, and team’s defensive strategy before settling on a final choice.
Dial in Chin Strap and Liner System
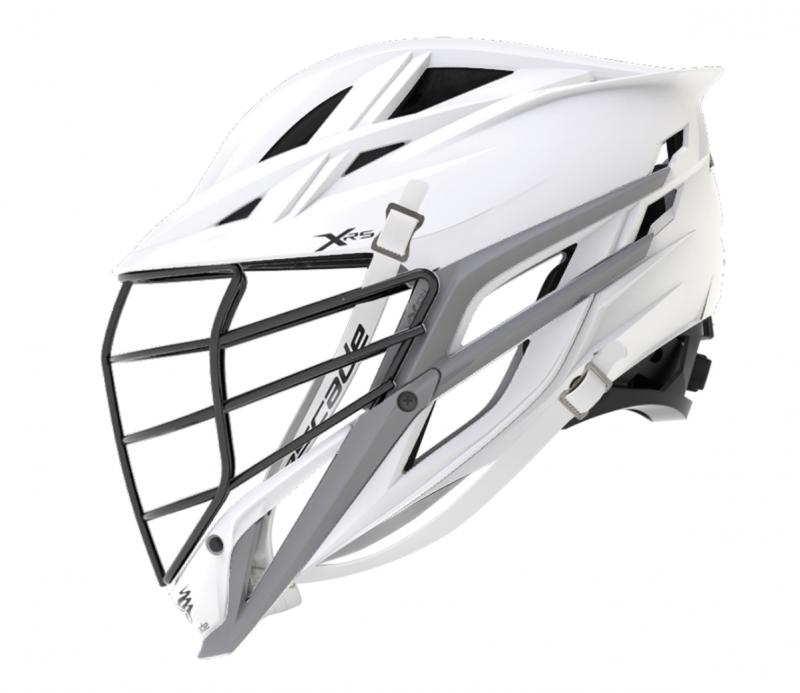
Finding your helmet’s ideal fit also involves properly adjusting the chin strap and liner system. The chin strap keeps your helmet securely in place, while the liner pads should snugly conform to your head’s shape.
Begin by fastening the chin strap loosely with the slider near the middle settings. Then slowly tighten while ensuring you can still talk and breathe normally. The strap should fit snugly under your chin but not restrict your jaw or neck’s mobility.
Next, adjust the liner system by loosening or tightening the 4 adjustment screws on the XRS shell. Loosen each screw several turns, then tighten evenly until the liners make firm contact with your head. Be sure not to overtighten, as the liners will relax and mold to your head shape over time.
Try nodding your head up and down and moving it side to side. Your helmet should move very little relative to your head when properly fitted. Re-adjust screws and strap as needed until the ideal snug fit is achieved.
Removing the liners periodically will help accelerate the break-in process. The liner material molds fastest when exposed to body heat and sweat.
Accessorize for Style and Utility
Adding lacrosse helmet accessories allows you to put your personal stamp on your new XRS. Visors, facemask covers, chin straps, helmet decals and more let you customize both form and function.
Clear polycarbonate visors attach easily to your facemask with a few screws. They protect your eyes from glare, errant sticks, and scrape abrasions. Or go for tinted visors that reduce brightness while looking slick.
Customize and soften the look of your helmet with reversible facemask covers. Choose from dozens of colors and patters to match your team’s uniforms or showcase your individual flair.
Upgrade your chin strap to an antimicrobial, moisture-wicking material for enhanced comfort and hygiene. Chin strap covers in bold colors or funky patterns also let you express your personal style.
Apply eye-catching decals and stickers to your shell to intimidate opponents or bring some swag to pre-game warmups. Use them to highlight your number, nickname, or pop culture interests.
For utility, add a facemask mounted GoPro camera mount to capture gameplay video for post-game analysis. The mount’s low profile ensures the camera’s weight is centered for stability.
Finding the right mix of accessories takes experimentation, so don’t be afraid to swap them out until you’ve created your perfect look and functionality.
Break it in for Peak Comfort
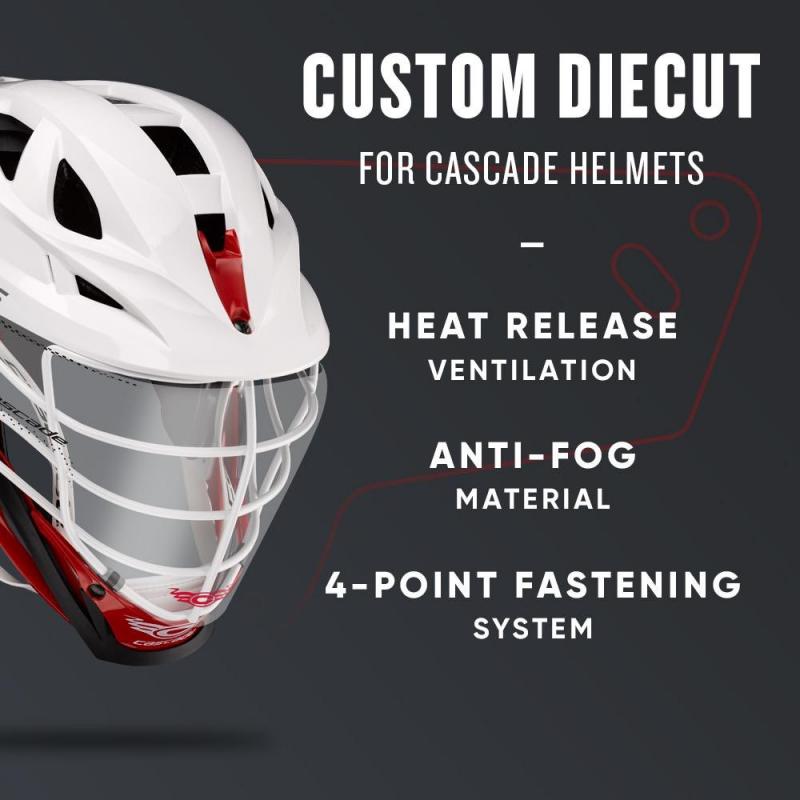
Brand new helmets often feel uncomfortably snug and restrict movement – but that’s normal. Cascade XRS shells and liner systems mould to your head over time for a truly custom fit.
Wear your new helmet frequently to help the break-in process move along quickly. The more time it spends on your head, the faster the materials conform to your unique shape.
Perspiration and body heat significantly accelerate how fast the helmet liner materials compress and take shape. So wear it during intensely active practice sessions instead of just on the sidelines.
Gradually increase your wear time as the helmet becomes more comfortable. But take occasional breaks to allow the foams to recover and avoid packing out prematurely.
Visibly inspect the shell and liners as they break in. Look for compression marks that indicate areas of uneven pressure. Use the fit adjustment screws to relieve pressure from hot spots if needed.
Be patient through at least 20 hours of wear before expecting your XRS to reach its full comfort potential. The right amount of break-in yields a helmet that feels like a natural extension of your head on the field.
Cascade’s innovative XRS lacrosse helmets maximize protection, vision, and ventilation wrapped in an eye-catching, customizable package. Taking the time to properly size, accessorize, and break-in your new helmet ensures it delivers peak safety, comfort, and style this season and beyond the game.
Find Your Perfect Liner
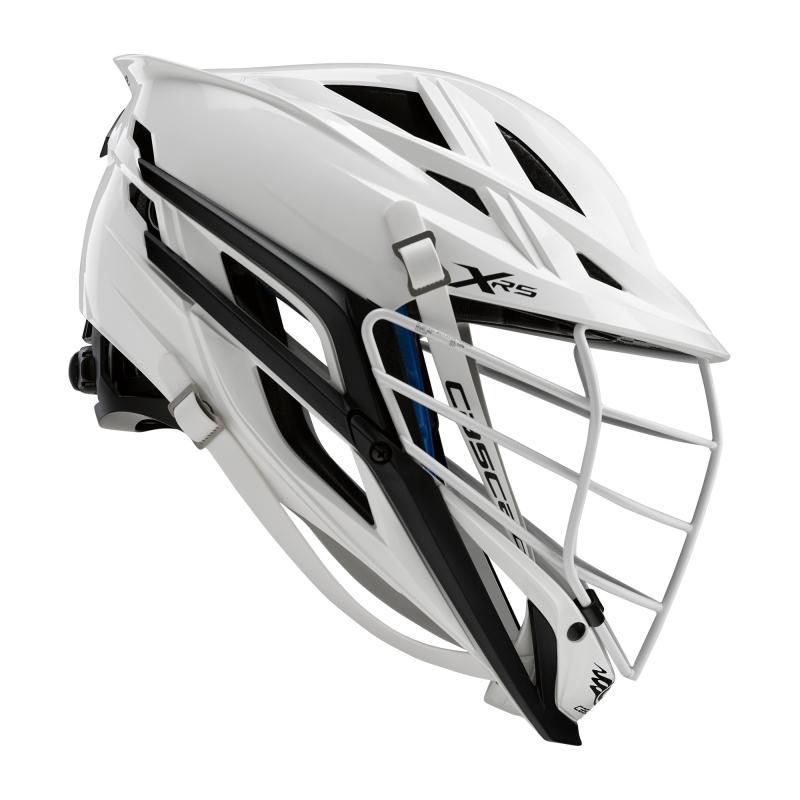
A helmet is only as good as its liner system. The foam pads inside your Cascade XRS lacrosse helmet play a critical role in comfort, fit, and safety. Taking the time to properly adjust and optimize the liners will ensure your helmet performs at its peak.
Cascade uses multiple densities of EPP foam for comfort padding and EPS foam to manage impact energy. Together, these advanced materials conform to your head’s shape while providing top-tier protection.
Start by identifying pressure points and hot spots where the pads make excessive contact. Loosen the 4 shell adjustment screws and reposition the pads as needed to relieve discomfort.
You want the pads to touch your head firmly but not pinch anywhere. Ensure the front, rear, and side pads distribute contact evenly for a stable, wobble-free fit.
Gradually tighten the screws while checking pads until the desired snugness is reached. Remember, the liners will relax and mold over time so avoid overtightening.
Make small turns of no more than 1/4 circle when adjusting screws to prevent stripping. The liner system should stabilize the helmet while still allowing free head movement.
Consider removing pads in areas that don’t make contact with your head. Eliminating bulk where not needed reduces overall mass and improves comfort.
Replace the standard comfort pads with thinner options if the fit feels too tight. Or upgrade to thicker, plusher pads for a little extra cushioning.
Cascade’s XRS helmet accommodates a range of pad thicknesses across the front, sides, and rear. Mixing and matching allows complete customization of the liner fit.
Wrap your forehead with a soft headband or sweatband to reduce abrasion in high friction areas. Just be sure it’s thin enough that it doesn’t impact the helmet’s fit.
Take occasional breaks during practices and games to remove your helmet and give the pads a chance to decompress. This will extend the liner life and prevent packing out.
Properly caring for your helmet’s pads is also essential. Use Cascade’s Foam & Liner Cleaner to deep clean pads and restore comfort.
Inspect the pads regularly for cracks, gouges, or other damage that could compromise their protective abilities. Replace damaged pads immediately.
Consider purchasing replacement liner kits for periodic refreshing of the pads. Swapping in new pads can restore the helmet’s out-of-box comfort.
Replacement kits also allow you to upgrade to the latest liner technologies. As Cascade develops next-gen foams, you can swap them in to improve protection.
Get the Right Chin Cup Fit
Like the helmet liners, dialing in the chin cup fit makes a big difference in comfort and security.
Cascade’s XRS helmet ships with a single density chin cup, but upgrading to a dual density cup provides even more protection. The two foam densities work together to better absorb impacts.
Select between flat or curved chin cup profiles to find the most natural fit. Curved cups typically conform better to jawlines while flat styles offer a more streamlined look.
Consider longer chin cups that extend down closer to the neck versus shorter, more compact versions. Maximum coverage versus lighter overall weight – choose what matches your needs.
Start with the chin cup loose and centered before slowly tightening the screws equally on both sides. Stop tightening as soon as the cup makes firm contact under your chin.
Opening and closing your mouth fully will help seat the chin cup properly. You want it snug without limiting jaw mobility or causing discomfort when talking or swallowing.
Like the helmet liners, replace the chin cup periodically or when you notice cracks or compression marks. Keeping it in top condition ensures ideal protection and fit.
Accessorize for Style and Function
The right accessories can take your XRS helmet to the next level both aesthetically and functionally.
Cascade makes custom graphic kits that adhered to the shell allow you to revamp the look. Choose from many design families or create your own one-of-a-kind graphic combo.
Pick a bold new chin strap color like crimson, electric blue, or neon green to accent your helmet. Or choose unique patterns and textures for an eye-catching look.
Add a chin strap shock disk for extra absorption right where you need it most on those lower helmet impacts. The soft, pliable disk fits between your chin and cup.
Install helmet bolt kits in a variety of anodized colors to replace the stock silver screws. It’s a small detail that adds just the right amount of visual pop.
Cascade’s decorative metallic rear bar kits attach easily to raise your helmet’s visual allure. Pick from chrome, brushed aluminum, gloss black, and more.
Use team logo stickers or custom number decals to identify your helmet on the sidelines. Apply eye black or zinc stickers to the brims to display your style.
Functionally, a helmet mounted GoPro camera provides awesome game footage. Choose front or side mount locations to best capture the action.
For more serious protection, add a field vision enhancing visor. Or go for a polycarbonate faceguard for extra facial coverage that attaches quickly.
Get the Perfect Shell Size
Finding your ideal Cascade XRS helmet shell size ensures a comfortable, secure fit.
Measuring just above your eyebrows, find your head’s circumference. Refer to Cascade’s sizing chart to identify the appropriate shell for your range.
Try on various sizes, minding pressure points and tightness. The helmet should fit snug when new to accommodate foam break-in. But make sure it’s not painfully tight.
Go up or down a shell size if your measurement falls between sizes for the best fit. It’s normal for XRS helmets to fit firmly at first before custom molding to your head.
Properly fitted, the XRS shell should sit one inch above the eyebrow with the front sloping down slightly. Avoid overly reclined or crooked placements.
With the chinstrap buckled, shake your head around to test stability. Adequate yet restrained helmet movement indicates good fit and sizing.
Be sure to evaluate the all-important temple clearance as well. Pads should touch without excess pressure that would cause discomfort.
Take the time to experiment with sizes and make any needed exchanges. An ideally sized shell ensures your XRS will provide seasons of comfortable head protection.
Break it in for Next-Level Comfort
Expect a snug fit with any brand new helmet. But with some quick break-in work, your new XRS will mold perfectly to your head.
Wearing it frequently and for long periods is the best break-in technique. The materials relax faster when subjected to body heat and sweat.
Gradually increase consecutive wear time as the fit loosens up. Take occasional short breaks to prevent the pads from packing down too densely.
Inspect for compression marks or hot spots after each wear session. Use the fit screws to relieve any uncomfortable areas of excess pressure.
Remove pads and foam occasionally to allow them to fully decompress and recover. Rotate pads at friction points to spread wear evenly.
Keep break-in sessions active by simulating lacrosse head movements and contact. Don’t just sit idle, get moving to accelerate the process.
Be patient and allow up to 20 total hours of wear for the materials to take final form. Proper break-in yields a custom fit helmet that feels like part of you.
A new lacrosse helmet ultimately needs some hands-on adjustment to realize a truly personalized fit. Invest the break-in time now and your Cascade XRS will protect and perform at its peak.
Cascade’s innovative XRS lacrosse helmets provide high-tech protection wrapped in an endlessly customizable package. Follow these liner, sizing, accessory, and break-in tips to craft the perfect helmet for your needs this season and for many more to come.
Add Soft Foam for Extra Comfort
The liner foam inside a Cascade XRS lacrosse helmet directly impacts its comfort and fit. Optimizing the foam pads lets you customize your helmet for ultimate protection and wearability.
Cascade constructs XRS helmet liners from varying densities of EPS and EPP foam. EPS manages impact energy, while EPP provides cushioning comfort.
Start by identifying any hot spots where the foam presses uncomfortably. Use a marker to note the areas on each pad.
Loosen the shell’s 4 adjustment screws to take tension off the liners. Then remove the pads and trim down the marked hot spots using sharp scissors.
Smooth any rough edges with fine grit sandpaper. Replace the modified pad and retighten the screws incrementally to check fit.
Consider removing pads entirely from zones that don’t make head contact. Eliminating unnecessary bulk improves fit and reduces helmet weight.
Upgrade thicknesses in key impact areas for extra protection. Add thicker comfort pads to the temples, sides and rear for cushioning.
For a plush fit, replace the standard EPP foam with higher density memory foam. It molds better to your head’s contours.
Order replacement liner kits from Cascade to swap out the entire padding system. Kits allow complete customization of thickness and density.
Mix and match foam pieces and densities for the ultimate personalized fit. Cascade’s pad system accommodates many configurations.
Wrap high friction areas like your forehead with soft athletic headbands. The extra cushion reduces hot spots and irritation.
Consider aftermarket pads like the Stealth Padding System that uses interconnected air pockets for a cloud-like feel.
Properly care for your foams by frequently sanitizing with Cascade’s Foam & Liner Cleaner. Keep them free of dirt and bacteria.
Dial in Your Chin Cup
Getting an ideal chin cup fit improves comfort while keeping your helmet securely in place.
Start by locating any discomfort points under your chin. Trim down the foam in those spots to alleviate pressure.
Chin cup screws should be loosened before making any mods. Retighten gradually as you test the fit.
Open and close your mouth fully with the cup on to help seat it into the proper position. Avoid limiting natural jaw movement.
Upgrade to a dual density chin cup for enhanced impact diffusion. The two foam thicknesses absorb energy better than single density.
Choose between flat or curved chin cup profiles. Curved cups typically fit natural jawlines best. Flat styles have a streamlined look.
Consider thicker aftermarket cups like the Stealth Chin for the ultimate in plush cushioning under your chin.
Developing the right chin cup fit takes some trial and error. But the comfort payoff is well worth the effort.
Accessorize Your Shell
The range of Cascade XRS helmet accessories allows you to customize style, visibility, and functionality.
Molded polycarbonate visors like the CLRV sharply reduce glare while adding an aggressive look. Or go for a tinted model that also cuts brightness.
Full polycarbonate faceguards attach securely over facemasks to provide expanded facial protection and jawline coverage.
Express yourself with a bold custom graphic kit that adheres to the shell for unique, head-turning style. Cascade offers many template options.
Trick out or soften the look with reversible facemask cover patches available in a rainbow of colors and prints. They quickly attach with Velcro.
Illuminate your helmet with industrial grade glow strips for enhanced visibility in night games. They adhere to the rear shell with strong adhesive.
Use eye black sticker kits featuring your number or team logos. Apply them smoothly to helmet brims to showcase spirit and style.
Install a helmet camera mount to capture high-quality game footage for later review and analysis. Position it for the best perspective.
The right accessories make your XRS as functional and stylish as possible. Mix and match to build your dream helmet.
Dial in Your Facemask
Choosing the right facemask optimizes visibility, breathability, and protection for your preference and playing style.
Narrower facemasks like Cascade’s SE allow excellent field vision with minimal obstruction. But they offer less facial coverage.
Wider facemasks limit vision slightly more but provide expanded protection from checks. Find your ideal balance.
Consider specialty masks like the Tri-Boss X that compress on impact to divert energy from your face. Maximum protection with great visibility.
Evaluate ventilation needs based on climate and exertion level. Well-ventilated masks like the SE allow air flow to prevent fogging.
Bar spacing affects ventilation and visibility too. More open bars increase airflow but allow more sticks and balls inside the mask.
Longer chin cups add lower facial protection at the cost of some mobility. Shorter cups allow you to move more freely.
Discuss options with your coach to select the right mask for your age group, skill level, and team defensive approach.
Take time to experiment with mask styles at practices until you find your ideal match. An optimal facemask improves vision, breathability and protection.
Get the Perfect Shell Size
Finding the right shell size ensures your XRS helmet fits comfortably while staying securely in place.
Use a soft tape to measure your head’s circumference about one inch above your eyebrows to get your size.
Compare your measurement against Cascade’s sizing chart. Remember helmets run snug when new to accommodate break-in.
Try on various sizes watching for pressure points or gaps around your temples and forehead.
The ideal shell should sit level one inch above your brows. Avoid crooked or tilted placements that compromise protection.
Shake your head vigorously while strapped up. Your helmet should move minimally if the shell size is correct.
Order additional shells if needed to zero in on the best fit. Take your time test fitting to get the size right before playing.
Finding your perfect shell size sets the stage for comfort, security and functionality. Don’t settle for a mediocre fit.
customizing your Cascade XRS lacrosse helmet with premium foam pads, ideal accessories and a spot-on shell size allows you to create your dream helmet. Invest the time now for safety, style and peak performance every time you hit the field.
Upgrade the Occipital Pad
The occipital pad in a Cascade XRS lacrosse helmet plays a key role in comfort, fit and protection. Optimizing this rear helmet liner unlocks the helmet’s full potential.
The occipital pad sits at the lower rear of the helmet, cushioning the occipital bone at the back of the skull.
This crucial impact zone deserves the best padding, so consider upgrading Cascade’s standard occipital foam pad.
Aftermarket options like the Stealth Occipital Pro pad use advanced materials to absorb big hits. Its integrated air pockets flex on impact.
The ProShield Occipital pad features layered foam densities for progressive compression. Dense PU outer foam transitions to softer inner EPS foam.
Upgraded pads also conform to your head’s contours better for a custom fit. The Stealth Occipital Pro’s memory foam liner molds perfectly.
Start by removing the stock pad and inspecting it for compression marks. This indicates where your occipital bone contacts.
Use scissors to trim just the contact areas to relieve pressure points. Smooth any rough foam edges with fine grit sandpaper.
Reinstall and make small turns of the helmet’s rear adjustment screw to dial-in the fit. Check for pressure relief in the trimmed zones.
If discomfort persists, remove more foam material in the marked areas. Take your time to incrementally achieve an ideal fit.
When replacing the pad, ensure the added thickness doesn’t lift the helmet excessively. The shell should sit level on your head when properly fitted.
Periodically sanitize upgraded pads using Cascade’s Foam & Liner Cleaner. Follow pad manufacturer cleaning guidelines to maximize durability.
Explore Liner Options
Reconfiguring liner pad thicknesses and densities can transform the XRS’ comfort and protection.
Start by identifying discomfort or hotspots and removing those problem pads. Trim down any excess foam impinging head contact.
Consider eliminating pads that don’t touch your head. Removing unnecessary bulk enhances fit and reduces mass.
Mix and match pad densities where you need them by ordering Cascade’s replacement liner kits. Add thickness for protection, remove it for comfort.
Replace the standard EPP foam with higher density options like memory foam for a plush custom feel. Or upgrade to EPS foam for maximum impact management.
Wrap high-friction zones like your forehead with a soft athletic headband. The extra cushion reduces skin irritation.
Take the time to experiment with various pad setups. Finding your ideal liner configuration takes trial and error, but the comfort rewards are immense.
Accessorize the Shell
Cascade XRS helmet accessories allow you to customize style, visibility and functionality.
Molded polycarbonate visors like the Proshield VTX attach securely to reduce glare while protecting eyes from contacts.
Full polycarbonate faceguards cover and shield the entire face for expanded facial protection. Less worry about checks and slashes.
Stand out with custom helmet graphic kits that adhere to the shell. Cascade offers templates or create your own design.
Soften the look or express yourself with reversible lycra facemask cover patches available in a spectrum of colors.
Illuminate your helmet with high-visibility glow strips that adhere to the rear. Ideal for enhancing visibility in night games.
Apply eye black brim sticker kits featuring your number or team logos. Show yourlacrosse spirit while looking cool.
Install a rotating helmet camera mount for capturing game footage for post-match review. Position it for the optimal angle.
The right accessories make your XRS uniquely you while boosting performance. Mix and match to build your dream helmet.
Upgrade Your Chin Cup
Fitting your Cascade XRS with an upgraded chin cup amplifies protection and comfort.
Premium aftermarket chin cups use advanced multi-layer foams to better absorb impacts from checks and falls.
For example, the Stealth Chin Cup combines plush EPP outer foam with shock-absorbing internal air pockets. Its 4-way stretch liner prevents bunching.
Begin by identifying any discomfort points under your chin. Use a marker to note areas of excessive contact on the cup.
Trim just the marked spots with sharp scissors to relieve pressure points. Then smooth any rough foam edges.
Reinstall the modified chin cup and slowly tighten the screws while checking the fit. Stop when the cup feels securely snug.
Opening and closing your mouth helps seat the cup properly. Avoid limiting natural jaw movement when fitted.
Upgrade to a dual density cup for even better impact absorption. The two foam thicknesses work together to diffuse hits.
Take your time dialing in an upgraded chin cup. The impact protection and comfort gains are worthwhile.
Select the Right Facemask
Choosing the ideal facemask optimizes vision, breathability and protection for your needs.
Narrow masks like Cascade’s SE-SW-E provide excellent field awareness but less facial coverage from checks.
Wider masks slightly limit vision in exchange for expanded protection of your face, chin and jawline.
Consider innovative masks like the Tri-Boss X that compress to deflect impact forces. Maximum protection and great visibility.
Assess ventilation needs based on climate and exertion level. Well-vented masks like the SE prevent lens fogging.
Bar spacing affects airflow too. Wider spaced bars allow more air circulation but increase sticks and balls contacting your face.
Longer chin cups add coverage and security at the cost of some mobility. Short cups provide freedom of movement.
Discuss mask options with your coach to choose the right one for your skill level and team strategy.
Take time to experiment with mask styles until you find your ideal fit for visibility, ventilation and protection.
Get the Perfect Shell Size
Determining your ideal Cascade XRS helmet shell size ensures a secure, comfortable fit.
Use a soft tape to measure around your head about one inch above your eyebrows. This is your size.
Refer to Cascade’s sizing chart and try on various sizes, watching for pressure points or gaps.
The helmet should fit snugly but not painfully tight. It will loosen up as the foam liners break-in.
The proper shell size positions the helmet level one inch above the brows without tilting or rocking.
Shake your head vigorously while strapped up. Minimal helmet movement indicates a great fit.
Take the time to experiment with sizes and make exchanges until the ideal shell for comfort, stability and protection is found.
An optimally sized shell sets the stage for total helmet customization. Don’t settle for less.
Strategically upgrading pads, accessories and shell size transforms the Cascade XRS into your perfect custom lacrosse helmet. The result is peak comfort, style and protection every time you step on the field.
Swap Out Visors for Flexibility
Polycarbonate visors give a Cascade XRS lacrosse helmet enhanced eye protection and aggressive style. Swapping visors allows you to customize your look for any situation.
Clear visors like Cascade’s ProShield VTX attach securely to reduce glare while shielding eyes from contacts.
Tinted visors cut brightness while accentuating the intimidation factor. Mirrored visors take it up another notch.
Specialized visors like the Rival Pro Ironman feature widened side panels for increased peripheral vision on the field.
Start by fully removing the 4 screws securing your current visor using a #2 Phillips screwdriver. Set aside the hardware.
Inspect the new visor for proper left/right orientation. The curvature should match your helmet’s brow line.
Insert the screws through the visor holes then into the helmet’s pre-drilled holes. Turn evenly until just snug enough to hold securely.
Avoid overtightening the screws. Visors can crack under excess torque. Check that the vision slit aligns properly with your eyes.
Test visibility by scanning the field through the visor while turning your head. Ensure your sight picture is not obstructed.
Store unused visors in a helmet bag away from direct sunlight and heat to prevent warping. Don’t stack or scratch them.
Rotate visors to match weather and field conditions. Swap to tinted visors for bright outdoor games. Go clear for night games.
Maintain optical clarity by occasionally buffing visor exteriors with a damp microfiber cloth. Use mild soap and water to remove stuck-on debris.
Explore Chin Strap Options
Upgrading your chin strap amplifies comfort while keeping your helmet securely in place.
Premium straps like Cascade’s Mako use antimicrobial, moisture-wicking materials for maximum comfort and hygiene.
Bold chin strap colors like metallic gold or neon orange express your personal style. Wild prints get you noticed.
Comfort fit straps contour to your chin and jawline. They eliminate pressure points and hot spots.
Quick-release buckle systems allow smoothly detaching your helmet in emergencies. Great for goalies.
Shock absorber chin straps cushion hits from checks. Some models utilize advanced foam or gel inserts.
Begin by detaching your current strap clips or sliding out the buckle strap. The new strap slips right into place.
Center the strap along your chin and jaw before clipping or buckling. Leave the strap slightly loose to start.
Gradually tighten while talking and swallowing until the strap feels securely snug. Avoid overtightening.
Take the time to find your ideal strap model. A properly fitted chin strap keeps your helmet locked in place.
Upgrade Your Facemask
Investing in a premium facemask amplifies protection, breathability and visibility.
Specialized masks like Cascade’s Tri-Boss X utilize advanced compression technology to deflect impact forces.
Low profile masks maximize vision with minimal scope obstruction. Wide masks provide expanded facial protection.
Open bar spacing improves airflow and ventilation on hot days. Tighter bars offer better ball deflection.
Match bar shape to your needs. Round bars tend to facet balls outward while flat bars direct more energy back at the shooter.
Consider steel alloys like titanium that maximize strength-to-weight ratios. Titanium masks weigh ounces less than chrome.
To swap masks, fully remove the existing screws using a #2 Phillips screwdriver. Set the hardware aside.
Line up the new mask properly oriented left and right. Insert the screws through the aligned holes.
Evenly tighten the screws just enough to hold the mask securely in place. Avoid overtightening.
Take practice shots at a wall while wearing the mask to test visibility and feel. Make small adjustments as needed.
Finding your ideal facemask optimizes vision, breathability and impact protection out on the field.
Personalize With Graphic Kits
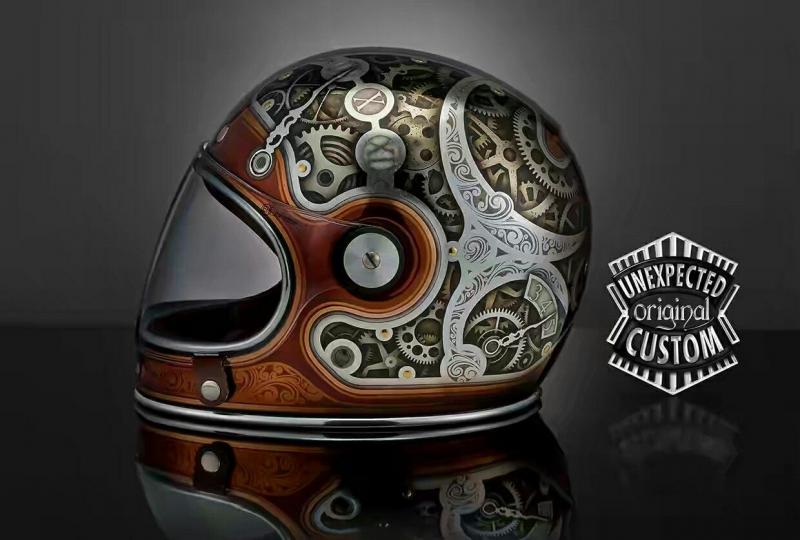
Custom graphic kits allow you to put a unique stamp on your XRS lacrosse helmet.
Kits come pre-designed with popular color combinations, camos, and patterns. Or fully customize your own look.
Bold colors and prints stand out while abstract shapes and lines express your personal style.
Reflect your interests with graphics of animals, cars, nature scenes or inspirational quotes. The creative options are endless.
Use high-resolution digital photos of friends, family or pets to make custom one-of-a-kind decals.
Cascade’s online Helmet Builder lets you design full wrap graphics or smaller accents like stripes and logos.
Carefully clean and dry your helmet shell before applying any stickers. Follow the kit instructions for a smooth bubble-free application.
Consider a clear matte helmet wrap for scratch protection that allows your graphic kit’s colors to really pop.
Personalized graphics display your inner passion while intimidating opponents. Make your mark with custom kits.
Lock In Your Chin Cup
Upgrading and properly fitting your Cascade XRS chin cup enhances protection and comfort.
Aftermarket chin cups like Cascade’s Mako use multidensity foams to better absorb impacts from checks.
Curved cups typically conform most comfortably to natural jawlines. But flat cups offer a streamlined look.
Thicker cups provide plush cushioning with the trade-off of slightly more bulk and heat buildup.
Start by locating any discomfort spots under your chin while wearing the cup. Use a marker to note the areas.
Trim just the marked spots using sharp scissors to relieve pressure points. Then smooth the trimmed edges.
Reinstall the cup and slowly tighten the side screws evenly while checking the fit. Stop when the cup feels snugly secure.
Talk, yawn and swallow fully with the chin cup on to help seat it into the ideal position.
Take the time to dial-in your upgraded cup. The impact protection and comfort improvements are well worth it.
Customizing pads, accessories, and components unlocks your Cascade XRS lacrosse helmet’s full potential. The result is optimized style, vision, airflow, and protection tailored specifically to you.
Add Visor Tear Off Posts
Installing visor tear off posts on your Cascade XRS lacrosse helmet allows quickly removing obstructed lens layers during games.
Tear off posts screw into the visor’s edge holes so you can rapidly detach damaged or fogged visor sections.
Simply grab and peel away sheets as vision becomes compromised. Fresh optic clarity in seconds.
Start by fully removing the screws securing your current visor. Set the hardware aside for reinstallation.
Use rubbing alcohol to thoroughly clean the visor edge holes. Debris can impede proper tear off post insertion.
Test fit the posts into the holes by hand. They should insert smoothly without binding or edge damage.
Use the included #2 Phillips screwdriver to slowly tighten each post evenly into the visor holes. Do not overtighten.
Reattach your visor with the original screws. Check that the posts align with the visor slit to allow clean tearing.
Carefully practice removing sheets by grabbing posts and peeling outward. Discard torn off layers after games.
Bring extra peel off post kits to tournaments and travel games for quick replacement if needed.
Tear off posts ensure you can strip obstructed visor layers in seconds to maintain clear vision in games.
Explore Chin Strap Options
Upgrading your chin strap brings enhanced comfort while keeping your helmet locked in place.
High-end straps like the Shock Doctor Pro Strap use antimicrobial, moisture-wicking fabrics for maximum comfort.
Bold colors like metallic gold or vivid patterns let you express your personal style. Stand out from the crowd.
Comfort fit straps contour to your chin and jawline, eliminating pressure points for a custom feel.
Quick-release buckles allow smoothly detaching your helmet in an emergency – great for goalies.
Shock absorbing straps cushion blows from checks and hits. Advanced foam inserts disperse impact forces.
Remove your old strap clips or unthread the buckle strap to swap in the new one. Takes just seconds.
Center the strap along your chin and jaw before clipping or buckling. Leave it slightly loose.
Slowly tighten the strap while talking and swallowing until it feels snugly secure. Avoid overtightening.
Invest some time finding your perfect chin strap model. A properly fitted strap keeps your helmet locked down.
Add Personality with Graphic Kits
Custom graphic kits let you put a unique stamp on your Cascade XRS while intimidating opponents.
Kits come designed with cool camos, abstracts, and color fades. Or create a one-of-a-kind look yourself.
Use the Helmet Builder tool on Cascade’s website to customize colors, logos and accents.
Consider colorful shapes and lines that express your personal flair. Or go minimalist with matte finishes.
Reflect your interests with graphics of cars, nature scenes or sports heroes. The design options are limitless.
Turn photos of friends, pets or favorite places into custom helmet decals with our online editor.
Carefully prep and dry your shell before applying the kit graphics for a smooth, bubble-free installation.
Finish with a clear matte helmet wrap to protect the graphics and amplify their vibrancy.
Custom graphic kits allow showcasing your passion while intimidating opponents. Make your mark.
Upgrade Your Facemask
Investing in a premium facemask optimizes vision, breathability and protection.
Low profile masks like the Nike Vapor maximize visibility with minimal obstruction for superior ball tracking.
Expanded coverage masks provide increased facial protection but limit vision slightly more.
Well-vented masks improve airflow to reduce lens fogging on hot humid days. Tighter spaced bars increase deflection.
Consider compression masks like Cascade’s Tri-Boss X that flex to divert impact forces for added protection.
To install, fully remove the screws securing the old mask using a #2 Phillips screwdriver. Set aside the hardware.
Line up the new mask properly oriented left/right. Insert the screws through the aligned mask holes.
Evenly tighten the screws just to the point of holding the mask securely without compressing it.
Spend time testing fit and visibility by scanning the field through the mask while moving your head.
Upgrading to a high-end facemask improves vision, breathability and protection when it matters most.
Optimize Your Chin Cup
Replacing your chin cup and dialing in the fit amplifies protection and comfort.
Aftermarket cups like the Shock Doctor Chin Cup use multi-layer foams to better absorb impacts from checks.
Evaluate flat versus curved profiles. Curved cups typically conform most naturally to jawlines.
Longer cups extend protection closer to your neck. Shorter cups prioritize mobility and breathability.
Mark any discomfort spots on the cup, then trim just those areas using sharp scissors to relieve pressure.
Reinstall the modified cup and slowly tighten the side screws while checking for a snug secure fit that allows free head movement.
Talking and swallowing naturally helps seat the cup in ideal alignment as you tighten screws.
Replacing and properly adjusting your chin cup makes a big difference in helmet security, protection and comfort.
Strategically upgrading components unlocks the full potential of your Cascade XRS. Enjoy a customized lacrosse helmet tailored specifically for you.
Get a No Fog Fan
Installing an anti-fog fan prevents visor fogging so you can play aggressively without vision obstruction.
Battery powered helmet fans like the NoFog Fan rapidly cycle air to eliminate inner visor condensation.
Strategically placed vent holes channel refreshing air flow directly onto the lens interior.
Begin by marking the shell for the mount holes using the included template. Orient it level and centered on the rear shell.
Use a 3/32″ drill bit to slowly drill the pilot holes. Take care not to penetrate the helmet’s inner padding.
Attach the mount plate using the provided screws and washers. Tighten just enough to hold securely.
Clip the fan onto the mount plate until it clicks into place. The unique clip design allows easy on/off.
Attach the mini USB charging cord through the helmet’s rear vents whenever the battery needs a boost.
Power on and select from 3 speed settings depending on conditions. Max speed fights severe fogging.
Routinely clean fan intakes and visor interiors with alcohol wipes to amplify airflow and fog prevention.
A visor fan expels inner condensation for crisp optical clarity even in muggy conditions. Play fog free.
Upgrade Your Facemask
Investing in a premium facemask optimizes vision, breathability and facial protection.
Low profile masks like the Nike Speed provide exceptional field awareness with minimal scope obstruction.
Expanded coverage masks limit vision slightly more but boost facial and mouth protection.
Well ventilated masks improve airflow on hot days. Tighter bar spacing increases ball deflection.
Compression masks flex on impact, diffusing energy for added protection. Great for close defenders.
Lightweight masks utilize advanced alloys like titanium for maximum strength with less mass.
Start by fully removing the screws securing the old mask using a #2 Phillips screwdriver. Set aside the hardware.
Line up the new mask properly left-to-right. Insert the screws through the aligned mask holes.
Evenly tighten the screws just enough to firmly hold the mask without compressing it.
Spend time testing the vision and fit during practices. Make small adjustments as needed.
Upgrading your facemask improves vision, breathability, communications and protection when it matters most.
Accessorize Your Chin Strap
Chin strap accessories allow customizing comfort, function and style.
Add antimicrobial chin sock liners to wick sweat and boost hygiene. Choose a bold color for style.
Jaw pads cushion chin contact for added comfort. Less skin irritation from strap friction.
Quick-release attachments allow smoothly detaching your helmet in an emergency.
Stabilizer straps prevent strap slippage for optimized security and fit.
Custom stitching personalizes your strap with initials, numbers or mantras. Make it uniquely you.
Shock absorber add-ons diffuse impact forces directed at your chin, jaw and neck.
Match your strap accessory colors to your helmet decals for a coordinated look. Or go contrasting and bold.
Mix and match accessories until your chin strap offers the perfect balance of comfort, function and style.
Lock Down Your Facemask
Carefully choosing and installing your facemask enhances protection, vision and breathability.
Narrow, low profile masks like the Nike Speed offer exceptional field awareness with minimal scope obstruction.
Expanded coverage masks provide increased facial protection at the cost of limiting vision somewhat more.
Well-vented masks improve airflow on hot days to reduce lens fogging. Ideal for midfielders.
Consider compression masks like Cascade’s SevenTech that flex to better absorb hard frontal impacts.
Start by fully removing the screws from the old mask using a #2 Phillips screwdriver. Set aside the hardware.
Orient the new mask properly left/right and insert the screws through the aligned holes.
Evenly tighten the screws just enough to firmly secure the mask without compressing it.
Take some practice shots to check vision and airflow. Make small tweaks until the fit feels perfect.
Choosing the right mask for your face and playing style is crucial for peak performance.
Get the Fit Dialed In
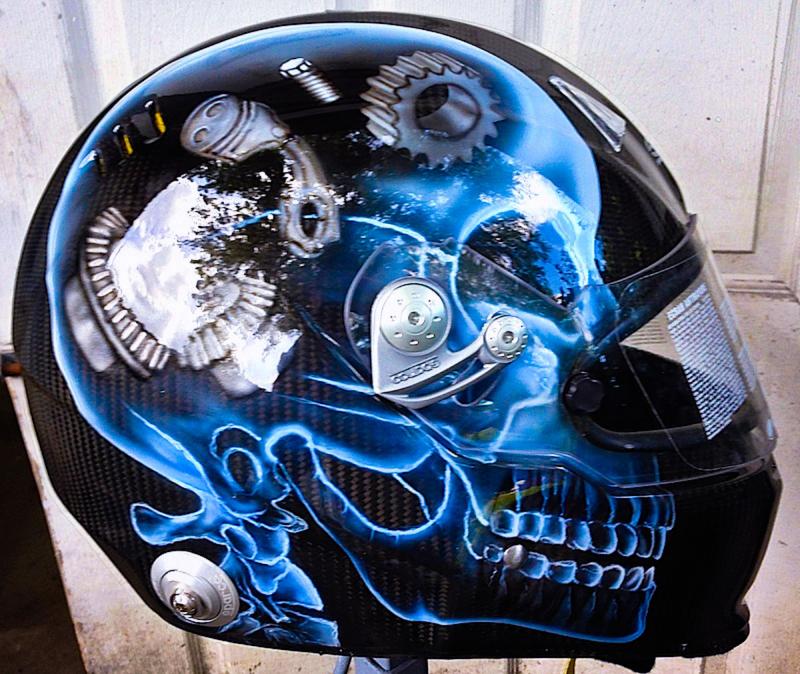
Properly adjusting your Cascade XRS liner system ensures ideal comfort, protection and stability.
Start by identifying liner hot spots causing discomfort. Note where pads make excessive contact.
Loosen all 4 helmet shell screws, then remove or thin pads at hot spots to relieve pressure.
Reinstall pads and slowly tighten screws while checking fit. Stop when pads make secure but comfortable contact.
Pad contact should feel uniform across your forehead, temples and rear. No gaps or wobble when properly fitted.
Periodically remove pads to allow the foam to fully decompress and recover its shape.
Replace worn pads for renewed comfort. Use Cascade’s liner kits to customize thickness and density.
Take the time to dial-in your liner fit. Proper helmet stabilization and impact diffusion depend on it.
Strategically upgrading components allows fully optimizing your Cascade XRS for peak performance tailored specifically to you.
Install Helmet Speakers
Upgrading your helmet’s audio can make a world of difference on the field. While the stock speakers in most lacrosse helmets get the job done, adding higher quality aftermarket speakers takes your listening experience to the next level. Quality helmet speakers with enhanced bass and clearer highs helps you clearly hear coaches’ instructions during timeouts and pumps you up with perfectly balanced tunes.
Installing new speakers in your Cascade XRS helmet is a straightforward process. Start by removing the stock speakers by gently prying them out with a flathead screwdriver. Be careful not to damage the speaker ports. Once the original speakers are out, connect your new speakers to the existing wiring. High quality speakers from brands like Skullcandy or JBL offer great sound quality while maintaining a slim profile that fits nicely within helmet speaker cutouts. Secure the new speakers with adhesive Velcro squares to prevent rattling. You’ll immediately notice richer audio and less outside noise seeping in.
Add Custom Graphics
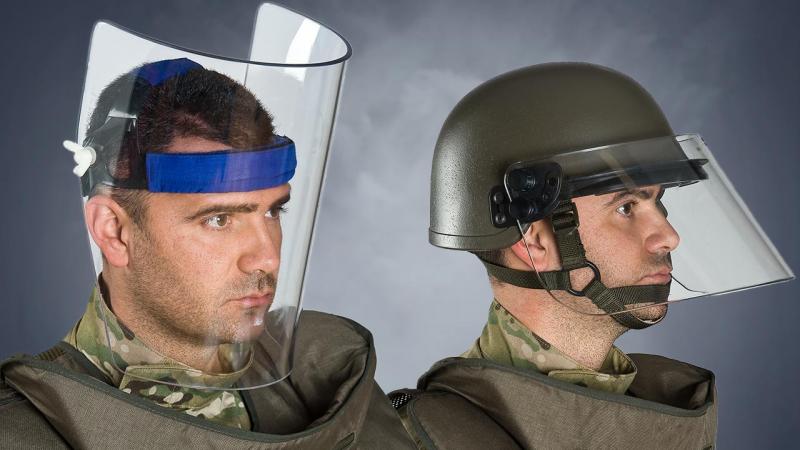
Plain white lacrosse helmets get the job done, but adding custom graphics amps up your style on the field. With the Cascade XRS’s sleek shape and ample canvas, you have plenty of opportunities to deck out your lid in eye-catching designs. Start by conceptualizing ideas – do you want an action graphic of yourself cradling a ball? Your jersey number in bold fonts? Something more abstract and artsy? Be creative and make it your own.
Once you’ve settled on a graphic, send your concept to a custom sticker company. Provide them with the helmet dimensions and work with their designers to fine-tune the layout. Vinyl decals, full color printed graphics, etched designs, or even airbrushed paint can all take your art from concept to reality. Apply the graphics carefully following the instructions and use a squeegee to smooth out any bubbles. Top it off with a few matching helmet decals and your customized Cascade XRS will turn heads on the field.
Trick Out the Visor
The XRS comes equipped with a serviceable clear visor, but lacrosse is all about standing out. Swapping in a tinted, mirrored or patterned visor transforms the look of your helmet. Vision is crucial during gameplay, so opt for visors permitted for use. Dark smoke or iridium reflective visors offer flash while maintaining excellent visibility downfield. For something more unique, rainbow mirrored or half-smoke, half-clear visors offer versatility in any light. Installation is quick with the XRS’s tool-less QuickFlip visor screws. Simply flip the clips up, switch out visors and flip back down to lock in place. A new visor gives your a whole new vibe as you scan the field.
Attach Camera Mount
First person footage from your point of view puts fans right in the action. Capture clrutch goals, bone-crushing hits and behind the scenes moments by mounting a GoPro or other action cam to your helmet. The smooth curves and multiple vents of the XRS provide several options to attach a camera mount. Adhesive mounts stick right onto the shell, or for more adjustment, mount to the facemask with zip ties. Position the camera high on the forehead or toward the side for a unique angle. Pair it with an external mic inside the helmet for enhanced audio. Sync the video and audio in editing to create professionally produced lacrosse highlights reels from your perspective on the field.
Upgrade the Facemask
While the XRS comes stock with a solid titanium facemask, upgrading to an aftermarket mask pushes protection and intimidation to the next level. Masks with thicker titanium alloy bars, more vents and edgier shapes enhance style while providing crucial face protection. Brands like SportStar, Mainline and Warrior offer mask upgrades tailored to Cascade’s shape. Look for models with optimized sight lines so you can keep your head on a swivel. Quick release attachments make swapping masks a breeze. Pair aggressive styling with eye-popping graphics on your helmet shell for a fierce lacrosse look.
Add Helmet Tape in Team Colors
Simple yet eye-catching, lacrosse helmet tape emphasizes team pride and unity on the field. Adding strips in your squad’s colors is an easy way to customize your XRS. Use athletic-grade tape in your school colors and apply it cleanly along the vents, ridges and brims of the helmet. Crisp lines and symmetry look best. You can also add your number on the back or tape your school’s logo on the sides. Swapping tape each season keeps your helmet looking fresh. The subtle highlight of color coordination with your jerseys pumps up team spirit.
Install Shield Deflectors
Prevent rain and sweat from dripping into your eyes during intense play with shield deflectors for your XRS facemask. Adhesive foam deflectors install above the face opening to divert liquid away from your field of vision. Brands like Cascade and Shock Doctor make shield deflectors specifically for the XRS that seamlessly integrate with the curves and ventilation. Place them strategically to channel moisture to the side vents. With drips and drops handled, you can keep your eye on the ball when the game heats up.
Add Soft Helmet Padding
Beef up comfort and fit inside your XRS with additional soft padding accessories. While the XRS features cushioning in key zones, strategic upgrades take the interior to the next level. Soft foam donut pads provide a super comfortable seal around your ears. temple pads alleviate pressure at your temples for headache-free play. Extra neck padding or padding kits offer full 360 degree interior cushioning for optimal comfort snap-in hard ears pads addanother layer of high-density protection right where you need it most. With the fully kitted XRS interior, you’ll play hard while hardly noticing you’re wearing a helmet.
Install Helmet Fan
As game intensity ramps up, things can get hot and sweaty inside your lacrosse helmet. An aftermarket clip-on fan helps keeps your head cool when the pressure’s on. Small battery-powered fans attach to the helmet’s vent holes to drive a constant breeze into the helmet interior. Strategic fan placement pulls fresh air in through the front and pumps hot air out the back vents. High-velocity airflow prevents helmet fog while cooling you down on scorching days. The best helmet fans have variable speed settings and runtimes over six hours, so you stay chill all game long.
Pop in Custom Earmolds
For the ultimate in comfort and stability inside your XRS, install custom earmolds. These molded silicone earpieces form to the exact shape of your ear for a personalized fit. Start by having earmolds professionally made by an audiologist – they’ll take ear canal impressions and create molds specific to your ears. Well-fitting earmolds all but eliminate in-helmet rattling and slipping. Their snug fit also helps seal out noise and enhance helmet audio. With custom earmolds anchoring it in place, your XRS helmet becomes an extension of you as you chase the ball downfield.
Reinforce the Shell
Take durability to the next level by adding aftermarket reinforcements to your XRS shell. Supplemental padding and cages provide extra impact disbursement for hard hitters. Hard cap style padding shells designed for the XRS latch onto helmet liner clips with a tough outer layer for added multi-directional protection. Facemask enforcement cages like the Cascade Face Legion bolts onto side screws to further strengthen mask flex and structure. With extra reinforcement in collision zones, you can play with confidence in the heat of the action.
Install Visor Screw Covers
Exposed visor screws on your shiny new XRS can snag on facemasks and gear, so cover them up. Screw caps smooth out the visor attachment points for a streamlined look and enhanced durability. The Cascade XRS utilizes convenient QuickFlip visor screws that allow tool-free visor swaps, so lightweight universal covers slip right into place over the flips. Get transparent covers for a subtle look or colored caps to match your graphics. Visor screw covers take seconds to install but their protective effects last all season long.
With endless options to trick out your helmet, on-field customization is limited only by your imagination. Deck out your Cascade XRS with add-ons optimized for upgraded performance, protection and style. With the ultimate personalized lacrosse helmet, you’ll play with confidence and intimidate the competition.
Add Visor Stickers and Graphics
The clear visor on the Cascade XRS is a blank canvas just waiting for your custom graphics. Lacrosse helmet visor stickers let you deck out your helmet with eye-catching designs and colors visible from all angles. From team logos and mascots to abstract graphics and color fades, the options for visor customization are endless.
Start by conceptualizing the right visor sticker design for your style. Look for high quality weatherproof vinyl stickers specifically sized for lacrosse visors. Working with the curved shape of the visor, map out the layout and order the graphics online. Opt for vibrant team colors, an intimidating image like flames or lightning, or an inspiring phrase. Carefully apply the stickers starting from the center and using a squeegee to smooth out bubbles. For a unique look, order custom die-cut visor stickers of your own design.
If stickers alone aren’t enough flare, up the ante with custom visor airbrushing. Send your visor off to a specialty airbrushing shop and have them professionally spray any design directly onto the surface. Vibrant colors, crisp lines, and flawless fades are no problem for experienced airbrush artists. Airbrushed visor designs really make your helmet pop. Switch out airbrushed visors between seasons to keep your look fresh.
Install Color Coordinated Hardware
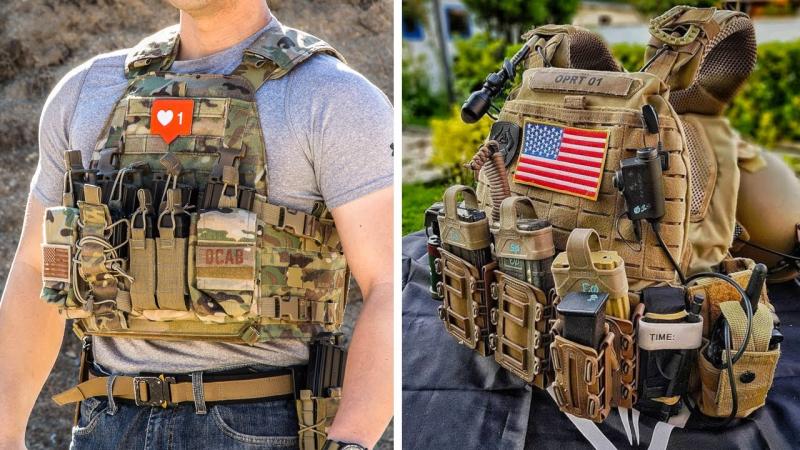
Take customization up a notch by replacing standard titanium helmet hardware with components that match your style. For a stealthy vibe, upgrade to matte black screws, locks and loops. Chrome pieces provide eye-catching shine, while brite anodized green, blue, red and orange hardware loudly announces your presence. Mix and match components for the perfect accent colors. QuickFlip visor screws and tool-less locks make swapping XRS components fast and easy.
Add Custom Molded Mouth Guard
Protect those pearly whites while showing off your personality with a custom mouth guard displaying your number, name or logo. A properly fitted moldable guard stays securely in place for safe, comfortable play. Start with a dental-grade molding kit and carefully follow the impression instructions to create an accurate mold. Send your mold to a provider specializing in custom guards like Shock Doctor or SISU. Options like personalization, ventilation channels and gel layers enhance fit, protection and style. Show off your custom mouth bling as you smile through face-off squabbles.
Install Camera Mount
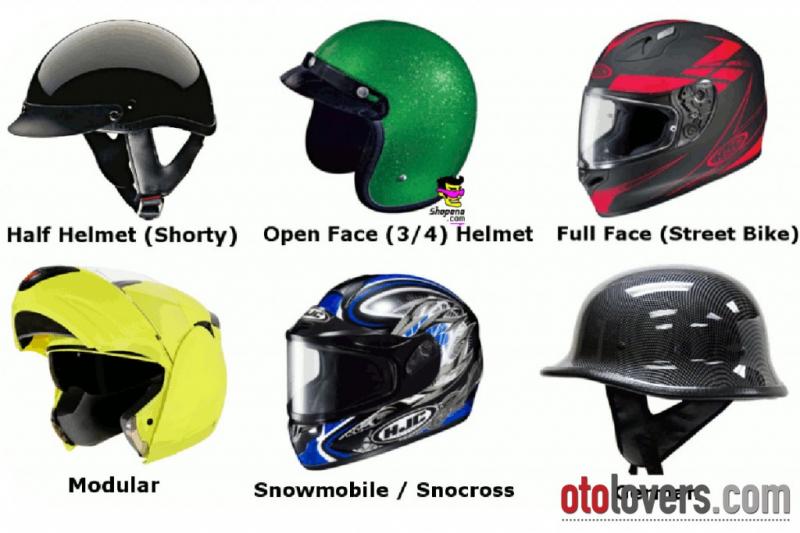
Provide fans with thrilling first-person game highlights and moments by mounting a compact action camera like GoPro on your helmet. The smooth shell and multiple vents on the XRS helmet offer several solid mounting points for cameras. Try a sticky mount on the shell or one strapped to the facemask for unique angles. Sync with an external mic inside the helmet for pro-level audio. Edit together the footage to produce intense lacrosse videos that offer an immersive player’s eye view of the on-field action.
Add Custom Helmet Bag
A generic helmet bag gets the job done, but a custom bag displays your style even when off the field. Personalized lacrosse helmet bags come printed with your name, number and graphics for a look all your own. Design your dream bag with bold colors and graphics that match your helmet. Add your name or inspirational phrase for a personalized touch. Premium bags provide padded protection, ventilated compartments and separate pockets to keep your gear organized. Your custom helmet bag announces your arrival in style.
Install Helmet Mirror Decals
Never get caught slipping again with helmet mirror decals providing eyes in the back of your head. These thin mirrored vinyl stickers install on side vents and reflect rear views to keep you aware of oncoming attackers. Look for helmet mirror decals sized and shaped specifically to integrate flush with the XRS shell. The subtle glint of the mirrors allows you to discretely monitor all angles. With enhanced awareness of every threat, you’ll have the drop on charging opponents.
Add Facemask Mirror Lens
Suite up for battle with a mirored facemask lens that intimidates opponents with your cold reflective gaze. These transparent lenses install over the facemask openings and provide augmented vision. Mirrored lens coatings also provide UV protection while looking totally badass. Quick change clips allow fast and easy lens swapping. Switch from clear to dark smoke to stay stealthy under bright lights. Nothing breaks a shooter’s concentration like confronting their own reflection in your icy death stare.
Illuminate with Integrated LEDs
Make sure everyone sees you coming with built-in LED helmet lighting. Waterproof LED strips install directly onto your XRS shell, lighting up team colors and graphics. Integrated buttons allow on-demand activation to strobe celebratory light shows. Look for high visibility colors like red, green and blue to stand out. Some LED kits sync with audio to flash along with pump up tunes. With eye-catching illumination, you’ll put on a show under the lights.
Apply Chrome Effect Film
Give your helmet the chrome treatment with reflective color shift wraps. These adhesive films coat the shell with an ethereal liquid metal look. Warp around compound curves seamlessly thanks to flexible 3M technology. They apply quickly with squeegees and heat guns for a creaseless surface. Chrome film gives stunning depth and dimension to any helmet color. The mirror-like finish offers next level flash whether you’re cradling downfield or just strolling the quad.
Upgrade to Premium Facemask
Step up protection and style with an upgraded titanium alloy facemask. Brands like EvoShield, Mainline and STX make premium masks contoured specifically for the XRS. Look for models with optimized sight lines and extra wide openings so you can keep your head on a swivel.pursue aggressive cage designs that also offer crucial eye and face protection. Premium materials like thickened titanium and carbon fiber lend rock solid durability. Quick release clips allow tool-less mask swaps to match any helmet setup.
Apply Matte Lacquer Spray
Matte lacquer spray transforms shiny helmet finishes into an ultra-smooth, velvety shell. Available in a variety of colors like black, white and grey, matte spray gives helmets a worn-in look straight off the shelf. Light coats prevent drips while retaining vent and graphic visibility. Durable polymers provide chip resistance to keep matte looking fresh all season. Reapply coats each year for an icy finish that shrugs off scratches and scuffs.
Take your plain white XRS to the next level with add-ons pumping up protection, comfort and style. Deck out your helmet with team colors, crisp graphics and personal flair. A customized Cascade XRS lacrosse helmet intimidates opponents and announces your arrival. With endless options to trick out your helmet, the only limit is your creativity.
Attach a GoPro Mount to Your Cascade XRS Helmet for Epic POV Footage
Looking to take your lacrosse game footage to the next level? Attaching a GoPro mount to your Cascade XRS helmet is an easy way to capture point-of-view video that puts your viewers right in the action. With a few simple modifications, you can document your on-field exploits like never before.
A rugged, lightweight camera like the GoPro HERO5 Black is perfect for attaching to your lid. It offers 4K video resolution, image stabilization, voice control, and waterproofing without the need for an external case. When paired with the GoPro helmet mount, it can provide immersive lacrosse footage from your perspective.
To install the mount, you’ll need to remove the two front vents from the XRS helmet. Don’t worry, this can be done easily with a screwdriver in just a few minutes. With the vents popped out, clean the surface thoroughly so the adhesive on the mount sticks properly.
Apply the adhesive squarely in the center of the front vent area. Press down firmly for about 30 seconds to make sure it sets properly. The industrial-grade adhesive ensures the mount will stay secured even with all the hard checks and impacts that are part of the game.
Once fully bonded, simply click your GoPro camera into the mount. You can adjust the angle however you like – pointing straight ahead or slightly downward to better capture your field of vision and crosse work. Secure the camera with the thumbscrew on the mount before heading out to play.
With your GoPro helmet cam in place, you’ll be ready to document your on-field exploits in true point-of-view fashion. Recording in 4K will ensure crystal clear detail when reliving your highlights. The wide angle lens captures all the peripheral action around you. And the stabilization keeps the footage smooth even when you’re sprinting up the field at full speed.
Be sure to use the GoPro mobile app to easily control your camera from your phone or smartwatch. You can start and stop recording, adjust settings, and preview your clips without having to fumble with the camera mounted on your helmet.
When it’s time to edit your footage, GoPro’s Quik video editing apps make it easy to combine clips, add effects and music, and share your epic lacrosse videos. Or take your raw footage into more advanced editing software for more polished productions.
Putting a GoPro on your helmet takes lacrosse game footage to the next level. With an immersive point-of-view perspective, it allows viewers to truly feel like they’re part of the action. Just be sure to check league rules to make sure on-helmet cameras are permitted before strapping on your GoPro and hitting the field.
Trick Out Your Lid with Custom Decals
Another way to put your personal stamp on your Cascade XRS is by decking it out with custom decals. From team logos to your jersey number, adding decals can transform your plain white helmet into a true on-field extension of your style.
Cascade offers a Decal Customizer on their website that makes the process easy. Just upload your design or artwork. Position and scale it how you like on the helmet template, then order. In about a week, you’ll receive high quality vinyl decals ready to stick on your lid.
Make sure to thoroughly clean the surface of your helmet before applying the decals. Give it a good wipe down with a cleaner like isopropyl alcohol to remove any dirt, wax or oils so the vinyl sticks properly. Carefully apply the decals, using a squeegee or credit card to smooth them out and remove any air bubbles or wrinkles.
Once applied, give the decals 24 hours to fully adhere before using your helmet. The vinyl material is designed to be rugged enough to stand up to the wear and tear of practices and games. Removing them can be done by heating with a hairdryer to soften the adhesive and peeling slowly.
Custom decals are a great way to deck out your helmet with unique flair. Rock your team’s logo and colors during games. Rep your uniform number so coaches, teammates and fans can easily ID you on the field. Or come up with a cool custom design that shows off your style and personality.
Just make sure any decals you apply meet league rules. Most allow team identifiers, numbers and small logos, but prohibit large graphics or distracting patterns. Stay tasteful and tactical, and your custom helmet will have you styling at game time.
Add Chin Strap Padding for Extra Comfort
One simple comfort upgrade for the Cascade XRS is adding extra padding to the chin strap. The thin nylon strap can sometimes dig into your chin and jaw area during games. But adding wrap-around foam padding helps relieve pressure for a more comfortable fit.
Look for chin strap pads made specifically for lacrosse helmets. They wrap fully around the strap with Velcro closures and are made of soft foam or gel that conforms to your chin. This cushions the contact point and helps prevent chafing or discomfort.
Apply the pad by undoing the strap clip and threading the end through the pad’s loop. Position it centered under your chin, then re-secure the clip. Adjust the tightness until the pad is providing sufficient cushioning without making the helmet fit too loosely.
The chin strap pad will require periodic repositioning or tightening as the Velcro connections can loosen over time. Check the fit and positioning periodically to make sure it stays centered on your chin. Replace the pad whenever the foam loses its squish and protective qualities.
Upgrading to a custom printed chin strap can also add style while providing plush padding. Companies like Custom Helmet Decals offer pads printed with your number, name or other designs. This lets you coordinate team colors and identifiers in a unique way.
Whatever pad style you choose, this simple add-on can pay big comfort dividends. Taking the bite out of the chin strap helps you focus on playing hard without jaw pain or irritation to distract you.
Install Visor Clips for Easy Lens Swaps
The Cascade XRS comes equipped with an X-Vision chrome facemask that provides excellent visibility. But swapping out tinted visors is made even easier with visor clip accessories. They allow tool-free lens changes so you can adapt to varying light conditions.
Clips like the Cascade Quick Release kit replace the visor’s standard screws with simple snaps. To swap lenses, just push in the tabs and pull the visor free. Snap in a new tinted lens and you’re ready for bright sun glare. No more fumbling with screwdrivers to make visor changes.
When installing the clips, be sure to thoroughly clean the visor edge and helmet surface so the adhesive sticks properly. Press the clips firmly in place for 30 seconds. Allow the adhesive to fully cure for 24 hours before use.
With the quick release clips in place, it takes just seconds to pop out one visor and snap in another. Keep clear and tinted spares in your gear bag so you can adapt to any lighting conditions. Amber lenses are great for low light games. Mirror tinted lenses reduce glare on sunny days. And clear lenses give maximum visibility for night games.
Having options to quickly adapt your helmet’s eye protection for varying light is a big performance advantage. The right tinted lens improves visibility and reduces eye fatigue. With visor clips, you’ll be ready to snap in the perfect lens for any game time or weather conditions.
The Cascade XRS already provides excellent vision and protection right out of the box. But with a few strategic add-ons, you can customize your lid for maximized performance and style. Whether you want POV video capability, a personalized look, extra comfort or quick lens changes, there are easy mods to take your helmet game to the next level.
Use Helmet Accessory Rails
Every player wants a customized lacrosse helmet that perfectly suits their style and needs. With the Cascade XRS, the possibilities are endless thanks to the genius Helmet Accessory Rail system. This innovative mounting platform lets you easily attach and remove accessories to trick out your lid.
The XRS features a continuous rail wrapping around the helmet exterior. MOLLE-style slots allow secure attachment of compatible accessories at any point along the rail. No more fussing with adhesive mounts that leave sticky residue behind. Just clip on and off accessories like visors, face masks, and GoPro mounts in seconds.
Visors come in a variety of tints like smoke, amber, and clear to suit different lighting conditions. Opt for a compact visor just over the eyes or go for full sideline coverage. Visors cut glare while maintaining critical peripheral vision on the field. Or skip the visor entirely and rock goggles for an edgy, retro lacrosse style.
For total face protection, accessorize your XRS with a cage mask combo. Models like the Raptor cage maintain airflow while shielding your mug during intense game play. Masks and cages just click right onto the rails for a custom look and feel.
GoPro users will love the seamless mounting options as well. Capture clutch plays and epic lax highlights hands-free with the SidelineCam or Rail Mount. Both models provide stable video footage from your point of view. Relive those insane 2-pointers and behind-the-back dimes with the XRS camera mounts.
The genius of the H.A.R. system lies in its adaptability. As your style evolves, simply swap out accessories on the Cascade XRS. The continuous rails let you put attachments anywhere you want. Mix and match visors, cameras, and masks all season long for the ultimate customized lacrosse helmet.
Add Custom Decals

Take customization a step further by decking out your XRS with unique decals. Cascade includes an official helmet decal kit with edgy designs perfect for head-turning style. But for a truly one-of-a-kind look, add your own custom decals.
Using lacrosse number and name decals is a classic way to personalize a helmet. Display your playing number prominently on the sides and back for easy identification by teammates, coaches, and fans. Include your last name across the back plate so the announcers can give you shoutouts after burying goals.
Team decals also let you represent your colors. Add your school or club logo decals on the side plates to show team pride during games. Display decals of your home state or country for international competition. Use team slogans or mascot decals like paw prints or hoof tracks for intimidating style.
For pure customization, create your own unique decals. Some online shops let you upload photos and images to print on adhesive vinyl material. Turn a favorite photo into a decal selfie on the helmet rear. Or use an inspiring quote or funny catchphrase across the chin area.
Get creative with custom graphic decals too. Use lacrosse stick and ball images in cool patterns over the helmet surface. Add tribal decals or animal prints for wild style. Use colors and designs that reflect your personality. Changing decals between seasons prevents helmet scuffing while updating your fresh look.
Adjust the Liner System
Dial in the perfect fit of your Cascade XRS with the adaptable Liner System. This lightweight inner padding conforms to your head shape for comfort while absorbing big impacts. Take advantage of the adjustable components to customize fit.
The key is setting pad thickness and position. Peel-and-stick padding sets allow you to add or remove padding thickness exactly where needed. Feel pressure points? Add padding layers until the fit feels uniform around your head. You can also slide pads vertically to shift contact points.
Getting the rear pads positioned and shaped correctly is crucial for a comfortable fit. Take the time to incrementally adjust this padding so the helmet sits securely on your crown. The Liner System makes micro-adjustments easy until you achieve your custom comfort and protection.
Beyond padding, utilize the precision ratchet system for a snug all-around fit. The Occipital Lock cinches in the rear padding for a stabilized feel. Two left/right sliders let you tweak side tension while an easy Boa dial fine-tunes fit across the forehead. Take advantage of this ratchet system to eliminate any helmet hot spots.
Don’t settle for an uncomfortable, generic helmet fit. The adaptable XRS Liner System lets you customize padding thicknesses and tension easily. Keep making micro-adjustments until your Cascade lacrosse helmet feels like a second skin.
Swap Chin Straps
While a chin strap may seem like an afterthought, this component significantly impacts helmet fit and comfort. Luckily, the XRS makes it easy to swap and upgrade chin straps until you find your perfect match.
Traditional nylon web straps with plastic clips provide adjustable tension but tend to loosen over time. For more stability, opt for a ratchet chin strap system. A quick twist of the dial creates just the right strap snugness for a secure helmet fit.
If chafing and rubbing is an issue, try a strap featuring extra foam padding or leather construction. The padding buffers contact points along the chin and jawline for increased comfort. Leather straps also soften and conform to your shape over time.
Jaw pads provide another comfort upgrade option. Models like the XLP Jaw Pad add a sleeve of padding along the strap interior. This cushions strap pressure against the delicate jawbone and TMJ joint. Use removable jaw pads to eliminate chafing and irritation.
Don’t settle for discomfort because of a subpar chin strap. With the XRS quick-release clips, you can test out different straps until finding your ideal combination of stability, padding, and adjustability. Get the custom fit you need to perform your best in the heat of competition.
When it comes to lacrosse helmet customization, the possibilities are endless with the Cascade XRS. Take advantage of the innovative accessory rails to trick out your lid with visors, masks, and cameras. Apply custom decals for an exclusive style all your own. Dial in the perfect fit with the adjustable Liner System padding and precision ratchet. Top it off with a custom chin strap for total comfort. With a customized XRS on your head, you’ll feel unstoppable hitting the field this season!
Install Aftermarket Shield Locks
Getting the most out of your Cascade XRS lacrosse helmet means taking customization to the extreme. While the stock XRS is loaded with top-tier features, installing aftermarket shield locks takes protection to the next level.
The XRS comes equipped with fixed anchor points for the facemask. But replacing the factory shield locks with aftermarket models provides more robust, foolproof protection. Upgraded shield locks practically eliminate any chance of the mask loosening or dislodging during intense gameplay.
Look for rugged aluminum or steel lock sets made specifically for the XRS helmet. Billet aluminum locks provide lightweight strength to securely anchor the facemask. Or go ultra-heavy-duty with stainless steel locks that withstand crushing impacts. Both materials resist corrosion and weathering far better than standard plastic locks.
The lock mechanism itself also impacts performance. For the most uncompromising protection, choose a shield lock system with more than a single latching point. Multiple latch points distribute forces evenly and provide redundancy. The mask simply cannot pop free even after huge collisions.
Easy installation is also key for upgrading your XRS shield locks. Most aftermarket systems use the factory mounting holes for a direct bolt-on fit. No modifications required. Simply remove the stock locks and bolt the new system into place in minutes. Detailed video tutorials make the process quick and foolproof.
Premium aftermarket shield lock sets may cost more than standard components but provide unbeatable multi-point security. For critical protection during fast-paced lacrosse gameplay, upgrade to rugged aluminum or steel locks. Your facemask will stay right where it should – guarding your moneymaker.
Swap Out Chin Cups
Finding the perfect chin cup for helmet comfort often means looking beyond the stock model. The XRS accommodates multiple chin cup styles for a customized stable fit. Experiment with different upgrades until you find the ideal model.
Type and thickness of foam padding makes a huge impact on chin cup feel. Multi-layer foam models with gel inserts provide advanced shock absorption and conform to facial contours. Or test chin cups with memory foam padding that molds permanently to your shape.
Moisture-wicking liner fabrics greatly boost comfort in hot weather. Look for antimicrobial, breathable liner materials to reduce sweat buildup. Removable and machine-washable liners maintain freshness after extreme use.
For the best shock absorption, keep an eye out for chin cups utilizing poron padding. This ultra-high-density foam withstands repeated impacts much longer than standard materials. Its durable padding prevents packing out or flattening over time.
Finding your customized chin cup often means mixing and matching features. Consider thickness and density of padding materials along with liner properties. Prioritize shock dampening for hard collisions or breathability for sweat-inducing play. The XRS accommodates aftermarket chin cups so you can test options.
Add Helmet Speakers

Helmet speakers take on-field communication to the next level while providing crisp tunes. Installing mini speakers and an audio system in your XRS keeps you plugged in and pumped up all game long.
High-end helmet models may include built-in speaker pockets, but the XRS can accommodate speakers with a little DIY creativity. Small openings drilled into the liner padding create mounting points for slim speakers. Use adhesive or velcro to position speakers near the ear openings.
For audio input, a wireless Bluetooth module connects easily to any mobile device. Clip the transmitter module to shoulder pads or inside jersey pockets for unrestricted motion. Some helmet audio kits even include microphones for two-way on-field communication.
Audio quality and volume levels vary widely for helmet speakers. Seek out systems using full-range drivers for booming bass and crisp highs even at loud volumes. Multi-speaker designs distribute audio more evenly within the helmet.
Make sure to choose lightweight, impact-resistant speakers as well. Playing hard means taking hits, so flimsy speakers will quickly get damaged. Robust speaker materials hold up to repeated impacts and wet weather.
Wired speaker kits avoid Bluetooth issues but may obstruct vision. Go wireless for clean helmet aesthetics and unhindered motion. Dial in the perfect soundtrack through your XRS helmet speakers to dominate the field in comfort and style.
Upgrade Facemask Attachment
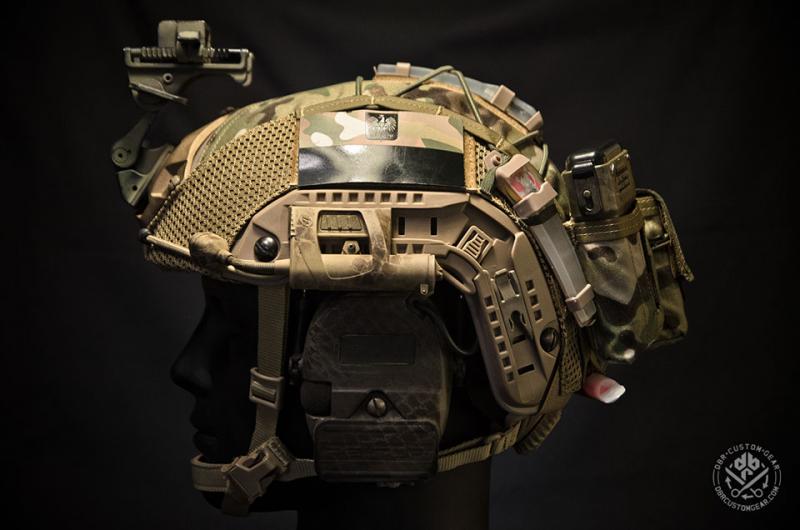
The XRS ships with a fixed-position facemask designed for central impacts. But upgrading to a quick-release facemask mount allows fast removal and alternate positioning.
Quick-release mounts use a pin lock rather than screw attachment. Pulling the release tabs allows the mask to detach instantly from the helmet. This allows medical access without helmet removal in case of injury.
An adjustable quick-release system offers even more customization benefits. Simply slide the tabs toward the desired facemask position before locking. Adjust the mask outward for max vision or inward for extra protection across the nose.
Installing a quick-release mount requires swapping out the XRS factory shield lock hardware. Check for model-specific mounting kits that make installation straightforward. Adjustable mounts may require drilling new shield lock holes.
While training rules often prohibit equipment modifications, some leagues allow alternate mask placements. Just remember to reset the facemask to the centered position for official games if required.
With the ability to quickly detach and reposition your facemask, the XRS becomes a far more versatile helmet. Install quick-release mounts to boost safety, widen vision, and find your ideal fit.
Swap Chin Strap Styles
Chin straps take a beating securing helmets during intense action. Frayed and loose straps poorly stabilize helmets, while worn padding chafes. Refresh your XRS with new chin strap styles for renewed comfort.
Replace worn nylon web straps with models using durable polyester or leather materials. These straps resist stretching from moisture and withstand heavy use. Seek out wide strap designs with added stitching for structural integrity.
Upgrading to a gel or foam padded strap enhances comfort – especially for players with facial hair. But frequent washing degrades foam pads over time. For maximum longevity, choose a leather strap integrating extra-soft suede padding.
The strap attachment points also impact fit. Swivel snap connectors allow micro adjustments and increased rotation versus fixed clips. Opt for medical-grade hardware resistant to breaks and corrosion.
While chin strap tech has advanced, traditional designs still get the job done. Pro-inspired neoprene sleeves offer lightweight padding and wicking at low cost. Or recreate old-school style with a wide, heavyweight leather strap.
Refreshing your chin strap delivers a clean look while dialing in comfort. Seek out durable, low-maintenance materials you can simply rinse out instead of replace. Upgrade your XRS strap for reliable protection game after game.
Maxing out your Cascade XRS’ potential means pushing customization to the limits. Robust aftermarket shield locks anchor the facemask against crushing impacts. Dial in the perfect chin cup for ideal shock absorption and moisture control. Integrate high-fidelity helmet speakers to provide critical communications and pumping jams on-field. Quick-release mask mounts allow medical access and vision adjustment at a flick. Top it off with a refreshed chin strap for the ultimate customized XRS lacrosse helmet setup this season and beyond.
Add Retro Reflectivity
One of the sleekest customizations for the Cascade XRS lacrosse helmet is adding retroreflective details. This subtle enhancement makes your lid shine under field lights while paying homage to vintage gear.
Retroreflective tape contains thousands of tiny glass beads or prisms that bounce light directly back to its source. This creates eye-catching flashes of color when illuminated just right. It’s the same technology used in road signs and safety apparel.
Adding retroreflective accents to your helmet transforms it into a beacon on the field. Subtly applied tape picks up stadium lights or car headlights. Teammates can easily pick you out from across the way based on helmet flash alone.
Strategically position retroreflective strips and shapes for custom dazzle. Outline helmet vents in sleek reflective piping that pops when you turn your head. Apply metallic flash shapes like chevrons, stars or lightning bolts stemming back from visor edges.
Use team colors for the reflective accents to stand out from rivals. Reflective appliques can even help officials distinguish you on the field. Be the most visible player out there after the sun goes down.
Retroreflectivity also reconnects to old-school lacrosse style. Vintage plastic helmets often featured retroreflective paint for visibility. Pay homage to the greats with your own modern reflective spin.
Visibility and style combine with retroreflective XRS helmet details. Add essential flashes that transform your lid into a beaming beacon when the lights kick on. Go full retro or keep it subtle – the flashy possibilities are endless.
Integrate Soft Lacrosse Ball Storage
Never scramble to find practice balls again by integrating ball storage pockets right into your XRS. With spare balls at the ready, you can sharpen handling skills anytime.
Most helmet storage solutions utilize stretchy lycra pouches adhered to exterior surfaces. The pouches stretch to hold 2-3 balls securely in place during intense play. Just reach back and grab to unleash wicked outlet passes on the fly.
For easy access, position the lacrosse ball pouch centered at the helmet rear. Place the pouch high enough to avoid obstructing your vision and collar movement. Reflective pouch fabrics help balls stand out.
Interior helmet storage offers a stealthier option. Adhesive velcro panels applied inside the shell hold a slim ball sleeve against the padding. Stash an extra ball for quick deployment when you need the element of surprise.
For added protection, look for helmet ball pouches featuring padding along the back rim. This cushions your head from errant ball impacts for comfortable storage. Mesh paneling helps air circulation so balls don’t get too funky.
Stop wasting time chasing loose balls. With integrated helmet storage from Cascade, you’ve always got an extra ball ready for blistering shots and feeds.
Paint a Unique Colorway
For a truly one-of-a-kind Cascade XRS, customize the colorway with a custom paint job. Give your lid slick fades, chrome effects or team colors with expert airbrushing techniques.
Start with a blank slate by stripping the stock XRS finish. Use chemical paint removers to get down to bare shell material. Thoroughly prep, clean and degrease the surface before priming.
Research helmet paint types compatible with the XRS shell material. Urethane or specialty lacquer paints adhere best while providing durability and high gloss. Properly cure each layer before applying masks and detailing.
Add team logos, unique graphics and textural effects using high-quality auto masking tape and airbrushing. Hydrodip patterns over a water base create wild multicolored fades. Apply clearcoat to protect the finish.
For slick chrome effects, use a silver prismatic paint base with transparent tint clears. Candy apple reds and electric neon hues turn heads. Straight matte black exudes menacing intimidation.
A professional grade helmet paint job costs more but delivers stunning results. The customized colorway and graphics make your XRS a legend bringing the hype on the field.
Install Helmet Camera Mount
Capture epic lacrosse highlights in real time with a mounted camera on your XRS. Compatible mounts securably attach action cams for stunning point-of-view footage.
For versatility, choose a universal mount compatible with popular cameras like GoPro and Insta360. Look for a low-profile design that sits flush to the helmet surface. The last thing you need is the mount snagging in play.
Helmet front mounts provide the best perspective of on-field action. Position the camera mount centered above the facemask for a head-on view. Point it slightly downward to capture more field and less sky.
Side helmet mounts give a unique profile perspective showing teammates in action. Point the sideways-aimed camera back toward the field rather than directly sideways.
Adhesive mounts allow repositioning the camera anywhere on the helmet exterior. For expanded mounting options, install a Picatinny rail kit to enable quick camera relocation.
Wired camera kits avoid wireless interference but may obstruct motion. Seek out a kit with a well-routed thin cable for clean integration. Go wireless for unhindered performance and big highlights!
Add Custom Helmet Bag
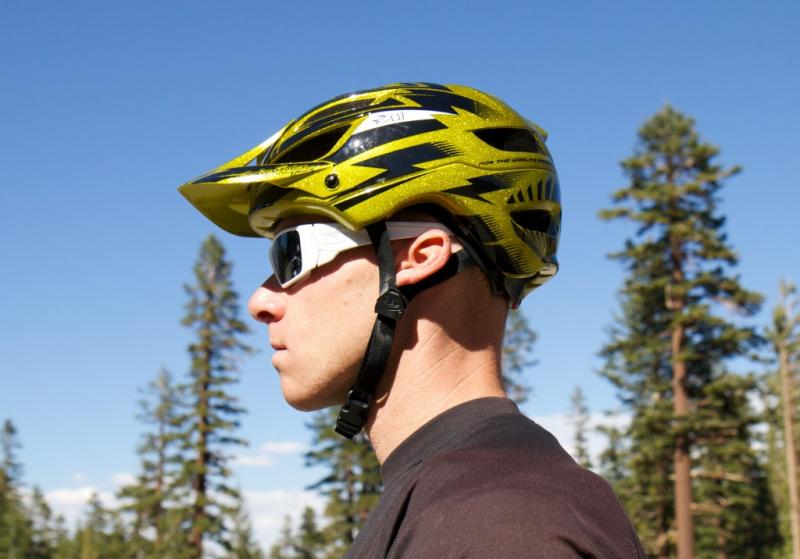
Protect your customized Cascade XRS in style off the field with a custom helmet bag. Personalized carrying cases keep your lid from getting dinged up in transit and storage.
For all-purpose use, choose a bag constructed from rugged nylon or ballistic fabrics. These materials resist tearing, moisture, and abrasion from gear contact. Look for wide openings that accommodate helmets with cages.
Hard-shell helmet cases provide maximum impact protection for airline travel or cramped storage. Consider a model with wheels for easy transport through airports or the locker room.
Customize your bag with personal ID patches, embroidery or decals. Add your name, number or team logo for easy identification. Use colored bag straps that stand out in crowded equipment rooms.
Interior bag compartments neatly organize visors, gloves, keys and other small essentials. Some feature dedicated helmet stabilization straps to prevent shifting in transit.
Don’t stash your customized XRS haphazardly – protect it in style. Carry your helmet in a personalized bag built to handle abuse and keep your gear in mint condition.
Adding retroreflective flair helps your Cascade XRS shine no matter the conditions. Integrated lacrosse ball storage ensures you’re always ready for action. Custom paints and graphics make it uniquely yours. Mounted cameras capture insane highlights from your perspective. And a custom helmet bag keeps your most prized possession safe and secure. Trick out your XRS with these essential upgrades for unmatched performance and style.
Customize with Paint or Hydrographics
Unleash your creative side by custom painting your Cascade XRS for a bold original look. Vibrant lacrosse helmet paint jobs and hydrographic designs make you shine on the field.
Start with a blank slate by completely stripping the factory XRS finish. Use chemical paint removers to get down to the bare shell material. Thoroughly clean and degrease before priming for ideal paint adhesion.
Research helmet-specific paints compatible with the XRS shell material. Certain urethanes, lacquers and enamels adhere best while providing durability. Properly cure each coat before taping or masking.
Hand paint creative designs in lacrosse colors using subtle fades or bold blocking. Add textural dimension with splatter techniques. Use auto pinstriping tape for super sharp lines when airbrushing.
Hydrodipping creates stunning multicolored fades by dipping the helmet into a water transferring printed film. Complex graphic designs like carbon fiber weaves transfer in one fluid motion.
Chrome paints simulate polished metal shine. Candy apple reds and neon brights turn heads. A custom airbrushed mural depicts your inspirations. Clearcoats protect the finished paintwork.
While costlier than wraps or decals, a pro paint or hydrographic job makes your XRS a legend. The eye-catching design reflects your vision for total creative expression.
Upgrade Facemask Style
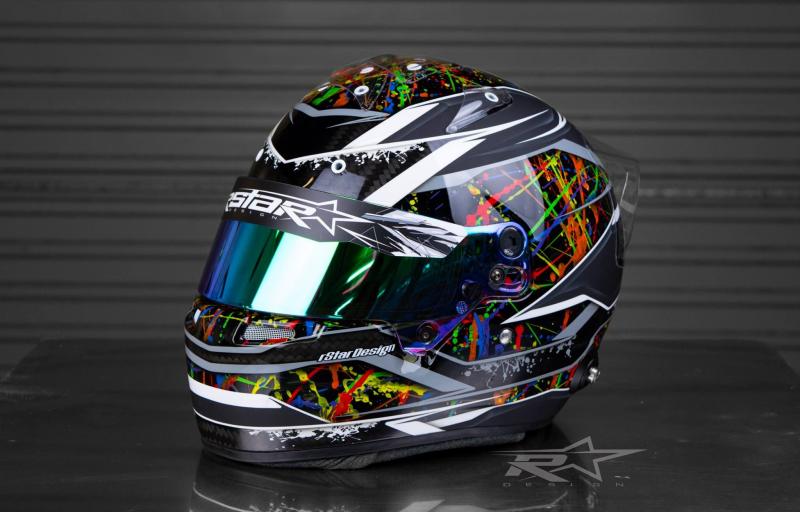
Finding your ideal facemask means looking beyond the stock model. Mix and match facemask shape, material, and visor tint to achieve the perfect balance of vision and protection.
Open shape designs like the SpeedView widen visibility with trimmed vertical bars spaced across the eyes. A wide-profile visor boosts peripheral vision and ball tracking.
For max protection, nothing beats the rugged stopping power of a full cage mask. The cage’s expanded coverage shields the entire face from harm.
Titanium facemask alloy delivers an ultra-strong but lightweight feel. Traditional thick chrome steel takes hits while still seeing action after years of hard use.
Matching visor tint to field lighting maximizes visibility. Yellow boosts contrast under bright sun. Orange highlights the ball against green grass. Smoke gray cuts harsh glare. Mirrored lenses add intimidating dazzle.
The XRS accommodates nearly every facemask style thanks to easy side clip swaps. Find your ideal blend of vision, protection and swagger – then own the field of play.
Install Camera and Video Systems
Capture highlights in real-time by recording video directly through your XRS helmet. Integrated camera and video systems preserve on-field action from your perspective.
Miniature camera lenses mount to the helmet exterior or interior to feed video. Position the lens for your optimal viewing angle such as capturing over-the-shoulder feeds.
For a pro broadcast look, add a small microphone to integrate game audio. Capture crushing hits and on-field banter in true surround sound.
The camera transmits wireless video to a controller unit. Mini LCD screens allow monitoring footage in real time. Or view playback later to study technique and share epic moments.
Memory cards slot into the controllers to record hours of HD video. WiFi and app integration uploads highlights for instant sharing. Some systems even livestream through social media.
Helmet video systems cost more but provide invaluable game footage. Relive most memorable plays and study performance from your on-field perspective.
Upgrade Visor Style
Finding your ideal Cascade XRS visor means experimenting with shape, tint, and attachments. Mix and match options for the perfect balance of vision, protection and style.
Hourglass visor shapes expand downward peripheral vision for tracking loose balls. Go widescreen for max sideline view. Or limit with a compact visor just over the eyes.
Lens material affects durability and optical clarity. Polycarbonate withstands impacts but scratches easiest. Optical-grade acrylic resists scratches for lasting clarity.
Match tint to lighting for sharpest vision. Yellow boosts contrast on sunny days. Rose-tinted shades are classics. Ion mirror coatings reflect glare from stadium lights.
Quick-release visor attachments allow changing lenses in seconds without tools. Opt for rounded spacer clips that pivot the visor outward for expanded vision.
The XRS accommodates nearly all visor varieties. Experiment until finding the perfect match of size, tint and hardware that suits your vision needs and style.
Install Rugged Quick-Release Systems
Maximize helmet protection and simplify facemask swaps by upgrading to quick-release shield lock systems.
Standard side clips securely anchor masks but require tools for removal. Quick-release systems provide tool-free mask swaps in seconds for simplified cleaning and replacement.
Look for heavy-duty quick-release models made from robust aluminum or steel. These withstand savage checks better than brittle plastic versions. Multiple anchor points distribute forces evenly across the shell.
Locking tabs click the mask into hardened steel latching posts with just finger pressure. Release levers disengage the system instantly for mask swaps or emergency removal.
Quick-release kits replace existing shield locks for straightforward bolt-on installation. Detailed video tutorials walk through each assembly step.
While costing more than standard clips, heavy-duty quick-release systems provide the quickest, most reliable mask swaps possible. Simplify equipment maintenance and keep playing without painful delays.
Upgrade Interior Liner and Padding
Rejuvenate fit and comfort levels by upgrading the XRS liner and padding. Aftermarket interior kits adapt the fit tailored specifically to your head shape.
Start by assessing padding breakdown and compression. Swap out flattened foam pads for fresh density and rebound. Target the problematic spots for an immediate comfort boost.
Foams infused with gel provide exceptional impact damping and distribute compression forces better. Antimicrobials reduce bacterial growth for refreshed smelling padding.
Adjust vertical pad positions using the peel-and-stick attachment backing. This shifts contact points to alleviate pain points. Dial-in the ideal front, crown and rear profile.
Ratchet systems with micro-adjustable wheels incrementally tweak tension across multiple vectors. Set the Occipital lock for ideal rear security and rotation control.
Refitting the liner transforms helmet feel and security. Consistent comfort inspires focused confidence for dominating play after play.
A custom Cascade XRS lacrosse helmet reflects your vision. Vibrant paint and hydrographic finishes express style. Robust quick-releases allow rapid mask swaps. Integrated cameras capture highlights from the ideal view. And refreshed padding enhances fit for unwavering comfort. Don’t just play the game – own it with a fully personalized XRS.
Build Your Dream Helmet from Scratch
For full creative freedom designing your Cascade XRS lacrosse helmet, start from an unpainted blank model. The bare white shell is your blank canvas for constructing a completely custom dream helmet.
An unpainted “virgin” shell provides the ideal foundation. Skip the factory finishes and logos to showcase your vision. Prep the bare shell by sanding smooth, cleaning thoroughly, and applying adhesion promoter.
Research paint types compatible with the XRS shell material, likely polycarbonate. Lacquer or urethane based paints provide professional results when applied properly. Fully cure each layer before taping or masking.
Apply stunning colors and effects using careful masking and airbrush techniques. Candy reds, chromes and intricate fades demonstrate next-level skills. Clearcoat protects the finished design.
Collaborate with graphic artists to integrate meaningful designs. Integrate inspirational phrases or images close to your heart. The possibilities for custom paintwork are endless.
Continue building by plotting facemask style and visor shape. Open shapes expand visibility while still protecting eyes and teeth. Full cages provide complete facial coverage at the cost of vision.
Dial in proper fit with upgraded liner and padding kits. Swap components until achieving ideal comfort and stability. Top-notch protection inspires confident, heads-up play.
Constructing your dream XRS from scratch takes vision, effort and skill. But the payoff is a legendary helmet expressing your identity and protecting what matters most.
Add Lighting Kits for Visibility
Enhance your presence in night games and low-light conditions by installing LED lighting kits. Bright helmet illumination helps you stand out on the field.
Helmet lighting uses compact LED strips and pods powered by small batteries or USB. Attach the lightweight modules using adhesive or velcro for easy application.
Position lights for maximum visibility. Front and rear facing pods catch the eye. Rim lights trace vent openings. Under-visor pods illuminate your facemask from below.
Select lighting colors complementing your helmet design. Go with classic white light for max visibility. Or use team colors for custom looks. RGB strips cycle through dazzling multi-hued flashes.
Control lighting activation manually or sync with impacts. Hard hits trigger automatic flash patterns, indicating you just crushed someone. Choose flash speed and sequencing for unique style.
Upgrade visibility after daylight. LED helmet lighting transforms you into a beacon on the night field for allies and intimidation.
Apply Custom Wraps and Decals
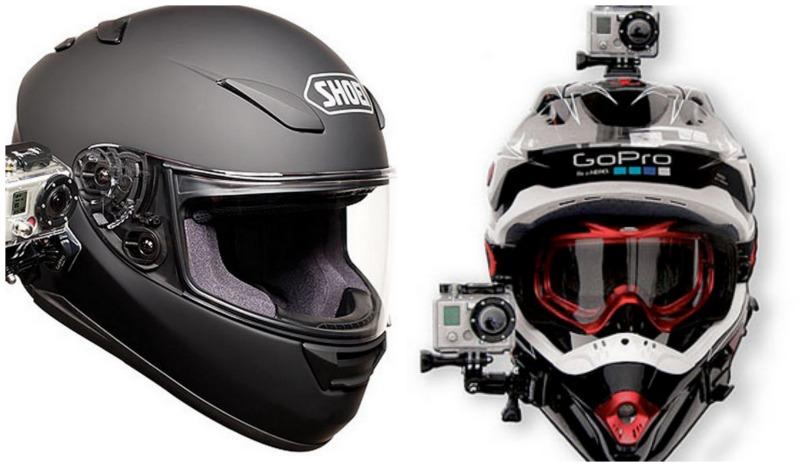
Refresh the Cascade XRS’ style while protecting the factory finish by applying custom wraps. Preprinted decals and appliques provide limitless personalization options.
Full helmet wraps give a fresh painted look without permanent commitment. Change designs between seasons while preventing shell scuffing. Use team patterns or unique prints that express personality.
Pre-cut lacrosse number and name decals attach using adhesive backings. Display your playing number large on the sides and name across the rear in team fonts.
Use helmet decals to commemorate big games and events. Themed decoration kits feature cool accents like claw marks, lightning bolts or checkerboard details.
Add custom phrases or inspirational quotes using vinyl letter decals. Names and messages along the rear rim pay tribute to loved ones. Inside jokes for teammates only are options too.
Apply new decals over existing wraps for evolving designs. Swap colors and graphics each season or when inspiration strikes. The possibilities are endless for DIY customization.
Upgrade Facemask and Visor
Refresh protection and vision by upgrading the XRS facemask and visor. Aftermarket masks and lenses provide expanded options to meet your needs.
Open facemask shapes with trimmed vertical bars expand vision peripherally. Full enclosure cages provide added facial protection and intimidation.
Robust aluminum alloys make masks lighter while still absorbing crushing checks. Durable finished steel cages withstand seasons of hardcore use.
Quick-release visor attachments simplify lens swaps in seconds. Go compact or extend vision down the sides. Match tints like amber, smoke and yellow to lighting conditions.
Finding the right balance means mixing and matching mask styles, visors and hardware. Experiment until the sightlines, coverage and swagger are perfect.
The ideal facemask and visor improves play through enhanced vision and confidence. See more, protect better and work the angles fearlessly.
Upgrade Chin Cup Comfort and Protection
Finding your ideal chin cup often means looking past the stock model. Aftermarket upgrades better adapt to your facial structure for comfort.
Replace flimsy OEM foam with memory foam or multi-layerPadding tailored to your chin’s shape eliminates pressure points and discomfort.
Moisture-wicking antimicrobial liner fabrics reduce sweat buildup for refreshed interior feel. Some pads feature removable machine-washable liners for easy cleaning.
Prioritize shock absorption and impact force dissipation. Poron or gel-infused foams provide advanced damping properties that standard foam can’t match.
Don’t settle for an ill-fitting chin cup. Mix and match paddings with specialty foams and liner fabrics until finding your just-right comfort and protection balance.
Fully realizing the Cascade XRS’ potential means pushing beyond standard components. Building from an unpainted shell allows complete creative freedom. LED lighting enhances visibility after dark. Wraps and decals customize style. And upgraded masks, visors and cups complete the dream helmet vision.