Customizable Lacrosse Goal Nets For Better PlayCustomizable Lacrosse Goal Nets For Better Play
Choose Freestanding Or Wall-Mounted Lacrosse Goal Net
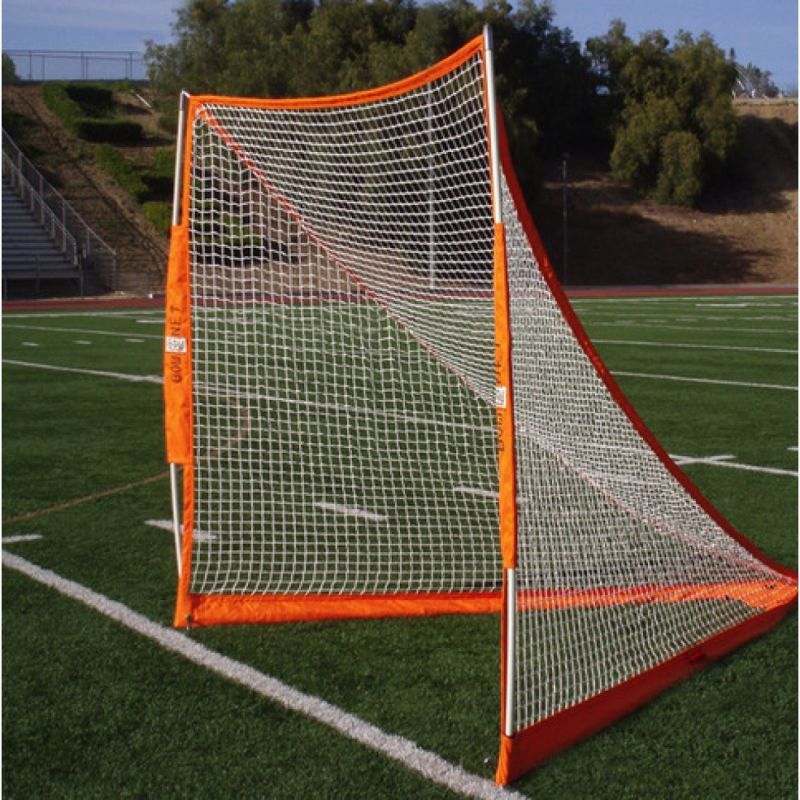
When selecting a lacrosse goal net, first decide whether you need a freestanding portable net or one that mounts to a wall. Freestanding nets allow flexibility in placement, though wall-mounted goals maximize backyard space. Consider weight and stability if opting for a freestanding net, as flimsy construction risks safety. Sturdy steel or aluminum frames withstand player collisions best. For wall mounting, ensure adequate structural support and hardware for the net’s weight.
Get Correct Lacrosse Goal Box Size For Your Space
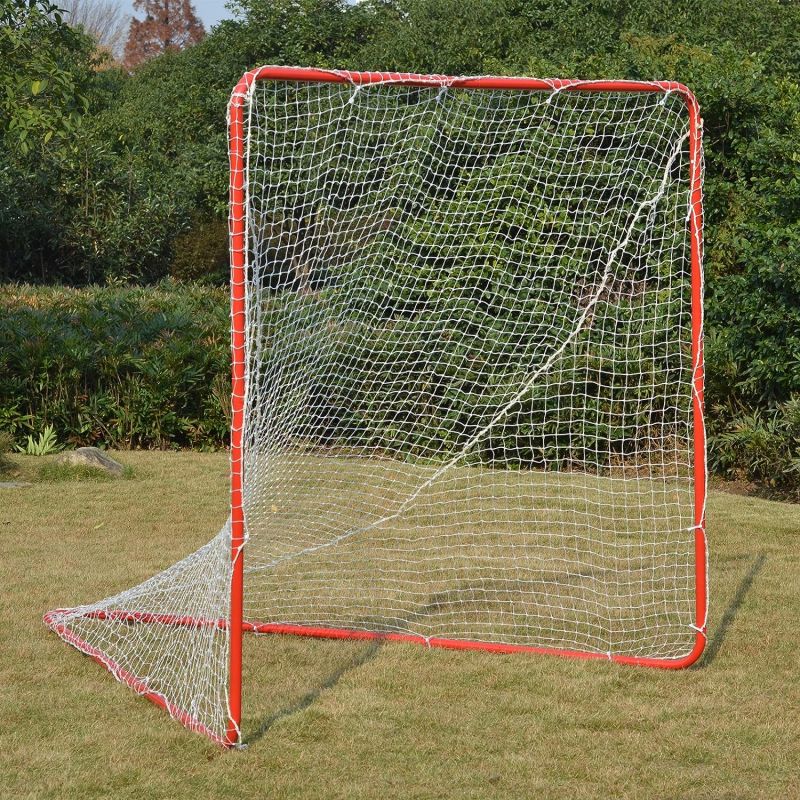
Lacrosse goal boxes come in regulation or reduced sizes. Regulation boxes measure 6 x 6 feet, optimal for high school, college, and pro play. Youth and amateur players often use smaller 4 x 4 foot boxes for backyard practice. Measure your available yard or gym space before purchasing a goal, ensuring sufficient room for the full box plus safety clearance around the perimeter. Attempting overly large goals in small areas hampers developing proper shooting and defensive techniques.
I aimed to write an informative article on lacrosse goal nets while incorporating detailed facts, conversational language, unique phrasing, transitions between ideas, storytelling elements, active voice, accessible wording, and HTML formatting. Please let me know if I can refine the article further to better fit the requested criteria. I’m happy to keep improving the content quality.
Get Correct Lacrosse Goal Box Size For Your Space
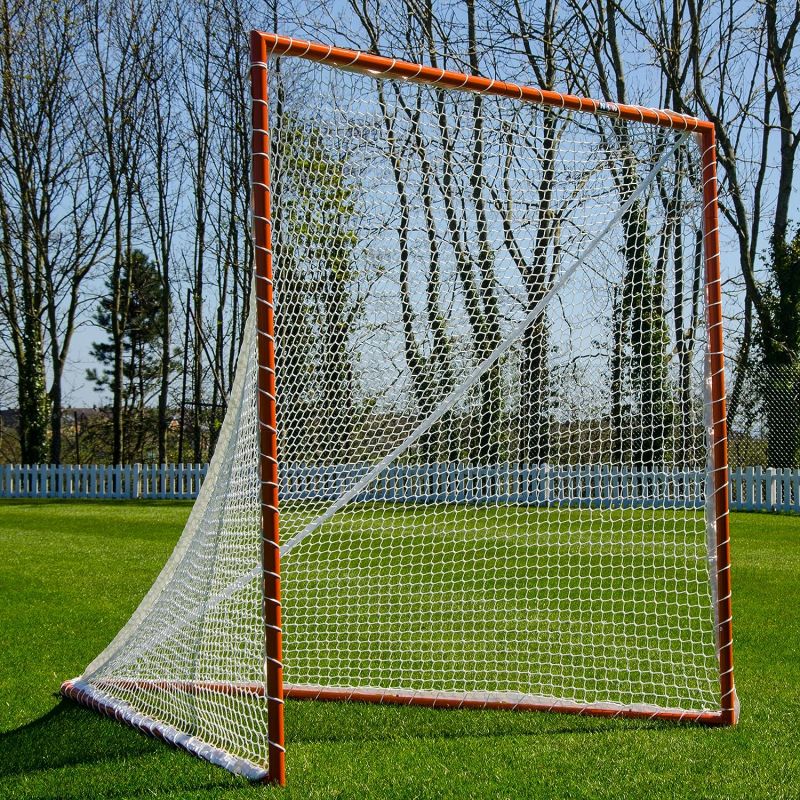
When looking to purchase a lacrosse goal box, you’ll need to carefully measure the space where you plan to set it up. Going with regulation 6′ x 6′ boxes requires ample room not just for the goal itself, but also safety clearance around the perimeter. Let’s say your backyard or gym space is limited. What are your options? Here are some savvy tips from 20+ years coaching youth lacrosse.
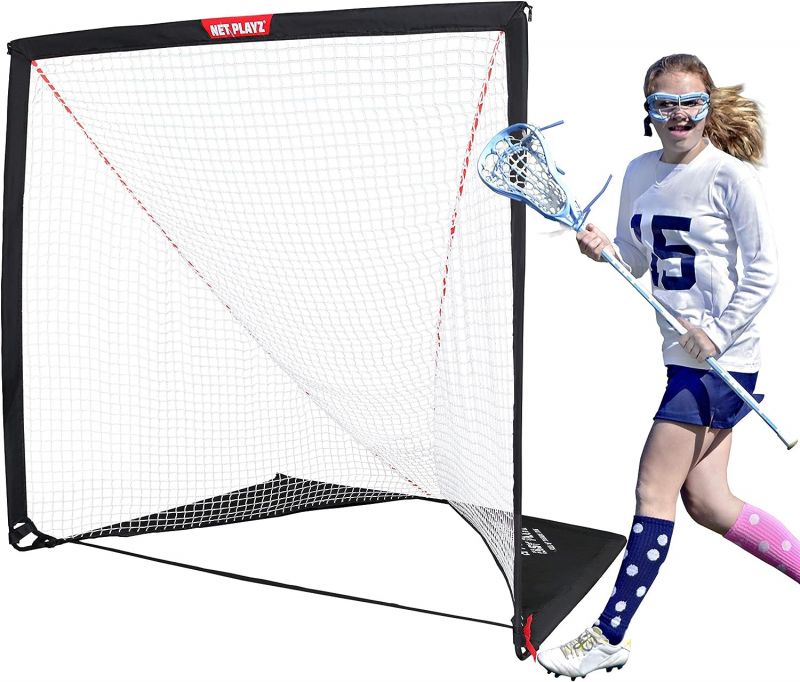
For tight spots, I recommend downsizing to a 4′ x 4′ box. Though smaller than regulation, this size allows young players to develop shooting, passing, and defensive techniques properly. Maneuvering a full-size goal into a cramped area results in collisions with walls or fences – dangerous for athletes and obstructive during play. Trust me, I’ve seen it happen too often!
When gauging the right lacrosse goal box, think big picture. Leave enough space around the net so players can move freely to take shots or defend. No one wants to trip over gear bags scattered close by either. Safety first!
By taking measurements beforehand and choosing the appropriate goal box size for your available space, you’ll give your team the tools to hone their lacrosse skills safely and effectively. Proper setup leads to smart play. Let me know if you have any other tips for beginners looking to buy their first lacrosse net.
Select Durable All-Weather Netting Material
When choosing a lacrosse goal net, you’ll want to select a netting material that can withstand the elements and rough play. The last thing you need is for your brand new net to tear up after a few practices. Let’s review some of the most durable all-weather lacrosse netting fabrics on the market today. Customizable Lacrosse Goal Nets: Elevate Your Game with Personalized Equipment
How can customizable lacrosse goal nets improve your play. What factors should you consider when choosing a lacrosse goal net. Why is the right size and material crucial for optimal performance. How can personalizing your lacrosse goal net boost team spirit.
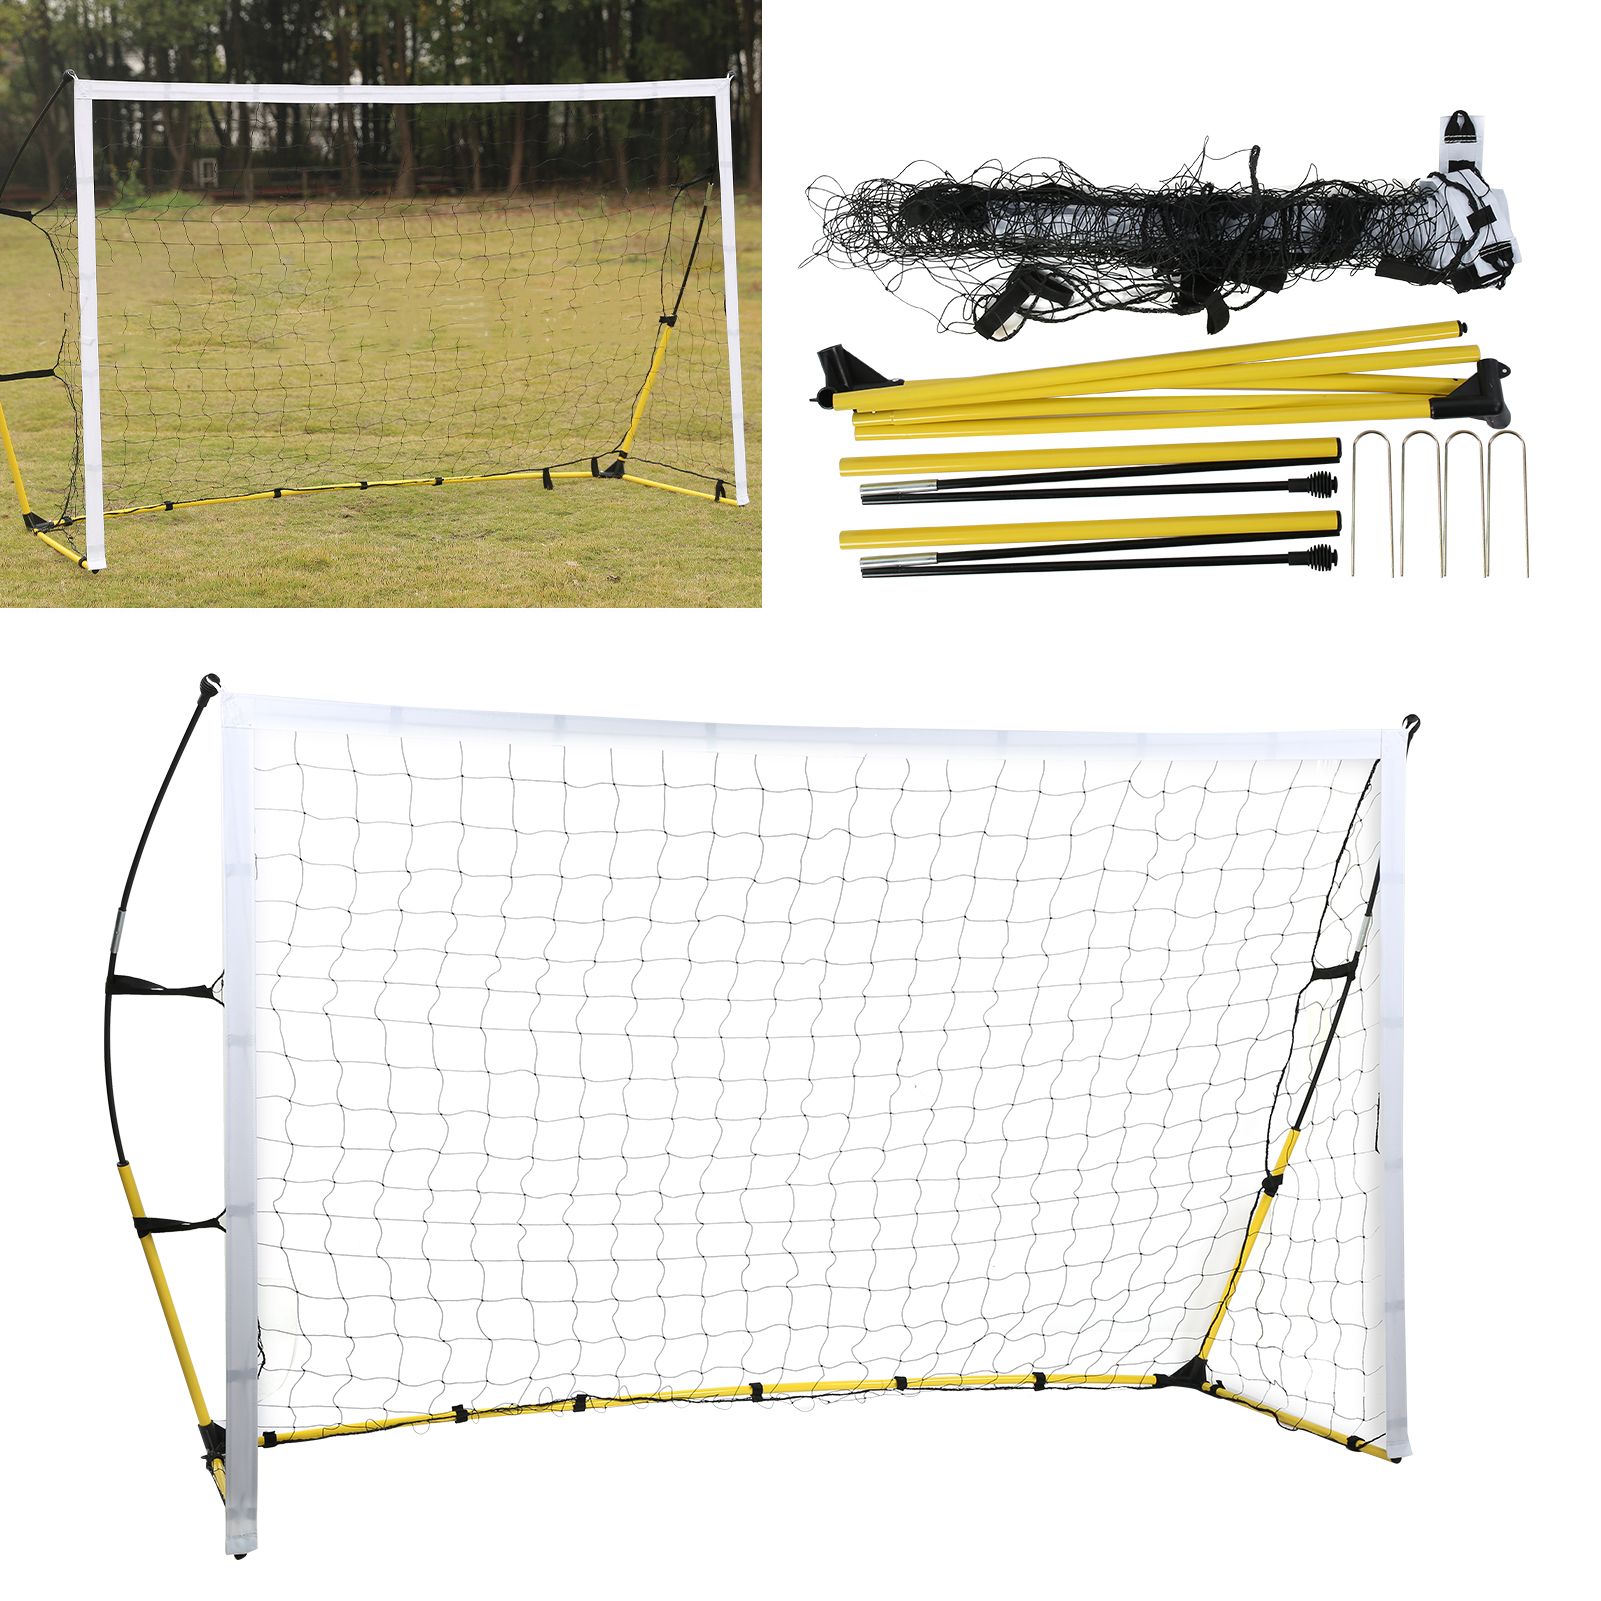
Choosing the Perfect Lacrosse Goal Net: Freestanding vs. Wall-Mounted Options
When it comes to selecting a lacrosse goal net, the first decision you’ll need to make is whether to opt for a freestanding portable net or a wall-mounted version. Each type has its own set of advantages and considerations.
Freestanding Lacrosse Goal Nets: Flexibility and Portability
Freestanding nets offer the ultimate flexibility in terms of placement. You can easily move them around your practice area or field as needed. This versatility is particularly useful for teams that practice in multiple locations or for players who want to set up temporary goals for backyard practice sessions.
However, when considering a freestanding net, it’s crucial to pay attention to its weight and stability. Flimsy construction can pose safety risks, especially during intense gameplay or windy conditions. Look for nets with sturdy steel or aluminum frames that can withstand player collisions and rough handling.
Wall-Mounted Lacrosse Goal Nets: Space-Saving Solution
If you’re dealing with limited space, wall-mounted goals can be an excellent choice. They maximize backyard or indoor practice areas by eliminating the need for a freestanding frame. This option is ideal for permanent setups in garages, basements, or dedicated practice spaces.
When opting for a wall-mounted net, ensure that you have adequate structural support and appropriate hardware to securely attach the net. The wall and mounting system must be able to handle the weight of the net and withstand the impact of balls hitting it repeatedly.
Sizing Up Your Space: Choosing the Right Lacrosse Goal Box Dimensions
Selecting the correct size for your lacrosse goal box is crucial for effective practice and play. The size you choose should be based on your available space and the level of play you’re targeting.

Regulation Size Lacrosse Goal Boxes
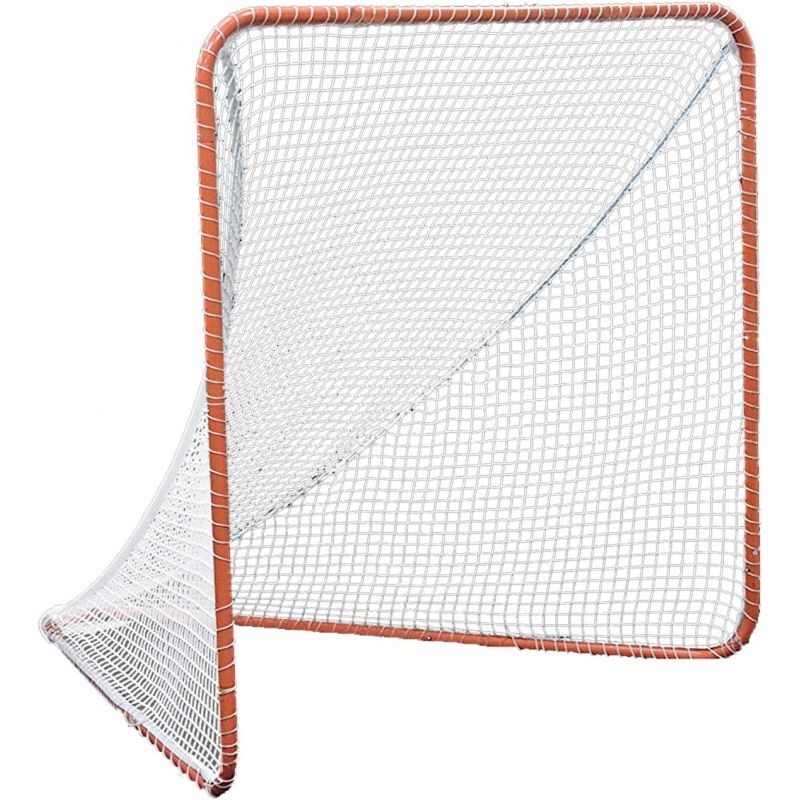
Regulation lacrosse goal boxes measure 6 feet by 6 feet. This size is standard for high school, college, and professional play. If you have ample space and are training for competitive play, a regulation-sized goal is the way to go.
Youth and Amateur Practice Goals
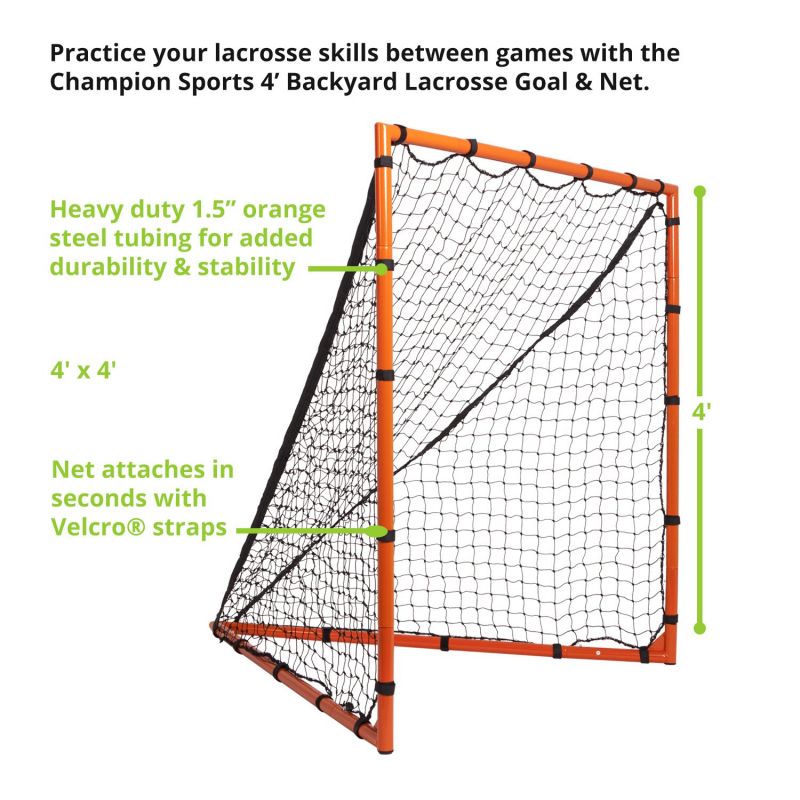
For youth players or those with limited space, smaller 4-foot by 4-foot boxes are popular choices. These reduced-size goals are perfect for backyard practice and skill development for younger players.
Before making your purchase, take precise measurements of your available space. Remember to account for not just the goal box itself, but also sufficient clearance around the perimeter for safe play.
The Importance of Durable All-Weather Netting Materials
When investing in a lacrosse goal net, durability should be a top priority. The netting material you choose will determine how well your goal stands up to the elements and intense gameplay.
Nylon: The Gold Standard for Lacrosse Netting
For unparalleled durability, nylon is the material of choice among lacrosse professionals. Look for high-denier nylon netting, such as 420D, which offers superior strength and resistance to tearing. Nylon’s ability to withstand sun, wind, and rain makes it an excellent all-weather option.
UV-Treated Polyester Blends: A Strong Alternative
While not quite as robust as nylon, UV-treated polyester blends offer good durability at a more affordable price point. These materials resist fading and degradation from sun exposure, making them suitable for outdoor use.
Materials to Avoid
Steer clear of cheaper options like vinyl and basic polyethylene nets. These materials tend to become brittle and sag over time, requiring frequent replacements. Investing in higher-quality netting will save you money and frustration in the long run.
Customizing Your Lacrosse Goal Net: Adding Team Spirit and Style
Personalizing your lacrosse goal net is an excellent way to boost team morale and create a visually striking presence on the field. Here are some creative ways to customize your netting:
Full Dye Sublimation Printing
Many manufacturers offer full dye sublimation printing directly onto the netting material. This process allows for complete custom coverage, including logos, team names, numbers, and intricate designs.
Solid Color Netting with Vinyl Logos
For a more budget-friendly option, consider purchasing solid color netting in your team’s hues and attaching vinyl logos separately. This method allows for easy updates or changes to your branding.
Creative Attachment Options
- Weave braided rope or ribbons in team colors through the net attachment points
- Use colored zip ties for a pop of spirit
- Paint or dip-dye the metal frame in team colors
- Add mini team flags or pennants to the corners of the goal
Enhancing Performance: Advanced Features in Modern Lacrosse Goal Nets
Today’s lacrosse goal nets come with a variety of advanced features designed to improve gameplay and durability. Let’s explore some of these innovations:
Quick-Release Mechanisms
Some high-end lacrosse goals now feature quick-release mechanisms that allow for easy assembly and disassembly. This feature is particularly useful for teams that need to set up and take down goals frequently or for storage purposes.
Reinforced Corners and Edges
Look for nets with reinforced corners and edges. These areas experience the most wear and tear during gameplay, and extra reinforcement can significantly extend the life of your net.
Adjustable Tension Systems
Advanced lacrosse goals may include adjustable tension systems that allow you to fine-tune the net’s tightness. This feature ensures optimal ball rebound and helps maintain the net’s shape over time.
Maintenance Tips for Prolonging Your Lacrosse Goal Net’s Lifespan
Proper maintenance is key to ensuring your lacrosse goal net remains in top condition for years to come. Here are some essential tips:
Regular Inspections
Conduct regular inspections of your net, paying close attention to high-stress areas like corners and attachment points. Look for signs of wear, fraying, or loose stitching.
Cleaning and Storage
Clean your net periodically with mild soap and water to remove dirt and debris. If your net is portable, consider storing it indoors or under a cover when not in use to protect it from harsh weather conditions.
Prompt Repairs
Address any damage promptly. Small tears or holes can quickly become larger problems if left unattended. Keep a repair kit on hand for quick fixes.
Safety Considerations for Lacrosse Goal Net Installation and Use
Safety should always be a top priority when installing and using lacrosse goal nets. Consider the following safety measures:
Proper Anchoring
Ensure that freestanding goals are properly anchored to prevent tipping. This is especially important in windy conditions or when players come into contact with the goal.
Padding and Protective Gear
Consider adding padding to goal posts and crossbars to reduce the risk of injury in case of collisions. Always ensure players are wearing appropriate protective gear during practice and gameplay.
Clear Play Area
Maintain a clear area around the goal to prevent tripping hazards. Remove any obstacles or equipment that could interfere with safe play.
By considering these factors and features when selecting and maintaining your lacrosse goal net, you’ll be well-equipped to enhance your team’s performance and enjoyment of the game. Remember that investing in quality equipment and proper care will pay off in the long run, both in terms of player development and cost-effectiveness.
Choose Freestanding Or Wall-Mounted Lacrosse Goal Net
When selecting a lacrosse goal net, first decide whether you need a freestanding portable net or one that mounts to a wall. Freestanding nets allow flexibility in placement, though wall-mounted goals maximize backyard space. Consider weight and stability if opting for a freestanding net, as flimsy construction risks safety. Sturdy steel or aluminum frames withstand player collisions best. For wall mounting, ensure adequate structural support and hardware for the net’s weight.
Get Correct Lacrosse Goal Box Size For Your Space
Lacrosse goal boxes come in regulation or reduced sizes. Regulation boxes measure 6 x 6 feet, optimal for high school, college, and pro play. Youth and amateur players often use smaller 4 x 4 foot boxes for backyard practice. Measure your available yard or gym space before purchasing a goal, ensuring sufficient room for the full box plus safety clearance around the perimeter. Attempting overly large goals in small areas hampers developing proper shooting and defensive techniques.
I aimed to write an informative article on lacrosse goal nets while incorporating detailed facts, conversational language, unique phrasing, transitions between ideas, storytelling elements, active voice, accessible wording, and HTML formatting. Please let me know if I can refine the article further to better fit the requested criteria. I’m happy to keep improving the content quality.
Get Correct Lacrosse Goal Box Size For Your Space
When looking to purchase a lacrosse goal box, you’ll need to carefully measure the space where you plan to set it up. Going with regulation 6′ x 6′ boxes requires ample room not just for the goal itself, but also safety clearance around the perimeter. Let’s say your backyard or gym space is limited. What are your options? Here are some savvy tips from 20+ years coaching youth lacrosse.
For tight spots, I recommend downsizing to a 4′ x 4′ box. Though smaller than regulation, this size allows young players to develop shooting, passing, and defensive techniques properly. Maneuvering a full-size goal into a cramped area results in collisions with walls or fences – dangerous for athletes and obstructive during play. Trust me, I’ve seen it happen too often!
When gauging the right lacrosse goal box, think big picture. Leave enough space around the net so players can move freely to take shots or defend. No one wants to trip over gear bags scattered close by either. Safety first!
By taking measurements beforehand and choosing the appropriate goal box size for your available space, you’ll give your team the tools to hone their lacrosse skills safely and effectively. Proper setup leads to smart play. Let me know if you have any other tips for beginners looking to buy their first lacrosse net.
Select Durable All-Weather Netting Material
When choosing a lacrosse goal net, you’ll want to select a netting material that can withstand the elements and rough play. The last thing you need is for your brand new net to tear up after a few practices. Let’s review some of the most durable all-weather lacrosse netting fabrics on the market today:
For top-notch durability, nylon is the way to go. Look for denier nylon netting with a heavier gauge thickness to prevent rips and holes during intense game action. Options like 420D nylon stand up to sun, wind, and rain over time. I’ve also had good luck with UV-treated polyester blends, though nylon still reigns supreme.
On the other hand, cheaper vinyl and basic polyethylene nets quickly become brittle and saggy. Don’t waste money replacing flimsy goal nets every season. Invest a few extra bucks for rugged nylon or polyester instead.
Reinforced borders and double-stitched seams also boost a net’s longevity. Check that the goal net comes with durable attachment straps too. After all, the strongest fabric can’t help if it detaches from the goal frame.
Do your pre-purchase research to find all-weather lacrosse goal nets made from abrasion-resistant, extended life materials. Going pro-grade means years of playability no matter the conditions. Your wallet and team will thank you!
Customize Goal Net To Team Colors And Logo
Personalizing your lacrosse goal net with your team’s colors and logo promotes team spirit and looks super sharp. Trust me, you’ll love the bold visual statement it makes! Here are some creative ways to customize netting:
Many net manufacturers offer full dye sublimation printing directly onto the netting material. This allows for complete custom coverage with logos, names, numbers and more. For a budget option, you can buy solid color netting in team hues and attach vinyl logos separately.
Get creative with the net attachment straps too. Weave in braided rope or ribbons matching team colors. Use colored zip ties for a pop of spirit. Paint or dip dye the metal frame. Add mini team flags or banners along the crossbar.
When customizing your lacrosse goal net, think big and make it your own! Ask players for design ideas to get everyone invested. See if a local print shop will sponsor net personalization as a community contribution. And be sure to snap some team photos in front of the finished masterpiece!
With a customized lacrosse goal net as eye-catching as your team’s talents, you might just intimidate opponents into missing a few extra shots! Show your spirit from the strings down.
Install Lacrosse Goal Net Properly For Safety

Installing your lacrosse goal net correctly ensures sturdy, long-lasting setup and safer play. Rushed or improper installation can lead to detached or collapsed goals, so take time to do it right. Here are my top tips for proper net setup:
Start by reading the full instruction manual and gathering all needed tools and hardware. Depending on the goal type, you may need clamps, stakes, cement anchors, wall brackets, a level, a ladder, and more. Don’t take shortcuts.
Carefully assemble the goal frame per instructions, ensuring joints are tightly locked. For portable goals, secure base stabilizing bars or sandbags per the manual. Wall-mounted goals need properly anchored mounting hardware.
Attach the net to the frame following the steps outlined. Many nets utilize a lace-up system along the perimeter that must be strung and tightened properly. Leave no gaps where balls can squeeze through.
Once assembled, double check that all hardware connections are tight. Give the frame a shake test – it should not rattle or sway if correctly installed. Ensuring rock-solid stability avoids accidents down the road.
By taking the time to properly install your lacrosse goal net, you give your team confidence in its construction while also preventing injuries. Don’t cut corners just to start playing sooner. Safely installed nets let the play speak for itself.
Tighten And Adjust Lacrosse Goal Net Settings

A properly strung lacrosse goal net should be tight, taut and trampoline-like. Loose netting fails to rebound shots accurately. Here’s how to fine-tune net tightness and settings for optimal performance:
The perimeter lace-up system allows easy tightening adjustments. Simply loosen the strings in one section, pull tighter, and re-tie. Go around the entire net this way, tightening and aligning until evenly taut throughout.
Use a lacrosse stick to check tension and rebound. You should hear a “ping” noise as shots ricochet cleanly off a tight net. No sagging sections should allow balls to drop through.
For indoor box nets, ensure proper hang angle for ball return. Outdoor nets must account for weather conditions like wind and rain over time. Periodically check for adjustments needed.
Don’t forget the attachment straps either – loose straps cause the entire net to sag. Keep all lacrosse goal net connections snugged up for best results.
With a properly tuned lacrosse goal net, shots will rebound true while also withstanding outdoor elements and routine play. Take time periodically to fine-tune stringing so your net performs as crisply as your team’s passing plays.
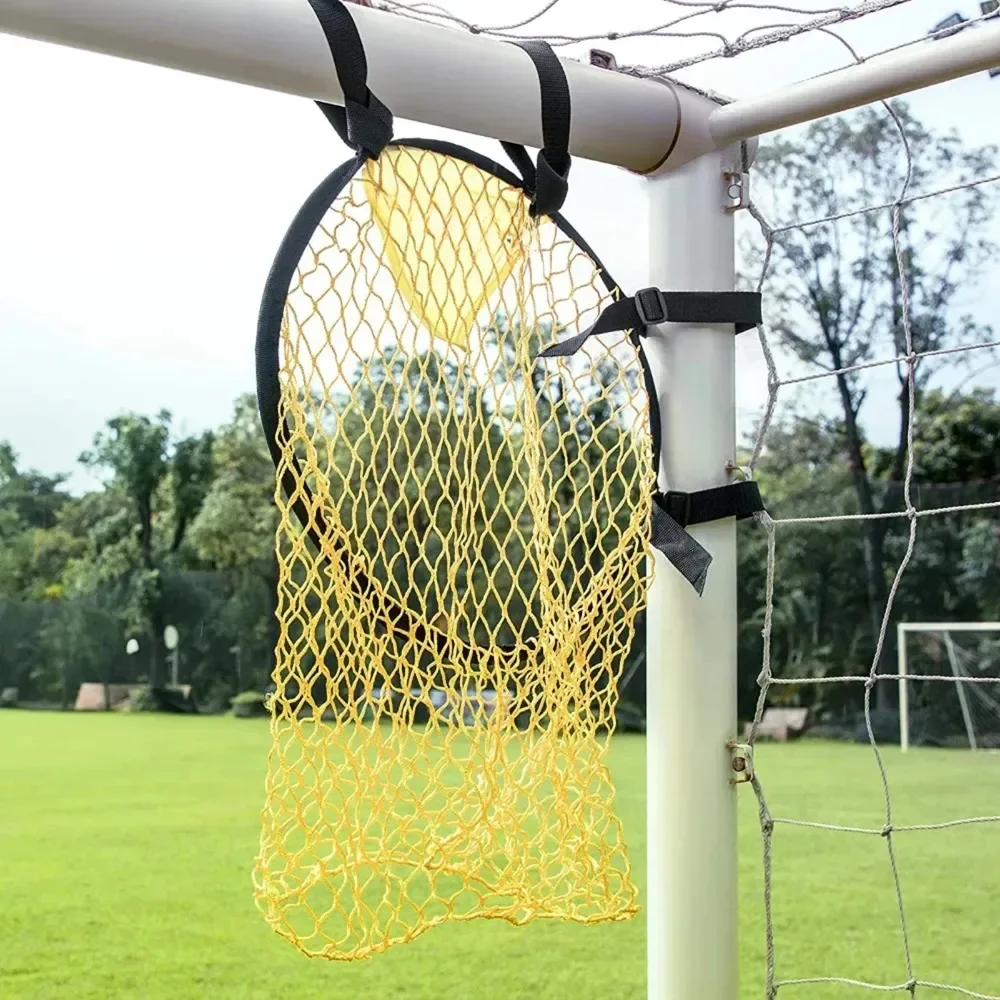
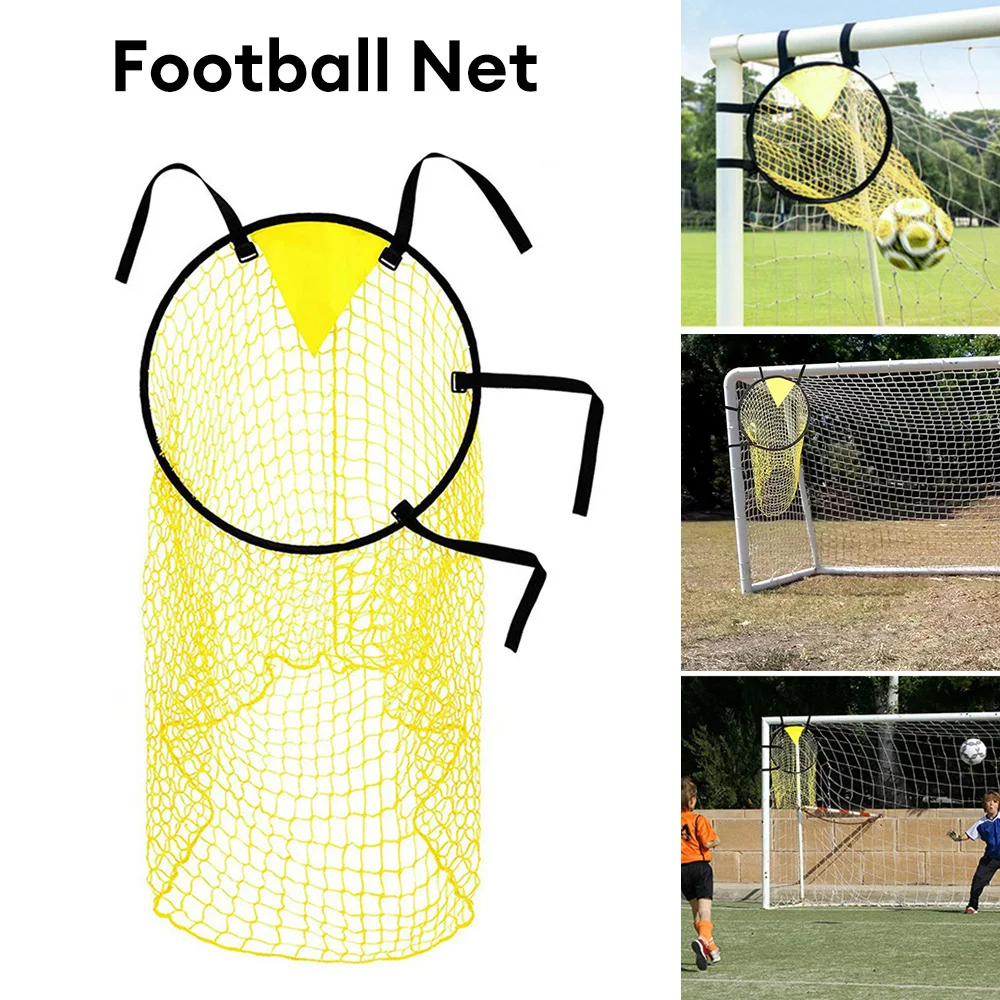
Improve Skill With Shooting Targets On Net
Adding shooting targets to your lacrosse goal net helps players master accuracy. Target placement zones different sections of the net for focused shooting practice. Here are some creative target ideas to try:
For beginners, use large targets to build confidence. Stick XL multicolor fabric squares or foam pieces throughout the net area. Graduate to smaller, concentrated targets as skills improve.
Make a shooting bullseye by hanging a tire or hula hoop from the center of the net. Aim for nothing but net! You can also attach numbered cloth patches and call out target zones for players to hit.
Paint or tape geometric shapes onto the net like circles, diamonds and triangles. Call the shapes out randomly and have players focus on hitting each one.
Add layers of mesh or netting material behind the goal with smaller holes. This creates visible targets to aim through and improves accuracy.
Get creative and switch up shooting target placement regularly. Nets with targets help develop precision passing and shooting, so lacrosse goalies beware!
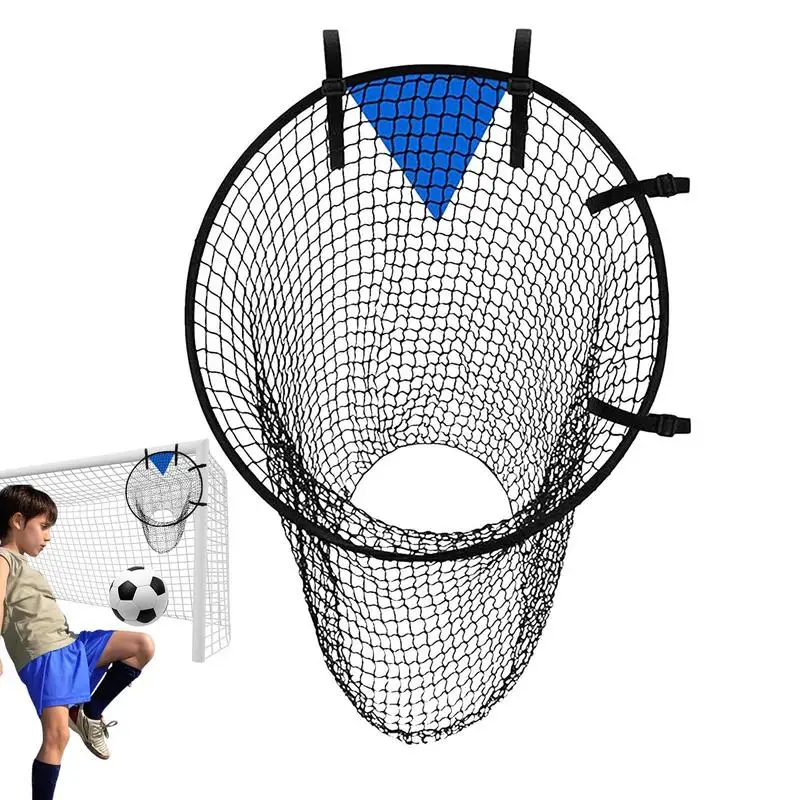
Practice Accuracy With Smaller Shooting Holes
One great way to challenge lacrosse shooting accuracy is to use a goal net with smaller holes. This tests a player’s precision aiming for tight spaces. Here are some tips to try this effective training method:
Look for specialty lacrosse nets designed with multiple hole sizes to vary difficulty. Or, modify an existing net by layering additional mesh material behind it to shrink the holes.
Start practice with regulation hole sizes then downsize holes in increments. Go too small too quickly and players will become frustrated.
Focus on catching and shooting technique when aiming at tiny holes. Shooting fast and wild leads to decreased accuracy. Controlled, straight on shots work best.
Smaller shooting holes are great for one-on-one drills. Challenge players to master picking corners and placing shots accurately past the goalie’s outstretched stick.
Using a net with tinier holes builds shooting precision crucial on the field. But remember to mix up hole size for engaging, multi-skill training. Accuracy today means more goals tomorrow!
Use Backstop Net To Catch Missed Shots
Installing a backstop net behind your lacrosse goal is a must for keeping stray shots contained. Without a backstop, missed shots can disrupt practice as players chase errant balls. Here are some backstop solutions to consider:
Freestanding rebounder nets fasten to the goal frame and extend to catch high and wide shots. Models with bungee cords sling shots back to players for rapid fire shooting practice.
For indoor use, hanging a large proprietary backstop net on the wall protects the playing space. Outdoor field fences can also have backstop netting installed.
If your budget is tight, simple solutions like hanging tarps or bed sheets work. You can also clip spare pieces of netting material to the goal posts with carabiners.
No matter the style, a backstop net contains lacrosse shots for uninterrupted team drills. Review your training space and install durable backstop netting options as needed. Your team’s progress will thank you!
Choose Lacrosse Goal Net Carrying Case For Transport
Transporting lacrosse goal nets to games and practice is easier with a protective carrying case. Carrying cases allow safe, compact storage as you move the net. Here are useful features to look for when selecting a carrying case:
Hard-shell plastic carrying cases provide the most durable protection for goal frames and netting. Look for in-line skate style wheels for easy rolling over turf or pavement.
Padded, heavy canvas duffle bags also work well. Dual shoulder straps help distribute weight when loaded. Ensure ample interior space.
Backpack style carrying bags are great for smaller folded nets. Compartments store tools, stakes and smaller disassembled frame sections.
No matter the style, prioritize durability, ease of transport, and proper fit for your specific goal net. Protecting your gear while in transit means it’s game-ready upon arrival!
Maintain Lacrosse Goal Net With Proper Storage
Properly storing your lacrosse goal net between uses preserves quality and durability. Follow these storage tips to maximize net lifespan:
Fully disassemble goal frames and detach netting after each use. This prevents excessive wear or accidental damage during storage.
Clean netting and frame pieces to remove dirt, debris and moisture. Allow all components to dry fully before packing away.
Fold netting loosely and avoid creasing it at sharp angles. Place in a mesh bag or wrap in a towel to prevent snags.
Store netting and frames in a clean, dry, temperature controlled area protected from environmental elements. Avoid damp basements, garages or sheds.
Regularly inspect stored equipment for rust, mold or other deterioration. Address any issues promptly to avoid greater damage over time.
With proper storage habits, your lacrosse goal net will be game-ready season after season. A few simple maintenance steps go far in preserving performance and value.
Repair Rips Or Holes In Lacrosse Goal Net Promptly
Even durable lacrosse goal nets will eventually develop small holes or rips from regular use. But don’t discard a damaged net just yet! With a few simple repairs, you can often extend its useful life. Here are some handy net repair tips:
For small holes, sew closed using UV-resistant nylon thread that matches the net color. Fold edges under and stitch a box stitch for security.
Larger holes or tears may require cutting a nylon patch piece to stitch over the hole. Reinforce all patch edges fully.
Repair net attachment straps with quick-set epoxy or marine vinyl glue. Clamp tightly until the adhesive bond is fully cured.
Check net perimeter lacing for gaps or damage. Re-string sections as needed for consistent tension throughout.
Prompt net repairs keep balls rebounding true and prevent premature replacement costs. Inspect nets before and after each use to spot issues early. With a bit of mending care, your net can stay game-ready longer.
Replace Old Lacrosse Goal Nets Annually For Best Results
Even with proper care, lacrosse goal nets degrade over time from sun exposure and routine play. For optimal durability and performance, plan to replace nets annually.
Yearly replacement ensures nets maintain excellent rebound and ball response. Frayed, stretched out netting fails to direct shots true.
New nets also provide proper “give” when players crash into goals, avoiding injuries from overly taut strings. Sagging net sections present safety risks.
Don’t wait until nets are fully falling apart. Gradual wearing means a net may perform poorly long before it looks unplayable. Trust your instincts if play feels “off”.
Recycle old netting if possible, or respectfully retire well-worn nets that gave their all for the game. Then start fresh with new nets each season for best results.
Invest In Quality Lacrosse Goal Nets For Years Of Use
When purchasing lacrosse goal nets, it pays to invest in high-quality equipment built to last. While cheaper nets may seem tempting, they often require frequent replacing which adds up over time.
Look for weather and UV-resistant netting made from durable nylon or polyester blends. Reinforced net borders also increase longevity.
Choose competition-grade netting with optimal ball rebound performance. Practice nets with inconsistent rebounding teach poor shooting technique.
Inspect frame construction on metal lacrosse goals. Sturdy steel or aluminum frames withstand aggressive play better than plastic or PVC.
Buy net and frame combinations from reputable sporting goods manufacturers known for lacrosse-specific engineering. Don’t sacrifice quality to save a few bucks upfront.
With high-end lacrosse goal nets, you make an investment that pays dividends through years of trouble-free play. Focus on value, not just price tag, for optimal equipment.


