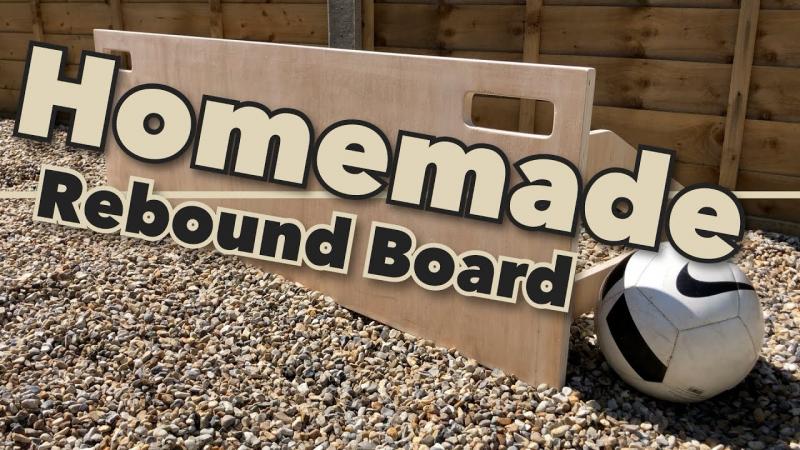
How to build a lacrosse rebounder wall in 15 steps. What materials are needed for a DIY lacrosse rebounder. Where to place your lacrosse rebounder for optimal training. How to properly install and maintain your homemade lacrosse wall.
Choosing the Perfect Location for Your Lacrosse Rebounder
Before diving into the construction process, it’s crucial to select an ideal spot for your DIY lacrosse rebounder. This decision will significantly impact your training experience and the longevity of your setup.
Space Considerations
How much space do you need for a lacrosse rebounder? Experts recommend a minimum of 20 feet between the wall and your shooting position. However, 30-40 feet is ideal for optimal training. This generous distance allows for full wind-up, proper follow-through, and provides ample space for errant shots to lose momentum before impact.
Surface Selection
The material of the wall itself plays a crucial role in the effectiveness of your rebounder. Brick and concrete surfaces are top choices due to their durability and ability to provide consistent rebounds. These materials can withstand repeated impacts without deteriorating, ensuring a longer lifespan for your training setup.

Softer materials like wood or vinyl siding are less ideal. They may absorb impact or become dented over time, leading to inconsistent rebounds and potentially shorter overall lifespan of your rebounder.
Backstop Importance
A backstop behind your rebounder wall can be a game-changer for your practice sessions. It prevents missed shots from traveling too far, potentially into neighboring properties. This added safety feature allows you to focus on your technique without worrying about errant balls.
Optimal Angle for Rebounds
The angle of your rebounder wall relative to your shooting position significantly affects the trajectory of rebounding balls. A 90-degree angle is ideal, as it causes balls to rebound directly back to you. Sharp angles can make returns unpredictable, while walls facing you head-on eliminate rebound entirely.
Avoiding Obstructions
Scan your chosen area for potential hazards or vulnerabilities. Windows, utility meters, or other fragile objects should not be in the line of fire. An unobstructed flat surface allows you to practice without hesitation or fear of causing damage.
Privacy Considerations
Consider the proximity of your rebounder to neighboring properties. Positioning your practice area away from property lines or direct sightlines can minimize distractions and potential conflicts with neighbors. This setup allows for more focused and uninterrupted training sessions.
Lighting Factors
Direct sunlight can make it challenging to track shots, depending on the time of day. If possible, choose a wall with some shade coverage or one that faces north. This ensures consistent lighting conditions throughout your practice sessions, regardless of the time of day.
Essential Materials for Building Your Lacrosse Rebounder
Before embarking on your DIY lacrosse rebounder project, it’s crucial to gather all necessary materials. Here’s a comprehensive list of what you’ll need:
- 3/4″ plywood sheet, 4′ x 8′
- 1″ x 3″ x 8′ pine board (furring strip)
- Exterior wood screws, 3″
- White semi-gloss latex paint
- Paint roller and tray
- High-grit sandpaper
- Measuring tape
- Circular saw or jigsaw
- Power drill with countersink bit
- Carpenter’s square
- Safety goggles & ear protection
Ensuring you have all these materials on hand before starting will streamline the construction process and help avoid unnecessary delays.

Step-by-Step Guide to Building Your Lacrosse Rebounder
Now that you’ve gathered your materials and chosen the perfect location, it’s time to dive into the construction process. Follow these detailed steps to create your very own lacrosse rebounder wall:
Step 1: Cutting the Plywood
Begin by measuring and marking a 4′ x 6′ rectangle on your plywood sheet. Use a circular saw or jigsaw to carefully cut along these lines. The remaining plywood can be saved for future projects or used to create a smaller practice target.
Step 2: Sanding the Edges
After cutting, use high-grit sandpaper to smooth any rough edges or splinters along the cut lines. This step not only enhances the finished look but also prevents potential injuries during installation and use.
Step 3: Sealing the Back
To protect your rebounder from moisture damage, apply a coat of exterior latex primer to the back side of the plywood. Pay special attention to the edges and middle section.
Step 4: Marking Stud Locations
Measure and mark the center point at both the top and bottom edges of your plywood. These marks will indicate the stud locations for mounting.
Step 5: Attaching the Furring Strip
Secure the 1″ x 3″ furring strip along the top edge of the plywood, centering it at the stud mark. This provides crucial mounting support and prevents sagging over time.
Painting and Finishing Your Lacrosse Rebounder
The finishing touches on your lacrosse rebounder are crucial for both aesthetics and longevity. Here’s how to properly paint and seal your new training tool:
Step 6: Priming the Front Surface
Apply a coat of primer to the entire front surface of the plywood. Allow this to dry completely before moving on to the next step. This primer coat ensures better paint adhesion and a more uniform final appearance.
Step 7: Painting the Rebounder
Once the primer is dry, apply two coats of white semi-gloss exterior latex paint to the front surface. Why use white paint? It provides excellent visibility for tracking your shots. Allow the paint to dry overnight between coats for the best results.
Installation Process for Your DIY Lacrosse Rebounder
With your rebounder constructed and painted, it’s time to securely install it in your chosen location. Follow these steps for a safe and sturdy installation:
Step 8: Locating Wall Studs
Use a stud finder to locate the studs on your mounting wall. Mark the centers of these studs at 16-inch intervals spanning the width of your rebounder.
Step 9: Marking Screw Holes
Hold your rebounder against the wall, aligning it with the stud marks. Trace the outline of the furring strip and mark where the screws will go.
Step 10: Drilling Pilot Holes
Use a 1/8″ drill bit to create pilot holes at your marked locations. This crucial step prevents the wood from splitting when you insert the screws.
Step 11: Securing the Rebounder
With the help of a friend, hold the rebounder against the wall and insert 3″ exterior screws through the furring strip into the wall studs. Ensure all screws are tightened securely.
Final Touches and Maintenance Tips
To ensure your DIY lacrosse rebounder stands the test of time, there are a few final steps and maintenance considerations to keep in mind:
Step 12: Caulking the Edges
Apply a bead of exterior caulk along the sides and top edges of your rebounder. Smooth this with your finger to create a tight seal against moisture. This step is crucial for preventing water damage and extending the life of your rebounder.
Step 13: Allowing Proper Curing Time
Give the caulk a full 24 hours to cure before using your rebounder. This patience prevents marring the fresh caulk seal and ensures optimal water resistance.
Step 14: Regular Inspections
Periodically inspect your rebounder for signs of wear or damage. Check for loose screws, peeling paint, or cracks in the caulk. Address any issues promptly to maintain the integrity and safety of your training tool.
Step 15: Seasonal Maintenance
Depending on your climate, consider applying a fresh coat of paint or sealant annually to protect against weather damage. In colder regions, you may want to remove and store your rebounder during harsh winter months to prolong its lifespan.
Maximizing Your Training with Your New Lacrosse Rebounder
Now that your DIY lacrosse rebounder is installed and ready for action, it’s time to make the most of your new training tool. Here are some tips and drills to elevate your game:
Proper Positioning
For optimal training, position yourself at least 20 feet away from the rebounder. This distance allows for full-speed shots and proper follow-through. Experiment with different distances to challenge yourself and improve accuracy at various ranges.

Effective Drills
- Quick Sticks: Practice rapid-fire catching and throwing to improve hand speed and coordination.
- Weak Hand Development: Dedicate time to working exclusively with your non-dominant hand to become a more versatile player.
- Shooting Accuracy: Place targets on your rebounder and aim for specific spots to enhance precision.
- Cradling Drills: Use the rebounds to practice cradling at different speeds and angles.
- Ground Ball Pickups: Let the ball bounce off the rebounder and practice scooping it up quickly.
Varied Shot Types
Don’t limit yourself to just one type of shot. Practice a variety of techniques including:
- Overhand shots
- Sidearm throws
- Underhand shots
- Behind-the-back passes
- One-handed throws
By incorporating these different shot types into your practice routine, you’ll become a more well-rounded and unpredictable player on the field.
Customizing Your Lacrosse Rebounder for Advanced Training
As you progress in your skills, consider these modifications to your DIY lacrosse rebounder to keep challenging yourself:
Adding Target Zones
Paint or tape different colored zones on your rebounder to represent various parts of a lacrosse goal. This visual aid helps improve shot placement and accuracy.
Incorporating Angled Surfaces
Attach small wedges at different points on your rebounder to create unpredictable rebounds. This simulates real-game scenarios where the ball doesn’t always return directly to you.
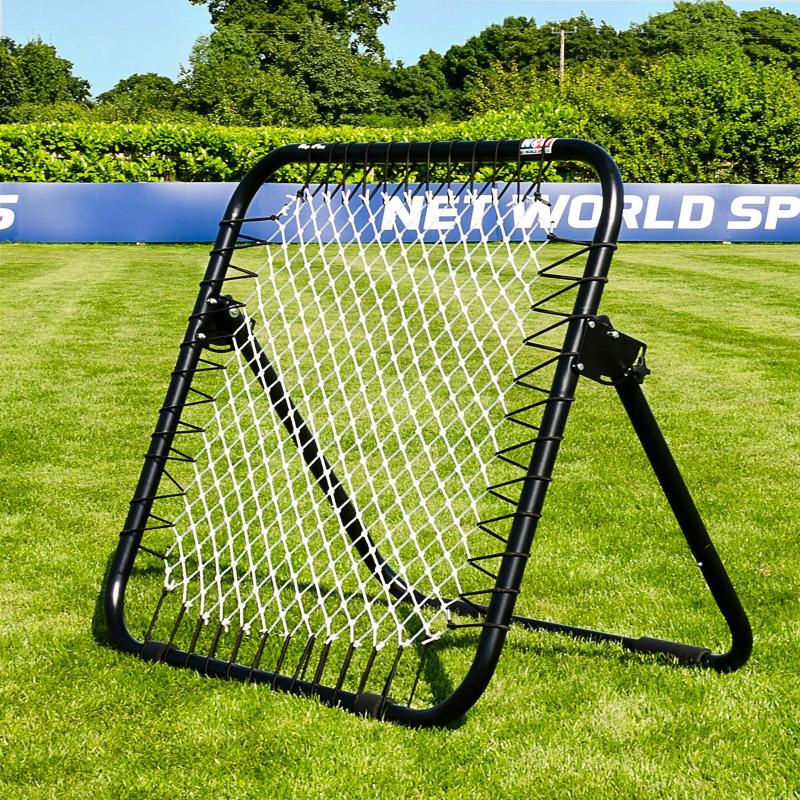
Installing a Net System
For more advanced setups, consider adding a net system above and around your rebounder. This allows for higher shots and helps contain errant balls, minimizing time spent retrieving them.
Creating a Multi-Wall Setup
If space allows, consider building multiple rebounder walls at different angles. This setup can simulate passing between teammates and help develop spatial awareness on the field.
By following these steps and incorporating these training tips, your DIY lacrosse rebounder will become an invaluable tool in your journey to becoming a better player. Remember, consistent practice is key to improvement, and with your own rebounder, you can train anytime, honing your skills and elevating your game to new heights.
Determine Ideal Location for Lacrosse Rebounder
Selecting the perfect spot to install your DIY lacrosse rebounder is crucial for maximizing your training experience. Here are some key factors to consider when scouting locations:
Space
First and foremost, ensure you have adequate room to take full shots without fear of damaging property or injuring others. A minimum of 20 feet between the wall and shooting position is recommended, with 30-40 feet being ideal. This distance gives you space to wind up, follow through and allows errant shots to dissipate energy before impact.
Surface
The wall material itself matters too. Brick or concrete surfaces work best as they evenly rebound shots and hold up over time. Softer siding materials like wood or vinyl may absorb impact or dent, reducing rebound consistency and lifespan.
Backstop
Consider if your wall has a backstop, such as a fence or additional structure behind it. This prevents missed shots from sailing deep into the yard or worse, into a neighbor’s property. A simple backstop gives you peace of mind to fire away without worry.
Angle
The angle of the wall relative to your shooting position affects rebound trajectory too. Aim for a straight on 90 degree angle for balls to rebound directly back to you. Sharp angles make returns unpredictable, while walls facing you head-on eliminate rebound entirely.
Obstructions
Scan the area and eliminate any walls with windows, utility meters, or other vulnerabilities in the blast zone. An unobstructed flat surface is ideal so you can rip shots without hesitation.
Privacy
Consider proximity to neighboring homes as balls do occasionally go astray. Position your rebounder away from property lines or sightlines from others if possible. This allows you to practice without distractions or concerns.
Sunlight
Direct sunlight can make tracking shots difficult depending on time of day. If possible, pick a wall with shade coverage or north-facing to keep conditions consistent during practice.
Once you’ve selected the optimal lacrosse rebounder location, it’s time to build your own custom training tool.
Build Your Own Lacrosse Rebounder Wall in 15 Steps:
Constructing a quality DIY lacrosse rebounder is straightforward with the right materials and techniques. Follow these steps to build your own custom lacrosse backstop for solo practice anytime.
Step 1: Gather Materials
You’ll need the following supplies:
- 3/4” plywood sheet, 4’ x 8’
- 1” x 3” x 8’ pine board (furring strip)
- Exterior wood screws, 3”
- White semi-gloss latex paint
- Paint roller and tray
- High-grit sandpaper
- Measuring tape
- Circular saw or jigsaw
- Power drill with countersink bit
- Carpenter’s square
- Safety goggles & ear protection
Step 2: Cut Plywood Sheet
Measure and mark a 4’ x 6’ rectangle on plywood. Use circular saw to cut rectangle. Save remaining plywood for future projects.
Step 3: Sand Edges
Lightly sand cut edges to smooth any splinters or rough areas. This prevents injury during installation and enhances finished look.
Step 4: Seal Back Side
On backside of plywood, coat edges and middle section with exterior latex primer. This seals unfinished surface from moisture damage.
Step 5: Mark Stud Location
Measure and mark center point at top and bottom edges of plywood. This indicates stud location for mounting.
Step 6: Attach Furring Strip
Screw 1” x 3” furring strip along top edge of plywood, centered at stud mark. Provides mounting support and prevents sagging.
Step 7: Prime Front Surface
Apply coat of primer to entire front surface of plywood. Allow to dry completely before painting.
Step 8: Paint Rebounder Surface
Apply two coats of white semi-gloss exterior latex paint to front surface. Allow to dry overnight between coats.
Step 9: Mark Studs on Wall
Locate studs on mounting wall and mark centers 16” apart spanning rebounder width. Use stud finder to locate if needed.
Step 10: Mark Screw Holes
Hold rebounder against wall over stud marks. Trace furring strip and mark screw holes with pencil.
Step 11: Drill Pilot Holes
Use 1/8” drill bit to drill pilot holes at marks. This prevents wood splitting when screws installed.
Step 12: Secure Rebounder to Wall
Hold rebounder against wall and insert 3” exterior screws through furring strip into studs. Tighten securely.
Step 13: Caulk Edges
Run bead of exterior caulk along sides and top edges. Smoothe with finger, sealing seams against moisture.
Step 14: Allow Caulk to Cure
Give caulk 24 hours to fully cure before using rebounder. Prevents marring fresh caulk seal.
Step 15: Start Training!
Position shooting area 20+ feet from new rebounder. Fire away practicing cradling, quick sticks, and other solo drills to elevate your game.
Now enjoy your own custom lacrosse rebounder for developing skills anytime. With smart preparation and quality materials, this durable backstop will provide years of reliable performance with minimal maintenance required. Dial in your shooting accuracy, reaction time, and handling moves with an essential practice tool right in your own backyard.
Choose Durable, Weather-Resistant Materials
The key to a long-lasting DIY lacrosse rebounder is using exterior-grade materials designed to withstand years of exposure to sun, rain, snow and errant shots. Follow these tips for choosing hardy components for your homemade backstop.
Marine Grade Plywood
Opt for 3/4″ or 1″ thick plywood rated for marine applications. The waterproof resin adhesive prevents delamination or rotting over time. Avoid interior plywood, as it will deteriorate quickly outside.
Galvanized Hardware
Zinc-coated screws, bolts, washers and framing hardware resist rust far better than standard steel. Hot-dipped galvanized is ideal for maximum protection.
Aluminum Edging
Affix aluminum L-channels or utility edging along the rebounder’s sides using galvanized screws. This fortifies the plywood perimeter against damage from errant shots.
Exterior Paint
High-quality 100% acrylic latex paint formulated for outside use on wood or concrete provides a protective and colorfast finish.
Weatherproof Sealant
Caulk edges with an exterior-grade polyurethane or silicone sealant matching your paint color to create a watertight seal.
Now let’s walk through constructing your own heavy-duty lacrosse rebounder built to handle the elements.
Build Your Own Lacrosse Rebounder Wall in 15 Steps:
Follow these steps to create a custom lacrosse backstop designed for longevity using rugged, weatherproof materials.
Step 1: Cut Marine Plywood
Use a circular saw to cut a 4′ x 6′ rectangle from a 3/4″ marine grade plywood sheet. This forms the rebounder surface.
Step 2: Frame Back Side
Screw 1″ x 2″ pressure-treated pine boards around back side perimeter to enhance sturdiness.
Step 3: Attach Aluminum Edging
Screw galvanized aluminum L-channels along front side and bottom edges using exterior screws.
Step 4: Create Hanging Cleat
Screw a 6″ pressure-treated 1″ x 4″ cleat to the rebounder’s top back side. This allows hanging it on screws.
Step 5: Prime & Paint
Apply two coats of exterior primer then topcoat with exterior latex paint. Allow full drying between coats.
Step 6: Mark Studs
Locate wall studs using a stud finder and mark centers with painter’s tape.
Step 7: Attach Mounting Boards
Screw pressure-treated 1″ x 4″ boards horizontally to wall studs using 3″ galvanized screws.
Step 8: Hang Rebounder
Lift rebounder and insert hanging cleat over mounting boards to suspend it.
Step 9: Secure Bottom
Screw bottom corners into studs for added support using 2″ galvanized screws.
Step 10: Caulk Perimeter
Run a bead of exterior silicone caulk around rebounder edges, smoothing with finger to seal.
Step 11: Allow Caulk to Cure
Give caulk 24 hours to fully cure before use.
Step 12: Attach Protection Boards
Optionally screw 1″ x 4″ boards over bottom corners to prevent damage from low shots.
Step 13: Install Backstop Netting
For containment, attach heavyweight backstop netting to poles behind the rebounder area.
Step 14: Slope Ground Downward
Grade a slight downward slope in front of rebounder so rain drains away from it.
Step 15: Start Training!
Face off about 30 feet from your new rebounder and start ripping shots! The weatherproof construction will provide years of reliable performance.
With smart design and rugged exterior-grade materials, this heavy-duty lacrosse rebounder will withstand sun, wind, rain and repeated ball impact. Dial in your shooting and handling skills anytime with a custom backstop built to deliver years of reliable performance.
Calculate Dimensions Based on Skill Level
Constructing your own lacrosse rebounder wall can be a fun and rewarding DIY project. The first step is determining what size to make your wall based on who will be using it. For younger or beginner players, a smaller 4’x4′ wall should suffice. Intermediate players will want more space to work with – try 6’x6′ or 6’x8′. Advanced players may prefer an full-sized 8’x8′ wall to practice their shooting and passing skills. Consider how much room you have in your yard and what skill levels you need to accommodate.
The height of your wall is also an important factor. Walls for beginners can be 4-5 feet high. Intermediate players may want 6-7 feet of height. Advanced lacrosse athletes will likely prefer a full 8 foot tall wall. This extra height allows working on high shots and passing. Determine the right dimensions for both the width and height of your DIY lacrosse rebounder based on who will use it the most.
Choose Durable, Weather-Resistant Materials
Once you’ve settled on the ideal size, it’s time to select the right materials. While you can use basic plywood, moisture-resistant exterior grade plywood will hold up better outside. Apply a sealant or paint to protect the wood even further. Some popular options include marine-grade plywood, pressure-treated lumber, or synthetic materials like Trex decking boards.
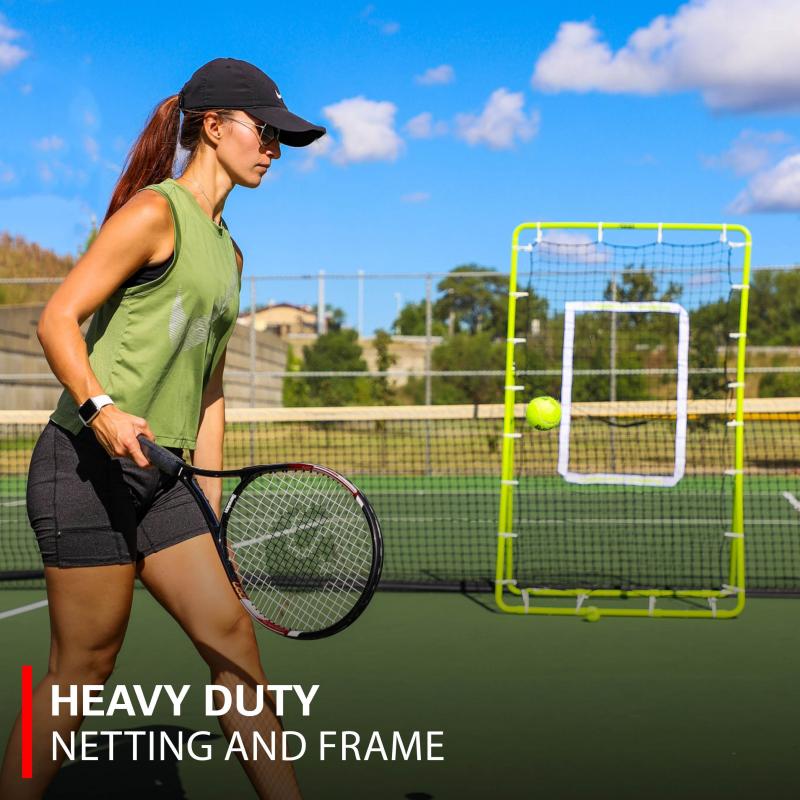
For the frame, use sturdy 4×4 posts and 2x4s. Galvanized steel brackets and hardware are ideal for assembling the frame. They will resist rusting and corrosion. You’ll also need mesh netting material for the wall surface. Polyester mesh works well, as it’s both durable and weather-resistant. Shop for the highest quality materials within your budget to construct a rebounder that will last.
Plan the Design and Layout
Sketch out the layout and structural design ahead of time. Mark the dimensions on the ground where the wall will be erected. Plan for 4×4 postssecured in concrete-filled holes at each corner. Run 2x4s along the top and bottom for stable framing. Space additional vertical 2×4 posts every 2-3 feet for strength.
Decide how you will attach the plywood and mesh material to the frame. Staples work well for fastening the plywood. You can then use heavy-duty zip ties, industrial Velcro, or screws and washers to securely attach the mesh to the front. Plan any additional bracing along the back or side walls as needed for stability.
Assemble the Frame
Construct a sturdy frame from your 4×4 corner posts and 2×4 supports. Measure and cut wood to required lengths using a power miter saw. Predrill holes to prevent splitting. Assemble using galvanized brackets and 3” exterior screws. Check corners for square and install diagonal bracing across the back.
Dig post holes 18-24” deep and at least 2’ on either side of corners. Pour concrete and allow to fully cure before installing frame. Alternatively, you can attach the frame to an existing fence or structure. Just be sure to adequately secure it using heavy-duty fasteners.
Once frame is solid, attach the plywood sheathing using an air staple gun or exterior screws. Apply weatherproof sealant to protect the wood. Allow drying fully before adding the rebound mesh surface.
Install the Rebound Mesh
Measure and cut a piece of high-quality polyester mesh to cover the entire front wall surface. Allow extra length on sides and top to go around back for attachment. Use heavy-duty zip ties, industrial Velcro, or metal grommets with screws and washers to fasten the mesh tightly.
Start by securing one side, then pull mesh taut across before fastening the other side. Do the top last, keeping the material very tight. Trim off any excess when fully secured. The end result should be a flat, drum-tight rebound surface.
Add Finishing Touches
Consider painting or staining the wood frame to protect and beautify your lacrosse rebounder wall. You can also stencil player numbers or team logos onto the mesh for some extra fun and motivation. Install poles or brackets to hold lights if planning to use at night.
Allow a “run back” area of at least 10 feet behind the wall. Cover ground with turf or mulch to prevent wet conditions. Integrate the rebounder into your backyard landscaping for a natural look.
Set up a protective fence or netting around the sides if needed for errant balls. Add a pass-through opening to easily access the practice space. Install a basketball hoop on the backside to double the wall as a multipurpose recreation space.
Maintain Your Lacrosse Wall
Periodically check hardware and tighten as needed to keep the bounce surface taut. Reapply protective sealants or paint when worn. Promptly replace any warped or cracked boards.
Take down net when not in use to extend lifespan. Store mesh indoors over winter if in a colder climate. Keep turf or mulch raked and clear of debris for better footing.
Constructing your own rebounder is a big project, but the end result is a custom lacrosse practice setup right in your own yard. With the right planning and quality materials, your DIY wall can provide years of use improving stick skills.
Construct Sturdy Support Frame
Welcome lacrosse enthusiasts! Building your own rebounder wall takes some work, but the payoff is having a customizable practice space right in your backyard. Let’s walk through the process step-by-step so you can improve your skills on your own time.
First things first – you need a sturdy frame to mount the rebounder surface on. The framework needs to withstand all those hard lacrosse ball impacts, so build it tough. Start by digging holes for 4×4 posts at each corner. Make sure they are deep and wide enough to firmly secure the posts.
Mix up some concrete and pour it into each hole. Insert the 4×4 posts and brace them so they are perfectly plumb while the concrete cures. Give it several days to fully harden before moving on. You’ll end up with firm corner anchors ready for assembly.
Now measure and cut 2×4 lumber to connect the corner posts. Screw them together using exterior rated screws. Check for 90 degree angles at all corners – precise frame construction is key. The 2x4s will tie the 4×4 posts together top and bottom, plus provide attachment points for the rebounder surface later.
Sturdy is the name of the game here. Consider adding cross braces on the back side for even more stability. The rebounder will see some impact forces once balls start flying, so overbuild the framework. This thing needs to last you for years to come.
Leave a little extra length before trimming the 4×4 posts – you want to attach side protection fencing down the road. For now, focus on getting a squared, robust, anchored frame assembled. That’s the foundation of a long-lasting rebounder wall. Take your time and do it right.
Choose Durable Rebounder Surface Material
The framework is up – now you need a surface for bouncing back those screaming lacrosse shots. There are a few options to consider based on your budget and needs.
One popular choice is good exterior grade plywood, at least 1/2” thick. Coat it with water sealant and paint for weather protection. The rigid plywood gives a nice rebound, though it lacks a bit of “give” for stick practice.
For a more flexible surface, go with a polyester mesh material. It should attach easily to the 2×4 frame with zip ties or lacing. The mesh provides great ball response for honing those passing and catching skills.
You could also opt for a more expensive rebound net system. These are made from high-density polyethylene or polymer for ultimate durability. Shop around to find the right rebounder material for your needs and budget.
Dial In Your Rebounder Dimensions
Sizing your new rebounder wall is an important decision. What you build should align with the skill level of players using it most often. Here are some dimensions to consider:
- Beginners: 4′ x 4′ wall
- Intermediate: 6′ x 8′ wall
- Advanced: Full 8′ x 8′ wall
Wall height is also key – 10 feet is ideal for advanced high shot practice. Scale down to 6-8 feet for younger players. Think about the kinds of practice you want to do and build accordingly. Don’t skimp on size only to wish you went bigger down the road.
Safety First When Installing
Once your new rebounder wall framework is up, take steps to make it safe. Enclose the sides with protective fencing to keep errant shots contained. Chain link or netting works well for this.
Leave room between the rebounder and fencing for run off space. Set up the wall facing a open yard area, not your neighbor’s house – for obvious reasons!
Consider hanging a pulley-style basketball hoop on the rear of the wall for some 2-sport action. Just make sure to leave room for lacrosse ball recovery behind the wall.
Check for stable footing in front of the wall and address any tripping hazards. Cover the ground with turf or mulch and keep it free of debris. Proper safety precautions will let you practice worry-free for years on your home rebounder.
Maintenance Keeps it Bouncing
Your custom lacrosse rebounder wall is ready for action! Keep it in top shape with regular maintenance:
- Check hardware and tighten as needed
- Re-tension rebounder surface if it begins to sag
- Reapply protective sealants if wood frame chips or shows wear
- Replace any damaged boards immediately
- Take down net when not in use to extend lifespan
- Store mesh indoors over winter if in cold climate
Don’t neglect maintenance or the wall won’t hold up. With proper care though, your homebuilt rebounder can handle shots for many seasons to come. Now grab a stick and start dialing in that wicked sidearm crank shot!
Attach Plywood or Sheet Metal to Frame
Hey lacrosse fans! Constructing your own rebounder wall is a weekend project that can pay off big in improving your skills. Let’s continue this DIY journey together step-by-step.
At this point you should have a sturdy wooden framework built. 4×4 corner posts set in concrete, 2×4 supports across the top and bottom, bracing in the back – make sure it’s solid. Now it’s time to attach the actual rebound surface.
First, measure the frame dimensions and cut a piece of plywood to size. Use at least 1/2 inch exterior-rated plywood for durability. Apply a protective sealant or paint to the wood before mounting. Leave the bottom edge unattached for now.
Use exterior screws or an air staple gun to attach the plywood sheet. Pre-drill holes to prevent splitting. Space fasteners every 12 inches around the perimeter and every 6 inches across studs. You want a secure bond that won’t loosen over time.
For a little more rebound, try using a sheet metal panel. Aluminum or galvanized steel work well. Cut to size and use metal screws to mount into the 2×4 frame. It’ll make a bit more noise than plywood, but provides excellent ball response.
Get creative if you want – some folks use old garage door panels or street signs for a fun rebound surface. Whatever you use, just ensure it’s firmly fastened to handle those blistering lacrosse shots. Safety first!
Add Protective Mesh Layer
Mounting the solid plywood or sheet metal is an important first step. But to really extend the life of your rebounder, add a protective mesh layer on top.
Measure and cut a piece of polyester mesh to fit over the main surface. Leave some extra length to go around the back edge. Use heavy duty zip ties, industrial Velcro or grommets with screws to attach it.
Work your way around the perimeter, pulling the mesh tight across the surface before securing. The end result should be a trampoline-tight fit. The mesh takes the brunt of the ball impact, protecting your plywood or sheet metal underneath.
Test for Proper Ball Rebound
You’ve got your rebound materials up – but do they perform? Grab a lacrosse ball and test that rebound action!
The ball should come flying off at a consistent pace, not too fast or slow. Adjust mounting tension if needed to tune the rebound to your liking.
Try out shots from different angles to ensure uniform response across the wall. You don’t want “dead spots” that don’t return the ball well. Dial it in until you get that perfect, lively rebound you’re after.
If certain spots seem dead, you may need to add support ribs behind them on the frame. Or swap out meshed plywood for solid sheet metal in those areas. Get creative with adjustments until it rebounds well from all over.
Safety First as Always
Your new lacrosse rebounder is ready for action! But let’s chat safety quick:
- Enclose sides with protective netting
- Check for tripping hazards around the wall
- Set up in an open space, not near windows
- Add lights if using at night
- Use caution and wear eye protection!
Treat this like an active sports training space. Dial in placement, footing, lighting and protective measures to keep it safe. A focus on safety means you can practice hard with confidence.
Now it’s time to grab a bag of balls and dial in that wicked overhand crank shot. Your homebuilt rebounder wall will have your game rising in no time. Just take care of it and it will deliver years of loyal service.
Let me know if you have any other lacrosse DIY questions! I’m always happy to help fellow enthusiasts. Have fun out there!
Install High-Tension Netting Across Face
Welcome back, lacrosse enthusiasts! We’re continuing our journey building a custom rebounder wall. Thanks for sticking with me as we move forward step-by-step.
At this point your framework should be complete, with plywood or sheet metal attached across the front. Now it’s time to ratchet up the rebound action with a high-tension netting layer.
Measure the dimensions of your wall and cut a piece of polyester netting to size. Leave some extra length along the edges to wrap around back for mounting. Heavy-duty poly netting is perfect for this application.
Start on one side, pulling the netting tight and using heavy zip ties to secure it to the support frame. Work across systematically, keeping tension to avoid any sagging or loose spots.
Once the netting is fully secured, trim off any excess material at the edges. The end result should be a flat, trampoline-tight rebound surface. Step back and give it a few test shots!
Get Creative with Your Rebounder Design
Now is a great time to customize your rebounder wall design. Here are some creative ideas to try:
- Paint or stencil player numbers, logos or designs onto the netting
- Use different color mesh panels for a stylish, unique look
- Add targets, bullseyes or other visual markers for aiming practice
- Mount a pulley basketball hoop on the rear side for 2-sport fun
Or keep it simple with solid white netting – either way, this project is all about making it your own. The right look will motivate you to practice more and hone your skills.
Position for Maximum Safety
You’ve put in the sweat to build an awesome rebounder – now position it safely to prevent injuries or property damage:
- Face wall away from neighboring houses or fragile objects
- Set up in an open yard area with plenty of run-off space
- Enclose the left, right and back with protective netting or fencing
- Check for tripping hazards – cover ground with turf or mulch
Take time to analyze potential ball flight paths and contain them. Proper positioning minimizes errant ball risks and makes your practice sessions safer.
Maintenance Keeps it Bouncing True
Your dream lacrosse rebounder wall is ready for action! Keep it performing like new with regular maintenance:
- Check netting tension and re-tighten if needed
- Watch for frayed or damaged netting and replace immediately
- Check frame for loose joints or hardware – tighten as required
- Reapply protective sealant if wood frame shows wear
- Take net down when not in use to extend lifespan
With proper care and maintenance, your homebuilt rebounder will pay dividends for many seasons. Now grab a pocket full of balls and start dialing in that wicked sidearm crank shot!
Let me know if you need any other lacrosse DIY tips. I’m always happy to help fellow enthusiasts build their skills. Shoot straight out there and have fun!
Add Target Squares or Circles for Accuracy
Welcome back lacrosse fans! We’re chugging along on our DIY rebounder wall project. Thanks for following along – let’s keep the momentum going.
Your framework should be up with plywood and netting attached. It’s bouncing balls back like a champ. Now let’s spice it up and add some targets for accuracy training.
Grab some leftover paint or tape and mark off square targets in different zones on the wall. Place them randomly to practice hitting precise spots.
Or use large paper plates as temporary targets. Affix them in the upper corners or tricky side angles that require accurate passing or shooting.
You can buy durable nylon target squares to mount permanently too. Attach them with industrial strength Velcro or screw grommets. Mix up target placement regularly to keep it fresh.
Elevate Your Game with Rebounder Drills
The target visuals are up! Now it’s time to leverage your rebounder for skill-building drills:
- Quick stick shots – receive pass from partner and shoot quickly at target
- Catching practice – call out random targets and test hand-eye coordination
- Dodging drills – fake left, dodge right and hit top target
- Accuracy contests – take shots from distance and count hits
Get creative with competitive drills that make you work. The options are endless for solo and team rebounder training games. Take your practice sessions to the next level!
Maintain Peak Performance
Your rebounder wall is built tough for hard training. But let’s keep it humming with proper maintenance:
- Check and tighten frame bolts/netting frequently
- Re-coat plywood with protective sealant annually
- Replace loose or damaged netting immediately
- Store netting when not in use to extend lifespan
- Keep debris clear of wall area and footing
With occasional TLC, your rebounder will deliver years of loyal service. Don’t neglect maintenance or performance will suffer.
Safety Remains Paramount
Let’s beat this drum again – safety should be your top priority:
- Enclose back and sides with netting
- Leave ample run-off space behind wall
- Check for tripping hazards around perimeter
- Use caution and wear eye protection!
Treating this as an active training space means you’ll practice hard while minimizing risks. So take some time to button up any safety items. Your only injury should be a bruised ego from hitting the crossbar!
Now grab a bag of balls and start firing, my friend. Your homebuilt rebounder will have your game rising in no time. Just remember the maintenance and enjoy!
Apply Protective Coating or Paint
Welcome back lacrosse fans! Our DIY rebounder wall project continues. Thanks for sticking with it – let’s keep marching forward together.
At this point your wooden framework should be fully constructed and stable. Before mounting the final wall surface, let’s add a protective layer of sealant.
For exterior wood, use a water-repellent sealer or exterior porch and deck paint. Apply 2-3 coats allowing proper drying time between coats. This protects the wood from moisture damage and premature rotting.
If using weather-resistant plywood or pressure treated lumber, sealing is less critical but still recommended. It will help the surface hold up to years of ball strikes and elements.
Proper sealing now will pay off for the long haul. So don’t rush through it – take the time to do it right and you’ll thank yourself down the road.
Mount Wall Surface Securely
Time to attach the main rebound surface panel – the “meat” of your DIY lacrosse wall. Consider these options:
- 3/4″ plywood – durable and weather-resistant when sealed
- Galvanized sheet metal – withstands heavy impacts
- Removable netting – easy take-down and portability
- Garage door panels – inexpensive and ample size
Whatever you use, mount it securely to the framework with exterior screws or heavy duty staples. Pre-drill holes in plywood to avoid splitting. Space fasteners closely, at least every 12 inches.
Get creative with your wall material – it really comes down to budget, durability and rebound performance. Just ensure whatever you use is firmly anchored to handle shots.
Add Protective Netting Layer
Mounting the solid plywood or sheet metal panel provides the base structure. But adding a protective netting layer on top is recommended.
The netting acts like a cushion, absorbing ball impact rather than transferring it directly to the wall. This saves wear and tear on your brackets, boards and joints.Use heavy-duty polyester netting material, pulled snug across the surface. Secure tightly with heavy duty zip ties, industrial Velcro or grommets.
Take time here for a professional installation. A taut, durable netting layer prolongs the life of your wall and improves rebound too.
Safety First as Always
Our rebounder wall project is really coming together! But as I always emphasize – safety first:
- Enclose sides with protective fencing
- Check for tripping hazards around perimeter
- Angle wall away from fragile objects
- Use caution and wear eye protection
Respect the power of errant lacrosse balls and contain them. With smart safety steps, you can practice hard knowing risks are minimized.
Well we’ve made some great progress today. Until next time, may your shots fly straight and true!
Install Anchor System for Stability
Welcome back lacrosse diehards! Our DIY rebounder wall project marches on. Thanks for sticking with me – let’s keep this momentum rolling.
Your wooden frame should be built and plywood mounted by now. It’s really taking shape! Now let’s focus on anchoring it firmly in place.
Start by digging holes around the perimeter, at least 2 feet deep. Fill these with concrete and insert galvanized anchor posts or rebar.
Allow the concrete to fully cure – this takes 72 hours. The result is sturdy anchors around the base to prevent your frame from shifting or swaying.
For even more stability, attach horizontal boards between the anchor posts. Fasten these securely to create triangular supports along the sides and back.
Proper anchoring is no small detail – it ensures your rebounder stands solidly in place for years. Take the time to do this right, using robust materials and techniques.
Add Side and Back Protective Netting
A rock solid anchor system is crucial. Now let’s focus on safety netting:
Enclose the left, right and back sides with netting to contain errant shots. Use heavy duty nylon or polyester netting designed for sports use.
Attach it to the wooden framework using large zip ties, industrial Velcro or grommets with screws. Keep it tight and trim off any loose ends when finished.
Leave 1-2 feet between the rebounder face and netting to allow some ball run-off space. Proper side netting is key for safety!
Position for Maximum Safety
Speaking of safety – proper positioning is also critical:
- Face wall away from fragile objects like windows
- Set up in an open yard area
- Check for tripping hazards around perimeter
- Use caution and wear eye protection!
Take time to consider ball flight paths and contain them. With smart placement and side netting, you can practice hard without worries.
Maintenance Keeps it True
Perform regular maintenance so your rebounder always performs its best:
- Check netting for looseness, tears – repair as needed
- Re-coat plywood annually with protective sealant
- Tighten any loose bolts/joints on frame
- Patch holes or dents in rebound surface
With proper TLC your homebuilt rebounder will deliver years of loyal service. Now grab a stick and dial in that wicked sidearm crank shot!
Leave Space for Ball Return System
Welcome back lacrosse fans! Our DIY rebounder project continues to progress nicely. Stick with me as we move forward with the next key steps.
By now your wooden frame should be up, anchored firmly in place. The plywood rebound surface is mounted and netted for protection.
Now let’s focus on a ball return system to save your legs during solo practice. Leave 8-10 feet of open space behind the rebounder wall.
Cover this area with artificial grass turf or soft mulch to create a cushioned landing zone. The turf minimizes ball bounce for easier scooping and pickup.
For even simpler retrieval, install PVC pipes along the bottom rear with openings to collect balls. Attach a net bag to catch them as they roll out the back after rebounding.
Add Visual Aids for Accuracy
With ample ball return space set up, let’s add some targets for accuracy practice:
- Paint or tape square targets onto the rebound surface
- Hang paper plates with bulldog clips for temporary targets
- Buy durable nylon targets to mount permanently
- Print images or logos to test precision shooting
Place targets randomly around the center, corners and sides. Adjust them regularly to keep your shooting and passing accuracy sharp.
Protect Your Investment
Now that your rebounder wall is complete, extend its lifespan through proper care:
- Check hardware and bolts, tighten as needed
- Reapply protective sealant to wood annually
- Patch holes or dents immediately
- Replace warped or damaged boards right away
Also take netting down when not in use and store indoors. With basic maintenance, your rebounder will deliver years of loyal service.
Safety Tips
Lastly, I’ll beat the safety drum once more:
- Enclose back and sides fully with netting
- Leave ample run-off space behind wall
- Check for tripping hazards around perimeter
- Use caution and wear eye protection!
Respect the power of errant balls and contain them. Now get out there, grab a stick, and start dialing in that wicked sidearm crank shot!
Add Padding to Prevent Injuries
Welcome back lacrosse enthusiasts! Our DIY rebounder project is really shaping up nicely. Let’s continue by discussing a crucial safety element – protective padding.
Your sturdy wooden frame is up, securely anchored in place. The rebound surface is installed and ready for action. Now let’s add some padding to prevent painful impacts with the wall.
Start by wrapping pole foam around the top crossbeam and vertical side posts. This softens contact if accidentally running into the frame.
For even more protection, strap padded mats across the rebounder face. Gymnastics mats or martial arts pads work perfectly. Make sure to leave the center open for rebounding though.
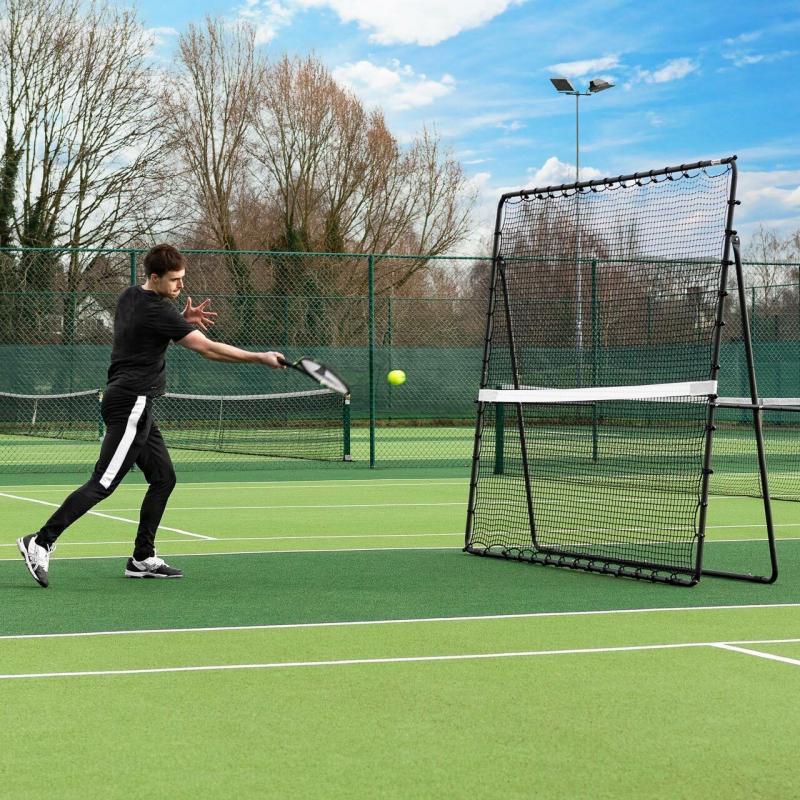
Check Proper Wall Angle
Padding minimizes injury risks, but proper wall angle is also key. Tilt the top back slightly so balls rebound out and down into the court.
A 10-15 degree rearward slant is ideal. This prevents balls from bouncing straight back at the shooter with velocity. Test different angles until you achieve the perfect ball return arc.
Leave Room to Move
In addition to padding, allow space around the rebounder perimeter for safe play:
- Set up in an open yard area
- Leave 10 feet behind wall as a run-off buffer
- Allow 5 feet clearance on left and right sides
- Check for tripping hazards and remove any
Ample room to move allows reacting and dodging during drills. Precise placement is key – don’t squeeze it into a tight spot.
Practice Proper Use
The rebounder is set up safely – now use it with care:
- Wear eye protection to prevent bounced ball injuries
- Keep body squarely facing the wall during use
- Stay alert – avoid turning back toward the wall during drills
- Inspect padding/netting; repair any looseness immediately
With smart padding, positioning and practices, your DIY rebounder can deliver years of safe, high-quality skill training.
Well, that wraps up another key phase. Until next time, may your shots fly straight and true!
Install Wheel System for Mobility
Welcome back lacrosse fans! Our DIY rebounder project keeps marching forward. Thanks for sticking with it – let’s talk mobility and portability today.
Your wooden frame is complete – solid 4×4 posts and 2×4 supports. The plywood rebound surface is mounted and netted for protection.
Now let’s add heavy-duty wheels so you can move it around your practice space with ease. This allows creating different drills by repositioning the wall quickly.
Bolt caster wheels onto the bottom of the rear 4×4 posts. Use industrial grade wheels with at least 5” diameter. The bigger the better for rolling over grass and dirt smoothly.
Install a handle on the top crossbeam for steering when moving. Make sure to lock the wheels during use so it stays firmly in place.
Make It Multi-Sport
Wheels provide portability to switch up lacrosse drills. But also consider multi-sport use:
- Add a basketball hoop on the rear
- Hang a soccer goal on the backside
- Paint court lines for tennis practice
- Add a strip of turf for golf chipping
Get creative transforming your rebounder into a multi-purpose sports wall. The ability to move it opens tons of training possibilities.
Practice Proper Use
A wheeled rebounder provides flexibility, but use caution:
- Lock wheels before use
- Move slowly – don’t run while rolling
- Watch for bumps in terrain
- Have others help steer around corners
Take it slow and be careful. But the ability to relocate your wall easily is a total game-changer for designing fun new drills.
Maintenance Matters
As always, stay on top of maintenance:
- Check hardware regularly, tighten as needed
- Lubricate wheel bearings annually
- Re-coat plywood with protective sealant yearly
- Patch any holes or dents immediately
With proper care, your wheeled rebounder will deliver years of loyal service. Now grab a stick and dial in that wicked bounce shot!
Adjust Net Tension Based on Preferences
Welcome back lacrosse diehards! We’re making great headway on our DIY rebounder project. Let’s talk about fine-tuning the netting tension next.
Your wooden frame is up, plywood mounted, and netting attached. Now it’s time to dial in the perfect tautness.
The rebound “liveliness” depends heavily on net tension. Tighter nets provide a super lively ball return. Looser nets take some pace off the rebound.
Test different tension levels to find your ideal. Loosen the mounting hardware and pull netting tighter or allow a bit of slack. Re-secure when satisfied.
Vary Tension for Drills
Consider setting up sections with different tension for training:
- Tight net area to practice quick reflex returns
- Looser net zones for ball control drills
- Mix of tight and loose forces you to adapt
Varying the liveliness keeps your reactions sharp. Use tightness, targets, and angle changes to keep drills challenging.
Leave Room Up Front
No matter the tension, allow space in front for safety:
- Set rebounder at least 10 feet from any structures
- Leave 5-10 feet clearance to move laterally
- Check for tripping hazards and remove any
- Consider side and rear protective netting
Ample room up front lets you react and move during drills. Precise placement is key – don’t cram it into a tight spot.
Inspect Netting Frequently
To maintain top performance and safety:
- Check netting for loose or damaged areas
- Re-secure any loosened fasteners immediately
- Adjust tension as netting stretches over time
- Replace worn netting sections as required
Staying on top of inspections and repairs keeps your rebounder in tip-top shape for skills practice.
Test Rebounder with Different Shots
We’re making great progress on our DIY lacrosse rebounder! Thanks for following along. Now it’s time for the fun part – testing it out.
Your solid wooden frame is up, plywood mounted, netting attached at proper tension. Grab your stick and start firing away to dial it in!
Take shots from straight on first to check overall rebound speed and consistency across the surface. Then vary your shooting angle and style.
Focus on problem spots that kick back unpredictable returns. Loosen netting there for a livelier response. Tighten overly lively areas to calm the rebound down.
Vary Shooting Height
Test high and low shots to ensure full wall coverage:
- Low skip shots
- Waist and chest level
- High over the shoulder cranks
- Jump shots above head level
Adjust net mounting at any height with dead spots. You want uniform liveliness top to bottom for real game practice.
Try Different Off-Speed Shots
For an even greater challenge, work on off-speed shots:
- Soft bounce passes
- Slow lob shots with an exaggerated arc
- Hard skips aimed low
Varying shot speed improves reaction time. Test the full range you’d use in a game situation.
Make Tuning Adjustments
If certain spots or heights seem “dead”, try:
- Loosening netting mounting points slightly
- Shimming frame behind flat areas
- Adjusting rebound surface mounting angle
The beauty of a DIY wall is the ability to easily customize performance. Dial it in until you get the perfect rebound for skill training.
After some testing and tweaks, your homebuilt rebounder will be primed for many seasons of use. Have at it! Just remember the eye protection.
Make Any Necessary Adjustments
We’re nearing the finish line on our DIY lacrosse rebounder project! Thanks for following along on this journey. Let’s chat about fine-tuning and adjustments today.
You should now have a stable wooden frame erected. The plywood rebound surface is mounted with protective netting installed. You’ve tested it out with a variety of shots.
Now it’s time to tweak and dial it in based on your test results. Are there any dead zones or overly lively sections? Make adjustments as needed.
Loosen Net in Dead Areas
If certain spots seem to kill rebounds, try loosening net mounting points slightly. This increases liveliness.
But just tweak in small increments! Overloose netting sags and lacks control. Find the sweet spot for responsive returns.
Shim Behind Flat Spots
For stubborn dead zones, shim the frame behind them. Simple wood spacers create more rebound “give” in problem areas.
You can also swap in a more lively material panel, like high-density polyethylene. Get creative solving any lingering issues.
Recheck Ball Return Setup
Ensure your ball return system is dialed in:
- Clear debris from run-off area
- Check turf or mulch depth – add more if needed
- Test ball rolling speed into collector
- Adjust collector position as required
Smooth ball returns means more reps during solo practice. Don’t neglect this important element.
Safety First as Always
Lastly, let’s emphasize safety again:
- Add side and rear netting if needed
- Check for tripping hazards
- Leave ample clearance on all sides
- Angle wall away from hazards
- Use caution and wear eye protection!
Take any final steps to minimize risks. Then get out there and unleash that wicked sidearm crank shot!


